
CTM1010 - Multitools Ferm - Free user manual and instructions
Find the device manual for free CTM1010 Ferm in PDF.
| Brand | Ferm |
| Model | CTM1010 |
| Product type | Multi-function tool (Combitool) |
| Supply voltage | 230 V |
| Frequency | 50 Hz |
| Power consumption | 160 W |
| No-load speed | 15,000 - 35,000 rpm |
| Clamping capacity | 3.2 mm and 2.4 mm |
| Weight | 0.6 kg |
| Sound pressure level (Lpa) | 70+3 dB(A) |
| Sound power level (Lwa) | 83+3 dB(A) |
| Vibration value | 1.7 m/s² |
| Protection class | II (double insulation) |
| Number of included accessories | 40 |
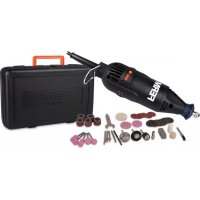
| Package contents | Combitool, flexible shaft, stand, chuck key, 40 accessories, case, instruction manual, safety booklet, warranty card |
| Speed adjustment | Electronic (thumbwheel) |
| Features | Flexible shaft, 360° rotating stand, safety stop via lock button |
| Maintenance | Clean with a soft cloth, regular greasing of the flexible shaft |
| Safety | Shaft lock button, motor stop before accessory change, keep away from moving parts |
| Spare parts | Available via Ferm customer service |
Frequently Asked Questions - CTM1010 Ferm
User questions about CTM1010 Ferm
0 question about this device. Answer the ones you know or ask your own.
Ask a new question about this device
Download the instructions for your Multitools in PDF format for free! Find your manual CTM1010 - Ferm and take your electronic device back in hand. On this page are published all the documents necessary for the use of your device. CTM1010 by Ferm.
USER MANUAL CTM1010 Ferm
natural_image
Product photo of a FERM tool with multiple endoscopic tools and pink components on a black background (no text or symbols visible)CTM1010
EN Original instructions 04
DE Übersetzung der Originalbetriebsanleitung 07
NL Vertaling van de oorspronkelijke gebruiksaanwijzing 11
FR Traduction de la notice originale 15
ES Traducción del manual original 19
PT Tradução do manual original 23
IT Traduzione delle istruzioni originali 27
SV Översättning av bruksanvisning i original 30
FI Alkuperäisten ohjeiden käännös 34
NO Oversatt fra orginal veiledning 37
DA Oversættelse af den originale brugsanvisning 41
natural_image
Cross-sectional diagram of a mechanical or electrical component with labeled section A (no text or symbols present)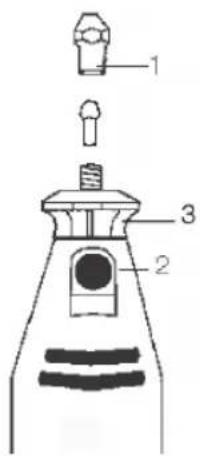
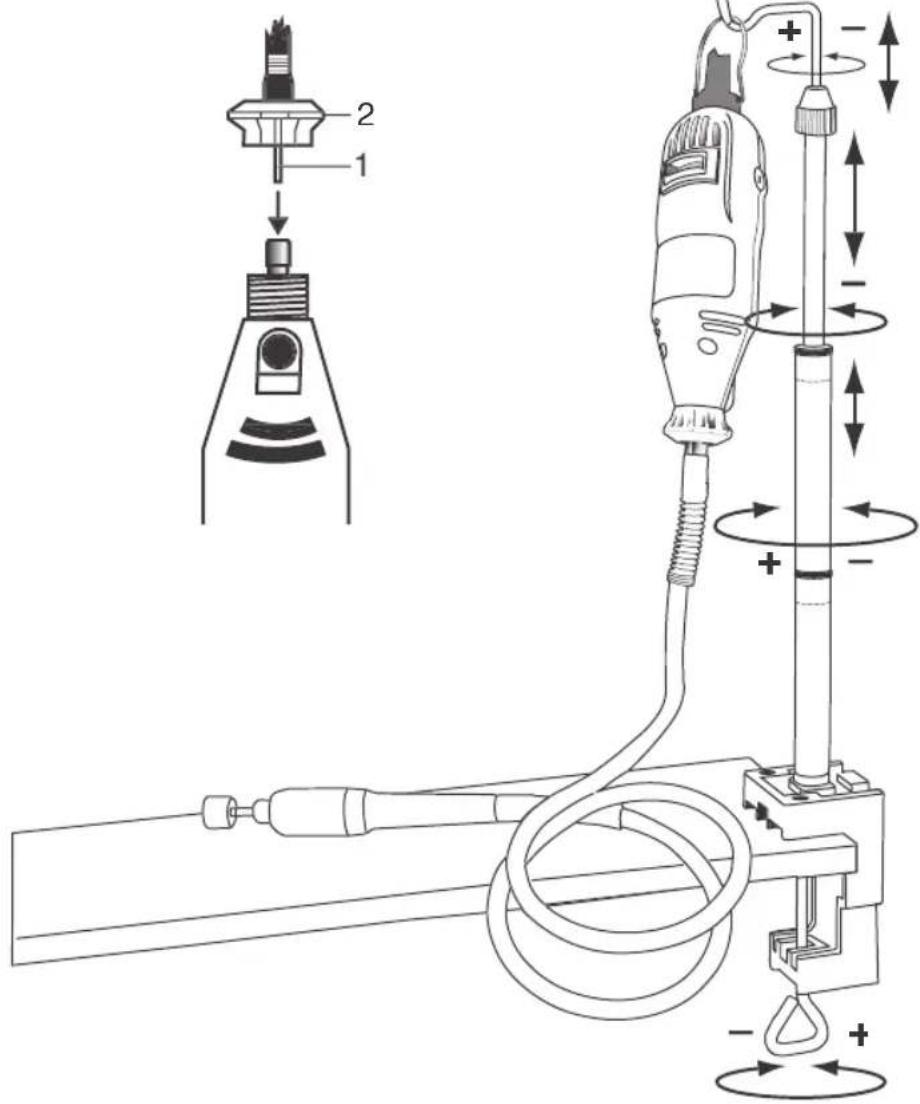
Fig. 2
Fig. 3
natural_image
Illustration of various electronic components including a diode, cone, sphere, and base plate (no text or symbols)Fig. 4
natural_image
Three simple line drawings of mechanical components or tools, no text or symbols presentFig. 5
natural_image
Technical line drawings of mechanical components including a cylindrical tool, flange, and base (no text or symbols)Fig. 6

natural_image
Technical line drawing of three cylindrical electronic components with no visible text or symbolsFig. 7
natural_image
Three simple line drawings of cylindrical objects with different top and bottom patterns (no text or symbols)Fig. 8
COMBITOOL 160W CTM1010
Thank you for buying this Ferm product.
By doing so you now have an excellent product, delivered by one of Europe's leading suppliers. All products delivered to you by Ferm are manufactured according to the highest standards of performance and safety. As part of our philosophy we also provide an excellent customer service, backed by our comprehensive warranty. We hope you will enjoy using this product for many years to come.
The numbers in the following text refer to the pictures on page 2-3

Read the operating instructions carefully before using this device. Familiarise yourself with its functions and basic operation. Service the device as per the instructions to ensure that it always functions properly. The operating instructions and the accompanying documentation must be kept in the vicinity of the device.
Contents
- Machinedata
- Safetyinstructions
- Assembly of accessoires
- Mounting the flexible shaft and stand
- Maintenance
1. MACHINE DATA
Technical specifications
Voltage 230 V
Frequency 50 Hz
Power consumption 160 W
No load speed 15.000–35.000/min
Capacity of spring chuck 3.2 + 2.4 mm
Weight 0.6 kg
Lpa (Sound pressure level) 70+3 dB(A)
Lwa (Sound power level) 83+3 dB(A)
Vibration 1.7+1.5 m/s
Vibration level
The vibration emission level stated in this instruction manual has been measured in accordance with a standardised test given in EN 60745; it may be used to compare one tool with another and as a preliminary assessment of exposure to vibration when using the tool for the applications mentioned.
- using the tool for different applications, or with different or poorly maintained accessories, may significantly increase the exposure level.
- the times when the tool is switched off or when it is running but not actually doing the job, may significantly reduce the exposure level.
Protect yourself against the effects of vibration by maintaining the tool and its accessories, keeping your hands warm, and organizing your work patterns.
Package contents
1 Combitool
1 Flexibleshaft
1 Stand
1 Spring chuck spanner
40 Accessories
1 Case
1 Instructions for use
1 Safetysection
1 Guaranteecard
Check first whether or not the delivery has been damaged by transport and/or whether all the parts are present.
2. SAFETY INSTRUCTIONS
Explanation of symbols

Denotes risk of personal injury, loss of life or damage to the tool in case of non-observance of the instructions in this manual.

Indicates the presence of an electrical voltage.

Variable speed control.

Wear ear and eye protection.

Wear a dust mask.
Special safety instructions
• Always keep the cord away from the moving parts of the machine.
- In the case of locking, switch the machine off immediately and remove the plug from the mains.
- Compare the maximum number of revolutions allowed of the accessories with the number of revolutions of the machine.
- When you put the machine away the engine must be switched off and moving parts must have reached a standstill.
- Never attach an assembly spanner to your machine with a piece of string or anything similar.
- Never use the axle locking button if the machine is operating.
- Make sure that the spring chuck diameter is the same as the axle diameter of the accessory.
- Use a clamping device for securing the work piece.
- Keep your hands away from the work piece.
Electrical safety
When using electric machines always observe the safety regulations applicable in your country to reduce the risk of fire, electric shock and personal injury. Read the following safety instructions and also the enclosed safety instructions.

Always check that the power supply corresponds to the voltage on the rating plate.

Your machine is double insulated, therefore no earthwire is required.
Replacing cables or plugs
If the mains cable becomes damaged, it must be replaced with a special mains cable available from the manufacturer or the manufacturer's customer service. Dispose of old cables or plugs immediately after replacing them with new ones. It is dangerous to connect the plug of a loose cable to a socket.
Using extension cables
Only use an approved extension cable suitable for the power input of the machine. The minimum conductor size is 1.5 mm2. When using a cable reel always unwind the reel completely.
3. ASSEMBLY OF ACCESSORIES

Before assembly always remove the plug from the mains.

Warning! Change accessories by inserting an accessory into the collet (or chuck) as far possible to minimize run out and unbalance.
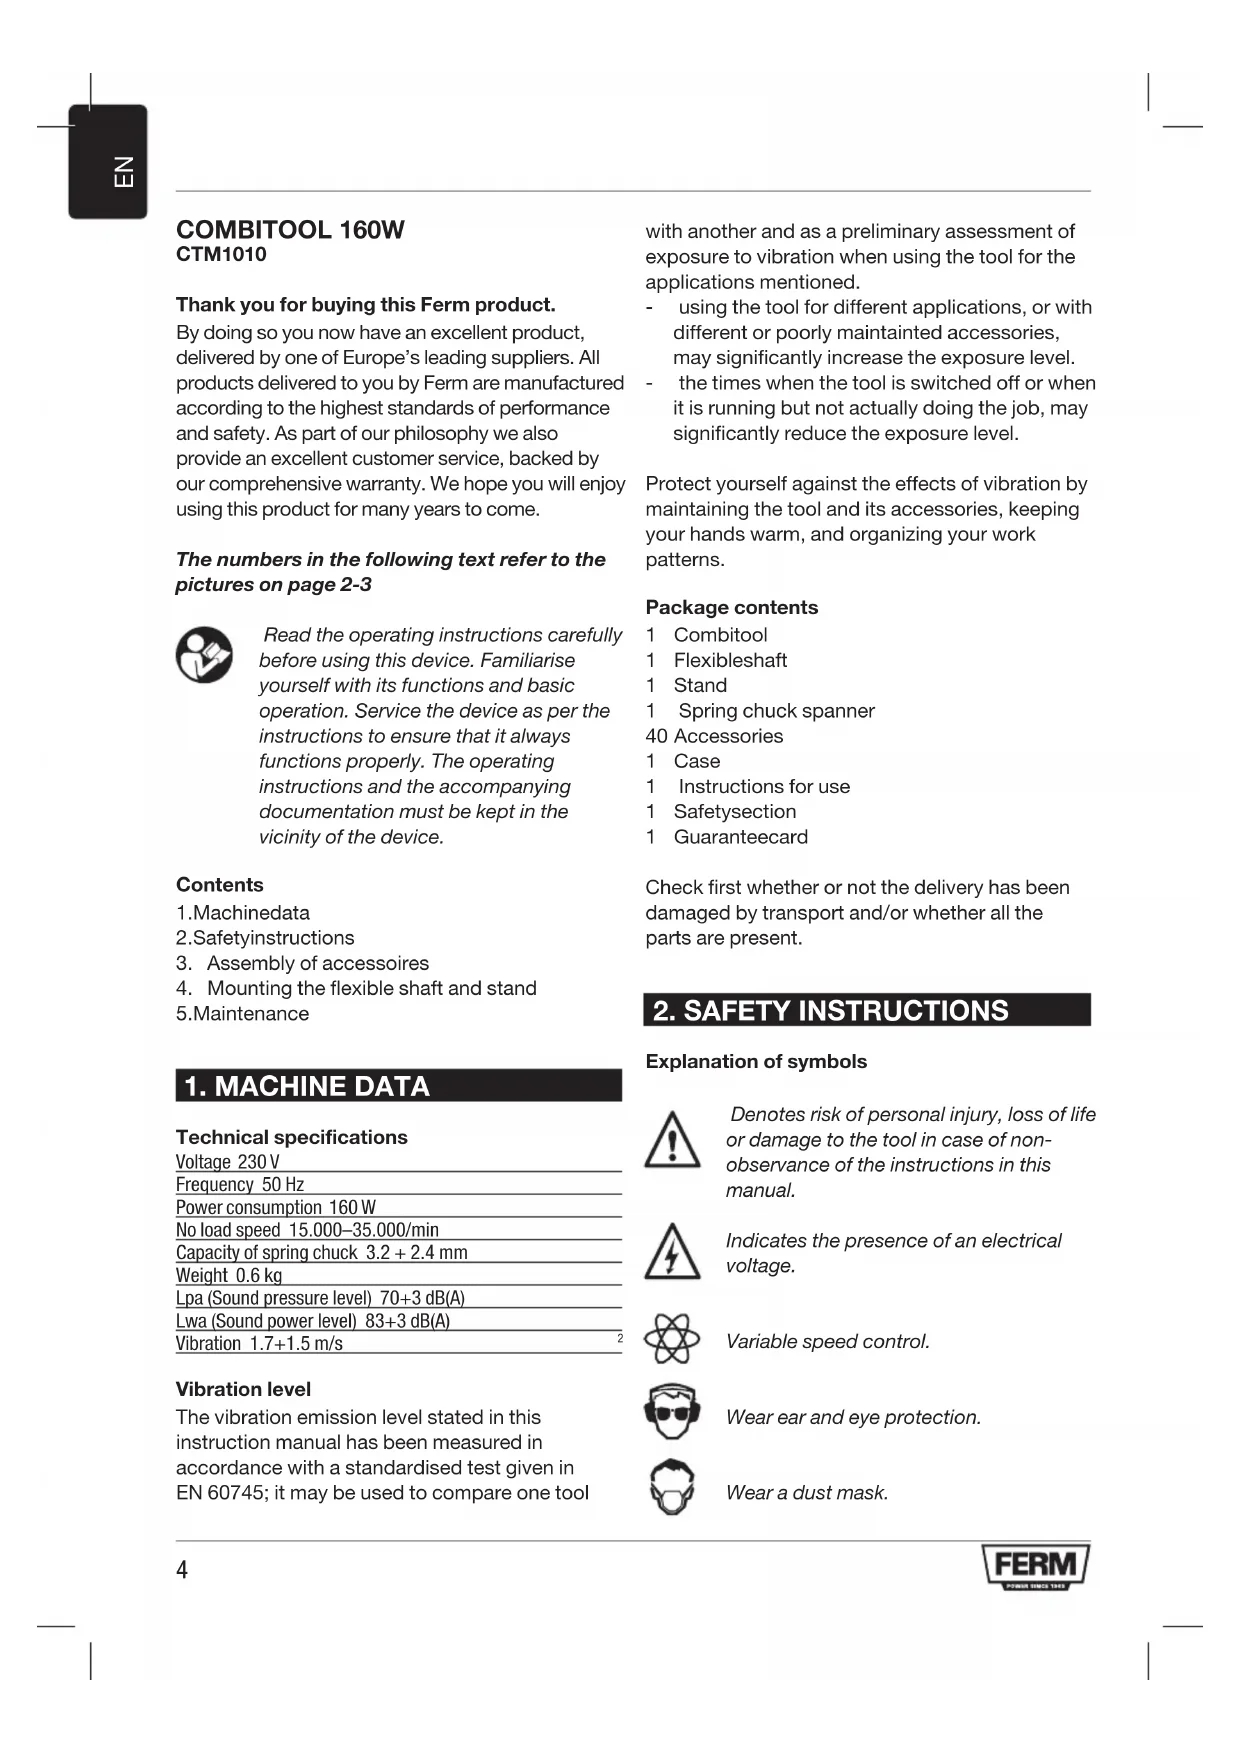
Assembly of accessories
Fig. 1
Press down the axle locking button (2) and hold it down. Using the spring chuck spanner you can undo the spring chuck (1). Put the accessory in its place. Hold down the axle locking button when you fasten the spring chuck with the spring chuck spanner.
Operation
Switch on the machine by engaging the on/out switch (A) By adjusting the adjusting wheel (B) you can regulate the speed of the Combitool. Do not put the machine down when the motor is still running. Do not place the machine on a dusty surface. Dust particles may enter the mechanism.

Too high a load at a low speed of the Combitool can burn out the engine.
4. MOUNTING THE FLEXIBLE SHAFT AND STAND
Flexible shaft
Fig. 2
Screw the ring off the chuck and remove it. Mount the flexible shaft on the Combitool, placing the inner shaft (1) in the chuck. The ring of the flexible shaft (2) can then be fastened onto the Combitool.

Never operate the axle locking button if the engine is still rotating.
Stand for the Combitool
- Mount the stand on the side of a workbench or worktop with a maximum thickness of 55 mm.
- The height of the stand is adjustable. Loosen the top tube of the stand by turning
it anticlockwise. Draw the tube out to its maximum height and secure it by turning the tube clockwise. The height of the suspension bracket is adjustable by loosening the black knob. After adjusting the suspension bracket to the correct height, retighten the knob.
- Attach the Combitool to the suspension bracket of the stand; this suspension bracket can be turned 360°.
Accessories for the Combitool
Always check that the maximum rpm of the accessory is suitable for the maximum speed of the Combitool.
Grinding stones
Fig. 3
When using a grinding stone the first time, use the dressing stone to balance it. The dressing stone can also be used for cleaning the surface or to give the grinding stone a special shape.
Material Speed setting
| Stone, shell - | |
| Steel | + |
| Aluminium, brass + - | |
| Plastic | - |
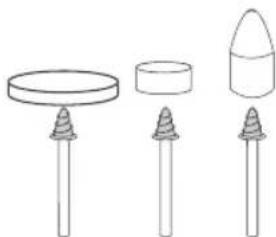
Felt wheels and tip
Fig. 4
The felt wheels or tip should be screwed on the mandrel.
Material Speed setting
| Steel | + |
| Aluminium, brass + - | |
| Plastic | + |
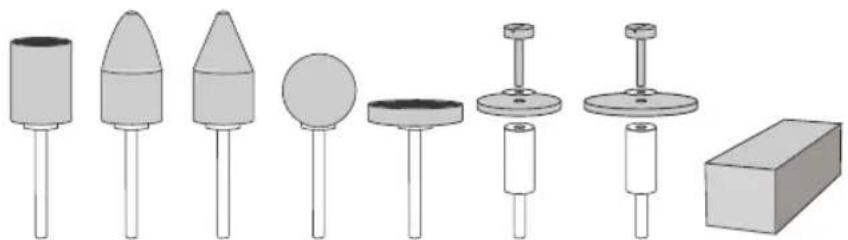
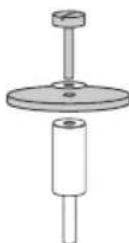
Sanding bands and disc
Fig. 5
Material Speed setting
| Wood + + | |
| Steel | - |
| Aluminium, brass + - | |
| Plastic | - |
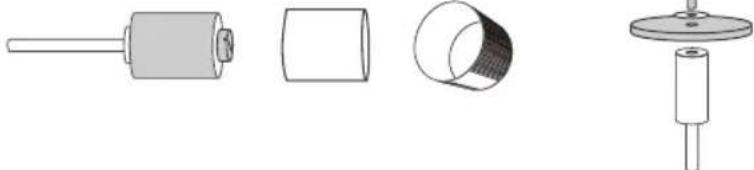
Stainless steel brushes and bristle brush
Fig. 6
Material Speed setting
| Stone, shell + - |
| Aluminium, brass + - |
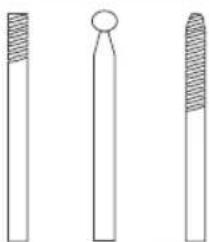
High speed cutter, Diamond wheel point and Drill
Fig. 7
Material Speed setting
| Stone, shell Max |
| Steel + - |
| Aluminium, brass ++ |
| Plastic - |
Abrasive disc
Fig. 8
Material Speed setting
| Steel | + |
| Aluminium, brass + - | |
| Plastic | - |
5. MAINTENANCE

Make sure that the machine is not live when carrying out maintenance work on the motor.
This machine has been designed to operate over a long period of time with a minimum of maintenance. Continuous satisfactory operation depends upon proper machine care and regular cleaning.
Cleaning
Keep the ventilation slots of the machine clean to prevent overheating of the engine. Regularly clean the machine housing with a soft cloth, preferably after each use. Keep the ventilation slots free from dust and dirt. If the dirt does not come off use a soft cloth moistened with soapy water. Never use solvents such as petrol, alcohol, ammonia water, etc. These solvents may damage the plastic parts. Please clean the tool immediately after use.
Lubrication
Make sure to lubricate the flexible shaft regularly to prevent excessive heat generation.
Faults
Should a fault occur, e.g. after wear of a part, please contact the service address on the warranty card. In the back of this manual you find an exploded view showing the parts that can be ordered.
ENVIRONMENT
To prevent damage during transport, the appliance is delivered in a solid packaging which consists largely of reusable material. Therefore please make use of options for recycling the packaging.

Damaged and/or disposed of electrical or electronic devices must be dropped off at recycling stations intended for that purpose.
Only for EC countries
Do not dispose of power tools into domestic waste. According to the European Guideline 2012/19/EU for Waste Electrical and Electronic Equipment and its implementation into national right, power tools that are no longer usable must be collected separately and disposed of in an environmentally friendly way.
WARRANTY
Read the warranty conditions on the separately supplied warranty card.
The product and the user manual are subject to change. Specifications can be changed without further notice.
KOMBIWERKZEUG 160W MSM1038
2. BEZPEČNOSTNL POKYNY
Vysvětlení symbolů


- CTM1010
- COMBITOOL 160W CTM1010
- Thank you for buying this Ferm product.
- The numbers in the following text refer to the pictures on page 2-3
- Contents
- MACHINE DATA
- Technical specifications
- Vibration level
- Package contents
- SAFETY INSTRUCTIONS
- Explanation of symbols
- Special safety instructions
- Electrical safety
- Replacing cables or plugs
- Using extension cables
- ASSEMBLY OF ACCESSORIES
- Assembly of accessories
- Operation
- MOUNTING THE FLEXIBLE SHAFT AND STAND
- Flexible shaft
- Stand for the Combitool
- Accessories for the Combitool
- Grinding stones
- Fig. 3
- Felt wheels and tip
- Fig. 4
- Sanding bands and disc
- Fig. 5
- Stainless steel brushes and bristle brush
- Fig. 6
- High speed cutter, Diamond wheel point and Drill
- Fig. 7
- Abrasive disc
- Fig. 8
- MAINTENANCE
- Cleaning
- Lubrication
- Faults
- ENVIRONMENT
- Only for EC countries
- WARRANTY
- KOMBIWERKZEUG 160W MSM1038
- BEZPEČNOSTNL POKYNY
- Vysvětlení symbolů
Brand : Ferm
Model : CTM1010
Category : Multitools