USER MANUAL Bio Master 2200 STIGA
EN Electric mains-operated garden chipper - OPERATOR'S MANUAL WARNING: read thoroughly the instruction booklet before using the machine.
CONOSCERE LA MACCHINA
E)TPAHCIOPT IN IPEMECTBAHE
1) Bcekn nbT, KOrato Tp6Ba Da npemeCTBaTe, NOBnIraTe, TpaHcNOpTnpaTe NnHaKlaHrTe MaunHata, e Heo6xOdmo: - cIaraiTe De6eN pa60THn PbKaBn; - Da XBaHeTe MaunHaTa B ToUKN, KOIT O rapaHTnpaT CNpyhO 3axBaUaHe, HMaIKn IpeDbN, TeJHexTTa n Pa3npdeJeHHeTo N;
- C Te3n DeHOCTH Da Ce 3aEmaT ToJIKOBA Xopa, KOJIKOTO Ca HeO6XODIMN B CbOTBETCTBHe C TerIoto Ha MaSHHaTa, XapaKTepHCTNKITE Ha TpaHCnOpTHOTo CpeDCTBO Hn Ha MAcTOTO, KbDeTO Tp8Ba Da 6bDe CLOKeHa Hn OTKbDeTo Da 6bDe B3eTa MaSHHaTa.
2)ПиТранспортуранБЗеме Te NOД-XODЯиОbe3OпаСтелнМеркИЧЕЗИЗПOL3ВаHe Na Вьжета Или Вериги.
3ANO3HABAHE C MAUHHATA
BELIEXHKA - HIOCTpaunnte, cBOTBeTCTBaun Ha O3Ha-ueHnra, ce Hamnpa Ha Ctp. 2 Ha TOBA ynbTbaHe.
ONICAHNE HA MAUHATA N CFEPA HA YNOTPEBA
Ta3n MaunHa e rpaHnckn HnCTpymeHT n NO-TOHNO eJekTpuecka rpaHncka np6nka.
MaunHaTa e czbTaBeHa OCHOBHO OT MOTOp, KOTo 3aDenCTBa OCTpne, NOCTaBeHo KOpNyCa Ha MaunHaTAt, KOeTo pa3dpo6ra KaONHtE.
PpeBnDena ynoTpe6a
MaunhaTa e npoEHTnpaHa n npedHa3NayeHa 3a pa3- dpo6BaHe Ha KIOHn, TbHN Xpactn H BlaHn JInCTa. KaBato n da 6nlo dpya ynoTpe6a MoKe Da ce OKaKe ONaCha n da npuHHn UeTr Ha Xopa N/nnn npedMeTr, Nn Ha Camata MaunHa.
Беленна: V Ha Maшинata 3a pa3dpo6BaHe OCHOBHO Ha cyxN KIoHn HaMaJIraBa eΦeKTA OT pr3aHTo N KINBOTa Ha OCTpNeTO.
Hecneunuynha ynoTpe6a
B "HenoDxoJaTa" ynoTpe6a ce BnIOuBaT (KaTo Henn3eep-naTeJen npImep):
- IN3NOJ3BaHETo Ha MaUHHaTa 3a pa3dpo6BaHe Ha HepaCTNTEJIHn MaTePnAIn;
KaUBaHeTO Bbpxy MaunHaTa;
- IN3PON3BaHcTo Ha MaunHaTa 3a PpeMeCTBaHe Ha PpeD-METN.
To3n ypei moje da 6bJe n3noJ3BaH OT deca Ha d 8 roJnHa Bb3pact, KaTTO n OT JInuca C HamaJIeHN fN3UHeCN, CeTHBHN IIN yMCTBeHH CNOCO6HoCTn, 6e3 ONIT N O3HaHnI, npn ycIOBneYe ca HabIoDaBAHN IIN INCTpyKTHnpAHnI 3a 6e3oNaChyNtpe6a Ha ypea n Ye pa36upat CBpb3aHHTe C TOBA pncOBe. Deata He 6nBa Da nIrpaTc ypea. NoCHCTBaHETo I TeKyuata TnDpBkKa He Tpr6Ba Da ce I3BbPbBaT OT deca 6e3 H6JIouDeHne.
OctaTbueh pnc
JaKe KOraTo n3NoJ3BaTe npaBnH0 MaunHaTa, MoKe Da ce npoRbT CInTyauCn Ha ocTaTbueH pNcK. Bb3MoXHH OnacHN CInTyauCm MORa Tda 6bDat npuHHeH OT (KaTO HEn3eepNaTeJIeH npImep):
- 3XbPJIHe Ha KaMbHn IIN dpyrMaTepeHaJI, Bne3JIcIyauHO C KIOHHTe;
ChyynBaHe H HeKoHTpoHpaHn DbNKeHnHa KIOHnTe npnIOCTaBraHTo IM BbTpe,BoeUdHO HapaHBAHe Ha KpaHnUte NIN OHT;
HDAEHTNPHKALNOHEETNHET
- HnBO Ha 3BykoBa MoUHocT cnopeD cTaHdapTa Ha EO 2000/14/CE
- 3nak 3a cboTBcTBue cnopei pa3npoe6ata Ha EO 2006/42/CE
- TOnHa Ha npOn3BOdCTBO
- BvMaHnHa
- CepneH Homep
6.Иme n aDpec Ha npOn3BOdnteIa
- TexHHueckn daHHN
- KoHa apTnKyHa
CACTH HAMAUHHATA
- Ipeca, KOrTo NOMara 3a H36yTbaHe Ha KbCnTe napYeTa KIOHn BbB yHnraTa;
10.Дрьжka 3a npnDbnBbahe;
11.Фунязаразеждан,КоТМоЖeдacceOTcPaHЯBa;
12. Pbyka 3a Фнсране Ha Фунята;
13. KomahДи xOД/CTOn;
13A.Cton(hepBeHo)
13B.XoD(3eJeHo)
14. HoHTaKT 3a eJelKtpuYecko 3axpaHbAHe;
15.ДрбингHoK;
16. Kopnyc ha MaunHaTa c Kolena 3a npemecTbaHe;
17. Cb6npaTeJIeH KOHTeINHeP;
18.ИЗхODиОТВьрСТи.
Bednara cne3aknybaHTo Ha MaunHaTa npennuTe NdeHTnФнkaUOnHnTe Homepa (3-4-5) Ha CneuaJInHe Tnpa3Hm MeCTa Ha NocleHaTcTpaHnca Ha yNbTbHaHTo.
PnmepeHa,Ankapaua 3a CbOBETCTBHe" Ce HAMnpa Ha npednoCneHata CtpaHua Ha HactoTo yTBAhe.

He n3xBbpynne eEeKtpnuecknTe ypeDn 3aeDnC 6ntOBnTe OTnabu. Cnped EbponeNcKaTa DnpeKTHBa 2012/19/CE 3a eEeKtpnuecknTe n eEeKtpoHHnTe ypeDn npHIOXeHHeTo B CbOTBeTCTBne C HauNoHaJIHOTo 3aHOHO DaTeJCTBO, N3TOUeHHte eEeKtpnueckn YpeDn Tp8Ba da ce Cb6puP aT OTdEnHO, 3a Da MoHe Da 6bDat ONOIN3OTBopBAHN NO EKOLOrHuO CbBMecTtM HaunH. Ako eEeKtpnuecknTe ypeDn Ce N3XBbPnT Ha CMeTHnSe NIn B 3emrTa, BpeHNTE BeIeCTBa Morat Da DOCTHRaBODocb6nPaUHTe 3EMHN PIACTOBE N Da HABJIA3a T XpaHITeIHHaTBePURA, yBpeJDAaIK N 3dpabeTO BN. 3a No-3aDbIbOeHa INΦOpMaZna 3a N3XBbPnHETo Ha TO3N pOpyKT, Ce CbBpHeTe C KOMNeTeHTHaTcIyJb6a 3a N3XBbPnIHe Ha 6NTOBN OTnabu Nnn C dncTpnoTyopa Ha MaunHata.

Klaic II:ДвоинИЗOLAцЯ
IPABNIA 3A B6E30NACHOCT
I3noJ3BaIte BHNMaTeJHO BaWata MaWHa. 3a Ta3n ceJ Bbpy MaunHata ca NOCTaBeH NIKTORpAMN, 3a Da BN HAnOMHrT OCHOBHTe IpeDna3Hm MepKn. No-dOly e o6rcheHo 3NaueHHeTo HM. OCBEN TOBA, IpeOpBvBame da npOyete BHImaTeJHO MEPHTe 3a 6e30nACHOCT, NOMcTeHn B CneuJIHATA rIaBa Ha HactoJTO yIbTBaHe. CmeHete noBpeDeHNTe IIN HeYETINB eTNKeTn.
- BhimaHne: PpoTeTe yTbTaHeTo npEi Da n3noJ3-BaTe MaunHaT.
- BhimaHne:ДрькTe ДалЧОпаТа, КОТо He ca пpeДиНэзнeн 3a pa6To c Maшинata.
- BhimaHne: Bbptrao ce octpne. He noctabnTe pbcE Bbb BXoHOTU IN3XoHOTO OTBbpcTne KOraTO MOTOpT pa60tN.
- BhmamHe: N3noJ3BaIte aKyCTnHn PpeJa3nteHn, PpeJna3Hn OuHla n PpOTbONpaXOBn MaChn.
- Bhimhahe: N3KJIIOUeTe OTeEJIeKTPuYeCKoTO 3axpaHBaHe npedn pa6Ota nO NOIpBbHKa NIN aKO Ka6eJIbT e NoBpeH.
- BhimaHne: INCTpyMeHTb3 a pr3aHe npOdbJhaBa da Ce BbpTN OSe MaIKo N CJIeN I3KIIIOYBaHETo Ha MaUN-Hata.
TEXHNUECHN DAHHN
[61] HanpeKeHne n YeCToTa Ha 3axpaHbAHe
[62] HOMINAHA MOIHOCT (P40)
[63]HOMINHAJIHaMOUHOCT
[64] ChopocT Ha npa3eH xoJ
[65] HoKOBe, KoJIInueCTBO
[66] MaKcImaJIeH dIaMTeBp Ha pR3aHe
[67]Kou, BmectHMOCT
[68] Bncoyna
[69] 甲nHnHa
[70] Terno
[71]「apaHTnpaHO HnBO Ha 3ByKOba MoHOCT
[72]ИЗмeperно Инвов на 3BykoBa MOnHOCT
[73]ИзмерВателнагршka
[74] HnBO Ha aKcyTnUHO hAraHe
[75]Измервателнагравka
*Pa6oTeH npoΦnIOT 4 MNHyTn C HatoBapBaHe N 6 MNHyTn Ha npa3eH xOJ. B npaKTnKaTa ce dOnycka HenpeKbChaTo fYHKUHOHpaHe.
INPABNJA 3A YNOTPEBA
BEJIENHHA-CbOTBeTCTBHeTO MeHJy daHHnTe B TeKCTa N cbOTBeTHnTE ΦHypn (NocTaBeHN Ha cTpahu2 n CneBaunTe) e NOKa3aHO OT Homepa, KOHTo npedWeCTBa BCEKN nparpaΦ.
1.ДОВБПУBAHEHAMOHTАЖА
BELIENHKA - MaunHaTa MoHe da 6bJe IOCTaBeHa C HAnON BeYe MOHTnpaHN KOMNOHEHTN.
BHIMAHHE - Pa3oNAKOBaHTo H 3aBbPbBaHTo Ha MOHa TaRa Da Ce OCbUeCTBrt BbPxy paBHa N 3dpaba NoBbPxHOCT, CIOCTaTbUHO IPOCTpaHCTBO 3a IpemecTBHe HaMaunHaTa H A OnAkoBKe, KATO CN CnyKHTe BnHarC POnXO4JN INHCTpyMeHTN. N3XBpIraHTo Ha OnAkoBKaTa Tp6Ba Da Ce N3BbPbBA CNOpeD DeYCTBaUHTe MeCTH Pa3NopeDn.
1.1 MOHTAX HA OCHOBATA HA MAUNHATA
Noctabete MaunHata Ha 3emrTa, paBnTe BnHTOBete (1), cnoJKeHN IpeBapnteHIO OT Dbete CtpaHn Ha Kopnyca Ha MaunHaTa, cNoKHeO OCHOBaHa MaunHata (2), KaKTo e NOKaHo Ha fInypata, MOHTpaIte OTHOBo BnHTOBete (1) n rN 3aTeHete.
1.2 MOHTAH HA KOJIENA TATA
MOnTnpaIte KOJIeJaTa (3), n3nOJI3BaIKN uNΦTa (4) nUONHKeTe (5) B yKa3aHaTa NocLeIOBaTeIHHOCr. CNoKHeTe TACOBete Ha KOJIeJaTa (6) KATO NOCTaBtE e3uHTaTa (7) BCbOTBeTHInTe rHe3da (8).
UOM 3aBbPwHTe MOHTaHa, pa3NoIIOKeTe MaINHaTa BvB BepTNKaHNO NOIOKeHHe, Taka Ye da 3acTaHe Ha 3eMaTa NocpeDCTBOM KOJIeLaTn OCHOBaTa.
2. ONHCAHNE HA KOMAHNTE
2.1 HOMAHDA MOTOP
MToPbT Ce KOMaHDbA O T DBA 6yToHa:
3eIeH6yToH(9-1)=XoI
YepBEN 6yToH (10-O) = CToN
PnI IINca Ha ToK ypeBt Cnnpa.3a Da BkIoUOHTe NaK MoTopa, Tp6Ba Da HATNCHeTe OTHOBo 3eJeHn8 6yToH (9).
3.ИЗПОЛ3BAHE HA MAШИHATA
BAHHO:
- H3noJ3BaIte MaunHata Bbpxy paBHa n 3paBa NOBbpxHOCT, KaTO dbpHXTe KpaHaTa Ha CbOTo HnBO Ha KOJIeJaT.
Korato BkHIOHTe MaunHaTa, MoKe Da ce npoBmOMeHTn CnaOBe Ha HApEKeHne. 3a Da n36eHHeTe EBeHTyaJIHc McyUeHn Ha Dpyr ypeHn, CBpb3aHn Cbc3axpaHbAaTa MpeKa, y6eTeCe, Ye TMAoKe Da n3-Dbpxn HaTOBapBaHeTo Ha MaunHaTa N Ha Dpyr ypeHn, EBeHTyaJIHO BkIIOUeHn B CbTa Ta MpeKa.
Ako MOTOpbT 3arpee n cnpe no Bpeme Ha pa6oTa, Tpr6Ba Da n34aKaTe OKOIO 5 MNHyTu npedn da ro BKliouHte OTHOBO.
3.1 NOIROBHA HA MAIHHATA
Pa3noJoxTe c6bupaTeHHN K0U NOd MaunHaTa C OTBOP, HacOueH Harope, 3akayete dpbHKnTe (1) Ha c6bupaTeHHN K0U KbM DBeTe KyKn (2).
3.2 CBbP3BAHE HA MAunHATA
Cbpxte ukepa Ha ydbnKHTJHnHa Ka6e (3) KbM cenla (4) Ha MaunHaTa, KaTTo e yka3aHo, NocLe Cbpxte Uencela Ha ydbnKHTeRa KbEm eJeKtpueChn KoHTaKT (5).
3.3 BHJIOUBAHE HA MOTOPA HAHYINH HA YIOTPE6A
3a BkIIOUbaHe Ha MOTopa HATINCHete 3eJIeHn6 6yTOH (1-1). NocTabete MaTePnAHa 3a pa3dpo6BaHe npe3 BXoHTo OTBepCTne (2) Ha cyHnraTa (3). PnH Heo6XoDnMoCt, HAppeBaHeto Ha MaTePnAHa MoKe da 6bJe yIecHo Upe3 yNtpe6aTa Ha cneuaHaTa npeca (4).
Pone3n yka3aHna 3a pa3dpo6BaHe
- He pa3dpo6aBte MoKb p MaTePnA.
- OkactpeTe KIOHHTe C MHOrO pa3HIOHeHn IOTcPaHTe CTpaHNUHTe N3dbHKn.
- He pa3dpo6aBaiTe KIOHn C dIaMeTbp NO-RoJAMOT 4 CM; B 3aBNCIMOCT OT BnDa H CBExeCTTa Ha DbPBeCNHaTa MoKe Da Ce HAOKn Da Ce HAaJI MaKcMmaHnI dIaMeTbp Ha O6pa6OBAHIne KIOHn.
- NocTabraIte BnHaT MaJIH KOLIYeCTBa MaTePnaI, 3a Da He 3anyuTe FyHnTa 3a 3apeKdaHe.
- I3xoJHOTO OTBepCTne Tp6Ba da 6bJe BnHaRn CBO6oJHO.
Pa3npo6BaIe TpaHnHcNte OTnabu cMo Ha MaJI KIOJnueCTBa;peyBaIe Tc KIOHn,3a Da n36eHHe-Te 3anyBaHHa.
- He pa3dpo6BaIe KxHHeHcN OtnaIbCn NIN dpyrMaTePnaJI C He TBbpDa KOHCNCteHcN.
Baxnn npenopbkn
- He npekalraBaTe C dIbIKNHaTa Ha pa3dpo6BaHnTe KIOHN, TbN KaTO, KlaTeIKn Ce HeKoHTpOJIpyeMO, MoT a Na pUnHHr HapaHbAHn.
3.4 N3nPA3BAHE HA CbBnPATEJHHKOH
Pa3dp06eHnT MaTePnaI B Cb6npaTeJIHnKoHTeHep He 6nBa Da DOCTnra H3XoDHO TOBepCTne.
AkoToBaCeCnyu,Buepepa3dpo6eHnT MaTePnaI 3anyuBa n3XoHnOTo OTBepCTne H ce Bpbua Ipe3 BXoHnOTo OTBepCTne.
Ppei Da OTCpaHnTe N3npa3HNTe KOHTeHepa, CnPteMOTopa N3KIOUcTe eJeKTPuYeCKoTo 3axpaHbaHe.
3.5 3AKJIINHBAHE HA MATEPNAJA
B clyuha Ha 3aKlnHbAHe Ha MaTeHaIa 3a pa3dpo6BaHe:
- Cnpete MOTopa n H3HJIIOHeTe eJIeHTpNuecKTo 3axpaHBaHe;
2.ClaarTe npedna3n pKaBnu;
- Pa3BnIe pByKaTa (1) 3aФнКсИрЕ HaФуHЯТа;
4.ИЗвадефунгая (2);ИЗдьрайтяharope;
5.Почирваiteфунята,30нараз(3)ндробингу HOH IN pinnelkaunte 3OHN;
- NocTabete O6paTHO yHnraTa nЯ phHKcnpaIte KaTo 3a-BuHTnte OTHOBOpbKaTa (1).
3.6 PIPKJIIOYBAHE HA PABOTA
B Kapa ha pa6oTaTc npTe MoTo KaTo HaTnChTe YepBeHHa 6yToH (4-O).
N3KIOUeTe ydbnHnTeJIa (5) PbPBO OT rnaBnHa KOHTaKT (7) nIOCJIe OT uencela Ha MaunHaTa (6).
OctpaHeTe n3npa3HeTe c6bupaTeJIHHKoI.
4. PEOBHA NOAUPbJHKHA
BAHHO PeoBHaTa n rpnKlnBa noDpBxHa e He3aMeHMa 3a noDbPkaHe nbpBOHaayAHHTe xapaKTepnCTnN HnBO Ha 6e3onacHOCT Ha MaunHata.
CbxpaHraBaTe MaunHaTa Ha cyxo macto.
I3KIOUbaIte OTe eIeHTpnuEchaTa MpeHa npedn da 3anOHeTe BcKaBb Hameca nO NOuHCTBaHe, KOHTpoN IIN NODpBkka.
BAHHO Nol3BaTeJrT Ha MaunHata H3BbPwBa cMo HA-MecHTe, ONIcAHN B HAcToaTO yIbTbaHe. BcHKn OctHaJIu Tp6Ba Da ce H3BbPWBAT B OTOpn3npaH cepBu3eH ueHTbp.
1.ClaarTe De6eHn pa60TH npkABuI npEIN BCaKO no- nCTBaHe, NOdbpKaHe Hn peylaucnaHa MaunHaTa.
2. CneB BcKa ynoTpe6a OTCpaHbAaTe KOHTeHepa 3a Cb6nPaHe INoHCTBaIte OTNaDbUHTe, OCTaHaJI N I3-XOHaHATA DIO3a.
3.BinHn npoBepaIte daJIIN Bb3dyxo3a6OpHnIe ca CBO6OHNOT OTnAdbuN.
4. He n3noJ3BaIte cTpyn BODa n 368BaIte da MOKpIte MOTopa n eJIeKtpnueckHTE KOMNoHEHTn. He n3noJ3BaIte aRpeCnBn TeuHOCTn 3a NOUcTbaHe Ha IJaCTMacoBInTe Yactn.
5.He ce onnTbaIte da n3BbPWBaTe cepno3Hn nonpaBn. BcnuKo, KOeTo He e oNcaHO B hactoTo ynbTbaHe, Tp6Ba Da ce ocBseCTBBA B OToPi3npaH cepBn3eH ueHTbp.BcKa Hameca, C n3KnIOUeHne Ha onncahTE B HactoAtoOyNbTbaHe, KOrTO He e n3BbPSeHa B OToPn3npaH cepBn3, BOdNo OTnaJaHe Ha rapaHcyra Ta N BCaKaBa OTROBOPHOCT Ha Ppon3BoNDTeJRA.
5.ОПАЗВАЕHAOKOLHATA CРEDA
Ona3BaHTo Ha OKoHaTa CpeDa Ta 6bDe npno-pntET n BaKeH acneKT pny yNoTpe6aTa Ha MaunHaTa, B NO3a Ha rpaKaDaHcKTo OObEcTBO n Ha CpeDaTa, B KOrTO KINBeem.
- N36aBaaTe da npnteChBaTe cbcedte.
CleBaIe CTpNtHO MeCTHHe HOpMn OTHOCHO 3-XBbPJIHeTo Ha OTNaIbCHMaTePnaJI.
CneBaTe CtpNKTHO MecTHHTe HOpMN 3a n3XBbPJIHe-TO Ha ONaKOBKN, IN3HOceHN YactH NIN KaKBaTO I da e Yact, CNlHO 3AmbpcraBaUa OKoJHaTa CpeJa; Te3N OTna
Ibci He Tpr6Ba Da ce H3XBpJrT B 60Klyka, a Tpr6Ba Da ce Cb6npat pa3dJIHo n Da ce npedeBaT B cneuaJIHnTe NyHKTOBe 3a Cb6npaHe, KbJeTo Ue ce NOrpnKaT 3a peuKlnpaHe Ha MaTePnaJInte.
B MOMENTa Ha n3BaJdahe OYynoTpe6a, He 3axbpbjIrTe MaunHaTa B OKoJHaTa CpeJa, a ce 06bpHeTe KbMcb6npaTeJeHnyHKT, cNopeD JeNCTBaUnte MeCTHN pa3nope6n.
6.ДИАГHOCTNHA
| Касков ду наразвим по... |
| Причина за пюбLEMа OTстраявае на пюбLEMа |
| 1. Машината не равOTи |
| He достига токdoes машината | Пюверete щелктуеското CBьрзвае |
| 2.При вklочвае на машината се задейства галов rat AVTO-Matунен пекльсанчы на зхранвано |
| Мошност(Tа(B amпеги) на лими-ята, каяТо зхранва щелктуес-СКИЙ KOНТК, He e doctaTbЧИ. | Свьрjete машината с[elektprи-чесни КОТТК CBС ЗХранваши лимис д doctaTbЧЕн amперац. |
| Има вklочени дуги[elektprи-чески у畴и | He cbvрзва对接уngи у畴и ed-NOBРЕмEHNO CBС CBДУЕ ПЕК-ТРИСЕСКI KOHТК |
| 3.Машинatura сп rapа по врeme на равotа |
| Hameca на правлaitеля | Изчakайтешоны минутп правл
OTHOВО Дд Вklочite MOTOPA. |
| 4.Машинatura сп rapа често по врeme на равота ил phункциони-
ра несягелярно |
| Teжkin yucloвия на ekspлоба-
taцяя | Раздробаяйтno-mek mate-
рал |
| Задрьствае вьвфунята | -Изралдпетe сьбираллney
Кош
-Разглобетe phунята(BИХ
naparpaФ 3.5) |
| Ножьт за рязANE e ИЗносен | Зakарайte машината в отор-
зран сервизен цHTbp, за дa
СMEнЯТ HONGA. |
| Задрьствае на коша за
сьбиранe | Рedingно Изралдзвайт e Коша
пreleni дa ce habлли догорe |
| 5.Небадоволителna pавota |
| Ножьт за рязANE e ИЗносен | Зakарайte машината в отор-
зран сервизен цHTbp, за дa
СMEнЯТ HONGA. |
B clyaHa h CbMHeHne nI np6IeM, CbbpKeTe ce 6e3 KOJIe6aHne C Hn-6IIIN3KInc cepBn3 nI IN C BaINJ dNCTpN6yTop.
SIGURNOSNI PROPISI kojih se strogo treba pridržavati
A) OBUKA
Gron knap (9-1) = Start
Rd knap (10-O) = Standsning
Apparatetstandseritilfaeldeafstromsvigt.
Tryk pa den gronne knap (9) for at taende motorenigen.
3. ANVENDELSE AF MASKINEN
VIGTIGT:
3.5 FASTKLEMNING AF MATERIAL
2. έπEPIΓΑΦH TΩN XΕΙΡΙΣΤΗΡΙΩΝ
2.1 ENTOEAK KINHTHPA
SAFETY REGULATIONS to be observed scrupulously
A) TRAINING
1) Read the instructions carefully. Familiarise yourself with the controls and proper use of the machine. Learn how to stop the motor quickly.
2) Bear in mind that the operator or user is responsible for accidents or unexpected events which may occur to other people or their property during use of the machine.
B) PRELIMINARY OPERATIONS
1) Use ear protectors, dust masks, gloves and safety goggles for the entire time the machine is being used.
2) Avoid wearing clothing that is loose fitting or has hanging cords or ties.
3) Only use the machine outdoors (e.g.. not close to a wall or other fixed objects) and on a firm and flat surface.
4) Do not use the machine on a paved gravel surface where ejected material could cause injuries.
5) Never allow children or people unfamiliar with the instructions to use the machine.
6) Do not use the machine with people in the vicinities.
7) Before starting the machine, make sure that all screws, nuts, bolts and other fastening elements are properly tightened and that guards and shields are in place. Replace damaged or illegible labels.
8) Keep all guards and deflectors in place and in good working position.
Before each use, check that the extension lead is not damaged or that there are no signs of deterioration or ageing. If the extension lead becomes damaged during use, disconnect it from the mains socket immediately. DO NOT TOUCH THE LEAD BEFORE DISCONNECTING IT FROM THE MAINS SOCKET. Do not use the machine if the extension lead is damaged or worn.
C) DURING USE
1) Before starting the machine, make sure the feeding hopper is empty.
2) Keep your head and body away from the feeding chute.
3) Do not place your hands or other body parts or clothing in the feeding or discharge chutes, or near moving parts.
4) For the entire time of use, always maintain proper balance and footing. Do not lean over it. When feeding material, never stand on a level that is higher than the base of the machine.
5) While operating the machine, always stand clear of the discharge area.
6) When feeding material, be extremely careful that metal objects, stones, bottles, cans or other foreign objects are not introduced.
7) If the cutting device strikes a foreign object or the machine makes unusual noises or vibrations, switch off the motor immediately and allow the machine to stop completely. Remove the plug from the mains supply and carry out the following operations:
- make sure the machine is not damaged.
- check and tighten the grip for fastening the feeding hopper.
If the problem persists, contact your service centre.
8) Do not allow processed material to accumulate in the discharge area. This may impede proper discharging and cause the material to back up through the feeding chute.
9) If the machine becomes clogged, switch off the motor and remove the power plug from the mains before clearing debris from the feeding chute and the discharge chute. Keep the motor clear of debris and other accumulations to prevent damage to the motor or fire hazards. Remember that when motorised machines are started, the cutting device is also activated.
10) Do not move the machine while the motor is running.
11) Turn off the motor and remove the plug from the mains when you leave the work area.
12) Do not tilt the machine while the motor is running.
Also:
WARNING - If something breaks or an accident occurs during work, turn off the motor immediately; if an accident occurs with injuries or third parties are injured, carry out the first aid measures most suitable for the situation immediately and contact the medical authorities for any necessary health care.
Carefully remove any debris that might cause damage or harm persons or animals should it not be seen.
1) When the machine is turned off for maintenance, inspection, storage or for the replacement of an accessory, make sure that the plug is disconnected from the mains power socket. Make sure that all moving parts have come to a complete stop. Allow the machine to cool before doing any maintenance, adjustments, etc.
2) Allow the machine to cool before storing it.
3) Except for normal cleaning, all other maintenance work must only be carried out at a specialized service centre.
E) ADDITIONAL WARNINGS
1) The permanent connection of any electrical equipment to the mains of a building must be installed by a qualified electrician in conformity with the regulations in force. Incorrect wiring can cause serious injury and even death.
2) WARNING: DANGER! Moisture and electricity are not compatible:
- always handle and connect electric cables in dry conditions;
- never allow electric sockets or leads
to contact wet areas (puddles or wet grass);
- connections between leads and sockets must always be watertight. Only use extension leads with intact, watertight and approved sockets sold on the market.
3) The quality of the extension leads must be no less than H07RN-F, with a minimum section of 1.5 mm2 and a recommended maximum length of 25 m.
4) Power up the machine using a differential switch (RCD - Residual Current Device) with a tripping current of max. 30mA .
5) The mains power socket for the electrical power supply must have the characteristics of voltage, frequency and power draw capacity which correspond to those indicated on the label of the machine.
F) TRANSPORTATION AND HANDLING
1) Whenever the machine is to be handled, lifted, transported or tilted you must:
- wear sturdy work gloves;
- grasp the machine at the points that offer a safe grip, taking account of the weight and its distribution;
- use an appropriate number of people for the weight of the machine and the characteristics of the vehicle or the place where it must be placed or collected.
2) During transport, fasten the machine securely with cables or chains
GETTING TO KNOW THE MACHINE
NOTE The images corresponding to the references are found on page 2 of this manual.
Machine description and usage
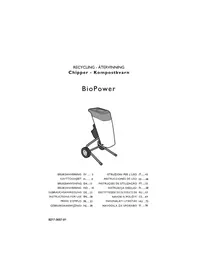
This machine is a garden tool, and precisely an electric garden chipper.
The machine consists of a motor, which drives a blade enclosed within the machine body and which chips branches.
Intended use
The machine is designed and intended for the chipping of branches, small shrubs and wet leaves. Any other usage may be hazardous and may cause harm to persons and/ or things or to the machine itself.
Note: using the machine for chipping mainly dry branches will reduce the efficacy of the cut as well as blade life.
Improper use
Examples of improper use (may include, but are not limited to):
- using the machine for chipping non plant material;
- climbing on the machine;
- using the machine to move objects.
This appliance can be used by children aged from 8 years and above and persons with reduced physical, sensory or mental capabilities or lack of experience and knowledge if they have been given supervision or instructions concerning use of the appliance in a safe way and understand the hazards involved. Children shall not play with the appliance. Cleaning and user maintenance shall not be made by children without supervision.
RISK REMAINING
Even when using the machine correctly, situations with residual risks may arise. Possible hazardous situations may be caused by (including but not limited to):
- ejected stones or other materials accidentally fed with branches;
- breakage and uncontrolled movements of branches during feeding, with injuries to limbs or eyes;
IDENTIFICATION LABEL
- Acoustic power level according to directive 2000/14/ EC
- Conformity marking in accordance with Directive 2006/42/EC
- Year of manufacture
- Type of machine
- Serial number
- Name and address of manufacturer
- Technical Data
- Article code
MACHINE COMPONENTS
-
Plunger, which helps to push short pieces of branches into the feeding hopper;
-
Handgrip for movement;
-
Feeding hopper, removable;
-
Grip for fastening the feeding hopper;
-
Run/stop controls;
15A. Stop (red);
15B. Run (green);
-
Power socket for the mains power supply;
-
Chipper blade;
- Machine body with wheels for movement;
- Collection box;
- Discharge chute.
Immediately after purchasing the machine, write the identification numbers (3-4-5) in the spaces on the last page of the manual.
An example of the conformity declaration may be found on the penultimate page of this manual.
Do not dispose of electrical equipment with household waste material. In observance of European Directive 2012/19/EU on electrical and electronic equipment waste and its implementation, in observance of UK Regulation "The waste electrical and electronic equipment regulations 2013 (as amended)" and in accordance with national regulations, electric equipment that has reached the end of its product life must be collected separately and recycled in an ecologically compatible way. If electrical equipment is disposed of in dumps or in landfills, hazardous substances can leak into the groundwater and get into the food chain, damaging your health and well-being. For further information on the disposal of this product, contact a domestic waste collection authority or your dealer.

Class II: Double insulation
SAFETY REQUIREMENTS
Your machine must be used carefully. Symbols have therefore been placed on various parts of the machine to remind you of the main precautions to be taken. Their meaning is explained below. You are also asked to carefully read the safety regulations in the specific chapter of this manual. Replace damaged or illegible labels.
- Warning: Read the instruction manual before using the machine.
- Warning: Prevent unauthorized persons from operating the machine.
- Warning: Rotating blade. Do not insert your hands into the feeding chute or the discharge chute when the motor is running.
- Warning: Use ear protectors, safety goggles and dust masks.
- Warning: Disconnect the plug from the mains before commencing maintenance work or if the power lead is damaged.
- Warning: The cutting means will continue to rotate for a while after you have switched off the lawnmower.
Technical data
[61] Power supply voltage and frequency
[62] Rated power (P40) *
[63] Rated power
[64]Idlespeed
[65] Blades, quantity
[66] Maximum cutting speed
[67] Bag, capacity
[68] Height
[69]Width
[70] Weight
[71] Guaranteed sound power level
[72] Measured sound power level
[73] Uncertainty
[74] Acoustic pressure level
[75] Uncertainty
- Working profile of 4-minute load and 6-minute idle time. Continuous operation is allowed in practical applications.
OPERATING INSTRUCTIONS
NOTE The number which precedes each paragraph links the references in the text to the respective illustrations (listed on page 2 and the following pages)..
1. COMPLETING ASSEMBLY
NOTE - The machine can be supplied with some pre-assembled parts.
WARNING - Unpacking and completing the assembly should be done on a flat and stable surface, with enough space for handling the machine and its packaging, always using suitable equipment.
Disposal of the packaging should be done in accordance with the local regulations in force.
1.1. ASSEMBLY OF THE MACHINE'S BASE
Lay the machine on the ground, loosen the pre-installed screws (1) on both sides of the machine's body, slide the machine's base (2) as shown in the figure, refit the screws (1) and tighten them.
1.2.WHEEL ASSEMBLY
Assemble the wheels (3), using the pin (4), and split pins (5) in the indicated sequence. Apply the wheel covers (6) inserting the tabs (7) in their slots (8).
Once the assembly is completed, place the machine in a vertical position on the ground so that it lays on the wheels and the base.
2. CONTROL DESCRIPTION
2.1.MOTOR CONTROL
The motor is controlled by two buttons:
- Green button (9-1) = Run
- Red button (10-O) = Stop
The tool will switch off in the event of a power shortage.
Press the green button (9) again to restart the motor.
3. USING THE MACHINE
IMPORTANT:
- Use the machine on firm level ground, keeping feet at the same level as the wheels.
- When starting the machine there can be momentary drops in voltage. To avoid any disturbances to other equipment connected to the mains power supply, ensure that it is able to support the load of the machine and of any other equipment connected to the same network.
- If the motor stops because it is overheated while working, you must wait about 5 minutes before restarting it.
3.1.MACHINE SET-UP
Place the bag under the machine with the opening facing upward, and attach the bag's handles (1) to the two hooks (2).
3.2.MACHINE CONNECTIONS
Insert the extension lead socket (3) in the machine plug (4) as indicated, then insert the extension lead plug in the mains socket (5).
3.3.MOTOR START-UP AND OPERATING MODES
Press the green button (1-l) to start the motor.
Introduce the material to be chipped through the feeding chute (2) of the hopper (3).
If necessary, use the provided plunger (4) to help push material through.
Useful advice for chipping
- Do not chip wet material.
- Strip branches with too many ramifications and remove the side shoots.
- Do not shred branches with a diameter exceeding 4cm ; it may be necessary to reduce the maximum diameter of branches to be shredded according to the wood type and freshness.
- Always feed small quantities of material in order to not clog the feeding hopper.
- The discharge chute must always be free of any material.
- Chip garden waste only in small quantities, alternate it with branches to prevent clogging.
- Do not chip kitchen waste or other material with a non-solid consistency.
Important recommendations
- Do not chip excessively long branches to prevent injuries from branches that may lash out uncontrollably.
3.4. EMPTYING THE BAG
The chipped material in the collection box must not reach the discharge chute.
If this occurs, the material which has already been chipped will clog the discharge chute, with its return through the feeding chute.
Before removing and emptying the collection box, stop the engine and disconnect the mains power supply.
3.5. CLOGGING OF MATERIAL
In case the material to be chipped jams:
- Stop the motor and disconnect the mains power supply;
- Wear safety gloves;
- Unscrew the grip (1) fastening the feeding hopper;
-
Pull out the feeding hopper (2), then pull it up;
-
Clean the feeding hopper, the (3) chipping blade area and adjacent areas;
- Replace the feeding hopper and fasten it by tightening the grip (1).
3.6.END OF WORK
When you have finished work, stop the motor by pressing the red button.
Disconnect the extension lead (5) BEFORE the general mains socket (7) THEN from the machine plug (6).
Remove and empty the bag.
4. STORAGE AND MAINTENANCE
IMPORTANT Routine and accurate maintenance is essential in maintaining original machine safety and performance levels.
Store the machine in a dry place.
Disconnect the machine from the mains power supply before starting any cleaning, inspection or maintenance activities.
IMPORTANT Only the work described in this manual may be performed by the user, all other work must be performed by an authorized service centre.
1) Wear sturdy work gloves before cleaning, maintaining or adjusting the machine.
2) After each use, remove the collection box and clean the remaining debris in the discharge chute.
3) Always make sure the air vents are free of debris.
4) Do not spray water onto and avoid wetting the motor and electrical components. Do not use harsh liquids to clean plastic parts.
5) Do not ever try to perform complicated repair work; work that is not described in this manual must be performed by an authorized service centre. Any work, except that which is described in this manual, which is not performed by an authorized service centre will void the Warranty and will exclude the manufacturer from liability.
5. ENVIRONMENTAL PROTECTION
Environmental protection should be a priority of considerable importance when using the machine, for the benefit of both society and the environment in which we live.
- Avoid causing any disturbance to the surrounding area.
- Scrupulously comply with local regulations for the disposal of waste materials after working.
- Scrupulously comply with local regulations for the disposal of packaging, deteriorated parts or any elements with a strong environmental impact; this waste must not be disposed of as normal waste, but must be separated and taken to specified waste disposal centres where the material will be recycled.
-
When decommissioning, do not abandon the machine in the environment, but hand it over to a disposal centre, in accordance with the local regulations in force.
-
DIAGNOSTICS
| What to do when ... |
| Source of problem Corrective action |
| 1. The machine does not work |
| Electric current does not reach the machine | Check the electrical connection |
| 2. Machine start up initiates the automatic general power supply switch |
| The capacity (in amps) of the line that feeds the mains power socket is insufficient | Connect the machine to a mains power socket with enough amperage to power the line |
| Other electrical appliances are working | Do not connect other equipment to the same power line at the same time |
| 3. The machine stops during work |
| The protection device triggers Wait | at least 5 minutes before restarting the motor |
| 4. The machine stops frequently during work or it does not operate in a regular manner |
| Demanding working conditions Chip softer material |
| Clog in the feeding hopper - Empty | the bag
- Remove the feeding hopper (see paragraph 3.5) |
| The cutting blade is dull Take the machine to the authorized service centre for replacement of the blade |
| The grass-catcher is clogged | Empty the grass-catcher regularly before it fills completely |
| 5. Poor and unsatisfactory performance levels |
| The cutting blade is dull Take the machine to the authorized service centre for replacement of the blade |
For any doubts or problems, please do not hesitate to contact your nearest Customer Service Centre or Your Dealer.
NORMAS DE SEGURIDAD a observar escrupulosamente
A) APRENDIZAJE
3.5 MATERJALI KINNIJAAMINE
Vihrea painike (9-1) = Kaynti
5.3AHTNTA HA HKNBOTHATA CPeDnHA
3aunntata Ha JINBOHTHATA CpeDnHa Tpe6a Da ce N3BpWyBa peJeBaHTHO n npOpNTeTHO npu yNtpe6a Ha MaunHata BO KOpCT Ha rpaFAncknTe NoroDnOCTn Ha npocTopoT Bo KoJ HnBeeme.
- I36erHyBaJte noctoeHe Ha eIeMeHTn 1TO rO HapyuSyBaAaT HenocpeHTo OnkpyKyBaHe.
CneTe rTOUHO JOKaHHTe 3aKOHn 3a φpIaHe Ha OTNaADHTe MaTepuJaJI.
- OocJeHcIeTe TIOkaJIHnTE 3aKOHn 3a φpIaHe Ha amBaIaKaTa, DeIOBn BO paCnaIaHaBe Hn KaKBN 6NIO eIeMeHTn CO WTeTHO BInJaHne Bp3 JINBOThaTcpeDnHa. Obne OTnadoOn He CMeaT da Ce φpIaAT Bo Iy6pe, TyKy Tpe6a Da ce CEJIeHTnpaAT N da Ce OJHeCat BO COoDBETHn Co6HpHn ZeHTpn 3a peuIKlnpaHe MaTePnjaJI.
- Pn nCpPnaHe oD yNoTpe6a, He ocTaBajTe ja MaunHaTa KaIe 6nlo Bo npnpOdaTa, TyKu npedajTe ja BO cObIneH ueHTap BO corlaacHOCT CO BaKeuKIne JIOkaJHi 3aKOH.
6.ДИJAГHOCTNKA
| Што да правноюг... |
| ПOTЕЦно на правимот | Дебъво 3а поравка |
| 1. Машината не павочи |
| Hema довOD на съчуда машината | Проберete го пашуньето co сел. eнергия |
| 2. Палевето на машината го Antимени рлавниот пекнистуваху на пашуньето co сел. eнергия. |
| Мошиста (Во Amпери) на колото за пашуньаге сел. eнергияа не сел. eнергияа
КOLOTо за пашуньаге сел. eнергияа
Зкльчени се дугп с来不及 уралати BO Истnot п��iodи в ВИстOTO
КOLО за пашуньаге сел. eнергия | Повозete щ машината со Истор на сел. eнергияа чесшто
КOLО лма за пашуньаге сел. eнергия
КOLО за пашуньаге сел.
eнергия |
| 3. Машината се racи bo tekot на павotata |
| Заш titата се влухуba | Почемajte有很大алку 5 минутп и рeding ду влухун'tе машината одною |
| 4. Машината се rache чесенати bo tekot на павotata ил павotи на Ненинн |
| Teшkin усLOBи на павота | Се селиаat Mногу мени
Mateри增加值 |
| Има зачени во Инкata | - Искразнete щ врейки за сбигары
- Искадete щ врейки (Видete)
ноглаве 3.5) |
| СechьOTO e Изабeo | Одесete щ машината bo obлacrtenе срвисен центар за вду о за мени.
сүлөвOTO |
| Зашунье на врейки за сбигары | Прочеме щ рedingвho врейки рпед ду се наллли дokраj |
| 5. He¾obолителни лим 텍ожи |
| СechьOTO e Изабeo | Одесete щ машината bo obлacrtenе срвисen центар за вду о за мени.
сүлөвOTO |
Bo cIyuj ha KaKBO 6nIO DBoMyHe nn npo6IeM, KOHTaKTHpaJte CO OBlaCTeHnOT cepBnC BO HeNocepEHa 6n3nHa nn Co 3actanHKnOT.
VEILIGHEIDSVOORSCHRIFTEN zorgvuldig in acht te nemen
A) VOORBEREIDING
5. BESCHERMING VAN DE OMGEVING
D) VEDLIKEHOLD OG OPPBEVARING
BLI KJENT MED MASKINEN
Grönn knapp (9-1) = Start
Rod knapp (10-O) = Stopp
Ved strömmangel slås apparatet av.
3.4 TOMMING AV OPPSAMLEREN
Det kvernede materialet i oppsmileren ma ikke næ utløpsap-ningen.
3.5 FASTSATT MATERIAL
I tilfeller der materialet som skal kvernes settes fast:
A这其中 is a very good idea.
Uso previsto
A这其中 is a good idea.
BxOHT B NOHrTne HEnpaBnIbHOro IcNoIb3OBaHnR (B Ka-ueCTBe npImepa, Ho He orpaHnUBaRC bTtMn ClyuAMyN):
- INCINb3OBAHne MaHHbI DnI N3MeJIbYeHnR HepaCTNTeJbHO rMaTePnAna;
- NOdHmAtbCra Ha MaunHy;
- INCIOJIb3OBA Tb MaIINHy IJN PepeBO3KN rpy3OB.
3TOOBOpyIOBaHHe MoKET HcNoJIb3OBAtbcra DeTbMn 8IeT n CTapwe, a TaKHe IIOBmC OrpaHnueHHbIMn Fn3NueeCHMN m YmCTBeHHbIMn CnOCo6HOCTaMn, C HApUWeHHoYyBCTBNTeJIbHOCTbIO, He O6JIaIOUHMn ONbITOM n 3HaHNMyE cINn INx DeIcTBnA MPyKOBOaNT dpyrooe IInO nIN eCIN mO6bRCHNI, KAK NOLb3OBAtbcra MaunHOH, n OHN IOHMAOT BO3MOXHyO OnaCHOCTb. DeTI He DoJHKbI INrPaTb C o6OpyIOBaHHeM. YcCTKa n IIaHOBoe O6cNyKHBaHHe He DOnKHBblIOJIHHTbcra DeTbMn 6e3 npNCMOTpa.
OctaToHbI pnc
JaKe npn npaBbHO 3KcNpyatauMaunHbMOrTy BO3- HNKHyTb CNTyaCIN C OCTaOHTbIM PnCKOM. IOTeHuaJIbHO ONaChbIe CNTyaCIN MOrTy NMeTb CLeDyUOJne PnUHHbI (B KaueCTBe npImepa, HO He ORpaHNUBaRc 3TmN CUYaAMN):
- BbIbOpC KaMHeN I DpyrNX MaTePnaJIOB, CnyaHNO nonaBShNX BHyTpB BMeCTe C BEtKaMn;
pa3pbIB H N EKOHTPOJIpyEMOE NEPeMeUeHHe BETOK Ha BXoDe MaUNHbMOrT BbI3BaTb TpaMbI KOHeuHOCTeN rJa3;
IDEHTNPHKAUHOHHbI AJPJIbIK
- YpOBeHb 3ByKOBoM MoUHOCn COrJaCHo DnpeKTHBe 2000/14/EC
- Mapknipobbca COOTBcTcTBn no DnpeKTHBe 2006/42/EC
- Tód n3rTOBJIeHn
- TIN MaHHbI
- 3aBODCKOHNOMep
- HanmeHOBaHne n aDpec n3rTOBtTeJIa
- TexHHueckHe xapaKTepeNCTIKI
8.HoIuIeIa
KOMHOHEThbIMAUHHbI
-
ToIkaTeIb, YTo6bI npotaIKnBaTb KOpOTKne BETKN B BOPOHky;
-
RykoTka dIy nepemueHnra;
- 3arpy3oHaBOPoHka,cbemHa;
- Pukka dIa 3akpeHnBOPoHN;
- YnpaBHeHne XoJ/OctaHOB;
13A.OctaHOB (KpaChbI);
13B. XoD (3eJIeHbI);
- Po3eTka dIra obecneueHnI 3JIeKTpOuNTaHnI;
15.Измельчauоин HOK;
- Hopnyc Maunnbl c KOlecamn dI nepeMeeHnra;
- C6opHnK n3MeIbYeHHoM aCCbl,
- BbinyckHoe OTBepcTne.
Cpa3y nocne nokynMaunHb 3aheCnTe ee ndeHTnKa- uonHHbI daHHbI (3 - 4 - 5) B cneuaJIbHbI neJHa noCneJe CTpAHue pyKOBODCTBa.
O6pa3eU,JeKlapaunu COOTBeTCTBn HaXoDHTcHa nped-nocleHne CTpaHnue daHHoro pyKOBOODCTBa.

He BbIbpaBbIaTe 3JeHTPOo6OpyDoBaHHe BMeCTe C obbIhIMN OTXoDAMN. B COOTBeTCTBN N C EbponeckOIN DnpeKTHBOI 2012/19/EC OTHOCHTeJIbHO BbIEBeEHORIO 3EKCIIyatauNN 3JeHTPnueCKoro I 3JeHTPOHORO 6OpoydoBaHNI H ee npImeHHeM CORaCHO npabINam CTpaHBI 3KcIIyatauNN, BbIEDeHHOE I3 3KcIIyatauNN 3JeHTPOo6OpyDoBaHNE DOJHKHO OTnpaBnTbcra Ha nepepa6Otky B COOTBeTCTBN C Tpe6OBaHNMI NO Oxpae OKpyKaIOUeI cpebl OTdJIbHO OT dpyHX OTxODOB. Ecln 3JeHTPOo6OpyDoBaHne BbIbpaBbAEtCn HA CBaIKY INI 3aKaANbIBaETcR B 3EMIO, JAOBtBIE BeUECTBA MOrYT pOnOHKNHyTB CLOI NOd3EMbIX BOI INONACTB INISeBbIe POnyKTbI, YTO npBBeDET K HAnecEnIO yUep6a BaWemy 3DopOBbIO IN XoPoWemy camOuyCBTNO. IInI ONyChENIA BoOEe Npdo6HO INHΦoMaunn IO nepepa6OTKe STOrO IN3dJIeNIA oBaAaTEcB b UypeKdHNe, OTBETCTBEHHO 3a nepepa6OTKy OTxODOB, INN K BaWemy dNCTPN6bIOTopy.

3eIeha KhoHa (9-1) = XoD
Kpacha KhoNka (10-O) = OctaHOB
Ecnnoa TOKA OTCYCTBYET, MaHnHa BbIKIOyaeTcR.
TTO TOObI CHOBA BKNIOUHTB DBNrAteJIb, HAno CHOBa HaHaTaH Na 3eJeHyIO KOnKy (9).
3. NOJIb3OBAHNE MAUNHOJ
BAHHO:
- IcnoIb3yIte MaunHy Ha POBHOI TBepDoI NOBepxHOCTH, pN 3TOM Bbl DOJIHHbl CTOrTb Ha ODNHom yPOBHe c HOJecAMn.
- Пи зanycke MaunHbI MOrTy Ipon3oHT BpeMeHHbIe NaDeHnHaPraJKeHn.Bo n36BeKaHne nomEx dJa DpyrOro 06OpyDoBaHnna, NOdJIIOHeHHoro K CetN NITaHnY, YDOCTOBeBpTEcB, YTO CeTb BbIDepHH T Harpy3Ky MaunHbI N DpyrOro 06OpyDoBaHn, NOdJIIOueHHoro K 3ToJ He ceTn.
EcnBnIaTeIbOCTaHaBnIbAeTcN3-3a nepepeBa BO Bpempa6oTbI, HeoXoIMNOdoKDaTb np6n3ntelbHO 5MHyT nepei NOBTOPbIM 3anyChOM.
3.1 NOIROTOBMAUHHbI
YcTaHOBHTe c6OpHNK IOI MaWHy OTBepCTHeM BBepx, npHKpeNTb pyuKN (1) c6OpHNka K DByM KpeJIeHnM (2).
3.2 NOdRJIIOUeHHe MauHHbI
IodcoeHHHe po3ETky Ka6eJyDInHHTeJ (3) K BnJIke (4) MaINHbI, KaK nOKa3aHO Ha pncyHKe, a 3aTeM BnIKy yDInHHTeJ K PO3eTKe 3JeKtpOnITaHJ (5).
3.3 3ANYCH DBNATEJIH PEXHM PABOTbI
3aynctnbBnraTeIb;HaKaTbHa 3eJeHyIO KHOHky (1-1).
3arpy3ntb MaTePnaI dIy n3MeJIbYeHnI Yepe3 aRpy3OuHoe OTBepCTne (2) BOPOHN (3).
B cnlyuae Heo6xoJHMOCTM MOKHO npOTOKHyTb MaTePnA1 CneuaJIbHbIM TOJKAteIeM (4).
Poi3HbIe COBeTbI NO H3MeJIbYeHHIO
He n3MeIbYaTe MOKpbM MaTePnAJI.
- 06pe3aTb BETBn C 60JIbWHM KOJIHueCTBOM CYKOB IN cpe3aTb 60KOBbie OTOPCTKN.
He n3meIbUaIte BeTbN c dIaMeTpom 6oJIe 4 cm; npHIMMa BO BHIMAHne TnI N CTeneHb cbIpocTH dpBeBecINbI, MOKeT BO3HNKHyTb Heo6XODMOCt b CHN3HTb MaKcIMaJIbHbI dIaMeTp o6pa6aTbIBaEMbIX BETOK.
3arpykaIte MaTePnAI MaIeHbKIMN NOpzma, YTO6bI He 3acopntb 3arpy3OHyIO BPOHky.
Pa3rpy30Hoe OTBepCTne DOJIHKHO 6bITb Bcerda CBO6OdHbIM.
- N3meIbuaaTe caIOBbI OTXoDbI MaJIeHbKIMN nopUaMn;YepeDyIteHX C BETHaMn BO H36eKaHne 3acopeHH.
He n3MeIbYaIe KxOHHbI OTxOdbI n dpyrmeMaTePnJIbI, He nMeIOUne TBepDoKoHCNCTeHcN.
BaxHbIe peHomeHdaun
He n3MeIbUaIe CInuKOM dInHHbIe BeTHN, NocKoJIbKy INx HeKOHTpOJIpyEMOE DnHKeHHe MOKeT Bbl3BaTb TpaBMBI.
3.4 ONOPOXHEHNE CBOPHNHA
YpOBeH N3MeIbYeHHOro MaTePnAna B c6OpHNKe He DOJIKeH DoXODHTb Do pa3rpy3OuHOrO OTBepCTnJ.
Ecnn 3TO npoHsOyIeT, To n3MeIbueHHbI MaTePnA13acOpNT pa3rpy3OuHbI KaHaI n HaUHeT Bo3BpaUaTbcYpeE3 aRpy3OuHoe OTBepCTne.
IpeHKe Yem CHaTb N OOnopoKHNb C6OpHNK, OCTaHOBNTe DBnRaTeJIb N OTHIOUHTe NOdAuy NITAHN.
3.5 3ACTPEBAHNE MATEPHAJA
B clyuae 3acTpeBaHHn H3MeIbuaemoro MaTePnaJa:
- BbIKIOHHT bBnraTeIb N OTCOeINHHTb MaunHy OT 3JIeKTPocETN;
2.Пользутесьзшпимперчтками;
- OTBnHTntb KpeHnHyIpyKy (1) BOpOHKn;
- ChrB BOpOHky (2); notarytbe ee BBepx;
- OuHCTnTb BOpOHky n 06laCTb (3) H3MeJIbUaIooJero HOHa, a TaKHe npIneAIOUne 3OHbI;
- YCTaHOBHTb BOPOHky Ha MeCTo H 3aKpeNtB ee, 3aBnHTNB pyHcy (1).
3.6 OKOHUAHNE PABOTbl
No OKOHuaHn pa60Tb BbIKIOHTb DBNrTaTeJb, HaKaB Ha KpacHyIO KhoNky (4-O).
OTKluuHtBu yIINHnTeJIb (5) CHAHA OTo o6uee po3eTKU (7), a 3ATEM OT BUNK MaunHbl (6).
CHaTb HOnOpOxHHTb C6OpHNK.
4. ПЛАHOBOE TEXHNUCHECHOE OБСЛУЖИBAHNE
BAHHO PeryraHoe n TuataTeIbHoe TexnuecHoe 06cnJHBaHne Heo6xOIMO dny NODepHaHNA BO BpemeH yPOBHe 6e3OpacHOCTn OpUNHaJIbHbIX 3KcNpyatauOHbIX XapAKTePNCtNK MaunHbI.
XpaHHTb MaunHy B CyXOM MecTe.
Ipeed BbINOJIHeHem KaHX-JI6o DeIcTBn IO OChCTke, KOHTPOIO INI TexO6CnyKINBaHNIO OTKIOUaTe MaUNHy OT CETN 3NeKTponNTAHN.
BAHHO IOnb30BaTeIb MOHeT BbIIOHrTb TOnbHO Oepaunu, N3IOJHeHHBie B DaHHOM pyKOBODCTBe, BCE OCTaIbHbIe Oepaunu DOJIHHbI BbIIOHrTbC8 B CepBnCHOM ueHTpe.
- P0JIb3OBAtbcra IPOUHbIM pa6OuHM nepuaTkAmn BO BpeM RAex ONEpaUN No OCHTKe, TEXHNueCKOMy 06cIyJKNBaHNUO NIN peYIpOBKe MaunHbl.
- KaHdbi pa3 nocle pa60tbi CHMaIte c6OpHN u ydaJIaIeOTXoDbI, OCTaBUnieCeB pa3rpy3OCHOM OTBepCTNI.
- Bcerda npoBepaIte, yTo BeHTnlaCIOHHbIe OTBepCTN He 3a6NTbI OTXODAMN.
4.He nCnoB3yIte cTpyn BObl u n36eraTe nonaHaHn BODbl Ha DnBraTeIb u 3JeKtpueeChne y3bl. He nCNoB3OBaTb arpeCCNBhIe XnDKoCTn dJa OCHCTN PJIaCTMaCCOBbIX YacteI.
- HnKOrJa He NbTaIeTcB BbIOJIHrA TcLOXHbI peMOHT, BCE ONEpaun, He ONuCAHHbIe B DaHHOM pyKOBOdCTBe, DOJHKbI BbIOINrBaC B CepBnCHOM ueHTpe. IIO6aR ONEpaun, 3a NcJIIOUeHNem ONuCAHHbIX B DaHHOM pyKOBOdCTBe, ecn OHa He 6bla BblIOJHeHa B yNOJHOMOueHNOM CepBnCHOM ueHTpe, pNBUoNT K yTpate DeIeCTBna rapaHTn n CHImaet IIO6yIO OTBETCTBEHHOCtB cΦnPmbl-3rOTOBInTeJI.
5. OXPAHA OKPYHAAIOUeI CPEdbl
OxpaHa OkpyKaIOSeI Cpebl DOJHKHa YBJIaTbCA cyueCTBeHHbIM N nepBooUepeHbIM acNeHTOM npN OJb3OBaHN MaunHo, BO 6laRo YelOBeueckoro 06eCTBa I OKpyKaIOSeI Cpebl, B KOTopoM MblHM.
He doctabTb 6ecnoKoHCTBa COeJrM.
- Ctporo co6IIOdaTb DeiCTByIOUne Ha MeCTHOM ypoBHe npaBnla nO BbIBO3y OTXoOB.
Ctporo co6IIOdaT MeCTHbIe HOpMbI no yTHIN3aunnyaIKOBKN, NOBpeJHDeHHbIX YacteN nn JIOb6IX 3JIeMeHTOB CO 3HaHTeJIbHbIM BIIHNHEM HaOKpyKaIOUyO CpeDy; 3TN OTXoDbI He DOJIHXbIBbl6paCbBaTcBcR B MyCopHbIe KOHTeHepbl, a DOJIHXbl6blOTJeHei NpePeHaHbIB CneuaJIbHbIe CEHTpbI c6opa OTxODOB, 3AHMaIOUneCe Ix nepepa6OTKoi.
- Nocne 3aBepseHnCpOa CnyKbMaunHbHe Bbl6paCbBaIe ee, a obaTnTecb UeHTp c6opa OTXoOB B COOTBeTCTBnC DeNCTByIOUIM MecTHbIM 3aHOHOdaTeJIbCTBOM.
6.ДИАГHOCTNHA
Zelen gumb (9-1) = Zagon
Rdec gumb (10-O) = Zaustavitev
V primeru odsotnosti toka aparat ugasne.
Za ponoven vklop motorja ponovno pritisnite na zeleni gumb (9).
3. UPORABA STROJA
POMEMBNO:
EN · The content and images in this User Manual were produced expressly for ST. SpA and are protected by copyright - any unauthorised reproduction or modification to the document, either partially or in full, is prohibited.