SASALARM110 - Alarm system KONIG - Free user manual and instructions
Find the device manual for free SASALARM110 KONIG in PDF.
User questions about SASALARM110 KONIG
0 question about this device. Answer the ones you know or ask your own.
Ask a new question about this device
Download the instructions for your Alarm system in PDF format for free! Find your manual SASALARM110 - KONIG and take your electronic device back in hand. On this page are published all the documents necessary for the use of your device. SASALARM110 by KONIG.
USER MANUAL SASALARM110 KONIG
KASUTUSJUHEND (Ik.18g)
MANUAL DE USO (p. 57)
NAVOD (5.200)
MANUAL (p. 68)
ROKASGRAMATA (Ipp.211)
HASZNÁLATI UTMUTATO (0.79)
NAUDIOJIMO VADOVAS (222 p.)
KAYTTOOHJE (s.90)
PRIRUCNIK(str.233)
BRUKSANVISNING (s.101)
PbKOBOACTBO (p.244)
NAVOD KPOUZITI (s.112)
INSTRUKCJA OBSLUGI (str. 255)
MANUAL DE UTILIZARE (p.123)
PRIROCNIK (str. 266)
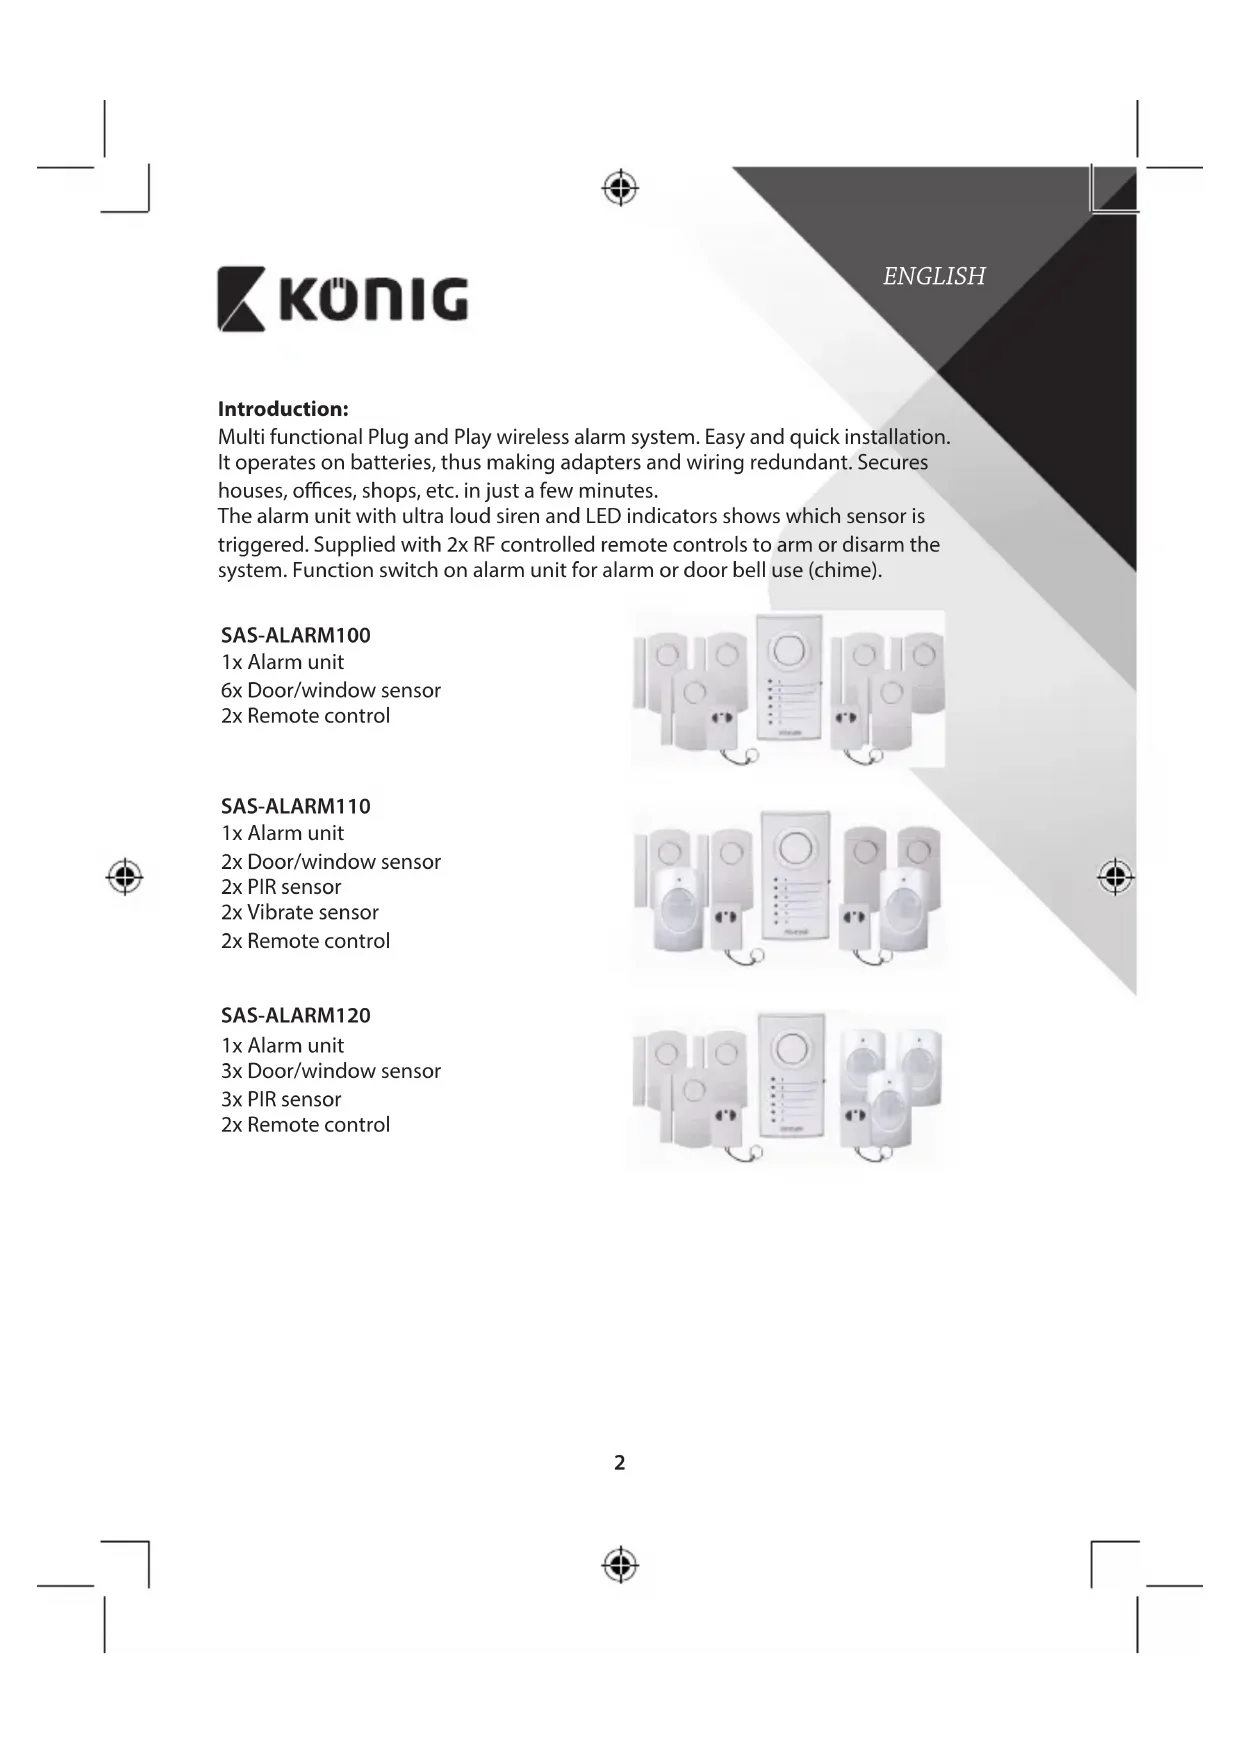
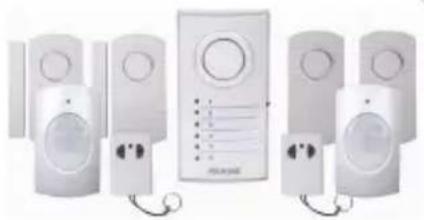
Multi functional Plug and Play wireless alarm system. Easy and quick installation. It operates on batteries, thus making adapters and wiring redundant. Secures houses, offices, shops, etc. in just a few minutes.
The alarm unit with ultra loud siren and LED indicators shows which sensor is triggered. Supplied with 2x RF controlled remote controls to arm or disarm the system. Function switch on alarm unit for alarm or door bell use (chime).
SAS-ALARM100
1x Alarm unit
6x Door/ window sensor
2x Remote control
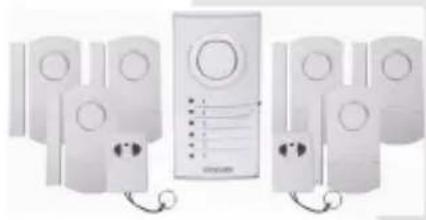
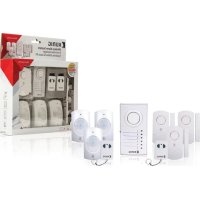
SAS-ALARM110
1x Alarm unit
2x Door/ window sensor
2x PIR sensor
2x Vibrate sensor
2x Remote control
SAS-ALARM120
1x Alarm unit
3x Door/ window sensor
3x PIR sensor
2x Remote control


KONIG
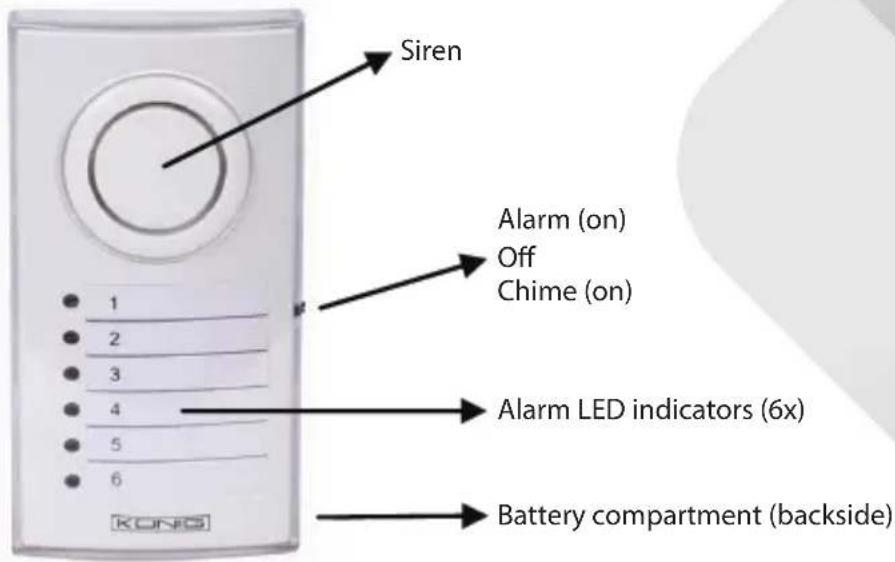
Description alarm unit (SAS-ALARM100/110/120): Figure 1
ENGLISH

Description door/window sensor (SAS-ALARM100/110/120): Figure 2

KONIG
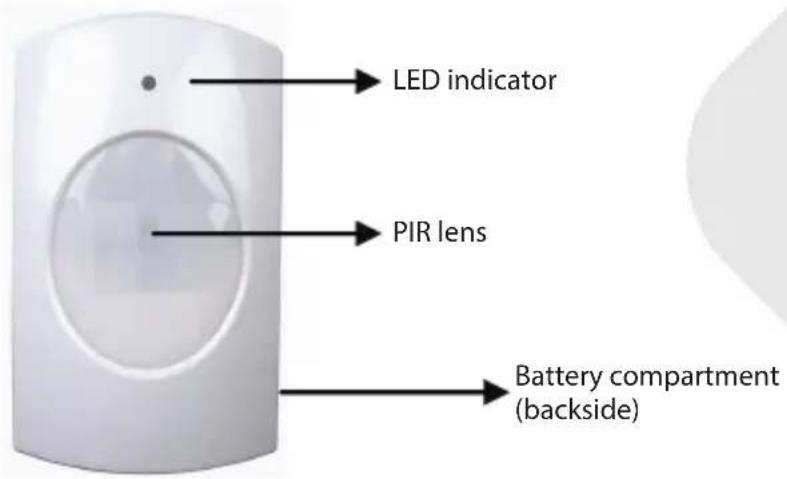
Description PIR sensor (SAS-ALARM110/120): Figure 3
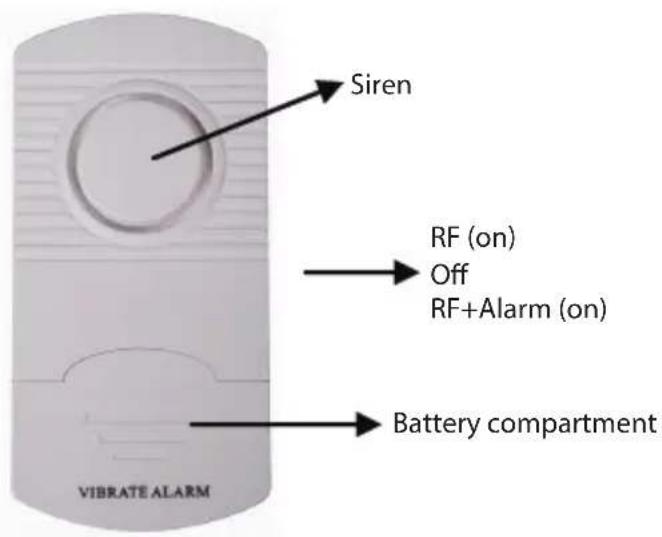
Description vibrate sensor (SAS-ALARM110): Figure 4
ENGLISH

KONIG
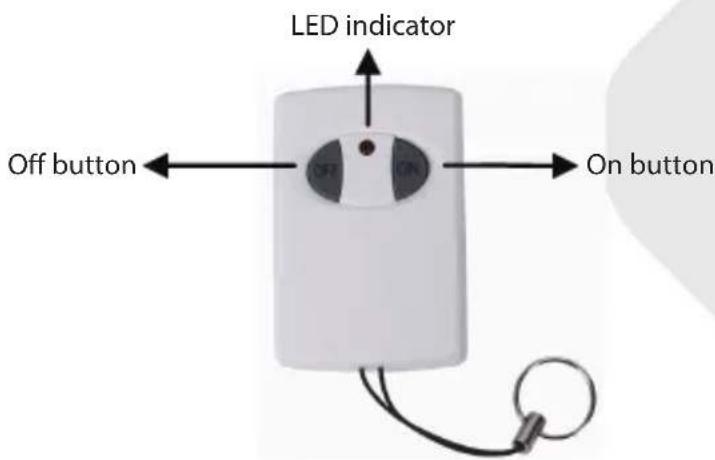
Description remote control (SAS-ALARM100/110/120): Figure 5
ENGLISH
Installation SAS-ALARM100
- Insert, according the diagram inside the battery compartment, (backside) the batteries for the alarm unit (3x AA).
- Install the door/window sensor with the adhesive tape to doors and windows. Note: maximum 1 cm distance between magnetic contact and sensor (see figure 2). Switch on the sensor to RF or RF+ALARM. If switched to RF+ALARM, the sensor will send, when triggered, a signal to the alarm unit and the siren of the sensor itself will also sound. In this case the siren of the sensor and the alarm unit will both sound.
- Remove the transparent front cover of the alarm unit to write down the position of the sensors corresponding with the numbered LED. (e.g. sensor 1=front door, 2=kitchen window, etc.).
- Install the alarm unit to a location. The distance between the alarm unit and the most far away door/window sensor may not exceed 60m (open area)*.
- Switch on the alarm unit to ALARM or CHIME function. If switched to CHIME, the alarm unit will sound like a door bell when a door or window is opened. Switched to ALARM generates a 100 dB loud siren. When the alarm unit is switched on, the alarm is not armed (active) yet. Push the ON button on the remote control to arm the alarm and OFF to disarm. The delay time for entering and leaving the protected area is between 20 25 seconds.

KONIG
- It's recommended to test the alarm system for correct operation with first use and every 3 months.
Procedure:
a) Switch the alarm unit on to ALARM or CHIME (for testing recommended).
b) Push the ON button on the remote control to arm the alarm.
c) Wait for 20~25 seconds (delay time).
d) Open every door or window one by one and check if the corresponding LED lights up and the CHIME sounds.
e) Disarm the alarm if everything operates correct.
f) The alarm system is ready to use.
Note:
1) The alarm unit will give a conformation tone when armed or disarmed. The tone for CHIME is different as for ALARM.
2) If a sensor does not need to be switched on, it's possible to switch off every sensor individually with the on/off switch. In this case the sensor is no part of the alarm system anymore when armed.
3) A sensor switched to RF+ALARM will always give an alarm sound on the sensor itself, unless the alarm unit is armed or disarmed.
4) When a sensor is triggered and the siren of the alarm unit sounds, it needs to be switched off with on/off switch of the alarm unit. After that the alarm unit can be switched on again. When the alarm keeps on going after arming the system, check if every door or window is closed properly.
Installation SAS-ALARM110
- Insert, according the diagram inside the battery compartment, (backside) the batteries for the alarm unit (3x AA).
- Install the door/window sensor with the adhesive tape to doors and windows. Note: maximum 1 cm distance between magnetic contact and sensor (see figure 2). Switch on the sensor to RF or RF+ALARM. If switched to RF+ALARM, the sensor will send, when triggered, a signal to the alarm unit and the siren of the sensor itself will also sound. In this case the siren of the sensor and the alarm unit will both sound.
- Install the vibration sensor with the adhesive tape to windows (on the glass). Switch on the sensor to RF or RF+ALARM. If switched to RF+ALARM, the sensor will send, when triggered, a signal to the alarm unit and the siren of the sensor itself will also sound. In this case the siren of the sensor and the alarm unit will both sound. Note: the vibrate sensor is very sensitive.
ENGLISH

KONIG
ENGLISH
The slightest vibration will trigger the sensor. It's not recommended to install the vibrate sensor on windows near to doors. Slamming doors will trigger the sensor.
- Insert, according the diagram inside the battery compartment, (backside) the batteries for PIR sensor (3x AAA). The PIR sensor needs to warm up for 30~40 seconds for first use. In this period it cannot detect motion. Install the PIR sensor at a height of 1 1.5m for best performance. Do not install the PIR sensor into direct sunlight, facing towards windows, objects that move easily and heat or cold source.
- Remove the transparent front cover of the alarm unit to write down the position of the sensors corresponding with the numbered LED. (e.g. sensor 1=front door, 2=kitchen window, etc.).
- Install the alarm unit to a location. The distance between the alarm unit and the most far away sensor may not exceed 60m (open area)*.
- Switch on the alarm unit to ALARM or CHIME function. If switched to CHIME, the alarm unit will sound like a door bell when a door or window is opened. Switched to ALARM generates a 100 dB loud siren. When the alarm unit is switched on, the alarm is not armed (active) yet. Push the ON button on the remote control to arm the alarm and OFF to disarm. The delay time for entering and leaving the protected area is between 20~25 seconds.
- It's recommended to test the alarm system for correct operation with first use and every 3 months. Procedure:
a) Switch on the alarm unit to ALARM or CHIME (for testing recommend).
b) Push the ON button on the remote control to arm the alarm.
c) Wait for 20~25 seconds (delay time).
d) For testing door/window sensor, open every door or window one by one and check if the corresponding LED lights up and the CHIME sounds.
e) For testing PIR sensor, move around the PIR sensor and check if the corresponding LED lights up and the CHIME sounds. Note: the LED indicator on the PIR sensor lights up also.
f) For testing vibrate sensor, hit carefully on the window and check if the corresponding LED lights up and the CHIME sounds.
g) Disarm the alarm if everything operates correct.
h) The alarm system is ready to use.

KONIG
Note:
1) The alarm unit will give a conformation tone when armed or disarmed. The tone for CHIME is different as for ALARM.
2) If a sensor does not need to be switched on, it's possible to switch off every sensor individually with the on/off switch. In this case the sensor is no part of the alarm system anymore when armed (except PIR sensor).
3) A sensor switched to RF+ALARM will always give an alarm sound on the sensor itself, unless the alarm unit is armed or disarmed.
4) When a sensor is triggered and the siren of the alarm unit sounds, it needs to be switched off with on/off switch of the alarm unit. After that the alarm unit can be switched on again. When the alarm keeps on going after arming the system, check if every sensor is installed properly.
Installation SAS-ALARM120
- Insert, according the diagram inside the battery compartment, (backside) the batteries for the alarm unit (3× AA) .
- Install the door/window sensor with the adhesive tape to doors and windows. Note: maximum 1 cm distance between magnetic contact and sensor (see figure 2). Switch on the sensor to RF or RF+ALARM. If switched to RF+ALARM, the sensor will send, when triggered, a signal to the alarm unit and the siren of the sensor itself will also sound. In this case the siren of the sensor and the alarm unit will both sound.
- Insert, according the diagram inside the battery compartment, (backside) the batteries for PIR sensor (3x AAA). The PIR sensor needs to warm up for 30~40 seconds for first use. In this period it cannot detect motion. Install the PIR sensor at a height of 1 1.5m for best performance. Do not install the PIR sensor into direct sunlight, facing towards windows, objects that move easily and heat or cold source.
- Remove the transparent front cover of the alarm unit to write down the position of the sensors corresponding with the numbered LED. (e.g. sensor 1=front door, 2=kitchen window, etc.).
- Install the alarm unit to a location. The distance between the alarm unit and the most far away sensor may not exceed 60m (open area)*.
- Switch on the alarm unit to ALARM or CHIME function. If switched to CHIME, the alarm unit will sound like a door bell when a door or window is opened. Switched to ALARM generates a 100 dB loud siren. When the alarm unit is switched on, the alarm is not armed (active) yet. Push the ON button
ENGLISH

KONIG
ENGLISH
on the remote control to arm the alarm and OFF to disarm. The delay time for entering and leaving the protected area is between 20 25 seconds.
- It's recommended to test the alarm system for correct operation with first use and every 3 months.
Procedure:
a) Switch on the alarm unit to ALARM or CHIME (for testing recommend).
b) Push the ON button on the remote control to arm the alarm.
c) Wait for 20~25 seconds (delay time).
d) For testing door/window sensor, open every door or window one by one and check if the corresponding LED lights up and the CHIME sounds.
e) For testing PIR sensor, move around the PIR sensor and check if the corresponding LED lights up and the CHIME sounds. Note: the LED indicator on the PIR sensor lights up also.
f) Disarm the alarm if everything operates correct.
g) The alarm system is ready to use.
Note:
1) The alarm unit will give a conformation tone when armed or disarmed. The tone for CHIME is different as for ALARM.
2) If a sensor does not need to be switched on, it's possible to switch off every sensor individually with the on/off switch. In this case the sensor is no part of the alarm system anymore when armed (except PIR sensor).
3) A sensor switched to RF+ALARM will always give an alarm sound on the sensor itself, unless the alarm unit is armed or disarmed.
4) When a sensor is triggered and the siren of the alarm unit sounds, it needs to be switched off with on/off switch of the alarm unit. After that the alarm unit can be switched on again. When the alarm keeps on going after arming the system, check if every sensor is installed properly.
Specifications:
Alarm unit (figure 1):
Power: 4.5 V DC (3x battery AA, not included)
- Standby current: < 1.5 mA
Chime current: < 90 ~mA
Alarm current: < 130mA
Alarm volume: 100 dB (0.5 m)

KONIG
- Chime volume: 90 dB (0.5 m)
- Switch: alarm/chime/off
LED indicator: 6
Frequency: 433MHz± 250kHz
Dimensions: 5.7 (W) x 3.9 (D) x 10.9 (H) cm
Delay time: 20 25 sec.
Door/window sensor (figure 2):
Power: 4.5 V DC (3x battery LR44, included)
- Standby current: < 10 A
Transmission current: < 6mA
- Working distance: + / - 60m (open area)*
Alarm volume: 95 dB (0.5 m)
- Switch: RF + alarm/RF/off
Frequency: 433MHz± 250kHz
Dimensions with magnet contact: 6 (W) x1 (D) x 9.9 (H) cm
PIR sensor (figure 3):
Power: 4.5 V DC (3x battery AA, not included)
- Standby current: <100 μA
Transmission current: <5 mA
Working distance: + / - 60m (open area)*
- Detecting range: 5 8 ~m
- Detecting angle: 100^ (horizontal)/80° (vertical)
Installation height: 1.5 m (recommended)
Frequency: 433MHz± 250kHz
Dimensions: 6 (W) x 5 (D) x 9.8 (H) cm
Vibrate sensor (figure 4):
Power: 4.5 V DC (3x battery LR44, included)
- Standby current: <10 μA
Transmission current: <6 mA
Working distance: + / - 60m (open area)*
Frequency: 433MHz± 250kHz
ENGLISH

KONIG
Alarm volume: 95 dB (0.5 m)
Dimensions: 4.8 (W) x 1 (D) x 9.9 (H) cm
Remote control (figure 5):
Power: 12 V DC (3x battery LR44, included)
- Standby current: 0
Transmission current: < 10 mA
- Working distance: +/- 30m (open area)*
- Buttons: on/off
LEDindicator:1
Frequency: 433 MHz ± 250 kHz
Dimensions: 3.5 (W) x 1.3 (D) x 5.2 (H) cm
- Working distance of remote control and sensors can vary due to environmental circumstances.
ENGLISH

KONIG
ENGLISH
Safety precautions:
Do not expose the product to water or moisture.
Maintenance:
Clean only with a dry cloth.
Do not use cleaning solvents or abrasives.
Warranty:
No guarantee or liability can be accepted for any changes and modifications of the product or damage caused due to incorrect use of this product.
General:
Designs and specifications are subject to change without notice.
All logos, brands or brand logos and product names are trademarks or registered trademarks of their respective holders and are hereby recognised as such.
This manual was produced with care. However, no rights can be derived. Konig Electronic can not accept liability for any errors in this manual or their consequences.
Keep this manual and packaging for future reference.
Attention:

This product is marked with this symbol. It means that used electrical and electronic products should not be mixed with general household waste. There is a separate collections system for these products.
This product has been manufactured and supplied in compliance with all relevant regulations and directives, valid for all member states of the European Union. It also complies to all applicable specifications and regulations in the country of sales.
Formal documentation is available upon request. This includes, but is not limited to: Declaration of Conformity (and product identity), Material Safety Data Sheet, product test report.
Please contact our customer service desk for support:
via website: http://www.nedis.com/en-us/contact/contact-form.htm
via e-mail: service@nedis.com
via telephone: +31 (0)73-5993965 (during office hours)
NEDIS B.V., De Tweeling 28, 5215 MC 's-Hertogenbosch, THE NETHERLANDS

KONIG
DEUTSCH
Einführung:
Installation SAS-ALARM120
Installation SAS-ALARM120
No实用性 of the product.
Garantia:
Vibrationsensor (figur 4):
- Ström: 4,5 V DC (3x batterier LR44, ej medleverade)

KONIG
- Standby spanning: < 10 A
Overfüringspanning: < 6mA - Funktionsomrade: + / - 60m (oppen yta)*
Frekvens: 433 MHz ± 250 kHz
Larmvolym: 95 dB (0,5 m)
Matt: 4,8 (B) x 1 (D) x 9,9 (H) cm
Fjarrkontroll (figur 5):
Ström: 12 V DC (3x batterier LR44, ej
medleverade)
IoXuc:12VDC(3xμnatapiecLR44,
περιλαμβάνονται)
- Peúma avaouvhC: 0
- Peúma μετάδοης: <10 mA
Aktiva etoupyiac:+-30m (avoixtn nepioxh)*
Koupiα:ενεργοποίησ/ANENEPRONIHΣH
EvdekTKEcLxvieLED:1
Σuxvotnta:433 MHz ± 250 kHz - i; 3,5() × 1,3(B) × 5,2()cm
*H akiva aeitoupyiaac tou nIeXeiipoiotnpiou kai twv aiOthnpwV npopei va δiapepei avaloya μe TIC πepiβaalovtike σuvhkec.
PpouaEic aopaaieiac:
Mny eKTeTe To pioov ovepoh npyaia.
Suvtnpno:
Kaθapiotε μovo ενστεγvπavi.
Mx npoiponoieite diautec n aeavikka.
Eyyunon:
Ouδεμia éyyunn n euvynn δev εival anodektn n e nepintwn aλaync n μetatponnc tou poiovtoc n 3λaβnc nou προληθκe λoγw εαραμενnc xρπαnc tou poiovtoc.
Evika:
To oxéδio kai ta xapaktnpiotika μnpoov va aλλαεovx wopic kaia npoeiδoioian.
Ola ta loyotuna, oI enwuyuiec kai oioovuaic npoiovtwv eivai emnpika onmuata n onmuata katateEvta twv aviroxuvkatoxyw kai dia tou napovtoc avaywpiovtai wTeota.
AutoTo eYxepidio ouvaytnke ie npooohn. Oto, de npokunov dkaiwata. H Konig Electronic dve pepiae uOuvyia opalmuatae autoTo eYxepidio n otic oveneiec touc.
DuAeTo npov Exyepidio kai n ouakeuaia yia eavokn avapopa.
NpOoOx:

To ouykepiévo npoiov exi enionuaovtei me auto to oumbolo. Auto onaivei otl o metaxeipiaevec nektpikec kai nektpovikec ouokevdec ne penei va avaeiyuvovtai te kaoka anoppmuata. Ynapexie Exwpoio uotma auoloync ia auta ta avtkiejeva.
To npoiov auto kataokeuaotnke kai napexetai oe umoppwon me to ovvo lo tw avtioxw kavoviauwkai oynuov nou ioxuov yia ta kpatn mean tnc Eupwaiknc Evwanc. Enianc, oumuoppwetai me to ovvo lo tw ixuouow npoaiypaowkai kavoviauow tnckwpaac diaeoc
Enionn tekunpiwn biatetai katoniiv ainnatoC. H tekunpiwn nepiaaabevi, xwiic nepiopiouo, ta e n: Anwon Suuopwooc (kai tautotnta pioiovtoc), dAio 0eouevvAoapaleiac YAIKOU, ek0eON dokiucn pioiovtoc.
Enkoivwovote e to tua Ea Eunnpetnonc nAataw mac ia unootnpiE:
anotovioToTo:http://www.nedis.com/en-us/contact/contact-form.htm
DatvnDbepn/okHa (pnc.2):
- IcToUHK 3Heprn: 4,5B noCt. ToKa (36aTapeiKn LR44, npnilaraIOTca)
Cnla ToKa B pexKme OxuaHn: <10 uA
Cnla ToKa nepedaH: <6 mA
Pa6ooye paocToHHe: +/- 60 M (OTKpbITar TeppuTOpn)*
PYCKH

KONIG
- Γρομκοθόνς Αγήλιαύητης: 95 Μδ (0,5 M)
- NepekIIOuataIb: P+CuHnHaun3auny/PU/BbIKI
- Yactota: 433 Mµ ± 250 kµ
Pa3MepbIC mArHHTHBIM KOHTaKToM: 6 (山) x 1 (Γ) x 9,9 (B) cm
Датчк PIR (pnc. 3):
- IcToUHnK 3Heprn: 4,5 B noCt. Toka (3 6aTapeiKn AA, He npuIaraiOTca)
CnlaToKaBpeKImeOxNdaHn:A<100μA
Cunataoka nepeda: < 5MA
Pa6oee paCCToHHe: + / - 60M (OTKpbTae TeppuTopna)*
Дианэзн обарухен:5\~8M -
YrOJ o6HApUxKeHnA: 100° (no roPn3oHTaIi)/80° (no BepTnKaIi)
-
BbICota yCTaHOBKn: 1,5 M (peKOMeHnyeTcA)
- Yactota: 433 Mµ ± 250 kµ
- Ra6apntb: 6 (山) x 5 (Γ) x 9,8 (B) cm
DatYnK Bn6paun (pnc.4):
- Источник зергейн: 4,5 B пост. Тoka (3 6атейки LR44, пилагаюта)
Cunla ToKa BpeKIme OxuaHn: <10μA
CnlaToKa npepaH: <6MA
Pa6ooye paocToHHe: + / - 60M (OTKpbTAn TeppuTopn)*
433 Mμ ± 250 kμ - POMKocb cnHaJn3aunn: 95 d6 (0,5 m)
- Ra6apntb: 4,8 (山) x 1 (Γ) x 9,9 (B) cm
NylbT dy (pnc. 5):
- IcToUHK 3Heprn: 12B noct. ToKa (36aTaepKu LR44, npnilaraIOTca)
CnlaTokaBpeKImeOxndaHna: 0
CnlaToKa npepaH: <10 mA
Pa6ooye paocToHnne: +/- 30 M (OTKpbIta TeppuTopna)*
KhoIKn: BkIIOueHne IV BbIKIOueHne
CBeTOIOHOHy INHnKAtOp: 1
PYCKH

KONIG
- Yactota: 433 MΓι ± 250 κΓι
-
Ra6apntb: 3,5 (山) x 1,3 (Γ) x 5,2 (B) cm
-
Pa6ooye pacctOraHne nyIaY n DaTcIKOB MOKeT MeHrTbC B 3aBnCmOCTN OT yCIOBn Cpebl.
PYCCKH
Mepbi 6e3onachOCTn:
He donyckai Te Bo3dienTBnB OBOHnn Bna.
TexHueckoe 6cnykBaHne:
OuHuaTb TOJIbKO CyXoN TkaHbIO.
He nbitaTecb ouHCTNTb yCTPOINCTBO pACTBOPHTeAMN nn a6pa3NBbIMn BESeCTBaMn.
TapaHTn:
B cnyuae n3MeHn H moNphiKaun yCtpoCTBa, a paBHO B cnyuae noBpeJeHnry yCtpoCTBa BCNECTBne erO He npabnBHoro nCnoB3OBaHHra paAHTnHbte o6RaTeNbCTBa pOnu3BoDnte TepHOT CBOO cnly.
06une noJoxeHHa:
IIN3aH IN TexHueckMe xapaKTepeNCTIKM OryT 6bITb N3MeHeHb 6e3 npEdbapntelbHoro yBeOMnEHa.
Bce Iorotnbl, TOpROBBe MapKn HaaBaHnI PNOyKTOB ABAHOTc TOpROBbIMm MapKaMn NIN 3apeRNCpnpoBaHHbIMN TopROBbIMm MapkAMN IN BlaaIeBueB IN, CneIOBaTeNbHO, Pn3HaIOTc TaKOBbIMN.
3To pyKOBOCTBO 6bINO COCTaBHeNo TuaTeJIbHbIM O6pa3OM. Tem He MeHee, OHO He HaJeIeT HnKaKmN PpaBAM. Konig Electronic He HecET OTBeTcBHeHOCTN 3a BO3MOXHbIe OOn6Kn B DaHHOM PYKOBOCTBE INN INN NOCNECTBn.
XpaHnTe 3To pyKOBOcTBO uynaKOBky dna daJIbHeIwero nCNoJIb3OBAHn.
BHHMaHMe:

JaHHb npOyKT OTMeueH 3TUM CmBONOM. 3To O3HaayeT, yTo TaKne 3NeKtpnueckne uNn 3NeKtpoHHbIe N3DeJINr He DOnJXHb B6pAcBbATcB BmEcTe C 6bTOBbIMN OTXdAMN. IInr TAKNX npOyKTOB cyIecCTByeOTdEhH aCtema c6opa OTXdOB.
IaHHe 3dEne 6bIO I3rOToBLeHO I NOCTabNeHO B COOTBeTCTBN CO BcEMN PnIMeHMbIMN NIOJOKeHnMn INIpeKTHBaMn, DeINCTByIOUmm INIg BCEX CPTaH-UIeHOB EBponeckoro Co1o3a. OHO TAKke COOTBeTCTByET BcEM HopMaMn INIpaBnAmn, DeINCTBYIOUM B CTpaHE pnoDAJN.
OfniabnaDOKyMeHTaun npneocTabnEeTcno 3anpocy. TaDOKyMeHTaun BkIouaet (HO He OrpaHnBaETcTtM) DeknapauncooTBETBn (n3denn), nacnpot 6eOnacHocTn, OTuT no npOBepKe npOdykta.
IINyHnnoMoOnnOBaHTecbBnaHyCnyKbYIOeepKKKnHeTOB:
uepe3 Be6-caT: http://www.nedis.com/en-us/contact/contact-form.htm
no n. novte: service@nedis.com
no Tenefohy:+31(0)73-5993965(ba6oueyacb)
NEDIS B.V., De Tweeling 28, 5215 MC 's-Hertogenbosch, THE NETHERLANDS (HIVIDEPJIAHIbl)

KONIG
Giris:
PIR sensors (3. attels):
Barosana: 4,5 V strava (3x AA akumulators, nav iekjauti komplekta)
Strava gaidisanas rezima: < 100 A
- Parrraides strava: <5 mA
Daribbas diapazons: + / - 60m (atklata zona)
Noteiksanas diapazons: 5 8m
Noteiksanas lenkis: 100^ (horizontal)/80° (vertikali)
Uzstadisanas augstums: 1,5 m (ieteicamais)
Frekvence: 433 MHz ± 250 kHz
Izmiri: 6 (P) x 5 (D) x 9,8 (A) cm
Vibracijas sensors (4. attels):
Barosana: 4,5 V strava (3x LR44 akumulators, ieklauts komplekta)
Strava gaidisanas rezima: < 10 A

KONIG
- Parrraides strava:
<6 mA
Darbibas diapazons:
+/- 60 m (atklata zona)
Frekvence: 433 MHz ± 250 kHz
Signala skalums: 95 dB (0,5 m)
Izmeri: 4,8 (P) x 1 (D) x 9,9 (A) cm
Talvadibas pults (5. attels):
12 V strava (3x LR44 akumulators, ieklauts komplekta)
Barosana:
Strava gaidisanas rezima:
0
- Parraides strava:
<10 mA
Daribas diapazons:
+/- 30 m (atklāṭa zona)
- Poga: ieslégt/izslegt
LED indicators: 1
Frekvence: 433 MHz ± 250 kHz
Izmeri: 3,5 (P) x 1,3 (D) x 5,2 (A) cm
RF+AJAPMA, npn BkIIOUbaHeTo cn ceH3OpbT n3npa7a CnHan KbMaJIapMeHnMoyn KaTO npO3ByaBa CNpeHaTa Ha camna CEH3Op. B To3NcLyuayn pO3ByaBaT KaTO CNpeHaTa Ha CEH3Opa, TaKa n CNpeHaTa HaJIapMeHn Moyn.
- NocTabete 6aTePnnte 3a PIR ceH3opa (3x AAA) kato cna3BaTe cxemata B OTdeneHneTo 3a 6aTePn. PIR ceH3OpbT Tp86Ba da 3arpee 30~40 ceKyni npedn PbBoto n3non3BaHe. B To3n nepnoJ He moKe da pa3no3HaBA dBHXeHne. MoHTnpaIte PIR ceH3opa Ha BncoUHa ot 1~1,5 m 3a Hau-do6pa pa6ota. He MOHTnpaIte PIR ceH3opa Ha DnpeKTHa CbHueBa CBETnHa, C Jnue KbM pO3Opeua, Do JecHo DVBXeUeCe IpeMeTu ndo n3TOuHNu Ha TOJIINHa n OXlaKaJaHe.
- OTeTpaHeTe npO3paHn npEeH kaHa aIapMeHn MoyI, 3a Da 3aIIWeTe I03uYra Ha ceH3Opnte B cBoTBcTcBne C HomepaTa Ha CBETNIHHnTE INdKATOpN. (T.e. ceH3Op 1=npedHa Bpata, 2=kyxHeHckn npo3opeu n dp.).
- MoHTnpaIe aIapMeHnMaMyI Ha MaCTO.Pa3CToRHeTo MExy anapMeHnMaMyI n Hai-OTdaJeueHnCeH3Op He Tp8Ba Da HauxBbPJIa 60 m (nlou6e3 npenTCTBn)*.
- BkIIOUeTe anapMeHnMoyn KbM fYHKunra TA ANAPMA uN 3BbHEL. Ako BkIOuHTe yHKunra TKAmbAHKA, anapMeHnT moyn ue 3Byu KaTO kAM6aHka 3a BpTa npn OTbapRhe Ha BpTa uN npo3opeu. BkIOUbaHeTo Ha AJAPMA reHepnpa cnpa HcC cnla Ha 3Byka 100 dB. BkIOUbaHeTo Ha aIapMeHnMoyn He O3HaayBa CTapTnpaHe (akTNBpupe) Ha aIapMaTa. HaTNCHeTe 6yToHa 3a BkIOUbaHe Ha nCTaHnOHHO YnpaBneHne 3a Da BkIOUHTe anapMaTa u 6yToHa 3a N3KIOUBAHe, 3a da N3KIOUHTe. BpemTo 3a 3AkbcHeHne 3a BIn3aHe n HanyckaHe Ha 3aUnTabaHaTa 3OHa e 20~25 cekHydn.
- Пренива се за Тecтва саларMeHaТСИСTeMa 3a павинHa pa6Ota праздппьрВОТо ИЗПОЛЗВаHe и На ВсЕКи 3 Meceц. ПрочEDура:
a) BkIIOUeTe anapMeHn MaOnyHa no3uNn AINAPMA. nn KAM6AHKA (3a TcTeBaHe).
b) HaTnucheTe 6yToHa BKJI. HaДиCTaHcUHcHTo ynpabJeHne, 3a da BKJIIOHTe aIapMaTa.
c)ИЗчakайт20~25cekyн(DВремTo3a3KbcheHne).
d) 3a da TectBaTe ceH3Opnte Ha BpaTu/npo3Opu, OTbaprTe BpaTuTeu nn npo3Opunte edHa n o eHa n npoBepraTte dAn CbOTBeTHn CBETnInHe HnDnKaTOp 3aJeNCTBa n npo3Byuaba 3Byk OTKAM5AHKA.
e) 3a da TecBaTe PIR ceH3Op, ce pa3xoJeTe OKONO PIR ceH3opa n npOBepeTe DaNN 3aJeNCTBa CBoTBHeTHnCBeTInHe HINDKaTOP

KONIG
B'JIAPCKH
dann npo3ByuBa KAM5AHKA. 3a6eJexKa: 3aJeIcTba n CBeTnnHnTnHnKaTOp Ha PIR ceH3opa.
f)ИЗкlioуete anapMaTa,ako BCnUko pa6Otn npaBnHNo.
g) AIIapMeHaTa CnCTeMa e rOToBa 3a yNtpe6a.
3a6eJexka:
1) AnapMeHnT MoyI n3dAba NOTBbPdnteH TOH npN BkJIIOUbaHe nn n3KIIIOuBaHe. Tohbt 3a KAM5AHKA ce pa3NIuYBa OT To3n 3a ANAPMA.
2) Ako He e Heo6xOIMO da BkIIOUBaTe ceH3Opa, e Bb3MOXHO da N3KIOUHTe NOOTDeHNO BCEKN CEH3Opc npeBkIOUbaTeTn 3a BkN./n3Kn. B To3n Cnya# CEH3OpBT Beue Hma Da 6bJe qact OT anapMeHaTa CNCTema npn BkIOUbaHeTo (c N3KIOUeHne Ha PIR ceH3Opa).
3) BkIIOueHnT KbM RF+AIIAPMA ceH3Op BuHaRn n3daBa aIapMeH 3ByK B cAmra CEH3Op, oCBeH aKO aIapMeHnT MoyJr He 6bJe BKJIIOUeH nn IN3KJIIOUeH.
4)ПиЗаДeICTBaHHeHaCEH3Op npO3ByuAbaCnpeHaTaHa anapMeHnMoUy. Ta Tp8Ba Da ce n3KIOuN CnpEbKIOUyBaTeJra 3a BkN./n3Kn. Ha anapMeHn MoUyJI.Cnei TOBa MOKeTe Da BKIOUHTe OTHOBO anapMeHn MoUyJI. Korato anapMaTApOIOBxKaBa Da 3Byu CnE Bd BKIOUVAHe Ha CNCTemaT, npOBepTe DaII BCNUK CEH3Opn Ca npaBUNHO MOnTIpaHn.
Cneunkaum:
AnapMeH moDyI (fNrgya 1):
3axpaHbaHe:4,5VDC(3xA6aTeepn,HceBklnuBaT)
- Tok Ha n3yaKaBaHe: <1,5 mA
- Tok Ha KaM6aHaTa: <90 mA
- Tok Ha anapMaTa: <130 mA
CunaHa3BykaHaanapMaTa:100dB(0,5m)
CnlaHa3BbHeHe:90dB(0,5m)
- PpeBkIIOuBaHe: aJapMa/KaM6aHka/u3KJI.
CBeTINHeH INHnKaTOp-CBETOIOID3aCbCTOAHne(LED):6
- YecToTa: 433 MHz ± 250 kHz
- Pa3mepn: 5,7 (Д) x 3,9 (Л) x 10,9 (В) cm
BpeMe Ha 3aKbCHeHneTo: 20~25 cek.
Cen3op 3a Bpata/npo3opeu (fnupa 2):
3axpaHbaHe: 4,5VDC(3xLR446aTeepuBkIIOCTaBkata)

KONIG
- Tok Ha n3uKaBaHe: <10 μA
ToKHa npedabahe: < 6mA
Pa60THo pa3CTOAHne: + / - 60m (OTKpTa nnoi)*
CunaHa3BykaHa anapMaTa:95dB(0,5m) - PpeBkIIOUbaHe: P+ aIapMa/Pu/N3KIOUeHo
- YecToTa: 433 MHz ± 250 kHz
Pa3Mepn c mArHHTNIA KOHTaKT: 6 (山) x1 (Д) x 9,9 (B) cm
PIR ceh3op (figure 3):
3axpaHbHe:4,5VDC(3xA6aTepuu,HceBkKnOuBaT)
- Tok Ha n3yaKaBaHe: <100 μA
- Tok ha npedabane: < 5 mA
Pa60THo pa3CTOHHne: + / - 60m (otKpnta nnoi)*
- 06xBaT ha pa3nO3HaBaHe: 5 8m
- brbl ha pa3no3HabaHe: 100^ (no xopn3oHTana)/80° (no BepTuKaJa)
BucounHa ha mONTaxa: 1,5m (npenopbunTeHo
- YecToTa: 433 MHz ± 250 kHz
Pa3mepn: 6 (Д) x 5 (Л) x 9,8 (В) cm
Bn6paunohen cen3op (figure 4):
3axpaHbaHe: 4,5VDC(3xLR446aTeepu,BKIOueHnB IOCTaBKata)
- Tok Ha n34aKaBaHe: <10 μA
- Tok Ha npedabahe: <6 mA
Pa6oTHo pa3CTOHNHe: + / - 60m (OTKpnta nlou)
- YecToTa: 433 MHz ± 250 kHz
CunaHa3BykaHaanapMaTa: 95dB(0,5m)
- Pa3mepn: 4,8 (Д) × 1 (Л) × 9,9 (В) cm
ДиctанционнуnpaBHeHne(ФИруа5):
3axpaHbaHe: 12 V DC (3x LR44 6aTeepn, BKnIoueHn BdoCTaBkata)
ToKaHa 3aKaBaHe: 0
- Tok Ha npedabahe: <10 mA
Pa6oTHo pa3CTOHHne: + / - 30m (otKpnta nlou)
BytoHn: BKJ./u3KJf.
B'JIAPCKH

KONIG
CBeTnHEn HnKAtOp-CBeToIOo3a CbCTOAHne(LED):1
- YecToTa: 433 MHz ± 250 kHz
- Pa3mepn: 3,5 (Д) x 1,3 (山) x 5,2 (В) cm
- Pa6oTHOTO pa3CTOJHHe Ha dInCTaHcUHOHOTo ynpabNeHne n ceH3OpHTe MoKe da 6bIe pa3NHyNo nopAdn o6CToTEnCTBaTa Ha cpeData.
B'JIAPCKH
PpeoXpaHnTeHm Mepkn:
He n3laai Te npdykTa Ha BnHnHa H BpeMeTo mHa BnaIa.
Poaepbckka:
TouinCTbaIte cmo Cbc cyxa Kbpna.
He n3non3BaIte 3a noocTbaHe pa3TBOpTeINnn a6pa3nBn.
Tapaanua:
He ce noemat rapaunu n otrobopnoct 3a KaKbnto N da e npomeH nn MOnn Kauu Ha npodykta nn uetn, npnuHneH npadn HnpabunHOTo My n3non3BaHe.
06n nooxhenr:
Hn3aHbT n CneuKauNTe ca npedMeT Ha npomraHa 6e3 npedn3BecTne.
Bcunm E6nem, TpbroBckn Mapk nnn E6nem C TpbroBckn Mapk n mHeHa npOdyKTn Ca TpbroBckn Mapk n nn peRtnpaHn TpbroBckn Mapk Ha CbOTBeHTne pntExKaTeJn c ne pIn3HaBaT kaTo TaKBA.
HaTcOaTO pKoOCTBO e c3daeHO BHMaTeHNO. BbPekn TOBa He MoarTa 6bDaT DaeHN HnKaKBr rapaHmN. Konig Electronic He noema OTROBOPHOCT 3a rpeuKN B TOBa pKoOCTBO Nn TexHnTe NOCEIcTBNA.
3ana3BaTe pBkoBOJCTBOTO n ONaKOBKaTa 3a 6bDeu CnpaBKn.
BHHMaHHe:

IpoodykTBe o6o3aueH cTo3n CmBON. TOba O3Haayaba, ye enektpuuecknte n enektpoHHn npOyKTn He Tpa6Ba Da ce CmecBaT c 6bHKHOBeHnTe DOMAKHCKN OTnabu. 3a Te3n npOyKTn cbjcctByBa dpyra cnCTema 3a cb6npaHe Ha OTnaDbu.
PpOyKbTe npOn3BeHn DcOCTaBHe B cBoTBcTbE CBCuKN npNIOXUM pa3Nope6n N dIpeKTHBn, BAIMHN 3a BCNUK CTpaHn-ueHKn Ha EBPOeNcKna CbIO3. OCBHe TOBA cBoTBcTbA Ha BCNUKN pNIOXMM CneUfKaun n pa3Nope6n B cTpaHnTe, B KOnTO ce npednara.
Moxete da noIyHTe oIuHaT aDokymentaun npi nonckBaHe. Ta BkIOUBA, Ho He ce orpaHuaBa Do:KeIapaua 3a CbOTBeCTBnE (N IeHTnHOCHT Ha IpOdyKta), nacnpT 3a 6e3oNaCHOCT Ha BeueCTBaTa N DOKlaD OT TcTeOBeTe Ha npOdyKta.
CbpxkeTe C 6oPoTo 3a 06cnykBaHe Ha KIneHTn 3a DoIbHInTeHa HhOpMaua:
Upe3Mpexkata: http://www.nedis.com/en-us/contact/contact-form.htm
Upe3 mmei: service@nedis.com
no TenefoHa:+31(0)73-5993965(npe3paOtroBpeMe)
NEDIS B.V., De Tweeling 28, 5215 MC 's-Hertogenbosch, XOJIAHДИA