
24G42E - Monitor AOC - Free user manual and instructions
Find the device manual for free 24G42E AOC in PDF.


| Product type | LED Monitor |
| Screen size | 24 inches (60.96 cm) |
| Native resolution | 1920 x 1080 (Full HD) |
| Refresh rate | 144 Hz (DisplayPort) |
| Panel type | IPS (In-Plane Switching) |
| Connectivity | 1 x DisplayPort 1.2, 2 x HDMI 2.0, 1 x headphone jack |
| Dimensions with stand (W x H x D) | 540 x 400 x 200 mm |
| Net weight with stand | 4.2 kg |
| Power supply | External power adapter (100-240 V, 50/60 Hz) |
| Typical power consumption | 25 W |
| Standby power consumption | 0.5 W |
| Main features | Adaptive-Sync / FreeSync, Low Blue Light, Flicker-Free, Game Mode |
| Ergonomic adjustments | Tilt: -5° ~ +23°, swivel: no, rotation: no, height: no |
| VESA mount | Yes (100 x 100 mm) |
| Security | Kensington lock slot |
| Care and cleaning | Use a soft, dry cloth. Do not use abrasive cleaners. |
| Spare parts and repairability | Power adapter available; repairability index: 6.5/10 |
| Operating temperature | 0 °C ~ 40 °C |
| Viewing angle | 178° / 178° |
| Warranty | 3 years (parts, labor, screen) |
Frequently Asked Questions - 24G42E AOC
User questions about 24G42E AOC
0 question about this device. Answer the ones you know or ask your own.
Ask a new question about this device
Download the instructions for your Monitor in PDF format for free! Find your manual 24G42E - AOC and take your electronic device back in hand. On this page are published all the documents necessary for the use of your device. 24G42E by AOC.
USER MANUAL 24G42E AOC
Setting the best resolution (English)....1
Windows 11....1
Windows 10 ....3
Windows 8 ....5
Windows 7....7
Install Monitor Driver....9
Windows 11....9
Windows 10 12
Windows 8....16
Windows 7 20
Install common software ....23
G-Menu 23
I-Menu (Screen+)....24
e-Saver 26
01 I-Menu (Screen+) or e-Saver
G-Menu 77 I-Menu (Screen+)....78 e-Saver 80
I-Menu (Screen+)....105
e-Saver 107
Setting Optimal Resolution (Traditional Chinese)....109
Windows 11....109
Windows 10 ....111
Windows 8 113
Windows 7 115
Installing the Monitor Driver 117
Windows 11....117
Windows 10 120
Windows 8 124
Windows 7 128
Installing Common Software....131
G-Menu 131
I-Menu (Screen+)....132
e-Saver 134
Setting the Best Resolution 136
Windows 11....136
Windows 10 138
Windows 8....140
Windows 7 142
Installing the Monitor Driver....144
Windows 11....144
Windows 10 147
Windows 8 151
Windows 7 155
Installing the Common Software....158
G-Menu 158
I-Menu (Screen+)....159
e-Saver 161
I-Menu (Screen+)....186
e-Saver 188
I-Menu (Screen+) 213
e-Saver 215
Setting the best resolution (Dutch) 217
Windows 11....217
Windows 10 219
Windows 8 221
Windows 7 223
Installing the monitor driver....225
Windows 11....225
Windows 10 ......228
Windows 8 232
Windows 7 236
Installing the software generally....239
G-Menu 239
I-Menu (Screen+)....240
e-Saver 242
Setting the optimal resolution......244
Windows 11....244
Windows 10 246
Windows 8 248
Windows 7 250
I-Menu (Screen+)....267
e-Saver 269
I-Menu (Screen+) 294
e-Saver 296
I-Menu (Screen+) 321
e-Saver 323
I-Menu (Screen+)....348
e-Saver 350
I-Menu (Screen+) 375
e-Saver 377
Setting the best resolution (Indonesian)....379
Windows 11....379
Windows 10 ....381
Windows 8 383
Windows 7 385
Installing the Monitor Driver....387
Windows 11....387
Windows 10 390
Windows 8 394
Windows 7 398
Installing common software....401
G-Menu 401
I-Menu (Screen+)....402
e-Saver 404
I-Menu (Screen+) 429
e-Saver 431
I-Menu (Screen+)....456
e-Saver 458
I-Menu(Screen+)....483
e-Saver 485
I-Menu (Screen+)....510
e-Saver 512
I-Menu (Screen+)....537
e-Saver 539
I-Menu (Screen+)....564
e-Saver 566
I-Menu (Screen+) 591
e-Saver 593
I-Menu (Screen+)....618
e-Saver 620
I-Menu (Screen+)....645
e-Saver 647
I-Menu (Screen+)....672
e-Saver 674
I-Menu (Screen+)....699
e-Saver 701
I-Menu (Screen+)....726
e-Saver 728
I-Menu (Screen+)....753
e-Saver 755
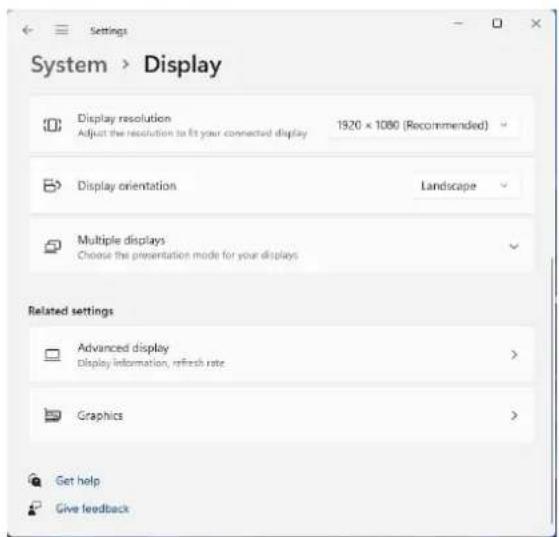
Setting the best resolution
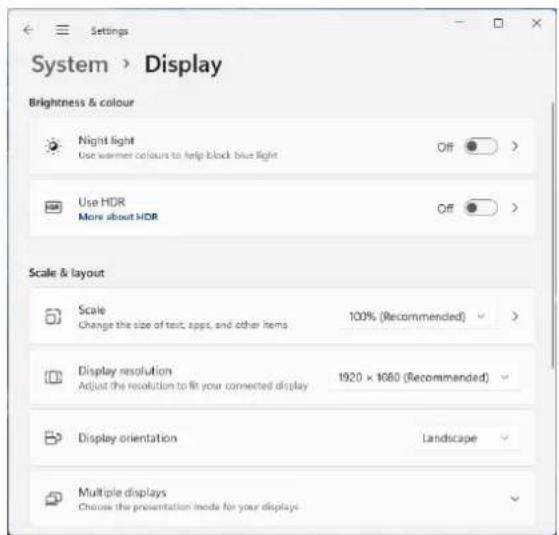
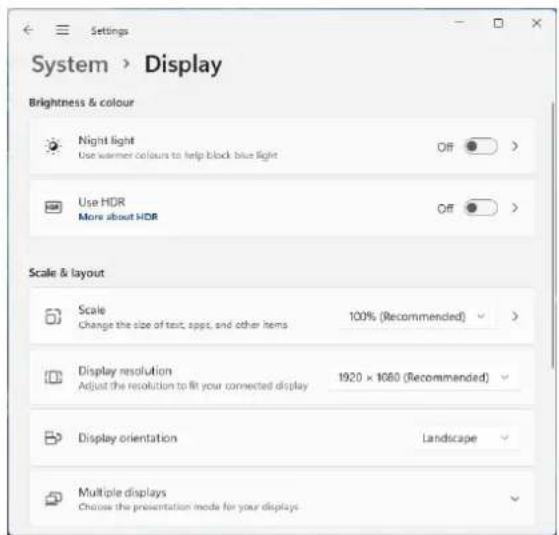
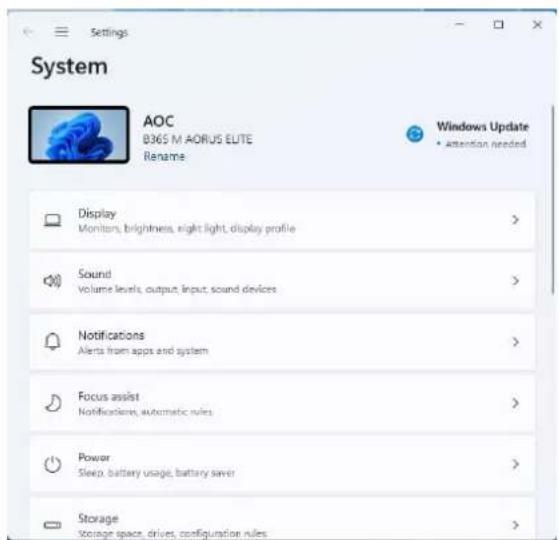
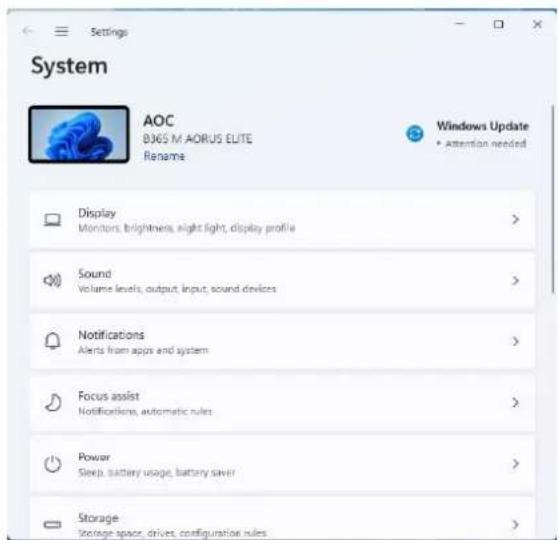
Windows 11
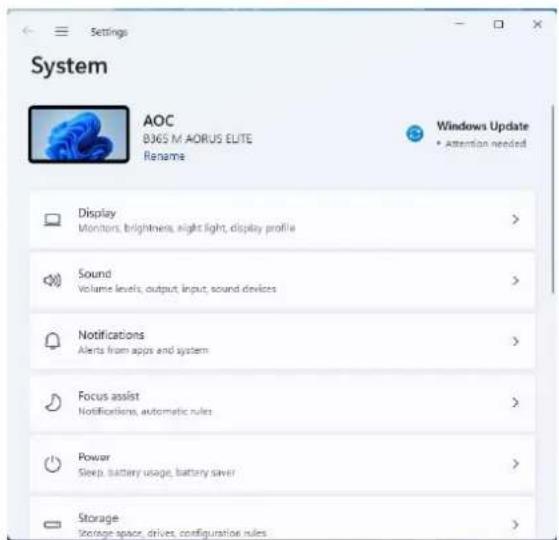
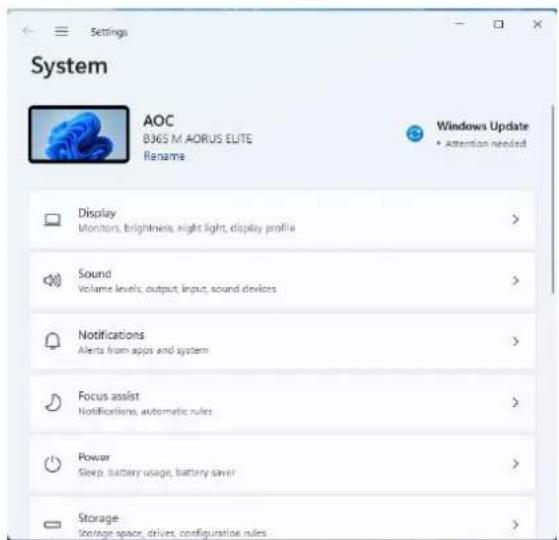
- Click Start.
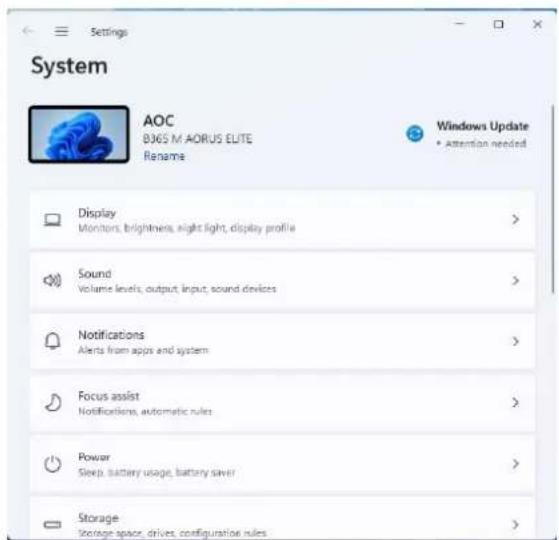
- Select "Settings".

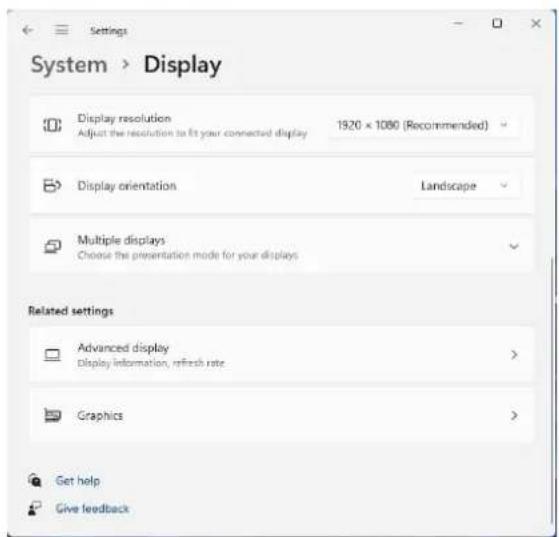
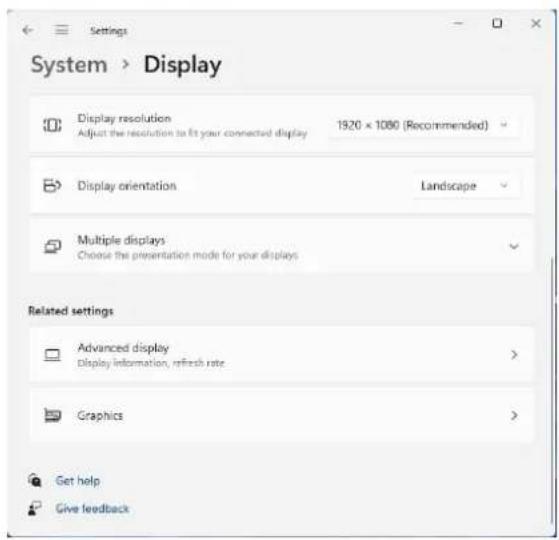
- Select "Display".
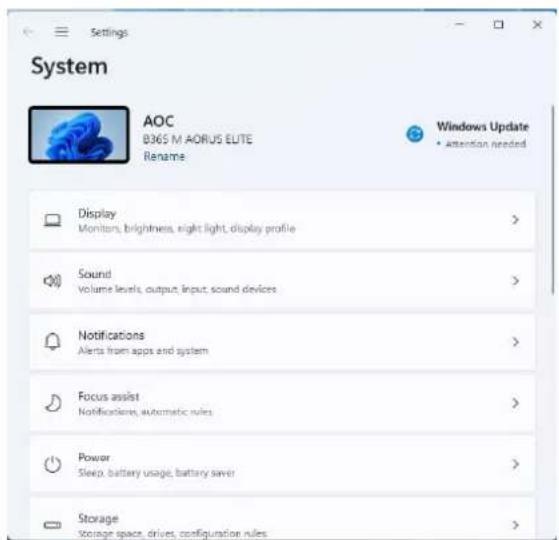
- Select "Recommended Resolution".

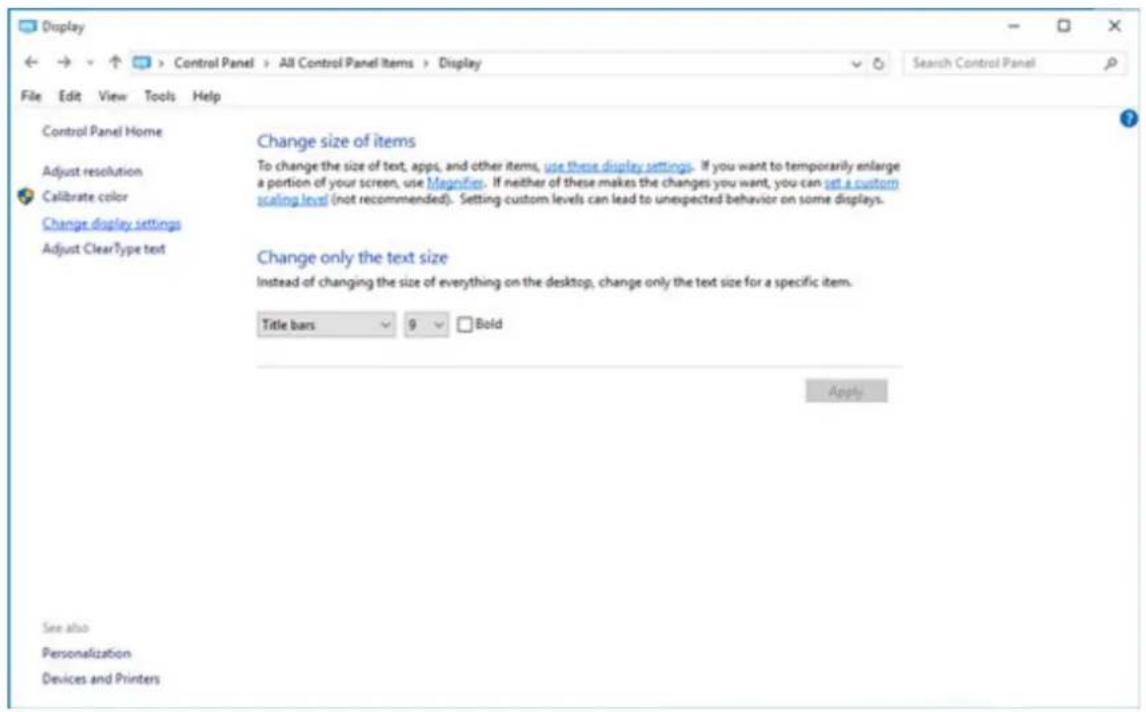
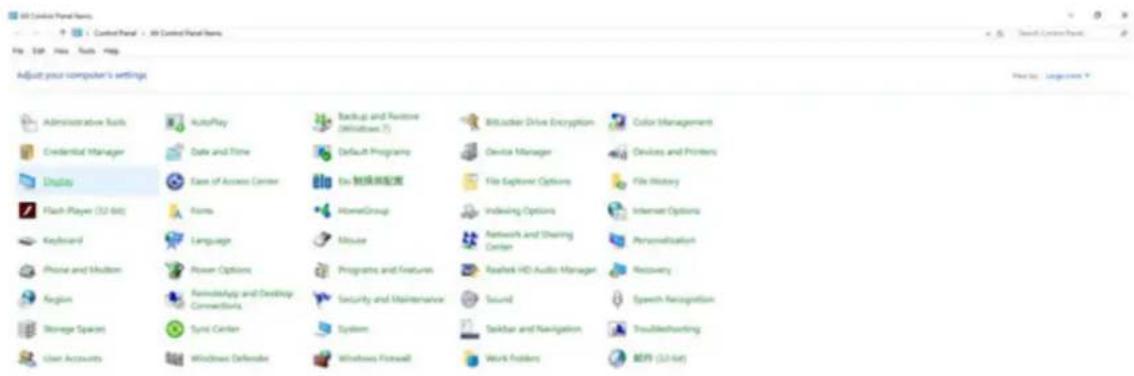
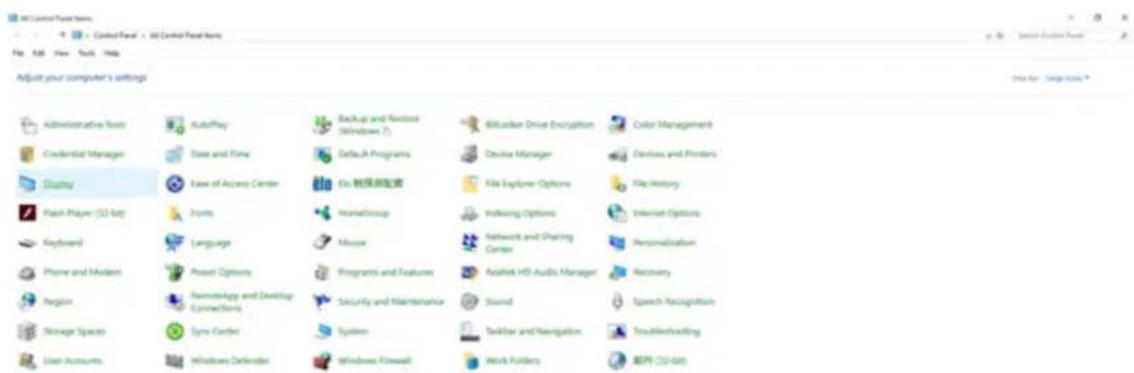
Windows 10
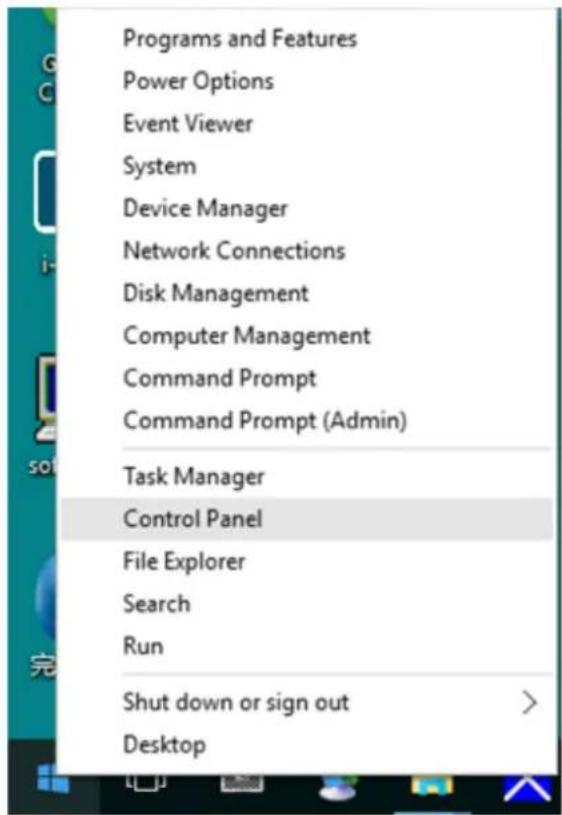
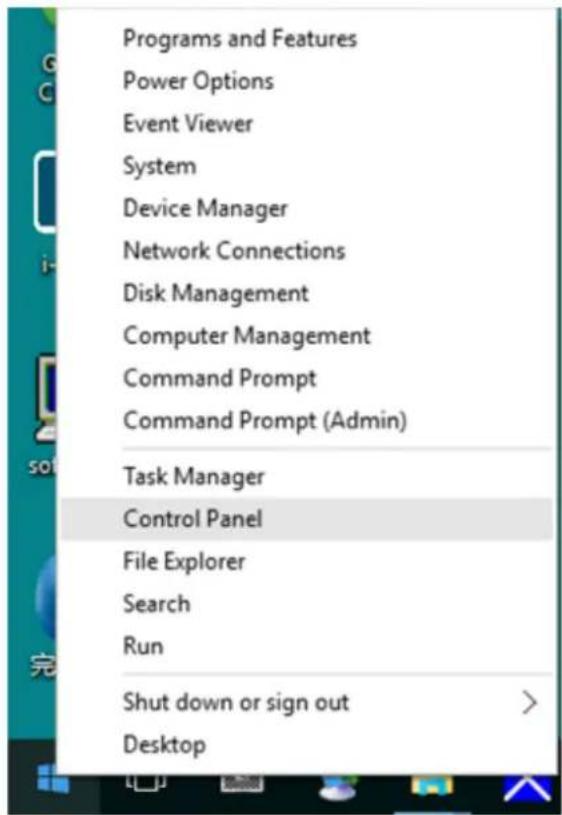
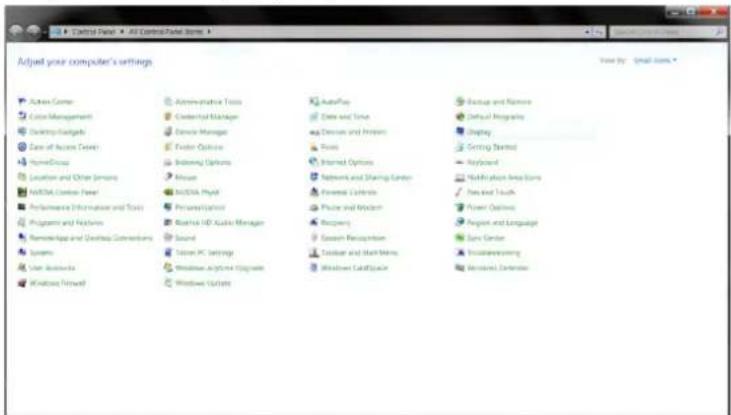
- Right-click Start. - Click "Control Panel".
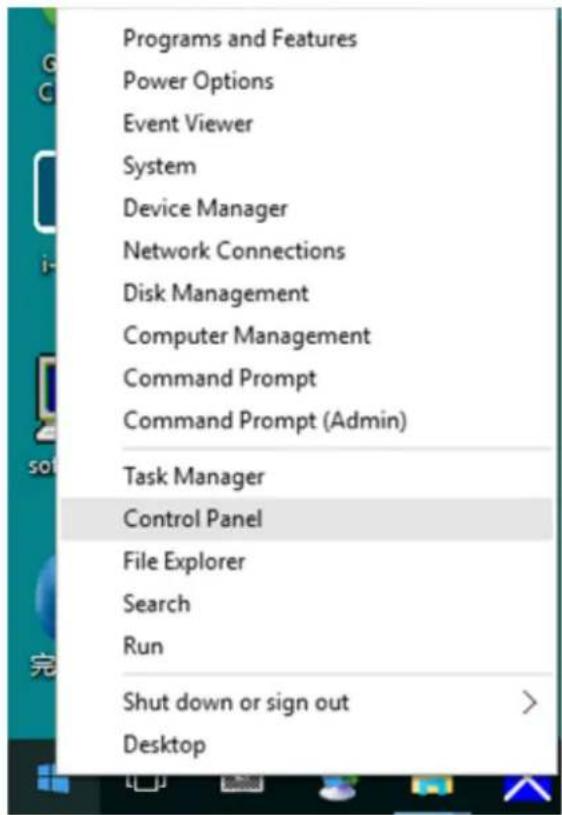
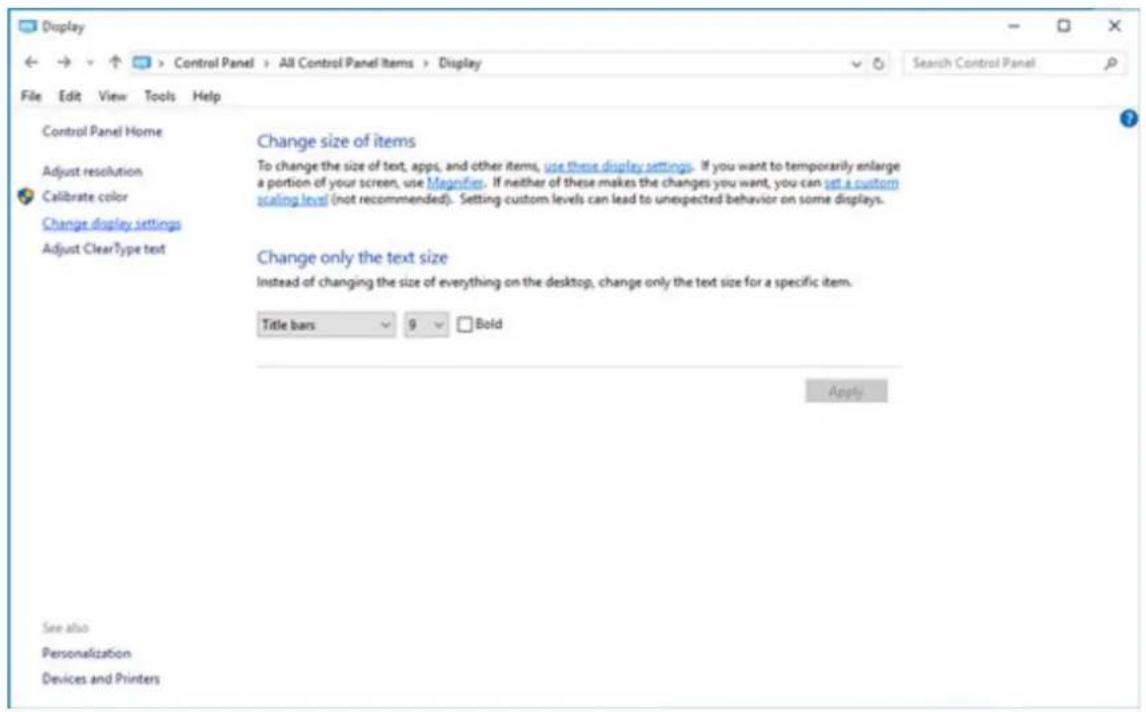
- Click "Display".

- Click the "Change Display Settings" button.

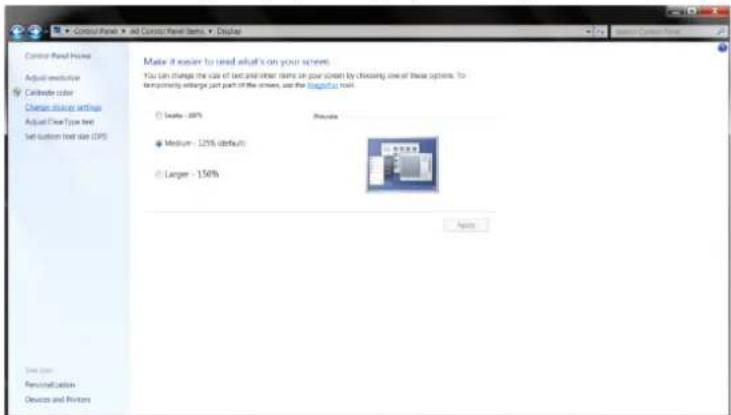
- Set the resolution slider to the best preset resolution.

Windows 8
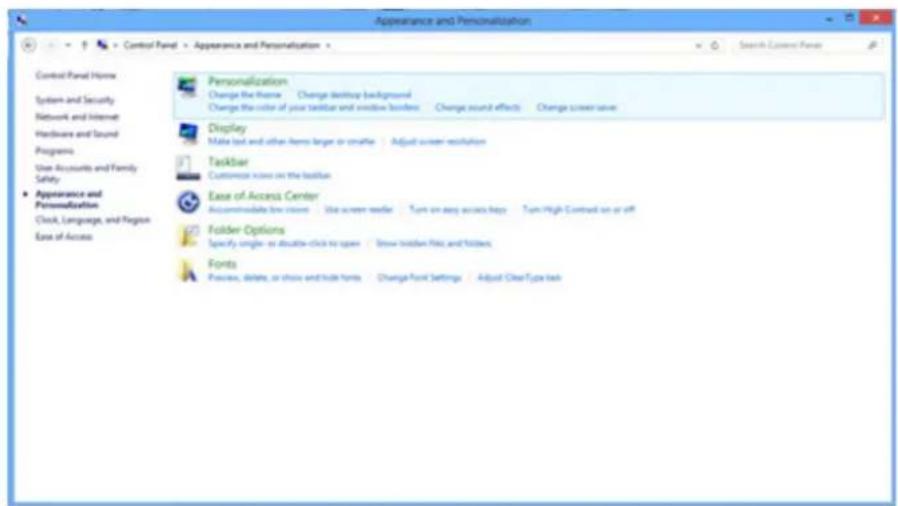
- Click Start, then right-click the bottom right corner of the screen, which is the bottom right of all applications.

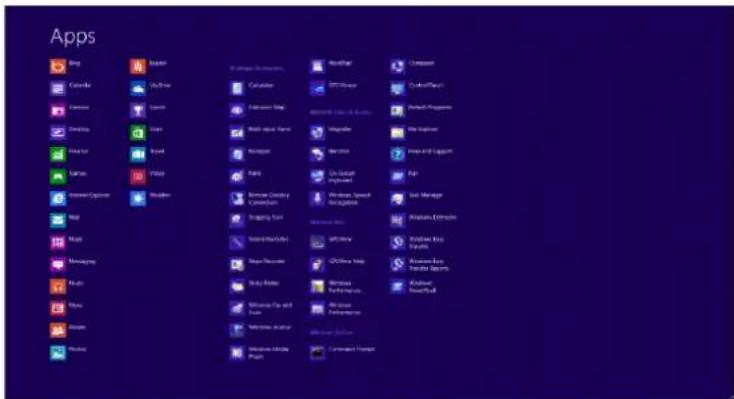
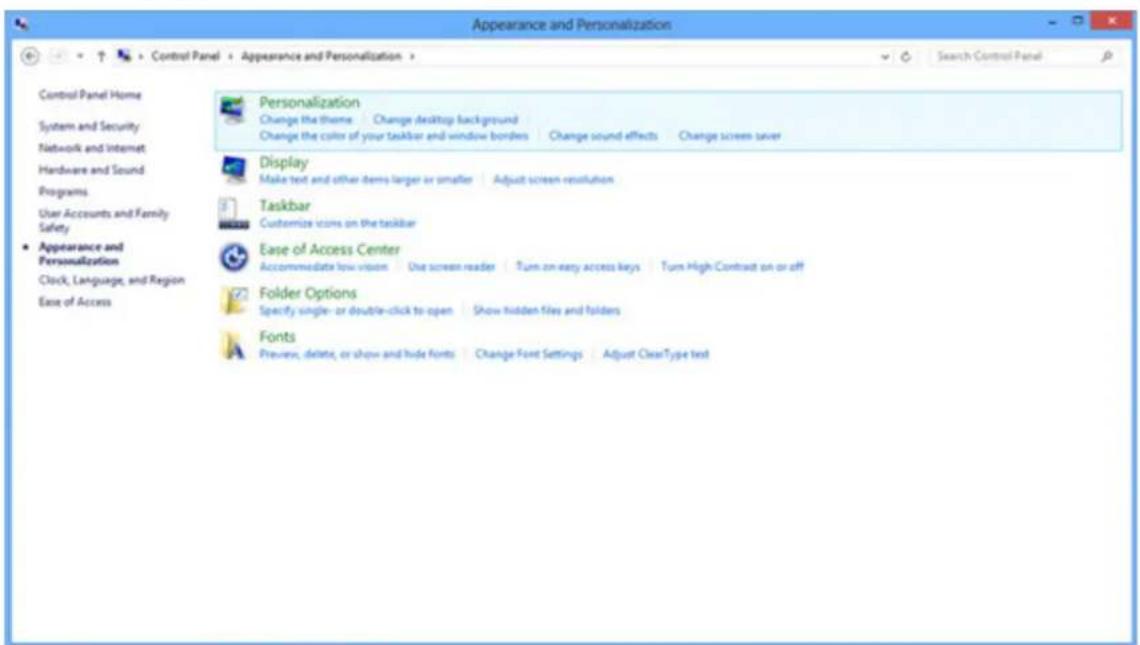
- Set "View By" to "Category".
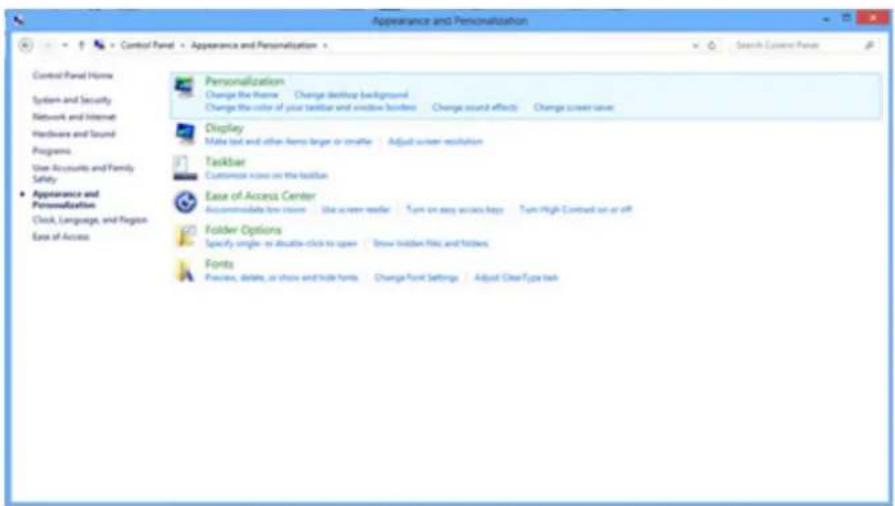
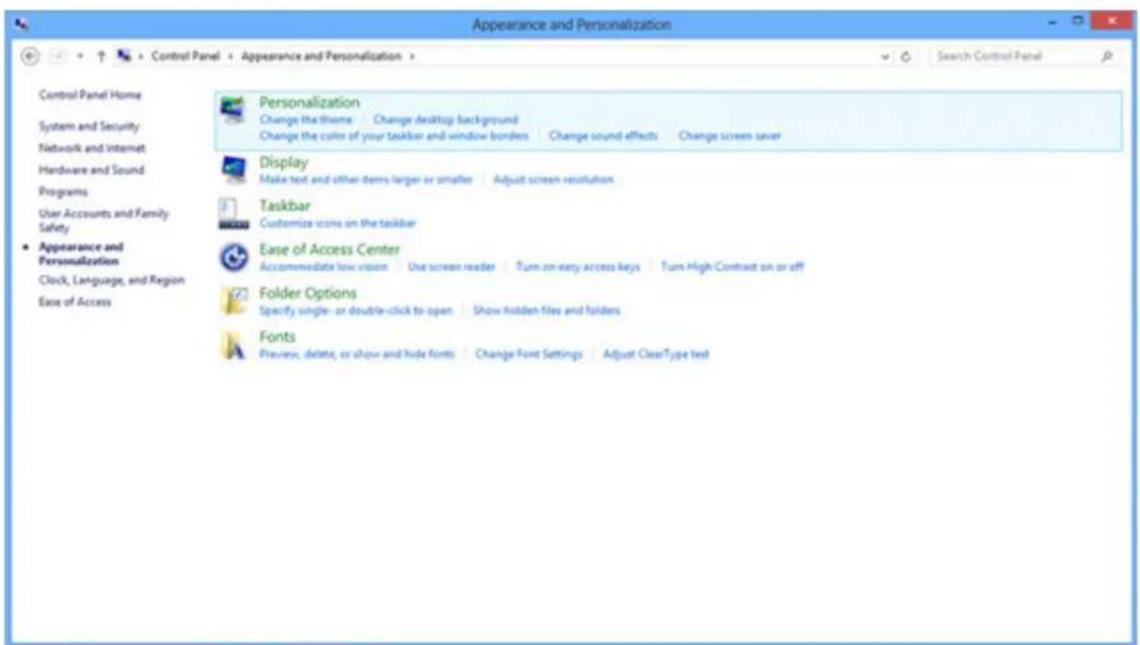
- Click "Appearance and Personalization".
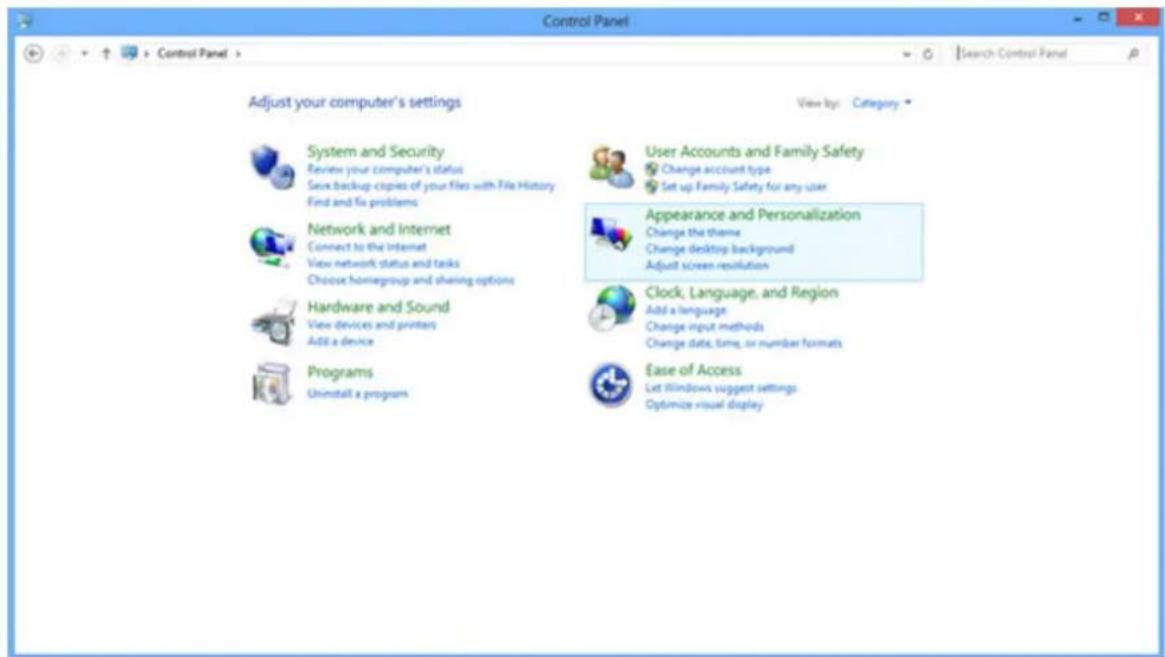
- Click "Display".

- Set the resolution SLIDE-BAR to the best preset resolution.

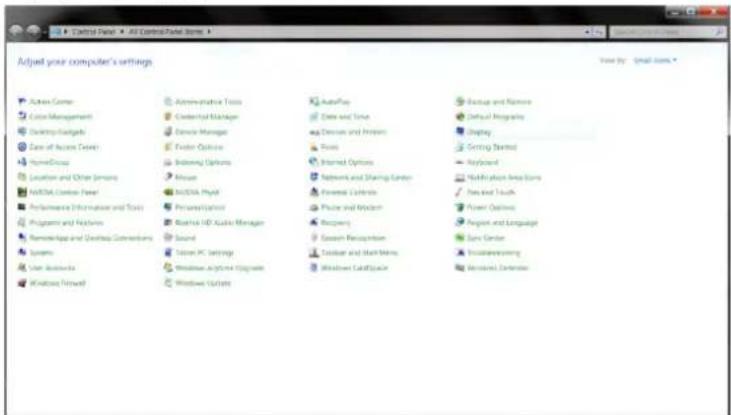
Windows 7
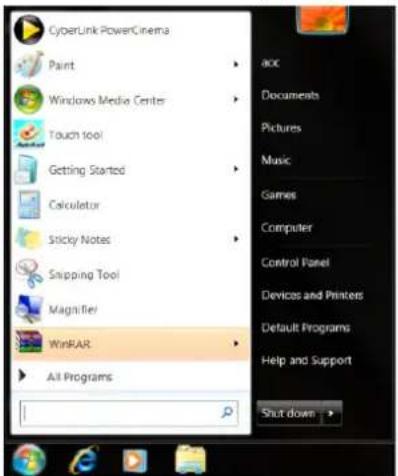
- Click Start.
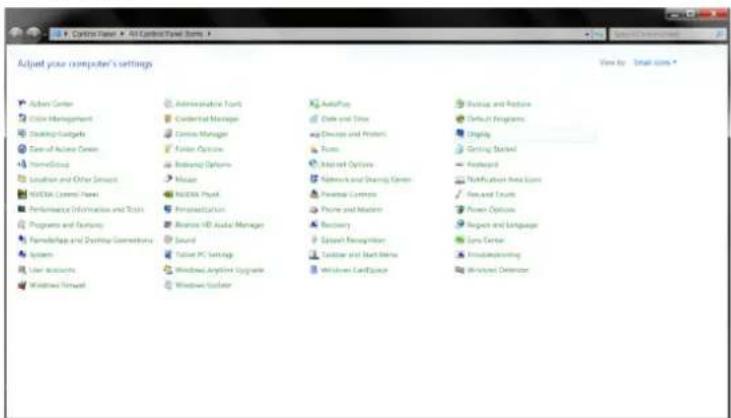
- Click "Control Panel".

- Click "Appearance".

- Click "Display".

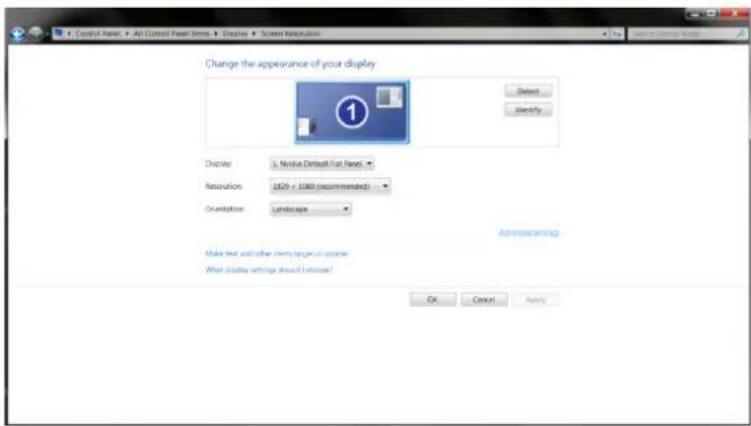
- Click the "Change Display Settings" button.

- Set the resolution SLIDE-BAR to the best preset resolution.

Install Monitor Driver
Windows 11
- Click "Start".
- Select "Settings".
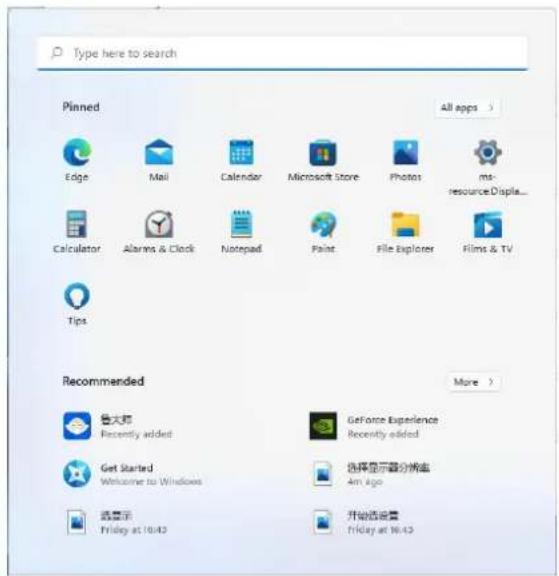

- Select "Display".

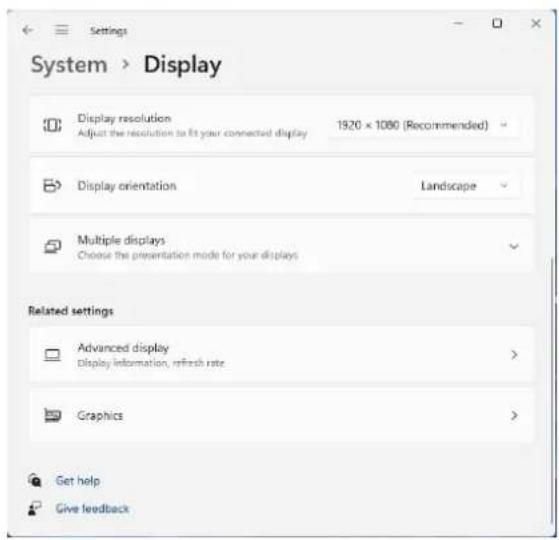
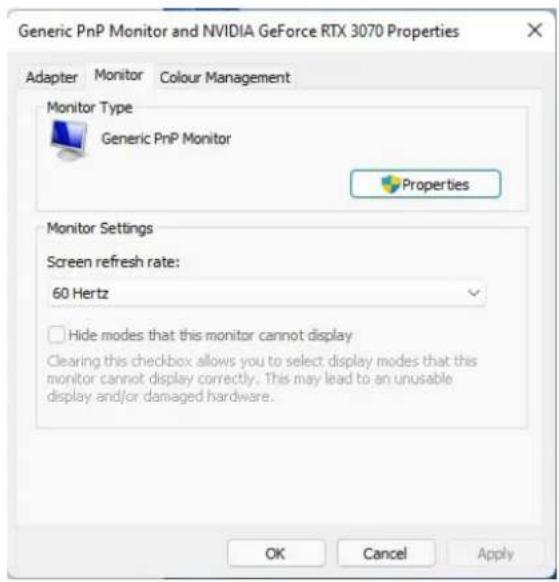
- Select "Advanced Display".
- Select "Display Adapter Properties".

- Select "Monitor".

- Select "Properties".

- Click "Update Driver" under "Driver", select the folder containing the driver and install it.

Windows 10
- Right-click Start. - Click "Control Panel".
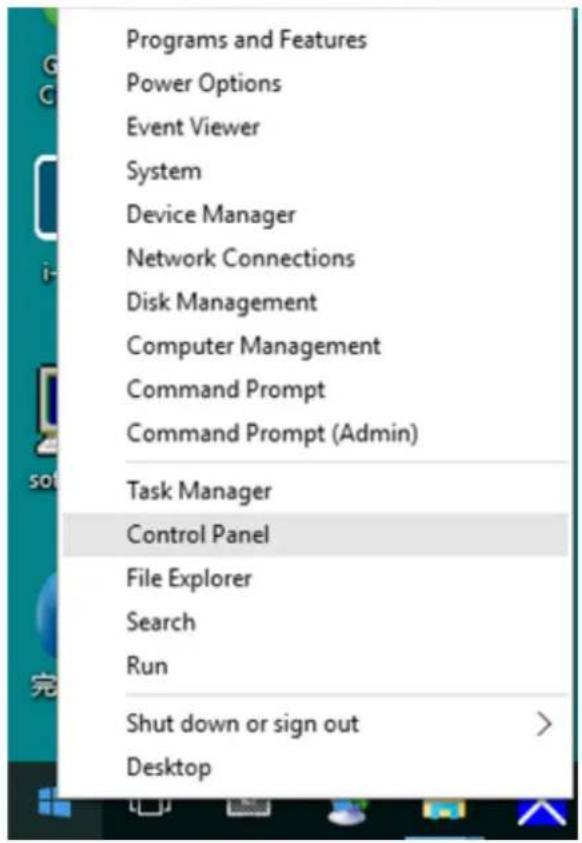
- Click the "Display" icon.
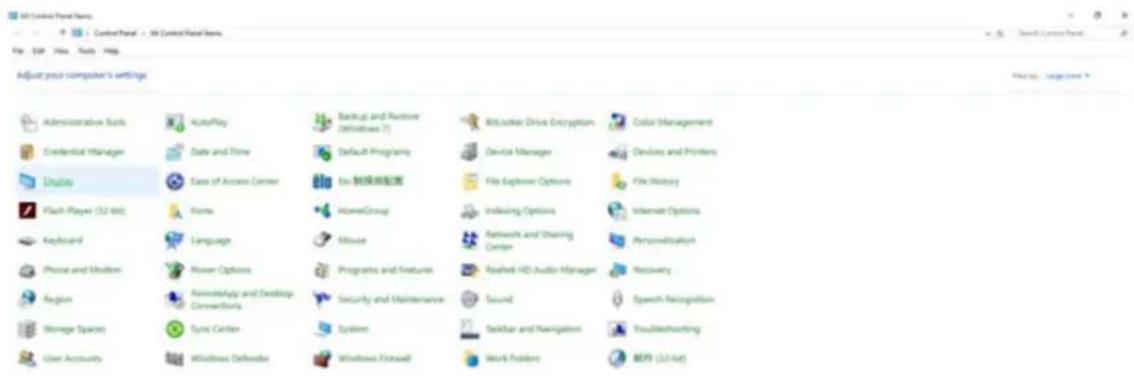
- Click the "Change Display Settings" button.
- Click the "Advanced Settings" button.
- Click the "Monitor" tab, and then click the "Properties" button.

- Click the "Driver" tab.

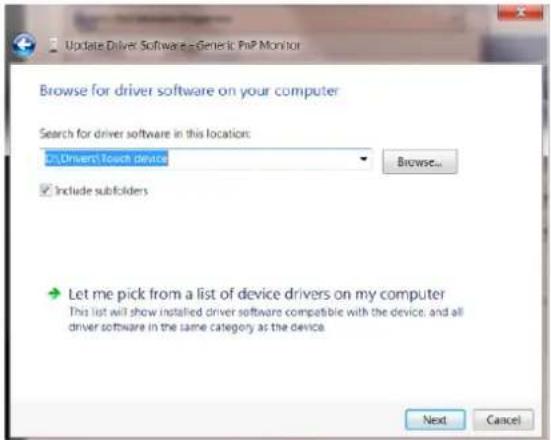
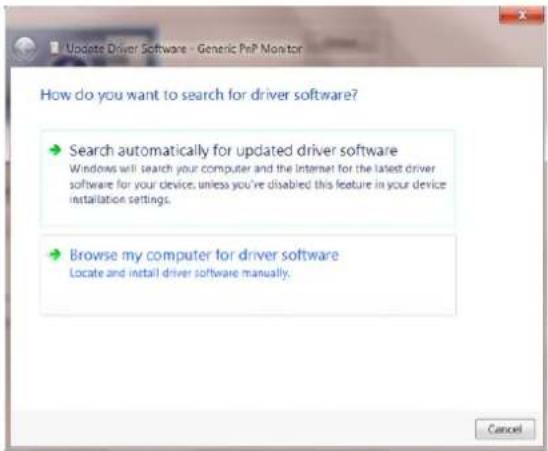
- Open the "Update Driver Software - General Plug and Play Monitor" window, click "Update Driver...", and then click the "Browse my computer for driver software" button.

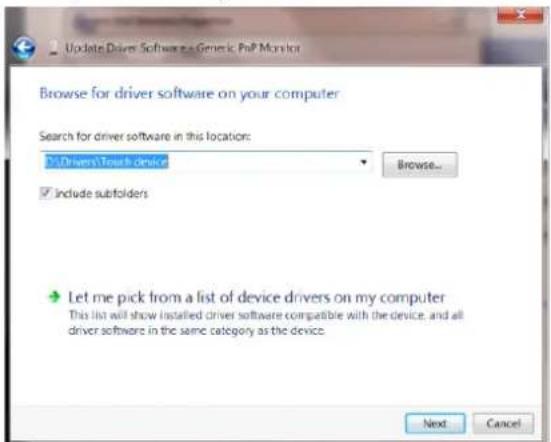
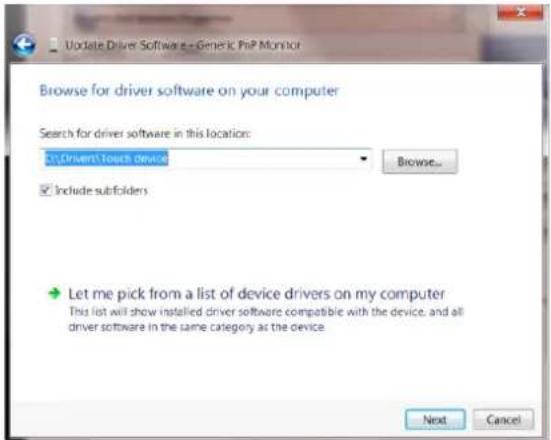
- Select "Let me pick from the list of device drivers on my computer".

- Click the "Install from Disk" button. Click the "Browse" button and navigate to the following directory:
X:\Driver\module name (where X is the drive letter indicator for the CD-ROM drive).

- Select the "xxx.inf" file and click the "Open" button. Click the "OK" button.
- Select the monitor model and click the "Next" button. This file will be copied from the CD to the hard drive.
- Close all open windows and remove the CD.
- Restart the system. The system automatically selects the maximum refresh frequency and the corresponding color matching profile.
Windows 8
- Click Start, then right-click the bottom right corner of the screen, which is the bottom right of all applications.
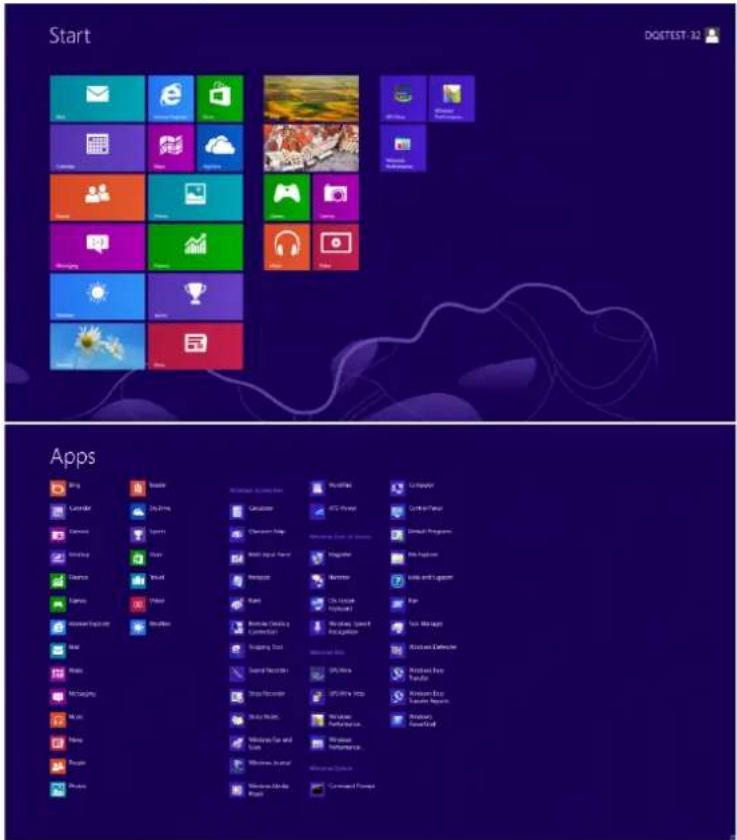
- Click the "Control Panel" icon.
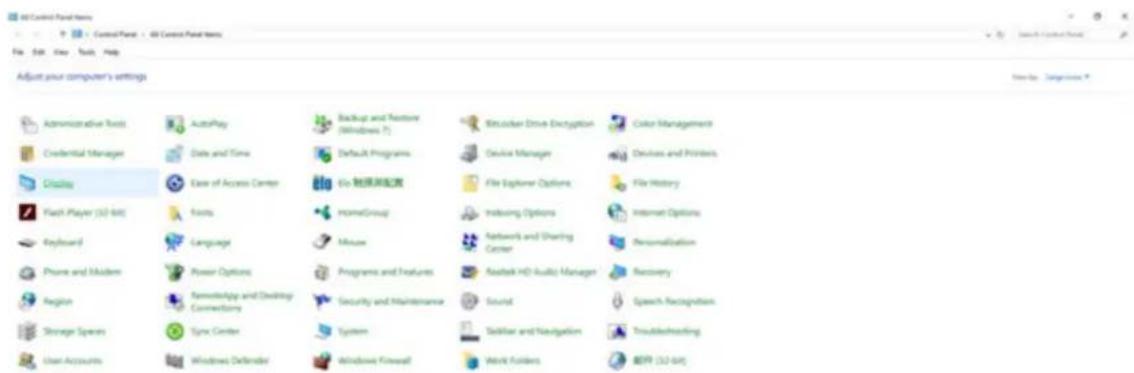
- Set "View By" to "Category" or "Small Icons".


- Click the "Display" icon.

- Click the "Change Display Settings" button.

- Click the "Advanced Settings" button.

- Click the "Monitor" tab, and then click the "Properties" button.
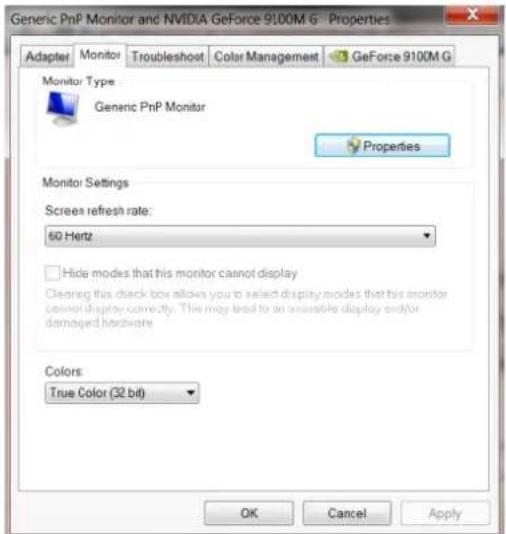
- Click the "Driver" tab.

- Open the "Update Driver Software Generic PnP Monitor" window, click "Update Driver..." and then click the "Browse my computer for driver software" button.

- Select "Let me pick from the list of device drivers on my computer".

- Click the "Install from Disk" button. Click the "Browse" button to find the following directory:
X:\Driver\module name (where X is the drive letter indicator for the CD-ROM drive).

- Select the "xxx.inf" file, and then click the "Open" button. Click the "OK" button.
- Select the monitor model and click the "Next" button. This file will be copied from the CD to the hard drive.
- Close all open windows and remove the CD.
- Restart the system. The system automatically selects the maximum refresh frequency and the corresponding color matching profile.
Windows 7
- Click the "Start" button and then click "Control Panel".

- Click the "Display" icon.

- Click the "Change Display Settings" button.

- Click the "Advanced Settings" button.
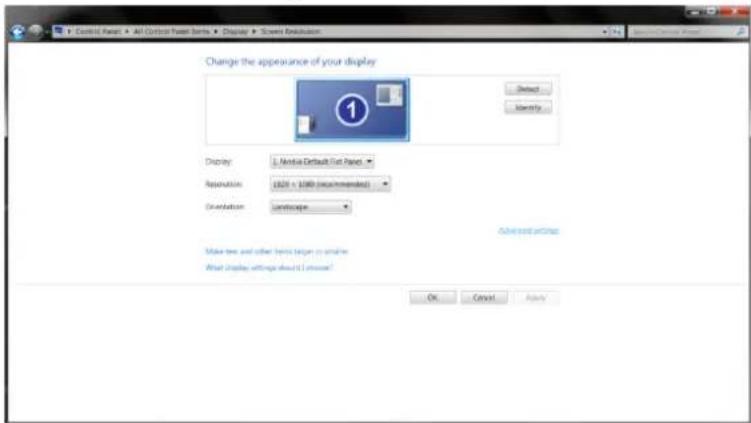
- Click the "Monitor" tab, and then click the "Properties" button.

- Click the "Driver" mark.

- Open the "Update Driver Software - General Plug and Play Monitor" window by clicking "Update Driver..." and then click the "Browse my computer for driver software" button.

- Select "Let me pick from the list of device drivers on my computer".

- Click the "Install from Disk" button. Click the "Browse" button and navigate to the following directory:
X:\Driver\module name (where X is the drive letter indicator for the CD-ROM drive).

- Select the "xxx.inf" file and click the "Open" button. Click the "OK" button.
- Select the monitor model and click the "Next" button. This file will be copied from the CD to the hard drive.
- Close all open windows and remove the CD.
- Restart the system. The system automatically selects the maximum refresh frequency and the corresponding color matching profile.
Install common software
G-Menu

Welcome to operate AOC "G-Menu" software!
By operating G-Menu with the mouse, you can quickly adjust game and display parameters of the monitor without operating the function buttons.
Please visit AOC's official website: http://www.aocdisplay.com.cn/ --»Service Support --»
Driver Download --»Monitor General Software or go directly to website:
http://www.aocdisplay.com.cn/service/download/46 to download and install the latest version of G-Menu.
Operating systems supported by the software include:
Windows 11, Windows 10, Windows 8.1, Windows 8, Windows 7
Note:
- The adjustment functionality of the G-Menu software may vary depending on the product model.
- Refer to the accompanying brief instructions for the applicable product model.

Welcome to operate AOC "I-Menu (Screen+)" software!
By operating I-Menu (Screen+) with the mouse, you can quickly adjust the monitor's display parameters without operating the function buttons.
Please visit AOC's official website: http://www.aocdisplay.com.cn/ -> Service Support -> Driver Download -> Monitor General Software, or go directly to the website:
http://www.aocdisplay.com.cn/service/download/46 to download and install the latest version of I-Menu (Screen+).
Operating systems supported by the software include:
Windows 11, Windows 10, Windows 8.1, Windows 8, Windows 7
Note:
- The adjustment function of the I-Menu (Screen+) software may vary depending on the product model, and the functions shown below are not applicable to all models.
- Refer to the accompanying brief instructions for the applicable product model.

- I-Menu (Screen+) integrates Screen+ monitor screen splitting software. The mouse action allows you to split the screen into multiple areas, dragging the window to the corresponding area to display different window contents in each area.

e-Saver

Welcome to operate AOC "e-Saver" monitor power management software!
The AOC e-Saver software allows you to set up your monitor to automatically shut down and save energy when your computer is in the four states, i.e. "On", "Off", "Sleep" or "Screen Saver", depending on your personal needs.
Please visit AOC's official website: http://www.aocdisplay.com.cn/ -> Service Support --» Driver Download --» Monitor General Software or go directly to the website:
http://www.aocdisplay.com.cn/service/download/46 to download and install the latest version of e-Saver.
Note: Refer to the accompanying brief instructions for the applicable product model.
When the computer is operating within any of the four states, you can select automatic shutdown time (in minutes) of the monitor from the e-Saver drop-down menu.
For example, as shown below:
- The monitor does not shut down automatically when the computer is working.
- Once the computer is turned off for 5 minutes, the monitor will automatically shut down.
- Once the computer is in sleep/standby mode for 10 minutes, the monitor will automatically shut down.
- Once the computer enters screen protection mode for 20 minutes, the monitor will automatically shut down.

You can restore e-Saver to its default settings shown below by clicking "Reset".

Display

Windows 10
"Change Display Settings"

Windows 7
Start • Click on
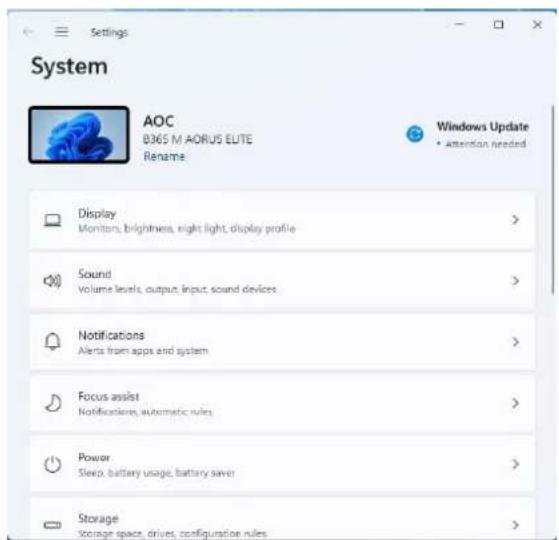
Windows 11
Click on Start


Select "Advanced Display"
Select "Properties"


Windows 10
Select "Let me pick from the list of device drivers on my computer".


Select "Let me pick from the list of device drivers on my computer".

Select the file "xxx.inf", then click "Open", then "OK".
Select "Display".
Windows 10
Windows 8
Windows 7

Select "Display".

- Select "Monitor".

Windows 10

Welcome to AOC "G-Menu" software!
e-Saver

- Select "Display".

· Select "Recommended resolution".

Windows 10
- Right-click on Start.
- Click "Control Panel".
- Click "Display".

- Click the "Change display settings" button.

Windows 8

- Click "Display".

Windows 7
- Click Start.
- Click "Control Panel".

- Click "Appearance".
- Click "Display".
- Click the "Change display settings" button.

Installing the monitor driver
Windows 11
- Click "Start". · Select "Settings".


- Select "Display".

- Select "Monitor".

· Select "Properties".

Windows 10
- Right-click Start.
- Click "Control Panel".

- Click the "Display" item.

- Click the "Change display settings" button.
- Click the "Advanced Settings" button.

- Click the "Driver" tab.


- Click the "Display" item.
- Click the "Change display settings" button.

- Click the "Advanced Settings" button.
- Click the "Driver" tab.

- Click the "Display" icon.
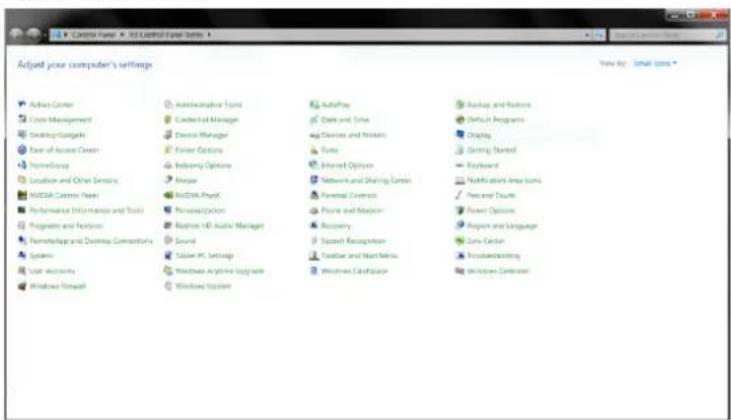
- Click the "Change display settings" button.

- Click the "Advanced Settings" button.

- Click the "Driver" tab.

Welcome to AOC "G-Menu" software!
- Select "Display".

Windows 10
- Right-click on Start.
Windows 8

Windows 7
Click Start.
Installing the Monitor Driver
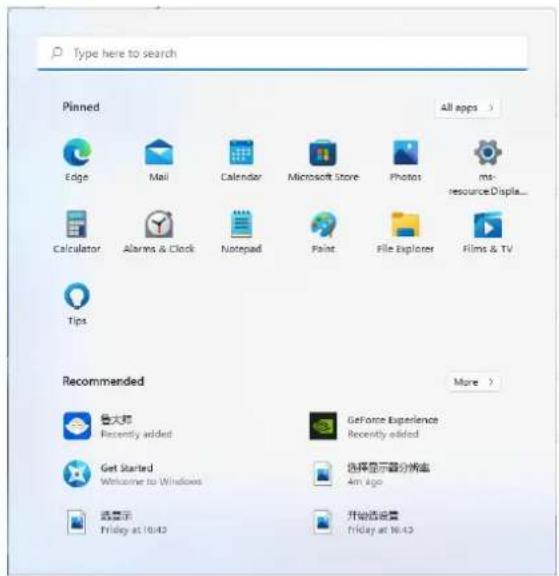
Windows 11
Click Start.
Select Settings.
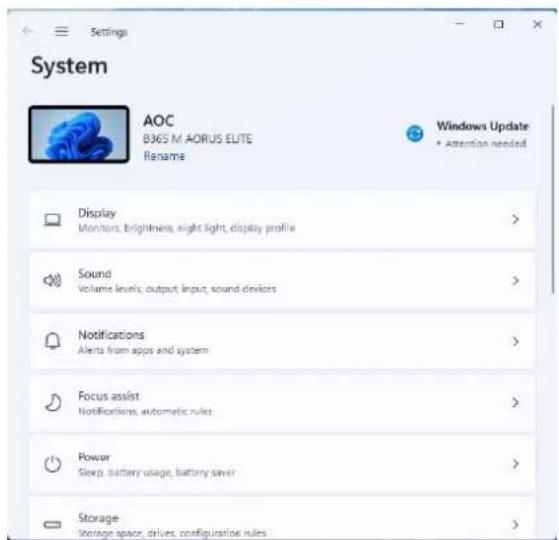
Select Display.


Select Monitor.

Windows 10
Right-click on Start.
Click the Advanced Settings button.

Open the Update Driver Software - General Plug and Play Monitor window, click Update Driver..., then click the Browse my computer for driver software button.

Select Let me pick from the list of device drivers on my computer.


Select Let me pick from the list of device drivers on my computer.
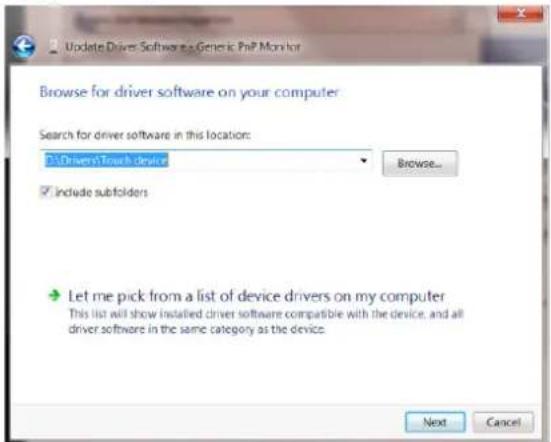
Select Let me pick from the list of device drivers on my computer.
Welcome to the AOC "G-Menu" software!
e-Saver

- Select "Display".

- Select "Recommended Resolution".

Windows 10
• Right-click on Start. • Click "Control Panel".

- Click "Display".

- Click the "Change Display Settings" button.
Windows 8
- Click "Start", then right-click on the bottom right corner of the screen, which is the bottom on the right side of all apps.

• Click "Display".
Windows 7
• Click Start. • Click "Control Panel".
• Click "Appearance".

- Click "Display".
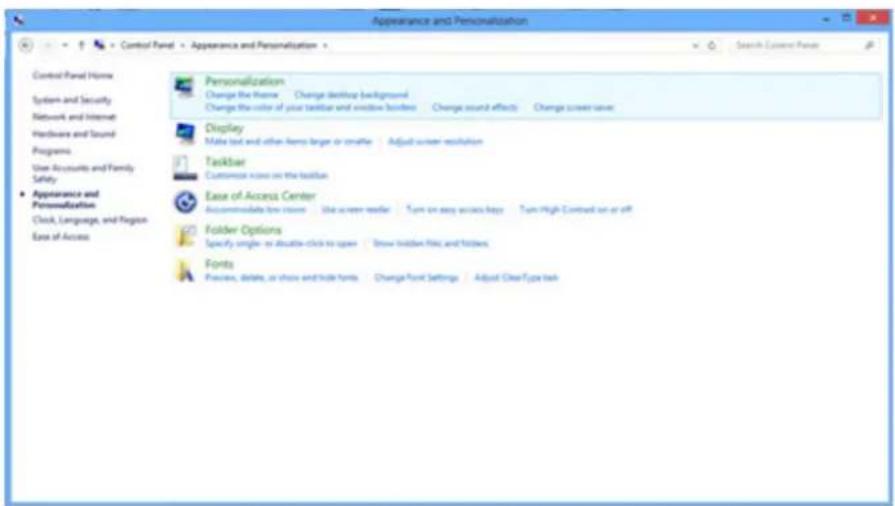
- Click the "Change Display Settings" button.

Install the monitor driver
Windows 11
- Click "Start".
- Select "Settings".
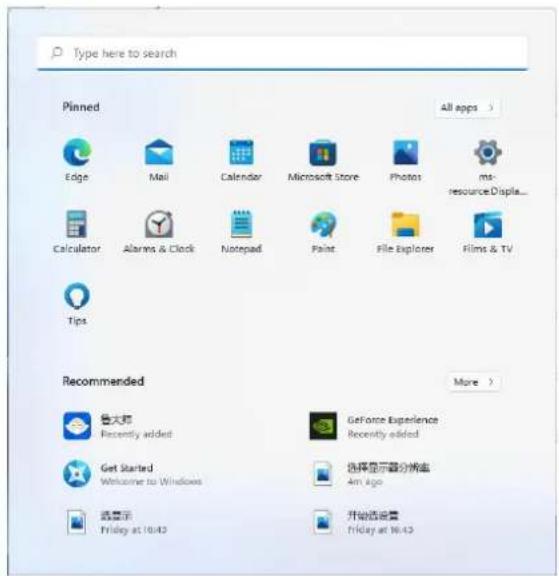
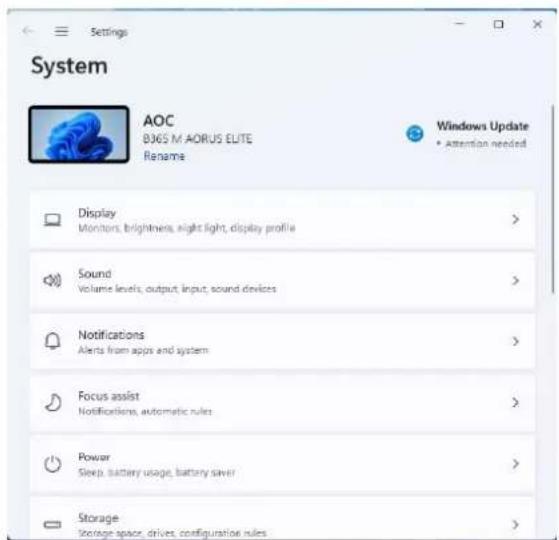
- Select "Display".


- Select "Advanced Display".
- Select "Display Adapter Properties".

- Select "Properties".

- Under "Driver", click "Update Driver", select the folder containing the driver, and install it.

Windows 10
• Right-click on Start. • Click "Control Panel".

• Click the "Display" icon.

- Click the "Change Display Settings" button.

- Click the "Advanced Settings" button.

- Click the "Monitor" tab, then click the "Properties" button.

- Click the "Driver" tab.

- Open the "Update Driver Software - General Plug and Play Monitor" window, click "Update Driver...", then click the "Browse my computer for driver software" button.

- Select "Let me pick from a list of device drivers on my computer".

- Click the "Install from Disk" button. Click the "Browse" button and load the following folder: X:\Driver\module name (where X is the drive letter for the CD-ROM drive).

- Select the "xxx.inf" file and click the "Open" button. Click the "OK" button.
- Select your monitor model and click the "Next" button. The files will be copied from the CD to the hard disk.
- Close all open windows and remove the CD.

• Click the "Display" icon.

- Click the "Change Display Settings" button.

- Click the "Advanced Settings" button.
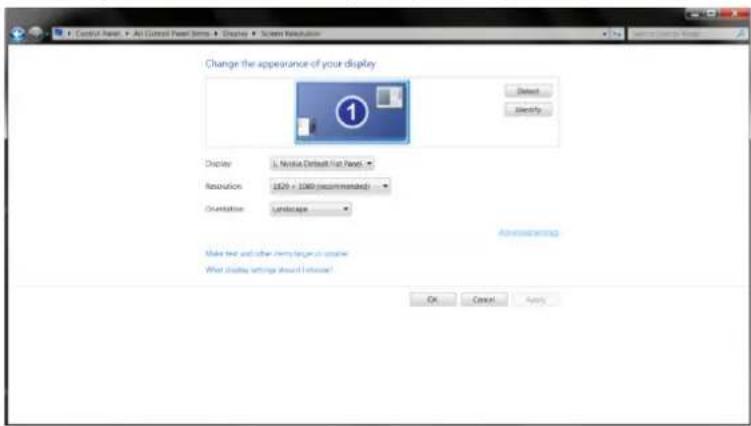
- Click the "Monitor" tab, then click the "Properties" button.

- Click the "Driver" tab.

- Open the "Update Driver Software Generic PnP Monitor" window, click "Update Driver...", then click the "Browse my computer for driver software" button.

- Select "Let me pick from a list of device drivers on my computer".

- Click the "Install from Disk" button. Click the "Browse" button and load the following folder: X:\Driver\module name (where X is the drive letter for the CD-ROM drive).
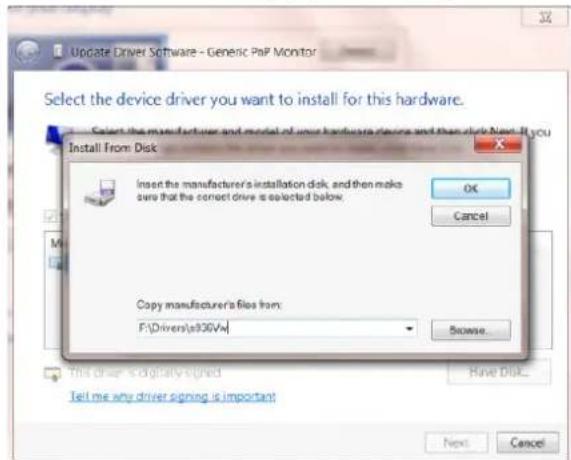
- Select the "xxx.inf" file and click the "Open" button. Click the "OK" button.
- Select your monitor model and click the "Next" button. The files will be copied from the CD to the hard disk.
- Close all open windows and remove the CD.
- Click the "Display" icon.

- Click the "Change Display Settings" button.

- Click the "Advanced Settings" button.

- Click the "Monitor" tab, then click the "Properties" button.
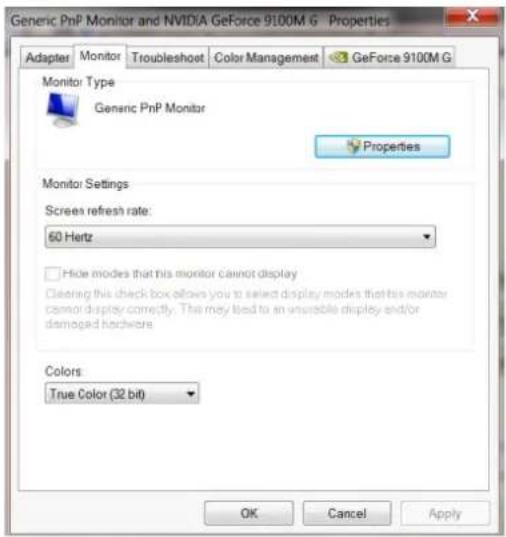
- Click the "Driver" tab.

- Open the "Update Driver Software - General Plug and Play Monitor" window by clicking "Update Driver...", then click "Browse my computer for driver software".

- Select "Let me pick from a list of device drivers on my computer".
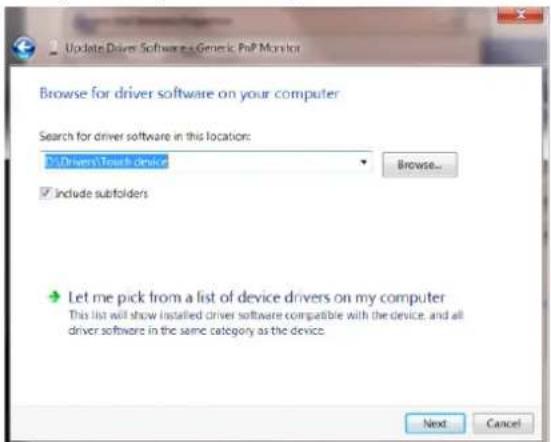
- Click the "Install from Disk" button. Click the "Browse" button and load the following folder: X:\Driver\module name (where X is the drive letter for the CD-ROM drive).

- Select the "xxx.inf" file and click the "Open" button. Click the "OK" button.
- Select your monitor model and click the "Next" button. The files will be copied from the CD to the hard disk.
- Close all open windows and remove the CD.
- Restart the system. The system will automatically select the maximum refresh rate and appropriate color matching profiles.
Install the usual software
G-Menu

e-Saver

Windows 10
Windows 8
Windows 7
Install the monitor driver
Windows 11


• Select "Monitor".

- Select "Properties".

Windows 10
• Select "Let me pick from the list of device drivers on my computer".
![Update Driver Software - Generic PnP Monitor. Browse for driver software on your computer. Search for driver software in this location: [ ] Include subfolders. Let me pick from a list of device drivers on my computer. This list will show installed driver software compatible with the device, and all…](/content/2026/06/1398862/images/c4733466a7da7bc162483f2063b9d4169ccab6fd8bdc9cb70232f301fa7baff3.jpg)
• Select "Let me pick from the list of device drivers on my computer".
![Update Driver Software - Generic PnP Monitor. Browse for driver software on your computer. Search for driver software in this location: [ ] Include subfolders. Let me pick from a list of device drivers on my computer. This list will show installed driver software compatible with the device, and all…](/content/2026/06/1398862/images/24e37b4e8268943180c4546609c70c1cd757482de0390294c9b896be12f65017.jpg)
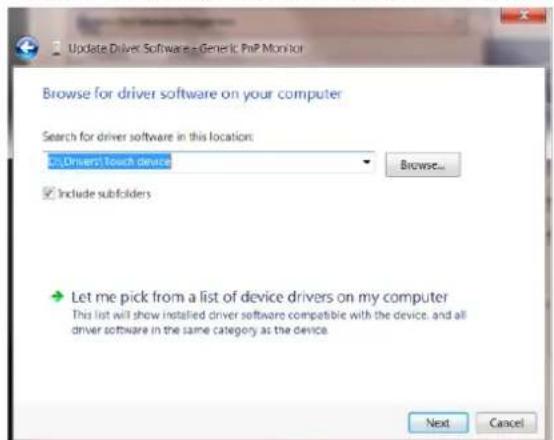
• Select "Let me pick from the list of device drivers on my computer".
e-Saver

• Select "Recommended Resolution".

Windows 10
• Click "Display".

• Click the "Change Display Settings" button.

Windows 8

• Click "Display".

Windows 7
• Click Start.
• Click "Display".

• Click the "Change Display Settings" button.


• Select "Advanced Display".
• Select "Monitor".

Windows 10
• Click the "Change Display Settings" button.
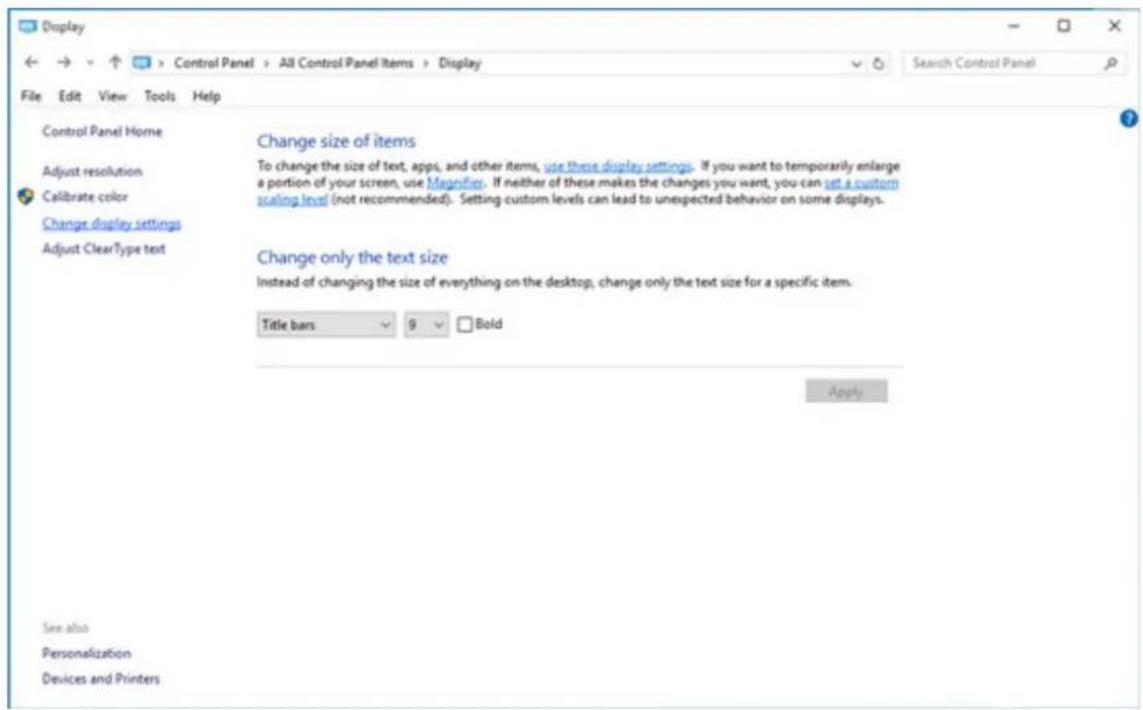
Click the "Advanced Settings" button.

Click the "Driver" tab.

Open the "Update Driver Software - General Plug and Play Monitor" window, click "Update Driver..." and then click the "Browse my computer for driver software" button.

Select the "xxx.inf" file and click the "Open" button. Click the "OK" button.

Click the "Change Display Settings" button.

Click the "Advanced Settings" button.

Click the "Driver" tab.

Open the "Update Driver Software Generic PnP Monitor" window, click "Update Driver..." and then click the "Browse my computer for driver software" button.

Select the "xxx.inf" file, and then click the "Open" button. Click the "OK" button.
Click the "Change Display Settings" button.

Click the "Advanced Settings" button.

Open the "Update Driver Software - General Plug and Play Monitor" window, click "Update Driver..." and then click the "Browse my computer for driver software" button.

Select the "xxx.inf" file and click the "Open" button. Click the "OK" button.
e-Saver

Select "Display".

- Select "Recommended Resolution".

Windows 10
• Click on "Display".
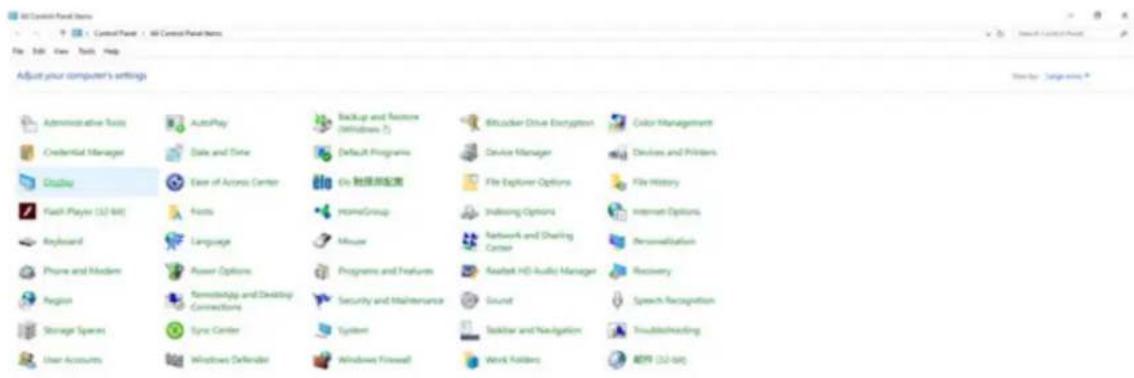
Windows 8
• Click on "Display".
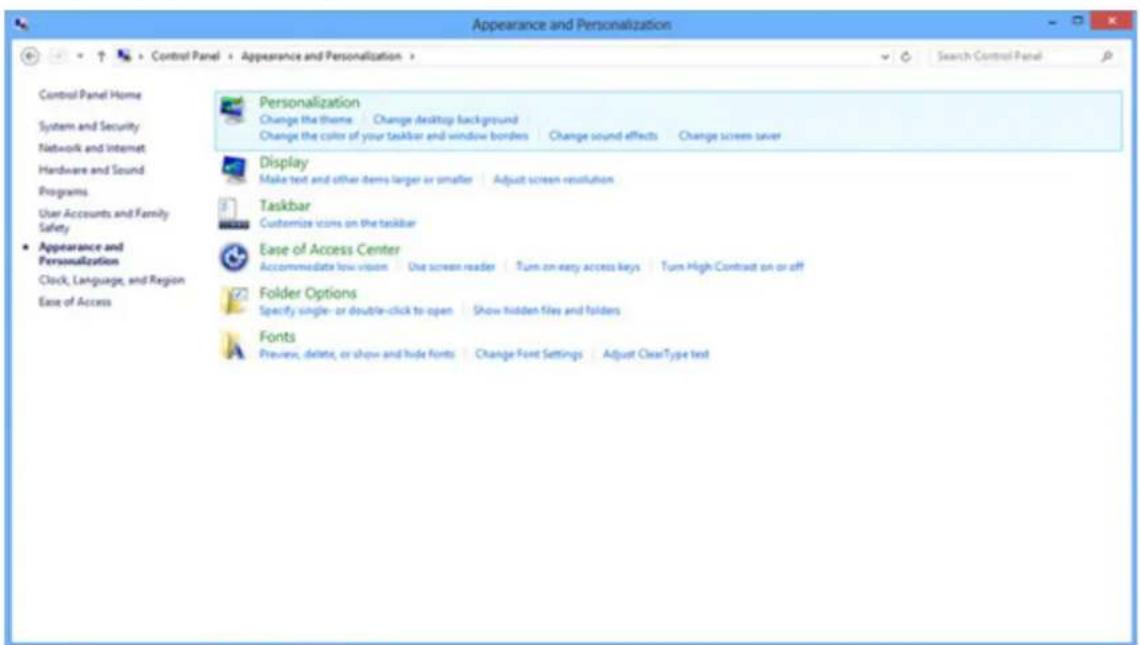
Windows 7
• Click on Start.
• Click on "Control Panel".

• Click on "Display".
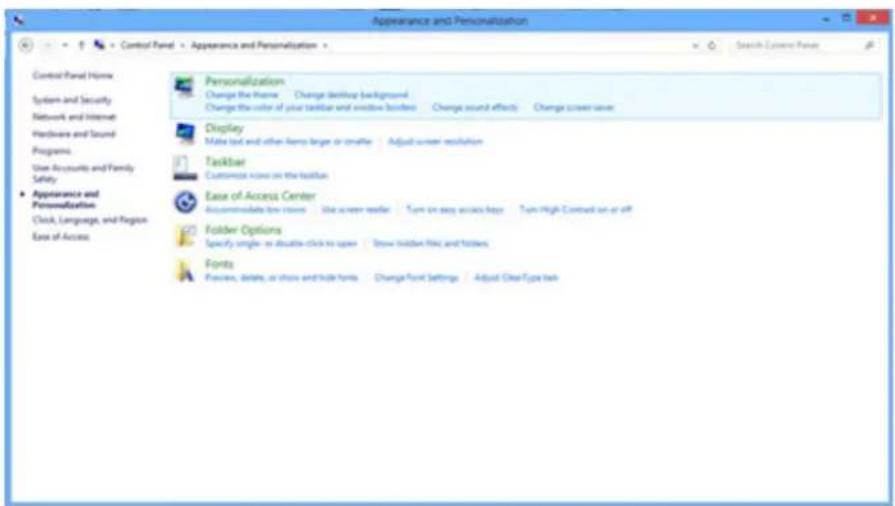
Installing the monitor driver
Windows 11
• Click on "Start".
- Select "Settings".
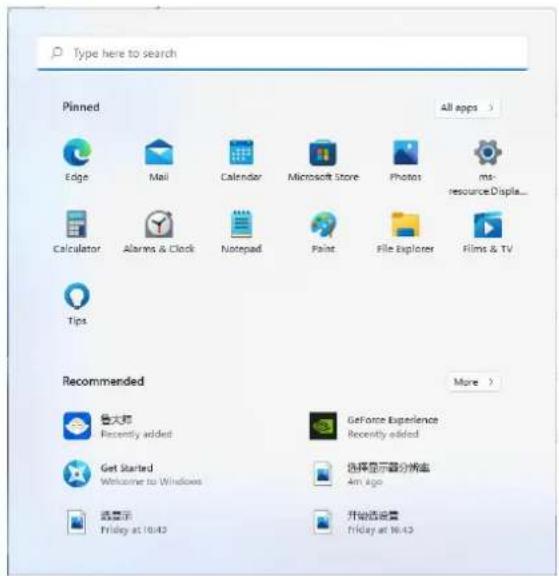

- Select "Display".

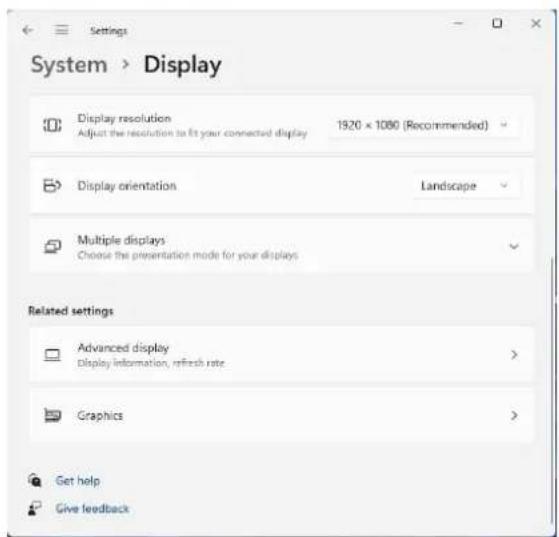
- Select "Advanced Display".
- Select "Display Adapter Properties".
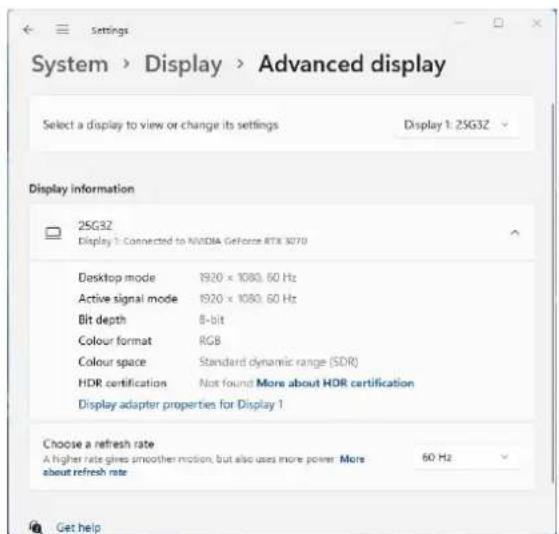
- Select "Monitor".

- Select "Properties".
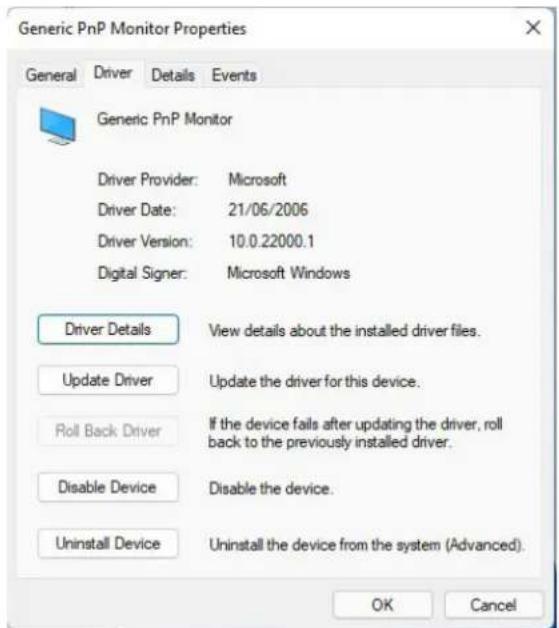
Windows 10

e-Saver

- Select "Recommended Resolution".

Windows 10
Windows 8
Windows 7
- Click "Appearance".

- Select "Monitor".

Windows 10
- Select "Let me pick from the list of device drivers on my computer".


- Select "Let me pick from the list of device drivers on my computer".

- Select "Let me pick from the list of device drivers on my computer".
e-Saver

Windows 10
Windows 8
Windows 7


Windows 10


e-Saver

Windows 10
Windows 8
Windows 7
Install monitor driver
Windows 11


Windows 10

e-Saver

- Select "Display".

Windows 10
Windows 8
Windows 7

- Select "Display".


Windows 10
e-Saver

Windows 10
Windows 8
Windows 7
• Click the Start button. - Click "Control Panel".

- Click "Appearance".

Windows 10
- Click the "Monitor" tab, then click "Properties".

- Click the "Driver" tab.


- Click the "Monitor" tab, then click "Properties".

- Click the "Driver" tab.

- Click on the "Monitor" tab, then click the "Properties" button.

e-Saver

•Select "Display".

•Select "Recommended Resolution".

Windows 10
•Right-click Start. •Click "Control Panel".
•Click "Display".

•Click the "Change Display Settings" button.

- Set the SLIDE-BAR resolution to the best standard resolution.

Windows 8

- Set "View By" to "Category".
- Click "Appearance and Personalization".

•Click "Display".

- Set the SLIDE-BAR resolution to the best standard resolution.

Windows 7
• Click Start.
• Click "Control Panel".

• Click "Appearance".

• Click "Display".

• Click the "Change Display Settings" button.
- Set the SLIDE-BAR resolution to the best standard resolution.

Install Monitor Driver
Windows 11
• Click "Start".

• Select "Display".


• Select "Advanced Display". • Select "Display Adapter Properties".

• Select "Monitor".
• Select "Properties".

• Click "Update Driver" in the "Driver" section, select the folder containing the driver and install the driver.

Windows 10
• Right-click Start. • Click "Control Panel".

• Click the "Display" icon.

• Click the "Change Display Settings" button.

• Click the "Advanced Settings" button.

• Click the "Monitor" tab, then click the "Properties" button.
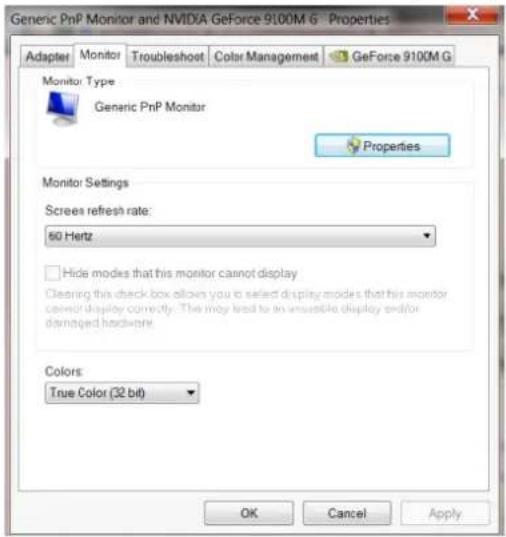
• Click the "Driver" tab.

• In the "Update Driver Software - General Plug and Play Monitor" window, click "Update Driver..." and then click the "Browse my computer for driver software" button.

- Select the file "xxx.inf", then click the "Open" button. Click "OK".
- Click the "Control Panel" icon.
- Set "View By" to "Category" or "Small Icons".
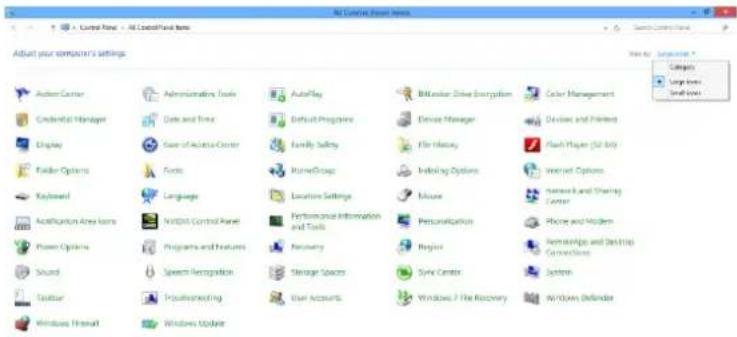

- Click the "Display" icon.

- Click the "Change Display Settings" button.

- Click the "Advanced Settings" button.
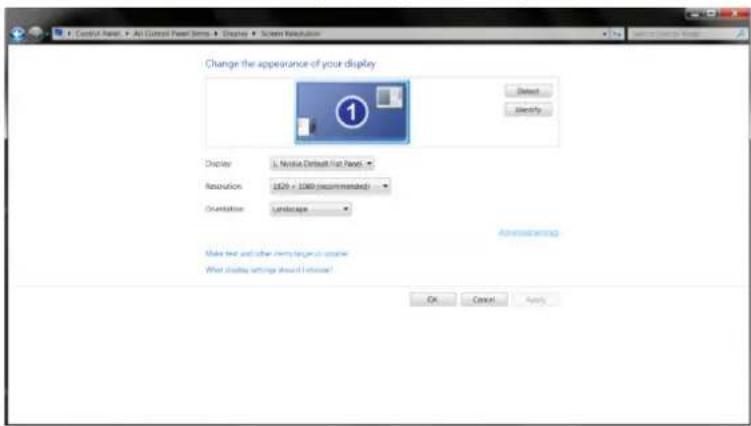
- Click the "Monitor" tab, then click the "Properties" button.

- Click the "Driver" tab.

Open the "Update Driver Software - Generic PnP Monitor" window, click "Update Driver..." and then click the "Browse my computer for driver software" button.

Select the "xxx.inf" file, then click the "Open" button. Click "OK".
Click the "Start" button, then click "Control Panel".

Click the "Display" icon.

Click the "Change Display Settings" button.

Click the "Advanced Settings" button.
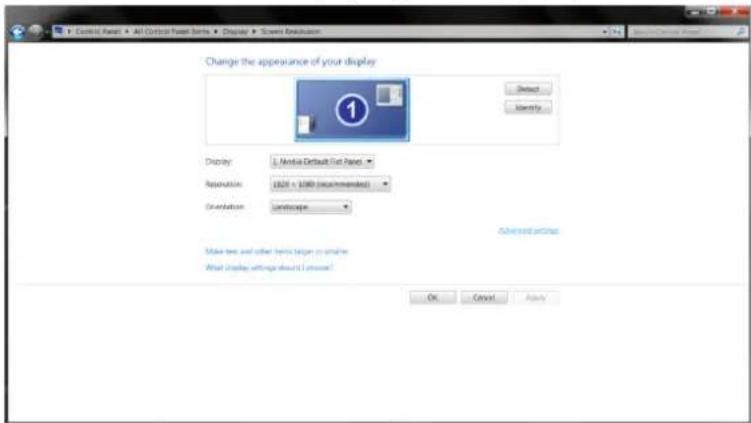
Click the "Monitor" tab, then click the "Properties" button.

Click the "Driver" tab.

Open the "Update Driver Software - General Plug and Play Monitor" window by clicking "Update Driver..." and then click the "Browse my computer for driver software" button.

Select the "xxx.inf" file, then click the "Open" button. Click "OK".
e-Saver

Windows 10
Click on "Display".

Windows 8
Click on "Display".

Windows 7
• Click Start.
• Click "Display (Screen)".


Windows 10
e-Saver

Windows 10
Windows 8

Windows 7
Install the monitor driver
Windows 11


Windows 10

e-Saver

Windows 10
Windows 8

Windows 7
Monitor driver installation
Windows 11

Windows 10

e-Saver

Windows 10
Windows 8
Windows 7
• Click Start.
• Click "Control Panel".


• Select "Monitor".

Windows 10

• Click the "Display" icon.

• Click the "Driver" sign.

e-Saver

- Select "Display".

Windows 10
Windows 8
Windows 7
• Click on Start.
Install the monitor driver
Windows 11

- Select "Display".


- Select "Properties".

Windows 10
- Click on the "Display" icon.

- Click on the "Driver" tab.

• Click on the "Display" icon.
- Click on the "Driver" tab.

- Click on the "Driver" tab.

e-Saver

- Select "Display (Screen)".

Windows 10
Windows 8
Windows 7
Click Start.
Install Monitor Driver
Windows 11
- Select "Display (Screen)".


- Select "Properties".

Windows 10
- Click the "Display (Screen)" icon.

- Click the "Driver" tab.


- Click the "Display (Screen)" icon.

- Click the "Driver" tab.

• Click the "Driver" tab.

e-Saver

- Select "Display".
Windows 10
Windows 8
- Click on "Display".

Windows 7

- Select "Display".


Windows 10
- Click on the "Display" icon.
- Click on the "Control Panel" icon.

- Click on the "Display" icon.

- Select "Let me pick from the list of device drivers on my computer".
![Update Driver Software - Generic PnP Monitor. Browse for driver software on your computer. Search for driver software in this location: [checkbox] Include subfolders. Let me pick from a list of device drivers on my computer: This list will show installed driver software compatible with the device, a…](/content/2026/06/1398862/images/17c43052ad55d18350b54b7a4665735a848a249e78197e813a0521a7bcb10e9e.jpg)
e-Saver

Windows 10
Windows 8
Windows 7
- Click on "Appearance".


Windows 10

Windows 11, 10, 8.1, 8, 7.
Note.
Windows 11, 10, 8.1, 8, 7.
Note.
e-Saver

- Select "Recommended Resolution".

Windows 10
- Click on "Display".
- Click on the "Change Display Settings" button.

Windows 8
- Click on "Display".
Windows 7
- Click on "Appearance".

- Click on "Display".

- Click on "Change Display Settings".


• Select "Monitor".

• Select "Properties".

Windows 10
- Click on "Change Display Settings".
- Click on "Advanced Settings".

- Open the "Update Driver Software - General Plug and Play Monitor" window, click on "Update Driver..." and then click on "Browse my computer for driver software".
- Select "Let me pick from the list of device drivers on my computer".

- Click on "Change Display Settings".

- Click on "Advanced Settings".

- Select "Let me pick from the list of device drivers on my computer".

- Click on "Install from Disk". Click on "Browse" and search for the following directory:
- Click on "Change Display Settings".

- Click the "Advanced Settings" button.

- Open the "Update Driver Software - General Plug and Play Monitor" window by clicking "Update Driver..." and then click the "Browse my computer for driver software" button.

- Select "Let me pick from the list of device drivers on my computer".
![Update Driver Software - Generic PnP Monitor. Browse for driver software on your computer. Search for driver software in this location: [text field] with checkbox 'Include subfolders'. Option: Let me pick from a list of device drivers on my computer (This list will show installed driver software com…](/content/2026/06/1398862/images/982df64790f2679bc94cd0bf72700321dd526b00bd3a92bd3115ae26b467f202.jpg)
Welcome to the AOC "G-Menu" operating software!
e-Saver

Welcome to the AOC "e-Saver" monitor power management software!
- Select "Display".

Windows 10
- Click "Display".

- Click the "Change Display Settings" button.

Windows 8
• Click "Display".

Windows 7
• Click "Appearance".
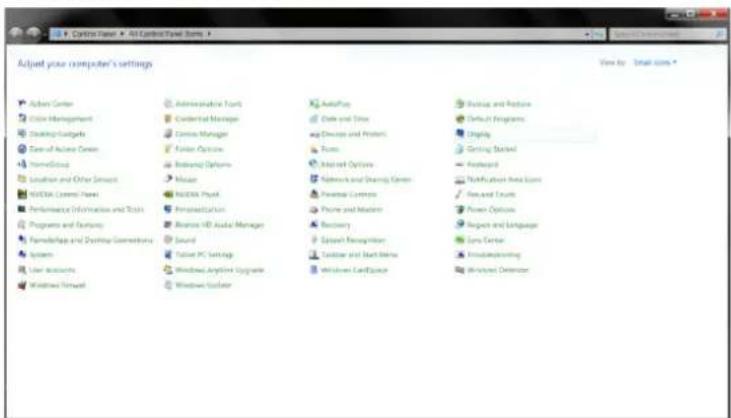
• Click "Display".

- Click the "Change Display Settings" button.


- Select "Display".


- Select "Advanced Display".
- Select "Display Adapter Properties".

Windows 10
- Click the "Display" icon.

- Click the "Change Display Settings" button.
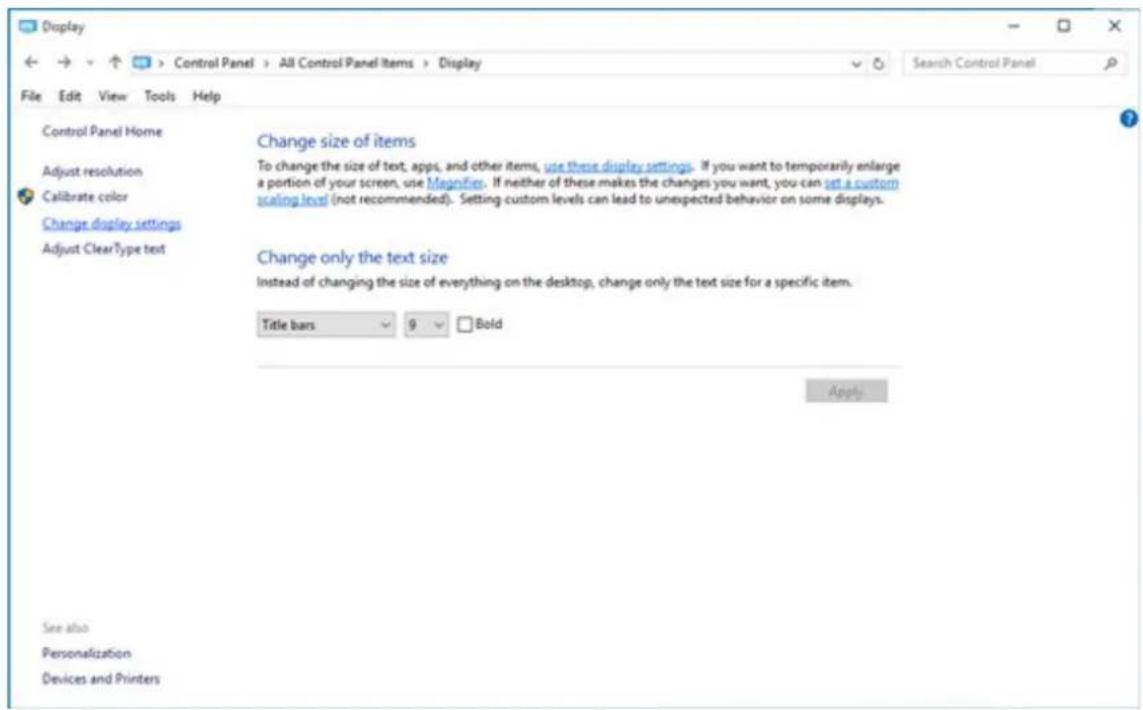
- Click the "Advanced Settings" button.

- Click the "Driver" tab.

- Open the "Update Driver Software - General Plug and Play Monitor" window and click "Update Driver..." and then the "Browse my computer for driver software" button.
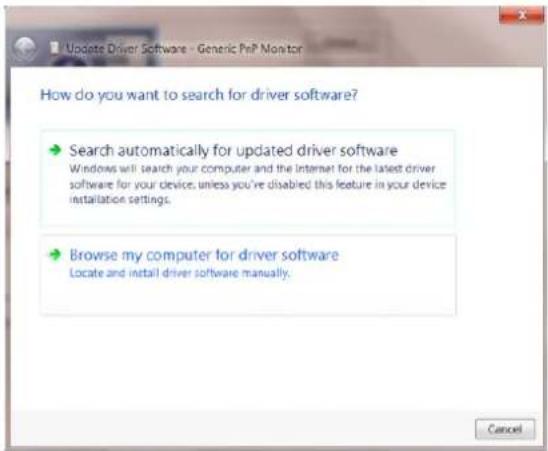
- Select "Let me pick from the list of device drivers on my computer".
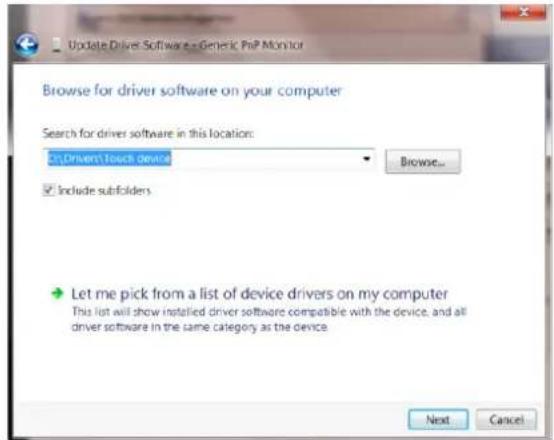

- Click the "Display" icon.

- Click the "Change Display Settings" button.

- Click the "Advanced Settings" button.

- Click the "Driver" tab.

- Select "Let me pick from the list of device drivers on my computer".

- Click the "Change Display Settings" button.

- Click the "Advanced Settings" button.
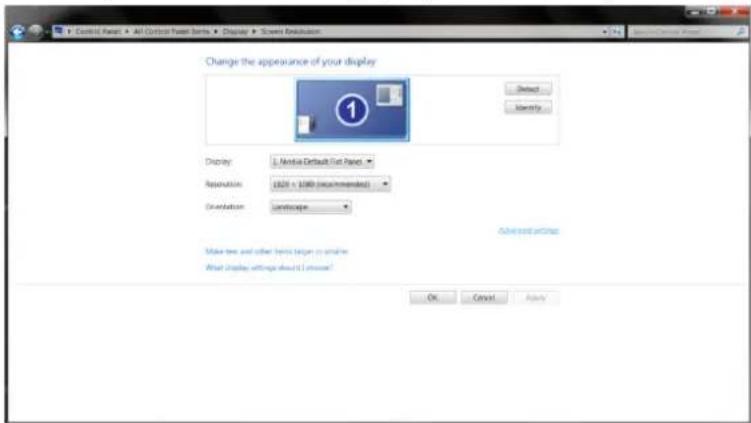
- Open the "Update Driver Software - General Plug and Play Monitor" window by clicking "Update Driver...", and then click the "Browse my computer for driver software" button.

- Select "Let me pick from the list of device drivers on my computer".

Welcome to the AOC G-Menu software.
e-Saver

- Select "Display".

- Select "Recommended Resolution".

Windows 10
• Click "Display".

Windows 8
• Click "Display".

Windows 7
• Click "Appearance".

• Click on "Display".

- SETTING THE BEST RESOLUTION (ENGLISH)
- INSTALL MONITOR DRIVER
- INSTALL COMMON SOFTWARE
- SETTING OPTIMAL RESOLUTION (TRADITIONAL CHINESE)
- INSTALLING THE MONITOR DRIVER
- INSTALLING COMMON SOFTWARE
- SETTING THE BEST RESOLUTION
- INSTALLING THE COMMON SOFTWARE
- SETTING THE BEST RESOLUTION (DUTCH)
- INSTALLING THE SOFTWARE GENERALLY
- SETTING THE OPTIMAL RESOLUTION
- SETTING THE BEST RESOLUTION (INDONESIAN)
- WINDOWS
- SELECT "DISPLAY
- G-MENU
- NOTE
- E-SAVER
- CLICK THE "CHANGE DISPLAY SETTINGS" BUTTON
- CLICK THE "ADVANCED SETTINGS" BUTTON
- INSTALL THE MONITOR DRIVER
- INSTALL THE USUAL SOFTWARE
- MONITOR DRIVER INSTALLATION
Brand : AOC
Model : 24G42E
Category : Monitor