
EasyMax 32/18V P4A - Lawn mower GARDENA - Free user manual and instructions
Find the device manual for free EasyMax 32/18V P4A GARDENA in PDF.

| Brand | Gardena |
| Model | EasyMax 32/18V P4A |
| Product type | Battery-powered lawn mower |
| Cutting width | 32 cm |
| Cutting height | 35 to 65 mm, adjustable to 4 positions |
| Grass box capacity | 30 L |
| Weight (without battery) | 10.9 kg |
| Power supply | 18 V lithium-ion battery, POWER FOR ALL system (PBA 18V) |
| Capacity of supplied battery | 4.0 Ah (depending on version) |
| Runtime (4.0 Ah battery) | Up to 200 m² |
| Blade speed | 3500 rpm |
| Safety | Two-hand safety device (start lever + lock) |
| Fill level indicator | Yes (flap in the box) |
| Sound pressure level (LpA) | 74 dB(A) (uncertainty 3 dB) |
| Guaranteed sound power level (LWA) | 87 dB(A) |
| Hand-arm vibration (ahw) | 2.2 m/s² (uncertainty 1.5 m/s²) |
| Compatible charger | AL 1810 CV, AL 1815 CV, AL 18V-20, AL 1830 CV, AL 18V-44, AL 1880 CV |
| Maintenance | Clean with soft brush, do not use water or pressure washer |
| Spare parts | Replacement blade ref. 4124, battery PBA 18V/72 ref. 14905, quick charger ref. 14901 |
| Warranty | Manufacturer warranty, register at gardena.com/registration |
Frequently Asked Questions - EasyMax 32/18V P4A GARDENA
User questions about EasyMax 32/18V P4A GARDENA
0 question about this device. Answer the ones you know or ask your own.
Ask a new question about this device
Download the instructions for your Lawn mower in PDF format for free! Find your manual EasyMax 32/18V P4A - GARDENA and take your electronic device back in hand. On this page are published all the documents necessary for the use of your device. EasyMax 32/18V P4A by GARDENA.
USER MANUAL EasyMax 32/18V P4A GARDENA
natural_image
Line drawing of a lawn mower with extended handle and wheels (no text or symbols)EasyMax 32/18V P4A Art. 14634-20
EasyMax 32/18V P4A Art. 14634-55
EasyMax+ 320/18V Art. 14634-60
System-Akku 5,0 Ah max. 250 m²
System-Akku 6,0 Ah max. 300 m²
4. WARTUNG

GEFAHR!
Original operator's manual
- SAFETY INSTRUCTIONS....11
- ASSEMBLY 13
- OPERATION....13
- MAINTENANCE....14
- STORAGE 14
- TROUBLESHOOTING 15
- TECHNICAL DATA 15
- ACCESSORIES/SPARE PARTS 16
- WARRANTY/SERVICE 16
- DISPOSAL....16
1. SAFETY INSTRUCTIONS
1.1 Symbols on the product

→ Read operator's manual.
WARNING!
→ Be careful of parts being ejected—keep bystanders away.
WARNING!
→ Keep the mains cable away from the blades (not applicable to cordless mowers).

WARNING!
→ Keep hands and feet away from the blades.

WARNING!
→ Unplug the mains plug before maintenance or if the mains cable is damaged (not applicable to cordless mowers).

WARNING!
→ Disconnect the battery before maintenance.

WARNING!
→ Remove the locking device before maintenance (not applicable to cordless lawnmowers without locking device).
1.2 General safety instructions
1.2.1 General machine safety instructions
WARNING!
Read all safety warnings, instructions, illustrations and specifications provided with this machine.
Failure to follow all instructions listed below may result in electric shock, fire and/or serious injury.
Save all warnings and instructions for future reference.
The term "machine" used in the safety instructions refers to mains-operated (corded) or to battery-operated (cordless) machines.
1) Work area safety
a) Keep work area clean and well lit. Cluttered or dark areas invite accidents.
b) Do not operate machines in explosive atmospheres, such as in the
presence of flammable liquids, gases or dust.
Machines create sparks which may ignite the dust or fumes.
c) Keep children and bystanders away while operating a machine.
Distractions can cause you to lose control.
2) Electrical safety
a) Machine plugs must match the outlet. Never modify the plug in any way. Do not use any adaptor plugs with earthed (grounded) machines. Unmodified plugs and matching outlets will reduce risk of electric shock.
b) Avoid body contact with earthed or grounded surfaces, such as pipes, radiators, ranges and refrigerators. There is an increased risk of electric shock if your body is earthed or grounded.
c) Do not expose machines to rain or wet conditions.
Water entering a machine will increase the risk of electric shock.
d) Do not abuse the cord. Never use the cord for carrying, pulling or unplugging the machine. Keep cord away from heat, oil, sharp edges or moving parts. Damaged or entangled cords increase the risk of electric shock.
e) When operating a machine outdoors, use an extension cord suitable for outdoor use. Use of a cord suitable for outdoor use reduces the risk of electric shock.
f) If operating a machine in a damp location is unavoidable, use a residual current device (RCD) protected supply. Use of an RCD reduces the risk of electric shock.
3) Personal safety
a) Stay alert, watch what you are doing and use common sense when operating a machine. Do not use a machine while you are tired or under the influence of drugs, alcohol or medication.
A moment of inattention while operating machines may result in serious personal injury.
b) Use personal protective equipment. Always wear eye protection. Protective equipment such as dust mask, non-skid safety shoes, hard hat, or hearing protection used for appropriate conditions will reduce personal injuries.
c) Prevent unintentional starting. Ensure the switch is in the off-position before connecting to power source and/or battery pack, picking up or carrying the machine. Carrying machines with your finger on the switch or energising machines that have the switch on invites accidents.
d) Remove any adjusting key or wrench before turning the machine on. A wrench or a key left attached to a rotating part of the machine may result in personal injury.
e) Do not overreach. Keep proper footing and balance at all times.
This enables better control of the machine in unexpected situations.
f) Dress properly. Do not wear loose clothing or jewellery. Keep your hair and clothing away from moving parts. Loose clothes, jewellery or long hair can be caught in moving parts.
g) If devices are provided for the connection of dust extraction and collection facilities, ensure these are connected and properly used. Use of dust collection can reduce dust-related hazards.
h) Do not let familiarity gained from frequent use of machines allow you to become complacent and ignore tool safety principles.
A careless action can cause severe injury within a fraction of a second.
4) Machine use and care
a) Do not force the machine. Use the correct machine for your application.
The correct machine will do the job better and safer at the rate for which it was designed.
b) Do not use the machine if the switch does not turn it on and off.
Any machine that cannot be controlled with the switch is dangerous and must be repaired.
c) Disconnect the plug from the power source and/or remove the battery pack, if detachable, from the machine before making any adjustments, changing accessories, or storing machines.
Such preventive safety measures reduce the risk of starting the machine accidentally.
d) Store idle machines out of the reach of children and do not allow persons unfamiliar with the machine or these instructions to operate the machine. Machines are dangerous in the hands of untrained users.
e) Maintain machines and accessories. Check for misalignment or binding of moving parts, breakage of parts and any other condition that may affect the machine's operation. If damaged, have the machine repaired before use. Many accidents are caused by poorly maintained machines.
f) Keep cutting tools sharp and clean. Properly maintained cutting tools with sharp cutting edges are less likely to bind and are easier to control.
g) Use the power tool, accessories and tool bits etc. in accordance with these instructions, taking into account the working conditions and the work to be performed. Use of the machine for operations different from those intended could result in a hazardous situation.
h) Keep handles and grasping surfaces dry, clean and free from oil and grease. Slippery handles and grasping surfaces do not allow for safe handling and control of the machine in unexpected situations.
5) Battery tool use and care
a) Recharge only with the charger specified by the manufacturer. A charger that is suitable for one type of battery pack may create a risk of fire when used with another battery pack.
b) Use machine only with specifically designated battery packs. Use of any other battery packs may create a risk of injury and fire.
c) When battery pack is not in use, keep it away from other metal objects, like paper clips, coins, keys, nails, screws or other small metal objects, that can make a connection from one terminal to another. Shorting the battery terminals together may cause burns or a fire.
d) Under abusive conditions, liquid may be ejected from the battery; avoid contact. If contact accidentally occurs, flush with water. If liquid contacts eyes, additionally seek medical help.
Liquid ejected from the battery may cause irritation or burns.
e) Do not use a battery pack or tool that is damaged or modified.
Damaged or modified batteries may exhibit unpredictable behavior resulting in fire, explosion or risk of injury.
f) Do not expose a battery pack or tool to fire or excessive temperature. Exposure to fire or temperature above 130 °C may cause explosion.
g) Follow all charging instructions and do not charge the battery pack or tool outside the temperature range specified in the instructions. Charging improperly or at temperatures outside the specified range may damage the battery and increase the risk of fire.
6) Service
a) Have your machine serviced by a qualified repair person using only identical replacement parts. This will ensure that the safety of the machine is maintained.
b) Never service damaged battery packs.
Service of battery packs should only be performed by the manufacturer or authorised service providers.
1.2.2 Lawnmower safety warnings
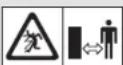
a) Do not use the lawnmower in bad weather conditions, especially when there is a risk of lightning. This decreases the risk of being struck by lightning.
b) Thoroughly inspect the area-for wildlife where the lawnmower is to be used. Wildlife may be injured by the lawnmower during operation.
c) Thoroughly Inspect the area where the lawnmower is to be used and remove all stones, sticks, wires, bones, and other foreign objects.
Thrown objects can cause personal injury.
d) Before using the lawnmower, always visually inspect to see that the blade and the blade assembly are not worn or damaged.
Wom or damaged parts increase the risk of injury.
e) Check the grass catcher frequently for wear or deterioration.
A worn or damaged grass catcher may increase the risk of personal injury.
f) Keep guards in place. Guards must be in working order and be properly mounted. A guard that is loose, damaged, or is not functioning correctly may result in personal injury.
g) Keep all cooling air inlets clear of debris.
Blocked air inlets and debris may result in overheating or risk of fire.
h) While operating the lawnmower, always wear non-slip and protective footwear. Do not operate the lawnmower when barefoot or wearing open sandals.
This reduces the chance of injury to the feet from contact with the moving blade.
i) While operating the lawnmower, always wear long trousers.
Exposed skin increases the likelihood of injury from thrown objects.
j) Do not operate the lawnmower in wet grass. Walk, never run.
This reduces the risk of slipping and falling which may result in personal injury.
k) Do not operate the lawnmower on excessively steep slopes.
This reduces the risk of loss of control, slipping and failing which may result in personal injury.
When working on slopes, always be sure of your footing, always work across the face of slopes, never up or down and exercise extreme caution when changing direction. This reduces the risk of loss of control, slipping and falling which may result in personal injury.
m) Use extreme caution when reversing or pulling the lawnmower towards you. Always be aware of your surroundings.
This reduces the risk of tripping during operation.
n) Do not touch blades and other hazardous moving parts while they are still in motion. This reduces the risk of injury from moving parts.
o) When clearing jammed material or cleaning the lawnmower, make sure all power switches are off and the battery pack is disconnected. Unexpected operation of the lawnmower may result in serious personal injury.
p) When clearing jammed material or cleaning the lawnmower, make sure all power switches are off and remove (or activate) the disabling device. Unexpected operation of the lawnmower may result in serious personal injury.
1.3 Additional safety instructions
1.3.1 Intended use
The GARDENA Lawnmower is intended for mowing lawns in private home gardens and allotments.
The product is not suitable for long-term use (professional operation).

DANGER!
Risk of injury!
→Do not use the product to cut bushes, hedges, shrubs and perennials, to cut climbing plants or grass on roofs or on balconies, to crush branches and twigs, and to compensate for irregularities in the ground.
→Do not use the product on slopes with an inclination of more than 20°.
1.3.2 Safety instructions for batteries and battery chargers


Read all safety warnings and instructions.
Failure to follow the warnings and instructions may result in electric shock, fire and / or serious injury.
→ Store these instructions in a safe place. Only use the charger if you can fully evaluate all functions and carry them out without restrictions, or if you have received corresponding instructions.
→Do not use the product in explosive atmospheres.
→Supervise children during use, cleaning and maintenance.
This will ensure that children do not play with the charger.
→Only charge lithium-ion batteries of the POWER FOR ALL system type PBA 18V with a capacity of 1.5 Ah or more (5 battery cells or more). The battery voltage must match the battery charging voltage of the charger. Do not charge any non-charging battery.
Otherwise there is a risk of fire and explosion.


Only use the battery charger in closed rooms and keep it away from moisture. Water entering a power tool will increase the risk of electric shock.
→ Keep the battery charger clean. Dirt poses a risk of electric shock.
→Always check the battery charger, cable and plug before use. Stop using the charger if you discover any damage. Do not open the charger yourself, and have it repaired only by a qualified specialist using only original replacement parts. Damaged chargers, cables and plugs increase the risk of electric shock.
→Do not operate the battery charger on easily combustible surfaces (e.g. paper, textiles etc.) or in combustible environments.
There is a risk of fire due to the charger heating up during operation.
→ If the connecting cable needs replacing, this must be carried out by GARDENA or by an authorised after sales service centre for GARDENA power tools to avoid safety hazards.
→ These safety instructions apply only to lithium-ion batteries of the POWER FOR ALL system PBA 18V.
→ Do not cover the battery charger's ventilation slots. The battery charger may otherwise overheat and no longer function properly.
→Use only battery chargers that are recommended by the manufacturer to charge the batteries. A battery charger that is suitable for one type of battery may cause a fire hazard if used with other batteries.
→ Vapours may escape if the battery is damaged or used improperly. The battery can set alight or explode. Ensure the area is well ventilated and seek medical attention should you experience any adverse effects. The vapours may imitate the respiratory system.
→ If the battery is defective, liquid may leak out and wet adjacent objects. Check affected parts. Clean these parts or change them if necessary.
→ If used incorrectly or if the battery is damaged, flammable liquid may escape from the battery; Contact with this liquid should be avoided. If contact accidentally occurs, flush with water. If the liquid comes into contact with your eyes, seek additional medical attention.
Liquid ejected from the battery may cause irritation or burns.
→Only use the battery in POWER FOR ALL system partner products.
POWER FOR ALL-marked 18V batteries are fully compatible with the following products: all 18V POWER FOR ALL system partner products.
→Observe the battery recommendations in the operator's manual for your product. This is the only way to operate the battery and the product safely and to protect the batteries from dangerous overloading.
→Only charge the batteries using battery chargers recommended by the manufacturer or by POWER FOR ALL system partners.
A battery charger that is suitable for a certain type of battery poses a fire hazard when used with other batteries (battery type: PBA 18V etc. / Compatible battery chargers: AL 18 etc.).
→The battery is supplied partially charged.
To ensure full battery capacity, fully charge the battery in the charger before using your power tool for the first time.
→Keep batteries out of the reach of children.
→ Do not open the battery. There is a risk of short-circuiting.
→ Do not short-circuit the battery. When the battery is not in use, keep it away from paper clips, coins, keys, nails, screws or other small metal objects, that can make a connection from one terminal to another. A short circuit between the battery contacts may result in bums or fire.
→ The battery contacts can be hot after use. Be careful of hot contacts when removing the battery.
→ The battery can be damaged by sharp objects such as a nail or screw-driver or by external force. An internal short circuit may occur, causing the battery to bum, smoke, explode or overheat.
→ Never service damaged battery packs. Service of battery packs should only be performed by the manufacturer or authorised service providers.

Protect the battery from heat, including prolonged exposure to sunlight, fire, dirt, water and moisture.
There is a risk of explosion and short-circuiting.

→ Operate and store the battery only at an ambient temperature between -20 °C and +50 °C. Do not leave the battery in your car in the summer, for example. At temperatures < 0°C, performance may be reduced depending on the device.
→Charge the battery only at an ambient temperature between 0 °C and +35 °C. Charging outside of the temperature range can damage the battery and increase the risk of fire.
→ After use, allow the battery to cool down for at least 30 minutes before charging or storing it.
1.3.3 Additional electrical safety instructions

DANGER!
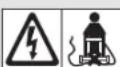
Risk of cardiac arrest!
This product generates an electromagnetic field during operation. This electromagnetic field may affect the functionality of active or passive medical implants (e.g. pacemakers), which may result in serious injury or death.
→Consult your doctor and the manufacturer of your implant before using this product.
→Remove the battery when you are not using the product.
1.3.4 Additional personal safety instructions

DANGER!
Risk of suffocation!
Smaller parts can be swallowed.
→Keep toddlers away when you assemble the product.
→ Stop the machine, remove the battery packs and wait for all moving parts to come to a complete stop.
- If a foreign object has been hit.
→ In this case, inspect the machine for damage and repair it before restarting and operating it again.
- If the machine begins to vibrate unusually.
→ In this case, immediately inspect the machine for damage, replace or repair damaged parts and inspect and tighten any loose parts.
→Before mowing, check the area to be mowed for hidden objects such as branches and remove them. This will reduce the risk of the cutting tool becoming jammed.
→ Stop the cutting tool if the machine needs to be tilted for transport when crossing surfaces other than grass and when transporting the machine to and from the mowing area.
→Do not tilt the machine when the motor is switched on.
→Empty the grass catcher before storing.
→ Recommendation: Perform cleaning and maintenance work before storing.
→ Service the machine regularly. This increases the life span of the machine.
→ Use only GARDENA-approved spare parts. Inappropriate spare parts can cause injuries or damage the machine.
→ Do not modify any safety components. Modifying safety components increases the risk of injury.
→ Take care when adjusting the machine. This prevents fingers from being caught between the moving cutting tool and stationary parts of the machine. → Always allow the machine to cool before storing.
→ When performing maintenance on the cutting tool, be aware that the cutting tool can still move after it has been switched off.
→Recommendation: Wear hearing protection.
2. ASSEMBLY

DANGER!
Risk of cutting injury from the blade.
If the product starts unintentionally, people can be injured by the blades.
→Remove the battery before assembling the product.
→Wear protective gloves.
2.1 Scope of supply
Art. 14634-20 Art. 14634-55 Art. 14634-60
| Cordless mower x x x | ||
| Battery charger x - | - | |
| Quick charger | - | - x |
| Battery (4.0 Ah) | x - x | |
| Operator's manual | x x x | |
2.2 Fitting the lower handle bars [Fig. A1]
- Push the lower handle bars ① into the handle bar holders ② on the mower.
Ensure that the handle bars are fully inserted and that the holes in the handle bars are aligned with the holes in the handle bar holders. - Insert the screws ③ into the hole on the mower.
- Tighten the screws ③.
2.3 Fitting the upper handle bar [Fig. A2]
The upper handle bar ④ can be mounted on the lower handle bars① to set the height in 3 positions.
→ Working position: Adjust the height of the handle bar so that you are in an upright position when using the mower.
| Position | Height of the handle bar above the ground |
| Bottom hole | 91 cm |
| Middle hole | 94 cm |
Top hole
97 cm
- Fit the upper handle bar ④ to the lower handle bars ①. Make sure the handle bars are fully inserted and that the desired holes in the handle bars are aligned.
- Insert the screws ⑤ through the holes.
- Fit the washers ⑥ and wing nuts ⑦ on the screws ⑤.
- Tighten the wing nuts ⑦.
2.4 Attaching the cable to the handle bar [Fig. A3]
→Attach the cabl® to the handle bar using the clamps⑨.
Make sure that the cable is not pinched between the upper and lower handle bars.
2.5 Fitting the grass collection bag [Fig. A4/A5]
- Push the tab ⑩ from the rear into the connectors⑪ on the grass collection bag until you hear the connections click into place.
Make sure that all connectors are engaged.
- First, insert the collection bag handle ⑫ into the rear of the collection bag lid ⑬.
- Then push the collection bag handle ⑫ into the front of the collection bag lid ⑬ until you hear the connections click into place.
Make sure that all connectors are engaged.
3. OPERATION

DANGER!
Risk of cutting injury from the blade.
If the product starts unintentionally, people can be injured by the blades.
→Wait until the blade has come to a standstill before adjusting or transporting the product.
→Remove the battery.
→Wear protective gloves.
3.1 Charging the battery [Fig. O1/O2/O3]
![GARDENA EasyMax 32/18V P4A - Charging the battery [Fig. O1/O2/O3] - 1](/content/2026/04/716904/images/e5d4f23457e68fc0055d81d5041fb4d10e8149287373c29613e0cba7c4ca5aec.jpg)
CAUTION!
Damage to property.
If the voltage of the power source does not match the specifications on the battery charger rating plate, the battery charger may be damaged.
→Note the mains voltage.

DANGER!
Risk of injury.
You may trap your fingers when inserting the battery.
→Mind your fingers
Thanks to the intelligent charging process, the charge condition of the battery is automatically detected and then charged up with the optimal charge current depending on battery temperature and voltage. In this way, the battery is treated with care and remains permanently fully charged when it is stored in the charger.
- Open the lid ⑱ on the battery holder ①.
- Press the release button Ⓐ and remove the battery Ⓑ from the battery holder Ⓓ.
- Connect the battery charger Ⓒ to a mains socket.
- Slide the battery charger Ⓒ onto the battery Ⓑ.
When the battery charge indicator Ⓞ at the charger flashes green, the battery is being charged.
When the battery charge indicator Ⓤ at the charger illuminates permanently green the battery is completely charged (charging time, see 7. TECHNICAL DATA).
- Examine the charge status regularly while you charge.
- When the battery Ⓑ is fully charged, the battery Ⓑ can be disconnected from the battery charger Ⓒ.
3.2 Meaning of display elements
3.2.1 Battery charge indicator on the battery charger [Fig. O3]
Battery charge indicator light flashing
The charge cycle is indicated by the battery charge indicator flashing.
Note: The charging procedure is only possible when the battery temperature is within the allowable charging temperature range, see 7. TECHNICAL DATA.
![GARDENA EasyMax 32/18V P4A - Battery charge indicator on the battery charger [Fig. O3] - 1](/content/2026/04/716904/images/09f65df3d6191c9cdb9d731c4ab5847adf3eb08ef47b57785fad3710014a08bf.jpg)
Battery charge Indicator solid light
![GARDENA EasyMax 32/18V P4A - Battery charge indicator on the battery charger [Fig. O3] - 2](/content/2026/04/716904/images/469e3dd5eb5bbf877eb6396a86d77cb74a2a2ef200a34cad51f19ed7223e8630.jpg)
A solid light on the battery charge indicator ① signals that the battery is fully charged or that the temperature of the battery is outside of the permissible charging temperature range and it cannot therefore be charged. As soon as the permissible temperature range is reached, the battery is charged.
If the battery is not inserted, a solid light on the battery charge indicator signals ① that the mains plug is inserted into the power outlet and that the battery charger is ready for use.
3.3 Working position [Fig. A2]
→Adjust the length of the handle ba②so that you are in an upright position when using the mower (see "2.3 Fitting the upper handle bar [Fig. A2]").
3.4 Adjusting the cutting height [Fig. O4]
The cutting height can be adjusted from 35–65 mm and set to 4 positions.
3.4.1 Reducing the cutting height
- Press the button ⑳.
- Push the handle ② down and snap it into place at the desired cutting height.
3.4.2 Increasing the cutting height
- Press the button ⑳.
- Pull the handle ② upwards and snap it into place at the desired cutting height.
3.5 Mowing with the grass collection bag [Fig. O5]
![GARDENA EasyMax 32/18V P4A - Mowing with the grass collection bag [Fig. O5] - 1](/content/2026/04/716904/images/f96e9d8388b50bfe7bae3a8e242325fa3ea65751ce8bffaff6fe802edad6b399.jpg)
DANGER!
Risk of cutting injury from the blade.
If the product starts unintentionally, people can be injured by the blades.
→Do not reach into the discharge opening with your hands.
3.5.1 Inserting the grass collection bag into the mower
- Lift the protective flap ②.
- Hook the grass collection bag ②3 onto the handle ⑫ and into the mower.
Make sure that the grass collection bag is securely attached.
- Start the mower.
3.5.2 Emptying the grass collection bag
When mowing, the level indicator ②4 opens. If it closes during mowing, the grass collection bag ②3 is full.
- Stop the mower when the grass collection bag ② is full.
- Lift the protective flap ②.
- Remove the grass collection bag from the handle ⑫.
- Empty the grass collection bag ②.
3.6 Starting/stopping the mower

DANGER!
Risk of injury
Risk of injury if the product does not stop when the start lever is released.
→Do not bypass the safety device or switches.
→For example, do not attach the start lever to the handle.
→Do not make any changes to the product that are not described in this manual.
3.6.1 Starting the mower [Fig. 01/06]
The product features a two-handed safety device (start lever ②6) and safety interlock ⑤) to prevent the product from being switched on by accident.
We recommend using only 4 Ah batteries P4A PBA 18V/72 (Art. 14905) or larger.
- Open the lid ⑱ on the battery holder ①.
- Insert the battery Ⓑ into the battery holder Ⓓ until you hear it click into place.
- Close the lid ⑬ of the battery holder ⑭.
- Press the safety interlock ② with one hand and pull the start lever ⑥ with the other hand towards the handle.
The mower starts.
- Release the safety interlock ②5.
3.6.2 Stopping the mower
- Release the start lever ②6.
The mower stops. - Remove the battery Ⓑ
3.7 Mowing tips
3.7.1 Tips for using the mower
If there is cutting material in the discharge opening, pull the mower back about 1 m so that the cutting material can fall out.
To maintain a well-kept lawn, we recommend mowing the lawn regularly, if possible once a week. The lawn becomes denser when mowed regularly.
After long mowing breaks (holidays), first mow at the highest cutting height in one direction and then across this direction at the desired cutting height. This prevents the blade from being blocked by too much cutting material.
If possible, mow the lawn only when dry. When the grass is wet, the cutting pattern becomes irregular.
3.7.2 Cutting performance and battery charge
The lawn area achieved per battery charge depends on various factors, such as moisture, grass density and cutting height. For optimum area utilisation, do not switch the mower on and off too often, as this will reduce the battery life. The best possible cutting performance per battery charge can be achieved by increasing the cutting height and frequent mowing.
Turn off the boost mode for maximum battery run time.
3.7.3 Lawn area per battery charge
System battery 4.0 Ah max. 200 m²
System battery 5.0 Ah max. 250 m²
System battery 6.0 Ah max. 300 m²
4. MAINTENANCE

DANGER!
Risk of cutting injury from the blade.
If the product starts unintentionally, people can be injured by the blades.
→Wait until the blade has come to a standstill before servicing the product.
→Remove the battery.
→Wear protective gloves.
4.1 Cleaning the mower

DANGER!
Risk of injury!
Risk of injury and risk of damage to the product.
→ Do not use water or a water jet (especially a high-pressure water jet) to clean the product. This can damage the product or allow water to penetrate the electrical components and cause corrosion or short circuits.
→ Do not clean with chemicals, including petrol or solvents. Some can destroy critical plastic parts.
The airflow slots must always be clean.
→Clean the top and bottom of the mower after each use.
4.1.1 Cleaning the top of the mower
- Clean the top of the mower with a damp cloth.
- Clean the ventilation slots with a soft brush (do not use sharp objects).
4.1.2 Cleaning the bottom of the mower [Fig. M1]
- Carefully place the mower on its side.
- Clean the bottom, the blade and the discharge opening ^② with a soft brush (do not use any sharp objects).
4.1.3 Cleaning the grass collection bag
→ Clean the grass collection bag with a soft brush (do not use any sharp objects).
4.2 Cleaning the battery and the battery charger
The surface and contacts of the battery and of the battery charger must be clean and dry before connecting the battery to the battery charger.
→Do not use running water.
4.2.1 Cleaning the battery
Do not use any chemical substances to clean the battery.
→ Use a soft, clean, dry brush to clean the ventilation slots and the contacts of the battery from time to time.
4.2.2 Cleaning the battery charger
→Use a soft, dry cloth to clean the contacts and the plastic parts.
5. STORAGE
5.1 Shutting down
The product must be stored away from children.
- Remove the battery Ⓑ.
- Charge the battery (see "3.1 Charging the battery [Fig. O1/O2/O3]).
- Empty the grass collection bag.
- Clean the mower, the batteries and the battery charger (see "4. Maintenance").
- Store the mower, the batteries and the battery charger in a dry, enclosed and frost-free place.
5.2 Space-saving storage position [Fig. S1]
- For space-saving storage, loosen the wing nuts ⑦ until the upper handle bar ④ is easy to fold together. Make sure that the cable is not pinched between the upper and lower handle bars.
6. TROUBLESHOOTING

DANGER!
Risk of cutting injury from the blade.
If the product starts unintentionally, people can be injured by the blades.
→ Wait until the blade has come to a standstill before troubleshooting the product.
→Remove the battery.
→Wear protective gloves.
6.1 Replacing the blade [Fig. T1/T2]
![GARDENA EasyMax 32/18V P4A - Replacing the blade [Fig. T1/T2] - 1](/content/2026/04/716904/images/b7a4ea66b4756d5865f2ab49dd9344970f61ebbbea72166f654b7d14880f00b7.jpg)
DANGER!
Risk of cutting injury from the blade.
Risk of cutting injury if a damaged or bent blade is used or one that rotates with imbalance or chipped cutting edges.
→Do not use the mower with a damaged or bent blade, an imbalanced blade or a blade with chipped cutting edges.
→Do not regrind the blade.
GARDENA spare parts are available from your GARDENA dealer or from GARDENA Service.
→ Only use an original GARDENA spare blade, Art. No. 4124
For safety reasons, we recommend that the blade is replaced by GARDENA Service or by an authorised GARDENA dealer.
-
Insert a screwdriver into one of the holes provided on the bottom of the body ⓐ.
The screwdriver thus serves as a stop for the blade. -
Unscrew the blade screw ⑲.
Make sure that the spacer ^30 is not damaged when applying force.
-
Remove the blade screw ⑲ and the washer ③ and remove the blade ③2.
-
Insert the new blade ③2 into the mower.
The label on the blade (this side to grass) must be visible.
-
Insert the washer ③ and the blade screw ⑲ into the mower.
-
Screw the new blade ③2 into place with the blade screw ⑲ (the tightening torque is 15 – 20 Nm). Do not over tighten.
Make sure that the spacer③0 is not damaged when applying force.
- Pull the screwdriver out of the mower.
Make sure the screwdriver is removed before starting the mower again.
6.2 Error table
Problem Possible Cause Remedy
| Loud noises, the mower rattles | Screws on the motor, mounting or mower housing are loose. | →Have the screws tightened by an authorised specialist dealer or by GARDENA Service. |
| Mower runs rough or vibrates strongly | Blade is damaged or worn. | →Replace the blade. |
| Blade screw is loose. | →Tighten the blade screw. | |
| Blade is heavily soiled. | →Clean the mower. If this does not resolve the problem, contact GARDENA Service. | |
| The lawn is not mown cleanly | Blade is blunt or damaged. | →Replace the blade. |
| Cutting height is set too low. | →Set a higher cutting height. | |
| Mower does not start or stops | Battery is empty. | →Charge the battery. |
| Battery temperature is outside the permissible temperature range. | →Wait until the battery temperature is between 0 °C and +45 °C again. | |
| There are drops of water or moisture between the battery contacts. | →Remove the water drops or moisture using a dry cloth. | |
| Obstacle is blocking the motor. | →Remove the obstruction. | |
| Cutting height is set too low. | →Set a higher cutting height. | |
| The mower is faulty. | →Contact GARDENA Service. | |
| Battery is defective. →Replace the battery. | ||
Problem Possible Cause Remedy
| Charging is not possible.Battery charge indicator lights up green continuously | The battery is not pushed onto the battery charger correctly. | →Push the battery onto the battery charger correctly. |
| Battery contacts are dirty →Clean the battery contacts (e.g. by connecting and disconnecting the battery several times). Replace the battery if necessary.) | ||
| Battery temperature is outside the permissible temperature range. | →Walt until the battery temperature is between 0 °C and + 45 °C again. | |
| Battery is defective. →Replace the battery. | ||
| Charging is not possible.Battery charge indicator does not light up | The mains plug of the battery charger is not plugged in correctly. | →Insert the mains plug fully into the power outlet. |
| Socket outlet, mains cable or charger is defective. | →Check the mains voltage.→Let the charger be checked, if necessary, by an authorised specialist dealer or the GARDENA Service. | |
NOTE:
Repairs must only be done by GARDENA service departments or specialist dealers approved by GARDENA.
→Please contact your GARDENA service centre in the event of other faults (see reverse).
7. TECHNICAL DATA
Cordless Lawnmower Unit Value (Art. 14634)
| Blade speed | RPM | 3500 |
| Cutting-height adjustment (4 positions) | mm | 35 – 65 |
| Cutting width | cm | 32 |
| Grass collection bag capacity | l | 30 |
| Weight (without battery) | kg | 10.9 |
| Sound pressure level L_pA^1) | cB(A) | 74 |
| Uncertainty K_pA | cB(A) | 3 |
| Sound power noise level I_WA^2) :measured/guaranteed | cB(A) | 86 / 87 |
| Uncertainty k_WA | cB(A) | 0.8 |
| Hand/arm vibration a_vhw^1) | m/s^2 | 2.2 |
| Uncertainty k_vhw | 1.5 |
Measurement methods according to: 1) EN IEC 62841-4-3 2) RL 2000/14/EC/S.I. 2001 No.1701
NOTE: The stated vibration emission value has been measured according to a standardized test procedure and can be used for comparison of one electric power tool with another. It can also be used for preliminary evaluation of exposure. The vibration emission value can vary during actual use of the electric power tool.
| System battery | Unit Value (PBA 18 V 4.0 Ah W-C) | |
| Battery voltage | V (DC) | 18 |
| Battery capacity | Ah | 4.0 |
| Number of cells (Li-Ion) | 10 | |
| Appropriate POWER FOR ALL system battery chargers | AL 1810 CV / AL 1815 CV / AL 18V-20 / AL 1830 CV / AL 18V-44 / AL 1880 CV | |
| System battery charger | Unit Value (AL 18V-20 CV) | |
| Mains voltage | V (AC) | 220 – 240 |
| Mains frequency | Hz | 50 – 60 |
| Rated Power | W 50 | |
| Battery charging voltage | V (DC) | 18 |
| Max. battery charging current | mA | 2000 |
| Battery charging time (approx.) | ||
| PBA 18V 2.0Ah W-B | min. | 64 |
| PBA 18V 2.5Ah W-B | min. | 79 |
| PBA 18V 4.0Ah W-C | min. | 124 |
| Permissible battery temperature during charging | °C | 0 to 45 |
| Weight | g | 210 |
System battery charger Unit Value (AL 18V-20 CV)
| Protection class | ☐/II | |
| Suitable POWER FOR ALL system PBA 18V batteries | PBA 18V | |
| Quick charger Unit Value (AL 18V-44) | ||
| Mains voltage V (AC) 220 – 240 | ||
| Mains frequency Hz 50 – 60 | ||
| Rated Power W 105 | ||
| Battery charging voltage V (DC) | 14.4 – 18 | |
| Max. battery charging current | A | 4.4 |
| Battery charging time (approx.) | ||
| PBA 18V 2.0Ah W-B | min. | 34 |
| PBA 18V 2.5Ah W-B | min. | 43 |
| PBA 18V 4.0Ah W-C | min. | 59 |
| Permissible battery temperature during charging | °C | 0 to 45 |
| Weight | g | 475 |
| Protection class | ☐/II | |
| Suitable POWER FOR ALL system PBA 18V batteries | PBA 18V | |
8. ACCESSORIES/SPARE PARTS
| GARDENA Spare Blade Set | As a replacement for blunt blades. | Art. 4124 |
| GARDENA System Battery P4A PBA 18V/72 | Battery for additional duration or for replacement. | Art. 14905 |
| GARDENA Battery Quick Charger AL 1830 CV P4A | Charger for fast charging the POWER FOR ALL System Batteries PBA 18V...W-... | Art. 14901 |
9. WARRANTY/SERVICE
9.1 Product registration
Please register your product at gardena.com/registration.
9.2 Service
Please find the current contact information of our service on the back page and online:
• United Kingdom: https://www.gardena.com/uk/support/advice/contact/
• USA: https://us.gardena.com/pages/contact
• Canada: https://www.gardena.com/ca-en/c/support/contact
• Australia: https://www.gardena.com/au/support/advice/contact/
• New Zealand: https://www.gardena.com/nz/support/advice/contact/
• South Africa: https://www.gardena.com/za/support/contact/
• Other countries: https://www.gardena.com/int/c/support/contact
10. DISPOSAL
10.1 Disposal of the product
(in accordance with Directive 2012/19/EU / S.I. 2013 No. 3113)

The product must not be disposed of to normal household waste. It must be disposed of in line with local environmental regulations.
IMPORTANT!
→ Dispose of the product through or via your municipal recycling collection centre.
10.2 Disposing of the battery

Li-ion
The battery contains lithium-ion cells that should not be disposed of with normal household waste at the end of its life.
IMPORTANT!
- Discharge the lithium-ion cells fully (contact GARDENA Service about this).
- Ensure that the lithium-ion cell contacts do not short-circuit by placing tape over them.
- Dispose of the lithium-ion cells properly at or through your local recycling collection point.
| Nabiječka x -- | |
| Rychlonabiječka | -- x |
| Akumulátor (4,0 Ah) | x - x |
Ref. 14634-20 Ref. 14634-55 Ref. 14634-60
Métodos de medición conforme: ^1 EN IEC 62841-4-3 ^2 RL 2000/14/EC / S.I. 2001 No.1701
9. GARANTIJA/SERVISAS
9.1 Gaminio registracija
Užregistruokite gamini svetaineje gardena.com/registration.
9.2 Servisas
9. GARANTIJA/SERVISS
9.1 Produkta registrēšana
- https://www.gardena.com/ly/serviss-un-atbalsts/meklet-veikalu-servisa-centru/
10. UTILIZĀCIJA
Registreer uw product op gardena.com/registration.
9.2 Service
Systembatteri 4,0 Ah Maks. 200 m²
Systembatteri 5,0 Ah Maks. 250 m²
Systembatteri 6,0 Ah Maks. 300 m²
4. VEDLIKEHOLD

FARE!
Målemetoder I henhold til: 1 EN IEC 62B41 4-3 2) RL 2000/14/EC / S.I. 2001 No.1701
• Portugal: https://www.gardena.com/pt/suporte/advice/contacto/
- Outros países: https://www.gardena.com/int/support/advice/contact/
10. ELIMINAÇÃO
Metode de masurare contom: EN IEC 62841-4-3 RL 2000/14/EC/S.I. 2001 No.1701
• Romania: https://www.gardena.com/ro/asistenta/advice/contact/
- Alte târi: https://www.gardena.com/int/support/advice/contact/
10. ELIMINAREA CA DEŞEU
- https://www.gardena.com/int/support/advice/contact/
10. УТИЛИЗАЦИЯ
| Akumulatorska baterija(4,0 Ah) | x - x |
Navodila za uporabo x x x
Metoclat e matjes sipas: 1 EN IEC 62841-4-3 2 RL 2000/14/EC / S.I. 2001 Nr.1701
- https://www.gardena.com/int/support/advice/contact/
10. ASGJËSIMI
Systembatteri 6,0 Ah max. 300 m²
4. UNDERHÅLL

FARA!
HOBHID C. HUMBO S.R.
Prentio Morice
例7
Велеродез. ZC: 1621
Buenos Aires
-1043: -5411: 5263 7662
Vonzeerumosen.com, an
Armenia
AES Systems LLC
Marshall Babajangan ulente 50?
(1) 19.40
mayschazan@iclsd.com
Australia
Husqarra Australia Pty. Ltd.
Locked Bag 5
Central Coast BC
50 252
40.85,611面243579.8
rfc@progress-garden.au
Bahrain
M.H. Al-Mahrus
BUILDING 209, BLOCK 356
HUAO 328
Sahya
PHONE: 573 (740) 8060
www.iesc.com
Belarus / Беларусь
CCC «Мастер Гар
22D11B, MHHCK,
(1) 3.58, 24 to be used in the field
The company is
Canada / USA
GAPLENA Canada Ltd.
125 Bogowky Road
UM: 15 A
"6. Canada
Phone: 11976 792 93 90
gardena.customerervice@husvamaigroup.com
7.3.1
Chile
HEPRESENDELESCUE S/C 60 DEL VALLENCOTE 957 DI
AV. LEE ANGEL KONTE SA 1930 4 LIECHURAPA SANTIAGO, CHILE
P.OCHORAZA, SANTIAGO, CHILE Phone: 7-5612-2414-2800
contacto@ire el
China
Huspanu (Shanghai)
Management Co., Ltd.
富世华(上海)管理有限公司
3F, Beno Square
No 207, Sang Feng Rd., Cheng Heng, Jiang
Shanghai PRC 100225
上海市长宁区中石路207号
基广场1座7楼 邮编:20035
主:刘红生,电话:200355
Colombia
Equiços do Tójana Colombia SAS
Gla 56 Cte 25 B Se Cl d 8 Efficio Tena Capital
2017
Phone: 157117039520/
+57 (1) 703 95 22
servicioservices@twama.com.cu
www.kyama.com.ca
Costa Rica
Exim DA Dosta Fica
Cale 250, 1", Manteaegre
Zapote
Santose
Cesia Rica
Phone (-506) 2221-5651/1-506, 2221-5659
CATCOSA CARE@gmail.com
Croatia
Hispanic Austria
Industriezeile 38
4012 Line
Phone: (+43) 732 77 01 01 485
scrl2.garden@espanadroup.com
Cyprus
Pantela Papadopoulos S.A.
\$2 Abchina Avenue
Amers
0442 G95CE
Phone: (1+30) 21 2519 3100
https://www.huaqun.com/
Czech R
Gardena
Service Center Viano
c/o Hsuwen
Manufacturing (2) s.r.o.
Jesentoe 146 7020014
79326 Vlnc pod Pradecem Phone: 002-100-425
Phone: 605-103-423 servie@cardena.cc
Denmark
GARDENA DANMARK
Larvej 19, st.
3500 Varies
TII: (+45) 70 26 47 70
gamenadocbusqvaragroup.com
Dominican Republic
BOSOLISA, SHI
Cametera Santiago Ivey
Km.5½
Esquina Copel I.
\$1000 Dominican Republic
PHONE: (1) 209-362-0416
Egypt
Universal Agencies Co
26, Abcel Hamid Lilly St.
Gea
Phone: (+20137615757
Estonia
Недиога Бо
Valdku 132
EE 11216 Tallinn
info@gardens.se
Finland
De Husa
1.1340678.2
C1510 Varnes
www.nan.com
France
Низкая France
9/11 Alieu des pierres mayottes
9235 Genneviliers Cedex
France
http://www.caiozha.com/
+70, Bellashell street
0159 Trails Georgia
Number: (+995) 322 14 71 71
info@transporter.com.ge
www.transporter.com.ge
Service Address and
Importer to Great Britain
Huayama UK Ltd
Preston Road
Ayclilio Industrial Park
Newton Aydilio
Cochy Duffam P.O.CHE
D-510F Ehow (+/-) 0.244.844.4558
Phone: 1-441 to 344 344-2533 info@depea@novitas.co.uk
FIGURE 15 of Lempfer's claim
Greece
1.04.07.02
- 10190932
15 p3 UK 104
E-mail:
Tr4: +206 210 5193 100
info@aceroportes.com
Hong Kong
Tung Tai Comp
151-153 Hot Bun Road
Kwan Tong
Hong Kong
P/EHE: 118,17; 3.183-1962
Hungary
F100E, 1+301 +251 =101
Iceland
BYKD and.
Skemmuregi 2a
200 Képavangur
Phone: (+354) 515-000
bykorebykois
MH5 Versur chf
Vikurhan 3
203 Kepavugur
Phone: (+354; 544-4856
BK BAMAN AND CO
Plot No. 185, Industrial Area.
Phase 2. Fair Cancer
Chancigarh
160102 India
Phone: (+91) 98140 06530
tamar@jagannhardware.com
Iraq
Alshcimal Alafour Company
Al-Faysdloth, Near Estate Bank
Mosul
Phone: (1+954) 78 18 18 46 75
Ireland
Lifley Distributors Ltd.
309 NW Business Park, Babycolen
15 Dublin
Phone: (1+353) 1 824 2600 info@illroad.com
11/3/11:30.05/1
Israel
HANGBING LTD
2 Nahal Harii St
812201 Yame
internet@steganin.co.i
Phone (+072) 6 932 0400
Italy
Husqvarna Italia S.p.A.
Husipanta Zensch Co. Ltd Japan
19 Minarckai, Kavagce
350 1165 Salama
Japan
garden
Kazakhstan
CC TAWA
Russien
Sara Highway (Beirut - Tripoli) Center
622 Member Bldg.
P.O.Box 215
Joohler Phone: 764-5-857503
Phone (+601) 8535277 +95112855
1-301, 5 000-401
2.201903.08-1424
Lithuania
040 Husvarna Delva
Methen, 77C
info@pandera