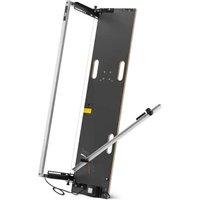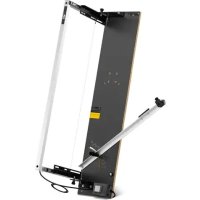
ISU-GIL ALU1 S1 - Thermal cutting tool MSW - Free user manual and instructions
Find the device manual for free ISU-GIL ALU1 S1 MSW in PDF.


User questions about ISU-GIL ALU1 S1 MSW
0 question about this device. Answer the ones you know or ask your own.
Ask a new question about this device
Download the instructions for your Thermal cutting tool in PDF format for free! Find your manual ISU-GIL ALU1 S1 - MSW and take your electronic device back in hand. On this page are published all the documents necessary for the use of your device. ISU-GIL ALU1 S1 by MSW.
USER MANUAL ISU-GIL ALU1 S1 MSW
natural_image
Close-up of a blue electric tool with two metal components and red arrows pointing to features, alongside an inset image of a red tool (no text or symbols visible)natural_image
Close-up of a blue and silver handheld tool with metal pins (no text or symbols visible)BETRIEB (Styroporschneider)
natural_image
Close-up of a mechanical assembly with green and black components, no visible text or symbols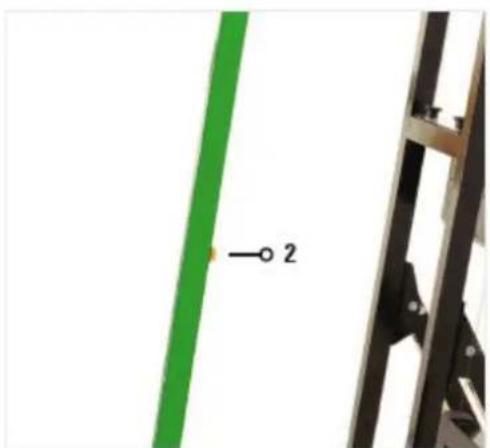
natural_image
Close-up of a green diagonal stripe and black metal frame against white background (no text or symbols)natural_image
Close-up of a mechanical spring assembly with a blue cylindrical component attached, mounted on a black base (no visible text or symbols)natural_image
3D illustration of a white rectangular block with a green vertical stripe on top (no text or symbols)GERADE SCHNITT
natural_image
Two 3D rectangular blocks, one white and one green, with no text or symbols.DIAGONALER SCHNITT
This User Manual has been translated for your convenience using machine translation. Reasonable efforts have been made to provide an accurate translation; however, no automated translation is perfect nor is it intended to replace human translators. The official User Manual is the English version. Any discrepancies or differences created in the translation are not binding and have no legal effect for compliance or enforcement purposes. If any questions arise related to the accuracy of the information contained in the User Manual, please refer to the English version of those contents which is the official version.
TECHNICAL DATA
| Parameter description Parameter value | |||
| Product name Styrofoam cutter | Styrofoam cutter | Hot knife | |
| Model | MSW-ISU-GIL ALU1 | MSW-ISU-GIL ALU1 S1 | |
| Input | AC ~230V / 50Hz | ||
| Output | Adaptor:DC 40V 5A 200W | Adaptor:DC 40V 5A 200W | 250W |
| Protection class | II | ||
| Protection rating IP | IP68 | X0 | |
| Dimensions [width x depth x height; mm] | 1557 x 1330 x 1800 | 1557 x 1345 x 1800 | 43 x 253 x 90 |
| Weight [kg] | 14.9 | 16.3 | |
| Cutting depth [mm] | 330 | 200 | |
| Max cutting length [mm] | 1350 | 1350 | |
| Max blade temperature [°C] | 500 | ||
| Thermal protection v | X(S2 15s on / 45s off) | ||
| Cutting angle [°] | 0-45 | - | |
The machine is intended for the cutting of non-plasticized foam (for example Polystyrene or Styrodur). The non-plasticized foam slabs must be free of adhesive, adhesive residues or any other kind of contamination.
ASSEMBLY
Styrofoam cutter
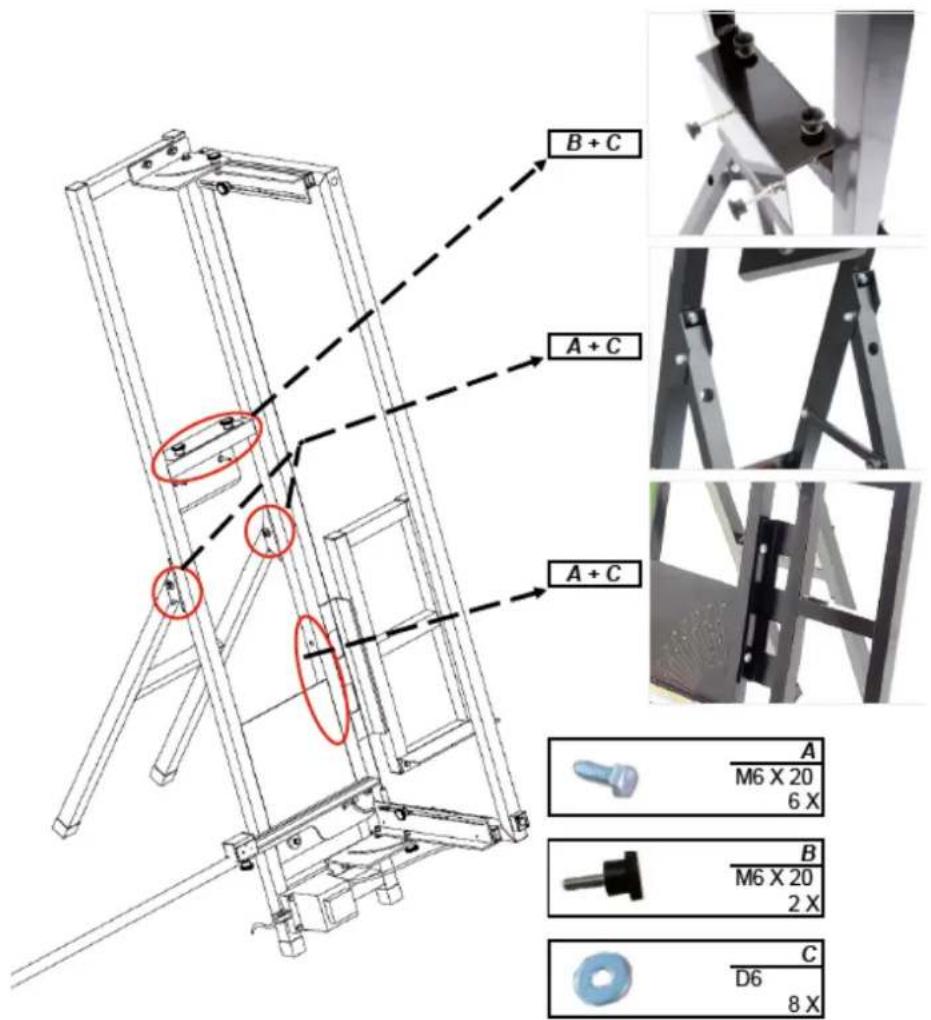
text_image
B + C A + C A + C A M6 X 20 6 X B M6 X 20 2 X C D6 8 XHot cutting knife
CAUTION: Install accessory to the device only when it is turned off and cool! Use proper gloves for protection. - With help of the included hex key loosen the 4 bolts indicated on the picture below:
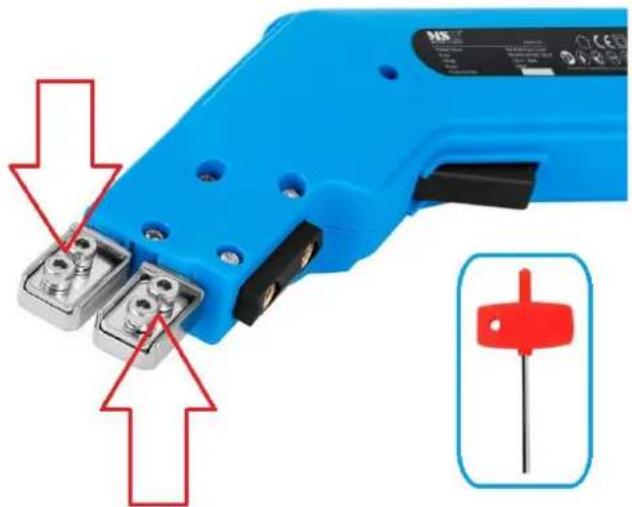
natural_image
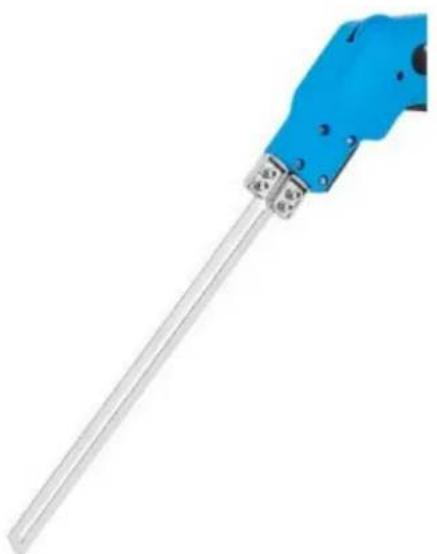
Close-up of a blue electric tool with two metal terminals and red arrows pointing to features, accompanied by a small inset image of a red tool (no text or symbols visible)- Insert the desired cutting accessory (metal) endings into the slots and securely tighten the 4 previously loosen bolts so that the device and accessory have a full contact:

natural_image
Close-up of a blue and silver handheld tool with metallic pins (no text or symbols visible)OPERATION (Styrofoam cutter)
Switching On and Off
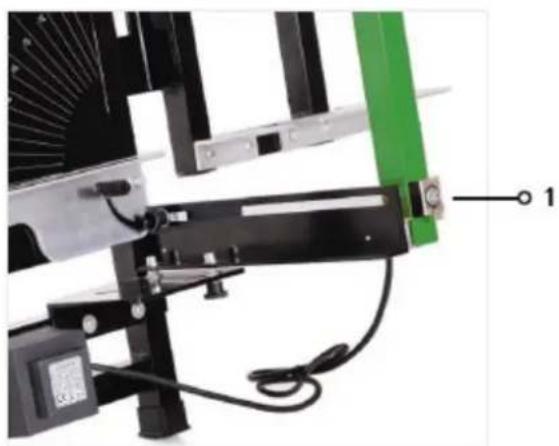
- For startup it is only necessary to plug in the XLR-connector (1) of the transformer into the corresponding socket on the bow and connect the power plug to the power socket.
- Press the On/Off switch (2) and keep it depressed. The cutting wire is fully functional within seconds
- Pull bow in direction of the material – material will be cut.
- NOTE: fire risk! Release the On/Off switch after every cut has been implemented; the cutting wire cools down within a few seconds.
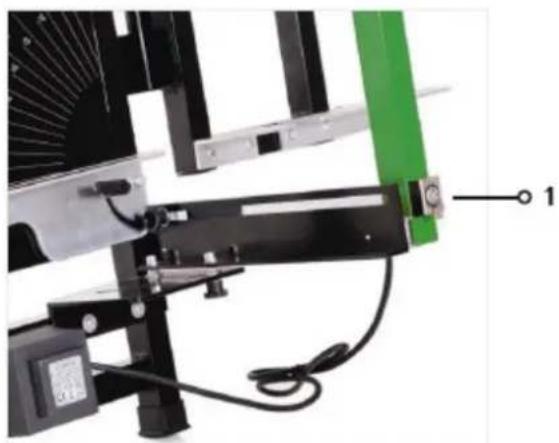
natural_image
Mechanical assembly diagram showing a green and black component with labeled part '1' (no readable text or symbols beyond label)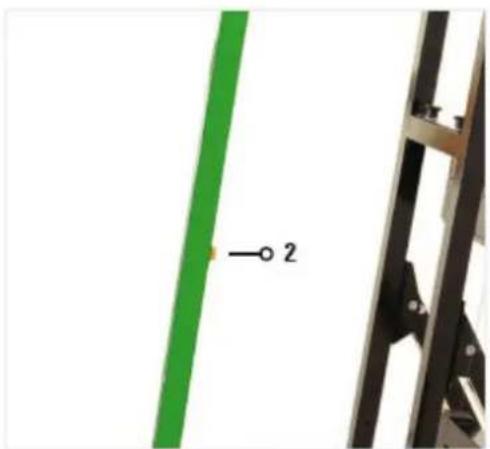
natural_image
Close-up of a green strip and black metal frame against white background (no text or symbols)Replacing the hot wire
Before any work on the machine itself, pull the mains plug and read all the instructions. Non-observance of the instructions below can cause electric shock, fire and or serious personal injuries.
- Carefully remove any remaining old hot wire.
- Hook the new hot wire to one of the springs and then under tension to the opposite spring. Be careful not to bend or damage the new hot wire during installation.
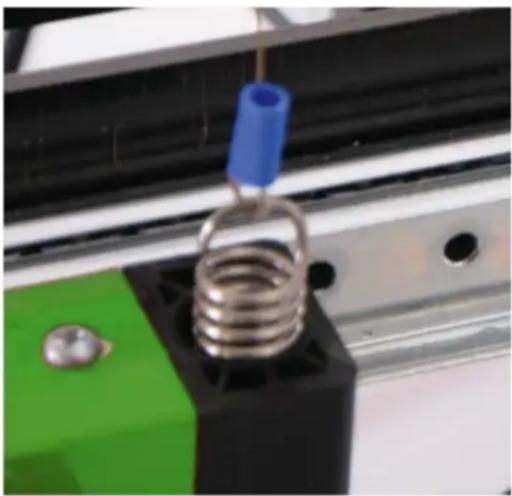
natural_image
Close-up of a mechanical spring assembly with a blue cylindrical component attached, mounted on a black base (no visible text or symbols)OPERATION (Hot cutting knife)
a) Set the temperature dial to the desired temperature - temperature control dial has 16-click settings that correspond to the graduated ridges on the surface. The smaller the ridge the lower the heating power setting.
b) Position the blade on the workpiece.
c) Turn on the heating trigger and warm up the tool a few seconds before starting to cut (making a test cut on waste pieces is recommended).
d) Maintain consistency of temperature and speed. Too much mist/vapor may be caused by low speed or excessive temperature. This will result in irregular/uneven cut paths. You can solve this problem by lowering the blade temperature or loosening the trigger.
e) Let go of the heating trigger before the last 3-5 cm of the cut is completed.
f) Proper temperature and cutting speed not only improve productivity, but also extend tool life.
g) Cutting time should not exceed 15 seconds.
CUTTING VARIANTS
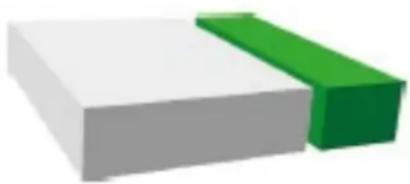
natural_image
3D illustration of a white rectangular block with a green vertical bar on top (no text or symbols)STRAIGHT CUT
Bow – adjust angle right and left to 0 degree. Mark the required dimensions on the polystyrene sheet. Lift bow in order to draw the material to be cut underneath the cutting wire. Place the material on the placement angle and pull it forward up to the required measure. Press pushbutton and keep it pressed (cutting wire heats up) Pull bow in direction of the material – material will be cut. Release pushbutton.
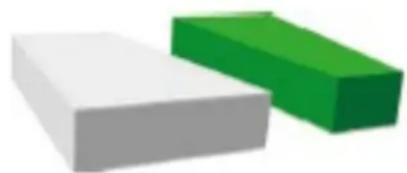
natural_image
Two 3D rectangular blocks, one white and one green, with no text or symbols.DIAGONAL CUT
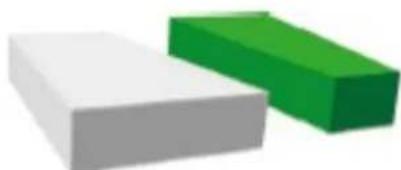
Bow – adjust angle right and left to 0 degree. Mark the required step (height and length) on the polystyrene sheet. Lift bow in order to draw the material to be cut underneath the cutting wire up to the marked length. Press pushbutton and keep it pressed (cutting wire heats up). Pull bow in direction of the material – step depth will be cut. When reaching the step depth pull the material to the left until the step is completely cut. Release pushbutton.
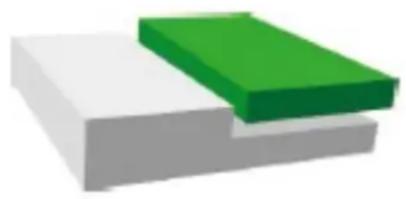 | TWO-STEP CUTBow – adjust angle right and left to the required angle. The supplied angular stop is required for this purpose. Lift bow in order to draw the material to be cut underneath the cutting wire up to the beginning of the cut. Press pushbutton and keep it pressed (cutting wire heats up). Pull bow in material direction – bevel will be cut. Release pushbutton. |
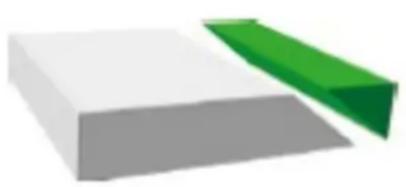 | BEVELBow – adjust angle right and left to 0 degree. Mark required cut on the polystyrene sheet. Lift bow in order to draw the material to be cut underneath the cutting wire. Adjust material in such a way that the required cut will exactly go along underneath the cutting wire. Press pushbutton and keep it pressed (cutting wire heats up). Pull the bow in material direction – material will be cut. Release pushbutton. |
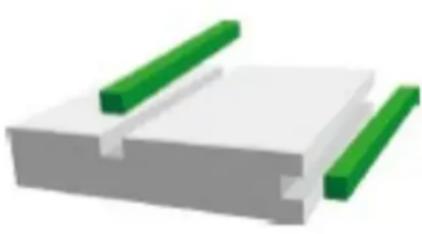 | CONCAVE CUTBow – adjust angle right and left to 0 degree. Mark required hollow groove on the polystyrene sheet. Lift bow in order to draw the material to be cut underneath the cutting wire up to the marked place. Press pushbutton and keep it pressed (cutting wire heats up). Pull bow in material direction – step depth will be cut. When reaching the step depth pull the material to the right towards the marked place until the step length has been cut. Pull the bow upwards out of the material. Release pushbutton. |
MAINTENANCE
Cleaning
a) Pull the mains plug and let the unit cool down completely before cleaning, adjusting or replacing accessories and when the unit is not in use.
b) Pull out the mains plug before each cleaning and when the unit is not in use.
c) Use only non-corrosive cleaning agents for cleaning the surfaces.
d) After each cleaning, all the parts should be dried well before the unit is used
e) again.
f) Store the unit in a dry and cool place protected from moisture and direct sunlight.
g) Do not spray the unit with a stream of water or immerse it in water. Make sure that no water enters through the ventilation openings in the casing.
h) Clean the ventilation openings with a brush and compressed air (not exceeding 3 bar).
i) Perform regular inspections of the unit checking technical fitness and any damages.
j) Use a soft, damp cloth for cleaning the device.
k) Do not clean the unit with acidic substances, medical products, diluent, fuel, oil or other chemicals as this may cause damage to the unit.
I) Clean the blades build up with accumulated material with help of the (included) wire brush.
Disposal
Do not dispose of this device in municipal waste systems. Hand it over to an electric and electrical device recycling and collection point. Check the symbol on the product, instruction manual and packaging. The plastics used to construct the device can be recycled in accordance with their markings. By choosing to recycle you are making a significant contribution to the protection of our environment.
Contact local authorities for information on your local recycling facility.

natural_image
Close-up of a blue electric tool with two metal components and red arrows pointing to features, alongside a small red schematic symbol (no text or labels)natural_image
Close-up of a blue and silver handheld tool with metal pins (no text or symbols visible)natural_image
Close-up of a mechanical assembly with green and black components, no visible text or symbols
natural_image
Close-up of a green diagonal stripe and black metal frame against white background (no text or symbols)natural_image
Close-up of a mechanical spring assembly with a blue plastic cap and green base (no visible text or symbols)natural_image
3D illustration of a white rectangular block with a green horizontal stripe extending from its side (no text or symbols)CIECIE PROSTE
natural_image
Two 3D rectangular blocks, one white and one green, stacked vertically (no text or symbols)CIECIE DIAGONALNE
natural_image
Close-up of a blue electric tool with two terminal blocks and red arrows pointing to features, alongside a small inset image of a red tool (no text or symbols visible)natural_image
Close-up of a blue and silver handheld electrical tool with metal pins (no text or symbols visible)natural_image
Mechanical assembly diagram showing a green and black component with labeled part '1' (no readable text or symbols beyond label)
natural_image
Close-up of a green strip and black metal frame against white background (no text or symbols)natural_image
Close-up of a blue and silver coiled spring attached to a black base, with a green base and black panel nearby (no text or symbols visible)natural_image
3D illustration of two stacked rectangular blocks, one white and one green, with no text or symbols.ROVNÝ STŘIH
natural_image
Two 3D rectangular blocks, one white and one green, stacked vertically (no text or symbols)DIAGONÁLNÍ STŘIH
natural_image
Close-up of a blue electric tool with two metal components and red arrows pointing to features, alongside a small red schematic symbol (no text or labels)natural_image
Close-up of a blue and silver handheld tool with metal pins (no text or symbols visible)natural_image
Close-up of a mechanical assembly with green and black components, no visible text or symbols
natural_image
Close-up of a green diagonal stripe and black metal frame against white background (no text or symbols)natural_image
Close-up of a blue and silver coiled spring attached to a black base, with a green base and black panel nearby (no text or symbols visible)natural_image
3D illustration of two stacked rectangular blocks, one white and one green, with no text or symbols.COUPE DROITE
natural_image
Two 3D rectangular blocks, one white and one green, with no text or symbols.COUPE DIAGONALE
natural_image
Close-up of a blue electric tool with two metal components and red arrows pointing to features, alongside an inset image of a red tool (no text or symbols visible)natural_image
Close-up of a blue and silver soldering tool with metal pins (no text or symbols visible)natural_image
Mechanical assembly diagram showing a green bracket mounted on a black frame with a labeled component (no text or symbols visible)
natural_image
Close-up of a green diagonal stripe and black metal frame against white background (no text or symbols)natural_image
Close-up of a blue and silver spring attached to a black base, with a green and black component nearby (no visible text or symbols)natural_image
3D illustration of a white rectangular block with a green vertical bar on top (no text or symbols)TAGLIO DRITTO
natural_image
Two 3D rectangular blocks, one white and one green, with no text or symbols.TAGLIO DIAGONALE
natural_image
Close-up of a blue electric tool with two metal components and red arrows pointing to features, alongside an inset image of a red tool (no text or symbols visible)natural_image
Close-up of a blue and silver handheld tool with metallic joints (no text or symbols visible)natural_image
Mechanical assembly diagram showing a green bracket mounted on a black frame with a labeled component (no text or symbols visible)
natural_image
Close-up of a green diagonal stripe and black metal frame against white background (no text or symbols)natural_image
Close-up of a blue and silver spring attached to a black base, with a green and black component nearby (no visible text or symbols)natural_image
3D rendered block with white and green segments (no text or symbols)CORTE RECTO
natural_image
Two 3D rectangular blocks, one white and one green, with no text or symbols.CORTE DIAGONAL
natural_image
Close-up of a blue electric tool with two metal components and red arrows pointing to features, alongside an inset image of a red tool (no text or symbols visible)natural_image
Close-up of a blue and silver handheld tool with metal pins (no text or symbols visible)natural_image
Mechanical assembly diagram showing a green bracket mounted on a black frame with wiring, no visible text or symbols
natural_image
Close-up of a green diagonal stripe and black metal frame against white background (no text or symbols)natural_image
Close-up of a mechanical spring assembly with a blue cylindrical component attached, mounted on a black base (no visible text or symbols)natural_image
3D illustration of a white rectangular block with a green vertical stripe on top (no text or symbols)EGYENES VÁGÁS
natural_image
Two 3D rectangular blocks, one white and one green, with no text or symbols.DIAGONÁLIS VÁGÁS
natural_image
Close-up of a blue electric tool with two terminal blocks and red arrows pointing to features, alongside a small inset image of a red tool (no text or symbols visible)natural_image
Close-up of a blue and silver handheld tool with metallic pins (no text or symbols visible)BETJENING (Styroporskærer)
Slå til og fra
natural_image
Close-up of a mechanical assembly with green and black components, no visible text or symbols
natural_image
Close-up of a green diagonal stripe and a black metal ladder, with a small circle labeled '2' pointing to the green stripe (no text or symbols on the main subject)natural_image
Close-up of a blue and silver spring attached to a black base, with a green component and black mounting bracket (no visible text or symbols)natural_image
3D illustration of two stacked rectangular blocks, one white and one green, with no text or symbols.STRAIGHT CUT
natural_image
Two 3D rectangular blocks, one white and one green, with no text or symbols.DIAGONAL CUT
natural_image
Close-up of a blue electric tool with two metal components and red arrows pointing to features, alongside an inset image of a red tool (no text or symbols visible)natural_image
Close-up of a blue and silver soldering tool with metal pins (no text or symbols visible)KÄYTTÖ (Styrofoam-leikkuri)
natural_image
Mechanical assembly diagram showing a green bracket mounted on a black frame with a labeled component (no text or symbols visible)
natural_image
Close-up of a green diagonal stripe and black metal frame against white background (no text or symbols)natural_image
Close-up of a blue and silver spring attached to a black base, with a green and black component nearby (no visible text or symbols)natural_image
3D illustration of two stacked rectangular blocks, one white and one green, with no text or symbols.SUORA LEIKKAUS
natural_image
Two 3D rectangular blocks, one white and one green, with no text or symbols.DIAGONALINEN LEIKKAUS
natural_image
Close-up of a blue electric tool with two metal components and red arrows pointing to features, alongside an inset image of a red electrical plug (no text or symbols visible)natural_image
Close-up of a blue and silver soldering tool with metal pins (no text or symbols visible)natural_image
Mechanical assembly diagram showing a green component mounted on a black frame with wiring and a labeled part '1' (no text or symbols beyond label)
natural_image
Close-up of a green diagonal stripe and a black metal frame with a numbered label '2' (no text or symbols on the main subject)natural_image
Close-up of a blue and silver coiled spring attached to a black base, with a green base and black panel nearby (no text or symbols visible)WERKING (Warm snijmes)
natural_image
3D illustration of a white rectangular block with a green vertical stripe on top (no text or symbols)RECHTE SNIJ
natural_image
Two 3D rectangular blocks, one white and one green, with no text or symbols.DIAGONALE SNIJDING
natural_image
Close-up of a blue electric tool with two metal terminals and red arrows pointing to features, alongside a small red component (no text or symbols visible)natural_image
Close-up of a blue and silver handheld tool with metallic pins (no text or symbols visible)DRIFT (styrofoamkutter)
Slå på og av
natural_image
Mechanical assembly with green and black components, no visible text or symbols
natural_image
Close-up of a green strip and black metal frame with a numbered label '2' (no text or symbols on the main objects)natural_image
Close-up of a blue and silver spring attached to a black base, with a green component and black mounting bracket (no visible text or symbols)BETJENING (Varmkuttekniv)
natural_image
3D illustration of two stacked rectangular blocks, one white and one green, with no text or symbols.RETT KUT
natural_image
Two 3D rectangular blocks, one white and one green, with no text or symbols.DIAGONAL KUT
natural_image
Close-up of a blue electric tool with two metal components and red arrows pointing to features, alongside an inset image of a red tool (no text or symbols visible)natural_image
Close-up of a blue and silver electrical tool with metal pins (no text or symbols visible)ANVÄNDNING (Styrofoamskärare)
Slår på och av
natural_image
Mechanical assembly diagram showing a green component mounted on a black frame with a labeled connection point (no text or symbols beyond the label)
natural_image
Close-up of a green vertical strip and a black metal frame with a numbered marker '2' (no text or symbols on the main subject)natural_image
Close-up of a blue and silver spring attached to a black base, with a green component and black mounting bracket (no visible text or symbols)ANVÄNDNING (Varmskärkniv)
natural_image
3D rendered block with white and green segments (no text or symbols)RAK KLIPPNING
natural_image
Two 3D rectangular blocks, one white and one green, with no text or symbols.DIAGONAL SNITT
natural_image
Close-up of a blue electric tool with two metal components and red arrows pointing to features, alongside an inset image of a red tool (no text or symbols visible)natural_image
Close-up of a blue and silver soldering tool with metal pins (no text or symbols visible)natural_image
Mechanical assembly diagram showing a green bracket mounted on a black frame with a labeled component (no text or symbols visible)
natural_image
Close-up of a green diagonal stripe and a black metal frame against a white background (no text or symbols)natural_image
Close-up of a blue and silver coiled spring attached to a black base, with a green base and black panel nearby (no text or symbols visible)natural_image
3D illustration of a white rectangular block with a green vertical stripe on top (no text or symbols)CORTE RETO
natural_image
Two 3D rectangular blocks, one white and one green, with no text or symbols.CORTE DIAGONAL
natural_image
Close-up of a blue electric tool with two metal components and red arrows pointing to features, alongside an inset image of a red tool (no text or symbols visible)natural_image
Close-up of a blue and silver handheld tool with metallic pins (no text or symbols visible)natural_image
Mechanical assembly diagram showing a green and black component with labeled part '1' (no readable text or symbols beyond label)
natural_image
Close-up of a green strip and black metal frame with a numbered label '2' (no text or symbols on the main objects)natural_image
Close-up of a blue and silver coiled spring attached to a black base, with a green base and black panel nearby (no text or symbols visible)natural_image
3D illustration of a white rectangular block with a green vertical bar on top (no text or symbols)ROVNÝ REZ
natural_image
Two 3D rectangular blocks, one white and one green, stacked vertically (no text or symbols)DIAGONÁLNY REZ
natural_image
Close-up of a blue electric tool with two metal components and red arrows pointing to features, alongside an inset image of a red tool (no text or symbols visible)natural_image
Close-up of a blue and silver handheld tool with metal pins (no text or symbols visible)natural_image
Mechanical assembly diagram showing a green bracket mounted on a black frame with a labeled component (no text or symbols visible)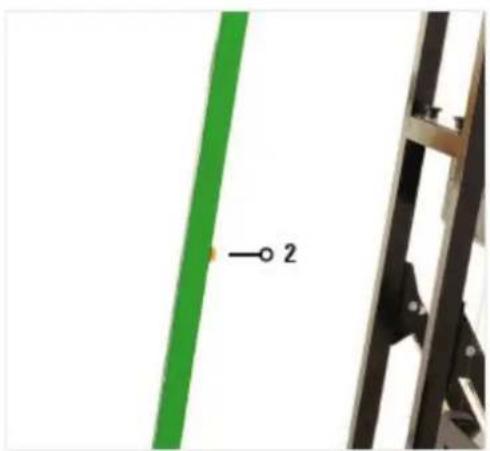
natural_image
Close-up of a green diagonal stripe and a black metal frame against a white background (no text or symbols)natural_image
Close-up of a mechanical spring assembly with a blue cylindrical component attached, mounted on a black base (no visible text or symbols)natural_image
3D illustration of a gray rectangular block with a green vertical stripe on top (no text or symbols)ПРАВА КРОЙКА
natural_image
Two 3D rectangular blocks, one white and one green, with no text or symbols.ДИАГОНАЛЕН СРЕЗ
natural_image
Close-up of a blue electric tool with two metal components and red arrows pointing to features, alongside an inset image of a red electrical plug (no text or symbols visible)natural_image
Close-up of a blue and silver electric soldering tool with metal pins (no text or symbols visible)natural_image
Mechanical assembly diagram showing a green component mounted on a black frame with a labeled part (1), no readable text or symbols present.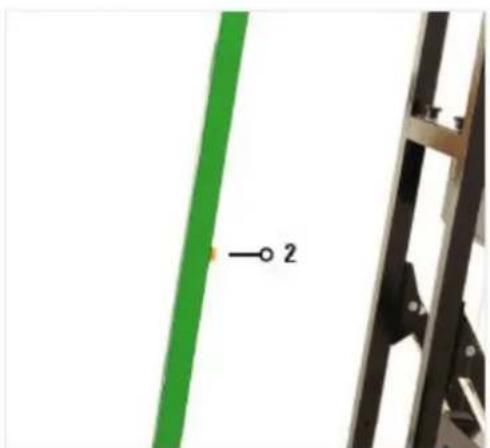
natural_image
Close-up of a green diagonal stripe and a black metal frame against a white background (no text or symbols)natural_image
Close-up of a mechanical spring assembly with a blue cylindrical component attached, mounted on a black base (no visible text or symbols)natural_image
3D illustration of a white rectangular block with a green vertical stripe on top (no text or symbols)ΕΥΘΕΙΑ ΚΟΠΗ
natural_image
Two 3D rectangular blocks, one white and one green, with no text or symbols.ΔΙΑΓΩΝΙΑ ΚΟΠΗ
natural_image
Close-up of a blue electric tool with two metal components and red arrows pointing to features, alongside an inset image of a red tool (no text or symbols visible)- Umetnite željene završetke pribora za rezanje (metalne) u utore i čvrsto zategnite 4 prethodno olabavljena vijka tako da uređaj i pribor imaju puni kontakt:
natural_image
Close-up of a blue and silver handheld tool with metal pins (no text or symbols visible)RAD (rezač stiropora)
natural_image
Mechanical assembly diagram showing a green bracket mounted on a black frame with wiring and a labeled component (no readable text or symbols)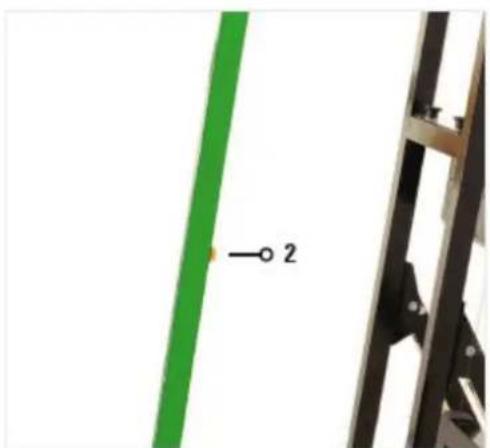
natural_image
Close-up of a green diagonal stripe and black metal frame with a numbered label '2' (no text or symbols on the main subject)Zamjena vruće žice
Prije bilo kakvih radova na samom stroju, izvucite utikač i pročitajte sve upute. Nepridržavanje dolje navedenih uputa može uzrokovati strujni udar, požar i/ili ozbiljne osobne ozljede.
natural_image
Close-up of a mechanical spring assembly with a blue cylindrical component attached, mounted on a black base (no visible text or symbols)natural_image
3D illustration of a white rectangular block with a green vertical stripe on top (no text or symbols)RAVNI KROJ
natural_image
Two 3D rectangular blocks, one white and one green, with no text or symbols.DIJAGONALNI REZ
natural_image
Close-up of a blue electric tool with two metal components and red arrows pointing to features (no text or symbols visible)natural_image
Close-up of a blue and silver handheld tool with metal contacts (no text or symbols visible)natural_image
Close-up of a mechanical assembly with green and black components, no visible text or symbols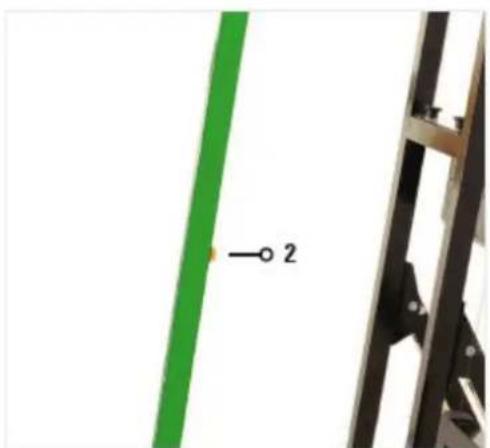
natural_image
Close-up of a green diagonal stripe and black metal frame against white background (no text or symbols)natural_image
Close-up of a blue and silver spring attached to a black base, with a green and black component nearby (no visible text or symbols)VEIKIMAS (karšto pjovimo peilis)
natural_image
3D illustration of two stacked rectangular blocks, one white and one green, with no text or symbols.TIESUS PJOVYMAS
natural_image
Two 3D rectangular blocks, one white and one green, stacked vertically (no text or symbols)Jstrižainė
natural_image
Close-up of a blue electric tool with two metal components and red arrows pointing to features, alongside an inset image of a red tool (no text or symbols visible)natural_image
Close-up of a blue and silver handheld tool with metallic pins (no text or symbols visible)FUNCTIONARE (Cutter de polistiren)
Pornirea și oprirea
natural_image
Mechanical assembly with green and black components, no visible text or symbols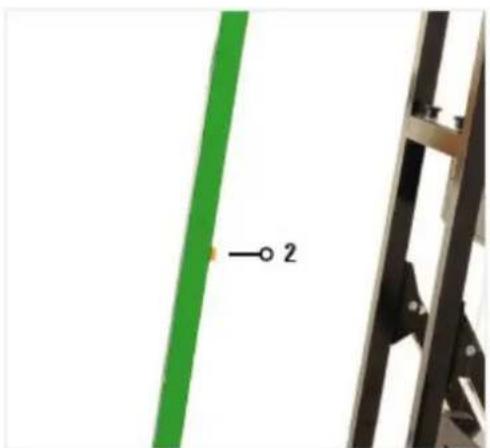
natural_image
Close-up of a green diagonal stripe and black metal frame against white background (no text or symbols)natural_image
Close-up of a mechanical spring assembly with a blue plastic cap and green base (no visible text or symbols)natural_image
3D illustration of a white rectangular block with a green horizontal bar extending from its side (no text or symbols)TĂIEREA DREPTĂ
natural_image
Two 3D rectangular blocks, one white and one green, stacked vertically (no text or symbols)TĂIERE DIAGONALĂ
natural_image
Close-up of a blue electric tool with two metal components and red arrows pointing to features, alongside an inset image of a red tool (no text or symbols visible)natural_image
Close-up of a blue and silver soldering tool with metal pins (no text or symbols visible)DELOVANJE (rezalnik stiroporja)
Vklop in izklop
- Za zagon je potrebno le vtakniti XLR-konektor (1) transformatorja v ustrezno vtičnico na loku in napajalni vtič priključiti v vtičnico.
- Pritisnite stikalo za vklop/izklop (2) in ga držite pritisnjenega. Rezalna žica je popolnoma funkcionalna v nekaj sekundah
- Potegnite lok v smeri materiala - material bo odrezan.
- OPOMBA: nevarnost požara! Po vsakem rezu spustite stikalo za vklop/izklop; rezilna žica se ohladi v nekaj sekundah.
natural_image
Mechanical assembly with green and black components, no visible text or symbols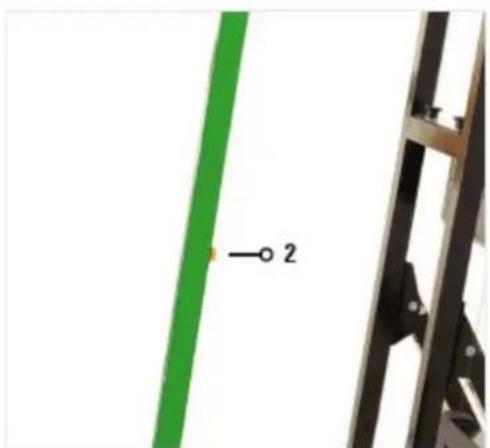
natural_image
Close-up of a green diagonal stripe and black metal frame against white background (no text or symbols)natural_image
Close-up of a blue and silver spring attached to a black base, with a green component and black mounting bracket (no visible text or symbols)natural_image
3D rendered block with white and green segments (no text or symbols)RAVNI KROJ
Lok – nastavite kot desno in levo na 0 stopinj. Označite potrebne dimenzije na polistirenski plošči. Dvignite lok, da povlečete material, ki ga želite rezati, pod rezalno žico. Material položite na namestitveni kot in ga potegnite naprej do želene mere. Pritisnite gumb in ga držite pritisnjenega (rezilna žica se segreje) Potegnite lok v smeri materiala – material bo odrezan. Sprostite tipko.
natural_image
Two 3D rectangular blocks, one white and one green, with no text or symbols.DIAGONALNI REZ
Lok – nastavite kot desno in levo na 0 stopinj. Na polistirenski plošči označite želeni korak (višino in dolžino). Dvignite lok, da povlečete material, ki ga želite rezati, pod rezalno žico do označene dolžine. Pritisnite tipko in jo držite pritisnjeno (rezilna žica se segreje). Povlecite lok v smeri materiala – globina koraka bo zmanjšana. Ko dosežete globino stopnice, povlecite material v levo, dokler ni stopnica popolnoma prerezana. Sprostitev tipkalo.
| DVOSTOPENJSKI REZLok – nastavite kot desno in levo na želeni kot. V ta namen je potreben priloženi kotni prislon. Dvignite lok, da narišete materialrezati pod rezalno žico do začetka reza. Pritisnite tipko in jo držite pritisnjeno (rezilna žica se segreje).Povlecite lok v smeri materiala – poševnina bo odrezana. Sprostite tipko. |
| BELLok – nastavite kot desno in levo na 0 stopinj.Označite potreben rez na polistirenski plošči. Dvignite lok, da povlečete material, ki ga želite rezati, pod rezalno žico. Prilagodite material tako, da bo zahtevani rez natančno potekal podrezalna žica. Pritisnite tipko in jo držite pritisnjeno (rezilna žica se segreje). Potegnite lok v smeri materiala – material bo odrezan. Sprostite tipko. |
| KONKAVEN IZREZLok – nastavite kot desno in levo na 0 stopinj.Označite potreben votel utor na polistirenski plošči.Dvignite lok, da povlečete material, ki ga želite rezati, pod rezalno žico do označenega mesta. Pritisnite tipko in jo držite pritisnjeno (rezilna žica se segreje).Povlecite lok v smeri materiala – globina koraka bo zmanjšana. Ko dosežete globino stopnice, vlecite material v desno proti označenemu mestu, dokler ni odrezana dolžina stopnice. Povlecite pentljo navzgor iz materiala. Sprostite tipko. |
VZDRŽEVANJE
Čiščenje
For the disposal of the device please consider and act according to the national and local rules and regulations.
CONTACT
expondo Polska sp. z o.o. sp. k.