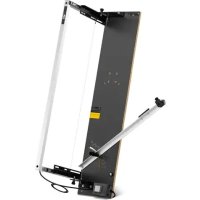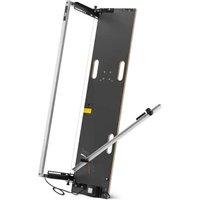
ISU-GIL E1 - Thermal cutting tool MSW - Free user manual and instructions
Find the device manual for free ISU-GIL E1 MSW in PDF.


User questions about ISU-GIL E1 MSW
0 question about this device. Answer the ones you know or ask your own.
Ask a new question about this device
Download the instructions for your Thermal cutting tool in PDF format for free! Find your manual ISU-GIL E1 - MSW and take your electronic device back in hand. On this page are published all the documents necessary for the use of your device. ISU-GIL E1 by MSW.
USER MANUAL ISU-GIL E1 MSW
natural_image
3D geometric shape with green and gray blocks (no text or symbols)Diagonaler Schnitt
natural_image
Two 3D rectangular blocks, one white and one green, with no text or symbols.natural_image
3D illustration of a layered block structure with white and green blocks (no text or symbols)Fase
natural_image
3D geometric shapes: a white rectangular block and a green triangular prism, both shaded with no text or symbols.Konkaver Schnitt
natural_image
3D illustration of a mechanical component with green and gray parts, no text or symbols visiblenatural_image
Close-up of a blue electric shaver with metal components and red arrows indicating assembly or inspection points (no text or symbols on the device itself)This User Manual has been translated for your convenience using machine translation. Reasonable efforts have been made to provide an accurate translation; however, no automated translation is perfect nor is it intended to replace human translators. The official User Manual is the English version. Any discrepancies or differences created in the translation are not binding and have no legal effect for compliance or enforcement purposes. If any questions arise related to the accuracy of the information contained in the User Manual, please refer to the English version of those contents which is the official version.
Technical data
| Parameter description | Parameter value | ||
| Product name | Styrofoam Cutter | ||
| Model | MSW-ISU-GILE1 | MSW-ISU-GILE1 S1 | MSW-ISU-GILE1 S1 |
| Input | AC~230V / 50Hz | ||
| Output | AdaptorDC 40V 5A 200W | 250W | |
| Max. Cutting length [mm] | 1350 | 200 | |
| Protection Class | II | ||
| Protection rating IP | IP68 | IPX0 | |
| Max. blade temperature [°C] | 500 | ||
| Thermal protection | √ | S2 (15s on / 45s off) | |
| Cutting angle [°] | 0-45 | - | |
| Dimensions [Width x Depth x Height; mm] | 935 X 1110 X 1640 | 43 x 253 x 90 | |
| Weight [kg] | 15.8 | 2.5 (set) | |
Before using the cutter, it is essential to read the operating instructions carefully. If you have any remaining questions, please contact the vendor who sold you the device. By starting the cutter, you confirm that you have read and understood the instruction manual, and you accept full responsibility for its operation.
Intended use
The machine is designed for cutting non-plasticized foam. The foam sheets must be free of adhesive, adhesive residues, or any other type of contamination.
The cutter should only be operated by individuals who are familiar with its operation. When using the cutter, appropriate work clothing and protective gloves must be worn (refer to the following safety instructions). The designated health and safety officer of the company where the cutter is used is responsible for ensuring compliance with the operating manual.
The term “cutter” in the following warnings refers to both mains-operated (corded) and battery-operated (cordless) power tools.
- Disconnect the power plug and/or remove the battery pack from the tool before making any adjustments, changing accessories, or storing the cutter.
- Use only the original wires provided manufacturer. Using non-compliant wires can damage the safety transformer, increase the risk of fire, and lead to further damages. The warranty is void if unauthorized third-party wires are used.
- Operate the cutter outdoors or in well-ventilated areas. Small amounts of styrene are released during cutting, but previous measurements have shown that there is no health risk when proper ventilation is maintained.
- It is critical to protect the device from moisture. Do not operate the cutter outdoors in the rain or under similar conditions.
- The cutting wire becomes extremely hot during use. Never touch the wire while the cutter is operating, as it can cause severe burns. Always wear protective gloves to prevent injuries.
- Always wear eye protection. The cutting wire is under strong tension, and if it breaks during operation, it can cause sparks and potential injury.
- Before each use, ensure that all screws are tightened and that all plug connectors are securely fastened.
- Before operating the cutter, confirm that it is installed in a stable position, and ensure that any sources of danger or trip hazards in the surrounding area have been removed.
CLEANING, STORAGE, TRANSPORT, MAINTENANCE
Before Maintenance, Cleaning, Transport, and Storage:
Always unplug the power plug and read all safety information and instructions. Failure to comply with these precautions may lead to electric shock, fire, or serious injury.
CLEANING:
- Remove any residual rigid foam from the device and tools after each use.
- Clean the device with a moist cloth after each use. Avoid using running water or solvents.
STORAGE:
- Before storing the device for an extended period, loosen screw connections and remove tools.
- Store the device and tools in a cool, dry place, out of reach of children.
TRANSPORT:
- Ensure secure packaging during transportation and remove tools.
- Batteries must be stored safely in the packaging with the contacts taped over. Follow national hazardous material regulations during transport.
MAINTENANCE:
- Before use, check the cutting wire for wear and aging. A worn wire may break suddenly and cause serious injuries or blindness. Worn or old wires cannot be repaired; they must be replaced with new ones. Everyone in the work area must wear protective glasses.
Assembly
The following assembly instructions cover all models and optional equipment available for your foam cutter. Please note that your foam cutter may not include all the features and accessories described (e.g., stand base or scaffold bracket). For a complete list of available accessories, please refer to our accessory catalog.
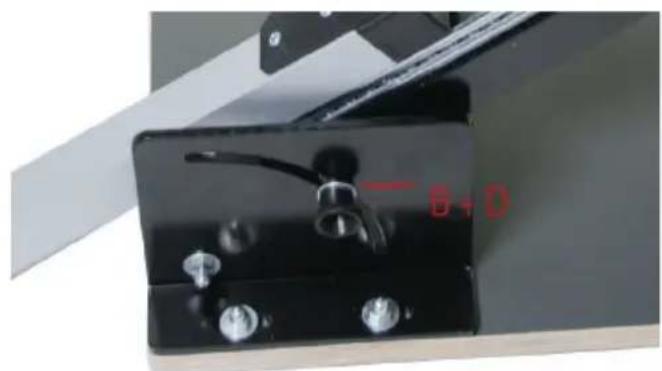
natural_image
Close-up of a black electrical switch with metal pins and a red 'B+D' label (no other text or symbols visible)B
natural_image
Close-up of a metallic mechanical knob or fitting with threaded end (no visible text or symbols)D
natural_image
Close-up of a metallic ring with a central hole, labeled D6 (no other text or symbols visible)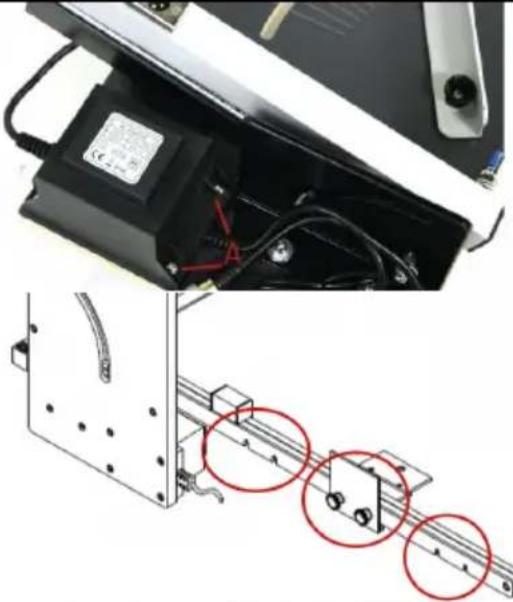 | A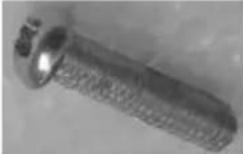 M6 x 20 M6 x 20 | |
| - | The additional support placement can be mounted on three locations | |
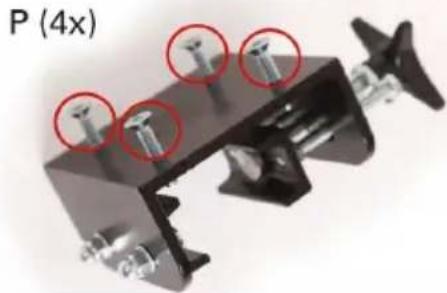 | The stand base can be replaced quickly with the scaffold bracket.(4 x P)The scaffold bracket is attached to the reverse side of the device, allowing for efficient cutting directly on the scaffold. | |
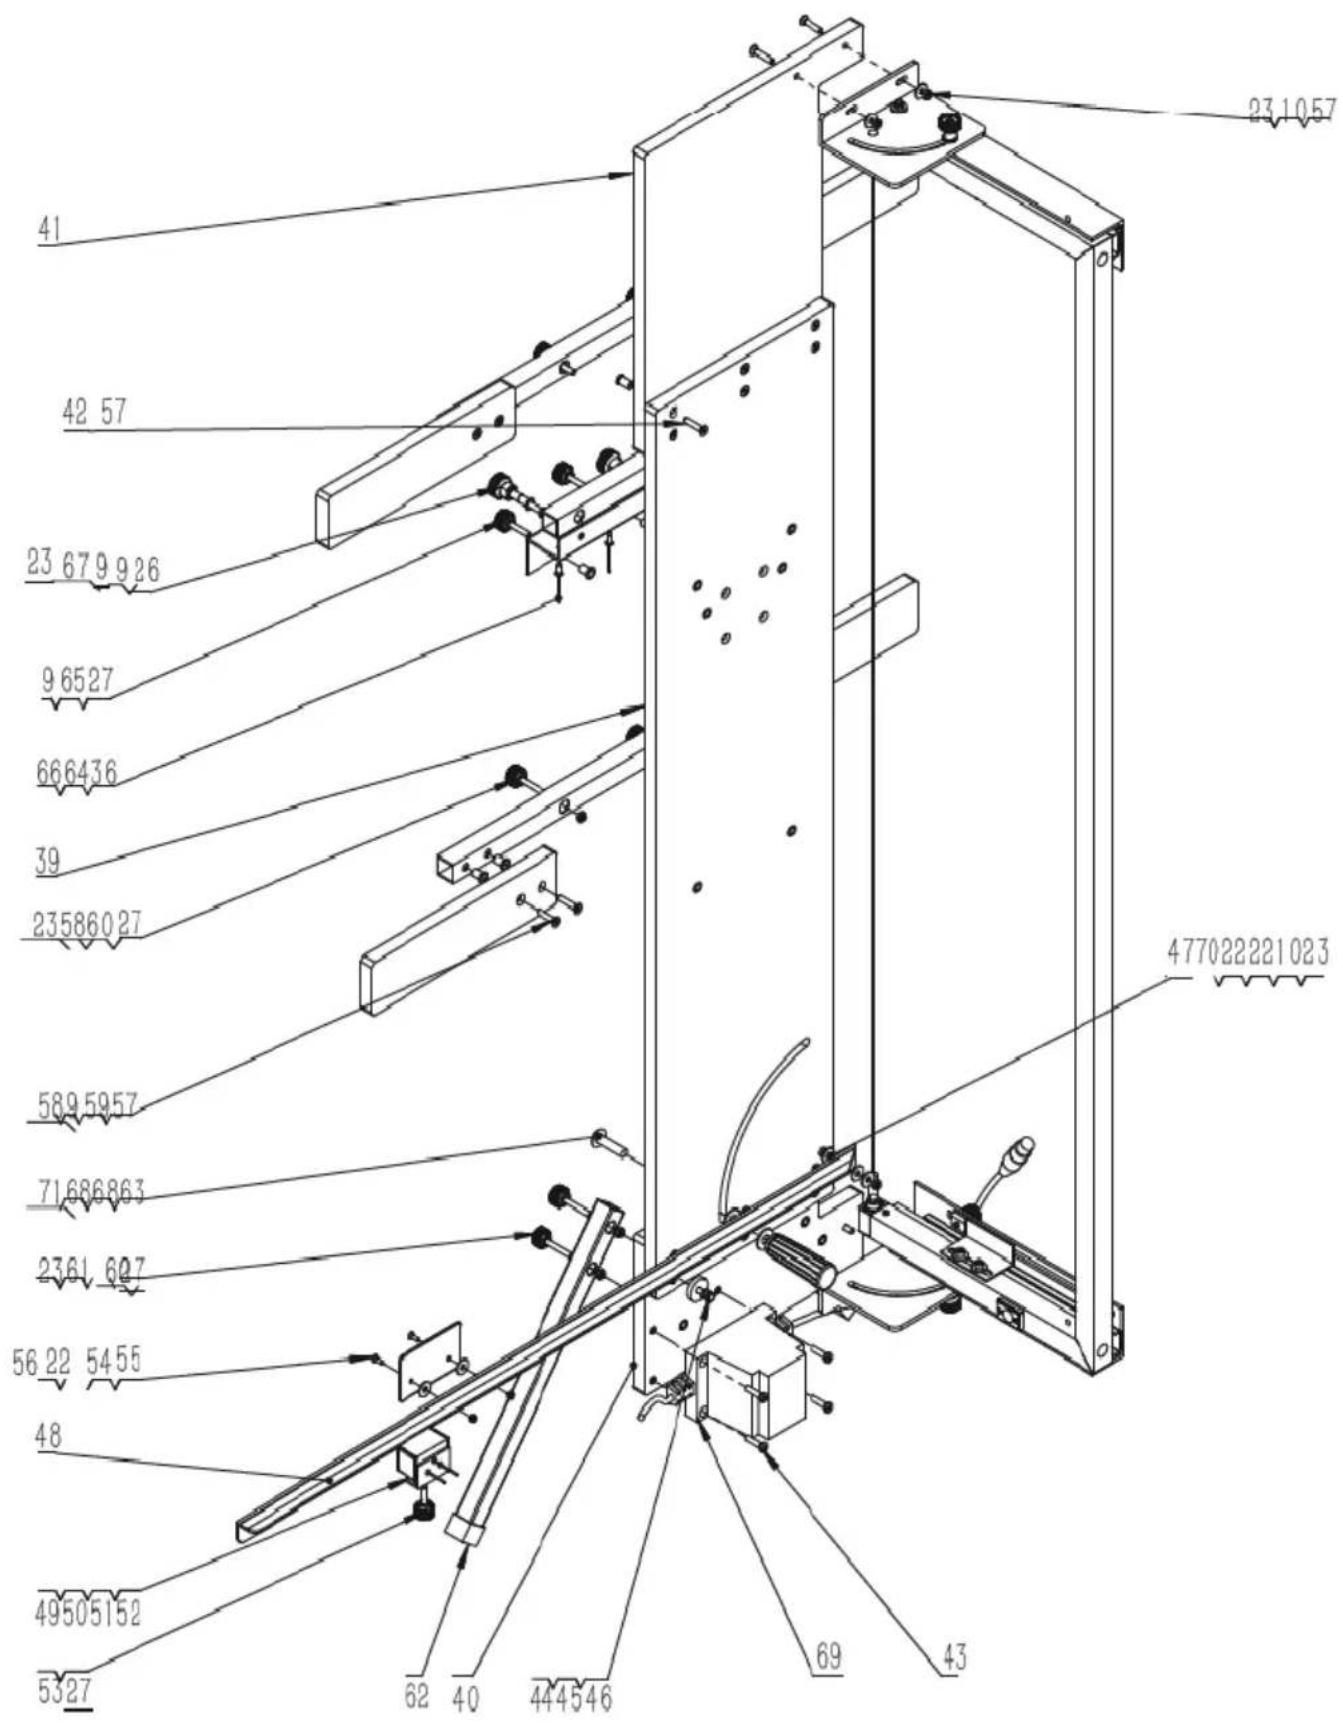
text_image
41 42 57 23 67 9 9 26 9 65 27 66 64 36 39 23 58 60 27 58 9 59 57 71 68 68 63 23 61 60 7 56 22 54 55 48 49 50 51 52 53 27 62 40 44 45 46 69 43 23 10 57 47 70 22 22 21 02 3| No. | Description | Qty |
| 1. | Bottom Base Plate For Bow | 1 |
| 2. | Top Base Plate For Bow | 1 |
| 3. | Bottom Holder For Bow | 1 |
| 4. | Top Holder For Bow | 1 |
| 5. | Longitudinal Square Tube | 1 |
| 6. | Square Tube Top | 1 |
| 7. | Square Tube Bottom | 1 |
| 8. | Limit Angle Aluminum | 2 |
| 9. | Wide-Edge Rivet Nuts 9x6x15.5 | 19 |
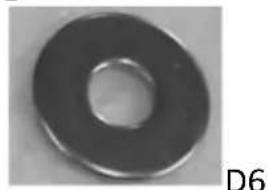
| 10. | Metal Washer 6x18x1.5 | 15 |
| 11. | Allen Screw M6×12 | 4 |
| 12. | Square Nut M6 | 2 |
| 13. | Switch | 1 |
| 14. | Buckle Cork12 | 2 |
| 15. | Integrated Plug 30X30 | 2 |
| 16. | Spring Protecting Sleeve 14*30 | 2 |
| 17. | Nut M4 | 4 |
| 18. | Machine Self Tapping Screw M3.5×13 | 2 |
| 19. | Female Plug Of Transformer | 1 |
| 20. | Pad Of Transformer | 1 |
| 21. | Flat Machine Self Tapping Screw M2.9x13 | 2 |
| 22. | Plastic Washer 6x18x1.5 | 12 |
| 23. | Slef-Retaining Nut M6 | 19 |
| 24. | Flat Cup Screw M6×25 | 2 |
| 25. | Hot Wire | 1 |
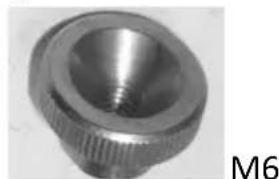
| 26. | Knurled Nut M6, Plastic | 4 |
| 27. | Plastic Nut | 13 |
| 28. | Rivet Screws M6*35 | 2 |
| 29. | Rivet Screws M6*20 | 2 |
| 30. | Slide 33cm | 2 |
| 31. | Spring 13x30x1.5 | 2 |
| 32. | Allen Screw M4×8 | 2 |
| 33. | Flat Tail Self-Tapping Screws ST3.5×12 | 2 |
| 34. | Pan Head Screws With Cross Recess M4×6 | 2 |
| 35. | Pan Head Screws With Cross Recess M4×10 | 2 |
| 36. | Double Drum Rivet 4.8*11 | 7 |
| 37. | Receding Spring | 2 |
| 38. | Metal Washer 4x9x0.8 | 2 |
| 39. | Motherboard | 1 |
| 40. | Bottom Wood Board | 1 |
| 41. | Top Wood Board | 1 |
| 42. | Narrow Rivet Nuts 6x9x15 | 31 |
| 43. | Machine Screws M6×25 | 4 |
| 44. | Eccenter Out Of Plastic | 1 |
| 45. | Metal Washer 6x12x1.5 | 1 |
| 46. | Flat Head Bolt M6×20 | 1 |
| 47. | Flat Cup Bolt M6×35 | 1 |
| 48. | Ruler | 1 |
| 49. | Metal Construction With Plastic Caps | 1 |
| 50. | Metal Construction With Plastic Tread | 1 |
| 51. | Blind Rivet 3.2×9 | 3 |
| 52. | Square Pipe Plug 30×30 | 2 |
| 53. | Knurled Screw Plstic M6X30 | 1 |
| 54. | Plate | 1 |
| 55. | Cross Recessed Countersunk Screw M4×12 | 2 |
| 56. | Locknut M4 | 2 |
| 57. | Flat Cup Screw M6×30 | 24 |
| 58. | Middle Aluminum Tube | 2 |
| 59. | Middle Board | 4 |
| 60. | Flat Cup Screw M6×50 | 8 |
| 61. | Front Leg | 2 |
| 62. | 25tube Overcoat | 2 |
| 63. | M10X40 Hexagon Flat Round Head With Padded Screws | 1 |
| 64. | Frame Holder | 1 |
| 65. | Flat Cup Screw M6×40 | 2 |
| 66. | Aluminium Tube Of Frame Holder | 1 |
| 67. | Allen Screw M6×80 | 2 |
| 68. | Metal Washer 10x25x1.5 | 2 |
| 69. | Transformer | 1 |
| 70. | Narrow Rivet Nuts M6×12 | 1 |
| 71. | Vertical Handle Screwe M10×86×25 | 1 |
| To start the cutter, follow these steps:Plug the XLR connector of the transformer into the corresponding socket on the bow.Connect the power plug to the power socket.Ensure that the mains voltage is correct. The voltage of the power source must match the voltage specified on the machine's nameplate. | 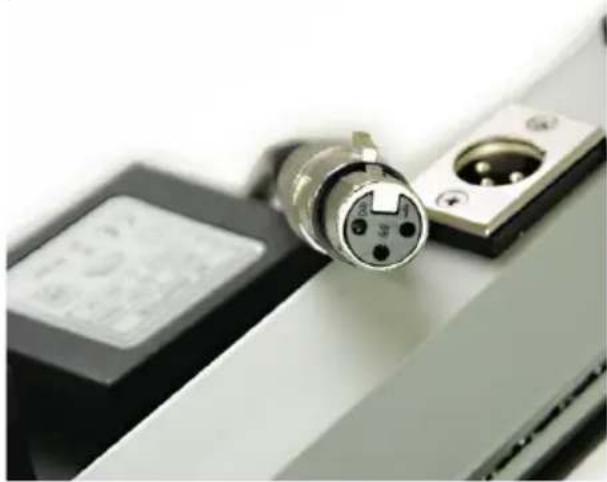 |
| Limit stopsThanks to the limit stops, as many slabs as desired can be manufactured with exactly the same dimensions. | 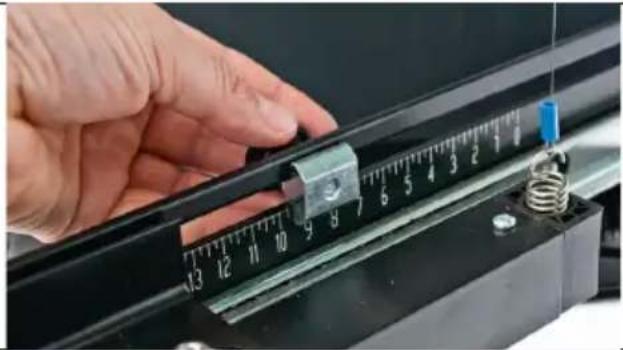 |
| on/off switchTo start the machine, press the On/Off switch1 and keep it pressed. To switch off the power tool, release the On/Off switch | 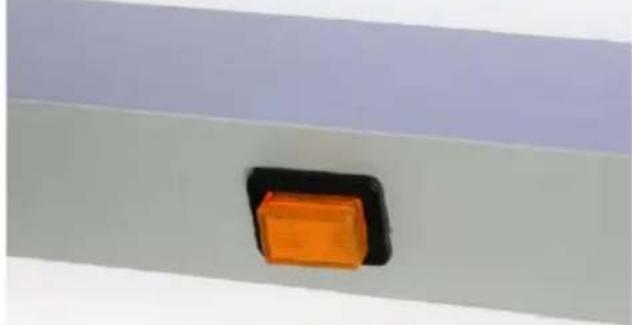 |
| To mount the supplied cutting wire:1. Attach the cutting wire to the springs on both the left and right sides. First, fix the wire into the spring on one side, then stretch it under tension and secure it on the opposite side.2. If the cutting wire breaks, remove any remaining wire by detaching the receptacles on the upper and lower parts of the wire. Only after this step can a new wire be installed. | 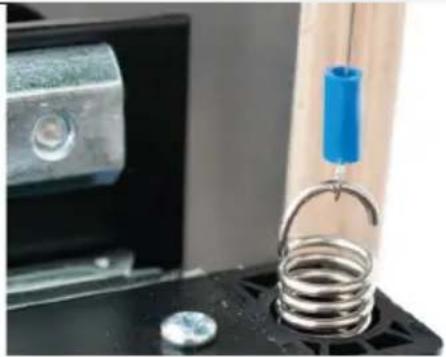 |
Note: Unlike new spare wires, the originally installed wire in the cutter is no longer copper-colored but appears dark. This discoloration is not a defect; it indicates that the cutter was tested under hot conditions to ensure proper functionality before leaving the factory.
Warning: Excessive voltage and heat generation can damage the transformer. Always use only the specified electrical power during cutting. The wire does not need to be glowing hot to effectively cut foam plastic.
Cutting variants
Straight cut
- Adjust the angle of the bow to 0 degrees on both the right and left sides.
- Mark the required dimensions on the polystyrene sheet.
- Lift the bow to position the material underneath the cutting wire.
- Place the material against the placement angle and pull it forward until it reaches the required measurement.
- Press and hold the pushbutton (this heats the cutting wire).
- Pull the bow towards the material to cut it.
- Release the pushbutton once the cut is complete.
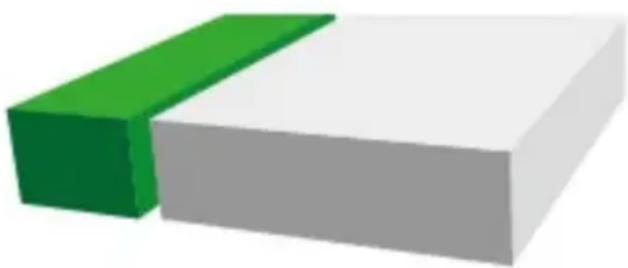
natural_image
3D geometric shape with green and gray blocks (no text or symbols)Diagonal cut
- Adjust the angle of the bow to 0 degrees on both the right and left sides.
- Mark the required step (both height and length) on the polystyrene sheet.
- Lift the bow to position the material underneath the cutting wire, aligning it with the marked length.
- Press and hold the pushbutton (this heats the cutting wire).
- Pull the bow towards the material to cut the step depth.
- Once the step depth is reached, move the material to the left until the step is fully cut.
- Release the pushbutton when the step cut is complete.
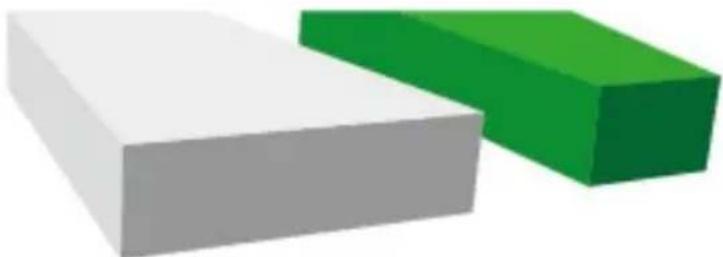
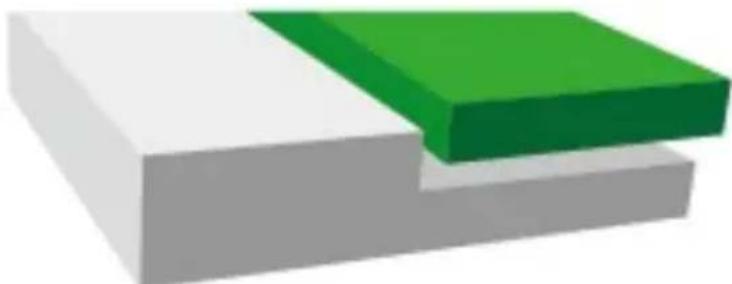
natural_image
Two 3D rectangular blocks, one white and one green, with no text or symbols.Two-step cut
- Adjust the bow to the required angle on both the right and left sides using the supplied angular stop.
- Lift the bow to position the material underneath the cutting wire, aligning it with the beginning of the cut.
- Press and hold the pushbutton (this heats the cutting wire).
- Pull the bow towards the material to cut the bevel.
- Release the pushbutton once the bevel cut is complete.
natural_image
3D illustration of a layered block structure with white, green, and gray segments (no text or symbols)Bevel
- Adjust the bow to 0 degrees on both the right and left sides.
- Mark the required cut on the polystyrene sheet.
- Lift the bow and position the material underneath the cutting wire.
- Adjust the material so that the marked cut aligns precisely with the cutting wire.
- Press and hold the pushbutton (this heats the cutting wire).
- Pull the bow in the direction of the material to make the cut.
- Release the pushbutton once the cut is complete.
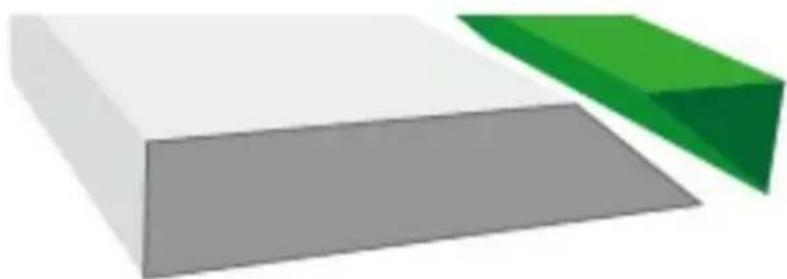
natural_image
3D geometric shapes: a white rectangular prism and a green triangular prism, both shaded with no text or symbols.Concave cut
- Adjust the bow to 0 degrees on both the right and left sides.
- Mark the required hollow groove on the polystyrene sheet.
- Lift the bow and position the material underneath the cutting wire, aligning it with the marked starting point.
- Press and hold the pushbutton (this heats the cutting wire).
- Pull the bow in the direction of the material to cut the step depth.
- Once the step depth is reached, move the material to the right, following the marked groove length.
- Pull the bow upwards out of the material once the step length has been fully cut.
- Release the pushbutton.
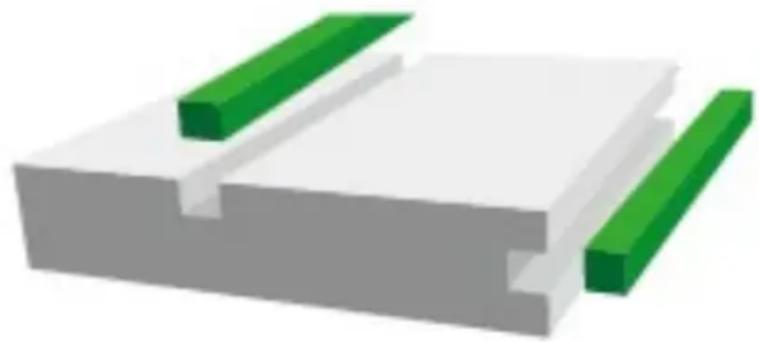
natural_image
3D illustration of a mechanical component with green and gray parts, no text or symbols visibleHot knife foam cutter for MSW-ISU-GIL E1 S1
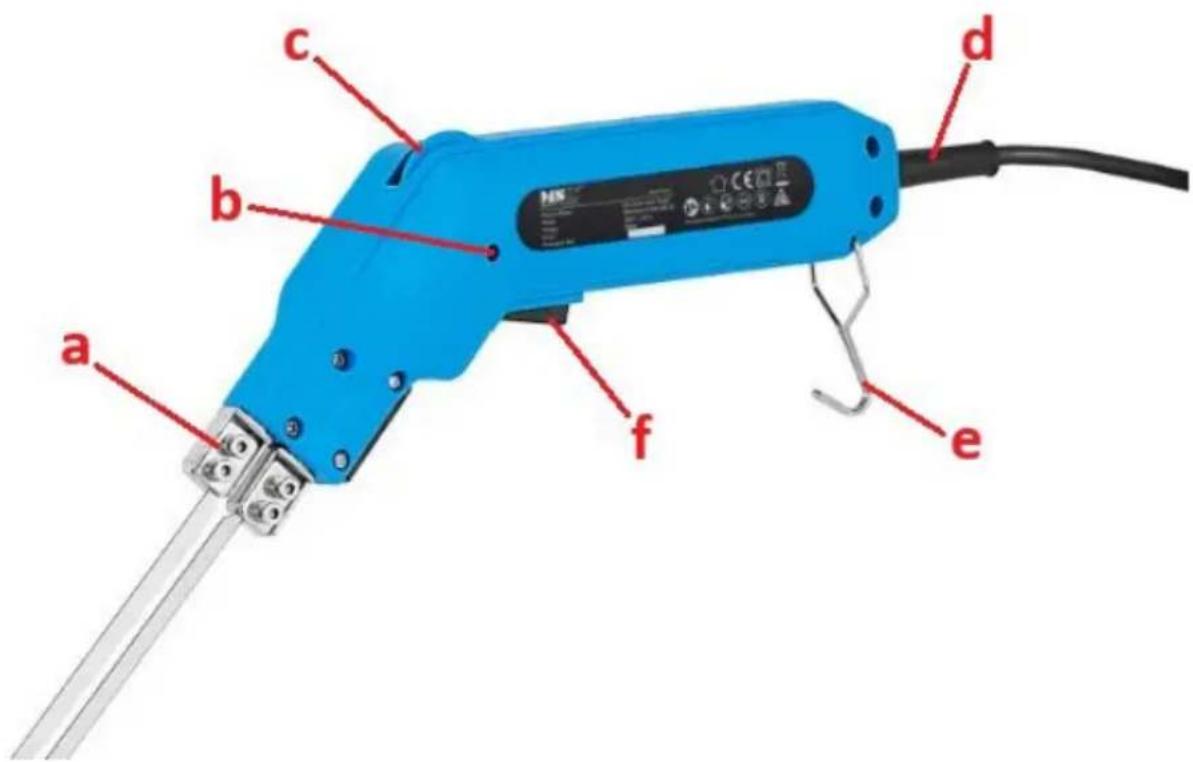
text_image
a b c d e fa. Slots for attaching cutting accessories
b. LED indicator for heating
c. Temperature adjustment dial
d. Power cable
e. Hook
f. Heating trigger
ASSEMBLING THE DEVICE
The device is delivered almost ready for use. The user must only attach the desired accessory that suits his needs.
CAUTION: Install accessory to the device only when it is turned off and cool! Use proper gloves for protection.
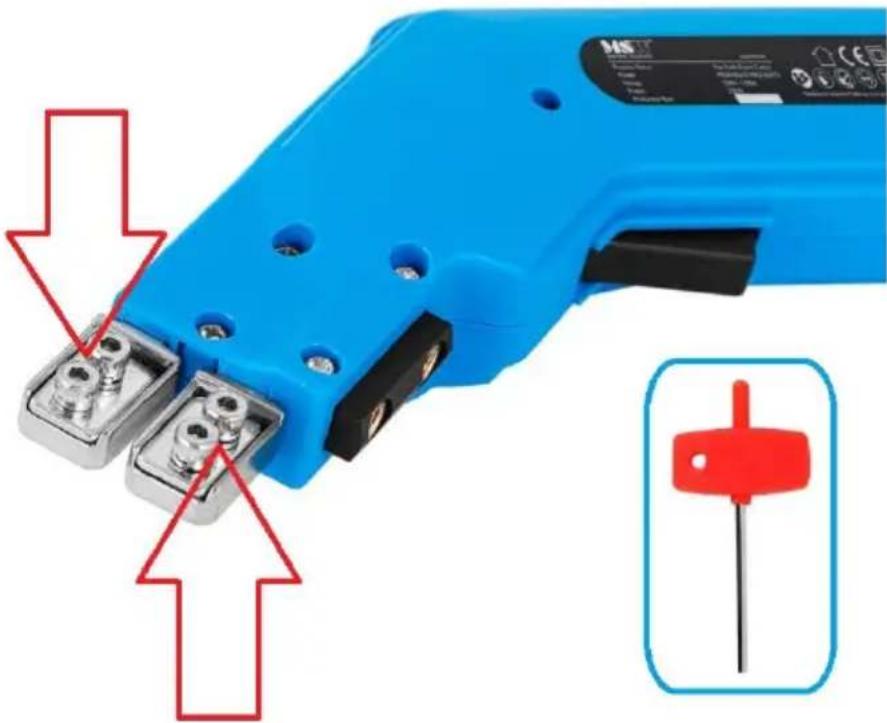
- With help of the included hex key loosen the 4 bolts indicated on the picture below:
natural_image
Close-up of a blue electric shaver with metal components and red arrows indicating direction (no text or symbols)- Insert the desired cutting accessory (metal) endings into the slots and securely tighten the 4 previously loosen bolts so that the device and accessory have a full contact:
- Improper installation will result in the blade not being heated

natural_image
3D geometric shape with green and gray blocks (no text or symbols)natural_image
Two 3D rectangular blocks, one white and one green, with no text or symbols.Ciecie dwuetapowe
natural_image
3D illustration of a layered block structure with white, green, and gray segments (no text or symbols)Ukos
natural_image
3D geometric shapes: a white rectangular prism and a green triangular prism, both shaded with no text or symbols.Ciecie wklęste
natural_image
3D illustration of a mechanical component with green and gray parts, no text or symbols visiblenatural_image
Close-up of a blue electric shaver with metal components and red arrows indicating assembly or inspection points (no text or symbols on the device itself)natural_image
Close-up of a metallic mechanical knob or fitting with threaded end and flange (no text or symbols visible)D
natural_image
3D geometric shape with green and gray blocks (no text or symbols)Diagonální střih
natural_image
Two 3D rectangular blocks, one white and one green, with no text or symbols.Dvoukrokový střih
natural_image
3D illustration of a layered block structure with white, green, and gray segments (no text or symbols)Úkos
natural_image
3D geometric shapes: a white rectangular block and a green triangular prism, no text or symbols present.Konkávní řez
natural_image
3D diagram of a mechanical component with green and gray parts, no text or symbols presentnatural_image
Close-up of a blue electric shaver with metal components and red arrows indicating direction (no text or symbols)natural_image
3D geometric shape with green and gray blocks (no text or symbols)Coupe en diagonale
natural_image
Two 3D rectangular blocks, one white and one green, stacked vertically (no text or symbols)natural_image
3D illustration of a layered block structure with white, green, and gray segments (no text or symbols)Biseau
natural_image
3D geometric shapes: a white rectangular prism and a green triangular prism, both shaded with no text or symbols.Coupe concave
natural_image
3D illustration of a mechanical component with green and gray parts, no text or symbols presentnatural_image
Close-up of a blue electric shaver with metal components and red arrows indicating assembly or inspection points (no text or symbols on the device itself)natural_image
3D geometric shape with green and gray blocks (no text or symbols)Taglio diagonale
natural_image
Two 3D rectangular blocks, one white and one green, stacked vertically (no text or symbols)Taglio in due fasi
natural_image
3D illustration of a layered block structure with white and green blocks (no text or symbols)Smussatura
natural_image
3D geometric shapes: a white rectangular block and a green triangular prism, both without any text or symbols.Taglio concavo
natural_image
3D illustration of a mechanical component with green and gray parts, no text or symbols visiblenatural_image
Close-up of a blue electric shaver with metal components and red arrows indicating motion direction (no text or symbols)natural_image
3D geometric shape with green and gray blocks (no text or symbols)Corte diagonal
natural_image
Two 3D rectangular blocks, one white and one green, stacked vertically (no text or symbols)Corte de dos pasos
natural_image
3D illustration of a layered block structure with white, green, and gray segments (no text or symbols)Bisel
natural_image
3D geometric shapes: a white rectangular block and a green triangular prism, both without any text or symbols.Corte cóncavo
natural_image
3D illustration of a mechanical component with green and gray parts, no text or symbols visiblenatural_image
Close-up of a blue electric shaver with metal components and red arrows indicating motion direction (no text or symbols)natural_image
3D geometric shape with green and gray blocks (no text or symbols)Átlós vágás
natural_image
Two 3D rectangular blocks, one white and one green, with no text or symbols.Kétlépéses vágás
natural_image
3D illustration of a layered block structure with white, green, and gray blocks (no text or symbols)Bevel
natural_image
3D geometric shapes: a white rectangular block and a green triangular prism, both without any text or symbols.Homorú vágás
natural_image
3D illustration of a mechanical component with green and gray parts, no text or symbols visiblenatural_image
Close-up of a blue electric shaver with metal components and red arrows indicating motion direction (no text or symbols)natural_image
Close-up of a metallic mechanical knob or fitting with threaded end and flange (no text or symbols visible)D
DA
natural_image
3D geometric shape with green and gray blocks (no text or symbols)Diagonalt snit
natural_image
Two 3D rectangular blocks, one white and one green, with no text or symbols.Skæring i to trin
natural_image
3D illustration of a layered block structure with white, green, and gray segments (no text or symbols)Skråkant
natural_image
Abstract 3D geometric shape with white and green color blocks (no text or symbols)Konkavt snit
natural_image
3D diagram of a mechanical component with green and gray parts, no text or symbols presentnatural_image
Close-up of a blue electric shaver with metal components and red arrows indicating motion direction (no text or symbols)natural_image
Close-up of a metallic mechanical knob or dial component (no visible text or symbols)D