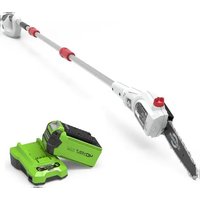
40PS - Saw Cramer - Free user manual and instructions
Find the device manual for free 40PS Cramer in PDF.


User questions about 40PS Cramer
0 question about this device. Answer the ones you know or ask your own.
Ask a new question about this device
Download the instructions for your Saw in PDF format for free! Find your manual 40PS - Cramer and take your electronic device back in hand. On this page are published all the documents necessary for the use of your device. 40PS by Cramer.
USER MANUAL 40PS Cramer
natural_image
Line drawing of a long, articulated tool or device with multiple arms and connectors (no text or symbols)English (Original instructions)
SPECIFICATIONS
| Model 40PS | |
| Voltage 40V | --- |
| Maximum chain speed 8 m/s | |
| Guide bar length 200 mm | |
| Oil tank capacity 50 ml | |
| Toothed chain 91PJ033X/JL9D-1X33 | |
| Guide bar | 080NDEA318/M1430833-1041TL |
| Weight without battery pack | 3.3 kg |
| Measured sound pressure level | 82 dB(A), k=3 dB(A) |
| Measured sound power level | 93.8 dB(A), k=3 dB(A) |
| Guaranteed sound power level | 97 dB(A) |
| Vibration level <2.5 m/s | ^2 , k=1.5 m/s ^2 |
| Battery | 40V110 / 40V220 |
| Charger | 40C120 / 40C60 |
DESCRIPTION
See figure 1.
- Battery Compartment
- Main Handle
- Trigger Switch
- Lock-out Button
- Comands rod
- Harness
- Extension tube
- Collar
- Power Head Pole
- Saw Head
- Sprocket Cover
- Oil Cap
- Chain Tension Knob
- Saw Chain
- Guide Bar
- Scabbard
ASSEMBLY
UNPACKING
■ This product requires assembly.
- Carefully remove the product and any accessories from the box. Make sure that all items listed in the packing list are included.
■ Inspect the product carefully to make sure no breakage or damage occurred during shipping.
■ Do not discard the packing material until you have carefully inspected and satisfactorily operated the product.
■ If any parts are damaged or missing, please contact your authorised service center for assistance.
PACKING LIST
■ Handle Pole
■ Extension Tube
■ Saw Head
Scabbard
Harness
■ Operator's Manual
WARNING
Before assembly, remove the battery from the tool. Do not insert the battery until assembly is complete. Failure to comply could result in accidental starting and possible serious personal injury.
FITTING THE POLE SAW
See figure 2.
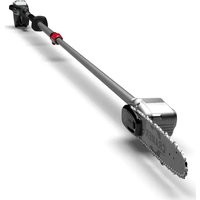
The saw head (10) can be mounted directly on comands rod (5) so as to achieve the standard length.
■ Insert the commands rod (5) in the saw head (10).
■ Slide the collar (8) upwards and turn it clockwise until it is completely tightened.
WARNING
Periodically check the connections to ensure that they are tightened securely.
EXTENSION OF POLE SAW
See figure 3.
The maximum reach can be achieved by fitting the extension tube (7) between the commands rod (5) and the saw head (10).
■ Slide the collars (8) up and rotate it clockwise until it is completely tightened.
WARNING
Periodically check the connections to ensure that they are tightened securely.
English (Original instructions)
REMOVING THE SAW HEAD
See figure 4.
■ Rest the pole saw on the ground, loosen the coupler, then take off the saw head (10).
USING THE HARNESS
See figure 5.
WARNING
The machine must always be used properly hooked to the harness worn when using extension tube. Frequently check the efficiency of the quick release mechanism used to quickly free the machine from the belts in case of danger.
The webbing must be put on before connecting the machine to the special coupling and the belts must be adjusted to suit the operator's height and stature.
■ The belt (17) must go over the left shoulder towards the right hip.
■ Fasten the snap hook (18) to the provided fitting on the extension tube.
ASSEMBLY OF THE GUIDE BAR AND TOOTHED CHAIN
See figure 6-12.
WARNING
Always wear heavy-duty gloves when handling the bar and chain. Mount the bar and chain very carefully so as not to impair the safety and efficiency of the machine. If in doubt, contact your dealer.
WARNING
Perform all operations after removing the battery.
■ Unscrew the knob (13) and remove the chain guard (11), to access the drive pinion and bar seat.
■ Mount the bar (15) by inserting the stud bolt (19) in the groove (20) and push it towards the back of the machine body.
■ Mount the chain around the drive pinion (21) and along the bar guide, being careful to follow the sliding direction (Fig. 8. A).
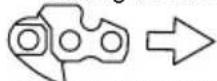
Direction in which the chain runs
If the tip of the bar is equipped with a nose sprocket, make sure the drive links are correctly inserted in the sprocket rims (Fig. 9.).
- Check that chain tension adjuster pin (22) is fitted properly in the hole on the bar; if it isn't, turn the chain tension knob (Fig. 8. B) until the pin is
completely inserted.
■ Replace the guard without fully tightening the knob.
■ Turn the chain tension knob (Fig. 8. B) to achieve the desired tension (Fig. 10.).
■ Raise the bar and tighten the guard knob (Fig. 11.13).
PREPARATION
Before starting to work, it is necessary to carry out several checks and operations to ensure you can work efficiently and in maximum safety.
CHECKING THE BATTERY
■ Before each use:
– check the battery charge status according to the instructions in the battery booklet.
CHECKING THE CHAIN TENSION
WARNING
Perform all operations after removing the battery.
■ Check the chain tension. The tension is correct when the drive links do not slip out of the chain guides if you hold the chain in the middle of the bar. See figure 10.
■ To adjust the chain tension:
1. loosen the cover knob;
2. turn the chain tension knob (Fig. 8. B) to achieve the desired tension;
3. raise the bar and tighten the guard knob (Fig. 11.13).
WARNING
Never work with the chain loose, as it can be hazardous if the chain slips out of the bar guides.
IMPORTANT
During the first period of use (or after replacing the chain) it must be checked more frequently due to settling of the chain.
OPERATION
English (Original instructions)
For complete charging instructions, refer to the Operator's Manuals for your battery pack and charger models.
NOTE: To avoid serious personal injury, always remove the battery pack and keep hands clear of the lock-out button when carrying or transporting the tool.
WARNING
Do not allow familiarity with this product to make you careless. Remember that a careless fraction of a second is sufficient to inflict serious injury.
WARNING
Always wear safety goggles or safety glasses with side shields when operating power tools. Failure to do so could result in objects being thrown into your eyes, resulting in possible serious injury.
WARNING
Do not use any attachments or accessories not recommended by the manufacturer of this product. The use of attachments or accessories not recommended can result in serious personal injury.
ADDING BAR AND CHAIN LUBRICANT
See figure 13.
Use Bar and Chain Lubricant. It is designed for chains and chain oilers, and is formulated to perform over a wide temperature range with no dilution required.
NOTE: Pole saw comes from the factory with no bar and chain lubricant added. Level should also be checked after every 20 minutes of use and refilled as needed.
■ Unscrew and remove the cap from the oil tank.
■ Pour oil in the tank and monitor the level on the indicator.
■ Make sure no impurities penetrate the oil tank when filling.
■ Screw on the oil cap and tighten it.
NOTE: Do not use dirty, used or otherwise contaminated oils. Damage may occur to the bar or chain.
NOTE: It is normal for oil to seep from the saw when not in use. To prevent seepage, empty the oil tank after each use then run for one minute. When storing the unit for a long period of time (three months or longer) be sure the chain is lightly lubricated; this will prevent rust on the chain and bar sprocket.
INSERTING AND REMOVING THE BATTERY
See figure 14.
■ To insert the battery, line it up with the battery compartment on the tool. Slide the battery into the battery compartment and push until the battery snaps into place.
■ To remove the battery, push the release button. This will cause the battery to raise out of the tool. Then pull the battery out of the battery compartment.
PREPARATION FOR CUTTING
■ Wear non-slip gloves for maximum grip and protection.
- Maintain a proper grip on the unit whenever the motor is running. Use your right hand to firmly grip the rear handle while your left hand has a firm grip on the pole shaft.
■ Hold unit firmly with both hands. Always keep your left hand on the pole shaft and your right hand on the rear handle, so your body is to the left of the chain line. Never use a left-handed (cross-handed) grip, or any stance that places your body or arm across the chain line.
■ Never stand directly under the limb you are cutting.
■ Be certain the collars are fully tightened before operating equipment; check them periodically for tightness during use to avoid serious injury.
TURNING THE TOOL ON AND OFF
See figure 15.
For your safety, this tool is equipped with a double switching system. This system prevents starting the tool inadvertently.
Switching on
■ Press the lock-out button (4) using your thumb and at the same time squeeze the trigger (3).
■ Release the lock-out button (4).
Switching off
■ Release the trigger (3). Upon release of the trigger (3), the trigger lock (4) will automatically reset to the locked position.
WORK TECHNIQUES
Delimbing a tree
See figure 16.
WARNING
Make sure there is nothing or nobody in the area where the branches will fall.
■ Stand opposite the branch you want to cut.
English (Original instructions)
■ Start cutting lower branches followed by the higher ones.
■ Cut downwards to prevent the bar from getting jammed.
Limbing tree branches
See figure 17.
Limbing means removing the branches from a felled tree.
WARNING
Be careful of where the branches are lying on the ground, the risk of them being under tension, the direction the branch may go during cutting and the risk of the tree being unstable after the branch has been cut.
When limbing, it is necessary to leave the lower, larger branches to support the trunk on the ground. Remove the small branches with a single cut (Fig. 17.A). It is recommended to cut the tensioned branches working from the bottom upwards to prevent the chain saw from bending (Fig. 17.B).
AFTER OPERATION
■ Remove the battery from its housing and recharge it.
■ Mount the bar cover.
- Allow the motor to cool before storing in an enclosed space.
■ Loosen the locking knob of the bar to reduce the tension of the chain.
■ Carefully remove any dust and debris and remove all traces of sawdust or oil deposits from the chain.
- Check there are no loose or damaged components. If necessary, replace the damaged components and tighten any screws and loose bolts.
MAINTENANCE
TOPPING UP THE CHAIN OIL TANK
See figure 13.
NOTE:
The following symbol is found on the chain oil tank cap:
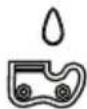
Chain oil tank
IMPORTANT
Only use chain saw oil or adhesive oil for chain saws. Do not use oil containing impurities so as not to block the oil filter and to prevent irreparable damage to the oil pump. It is essential that you use good quality oil to lubricate the cutting parts effectively. Used or poor quality oil does not guarantee good lubrication and reduces the working life of the chain and bar.
IMPORTANT
Never run the chain without sufficient oil, this could damage the saw and compromise safety.
Check the amount of oil in the pruner device by checking the oil level indicator. If the oil level is low, top up as follows:
- Unscrew and remove the cap from the oil tank.
- Pour oil in the tank and monitor the level on the indicator.
- Make sure no impurities penetrate the oil tank when filling.
- Screw on the oil cap and tighten it.
CLEANING
Cleaning the machine and the motor
After every work session, clean the machine thoroughly to remove all dust and debris.
■ To reduce fire hazards, keep the machine and, in particular, the motor free of leaves, branches or excessive grease.
■ Always clean the machine after use with a damp cloth dipped in neutral detergent.
■ Remove all traces of humidity using a soft damp cloth. Humidity can generate risks of electric shocks.
■ Do not use aggressive detergents or solvents to clean the plastic parts or handgrips.
■ Do not spray water onto the motor and electrical components and prevent them from getting wet.
■ To avoid overheating and damage to the motor or the battery, always keep the cooling air vents clean and free of debris.
Cleaning the chain
Remove any traces of sawdust or oil deposits from the chain every time it is used.
If there is excessive dirt or resin build-up, disassemble the chain and place it in a container with a specific cleanser for a few hours. Then rinse it with clean water
English (Original instructions)
and treat it with a suitable anticorrosive spray, before reassembling on the machine.
CHAIN CATCHER
Check chain stop pin conditions before each use and repair in the event of damages.
NUTS AND BOLTS
- Keep all nuts, bolts and screws tight to be sure the equipment is in safe working condition.
■ Check regularly that the handles are fixed firmly.
STORING
STORING THE MACHINE
When the machine is to be stored away:
- Remove the battery from its housing and recharge it;
- Mount the bar cover.
- Wait until the motor is sufficiently cold;
- Clean.
- Check there are no loose or damaged components. If necessary, replace the damaged components and tighten any screws and loose bolts or contact the authorised service centre.
-
Store the machine:
-
in a dry place
– protected from inclement weather
– in a place where children cannot get to it - making sure that keys or tools used for maintenance are removed.
STORING THE BATTERY
The battery must be kept in a cool, shaded place without humidity.
NOTE: If unused for any length of time, recharge the battery every two months to prolong its working life.
DISPOSAL
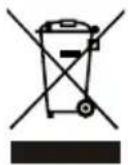
Separate collection. This product must not be disposed of with normal household waste. Should you find one day that your Cramer product needs replacement, or if it is no further use to you, do not dispose of it with household waste. Make this product available for separate collection.

Separate collection of used products and packaging allows materials to be recycled and used again.
Re-use of recycled materials helps prevent environmental pollution and reduces the demand for raw materials.
Batteries
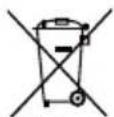
Li-ion
At the end of their useful life, discard batteries with due care for our environment. The battery contains material which is hazardous to you and the environment. It must be removed and disposed of separately at a facility that accepts lithium-ion batteries.
English (Original instructions)
TROUBLESHOOTING
| PROBLEM | POSSIBLE CAUSE | SOLUTION |
| Polesaw fails to switch | The poles are not assembled correctly. | Reassemble the poles according to the instructions. |
| No electrical contact between the polesaw and battery. | To secure the battery, make sure the latches on the battery compartment snap into place. | |
| The battery pack is depleted. | Charge the battery pack. | |
| The lock-off lever and trigger are not depressed simultaneously. | Press down the lock-off lever and hold it, then depress the trigger to turn on the pole saw. | |
| The battery and power tool is too hot or too cold. | Refer to the battery and charger maintenance part in the manual. | |
| Bar and chain running hot and smoking. | No oil in the oil tank. | Refill oil into the oil tank. |
| The discharge port is blocked by debris. | Refer to the manual to remove the bar and clean out the debris. | |
| Inlet opening in inner oil tank is blocked by debris. | Clean the oil tank, and refill with clean bar and chain lubricant. | |
| The sprocket is stuck and clogged with debris. | Clean the sprocket and refill with clean bar and chain lubricant. | |
| The chain and bar running too hot and can not cutting. | Chain tension for overtightened or loose condition. | Refer to Re-tensioning the saw chain in the manual. |
| Dull chain. | Sharpen or replace the chain. | |
| Chain on backwards. | Refer to Replacing the Bar and Chain assembly earlier in this manual. | |
| Motor running, but cutting abnormal | Motor stops after about 3 seconds. | Recharge the battery. |
| When using the polesaw under load, it stops. | Release trigger. Restart the polesaw. Do not force the polesaw. Refer to the manual for proper use. | |
| Battery is not charged. | Charge the battery. Refer to the battery and charger manual for correct charging procedures. | |
| Lack of bar and chain lubricant can cause increased friction. Chain needs to be properly maintained. | Make sure the polesaw always has bar and chain lubricant. | |
| Incorrect battery storage temperature. | Allow the battery pack to cool until the temperature drops to room temperature. |
■ Carefully remove the product and any accessories from the box. Make sure that all items listed in the packing list are included.
■ Inspect the product carefully to make sure no breakage or damage occurred during shipping.
■ Do not discard the packing material until you have carefully inspected and satisfactorily operated the product.
■ Als er onderdelen beschadigd zijn of ontbreken, neem contact op met uw erkend servicecentrum voor bijstand.
VERPAKKINGSLIJST
TELESCOPISCHE ZAAGMACHINE MONTEREN
Zie Afbeelding 2.
TUOTTEEN TEKNISET TIEDOT
KONTROLL AV KJEDETS STRAMMING
ADVARSEL
KORREKT AVHENDING AV DETTE PRODUKTET
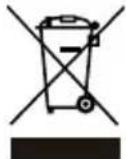
.הכלההוּרָהוּרָהוּרָהוּרָהוּרָהוּרָהוּרָהוּרָהוּרָהוּרָהוּרָהוּרָהוּרָהוּרָהוּרָה
ZĀGA GALVAS NONEMŠANA
Sk. 4. attēlu.
EN EC DECLARATION OF CONFORMITY
Manufacturer: Changzhou Globe Co., Ltd.
Address: No. 65 Xinggang Rd., Zhonglou Zone, Changzhou, Jiangsu, China
Name and address of the person authorised to compile the technical file:
Name: Peter Söderström
Adress: Propellergatan 1, 211 15 Malmö, Sweden
Herewith we declare that the product
Category POLESAW
Model 40PS(1400286)
Serial Number ...... See product rating label
Year of Construction ...... See product rating label
■ is in conformity with the relevant provisions of the Machinery Directive (2006/42/EC)
■ is in conformity with the provisions of the following other EC-Directives EMC Directive (2014/30/EU), RoHS Directive (2011/65/EU)
Noise Emission Directive (2000/14/EC amended by 2005/88/EC)
And furthermore, we declare that
■ The following (parts/clauses of) European harmonised standards have been used EN 55014-1, EN 55014-2, EN 60745-1, EN ISO 11680-1, EN ISO 3744
Measured sound power level 93.8 dB(A)
Guaranteed sound power level 97 dB(A)
Conformity assessment method to Annex V / Directive 2000/14/EC
The EC type-examination certificate number: 18SHW0120-01
issued by Intertek Deutschland GmbH (Notified body 0905).
Place, date: Changzhou, 04/20/2016
Signature: Ted Qu Haichao
Quality Director
Ted Qu
DE
Adresse: No. 65 Xinggang Rd., Zhonglou Zone, Changzhou, Jiangsu, China
Indirizzo: No. 65 Xinggang Rd., Zhonglou Zone, Changzhou, Jiangsu, China
FR DÉCLARATION DE CONFORMITÉ EC
Fabricant : Changzhou Globe Co., Ltd.
Adresse : No. 65 Xinggang Rd., Zhonglou Zone, Changzhou, Jiangsu, China
Endereço: No. 65 Xinggang Rd., Zhonglou Zone, Changzhou, Jiangsu, China
Local, data: Changzhou, 04/20/2016
Adres: No. 65 Xinggang Rd., Zhonglou Zone, Changzhou, Jiangsu, China
Osoite: No. 65 Xinggang Rd., Zhonglou Zone, Changzhou, Jiangsu, China
Adress: No. 65 Xinggang Rd., Zhonglou Zone, Changzhou, Jiangsu, China
Adresse: No. 65 Xinggang Rd., Zhonglou Zone, Changzhou, Jiangsu, China
Adresse: No. 65 Xinggang Rd., Zhonglou Zone, Changzhou, Jiangsu, China
Adres: No. 65 Xinggang Rd., Zhonglou Zone, Changzhou, Jiangsu, China
Adresa: No. 65 Xinggang Rd., Zhonglou Zone, Changzhou, Jiangsu, China
Adresa: No. 65 Xinggang Rd., Zhonglou Zone, Changzhou, Jiangsu, China
Naslov: No. 65 Xinggang Rd., Zhonglou Zone, Changzhou, Jiangsu, China
Adresa: No. 65 Xinggang Rd., Zhonglou Zone, Changzhou, Jiangsu, China
Ime i prezime, i adresa osobe ovlaštene da sastavi tehničku datoteku:
Ime i prezime: Peter Söderström
Adresa: Propellergatan 1, 211 15 Malmö, Sweden
Cím: No. 65 Xinggang Rd., Zhonglou Zone, Changzhou, Jiangsu, China
Adresa: No. 65 Xinggang Rd., Zhonglou Zone, Changzhou, Jiangsu, China
Adres: No. 65 Xinggang Rd., Zhonglou Zone, Changzhou, Jiangsu, China
Yer, tarih: Changzhou, 04/20/2016
Kalite Müdürü
Ímza: Ted Qu Haichao
Ted Qu
.Changzhou Globe Co., Ltd :
No. 65 Xinggang Rd., Zhonglou Zone, Changzhou, Jiangsu, China :
,(EMC (2014/30/EU n"nun
RoHS Directive (2011/65/EU)
Adresas: No. 65 Xinggang Rd., Zhonglou Zone, Changzhou, Jiangsu, China
Adrese: No. 65 Xinggang Rd., Zhonglou Zone, Changzhou, Jiangsu, China
Aadress: No. 65 Xinggang Rd., Zhonglou Zone, Changzhou, Jiangsu, China