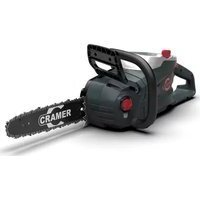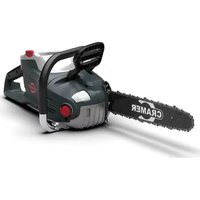
82CS25 - Saw Cramer - Free user manual and instructions
Find the device manual for free 82CS25 Cramer in PDF.


User questions about 82CS25 Cramer
0 question about this device. Answer the ones you know or ask your own.
Ask a new question about this device
Download the instructions for your Saw in PDF format for free! Find your manual 82CS25 - Cramer and take your electronic device back in hand. On this page are published all the documents necessary for the use of your device. 82CS25 by Cramer.
USER MANUAL 82CS25 Cramer
natural_image
Black-and-white illustration of a Cramer chain saw with visible teeth and metal bands (no text or symbols)

cramer.eu
Product Overview
Your machine has been engineered and manufactured to high standard for dependability, ease of operation, and operator safety. When properly cared for, it will give you years of trouble-free performance.
Know your Chain saw
Packing List
1 Chain saw
4 User's manual
2 Bar and chain
5 Wrench
3 Scabbard
The recommended ambient temperature range:
| ITEM TEMPERATURE | |
| Chain saw storage Temperature range -4 °F (-20 °C) ~ 158 °F (70 °C) | |
| Chain saw operation temperature range | 1.4 °F (-17 °C) ~ 104 °F (40 °C) |
| Battery Charging Temperature Range 41°F (5°C) ~ 125.6 °F (52 °C) | |
| Charger Operation Temperature Range 39°F (4°C) ~ 104 °F (40 °C) | |
| Battery storage Temperature range | 1 year: 32°F (0°C) ~ 73 °F (23 °C) |
| 3 month: 32°F (0°C) ~ 113 °F (45°C) | |
| 1 month: 32°F (0°C) ~ 140 °F (60 °C) | |
| Battery Discharging temperature Range | 6.8 °F (-14 °C) ~ 149 °F (65°C) |
Safety Precautions

Carefully read all the safety warnings and instructions in this manual before operating this chain saw. Save this operator's manual for future reference.

These chain saws conform to CE safety standards and directives concerning electromagnetic compatibility, machines and low voltage.
Intended use
This chain saw is designed for cutting branches, trunks, logs and beams of a diameter determined by the cutting length of the guide bar. It is only designed to cut wood.
It is only to be used by adults.
Do not use the chain saw for any purpose not listed above.
It is not to be used by children or by persons not wearing adequate personal protective equipment and clothing.
Residual risks:
Even with the intended use of the appliance, there is other risk which cannot be prevented. According to the type and construction of the appliance, the following potential hazards might happen:
• Contact with exposed saw teeth of the saw chain (cutting hazards).
- Access to the rotating saw chain (cutting hazards).
• Unforeseen, abrupt movement of the guide bar (cutting hazards).
• Flung out of parts from the saw chain (Cutting / injection hazards).
• Flung out of parts of the work piece.
• Inhalation of work piece particles.
• Skin contact with the lubrication oil.
- Loss of hearing, if no ear protection is used during work.
General power tool safety warnings

Read all safety warnings and all instructions. Failure to follow the warnings and instructions may result in electric shock, fire and/or serious injury.
Save all warnings and instructions for future reference. The term "power tool" in the warnings refers to your mains-operated (corded) power tool or battery-operated (cordless) power tool.
Work area safety
- Keep work area clean and well lit. Cluttered or dark areas invite accidents.
- Do not operate power tools in explosive atmospheres, such as in the presence of flammable liquids, gases or dust. Power tools create sparks which may ignite the dust or fumes.
- Keep children and bystanders away while operating a power tool. Distractions can cause you to lose control.
Electrical safety
- Avoid body contact with earthed or grounded surfaces, such as pipes, radiators, ranges and refrigerators. There is an increased risk of electric shock if your body is earthed or grounded.
- Do not expose power tools to rain or wet conditions. Water entering a power tool will increase the risk of electric shock. Please note that rain, fog and other humidity can vary in intensity and the equipment can not be used in extreme conditions. Keep batteries away from saline environment and contaminated liquids. After use, the battery and the device are to be dried.
Personal safety
- Stay alert, watch what you are doing and use common sense when operating a power tool. Do not use a power tool while you are tired or under the influence of drugs, alcohol or medication. A lapse of attention while operating power tools may result in serious personal injury.
- Use personal protective equipment. Always wear eye protection. Protective equipment such as dust mask, non-skid safety shoes, hard hat
or hearing protection used appropriately will reduce personal injuries.
- Prevent unintentional starting. Ensure the switch is in the off position before connecting to power source and/or battery pack and when picking up or carrying the tool. Carrying power tools with your finger on the switch or energizing power tools that have the switch on invites accidents.
- Remove any adjusting key or wrench before turning the power tool on. A wrench or a key left attached to a rotating part of the power tool may result in personal injury.
Do not over-reach. Keep proper footing and balance at all times. This enables better control of the power tool in unexpected situations. - Dress properly. Do not wear loose clothing or jewellery. Keep your hair, clothing and gloves away from moving parts. Loose clothes, jewellery or long hair can be caught in moving parts.
If devices are provided for the connection of dust extraction and collection facilities, ensure these are connected and properly used. Use of dust collection can reduce dust-related hazards.
Power tool use and care
Do not force the power tool. Use the power tool for the application. The correct power tool will do the job better and safer at the rate for which it was designed.
- Do not use the power tool if the switch does not turn it on and off. Any power tool that cannot be controlled with the switch is dangerous and must be repaired.
- Disconnect the plug from the power source and/or the battery pack from the power tool before making any adjustments, changing accessories, or storing power tools. Such preventive safety measures reduce the risk of starting the power tool accidentally.
- Store idle power tools out of the reach of children and do not allow persons unfamiliar with the power tool or these instructions to operate the power tool. Power tools are dangerous in the hands of untrained users.
- Maintain power tools. Check for misalignment or binding of moving parts, breakage of parts and any other condition that may affect the power tool's operation. If damaged, have the power tool repaired before use. Many accidents are caused by poorly maintained power tools.
- Keep cutting tools sharp and clean. Properly maintained cutting tools with sharp cutting edges are less likely to bind and are easier to control.
- Use the power tool, accessories and tool bits etc. in accordance with these instructions, taking into account the working conditions and the work to be performed. Use of the power tool for operations different from those intended could result in a hazardous situation.
Battery tool use and care
- Recharge only with the charger specified by the manufacturer. A charger that is suitable for one type of battery pack may create a risk of fire when used with another battery pack.
• Use power tools only with specifically designated battery packs. Use of any other battery packs may create a risk of injury and fire. - When battery pack is not in use, keep it away from other metal objects like paper clips, coins, keys, nails, screws, or other small metal objects that can make a connection from one terminal to another. Shorting the battery terminals together may cause burns or fire.
- Under abusive conditions, liquid may be ejected from the battery; avoid contact. If contact accidentally occurs, flush with plenty of soap and water. If liquid contacts eyes, immediately seek medical help. Liquid ejected from the battery may cause irritation or burns.
Service
- Have your power tool serviced by a qualified repair person using only identical replacement parts. This will ensure that the safety of the power tool is maintained.
Specific safety warnings
- Keep all parts of the body away from the saw chain when the chain saw is operating. Before you start the chain saw, make sure the saw chain is not in contact with anything. A moment of inattention while operating chain saws may cause entanglement of your clothing or body with the saw chain.
- Hold the power tool by insulated gripping surfaces only, because the saw chain many contact hidden wiring. Saw chains contacting a "live" wire may make exposed metal parts of the power tool "live" and could give
the operator an electric shock.
• Always hold the chain saw with your right hand at the rear handle and your left hand at the front handle. Holding the chain saw with a reversed hand configuration increases the risk of personal injury and should never be done.
- Wear safety glasses and hearing protection. Further protective equipment for head, hands, legs and feet is recommended. Adequate protective clothing will reduce personal injury from flying debris or accidental contact with the saw chain.
- Do not operate a chain saw in a tree. Operation of a chain saw while up in a tree may result in personal injury.
- Always keep proper footing and operate the chain saw only when standing on fixed, secure and level surface. Slippery or unstable surfaces such as ladders may cause loss of balance or control of the chain saw.
- When cutting a limb that is under tension, be alert of spring back. When the tension in the wood fibres is released, the spring loaded limb may strike the operator and/or throw the chain saw out of control.
- Use extreme caution when cutting brush and saplings. The slender material may catch the saw chain and be whipped toward you or pull you off balance.
- Carry the chain saw by the front handle with the chain saw switched off and away from your body. When transporting or storing the chain saw, always fit the guide bar cover. Proper handling of the chain saw will reduce the likelihood of accidental contact with the moving saw chain.
- Follow instructions for lubricating, chain tensioning and changing accessories. Improperly tensioned or lubricated chain may either break or increase the chance for kickback.
- Keep handles dry, clean, and free from oil and grease. Greasy, oily handles are slippery, causing loss of control.
- Cut wood only. Do not use chain saw for purposes not intended. For example: do not use chain saw for cutting plastic, masonry or non-wood building materials. Use of the chain saw for operations other than intended could result in a hazardous situation.
- When not in use, store the machine out of the reach of children. Make sure to store the product indoors, in a dry place.
Causes and operator prevention of kickback:
Kickback may occur when the nose or tip of the guide bar touches an object, or when the wood closes in and pinches the saw chain in the cut.
Tip contact in some cases may cause a sudden reverse reaction, kicking the guide bar up and back towards the operator.
Pinching the saw chain along the top of the guide bar may push the guide bar rapidly back towards the operator.
Either of these reactions may cause you to lose control of the saw which could result in serious personal injury. Do not rely exclusively upon the safety devices built into your saw. As a chain saw user, you should take several steps to keep your cutting jobs free from accident or injury.
Kickback is the result of tool misuse and/or incorrect operating procedures or conditions and can be avoided by taking proper precautions as given below:
- Maintain a firm grip, with thumbs and fingers encircling the chain saw handles, with both hands on the saw and your body and arm positioned to allow you to resist kickback forces. Kickback forces can be controlled by the operator, if proper precautions are taken. Do not let go of the chain saw.
- Do not overreach and do not cut above shoulder height. This helps prevent unintended tip contact and enables better control of the chain saw in unexpected situations.
- Only use replacement bars and chains specified by the manufacturer. Incorrect replacement bars and chains may cause chain breakage and/or kickback.
- Follow the manufacturer's sharpening and maintenance instructions for the saw chain. Decreasing the depth gauge height can lead to increased kickback.
Additional warnings
It has been reported that vibrations from hand-held tools may contribute to a condition called Raynaud's Syndrome in certain individuals. Symptoms may include tingling, numbness and blanching of the figures, usually apparent upon exposure to cold and dampness, diet, smoking and work practices are all thought to contribute to the development of these symptoms. It is presently unknown what, if any, vibrations or extent of exposure may contribute to the condition.
There are measures that can be taken by the operator to possibly reduce the effects of vibration:
- Keep your body warm in cold weather, when operating the unit wear gloves to keep the hands and wrists warm. It is reported that cold weather is a major factor contributing to Raynaud's Syndrome.
• After each period of operation, exercise to increase blood circulation.
Take frequent work breaks. limit the amount of exposure per day.
If you experience any of the symptoms of this condition, immediately discontinue use and see your physician about these symptoms.
- The recommended cutting capacity of this chain saw is 153mm (6 in.) and smaller to prolong the life of the tool and allow for safest operation.
- Cutting logs with a diameter larger than this will cause excess wear on your tool. Logs with a maximum diameter of 229mm (9in.) can be cut, but should only be done so rarely and with caution.
• The integral spiked bumper is designed to assist cutting. When forced against the log while cutting it provides a more stable pivot point. - Any chain saw is potentially lethal if used inappropriately. It is strongly suggested that you seek professional training in the safety and use of this tool.
SAVE THESE INSTRUCTIONS. REFER TO THEM FREQUENTLY AND USE THEM TO INSTRUCT OTHERS WHO MAY USE THIS UNIT. IF YOU LOAN SOMEONE THIS UNIT, LOAN THEM THESE INSTRUCTIONS ALSO.
Disposal

Do not dispose of the power tool with other household waste. Dispose of power tool in return and collection systems designated for environmental safe recycling.

Separate collection of used products and packaging allows materials to be recycled and used again. Re-use of recycled materials helps prevent environmental pollution and reduces the demand for raw materials.

At the end of their useful life, discard batteries with due care for our environment. The battery contains material which is hazardous to you and the environment. It must be removed and disposed of separately at a facility that accepts lithium-ion batteries.
Symbol
| SYMBOL DESCRIPTION/EXPLANATION | |
 | Precautions that involve your safety. |
 | Read the operation manual and follow all warnings and safety instructions. |
 | Wear eye protection and ear protection. |
 | DANGER! Beware of kickback. |
 | Keep all bystanders, especially children and pets, at least 15m from the operating area. |
 | Hold with both hands. |
 | Wear non-slip, heavy duty gloves. |
 _ _ | Avoid bar nose contact. |
 | Double-insulated construction. |
Before Operation
The safe use of this product requires an understanding of the features on the product and the information in the operator's manual. Before use of this product, familiarize yourself with all operating features and safety rules.
| 1. Guide bar cover 2. Front handle guard / chain brake | |
| 3. Front handle 4. On/Off switch | |
| 5. Safety lock-off button 6. Switch trigger | |
| 7. Oil tank cap 8. Oil level gauge | |
| 9. Spike bumpers 10. Saw chain | |
| 11. Guide bar 12. Rear handle | |
| 13. Chain tensioner adjustment screw | 14. Sprocket cover |
| 15. Sprocket cover tighten nuts | 16. Bolt for saw chain tension |
| 17. Sprocket 18. Battery release button | |
| 19. Oil outlet 20. Bar groove | |
| 21. Chain drive links 22. Cutter | |
| 23. Felling direction 24. Danger zone | |
| 25. Escape route 26. Direction of fall | |
| 27. Notch | 28. Felling back cut |
| 29. Hinge | 30. Limb cut |
| 31. Keep work off ground leave support limbs until log is cut | |
| 32. Log supported along the entire length | |
| 33. Cut from top (over buck) avoid cutting earth | |
| 34. Log supported one end | |
| 35. Under buck 36. Over buck | |
| 37. Log supported both ends | |
| 38. Bucking a log | |
| 39. Stand on uphill side when cutting because log may roll | |
| 40. Wrench | |
Batteries and Battery Charger
See the battery and charger manual.
Assembly

WARNING!
To prevent accidental starting that could cause serious personal injury, always remove the battery pack from the tool when assembling parts.
This chain saw requires assembly.
1 Unscrew the sprocket cover tighten nuts and remove the sprocket cover.
2 The saw chain should face in the direction of chain rotation. If they face backwards, turn the loop over.
3 Place the chain drive links into the bar groove.
4 Position the chain so there is a loop at the back of the bar.
5 Hold the chain in position on the bar and place the loop around the sprocket
and make sure it is correctly mounted. Make sure the bar hole fits well with bolt for saw chain tension.
6 Replace the sprocket cover, turn the chain tension adjust bolt clockwise until the saw chain is properly tensioned. The guide bar must then be pushed upwards, check chain tension again, do not tension the chain too tight.
7 After the chain is well-tensioned, tighten the nuts again.
NOTE: The saw chain is properly tensioned if, in the middle of the guide bar, it can be lifted 3mm to 4mm from the edge of the guide bar. Start the saw again with a new saw chain, allowing it to run-in for 2\~3 minutes.
To Install/ Remove the Battery
To Install (see Figure 2)
1 Align the battery pack with the battery compartment on the chain saw.
2 Grasp the chain saw firmly.
3 Push the battery pack into the battery compartment until the latch locks into place.
4 You should hear a "click" once the battery is installed.
To Remove (see Figure 2)
1 Press the battery release button on the chain saw.
2 Grasp the chain saw firmly and pull the battery out of the handle.
Operation
Before each use check the saw chain tension
- Pull the saw chain in the middle of the lower side of the bar away from the bar. The gap between the cutter in the saw chain and the bar should be between 3mm - 4mm.
- If you need to adjust the saw chain tension, please refer to the section "ADJUSTING THE CHAIN TENSION" later in this manual.
In order to prevent kickback, please follow these safety instructions:
- Never cut with the tip of the guide bar! Be careful when continuing from previous cuts.
• Always start cutting only when the chain saw is already running.
• Make sure that the saw chain is always properly sharpened. - Never cut through more than one branch at a time! When lopping off branches, be careful not to touch any other branches.
- When cross-cutting, pay attention to trunks standing very close to each other. If possible, use a sawing trestle.
Checking the chain lubricant
Check the amount of oil in the chain saw by looking at the oil level gauge. If the oil level is low, follow the steps shown in section "ADDING CHAIN & BAR LUBRICANT" of this manual.
Holding the chain saw (see Figure 8)
Always hold the chain saw with your right hand at the rear handle and your left hand at the front handle.
Grip both handles with the thumbs and the hands. Ensure that your left hand is holding the front handle so that your thumb is underneath.
Starting operation (see Figure 1)
1 Before starting for operation, you should install the battery pack in the machine.
2 Press the on/off switch.
3 Press the safety lock-off button, and then pressure the switch trigger.
Stopping operation (see Figure 2)
1 Release the switch trigger to stop the chain saw.
Operating the chain brake (see Figure 22)
Check the operating condition of the chain brake prior to each use.
- Engage the chain brake by rotating your left hand around the front handle, allowing the back of your hand to push the chain brake lever/hand guard toward the bar while the chain is rotating rapidly. Be sure to maintain both hands on the saw handles at all times.
- Reset the chain brake back into the RUN position by grasping the top of the
chain brake lever/hand guard and pulling toward the front handle.

WARNING!
If the chain brake do not stop the chain immediately, or if the chain brake will not stay in the run position without assistance, take the saw to an authorized service center for repair prior to use.
Using the chain saw
Always be sure of your footing and hold the chain saw firmly with both hands while the motor is running.
Basic felling, limbing, and crosscutting techniques
(see Figure 9)
Felling a tree
When bucking and felling operations are being performed by two or more persons at the same time, the felling operation should be separated from the bucking operation by a distance of at least twice the height of the tree beingfelled. Trees should not be felled in a manner that would endanger any person, strike any utility line or cause any property damage.If the tree does make contact with any utility line, the utility company should be notified immediately. The chain saw operator should keep on the uphill side of the terrain as the tree is likely to roll or slide downhill after it is felled. An escape path should be planned and cleared as necessary before cuts are started. The escape path should extend back and diagonally to the rear of the expected line of fall. Before felling is started, consider the natural lean of the tree, the location of larger branches and the wind direction to judge which way the tree will fall. Remove dirt, stones, loose bark, nails, and staples from the tree.
NOTCHING UNDERCUT (A NOTCH CUT IN A TREE TO DIRECT THE FALL)
(see Figure 10)
Make the notch 1/3 in diameter of the tree, perpendicular to the direction of falls. Make the lower horizontal notching cut first, this will help to avoid pinching of either the saw chain or the guide bar when the second notch is being made.
FELLING BACK CUT (THE FINAL CUT IN A TREE FELLING OPERATION, MADE ON THE
OPPOSITE SIDE OF THE TREE FROM THE NOTCHING UNDERCUT)
(see Figure 10)
Make the felling back cut at least 50mm higher than the horizontal notching cut. Keep the felling back cut parallel to the horizontal notching cut. Make the felling back cut so as to leave enough wood to act as a hinge. The hinge wood keeps the tree from twisting and falling in the wrong direction. Do not cut through the hinge. As the felling cut gets close to the hinge, the tree should begin to fall. If there is any chance that the tree may not fall in the desired direction or it may rock back and bind the saw chain, stop cutting before the felling back cut is complete and use wedges of wood, plastic or aluminium to open the cut and drop the tree along the desired line of fall. When the tree begins to fall, remove the chain saw from the cut, stop the motor, put the chain saw down, and then use the retreat path as planned. Be alert of overhead limbs falling and watch your footing.
Limbing a tree (see Figure 11)
Limbing is removing the branches from a fallen tree. When limbing, leave the larger lower limbs to support the log off the ground. Remove the small limbs in one cut. Branches under tension should be cut from the bottom up, to avoid binding the chain saw.
Bucking a log (see Figure 12-15)
Bucking is cutting a log into lengths. It is important to make sure your footing is firm and your weight is evenly distributed on both feet. When possible, the log should be raised and supported by the use of limbs, logs or chocks. Follow the simple direction for easy cutting:
- When the log is supported along the entire length, it is cut from the top (over buck).
- When the log is supported on one end, cut 1/3 of the diameter from the underside (under buck). Then make the finished cut by over bucking to meet the first cut.
- When the log is supported on both ends, cut 1/3 of that diameter from the top (over buck). Then make the finished cut by under bucking the lower 2/3 to meet the first cut.
- When bucking on a slope, always stand on the uphill side of the log. When cutting through, to maintain complete control, release the cutting pressure near the end of the cut without relaxing your grip on the chain saw handles.
Do not let the chain contact the ground. After completing the cut, wait for the saw chain to stop before you move the chain saw. Always stop the motor before moving from tree to tree.
MAINTENANCE

WARNING!
Always remove the battery pack from the machine before checking the chain tension or making adjustments to the chain. Wear protective gloves while touching the chain, bar or areas around the chain.
Adjusting the chain tension (see Figure 2-7)
- Loosen the chain cover lock nuts with the supplied wrench. The chain cover lock nuts do not have to be completely removed in order to adjust the chain tension.
- Rotate the chain adjustment screw clockwise to increase the chain tension and rotate counterclockwise to decrease the chain tension.
• Once the chain is at the desired tension, tighten the chain cover lock nuts.
Replacing the bar and chain (see Figure 3-7)
- Remove the battery from the chain saw.
- Remove the two chain cover lock nuts from chain cover by rotating them counterclockwise with the wrench.
- Remove the chain cover from the mounting surface.
- The bar and chain can now be removed by lifting it away from the main body of the saw and releasing the chain from the sprocket.
- Remove the old chain from the bar.
- Lay out the new saw chain in a loop and straighten any kinks. The cutters should face in the direction of chain rotation. If they face backwards, turn the loop over.
- Place the chain drive links into the bar groove.
-
Position the chain so there is a loop at the back of the bar.
-
Hold the chain in position on the bar and place the loop around the sprocket.
- Fit the bar flush against the mounting surface so that the bar studs are in the long slot of the bar. Ensure that the chain is over the sprocket.
- Replace the chain cover.
- Remove all slack from the chain by turning the chain adjustment screw clockwise until the chain seats snugly against the bar with the drive links in the bar groove.
• Lift the tip of the guide bar up to check for sag. - Release the tip of the guide bar and turn the chain adjustment screw 1/2 turn clockwise. Repeat this process until sag does not exist.
- Hold the tip of the guide bar up and tighten the chain cover lock nuts by turning them with the wrench. The chain is correctly tensioned when there is no sag on the underside of the guide bar, the chain is snug, but it can be turned by hand without binding.
Adding chain & bar lubricant
- Unscrew and remove the cap from the oil tank.
- Pour the oil into the oil tank and monitor the oil level gauge. Ensure that no dirt enters the oil tank while filling the oil in.
• Put the oil cap back on and tighten it up.
• One full oil tank will enable you to use the saw for 20-40 min.
Adjust the amount of the lubricant (see Figure 16)
You can adjust the amonut of the lubricant according to the cutting requirement.
1 Find the adjustment screw at the bottom of the chain saw.
2 Turn the screw with the wrench clockwise to increase the amount of the lubricant.
3 Turn the screw with the wrench counterclockwise to decrease the amount of the lubricant.
Transporting the chain saw
Before transporting the chain saw, always remove the battery pack from the chain saw and slide the chain cover over the bar and chain. If several cuts are to be performed with the chain saw, the saw must be switch off between cuts.
Guide bar cover
The chain cover must be clipped onto the chain and bar as soon as the sawing work has been completed and whenever the machine has to be transported.
Sharpening the saw chain (see Figure 17-22)
When the chain penetrates into wood with difficulty, it needs sharpening as follows:
- Put the chain under tension.
- Fasten the bar in a vice so that the chain can slide.
• Fasten the file to the file holder and place it on cutter at 35° angle. - File with forward strokes only until all the worn out parts of the cutting edge are taken away.
- Count the number of strokes given to the cutter as a reference and file away with the same number of strokes on all other cutters.
- If the depth gauge protrudes from the template after sharpening a few times, reset its level. Use a flat file. Finally, round off the depth gauge.
NOTE: It is recommended to have the deep or important sharpening carried out by a service agent who is equipped with electric sharpener.
Guide bar maintenance
- When you have finished working, clean out the groove and the oil passages with a scraping hook.
Periodically trim the sides of rails using a flat file. If not done in the long run, the feather edges might break away and damage the bar.
If one rail is higher than the other one, it is necessary to make it even with a flat file then smooth it with a file or fine grain abrasive paper.

WARNING!
To avoid serious personal injury, always remove the battery pack from the tool when cleaning or performing any maintenance.
General maintenance
Before each use, inspect the entire product for damaged, missing, or loose parts such as screws, nuts, bolts, caps, etc. Tighten securely all fasteners and caps
and do not operate this product until all missing or damaged parts are replaced. Please call Customer Service for assistance.
Avoid using solvents when cleaning plastic parts. Most plastics are susceptible to damage from various types of commercial solvents and may be damaged by their use. Use clean cloths to remove dirt, dust, oil, grease, etc.

WARNING!
Do not at any time let brake liquids, gasoline, petroleum based products, penetrating oils, etc., come in contact with plastic parts. Chemicals can damage, weaken or destroy plastic which may result in serious personal injury.
Only the parts shown on the parts list are intended to be repaired or replaced by the customer. All other parts should be replaced at an authorised service centre.
STORAGE
Storing the product
- Remove the battery pack from the unit before storing.
• Clean all foreign material from the unit.
• Store it in a place that is inaccessible to children. - Keep away from corrosive agents such as garden chemicals and de-icing salts.
- Store and charge your batteries in a cool area. Temperatures above or below normal room temperature will shorten battery pack life.
- Never store batteries in a discharged condition. Store battery packs in a 30%-50% charged condition.
- Store the battery pack where the temperature is between 0-23* C and away from moisture.
- All batteries gradually lose their charge. The higher the temperature, the quicker they lose their charge. If you store your unit for long periods of time without using it, charge the pack as normal every six months of storage. This practice will prolong battery pack life.
Troubleshooting
| PROBLEM PROBABLE CAUSE POSSIBLE SOLUTION * | ||
| Bar and saw chain running hot and smoking. | Check saw chain tension for overtightened condition. | Tension saw chain. |
| No oil in the oil tank. Refill oil into the oil tank. | ||
| The discharge port is blocked by debris. | Refer to the manual to remove the bar and clean out the debris. | |
| Oil tank is blocked by debris. | Clean out the oil tank and refill with clean oil. | |
| Bar and chain oil tank cap is blocked by debris. | Clean the debris off the oil cover. | |
| The sprocket or guide wheels is clogged with debris. | Clean and remove debris from sprocket and guide wheel. | |
| Motor runs, but chain is not rotating. | Saw chain tension is too tight. | Refer to Saw Chain Tension Guide earlier in this manual. |
| Check guide bar and saw chain assembly. | Refer to Replacing the Bar and Saw Chain assembly earlier in this manual. | |
| Check guide bar and saw chain for damage. | Remove the battery from the unit. Take the bar cover off, and remove the bar and saw chain. Clean all debris from the chain saw. After all debris is cleared, insert battery and run the chain saw. If the sprocket is spinning your motor is okay. If the sprocket is not spinning, call customer service. | |
EN
| Motor runs, chain rotates but does not cut. | Dull chain. | Sharpen or replace the saw chain. |
| Chain on backwards. | Refer to Replacing the Bar and Saw Chain assembly earlier in this manual. | |
| Chain tension could be overtightened or too loose. | Refer to Re-tensioning the saw chain in the manual. | |
| Chain saw does not start. | The chain brake is engaged. | Pull the chain brake towards you until the chain brake is disengaged. |
| No electrical contact between the chain saw and battery. | To secure the battery, make sure the latches on the battery compartment snap into place. | |
| The battery pack is depleted. | Charge the battery pack. | |
| The lock-off lever and trigger are not depressed simultaneously. | Press down the lock-off lever and hold it, then depress the trigger to turn on the chain saw. | |
| The battery and power tool is too hot or too cold. | Refer to the battery and charger maintaince part in the manual. | |
| The machine cannot work, when the red light flash and it checks itself for the protection. | Press down the trigger first then start the power button the machine cant work before solving its faults. |
| Start the machine, red light flash and the machine can not work. | The machine checks itself for the protection. You can;1. Install the battery, press the trigger, and then press the power button.2. The machine will keep flashing light and sound hums.3. Remove the battery4. Re-start the machine. | |
| Motor running,but cutting abnormal. | Motor stops after about 3 seconds. | Recharge the battery. |
| If the unit cuts off and beeps during a cut, it went into protection mode. This protects the PCB from damage. | Release the trigger and restart the chain saw. Let the chain saw do the work and do not force the cut. | |
| Battery is not charged. | Charge the battery. Refer to the battery and charger manual for correct charging procedures. | |
| The saw chain needs lubrication, and will increase friction if not properly maintained. | Make sure the chain is always lubricated by never letting the bar and chain oil run low. | |
| Incorrect battery storage temperature. | Allow the battery pack to cool until it drops to room temperature. |
* If the fault is not solved, you must go to your distributor and/or nearest Authorized Technical Service.
Technical Data
| PROPERTY VALUE | |
| Type Cordless, battery-operated | |
| No Load Speed 24m/s | |
| Guide bar length | 330 mm |
| Chain type | 95TXL056X |
| Bar type 130MLBK041 | |
| Battery pack 82V220G/82V430/G82V220/82V430 | |
| Charger | 82C1G/82C2/82C6 |
| Chain stop | < 0.2s |
| Chain oil capacity | 250 ml |
| Weight without battery pack | 4.3 kg |
| Emission sound pressure level LpA | 94 dB(A), K_PA : 3 dB(A) |
| Sound power level LwA | L_WA = 105.5 dB(A) |
| Guaranteed sound power level LwA(G) | L_WA = 109 dB(A) |
| Vibration total value ah | 3.9 m/s2k= 1.5 m/s2 |
CE Declaration of Conformity
Manufacturer Name: Changzhou Globe Co., Ltd.
Address: No.65 Xinggang Road Zhonglou Zone Changzhou, Jiangsu 213000 P.R.China
Name and address of the person authorised to compile the technical file
Name: Peter Söderström
Address: Propellergatan 1
211 15 Malmö
Sweden
WE HEREBY DECLARE UNDER OUR OWN RESPONSIBILITY THE MACHINE
| Original Instruction | |
| Type Chain saw | |
| Brand Cramer | |
| Model 82CS25 | |
| Serial No See product rating label | |
Has been manufactured in accordance with the standards or regulatory documents:
Electromagnetic compatibility EN 60745-1/EN 60745-2-13
Electric tools safety EN 55014-1/EN 55014-2/EN ISO 3744
Noise Emission Standard EN ISO 3744
And conforms to the essential requirements of the following directives:
Machine directive 2006/42/CE
Electromagnetic compatibility directive
RoHS Directive 2011/65/EU
Noise Emission Directive 2000/14/EC amended by 2005/88/EC
Model 82CS25
Measured sound pressure level
Measured sound power level 109 dB(A)
The EC type-examination certificate number: MDC1977 issued by SGS United Kingdom Limited (0890).
Ted Qu Haichao
Quality Director
Changzhou, 22/07/2017
Ted Qu
Produktüberblick
4 Schraubenschlüssel
2 Schiene und Kette
Geräuschemissionsnorm 2000/14/EC amended by 2005/88/EC
Always be sure of your footing and hold the chain saw firmly with both hands while themotor is running.
Address: Propellergatan 1
211 15 Malmö
Sweden
DICHIARIAMO SOTTO LA NOSTRA RESONSABILITÀ CHE L'UTENSILE
Endereço: No.65 Xinggang Road Zhonglou Zone Changzhou, Jiangsu 213000 P.R.China
In order to prevent kickback, please follow these safety instructions:
FÄLLSKÄRET (DET SISTA SKÄRET I TRÄDFÄLLNINGEN SOM GÖRS PÅ TRÄ-DETS
MOTSATTA SIDA SETT JÄMFÖRT MED URSKÄRNINGEN) (se figur 10)
Address: No.65 Xinggang Road Zhonglou Zone Changzhou, Jiangsu 213000
P.R.China
Address: Propellergatan 1
211 15 Malmö
Sweden
HÄRMED INTYGAR VI UNDER EGET ANSVAR ATT MASKINEN
Starting for bruk (Se Fig 1)
USE SAVE THESE INSTRUCTIONS. REFER TO THEM FREQUENTLY AND USE THEM TO INSTRUCT OTHERS WHO MAY USE THIS UNIT. IF YOU LOAN SOMEONE THIS UNIT, LOAN THEM THESE INSTRUCTIONS ALSO.
Likvidace

Has been manufactured in accordance with the standards or regulatory documents:
Your machine has been engineered and manufactured to high standard for dependability, ease of operation, and operator safety. When properly cared for, it will give you years of trouble-free performance.
conditions and can be avoided by taking proper precautions as given below:
Adrese: No.65 Xinggang Road Zhonglou Zone Changzhou, Jiangsu 213000 P.R.China