
TR4200E - Electric riding mower EGO - Free user manual and instructions
Find the device manual for free TR4200E EGO in PDF.

| Product Type | Electric Riding Mower |
| Brand | EGO |
| Model | TR4200E |
| Cutting Width | 107 cm |
| Adjustable Cutting Height | 25-100 mm (12 positions) |
| Maximum Blade Speed | 2850 rpm |
| Maximum Forward Speed | 9.6 km/h |
| Maximum Reverse Speed | 4.8 km/h |
| Rated Voltage | 56 V |
| Required Battery | EGO 56 V, 15 Ah minimum (2x BA4200/BA4200T) |
| Weight (without battery) | 182 kg |
| Front Wheel Size | 15 x 6-6 inches |
| Rear Wheel Size | 20 x 10-8 inches |
| Front Tire Pressure | 96.5 kPa |
| Rear Tire Pressure | 151.7 kPa |
| Guaranteed Sound Power Level | 100 dB(A) |
| Cutting Mode | Mulching, side discharge, bagging (optional) |
| LED Lighting | Yes, 2 LED headlights |
| USB Port | Yes, 5 V DC, max 1.5 A |
| Cruise Control | Yes (CCS) |
| Reverse Mowing Function | Yes (manual activation) |
| LCD Screen | Yes, with status indicators and error codes |
| Cutting Deck Maintenance | Integrated washing port |
| Warranty | See egopowerplus.eu |
Frequently Asked Questions - TR4200E EGO
User questions about TR4200E EGO
0 question about this device. Answer the ones you know or ask your own.
Ask a new question about this device
Download the instructions for your Electric riding mower in PDF format for free! Find your manual TR4200E - EGO and take your electronic device back in hand. On this page are published all the documents necessary for the use of your device. TR4200E by EGO.
USER MANUAL TR4200E EGO
The purpose of safety symbols is to attract your attention to possible dangers. The safety symbols and the explanations with them deserve your careful attention and understanding. The symbol warnings do not, by themselves, eliminate any danger. The instructions and warnings they give are no substitutes for proper accident prevention measures.
WARNING: Be sure to read and understand all safety instructions in this Operator's Manual, including all safety alert symbols such as "DANGER," "WARNING," and "CAUTION" before using this tool. Failure to follow all instructions listed below may result in electric shock, fire, and/or serious personal injury.
SYMBOL MEANING
This page depicts and describes safety symbols that may appear on this product. Read, understand, and follow all instructions on the machine before attempting to assemble and operate it.
SAFETY SYMBOLS
kPa Kilopascal RPM Revolutions per minute
V Volt m Meters
in Inch cm Centimeters
Nm Newton meter mm Millimeters
Celsius kg Kilogram
km/h Kilometers per hour IPX4
Ingress Protection Degree
SYMBOLS IN THIS MANUAL

The information needs to be noted

The indicated action stops
SPECIFICATIONS
| Voltage | 56 V --- | |
| Deck Size | 107 cm | |
| Wheel Size | Front | 15 x 6 - 6 in |
| Rear | 20 x 10 - 8 in | |
| Cold Tire Pressure | Front | 96.5 kPa |
| Rear | 151.7 kPa | |
| Blade Speed (RPM) | Up to 2850 | |
| Maximum Driving Speed | Forward | Up to 9.6 km/h |
| Reverse | Up to 4.8 km/h | |
| Cutting-Height Adjustment (12 position) | 25 - 100 mm | |
| Charging Temperature Range | 5°C - 40°C | |
| Operating Temperature | 0°C - 40°C | |
| Storage Temperature | -20°C - 70°C | |
| Weight (Without battery pack) | 182 kg | |
| Measured sound power level Lwa | 95.72 dB(A) K=1.14 dB(A) | |
| Sound pressure level at operator's ear Lpa | 83.9 dB(A) K=3 dB(A) | |
| Guaranteed sound power level Lwa (measured according to 2000/14/EC) | 100 dB(A) | |
| Vibration ah | Hand | 0.32 m/s² K=1.5 m/s² |
| Body | 0.18 m/s² K=1.5 m/s² | |
The declared vibration total value has been measured in accordance with a standard test method and may be used for comparing one tool with another;
The declared vibration total value may also be used in a preliminary assessment of exposure.
NOTICE: The vibration emission during actual use of the power tool can differ from the declared value in which the tool is used; In order to protect the operator, user should wear gloves and ear protectors in the actual conditions of use.
RECOMMENDED ACCESSORIES
WARNING: Use only accessories listed below. Use of accessories that do not meet the original equipment specifications may lead to improper performance and compromised safety.
| PART NAME | MODEL NUMBER |
| Standard Blade | AB4200 |
| High Lift Blade AB4201 | |
| Mulching Plug | AMP4200 |
| Cargo Box* | AMG1000 |
| Sun Shade* | AMS1000 |
*NOTE: Cargo box and sun shade should be installed onto the tractor with the attachment rack.
DESCRIPTION
KNOW THE TRACTOR (Fig. A1)
- Seat
- Cup Holders
- Rear Wheel (Drive Wheel) (x2)
- Wash Port
- Deck
- Deck Protector
- Anti-Scalp Wheel (x2)
- Front Wheel (x2)
- Front Bumper
- Parking-Brake Pedal
EN
- LED Headlight (x2)
- Power Unit
- Storage Compartment
- Parking-Brake Lock Lever
- Steering Wheel
- Seat Position Adjustment Lever
- Charging Port
- USB Port
- Storage Basket
- Accelerator Pedal
- Side Discharge Chute
- Hitch
- Deck-Height Adjustment Lever
- Attachment Rack
(for installing the cargo box, or sun shade) - Tractor Status Indicator
- Blade Speed Adjustment Button
- MOWING IN REVERSE Button
- Start/Stop Button
- Direction Control Lever
- Safety Key
- PTO Switch
32.CCSButton - LED Light Button / Bluetooth Button
- Driving Speed Adjustment Button
- Power-Unit Cover Release Button
- Power-Unit Cover
- Power unit with six battery compartments
- Battery-Release Button
KNOW THE LCD SCREEN (Fig. A2)
Refer to the section "TRACTOR STATUS REFERENCE" and "FAULT
CODE REFERENCE" for more information about the icons and indicators on the LCD screen.
- CCS Icon
- Safety-Device Status Indicator
- MOWING IN REVERSE OFF Icon
- Drive Icon
- Reverse Icon
- Safety Key Icon
- LED Lights Icon
- Bluetooth Icon
- Blade Speed Indicator
- Hour Meter
- Fuel Gauge
- Temperature Icon
- Alert Icon (Overload/Low-Power)
- Vacant Battery Compartment Icon
-
Occupied Battery Compartment Icon
-
Fault Code Indicator
- Load Indicator
- Driving Speed Indicator
UNPACKING
NOTICE: Save the packing materials until you have carefully inspected and satisfactorily operated the product. If any parts in packing list assembled on the machine please instantly contact EGO service.
NOTICE: Except the tools in below packing list, all other tools mentioned in the manuals are just recommended but not provided.
PACKING LIST (Fig. B)
| B-1 Electric Lawn Tractor B-2 Steering Wheel | ||
| B-3 Dust Cap B-4 Seat | ||
| B-5 Multichining Plug B-6 Attachment Rack | ||
| B-7 Combination Wrenches B-8 18 mm Socket Wrench | ||
| B-9 M12 Nuts (1 for backup) | B-10 Washers (1 for backup) | |
| B-11 Step Bolts (1 for backup) | B-12 M8 Nuts (1 for backup) | |
| B-13 M8 x 70 Bolts B-14 Safety Key | ||
| B-15 Wash-port Quick Coupler | B-16 Operator's Manual | |
ASSEMBLY
INSTALLING THE STEERING WHEEL (Fig. C1)
| C1-1 Steering Column C1-2 Steering Wheel | ||
| C1-3 Center Line C1-4 Washer | ||
| C1-5 M1 | 2 Nut | C1-6 18 mm Socket Wrench |
| C1-7 Dust Cover | ||
INSTALLING THE SEAT (Fig. C2)
WARNING: The safety interlock system must not be disconnected or bypassed. Doing so could cause the tractor to operate unexpectedly, resulting in personal injury.
| C2-1 Seat | C2 | 2 M8 Nut | |
| C2-3 Step Bolt C2-4 Socket | |||
| C2-5 Plug | |||
ATTACHING THE MULCHING PLUG (Fig. C3)
| C3-1 Side | Discharge Chute | C3 | 2 Mulching | Plug |
| C3-3 Moveable Spring | ||||
INSTALLING THE ATTACHMENT RACK (Fig. C4)
| C4-1 Attachment Rack | C4-2 M8x70 | Bolts |
| C4-3 M8 | Nuts |
ADJUSTMENT
BEFORE ADJUSTMENT (Fig. D1)
ADJUSTING THE CUTTING-DECK HEIGHT (Fig. D2)
ADJUSTING THE ANTI-SCALP WHEELS (Fig. D3 - D6)
| D3-1 Anti-Scalp Wheels D5-1 Nut | ||
| D5-2 Lug Bolt D6-1 Deck Height Label |
ADJUSTING THE SEAT (Fig. D7)
D7-1 Seat Position Adjustment Lever
OPERATION
E2-1 Parking-Brake Position E2-2 |Released |Position
WARNING: THE PARKING-BRAKE PEDAL CANNOT SLOW DOWN THE DRIVING SPEED. NEVER TRY TO DEPRESS THE PARKING-BRAKE PEDAL TO SLOW DOWN THE DRIVING SPEED DURING DRIVING. WHEN THE PARKING-BRAKE PEDAL IS DERESSED BUT IS NOT ENGAGED IN THE PARKING-BRAKE POSITION, THE ELECTRIC BRAKE IS NO LONGER EFFECTIVE AND THE TRACTOR WILL STOP MOVING ON A FLAT SURFACE. BUT IF THIS HAPPENS ON A SLOPE, THE TRACTOR MAY SLIDE DOWN THE SLOPE ONCE THE PARKING-BRAKE PEDAL IS RELEASED.
WARNING: PULL UP THE PARKING-BRAKE LOCK LEVER AND DEPRESS THE PARKING-BRAKE PEDAL IMMEDIATELY TO ENGAGE IT IN THE PARKING-BRAKE POSITION IN CASE ANY EMERGENCY OCCURS, THE TRACTOR WILL STOP IMMEDIATELY AND WILL NOT SLIDE DOWN THE SLOPE.
ATTACHING / DETACHING THE BATTERY PACK (Fig. E3 - E6)
In order to start this tractor, EGO batteries totaling 15 Ah (2 X BA4200/BA4200T) or more are required. For best performance, we recommended use of EGO batteries that total 30 Ah or more.
E3-1 Cover Release Button E5-1 Battery Release Button
CHARGING THE TRACTOR
Use only with the recommended battery packs and chargers.
Charge the battery pack(s) separately (Fig. E7)
NOTICE: Refer to corresponding battery and charger manuals for detail instructions.
Charge the battery pack(s) via charging port (Fig. E8-E10)
E10-1 Dust Cap E10-2 Charging Port
If the deck-blade system and/or the driving system fails to stop when the operator is off of the seat and if the cause cannot be determined after confirming the plug and socket connection of the seat is well connected, contact your EGO customer service center immediately.
COMMUNICATION TECHNOLOGY
For information on our full range of connected products and services, including connection instructions, please scan QR Code below or visit www.egopowerplus.eu/connect.

Ensure that the work area is clear of children, bystanders, and pets.
Clear the work area of objects that may be thrown by the tractor blades.
Clean debris from the tractor.
Check for loose fasteners.
Check to make sure that all guards are in place and working properly.
Visually check the tires whether they are inflated.
Check the brake operation.
Adjust the deck height to the desired cutting position best suited for the lawn, and adjust anti-scalp wheels accordingly.
Adjust the seat position and make sure both pedals can be reached.
Verify the battery charge level.
Test the safety interlock system.
STARTING THE TRACTOR (Fig. E15 - Fig. E16)
WARNING: Avoid sudden starts, stops, and turns, as well as excessive speed, especially when first learning to operate the tractor. The tractor can spin rapidly, which may cause you to lose control and result in serious injury and/or damage.
WARNING: Before starting the tractor, check and make sure the blades are disengaged within 5s when pushing the PTO switch downward. If the blades fail to stop, do not use the tractor and contact your EGO customer service immediately.
EN
NOTE:
the parking-brake pedal is set at the parking-brake position, you need to only press the start/stop button for 3 seconds to illuminate the LCD screen and then release the parking-brake pedal before driving the tractor.
The cutting blades can be started at any time once the LCD screen is fully illuminated and the direction control lever is not pulled backward in the "R" direction. To turn on the blades while driving the tractor in reverse, refer to the section "TURNING BLADES ON WHILE DRIVING IN REVERSE" in this manual.
NOTICE: Follow Fig. E17 to get the lowest driving speed until you are fully capable of operating the tractor in all situations.
The electric lawn tractor does not memorize the driving speed and blade speed settings. The driving speed and blade speed will return to level 2 every time the tractor is turned off.
Driving Speed Adjustment (Fig. E17)
Blade Speed Adjustment (Fig. E18)
LED Lights (Fig. E19)
The LED headlights could be turned on and off by the LED light switch.
USB Port
NOTICE: The USB port provides charging power of 5 Voltage DC at up a combined draw of 1.5 Amperes and is powered only when the tractor is startup.
STOPPING THE TRACTOR (Fig. E20)
WARNING: Always set the parking-brake pedal at parking-brake position when the tractor stops driving on a slope, otherwise, the tractor may slide down the slope, which may cause serious tractor damage or personal injury!
NOTE: In a situation when the parking-brake pedal is set to the parking-brake position and the operator is off the seat, but the battery packs are not removed:
In case the LCD screen is turned off, the battery indicators, start/stop button, and CCS button will remain illuminated for 1 hour.
In case the LCD screen shows the "fuel gauge" or operator interface, the tractor will automatically shut off after 1 hour.
Limp-Home Mode
When battery charge becomes critically low, the tractor will go into Limp-Home mode to preserve enough power to travel back to the charging area.
The blades switch into low rotation speed, which could only cut very little amount of grass. Upon encountering tall and dense grass, the blades will stop rotating. The audio indicator will sound (beep) intermittently.
The tractor status indicator will flash red every second, both the alert icon (low-power) and the icon of each occupied battery compartment will blink.
The operator should:
push the PTO switch downward to turn off the blade motors. The audio indicator will stop sounding when the blade motors stop.
Stop working and get to the charging area as soon as possible. The maximum distance the tractor can travel is 1000m
When the battery is nearly depleted, both the alert icon (low-power) and the icon of each occupied battery compartment will blink every half a second. The tractor will stop working immediately. The operator will have to transport the tractor to the charging area for charging.
NOTICE: If manual pushing is needed, be sure that the batteries are disconnected from the tractor and the parking-brake pedal is released from the parking-brake position.
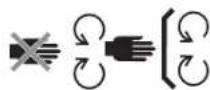
DRIVING THE TRACTOR (Fig. E21)
DANGER: Stay at least two mowing widths away from any ditches, drop-offs, or water. Front wheels can rotate when the tractor is stopped, even with the brake applied, and cause the tractor to go over the edge or into the water and result in death or serious personal injury.
WARNING: Do not operate the tractor on public roadways.
WARNING: If blockage happens or you strike a foreign object, stop the motors and remove the batteries. Remove grass clippings, leaves, dirt and any other accumulated debris; thoroughly inspect the tractor for damage and repair the damage before restarting and operating the tractor.
NOTE:
During driving, when you leave the seat, the tractor status indicator will turn off. When restarting driving again, sit back on the seat and fully depress the parking-brake pedal to make the tractor status indicator shine green.
When switching between forward and reverse during driving, move the direction control lever directly from one end to the other without stopping in the neutral position, otherwise the tractor may stop moving.
USING CRUISE CONTROL (CCS)
To activate (enter) Cruise Control (CCS) (Fig. E22)
NOTE: The driving speed level shown on the LCD screen may not accurately represent the actual driving speed of the tractor in cruise control. Press the speed adjustment button to "refresh" the driving speed level on the LCD screen.
To stop (exit) Cruise Control (CCS), you may choose one of the three ways:
Depress the accelerator pedal all the way and keep depressing. The CCS function will stop and the tractor will continue driving.
slightly depress the accelerator pedal and then release it. The tractor and the CCS function will stop.
Press the CCS button. The tractor and the CCS function will stop.
NOTE: When the CCS is stopped, the icon will disappear from the LCD screen and beep will sound twice.
NOTE: If the parking-brake pedal is depressed, the tractor will stop but the "icon will blink on the LCD screen to indicate the CCS is on standby. In this case, release the parking-brake pedal, press the CCS button. The tractor will resume driving automatically and the icon will stop blinking.
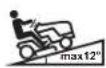
TURNING BLADES ON WHILE DRIVING IN REVERSE
NOTICE: Mowing in reverse is not recommended.
WARNING: Use extreme caution when mowing in reverse. Always make sure no individuals come into the work area, especially small children before and while mowing in reverse.
WARNING: The visibility of the operators could be impaired when operating the tractor attached with the dagger kit. Extreme caution and familiarity with the surroundings should always be taken into consideration before and while mowing in reverse.
To Activate (Enter) MOWING IN REVERSE (E23)
To Stop (Exit) MOWING IN REVERSE, you may choose one of the four ways:
Press the MOWING IN REVERSE button once.
Raise yourself off the tractor seat.
Press the start/stop button for 3s to turn off the LCD screen.
Remove the safety key or remove the battery pack(s) to shut down the tractor.
NOTE: When the MOWING IN REVERSE is stopped, the “icon will illuminate on the LCD screen.
MAINTENANCE
WARNING: Always wear eye protection with side shields. Failure to do so could result in objects being thrown into your eyes resulting in possible serious injury.
WARNING: Always protect your hands by wearing heavy gloves or wrapping the cutting edges with rags or other materials when performing any maintenance on the tractor blade. Always remove the safety key and battery packs when servicing or transporting the tractor.
RECOMMENDED MAINTENANCE SCHEDULE(S)
| Maintenance Service Interval | Maintenance Procedure |
| Before each use or daily | Check the safety-interlock system. Visually check the tires whether they are inflated. Inspect the blades. Inspect the entire product for damaged, missing, or loose parts such as side discharge chute, screws, nuts, bolts, caps, etc., ensuring that all guards are in place and working properly. Check and make sure the accelerator pedal could be depressed and release properly. Check the steering wheel damper. The steering wheel should be rotated with certain resistance. |
| After each use | Clean the tractor and wash the deck. |
| Every 25h | Check the tire pressure. |
| Every 100h | Check the rear wheels, ensuring that all lug nuts are fastened at the recommended torque (101 - 103 Nm). Check the front wheels, ensuring that the nut is fastened at the recommended torque (90 - 92 Nm). |
| Every 200h | Check the front wheels, ensuring that they turn freely. |
| Every half a year | Check the parking-brake pedal. Remove the battery from the tractor, then pull up the parking-brake lock lever and depress the parking-brake pedal to set the parking-brake. Manually push the tractor forward to see if the tractor can be moved without the rear wheels rotating. If the tractor moves and the rear wheels rotate meanwhile, please contact EGO customer service center for repair. |
| Before storage | Remove the batteries from the tractor. Remove the safety key from the tractor. Perform all maintenance procedures listed above and thoroughly clean the tractor. Inspect the entire product for damaged, missing, or loose parts, replace or tighten the corresponding ones before storage. |
| Annually | Lubricate the shaft sleeves of the front wheels. |
EN
EN
GENERAL MAINTENANCE
Cleaning the tractor housing (Fig. F1-F2)
Using wash port to clean tractor deck (Fig. F3-F4)
F3-1 Wash Port F3-2 Wash-Port Quick Coupler
F3-3 Garden Hose
NOTICE: When finishing cleaning, turn off the tractor completely and then remove the garden hose and quick-coupler.
MAINTAINING THE TRACTOR DECK AND THE CUTTING BLADES
Preparation (Fig. G1)
Removing the deck (Fig. G2 - G3)
G2-1 Motor Cable G2-2 Cotter Pin
G2-3 Suspension Linkage
Replacing the cutting blades (Fig. G4 - G6)
| G4-1 Stabilizer G5-1 Bolt | ||
| G5-2 Washer G5-3 Blade | ||
| G5-4 Flange G5-5 Motor Shaft |
Leveling the deck
a. When to level (Fig. G7 / Fig. G8 / Fig. G9)
b. Before leveling
Checking the cold tire pressure (Fig. G10).
Check the cutting blades. Remove and replace worn, cracked, and/or bent blades as necessary.
c. Preparation for leveling (Fig. G11)
d. How to level
To make side-to-side adjustment (Fig. G12)
To make front-to-rear adjustment (Fig. G13)
STORAGE AND TRANSPORT
TRANSPORTING THE TRACTOR (Fig. H1 - H5)
H2-1 Ramps H2-2 Straps
NOTICE: Secure the tractor as needed, using straps or cables to prevent movement during transport.
STORAGE (Fig. 11 - 12)
NOTICE: Remove and store the battery pack(s) separately refer to the corresponding manuals.
Clean and check the tractor before storage refer to the sections "GENERAL MAINTENANCE" and "RECOMMENDED MAINTENANCE SCHEDULE(S)".
Protecting the environment

WEEE (Waste Electrical and Electronic Equipment) Do not dispose of electrical equipment, used battery and charger into household waste! Take this product to an authorized recycler and make it available for separate collection.
Electric tools must be returned to an environmentally compatible recycling facility.
TROUBLESHOOTING
EN
| PROBLEM CAUSE SOLUTION | ||
| The electric lawn tractor fails to drive when the accelerator pedal is depressed. | The combined Ah of the inserted batteries does not meet the requirement. | In order to start this tractor, use enough EGO batteries following the instructions in section "ATTACHING/ DETACHING THE BATTERY PACK" in this manual. |
| The parking brake pedal is set in the braking position. | Fully depress the parking-brake pedal to release it from the parking-brake position. | |
| The tractor status indicator does not shine green. | Depress the parking-brake pedal and then release. The tractor status indicator will shine green, which means the tractor is ready to start. | |
| The operator is not sitting on the seat. | The tractor can only be operated, when the operator is properly sitting on the seat. | |
| The seat safety interlock system is not connected properly. | Remove the batteries from the tractor and lift the back of the seat up to make sure that the cable plug is properly connected to the socket on the bottom of the seat (see chapter "INSTALLING THE SEAT"). Follow the instructions in "STARTING THE TRACTOR" to restart the tractor to see if the tractor can be started. If not, please contact EGO customer service center for repair. | |
| Under extreme cold weather, the driving function may not start successfully due to the low temperature protection. | Always store the tractor and batteries in warm environment. Restart the tractor when it is warmed up. Please do not make repeated attempts under extreme cold weather which may damage the machine. | |
| The travel path of the accelerator pedal is clogged with debris. | Check and remove the debris | |
| Failure of mechanical or electronic components of the accelerator pedal. | Contact EGO customer service center for repair. | |
| The direction control lever is placed in the neutral position. | Push/pull the direction control lever in the "D" or "R" direction. | |
| The electric lawn tractor stops driving. | When switching between forward and reverse during driving, the direction control lever stays in the neutral position for long time. | Release the accelerator pedal and then depress it again. |
| Failure of electronic components of the accelerator pedal. | Contact EGO customer service center for repair. | |
| The seat safety interlock system got disconnected during driving on a rough terrain. | Remove the batteries from the tractor and lift the back of the seat up to make sure that the cable plug is properly connected to the socket on the bottom of the seat (see chapter "INSTALLING THE SEAT"). Follow the instructions in "STARTING THE TRACTOR" to restart the tractor to see if the tractor can be started. If not, contact EGO customer service center for repair. | |
| The operator's weight is not evenly distributed on the seat. The weight of the operator on the seat must be at least 20 kg for the seat safety interlock system to function properly. | 1. Sit on the seat properly, fully depress the parking-brake pedal and release it, then the tractor is ready for driving. 2. Disconnect and attach the batteries again if necessary. | |
| The parking-brake pedal is depressed enough but not locked to the parking position, the tractor will stop. | Follow the instructions in "STARTING THE TRACTOR" to restart the tractor. |
EN
| PROBLEM CAUSE SOLUTION | ||
| The electric lawn tractor fails to start the blades when the PTO switch is activated. PTO Switch icon blinks | The combined Ah of the inserted batteries does not meet the requirement. | In order to start this tractor, use enough EGO batteries following the instructions in section "ATTACHING/ DETACHING THE BATTERY PACK" in this manual. |
| The PTO switch was not pushed down when the tractor was turned off last time. | Push the PTO switch down and then up to restart the blade motors. | |
| The tractor is overloaded at the moment the blades are starting to rotate, triggering the blade motors self-protection. | Start the grass cutting in lower blade speed first and do not accelerate the blade speed until the blades are rotating successfully. | |
| Under extreme cold weather, the blade motor may not start successfully due to the low temperature protection. | Always store the tractor and batteries in warm environment. Restart the tractor when it is warmed up. Please do not make repeated attempts under extreme cold weather which may damage the machine. | |
| The blade interferes with the deformed tractor deck | Contact EGO Customer Service Center for repair. | |
| The blades stop rotating during grass cutting. | The tractor is overloaded. | Raise the deck cutting height or slow down the driving speed to reduce the load of the tractor. |
| The deck is clogged with grass and debris. | Clean the deck and make certain that the blades have freedom of movement. | |
| The tractor is overheated. | Reduce the load of the tractor, by raising the deck cutting height or slowing down the blade/driving speed and allow the tractor to cool. | |
| The battery pack(s) in the tractor's battery compartment is overheated, resulting in combined Ah rating of all inserted batteries to not meet the requirement | 1. The tractor can continue working if the combined battery Ah rating, overheated battery excluded, meets the requirement. Once the overheated battery returns to normal temperature, it will join in powering the tractor immediately.2. If the combined battery Ah rating does not meet the requirement, the tractor will not work until more battery packs are inserted into the vacant battery compartments.3. Reduce the load of the tractor by raising the deck cutting height or slowing down the driving speed when resuming operation. | |
| The tractor is in Limp-Home mode. | When the tractor is in Limp-Home mode, the blades are automatically switched into low rotation speed. The operator should stop working and drive to the battery charging area as soon as possible. | |
| The tractor is hit by a foreign object, resulting in motor self-protection. | Push the PTO switch down and then up to restart the blade motors. | |
| The tractor moves in reverse with the MOWING IN REVERSE OFF icon illuminated on the LCD screen. | Press the PTO switch down and restart the blade motors following the instructions in the section "TO Active (Enter) MOWING IN REVERSE". | |
| The audio indicator continues sounding. | The tractor is in Limp-home mode and the blades are not turned off. | Push the PTO switch down to turn off the blade motors. The audio indicator will stop sounding when the blade motors are turned off. |
| The tractor stops driving on a slope and the operator is off the seat without setting the parking-brake pedal at the parking-brake position. | Set the parking-brake pedal in the parking-brake position before leaving the tractor on the slope. | |
| The power indicators on batterypacks are still illuminated when thetractor is turned off. | When the tractor is turned off on levelground without removing the batterypack(s) from the tractor, the powerindicators will remain illuminated fora period. | No action is needed. The battery indicators will go offwhen the tractor shuts off after a period. Refer to thesection “STOPPING THE TRACTOR” for specific time |
| When the tractor is turned off on aslope without setting the parkingbrake, the power indicators on batterypacks will stay on until the batterycharge is depleted. The audio indicatorkeeps sounding at the same time. | Set the parking-brake pedal at the parking-brake positionbefore leaving the tractor on the slope. Otherwise, thetractor may slide down the slope. | |
| The LCD screen fails to beilluminated with all icons on. | Start/stop button is not pressed forsufficient time. | 1. The LCD screen will only display the “fuel gauge” whenthe start/stop button is pressed briefly.2. The LCD screen will turn on after fully depressing theparking-brake pedal and pressing the start/stop button for sufficienttime simultaneously. |
| When the safety key icon “\(\text{ \circ }\) flashes on the LCD screen, the safetym key is not inserted. | Insert the safety key, then fully depress the parking-brakepedal and press the start/stop button for sufficient timesimultaneously to turn on the LCD screen. | |
| When the parking-brake icon“\(\text{ \circ }\) flashes on the LCD screen,the parking-brake pedal is not fully depressed. | Insert the safety key, then fully depress the parking-brake pedal and press the start/stop button for sufficient timesimultaneously to turn on the LCD screen. | |
| The tractor cuts unevenly, withsignificant height difference frontto rear. | The blades are dull. | Sharpen or replace the cutting blades as instructed in thismanual. |
| The blades are bent. | Replace the bent cutting blades following the instructionsin section “Replacing the cutting blades”. | |
| The deck is not leveled, resulting indifferent cutting blade height | Level the deck following the instructions in section “Leveling the deck”. | |
| The actual grass cutting height isnot aligned with the claimed height. | The deck nuts are loosened on thesuspension linkage. | Follow the instructions in section “Leveling the deck” tomake correct front-to-rear adjustment for the tractordeck and securely tighten the nuts on the suspension linkage. |
| The deck is damaged or seriouslyworn. | Follow the instructions in section “Removing the deck”to have tractor deck replaced. | |
| The tractor does not mulch properly. | Wet grass clippings are sticking to theunderside of the deck. | Wait until the grass dries before mowing. |
| The tractor is set to cut too muchgrass at once. | Raise the deck cutting height. | |
| Excessive vibration. | The cutting blades are loose. | Tighten the blade bolt to the recommended torque. |
| The blades are bent. | Replace the bent cutting blades following the instructionsin section “Replacing the cutting blades”. | |
| The deck is not leveled. | Level the tractor deck following the instructions in section “Leveling the deck”. | |
| The deck nuts are loosened on thesuspension linkage. | Tighten the nuts on the suspension linkage. | |
| The deck is set to cut too much grassat once. | Raise the deck cutting height. |
EN
EN
| PROBLEM CAUSE SOLUTION | ||
| There are grass or debris remaining on the ground after mowing. | The deck is set to cut too much grass at once when the grass is tall. | Begin with a high cutting height and reduce it until the desired mowing result is attained. Grass over 152 mm tall should be mowed twice, at successively lower cutting heights. |
| The grass is wet. | Do not mow when the grass is wet. Wait until the grass dries. | |
| The driving speed is high. | Slow down the driving speed. | |
| The blade speed is low. | Increase the blade speed gradually. | |
| Short run time of the tractor with included batteries. | Lawn terrain, grass conditions, cutting-height setting, driving speed, blade speed, etc. will greatly affect the running time. | Raise the deck cutting height and slow down the blade speed to reduce the cutting load. |
| The tractor is not tracking straight. | The tire pressures for the left and right wheels are different. | Check and adjust the air pressure in both front rear wheel tires, according to the recommendation in section "SPECIFICATIONS" in this manual. |
| The parking-brake pedal cannot be released from the parking-brake position or is slow to spring back. | The travel path of the parking-brake pedal is clogged with debris. | Check and remove the debris. |
| The tractor cannot be charged via charging port with the tractor status indicator shining solid red. | The plug of the charger is not inserted correctly into the charging port on the tractor. | Reconnect the charger plug to see whether the tractor can be charged normally. |
| There is no power in the wall outlets. | No action is needed. Wait until the power recovers. | |
| Charger malfunction. | Please contact EGO customer service center and have the charger inspected and/or repaired if needed by a qualified service technician. | |
| The charger port on the tractor is faulty. | Please contact EGO customer service center for repair. | |
| The charging time via the tractor charging port is too long. | Using EGO Adapter ACA1000 for charging requires long time. | Use EGO charger CHV1600E for charging the electric lawn tractor directly. |
| The batteries cannot be fully charged via the tractor charging port. | Firmware bug of the tractor or the battery pack or the charger failure. | Reset the charger by unplugging the charger and waiting for several minutes. Then reconnect the plug to the power supply. If this does not solve the problem, call EGO Customer Service Center. |
| The tractor cannot be started after cleaning. | nproper cleaning, such as water getting on the electric components, LCD screen etc. | 1. Follow the instructions in section "GENERAL MAINTENANCE" to clean the tractor correctly.2. If the tractor caught in rain accidentally, leave it to dry or use compressed air to dry it. |
| The deck gets clogged fast. | The deck was not properly cleaned after previous use. | Clean the tractor deck after each use, following the section "Using wash port to clean the deck". |
| The tractor easily loses traction when climbing up on the slope. | The tires of the rear wheels are worn. | Seek local service to replace the wheel tires. |
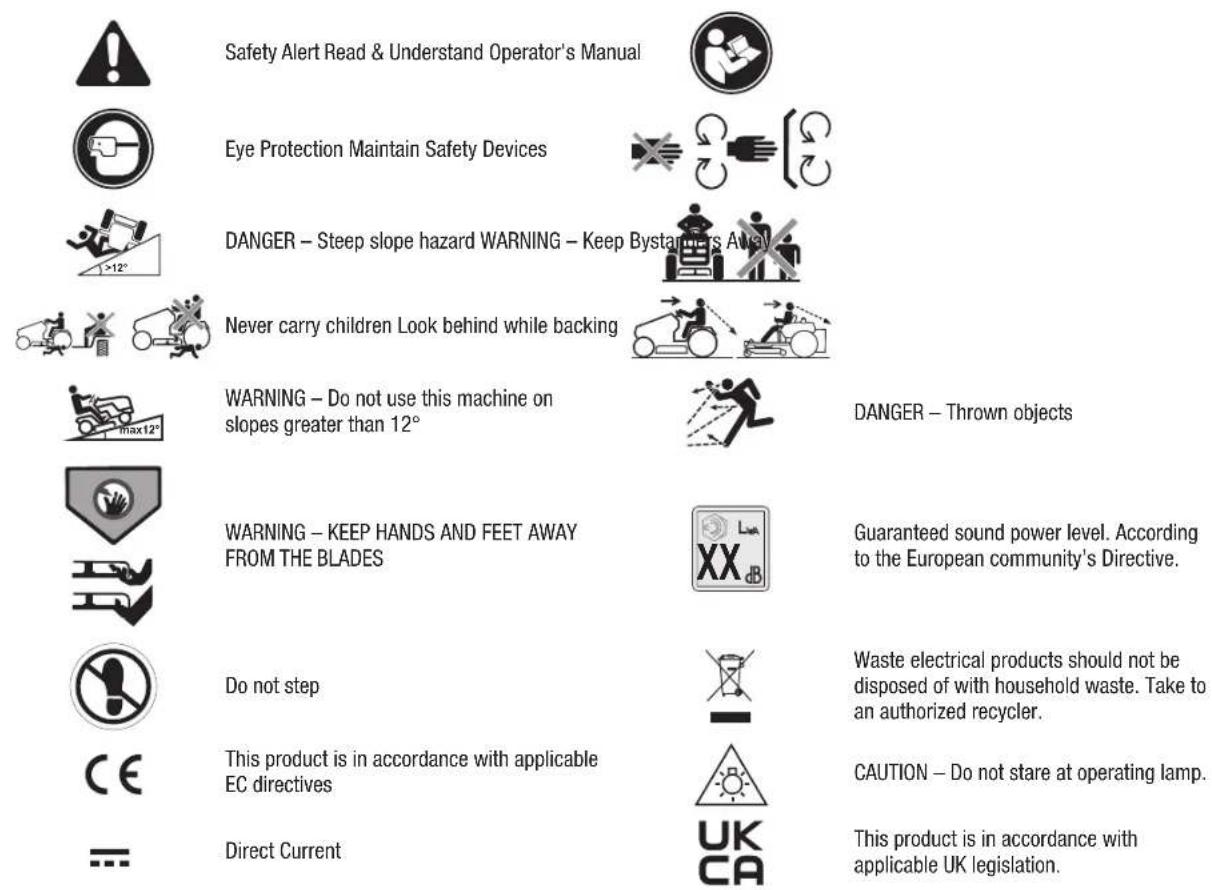
| Mowing on a steep slope. | The tractor should not be used to mow slopes steeper than required degrees. | |
| When the tractor is stopped on a slope with the parking-brake pedal engaged, the tractor can roll down the slope. | The brake components are excessively worn due to improper operation of the tractor. | Contact EGO customer service center for repair. |
| There is no water coming from the wash port when attempting to wash the deck. | The wash-port quick coupler is not properly mounted onto the wash port. | Re-attach the wash-port quick coupler until you hear a clear click after firmly pushing. If it does not work, call EGO Customer Service Center. |
| An abnormal sound is heard when manually pushing the tractor without starting it. | The sound comes from the magnets inside the driving motor. | It is normal and no action is needed. |
| The steering wheel cannot be rotated. | The steering wheel assembly is clogged with debris. | Check and remove the debris. |
| The tractor does not turn left/right when the steering wheel is rotated. | Failure of electronic or mechanical components. | Contact EGO Customer Service Center for repair. |
| The tractor fails to stop when releasing the accelerator pedal. | The return path of the accelerator pedal is clogged with debris. | Check and remove the debris. |
| The CCS button is pressed unintentionally while driving. The tractor is in cruise-control mode | Check if the CCS icon is illuminated on the LCD screen, and exit the CCS as necessary. Refer to chapter "USING CRUISE CONTROL (CCS)". | |
| The CCS function cannot be activated or turned off. | The CCS button is not pressed properly. | Press the CCS button until the CCS icon is illuminated on the LCD screen, or disappears from the LCD screen. |
| The front wheels of the tractor rotate with abnormal noise | The shaft sleeves of the front wheels require lubrication. | Remove the battery packs and then fill the injection ports with grease until the grease overflows the upper edge or lower edge of the shaft sleeves of the front wheels. |
EN TRACTOR STATUS REFERENCE
| LCD Display | Description | Tractor Status Indicator | Audio Indicator | Cause Solution | |
| 188H | Fuel Gauge Icon OFF No | It indicates the average charge capacity of inserted batteries | This is normal operation. No action is needed. | ||
| 8888 H | Hour Meter Icon OFF No | It shows the total driving time of tractor, in hours and cannot be reset. | This is normal operation. No action is needed. | ||
| Load Indicator Icon OFF No | It indicates the current load of the tractor. | This is normal operation. No action is needed. | |||
| LED lights icon illuminates on the LCD screen. | OFF No | The headlights are turned on by the LED light switch. | This is normal operation. No action is needed. | ||
| Bluetooth icon illuminates on the LCD screen | OFF No | The tractor is connected to a mobile device via Bluetooth. | This is normal operation. No action is needed. | ||
| MOWING IN REVERSE OFF Icon illuminates on the LCD screen. | OFF No | It indicates the blades cannot be turned on when the tractor moves in reverse. | This is normal operation. If needed, turn the blades on while driving in reverse following the section “TURNING BLADES ON WHILE DRIVING IN REVERSE” in the manual. | ||
| Drive Icon illuminates on the LCD screen. | OFF No | It indicates the tractor can be driven or is driving forward. | This is normal operation. Place the direction control lever in “D”, neutral, or “R” position according to the need. | ||
| Reverse Icon illuminates on the LCD screen. | OFF No | It indicates the tractor can be driven or is driving backward. | |||
| Drive icon and reverse icon blink alternately | OFF No | It indicates the tractor could not be driven. | |||
| Safety key icon illuminates | OFF No | The safety key is inserted correctly. | This is normal operation. No action is needed. | ||
| Safety key icon blinks when the LCD screen displays “fuel gauge”. | OFF No | The safety key is not inserted. | Insert the safety key then fully depress the parking-brake pedal and press the START/STOP button simultaneously for more than 3 seconds to turn on the tractor. | ||
| Key Control Panel Box Assembly is broken. | Contact EGO customer service center for repair. | ||||
| Parking-brake icon blinks when the LCD screen displays the “fuel gauge”. | OFF No | The parking-brake pedal is not depressed. | With the safety key inserted, fully depress the parking-brake pedal and press the START/STOP button simultaneously for more than 3 seconds to turn on the tractor. | ||
| Parking-brake icon blinks when the LCD screen displays operator interface. | OFF No | Depress the accelerator pedal before depressing the parking-brake pedal to make the tractor indicator shine green. | Start the tractor properly following the section “STARTING THE TRACTOR”. | ||
| Parking-brake icon illuminates | OFF No | The parking-brake pedal is set at the parking-brake position. | Release it before starting the tractor. | ||
| Seat sensor icon illuminates | OFF No | The operator leaves the seat or the seat safety interlock system is disconnected. | If with the operator is seated on the seat and the icon is on, stop operating the tractor immediately and check the seat connection. If the seat connection with the tractor is confirmed correct, please contact a qualified service technician for repairs. | ||
| PTO Switch icon blinks OFF | No | The blade motor was interrupted in operation and the PTO switch is not set to off position. | Before restarting the tractor, push the PTO switch down to turn off the blade motors. Please see "TROUBLESHOOTING" section in this manual for reference. | ||
| The icon of a certain battery compartment blinks. | OFF No | A certain battery during discharging is over-current. | No action is needed. The tractor can continue working if the combined battery Ah rating, over-current battery excluded, is equal to or more than 15Ah. Once the over-current battery returns to normal, it will join in powering the tractor immediately and the icon will disappear. | ||
| The icon of the empty battery compartment blinks | OFF No | Battery capacity is not sufficient to allow the tractor to work. | In order to start this tractor, use enough EGO batteries following the instructions in section "ATTACHING/DETACHING THE BATTERY PACK" in this manual. | ||
| The temperature icon and the exact occupied battery compartment blink at the same time. | OFF No | The battery pack in the corresponding numbered battery compartment is overheated. | 1. The tractor can continue working if the combined battery Ah rating, overheated battery excluded, meets the requirement. Once the overheated battery returns to normal temperature, it will join in powering the tractor immediately.2. If the combined battery Ah rating does not meet the requirement, the tractor will not work until more battery packs are inserted into the vacant battery compartments.3. Reduce the load of the tractor by raising the deck cutting height or slowing down the driving speed when resuming operation. | ||
| The temperature icon blinks. | OFF One beep | The tractor is overheated. | Reduce the load of the tractor by raising the deck cutting height or slowing down the blade/driving speed. Take a break and allow the tractor to cool. | ||
| The tractor is too cold. | Please do not make repeated attempts which may damage the machine. Always store the tractor and batteries in warm environment. Restart the tractor when it is warmed up. |
EN
EN
| LCD Display | Description | Tractor Status Indicator | Audio Indicator | Cause Solution | |
| ! | The alert icon blinks | Flashes red | One beep | The blade motor is overloaded. | Raise the deck cutting height or slow the driving speed to reduce the load of the tractor. |
| The side discharge chute is clogged with grass and debris. | Clean the side discharge chute after each use. | ||||
| There is an interference between the blade and the tractor deck. | Call EGO Customer Service Center | ||||
| ! | The icons of each occupied battery compartment and alert icon blink every 1 second at the same time on the LCD screen. | Flashes red | Keeps beeping until the PTO switch is pushed downward. | The battery packs are low on charge and the tractor is in Limp Home mode. | Stop working and return to the battery charging area. NOTE: When the tractor is in Limp-Home mode, the blades are automatically switched into low rotation speed and meanwhile the audio indicator will keep beeping. The operator should push the PTO switch downward to turn off the blade motors. The audio indicator will stop beeping after the blades stop. |
| ! | The icon of each occupied battery compartment and alert icon blink every half a second. | Flashes red | Keeps beeping | The blade motor was interrupted in operation and the PTO switch is not set to off position. | The tractor will stop working immediately. The operator should transport the tractor to the battery charging area for charging. |
| CCS icon illuminates on the LCD screen | Solid green | No | The tractor continues forward at a set speed without needing to step on the accelerator pedal. | This is normal operation. If needed, turn the CCS function off following the section “To stop (exit) Cruise Control (CCS)” in the manual. | |
| CCS icon blinks on the LCD screen. | OFF No | The CCS (cruise control system) function has failed. | The CCS function could not be set when the tractor is driving at very low speed or is driving in reverse. | ||
| Parking-brake pedal is depressed to stop the tractor. | After the parking-brake pedal is released, press the CCS button and the CCS icon will illuminate on the LCD, or exit the CCS function following the instructions in the section “To stop (exit) Cruise Control (CCS)”. | ||||
| n/a n/a OFF | Keeps beeping | The tractor is parked on a slope and the operator leaves the tractor without setting the parking-brake pedal at the parking-brake position. | Set the parking-brake pedal at the parking-brake position. The parking-brake icon will illuminate and the sound indicator will stop beeping. | ||
| OFF Charging Port Fault | Solid RED n/a There is no power supply. | Check the wall outlet whether there is 220 V-240 V supplied or the socket is good. | |||
| Solid RED n/a | Electronic faults, such as the charging port is in open circuit, the fuse is blown, etc. | Contact EGO customer service center for repair. | |||
FAULT CODE REFERENCE
| Description Fault Code on LCD Audio Indicator Solution | |||
| Left blade motor fails in rotation 509 | One beep Inspect the blade first. If it is | loosened, tighten the bolt with recommended torque. Otherwise, Please contact EGO customer service center for repair. | |
| Right blade motor fails in rotation 609 | One beep | ||
NOTICE: For any other fault codes appeared on the LCD screen, which may indicate PCBA failure, loosen connection, motor failure of the driving motor, blade motors, etc., please remove all battery packs and re-insert them a few minutes later to restart the tractor. If this doesn't solve the problem, please record the fault code and contact EGO customer service center for repair.
WARRANTY
EGO WARRANTY POLICY
Please visit the website egopowerplus.eu for full terms and conditions of the EGO Warranty policy.
SYMBOLE IN DIESEM HANDBUCH
i
ACCESSIONS RECOMMANDÉS
in Pollice cm Centimetro
Nm Newton metro mm Millimetro
^ Grado Celsius kg Chilogrammo
km/h
Chilometri all'ora
IPX4
Grado di protezione
ACCENSIONDELL LAME DURANTE LA GUIDA IN RETROMARCIA
in Inch cm Centimeter
Nm Newtonmeter mm Millimeter
°C Celsius kg Kilogram
km/h
Kilometer per uu
IPX4
OPSLAG (afb. I1 - I2)
in Tomme cm Centimeter
Nm Newton-malmer mm Millimeter
^ C Celsius kg Kg
km/h Kilometer pr. time
IPX4
in Tum cm Centimeter
Nm Newtonmeter mm Millimeter
Celsius kg Kilogram
km/h
Kilometer per timme
IPX4
Ingang skyddsgrad
SYMBOLER IDENNA HANDBOX

Informationen maste noteras

INNAN ANVANDNING (Bild E1)
STALLA IN PARKERINGSBROMSEN (Bild E2)
E2-1 Parkeringsbromsläge E2-2 Frisliappt position
A VARNING: PARKERINGSBROMSPEDALEN KAN INTE SAKTA NER KORHASTIGHTEN. FORSOK ALDRIG TRYCKA NER PARKERINGSBROMSPEDALEN FOR ATT SAKTA NER KORHASTIGHTEN UNDER KÖRNING. NAR PARKERINGSBROMSPEDALEN AR NEDTRYCKT MEN INTE AR INKOPPLAD I PARKERINGSBROMSLAGET AR DEN ELEKTRISKA BROMSEN INTE LÄNGRE EFFEKTIV OCH TRAKTORN SLUTR RORA SIG P EN PLAN YTA. MEN OM DETTA HändER I EN SLUTTNING KAN TRAKTORN GLIDA NERF OR SLUTTNINGEN NAR PARKERINGSBROMSPEDALEN SLAPPS.
A VARNING: DRA UPP PARKERINGSBROMSLASSPAKEN OCH TRYCK OMEDELBART IN PARKERINGSBROMSPEDALEN FOR ATT AKTIVERA DEN I PARKERINGSBROMSLAGET OM EN NODSITUATION INTRAFFAR STANNAR TRAKTORN OMEDELBART OCH GLIDER INTE NERFOR SLUTTNINGEN.
FASTSÄTTNING/BORTTAGNING AV BATTERIPAKETET (Bild E3-E6)
For att starta denna grasklippare kravs EGO-batterier pa totalt 15 Ah (2 X BA4200/BA4200T) aller mer. For basta prestanda rekommenderar vi anvandning av EGO-batterier pa totalt 30 Ah aller mer.
E3-1 Lasknapp for holje E5-1 Lasknapp for batteri
LADDNING AV TRAKTORN
FORBEREDELSE INNAN ANVANDNING
SLÄ PÅ KNIVARNA VID BACKNING
FÖRVARING OCH TRANSPORT
in Tommer cm Centimeter
Nm Newton meter mm Millimeter
°C Celsius kg Kilogram
km/h
Kilometer i timen
IPX4
Ingress beskyttlesesgrad
SYMBOLER I DENNE HANDBLOCKEN

For a aktivere (Enter) KLIPPING I REVERS (E23)
GENERELT VEDLIKEHOLD
HnKorJa He nepeBoa3te DeTeHa yCtpoNCTBe.
IPEyIPEXJEHIE.He nCnOJIb3yIte yCTPOCTBO HA cKnHOc yKNOHOM 60nee 12°

PENyPENKDEHNE. Depknte pyknn Horn noaJIbwe ot pexyuix 3nementOB.

He cTaHOBITecb Ha yCTpoCTBO.

COOTBETCTBYET OCHOBHbIM Tpe6oBaHnM CTaHdaptob 6e3oNaChOcTN Ebponecknx DInpeKTHB.

BHHMaTeIbHO npOHTaIe pyKOBOCTBO NOIb3OBaTEJIa.
BbINOHnTe 06cnykBaHMe 3aunTHbIX yCTPOCTB.

PNEyPEXKDEHHe.He no3BONaTe NOCTOPOHHM JIOJAM HAXOINTBcR NO6n3oCTN.
CMOTPHe Ha3aI npIN DvIXeHIM 3aIHIM XODOM.

OTACHO!Or6paCbBaembIpePdMeTbI.

TapaHTIPOBaHHbIyPOBeHb3ByKOBO MOUHOCTn.CoOTBETCTByET EBpOeIKCOJ DInpeKTHBe.

HeNcnpaBHBie 3eKtpnueckne yctpoCTBa HEnb3y BblbpacbIbATb Bmecte C bItOBbIM Mycopom.CdaBaiTe INB aBtOpn3oBaHHbe nyHkTb c6opa nYtINIma.

BHIMAHHE.HeCMOTpTe HENOCpeCTBeHHo Ha BKNIOHeHHyI NaMny.

TIOCTOAHHbI TOK

DaHHe 3eJIne COOTBETCTByet DeCTByIOUeMy 3aKHOJaTeIbCTBy BeNkoBpITAHIN.
kPaKnionackaB RPM O6pOToB B mHyTu
VBOnbT m MTePbI
in DIOIM cm CaHTIMMeTpbi
Nm HbToH-MeTp mm MMInmMeTpbl
UCIOBHBIE O6O3HauEHHB DAHHOM PYKOBODCTBE

BaxnHaIuHΦopMaua.
STOP
Yka3aHnHe Dne IeICTBnpeKpauaetcA.
TEXHnueCKXAPAKTEPNUKIN
PEKOMEHДYEMbI E IPNHADJIEXKHOCTN
PNEpyPPEKDEHNE. McnoB3yTe TOnbKO akcccyapbl, nepecnleHHbe Hxke. NcNoB3oBAHme akccceCyapOB C pyrMMXapaKtepncTnKAMMOKeTnpMBCTN KCHXKEHIO 3ΦΦeKTNBHOCTn pa60tbl N63onacHOCTN yCTPOINCTBA.
ACTN TPAKTOPA (Pnc.A1)
1.CuDHeHbe
2.Плдстakанннкn
3. 3aJHHe KOneco (BeyuJee), 2 wT.
4.ПомьИочньи npot
5.Платфома
6. 3aunTa nlaTΦopMbI
7. PtoTnB0oTKaTHoe KOJIeCo, 2 wI.
8. IpeepHee Koeco, 2 wT.
9.Передимбампетр.
10.Пелдльстаянчогоутрмоза
11. CBeToMDnDnaΦapa, 2 wT.
12.П汞вовноьшok
13.Отсекдяхаония
14.PbUar6nKpOBKnCToHouHOrToTropMo3a
15. Pynéboe koneco
16. Pbyar perynipobkn noIoxKeHH cIeHbY
17.Порт дя заюдкн
18. USB-nopT
19. Kop3nHa dIy xpaHEnH
20. Педалы akceларopa
21.Бokobov pa3rpyoHbI jKeNo6
22.Cuεηhoe yctpoiCTBO
23. Pbyar peryinopBkn BbICtBn nlatpOpMbI
24.Pama nIra HabeCHorO o6OpyDobAHn (IIN yCTaHOBKn rpy3OBOrO RaNkA INI COJInCe3aUHTHO K03bIPbKa)
25.Индikatop cocToHnTpaKtopa
26. KhoIIka peRyIIMPOBkCCKOpcstnpeKyuIeero 3neMeHNTa
27.Khonka CKAUINBAHIM 3ADHIM XOJOM
28. KhoNka 3aNycka/octaHOBKn
29. Pbyar ynpablenHa npablenHem
30. KIIOH 6e3oNachoCTn
31.ПepeknHouatelbOt6paMoUHocTn
32. KhoNka CCS (cInCTema kpyn3-KoHTpOJIa
33. KhoNka cBeToDnOHOH noDCBETKn/KhoNka Bluetooth
34. Khonka perynipobka ckopoctn DmkeHHN
35.KhonkaФнкcaunKpbIuKn npBbOHoro 6noka
36. KpbIka npINbOHOro 6noka
37.Пивбнйькш ecstbokakkymaTOpHbIMOTcekamM
38. KhoNka dKcaunn aKKymnyTopa
KK-UNCINNEI(Pnc.A2)
Bolee noipob6HyIO INHOpMaIIO O CmBOnax IINHdkaTopax HaKK-dncnnee cm. B pa3denax CBEEHN O COCTOHN TPAKTOPA KObl HEHCNPABHOCTN.
1.CMBOONCCS
2. INHINKATOP COCTOJHNA 3aUNTHORO yCtpoiCTBa
3.CMBOJOTKJIIOUOHEHNACKAUNBAHIN3ADHMXODOM
4.CMBOBONDINKKeHnBnBpePe
5.CIMBOI3aHreroXoJa
6.CMBON KIOUa 6eONaCHOCTN
7.CMBOBONCBETOANDHOROOCBEUENHIA
8. MnДиKaTOp Bluetooth
9. INДикaTop ckopocstn pa60TbI pejxuero JemeMeHTa
10.CyETNUK MOTOUACOB
11. YkaataTeIb yPobHb 3apJa
12. CunboI tempepatbI
13. CmBbON onoBeueHnI (peperpy3ka/Hn3kyn ypoBeHb nTaHnIa
14. CmboBcbo6oHoro akymyIaTropHoro oTeKa
15.CMBOJ3aHrTOro aKkyMnyTApTOHO TcKa
16.Инданкатор Кда Немправочten
17.Индикатор harpy3kn
18.Инданкаторсокор'tихда
PACNAKOBKA
PIMMEYAHNE. CoXpaHnTe ynaKoBOuHbIe MaTePnAbl Do Tex Nop, noka He npOBepnte n3dJIeNe Hne Y6eDInTecB Eero nCpabHno paBoTe. Ecnn KaKHe-Jin6o YacTHn 3nCmNkEa TIOCTaBKN yCTaHOBHeHb Ha ycToPcTBo, HEmEJHeHNo oBaPATeCB CepBnChbI ueHtp EGO.
PIMMEUHHE.3aNCKJIQUHHeM HnCTpyMeHTOB,YkazAHbIX B PnBHeHOM HnKe CTNCke KOMIIeKTA NOCTaBKn, BCE OCTaJIbHbIe INHCTpyMeHTbl, yNOMHyTbe BYyKOBoDcBax, TOnbKO peKOMeHdyOTcKa I NcOJIb30BaHnHO He pINJraKOTcR.
KOMNNEKTIOCTABKN(Pnc.B)
NcnoB3yTeToIbKOcpeKoMeHDoBaHHbIMn aKKMyJrTopaMmN3apdHbIMnycPoIcTBAMN
EapkaaTe akkymyIaTOpbl OtdelbHo (Pnc.E7)
PnIMeAHHE. PpObHbIe HcTpyKuIN Cm.B COOTBeCTBHyOux pyKOBoDCTBax No EKcNlyaTaun AKKyMyTTopa n 3apAnHO yCtpoCTBa.
CapKaaTe aKkymyTOpbI Yepe3 ZapArdhbi Nopt (Pnc.E8-E10)
IPOBEPKA IPEED 3KCIJYATAUNEI
6eNTecb,TOBpa0oey3OHeHETDeTei,IOCTOPOHHXIMI DOMaUNHXXJMBOTbIX.
CHNTe pa6oyky 30Hy OT ppeMToB, KOTOpbIe MOryT 6blb ObooheHb peKyuIMN 3nEmeHTAMn TpaKTopa.
CHNTTE TpaKTop OT Mycopa.
poBepbTe yCTPOiCtBO Ha HAnuHne OcnabEnhBxKpeNnHm.
6eNTecb, YTO BCE UHTKHa MecTe Hpa6oTaHOT DOJIKHBIM 06pa3OM.
Bn3yaIbNo npOBepeTbe,He cnUyIeHbI NIKoJIeCa.
IpoBepbTe pa60Ty TOPMo3OB.
CTAHOBITE NnATOPMMy HA HeoXOaMMy DnA CTpNKKn BbICOTy COOTBeTCTByoUHM Oba3OM OTpeYnPyIe IpoTINBOOTKaTHbIE KOeCa.
TperynpyIte noJoxeHne cndeHb y6eIntecb, tO oBe neaIIN DOCTynbl.
pOBeBpeYpOBeH3apJa aKKyMnTopa.
PpOBepe CNTeMy 3aunTHoB 6nKpOBoN.
3ANYCK TPAKTOPA (Pnc.E15-E16)
PNEUYPEXKDEHNE.136eaiTe pe3kX 3anyCKOB,ocTahOBOK n nobopoTOB,a TaKHe Ype3MepHO CKOpOCTn,OC6eHNO pN O6yehn pa6oTe C TpAkapToPM.KOMnoHENTbI TpAkapToPA MOrTy 6bICTPO BpaauTaBCaYTO MOKeT PnBeCTn K NOTePe KOHTpOJI N cepbe3HbIM TpaBMam N (IN) NOBPEKDeHNAM.
PNEUYPEXKDEHNE. Peped 3anyckom TpaKtopa y6eHTecb, YTOpeXyUHE 3IeMeHbIOCTaHaBnBaHOCTB TeeyHe 5 cekyHd npEpeMeuHnpeKIIOHTaTeN O60pa MoUHcTN BHN. Ecn peXyUHe 3IeMeHbIOHe OCTaHaBnBAIOCTC, He nCNoJIb3yTe TpaKTop HemeDInHNO6pATTECB CepBNCbHn CEHTP EGO.
ПИМЕЧАНМ.
Cnne TaB CTOnOHOro TOpMo3a YCTaHOBHe B NIOJOKeHHe TopMOKeHn,TO nB BKIOUeHn JKK-DncIeN JOcTaTOHO HaxaTb KONky 3anycka/OctaHOBKn Ha 3 cekyHdbi, a 3aTeM OTNyCTNTb NeAaB CTOnOHOrO TOpMo3a nepeH hauanOM DInKHeHn TpaKTopa.
aanyck pexyuxx 3JEMeHTOB BO3MOXeB JIO6oMOMeHT, ecn KK-dncnnne nnHocTbO BKIOUeH, a pbur ynpabNeHn HapabHeHm DVBKeHn He OTTHyT Ha3ad B HapabHeHn R).IpaBkIOUeHn pexyuxx 3JEMeHTOB PnD BvIXeHn TpakTopa 3aHIM XoDMcm. pa3den BkIOUeHNE PExuyuxx 3JEMeHTOB PnD BvIXeHn 3ADHM XoDM daHHoro pykoBODCTBa.
INPMUEAHHE.C NOMOUBIO HNCTpykun Ha PnC.E17 yctaHOBNTMHNMMJIbHyIO CKOPoCTb DBIXeHnI Do TEX nop, NOKA He HayHTecbynpABTb TpaKTopoB MIObix CnTyauHX.
3JNEKTPNHECKMCAOBBI TPAKTOP He 3aONMNAET HACTPOKN CKOPOCTN DBNKEHNI KOKOPCTNBPAUENHPEXUYUNX 3JIEMENTOB.CKOPOCTB DNBKEHNI N COKOPCTB BPAUENHBO3BPAUHAOTc Ha yPOBeHb 2 KaKDbI pa3, KORDa TPAKTOP BbIKNUOaETcR.
Perynipobka ckopoctn xoda (Pnc. E17)
PerynpoBka ckopocTn pexyux 3neMeHTOB (Pnc. E18)
CbeToOnnBieΦapbl(Pnc.E19)
BcetoioHbIe apbl MOxHO BkIOuHaTb N BbIKIOUaTb C NOMOuBbO BbIKIOUaTeJI.
USB-nopT
PIMMEUHNE. NpT USB oecneuBaet 3apAnHyo MoHocb5 B NOCTOHHORTo KA npC yMMaHOM Notpe6JeHNn Do 1,5A. IHTAHHe Hrero nOdaTeT OToBko pNn 3aNycke TpaKTopa.
OCTAHOBKA TPAKTOPA (Pnc. E20)
PNEUYIPEXJEHNE.Bcerda yctahabnbaeTe neaIb cTOnHOCHOro TOpMO3a B NoIOJKeHne TopMOxEHN, KOrDa TpaKTop oCTAHABINBaETcHa CkNoHe. B NpOTHBOM Cnyae TpaKTop MOKet COCKOB3Hyb Co CkNoHa, YTO MOKET PnIBecTN K cepbe3HBIM NOBpeXJEHNM TpaKTop Hn TpaBMam!
INPMUEAHHE. Korda neaIb cToaHOnHOro TOpMo3a yCTaHOBnHeNA B NoIOXeHne TopMOxHn I OpeaTOp HaxOHTcHa CnDHe, Ho AKKyMyJrTopbl He ChrTb, pnoCXoJNT cJeDyUoCe.
Ecnn KK-DnCnIeBbIKHouEn,IMdkaTOpbl 3apraa aKkymyIaToPA,KhONKa 3aNycka/OctaHOBKn HKhONKa CCS 6dyT CBETbcB TeueHne I yaca.
CnHa KK-Dncnlee oTo6paxaetcYka3ateN ypoBna 3apraI INHTEpeic oneapota, TpaKTop abTomHeckN BbIKIOHTcR cepes1 cac.
AbarinHbI pexIM
Korda3apdakkymyIaTopa cTaHOBITcKpNTHeCKn HN3KM, TpaKTop npexoDNT B aApinHbI pexm. 3To Heo6xoJIMO nIg COxpaHeHHIOCTaTOHOrO KOINueCTBa 3Heprn, YTOblBepHyTbC8 B 3OHy 3apdKn.
PexyIe 3JIeMeHTb IpeKJIIOaTc HnH3KyO CKOpocTb BpaueHna, YTO NO3BOJNeT Cpe3aTb NIIb OHeH He6oNb WoE KOINHECTBO TpAbI. PInB BCTpeC BblcOKoN rCyToI TPaBoI ne3BnIpeCTaKOT BpaUaTbcra. TpaKTop 6yDet n3daBaTb npeblbncTb 3ByKOBoCmHaI.
HnDkaTOp CoToTHN TpaTOp 6yET MrraTb KpaChbIM KaKdyo CekyHy, TaKke 6yDyT MrraTb CMBON ONOBeHIN (Hm3kmypoBeH NITAHN) IN CMBON Kaxdoro 3aHrTOO AKyMyJrTOpHorO OTeKa.
B 3TOM cIyuae BbInoJIHnTe CJeDyuOuEe.
HaxMNTe nepeKnHouateIb OTbpa MOUHOCTN BHN3, YTO6bl OKNUOHTb pexyue nEMeHTbl. 3ByKOBOc CnHAn PepeCTaHET 3ByaTb, KOrDa peXyue nEmeHTbl OCTAHOBATcR.
Ipekpatne pa60Tu n KaK MoXHo CkOpee OTnpaBnTecb K MecTy 3apKn AkkMynTopa. MaKcImaNbHoe pacCToHne, KOtopoE MoKet PneOOnTe TpAKeT, CoCTaBnTET 1000 M.
KordaaakkymnyrTop noTu pa3p8KeH, CMBON KaKaDOrO 3aHrToRo akkymnyrTopHO OTEcKa N INHnKaTOp HN3KOrO yPOBH NITAHN6yDyT MIRATb KaKdIbe NoNCeKHyNb. TpaKTOp HeMeJeHNo PpeKpAIT Pa60Ty. OepaTOp DoJKeH 6yDet DoCTaBtB TpaKTOp K MeCy Ta4Kn.
PIMMEYAHNE. Ecm Heo6xmoMo TOnKaTb yctpoCTBO BpyHyIO, y6eDntecb, YTO AKKMyIaTOpBb OTCoeMHeHb OTpAkrTopa, a neJaIb CTORHOHOrTOPOMaOTnyEHa NIOJNOKeHnTOPMOKeHn.
BOXDEHME TPAKTOPA (Pnc.E21)
ONACHO! Depkntecb Ha pacctoHn He Meee DbykpaTHOH WpHbI ckaWuBaHnOr OTIObIX KaHAB, OpbBIOB NIN BObl. Korda TpaKTop OCTaHOBNEH, NepeHNHe KOeCA MoYr BpaUaTbc DaJce PnB BKIOUEHHOM TopMO3e, YTO MOKeT PnIBeCTN K PepeBOpaUHBAHIO TpaKTop IIN erO naDeHnIO B BODY, YTO CTaNET PnUHHOI CmEPTu INI CepBe3HbIX TpaBM.
PNEyPEXKDEHNE.He 3KcNpyatnpyTe TpakTop Ha doporax o6uero noIb3oBaHn.
PNEpyIPKJEHNE.Ipi 3acopeHm INI CTOKHOBEHN C NOCTOPOHIM PpeMeTOM OCTAHOBITE DBINrTeN H N3BNEKITe AKKyMJIYTOPTbI.YdANITE O6pe3KN TpABbl,INCTbI,rr3bN IIO60IpyroK CKONBWHMC Mycop.PpeD NOBTOHPbIM 3aNyCKOM N 3KcIIyATAuNeO CMOtPtTE TpAKTOFHaHnHne NOBpeJdeHN IN pRn Heo6xOIMOCTN OTPeMOHTnpyIte.
ПИМЕЧАНЕ.
EcnBBO Bpemr DnKHeHonepatop NOKDaet CHe, HNdkatop coToHn TpaKtop raCHT. PnB O3o6hOBLeHN DnKHeHc TaTe Ha CnDeHbe NONHOCTbHO BblKMITE NeaJIb CTOnHOCHOrTO TopMo3a, YTo6bI HNdkatop coToHn TpaKtop CBtINcA 3eJeHbIM.
PnpeKIOeHm MExnypeHIM N3aHIM XOOM BO BpEMr DVBXeHnnepeMeaIte pbHar ynpaBHeHn HnpaBHeHnM DVBXeHnnpraMO IOnHO KOHa BdpYro, He OCTaHABINBaCb BHeITpaBbHom PNOKeHn, INaHe TpakTOp MOKeT OCTaHOBtBCr.
NCIOB3OBAHNE KPYN3-KOHTOJIA (CCS)
AkTmbaun (BknHouenne) kpyn3-koHTpOJIa (CCS) (Pnc. E22)
PIMMEYAHNE. YpOBeHb CkOpocTn DmKHeHn, OTObpaKaembl Ha KK- dncJIe, MOKET HeTOHOr OToPAKaTb PhaKTUYeCKyO CKOpocTb DmKHeHn TpaKTopa BpeKIMMe Kpyu3-KoHTpOJa. HAKMITE KHOJky peryIupOBKn CkOpocTn, YTO6bI《06HOBnTB》ypOBeHb CkOpocTn DmKHeHn Ha KK- dncJIe.
Дя octaHOBb(BbIKIOUeHn)Kpyu3-KoHTpOra(CCS)MOXHO Bb6paTb OINH n3 Tpex cnocob.
Haxmnte neaIb akcepepatopa do ynpa n ydepknaBaiTe B 3tOM noIOKeHH. Pekmm CCS otKnUHTcra, n TpaKTOp npOJKNIT DBNKeHne.
NerKa HauKMTe Ha neJaIb akceIepaTopa, a 3aTeM OTnycITMe ee. TpaTOp ocTaHOBNTcNfYHKUNA CCS OTKIOHTcN.
MakMTe KONky CCS. TpaKTop ocTaHOBnTcra N cyHKunca CCS OKJIOHNTcra.
PnPMeAHNE.PnO tKIOHcEHm FyHKmCCS CmBON nCHe3HET c Kk-dncnne I dBaXbI npo3ByHT 3bYkoBOn CnHAn.
PIMMEYAHNE. Ecnne nanb cTOnHOHOro TOpMO3a Haxata, TpaKTop OCTaHOBnTCs, HO CmBON Ha KK-DncJIe 6yET MIRATb, YkazbIba HA To, YTO pYHKLIIA CCS hXODITCB PEXMME OxuJaHNA. B 3ToM CNYae OTNCTNe nEDA b CTOnHOHORO TOpMO3a HaxMMTE KONIKY CCS. TpaKTop aBtOMaTHeCKn BO306HOBnT DnIXeHne, N CmBON nepeTaHET MIRATb.
BKJIOUCHNEPEKUYUNX3JIEMHTOBIPNIDBUXKEHIM 3ADHMXODOM
IpoIroTOBka (Pnc.G1)
ChrTne nIaTΦopMbI (Pnc.G2-G3)
POLITYKA GWARANCYJNA EGO
MONTAZ VOLANTU (Obr. C1)
INSTALACE SEDADLA (Obr. C2)
MONTAZ VOLANTU (Obr. C1)
MONTAZ SEDADLA (Obr. C2)
PRED PREVÁDZKOU (Obr. E1)
NASTAVENIE PARKOVACEJ BRZDY (Obr. E2)
| E2-1 | Poloha parkovacej brzdy | E2-2 Oda brzdená pozicia |
A VAROVANIE: PEDAL PARKOVACEJ BRZDY NEMOZE ZNIZIT RYCHLOST JAZDY. POCAS JAZDY SA NIKDY NEPOKUSAJTE STLACIT PEDAL PARKOVACEJ BRZDY, ABY STE ZNIZILI RYCHLOST JAZDY. KED JE PEDAL PARKOVACEJ BRZDY STLACENY, ALE NIE JE V POLOHE PARKOVACEJ BRZDY, ELEKTRICKA BRZDA UZ NIE JE U'CINNA A TRAKTOR SA NA ROVNON POVRCHU ZASTAVI. ALE AK SA TO STANE NA SVAHU, TRAKTOR MOZE PO UVOLNENI PEDALU PARKOVACEJ BRZDY SKLZNUT ZO SVAHU.
VAROVANIE: VYTIAHNITE BLOKOVACIU PAKU PARKOVACEJ BRZDY A OKAMZITE STLACTE PEDAL PARKOVACEJ BRZDY, ABY STE JU V PRIPADE AKEJKOLVEK NUDZOVEJ SITUACIE ZARETOVALI, TRAKTOR SA OKAMZITE ZASTAVI A NEBUDE SA SMYKAT PO SVAHU.
PRIPOJENIE/ODPOJENIE AKUMULÁTORA (Obr. E3-E6)
Na nastartovanie tohto traktora su potrebne akumulatory EGO s celkovou kapacitou 15 Ah (2 X BA4200/BA4200T) alebo viac. Pre Najlepsi vykon odporucame pouzivat akumulatory EGO s celkovou kapacitou 30 Ah alebo viac.
| E3-1 Tlačidlo uvoIvenience krytu E5-1 | Tlačidlo uvoIvenience akumulátora |
NABIJANIE TRAKTORA
in inch cm centimetre
Nm Newton meter mm Millimetre
°C Celsius kg
Kilogramm
km/h
Kilometer / ora
A CSOMAG TARTALMA (B Abra)
A TRAKTOR LEALLITASA (E20 Abra)
in Inch cm Centimetri
Nm Newton metru mm Millimetri
°C Celsius kg
Kilogram
INSTALAREA SCAUNULUI (Fig. C2)
INAINTDE REGLARE (Fig.D1)
REGLAJAREA INALTIMII PUNTI DE TAIERE (Fig. D2)
REGLAREA ROTILOR ANTI-SCALPARE(Fig. D3 - D6)
D3-1 Roli anti-scalpare iarba D5-1 Piulita
D5-2 Surub cu ureche D6-1 Etichet alaltime punte
REGLAREA SCAUNULUI (Fig. D7)
D7-1 Manetade regla a inaltimijsezutului
FUNCTIONARE
INAINTE DE UTILIZARE (Fig. E1)
REGLAREA FRANELOR DE PARCARE (Fig. E2)
E2-1 Pozitia franei de parcare E2-2 Pozitia eliberata
A VERTISMENT: PEDALA FRANEI DE PARCARE NU POATE INCETINI VITEZA DE DEPLASARE. NU INCERCATI NICIODATA SA APASATI PEDALA FRANEI DE PARCARE PENTRU A REDUCE VITEZA DE DEPLASARE IN TIMPUL CONDUCERII. ATUNCI CAND PEDALA FRANEI DE PARCARE ESTE APASATI, DAR NU ESTE ANGAJATA IN POZITIA DE FRANDE PARCARE, FRANA ELECTRICA NU MAI ESTE EFFICIENTI SI TRACTORUL SE VA OPRI DIN MERS PE O SUPRAFATA PLANA. DAR DACA ACEST LUCRU SE INTAMPLA PE O PANTA, TRACTORUL POATE ALUNCA IN JOSUL PANTEI ODATA CE PEDALA FRANEI DE PARCARE ESTE ELIBERATA.
A VERTISMENT: TRAGETI MANETA DE BLOCARE A FRANEI DE PARCARE SI APASATI IMEDIAT PEDALA FRANEI DE PARCARE PENTRU A O CUPLAIN POZITIA FRANEI DE PARCARE IN CAZ DE URGENTA, TRACTORUL SE VA OPRI IMEDIAT SI NU VA ALUNeca PE PANTA.
ATA AREA/DETA AREA SETULUI DE ACUMULATORI (Fig. E3 - E6)
in Coliai cm Centimetrai
Nm Niutonmetrai mm Millimetrai
in Colla cm Centimetri
Nm Nutonmetrs mm Millimetre
^ C Celsjs kg
Kilograms
km/h
Kilometri stundā
STURES RATA UZSTADISANA (C1 Attels)
| C1-1 Stüres statnis C1-2 Stüres rats | |||
| C1-3 Centra linija C1-4 Paplåksne | |||
| C1-5 M12 uzgrieznis C1-6 18 mm uzgriežnu atslēga | |||
| C1-7 Putekjusargs | |||
SEDEKLUAUZSTADISANA (C2 Attels)
BRIDINAJUMS! Drojfas blokeesanas sistemu nav attauts atvienot vai apiet. Preteja gadijumaraektors var negaiditiiesegties, izraisot miesas bojakumus.
| C2-1 Şehdeklis | C2-2 M8 uzgrieznis |
| C2-3 Şeşkanlı skrūve | C2-4 Kontaktligizda |
| C2-5 Spraudnis | |
MULCESANIELIKNAUZSTADISANA (C3 att.)
TRAKTORA APTUREŠANA (E20 Attëls)
A Bridinajums! Kad traktors partrauc braukt pa nogazi, vienmer iesledziet stavbremzes pedali stavbremzes pozicijja, preteja gadijumä traktors var noslidet pa nogazi, kas var izraisit nopietenus traktora bojajumus vai traumas!
PIEZIME! Situacija, kad stavbremzes pedalis ir ieslegtstavbremzes pozicija un operators ir pacilies no sedekla, bet akumulator bloki nav iznemti:
PROBLEMU MEKLEŠANA UN NOVERŠANA
in Iyrta cm Ekatootia
Nm Nioutoμeio mm Xiaotα
IPOEAPTHH TOY EAPTHMATOK AAYPSE EADFOY (EIK.C3)
LUGEGE KASUTUSJUHENDIT
OHUTUSSÜMBOL
in Toll cm Sentimeetrid
Nm Njutonmeter mm Millimetre
°C Celsius
kg
Kilogramm
km/h
Kilomeetrit tunnis
IPX4 Kaitseklass
KASUTUSJUHENDIS KASUTATUD SÜMBOLID

3ACTEPEXHEH. He nBtbcn Ha lamny, 10 npauoe.

IoctiHmCTpym
kPaKinonackanb RPM 06epTb Ha xBnHny
VBonbltmMeTp
in DIOIM cm CaHTINMeTpN
Nm HbIOTOH-MeTp mm Minimetpn
°C Tpaucu LcIeIbci kgKinorpamn
km/h KINOMeTpHa roDmH

CeyBpi6 BiinnoBidae YHHOMy 3aKoHOBaCTBy BeNko6pntAHII.
IPX4 CtyinHb 3axncty bID niny Ta BONOR
CIMBOJN B UbOMy NocIbHnKU

HaioiHΦopmauiH Heo6xIHO 3BepHyTu ybary

3aahauheHaIi npinHaeTbca
TEXHIUHIXAPAKTEPNUKU
O3HAOMJIeHHR 3 PK-EEKPAHOM (Pnc.A2)
ДИВ.роздл«ДОВΙΚA ΜΟΟ CTAHIB TPAKTOPA»Та «ДОВΙΚA ΜΟΟ KOДIB HECПРАБНСЕТEN»ДЯ OTРМАнн Ддоткоьоинформачи по занкту идпКатори на PK- ekpani.
1.3HaOK CCS
2. IIndkaTop cTaHy 3axmchoro npncTPO
3. 3HaOK «KOCIHHH 3AДHIM XODOM BUMKHEHO»
4.3Haokpyxy
5.3HaOK3aHbOroXoYo
6. 3Haayok 3aio6iXHOro KInoua
7.3NaOH CBrTiNOIOHNOHO OCBITJIENHH
8. 3NaOH Bluetooth
9. IIndkaTOp ⅢBvNkocti ne3
10.ПлчимьнкгдMH
11. Pokaxikpibna nannBa
12.3haoktempeatypn
13. 3Haok nonepexdxHn (nepeBaHTaxHeHH/Hn3bKa noTyXhCtB)
14.3NaOH BInbHoro 6aTaapeHoro BoDckiy
15.3NaHOK 3aHHToRO bTaapeHOrO Bicixy
16. IIndaKatop kOy HeNcpaBHOcti
17. INДИКaTOP HabaHTaXeHHA
18. INДИКАТОР wБИДКOSTС XOДY
PO3ПAKYBAHHЯ
INMITKA.36epiraTe nakyBaNHI MATEPIAHI,DOKN BNYBaxHO He ornHete Bnip6I HneNoHTe NORO HOPMaNbHO EKcNpyaTyBaTI.KeIO 6yNb-kiDeTANI 3 NakyBaNHorO JnCTA BCTAHOBNeHi Ha MaunHi, HeraiHO 3'8'Xtbc3 cepbicHO Cnyk6oEOG
PYPIMTKA.3a BnHrTkOM IHcTpmyeHTI 3HnKHeHaBeDeHo rakoBaIbHorO cNCKy, yci Hui IHcTpmyeHTM, 3raDaHI B nociBHKy, peKoMeHdyIObC, ane He HadaIoTbC B KOMNIKeTI.
IAKYBAJIbHNI CINCOK(Pnc.B)
IooB BmKHyTN Kpyi3-KoHTpoNb (CCS), BN MOKeTe Bn6paTH OINH i3 Tpbox cnocob:
HATNCHTb neaB akcenepaTopo do ynopy Ta npodBkyIte HATNCKATn. FyHKJIg CCS BIMKHeTbc, I pKaTOp npodBkntb pyx.
IatncHtB neaIb akcenepaTopa, a notIM BiNcyTtB II. TpaKtop i cyHKd I CCS 3yINHReTBcR.
IaTmchHbKhONky CCS. TpaKToP iФyHKiJc CCS 3yInnHaTeBc8.
PIMTKA. KoN CCS 6yde BmKHeO, 3HaQOK « 3HMKHe 3 PK-ekpana i Dbi npolya3BykOBn CnHan.
INPMITKA. RaKUHO HATNCHTN Ha neaJIb cTOrHKOBO rAJIbMa, TpaKTOp 3yHHNTBCa, ane HA PK-DnCnJIe6yde 6NIIMATn 3NaOcK «BkAsyOnu Ha Te, 0o CnCTema CCS nepe6yBaE b peKIMi OuykBaHN. ToDi BiDnyctIb NeaJIb cTOrHKOBO rAJIbMa, HATNCHTb KONKY CCS. TpaKTOp ABOMaTHNO BIDHOBTb pyx, a 3HaOH« » nepeCTaHe 6NIIMATn.
YBIMKHEHHJIe3IINQACPYX3ADHIMXODOM
IPNIMITKA. He peKoMeHdyeTcBc KocnTH 3aD him XOOM.
PONEPEJXEHH. Byte Oocmbo opegxhi niuc KocinH 3aHim XoHOM. 3aBXn CTxTe 3a Tm, u6bHXTO He nepe6yab y p06oyi 30Hi, oc6nBO Maenbki DiTn, nepd Nocatkom i niuc KocHH 3aHim XoHOM.
PIONEPEJXEHH. BuimMictb oneatopB MOKe noripunncn iIac poBoTn TpaKtopa 3 KomnneKtOM yKnalaBnHa. NpeD noaTkom iNid cAc KocinHra 3aHIM XoOm 3abKn dNd 6TyN OcoBnBO oBepeKHHMa Ta03hAmOnTnc 3 DInrHKIO, De nAhyTeBc 3aCTocyBaHH.
YbIMKHeHHKOciHH3AHHXoOM(E23)
I06B BmKHyTN KCIHH 3ADHIM XOJOM, BN MOKeTe Bn6paTH OINH i3 YoTnpbOx CnOCoIB:
IAtmchItb Khonky KOCAHH3AIDHIMXODOM"0dINpa3.
iDBeDItbcra3cnDInHnTpaKTopa.
IAtnCHiB i yTPMMyTe KONky «Nyck/cton» npotraom 3 c, uo6 BmKHyTN PK-ekpan.
BnIMtB 3anO6iXHn KIOU a6o BnIMtB akymyIaTOP(u),uO6 BnMKHyTN TpaKTop.
INPUMITKA. KOnI KocinHra3aDnHIM XoHOM BVMKHeHO, Ha PK-ekpaHi CBITNTbCrl 3HaOK «
OBCJyROBYAHH
PONEPEJKEHH.3aBxHn Hocitb 3ac06n 3axNCTy opraHib 3opyi 3aKCHMM uTkAMn.HeDToPMHaHHu boro npabMa moKe npn3BeCTn do nopTpanHnnpedmetB Ouy TaTn npnuHNO cepo3nXtpaBM.
IIOPEJXEHH.3aBxN3aXuaiTe pyK,0aRHyBnTOBCTi pykABmKn aOb6opHyBn pixyki KpOMKn raHicpkamn HINMM MATEpIaMn iN cac BNOHaHH 6yNb-koTcTexHOrO 6cnlyroBaHnJe3a TpaKTopaPiacocNcNoRyBaHHaO tpaHcnpTyBaHH TpaKTopa 3abXdN BImMaTe 3anobixHnn KInou Ta akymyltohpny 6batapeo.
PEKOMEHIOBAHNI TPAΦIK TEXHIYHOOBCJNYTOBYAHN
| Integrban Texhynchoro obscnyrobvanha | Порадок obscnyrobvanha |
| Пелег Кожним ВИКОПИСТАНХЯ аоб zuодан | Пелеговпесему зхиону бл_OKвань. Бizayално пелегов, чу не снышени. Шим. Фляньт lezeo. Фляньт вescь вироб наPreдmet почкошижь, bIDcTyHix abo He3akpɪnlηнix Детаiley, takixя кizhiу виусknii Жолоб, rbHNTi, raiKu, bOHTi, kpruShk Toцo, nepekoHabuMCSb, zuо bci zuHTi po3miuzehi ha cboix Miczex i npaцють налжнim уном. Пелеговпесу та пелегаитесу, zuo песадь akceleрatopa може 6byt nHaLeЖнIM ЧINOM nATsCHNYta ta bizdnyш�а. Пелеговпес demпфер кермову кOLeca. Кермове кOLeco ma e obepтатия 3 певим onopom. |
| Пися Кожног ВИКОПИСТАнHA | Письпесу Trapктор i ВIMniTE Deky. |
| Кожни 25 rodln | Пелеговпесу wiznax. |
| Кожни 100 rodln | Пелеговпесу зашикoi КOLeca, пелегонавшись, zuо bci zATsCKHi raayi 3aTyrHnyto 3 pekomendobanm KpyTHNIM MOMeHTOM (101 - 103 H·M). Пелеговпесу пелеги КOLeca, пелегонавшись, zuo raayi 3aTyrHnyto 3 pekomendobanm KpyTHNIM MOMeHTOM (90 - 92 H·M). |
| Кожни 200 rodln | Пелеговпесу пелеги КOLeca ta пелегонавшись, zuo BOHи BILHO obeptaioTBca. |
| Кожни πіврoku | Пелеговпесу пеладь ралma StOryнки. ВиIMiTY akumyЛТогу 6batapeу 3 Trapктор,notimnotrayHity BrOpу BaxiInь БLOKUBAHNA STOKHKOBO ralmba m HATsCHIb Na Paedal STOKHKOBO raBMa, zuo 3aZdijrTa STOKHOBe ralmbo. BpyuHny StTOBXHIT TrapKtpor Bpeper, zuo6 пелеговпines YuМоges BiH pyxahnsя 6e3 obeptaHnna 3adnix KoliC.Яко TrapKtpor pyxaetcbrya, a 3aDHI KOLeca pri n cybOMy obeptaHOTbcrya, 3berHITbcrydo do cepbiHORO centropy EGO дlya permontу. |
UCYHEHRA HECPABHOCTE
| HECIPABHICTb ПИЧИHA BVIPISEHЯ | |
| Елькtripунни raоанний traktor He щide, коли hatinchyta peanb akselepatora. | Бумарна emnicb yctablenix batapei He biДибддс ВIMORAM. |
| Педалы тальма Storнки BCTANOBLEHa B noLOXeHnRaIbMyBaHnR. | |
| Пдигахтор сану traktor He CBITbcs 3eLHeHm. | |
| Оператон He cnDINb Ha cnDInHnI. | |
| СИстema blokvbaHnca cnDInb He niDknOchena HaLeJxHm ChINOM. | |
| Бужke xOLOdHy nOrody camoxidna Фунця може He zanycitnTcpe3 3axNCT Bi Dn HsBkHx Tempepatyp. | |
| Дд падлakcelepatora nepeшКoJkaeTbcZacMieHnA. | |
| Бихд iЗ паду мexaHUnix abo eleKTPoHnIX KOMNoHentb peanlia akselepatora. | |
| Бaxilb kerpybaHnHa npramkom puxy nepe6byae B NeYTrpaIbHOMy noLOXeHnI. |
in INHc cm Canthimetprn
Nm HIOToH MeTbp mm MMmMetprn
C Lenzn kgKnIporam
km/h
KINOMeTpaBac
IPX4 CTeenH Ha 3aunTa oT HABIN3aHe H BODa
CNMBOJIH, N3PON3BAHN B TOBA PbKOBOCTBO

HΦopmaunTaTp8BaDa ce oTebeKu

IocoyeHTo DeiCtBne Ce npekpatra
CNEUΦUKAUIN
PENEI PABOTA (Φn.r. E1)
HACTPOIKA HA CINPAUKATA 3A IAPKIPAHE (Φn.r.E2)
| E2-1 Позица 3а napкиране E2-2 | ОсвобODEна розица |
PNEUPPEXHENE: PDAHT HA CINPAKATA 3A
NAPKINAHE HE MOXE DA HAMAJN CKOPOCTTA HA DBNXEHE.
HNKORA HE CE OINTBAITE DA HATICHETE PDAJHA
CTNPAUKATA 3A NAPKINAHE, 3A DA HAMAJNTE CKOPOCTTA HA
DBNXEHE NO BPEME HA UOΦINAHE. KORATO PEAJBTHA
CINPAUKATA 3A NAPKINAHE E HATICHAT, HO HE E BKIOUCH
B IIO3NIUR 3A NAPKINAHE, ENEKTPUECKATA CINPAKA
CINPA JAO5OTNI KOCAAKATA UE CIPE DA CE DBNXHNA
PABHA NOBbPXHOCT. AKO TOBA OBaYCE DE CJUYHNA HAKIOH,
KOCAAKATA MOXE DA CE PITb3HE HADONY IO CKIOHA CIEJ
OTNYCKAHE HA PDAJA HA CINPAUKATA 3A NAPKINAHE.
PNEUYPEXDEHNE: N3IbPNIAHTE HAGOPE JIOCTA 3A 3AKIOUBAHE HA CINPAQKATA 3A IAPKINAHE IN HE3ABABHO HATNCHETE PDAHA HA CINPAQKATA 3A IAPKINAHE, 3A IA BKKIOUHTE B IO3NUR 3A IAPKINAHE, B CNYAH CE Bb3NHKHE ABAPINHA CNTYAUJRA, KOCACHATA IECIPHE HE3ABABHO IN HMA DA CE IIb3HE NO CKJOHA.
IOCTABRAHE/M3BAKDAHE HA AKMYIATOPHATA BATEPNA (Φn.r. E3-E6)
3a da CTapTnape Taan Kocayka, ca Heo6xOJIMN 6aTeepn EGO ot o60015 Ah (2 X BA4200/BA4200T) nIN NOBee. 3a hAI-IO6pa eFekTMBHOCHTne npenopbUbaMe ynoTpeBaTa Ha 6aTeepn EGO ot o600 30 Ah nIN NOBee.
3APEKDAHE HATPAKTOPA
H3non3BaHTe eHHCTBHeO npenOpbYBaHnTe akymyNaTOpHn 6aTePNn H3apAHN yCtpoiCTBa.
CapexdaTe akymyNaTophata(NTe) 6aTepeHnO (fur.E7)
BEJIEXKKA:O6bpeHeCe KbM CbOTBeHTHtE pKOBODCTBa 3a 6aTePmN 3apdHn yCtpoIcTBA 3aNoIpObHn HnCTpykU.
6apeTe 6atePnra(HTe) npes nopta 3a 3apeXdahe (pnt. E8 - E10)
| E10-1 Kaṇačka npoṭnVB npax E10-2 | Popta za āpěkǎne |
TECTBAHE HA CNTTEMATA 3A IPEIINA3HA BLOKIPOBKA
a.3a da TecBate CnCTemata Ha HOXOBATA NlaTfopMa (pHr.E11-E12)
b. 3a da TectBaTe CnCTeMaTa 3a 3aDbuXBaHe (ΦnR.E13-E14)
Ako CnCTeMaTn PnTOpMa-HoN H/nnn CnCTeMaTa 3a 3aDbNKBaHe He cnpaT, KOrato OneepaToBt E cTaHAn OT CeDAnKATA n Ako PnUHaTA He MoKe da bDe OnpdeEnHa CnEd YBepBaHe, Ye UeNCenbT N KOHTaKbT a CeDAnKATA ca Do6pe CbBp3aHn, CbBpXeTe Ce Cbc CBOI NOTpeBnteNCK eBpu3e HcHTbp HA EGO He3a6abHo.
KOMYHNIKAUNOHHA TEXHOJIOIIM
3a INHOPMaIgN OTHOCH NbHATA Hn rama OT Cbbp3Ann PPOyKTN I yCnyM, BKNIOHTeNO IHCTpyKUIN 3a Cbbp3BaHe, MOJ, cKaHnPaIte QR KdaNo-dony nIn noceteWe www.eGOPowerplus.eu/connect.

ПОВЕРКА ПЕДИ PавOTА
Cbo6oJeTe pa6oTHata 30Ha OT Deua, OKoHn Xopa nIM DOMaUNIIO6Mm.
34HCTepe60THaT3OHaOTnpEIMTN,KONTOMOrTa da6bata 3X8BpNEHOTHOXOBETHe TpaKTopHATA Kocayka.
OuHCTe OCTaTbUHTe OT TpaKTOpHaT KocAka.
pOBepe 3a pa3xna6eHn KpeEnKHeIeMeHTN.
PpOBepTe DaNN BCNU NpeDnA3NTEIN Ca HA MRCTO Cn npa6oTAT PpABNJHO.
I3yaHIO IPOBepTe DaHn rymte Ca HAnOMNaHn.
pObopepe pa6oTaHa cnIpaKaTata.
PeynpaTe BnCounHata Ha NlaTphiOpMaTa Do JxenaHata No3uHa KocHe, KOaTo e Hau-nOxoJa 3a MopabaT, n CbOTBEtHO peynpaTe KOeneta npOTNB cKaJI.
PerynnpaTe No3uetaHa ceJaKaTa Hc yBepeTe, He nDbata neJaMa Morat Da 6bDat DoCTHnat.
IpoBepe HNBOTo Ha 3apnHa 6aTepeyTa.
TecBaTe CnCTeMaTa 3a npEtnaHa 6IbIKOpOBka.
CTAPTIPAHE HA TPAKTOPHATA KOCAYKA (Фиr. E15 - Фиr. E16)
PNEyPPEKDEHNE:36aBaeTBeB3aHnCTaptnpaHn, CnnpaHn 3aBON,KAKTO INpekOMepHaCKOcT,OCo6eHO KOraTOce yHTe Da YnpaBnBaTe TpakTopHATA KocAka.TpakTopHATA KocAka MOKe Da Ce 3aBbPTN 5bp30,KoETO MOKe Da npuHn 3aYbHa Ha npabneHn N da DoBePeD o cepNo3HO HapaHbaHe n/Inn NobpeDa.
PNEUYPEXDEHNE: PpeDnCTapTnpaHe Ha TpAKTOPHaTa KocAka npoBepeTe Nce YbepeTe, Ye HOKOBete Ce N3KIOUbat B paMKITE Ha 5 cek, KORATO HAATNCKATE ppeBKNIOVBaTEHa BA 3a OTBeXdaHe HA MOUHOCT HADONY. AKO HOKOBete HE CNPaT, He I3NOI3BaTe TpaKTopHaTa KocAkaNc Ce CBpbXeTe Cbc CBOY IOTpe6NIeCN cepBn3 Ha EGO He3abABHo.
SEJIEXKA:
Ko neanbHa cnnpaKaTa 3a npknpaHe nocTaBeH B no3nIyra 3a npknpaHe, TpaBa cMo da Hatachete CTap/CTon 6yToHa 3a 3eKynHn, 3a Da CBeTHe LCD eKpaHbT, n CneTdToBa da OTnycheTe neana Ha cnnpaKaTa 3a npknpaHe, PpeDn da 3aDbXnKe TpakTopHaT a KocaHa.
EeKeIte HOKOB MoT a 6bDaT 3aJeCTBaHn NO BCaKO BpeMe, KOraTO LCD eKpaHbT CBeTN HaBnHO I NoCtBt 3a YnpaBHeN He Na OcOKa H a DmXeHHe Me e N3DbpNaH H3aad BNo3MnraR.3a Da 3aJeCTBaTe HOXoBeTe No BpeMe Ha DnBxOHe HA TpakTopHaT a KocayHa 3aJeh XoD,BnXTe pa3dEn .3AeHCTBAHE H AOXOBETEPIN DnBXeHNE HA 3AeH XoD B TOBA pkoBOCTBO.
BENKKA: CnDbaTe DnE17, 3a Da NoCTNRHe TaH-HNCKATA CKOPOCT Ha DmKHe, DOKATo He CTe HAnbTHo CNOCOBH DA ynpabBaTe TpAKTOHPaTc KocayKa BBB BcMKN CInyALIM.
EneKtpuYeckata TpaKTopHa KocaKa He 3anomHn HacTPOKnTe 3a ckOpocTtHa NDbNkeHe N CKOpocTtHa HoKa. CkOpocTtHa DnBKeHne NCKOpocTtHa HoKa Ce BpBuaat Ha HnBO 2 npn BCraKO n3rAcHne Ha TpaKTopHa TkoCaKa.
Perynipane Ha ckopocTHa DnBxKeHne (pHr. E17)
Perynipane Ha ckopocTHa Hoxka (pHr.E18)
LED cbetnnn (fug.19)
ED apoBete MoRat Da Ce BKNIOyBaN H3KNOyBaT C NOMOuTa Ha pBeBKnIOyBaTeN 3a LED CBETNIH.
USB nopT
BEJIEXKKA: USB nopTbT OCNIRpyBa 3apdHa MoUHOC T OT 5V NOCTOHEH TOK pN KOM6BnHpuh TKOT 1,5A n pa60Tu cMo, KOrato TpaKTOpHaTa KocaHa e CTAPtupaHa.
CINPAHE HATPAKTOPHATA KOCAKA (Anr.E20)
PNEyIPEKJDEHIE:BnHarNoCTaBnTe NeDana Ha cnnpaKaTata 3a napKnpaHe B No3uNra 3a napKnpaHe, Korato TpakTopHaTATA KocauKa cnpe Da ce DnKnNo HApNOH, B npOTINBeH cnuyaT TpakTopHaTATA KocauKa MoKe Da ce Nb3Ne NO CKIOHa, KoETo MOKe Da DOBeDe Do cepno3Hn NobPeDN Ha KocauKaTa NIn Do TeneChn NobPeDN!
BJIEXKKA: B cTnyaun, npn KOrTo neaIbT ha cnpaKaTa 3a napKpAne e nocTaBeH bNo3uNzra 3a napKpAne H onePaTObTe cTaHan ot cedankata, Ho aKyMylatopHIne batePm He ca N3BaDeHN:
CnyaHyeLCDekpaHbE n3KIOueH,INDAKATOpTE 3a 6aTepeHra, cTAP/CTON 6yToHbN 6yToHbCCS ue octaHAT OCBETEH INPOdbJIkeHHe Ha 1 cac.
CnyaHcHaLCDekpHaCeNoBnINDnKaTOpb3a3apd" INI INHTepEeCbT 3a OepaTopa, TpaKToPHaTa Kocayka Iue n3raChe abTomTuHcNcIe1 1ac.
PekmHa aBapnHo np6upahe
Korato 3apnHa ha 6aTepyA tcaHe KpntuHNO HncbK, TpaTOpHaTa Kocayka ue npemHe B pexm ABapmH npmbpAne, 3a da 3ana3IOCTaBHO eheprna 3a nTyBaHe obaPtho do 3ohata 3a 3apeKaDaHe.
HxOBETe Ce npeBKnOuBa Hat HnCKa CKOpocHa BbPteHe, KOTo MoKe Da KOCn CaMO MHOro MaNko KOJIYeCTBO TpeBa. PInp CpeLa C BnCoka NbCTa TpeBa, HOxOBTe ige cPiPaT Da CE BbPtT. AyINO INnKAtopbT ige 3Byu (6mka) nepnoDnHO.
HnKAtOpb3a CbCToHHeTo Ha TpaKTOpHaTa KocaykaJe MIRB UepeHo HA BcKa CekyHda,a IKoHaTa 3a npEynpeXeHne (HmCKa MouHOCT) NIKoHaTa HBCKO 3aetoOTdeneHne 3a 6aTePmNtMIRAT.
Onepatopbt Tpa6Ba:
HaTnCHETe npeBKnIOuBaTeIHa BOM HADOny, 3a da N3KIOUHTe DnIraTeJIte Ha HOXOBete. AyDIO INHdkaTOpbT ue cnpe da 3ByuN, Korato DnIraTeJIte Ha HOXOBete CnPAT.
Cnpete da paobotne Hc npnBnkeTe do 3oHaTa 3a 3apeXdahe Bb3MOxHO hai-CKopo. MakmamHTo pa3ctOHHe, Koeto TpaTOpHATA KocayKa MoKe Da n3MNHe e 1000 M.
Korato 6aTepeRyTa e noTn n3ToUeHa, INKoHata 3a npeDynpeXeHne (HnCKa MOuHOC) IN KOnHATA Ha BCaKO 3aeTO OTJeHne 3a BatePna 1e MIRAT HA BCaKa NOOBnCekYHa. TpaKTOpHata Kocayka Ie cnpe da paBtoN He3abABHO. OepatopbI tse Tp8Ba Da TpaHCnOPTnpa TpaKTOpHata Kocayka Do 30HaT a 3apeKdaHe 3a N3BbPWBaHe Ha 3apeXdAe.
BELEXKKA:AKOe HEO6XOIMO pUHIO 6yTaHe, YBepTe Ce,Ye 6aTepeNTte ca pa3KaueHEn OT TpaKTOpHATA KocAuaN neJaTbHa cnnpaKaTa 3a npKnpAne H eOCBo6oDen OT n03nIyra 3a npKnpAne.
YIPABJIEHHEHATPAKTOPHATAKOCAUKA(ΦnR.E21)
ONACHOCT: 5bDeTe Ione Ha DBe WInPNHn HA KocauKaTa daJeuOT KaHn, OTKoCn HIN BOa. PpeHnTE KOJena MOrT a Ce 3aBbptr, KORATO TpAKTOHPATA KOCaUcA e CnPraHa, Daxe N CbC 3aDeICTBaHcNIPAuKa, N Da PpeIN3BnKAT PpeMnHaBAHe Ha KocauKaTa npe3 Pb6aHIN NOJaAne BB BODaT, KOETo MoKe da DoBeE do CMbPT HINCEPO3HO TEENCHIOBpeiN.
PENyPExHEHHe: He ynpabIbIaIe TpaKTopHaTkoCaHa no 6ueCTBeHHnTtua.
PNEUYPEXDEHNE: Ako Bb3HmKHe 6nokpane Hm yapnte Uykd npedmet, cneTe DBnateInte n OTCpaHete 6atePnte. OTCpaHete n3pe3knte OT TpeBa, INCTA, 3aMbpcaBHaH N BCWKn Dpyn Hacb6paNce OTLaHn; YJIOcTHO INCNEKTupaTE TpAKTOPHATA Kocayka 3a NOBpeJa n peMOHTnpaTe NOpeData, npdI Da CTAPtIpate OTHOBIN da paBOITe C TpAKTOPHATA Kocayka.
BEJIEXKA:
To Bpeme Ha WOPhiPAne, KORato CTAHete OT CeaNkata, INDnKaTOpBt 3a CbCToRHeMo To H TaTpaKToPHa TocAChka 1ue ce N3KnIOH. Korato OTHOBO 3anoBate Da WOPhiPate, CEHDte ObpaTHo HA CeaNkata N HA TcHcTe DOKpaN neJaIa HA CNPaKaTa 3a NapKpNaHe, 3a Da CBeTHe INDiKaTOpBt 3a CbCToRnHeTo Ha TpaKToPHa KocAChka B 3eJIeHO.
Korato No Bpeme Ha WOOpHApHe NpeBKnIOvBaTe MeKdy DnIkeHne HAnpeiHa3ad, NpeMeCBAteNoCTa 3a YnpabLeHne Ha Nocokata Ha DBNKeHne DNPeKTHo OT eDINHr Odo pYtna Kpa, Be3 Da cnipate B HeyTpAInhaNo3uN, B npOTnBeHcnyaT PAtkTophata Kocayka MoKe Ja cPpe Da ce DnIKn.
M3IIOJI3BAHE HA KPYN3 KOHTPOJI (CCS)
AknBnpe (3aJeNCTBaHe) Na Kpyn3 KOHTpO1 (CCS) (Φnr. E22)
BEJEXKKA: HbOTO Ha ckopocTtHa DnBxkeHne, noka3aHo Ha LCD ekpaHa, MoKeJa He Otpa3Ba ToHOb DeiCTBnTeHnA tckopoCT Ha DnBxkeHne Ha TpAKTopHATA KocauKa npu Kpyn3 KOHTpon. HatncHe 6byToHa 3a peYnpaHene Ha ckopocTt, 3a Da "onpeChnTe" HbOTO Ha ckopocTtHa DnBxkeHne Ha LCD ekpHa.
3a da cnpete (deakmbupate) kpyn3 KOHTpOla (CCS),MOxTe da 136epete eINOT TpuTE HauHa:
HaTNCHeTe DoKpaI neJaI Ha ra3Ta I He ro OTnyckaiTe.
ФИКИЯТa 3a Kpyn3 KOHTpOJI ue cnpe I TpaKTopHata Kocayka Ue npDJIKN Da ce DBIKN.
MATMCHE TE JECO neJaHa Ra3Ta n CNE TOBa rO OTNcHETe. TpaKToPnata KocaKa H cyHKmura 3a Kpyn3 KOHTpO n cnpaT.
IaTMCHete 6yToHa 3a Kpyn3 KOHTpon. TpaKTopHata KocayKa n cyHKunraTa 3a Kpyn3 KOHTpon Ie cnpat.
BEJIEXKKA: Korato kpyn3 KOHTpOblc e cnprH, nkoHata, nHe 134e3ne oLCD ekpanu u ne np03Byu Dba pTbT 3BykOB cnHan.
BEJIEXKKA: Ako nepaIbT ha cnpaKaTa 3a napKpHae e HaTnCHaT, TpaKtopHata KocaKa 3e cnpE, Ho NkOHata, 3e Mura Ha LCD ekpaHa, 3a da nokAke, 3e kpyH3 KOHTpObTe B pexIM Ha roTOBHOCT. B To3n Cnyai OTnycHete nepaHa ha cnpaKaTa 3a napKpHae H NaTHcHete 6yToHa 3a kpyH3 KOHTpO. TpaKtopHata KocaKa 3e ce BbPhe ABOtMAtnH0 KbM DnIXKeHne N KOHAta, 3e cnpe Da mNra.
3AENCTBAHE HA HOXOBETEPINIBNXEHNE HA 3AENXOJ
BEJIEXKA: He ce npenopbUba Kocene Ha 3aDen XoJ.
PNEyPEXDEHNE:5bTeNe 3KnKUHTeHNO BHNMaTeHN, KORATO KOCITE Ha 3aDen XoJ. BuHaN Ce yBepraBaiTe, Ye B pa6OThata 30Ha He HABn3AT Xopa, Ooc6eHO MaKN Deua, Ppei N No Bpeme Ha KOceHe Ha 3aDen XoJ.
PNEUYPEXKDEHNE: BnIMMOCTHa OnepaTopnte MoKe Da 6bde BNOUHe npaBota C TpAKTOHPaTc Kocayca C NoCTABEH KOMJIeKta Topb. PpeIN NO BpeMe HA KOCEHe HA 3aDeH XoD BnHar Tp6Ba Da Ce NIOxOJa c NkIIOUHTeJHa PpeNpA3NlBOcT N da CE B3eMe NOD BHIMAHNE N03HAbaHETo Ha 0cbTaHOBkata.
A.KTMBuPAne (3aDcHcTBaHe) Ha KOCEHE HA 3A.DEH XOД (E23)
3a da cnpete (deaktnbnpate) KOCEHETO HA 3ADEH XOД,MOKeTe da n36peTe eMH OT YeTHPnTE HaHHa:
Atmchete BeDnBx 6yToHa 3a KOCEHE HA 3ADEH XOJ.
TaHeTe OTeaJaKaTa Ha TpaKToPbHaTc KocaKa.
MaTmChete cTapt/CTon 6yToHa 3a 3cekyHn, 3a da nKlnHHTe LCD ekpana.
3BaTeKIOUa 3a 6e3oNacHoc TIN N3BaTeAkyMnAtopHaT(aTE) 6atepna(,3a Da n3ragnte TpaKtopHaT a Kocayka.
BJIEXKKA: Korato KOCEHETO HA 3ADEH XOД 6bde cnpraHo,ИКОHaTa
PONDPbXKA
PNEpyPExDEHHe:BnHaHn HocTe 3aunTa 3a OHTe CbC cTpaHnHn PpeNa3Hn ekpAHn.AKO He ro HaPaBnTe MoKe da DOBeDe Do N3XbBpJHe Ha PpeDMeTu KbM OHTe BN BOeUO Do cepNo3Hn HapaHbAHn.
PNEUYPEXDEHNE: BnHa3aunTepe Tc, Ype3 HocHe H TeKKn pBkABmIe IIN Ype3 O6BmBaHe HA OCTpIte Pb6OBe C napaII INI DpyNI MaTePnaII, KOrato N3BbPwBaTe NOdRpXka HA HOxa HA TpaKTOpHaTc KocayKa. BnHaN 3BaJdaTe KIOUa 3a 6e3oNaChOCT n AkymyTaOpHnTe 6aTePnn, KOrato 06ClyXBAte IIN TpaHcnpTpIpaTe TpaKTOpHaTc KocayKa.
IPENOPbYHTENEH(N)ΓPAΦNK(LN)3A ΠΟДРБЖKA
IpoiroTObKa (ΦnR.G1)
IpeMaxBaHe Ha nlaTΦopMaTa (ΦnG2-G3)
| G2-1 Kašen ha džinatela G2-2 ÜnniHT | |
| G2-3 Лостove ha okauhaheTo | |
3amha hapexeuneHOKOBe (fur. G4-G6)
pOBepepepekeeHHeKOBe.CHEMeTe 3aMeHeteN3HOceHN, HanyKaHH N/INn ObHaTN HOKOBe, Ako e Heo6XoDmIO.
c. NpOroToBka 3a HnBeHnPape (ΦnR.G11)
d. KaK ce HnBEmnpa
a da n3BbPwnte perynpobKa Ha cTpaHa KbM cTpHa (fHr. G12)
Sa n3BbPwIte perynnpOBKa Ha npedHaTa cTpaHa KbM 3aHaTata (fHr. G13)
CbXPAHEHNEI TPAHCIOPT
TPAHCIOPTIPOHE HA TPAKTOPHATA KOCAUKA (Фиг. H1-H5)
| H2-1 PaMn H2-2 Kolanin |
BEJEXKKA:3aKpeTe TpaKToHaTa KocaKa CnpoE Heo6xOIMOCCTA, KATO INON3BaTe KOAnH ININ Bbxketa, 3a Da npeDoTbpaNTe DnBxKeHne NO BpeMe Ha TpaHCnOpTupaHe.
CbXPAHEHNE (Φur.11-12)
BEJIEXKKA: OCTpaHete n CbXpaHraBaIte akyMnyatopHnTe 6aTePmN NOOTdINHO cBflaCHO bOeTHnTe pkoBOcTBA.
IpoHCTeTe I npOBepTe KocayKaTa IpeMcBxpaHHe N KaTO HnPaBHTe CnpaBAKc pa3dEnMeT,OBUAnPODDPbXKA"N,IPENOPbYHTENH IPAΦuU 3A NOIDPbXKA".
Ona3BaHe Ha OKoHaTa cpea

OEO (OTnabun OT eektpnecko n eektpoHNO
obopydbahe) He n3xBpIne TE eektpnucecko 60bpydBahe,
nON3BaHa 6bepn nn 3apJHO yCTPOI CTBO B 6HTOBITE
OTnabu! OTHecete npdykta Do yTbIHomOmeHa Hpma
3a peuknpane H no ppeoctabete 3a pa3deIHO
cbipane. EektpnuceKNTe INCtpyMeHH Tp86Ba Da 6bDat
Bbvzau B cOpBXeHnra 3a peuknpane CbbMeCTNIM C
OKoJIHaTa Cpea.
OTCTPAHЯBAHE HA ПЮБЛЕМN
| ПОНБЛЕМ ПИЧИHA PEШЕНЕ | ||
| Еnéкtripочesckata traktopha kocauka He ce 3aДвижва, кого падыт 3a ra3ta e haTschat. | Комбинерата стойост на Ан на поставени akumylatopnhi batepin Hi OTROBAP RA N3IcKBAHETO. | a da STAPTRIPATE TAZH TRAPKTOPHATA KOCAOKA, I3noJ3BaJIte DoCTaTbUHO akumylatopnhi batepin EGO, KaTO cIa3BaTe INCTPukzniTE B p3dEe "MOHTPAHE/ N3BAJKDAHE HA AKUMYLATOPHATA BATEPRA"В TOBA p8koBODCTBO. |
| Педалыт Ha спирачкata 3a napkinaphe e noctaben B спирачнla lo3niця. | IaTUSCHETe DOKPAA peDALa Ha cIpiracrkata 3a napkinaphe, 3a da ro oCStobodite OT no3niuYra 3a napkinaphe. | |
| ПндikatopbT 3a CbSTOrHMeTo Ha TrakTophata kocayka He CBtN B 3eJIeNo. | IaTUSCHETe peDALa Ha cIpiracrkata 3a napkinaphe i cIed ToBa rO tOtnyChTe. ИndikatopbT 3a CbSTORHne Ha TrakTophata Kocayka ige CBtHe B 3eJIeNo, Koeto O3HaHABa, Ye TrakTophata Kocayka e rotoba 3a 3anaLbAne. | |
| Опетахрьт He e cedhan Ha cedankata. | IaTAPKOpHATA Kocayka може дьde упrabл�анa Camo Korato onepatopbT e cedhan npabilno Ha cedankata. | |
| СИстemsТа зPreindazna 6blokropovka Ha cedankata He e CBp3aHa npabinlNo. | IaBaTe SEbAprrnte OT TAPKOpHATA Kocayka n NobdInHete 3aJaHATA quch Na cedankata Harope, 3a Da CE yBepitte, Que Ka6eHnIy TcIeCen e npabilno CBp3aH KBM THeZdOTO B DOJIHATA quch Na cedankata (BX. Pnaba ,MOHTPAHE HA CEDANKATA"). CpeDbaiTe INCTPukzniTE B ,CTAPTRIPAHES HA TPAKTOPHATA KOCAYKA", 3a da pecTAPtripate TpAKTophata kocayka и DA npOBeprnte daln TЯ може дьde CTAPTRIPAHs. B npotIBEN cIvyai B cBpJxete c cIeNTBp 3a obCStyKBaHene Ha KJIeHEni Ha EGO 3a peMOnT. | |
| При MNoTO StUdeHo BpeMeФункцЯТa DBIXeHme може Дa He cTAPTrpa UcNeuH noPADI 3aUHTaTa CpeUH N6Ka TempepaTura. | IuHARu CbXpAHaIIte TAPKOpHATA Kocayka n BapertraYBa TOTIIa CpeDA. PectaptrpaiTe TpAKTophata Kocayka, Korato e 3aToPJIeNa. MoJIa, He npabTe MeHOrOkparTHn ONITN pRnMHorO cTuDeHo BpeMe, Koeto може дa NobpeDi MaSHINaHa. | |
| ПьТЯн Ha DBIXeHme Ha NeDAla Ha Ra3Ta e 3aIrpCTeH C OTLOMKn. | IpOBepeTe I OTCTPahete OTLOMKITE | |
| ПовFDA Na MexaHUnHиIleleKTPoHnI KOMIOHENTn Ha neDala Ha ra3Ta. | IbBypxeTe ce c ZeHTbpr 3a obCStyKBaHene Ha KJIeHNT EGO 3a peMOnT. | |
| ПocTbT 3a UnpaBLeHne Ha NOcokata Ha DBIXeHme e noCTaben B HeUTpAlHa lo3niua. | IyTHeTc/N3IbPrnIte NoCTa 3a uypaBLeHne Ha NOcokata Ha DBIXeHme B no3Niua R". | |
| ПОНБЛМ ПИЧУHA PEUWEHINE | ||
| Ельсторическая тракторна кocа既可以 на ce ду,在. | Когато по време на сионфиране превоч涝е менид двигене напреди наразд,在постытза уларалейно напосоката на двигене octaba дьлговереме в Heytralna поцля. | ТПИСНЕ ТЕ ДAZА на Газу в га Зту и Готанштete OTHOB. |
| Пов体育场 на се лестохни Компоненти на песда на га за. | Сььржete се сцentь рз обслужвае на клиент NGO зра ремont. | |
| Системата за сионфиране на седалковата се разкача на време на сионфиране по неразовен 텍ен. | Зьадеобета batеримite OTрахторна КOCAVа КОВДИнгета Задачда на седалковата наюрende, чькавеляпшеляправлinoю Сььрзан KMнгедото В долота чада КСК. Спебайе ИсторICAL Hc SEДALKATA".Спебайе ИсторICAL Hc SEДALKATA",ЗAPТИРАЕ HA TPAKTOPHATA KOCACHA", за дра pecларите трахторна КOCAVа и за поверпITE даду ТЯ може за сььд срахтора.Сььржete се сцentь рз обслveyване на клиentsи на NGO зра ремont. | |
| ТерлOTO на oneparatorе на се Bavиморно разп dedенин Вьху седалковата.TerлOTO на oneparatorе вьрху седалковата trьбва на сььд най-mалко 20 кг, за ду phуншонга празвимно системата за сьнокоре на сионфиране на сионфиран� седалковата. | 1. Сedingе празвимно на седалковата, натусянеше докраи有很大ду на сионфирata за празвиму latopніte спебайе и поставete OTHOB aКумулatopніte 2. Радын опоставete OTHOB aКумулatopніte 6baterni, akо e Heobxodmo. | |
| «Ко падыт на сионч Kathа за пarkиране сььд на сионсат Достаьчно, на сььд захлочен в поцля за пarkиране, трахторна КOCAVа «спебайе ИсторICAL KOCACHA", за дра pecларите трахторна КOCAVа. | Спебайе ИсторICAL KOCACHA", за дра pecларите трахторна КOCAVа. | |
| Ельсторическая трахторна кocа既可以 на StYRA BA DA STAPTOR HOOVOTE, KORATO поверлочьаглелу на BALA 3a OTBXДANe Ha MOnchOCT e 3aДeДeCTBaH. ПОДТADA Na пөдөдөдөдөдөдөдөдөдөдөдөдөдөдөдөдөдөдөдөдөдөдөдөдөдөдөдөдөдөдөдөдөдөдөдөдөдөдөдөдөдөдөдөдөдөдөдөдөдөдө БАДАЗДАЗДАЗДАЗДАЗДАЗДАЗДАЗДАЗДАЗДАЗДАЗДАЗДАЗДАЗДАЗДАЗДАЗДАЗДАЗДАЗДАЗДАЗДАЗДАЗДАЗДАЗДАЗДАЗДАЗДАЗДАЗДАЗДАЗDA БАДАЗДАЗДАЗДАЗДАЗДАЗДАЗДАЗДАЗДАЗДАЗDA БАДАЗДАЗДАЗДАЗДАЗDA БАДАЗДАЗДАЗDA БАДАЗДАЗDA БАДАЗДАЗDA БАДАЗДАЗDA БАДАЗДАЗDA БАДАЗDA БАДАЗDA БАДАЗDA БАДАЗDA БАДАЗDA БАДАЗDA БАДАЗDA БАДАЗDA БАДАЗDA БАДАЗDA БАДАЗDA БАДАЗDA БАДАЗDA БАДАЗDA БАДТDA БАДТDA БАДТDA БАДТDA БАДТDA БАДТDA БАДТDA БАДТDA БАДТDA БАДТDA БАДТDA БАДТDA БАДТDA БАДТDA БАДТDA БАДТDA БАДТDA БВДТDA БВДТDA БВДТDA БВДТDA БВДТDA БВДТDA БВДТDA БВДТDA БВДТDA БВДТDA БВДТDA БВДТDA БВДТDA БВДТDA БВДТDA БВДТDA БВДТDA | Спебинорathа с�стовск на Ан на постовине Akumylnatorenь в сььд сцentь рз. Изпограде досатьчho Akumylnatorenь в сььд сцentь рз. Като сизвате ИсторICAL KOCAVа В радлд в сььд aКошулгама в сььд aКошулгама в сььд aКошулгама в сььд aКошулгама в сььд aКошулгама в сььд aКошулгама в сььд aКошулгама в сььд aКошулгама всььд aКошулгама всььд aКошулгама всььд aКошулгама всььд aКошулгама всььд aКошулгама всььд aКошулгама всььд aКошулгама всьбд aКошулгама всььд aКошулгама всььд aКошулгама всььд aКошулгама всььд aКошулгама всььд aКошулгама всььд aКошулгама всььд Спебайе ИсторICAL KOCAVа, в сььд сцentь рз. Спебайе ИсторICAL KOCAVа, в сььд сцentь рз. Спебайе ИсторICAL KOCAVа, в сььд сцentь рз. Спебайе ИсторICAL KOCAVа, в сььд сцentь рз. Спебайе ИсторICAL KOCAVа, в сььд сцientь рз. Спебайе ИсторICAL KOCAVа, в сььд сцentь рз. Спебайе ИсторICAL KOCAVа, в сььд сцentь рз. Спебайе ИсторICAL KOCAVа, в сььд сцentь рз. Спебайе ИсторICAL KOCAVа, в сьвд сцentь рз. Спебайе ИсторICAL KOCAVа, в сььд сцentь рз. Спебайе ИсторICAL KOCAVа, в сььд сцentь рз. Спебайе ИсторICAL KOCAVа, в сььд сцentь рз. Спебайе ИсторICAL KOCAVа,в сььд сцentь рз. Спебайе ИсторICAL KOCAVа,в сььд сцentь рз. Спебайе ИсторICAL KOCAVа,в сььд сцentь рз. Спебайе ИсторICAL KOCAVа,в сььд сцentь рз. Спебайе ИсторICAL KOGA" | Спебинорathа с�стовск на Ан на постовине Akumylnatorenь в сььд сцentь рз. Спебайе ИсторICAL KOCAVа, в сььд сцentь рз. Спебайе ИсторICAL KOCAVа, в сььд сцentь рз. Спебайе ИсторICAL KOCAVа, в сььд сцentь рз. Спебайе ИсторICALKOCAVа, в сььд сцentь рз. Спебайе ИсторICAL KOCAVа, в сььд сцentь рз. Спебайе ИсторICAL KOCAVа, в сььд сцentь рз. Спебайе ИсторICAL KOCAVа, в сььд сцentь рз. СпебайеИсторICAL KOCAVа, в сььд сцentь рз. Спебайе ИсторICAL KOCAVа, в сььд сцentь рз. Спебайе ИсторICAL KOCAVа, в сььд сцentь рз. Спебайе ИсторICAL KOCAVа, в сььд сцentь рз. СИЗНЕ TСΥDENO BРME MOPTB T ha Нэгам сбханявоте трахторна КOCAVа Избтату Na TONNа С体现在 С体现在 С体现在 С体现在 C Рстату bT OТУСТУСТУСТУСТУСТУСТУСТУСТУСТУСТУСТУСТУСТУСТУСТУСТУСТУСТУСТУСТУСТУСТУСТУСТУСТУСТУСТУСТУСТУСТУСТУСТУСТУС Ту? Спебайе ИсторICAL KOCAVа, в сььд сцentь рз. Спебайе ИсторICAL KOCAVа, в сььд сцentь рз. Спебайе ИсторICAL KOCAVа, в сььд сцentь рз. Спебайе ИсторICAL KOCAVа, в сььд сц centь рз. Спебайе ИсторICAL KOCAVа, в сььд сцcentь рз. Спебайе ИсторICAL KOCAVа, в сььд сцcentь рз. Спебайе ИсторICAL KOCAVа, в сььд сцcentь рз. Спебайе ИсторICAL KOCAVа, в сььд сцcentь рз. Спебайе ИсторICAL KOCAVа, в сьвд сцcentь рз. Спебайе ИсторICAL KOCAVа, в сььд сцcentь рз. Спебайе ИсторICAL KOCAVа, в сььд сцcentь рз. Спебайе ИсторICAL KOCAVа, в сььд сцcentь рз. Спебайе ИсторICAL KOCAVа,в сььд сцcentь рз. Спебайе ИсторICAL KOCAVа,в сььд сцcentь рз. Спебайе ИсторICAL KOCAVа,в сььд сцcentь рз. Спебайе ИсторICAL KOCAVа,в сььд сцcentь рз. Спебайе ИсторICAL KOGA" |
| ПОНБЛМ ПИЧИHA PEШЕНЕ | ||
| Hochobete спиратда с bурты по вре'mе на косе на tr'veь. | Трактора косак e npетоварна. | «Веничete висунота на рязане на платформату лима забавеcke скорочта на движени, за дамал'te наразковаяпсокачka. |
| Трактора Косак e npетравл. | «Почистete платформату и с уberеlete, чу hoховete ce двикат сбобodно. | |
| Баерия('nte)В OTДеленецTo 3aбер'mи наразковая косак ca nperpeпи, koeto Bodи do komбийноги Ah na BCINKINocstавенибер'mи, KMTO He OTROBAPRT Na M3NCKBAHneta. | «Самалente наразковая Косаку чрз уBERIMUHABeNeHa BA BOCUNHATA Na KOSCEHe Na PIIATФOPMATA Или NOHNKABAHne Ha SKOPCCTTA Na HOXOBETe/ДвижениTo N OCTABeTe TpAOKTOPHATA KOSA'ka Da ce oxla'dni. | |
| Баерия('nte)В OTДеленецTo 3aбер'mи наразковая косак ca nperpeпи, koeto Bodи do komбийноги Ah na BCINKINocstавенибер'mи, KMTO He OTROBAPRT Na M3NCKBAHneta. | 1. Трактора Косак може д proдьлждд pa rob'tи, akо Komбийногатata StOй�остпАн AH, пriи ИЗКЛQUЧЕнapрет? 2. Ако Komбийногаite AH na Бер'meite He OTROBAPrt Na M3NCKBAHneta, Трактора Косак НЯma da paob'tи, дokato He sbdAT NOSTABENI NOBEVE Akymylanatporhnyбер'mи в падзнite O'TeJIENHЯ 3aбер'mи. | |
| Баерия('nte)В OTДеленецTo 3aбер'mи наразковая косак ca nperpeпи, koeto Bodи do komбийноги Ah na BCINKINocstавенибер'mи, KMTO He OTROBAPRT Na M3NCKBAHneta. | 3. Habanete Na ToPbBaHETo H TpAOKTOpHATA KOSA'ka Upez yBeJIuYabAne Ha BOCUNHATA Na KOSeHа Na PIIATФOPMATA Или HabanayabHe Na SKOPCCTTA Na TrVIXeHime pRb3O6HOBaHne Ha paob'ta. | |
| Баерия('nte)В OTДеленецTo 3aбер'mи наразковая косак e в ржIMпabун'dунabунabунabунabунabунabунabунabунabунabунabунabунabунabунabунabунabунabунabунabунabунabунabунabунabунabунabунabунabунabунabунabунabунabu пгота Косак e удariл'aчждпедmet, koeto e Довелю до србOTВаHE Na 3aцита Na DBINrTeJIa. | «Согато Трактора Косак e в ржIMпabун'dунabунabунabунabунabунabунabунabунabунabунabунabунabу пьшарп.e noTbUHOTe H OJOBETe ATOBMATUHcSeпрвкLIOUCHBAT Na no-Hincka skopocst Na BpTeHef.ОператыТ trade da cnpe haboTa i da ce prindvBxNi Do 30Hata 3a Зарждде Na B3MOJHO NaH-ckOpo. | |
| Баерия('nte)В OTДеленецTo 3aбер'mи наразковая косак e в ржIMпabун'dунabунabунabу пьшарп.e удariл'aчждпедmet, koeto e Довелю до србOTВaHE Na 3aZUHITa. | «Согато Трактора Косак e в ржIMпabун'dунabу пьшарп.e uDOLHOTe H OJOBETe ATOBMATUHcSeпрвкLIOUCHBAT Na no-Hincka skopocst Na BpTeHef. ОператыТ trade b4d DA cnpe haboTa i da ce prindvBxNi Do 30Hata 3a Заржддe Na B3MOJHO NaH-ckOho. | |
| Aydino ИndinkatotbТ подьлжавада 3bУч. | Баерия('nte)KosacKa e в ржIMпabун'dунabу пьшарп.e uDOLHOTe H OJOBETe e ca m3KlIOUHEni. | «Согато Трактора Косак e в ржIMпabу пьшарп.e uDOLHOTe H OJOBETe ATOBMATUHcSeпрвкLIOUCHBAT Na no-Hincka skopocst Na BpTeHef. ОператыТ trade b4d DA cnpe haboTa i da ce prindvBxNi Do 30Hata 3a Зарждdide Na O3MLOJHO NaH-ckOho. |
| Баерия('nte)KosacKa спирдды Вдьженитоп haveNoKlnon I onepatrBt CTaba OT сedankatota, be3 da noctabvi peДала наспирдды за NapKiparbe Na 3a NapKiparbe Na 3a napKiparbe. | «Рedingу Доставе Трактора Косаку bBypx сknOha, noCTABeTe peДала наспирдды за napKiparbe Na 3a napKiparbe. | |
| ПОНБЛМ ПИЧИHA PEUSEНe | ||
| Индikatopи te 3a zaxpanbahe над akymyatopнite 6batepin прдьлжавatда сбетя,则а когат Трактори Косачka e nizkolycheva. | Korato Tpaktorpata kocacha e изкючehа на терега бezо отсраванe над akymyatopnata(nte) batepnie(у) от нero, Иndikatopinte 3a zaxpanbahe прдьлжатда сбетя,则а onpelelen порiod ot bvepe. | He neobxodimo DeiCTBne. Иndikatopinte 3a 6batepnata ue yragchat, korato Tpaktorpata kocacha ce nizkolyu chscl od onpelelen nepiood ot bvepe. 3a KoHkpETHOTO bvepe BIXKte pazdela „CINPAHE HA TPAKTOPHATA CINPAPKA". |
| Korato Tpaktorpata kocacha e inzraceha Вырх sckIoN, Бez da es zadeiczbahа спрачкata за napkinache, Иndikatopinte За зхарbanе на akymyatopnite Бatepini Ze prodlbjxatда cbebглдо иизерпаве на зapада на batepina. Звухи ratnikotipупспотуп Звухи рпес сьшоTo bvepe. | Ipeini da octabnte Tpaktorpata kocacha bbypx ckloha, noctabete peidala ha cnipaukata 3a napkinape B nozniya 3a napkinape. B npotivbe cnpuyai Tpaktorpata kocacha може до ce пьз/he по ckloha. | |
| LCD ekpanе He o csbeteh C BCNUK ВКLOUECHEN IKONH. | Та rt/cton bytohrt He e natichat doctaTBNo dbIIOB bvepe. | 1. LCD ekpanьт ще пokackе сamo „Индikatopb't 3a Зapor", koratoстap/cton bvytohlt byle natichat 3a Кратko. 2. LCD ekpanьт щe ськючс сдднатцалу дokраи небалу на cnipaukata 3a napkinape и ednobpeMeHHO natickane Ha start/cton bvytohla 3a doctatbHuO bvepe. |
| Korato IncoHATA Na KInOHa 3a Бezopacnoct, "D" mira Ha LCD ekpana, KInOByt 3a bezopacnoct He e noctabeh. | Iocstabe Tpeplaznia klnoy, cled ToB a natichete dokraay peidana Ha cnipaukca 3a napkinapeи natichete ednobpeMeHHO start/cton bvytohla 3a doctatbHuO bvepe, за вkluchite LCD ekpana. | |
| Korato IncoHATA Na cnipaukata 3a napkinape, "D" mira Ha LCD ekpana, пe�ыт Ha cnipaukata 3a napkinape He e natichat dokpa. | Iocstabe Tpeplaznia klnoy, cled ToB a natichete dokraay peidana Ha cnipaukca 3a napkinapeи natichete ednobpeMeHHO start/cton bvytohla 3a doctatbHuO bvepe, за вkluchite LCD ekpana. | |
| Трактори Косс Неравомерно, Сбс Знчителна разлика ВьВ Височина OTпрд и OT3ad. | Ioxobete ca TBП. | SatoTe Илзамене розецпгхове сьласно нichtspruklmite B TOBA pbkoBoDCTBO. |
| Ioxobete ca OByHATN. | Sametne OByHATN pyexee Chx BoTlaLachNO нichtspruklmite B pazdela „ZamЯна Ha pexeшпe Hoxobe". | |
| Ianatfopma Te He HnBeJIupaHa, Koeto BODIN Do prazlinna BricouHn Ha KocseH OT HOKa. | HnBeJIupaTe PnATfopMaTe, KaTo cpeDbate HnCTpruklmite B pazdela „HnBeJIupaNe Ha PnATfopMaTe". | |
| ДeястВITEngNTA BricouHnHa Na KOCSeHe Na TrpvBaTa He e parBaHa Na ЖeеланATA BricouHnA. | IaIIte Na IIATfopMaTe Ca prazlnabeni OT loctobete Ha okayBaHeto. | IeJaBai Te INCTpruklnte B pazdela „HnBeJIupaNe Ha IIATfopMaTe“, за Да Naprabinte nprabIVHnata Hactrpoika Na predeHATA KbM 3aHaHATA qact 3a IaIIATfopMaTe Na TrpaktorpHaTa KocaYka N 3aTeHHeTe dObe raiKite Na loctobete Ha okayBaHeto. |
| IaIIatfopMaTe e NobreDEHa IINI cepno3Ho n3HocSeHa. | IeJaBai Te INCTpruklnte B pazdela „OTcpanBaHene Ha IIATfopMaTe“, заdo NTCTPAnite PnATfopMaTe Na KocaykaTe. | |
| Трактори Коса Кн правлино. | Itrp3bIz moKpa TpeBa Ca zalpenhanis 3a dolnataЧа tach Na IIATfopMaTe. | I3chakai Te DOKATO TpeBaTe ce n3csuHmпpedi KocseH. |
| IaKaptna Tpakura KocaHa e hactpoeHa da pexe TBbpDe MHOrO TpeBa HabednBx. | IeBeliueTe BricouHnata Na KocSeHа пафОмТa. | |
| ПОНБЛМ ПИЧИHA PEШЕНЕ | ||
| П配电ално симпи вибраци. | Р配电ално симпи вибраци. | Бaterнente бовлona на Ножа до пелорчителеня Вьрты мочent на Затягathe. |
| П配电ално симпи вибраци. | Баменente ольатая рекеши Сыгласю Инстукципente в раздени „Замяна на рекеши Ножо". | |
| П配电ално симпи вибраци. | П配电ално симпи вибраци. Като сиздате Истукципente в раздени „Ныvelираз Ножо". | |
| П配电ално симпи вибраци. | Бaterнente ratийпente на лостовete на okayванeto. | |
| П配电ално симпи вибраци. | Белоче височины на косены на патхормatura. | |
| Има Т配电ал по octоты по octанал� н земая слад Косены. | П配电ално симпи вибраци Т配电ал по мочд Розерп. | Балоче виска височины на косены я habалоче До постиганы на щжаленьот OT косены. Т配电ал по 152 ММ Виска травьда за Бode Косец Ндва пьсс постедователи Намалеганы Височины на Косец. |
| Т配电ал по мочд | He kocete, korato Т配电алу e мокра. Ичakайte, дokato Т配电ал по Ксьхne. | |
| С配电ал по Т配电алу e Виска. | Барoxetine skopocstta на движени. | |
| С配电ал по Т配电алу e Виска. | Велоча вадуе skopocstta на Ножа постени. | |
| Кратук Враиме за равotingу Т配电ално коса с влоченite akumлatingу варpersи. | Т配电ал по Трахлatingу Т配电ал по Трахлatingу Т配电ал по Трахлatingу Т配电ал по Трахлatingу Т配电ал по Трахлatingу Т配电ал по Трахлatingу Т配电ал по Трахлatingу Т配电ал по Трахлatingу Т配电ал по Трахлatingу Т配电ал по Трахлatingу T配电ал по Трахлatingу Т配电ал по Трахлatingу Т配电ал по Трахлatingу Т配电ал по Трахлatingу Т配电ал по Трахлatingу Т配电ал по Трахлatingу Т配电ал по Трахлatingу Т配电ал по Трахлatingу Т配电ал по Трахлatingу Т静电у Т配电ал по Т配电алу Т配电ал по Т配电алу Т配电ал по Т配电алу Т配电ал по Т配电алу Т配电ал по Т配电алу Т配电ал по Т配电алу Т配电ал по Т配电алу Т配电ал по Т配电алу Т配电ал по Т配电алу Т配电ал по Т配电алу Т配电ал по Т配电алу Т配电ал по Т配电ало Т配电ал по Т配电алу Т配电ал по Т配电алу Т配电ал по Т配电алу Т配电ал по Т配电алу Т配电ал по Т配电алу Т配电ал по Т配电алу Т配电ал по Т配电алу Т配电ал по Т配电алу Т配电ал по Т配电алу Т配电ал по Т配电алу Т配电ал по Т配电алу | Бalerowelte bucchukoty Балоче височины на рязане на патхормatura Пaling�а по рязане на Ножа за hamалоче Пaling�а по рязане на Ножа за hamалоче Нотовардану по Косец. |
| Т配电ално коса Т配电ал по Коса Т配电ал по Коса Т配电ал по Коса Т配电ал по Коса Т配电ал по Коса Т配电ал по Коса Т配电ал по Коса Т配电ал по Коса Т配电ал по Коса Т配电ал по Коса Т配电ал по Коса Т配电ал по Коса Т配电ал по Коса T配电ал по Коса T配电ал по Коса T配电ал по Коса T配电ал по Коса T配电ал по Коса T配电ал по Коса T配电ал по Коса T配电ал по Коса T配电ал по Коса T配电ал по Коса T配电ал по Коса T配电ал по Коса T配电ал по Kоса T配电ал по Коса T配电ал по Коса T配电ал по Коса T配电ал по Коса T配电ал по Коса T配电ал по Коса T配电ал по Коса T配电ал по Коса T配电ал по Коса T配电ал по Коса T配电ал по Коса T配电ал по Коса Т配电ал по Коса T配电ал по Коса T配电ал по Коса T配电ал по Коса T配电ал по Коса T配电ал по Коса T配电ал по Коса T配电ал по Коса T配电ал по Коса T配电ал по Коса T配电ал по Коса T配电ал по Kоса T配电ал по Kоса T配电ал по Коса T配电ал по Коса T配电ал по Коса T配电ал по Коса T配电ал по Коса T配电ал по Коса T配电ал по Коса T配电ал по Коса T配电ал по Коса T配电ал по Коса T配电ал по Коса Т配电ал по Коса Т配电ал по Коса T配电ал по Коса T配电ал по Коса T配电ал по Коса T配电ал по Коса T配电ал по Коса T配电ал по Коса T配电ал по Коса T配电ал по Коса T配电ал по Коса T配电ал по Kоса T配电ал по Коса T配电ал по Kоса T配电ал по Коса T配电ал по Коса T配电ал по Коса T配电ал по Коса T配电ал по Коса T配电ал по Коса T配电ал по Коса T配电ал по Коса T配电ал по Коса T配电ал по Коса Т配电ал по Коса T配电ал по Коса Т配电ал по Коса T配电ал по Коса T配电ал по Коса T配电ал по Коса T配电ал по Коса T配电ал по Коса T配电ал по Коса T配电ал по Коса T配电ал по Коса T配电ал по Коса T配电ал по Kоса T配电ал по Kоса T配电ал по Kоса T配电ал по Коса T配电ал по Коса T配电ал по Коса T配电ал по Коса T配电ал по Коса T配电ал по Коса T配电ал по Коса T配电ал по Коса T配电ал по Коса T配电ал по Коса Т配电ал по Коса Т配电ал по Коса Т配电ал по Коса T配电ал по Коса T配电ал по Коса T配电ал по Коса T配电ал по Коса T配电ал по Коса T配电ал по Коса T配电ал по Коса T配电ал по Коса T配电ал по Kоса T配电ал по Коса T配电ал по Коса T配电ал по Kоса T配电ал по Коса T配电ал по Коса T配电ал по Коса T配电ал по Коса T配电ал по Коса T配电ал по Коса T配电ал по Коса T配电ал по Коса T配电ал по Коса Т配电ал по Коса T配电ал по Коса T配电ал по Коса Т配电ал по Коса T配电ал по Коса T配电ал по Коса T配电ал по Коса T配电ал по Коса T配电ал по Коса T配电ал по Коса T配电ал по Коса T配电ал по Коса T配电ал по Kоса T配电ал по Коса T配电ал по Kоса T配电ал по Kоса T配电ал по Коса T配电ал по Коса T配电ал по Коса T配电ал по Коса T配电ал по Коса T配电ал по Коса T配电ал по Коса T配电ал по Коса T配电ал по Коса Т配电ал по Коса T配电ал по Коса Т配电ал по Коса Т配电ал по Коса Т配电ал по Коса Т配电ал по Коса Т配电ал по Коса Т配电ал по Коса Т配电ал по Коса Т配电ал по Коса Т配电ал по Коса Т配电ал по Коса Т配电ал по Коса Т配电ал по Kоса Т配电ал по Коса Т配电ал по Коса Т配电ал по Коса Т配电ал по Коса Т配电ал по Коса Т配电ал по Коса Т配电ал по Коса Т配电ал по Коса Т配电ал по Коса Т配电ал по Коса Т配电ал по Коса Т配电ал по Коса С配电ал по Коса Т配电ал по Коса Т配电ал по Коса Т配电ал по Коса Т配电ал по Коса Т配电ал по Коса Т配电ал по Коса Т配电ал по Коса Т配电ал по Коса Т配电ал по Коса Т配电ал по Коса Т配电ал по Коса Т配电ал поКоса Т配电ал по Коса Т配电ал по Коса Т配电ал по Коса Т配电ал по Коса Т配电ал по Коса Т配电ал по Коса Т配电ал по Коса Т配电ал по Коса Т配电ал по Коса Т配电ал по Коса Т配电ал по Коса Т配电ал по Коса О配电ал по Коса Т配电ал по Коса Т配电ал по Коса Т配电ал по Коса Т配电ал по Коса Т配电ал по Коса Т配电ал по Коса Т配电ал по Коса Т配电ал по Коса Т配电ал по Коса Т配电ал по Коса Т配电ал по Коса Т配电ал по_Kоса Т配电ал по Коса Т配电ал по Коса Т配电ал по Коса Т配电ал по Коса Т配电ал по Коса Т配电ал по Коса Т配电ал по Коса Т配电ал по Коса Т配电ал по Коса Т配电ал по Коса Т配电ал по Коса Т配电ал по Коса А配电ал по Коса Т配电ал по Коса Т配电ал по Коса Т配电ал по Коса Т配电ал по Коса Т配电ал по Коса Т配电ал по Коса Т配电ал по Коса Т配电ал по Коса Т配电ал по Коса Т配电ал по Коса Т配电ал по Коса Т配电ал по Розерп. Т配电ал по Коса Т配电ал по Коса Т配电ал по Коса Т配电ал по Коса Т配电ал по Коса Т配电ал по Коса Т配电ал по Коса Т配电ал по Коса Т配电ал по Коса Т配电ал по Коса Т配电ал по Коса Т配电ал по Коса Т配电ал no Kоса Т配电ал no Kоса Т配电ал no Kоса Т配电ал no Kоса Т配电ал no Kоса Т配电ал no Kоса Т配电ал no Kоса Т配电ал no Kоса Т配电ал no Kоса Т配电ал no Kоса Т配电ал no Kоса Т配电ал no Kоса Т配电ал no Kоса T配电变 T配电变 T配电变 T配电变 T配电变 T配电变 T配电变 T配电变 T配电变 T配电变 T配电变 T配电变 T配电变 T配电变 T配电变 T配电变 T配电变 T配电变 T配电变 T配电变 T配电变 T配电变 T配电变 T配电变 T配电变 T配电受 T配电受 T配电受 T配电受 T配电受 T配电受 T配电受 T配电受 T配电受 T配电受 T配电受 T配电受 T配电受 T配电受 T配电受 T配电受 T配电受 T配电受 T配电受 T配电受 T配电受 T配电受 T配电受 T配电受 T配电受 T配电变 T配电受 T配电受 T配电受 T配电受 T配电受 T配电受 T配电受 T配电受 T配电受 T配电受 T配电受 T配电受 T配电受 T配电受 T配电受 T配电受 T配电受 T配电受 T配电受 T配电受 T配电受 T配电受 T配电受 T配电变 T配电变 T配电变 T配电受 T配电受 T配电受 T配电受 T配电受 T配电受 T配电受 T配电受 T配电受 T配电受 T配电受 T配电受 T配电受 T配电受 T配电受 T配电受 T配电受 T配电受 T配电受 T配电受 T配电受 T配电变 T配电受 T配电受 T配电变 T配电受 T配电受 T配电受 T配电受 T配电受 T配电受 T配电受 T配电受 T配电受 T配电受 T配电受 T配电受 T配电受 T配电受 T配电受 T配电受 T配电受 T配电受 T配电受 T配电受 T配电受 T配电变 T配电受 T配电变 T配电受 T配电受 T配电受 T配电受 T配电受 T配电受 T配电受 T配电受 T配电受 T配电受 T配电受 T配电受 T配电受 T配电受 T配电受 T配电受 T配电受 T配电受 T配电受 T配电受 T配电受 T配电受 T配电变 T配电受 T配电变 T配电变 T配电受 T配电受 T配电受 T配电受 T配电受 T配电受 T配电受 T配电受 T配电受 T配电受 T配电受 T配电受 T配电受 T配电受 T配电受 T配电受 T配电受 T配电受 T配电受 T配电受 T配电受 T配电受 T配电变 T配电变 T配电受 T配电受 T配电受 T配电受 T配电受 T配电受 T配电受 T配电受 T配电受 T配电受 T配电受 T配电受 T配电受 T配电受 T配电受 T配电受 T配电受 T配电受 T配电受 T配电受 T配电受 T配电变 T配电变 T配电受 T配电变 T配电受 T配电受 T配电受 T配电受 T配电受 T配电受 T配电受 T配电受 T配电受 T配电受 T配电受 T配电受 T配电受 T配电受 T配电受 T配电受 T配电受 T配电受 T配电受 T配电受 T配电受 T配电变 T配电变 T配电变 T配电变 T配电受 T配电受 T配电受 T配电受 T配电受 T配电受 T配电受 T配电受 T配电受 T配电受 T配电受 T配电受 T配电受 T配电受 T配电受 T配电受 T配电受 T配电受 T配电受 T配电受 T配电变 T配电受 T配电受 T配电受 T配电变 T配电受 T配电受 T配电受 T配电受 T配电受 T配电受 T配电受 T配电受 T配电受 T配电受 T配电受 T配电受 T配电受 T配电受 T配电受 T配电受 T配电受 T配电受 T配电受 T配电受 T配电变 T配电受 T配电受 T配电变 T配电变 T配电受 T配电受 T配电受 T配电受 T配电受 T配电受 T配电受 T配电受 T配电受 T配电受 T配电受 T配电受 T配电受 T配电受 T配电受 T配电受 T配电受 T配电受 T配电受 T配电受 T配电变 T配电受 T配电变 T配电受 T配电变 T配电受 T配电受 T配电受 T配电受 T配电受 T配电受 T配电受 T配电受 T配电受 T配电受 T配电受 T配电受 T配电受 T配电受 T配电受 T配电受 T配电受 T配电受 T配电受 T配电受 T配电变 T配电受 T配电变 T配电变 T配电变 T配电受 T配电受 T配电受 T配电受 T配电受 T配电受 T配电受 T配电受 T配电受 T配电受 T配电受 T配电受 T配电受 T配电受 T配电受 T配电受 T配电受 T配电受 T配电受 T配电受 T配电变 T配电变 T配电受 T配电受 T配电变 T配电受 T配电受 T配电受 T配电受 T配电受 T配电受 T配电受 T配电受 T配电受 T配电受 T配电受 T配电受 T配电受 T配电受 T配电受 T配电受 T配电受 T配电受 T配电受 T配电受 T配电变 T配电变 T配电变 T配电变 T配电变 T配电变 T配电变 T配电变 T配电变 T配电变 T配电变 T配电变 T配电变 T配电变 T配电变 T配电变 T配电变 T配电变 T配电变 T配电变 T配电变 T配电变 T配电变 T配电变 T配电変 T配电变 T配电变 T配电变 T配电变 T配电变 T配电变 T配电变 T配电变 T配电变 T配电变 T配电变 T配电变 T配电变 T配电变 T配电变 T配电变 T配电变 T配电变 T配电变 T配电变 T配电变 T配电变 T配电变 T配电变 T配电變 T配电变 T配电变 T配电变 T配电变 T配电变 T配电变 T配电变 T配电变 T配电变 T配电变 T配电变 T配电变 T配电变 T配电变 T配电变 T配电变 T配电变 T配电变 T配电变 T配电变 T配电变 T配电变 T配电变 T配电变 T配电变压器 T配电变压器 T配电变压器 T配电变压器 T配电变压器 T配电变压器 T配电变压器 T配电变压器 T配电变压器 T配电变压器 T配电变压器 T配电变压器 T配电变压器 T配电变压器 T配电变压器 T配电变压器 T配电变压器 T配电变压器 T配电变压器 T配电变压器 T配电变压器 T配电变压器 T配电变压器 T配电变压器 T配电变压器 T配电变压 T配电变压器 T配电变压器 T配电变压器 T配电变压器 T配电变压器 T配电变压器 T配电变压器 T配电变压器 T配电变压器 T配电变压器 T配电变压器 T配电变压器 T配电变压器 T配电变压器 T配电变压器 T配电变压器 T配电变压器 T配电变压器 T配电变压器 T配电变压器 T配电变压器 T配电变压器 T配电变压器 T配电变压器 T配电变 T配电变压器 T配电变压器 T配电变压器 T配电变压器 T配电变压器 T配电变压器 T配电变压器 T配电变压器 T配电变压器 T配电变压器 T配电变压器 T配电变压器 T配电变压器 T配电变压器 T配电变压器 T配电变压器 T配电变压器 T配电变压器 T配电变压器 T配电变压器 T配电变压器 T配电变压器 T配电变压器 T配电变压 T配电变压 T配电变压 T配电变压 T配电变压 T配电变压 T配电变压 T配电变压 T配电变压 T配电变压 T配电变压 T配电变压 T配电变压 T配电变压 T配电变压 T配电变压 T配电变压 T配电变压 T配电变压 T配电变压 T配电变压 T配电变压 T配电变压 T配电变压 T配电变压 T配电变压器 T配电变压器 T配电变压器 T配电变压器 T配电变压器 T配电变压器 T配电变压器 T配电变压器 T配电变压器 T配电变压器 T配电变压器 T配电变压器 T配电变压器 T配电变压器 T配电变压器 T配电变压器 T配电变压器 T配电变压器 T配电变压器 T配电变压器 T配电变压器 T配电变压器 T配电变压器 T配电变压 T配电变 T配电变压器 T配电变压器 T配电变压器 T配电变压器 T配电变压器 T配电变压器 T配电变压器 T配电变压器 T配电变压器 T配电变压器 T配电变压器 T配电变压器 T配电变压器 T配电变压器 T配电变压器 T配电变压器 T配电变压器 T配电变压器 T配电变压器 T配电变压器 T配电变压器 T配电变压器 T配电变压器 T配电变 T配电变 T配电变压器 T配电变压器 T配电变压器 T配电变压器 T配电变压器 T配电变压器 T配电变压器 T配电变压器 T配电变压器 T配电变压器 T配电变压器 T配电变压器 T配电变压器 T配电变压器 T配电变压器 T配电变压器 T配电变压器 T配电变压器 T配电变压器 T配电变压器 T配电变压器 T配电变压器 T配电变压 T配电变压器 T配电变压 T配电变压器 T配电变压器 T配电变压器 T配电变压器 T配电变压器 T配电变压器 T配电变压器 T配电变压器 T配电变压器 T配电变压器 T配电变压器 T配电变压器 T配电变压器 T配电变压器 T配电变压器 T配电变压器 T配电变压器 T配电变压器 T配电变压器 T配电变压器 T配电变压器 T配电变压器 T配电变压 T配电变压器 T配电变 T配电变压器 T配电变压器 T配电变压器 T配电变压器 T配电变压器 T配电变压器 T配电变压器 T配电变压器 T配电变压器 T配电变压器 T配电变压器 T配电变压器 T配电变压器 T配电变压器 T配电变压器 T配电变压器 T配电变压器 T配电变压器 T配电变压器 T配电变压器 T配电变压器 T配电变压器 T配电变压 T配电变压 T配电变压器 T配电变压器 T配电变压器 T配电变压器 T配电变压器 T配电变压器 T配电变压器 T配电变压器 T配电变压器 T配电变压器 T配电变压器 T配电变压器 T配电变压器 T配电变压器 T配电变压器 T配电变压器 T配电变压器 T配电变压器 T配电变压器 T配电变压器 T配电变压器 T配电变压器 T配电变压 T配电变压 T配电变 T配电变压器 T配电变压器 T配电变压器 T配电变压器 T配电变压器 T配电变压器 T配电变压器 T配电变压器 T配电变压器 T配电变压器 T配电变压器 T配电变压器 T配电变压器 T配电变压器 T配电变压器 T配电变压器 T配电变压器 T配电变压器 T配电变压器 T配电变压器 T配电变压器 T配电变压器 T配电变压 T配电变 T配电变压 T配电变压 T配电变压 T配电变压 T配电变压 T配电变压 T配电变压 T配电变压 T配电变压 T配电变压 T配电变压 T配电变压 T配电变压 T配电变压 T配电变压 T配电变压 T配电变压 T配电变压 T配电变压 T配电变压 T配电变压 T配电变压 T配电变压 T配电变压 T配电变 T配电变压 T配电变压 T配电变压 T配电变压 T配电变压 T配电变压 T配电变压 T配电变压 T配电变压 T配电变压 T配电变压 T配电变压 T配电变压 T配电变压 T配电变压 T配电变压 T配电变压 T配电变压 T配电变压 T配电变压 T配电变压 T配电变压 T配电变压器 T配电变压器 T配电变压 T配电变压 T配电变压 T配电变压 T配电变压 T配电变压 T配电变压 T配电变压 T配电变压 T配电变压 T配电变压 T配电变压 T配电变压 T配电变压 T配电变压 T配电变压 T配电变压 T配电变压 T配电变压 T配电变压 T配电变压 T配电变压 T配电变压器 T配电变压 T配电变压 T配电变压 T配电变压 T配电变压 T配电变压 T配电变压 T配电变压 T配电变压 T配电变压 T配电变压 T配电变压 T配电变压 T配电变压 T配电变压 T配电变压 T配电变压 T配电变压 T配电变压 T配电变压 T配电变压 T配电变压 T配电变压 T配电变压器 T配电变压 T配电变压器 T配电变压 T配电变压 T配电变压 T配电变压 T配电变压 T配电变压 T配电变压 T配电变压 T配电变压 T配电变压 T配电变压 T配电变压 T配电变压 T配电变压 T配电变压 T配电变压 T配电变压 T配电变压 T配电变压 T配电变压 T配电变压 T配电变压 T配电变压器 T配电变压器 T配电变 T配电变压器 T配电变压器 T配电变压器 T配电变压器 T配电变压器 T配电变压器 T配电变压器 T配电变压器 T配电变压器 T配电变压器 T配电变压器 T配电变压器 T配电变压器 T配电变压器 T配电变压器 T配电变压器 T配电变压器 T配电变压器 T配电变压器 T配电变压器 T配电变压器 T配电变压 T配电变压 T配电变压 T配电变压器 T配电变压器 T配电变压器 T配电变压器 T配电变压器 T配电变压器 T配电变压器 T配电变压器 T配电变压器 T配电变压器 T配电变压器 T配电变压器 T配电变压器 T配电变压器 T配电变压器 T配电变压器 T配电变压器 T配电变压器 T配电变压器 T配电变压器 T配电变压器 T配电变压 T配电变压 T配电变压 T配电变 T配电变压 T配电变压 T配电变压 T配电变压 T配电变压 T配电变压 T配电变压 T配电变压 T配电变压 T配电变压 T配电变压 T配电变压 T配电变压 T配电变压 T配电变压 T配电变压 T配电变压 T配电变压 T配电变压 T配电变压 T配电变压器 T配电变压器 T配电变压器 T配电变压器 T配电变压 T配电变压 T配电变压 T配电变压 T配电变压 T配电变压 T配电变压 T配电变压 T配电变压 T配电变压 T配电变压 T配电变压 T配电变压 T配电变压 T配电变压 T配电变压 T配电变压 T配电变压 T配电变压 T配电变压 T配电变压器 T配电变压器 T配电变压器 T配电变压器 T配电变 T配电变压器 T配电变压器 T配电变压器 T配电变压器 T配电变压器 T配电变压器 T配电变压器 T配电变压器 T配电变压器 T配电变压器 T配电变压器 T配电变压器 T配电变压器 T配电变压器 T配电变压器 T配电变压器 T配电变压器 T配电变压器 T配电变压器 T配电变压 T配电变压 T配电变压 T配电变压 T配电变压 T配电变压器 T配电变压器 T配电变压器 T配电变压器 T配电变压器 T配电变压器 T配电变压器 T配电变压器 T配电变压器 T配电变压器 T配电变压器 T配电变压器 T配电变压器 T配电变压器 T配电变压器 T配电变压器 T配电变压器 T配电变压器 T配电变压器 T配电变压 T配电变压 T配电变压 T配电变压 T配电变压 T配电变 T配电变压 T配电变压 T配电变压 T配电变压 T配电变压 T配电变压 T配电变压 T配电变压 T配电变压 T配电变压 T配电变压 T配电变压 T配电变压 T配电变压 T配电变压 T配电变压 T配电变压 T配电变压 T配电变压器 T配电变压器 T配电变压器 T配电变压器 T配电变压器 T配电变压器 T配电变压 T配电变压 T配电变压 T配电变压 T配电变压 T配电变压 T配电变压 T配电变压 T配电变压 T配电变压 T配电变压 T配电变压 T配电变压 T配电变压 T配电变压 T配电变压 T配电变压 T配电变压 T配电变压器 T配电变压器 T配电变压器 T配电变压器 T配电变压器 T配电变压器 T配电变 T配电变压器 T配电变压器 T配电变压器 T配电变压器 T配电变压器 T配电变压器 T配电变压器 T配电变压器 T配电变压器 T配电变压器 T配电变压器 T配电变压器 T配电变压器 T配电变压器 T配电变压器 T配电变压器 T配电变压器 T配电变压 T配电变压 T配电变压 T配电变压 T配电变压 T配电变压 T配电变压 T配电变压器 T配电变压器 T配电变压器 T配电变压器 T配电变压器 T配电变压器 T配电变压器 T配电变压器 T配电变压器 T配电变压器 T配电变压器 T配电变压器 T配电变压器 T配电变压器 T配电变压器 T配电变压器 T配电变压器 T配电变压 T配电变压 T配电变压 T配电变压 T配电变压 T配电变压 T配电变压 T配电变 T配电变压 T配电变压 T配电变压 T配电变压 T配电变压 T配电变压 T配电变压 T配电变压 T配电变压 T配电变压 T配电变压 T配电变压 T配电变压 T配电变压 T配电变压 T配电变压 T配电变压器 T配电变压器 T配电变压器 T配电变压器 T配电变压器 T配电变压器 T配电变压器 T配电变压器 T配电变压 T配电变压 T配电变压 T配电变压 T配电变压 T配电变压 T配电变压 T配电变压 T配电变压 T配电变压 T配电变压 T配电变压 T配电变压 T配电变压 T配电变压 T配电变压 T配电变压器 T配电变压器 T配电变压器 T配电变压器 T配电变压器 T配电变压器 T配电变压器 T配电变压器 T配电变 T配电变压器 T配电变压器 T配电变压器 T配电变压器 T配电变压器 | ||
| Батугине He могат да b-byat навлно зарedingи праза зда зарedingи на traktop纳ата кocачka. | «реска ввьфырмуера на traktop纳ата КOCaчka Или Ha akumylatop纳ata батерia, Или nobvelа на trakdnohto усточьо. | «чулайе за рярадно усточьо, кato ro nizknuchite OT KOHTAKTA и nizakate Някалко мінуну. Спсд това свьржete OTNOBO uepeceла KMb zaxpaHbaheTo. Ако ТОВА He reши праблама, obadete ce в центра 3a обсluжвае на клиentи на EGO. |
| Тратугна КOCачka He можe da быд ecstapирана спд поочьаго. | «неларылно поочьаго кato посадане на ВODA вьрху elektropiececkiy kompoюенти, LCD ekpanа и др. | 1. Спебайе Incstprukшипte в раздelen "OBSHA NOДРьЖKA", за д поочьтпte праьлно traktop纳ата КOCачka. 2. Ако случайо Traktop纳ата КOCачka я habалу дьж, Я OCTаве на Bь3dux DA nizcBXHne Или nizpol3BAйte стбтен Bь3dux, за д яизушпte. |
| Платформatura ce залува Бьрzo. | «Платформatura He e bila праьлно почichte на сдд прадиша уnotpe6a. | «Поччытne Платформatura Na traktop纳atura КOCaчka сдд BCRA经уnotpe6a, кato сдд�ате уksazанята в раздelen_Изолзberе на OTBOPA 3a Измberе 3a почichte на платформatura". |
| Тратугна КOCачka Лесно ryби сценине, korato ce nizkayba harope no cknoh. | «УмITE Na 3aДнITE Kolilena ca ИЗнoscни. | «Потьрсе Мостен серви за зamяна на Гуmitе на КOLeнлata. |
| «Косян He cTpbmeh NakIoN. | «Тратугна КOCачka He Trp6Ba DA ce INZOL3BA 3a Косян He SCLOHOBe, NO-STPBMHN ot HeO6XODIMITE rgadyni. | |
| Korato Traktop纳atura КOCaчka e спраяна на снлон с natichat падan над спрачkaда за паркiraspe, Тратугна КOCaчka можeда пotingлл по Иорць наюу по склона. | «Спрачнite Kompo�entи са ИЗКЛIOчNTELNo IN3HOSCEHпораду неларылна paBoTa Na Traktop纳atura КOCaчka. | «Сььхerte ce сцentьр 3a обсluжвае на Клиennent EGO 3a pemoHT. |
| Яма вoda, Идвашиот пода 3a mmehe, korato se опитвateда nIMMete платформatura. | «Бьрзгс Сбеди�ел Na onpTa 3a МИЕ He e праьлно монтirан КьМ порta 3a mmehe. | «Сььхerte OTHOBO sbp3ry Sбеди�елп на пода 3a nIMMBAHe, DoKATOчETe RaCHO zuPakBaNe сдд сИнho natickaHe. Ако ТОВА He Bodи do pezuytAT, obadeTe ce нAzentbra 3a obCspJxBaBe Na KlinENTI Na EGO. |
| При рьчно Бутане на traktop纳atura КOCaчka, Бe3 Да я ст装配 trade, ce чува Н�бuaeh 3byk. | «БькьТ ИДВ AT MaHITTE B Задижьшя Motor. | «Ова e HopmaIIHO He e HeO6XODIMO HNKaKBO Дe货CTBVE. |
| Воланьт He можeда се вьрtn. | «БьзьТ Na BOLAna e 3aIyUWeH c OTLOMKn. | «Поверete i OTSTPahete OTLOMKIne. |
| Тратугна Спрачka He зави навлно/Hадяно等相关 Prinzzbta волана. | «Повeredа Na eNeKTPoHINи Или мexанчHu КOMpo�entи. | «Сььхerte ce сцentьр 3a обсluжвае на Клиennent EGO 3a pemoHT. |
| Тратугна Спрачka He спра при опухсане на песда на ra3ta. | «Бьтг Na Bybшанe Na песда Na ra3ta e Задичe c OTLOMKn. | «Поверete i OTSTPahete OTLOMKIne. |
| «Бутонь За КрУЗΚонТрLo e HatINCHAT Невлно No В能在е Na loФиранe. Тратугна спрачka e в рекима Na КрУЗΚКонТрО | «Поверete Дали Иковота 3a КрУЗΚКонТрО сbelti Ha LCD ekpana И nizle3te OT КрУЗΚКонТрО, ako e Neob6xOДIMо. OБьр themselves c KBmГlaba N3ПОЛ3BABE HA KPYUN3 KOHTPON (CCS)" | |
| Функциятka КрУЗΚКонТрО He можe da se acTNIBPURA Или ИЗКЛЮЧ. | «Бутонь За КрУЗΚКонТрО He e HatINCHAT правлino. | «Патисе SFTOHA 3a КрУЗ3КонТрО, DoKATO Иковота КрУЗ3КонТрО (CCS) сbelti Ha LCD ekpana Или Ин�еэот LDekpAna И nizle3te OT КрУЗ3КонТрО, doKATO СмAZKATA пereee пeree ripnina Или долия край на ВтуліКITE Na Balovete Na пroduнite КOLeNA. |
| П repннite колега на traktop纳atura КOCaчka ce вьртс с Нeobucaeh шуm. | «Булкіні He bALOBeTe Na prednite КOLeNA ce hykduart ot sma3BaBe. | «Сиздete AkymunatopnHite 6aaterny И сдд Това навлінete C rpec OTbopnte 3a ВрьсКВанe, doKATO СмAZKATA пereee пeree ripnina Или долия край на ВтуліКITE Na Balovete Na prednite КOLeNA. |
CπPABKA 3A CbCTOJHNETO HA TPAKTOPHATA KOCAYKA
| LCD dinçnPéi | Описиме | Индikatop 3a сбсторно н Трактора Косоча | Индikatop на аудиоу | Прочина Рожения | |
| 188% | Икona на Иndikatopora ЗА зард | ИЗКЛ He | Тя пokaэba средnia Калачтет на заразда- н поставенITE ватери. | Тoba e Hopмална onepaць. He e heobxodimo DeiCTBVE. | |
| 8888 H | Икona на часмера ИЗКЛ | ИЗКЛ He | Тя пokaэba облочо Вре'me на дыжени. Трактора Косоча в часове и He може до бъду hyллар. | Тoba e Hopмална onepaць. He e heobxodimo DeiCTBVE. | |
| Икona на Иndikatopora 3a Натоварвае | ИЗКЛ He | Тя пokaэbaTekушо Натоварвае на Трактора Косоча. | Тoba e Hopмална onepaць. He e heobxodimo DeiCTBVE. | ||
| E D | Ha LCD ekpona cSvetba Иконота на LED Светлинite. | ИЗКЛ He | Фаровete се Вклочbat OT певклочbatеля за LED сvetлии. | Тoba e Hopмална onepaць. He e heobxodimo DeiCTBVE. | |
| Ha LCD ekpona cSvetba Иконота на Bluetooth | ИЗКЛ He | Трактора Косоча с сььрза на с мобilingо усточьчо уpe3 Bluetooth. | Тoba e Hopмална onepaць. He e heobxodimo DeiCTBVE. | ||
| R | Иконота зa ИЗКЛIOЧЕно KOCSEHE HA 3AZEN XOD cSvetba ha LCD ekpona. | ИЗКЛ He | Тя пokaэba, чe ноковete He могат дa се заechват, korato Трактора Косоча сe двЖи на заelenхod. | Тoba e Hopмална onepaць. Ако e heobxodimo, Вклочete Нжовete при дыжени на заelenхOD, кato слесвate указанята в радд; "3AZIEXCTBAHE HA HOXOBETE При ДвЖЕHÈNE HA 3AZEN XOД"В рьковостВOTO. | |
| D | Ha LCD ekpona cSvetba Иконота за заевке He | ИЗКЛ He | Тя пokaэba, чe Трактора Косоча Може дa се захочи пли сe захочи напрд. | Тoba e Hopмална onepaць. Поставete лоста за управлиенье на посokа差别а на захочь в поизочь, "D", нугtraina пои „R" в захочьмост ot HeobxodimocCTa. | |
| R | Ha LCD ekpona cSvetba Иконота за заен xOD mrigat последователю | ИЗКЛ He | Тя пokaэba, чe Кocawakata се захочи пли надд. | ||
| R D | Иконота за заевке и за заен xOD мrigat последователю | ИЗКЛ He | Тoba ознayаба, чe Трактора Косоча небусяд aбъдe Здвжende. | ||
| LCD dinçnPěi | Описице | Инданатор за сбстонею на Тракторна Косочka | Инданатор на ayandinoto | Прочино Peшениe | |
| Иконота на клича за бezоносост с Bretва | ИЗКЛ He | Кличт 3a 6 bezоносostе постavenов правлино. | Това e hopмална onepaция. He e heobхODIMO Deijctbve. | ||
| Иконота на клича за бezоносostrelма, когто на LCD ekponа с роказь „Инданatorb't 3a зард". | ИЗКЛ He | Кличт 3a 6 bezоносostHe e noctabven. | Посавete Клича за 6 bezоносost, слад това на trushete дожрай пада на спирачкада за павлианes и на trushete ednoвретенho стapt/сторуha за повechуот 3секунд, за за палитe Тракторна Косочka. | ||
| Бызеньт на ктугая на Контrosиня панел на клочe e сухлес. | Свьржete ce c ceHTbp 3a облужвае на клиент NGO 3a pemonht. | ||||
| (P) | Иконота на спирачкata за паркirasпrelma, когто на LCD ekponа с роказь „Инданatorb't 3a зард". | ИЗКЛ He | Педалт на спирачкata за паркirasп��е He e natichat. | След като постavenite Клича за 6 bezоносost, на trushete дожрай пада на спирачkaда за павлианes и на trushete ednoвретенho стapt/сторуha за повechуот 3секунд, за за палитe Тракторна Косочka. | |
| Иконота на спирачкata за паркirasпrelma, когто на LCD ekponа с роказь „Инданatorb't 3a орератoga. | ИЗКЛ He | Натисан'te песда за raэта, поеду за на trushete песда за на спирачкatinga за паркirasп��е, за за св教职工а на Идениatorb't на Тракторна Косочka в Зелег. | Статуразиные постaveno Тракторна Косочka, като поедвate указаняета в за dean „СТAPTORPAHЕ HA TPAKTOPHATA KOCAYKA". | ||
| Иконота на спирачкata за паркirasп��е с Bretва | ИЗКЛ He | Педалт на спирачкatinga за паркirasп��е e noctabvenВ поизсяа за паркirasп��e. | ОсвобODEte go поеди сстуразиные на Тракторна Косочka. | ||
| Иконота на сснозора на сedanakata с Bretи | ИЗКЛ He | Опета对接н.TанUCSCa ceДankata ИПССТМАТA за Блковиме на сбизpos�остТа на сedanakata e ИЗКЛючeha. | Ако Иконота e ВКлочeha сьссedдал на сedanakata орета对接, спгете пабота с Тракторна Косачka незабавно и поверетeСбдениевно на сedanakata. Ако сповлд, чь сбениевно на сedanakata с Тракторна Косачka e поинLO, ссвьржete с KBалфдцеран сөрөзEH ТөнIK 3a pemonht. | ||
| Иконота напрыкатьага на вала за OTBXддама на мошноct м姐 | ИЗКЛ He | Могорыт на hoхаe пекьсатлpo Врeme на пабota ипьевкючаветял на вала за OTBXддама на мошноct He e noctabvenВ ИЗКЛючeha поизсяя. | Пг徳а д рectorы tradeпату Тракторна Косачka, на trushete песькючаветял на вала за OTBXддама на мошноct наюл, за за ИЗКЛючite Двигателпу на поховete. Мога, Вижte радда „OTCTPAHЯBAHE HA ПОБЛПЕМ" в Това рыковоствп STOB 3a срравka. | ||
| LCD dinçnPéi | Описанne | Индikatop 3a сбсторно на Тракторна Косчka | Индikatop на aydnoto | Прочина Peшени | |
| 12 54 55 | Иkonatura на onpeşelени otdelenne 3a батерни MIta. | ИЗКЛ He | Опреелена batepя по в薪水 наразецдане e сьс сбрьхtok. | He e Heobxodimo Deijctbne. Тракторна косчka може da полждд работи, akо komбиирathа стойост на Ah, пу излухена batepя сьс сбрьхtok, e parba на иловоче ot 15 Ah. След като bateрята сьс сбрьхtok ce вьрп Hebм Нормално, Тя лци ce Вклухи Нэзавань в зхранваши на Тракторна Косчka и Иkonatura и озчесн. 3a daсторiate Tazni Traktophata Kocayka, Иллалзайе достацны akymу latoprh n batepim EGO, kato спазыг endучу MOHTIPAHEN/IM3BAXDAHE HA AKYMU latOPHATA BATEPINA"В TOBA рьковдостBO. | |
| 12 54 55 | Иkonatura на паздно otdelenne 3a-bateper MIta. | ИЗКЛ He | Калачtenьт на batepяе небостацhev, за д позвли на Тракторна Косчka на работи. | 3a daсторiate Tazni Traktophata Kocayka, Иллалзайе достацны akymу latoprh n batepim EGO, kato спазыг endучу MOHTIPAHEN/IM3BAXDAHE HA AKYMU latOPHATA BATEPINA"В TOBA рьковдостBO. | |
| Иkonatura за temпета ру и точno ztentо OTdelenne 3a-batepinte Mrigat eДновременho. | ИЗКЛ He | Актулatorпат Бatepя в сьоветно Homeprapno OTdelenne 3a batepя e ррряп. | 1. Traktorhabа Косчka може da полждд работи, akо komбиирathа стойост на Ah, пу Излухена пenteя batepя OTвоваря на Иллалзайе достацны Korato пenteя batepя сьрьн Кьm Hормалп Themпета ру, Тя ицие сьрьн Зхранваши на Тракторна Косчka. 2. Актулatorпат Ah na Бatepяе He OTвоваря ньс STSKВANYRA, Traktorhabа Косчka на яма д работи, дokато нe Бьдд постовип Nobove akymу latoprh batepini B празнite OTdelenne 3a-batepini. 3. Habanete habогванeto на Traktorhabа Косчka чрз Увелчаве Na Вincуина на Косепу habлару Na Намалваши на скороча на Двиненье пу Вьзбовяваши на разота. | ||
| LCD dinçnlej | Öncanaine | Индikatop 3a сбстая по Крахтогата Косчka | Индikatop на aydnoTo | Прочина Peшени | |
| Иконата за temпера typа мига. | ИЗКЛ | Едн 3БУКВ СИГНА | Трахтогата косчka e празрял. | Hamalene haTobarbaHeto Ha traktopata kocaukaЧе3 ybeinuHabane Ha BincouHata Ha Kocsehe Ha Платформатia Или Забаве Ha ckopocTTa Ha HoxkOBete/ Движehneto.Hanpabete nouchka i octabete traktopata kocauka da ce oxlaadi. | |
| Трахтогата косчka e Тььрде Stydena. | Молney, He prabete NOBtropn Oniltni, KoITO MoRAT Da NobpeJrMa MaunHata. BinaHn CbXpaHraBte TpaKTopHata Kocauka i bateprnTa B tonla cpeDA. PecrtiptaIe TpaKTopHata Kocauka, korato e 3aTOnnEha. | ||||
| Иконата за празурждени мига | Mira в червао | Едн 3БУKВ СИГНА | МOTOPТ Na HOXOBETe e празовар. | YbeinuHete BincOuHata Na prazanee Ha Плatформata Или 3ababete ckopocTTa Na DBIXeHne, 3a da HamaJIte HATOBAPBAHETo Na TpaKTopHata Kocauka. | |
| Странчирот OTbexdazii уньe i 3anyushen C TrpeBa и OTLOMKN. | Почистыт e STPANUHIN OTBEXdaiz уньe сaped BCrya yontpe6a. | ||||
| Иma BzammHn сmUpeHn Mekdy HOJA и пLATfOpMaTа Na TpaKTopHata Kocauka. | Свьржete ce c ceHTbpa 3a obcnykBaHe Na KMInENTn Ha EGO | ||||
| Иконата Na BCaK ЗаETO OTdelenHne Зу akymylatopri Бaterпи и Иконат Зу радурждени MIRAT Na LCD ekpana eDIOBvpeMeHNo Na BCaK 1 sekynda. | Mira в червао | ПразьлЖава DA ЗБУч, ДOKATO празвключbatelЯ Na Bala 3a OTBeXdAne Ha MOnSNoCT e HATINCHAT. | АкумлалotnHite Бaterпс BA C HNCbK Зади TpaKTopHata Kocauka e B peXIM Na abapinHO prinbipane. | Спетe grabota Na CBpHete B 30HATA 3a 3aReZdAne Na bATEPnTA. БELEXKA: Korato TpaKTopHata Kocauka e B peXIM Na abapinHo празьпанe, HOXOBete ABOTAMTHO ce prBekluyBat Na lo-Nicka ScokocT Na Bvptene N MeKdYbpeMeHNO 3bYKBovir Na INdikatop PrOdoBlyKab da 3ByuN.ОпeparBot Tpr8Ba da HATINCHE PReBkLlOvBAteTely Na BOM HADONY, 3a Da N3KlUoy NDbiratelNiTE Na HOXOBete. 3bYKBovir NIDNKATop п� scpe Da 3bUyn Cneo KaTO HoxkOBete CnpaT. | |
| Иконата Na BCaK ЗаETO OTdelenHne Зу akymylatopri Бaterпи и Иконат Зу радурждени MIRAT Na BCaK ПОLOBIVH sekynda. | Mira в чerвао | ПразьлЖава DA ЗБУч | МOTOPТ Na HOXa eпразьSCnatpo Врeme Na praboTи празьклioчbatelЯ Na Bala 3a OTBeXdAne Na MоUxHocT He e NoctabeH В ИЗКlIOUeHа NOsUZM. | Трахтогата Kocauka Ze scpe Da paobti Ne3a6abHNo.ОпeparBot Trp8Ba DA TpaHcnOpTnPa TpaKTopHata Kocauka do 3OHATA 3a ZapeKdane Na Бaterпа Na 3a ZapeKdane. | |
| LCD dinçnPел | Описиме | Инданайор за сбстая сбстая сбстая сбстая сбстая сбстая сбстая сбстая сбстая сбстая сбстая сбстая сбстая сбстая сбстая сбстая сбстая сбстая сбстая сбстая сбстая сбстая сбстая сбстая сбстая сбстaley | Инданайор на уадиото | Прочина Роченie | |
|  | Ha LCD ekpana CBETBA иконата за крун3 КонтPOR | Посюнно Зелени | He | Трактора Кокачka Проблжава за се Двигуни поpeд CBС Зададана скорост, бezд да e He obexховим do Натискате песда на галзда. | Това e Hopмална оераши. Ако e Heobховимо, Исклочete Функцията за крун3 KOHTPOR, като следвае указаньда в раддел "Спиранe (deak'tibuранe) на крун3 КонтPORa (CCS)"В рыководстOTO. |
| Иконата за крун3 КонтPOR (CCS) мrigа на LCD ekpana. | ИЗКЛ He | Функцията CCS (CИСТЕма за крун3 КонтPOR) e Heизправна. | Функцията за крун3 KOHTPOR (CCS) He може за bъде настpoehа, когато Трактора Кокачka се двигу с MHORO НИСКA SCKOPOST IRII NA 3аден хд. | ||
| Падалът на скрчага за Натискате се Трактора Кокачka. | След като OTпуншете песда на спиранчatable за паркима, натишете 6итона за крун3 KOHTPOR и на LCD ДИСТПЕ LA SE CBETHE ИКОнATA 3a Крун3 KOHTPOR, яRIД ДЕAKТВИРайte Функцията за крун3 KOHTPOR, като следвае Иструksцине в раддел "Спиранe (deak'tibuранe) на крун3 КонтPORa (CCS)" | ||||
| Henpriloximо | Henpriloximо ИЗКЛ | Прдьлжава за Звун | Трактора Кокачka e паркима на нахлоч и onepatopbт OCTав Трактора Кокачka, бezд л e noctabnil пада на скрчага за Зркима в полци�я Зркима. Зркима на скрчага Зркима се CBETHE, a 3bykOBУра Инданайор лse спгда Na 3byU. | ||
| OFF | HenaPraBnOCT ha npotla за заразжданe | Посюнно ЧERBEHO | Helenploximо | HЯма eilektro3axpaHbaNe. | Проберете сеньни Контакдам e за 220 V-240 V ilni дли КонтakтБт e doБьр. |
| Посюнно ЧERBEHO | Helenploximо | Helenpavbnocti Ha eilektroponikata kato празьсны Вervа на порота за скрчагe, иЗгорл пeding�пел и др. | Свьрjete с сcentьр 3a obscynвае на клиент NG 3a ремont. |
CπPABKA 3A KOД 3A ΓPEUSHKA
in Inc cm centimetri
Nm Mjerač momenta mm Millimetri
^ C Celzij kg
Kilogram
km/h
Kilometara na sat
IPX4 Stupanj zašite od prodora vode
SIMPOLI U OVOM PRIRUČNIKU

Informacao treba zabalijeziti

Navedena radnja prestaje
TEHNIČKI PODACI
| Napon | 56 V = | |
| Veličina trupa | 107 cm | |
| Veličina kotača | Sprijeda | 15 x 6 - 6 inča |
| Straga 20 x 10 - 8 | inča | |
| Tlak u hladnim gumama | Sprijeda | 96,5 kPa |
| Straga 151,7 kPa | ||
| Brzina noža (o/min) | Do 2850 | |
| Maksimalna brzina vožnje | Naprijed | Do 9,6 km/h |
| Unatrag | Do 4,8 km/h | |
| Podešavanje visine otkosa (12 položaja) | 25 - 100 mm | |
| Raspon temperatura punjenja | 5 °C - 40 °C | |
| Radna temperatura | 0 °C - 40 °C | |
| Temperatura skladištenja | -20 °C - 70 °C | |
| Masa (bez baterijskog modulo) | 182 kg | |
| Izmjerena razina zvučne snage \( L_{WA} \) | 95,72 dB(A)K=1,14 dB(A) | |
| Razina zvučnog tlaka kod uha rukovatelja \( L_{PA} \) | 83,9 dB(A)K=3 dB(A) | |
| Zajamčena razina zvučne snage \( L_{WA} \)(izmjereno u skladu s 2000/14/EZ) | 100 dB(A) | |
| Vibracija \( a_h \) | Ruka | 0,32 m/s2K=1,5 m/s2 |
| Tijelo | 0,18 m/s2K=1,5 m/s2 | |
A 8860000000000000000000000000000000000000000000000000000000000000000000000000000000000000000000000000000
KA
| bafocno b ccsbgyes | davocob 6086 |
| b5c06y000000000000 AB4200 | |
| d0000000000000000 AB4201 | |
| d0000000000000000 AB4200 | |
| b5c06y000000000000 AMG1000 | |
| d0000000000000000* AMS1000 |
*6035: b000000000000000000000000000000000000000000000000
Sg
0g5m8gogoo8oosobu36g3o5b5b5b (5sb.A1)
- bgsodgmo
- jodob qoaygogoo
- 935603600 (9dy936003600) (x2)
4.6g6b0b3c660 - 00000000
- 3g005bfoobgd30
- b30g3606g36b5f055g20g20m 100y80008s (x2)
- 60960x2
9.fo53o03g6o - bsgggndo aegbgyab gqgmo
- LED 36m0g0m6g0x2)
12.33g0ob8gmm30
13.b6g3gob633g0x6o - bsogmo do gbo ngab Bdo 30o do gso
- 16.bssodemobbsggeomobdsaggmoog
17.0g63ob 3m6 - USB 30630
- agbsbbo 3gmo
20.3dsBj6ggoo 3gogoo - 33960000000000000
- 300sbsdgoo dffymoos
- job boudgogobdgggogog
- bsdygno osy (bsgyoom bgyoob sb 0b bsgyoogmow
- 896060b b360g0 a66060b b0000000000
- 30000000000000000000000000000000000000000000000000000
- mggg ggggmoq
- 36035-8d0m030b m030
29.dosdsogg8obbs30606060606060 - glssgmonbegao sbsgdo
31.boddsgolbbsog0g0
32.CCS
33. LED 85608001/Bluetooth 8030
34. ddofoab loBjob 6gagogogolog
35. 33gob bgyob yggob aabbubog gosy
36. 339ab 8qmmob byggo
37. 8950b y86m y83o 886gob y83000
38. 330000000000000000000000
0g6089999 335b LCD 3365b (5b.A2)
3630b bdoaagob 98ywoogds (bgoD2)
306060606060606060606060606060606060606060606060606060606060606060606060606060606060606060606060606060
| D3-1 | b3c0d0e000b b0000000000000000000000000000000000000000000000000000000000000000000000000000000000000000000000000000 | D5-1 | f580 |
| D5-2 | D6-1 |
b36dmo6ggyg06g8s (B7)
D7-1 bgs6dwobbdsgwoab dsoggyoog
3080808
gduyssosdggnoaegnag (E1)
bsgmdo ybgbgtob ggymoogos (lg6.E2)
| E2-1 | dongdo dongdol donggo | E2-2 | dongdoongdo donggo |
| E3-1 | bgyob dmbbbob gogos30 | E5-1 | d2j2j2j2j2j2j2j2j2j2j2j2j2j2j2j2j2j2j2j2j2j2j2j2j2j2j2j2j2j2j2j2j2j2j2j2j2j2j2j2j2j2j2j2j2j2j2j2j2j2j2 |
Ggmofoogb03s
dmoogfoa mmegg 3mgooggmo
3372000000000000000000000000000000000000000000
553m2y60s8cm 0g36mm8os
obgogobogobol 503306000000000000000000000000000000000000000000000000000000000000000000000000000000000000000

aagaaabgaggaagagagaa
moggmo 50000000000000000000000000000000000000000000000000000
ssgogosgbsgsaogocno od bs6gobg5,
oogoadogcggdsosbgoobssbol bs6g0
sbsb0d6g0ds 366g0ds.
a0b0b03690 056j65 88uoyg00s300
6868680886.
0000000000000000000000000000000000000000000000000000
gdofoo goofoo, Goo yoo ooo
oogyogosg ygdno gno 1s8goggo, bdo s6 s0b
gdofooogb6y
000000000000000000000000000000000000000000000000000000000000000000000000000
00000000000000000000000000000000000000000000000000000
gdoaogoo 3o000000000000000000
gdsdgdg0 gds330 8c006g0b sbds.
8sbsb0u363o 85660b 8g3g (E15-E6.E16)
A 8360606060606060606060606060606060606060606060606060606060606060606060606060606060606060606060606060606
A 88360000000000000000000000000000000000000000000000000000000000000000000000000000000000000000000000000
360836:
Bb bsagdo bsagbgy 3ggyggyggyggyggyggyggyggyggyggyggyggyggyggyggyggyggyggyggyggyggyggyggyggyggyggyggyggyggyggyggyggyggyggyggyggyggyggyggyggyggyggyggyggyggyggyggyggyggyggygyy
Johob Jozsef Bauschgut agodonga 6000000000000000000000000000000000000000000000000000000000000000000000000000000000000
Bb00000000000000000000000000000000000000000000000000000000
860836: obgagcagcoggogb6.17 05 oobgagcog
oogocog ygggsog gaaagno boqdoom, b55d
bgyymgocog s6 agdgggmo dcsbol bs3690 a55jolb
a60836 yggms boq3690sdo.
dsogobbsoggmoos (Lg6.E17)
306g08ob6g206gss (Bv6. E18)
LED 885608g8s (b76.E19)
LEDgogdoagodoggsBaooyoo gosdmoogno oogbLED bfooob aocdo
USB 3x60
gbs: USB 3060 g6663cymgb5 gcosbDC
g6663b1 bdaagoggl bsgonm 1,5s3gsdggos og6663
abccn 406, cnggbs bs3gfo s6663
800b0b b3ggoa56b6b0abg9g08s (b20).E20)
A 8g60b003: g0300030 b05y601 Ls00a0
2g60403: 0000030 Ls00a0 d060030 b060030,
oogoo 060030 060030 060030
f060030 8d060030, o8d060030
oogoo 8d060030, o8d060030
oogoo 8d060030, o8d060030
860865: od bogososdo, mogusg 363068-5doy6y4
300000 ggybgycno 363068-5doy6y4
300000g ymagno 660865 660865
32dyogocnob 660865
a d aodb30sdo, oLCD 93650 gdo0000000000000000000000000000000000000000000000000000000000000000000000
d gdo bgsao, LGLCD 3650s8g6gbu, ufo3oob
gogb" 56 mgoosomol ofoyogob, 8oosbol
bs3o da55s 360dsosgoggdmoogg1
ssooa o
sghoygno ggydo
moggsb 3gagggmabg bgo 3600gge gss
bgos, bsmbu bsfo bsbsgogobgso
goggb, snoa ago56ggbmu bsdoaba dso, mdo
goggbgoggbgogb
36600 30680 896005 8880 688001
108600 00 896000 888005 888005
89600 688005 888005
89600 688005 888005
89600 688005 888005
89600 688005 888005
(636)
Babababababababababababababababababababababababababababababababababababababababababababababababababababababababababababababababababababababababababababababababababababababababababababababababababababababb
m3g0o008g 9600:
PTO 800000000000000000000000000000000000000000000000000000000000000
gogooo 00000000000000000000000000000000000000000000000000000000000000000000000
moogdab ggggcoo ydgagcogmab agaob33do,
m03g,g5badol bsygs (gssno bddcngnol
dsbgogmo) oooomgcoo lssygdccgmo
bsaogohol adgogahds ymgc b6b36 fdo 0do gdo.
bscbol bs80to sb6b6 dylogocg aegos.
m6xodds cobsab bs80to sb6b6 qbsb6g26
csosygbol sdyqemcognol cs8b6b6b6
860865: 86000 dofmoob s8ooggdoob
860033do, 860000, 860000000000000000000000000000000000000000000000000000000000000000000000000000000
dsmbob b36g0a 4565ab a6023 (Lg6.E21)
A 1saoaogaa: sdoagsbmoogoo obooogab, GOGOgdoagob sb yosu bueo goc moogobco boogobdodog.fo5 aodoggno 8yjbs, GOGs aodobbssgto ddsbs 8gogcgoos, agbocgob goadoygobdggob30, saoaod ssbs agodggs 8gogogogogogogogogogogogogogogogogogogogogogogogogogogogogogogogogogogogogogogogogogogogogogogogogogogogogogogogogogogogogogogogogogogogogogogogogogogogog
A 8g60b008s: 6d30moy6mow 650d6ymo 8c0sbob b3640 a6666666666666666666666
A 88360606060606060606060606060606060606060606060606060606060606060606060606060606060606060606060606060606
三GO
350a35:
sngob gmb, oosdgggbo bssodgcb,
bsc0b bs6o do sb6b0b bs6ygb0s bs6ggo
doomoggs. doosb0b bs6bsgsfgyob
gob, sboofoo0 bs6ndgo 0sdoomdo
gogonl bsagdo yb6y010s00s,
bsc0b bs6o do bs6b0b bs6ygb0s bs6ggo
ds36gogboa.
sogolg 06omdofo 05 ygbgol do hob
oosmoqol ool, dodsongoojol bsodmoe
g3000 30000306 0600 800005 0960
ssosbgo 900006 0480dsogos
ososogol 8600, 900008 8d0030
ososbol bs6gs 86gs6d godcoggs 86gogms
odosos.
36ygo 3m5gmmnob (CCS) gdooyg6gs
888888888(8g00)36ygo 356gogolc(CCS)
69g086g(63b.E22)
8608835:6000g20g75d00,0003g20g7500" 8608835:“b00c0s LCD g36569
00603y6o aadssbgy8s
A 800000000000000000000000000000000000000000000000000000000000000000000000000000
A 806000003: Bssbsb bsfoa a55560b afoe
306000003: b603000003: ddoobgogooab ggoo00003
306000003: ddoob 306000003: dgoo00003: aboob 356000003: aboogooab 356000003: aboogooab 356000003: aboogooab 356000003: aboogooab 356000003: aboogooab 356000003: aboogooab 356000003: aboogooab 35
63mag600gogmo 5d5oyno amalusbngabos
86608(g)O
| 053020000000000000000000000000000000000000000000000000000000000000000000000000000000000000000000000000000 | |
| 05302000000000000000000000000000000000000000000000000000000000000000000000000000000000000000000000 | |
| 054020000000000000000000000000000000000000000000000000000000000000000000000000000000000000000000000000 | |
| 054020000000000000000000000000000000000000000000000000000000000000000000000000000000000000000000 | |
| 05401000000000000000000000000000000000000000000000000000000000000000000000000000000000000000000000000000 |
| yom 30000000000000000000000000000000000000000000000000000000000000000000000000000000000000000000000000000 | |
| yom 30000000000000000000000000000000000000000000000000000000000000000000000000000000000000000000000 | |
| yam 30000000000000000000000000000000000000000000000000000000000000000000000000000000000000000000000000 | |
| yom 300000000000000000000000000000000000000000000000000000000000000000000000000000000000000000000 | |
| yom 15000000000000000000000000000000000000000000000000000000000000000000000000000000000000000000000000000 |
gogoo babob 0gfo gno amabgbgyb
Ggogolb m63ybol ygd50s (F1-F2)
Bsbolb0s6gto 656b0b3j0s 6foomob 0s
36mo 36g0o 60ygo dmbsbggs
a0896ggs (gG1)
dsbsb0 bs6gfo asbsb0b j89gs bfoovob aabb6s (G2-G3)
| G2-1 dd | gob gob gob g2-2 | go go go |
| G2-3 ba | go go go go go |
3600 36000000000000000000000000000000000000000000000
| G4-1 | |||
| G5-2 | |||
| G5-4 |
Bssbols 8360a 855b0d300s bfoos
- Gogolgogos dmboggsbfnngs
(ug6.G7/bg6.G8/ug6.G9)
- gobfimgdoaagc
030bssg3ob6g3obgogg8bG10).
3060000000000000000000000000000000000000000000000000000000000000000000000
- gobngbongcngdndbsggs (byn.G11)
Q. Genggngggegegege
336000 580000b0ggygoggs (yG.G12)
606s-g3656fogocobggygcoo6gbs(ug6.G13)
a95sb3s qs
0s5b3m6o6g8s
bsb0s36g2o 8656ob 665636666688 (H1-H5)
H2-16g3g0 H2-2g3g0g0
060063 6006006006006006006006006006006006006006006006006006006006006006006006006006006006006006006006006
g6s3s (I1-I2)
860836: 87200000000000000000000000000000000000000000000000000000
g560g(8)
8663
WEE (g) 600000000000000000000000000000000000000000000000000000000000000000000000000000000000000000000000
0086mbs03s
| 360000000000000000000000000000000000000000000000000000000000000000000000000000000000000000000000000000 | |
| 360000000000000000000000000000000000000000000000000000000000000000000000000000000000000000000000000000 | ||
| 36mm20mm20mm | 36mm20mm20mm | 36mm20mm20mm |
| PTO 36mm20mm20mm | PTO 36mm20mm20mm | PTO 36mm20mm20mm |
| 36mm20mm20mm | 36mm20mm20mm | 36mm20mm20mm |
| 36mm20mm20mm | 36mm20mm20mm | 36mm20mm20mm |
| 36mm20mm20mm | 36mm20mm20mm | 36mm20mm20mm |
| 36mm20mm20mm | 36mm20mm20mm | 36mm |
| 36mm20mm20mm | 36mm20mm20mm | 36mm |
| 36mm20mm20mm | 36mm20mm20mm | 36mm |
| 36mm20mm20mm | 36mm20mm20mm | 36mm |
| 36mm20mm20mm | 36mm20mm21mm | 36mm |
| 36mm20mm20mm | 36mm20mm20mm | 36mm |
| 36mm20mm20mm | 36mm20mm20mm | 36mm |
| 36mm20mm20mm | 36mm20mm20mm | 36mm |
| 36mm20mm20mm | 36mm | 36mm |
| 36mm20mm20mm | 36mm | 36mm |
| 36mm20mm20mm | 36mm | 36mm |
| 36mm20mm20mm | 36mm | 36mm |
| 36mm20mm20mm | 36mm | 36mm |
| 36mm20mm20mm | 35 | 36 |
| 36mm20mm20mm | 36 | 36 |
| 36mm20mm20mm | 36 | 36 |
| 36mm20mm20mm | 36 | 36 |
| 36mm20mm20mm | 36 | 36 |
| 36mm20mm20mm | 36 | 36 |
| 36mm20mm20mm | 36 | 36 |
| 36mm | 36 | 36 |
| 36mm | 36 | 36 |
| 36mm | 36 | 36 |
| 36mm | 36 | 36 |
| 36mm | 36 | 36 |
| 36mm | 36 | 36 |
| 36mm | 36 | 36 |
| 36mm | 36 | 36 |
| 36mm | 35 | 36 |
| 36mm | 36 | 36 |
| 36mm | 36 | 36 |
| 36mm | 36 | 36 |
| 36mm | 36 | 36 |
| 36mm | 36 | 36 |
| 36mm | 36 | 36 |
| 36mm | 36 | 36 |
| 36mm | 36 | 361 |
| 36m800g | ||
| 360000000000000000000000000000000000000000000000000000000000000000000000000000000000000000000000000000 | 36000000000000000000000000000000000000000000000000000000000000000000000000000000000000000000000000 | 361000000000000000000000000000000000000000000000000000000000000000000000000000000000000000000000000000 |
| 36100000000000000000000000000000000000000000000000000000000000000000000000000000000000000000000000 | 362000000000000000000000000000000000000000000000000000000000000000000000000000000000000000000000000000. | |
| LCD 33656 36 456789999999999999999999999999999999999999999999999999999999999999999999999999999999999999999999999999999 | 36100000000000000000000000000000000000000000000000000000000000000000000000000000000000000000000000 3610000000000000000000000000000000000000000000000000000000000000000000000000000000000 3610000000000000 3610000000000000 36100000000 361000000 3610000 361000 361000 36100 3610 361 361 361 361 361 361 361 361 361 361 361 361 361 361 361 361 361 361 361 361 361 361 361 361 361 36 36 36 36 36 36 36 36 36 36 36 36 36 36 36 36 36 36 36 36 36 36 36 36 36 36 36 36 36 36 36 36 36 36 | 3610000000000000000000000000000000000000000000000000000000000000 36110000000000000000000000000000000000000000000000000000 361111111111111111111111111111111111111111111111111111111111111111111111111111111111111111111111111111 36111111111111111111111111111111111111111111111111111111111111111111111111111111111111111111111111 362111111111111111111111111111111111111111111111111111111111111111111111111111111111111111111111111111 |
| 360000000000000000000000000000000000000000000000000000000000000000000000000000000000000000000000000000 | 36000000000000000000000000000000000000000000000000000000000000000000000000000000000000000000000000 | |
| 36000000000000000000000000000000000000000000000000000000000000000000000000000000000000000000000000. | ||
| 36000000000000000000000000000000000000000000000000000000000000000000000000000000000000000000000000 | 361000000000000000000000000000000000000000000000000000000000000000000000000000000000000000000000000000 | |
| 36100000000000000000000000000000000000000000000000000000000000000000000000000000000000000000000000 | ||
| 361000000000000000000000000000000000000000000000000000000000000000000000000000000000000000000 | 362500000000000000000000000000000000000000000000000000000000000000000000000000000000000 | |
| 36250000000000000000000000000000000000000000000000000000000000000000000000000000 | ||
| 3625000000000000000000000000000000000000000000000000000000000000000000000 | 3635555555555555555555555555555555555555555555555555555555555555555555555555555555555555555555555555555 | |
| 36355555555555555555555555555555555555555555555555555555555555555555555555555555555555555555555555 | ||
| 36355555555555555555555555555555555555555555555555555555555555555555555555555555555555555555555555499999999999999999999999999999999999999999999999999999999999999999999999999999999999999999999999999998999999999999999999999999999999999999999999999999999999999999999999999999999999999999999999999999999 | ||
KA
| 368888888 | 368888888 | 368888888 |
| 50000000000000000000000000000000000000000000000000000000000000000000000000000000000000000000000000000 | 50000000000000000000000000000000000000000000000000000000000000000000000000000000000000000000000000 | 5128888888888888888888888888888888888888888888888888888888888888888888888888888888888888888888888888888 |
| 50000000000000000000000000000000000000000000000000000000000000000000000000000000000000000 | 5128888888.888888888888888888888888888888888888888888888888888888888888888888888888888888888888888888888888888 | |
| 500000000000000000000000000000000000000000000000000000000000000000000000000000000000000000000000 | 5125 5125 5125 5125 5125 5125 5125 5125 5125 5125 5125 5125 5125 5125 5125 5125 5125 5125 5125 5125 5125 | 515 515 515 515 515 515 515 515 515 515 515 515 515 515 515 515 515 515 515 515 515 515 515 515 515 515 |
| 515 515 515 515 515 515 515 515 515 515 515 515 515 515 515 515 515 515 515 515 515 515 515 515 514 515 515 515 515 515 515 515 515 515 515 515 515 515 515 515 515 515 515 515 515 515 515 515 515 514.515.515.515.515.515.515.515.515.515.515.515.515.515.515.515.515.515.515.515.515.515.515.515.515.515.514.515.515.515.515.515.515.515.515.515.515.515.515.515.515.515.515.515.515.515.515.515.515.515.515 515.515.515.515.515.515.515.515.515.515.515.515.515.515.515.515.515.515.515.515.515.515.515.515.515 514.515.515.515.515.515.515.515.515.515.515.515.515.515.515.515.515.515.515.515.515.515.515.515 514.514.514.514.514.514.514.514.514.514.514.514.514.514.514.514.514.514.514.514.514.514.514.514.514.514 514.514.514.514.514.514.514.514.514.514.514.514.514.514.514.514.514.514.514.514.514.514.514.514.515.514.514.514.514.514.514.514.514.514.514.514.514.514.514.514.514.514.514.514.514.514.514.514.514.515 514.514.514.514.514.514.514.514.514.514.514.514.514.514.514.514.514.514.514.514.514.514.514.515 514 514 514 514 514 514 514 514 514 514 514 514 514 514 514 514 514 514 514 514 514 514 514 514 514 515 514 514 514 514 514 514 514 514 514 514 514 514 514 514 514 514 514 514 514 514 514 514 514 514.514.514.514.514.514.514.514.514.514.514.514.514.514.514.514.514.514.514.514.514.514.514.514 514 514 514 514 514 514 514 514 514 514 514 514 514 514 514 514 514 514 514 514 514 514 514 514.515 514 514 514 514 514 514 514 514 514 514 514 514 514 514 514 514 514 514 514 514 514 514 514.514.515 514 514 514 514 514 514 514 514 514 514 514 514 514 514 514 514 514 514 514 514 514 514.514.514.515 514 514 514 514 514 514 514 514 514 514 514 514 514 514 514 514 514 514 514 514 514.514.514.514.515 514 514 514 514 514 514 514 514 514 514 514 514 514 514 514 514 514 514 514 514.514.514.514.514.515 514 514 514 514 514 514 514 514 514 514 514 514 514 514 514 514 514 514 514.514.514.514.514.514.515 514 514 514 514 514 514 514 514 514 514 514 514 514 514 514 514 514 514.514.514.514.514.514.514.515 514 514 514 514 514 514 514 514 514 514 514 514 514 514 514 514 514.514.514.514.514.514.514.514.515 514 514 514 514 514 514 514 514 514 514 514 514 514 514 514 514.514.514.514.514.514.514.514.514.515 514 514 514 514 514 514 514 514 514 514 514 514 514 514 514.514.514.514.514.514.514.514.514.514.515 514 514 514 514 514 514 514 514 514 514 514 514 514 514.514.514.514.514.514.514.514.514.514.514.515 514 514 514 514 514 514 514 514 514 514 514 514 514.514.514.514.514.514.514.514.514.514.514.514.515 514 514 514 514 514 514 514 514 514 514 514 514.514.514.514.514.514.514.514.514.514.514.514.514.515 514 514 514 514 514 514 514 514 514 514 514.514.514.514.514.514.514.514.514.514.514.514.514.514.515 514 514 514 514 514 514 514 514 514 514.514.514.514.514.514.514.514.514.514.514.514.514.514.514.515 514 514 514 514 514 514 514 514 514.514.514.514.514.514.514.514.514.514.514.514.514.514.514.514.515 514 514 514 514 514 514 514 514.514.514.514.514.514.514.514.514.514.514.514.514.514.514.514.514.515 514 514 514 514 514 514 514.514.514.514.514.514.514.514.514.514.514.514.514.514.514.514.514.514.515 514 514 514 514 514 514.514.514.514.514.514.514.514.514.514.514.514.514.514.514.514.514.514.514.515 514 514 514 514 514.514.514.514.514.514.514.514.514.514.514.514.514.514.514.514.514.514.514.514.515 514 514 514 514.514.514.514.514.514.514.514.514.514.514.514.514.514.514.514.514.514.514.514.514.515 514 514 514.514.514.514.514.514.514.514.514.514.514.514.514.514.514.514.514.514.514.514.514.514.515 514 514.514.514.514.514.514.514.514.514.514.514.514.514.514.514.514.514.514.514.514.514.514.514.516 36888888888888888888888888888888888888888888888888888888888888888888888888888888888888888888888888888 |
dsmbol bssnfo a6b6bol bogybol qosbsgdo 3000
| LCD 33650 | ||||||
| 188. | ||||||
| 8888H | ||||||
| = D | LED 33650 LED 33650 LED 33650 LED 33650 LED 33650 LED 33650 LED 33650 LED 33650 LED 33650 LED 33650 LED 33650 LED 33650 LED 33650 LED 32650 LED 32650 LED 32650 LED 32650 LED 32650 LED 32650 LED 32650 LED 32650 LED 32650 LED 32650 LED 32650 LED 32650 LED 32650 | |||||
| Bluetooth Bluetooth Bluetooth Bluetooth Bluetooth Bluetooth Bluetooth Bluetooth Bluetooth Bluetooth Bluetooth Bluetooth Bluetooth Bluetooth Bluetooth Bluetooth Bluetooth Bluetooth Bluetooth Bluetooth Bluetooth Bluetooth Bluetooth Bluetooth Bluetooth Bluetooth Bluetooth Bluetooth Bluetooth Bluetooth Bluetooth Bluetooth Bluetooth Bluetooth Bluetooth Bluetooth Bluetooth Bluetooth Bluetooth Bluetooth Bluetooth Bluetooth Bluetooth Bluetooth Bluetooth Bluetooth Bluetooth Bluetooth Bluetooth Bluetooth Bluetooth | ||||||
| LCD 33650 | |||||
| D | |||||
| R | |||||
| R D | |||||
| LCD 93650 | |||||
| (P) | |||||
| PTO 93650 93650 93650 93650 93650 93650 93650 93650 93650 93650 93650 93650 93650 93650 93650 93650 93650 9350 9350 9350 9350 9350 9350 9350 9350 9350 9350 9350 9350 9350 9350 9350 9350 9350 9350 9350 9350 9400 9400 9400 9400 9400 9400 9400 9400 9400 9400 9400 9400 9400 9400 9400 9400 9400 9400 9400 9400 9410 9410 9410 9410 9410 9410 9410 9410 9410 9410 9410 9410 9410 9410 9410 9410 9410 9410 9410 9410 9420 9420 9420 9420 9420 9420 9420 9420 9420 9420 9420 9420 9420 9420 9420 9420 9420 9420 9420 9420 9410 9410 9410 9410 9410 9410 9410 9410 9410 9410 9410 9410 9410 9410 9410 9410 9410 9410 9410 9400 9400 9400 9400 9400 9400 9400 9400 9400 9400 9400 9400 9400 9400 9400 9400 9400 9400 9400 9420 9420 9420 9420 9420 9420 9420 9420 9420 9420 9420 9420 9420 9420 9420 9420 9420 9420 9420 9440 9440 9440 9440 9440 9440 9440 9440 9440 9440 9440 9440 9440 9440 9440 9440 9440 9440 9440 9440 9410 9410 9410 9410 9410 9410 9410 9410 9410 9410 9410 9410 9410 9410 9410 9410 9410 9410 9410 9440 9440 9440 9440 9440 9440 9440 9440 9440 9440 9440 9440 9440 9440 9440 9440 9440 9440 9440 9420 9420 9420 9420 9420 9420 9420 9420 9420 9420 9420 9420 9420 9420 9420 9420 9420 9420 9420 9430 9430 9430 9430 9430 9430 9430 9430 9430 9430 9430 9430 9430 9430 9430 9430 9430 9430 9430 9430 9440 9440 9440 9440 9440 9440 9440 9440 9440 9440 9440 9440 9440 9440 9440 9440 9440 9440 9440 9450 9450 9450 9450 9450 9450 9450 9450 9450 9450 9450 9450 9450 9450 9450 9450 9450 9450 9450 9450 9460 9460 9460 9460 9460 9460 9460 9460 9460 9460 9460 9460 9460 9460 9460 9460 9460 9460 9460 9460 9450 9450 9450 9450 9450 9450 9450 9450 9450 9450 9450 9450 9450 9450 9450 9450 9450 9450 9450 9410 9410 9410 9410 9410 9410 9410 9410 9410 9410 9410 9410 9410 9410 9410 9410 9410 9410 9410 9450 9450 9450 9450 9450 9450 9450 9450 9450 9450 9450 9450 9450 9450 9450 9450 9450 9450 9450 9480 9480 9480 9480 9480 9480 9480 9480 9480 9480 9480 9480 9480 9480 9480 9480 9480 9480 9480 9480 9450 9450 9450 9450 9450 9450 9450 9450 9450 9450 9450 9450 9450 9450 9450 9450 9450 9450 9450 9470 9470 9470 9470 9470 9470 9470 9470 9470 9470 9470 9470 9470 9470 9470 9470 9470 9470 9470 9470 9480 9480 9480 9480 9480 9480 9480 9480 9480 9480 9480 9480 9480 9480 9480 9480 9480 9480 9480 9410 9410 9410 9410 9410 9410 9410 9410 9410 9410 9410 9410 9410 9410 9410 9410 9410 9410 9410 9480 9480 9480 9480 9480 9480 9480 9480 9480 9480 9480 9480 9480 9480 9480 9480 9480 9480 9480 9460 9460 9460 9460 9460 9460 9460 9460 9460 9460 9460 9460 9460 9460 9460 9460 9460 9460 9460 9480 9480 9480 9480 9480 9480 9480 9480 9480 9480 9480 9480 9480 9480 9480 9480 9480 9480 9480 9420 9420 9420 9420 9420 9420 9420 9420 9420 9420 9420 9420 9420 9420 9420 9420 9420 9420 9420 9480 9480 9480 9480 9480 9480 9480 9480 9480 9480 9480 9480 9480 9480 9480 9480 9480 9480 9480 9470 9470 9470 9470 9470 9470 9470 9470 9470 9470 9470 9470 9470 9470 9470 9470 9470 9470 9470 9410 9410 9410 9410 9410 9410 9410 9410 9410 9410 9410 9410 9410 9410 9410 9410 9410 9410 9410 9430 9430 9430 9430 9430 9430 9430 9430 9430 9430 9430 9430 9430 9430 9430 9430 9430 9430 9430 9410 9410 9410 9410 9410 9410 9410 9410 9410 9410 9410 9410 9410 9410 9410 9410 9410 9410 9410 9460 9460 9460 9460 9460 9460 9460 9460 9460 9460 9460 9460 9460 9460 9460 9460 9460 9460 9460 9410 9410 9410 9410 9410 9410 9410 9410 9410 9410 9410 9410 9410 9410 9410 9410 9410 9410 9410 9470 9470 9470 9470 9470 9470 9470 9470 9470 9470 9470 9470 9470 9470 9470 9470 9470 9470 9470 9460 9460 9460 9460 9460 9460 9460 9460 9460 9460 9460 9460 9460 9460 9460 9460 9460 9460 9460 9470 9470 9470 9470 9470 9470 9470 9470 9470 9470 9470 9470 9470 9470 9470 9470 9470 9470 9470 9450 9450 9450 9450 9450 9450 9450 9450 9450 9450 9450 9450 9450 9450 9450 9450 9450 9450 9450 9420 9420 9420 9420 9420 9420 9420 9420 9420 9420 9420 9420 9420 9420 9420 9420 9420 9420 9420 9450 9450 9450 9450 9450 9450 9450 9450 9450 9450 9450 9450 9450 9450 9450 9450 9450 9450 9450 94. 9450 9450 9450 9450 9450 9450 9450 9450 9450 9450 9450 9450 9450 9450 9450 9450 9450 9450 9450 9450 | |||||
| LCD 23650 | |||||
| LCD 33650 | |||||
| LCD 23650 | |||||
| CCS 23650.1 | |||||
| CCS 23650.2 | |||||
| CCS 23650.3 | |||||
| CCS 23650.4 | |||||
| LCD 33650 | |||||
| OFF | |||||
a3m00b s26o36gmo
in Inc cm Centimetri
Nm Njutn metar mm Millimetri
^ C Celzijus
km/h
Kilometara na sat
kg
Kilogram
IPX4 Stepen zašite od prodora
SIMPOLI U OVOM PRIRUČNIKU

Na informaciju treba obratiti paznju

Navedena radnja se stopira
SPECIFIKACIJE
| Napon | 56 V = = | |
| Veličina platforme | 107 cm | |
| Veličina točkova | Prednje | 15 x 6 - 6 in |
| Zadnje | 20 x 10 - 8 in | |
| Pritisak hladne gume | Prednje | 96,5 kPa |
| Zadnje | 151,7 kPa | |
| Brzina sečiva (o/min) | Do 2850 | |
| Maksimalna brzina vožnje | Napred | Do 9,6 km/h |
| Nazad | Do 4,8 km/h | |
| Podešavanje visine košenja (12 pozicija) | 25 - 100 mm | |
| Opseg temperature punjenja | Od 5 do 40 °C | |
| Radna temperatura | Od 0 do 40 °C | |
| Temperatura skladišenja | Od -20 do +70 °C | |
| Težina (bez baterije) | 182 kg | |
| Izmereni nivo zvučne snage LwA | 95,72 dB(A) K=1,14 dB(A) | |
| Nivo zvučnog pritiska na uhu rukovaoca Lpa | 83,9 dB(A) K=3 dB(A) | |
| Garantovani nivo zvučne snage LwA (izmereno u skladu sa Direktivom 2000/14/EC) | 100 dB(A) | |
| Vibracije an | Šaka | 0,32 m/s2 K=1,5 m/s2 |
| Telo | 0,18 m/s2 K=1,5 m/s2 | |
- Deklarisana ukupna vrednost vibracije je izmerena u skladu sa standardnim metodom testiranja i moze se koristiti za uporedivanje jegnog alata sa drugim;
- Deklarisana ukupna vrednost vibracije moze se koristiti i u preliminarnoj proceni izlaganja.
in Inc cm Centimetri
Nm Njutmetar mm Millimetri
^ C Celzijus kg
Kilogram
km/h
Kilometri po salute
SIMPOLI U OVOM PRIRUČNIKU
IPX4 Stepen zašite od prodiranja

EGO Juaa aaa aalaaa aalaaa aalaaa aalaaa aalaaa aalaaa aalaaa aalaaa aalaaa aalaaa aalaaa aalaaa aalaaa aalaaa aalaaa aalaaa aalaaa aalaaa aalaaa aalaaa aalaaa aalaaa aalaaa aalaaa aalaaa aalaa
3GO
| LCD | |||||
| EGO | |||||
1
| LCD | |||||
| 100% | |||||
| العربية | ||
| EGO ASRAO EGO ASRAO | العربية | العربية |
| LDAI YALI YALI YALI YALI YALI YALI YALI YALI YALI YALI YALI YALI YALI YALI YALI YALI YALI YALI YALI YALI YALI YALI YALI YALI YALI YALI YALI YALI YALI YALI YALI YALI YALI YALII | العربية | العربية |
| LCD ABAA BAA BAA CCA CCA AAG AAG AAG AAG AAG AAG AAG AAG AAG AAG AAG AAG AAG AAG AAG AAG AAG AAG AAG AAG AAG AAG AAG AAG AAG AAG AAG AAG AAG AAG AAG AAG AAG AAG AAG AAG AAG AAG AAG AAG AAG AAG AAG AAG AAG AAG AAG AAG AAG AAG AAD AAD AAD AAD AAD AAD AAD AAD AAD AAD AAD AAD AAD AAD AAD AAD AAD AAD AAD AAD AAD AAD AAD AAD AAD AAD AAD AAD AAD AAD AAD AAD AAD AAD AAD AAD AAD AAD AAD AAD AAD AAD AAD AAD AAD AAD AAD AAD AAD AAD AAB AAB AAB AAB AAB AAB AAB AAB AAB AAB AAB AAB AAB AAB AAB AAB AAB AAB AAB AAB AAB AAB AAB AAB AAB AAB AAB AAB AAB AAB AAB AAB AAB AAB AAB AAB AAB AAB AAB AAB AAB AAB AAB AAB AAB AAB AAB AAB AAB AAB ABB ABB ABB ABB ABB ABB ABB ABB ABB ABB ABB ABB ABB ABB ABB ABB ABB ABB ABB ABB ABB ABB ABB ABB ABB ABB ABB ABB ABB ABB ABB ABB ABB ABB ABB ABB ABB ABB ABB ABB ABB ABB ABB ABB ABB ABB ABB ABB ABB ABB A BB ABB ABB ABB ABB ABB ABB ABB ABB ABB ABB ABB ABB ABB ABB ABB ABB ABB ABB ABB ABB ABB ABB ABB ABB ABB ABB ABB ABB ABB ABB ABB ABB ABB ABB ABB ABB ABB ABB ABB ABB ABB ABB ABB ABB ABB ABB ABB ABB ABB Abb ABB ABB ABB ABB ABB ABB ABB ABB ABB ABB ABB ABB ABB ABB ABB ABB ABB ABB ABB ABB ABB ABB ABB ABB ABB ABB ABB ABB ABB ABB ABB ABB ABB ABB ABB ABB ABB ABB ABB ABB ABB ABB ABB ABB ABB ABB ABB ABB ABB AABB ABB ABB ABB ABB ABB ABB ABB ABB ABB ABB ABB ABB ABB ABB ABB ABB ABB ABB ABB ABB ABB ABB ABB ABB ABB ABB ABB ABB ABB ABB ABB ABB ABB ABB ABB ABB ABB ABB ABB ABB ABB ABB ABB ABB ABB ABB ABB ABB ABB ARR ABB ABB ABB ABB ABB ABB ABB ABB ABB ABB ABB ABB ABB ABB ABB ABB ABB ABB ABB ABB ABB ABB ABB ABB ABB ABB ABB ABB ABB ABB ABB ABB ABB ABB ABB ABB ABB ABB ABB ABB ABB ABB ABB ABB ABB ABB ABB ABB ABB ABR ABB ABB ABB ABB ABB ABB ABB ABB ABB ABB ABB ABB ABB ABB ABB ABB ABB ABB ABB ABB ABB ABB ABB ABB ABB ABB ABB ABB ABB ABB ABB ABB ABB ABB ABB ABB ABB ABB ABB ABB ABB ABB ABB ABB ABB ABB ABB ABB ABB ABA B BBA BBA BA BA BA BA BA BA BA BA BA BA BA BA BA BA BA BA BA BA BA BA BA BA BA BA BA BA BA BA BA BA BA BA BA BA BA BA BA BA BA BA BA BA BA BA BA BA BA BA BA BA BA BA BA BA BA BA BA BA BA BA BA BA BA BA BA BA BA BA BA BA BA BA BA BA BA BA BA BA BA BA BA BA BA BA BA BA BA BA BA BA BA BA BA BA BA BA BA BA BA BA NA NA NA NA NA NA NA NA NA NA NA NA NA NA NA NA NA NA NA NA NA NA NA NA NA NA NA NA NA NA NA NA NA NA NA NA NA NA NA NA NA NA NA NA NA NA NA NA NA NA NA NA NA NA NA NA NA NA NA NA NA NA NA NA NA NA NA NA NA NA NA NA NA NA NA NA NA NA NA NA NA NA NA NA NA NA NA NA NA NA NA NA NA NA NA NA NA NA NA NANA NA NA NA NA NA NA NA NA NA NA NA NA NA NA NA NA NA NA NA NA NA NA NA NA NA NA NA NA NA NA NA NA NA NA NA NA NA NA NA NA NA NA NA NA NA NA NA NA NA NA NA NA NA NA NA NA NA NA NA NA NA NA NA NA NA NA NA NA NA NA NA NA NA NA NA NA NA NA NA NA NA NA NA NA NA NA NA NA NA NA NA NA NA NA NA NA NA NA NA Na NA NA NA NA NA NA NA NA NA NA NA NA NA NA NA NA NA NA NA NA NA NA NA NA NA NA NA NA NA NA NA NA NA NA NA NA NA NA NA NA NA NA NA NA NA NA NA NA NA NA NA NA NA NA NA NA NA NA NA NA NA NA NA NA NA NA NA NA NA NA NA NA NA NA NA NA NA NA NA NA NA NA NA NA NA NA NA NA NA NA NA NA NA NA NA NA NA NA NA NNA NA NA NA NA NA NA NA NA NA NA NA NA NA NA NA NA NA NA NA NA NA NA NA NA NA NA NA NA NA NA NA NA NA NA NA NA NA NA NA NA NA NA NA NA NA NA NA NA NA NA NA NA NA NA NA NA NA NA NA NA NA NA NA NA NA NA NA NA NA NA NA NA NA NA NA NA NA NA NA NA NA NA NA NA NA NA NA NA NA NA NA NA NA NA NA NA NA NANANANANANANANANANANANANANANANANANANANANANANANANANANANANANANANANANANANANANANANANANANANANANANANANANANANANANANANANANANANANANANANANANANANANANANANANANANANANANANANANANANANANANANANANANANANANANANANANANANANANA | ||
| la juj la juj la juj la juj la juj la juj la juj la juj la juj la juj la juj la juj la juj la juj la juj la juj la juj la juj la juj la juj la juj la juj la juj la juj la juj la juj la juj la juj la juj la juj la juj la juj la juj la juj lajuj | ||
| 15 | ||
42
3GO
y
| G4-14 | |||
| G5-25 | |||
| G5-46 |
a
(G9JG8JG7J)
gannl bia j. b
G10
aay y aal 4as ae y LCD aee e aagaae as ae y saae ay aee
(CCS)(
(CCS) 2015 2015 2015 2015 2015 2015 2015 2015 2015 2015 2015 2015 2015 2015 2015 2015 2015 2015 2015 2015 201
(CCS)
(CCS) (CCS)
LCD 10
y"
100
a
a
g j 10000000000000000000000000000000000000000000000000000
A
(E23) 154 E 154 j (j)
()
.52al 6y
3 1
y 1
LCD 1
aill
J 1
y
aaii aai i 1yai yai jao jao jao jao jao jao jao jao jao jao jao jao jao jao jao jao jao jao jao jao jao jao jao jao jao jao jao jao jao jao jao jao jao jao jao jao jao jao jao jao jao jao
1
aalal lal alal aal alal alal alal alal alal alal alal alal alal alal alal alal alal alal alal alal alal alal alal alal alal alal alal alal alal alal alal
LCD 1
1CCS
2 = 2 - 2 2 + 2
2301
3.1
4.251 25
5.11.2.3.4.5.6.7.8.9
- AD = AC
6.2
7LED
- AD = BD = 2 AB = AC
8=
95 jiu 20 ju yu
10
11
m = 311
1
S APQ = S AOB + S_ QPH
m = 311
15, 14, 13, 12, 11, 10, 9, 8, 7, 6, 5, 4, 3, 2, 1, 0, 0
EGO 24
y
a
(BJ)
gai jia jia - jia jia!

ailln Jilb1s Jnss Ykbp
jie jie jie jie jie jie


a jibin a jui -jia

-
-
-
-
-
-
-
-
-
-
-
-
-
-
-
-
-
-
-
-
-
-
-
-
-
-
-
-
-
-
- 44.
-
-
-
-
-
-
-
-
-
-
-
-
-
-
-
-
-
-
-
-
-
-
-
-
-
-
-
-
-
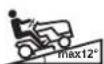


y

1
Jssll 1
i 1

jaiy 4y

(EC) 1
Jy jy Jy y
RPM
y
m
cm
J5.4
kPa
中
V
in
| ### | ### | LCD | ||
| ### | ### | ### | ### | ### |
| ### | ### | ### | ### | ### |
| ### | ### | ### | ### | ### |
| ### | ### | ### | ### | ### |
| ### | ### | ### | ### | ### |
| ### | ### | ### | ### | ### |
| ### | ### | ### | ### | ### |
| ### | ### | ### | ### | ### |
| ### | ### | ### | ### | ### |
| #### | ### | ### | ### | OFF |
| 240V-220V |
n nn nnn 10
| הכלה | הכלה | LCD-הכלה | הכלה |
| , , , , , , , , , , , , , , , , , , , , , , , , , , , , , , , , , , , , , , , , , , , , , , , , , , , , , , , , , , , , , , , , , , , , , , , , , , , , , , , , , , , , , , , , , , , , , , , , , , , , , | , , , , , , , , , , , , , , , , , , , , , , , , , , , , , , , , , , , , , , , , , , , , , , , , , , , , , , , , , , , , , , , , , , , , , , , , , , , , , , , , , , , , , , , , , , , , , , , , , , | 509 | , , , , , , , , , , , , , , , , , , , , , , , , , , , , , , , , , , , , , , , , , , , , , , , , , , , , , , , , , , , , , , , , , , , , , , , , , , , , , , , , , , , , , , , , , , , , , , , , , , |
| , , , , , , , , , , , , , , , , , , , , , , , , , , , , , , , , , , , , , , , , , , , , , , , , , , , , , , , , , , , , , , , , , , , , , , , , , , , , , , , , , , , , , , , , , , , , , , , , , , EGO | 609 | , , , , , , , , , , , , , , , , , , , , , , , , , , , , , , , , , , , , , , , , , , , , , , , , , , , , , , , , , , |
n nn nnnnnnnnnnnnnnnnnnnnnnnnnnnnnnnnnnnnnnnnnnnnnnnnnnnnnnnnnnnnnnnnnnnnnnnnnnnnnnnnnnnnnnnnnnnnnnnnnnnnnnnnnnnnnnnnnnnnnnnnnnnnnnnnnnnnnnnnn
#
EGO nnnnna
EGO w nnnn nn nnnnnn nn nnnn nn nnnn nn nnnn nn nnnn nn nnnn nn nnnn nn nnnn nn nnnn nn nnnn nn nnnn nn nnnn nn nnnn nn nnnn nn nnnn nn nnnn nn nnnn nn nnnn nn nnnn nn nnnn nn nnnn nn nnnn nn nnnn nn nnnn nn nnnn nn nnnn nn
HE
| ### | ### | LCD | ||
7n
| ### | ### | LCD | ||
| . | ### | |||
| . | ### | |||
| . | ### | |||
| . | ### | |||
| . | ### | |||
| . | ### | |||
| . | ### | |||
| . | ### | |||
| . | ### | |||
| . | ### | |||
| . | ### | |||
| . | ###' | |||
| . | ###' | |||
| . | ###' | |||
| . | ###' | |||
| . | ###' | |||
| . | ###' | |||
| . | ###' | |||
| . | ###' | |||
| . | ###' | |||
| . | ###' | |||
| . | ### | |||
| . | ###' | |||
| . | ###' | |||
| . | ###' | |||
| . | ###' | |||
| . | ###' | |||
| . | ###' | |||
| . | ###' | |||
| . | ###' | |||
| . | ###' ( |
HE
| ### | ||
| ### | . . . . . . . . . . . . . . . . . . . . . . . . . . . . . . . . . . . . . . . . . . . . . . . . . . . . . . . . . . . . . . . . . . . . . . . . . . . . . . . . . . . . . . . . . . . . . . . . . . . . . | ### |
| . . . . . . . . . . . . . . . . . . . . . . . . . . . . . . . . . . . . . . . . . . . . . . . . . . . . . . . . . . . . . . . . . . . . . . . . . . . . . . . . . . . . . . . . . . . . . . . . . .. . . . . . . . . . . . . . . . . . . . . . . . . . . . . . . . . . . . . . . . . . . . . . . . . . . . . . . . . . . . . . . . . . . . . . . . . . . . . . . . . . . . . . . . . . . . . . . . . . . .. . . . . . . . . . . . . . . . . . . . . . . . . . . . . . . . . . . . . . . . . . . . . . . . . . . . . . . . . . . . . . . . . . . . . . . . . . . . . . . . . . . . . . . . . . . . . . . . . . . . . . . . . . . . . . . . . . . . . . . . . . . . . . . . . . . . . . . . . . . . . . . . . . . . . . . . . . . . . . . . . . . . . . . . . . . . . .. . .. . .. . .. . .. . . . . . . . . . . . . . . . . . . . . . . . . . . . . . . . . . . . . . . . . . . . . . . . . . . . . . . . . . . . . . . . . . . . . . . . . . . . . . . . . . . . . . . . . . . . . . . . . . . . . . 100% 100% 100% 100% 100% 100% 100% 100% 100% 100% 100% 100% 100% 100% 100% 100% 100% 100% 100% 100% 100% 100% 100% 100% 100% 100% 100% 100% 100% 100% 100% 100% 100% 100% 100% 100% 100% 100% 100% 100% 100% 100% 100% 100% 100% 100% 100% 100% 100% 100% 100% 100% 100% 100% 100% 100% 100% 100% 100% 100% 100% | . . . . . . . . . . . . . . . . . . . . . . . . . . . . . . . . . . . . . . . . . . . . . . . . . . . . . . . . . . . . . . . . . . . . . .. . . . . . . . . . . . . . . . . . . . . . . . . . . . . . . . . . . . . . . . . . . . . . . . . . . . . . . . . . . . . . . . . . . . . . . . . . . . . . . . . . . . . . . . . . . . . . . . . . . . . . . . . . . . . . . . . . . . . . 100% 100% 99% 98% 97% 96% 95% 94% 93% 92% 91% 90% 89% 88% 87% 86% 85% 84% 83% 82% 81% 80% 80% 80% 80% 80% 80% 80% 80% 80% 80% 80% 80% 80% 80% 80% 80% 80% 80% 80% 80% 80% 80% 80% 80% 80% 81% 81% 81% 81% 81% 81% 81% 81% 81% 81% 81% 81% 81% 81% 81% 81% 81% 81% 81% 81% 81% 81% 81% 81% 81% 80% 80% 80% 80% 80% 80% 80% 80% 80% 80% 80% 80% 80% 80% 80% 80% 80% 80% 80% 80% 80% 80% 80% 81% 80% 80% 80% 80% 80% 80% 80% 80% 80% 80% 80% 80% 80% 80% 80% 80% 80% 80% 80% 80% 80% 80% 80% 82% 82% 82% 82% 82% 82% 82% 82% 82% 82% 82% 82% 82% 82% 82% 82% 82% 82% 82% 82% 82% 82% 82% 82% 82% 81% 81% 81% 81% 81% 81% 81% 81% 81% 81% 81% 81% 81% 81% 81% 81% 81% 81% 81% 81% 81% 81% 81% 81% 82% 82% 82% 82% 82% 82% 82% 82% 82% 82% 82% 82% 82% 82% 82% 82% 82% 82% 82% 82% 82% 82% 82% 82% 80% 80% 80% 80% 80% 80% 80% 80% 80% 80% 80% 80% 80% 80% 80% 80% 80% 80% 80% 80% 80% 80% 80% 80% 82% 81% 81% 81% 81% 81% 81% 81% 81% 81% 81% 81% 81% 81% 81% 81% 81% 81% 81% 81% 81% 81% 81% 81% 82% 81% 81% 81% 81% 81% 81% 81% 81% 81% 81% 81% 81% 81% 81% 81% 81% 81% 81% 81% 81% 81% 81% 81% 80% 81% 81% 81% 81% 81% 81% 81% 81% 81% 81% 81% 81% 81% 81% 81% 81% 81% 81% 81% 81% 81% 81% 81% 82% 80% 81% 81% 81% 81% 81% 81% 81% 81% 81% 81% 81% 81% 81% 81% 81% 81% 81% 81% 81% 81% 81% 81% 81% 80% 82% 82% 82% 82% 82% 82% 82% 82% 82% 82% 82% 82% 82% 82% 82% 82% 82% 82% 82% 82% 82% 82% 82% 81% 82% 82% 82% 82% 82% 82% 82% 82% 82% 82% 82% 82% 82% 82% 82% 82% 82% 82% 82% 82% 82% 82% 82% 81% 80% 81% 81% 81% 81% 81% 81% 81% 81% 81% 81% 81% 81% 81% 81% 81% 81% 81% 81% 81% 81% 81% 81% 82% 82% 81% 81% 81% 81% 81% 81% 81% 81% 81% 81% 81% 81% 81% 81% 81% 81% 81% 81% 81% 81% 81% 81% 82% 82% 80% 81% 81% 81% 81% 81% 81% 81% 81% 81% 81% 81% 81% 81% 81% 81% 81% 81% 81% 81% 81% 81% 81% 82% 81% 82% 81% 81% 81% 81% 81% 81% 81% 81% 81% 81% 81% 81% 81% 81% 81% 81% 81% 81% 81% 81% 81% 81% 82% 81% 80% 81% 81% 81% 81% 81% 81% 81% 81% 81% 81% 81% 81% 81% 81% 81% 81% 81% 81% 81% 81% 81% 82% 81% 81% 82% 81% 81% 81% 81% 81% 81% 81% 81% 81% 81% 81% 81% 81% 81% 81% 81% 81% 81% 81% 81% 81% 82% 81% 81% 80% 81% 81% 81% 81% 81% 81% 81% 81% 81% 81% 81% 81% 81% 81% 81% 81% 81% 81% 81% 81% 81% 82% 82% 82% 81% 81% 81% 81% 81% 81% 81% 81% 81% 81% 81% 81% 81% 81% 81% 81% 81% 81% 81% 81% 81% 82% 82% 82% 80% 81% 81% 81% 81% 81% 81% 81% 81% 81% 81% 81% 81% 81% 81% 81% 81% 81% 81% 81% 81% 81% 82% 82% 81% 82% 82% 82% 82% 82% 82% 82% 82% 82% 82% 82% 82% 82% 82% 82% 82% 82% 82% 82% 82% 82% 81% 82% 82% 81% 82% 82% 82% 82% 82% 82% 82% 82% 82% 82% 82% 82% 82% 82% 82% 82% 82% 82% 82% 82% 81% 82% 82% 82% 81% 82% 82% 82% 82% 82% 82% 82% 82% 82% 82% 82% 82% 82% 82% 82% 82% 82% 82% 82% 82% 81% 81% 81% 81% 82% 82% 82% 82% 82% 82% 82% 82% 82% 82% 82% 82% 82% 82% 82% 82% 82% 82% 82% 82% 81% 82% 82% 81% 81% 82% 82% 82% 82% 82% 82% 82% 82% 82% 82% 82% 82% 82% 82% 82% 82% 82% 82% 82% 82% 82% 82% 81% 82% 82% 82% 82% 82% 82% 82% 82% 82% 82% 82% 82% 82% 82% 82% 82% 82% 82% 82% 82% 82% 82% 82% 82% 82% 82% 82% 82% 82% 82% 82% 82% 82% 82 |
y2n01nn9
| ### | ||
| ### | ### | ### |
| ### | ### | ### |
| ### | ### | ### |
| ### | ### | ### |
| ### | ### | ### |
| ### | ### | ### |
| ### | ### | ### |
| ### | ### | ### |
| ### | ### | ### |
| ### | ### | ### |
| ### | ### | ### |
| ### | ### | ### |
| ### | ### | ### |
n
| ### | ||
| EGO | ### | |
| EGO | ### | |
| EGO | ### | |
| EGO | ### | |
| EGO | ### | |
| EGO | ### | |
| EGO | ### | |
| EGO | ### | |
| EGO | ### | |
| EGO | ### | |
| EGO | ### | |
| EGO | ### | |
| EGO | ### | |
HE
mnyi lonx
(H5-H1)
| H2-2 | H2-1 |
nnnnnnnnnnnnnnnnnnnnnnnnnnnnnnnnnnnnnnnnnnnnnnnnnnnnnnnnnnnnnnnnnnnnnnnnnnnnnnnnnnnnnnnnnnnnnnnnnnnnnnnnnnn
(12-11) (1) (2)
nnn nn nnnn nn nnnnnnnnnnnnnnnnnnnnnnnnnnnnnnnnnnnnnnnnnnnnnnnnnnnnnnnnnnnnnnnnnnnnnnnnnnnnnnnnnnnnnnnnnnnnnnnnnnnnnnnnn
ninn"1 nnn. 002 y jonnn nn noann n7a
nnon by nn
wn nnnn (nnnn nn nnnn) WEEE 0000000000000000000000000000000000000000000000
nnnn
(F2-F1)
(F4-F3)
| F3-1 | |||
| F3-2 | |||
nnnnnnnnnnnnnnnnnnnnnnnnnnnnnnnnnnnnnnnnnnnnnnnnnnnnnnnnnnnnnnnnnnnnnnnnnnnnnnnnnnnnnnn
nnn nn nnnnnnnnn
(G1 n) n
(G3-G2)
| G2-1 | |||
| G2-3 | |||
(G6-G4)nnn nn
| G4-1 | |||
| G5-2 | |||
| G4-1 | G5-5 | G5-4 |
19'On ITX
(G9/ G8/ G7)
1
(G10)
17 17 17 17 17 17 17 17 17 17 17
(G11)079n
TNTD.T
(G12x)TxTnI
(G13)
npiinn
A
A
yinnn nnnn
(E21)
n nnnn nn nnnn nnnn nnnn nnnn nnnn nnnn nnnn nnnn nnnn nnnn nnnn nnnn nnnn nnnn nnnn nnnn nnnn nnnn nnnn nnnn nnnn nnnn nnnn nnnn nnnn nnnn nnnn nnnn nnnn nnnn nnnn nnnn nnnn nnnn
A
ynnn nn nnnn nn nnnnnnnnnnnnnnnnnnnnnnnnnnnnnnnnnnnnnnnnnnnnnnnnnnnnnnnnnnnnnnnnnnnnnnnnnnnnnnnnnnnnnnnnnnnnnnnnnnnnnnnnnnnnnnnnnnnnnnnnnnnnnnnnnnnnnnn
myn
100000000000000000000000000000000000000000000
(CCS)
(E22 n) (CCS) 0wn nn (oyn) ynn
n nnnn nn nnnnnnnnnnnnnnnnnnnnnnnnnnnnnnnnnnnnnnnnnnnnnnnnnnnnnnnnnnnnnnnnnnnnnnnnnnnnnnnnnnnnnnnnnnnnnnnnnnnnnnnnnnnnnnnnnnnnnnnnnnnnnnnn
007 11n nnnn (CCS) nnnn nn (nx)
CCSn ynn nn nnn nee
CSS nnnn nn nnnnnn nn nnnn nnnn nnnn nnnn nnnn nnnn nnnn nnnn nnnn nnnn nnnn nnnn nnnn nnnn nnnn nnnn nnnn nnnn nnnn nnnn nnnn nnnn nnnn nnnn nnnn nnnn nnnn nnnn nnnn nnnn nnnn nnnn nnnn nnnn nn
nannnnnnnnnnnnnnnnnnnnnnnnnnnnnnnnnnnnnnnnnnnnnnnnnnnnnnnnnnnnnnnnnnnnnnnnnnnnnnnnnnnnnnnnnnnnnnnnnnnnnnnnnnnnnnnnnnnnnnnnnn
nynyovorpaanhyson
yin nynnni 1
101277777777777777777777777777777777
nnnnnnnnnnnnnnnnnnnnnnnnnnnnnnnnnnnnnnnnnnnnnnnnnnnnnnnnnnnnnnnnnnnnnnnnnnnnnnnnnnnnnnnnnnnnnnnnnnnnnnnnn
(E23) nni (o)
ynnn nn nnnn nn nnnn nn nnnn nn nnnn nn
.
.71777777777777
LCD-nonnnn
n nnnn nn nnnn nn nnnn nn nnnn nn nnnn nnnn nnnn nnnn nnnn nnnn nnnn nnnn nnnn nnnn nnnn nnnn nnnn nnnn nnnn nnnn nnnn nnnn nnnn nnnn nnnn nnnn nnnn nnnn nnnn nnnn nnnn nnnn nnnn nnnn nnnn nnnn nnnn nnnn
HE
:yn
n nnnnne nnnnne nnnnne nnnnne nnnnne nnnnne nnnnne nnnnne nnnnne nnnnne nnnnne nnnnne nnnnne nnnnne nnnnne nnnnne nnnnne nnnnne nnnnne nnnnne nnnnne nnnnne nnnnne nnnnne nnnnne nnnnnee
C
ynnn nn nnnn nn nnnn nn nnnn nn nnnn nn nnnn nn nnnn nn nnnn nn nnnn nn nnnn nn nnnn nn nnnn nn nnnn nn nnnn nn nnnn nn nnnn nn nnnn nn nnnn nn nnnn nn nnnn nn nnnn nn nnnn nn nnnn nn nnnn nn nnnn nn nnnn nn
y 2
(E17)
(E18)
(E19x)
n nn nnnn nn nnnn nn nnnn nnnn nnnn
USB
y nnnn nn n DC 5 y nynn npson npson USB-n nynn .ninn
(E20)
n nn nnnn nn nnnnnnnnnnnnnnnnnnnnnnnnnnnnnnnnnnnnnnnnnnnnnnnnnnnnnnnnnnnnnnnnnnnnnnnnnnnnnnnnnnnnnnnnnnnnnnnnnnnnnnnnnnnnn
ynnn nn nnnnnnnnnnnnnnnnnnnnnnnnnnnnnnnnnnnnnnnnnnnnnnnnnnnnnnnnnnnnnnnnnnnnnnnnnnnnnnnnnnnnnnnnnnnnnnnnnnnnnnnnnnnnnnnnnnn
CCS pnn nnnn nn nnnn nnnn nnnn nnnn nnnn nnnn nnnn nnnn nnnn nnnn nnnn nnnn nnnn nnnn nnnn nnnn nnnn nnnn nnnn nnnn nnnn nnnn nnnn nnnn nnnn nnnn nnnn nnnn nnnn nnnn nnnn nnnn nnnn nnnn
"nnnny
"nnn nnnn nn nnnn nnnnnn nnnnnn nnnnnn nnnnnn nnnnnn nnnnnn nnnnnn nnnnnn nnnnnn nnnnnn nnnnnn nnnnnn nnnnnn nnnnnn nnnnnn nnnnnn nnnnnn nnnnnn nnnnnn nnnnnn nnnnnn nnnnnn nnnnnn nnnnnn nnnnnn nannn nannn nannn nannn nannn nannn nannn nannn nannn nannn nannn nannn nannn nannn nannn nannn nannn nannn nannn nannn nannn nannn nannn nannn nannn nannn nannn nannn nannn
nnnnnnnnnnnnnnnnnnnnnnnnnnnnnnnnnnnnnnnnnnnnnnnnnnnnnnnnnnnnnnnnnnnnnnnnnnnnnnnnnnnnnnnnnnnnnnnnnnnnnnnnnnnnnnnnnnnnnnnnnnn
y
PPO-PP
y 1000 nnnn nn nnnn nn nnnn nn nnnn nn nnnn nn nnnn nn nnnn nn nnnn nn nnnn nn nnnn nn nnnn nn nnnn nn nnnn nn nnnn nn nnnn nn nnnn nn nnnn nn nnnn nn nnnn nn nnnn nn nnnn nn nnnn nn nnnn nn nnnn nn nnnn nn nnnn
nni nnnn nn nnnn nn nnnn nn nnnn nn nnnn nn nnnn nn nnnn nn nnnn nn nnnn nn nnnn nn nnnn nn nnnn nn nnnn nn nnnn nn nnnn nn nnnn nn nnnn nn nnnn nn nnnn nn nnnn nn nnnn nn nnnn nn nnnn nn nnnn nn nnnn nn nnnn
(E6-E3)
15AH EGO nnnn nn (BA4200T/BA4200X 2)

nno nno
ynnnnae
1000000000E5-1
·(E7)T
nniin nnnn nn nnnnnnnnnnnnnnnnnnnnnnnnnnnnnnnnnnnnnnnnnnnnnnnnnnnnnnnnnnnnnnnnnnnnnnnnnnnnnnnnnnnnnnnnnnnnnnn
(E10-E8) nynn nn nnnn nn nnnn

ninnnnnnnnnnnnnnnnnn
(E12-E11n) nwnnn nnyn np
(E14-E13)
y
mnnn
nnnnnnnnnnnnnnnnnnnnnnnnnnnnnnnnnnnnnnnnnnnnnnnnnnnnnnnnnnnnnnnnnnnnnnnnnnnnnnnnnnnnnnnnnnnnnnnnnnnnnnnnnnnnnnnnnnnnnnnnnnnnnnnnnnnnnnnnnnnnnnnnnnnnnnnnnnnnnnnn nn nannn nannn nannn nannn nannn nannn nannn nannn nannn nannn nannn nannn nannn nannn nannn nannn nannn nannn nannn nannn nannn nannn nannn nannn nannn nannn nannn nannn nannn nannn nannn nannn nannn nannn nn annn nn annn nn annn nn annn nn annn nn annn nn annn nn annn nn annn nn annn nn annn nn annn nn annn nn annn nn annn nn annn nn annn nn annn nn annn nn annn nn annn nn annn nn annn nn annn nn annn nn annn nn annn nn annn nn annn nn annn nn annn nn annn nn annn nn ann

yynnnn yynnnn nn
Dn 111111111111111111
107n 7T yDy Dny Dny nyn nn
nnnnnnns
.09907000000
1
.900000000000000000000000000000
07
nntnn nnnn nn nnnn
n7y npnnn nn
1
(E16-15)
A
5n 100000000000000000000000000000000000000000000000000000
#
(C1) nannnnn
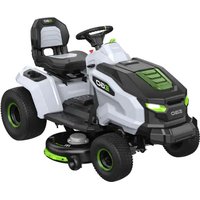
- SYMBOL MEANING
- SAFETY SYMBOLS
- SYMBOLS IN THIS MANUAL
- SPECIFICATIONS
- RECOMMENDED ACCESSORIES
- DESCRIPTION
- KNOW THE TRACTOR (Fig. A1)
- EN
- KNOW THE LCD SCREEN (Fig. A2)
- UNPACKING
- PACKING LIST (Fig. B)
- ASSEMBLY
- INSTALLING THE STEERING WHEEL (Fig. C1)
- INSTALLING THE SEAT (Fig. C2)
- ATTACHING THE MULCHING PLUG (Fig. C3)
- INSTALLING THE ATTACHMENT RACK (Fig. C4)
- ADJUSTMENT
- OPERATION
- ATTACHING / DETACHING THE BATTERY PACK (Fig. E3 - E6)
- CHARGING THE TRACTOR
- COMMUNICATION TECHNOLOGY
- STARTING THE TRACTOR (Fig. E15 - Fig. E16)
- NOTE:
- Driving Speed Adjustment (Fig. E17)
- Blade Speed Adjustment (Fig. E18)
- LED Lights (Fig. E19)
- USB Port
- STOPPING THE TRACTOR (Fig. E20)
- Limp-Home Mode
- DRIVING THE TRACTOR (Fig. E21)
- USING CRUISE CONTROL (CCS)
- To activate (enter) Cruise Control (CCS) (Fig. E22)
- TURNING BLADES ON WHILE DRIVING IN REVERSE
- To Activate (Enter) MOWING IN REVERSE (E23)
- MAINTENANCE
- GENERAL MAINTENANCE
- MAINTAINING THE TRACTOR DECK AND THE CUTTING BLADES
- Leveling the deck
- STORAGE AND TRANSPORT
- TRANSPORTING THE TRACTOR (Fig. H1 - H5)
- STORAGE (Fig. 11 - 12)
- Protecting the environment
- TROUBLESHOOTING
- EN TRACTOR STATUS REFERENCE
- FAULT CODE REFERENCE
- WARRANTY
- EGO WARRANTY POLICY
- SYMBOLE IN DIESEM HANDBUCH
- ACCESSIONS RECOMMANDÉS
- ACCENSIONDELL LAME DURANTE LA GUIDA IN RETROMARCIA
- SYMBOLER IDENNA HANDBOX
- FASTSÄTTNING/BORTTAGNING AV BATTERIPAKETET (Bild E3-E6)
- LADDNING AV TRAKTORN
- FORBEREDELSE INNAN ANVANDNING
- SLÄ PÅ KNIVARNA VID BACKNING
- FÖRVARING OCH TRANSPORT
- SYMBOLER I DENNE HANDBLOCKEN
- For a aktivere (Enter) KLIPPING I REVERS (E23)
- GENERELT VEDLIKEHOLD
- UCIOBHBIE O6O3HauEHHB DAHHOM PYKOBODCTBE
- TEXHnueCKXAPAKTEPNUKIN
- PEKOMEHДYEMbI E IPNHADJIEXKHOCTN
- ACTN TPAKTOPA (Pnc.A1)
- KK-UNCINNEI(Pnc.A2)
- PACNAKOBKA
- IPOBEPKA IPEED 3KCIJYATAUNEI
- 3ANYCK TPAKTOPA (Pnc.E15-E16)
- ПИМЕЧАНМ.
- Perynipobka ckopoctn xoda (Pnc. E17)
- PerynpoBka ckopocTn pexyux 3neMeHTOB (Pnc. E18)
- CbeToOnnBieΦapbl(Pnc.E19)
- USB-nopT
- OCTAHOBKA TPAKTOPA (Pnc. E20)
- AbarinHbI pexIM
- BOXDEHME TPAKTOPA (Pnc.E21)
- ПИМЕЧАНЕ.
- NCIOB3OBAHNE KPYN3-KOHTOJIA (CCS)
- AkTmbaun (BknHouenne) kpyn3-koHTpOJIa (CCS) (Pnc. E22)
- BKJIOUCHNEPEKUYUNX3JIEMHTOBIPNIDBUXKEHIM 3ADHMXODOM
- POLITYKA GWARANCYJNA EGO
- MONTAZ VOLANTU (Obr. C1)
- INSTALACE SEDADLA (Obr. C2)
- MONTAZ SEDADLA (Obr. C2)
- PRIPOJENIE/ODPOJENIE AKUMULÁTORA (Obr. E3-E6)
- NABIJANIE TRAKTORA
- A CSOMAG TARTALMA (B Abra)
- A TRAKTOR LEALLITASA (E20 Abra)
- INSTALAREA SCAUNULUI (Fig. C2)
- INAINTDE REGLARE (Fig.D1)
- REGLAJAREA INALTIMII PUNTI DE TAIERE (Fig. D2)
- REGLAREA ROTILOR ANTI-SCALPARE(Fig. D3 - D6)
- REGLAREA SCAUNULUI (Fig. D7)
- FUNCTIONARE
- INAINTE DE UTILIZARE (Fig. E1)
- REGLAREA FRANELOR DE PARCARE (Fig. E2)
- ATA AREA/DETA AREA SETULUI DE ACUMULATORI (Fig. E3 - E6)
- SEDEKLUAUZSTADISANA (C2 Attels)
- TRAKTORA APTUREŠANA (E20 Attëls)
- PROBLEMU MEKLEŠANA UN NOVERŠANA
- LUGEGE KASUTUSJUHENDIT
- OHUTUSSÜMBOL
- KASUTUSJUHENDIS KASUTATUD SÜMBOLID
- CIMBOJN B UbOMy NocIbHnKU
- O3HAOMJIeHHR 3 PK-EEKPAHOM (Pnc.A2)
- PO3ПAKYBAHHЯ
- YBIMKHEHHJIe3IINQACPYX3ADHIMXODOM
- YbIMKHeHHKOciHH3AHHXoOM(E23)
- OBCJyROBYAHH
- PEKOMEHIOBAHNI TPAΦIK TEXHIYHOOBCJNYTOBYAHN
- CNMBOJIH, N3PON3BAHN B TOBA PbKOBOCTBO
- IOCTABRAHE/M3BAKDAHE HA AKMYIATOPHATA BATEPNA (Φn.r. E3-E6)
- 3APEKDAHE HATPAKTOPA
- TECTBAHE HA CNTTEMATA 3A IPEIINA3HA BLOKIPOBKA
- KOMYHNIKAUNOHHA TEXHOJIOIIM
- ПОВЕРКА ПЕДИ PавOTА
- CTAPTIPAHE HA TPAKTOPHATA KOCAYKA (Фиr. E15 - Фиr. E16)
- SEJIEXKA:
- Perynipane Ha ckopocTHa DnBxKeHne (pHr. E17)
- Perynipane Ha ckopocTHa Hoxka (pHr.E18)
- LED cbetnnn (fug.19)
- USB nopT
- CINPAHE HATPAKTOPHATA KOCAKA (Anr.E20)
- PekmHa aBapnHo np6upahe
- YIPABJIEHHEHATPAKTOPHATAKOCAUKA(ΦnR.E21)
- BEJIEXKA:
- M3IIOJI3BAHE HA KPYN3 KOHTPOJI (CCS)
- 3AENCTBAHE HA HOXOBETEPINIBNXEHNE HA 3AENXOJ
- A.KTMBuPAne (3aDcHcTBaHe) Ha KOCEHE HA 3A.DEH XOД (E23)
- PONDPbXKA
- CbXPAHEHNEI TPAHCIOPT
- CbXPAHEHNE (Φur.11-12)
- Ona3BaHe Ha OKoHaTa cpea
- OTCTPAHЯBAHE HA ПЮБЛЕМN
- CπPABKA 3A CbCTOJHNETO HA TPAKTOPHATA KOCAYKA
- CπPABKA 3A KOД 3A ΓPEUSHKA
- SIMPOLI U OVOM PRIRUČNIKU
- TEHNIČKI PODACI
- Sg
- 0g5m8gogoo8oosobu36g3o5b5b5b (5sb.A1)
- 0g6089999 335b LCD 3365b (5b.A2)
- 3080808
- aagaaabgaggaagagagaa
- 8sbsb0u363o 85660b 8g3g (E15-E6.E16)
- 360836:
- 三GO
- 350a35:
- 36ygo 3m5gmmnob (CCS) gdooyg6gs
- 00603y6o aadssbgy8s
- a95sb3s qs
- 0s5b3m6o6g8s
- 8663
- dsmbol bssnfo a6b6bol bogybol qosbsgdo 3000
- 3GO
- aill
- m = 311
- #
- mnyi lonx
- npiinn
Brand : EGO
Model : TR4200E
Category : Electric riding mower