
SC 4 Deluxe EasyFix Premium - Steam cleaner Kärcher - Free user manual and instructions
Find the device manual for free SC 4 Deluxe EasyFix Premium Kärcher in PDF.
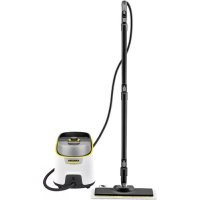



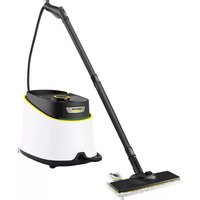
| Product type | Steam cleaner with removable water tank |
| Brand | Kärcher |
| Model | SC 4 Deluxe EasyFix Premium |
| Dimensions (L × W × H) | 400 × 270 × 300 mm |
| Weight (without accessories) | 6.8 kg |
| Power supply | 220-240 V ~ 50 Hz |
| Heating power | 2200 W |
| Maximum working pressure | 0.4 MPa |
| Heating time | Approximately 3 minutes |
| Continuous steam output | 60 g/min |
| Maximum steam burst | 150 g/min |
| Water tank capacity | 1.3 L |
| Steam boiler capacity | 0.5 L |
| Protection rating | IPX4 |
| Protection class | I |
| Floor nozzle type | EasyFix |
| Included accessories | Pencil jet nozzle, small and large round brushes, Power nozzle, crevice brush, hand suction nozzle, microfiber cover, extension tubes, microfiber mop, carpet glide |
| Safety | Safety thermostat, boiler thermostat, maintenance closure with safety valve, child safety lock on steam trigger |
| Special functions | Steam flow adjustment (3 levels), boiler drainage in CLE mode, descaling recommended every 50 to 100 refills depending on water hardness |
| Maintenance | Boiler rinse every 10 refills, descaling with KÄRCHER agent, wash mops at max 60°C without fabric softener |
| Spare parts and repairability | Original accessories and spare parts available at www.kaercher.com, authorized after-sales service |
| Warranty | According to country conditions, manufacturing defects covered upon presentation of the invoice |
Frequently Asked Questions - SC 4 Deluxe EasyFix Premium Kärcher
User questions about SC 4 Deluxe EasyFix Premium Kärcher
0 question about this device. Answer the ones you know or ask your own.
Ask a new question about this device
Download the instructions for your Steam cleaner in PDF format for free! Find your manual SC 4 Deluxe EasyFix Premium - Kärcher and take your electronic device back in hand. On this page are published all the documents necessary for the use of your device. SC 4 Deluxe EasyFix Premium by Kärcher.
USER MANUAL SC 4 Deluxe EasyFix Premium Kärcher
Environmental protection 11
Accessories and spare parts 11
Scope of delivery 11
Warranty 11
Safety devices 11
Description of the device 11
Installation 12
Operation 12
Important application instructions 13
How to use the accessories 13
Care and service 15
Troubleshooting guide 15
Technical data 16
General notes

Read these original operating instructions and the enclosed safety instructions before using the device for the first time.
time. Proceed accordingly.
Keep both books for future reference or for future owners.
Intended use
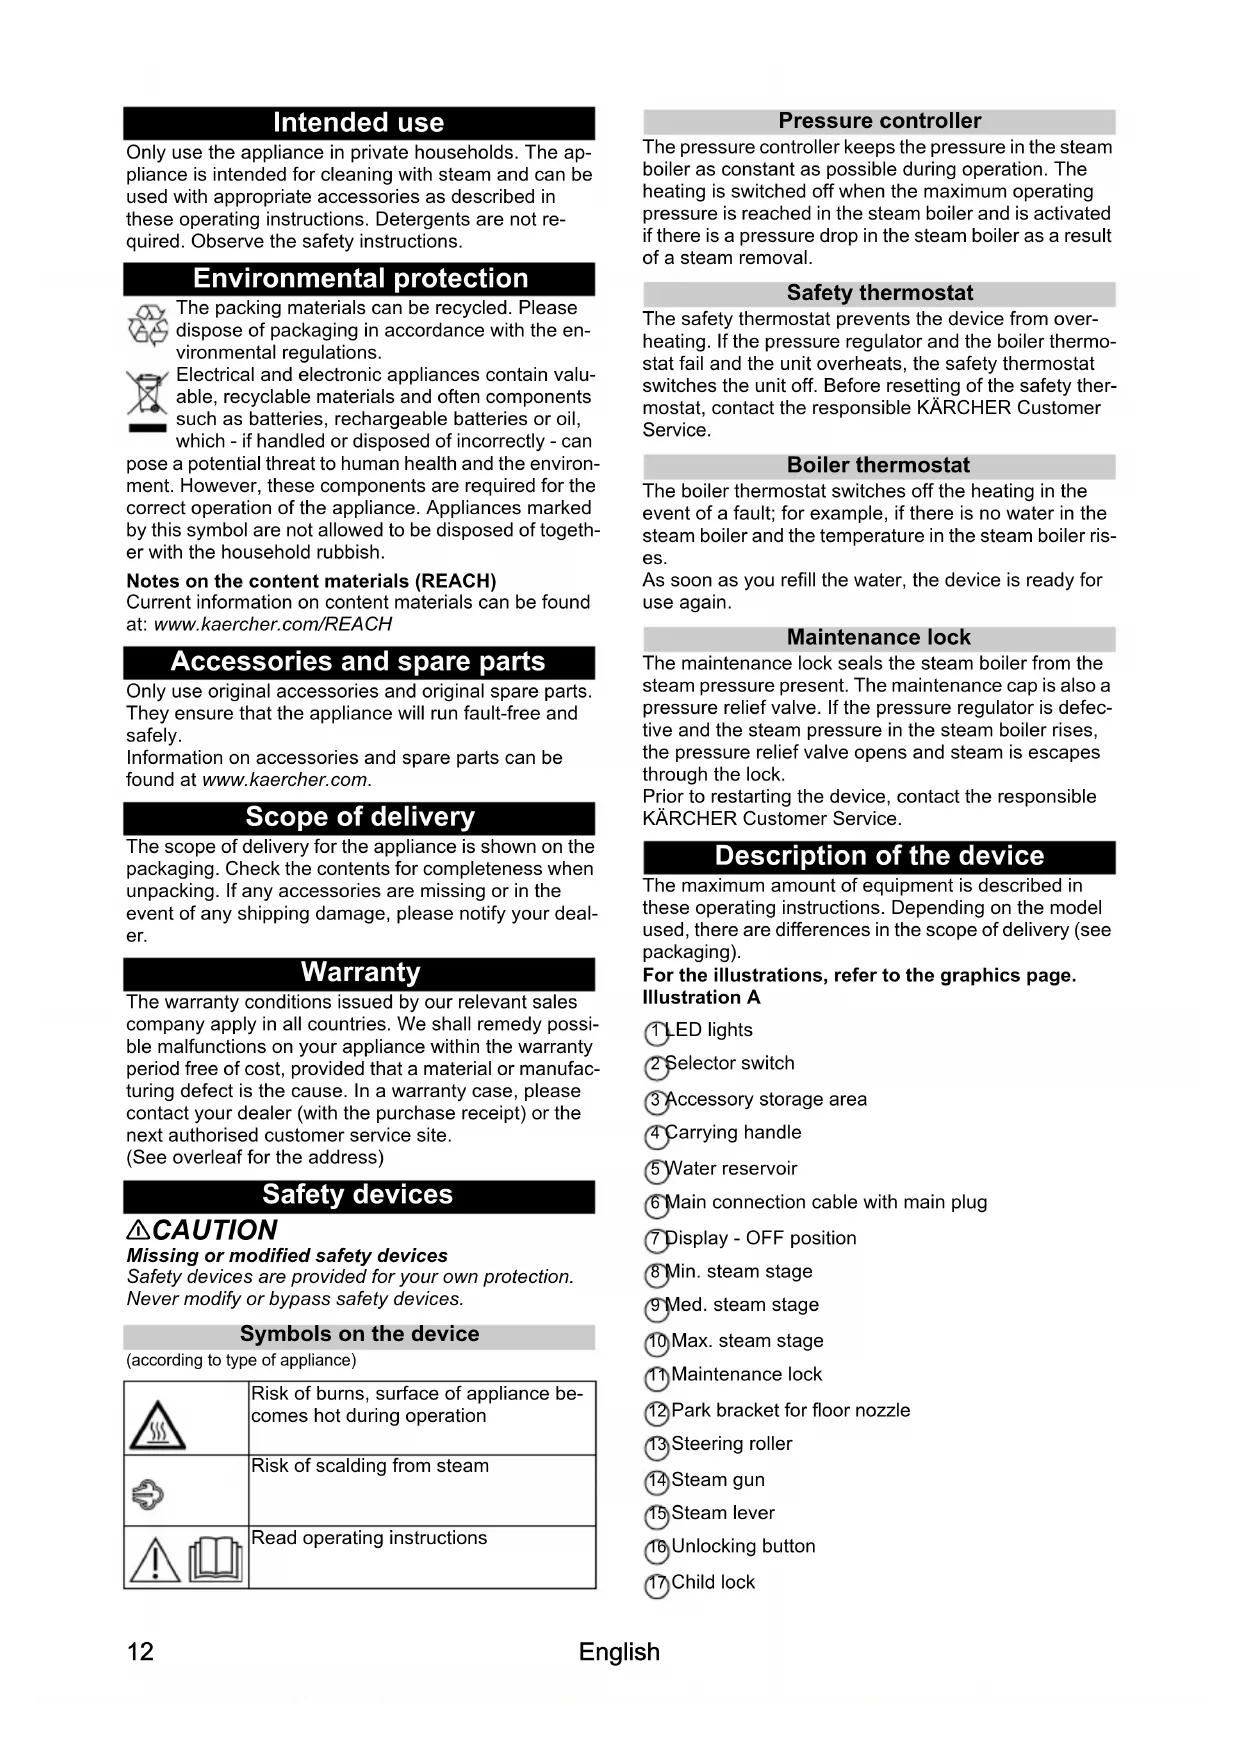
Only use the appliance in private households. The appliance is intended for cleaning with steam and can be used with appropriate accessories as described in these operating instructions. Detergents are not required. Observe the safety instructions.
Environmental protection

The packing materials can be recycled. Please dispose of packaging in accordance with the environmental regulations.

Electrical and electronic appliances contain valuable, recyclable materials and often components such as batteries, rechargeable batteries or oil, which - if handled or disposed of incorrectly - can
pose a potential threat to human health and the environment. However, these components are required for the correct operation of the appliance. Appliances marked by this symbol are not allowed to be disposed of together with the household rubbish.
Notes on the content materials (REACH)
Current information on content materials can be found at: www.kaercher.com/REACH
Accessories and spare parts
Only use original accessories and original spare parts. They ensure that the appliance will run fault-free and safely.
Information on accessories and spare parts can be found at www.kaercher.com.
Scope of delivery
The scope of delivery for the appliance is shown on the packaging. Check the contents for completeness when unpacking. If any accessories are missing or in the event of any shipping damage, please notify your dealer.
Warranty
The warranty conditions issued by our relevant sales company apply in all countries. We shall remedy possible malfunctions on your appliance within the warranty period free of cost, provided that a material or manufacturing defect is the cause. In a warranty case, please contact your dealer (with the purchase receipt) or the next authorised customer service site.
(See overleaf for the address)
Safety devices
CAUTION
Missing or modified safety devices
Safety devices are provided for your own protection. Never modify or bypass safety devices.
Symbols on the device
(according to type of appliance)
| Risk of burns, surface of appliance be- comes hot during operation | |
| Risk of scalding from steam | |
| Read operating instructions |
Pressure controller
The pressure controller keeps the pressure in the steam boiler as constant as possible during operation. The heating is switched off when the maximum operating pressure is reached in the steam boiler and is activated if there is a pressure drop in the steam boiler as a result of a steam removal.
Safety thermostat
The safety thermostat prevents the device from overheating. If the pressure regulator and the boiler thermostat fail and the unit overheats, the safety thermostat switches the unit off. Before resetting of the safety thermostat, contact the responsible KÄRCHER Customer Service.
Boiler thermostat
The boiler thermostat switches off the heating in the event of a fault; for example, if there is no water in the steam boiler and the temperature in the steam boiler rises.
As soon as you refill the water, the device is ready for use again.
Maintenance lock
The maintenance lock seals the steam boiler from the steam pressure present. The maintenance cap is also a pressure relief valve. If the pressure regulator is defective and the steam pressure in the steam boiler rises, the pressure relief valve opens and steam escapes through the lock.
Prior to restarting the device, contact the responsible KÄRCHER Customer Service.
Description of the device
The maximum amount of equipment is described in these operating instructions. Depending on the model used, there are differences in the scope of delivery (see packaging).
For the illustrations, refer to the graphics page. Illustration A
① LED lights 2 selector switch 3 Accessory storage area 4 Carrying handle 5 Water reservoir 6 Main connection cable with main plug ⑦ display - OFF position 8 Min. steam stage 9 Med. steam stage 10 Max. steam stage 1 Maintenance lock (12) Park bracket for floor nozzle 13 Steering roller 14 Steam gun 15 Steam lever Unlocking button Child lock
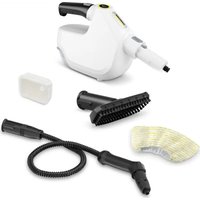
(18) Steam hose 19 Spotlight nozzle 20 Round brush (small) (2) Round brush (large) 2 Power nozzle (23) Crevice brush (24) Manual nozzle 25 Manual nozzle microfibre cover (26) Extension tubes (2 x) (27) Unlocking button 28 Floor nozzle 29 Hook and loop fastener 30 Microfibre floor cloth (1 x) (31) Microfibre floor cloth (2 x) (32) Carpet glider
**SC 4 Deluxe EasyFix Premium
Installation
Installing accessories
- Push the open end of the accessory onto the steam gun so that the unlocking button on the steam gun engages.
Illustration F
- Push the open end of the accessory onto the spotlight nozzle.
Illustration G
- Connect the extension tubes with the steam gun.
a Push the 1st extension tube onto the steam gun so that the unlocking button on the steam gun engages.
The connection pipe is connected.
b Push the 2nd extension tube onto the 1st extension tube.
The connection pipes are connected.
Illustration H
- Push the accessory and / or the floor nozzle onto the free end of the extension tube.
Illustration I
The accessory is connected.
Disconnecting accessories
- Move the child lock back.
The steam lever is locked.
- Press the unlocking button and pull the parts apart.
Illustration N
Operation
Filling water
The water reservoir can be removed at any time for filling or be filled directly at the device.
ATTENTION
Damage to the device
Unsuitable water can block the nozzles or damage the water level indicator.
Do not fill in pure distilled water. Use a maximum of 50% distilled water mixed with tap water.
Do not use condensation from the clothes dryer for filling.
Do not use collected rain water for filling.
Do not use cleaning agents or other additives (e.g.
scents) for filling.
Removing the water reservoir for filling
- Pull the water reservoir vertically upwards. Illustration B
- Fill the water tank vertically with tap water or a mixture of tap water and no more than 50% distilled water.
- Insert the water reservoir and press downwards until it locks into place.
Filling the water reservoir directly on the device
- Fill tap water or a mixture of tap water and no more than 50% distilled water from a vessel into the filling hole of the water reservoir.
Illustration C
Switching on the device
Note
If there is no or too little water in the steam boiler, the water pump starts to run and pumps water from the water reservoir into the steam boiler. The filling process can take several minutes.
Note
The device briefly closes the valve every 60 seconds causing an audible soft click. Closing prevents the valve from clogging. This does not affect the steam output.
- Place the device on a firm surface.
- Insert the main plug into a socket.
- Turn the selector switch from the OFF position to the steam setting selection range.
Illustration D
The LED strip is in fading red.
- The LED light lights up a continuous green after approx. 3 minutes. The device is ready for use.
Illustration E
- Press the steam lever.
Illustration F
Steam leaks out.
Regulating the steam volume
The expelled steam volume is regulated using the selector switch for steam volume. The selector switch has three positions.
| Maximum steam volume | |
| Medium steam volume | |
| Minimum steam volume |
- Set the selector switch for the steam volume to the required steam volume.
- Press the steam lever.
- Before cleaning, point the steam gun at a cloth until steam is expelled evenly.
Refilling water
If there is not enough water in water reservoir, the LED light rapidly flashes red and a signal tone sounds.
Note
The water pump fills the steam boiler at intervals. If the filling is successful, the LED light is quick flashing red.
Note
If there is no or too little water in the steam boiler, the water pump starts to run and pumps water from the water reservoir into the steam boiler. The filling process can take several minutes.
ATTENTION
Damage to the device
Unsuitable water can block the nozzles or damage the water level indicator.
Do not fill in pure distilled water. Use a maximum of 50% distilled water mixed with tap water.
Do not use condensation from the clothes dryer for filling.
Do not use collected rain water for filling.
Do not use cleaning agents or other additives (e.g. scents) for filling.
- Fill the water tank with tap water or a mixture of tap water and no more than 50% distilled water. The device is ready for use.
Switching off the device
- Turn the power switch to the "OFF" position.
Illustration L
The device is switched off.
- Press the steam lever until steam is no longer released.
Illustration M
The steam boiler is depressurised.
- Move the child lock back. The steam lever is locked.
- Pull the main plug out of the socket.
- Drain the water reservoir.
Rinsing out the steam boiler
Rinse the device's steam boiler out after every tenth filling of the tank.
- Switch the device off; see Chapter Switching off the device.
- Allow the device to cool down.
- Drain the water reservoir.
- Remove the accessory / accessories from the accessory storage area.
- Open the maintenance lock. To do this place the open end of an extension tube on the maintenance lock, insert this into the guide so it engages and open it.
Illustration R
- Fill the steam boiler with water and swing it around vigorously. Lime residue which has been deposited on the bottom of the steam boiler will be released as a result.
- Drain the water completely out of the steam boiler.
Illustration S
Clearing the boiler
The water in the boiler can be emptied by CLE Mode: 1. Remove the water reservoir. 2. Turn on the device. 3. Press the steam trigger 3 times until the LED light flashes green and a long beep is emitted. 4. Steam will be available until the water in the boiler is empty.
Storing the device
- Connect the extension tubes to the large mounts for accessories.
- Connect a manual nozzle and spotlight nozzle to each extension tube.
- Fasten the large round brush to the spotlight nozzle.
- Hang the floor nozzle in the park bracket.
Illustration O
- Wrap the cable and place it in the accessory compartment.
Illustration Q
- Wrap the steam hose and place it in the accessory storage area.
Illustration P
- Place the small round brush and crevice brush in the accessory storage area.
- Store the device in a dry location that is protected from frost.
Important application instructions
Cleaning the floor areas
We recommend sweeping the floor or vacuum cleaning it before using the appliance. In this way the floor will be cleared of dirt and loose particles before the wet cleaning.
Freshening up textiles
Prior to using the appliance, always check the compatibility of the textiles at a concealed point: Steam down the textile, allow it to dry and then check it for any change in colour or shape.
Cleaning coated or painted surfaces
ATTENTION
Damaged surfaces
Steam can loosen wax, furniture polish, plastic coatings or paint and edge band from edges.
Do not direct the steam at glued laminated edges as the edge band may loosen.
Do not use the appliance for cleaning unsealed wood or parquet floors.
Do not use the appliance for cleaning painted or plastic coated surfaces such as kitchen or living room furniture, doors or parquet.
- To clean these surfaces, steam a cloth briefly and use it to wipe over the surfaces.
Glass cleaner
ATTENTION
Glass breakages and damaged surfaces
Steam can damage sealed points of the window frame and, at low outside temperatures, lead to tension on the surface of window panes and hence to glass breakages. Do not direct the steam at sealed points on the window frame.
At low outside temperatures, heat up the window panes by gently steaming the full surface of the glass.
- Clean the window area with a manual nozzle and cover. To remove the water, use a squeezegee or wipe the surfaces dry.
How to use the Accessories
Steam gun
The steam gun can be used for the following applications without accessories:
- For removing slight creases from the hanging clothing items: Steam the clothing item from a distance of 10 - 20cm .
- For wiping damp dust: Steam a cloth briefly and use it to wipe over the furniture.
Spotlight nozzle
The spotlight nozzle is suitable for cleaning areas, joins fittings, drains, sinks, WCs, blinds or radiators that are difficult to access. The closer the spotlight nozzle is to the soiled area, the greater the cleaning efficiency will be as the temperature and steam volume are at their highest at the nozzle opening. Larger lime deposits can be treated before steam cleaning with a suitable detergent. Allow the detergent to soak in for approx. 5 minutes and then steam it off.
- Slide the spotlight nozzle onto the steam gun.
Illustration F
Round brush (small)
The small round brush is used for cleaning stubborn dirt. Stubborn dirt can be removed more easily by brushing.
ATTENTION
Damaged surfaces
The brush may scratch sensitive surfaces. It is not suitable for cleaning sensitive surfaces.
- Fit the round brush to the spotlight nozzle.
Illustration G
Round brush (large)
The large round brush is suitable for cleaning large rounded surfaces, e.g. wash basin, shower tray, bath tub, kitchen sink, etc.
ATTENTION
Damaged surfaces
The brush may scratch sensitive surfaces. It is not suitable for cleaning sensitive surfaces.
- Fit the large round brush to the spotlight nozzle.
Illustration G
Power nozzle
The power nozzle is used for cleaning stubborn dirt and for blowing down corners, on joints, etc.
- Install the power nozzle onto the spotlight nozzle according to the round brush.
Illustration G
Crevice brush
- The crevice brush is used for cleaning narrow gaps e.g. window recess and cranks in the walls.
Illustration G
Manual nozzle
The manual nozzle is used for cleaning small areas that can be washed down, shower cubicles and mirrors.
- Push the manual nozzle onto the steam gun according to the spotlight nozzle.
Illustration F
- Pull the cover over the manual nozzle.
Floor nozzle
The floor nozzle is used for cleaning washable wall and floor coverings e.g. stone floors, tiles and PVC floors.
ATTENTION
Damage due to build-up of steam
Heat and moisture can lead to damage.
Check the heat resistance and steam effect on an inconspicuous area using a minimal volume of steam prior to use.
Note
Detergent residue or care emulsions on the surface to be cleaned can lead to streaks during steam cleaning, which will disappear however once these have been used several times.
We recommend sweeping the floor or vacuum cleaning it before using the device. In this way the floor will be cleared of dirt and loose particles before the wet cleaning commences. Work slowly on surfaces that are heavily soiled so that the steam has longer to take effect.
- Connect the extension tubes with the steam gun. Illustration H
- Push the floor nozzle onto the extension tube. Illustration I
- Fasten the floor cleaning cloth to the floor nozzle. a Place the floor cleaning cloth with the hook and loop fastener strips pointing upwards on the floor. b Place the floor nozzle onto the floor cleaning cloth, applying slight pressure. Illustration J The floor cleaning cloth will stick to the floor nozzle of its own accord due to the hook and loop fastener.
Removing the floor cleaning cloth
- Place one foot on the bottom corner of the floor cleaning cloth and lift the floor nozzle up.
Illustration J
Note
Initially, the floor cleaning cloth's hook and loop fastener strip is very strong and cannot be removed from the floor nozzle easily. After the floor cleaning cloth has been used several times and washed, it is easier to remove from the floor nozzle and it has reached the optimum adhesion.
Parking the floor nozzle
- Hang the floor nozzle in the park bracket during breaks in work.
Illustration O
Carpet glider
The carpet glider is used for freshening up carpets.
ATTENTION
Beware of damaging the carpet glider and carpet
Contamination on the carpet glider, as well as heat and moisture penetration, can result in the carpet being damaged.
Prior to the application, also check the heat resistance and impact of steam on the carpet at an insignificant spot using as small an amount of steam as possible.
Observe the cleaning instructions from the carpet manufacturer.
Prior to using the carpet glider, make sure that the carpet has been vacuumed and that stains have been removed.
Prior to application and following operating pauses, remove any possible water accumulation (condensate) in the appliance by means of evaporating the condensate into a drain (without floor cleaning cloth / with accessories).
Only use the carpet glider with a floor cleaning cloth on the floor nozzle.
Steam clean with a weak steam stage when using the carpet glider.
In order to prevent too much moistening and to avoid the risk of damage due to temperature effects, do not direct the steam continuously onto one spot (maximum 5 seconds).
Do not use the carpet glider on deep-pile carpets.
Fastening the carpet glider to the floor nozzle
- For fastening the floor cleaning cloth to the floor nozzle, please refer to chapter Floor nozzle. Illustration J
- Using a little force, allow the floor nozzle to slide into the carpet glider and engage there.
Illustration K
- Start cleaning the carpet.
Removing the carpet glider from the floor nozzle
CAUTION
Beware of burns to your feet
The carpet glider can heat up during the steaming process.
Do not operate or remove the carpet glider bare-footed or using open sandals.
Only operate or remove the carpet glider using suitable footwear.
- Press the strap on the carpet glider downwards using the front of toe-capped shoes.
- Lift the floor nozzle upwards.
Illustration J
Care and service
Descaling the steam boiler
Note
Since lime clogs the appliance, we recommend descaling it based on the number of times the water reservoir is filled, as specified in the table (TF = tank fillings).
| Hardness range °dH | mmol/l TF | |||
| I soft 0 | -7 0-1.3 100 | |||
| II Med | um 7-14 | 1.3-2.5 | 90 | |
| III | Hard | 14-21 | 2.5-3.8 | 75 |
| IV | Very hard | >21 | >3.8 | 50 |
Note
Your water board or municipal utilities authority can provide information on the hardness of tap water.
ATTENTION
Damaged surfaces
The descaler may corrode sensitive surfaces.
Fill and empty the appliance carefully.
- Switch off the device; see chapter "Switching off the device".
- Allow the device to cool down.
- Drain the water reservoir.
- Remove the accessory/accessories from the accessory storage area.
- Open the maintenance lock. To do this, place the open end of an extension tube on the maintenance lock, insert it into the guide so it engages, and open it.
Illustration R
- Drain the water completely out of the steam boiler.
Illustration S
ATTENTION
Appliance damage due to descaler
An unsuitable descaler or incorrect dosing of the descaler may damage the appliance.
Only use KARCHER descaler.
Use 1 dosing unit of the descaler for 0.5I water.
- Apply descaler solution to the descaler according to the details.
- Fill the descaler solution into the steam boiler. Do not seal the steam boiler.
- Allow the descaler solution to take effect for approx. 8 hours.
- Drain descaler solution completely out of the steam boiler.
- Repeat the descending process if necessary.
- Rinse the steam boiler 2-3 times with cold water in order to drain all the descaler solution residue.
- Drain the water completely out of the steam boiler. Illustration R.
- Dry the mounting for the grid connection cable.
- Close the maintenance lock with an extension tube.
Care of accessories
(Accessories - depending on scope of delivery)
Note
The micro fibre cloths are not suitable for dryer.
Note
When washing the cloths, observe the instructions on the washing tag. Do not use any liquid softeners as this will affect the ability of the cloths to pick up dirt.
- Wash the floor cleaning cloths and covers at a max. temperature of 60°C in the washing machine.
Troubleshooting guide
Malfunctions often have simple causes that you can remedy yourself using the following overview. When in doubt, or in the case of malfunctions not mentioned here, please contact your authorised Customer Service.
WARNING
Risk of electric shock and burns
Trying to eliminate faults while the appliance is connected to the mains or has not yet cooled down is always dangerous.
Remove the mains plug.
Allow the appliance to cool down.
Reduced steam quantity
The steam boiler is scaled
- Descale the steam boiler.
The LED light is in quick flashing red and a signal tone sounds
No water in the water reservoir.
- Fill the water reservoir.
The steam lever cannot be pressed
The steam lever is locked with the child lock.
- Move the child lock forward.
The steam lever is released.
Long heating-up time
The steam boiler is scaled.
- Descale the steam boiler.
High water output
The steam boiler is scaled.
- Descale the steam boiler.
Technical data
| SC 4 Deluxe EasyFix | SC 4 Deluxe EasyFix Premium | ||
| Electrical connection | |||
| Voltage V 220 - | 240 | 220 - 240 | |
| Phase ~ 1 1 | |||
| Frequency Hz 50 50 | |||
| Protection class IPX4 IPX4 | |||
| Protection category I I | |||
| Device performance data | |||
| Heating capacity | W 2200 | 2200 | |
| Maximum operating pres-sure | MPa 0.4 | 0.4 | |
| Heating-up time | Min-utes 3 | 3 | |
| Continuous steaming | g/min 60 60 | ||
| Maximum steam blast | g/min 150 | 150 | |
| Filling quantity | |||
| Water reservoir | 1 | 1.3 | 1.3 |
| Steam boiler | 1 | 0.5 | 0.5 |
| Dimensions and weights | |||
| Weight (without accesso-ries) | kg 6.8 | 6.8 | 6.8 |
| Length | mm 400 | 400 | 400 |
| Width | mm 270 | 270 | 270 |
| Height | mm 300 | 300 | 300 |
Subject to technical modifications.
Contents
General remarks 16
Before treating with the appliance, it is advisable to check the time. It is important to note that the exact time of the event is not precisely defined.
No water in the water tank.
- Fill the water tank.
The steam lever cannot be pressed
(depending on machine type)
Reduced steam output
Do not operate the appliance without water in the boiler. Do not use the appliance for purposes other than those described in the manual. Do not use the appliance for ironing clothes or fabrics that are not specified, e.g., silk, etc.
- For cleaning the appliance, wipe it with a damp cloth and then dry the surface.
Note on surfaces
The cleaning solution may cause damage if it comes into contact with sensitive surfaces.
Electrical and electronic devices often contain materials suitable for recycling, and often such components as batteries,
accumulators and oil, which, if handled incorrectly or disposed of improperly, may pose a potential hazard to health and the environment. Nevertheless, these components are necessary for the proper operation of the device. Devices marked with this symbol are prohibited from being disposed of with household waste.
Information for end users (REACH)
If the water level is insufficient, the indicator light quickly flashes red and an audible signal sounds.
Note
The water pump fills the steam reservoir at certain intervals. If the filling is successful, the LED indicator quickly flashes red.
Note
If there is no water in the steam reservoir or if it is too little, the pump is activated, which supplies water from the tank for steam generation.
The filling process may take several minutes.
WARNING
Device checks
When using water of unsatisfactory quality, clogging with salts and damage to the water level indicator may occur.
Do not use distilled water only. Use a maximum of 50% distilled water mixed with tap water.
Do not use condensation water from the tumble dryer.
Do not pour in collected rainwater.
Do not add cleaning agents or other additives (e.g., fragrances).
1. Fill the water tank with tap water or a mixture of tap water and distilled water (max. 50% distilled water). The appliance is ready for use.
Switching off the appliance
- Set the switch to the "Off" position. Figure L Appliance switched off.
- Press the lever down until steam stops coming out.
Figure M
The steam reservoir is in a pressureless state.
- Slide the lock back. The steam release lever is locked.
- Pull the mains plug out of the socket.
- Empty the water tank.
Rinse the steam reservoir.
Check the steam reservoir of the device after every tenth refill of the tank.
- Turn off the device, see the chapter Turning off the device.
- Let the device cool down.
- Empty the water tank.
- Remove the accessories from the accessory compartment.
- Open the lock for technical maintenance. To do this, set the opening key of the extension tube on the lock of the inspection opening, fix it in the guide, and turn.
Figure R
- Fill the steam reservoir with water and shake it vigorously back and forth, this frees it from lime scale residues that have settled on the bottom of the steam reservoir.
- Completely pour the water out of the steam reservoir. Figure S
Emptying the steam reservoir
You can pour the water out of the boiler in CLE mode:
- 1. Empty the water tank. 2. Turn on the device.
- Press the steam switch 3 times until the indicator light flashes green and a long acoustic signal sounds.
- Steam is available until the water in the steam reservoir runs out.
Storing the device
- Attach the hose to the holder and accessories of a larger size.
- Install the hand nozzle and the fine nozzle on the extension hose.
- Secure the large round brush on the fine nozzle.
- Hang the nozzle for the floor on the parking bracket.
Figure O
- Wind the cable and store it in the accessories compartment.
Figure Q
- Wind the steam hose and store it in the accessories compartment.
Figure P
- Place the small round brush and the brush for upholstery in the accessories compartment.
- Store the device in a dry place protected from frost.
Important instructions for use
Floor cleaning
Before using the device, we recommend vacuuming or sweeping the floor. Thanks to this, the floor will be free of dirt and debris before wet cleaning.
Upholstery cleaning
Before processing the fabric, it is mandatory to check the fabric for transferability, by hiding a section: treat the fabric with steam, let it dry, and then check for changes in color or shape.
Cleaning surfaces with paint or varnish coatings
WARNING
Damaged surfaces
Steam can damage varnish, polished wood, polymer coatings, or paint and stickers on edges. Do not direct steam at glued edges, as this may cause the glue to come off. Do not use the device for cleaning unvarnished wooden and parquet floors. Do not use the device for cleaning painted or plastic-coated surfaces, such as kitchen and living room furniture, doors, and parquet.
- To clean such surfaces, briefly treat a cloth with steam and wipe the surface with it.
Cleaning glass
WARNING
Glass and damaged surfaces
Steam can damage varnished parts of window frames, and at low outside temperatures, it can cause cracks on the surface of window panes and their breakage.
Do not direct the steam jet at varnished parts of window frames.
At low temperatures, heat the window panes, briefly treat the surface of the pane with steam.
Clean the window with a hand squeegee and cloth. To remove water, use a squeegee or wipe the surface dry.
Use of accessories
Steam gun
The steam cleaner can be used without accessories in the following cases:
- Removing minor creases on textile items: treat the textile item with steam from a distance of 10-20 cm. Wet dusting: briefly treat the item with steam and then wipe it with a cloth.
Precision nozzle
The precision nozzle is intended for cleaning hard-to-reach areas, joints, mixers, drains, sinks, toilets, and radiators. The closer the precision nozzle is to the dirty area, the more effective the cleaning. This is because the temperature and amount of steam are maximum at the point of exit from the nozzle. Stubborn limescale deposits can be treated with steam after applying a descaling agent. The exposure time of the cleaning agent is about 5 minutes, after which treat with steam.
- Attach the precision nozzle to the steam gun.
Figure F
Round brush (small)
The small round brush is suitable for removing stubborn dirt. Treating with the brush allows you to clean surfaces from stubborn dirt.
CAUTION
Damaged surfaces
The brush may scratch sensitive surfaces.
It is not suitable for cleaning varnished surfaces.
- Mount the small round brush onto the precision nozzle.
Figure G
Round brush, large
The brush is designed for cleaning large round surfaces, such as washbasins, showers, bathtubs, and toilet bowls, etc.
WARNING
Damaged surfaces
The brush may scratch delicate surfaces.
It is not suitable for cleaning delicate surfaces.
- Attach the large round brush to the telescopic pole.
Figure G
Telescopic pole
The brush is suitable for removing stubborn dirt, cleaning corners, joints, etc.
- Attach the brush to the telescopic pole, matching the brush's opening.
Figure G
Brush for cleaning
With the non-scratching attachment for carpets, you can clean carpets.
WARNING
Damage to carpets and non-scratching attachment for carpets
Abrasive pads for the carpet, as well as high temperature and humidity, can damage the carpet.
Before use, it is necessary to check the heat resistance and effect on the carpet in an inconspicuous place with a minimal amount of steam.
Follow the cleaning instructions from the carpet manufacturer.
Make sure that the carpet is clean from dust and stains before using the steam glide pad for the carpet.
Before use and after breaks in work, remove accumulated water (condensate) from the device by steaming (without touching the fabric or the pad's non-woven material).
Use the steam glide pad for the carpet only with the fabric for washing floors on the floor nozzle.
Carry out steam cleaning when using the steam glide pad for the carpet at a low steam level.
Do not direct steam continuously at one point (no more than 5 seconds) to avoid excessive exposure and risk of damage due to high temperature.
Do not use the steam glide pad for the carpet on carpets with high pile.
Attaching the steam glide pad for the carpet to the floor nozzle
- Attaching the washing fabric for floors to the floor nozzle: see the floor nozzle section. Figure J
- Insert the floor nozzle with a slight pressure into the steam glide pad for the carpet until it clicks. Figure K. Then attach the carpet glide.
Removing the steam glide pad for the carpet from the floor nozzle
CAUTION
Hot surfaces
The appliance may heat up if steam is missing.
Do not use or use the steam nozzle without the attachment or in open shoes. Use the steam nozzle only with the attachment in appropriate shoes.
Damaged surfaces
The solution for removing limescale may damage delicate surfaces.
Fill or empty the appliance carefully.
- Switch off the appliance, see chapter Switching off the appliance.
- Let the appliance cool down.
- Empty the water tank.
- Remove accessories from the accessory compartment.
- Open the lock for technical maintenance. To do this, insert the open end of the extension tube into the lock catch inspection opening, fix it in the guide and turn.
Figure R
- Empty the water from the steam reservoir. Figure S
CAUTION
Damage to the appliance due to descaling agent
Using an unsuitable descaling agent and incorrect dosing may lead to damage to the appliance.
Use a descaling agent for removing limescale from KARCHER.
Use 1 dose of agent for removing limescale per 0.5 L of water.
7. Use the descaling solution according to the instructions. 8. Pour the descaling solution into the steam boiler. Do not close the steam boiler. 9. Leave the descaling solution to act for about 8 hours. 10. Pour the descaling solution out of the steam boiler. 11. Repeat the descaling process if necessary. 12. Rinse the steam boiler 2 or 3 times with cold water to remove all residues of the descaling solution. 13. Empty the water from the steam boiler. Figure R
Troubleshooting
Faults often have simple causes, so you can fix them yourself using the following overview. If in doubt or if faults not described here occur, contact the authorized customer service.
DANGER
Danger of electric shock and injury. Only carry out troubleshooting on a device that is unplugged from the mains or disassembled.
Pull out the mains plug.
Let the device cool down.
Limited steam output
Limescale has formed in the steam boiler.
- Remove limescale from the steam boiler.
The indicator lamp flashes red quickly and an audible signal sounds.
There is no water in the water tank.
Fill the water tank with water.
It is possible to press the steam lever.
The steam lever is locked. Press the unlock button.
Slide the lock away from the lever. The steam lever is unlocked.
Long periods of use
Scale has formed in the steam boiler.
- Remove the scale from the steam boiler.
Significant water discharge
Scale has formed in the steam boiler. - Remove the scale from the steam boiler.
Technical specifications
SC4 SC4
Deluxe Deluxe
www.kaercher.com/REACH
You can find information about the ingredients of the substances at: www.kaercher.com/REACH
Accessories and spare parts
Use only original accessories and original spare parts. They ensure that the appliance is safe and trouble-free to operate.
Spare parts and accessories. Part 1. Measure: www.kaercher.com.
Scope of delivery
The scope of delivery is shown on the packaging. When unpacking, check the contents for completeness. If accessories are missing or if there is transport damage, contact your distributor.
Warranty
For every device, the warranty conditions of our authorized distributor apply. Possible damage to the device will be repaired free of charge within the warranty period if it is due to a material or manufacturing defect. In case of warranty claims, contact your distributor or the nearest authorized service center, presenting the proof of purchase. (Address, see back page)
Safety devices
SAFETY
Safety devices and their function
Safety devices serve for your protection.
Never modify or bypass safety devices.
Symbol on the device
(see device)
| Опасноct OT ИЗgarян, NOВьрховская на уреда се наgoresses в no Враиме на работа | |
| Опасноct OT ИЗgarян ot napata | |
| Прочete пькововсковто за ekсплοатουя |
Pressure regulator
The pressure regulator keeps the pressure in the high-pressure system constant. The maximum working pressure is switched off when the maximum working pressure is reached. If the pressure in the high-pressure system drops due to the release of the trigger, the device switches on again.
Thermal overload protection
The boiler thermostat prevents the device from being interrupted. If the pressure regulator on the boiler thermostat fails in the event of a device malfunction, the boiler thermostat switches off the device. For resetting the boiler thermostat to its initial position, contact KÄRCHER customer service.
Boiler thermostat
The boiler thermostat switches off the heating in the event of a fault, e.g. if the steam iron boiler runs out of water and the temperature in it rises. Once water has been added, the device is ready for operation again.
Service valve
The service valve closes the steam iron boiler when the pressure is released. The service valve is also a safety valve for pressure relief. If the pressure regulator is defective and the steam pressure in the steam iron boiler rises, the safety valve opens and the steam is released through the service valve. Before putting the device back into operation, contact KÄRCHER customer service.
Device description
This operating manual describes the maximum equipment. Depending on the model, there are differences in the scope of delivery, see the packaging.
See the illustrations on the graphics page. Figure A
Steam iron ② Selection button ③ Child safety lock ④ Carrying handle ⑤ Water tank ⑥ Mains cable with plug ⑦ Indicator light - OFF ⑧ Minimum steam level ⑨ Medium steam level
10 Maximum steam level 11 Service valve 12 Filling opening for the water tank 13 Water filler cup 14 Steam iron pistol (15) Steam nozzle 16 Descaling button (17) Child safety lock 18 Steam iron brush 19 Jet nozzle (20) Brush, fine (21) Brush, coarse 22 **Filling opening 23 Brush for the jet nozzle 25 Microfiber cover for the jet nozzle 26 Descaling pin (2 pieces) (27) Descaling button 28 Filling opening 29 Connection to the self-cleaning function 30 Microfiber cover for the floor (1 piece) (31) Microfiber cover for the floor (2 pieces) 32 **Accessory for cleaning
**SC 4 Deluxe EasyFix Premium
Assembly
Mounting accessories
- Place the opening of the accessory on the steam iron pistol and press until the locking button on the steam iron pistol engages.
Figure F
- Place the accessory on the open end of the nozzle on the current side.
Figure G
- Insert the extension tubes with a simple push.
a Place the first extension tube on the nozzle and push it until the clips engage for locking the extension tube.
The extension tube is connected.
b Place the second extension tube on top of the first extension tube.
The extension tubes are connected.
Figure H
- Place the accessory for the lower part of the nozzle on the free end of the extension tube.
#
The accessory is connected.
The device is ready for operation.
Switching off the device
- Set the switch on the device to "OFF". Figure L
The device is switched off.
- The boiler is ready for use. It is forbidden to use it before it is fully prepared.
Figure M
Distribute the boiler freely and without pressure.
3. The safety valve for the boiler. It is ready for adjustment. 4. Remove the cover of the boiler. 5. Adjust the pressure.
Filling the steam boiler
Fill the steam boiler with water through the funnel until the water level is full.
- Close the funnel, then open the main valve.
- Leave the boiler to cool down.
- Adjust the pressure
- Check the tightness of the connection.
- Open the inspection hole. For this, place the open end of the hose over the inspection hole, fix it in the water and then close it.
- Fill the steam boiler with water and heat it well. Then the pipes from the boiler, which are laid on the floor, will expand.
- Drain the water from the steam boiler. Figure S
Draining the steam boiler
The water in the boiler can be drained through the CLE valve.
- Water reservoir.
- Turn on the device.
- Press the button for 3 seconds until the LED lamp lights up in green and you hear a sound signal.
- The device is on as long as there is water in the steam generator.
Storage device
- Place the accessories in the large storage compartment.
- Place the flat nozzle and the jet nozzle on each accessory.
- Attach the large brush to the jet nozzle.
- Fill the water tank in the parking position. Shut off
- Wind the cable and store it in the accessory compartment. Q
- Wind the steam hose and store it in the accessory compartment. P
- Store the small brush and the brush for fugues in the accessory compartment.
- Store the device in a dry and frost-protected place.
Important usage instructions
Cleaning the floor surfaces
IpenopbUbaMe npEn n3non3ovaHe Ha ypeDa noBt da ce n3MeTe nn Da ce Noocn C npaxocmykaKa. Taka Ooie npEn BnaXHOTo NOcHCTBaHe NOBt Ce OCBO6OxJaBA OT MPbCOTnN CBO6OHN YacTnN.
OcbexaBaHe Ha TeKCTnJ
IpeNi TpEtnpaHe C ypeDa BnHaH npoBepBaIte yCTOnuNBOCTTa Ha TEKCTUINHTe TbKaHn Ha cKPNTO MRCTo: O6NeTe TEKCTUINHaTa TbKaHc napa, ocTaBeTe da N3CbxHe H CneD TOBA npoBepTe 3a IpOMEH B CBEta INIΦoMaTa.
NouchBaHe Ha noBbpxHOCTn c nokpnTne
IINJaKpAHN NOBbpxHocTN
BHIMAHHE
Poepeenuoebpxhocmu
Napama moke da pa3meopu 8ocbk, Mebehen naK, u3kycmbeHu nokpumua un6ou, KaKmo u neunomo, c Koemo ca 3aIenHmu Me6nHume KaHmoe.
He hacoueaume napama kbl menehu Me6enHu KaHMOE, mbu kamo nenulomo, c Koemo ca 3aIeneHu, MoKe da ce pa3meOpu.
He u3non3aume yeda 3a noucmbahe Ha nakupaHu bpehu nodoe unnapkm.
He u3non38aume ypeda 3a noucmeane Ha nakupaHu unu cna6dehu c u3kycmeeho nokpumue noebpxhocmu, kamo Hanp. KxheHcku U cmaHn Me6enu, epamu unu napkem.
- 3a NOHcTBaHeTo Ha Te3n NOBbpxHOCTn O6JeTte 3a KpaTKO eHa KbPna C npapa Nn36bPwTe NOBbpxHOCTnTe C HeJ.
NouchBaHe Ha CTbKJIO
BHIMAHNE
CyueneHa hcmbknomo u noepedeHu noebpxHocmu
The frame can be heated at the glazing points and at low temperatures to relieve stress in the glazing joint, and thus also to prevent cracking of the joint.
Do not heat the frame at the glazing points.
At low temperatures, preheat the glazing joint, without touching the joint surface with the flame.
Surfaces to be cleaned
The brush can be used on painted surfaces.
It is not suitable for cleaning textured surfaces.
- Mount the small brush on the current side of the nozzle.
Figure G
Large brush
The large brush is suitable for cleaning large contaminated surfaces, e.g. floors, walls, bathtubs, kitchen surfaces, etc.
ATTENTION
Surfaces to be cleaned
The brush can be used on painted surfaces.
It is not suitable for cleaning textured surfaces.
- Attach the large brush to the current side of the nozzle.
Figure G
Blow gun
The blow gun is suitable for cleaning filters, ventilation openings, pipes, etc.
- Mount the blow gun onto the air hose with the pointed side of the gun.
Figure G
Dust nozzle
- The dust nozzle is used for cleaning tight spaces, e.g., between radiators and walls.
Figure G
Flat nozzle
The flat nozzle is suitable for cleaning large surfaces, e.g., cabinets or ceilings.
- Attach the flat nozzle in the same way as the pointed nozzle onto the spray gun.
Figure F
- Slide the cover over the flat nozzle.
Head nozzle
The head nozzle is suitable for cleaning hard-to-reach areas, e.g., stone floors, laminate floors, or PVC floors.
The steam may cause burns.
Strong steam and handling may cause burns.
Misuse of the steam iron and the action of steam on the ironing board may cause burns.
Warning
Residues from detergents or fabric softeners on the ironing board surface, which is not ironed, can
cause stains that are difficult to remove with repeated use. Before using the iron, it is recommended to clean or vacuum the ironing board. This way, the ironing board will be free of dust and loose particles. For heavily soiled surfaces, treat them well so that the steam action lasts longer.
1. Insert the steam hose into the steam generator.
Figure H
- Place the iron on the steam generator.
Figure I
- Attach the iron cord to the iron. a. Attach the iron cord with the hanging loops on top of the iron.
b. With light pressure, place the iron on the iron cord.
Figure J
The iron is secured with the cord to the iron, which automatically connects to the iron.
Attention to the door hinge
- Place one hook on the service bracket with the hook of the door hinge, then push the door upwards.
Figure
Instruction
In the initial operation of the door hinge, it is very strong and may likely detach from the door. After repeated use and cleaning of the door hinge, it may detach from the door, and optimal adhesion is achieved.
Parking the door
Sensitive surfaces
The detergent may damage sensitive surfaces.
Clean and rinse carefully.
- Clean the device, rinse the device.
- Let the device cool down. 3. Empty the water reservoir. 4. Remove the accessories from the accessory compartment.
- Open the inspection valve. For this, place the open hook of the suction hose onto the inspection valve, immerse it in water, and fill it.
Figure R
Installing the accessories
Current information about components is available at: www.kaercher.com/REACH
The original spare parts and original accessories are guaranteed to ensure safe and trouble-free operation of the device.
Information about the device and spare parts can be found at www.kaercher.com.
Scope of delivery
The accessories included with the device are indicated on the packaging. When unpacking the device, check that the accessories are complete. In case of missing parts or damage incurred during transport, please contact the dealer who sold the device.
Warranty
The warranty conditions applicable in each country are set by the authorized distributor in that country. We will remedy any malfunctions free of charge within the warranty period, provided that the cause of the malfunction is due to material defects or manufacturing faults. In the event of a claim within the warranty period, please contact your dealer or the nearest authorized customer service center with the proof of purchase. (See address on the back)
Safety devices
CAUTION
Removing or modifying safety devices
Safety devices are provided for your protection. It is forbidden to modify or bypass safety devices.
Symbols on the device
(depending on device type)
Do not leave the collected dirty water standing.
It is forbidden to add cleaning agents or other additives (e.g., fragrances, deodorizers) to the water.
Fill the water tank using the filling method.
- Place the tank for water vertically. Picture B
- Fill the tank for water with tap water or significantly tap water through a maximum of 50% distilled water, holding it vertically.
- Insert the water tank and press it down until it clicks.
Filling the water tank directly on the device
- Through the opening of the water tank for filling water, pour tap water or significantly tap water with a maximum of 50% distilled water.
Picture C
Removing the device
Indicator
If the water reservoir is empty or has little water, the pump that supplies water from the water tank to the steam reservoir will start. The filling process may take several minutes.
Indicator
When the 60-second device short-circuit protection is activated, the pump will be quiet.
Do not use collected water.
It is forbidden to use chemical agents in other containers (for example, aromatizers).
- Fill the water tank with tap water or significantly tap water with a maximum of 50% distilled water.
Pnpctpi roTOBm do BVKOpncTAHn.
BmKHeHH npncTopo
- BCTaHOBbTN BmMkaU npucTpoU B nIOJoxKeHHA «OFF»
MaJIIOHOK L
ПпстpiВьмКнeHo.
- Hatnckatn BaxiNb noaui napn dOn, DOKn He npnnHtbcra Buxid napn.
MaJIHOHOK M
Tnck y napobomy pe3epByapi BiicytHi.
- BiCyHyTu Ha3a3 3axnCT BiD iTei. Baxkib noaui napn 3a6koBaHo.
- Bntarhytn wTeNceJbHy BNkny 3 po3eTkn.
- CnpoXnTb 6ak nIy BoDn.
PozraJkyBaay KInnMIB
3a donomoro1o po3rnaJxvBaay KINIMIB MOKHa NOKpaUyBaTn 3OBHlHiBnIgNIMIB.
yB4A
NookoeHHa KUIma ma po3naQyBa a KUnumie
Boiling can cause damage, and high temperature and humidity can lead to damage of the kettle.
In addition, before using, check the integrity of the kettle and its effect on it with the help of the instructions from the kettle manufacturer.
Make sure that before using, the kettle was cleaned with a cloth and no stains were left.
Before using and after each use, it is necessary to check for possible accumulations (condensation) in the device (without water or with additional equipment).
When using the kettle, use only with water. Do not use the kettle without water. When using the kettle, use only the required amount of water.
Do not operate for a long time in one place (no more than 5 seconds) to avoid strong heating and risk of damage from high temperature.
Do not use the kettle on surfaces with high moisture.
Attaching the kettle to the surface
- Attaching the kettle to the surface, see the chapter on surface attachment.
Figure
- Lightly press and fix the surface attachment in the kettle. Figure K
- Start cleaning the kettle.
Remove the kettle from the surface attachment
SURFACE
They are
The device is designed for use with cold water only.
Do not use or store the device in damp places or in open air.
Use and store the device only in a heated room.
- The pressure switch is set for a certain pressure. 2. Adjust the pressure for the device.
MAINTENANCE
Maintenance and technical service
Removing scale from the steam boiler
Instruction
Since scale forms in the device, we recommend filling the tank with distilled water (DW = distilled water) as indicated in the table, to remove scale from the device.
| ДIANAZH TVERDOSTI | dH | Мольь/л | 3Б | |
| I M'Яка | 0-7 0-1,3 100 | |||
| II | середny | 7-14 | 1,3-2,5 | 90 |
| III | ТВерда | 14-21 | 2,5-3,8 | 75 |
| IV | Дужete Верда | >21 | >3,8 | 50 |
Instruction
You can obtain information about water hardness from the water utility or local municipal services.
ATTENTION
Damaged surfaces
The device for removing scale may damage surfaces.
Fill and empty the device alternately.
- BmKHyTn npucptpi, nVB. rnaBy BumKHeHH npucmpoio.
- DAtn npictroO oxoJohTyN.
- CnpoXnTn 6ak dIy BOIDN.
- DiCTaTI npIJIaIaIaI3 BiDciKy.
- BiKpnTn 3aRnykU pyTeXHiHOro obCnyROBaHHraBcBO BCTaBHTn KHeu noDObKyBaJIbHOI Tpy6Kn B 3aTBop IHcneKuiHoro OTBOPy, 3aFikCyBaTu II B HApPmHi Ta HaBHTn. MaJIOHOK R
- Повсгю зин Body 3 napOBOro pe3epByapa.
ManpoHok S
yB4A
Nowokdkenn npucmpo3ac6om dna budaneHHn HAKUNY
BukopucmaHHaHnepudamHOz3ac06y dna buaeneHHaKuny, a maKoX uOzo HnpaeunbHe do3oyeaHHaMoxym npu3eodumdo nowkodKeHH npucmpoIO. Bukopucmoyeamu buKnUoHNo 3aci6d nra buaeneHHaKuny KARCHER.
Iodamau 1 do3amop 3acoby Ha 0,5 n eodu.
- BnKOpncToBvBaTn po3uH nIaBuaJeHHaKaNpy BiINObiHDo iHCTpykui.
- 3aJIHTn po3uHn IJIY BuaIaHeHHaHKIny B napOBn pe3epByap. He 3akPbBaTu npOBn pe3epByap.
- 3aIIuHTn po3HH nIy BuaJIeHnHaKIny np6Jn3HO Ha 8 roINn dnn iI. 10.Повсichtу злптю розундя вдаленинся napoboro pe3epbyapa. 11.Якwo notpi6Ho, noBtOpTu npoec BuaaeneHHaKauny.
- Ppomntn napobn pe3epByap 2 a6o 3 pa3n XOIOHO BOIOO, IO6 BuaJIHTN 3aIIuKIN p03HHy dIy BuaJIeHHHaKIny. 13.Повсгюзпун Body 3 napOBOro peЗерByapa. ManJOHOK R
- Drying cabinet for cable network equipment. 15. Before starting technical maintenance, disconnect the supply pipe.
Accessories
- Fabrics and items should be dried in the machine at temperatures not exceeding 60°C.
Troubleshooting
Malfunctions often have a simple cause that can be eliminated independently using the instructions below. If in doubt or in case of unspecified faults, contact an authorized service center.
WARNING
Danger of electric shock and fire hazard
When the device is connected to the electrical network or has not cooled down, it is forbidden to eliminate faults.
Unplug the device.
Let the device cool down.
Reduced steam output
Scale in the steam reservoir.
Remove scale from the steam reservoir.
The indicator light flashes frequently
First, check the sound signal.
Ybaizi HemaebOdi.
- HanobHHTn 6ak JnBODn.
BaxiNb noaqi napn 6inbue He HataNcKaTbcra
Baxijb noaui napi 3a6lokoBaHn 3axntom BiD iTei.
NocyuTn 3axnt BiD iTei ynepei. Baxinb noaui napi po36nokoBaHO.
TpBane HarpibaHH
Hakim y napobomy pe3epByapi.
Bndaanitn haknn i3 napoBoro pe3epByapa.
Benvikn Bvxid BoDn
Hakun y napobomy pe3epByapi.
Budanitn hakni i3 napoBoro pe3epByapa.
TexhiHiXapaKTepeNCTnKn
| SC 4 | SC 4 |
| Deluxe | Deluxe |
| EasyFix | EasyFix |
| Premiu | |
| m |
EneKtpnue nikNoeHHa
| Hanpyra | B | 220 - | 220 - | ||
| 240 | 240 | ||||
| Φa3a | ~ | 1 | 1 |
Uactota 5050
CTyniHb 3axnctTy IPX4 IPX4
Parameters of the working characteristics
By generator
Water supply in the operating mode of the boiler:
- Water for the main circuit.
- Dry steam.
- The dry steam valve must be opened slowly and the pressure must be maintained. 4. When the generator is heated, this is a normal phenomenon.
Dry steam installation
- Install the fittings into the holes intended for them.
- Tighten the fittings with the appropriate wrench to 1 turn.
- Tighten the fittings with the appropriate wrench.
- Install the fittings into the holes intended for them. Figure O
- Each fitting must be sealed with a sealant intended for fittings. Figure Q
- This fitting must be sealed with a sealant intended for fittings. Figure P
- Sharpening is applied to the contours of the image to make them more clearly defined.
- We will store the device in a dry and cool place.
Cleaning and maintenance
Cleaning the device
Before cleaning the device, disconnect it from the power supply and wait for it to cool down. Do not use abrasive or corrosive cleaning agents.
Cleaning the lens
Clean the lens with a soft, dry cloth. If necessary, use a lens cleaning solution: apply a small amount to the cloth, then gently wipe the lens.
Cleaning the battery and charger
ATTENTION
Charging the battery
Do not use the device if the battery, charger, or cables are damaged.
If the device is damaged, the battery may leak.
Do not expose the device to rain or moisture.
Do not use the device if the battery or cables are damaged, or if the device has been dropped or damaged.
- For this type of gas, the material must be resistant to it, and the surface must be treated accordingly.
Type of gas.
ATTENTION
Do not use the device in explosive atmospheres.
In this case, the device must be protected from the effects of high temperatures and possible contact with water. In this case, the device must be protected from the effects of high temperatures and possible contact with water. In this case, the device must be protected from the effects of high temperatures and possible contact with water.
The device must be protected from the effects of high temperatures and possible contact with water. In this case, the device must be protected from the effects of high temperatures and possible contact with water.
Before cleaning the device, disconnect it from the power supply and allow it to cool down. Do not immerse the device in water or other liquids. Do not use abrasive cleaners or solvents.
Cleaning the device
This section
This device can be used in the following environments without any issues:
For quick drying: place the device at a distance of 10-20 cm. For thorough drying: place the device on a flat surface and let it dry completely.
Point cleaning
Point cleaning can be used to clean keyboards, printers, monitors, switches, sockets, connectors, and radiators. Point cleaning is most effective when the surface is dirty, and the cleaning effect is low, so the temperature and these parameters are the lowest. When cleaning with a cloth, it is necessary to use a soft cloth and wipe gently. The soft cloth should be moistened with water and then wiped.
- Point cleaning is not recommended.
Figure G
The chain must be attached to the hook using the ring. The hook is designed for the chain.
ATTENTION
Closed hook
The hook is designed for connecting the chain links. The hook is not intended for lifting.
- Attach the chain to the hook correctly to avoid damage.
Figure 6
Large chain hook
For large chain hooks, the safety cable, bath, and large chain hooks are designed for cleaning the bathtub.
ATTENTION
Accessories for the hook
The accessories must be checked regularly for wear and tear. If the hooks are damaged or worn, contact the service center.
DANGER
Use with caution and electric shock hazard
When using the hook in wet or damp conditions, the hook must be kept dry.
The generator is turned on.
The generator is turned off.
The red and blue lights indicate the presence of voltage.
The water is drained.
This device is a pressure gauge.
This device is connected to the compressor.
- The pressure is released from the tank. This device is turned off.
The generator is turned on.
The generator is turned off.
The water level is low.
The generator is turned on. The generator is turned off.
Technical manuals
| SC 4 Deluxe EasyFix | SC 4 Deluxe EasyFix Premiu m | ||
| Эльекгжелicîne кosity | |||
| КерneyВ220- | 240 | 220 - 240 | |
| Фаза~1 | 1 | ||
| Жилік Гú 50 50 | |||
| Корганыс Клась | IPX4 | IPX4 | |
| КорRAY Клась | I | ||
| Курьлфынбий Бимділiri Tураьы Деректөр | |||
| Жыліч КуаТы | Вт | 2200 | 2200 |
| Мakсимал жуMbіс | Мпа | 0,4 | 0,4 |
| Кысымы | |||
| Кызу укыты | Минут | 3 | 3 |
| Тар | |||
| Узідікіз 6-byлал жібіту | r/MиH | 60 | 60 |
| Мakсимал 6у有很大ульci | r/MиH | 150 | 150 |
| Сынымділів | |||
| Су 6агы | I | 1,3 | 1,3 |
| Бу reнераTopы | I | 0,5 | 0,5 |
| Θлшем'dеріmen салмafы | |||
| Салмafы(Tолымданшыларсыз) | КГ | 6,8 | 6,8 |
| Yзындаыfы | MM | 400 | 400 |
| Енi | MM | 270 | 270 |
| Биіktіri | MM | 300 | 300 |
Technical specifications are provided.
Jabul ala> alwog ogo jolllgj
pU JJIabUl a> alw g
2j = 0| j : j|
jglbcl>1j0j
Jusgio Jolll
JlJI aIe JcJllKJI alljLp
sllljic
Jusoo Jusu J>oo
JlJ>o no Lwksll allj!
auiu
| SC 4 Deluxe EasyFix Premium | SC 4 Deluxe EasyFix | ||
| الصحيى | |||
| -220 | -220 | ف��得了 | الصحيى |
| 240 | 240 | ||
| 1 | 1 | ~ | العربي |
| 50 | 50 | شامز | الترجمة |
| IPX4 | IPX4 | العربية | |
| الرّب | الرّب | العربية | |
| الإستعمال | |||
| 2200 | 2200 | بُلْع | الإستعمال |
| 0.4 | 0.4 | مُّلُّلُّلُّلُّلُّلُّلُّلُّلُّلُّلُّلُّلُّلُّلُّلُّلُّلُّلُّلُّلُّلُّلُّلُّلُّلُّلُّلُّلُّلُّلُّلُّلُّلِ | |
| 3 | 3 | دَالَّج | العربية |
| 60 | 60 | /\(مُّلُّلُّلُّلُّلُّلُّلُّلُّلُّلُّلُّلُّلُّلُّلُّلُّلُّلُّلُّلُّلُّلُّلُّلُّلُّلُّلُّلُّلُّلُّلُّلُّlc) | الإستعمال |
| 150 | 150 | /\(مُّلُّلُّلُّلُّلُّلُّلُّلُّلُّلُّلُّلُّلُّلُّلُّلُّلُّلُّلُّلُّلُّلُ" | العربية |
| الصحيى | |||
| 1.3 | 1.3 | الرّب | العربية |
| 0.5 | 0.5 | الرّب | العربية |
| العربية | |||
| 6.8 | 6.8 | سَعَمَ | (العربية) ب直升玲玲玲玲玲玲玲玲玲玲玲玲玲玲玲玲玲玲玲玲玲玲玲玲玲玲玲玲玲玲玲玲玲玲玲玲玲玲玲玲玲玲玲玲玲玲玲玲玲玲玲玲玲玲玲玲玲玲玲玲玲玲玲玲玲玲玲玲玲玲玲玲玲玲玲玲玲玲玲玲玲玲玲玲玲玲玲玲玲玲玲玲玲玲玲玲玲玲玲玲铃 |
| 400 | 400 | مُّلُّلُ | العربية |
| 270 | 270 | مُّلُّلُ | العربية |
| 300 | 300 | مُّلُّلُ | العربية |
Jzll aol ailllgloll
J
10gla//u/2gj a//g/aj//ol//o//a//
4
- SΔAOB = 1/2 · OB · AB = 1/2 × 4t
- a : a x,y,z
- ägws
__SUPPIMER__
- j j
19 a 2011
Therefore a1 = 2/3, a2 = -4/3, b1 = 5/8, b2 = -3/4
- |x,y| = 2 |y,z| = 2 |z,1|
4a
ρ · 2δl//
yll lsc slwll poio yu j
gogc/lll lll lllllllllllll
Slll plxwulgo Jgj bui
jI jI I Jg aJU U g aJU 1
a
Jgbl ojol jlll p 1
1.1
a>la|g
.2
a>la|ojgd
aall glg jc aaiil alaaal lalll
20-10 aIwJLsUlll aIe:
cogoojolwaoa:abllg j
a50.9>5%
- c g > c θg
∴ Sµ β - Sµ β = 0
| سُفَرِبْلَبْنَهُّةِ | ⁄⁄ |
| الإستعمالِلَبْنَهُّةِ | ⁄⁄ |
| الترجمةِلَبْنَهُّةِ | ⁄⁄ |
(4) a = b + c
14
15
16
17]UabUl
(18)
19, baijui
(20) (a,20).
②()o.
20gai
231g>allolu
24.59.2 Cioio
(25)s9aJU Cua
(26)
27
28
- U
30 31 32
SC 4 Deluxe EasyFix Premium**
#
claxall
Aa
Jlll
F aDlaOg
aill jlll cio lalssu gssall 2
G( a > 1) ( a > 1)
J 1
wua 1 gUaJIbawU Ogwoa a
Jll J 1
algo Jgul oJgulo
oogwloJe auiu alliuwul oogwlo >b
JUJI AJIJAJI
Jooogoljgwo jaoicg
H aDlaOg
Therefore a2 > a1
algorithm
.1
jdo jdo
Lg 2
Therefore m : x = 1 or 3x + 4y + 1 = 0
J
4a


KÄRCHER.
1 LED


www.kaercher.com/REACH
www.kaercher.com

THANK YOU!
MERCI! DANKE! iGRACIAS!
Register your product and benefit from many advantages.
www.kaercher.com/welcome ★★★★★
Rate your product and tell us your opinion.
www.kaercher.com/dealersearch
Alfred Kärcher SE & Co. KG
Alfred-Karcher-Str.28-40
71364 Winnenden (Germany)
Tel.: +49 7195 14-0
Fax: +49 7195 14-2212

- GENERAL NOTES
- INTENDED USE
- ENVIRONMENTAL PROTECTION
- NOTES ON THE CONTENT MATERIALS (REACH)
- ACCESSORIES AND SPARE PARTS
- SCOPE OF DELIVERY
- WARRANTY
- SAFETY DEVICES
- CAUTION
- SYMBOLS ON THE DEVICE
- PRESSURE CONTROLLER
- SAFETY THERMOSTAT
- BOILER THERMOSTAT
- MAINTENANCE LOCK
- DESCRIPTION OF THE DEVICE
- FOR THE ILLUSTRATIONS, REFER TO THE GRAPHICS PAGE. ILLUSTRATION A
- INSTALLATION
- INSTALLING ACCESSORIES
- ILLUSTRATION F
- ILLUSTRATION G
- ILLUSTRATION H
- ILLUSTRATION I
- DISCONNECTING ACCESSORIES
- ILLUSTRATION N
- OPERATION
- FILLING WATER
- ATTENTION
- DAMAGE TO THE DEVICE
- REMOVING THE WATER RESERVOIR FOR FILLING
- FILLING THE WATER RESERVOIR DIRECTLY ON THE DEVICE
- ILLUSTRATION C
- SWITCHING ON THE DEVICE
- NOTE
- ILLUSTRATION D
- ILLUSTRATION E
- REGULATING THE STEAM VOLUME
- REFILLING WATER
- SWITCHING OFF THE DEVICE
- ILLUSTRATION L
- ILLUSTRATION M
- RINSING OUT THE STEAM BOILER
- ILLUSTRATION R
- ILLUSTRATION S
- CLEARING THE BOILER
- STORING THE DEVICE
- ILLUSTRATION O
- ILLUSTRATION Q
- ILLUSTRATION P
- IMPORTANT APPLICATION INSTRUCTIONS
- CLEANING THE FLOOR AREAS
- FRESHENING UP TEXTILES
- CLEANING COATED OR PAINTED SURFACES
- DAMAGED SURFACES
- GLASS CLEANER
- GLASS BREAKAGES AND DAMAGED SURFACES
- HOW TO USE THE ACCESSORIES
- STEAM GUN
- SPOTLIGHT NOZZLE
- ROUND BRUSH (SMALL)
- ROUND BRUSH (LARGE)
- POWER NOZZLE
- CREVICE BRUSH
- MANUAL NOZZLE
- FLOOR NOZZLE
- DAMAGE DUE TO BUILD-UP OF STEAM
- REMOVING THE FLOOR CLEANING CLOTH
- ILLUSTRATION J
- PARKING THE FLOOR NOZZLE
- CARPET GLIDER
- BEWARE OF DAMAGING THE CARPET GLIDER AND CARPET
- FASTENING THE CARPET GLIDER TO THE FLOOR NOZZLE
- ILLUSTRATION K
- REMOVING THE CARPET GLIDER FROM THE FLOOR NOZZLE
- BEWARE OF BURNS TO YOUR FEET
- CARE AND SERVICE
- DESCALING THE STEAM BOILER
- APPLIANCE DAMAGE DUE TO DESCALER
- CARE OF ACCESSORIES
- TROUBLESHOOTING GUIDE
- WARNING
- RISK OF ELECTRIC SHOCK AND BURNS
- REDUCED STEAM QUANTITY
- THE LED LIGHT IS IN QUICK FLASHING RED AND A SIGNAL TONE SOUNDS
- THE STEAM LEVER CANNOT BE PRESSED
- LONG HEATING-UP TIME
- HIGH WATER OUTPUT
- TECHNICAL DATA
- CONTENTS
- REDUCED STEAM OUTPUT
- NOTE ON SURFACES
- INFORMATION FOR END USERS (REACH)
- DEVICE CHECKS
- SWITCHING OFF THE APPLIANCE
- FIGURE M
- RINSE THE STEAM RESERVOIR
- FIGURE R
- EMPTYING THE STEAM RESERVOIR
- FIGURE O
- FIGURE Q
- FIGURE P
- IMPORTANT INSTRUCTIONS FOR USE
- FLOOR CLEANING
- UPHOLSTERY CLEANING
- CLEANING SURFACES WITH PAINT OR VARNISH COATINGS
- CLEANING GLASS
- GLASS AND DAMAGED SURFACES
- USE OF ACCESSORIES
- PRECISION NOZZLE
- FIGURE F
- FIGURE G
- ROUND BRUSH, LARGE
- TELESCOPIC POLE
- BRUSH FOR CLEANING
- ATTACHING THE STEAM GLIDE PAD FOR THE CARPET TO THE FLOOR NOZZLE
- REMOVING THE STEAM GLIDE PAD FOR THE CARPET FROM THE FLOOR NOZZLE
- TROUBLESHOOTING
- DANGER
- LIMITED STEAM OUTPUT
- THE INDICATOR LAMP FLASHES RED QUICKLY AND AN AUDIBLE SIGNAL SOUNDS
- IT IS POSSIBLE TO PRESS THE STEAM LEVER
- LONG PERIODS OF USE
- SIGNIFICANT WATER DISCHARGE
- TECHNICAL SPECIFICATIONS
- SAFETY
- SYMBOL ON THE DEVICE
- PRESSURE REGULATOR
- THERMAL OVERLOAD PROTECTION
- SERVICE VALVE
- DEVICE DESCRIPTION
- SEE THE ILLUSTRATIONS ON THE GRAPHICS PAGE. FIGURE A
- ASSEMBLY
- MOUNTING ACCESSORIES
- FIGURE H
- FILLING THE STEAM BOILER
- DRAINING THE STEAM BOILER
- STORAGE DEVICE
- IMPORTANT USAGE INSTRUCTIONS
- CLEANING THE FLOOR SURFACES
- OCBEXABAHE HA TEKCTNJ
- NOUCHBAHE HA NOBBPXHOCTN C NOKPNTNE
- IINJAKPAHN NOBBPXHOCTN
- BHIMAHHE
- POEPEENUOEBPXHOCMU
- NOUCHBAHE HA CTBKJIO
- BHIMAHNE
- CYUENEHA HCMBKNOMO U NOEPEDEHU NOEBPXHOCMU
- LARGE BRUSH
- BLOW GUN
- DUST NOZZLE
- FLAT NOZZLE
- HEAD NOZZLE
- FIGURE I
- FIGURE J
- ATTENTION TO THE DOOR HINGE
- FIGURE
- PARKING THE DOOR
- SENSITIVE SURFACES
- INSTALLING THE ACCESSORIES
- FILL THE WATER TANK USING THE FILLING METHOD
- FILLING THE WATER TANK DIRECTLY ON THE DEVICE
- REMOVING THE DEVICE
- INDICATOR
- BMKHEHH NPNCTOPO
- MAJIIOHOK L
- MAJIHOHOK M
- POZRAJKYBAAY KINNMIB
- YB4A
- NOOKOEHHA KUIMA MA PO3NAQYBA A KUNUMIE
- ATTACHING THE KETTLE TO THE SURFACE
- REMOVE THE KETTLE FROM THE SURFACE ATTACHMENT
- SURFACE
- THEY ARE
- MAINTENANCE
- MAINTENANCE AND TECHNICAL SERVICE
- REMOVING SCALE FROM THE STEAM BOILER
- INSTRUCTION
- MANPOHOK S
- NOWOKDKENN NPUCMPO3AC6OM DNA BUDANEHHN HAKUNY
- ACCESSORIES
- THE INDICATOR LIGHT FLASHES FREQUENTLY
- FIRST, CHECK THE SOUND SIGNAL
- BAXINB NOAQI NAPN 6INBUE HE HATANCKATBCRA
- TPBANE HARPIBAHH
- BENVIKN BVXID BODN
- TEXHIHIXAPAKTEPENCTNKN
- BY GENERATOR
- DRY STEAM INSTALLATION
- CLEANING AND MAINTENANCE
- CLEANING THE DEVICE
- CLEANING THE LENS
- CLEANING THE BATTERY AND CHARGER
- CHARGING THE BATTERY
- TYPE OF GAS
- DO NOT USE THE DEVICE IN EXPLOSIVE ATMOSPHERES
- THIS SECTION
- POINT CLEANING
- CLOSED HOOK
- LARGE CHAIN HOOK
- ACCESSORIES FOR THE HOOK
- THIS DEVICE IS A PRESSURE GAUGE
- THE WATER LEVEL IS LOW
- TECHNICAL MANUALS
- A
- SC 4 DELUXE EASYFIX PREMIUM
- J
- THANK YOU
- MERCI! DANKE! IGRACIAS
- WWW.KAERCHER.COM/WELCOME ★★★★★
Brand : Kärcher
Model : SC 4 Deluxe EasyFix Premium
Category : Steam cleaner