One+ R18RH - Radio RYOBI - Free user manual and instructions
Find the device manual for free One+ R18RH RYOBI in PDF.

| Product type | Portable radio |
| Brand | RYOBI |
| Model | One+ R18RH |
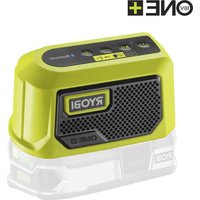
| Main power | 18V lithium-ion battery pack (One+ compatible) |
| Backup power | 2 AAA batteries (for clock backup) |
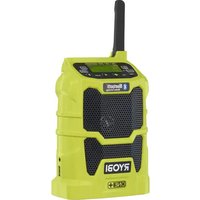
| Reception types | FM/AM with folding antenna |
| Wireless connectivity | Bluetooth (range ~10 m) |
| Ports | 1 x USB (charging, 2 A max), 1 x AUX IN (3.5 mm), 1 x AUX OUT (3.5 mm) |
| Display | Backlit LCD screen |
| Audio functions | Equalizer with bass and treble adjustment (-5 to 5) |
| Preset memory | 20 stations (10 FM + 10 AM) |
| Clock | Integrated, manual setting, backed up by AAA batteries |
| USB charging power | Up to 2 A |
| Approximate dimensions | Approx. 30 x 15 x 20 cm (estimate) |
| Approximate weight | Approx. 2 kg (estimate) |
| Housing material | Durable plastic |
| Intended use | Radio listening, external music, USB device charging |
| Maintenance | Clean with a dry cloth; do not use solvents |
| Warranty | 24 months (extension possible via registration) |
| Safety standards | CE, EURAS, Ukraine; usage warnings |
| Included accessories | Antenna, battery compartment, carrying handle |
Frequently Asked Questions - One+ R18RH RYOBI
User questions about One+ R18RH RYOBI
0 question about this device. Answer the ones you know or ask your own.
Ask a new question about this device
Download the instructions for your Radio in PDF format for free! Find your manual One+ R18RH - RYOBI and take your electronic device back in hand. On this page are published all the documents necessary for the use of your device. One+ R18RH by RYOBI.
USER MANUAL One+ R18RH RYOBI
Important! It is essential that you read the instructions in this manual before assembling, maintaining and operating the product.
Safety, performance, and dependability have been given top priority in the design of your radio.
INTENDED USE
The Radio is intended for:
■ listening to FM/AM radio, MP3 players, and other audio devices
- charging USB capable devices
■ streaming audio from BLUETOOTH enabled devices
Do not use the product in any way other than those stated for intended use.
GENERAL SAFETY WARNINGS
WARNING
Read all safety warnings and all instructions. Failure to follow the warnings and instructions may result in electric shock, fire and/or serious injury.
Do not use the product near water.
Clean only with dry cloth. Never use brake fluids, gasoline, petroleum-based products, or any strong solvents to clean the product. Following the rule will reduce the risk of loss of control and deterioration of the enclosure plastic.
- Do not block any ventilation openings. Install in accordance with the manufacturer's instructions.
- Do not place the product in closed bookcases or racks without proper ventilation. Allow a minimum distance of 5cm from any foreign object.
- Do not place product near any heat sources such as radiators, heat registers, stoves, or other products (including amplifiers) that produce heat.
Only use attachments and accessories specified by the manufacturer.
Refer all servicing to qualified service personnel. Servicing is required when the product has been damaged in any way, liquid has been spilled or objects have fallen into the product, the product has been exposed to rain or moisture, does not operate normally, or has been dropped.
- When servicing the product, use only manufacturer's replacement parts, accessories and attachments. Follow instructions in the Maintenance section of the manual. Use of unauthorized parts or failure to follow Maintenance instructions may create a risk of shock or injury.
- Know your product. Read operator's manual carefully. Learn its applications and limitations, as well as the specific potential hazards related to the product. Following the rule will reduce the risk of electric shock,
fire, or serious injury.
- Do not operate the product in explosive atmospheres, such as in the presence of flammable liquids, gases, or dust. The product may create sparks that may ignite the dust or fumes.
ELECTRICAL SAFETY
A battery operated product with integral batteries or a separate battery pack must be recharged only with the specified charger for the battery. A charger that may be suitable for one type of battery may create a risk of fire when used with another battery.
Use battery operated product only with specifically designated battery pack. Use of any other batteries may create a risk of fire.
Use 18 V lithium-ion battery packs.
WARNING
Danger of explosion if battery is incorrectly replaced. Replace only with the same or equivalent type.
PERSONAL SAFETY
- Do not use the product to listen to music or other audio programs while operating machinery. Doing so may cause distractions that could result in serious personal injury.
The product is capable of producing sound levels that can be dangerous to long-term hearing. Listening to music at high volume for any period of time may cause noise-induced hearing loss. The higher the volume, the less time required before your hearing may be affected.
PRODUCT USE AND CARE
- When battery pack is not in use, keep it away from other metal objects like paper clips, coins, keys, nails, screws, or other small metal objects that can make a connection from one terminal to another. Shorting the battery terminals together may cause sparks, burns, or a fire.
- Keep the product dry, clean and free from oil and grease. Always use a clean cloth when cleaning.
- Battery products do not have to be plugged into an electrical outlet; therefore, they are always in operating condition. Be aware of possible hazards when not using your battery product or when changing accessories. Following the rule will reduce the risk of electric shock, fire, or serious personal injury.
- Do not place battery products or their batteries near fire or heat. This will reduce the risk of explosion and possibly injury.
- Do not crush, drop or damage battery pack. Do not use a battery pack or charger that has been dropped or received a sharp blow. A damaged battery is subject to explosion. Properly dispose of a dropped or damaged
PRODUCT USE AND CARE
battery immediately.
- Batteries can explode in the presence of a source of ignition, such as a pilot light. To reduce the risk of serious personal injury, never use any cordless product in the presence of open flame. An exploded battery can propel debris and chemicals. If exposed, flush with water immediately.
- Do not charge battery product in a damp or wet location. Following the rule will reduce the risk of electric shock.
For best results, your battery product should be charged in a location where the temperature is more than 10^ but less than 38^ . To reduce the risk of serious personal injury, do not store outside or in vehicles. - Risk of uncontrolled situations when used in ambient temperatures below 0^ or above 40^ .
Under extreme usage or temperature conditions, battery leakage may occur. If liquid comes in contact with your skin, wash immediately with soap and water. If liquid gets into your eyes, flush them with clean water for at least 10 minutes, then seek immediate medical attention. Following the rule will reduce the risk of serious personal injury.
To reduce the risk of personal injury and electric shock, the product should not be played with or placed where small children can reach it. - Save these instructions. Refer to them frequently and use them to instruct others who may use this product. If you loan someone this product, loan them these instructions also.
- Do not dispose of used battery packs in the household refuse or by burning them. Take them to an appropriate disposal/collection site.
The apparatus shall not be exposed to dripping or splashing and that no objects filled with liquids, such as vases, shall be placed on the apparatus. - Batteries (battery packs or batteries installed) shall not be exposed to excessive heat such as sunshine, fire and the like.
The appliance employs an appliance coupler as the disconnect device from mains supply. The disconnect device shall remain readily operable.
ADDITIONAL BATTERY SAFETY WARNINGS
WARNING
To reduce the risk of fire, personal injury, and product damage due to a short circuit, never immerse your tool, battery pack or charger in fluid or allow a fluid to flow inside them. Corrosive or conductive fluids, such as seawater, certain industrial chemicals, and bleach or bleach-containing products, etc., can cause a short circuit.
- Replacement of a battery with an incorrect type can defeat a safeguard.
- Disposal of a battery into fire or a hot oven, or mechanically crushing or cutting of a battery, can result in an explosion.
Leaving a battery in an extremely high temperature surrounding environment can result in an explosion or the leakage of flammable liquid or gas.
A battery subjected to extremely low air pressure may result in an explosion or the leakage of flammable liquid or gas.
TRANSPORTING LITHIUM BATTERIES
Transport the battery in accordance with local and national provisions and regulations.
Follow all special requirements on packaging and labelling when transporting batteries by a third party. Ensure that no batteries can come in contact with other batteries or conductive materials while in transport by protecting exposed connectors with insulating, non-conductive caps or tape. Do not transport batteries that are cracked or leaking. Check with the forwarding company for further advice.
KNOW YOUR PRODUCT
See page 175.
- AAA batteries
- Fold-down FM receptor
- Touchpad controls
- Carrying handle, insulated gripping surface
- Device tray
- Battery port
- Battery cover
- Speakers
- Auxiliary output port
- Backlit LCD display
- USB dedicated charging port
- Auxiliary input
- Battery compartment
- Screw
- Battery pack
- Latches
- Clock settings button
- Mode selection display
- Battery pack indicator
- On / Off button
- Preset station button
- Volume buttons
- Frequency scan buttons
- Mode selection button
- Bass display
- Treble display
- External device (not included)
- USB cable (not included)
- Auxiliary connector
2 | English
ASSEMBLY
WARNING
Do not use the product if it is not completely assembled or if any parts appear to be missing or damaged. Use of a product that is not properly and completely assembled or with damaged or missing parts could result in serious personal injury.
WARNING
Do not attempt to modify the product or create accessories or attachments not recommended for use with the product. Any such alteration or modification is misuse and could result in a hazardous condition leading to possible serious personal injury.
OPERATION
WARNING
Do not allow familiarity with the product to make you careless. Remember that a careless fraction of a second is sufficient to inflict serious injury.
WARNING
Always remove the battery pack from the product when you are assembling parts, cleaning, or when not in use. Removing these energy sources will prevent accidental starting that could cause serious personal injury.
WARNING
The product is not waterproof. Do not submerge in liquid. Failure to heed this warning could result in serious personal injury.
CAUTION
Always refer to the manual for any device recommended for use as an attachment or accessory. Proper use of any device, when attached to the product, is the sole responsibility of the operator. Improper use may damage the device or the product.
WARNING
The product is capable of producing sound levels that can be dangerous to long-term hearing. Listening to music at high volume for any period of time can cause noise-induced hearing loss. The higher the volume, the less time required before your hearing could be affected.
INSTALLING/REMOVING AAA BATTERIES
See figure 1.
It is advisable to write down saved channels before replacing the AAA batteries.
There is a 15-second time frame for replacing the AAA batteries. If the batteries are not replaced within 15 seconds, the product will lose all settings previously stored in memory, and they will require reprogramming.
Always use new alkaline batteries for replacement.
- Remove the battery pack, if installed.
- Loosen the screw in the battery cover. Remove the cover and set aside.
- Install two new AAA batteries according to polarity indicators inside the battery compartment.
NOTE: Do not mix old and new batteries. Do not mix alkaline, standard (carbon-zinc), or rechargeable (nickel-cadmium) batteries.
- Replace the battery cover and tighten screw to secure.
INSTALLING/REMOVING BATTERY PACK
See figure 2.
To install the battery pack:
- Place the battery pack in the product, aligning the rib on the battery pack with the groove in the battery port.
- Make sure the latches on the battery pack snap into place and the battery pack is secured to the product before beginning operation.
- Depress the latches to remove the battery pack.
NOTE: Always remove the battery pack from radio when not in use. Leaving the battery pack connected for long periods of time may drain the battery pack.
LCD DISPLAY
See figure 3.
When a battery pack is installed and the product is in the ON position, the LCD display will show the time, frequency, mode, and settings. When the battery pack is removed and AAA batteries are installed, the LCD display will display the time only.
NOTE: The illustrations of the LCD display shown in the manual are only examples of the frequencies you may see on your radio and are not the exact frequencies that you may choose to listen to.
MENUNAVIGATIONBUTTONS
Use the menu navigation buttons to turn the product on and off, control the volume, change frequencies, toggle between modes and set the time.
SWITCHING THE PRODUCT ON AND OFF
See figure 3.
Press to switch the product on and off.
NOTE: You may need to keep the button pressed for up to 3 seconds before the product will start. If this happens,
replace the AAA batteries.
NOTE: When the product is on and a battery pack is installed, will be shown in the LCD display. If the battery charge is low, a flashing will be displayed.
To help preserve battery power, the product will automatically enter sleep mode approximately 1 hour after it is turned off. To exit sleep mode and restart the product, you must press on the product.
MODE SELECTION
See figure 3.
PresMODE to cycle through available modes.
There are four modes to choose from:
FM mode
AM mode
AUX mode
■ BLUETOOTH mode
ADJUSTING THE VOLUME
See figure 3.
When the product is switched on, the product will return to the last volume setting used.
NOTE: If the AAA batteries are removed from the product or have no charge, the volume will return to its default settings.
To increase the volume, press
To decrease the volume, press
NOTE: To change volume quickly, hold or
CAUTION
Do not use the product at maximum volume for an extended period of time with the bass and treble at maximum levels. It could cause damage to the speakers and/or amplifiers in the product.
FM/AM TUNING
See figure 3.
Use and to tune to the desired radio frequency. The selected frequency is displayed on the LCD display.
To tune frequency manually:
Briefly push either or (hot press and hold) to tune one frequency step at a time.
- Press and release to tune to a lower frequency.
- Press and release 一 to tune to a higher frequency.
4 | English
To tune frequency automatically:
- Press and hold or for one second to tune frequency automatically.
- Press or stop scanning and select a frequency.
To decrease interference or electrical noise, adjust the position of the FM receptor or move the product to a higher elevation.
STORING A PRESET IN MEMORY
See figure 3.
The memory feature saves up to 20 frequencies as presets in the product's memory. You can save up to 10 frequencies each for FM and AM modes.
To store a frequency in memory:
- Tune to the desired FM or AM frequency.
- Press and hold PRESET until "MEMORY" and the preset position number flash on the screen.
- Press and to choose a preset position number.
NOTE: There are 10 preset positions for FM and 10 for AM. Only one station can be saved in each preset position.
- Press PRESET again to store the frequency.
To tune to presets (FM or AM mode):
Press and release PRESET to cycle through each preset position number and its associated frequency.
EQUALIZER FUNCTION
To adjust the bass and/or treble settings:
- Press and holMode until "b" (BASS) is displayed. Press again and "t" (TREBLE) is displayed.
- Press or until the desired bass or treble level (-5 to 5) is achieved. Press Mere your selection.
SETTING THE CLOCK
See figure 3.
Press CLOCK to view the frequency in the digital display for 10 seconds. The display will return to the current time after 10 seconds.
NOTE: In all modes, the time is the default display.
To set the clock:
- Press and hold CLOCK until the hour time blinks.
- Press or To select the hour.
-
Press and release CLOCK to lock in the hour setting. Minute time blinks.
-
Press or to select the desired minute.
- Press and release CLOCK again to confirm the time. The clock is now set.
NOTE: If AAA batteries are removed or lose charge for more than 15 seconds, clock settings will be lost. Settings are not affected by the removal of the 18V battery.
AUXILIARY MODE
See figure 3, 4.
The product can be used as an amplifier for MP3 players, CD players, smartphones, tablets, and other music devices.
To use the auxiliary mode:
- Press MODE until AUX mode is highlighted.
- Connect auxiliary cable (not included) to the device.
- Connect the other end of the auxiliary cable to the auxiliary input port.
NOTE:
The external device must be on and in play mode for sound to be heard through the speakers.
- All external device controls can be used normally while connected to radio.
Volume for any device connected through the auxiliary cable can be adjusted using the volume control for that device or by using or of the product.
- Switching the product off will not switch the external device off.
- The auxiliary cable does not provide charging function.
- For complete operating instructions for the connected device, always refer to the manual that was included with your device.
The device tray may be used to store your external device.
NOTE: The device tray cannot secure external devices.
NOTE: The AUX OUT port is for connecting external speakers only. Do not plug headphones into the auxiliary output port. The volume for this port is set to maximum level and cannot be lowered with pressing . Volume can be adjusted from the external speaker only. When the volume is set to 0 from the radio, the external speaker will be mute.
USING THE USB DEDICATED CHARGING PORT
See figure 5.
The USB dedicated charging port provides charging power of up to 2 Amps for your cell phone, MP3 player, tablet, or other USB devices.
CAUTION
Attempting to charge devices rated more than 2 Amps could damage the USB dedicated charging port and/or the device.
- Connect one end of a USB cable (not provided) to your USB device.
- Connect the other end of the USB cable (not provided) to the USB dedicated charging port to begin charging the device.
NOTE: The USB dedicated charging port provides power only; it does not provide any data communication capabilities.
When the product is operating on battery power, the USB dedicated charging port will continue to function for approximately 1 hour after switching the product off. If the product remains inactive after this time, charging will stop. Turn the product on to resume operation.
USING A BLUETOOTH ENABLED DEVICE (NOT INCLUDED) WITH THE PRODUCT
See figure 6.
- Press MODE until the BLUETOOTH mode is highlighted.
NOTE:
- When the product is switched to BLUETOOTH mode, the product will attempt to pair to a BLUETOOTH enabled device and b t will flash in the LCD display.
- The product will automatically attempt to connect to the last device it was paired to. If a connection cannot be established within five seconds, the product will make itself available to other BLUETOOTH enabled devices.
-
BLUETOOTH enabled devices must be within 10m (30 ft) of the product and set to search/scan in order to pair with the product.
-
Select "Ryobi Stereo" from your device's list of available BLUETOOTH signals to pair the device and the product. No password or PIN is required for connection.
NOTE:
- When the device has successfully paired with the radio, will stop flashing.
-
When a device is paired to the product, information for connecting to the device is saved in the radio's memory.
-
Press and to go to the previous or next track when streaming audio from a BLUETOOTH enabled device.
- Press and release PRESET to cycle between pausing and playing the audio.
NOTE:
- These controls may not be supported by the BLUETOOTH device and application.
-
All BLUETOOTH enabled device controls can be used normally while paired to the product.
Volume for any device paired to the product can be adjusted using the volume control for that device or by pressing or on the product. -
Press and reset to disconnect all BLUETOOTH enabled device.
NOTE: When the device is disconnected, bt will begin flashing in the LCD display and the product will begin searching for another device.
FOLD-DOWN FLEXIBLE FM RECEPTOR
See figure 7.
To decrease interference or electrical noise, extend the FM receptor or move the product to a higher elevation. The FM receptor folds down and out of the way when not in use.
MAINTENANCE
WARNING
The product should never be connected to a power supply when assembling parts, making adjustments, cleaning, performing maintenance, or when the product is not in use. Disconnecting the product will prevent accidental starting that could cause serious injury.
- Avoid using solvents when cleaning plastic parts. Most plastics are susceptible to damage from various types of commercial solvents and can be damaged by their use. Use dry cloths to remove dirt, dust, oil, grease, etc.
WARNING
Do not at any time let brake fluids, gasoline, petroleum-based products, penetrating oils, etc., come in contact with plastic parts. Chemicals can damage, weaken or destroy plastic which could result in serious personal injury.
When servicing, use only original manufacturer's replacement parts. Use of any other part could create a hazard or cause product damage.
ENVIRONMENTAL PROTECTION

Recycle raw materials instead of disposing of as waste. The machine, accessories and packaging should be sorted for environmental-friendly recycling.
SYMBOLS

Safety alert

CE conformity

EurAsian Conformity Mark

Ukrainian mark of conformity

Please read the instructions carefully before starting the product.

Waste electrical products should not be disposed of with household waste. Please recycle where facilities exist. Check with your local authority or retailer for recycling advice.
SYMBOLS IN THIS MANUAL

Parts or accessories sold separately
The following signal words and meanings are intended to explain the levels of risk associated with this product:
DANGER
Indicates an imminently hazardous situation, which, if not avoided, will result in death or serious injury.
WARNING
Indicates a potentially hazardous situation, which, if not avoided, could result in death or serious injury.
CAUTION
Indicates a potentially hazardous situation, which, if not avoided, may result in minor or moderate injury.
CAUTION
(Without Safety Alert Symbol) Indicates a situation that may result in property damage.
Votre radio a ete concue en donnant priorite a la securite, a la performance et a la fi ableit.
UTILISATION PREVUE
APPRENEZ A CONNAITRE VOTRE PRODUIT
Voir la page 175.
MISE EN MARCHE ET ARRET DU PRODUIT
Voir figure 3.
Mode FM
Mode AM
Mode AUX
Mode BLUETOOTH
REGLAGE DU VOLUME
Voir figure 3.
UTILISATION D'UN APPAREIL COMPATIBLE BLUETOOTH (NON FOURNI) AVEC LE PRODUIT
Voir figure 6.
RECEPTEUR FM FLEXIBLE RABATTABLE
Voir figure 7.
MACHEN SIE SICH MIT IHREM PRODUKT VERTRAUT
SieheSeite175.
FLEXIBLER EINKLAPPBARER FM-EMPFANGER
Siehe Abbildung 7.
RECEPTOR FM DESPLEGABLE FLEXIBLE
Ver figura 7.
ANTENNA FM FLESSIBLE PIEGHEVOLE
Vedere la figura 7.
ALGEMENE VEILIGHEIDSWAARSCHUWINGEN
VAARSCHUWING
RECEPTOR FM FLEXIVEL DOBRAVEL
Ver figura 7.
INDSTILLING AF LYDSTYRKE
Sefigur3.
SLA P A OCH STANGA AV PRODUKTEM
Se bild3.
LAGRA EN FREKVENS I MINNET
Se bild3.
ANVANDA BLUETOOTH-ENHET (MEDFÖLJER INTE) MED PRODUKTEN
Se bild6.
- Tryck paMODEtills BLUETOOTH-laget markeras.
NOTERA:
LAGRING AV EN FORHANDSINNSTILT STASJON MINNET
Se fig. 3.
IPEKJIIOHATENPEKIMOB
Cm.puc.3.
KhoNka MODE no3BOJnEepeKnUoYaTbcMexNy DOCTyINHbIMn peKmamn.
MoxHO BbIbpaTb N3 yeTbIpex peXIMOB:
PexmFM
PekIMAM
PeknAUX
PexmBLUETOOTH
PERYINPOBKA YPOBHRA TPOMKOCTN
Cm.pnc.3.
PnB BKIOUeHn paIIOnpEeMHNka yOBoeHb rPOMKoCTn 6ydt yCTaHOBHeNo erO HAcTpoKe Do BbIKIOUeHn.
IPIMEAHHE: B Cnyae n3BleueHn nn pa3pndkn 3JeMeHTOB NITaHn Tnna AAA yPOBeHb rpOMKOCtN c6paCbIbAeTcB B COOTBeTCTBnC 3aBOIDCKMn HAcTPOKaMn.
YBENUHHe yPOBnI rPOMKoCTn:
UmeHbWeHne ypoBn rPOMKoCTN:
PIMMEAHNE: ⅡIa6bIcTpoHacTpOuKn rPOMKoCTn ydepKuBaTe uNn
BHIMAHNE
Bo3depkntecb ot nCNoIb3ObaHnna H3dEInna Ha MaKcMaJIbHOI rPOMKOCTN B TeUeHne DInTeJbHOro nepoJaBpeMeHH C MaKcMaJIbHbIM yPoBHem 6acOB n BbICOKNX qACTOT. 3TO MOKe I pUBeCTN K NOnOMKe dINHAMKOB N/INN yCINNTeJIe N3dEInna.
HACTPOIKA FM/AM
Cm.pnc.3.
KhoNKn Hn npedHa3HaYeHbI dIa HacTpoKn paAnocactOT. BbIbpaHna Yactota OTo6paXaetcra Ha KKdncnnee.
TtO6bI HAcTpoNTb YacToTy BpyHyIO:
ДяTOHNoH HAcToPouKn HaxKMaIte KHOKN 《 OtpbIBnCTO(He ydepKnBa).
- Haxmnte n OTnyCTnTe < dny nepexoHa 60nee HN3KyIO YactOTy.
- Haxmte n otnyctnte 品 nepexoHa 6oonee BbICOKyU yactOTy.
YTo6bI HAcTpOntb YAcTOTy ABTomAtuYeCKn:
1.ДЯ BbIOnHeHn ABToMaTnuecKo HAcTpOKn HaxMnte n ydepXnBaITe 二B TeHeHne OdHOI CekyHdbI.
2. 4To6bI ocTaHOBnTB cKaHnpOBaHne N Bbl6paTb YacToTy, HaxMNTe
IyMeHbWeHn NOMEx IINN 3NeKtpueeCKnx WymOB Otperyu npyTe NOIOXeHne aHTEHbI INN NOCTaBbTe np6Op Ha BO3BbIeHHoe MecTo.
COXPAHEHNE HACTPOIN HA PAIOCTAHUIO B IAMYI
Cm.puc.3.
B namr np paHnnpmHnka moKHO coXpaHnTb do 20 hactpoek Ha paHnoctaHun. Bbl MoKTe coXpaHnTb do 10 qactot kak pekmOB FM, taN dIy AM.
CoxpaHHeHne yactotbHaCTpoKn B namrtn:
- HacptpoTecb Ha keJaemyu cactOtu FM nIN AM.
- Haxmte n yedepkmbaTe KhoNky PRESET do NOBHeHa 3KpaHnncn "MEMORY" (PAMrTb) HOMepa HacTroKn.
3.ДЯ BB6opa HOMepa HactpoiKn HAKIMMaTe KHOJKN
IPIMEAHHE:Imeetc103aDaHHbIXNIOXKeHIN dIy FMn10dAmB OOnHom 3aDaHHom NIOXKeHIN MOKeT COxpaHrTbcr TOnbKO OOnHa CTaHcH.
- Haxmte PRESET eue pa3, yTo6bI coxpaHnTb YactOty.
YTo6bI HAcTpOntb 3aHaHHbIe yCTaHOBKn (peXnM FM nNAM):
Дляпереклоченя МждуНаCTpoКами COOTBETCTBYUOUMN YACTOTAMN OTpbIBNCTO HaxIMaTe PRESET.
ФУHKUЯЗКВАЛАИЗЕРА
UTo6bI Otperyu npoBaT hAcTpoKn HxHnx N/INBepxHnx UactOT:
- Haxmnte u ydepxnbaiTe MODE do noBHeHnCnmbona "b" (5AC). Haxmnte cHOba n oTo6pa3ntc «t» (BEPXHNE YACTOTbl).
- Haxmamte KhoKn nnBb6opa HyxHoro ypoBHn H3KNX nn BbcOKnx qactOT (-5 to 5).YTo6by coXPaHTb HaCTpOky, HaxmTe MODE.
HACTPOIKA BPEMEHN
Cm.pnc.3.
HaKMTe CLOCK nra OTobpaXeHn Ha cTbHa cnpoBOM dncJIee B TeHne 10 cekyH. Ype3 10 cekyHd Ha dnCJIeB BHOb bnoBtca Tckyuee Bpemr.
ПРИМЕЧАНЕ:Во BCex peЖIMax BpeMЯ OTOбpaKaetcnoуmOLчанIO.
YcTaHOBKa BpeMeHN:
- Haxmnte n ydepKnBaIte KhONky CCLK, noka He HaHHe MrrA Tb INDnKaTOp YacOB.
- YCTAHOBINTE YacbI C NOMOUIK HONOK
- Haxmnte n otnyctnte CLOCK, yTo6bl coxpaHnItb yCTaHOBky. Miraet INdikatop MNHyT.
- YcTaHOBtE MmHyTbI C NOMOuBIO KHONOK
- Haxmte n otnyctnte CLOCK eue pa3, yTo6bl noTBePntb Bpem. Pocne 3toro Bpem 6ydet yCTaHOBJIeHO.
IPNMEAHNE:Пи n3BneHn nI np pa3ppe 6aTape Tnna AAA B TeueHne CbIe 15 cekyHd HactpoKn BpeMeHn c6paCbIbAOTc. HactpoKn He c6paCbIbAOTc npn n3BneHn nAkkymyIaTOPHO 6aTape HaprrKeHem 18 B.
PEKIM AUX
CM.pnc.3-4.
N3eJIne MoKET NcONb3OBAbC B KaueCTBe yCuJIInTeJMP3-IIeepOB, CD-npOnIrPbIbAteJeIe, cMapTfoHOB, nlaHwETOB INpyrnx My3bIkaJIbHbIX yCTpoINCTB.
Длвхоба В ржм Aux:
- HaximmaTe MODE do nOBHeHpeKIMa AUX.
2.ПодсоeДинITEКпрбopydoNoIHTeHbI Ka6eNB (He BKIOUHeH). - Поdkночи Te pyroй koHeц ka6eЯ K BXoDHOMy pa3bemy Aux.
ПРИМЕЧАНО:
-ДЯ BOCnpon3BeDEHNA 3Byka Ypee3 DnHaMnKINBHeWHee yCTPOJCTBO DOJNKHO 6bITb BKNIOEHO INHaxODNTbcrB peKIMe BOCnpOu3BeDEHNA.
- Ppi nodknuehenn K paDnOpnpemHnka BCE oprahbl ynpabLeHn BHeuHero ycTpoiCTBa Moryt NCIOJIb3OBAtbcraB O6bIyHOM pexime.
- rPOMKocTb NOkHoueHHoro Ype3 Aux yCTpoiCTBa HAcTpAnBaetc NocpeDCTBOM opraHOB peYInpOBKn rPOMKoCTn DaHHoro yCTpoiCTBa INN KHOJOK U 3deJIa.
BbIKIOUeHHe n3dEINn He BneueT 3a c6oBn BbIKIOUeHHe BHeuHero ycTpoCTBa.
- DOnoJIHnTeIbHbIe KaBeJIr He oBecneuBaIOT 0apJKn.
4.ДЯ NOIyueHnI NOINbIX INCTpyKcIIN NOIDCOeINHeHHU yCTpOInCTB O6paauTecb K pyKOBOIDCTBy, pnpIOKeHHOMy K npu6opy.
IOTOKMOKETNCNOLb3OBaTbC4DnXpAHENBHeHrO yCTPOINCTBa.
Yka3bIbAeHaNoTeHuaJIbHOOnaCHyOcHTyaUHO, KOtOpa,ecJn ee He N36ExaTb,MOKeT npVBecTN K TpaBMeJeKo nn CpeDHe TjXeCTN.
BHIMAHHE
(Be3 CmBona TpeBorN Be3onacHocTn) Yka3bIbaet cnTyauIO, KOTOPa MOKET KOHcTaBCr NOBpeXJdeHNEM CO6CTBEHHOCtN.
He peKOMeHnyeTc K 3KnIyatauMn no nCTeueHm 5 let XpaHeHn C DaTbI N3rOToBneHn 6e3 PpeDbapnteJbHO npOBepKn.
Data n3ROTOBJeHn (KoI DaTbI) OTUaMNoBaH Ha NOBepxHOCTN Kopnyca N3dEJI.
Pnmupe:
W17 Y2015, rnde Y2015- roD n3roTOBnHeHn
W17-HeJeIur3rTOBJIeHnI
OnpedeJntb Mecu N3ROTOBHeHMOxHO cOrlaCHO npueeHHo Hxke Ta5nue,Ha npimepe 2015 roda.
06paHTe BnMaHne! KOINueCTBO HeJeB Mecrapea3NnaeTcO T rda B rdo.
NULENKIAMAS LANKSTUSIS FM IMTUVAS
Zr.7 pav.
SPLOsNA VARNOSTNA OPOZORILA
POZORILO
YIOTPEBAI IPRXKA 3A YPEDA
Korato 6atepnaTa He ce n3non3Ba,cbxpaHbAte Ta daeotpytn MetaHn OBeKTn,Kato HapnpMep KnaMepu,MOHeTn,KnOyOBe,ΓB03Den,raKNnNIn dpTu
MaKn MeTaJIH N OBeKTN, KOITo MOrat Da HAnpaBArT Bpb3ka MExkDy KJIeMITE. KbCOTc CbeDInHeHne OT KJIeMITE MoKe Da npeDn3BnKa NCKPn, n3rapAHHn IIN NOxap.
IpoIbpxKaIte npOdyKta cyx, uNCT HHeomacneH. BnHaru n3Pon3BaIte uNCT npaIa 3a noNCTBaHe.
Ypeinte, KOINTO pa60Tc C 6aTeepn, He Tp6Ba da CE BKNIOyBb ENEKTPnueckn KOHT; CneIOBaTeHTo TE BnHaCa B pa6TOCbCToHHe. O6bpHete BHMMaHHe Ha Bb3MOXnTE OnaCHOCTN, KOrato He N3NoI3BaTe BaShn ypeC 6aTeepn nn npn cmHa Ha akcecoapnte. Cna3BaHeto Ha TOBa npabnIo ige HamaIIOn aNaCHocTTa OT TKOB ydap, Noxap nnn cepno3HN Phn3uYeCKn HapaHBAHH.
He octabraye npodyktn c 6atepn nI IN texhnte 6atepn 6n30 do orbH nIN TOnnHa. ToBa ue HamaII ONaCHOCTTA OT EKCNIIO3N IN BepoTHOCTTa 3a HapaHraHna.
I Na3ete 6atepyra ot cnHn yapn, naahe nn noBpeu. He n3no13BaTbe 6atepynn 3apndHO yctpoiCTBO, KOUTo ca 6uNn H3nychaTHn nn CnHNOyapEn. NOBpeHaTa 6atepy MoKe da npuHHn EKcIIIO3N. I3XbPnIte He3a6abHO Ha NOxOJaUNTe MeCTa 6atepyn, KOUTo ca 6uNn H3nychatn nn NoBpeDeHN.
BaTePnnte Morat da ekCnIOnIpaT B npncbCTBneTo Ha 3anaIteHn H3TOChu, KaTO HApNIMep NnIOTha lamna. 3a da HamaJIte OAnchocTta OT cepno3Hn fN3NuEckn HapaHraBaHn, HNKORA He n3NoJ3BaIte KAKBnTO n Da 6nIO 6e3KnUHn PPOyKTn B npncbCTBneTo Ha oTKpnt Orh. EKnOJaPaNaTa 6aTepeR MoKe da OTdeHn OTnOMKn IN XmMkaHn. Ppi KOHTc C NOo6Hn He3a6abHO n3MNTE 3acERHaTOTo MRCTO C BOda.
He 3apekdaTe ypeI c 6aTeepn Ha BnaKHO mMOKpo MRCTo. KaTO CneBATE TOBa npabNIO ue HamaJIte onachOCTTa OT eNEKTpuueckn ydap.
3a Hau-Dobpn peayntaTn Tp86Ba da 3apekdaTe CBOA INHCTpymEnC 6atepn Ha MxCTO, KbDeTo TEMpepatypata e HAD 10^ , Ho NOD 38^ . 3a Da HamaNTe pncKa OT cepno3Hn Fn3Nueckn HapaHraBaHna, He ro OCTabYte Ha OTKPITO nIN B IpeBO3HN cpeCTBA.
PnCK OT HeKoHTpOJIpaHn CItyaUuN, KOraTO ypeIbT Ce n3non3Ba npi TemnepaTypn Ha OKoJHaTa cpeJa NOD 0^ nJn HAd 40^
Ipnn 3nnoJ3BaHeto B ekCTpeMHn ycNoBn nn TemnepaTpyn 6bATEpna T moKe da npoteye. Ako TeHOC7 BnE3e B KOHTaKc C KoxKaTa BN, He3a6abHo n3MmTe CbcCanyH n BODa. Ako TeuHOCTTA BnE3e B KOHTaKT C OHTe BN, IpomNte rC qHCTa BOda 3a noHe 10 MInHyTN, cNeD KoTo H3a6abHO notbpcTe MeiunHcKa NOMoU. Kato CneDbate TOBA npabNIO ue HAmaJIte ONaCHocTTA OT cepNO3HN HapaHraBaHHa.
3a da HamaNTe onachocTta OT hapaHbaHe n eNeKtpueckn yap, c N3denneto He Tp8Ba da Cn IrpaaT deca n To He Tp8Ba da ce pa3nonara Ha
MRCTO, KbTeO MaIKN DeLa MoRt Da FO DOKoCHaT.
3ana3eToBa pkoBOcTBo. IpenpoHTaTe ro peoBHO n ro n3non3BaIte, Korato Tp6Ba da HnCTpykTnpate dpyro nue, Koeto ue 6opabn C TO3n npOdyKT. Ako 3aemate Ha hKoro uHcTpymEHTa, PpeaTe My n TOBa pkoBOcTBo.
He n3xBpIyTe n3NoJI3BaHITe akyMnyaTOpHN 6atePNB 6NTOBITE OTNaIbCn IIN ype3 n3rapAne. N3XBpIeTe rHa noDxOJaIO MAcTO 3a n3XBBpIyHe/ cb6npaHe Ha OTnAbcN.
YpeTHe Tp6Ba Da ce H3Jara Ha HakaBae He HnHapbckBaHe Nbpxy Hero He Tpa6Ba Da ce NoCTaBT npEdMeTN, PbJInC TeHocTn, KaTO HanPmep Ba3N.
Batepnte (noCTaBeHn ayMyIaTOpHn nn 6nKHOBEHn 6atePn) He Tpr6Ba Da ce n3naRaT Ha npEkoMePHn ToJIInHa, KaTo HAnpIMep CJIbHueBa CBETJInHa, OrH NIOO6Hn.
YpeBt e cHa6dEn C KyIpyHr, npdeCTaBnBaU MExaHn3bM 3a N3KlIOUBAHe OT eNKeTpUeCKaTa MPexka. MexaHn3MbT 3a N3KlIOUBAHe Tpr6Ba da e BInHaR DoCTbneH.
DONJIHHTEJHH INPEUYIPEXJEHNA 3A BE30NACHOCT 3A BATEPNYTA

PNEUYNPEXDEHME
3a da n36erHete onachocCTTA OT noxap, npedn3BnkaHa OT Kbco CbeDInHeHne, KaKTo N HapaHbAHnra T NOBpeDnTe Ha npOdykTa, He NotanTne INCtpyMeHTA, CmehemaT akyMylatopHa 6atepna nn 3apdHoto yctpoiCTBO B TeuHOCTN n Ce nOrpnjKeTe BypeDnTE AkyMylatopHnTe 6atepnn Da He nonaat TeuHOCTN. TeuHOCTNe, npedn3BnKBaun Kopo03n nnnpobexdaun eNEKtpnueeCTBO, KaTO CoJeha BOda, ONpeDeJIeHN XIMnKaIIN, n36enBaun BeUeCTBA nnnpoDyKTn, Cdbbpkaun n36enBaun BeUeCTBA, Morat Da npedn3BnKAT KbCO CbeDInHeHne.
IpoMraHaTa Ha 6aTepeRyTa C HnepaBnHe Tm MoKe Da DOBeDe Do npeneb6perBaHe Ha npedna3Ha MpaKa.
N3xbpHHeTo Ha 6aTePnTa B Orb Hnn IropeuaΦypHa, KaKTo n MexaHnHOTo CmaKBaHe nnCpr3BaHe Ha 6aTePnMoKe Da DOBeDe Do EKcnNo3n.
Ako 6aTepeyra 6bJe octabeHa B cpea C npeKoMePHO BnCoka TemnepaTypa, TOBa MoKe Da DoBeDe Do EKcNIO3nI NnN H3TnUaHe Ha 3anaJInMa TeuHoc Tnnr Ra3.
Ako 6aTepeyra 6bDe nOJNOxKeHa Ha Bb3JeCTBneto Ha TBbpHe HNCKo Bb3DyUH0 HaJIraH, TOBa MOKe Da IOBeDe Do EKcIIIO3nI INI IN3TtUaHe Ha 3aIaNIMa TeHOC TINrA3.
TPAHCNOPTIPPAHE HA JNTNEBIN BATEPNI
TpaHcnpopnape 6atepeNTe B cBcOTBeTCTBne C MeCTHnTe HauNoHaJIH NoCTaHOBNeHn npa3npoep6n.
Cna3BaIte BCnUKN CNEuHaJIH Nn 3NcKBaHn 3a NaKeTnpaH n eTKeTnpaH, KOrato TpaHCnOpTnpate Batepnn Ype3 TpeTo Nnue. YBepeTe ce, Ye BatepInTe He Bn3at B KOtAKT C DpyrB Batepnn Nn npoBOIMM MaTePnaJn NO BpeMe Ha TpaHCnOpTnpaHne, KATO NpeDnA3nte OTKpnNTe KOHeKTopn C N3OJaun, HEnpoBOIMM Kanayetra Nn NeHTa. He TpaHCnOpTnpaIte Batepnn, KOnTO ca CnyKaHn Nn TeKaT. CBbpXeTe Ce Cbc CneDHaTa KOMNaHn 3a DoNbJIHNTEJeH CbBET.
ONO3HAITEBAUINIPOJKT
Bx. cTpaHnua 175.
- Batepn Tn AAA
- CbBaAca ce FM aHTeHa
- KohtpOJI Na TbUNaJa
- Pbkoxbatka 3a npehacrHe, n3oInpaHa NOBbpxHocT 3a 3axBaunHe
- Taba 3a yctpoNCTBO
- THe3do 3a 6aTepeyra
- Kanak Ha 6aTeepnra
- Bucokoroboputei
- IopT 3a DonbHnHTeIeH n3XoD
10.CBToDnOeHnnneCnoCBETKa
11.Cneuaneh USB nprt 3a 3apejdahe - IopT 3a DOnbIHHTeIeH BXoD
- OTeJeHne 3a 6aTeepn
- BnHT
- BaTePnA
16.ФИКСТОП - ByToH 3a HAcTpOuKn Ha YaCoOBnHa
18.Диспелзаиборнрахим
19.Инданкаторзабатерияа - BytoH on/off (Bkn./n3Kn.)
- ByToH 3a npedBapnteH0 3aadaeHa cTaHcHnA
- ByToHn 3a cnJaTa Ha 3Byka
- ByToHn 3a cKaHnpaHe Ha YecToTaT
- ByToH 3a n36op Ha peKIM
25.Инданацnia 3a 6acn
26.Инданкацязан检кn - BbHnHO yCtpoNCTBO (He e BkIIOueHo)
- USB Ka6eI (He e BkIoueHo)
- DonbHnTeIeH KOHeKToP
CTIO6BAHE
EDYUPEXDEHME
He n3non3BaIte ToBa n3deJIne, ako To He e HanbIHo crIObeHO nn Ako HAKOn Yactn BepoTHO nnCBaT nn ca NaOBpeDeHn. n3non3BaHe Ha n3deJIne, KoToE ne npabuHNO n HanbJIHO crIObeHO nn e c NobpeDeHn nn IINCBAU ChT MoKe da Do BoBeDo cepno3HN HapaHraHn
ENYUNPEXDEHME
He ce onntbaite da npomehre ypea nn da cb3daBate akcecoapn nn npctabkn, konto He ca npenopbuaHn 3a ynotpe6a c Hero. Bcka noo6ha nonpaBknn npomHa e HeKopekTHa ynotpe6a mOKe da cb3dae onachn ycNoBn n da haHece cepno3n fnnueckn HapaHbHn.
PA5OTA
EDYNYPEXJEHME
He no3BONBAIte Do6pTo No3HabaHe Ha To3n PpOdyKT Da OTCNa6n 6DInTeJNHOCTTa BN. 3aONMHeTe, Ye Mnr HeBHHMaHHe e DocTaTbUeH 3a HAHacAHeTO Ha cepNo3HN HapaHbAHNA.
ENYUNPEXJEHNE
BnHa n3BaXdaIte 6atepnaT oYpea, Korato crNo6BaTe Yactne, NoCTBaTe Nn Korato He n3non3BaTe ypea. n3BaXdaHTo Ha Te3n n3ToUHnCu Ha eHepra Ie npedotbpatn CnyauHo BKIOuBaHe, KoETO mOrIIO Da npuHHc cepno3Hn HapaHbaHn.
ENYUNPEXJEHME
YpeBt He e BDOOyCToHvB. He ro NotaIYe B TeuHocT. HecbOpa3raBaHeTo C TOBA npDeynpeJxHene MoKe da doBeJe Do cepNo3HN pN3nueckn HapaRaHaHna.
BHIMAHNE
BnHa nperIeJaTe pkoOcTBoTo Ha BcKO yctpoiCTBO, npenopbuaHO 3a N3No3BaHe KaTO npictabKa nn akcecoap. OepaTopbT Hocn NlHa OTROBOPHOCT 3a npabuHtO uN3No3BaHe Ha BcKO yctpoiCTBO, npikpeneHo KbM npoDyKta. HenpaBunHaTa ynotpeMoKe Da nobpeDN yctpoiCTBO nn ypeDa.
EYUNPEXJEHNE
YpeT MoKe Da npOn3BExJa 3ByK CbC cNla, KOrTo MoKe Da 6bDe OnaCha 3a CnyxA BdbnrocpoeH nnaH. CnyuHaTe Ha My3nKa C BnOcKa CnJa Ha 3ByKa 3a npOn3B0NeH nepNoD OT Bpeme MoKe Da DoBeDe Do 3ary6a Ha Cnyx, NpeDn3BnKaHa OT Wyma. Konkoto no- ronma e CnNaTa Ha 3ByKa, TOnKOba No-MaJIko Bpeme e Heo6xoJMo 3a yBpeKdAhe Ha BaWnCnX.
IOCTABRHE/IM3BAJDAHEHA BATEPNI AAA
Bux Φurypa 1.
Ppenopbya ce da 3aunwete 3anamteHnTe KaHaJI, npdAn da noDmeHnTe 6atepnTe AAA.
CbueCTByBa nepno 15 ckyHn 3a noDMraHa Ha 6atePnte AAA.Ako 6atePnte He 6bDat noMeHeHn B pAMKeTe Ha 15 ckyHn, ypeBt ue n3ry6n BCNU
PnpeBapntenHO 3anamTeHn HactpoKn N ige Tp6Ba Da ce npenporpamnpa.
Pn noDMHa BnHa n3no13BaIte HOBn aJkaJIHn 6aTepn.
- CbaneTe akymyIaTOPHOTo ycTpoIcTBO, aKO e MOHTnpaHO.
- Pa3BnIe BnHTa Ha KaNaYeTo Ha KaNaKa 3a 6aTePnMaxHete Kanaka n Iro octaBeTe HacTpaHn.
- Пoctabete Дев Нов батуп AAA, кato саЗbaTe Hндкаторite 3a плярноct B OTделенeto 3aбатуп.
3ABEJIEXKA:He n3no3BaIte eHNOBpeMeHHO CTapn HOBn 6aTePN. He n3no3BaIte eHOBpeMeHHo aJkaHn, cTahApTHn (BbInePOHO-UNKOBn) nn akymnatopHn (HNKeIO-KaDMeBN) 6aTePN.
- BbPHeTe Kanaka Ha oTdeHeneto 3a BaTePNn Ha MRCTO My N 3aTeHHe TE BNHTa, 3a Da ro 3akpeNITE.
IOCTABRHE/IM3BAKDAHE HA NAKETA C BATEPNI
Bux Phrypa 2.
Noctabane Ha 6aTepey:
- NocTabete 6aTePnraTb ypeDa, Karo noOpabHnTe p6aHa 6aTePnraTc yIeB bOTbopa 3a 6aTePnra.
2.ПрдидаЗаночerte pa6ota,ce yBepTe,ч eФИКСТОПЕТЯ ha 6aTePnIa TцpaKBaT Ha MrcTO n 6aTePnIaTe 3actOnOpena B ypeDA. - Hatapeu.
3A6EJIEXK4: BuHaHn n3BaXdaiTe 6aTeepnTa OT ypeDa, KOrato ToI He ce n3NoJ3Ba.AKO OCTaBnTE akymyNaTopHaTAt 6aTePnC BbP3aHa IpoDbJknteNHO Bpeme, TMOKe da Ce n3TOU.
DNCJIEN C TEUHN KPNCTAJIN
BuxФurypa3.
Korato naketbT c 6atepn e noctabeh, a ypebt e B no3nue "Bkn." Ha dincnpe r C teyn Kpnctae I ce ce nokaxe qacbT, YecOTATA, pekmbt H hactpoinkte. Korato naketbT c 6atepn e n3baedn ca nocctaehn 6atepn AAA, Ha dincnpe r Teyn Kpnctae I ce nokaxe camo qacbT.
3ABEJIEXKA: NIOCTpaunTe Ha DCNnner C TeHN KpncTAn, NOKa3aHn B pBKOBOcTBOTO, PpeCtabJBArCaMo IINMepHn YecTOTN, KOINTOMOKeTe Da BnNTe Bbpxy BaWeto paINO; Te He ca ToCHNe YecTOTN, KOINTOMoKeTe Da n36epete da cnyuatae.
BYTOH3A HABUNALI B MEHOTATA
N3noJ3BaIte 6yToHInTe 3a HABnraun B MeHIOTaTa 3a BKJIIOUbaHe n N3KIIIOUbaHe Ha ypeDa, 3a peryInpaHe Ha CINJaTa Ha 3Byka, 3a npOMraHa Ha YecTOITe, 3a
npeBKnHouBaHe MeKdy peXMMTe n 3a 3aDaBaHe Ha Yaca.
BKIIIOUBAHE/IMKIIIOUBAHE HA IPOIyKTA
BuxΦurypa3.
HaTncheteO,3a Da BkHIOUHTe Nn3KnHOHTe ypeDa
3A6EJEXK4: Tp6Ba Da 3aDbpxKe 6yToHa HATnCHaT 3 cekyn, npden ypeBbTa da ce CTaptnpa. Ako ToBa ce cnuyn, cmHeTe 6atepnnte (TN AAA).
3A6EJEXKA: Korato ypeDbTe BKNOueH ca NoctabeHH akyMnyatopnB 6aTePN, Ha CBeToNDHn DaCnNei ce NOKaxe Ako 3apndT ha 6aTePnTa e HncbK, ue ce NOKaxe npemrBaUc CMBOJ.
3a da cbxpaHra 3apraHa 6atepnaTa, ypeBt ABTomTuHO ige BJe3e B peKIm Ha 3acnBaHe np6n3ntenHo 1 cac, cne KaTo e 6n n3KnIOueH. 3a da n3ne3eTe OT peKIma Ha 3acnBaHe n da CTApTnpate NOBTOPOHOypeA, TpyBa Da HAtnChete Bbpxyypea.
CEJEKTOP HA PEXKIM
BnK Φnrgypa 3.
HaTnucHeTe MODE,3a Da npemHHeTe npe3 HauuHnTe peXmM.
Mokete Ta n36peTe eDIN O T yeTnp peKIma:
PexMM FM
PekmAM
PexnAUX
Pexm BLUETOOTH
PEYINPAHE HA CUNATA HA 3BYKA
BuxΦnrypa3.
Korato ypeBt 6bIe BKNIOueH, ToI ue ce BbpHe KBM nocJeHaTnON3BaHa HaCTpOka Ha Cnla Ha 3Byka.
3A6EJEXK4: Ako 6aTeepnte TIN AAA 6bDaT n3BaIeHn OT ypeNa 3apjBt IM e N3eepnaH, HNBOTo Ha 3Byka. 1e Ce BbpHe Do NaHcTpoKnTe No NOpa3bnpaHe.
3a da yBeJIyUHTe CnIaTa Ha 3Byka,HaTInChTe
3a da HamaJIte CINaTa Ha 3Byka,HaTInChTe
3A6EJIEXKKA: 3a da npomeHnTe 6bp3o HnBOTo Ha 3Byka, 3aDpBkTe Unn
BHIMAHINE
He n3no3BaIte ypeJa npi MaKcImaHNo HnBO Ha 3Byka npoDbJknteHb BpeMe, DOKaTO BaCIne N BVCOKnte YecToTn Ca Ha MaKcImaJIHn HnBa. Toba MoKe da NobpeDi BNCOKOROBOpTeJIte N/INu ycINBaTeJIte BypeJa.
HACTPOIKA HA FM/AM
Bux Φnrgypa 3.
H3non3BaIte< n>,3a da Hactponte XeJHaHaTa paIINO YecToTA. N3bpaHaTa YecToTA ce NOKa3Ba Ha DnCnJe C TeuHN KpIcTaN.
3a da hactponTe yeCToTa Ta pBHyO:
HaTnCHHe 3a KpaTko (HIN (He 3aIbpxKaITe), 3a Da HAcTpOte YecToTA C eHa CTbNka.
- HATNCHETe n OTnycHete 3a Da HAcTpOnTe No-HnCKa YecToTa.
- Hatnchete n otnycheTe 3a da hactponTe noBncoKa yectota.
3a da Hactponte YecToTa aBtOMaTHUHO:
- HATNCHETe n 3aDpBxTe
3a eHa ceKyHda, 3a Da HACPTPOnTE YeCTOTaT aBTOMaTHHO. - HATINCHETE nnn, 3a da cnpete ckaHpaHTo n da n36peTe YecTota.
3a da HamaJnte CmyueneHnra Tn n enektpnueckn yum, perynpaIte no3nnaTHa FM aHTehata nn npemecte Te ypeDa Ha no-roJaMa BncoHnA.
3AINC HA PAIIOHOCCTOTA B IAMETTA
BnKΦnrgpa3.
B nametTa Ha ypeDa Morat Da ce cbxpaHbBat Do 20 paAnooyecToN. MoKeTe Da 3aHwete Do 10 paAnooyecToN 3a BcEKN OT peKmnte FM n AM.
3a da cbxpaHte yeCTota B naMeTTa:
- Tbpche Ha XeIaHaTa paIIOueCTOta FM nIu AM.
- Hatnche T 3aPbXTe PRESET,doKato Ha ekpaHa 3anoHHe da npemrBa ,MEMORY" (PaMet) n 3aNcAHnT HOMe H No3uINr.
- HATNCHETe
,3a da n36epete 3ancaHnH OMEp HA NO3NUR.
3A6EJIEXKKA: CbIeCTByBat 10 3aHcHnNo3uHn 3a FM n 10 3a AM. Camo eHa cTAnuM oKe da ce 3anamEtN BvB BCKa 3aHcHn No3uHn.
- HatncheTe PRESET OTHOBO, 3a Da 3annuTe yectOTata.
3a da Hamepnte 3a ncaHn paHnoyeCTOTn (B pexm FM nn AM):
HaTnCHete nOCBO6oTe PRESET,3a da npemHHe Tpe3 BCEKN 3aINCAH HOMep Ha N03uN IN CBpb3aHaTa C Hero YecToTa.
ФУHKUOHOHPAHEHA EKBUNA3EPA
3a da perynnpate HactpoynKeHa Hncknte n/nn BUCOKTe YecToTn:
- HatncheTe n 3aipbXte MODE,doKaTo ce noBn,b" (BASS-HnCKn YecTOn).HataChete OTHOBo nIe Ce noBn,t" (TREBLE-BnCOKn YecTOn).
- HatncheTe nnn, DOkato DOCTHHeTe JeknHOTo HnBO Ha HnCKn nn BnCOKn YecTOn (OT -5 Do 5). HatncheTE MODE, 3a da cbxpaHnTe n36paHaTa hactpoiKa.
HACTPOINBAHE HA YACOBHNKA
Bux Φnrgpa 3.
HaTncheTe CLOCK, 3a Da BnDnTe YecToTaHa cnffpoBna dnCnne 3a 10 cekyHn. Cnej 10 cekyHn Ha dnCnner ige ce n3BeDe TekyuHnT Yac.
3A6ELEKKA: BbB BcNqk peKmM yacbT ce noka3Ba Ha dncnner no nopa3bnpahe.
3a da hacptponTe yacOBHnka:
- Hatnche T 3apbXTe CLOCK,doKATO YacBt 3anoHHe da npemRBA.
- HatincheTe uyn 3a da n36epete yac.
- HatncheTe n ocbo6oTe CCLK, 3a da 3anuweTe HactpoKaTa 3a Yac. MInHyTne 3anoYBaT da PdEMrBAT.
- HatncheTe uinn, 3a da n36peTe XeNaHNTe MNHyTN.
- HatncheTe n ocbooTe CCLK OTHOBO, 3a da notBbPdnte Yaca. YacOBHkT e Hactpoeh.
3A6EJEXKKA:AkO 6aTeepnTe TIN AAA 6bDat N3BaJeHHN HmAT 3apd 3a NOBuee OT 15 ckyHdn, HacTPOKnTe Ha YacOBnKa ige 6bDat 3aryBeHN. HAcTPOKnTe He ce BnIaRr OT n3BaXdaHeto Ha 6aTeepnTa C HanpeXeHne 18 V.
PEXIMC N3IIOJ3BAHE HA JOINbJIHNTEJIEN BXOJ
BnK Φnrgpa 3,4.
YpeBt Moke da ce n3non3Ba KaTO ycINbATEJ 3a MP3 nneynpn, CD nneynpn, CMaprTFOHN, Tabnetn npynn My3NKaHn yCTPOIcTBa.
3a da n3no n3BaTe peKIma c n3NoJ3BaHe Ha donbIInTeJeH BXoI:
- HatncheTe MODE,doKaTo ce oCBeTN peXIM AUX.
- CbpxTe DoIbJIHHTeHHa Ka6e (He e BkIIOueH) KbM yCTPOJCTBOTO.
- CbpxTe npyna Kpa Ha Ka6ena 3a DonbHnTeHe CNHaJI KbM NpTa 3a DOnbJIHNTeHe BXoJ.
3A6EJIEXKA:
BbHnHOTO yCTPOINCTBO TpRABa Da 6bDe BKNHOeHo n da 6bJe B pexKIM Ha Bb3PON3BeKJaHe, 3a Da MOKeTe Da UyBaTe3ByKaIpe3 BUCOKOROBOpNTeNTe.
- Bcunck 6ytoHn 3a ynpabHeHne Ha BbHsHOTO yctpoICTBO MORAT da ce nON3BaT HopMaJHO, DOKATO yctpoICTBOTO e Cbbp3aHO KbMaNOTO.
Cnata Ha 3Byka Ha BCaKO yCTPOINCTBO, Cbbp3aHOpe3 DonbHInTeHHa Ka6en, MoKe Da ce peYnnpaC NOMOHTa Ha 6yToHa 3a ynpabIeHne Ha CnataHa 3Byka Ha TOBa yCTPOINCTBO INN C NOMOHTa Ha 6yTOHnTE HnN HAypeda. - Ppi N3KJIIOUBAHETO Ha ypea BbHsHOTO yCTpOJCTBO HMa Da ce N3KJIIOUH.
- DOnbJHnTeHnIaKeI He OcnIpyra Bb3MOxHOCT 3a 3apeKdaHe.
4.Пьнг Te INHCTpyKUIN 3a EKCNIOaTauIN Ha CBp3aHOTO yCTPOIcTBO BHNARMOKeTe Da HamePte B pkoBOcTBOTO, pNIOJOxEHO KbM BaIeTO yCTPOIcTBO.
Tabata 3a yctpoiCTBO MOKe da ce n3non3Ba 3a cbxpaHEHHe Ha BbHHOTO yctpoiCTBO.
3A6EJIEXKKA: TaBata 3a yCTpoIcTBo He MoKe Da npEiNa3Ba BbHsHn yCTpoIcTba.
3A6EJIEXKA: IopTbT AUX OUT e cAmO 3a Cbbp3BaHe H BbHsH N BnCOKOrOBOpTeJIn. He BKnUoyBaIte CnyuAnKnB N nopTa 3a DonbHnHTeJen HxOJ. CnIaT a Ha 3Byka 3a To3n N nopTe HAcTpoEHa HA MaKcImaJHO HNBO H He MoKe Da ce HamaJIc HAtnCKaHToHa CnIaT a Ha 3Byka MoKe Da ce perynipa cAmO OT BbHsHnR BnCOKOrOBOpTeJN. Korato CnJaTa Ha 3Byka e HacTpoEHa 0 OT paJnOTO, BbHsHnRT BnCOKOrOBOpTeJL ue e 3arnyuJH.
N3NOJ3BAHE HA CNEUHAHNR USB IOPT 3A 3APEKDAHE
BuxФurpya5.
CneuaHnT USB nopT 3a 3apeKdahe ocNpyBa 3axpaHbAHe B pa3Mep Ha 2 aMnepa 3a MoBnEn TepeOH MP3 nIeBp, TabIe nnI npRy USB ycToPocTba.
BHIMAHNE
Ako ce onntate da 3apejdaTe yctpoiCTBa c HOMHnHa n4 2 amnpa, moKeTe da nobpeinte cneuaJIHHa USB nopT 3a 3apejdaHe / nn yctpoiCTBOTO.
- CB bpjxe Te eHnna Kpa H a USB Ka6ena (He oCnrypeH) KbM yCTpoiCTBTO C USB.
- Cbpxte npytn Ha USB ka6ena (he e ocnpyen) KbM cneuaannna USB nopT 3a 3apekdahe, 3a da 3anoHete da 3apekdaTe ycToPCTBOTO.
3AEBJEXKKA: CnueaJIHnIyT USB nopT 3a 3apejXdaHe OcIpyra BcMo3MOxHocT 3a 3axpaHbAhe; ToH He IpeIOCTABBb3MOxHocTn 3a IpeHOC Ha daHHN.
Korato ypeBbT pa60Tu Ha 3axpaHbAe OTe BATEpna CneuAnnrt USB npT 3a 3apeXdaHe ue npOdbJnx Da pa60Tu 3a OKoTo 1 cNeI N3KIOUbaHeto Ha ypeDa Ako ypeBbT ocTaHe HeakTNBeH cNeI To3n nepNoD, 3apeXdaHeto ige cnpe. BkIOUteyeJa 3a da Bb306HOBNTe cyHKuaTa.
N3I013BAHE HA YCTPOIcTBOC BLUETOOTH (HE E BKLIOUeHO B KOMJIeKTA) 3AEIDHO C YPEDA
BnK Φnrgpa 6.
- HaTnchete MODE,doKaTo ce ocBeTu peXIM BLUETOOTH.
3ABEJIEXKA:
KoratoypebT 6bDe BkJIOueH BpeKM BLUETOOTH,ToI ue ce onnTa da ce CbPxe c yctpoiCTBO c aKTINBupah BLUETOOTH,a Ha dncnnepc TceHN KpNCTaNN Ue 3anOHe da npemrBa bT.
- YpeBt ABTomauHNo ue ce ONTa da ce Cbbpke KbM NocJeHTo yCTpoiCTBO, KbM KOeTO e 6nI CBbp3AH. Ako He MoKe Da ce yCTaHOBn Bp3ka B paMKInTe Ha Net CeKHyDn, YpeBt ue 6bDe DOCTbHeN 3a dpyrN yCTpoiCTBa c BLUETOOTH.
- YcTpoiCTbata c BLUETOOTH TpI6Ba da 6bIaT pa3nOIOXeHn Ha pa3CToHne Do 10 M.OT ypeHa n Da 6bIaT HAcTpoEHn 3a TbpcHe / cKaHnpaHe, 3a Da ce CbIpxat CypeA.
2.Изберетe"RYOBI Stereo"OT cIncькa cHaINHnTE BLUETOOTH CnHnB yCTpoiCTBOTo,3a Da CBpbKTe yCTpoiCTBOTo nypeda.3a CBbp3BaHeTo He ce n3nCKBa napoI nnПнн KqI.
3A6EJEXKA:
Korato yctpoiCTBOTO ycneuHo ce Cbbpke c paIIOTo, cnpa da npemrBa.
Korato daheo yctpoiCTBO e Cbbp3aHO kmb ypeda, nHΦopMaunraTa 3a Cbbp3BaHe kmb yctpoiCTBOTO ce 3anCBA B naMetTA Ha paINOTO.
- Hatahe 3a da npemHeTe KbM npednHaTa nnCneBaAata neceH, KoraTo notoHNo npexBpIaTe ayno oytpoctBO c BLUETOOTH.
- HatncheTe n ocbo6oTe PREsT, 3a da npebbptnte MeJy cnpaHe Ha nay3a n Bb3npo3BexdaHe Ha aydno.
3A6EJIEXKA:
Te3n 6ytoHn 3a ynpabJeHne Morat Da He Ce NOndbpxkAT OT yCTpO'CTBOTO n npInIOxKeHneTO BLUETOOTH.
- Bcukn 6ytoHn 3a ynpabHe H a yctpoCTBOTO c BLUETOOTH Moat da ce n3noJ3Bat HopMaJHo, DOKaTO yctpoCTBOTo e Cbbp3aHO KbM ypeJa.
CnnaTHa 3ByKa Ha BCaKO yCTpOcTBO, CbBp3aHO KbM ypeDa, MOKe Da ce peRyNIPA c NOMOuTa Ha 6byToHa 3a ynpabNeHHe Ha CnNaTa Ha 3ByKa Ha TOBa yCTpOcTBo HnC NOMOuTa Ha 6yTOHnTe 一 nHa ypeDa.
- Hatnche n 3aPbXte PRESET, 3a da pa3eHnHte yctpoictBO c BLUETOOTH.
3A6EJEXKA: Korato yctpoiCTBOTO 6bnde pa3eHHeHO, Ha dncnner c TeuHKnpctaJIu 3aneOue He npemirBa b, aypebT 3ane 3anohe Da
Tbpcn dpyro yctpoNCTBO.
CfBAUCA FbBKABA FM AHTEHA
BuxxΦnrgpa7.
3a Da HamaI NTe CmyuHnra Ta nIeNktpueckn IyM, pa3TeHHe FM aHTeHaT aI npEmecTe ypeDa Ha no- rOraMa BnCOUHa. FM aHTeHaTa ce cRbBa n npu6upa, KOrato He ce n3non3Ba.
IIOIDPbJxKA
ENYIPPEXJEHNE
IpoDyKbT He TpR6Ba HnKOra Da Ce BkLIOUBa B 3axpaHbaHe, KOrato CrlNo6BaTe Yactn, npabnte HacTpoKn, NoCHCTBaTe, N3BbPbBaTe NODpbXka nn Korato He ro n3noJ3BaTe. N3knOuBaHoTo Ha npOdyKta OT 3axpaHbaHeTo Ue npedOTbPaTu CnyaHHO CTapTnpaHe, KoETO 6n MOrTo da npuHHn cepno3Hn HapaHraBaHna.
136raBte H3no3BaHTo Ha pa3TbOpTeHn npn NOCTBAHTo HA nlaCTMacOBte yactn. NObeHTo IAACTMaCn Ca YyBCTBnTeHN KbM pa3NHyH BNDBe pa3TbOpTeHn mOKe Da ce NobpeJr npn H3no3BaHTo Ha TAKnBa. H3no3BaTe CyxN KbPn 3a OTCTpaHBAHe Ha 3aMbpcBAHn, npax, MacNo, CMA3Ka nT.H.
ENYIPTPEXDEHME
B HnkaKbB CnyaH He No3BoJBaIte NnactMacOBnte YacTn Da BIn3at B KOHTaK TcC CNpaHn TeHocTn, HeTeHN npOdyKTN, PpOHKBaU McaNa n T.H. XMMKaJIte MoRat da NobpeJr, OTCna6r nn yHnIOXkT pNactMacata, KoEtO MoKe da DoBeJe DO cepno3Hn Qn3NuCeckn HapaHraBaHna.
Pn n3BpWbAe Ha cepBn3Hn DeHocTn 3nON3BaIte
cAmo opnHaJIHn pe3epBHN qactn OT npOn3BOJnteJr.
YnoTpE6bata Ha BcKaKBN dpyn qactn MoKe da
npedCTaJIbRa pNCK Nn Da npuHn NOBpeJa Ha
npOdykTa.
ONA3BAHE HA OKOJIHATA CPEDA

PeuKnipaHe Ha CypOBHH, BMeCTO 3a
Obe3BpeKdaHe KaTo OTnabk. MaunHata,
DonbJIHNTeHHTe PnucNOC6NeHn
n OnakOBKeTepraBa Da bDat
NoIIOxEHn Ha NpOxDxa Npepa60tKa 3a
ONoI3OTBopRaHe Ha CbDbPkaaHTe ce B
T8X BTOPNHcypOBHH.
CNMBOJIH

PpeDynpexKeHne OTHOCHO630nachOCTTA

CEcbOTBETCTBNE

EurAsian 3nak 3a cboTBeCTBne

YkpanHcN3HaK 3a CbOTBETCTBNE

Ppoetete INCTpykunnte BHNMaTeHNO, npdi cTaptnape MaHHata.

EneKtpueecknte ypei He Tp6Ba Da ce n3XbPnT 3aeHc C 6BtOBnTe OTnabu. PeunKnnpaTe, KbTeo mA Bb3MOxHOCT. O6bpHete ce 3a CbBT no peunKnnpaHTo KbM MeCTHnTe Bnactn INI pa3npocTpahntenTe.
CNMBONB HACTOJTO PbKOBOCTBO

Uactnte nn npnaadneXHOCTte ce npoabarotdennho
CneHnTE CnHnHnDyMn N TexHnTe CbOTBeTHN 3HaueHnna O6BcHBAt Hbata Ha OnaCHOCT, CBbp3aHn C yIOTpe6aTa HA To3n npOdyKT:
ONACHOCT
Yka3Ba HEmnHyemo OnaCha CNTyaun, KOrTo aKO He 6bJe n36ErHata, Ue DOBeDe Do cepno3Hn HapaHraHHaNN cMbpt.
PDEyPExKdEHNE
Yka3Ba noteHuaJIHO onaCha cItyaJRA, KOrTO aKO He 6bDe N36eHata, MoKe Da IOBeDe Do cepNo3HN HapaHaBaHn IIN CMBPT.
BHIMAHNE
Yka3Ba noteHuaHNO onaCha CnTuay, KOrTo aKo He 6bIe n36BerHata, MoKe da DoBepeHn nn cpeHn HapaHaBaHna.
BHIMAHNE
(Be3 npedynpeDnteneH cIMBON 3a 6e3onacHOCT) Yka3Ba cnTyauN, KOrTO MOKe Da DOBeDe Do IMyueCTBeHn UeTI.
TolOBHmM mIPkyBaHHm npn po3po6u zboro paio 6ynn 6e3neKa, efeKTHBHCtTa HaidHicTB.
PNU3HAUH
Ipoodyk npn3NaeHn dlya:
npoocnyoxoByaHHa FM / AM paio, MP3-nneepib Ta iHux ayio npucTpoB
USB-3apradkacymicnHex npncTrooIB
notokobe ayio 3 npncptoiB, io BnKOpncTObyoTB BLUETOOTH
Длд Довбанн Ta CBepДлeнн Ka'm'HoI KnaIKN, MOKe 6yTN BkOpuctanH pexm MoJOTka.
3AΓAJIbHI INPABNIA B6E3NEKIN
TNEPEDXEHH
YntaIte Bci npabnla 6e3neKa Ta IHcTpkykui. HeDoTpmaHnna nonepeJxKeHb Ta IHcTpkykui MoKe npu3BecTu Do ypaXeHH eJeKtpnuHm CTpyMOM, noXeKi Ta / a6o cepno3HO TpaBMn.
He BnKopncToBvIe npicTpi no6n3y BOuN.
Дя Oуишени npictpoB BnKOpNCTOByTe TjIbky cyxyTkAHHy. Hikon He BnKOpNCTOByTe raJbMIBi piHn,HaftponpoyKTn a60 6yNb-ki po3uHHNKn dny OuyiHnnpictpoI. DToPImaHHN cboRTO npabNa do3BOJNTb 3Hn3HTn pck BtpaTH KOHTPOIO Ta yHNKHyTN NOWKODKeHH NpactNY KOPNcy.
He BcTaBnIe HiaKIpneDMeTny BeHTnJIaHi OTBOpN. BcTaHOBnIOte BiINoBInHO Do iHCTpyKci,HaDaHnx BnPo6HnKOM
He po3miuye npncptpi B 3akpnux waqax a6o Ha cTikkax 6e3 HalejXhoi BEHTnnaui. Tpmaute DnctaHIO oohaimeHwe 5 cm do IHwix o6'kTIB.
He po3taoobyte npucptpi no6n3y 6yb-aknx dkepeTenJa, taKx Jk paiaTopu, oirpiBaui, nei Ta iHwi (BKnHouaOuNi dcunHobai), kI Bnp6bnoTb tenNo.
BnKOpNCToByTe TINbKn Bn3HaueHi BnPo6HnKOM DoaTKn Ta akcecyapn.
3 npNbOy 6yIb-koT O6cnyroByaHH 3BepTaTEcb TlBkn Do KBaIiΦikOBaHHx CneuianicTB. TexHue 6cnyroByaHHn oTpi6Ho npn 6ydb- kKomy noWKoJKeHH, KaHnHa npncpti Bysn npoHnA pIdnHa a6o npn noppannnHHi y HbOro cToPOHHx npedMeTIB, KaHnPnCpti 6yB HamoueHn doUem a6o noWKoJKeHH BOIoro, KaHc npncpti He npaHc HaneXHM YINOM, a6o npncpti BnaB.
■PnO6cnyroByBaHHI BkOpncTObyTe BkNHOOpnHaBHi 3aNactHIn, akcecyapTa npnaDByBID Bnpo6hka. DToPmMyTeCb IHCTpyKuJ 3 po3diny "TexHnHe 6cnyroByBaHH" y uiei IHCTpyKu3 3 eknnyataa. BkOpncTAnHn Heo3BOJeHx 3aNactHn a6o HeoDTpMaHn IHCTpyKuJ 3 TexHniHO 6cnyroByBaHH MoKe cnpuHNHTn pN3NK ypaKeHHeNEKtpuHm cTpyMOM a6o OTPMaHn TpaBMn.
3HaIe Cbi npOdyKT. YBaXHO npOuHTaTe iNCTpyKciIO 3 EKCnnyatauii.BuBvIt np3NaueHnra Ta o6MeKeHHn Dnra cBoRo BnPo6y, a TakoCneUPhiHi nToEHnJIaNbHi He6e3NeKn, Nob'3aHI 3 Hm.CiYBaHHa UbOMy npabNHy 3Hn3ntb pN3NK ypaXeHHn eNEkTpNCHM CTpyMOM, noXekj a6o cepNo3HOITpABMI.
He BnKopncToByTe eKeTpoHcTpymEnTu Bn6yXoHe6e3neuHi aTMocpepi, HapnPKnaD, y npncTyHocTi IerKo3aMnCTnx piINH, ra3iB a60 nNtY. EKeTprHHi IHcTpymEnTu CTbOpIOIb icKn, 1O MoKxyTb 3anaNTn nn a6o napn.
EJEKTPO6E3NEKA
Pnucpi,o npaue 3 BMOHTOBAHIMn akymyITopamn a6o 3 Okpemm akymyITopHm 6NOKOM cIid 3apxkTn TlBKn 3a DonomorOpe komeHDoBaHOrO 3apJHoro npcTpoDnAkyMnyTopiB. 3apdHn npcTpi, 0 niXoDttb DnOHO TnPy akymyITopiB, MoKe CTBOpTN pN3NK 3aropHH npu BVKOpNCtahHi 3 IHsIM akymyITopHm 6NOKOM.
BukopncToByte eNekTpoHcTpymEnTn TJIbKn 3 npn3HaueHMM nIg HIX akMyJrTopaMn. BukopncTaHH6yNb-4kNx IHmX akMyJrTopiB, MoKe CTBOpHTn p3NK OTpMaHH TaPBM i NoKexKi.
BukopncToByTe 18 B niiTi-n-IOHHaKMyJrTopu.
DONEPEDXEHH
Pn HeHanexKhi 3amHi akymyIaTopa icHy eHe6e3neKa Bb6byx akymyIaTopa 3amHIOte JInue TaKIM CaMM akymyIaTOpOM a60 akymyIaTOpOM TORX TINy.
OCO6NCTA BE3NEKA
He BnKOpNCTOByIe npncTpii dny npocnyxObyBaHH My3NKn a6o iHux 3ByKOBnx nporpam nid Yac KepyBaHH po60TOO o6naHaHH. TaKa nobEdiHKa MOKe BiDBoJIkTN Ta CTATN npuHHO OTPMaHH cepNo3HOITpaBMn.
Pnucpi 3daTHN Bnpo6JnT 3ByKoI qactOTn, kMoKyTB 6yTN He6e3neHmN npn DOBromy npocnyxOByBaHHI. PocnyxOByBaHHa My3NKn Ha BeNKi rYHoctI npTAROM 6yDb-akoro yacy, MoKe npn3BecnDo iHykOBaHO Wymom Btpn Cnyx. YmM 6JIbwa ryHicTB, Tm MeHwe yacy MaE npouTn nepu
HIX BaI CyX MoKe IocTaKaDaTn.
BKNOPNCTAHHRAOBCIYTOBYBAHHNIPNCPTPOU
KoJIyAkymJrTOp He BnKOpNCTOBYeTcBc, TpMaIte NOrO nOdani Bid MetaneBux npEdMeTIB, TaKx JckPINK, MOHETN, KIOUci, ZbAyn, WypuN, a60 iHsi Dpi6Hi MetaneBi npEdMeTn, kI MoKyTb NiIDKnHouNTn OINH KOtAKT Do IHsoro. KopOTke 3aMnKaHnHa KOtAKTIB akymjraTopa MoKe npN3BeCtN do onIKIB a60 noKexi.
TpmaTe iHcTpymeHTn cyxmnn, uCTmni i BInbHMn BiD MaCTnna n 3MaueHH. IJn yuueHH 3aBxDi BVKOpNCToByIte YNCTy TkaHHy.
AkymyIaTOpHi IHcTpymeHTn He noTpioHo nIKNoHoyatn Do eNeKtpuHoi po3eKn. BHaCNIIOK cboRo BOHN 3aBXdN 3hAxOJaTBcY pOboOHy CTaHI. YCbIDOMnHOte MoKJIbBi He6e3neKn iD qac BnKOpNCtAHnA kMyIaTOpHOro npncTroO, a60 KOn MInHeTe NOro akceCyapn. CnIyBaHHra bOmy npabNy 3Hn3NTb Pn3NK ypaXeHHra eNeKtpuHm cTpymom, noXeXi a6o cepno3HOITpabMn.
He po3miuye akymyaTOpHi IHCTpyMeHTn a6o ix akymyaTOpn no6n3y BorHIO a6o dKepeNa TeNna. BnKoHaHH yBoO npabnla 3Hn3ntb pn3NK Bn6yxy Ta MoKJIbICtB TpaBMn.
He po36nbaite, He ynyckaite Ta He noWkoJkyte akymyIaTOpHy 6bataeIO. HikOnn He BnKopncToByte akymyIaTOpHy 6bataeIO a60 3apAHN npicTpii, knn naab a6o ndaabacn CnIbHOMy ydApy. NpOskOKeHn akymyIaTOp MoKe BV6xHyTN. IpaBnIbHO no36ydbTec8 ynyueHOi a60 noWkoJkeHOI 6bataeI.
AkymyIaTOPn MoKyTB Bn6yXHyTn, kKIO NOpuy E DkepeNo 3anaIbOaHHa, HapnKnaI, MaII NpaJIbHNI. IJa 3MeHWeHHra PN3Nky cepno3HOI TpaBMn HikoJIH BeNKOpIcTOByTe 6e3dpoToBI BnpoBn npiC 3 BiDkpTmM nOnym'Am. Pid Yac Bn6yxy AkymyIaTopa MoKyTB BiNITATn yamKn Ta BnIjTncs XmiHi peOboHN. B pa3i Bn6yH heraiHo 3aIInte MOro BOIO.
He 3apkaTe akmyTOpHn IHcTpMeHT y cnpomy a6o BOnoromy Micci. CndyBaHHN cBomy npabiny 3HNtB pnsK ypaKeHH eJeKTPnHm CTpyMOM.
Дя efeKTHBOI 3apRKn, npcTpiMae 3apRJaTncb y npmiiueHhi de Tempepatya Bnua 3a 10^ Ta MeHsHa HIX 38^ .ДЯ 3HnKeHHpaN3kY cepNo3HOro TpaBMyBaHH, He 36epiraTe npcTpi Ha CBixKomy nobitpi a6o y TpaHcnOpTHnx 3acobax.
Kuio npicptpi BnKOpncToByeTbcra npi TemnepaTypi HABKOINHbOro cepedOBuHa HxKYe 0^ a6o Bnue 3a 40^ , icHy e pn3nk HeKoHTpoJbObaHo i CnTuayi.
Pn HAdMipHomy BkOpncTaHHi a6o NiD iieO ekTpeMaJIbHnx TeMnepaTy moKe BiID6yTnca BNTIkaHHa KNCnotu 3 akMyJrTopa. B pa3i KOHTaKty
KNCLOTNI 3I KIKPOHO HRAHNO NOMNTE II BOIO 3 MNJOM.
RKO KNCOTA NOTPANNE B OOY, NPMNTE IX YNCTOHO BOIO BNPODOBK MINIMYM 10 XBNINH, NOITHERAHO 3BepHITbCdo NIKAPRA. DOpUMaHHa CBOrO npabnla 3HN3NTb PN3NK OTPUMAHHcpeNo3HO TpaBMN.
ДЯ 3MeHWeHHpy3Nky TpaBMyBaHHa6O ypaXeHHeEKeTpUHm CtpyMOM, npucTpiMaE BnKOpNCToBvBaTncb Ta 36epiratncb y HeoCTynHomy dIraDTeiMiCi.
36epexitb ci ihctpykii. Yactiwe 3BeptaTeecdo HIX, Ta BnKOpNCTOByIe ix, i06 IHcTpkyBaTN iHux, XTO MOKe BnKOpNCTOByBatN cey npctpi. RaIO Bu N03uAcTe KOMycb cey IHcTpymENT, nepedaBaiTe Iomy taKoX cio IHcTpkyCIO.
He BnKndaIte BNKOpunctaI akymyIaTOpHi 6atapei pa30M 3 no6yTOBIMu BiXoamn Ta He cnaIIOte ix. BiinpaBTe ix do BiNobIDHoro Micy yTuINi3aui/36opy.
Pnncpti He noBHeH nDnraTn BnInBy BoaHnx Kpanenb Ta 6pn3OK, a TAKOX Hiaki npedMeTu, HanoBHeHi piDnHO, HanpNKlaI, Ba3I, He noBHHi 6yTu po3MiueHi Ha npctpoi.
AkymyIaTOPn(BMOHToBaHI a60 OkpemM 6NOKOM) He MaOTb 3HaxOuNTucb nopRd i3 JxKepeNaM Tenla, HapnKnaD, coHryHi npomeHi, BOROh Ta iHsi.
PnucpiBnKOpNCToByEcpa3oimnucptpoem 3'EDHaHHB AkoCTi npucptpoBIdkIIOUeHHBAID Mepeki eNEKtpOKNBLeHH. PnucpiBIdkIIOUeHHMaE6yTu y HanexHOMy po6OcMy cTaHi.
IODATKOBI IONEPEIXEHH3 TEXHIKBE3NEKUNOIO BNIKOPNCTAHNAKUMYJATOPIB
A NONEPEIXEHNA
Дя 3anobirahн He6e3nei noKexi B pe3yntari KopoTKoro 3amKaHH, TpaBMam i NOWKoJKeHHIO Bnpoib He 3aHypnoIte IHcTpMyENT, 3miHHN akymnyTop a0 3apdHn npctpi y piDHy i He donyckaTe NotpannnHry piHN BCEpyH npCtpoIB a0 akymyTOpB. Kopo3iHi i ctpymonpObiHi piDHN, Taki k CoONH pOzHn, NeBHi xIMiKaTu, Bu6iNoBaJIbHi 3ac06n abo npOdykTN, UO IX MICTaTb, MoKyTB npu3BeCTn Do KopoTKoro 3amKaHH.
3amHa akymyIaTopa Ha iHn HHeHaJeKHoro Tnny MoKe nocnaBHT 3axnt.
3a6bOpHeO yTuNi3yBaTn akyMylrTop y BOrHi, BRapayi nei afo nidaBaTn MexAHHyHOMy Dpo6JeHHo Hn po3pi3AHHO, ce MOKe npN3BecTn Do Bu6yxy.
3a6bOpHeHO 3aHnWATn aKymyTOp B HABKOINHbOMy cepeoBnui 3 HaD3BuaHNO BNCOKO TeMnepaTypoU, ue MoKe npN3BeCTn Do Bn6Byx A60 BNTOKY rOIOOi piDHH a6o ra3y.
KkuO akMyJITop nIaTbCn Hau3BuaHn Hn3bKOMy TnCKy noBITpr, ce MoKe npu3BeCTn do Bboxy a60 BntOKy rpoooi piDHH a60 ra3y.
TPAHCIOPTYBAHHJIITIEBHX BATAPEI
TpaHcnpTyTe 6bTaapeIO BiINOBiINO Do MlCueBnX Ta HauioHaIbHnX NIOJKeHb Ta npaBnI.
Dotpmytebc ycix cneiaIbHnx BmOr 0do NaKyBaHH Ta MapkyBaHH npn TpaHcnopTyBaHHi 6aTapei TpeTboO CTopoHO. NepeKoHaIeCra, 00 6aTapei He MoKyTb BCTynATn B KOHTAKT 3 IHNIMn 6aTapeRMn a60 npOBiHNIMn MaTepiAnAMn npn TpaHCnpTupOBuCi, 3axNlaOChn BiKnpti PO3'EMn I3OJIaIIHMMn HEnpOBoDAIaMMn KpnKamn a60 CTpiKoHO. He nepeBOzNTn 6aTapei, kAI MaOTb TpiHNn a60 npoteKN. KOHCyIbTuTEc3 ekCneIITOpcbKOIO KOMnaHIEO dnn NoaIbWx NKcYbTaui.
3HAHTECBINPPODyKT.
IuB.CTOp.175.
- BaTapeiKu AAA
- Cknaadn FM-paionpmau
- Cechopha naHene ynpabnHH
- Pучka Дпя Трансортувань, i3ольова на NOВерхндя утимання
- Bicik npictpo
- Hhi3do nnayakmynTopa
- Kpnuka akymyntopHoro BiDciKy
8.Диhamikn
9.Додаткови пот Вихову
10.PK-dncne3niDCBvBaHHM - Budilenei USB- nopT dnia 3apdkaHn
12.ДодаTKOBи npвOу - Bicik nna akymyntopib
14.ΓBnHT - AkymyJItopHa 6aTapeJ
16.ΦikcaTopu - Khonka perynkoBaHHa cay
18.Диспел Вибору ржIMy - Inukatop Biicky dna akymyntopib
- Nepemikay BkIIOueHHB/BmIKaHH
- Khonka HanaawybaHHa TAHJI
- Khonkn perynbHaHnryu
- Khonkn ckahybaHHaCTOT
- Khoinka Bv60py pexmMy
- BiodobpaKeHHn Hn3bKxHcAcot
- BIDObpaKeHHBepxHix qactOT
27.3OBHHHn npntpi (He BKIOueHO) - USB-ka6eJIb (He BKJIOUeHnI)
29.ДоаТКOBи рОЗ'IM
3BPAH
TNEPEXEHNA
He BnKOpNCToBnyTe uei Bpi6, kUo BiH He NOBHCtIO 3i6paHm a6o kUO BiCyTHi a6o NoWkoJxKeHi DeaKi NOro Detani. BnKOpNCaHHa NpncTpoH, 3i6paHm HeHaJIeXHM uHOM Ta HneBHCtIO, a6o 3 nOwKOJxKeHMu cactnHAM MoKe CnpuHHTn cepNo3Hi TpaBMn.
NEPEXEHNA
HeHAMaraiTeCe3MiHHTUeIHCTpymENT a6o 3po6ntu npJIAaI,HepeKOMeHDoBaHI IJI BIKOpNCtAHN3 UIM IHCTpymENTOM.ByNb-kaTaka3MiHa a6oMoNΦiKaIzI -Ze HnPaBnJIbHE BIKOpNCtAHN iMOKe pnp3BeCTn Do He6e3neHoI cTuyaIi,IO pnp3BOIDtBdoMOKJIINBX cepno3Hnx TpaBM.
ФУHKUIOHYBAHHY
TNEPEDEXHH
He Do3BOJnTe 06iHaHocTi npo npOyKT 3po6ntu BAC He6bAIm. PAm'TaIte, 10 HeoBepeKHOi YacTKN CekyHn DOCaTHBo, 106 3aBdTu CepNo3HOI TpaBMn.
TNEPEXEHNA
IpeB BCTAHOBJIeHHaM DeTanei, BIKOHaHHaM peryIbBaHb, YIeHHa, a6o KOnn Bupi6 He BIKOPNCOTByEcra, 3aBXdN 3HimaTe 3 HbOro akymyIaTOpy 6bataeIO. BuaIaeHHa AkymyIaTOpHOI 6bataei 3anobirae HeHaBMnCHomy 3anycky, kKn MoKe npu3BeCTn Do cepno3HOITpaBMn.
TNEPEXEHNA
Pnucpii He e BODocTikm. He 3aHypBoatu y piDHy. HeDoTPMaHHy UBOrO nonepdKeHHr MOKe npu3BecTu Do cepo03Hx TpaBM.
yBAGA
3aBxD 3BepTaeTcB do iHCTpyKuii 3 TexHiHoro
06CnIyROvBaHHa 0do peKOMeHIOBaHnx Do
BVKOpNCTaHH aKceCyapib a6o npuaJd. Pn
BVKOpNCTaHHi 6bY-b-aKOrO npuaJd, niKJIouHeHO
DO npIcTPOU, HaneXHM YINOM, BHNrTKOBy
BiNDoIaIbHiCTb Hece KOpNCtBuA. HenalexHe
BVKOpNCTaHH MoKe NOsKOHTn npuaJd a6o
npIcTpi.
TNEPEDXEHNA
Pnctpi 3aTHN Bnpo6Tn 3ByKOBi qactOTn,
Aki MoKyb 6yTu He6e3neuHmPi np DOBROMy
npocnyoxobyBaHH. IpocnyoxobyBaHH My3NKn Ha
BeNIki ryHocti npotraom 6yb-koTO qacy, moKe
npn3BcTe n Do iNDyKObaHOI WymOM BtpaN cNYx. YIM
6Inbwa rHyHcTB, TmM MeHwe yacy Ma e npOITn nepw
HIX BaW CNY M0Ke NOCTpaxkDaTI.
BCTAHOBJIEHHRA/3AMIHA AKMYJITOPIB TINY AAA
ДиВитсmaJIIOHOK1.
Iepw HIX npoBOnTu 3amHy akymyIaTopiB Tnny AAA, peKomeHDoBaHO 3anCaTu 3epeXeHi KaHaJI.
3amHy akymyIaTOpB tiny AAA cnid npoBOnTu npotrorm 15 cek. Jkso akymyIaTOpn He 6dyTb 3amHei npotraom 15 cekyH, BcHnAaWtBuHn HpncTpOu, 6ynn 3epeXeHb nAm'rti, 6dyTb Btpaehi, Ta npicTpim BmaraTIme nepenporpaMyBaHH.
ДяЗamIH 3aBXKn BnKOpNCTOByTe HOI anKaJIHObi akymyIaTOpN.
- Bndaitb akymyIaTOpn, kkuo BOHn BCTaHOBJIeHi.
- Nocna6Te rBnHT Ha 3axnchien Kpnu akymyIaTopa. 3HimItb KpNkTu Ta BiKnJaIdt b y 6ik.
- BctaHObITb Dba HOBnX akymyIaTOPu Tnny AAA 3riHNO do iHdkaTOpIB nonpHoCTi BCEpeDInHi BiDcKiY dnaakymyIaTOPiB.
IPNMITKA: He BnKOpNCTOByTe ONoHocHO aKyMnyTOpN, 106 byy N y BnKOpNCtAHHi, Ta HObi. He BnKOpNCTOByTe ONoHocHO anKaJIHOBI, cTaHdApTHI (kapboH-uzHKoBi) abO (hikeJb-KaDmicBi) akyMnyTOpN. - NocTe ABTe KPNsKy Ha MicCe Ta HadiH No 3aTnHtBnHT.
BCTAHOBJIeHHr/3AMIHA AKMYJITOPHORO BIOK
DnBtbcMaHIOHOK2.
ДяВСТАНБЛЕнHAkMyЛТOPHOrO6NOKy:
- Nomicitb akymyIaTOPHn 6bok do npictpo, NOeHaBn pe6po akymyIaTOPHO 6bOKy 3 KaHABKO y BiDcIKy dNra akymyIaTOPiB.
- Ipeed noatkom BnKOpncTahHnapekoHaTeCb, 00 fikcatopn Ha akyMnyTopHom6noi KnaCyHn Ta 6nok HadiHO 3akpinHeO y npctpoi.
- ΜΟδ 3ΗΤΑΝΑΚΥΜΥΙΝΟΡΗΝ ΜΙΚΟ ΚΟλαβε φικατορη.
NIPMITKA: Raio paio He BnKOpNCToBcyTc3aBXd3HaimTe akymyIaTOPHn 6Jok. Raio akymnyaTOPHn
6nok 3aIuHcHo y npucTpoHa doBriu Yac, BIn MoKe po3pndntncr.
PK-ДИСПЛЕМ
ДиВITбЯ МAJIOHOK3.
KoHn akymyIaTOPHn 6JOK BCTaHOBJeHO Ta npncptpi BKNoeHn, PK-DnCnneN nokaYBaTmE qac, qactOry, peXm Ta HalaWtYBaHH. KOnn akymyIaTOPHn 6Jok He BCTaHOBJeHn, a BCTaHOBNeHi akymyIaTOPn TIny AAA, PK-DnCnneN nokaYBaTmE nIwe qac.
INIOCTpaui PK-dncnne, HabeDeH i hctpykii 3TexHOrO OcnyroByBaHHe, E Nnue npKnaamu yactOT, kBI MoXeTe No6aHTn Ha BaWOMy paio, ane He e ToCHMn YactOTAMn, kBI MoXeTe o6patn dnn InpocnyxOByBaHHra.
Pnpctpi Mae YoTnppeKIMn, kI MOxHa o6paTn:
FM-peximM
AM-pexmm
AUXpeKIMM
PexMM BnKOpNCtAnHBLUETOOTH
PERJIOBAHRAIYHOCTI
ДиВITбСМЛHOK3.
KoJI npIcTpiyBIMkHyTm, pIncTpii NOBepHeTbcra Do octaHHix HanaWtYBaHb ryHocTi.
PIMITKA: Raio B npicTroi BiCyTHi akymyIaTOpn TIny AAA a6o BOHn He3apJxKeHi, HanaWtYBaHHraYHocTi nobepHybCdo CTaHdApTHnx.
IyHnOCTi, HATNCHTb
Дязмehшенигунocti, hematchiTb
ПРИМITKA: Дяшвдков 3MiHи ГУHOCTi, yTpIMyIte a6o
YBATA
He BnKOpNCToBnyTe npncTpi npu MaKcMaJIbHiI rHyHocTI npOTAROM TpINBaNOrO Yacy 3 BnKOpNCaHHaM MaKcMaJIbHNx pIBHb HanaHTyBaHb Hn3bKnX i BnCOKNX qactOT. Lc MoKe npn3BecTu Do NOLKOJKeHHa DInHaMIkIB Ta/a6o NocNIIOBAuIB npncTpoHO.
FM/AM-HAJIAIHTYBAHH
ДИВITбСМАнOHOK3.
BnKOpNCTOByIe Ta DnH HanaWtYBaHH 6aXaHOi paio qactOTn. O6paHa qactota BiO6paKaATmEtbcra Ha PK-dncnnei.
HnHaJauaTyBaHHaCToTn BpyHy:
WBnKOHaTNCHTb a6o a6o (he yTPMByBaN iD qac HATNCHeHH) dna HanaWtYBaHH po3Mipy KpOky cactOTN.
- HatncihTb Ta BiDnycTItb <dna HanaWtYBaHHa 6inbHn3bKOi YactOTN.
- Hatnchitb Ta BiDnyctitb Dnna HanaWtYbaHHa 6inbB Bucokoi yactOTH.
ДЯВТOMATHNOHAJWHTYBAHNA YaCTOTN:
- Hatncihb Ta ytpmyte a6o npotrom oHiei CEkyHn dna aBTOMaTHOHO HanaHTyBaHHaCTOTN.
- Hatnchitb a6o Dnra toro, 0o6 npnnHnTn cKaHyBaHH Ta o6paTn qactOTy.
ДяЗнжehнзаадтэелкгчногушу,налшуп Te noJoxeHH npHMy FM a6o nepemictntb npncptiHa 6inbBncoke Micue.
36EPEXEHH NONEPEDHIX HANAHTYBAHB B NAM'RTI INPCTPOIO
ДиВITбСМAJIOHOK3.
Bid3hakoI na'm'pi npctpO e Te, IO BOHa Do3BOJnE 36epiratn do 20 nonepeHix HanaWtYBaHb YactOT. MoKHa 36epiratn do 10 1actot k dF, ta i dA AM pexmib.
Dnra toro, 0636epertn qactoty y nam'pi npncptpo:
- HanaTsyBaHHaKaHoi FM a6o AM yactOTn.
- HaTnChiItb Ta yTpmyTe PRESET DOKn "MEMORY" Ta HOMep NOIOXeHNr NOpeIbOTo HAJaUStyBaHHr He noUHe 6IIMATn Ha ducnnei.
- Hatncitb Ta DnBv6opy Homepa noIoxeHHN nonepedhboro hanaHTyBaHHr.
PIMITKA: DocTynho 10 noLoXeHb dIa nonepdHbOro HanaWtBuHHa dIy FM ta 10 dIa AM peKmUy. dIa KoxHoro noLoXeHHa nopeDhBoro HanaWtBuHHa MoKe 6ytu 36epXeHa TiIbKn ODa hctauia.
- Hatncitb PRESET ue pa3 dnn 36pekeHHaCTOTN.
ДлгнаналштУваннnoNoXeHHn nonepeHbOrO наналштУванн(FM a6o AM pexm):
Дляпесуд між HomepaMu NОLOKeHB NONEpeHbOrO HanaштУbaHнТа усгOTamN,IIO i3 HmN NOB'raHi, HATnCKaIte Ta BiDnyckaIte PRESET.
ФУHKUIGEKBAJAN3EPA
HanaHTyBaHHn Hm3bKnx Ta/a60 BnCOKnx YactOT:
- HatnciB Ta ytpmyte MODE DOKN "b" (BASS) He 6yde BiO6paKeHo. HatnciB 3HOby Ta "t" (TREBLE) 6yde BiO6paKeHo.
- Hatncihb a6o DOKn He 6ynde o6paH6aKaHnPiBeHb H3bKnx a6o BnCOKnx qactOT (-5 do 5).HaTncihb MODE dIra 36peXeHHBaUoro Bn6Opy.
HANAUTYBAHHI TOOHNHNA
DnBtbcMaHIOHOK3.
HaTncHtB CCLK DnB BiDopaxeHHaCToTH Ha Unpobomy DnCnnei npotrom 10 cekyH. DnCnnei NOBepHebcsdo notoHoro yacy npotrom 10 cekyH.
PIMITKA:Дя Bcix pexKmIB,ДиCnIeN noka3yec Yac, BCTAHOBJIeHn 3a 3AmOByBaHHrM.
Дянанаштуваньгоиннку:
- HatnciB Ta yTpmyTe CLOCK DOKN no3HaUka roDHH Ha roDHHKy He noHHe 6nmatn.
- HatnciTb a6o, 0606paTu rOuHy.
- Hatncihb Ta BiDnycttb CCLK nI niTbepeKeHHa HanaHTyBaHb roHNn. No3HaKn XBInn Ha roHNHky 6nmae.
- HaTnChiTb a6o, 106 o6paTu Heo6xIDHy XBUNHy.
5.ДЯ nIDTBepKHeHHaCy ue pa3 HATNCIb Ta BiDnyCTITB CLOCK.ToHnHnK HajaTuBOHaHO.
NIPMITKA: Raio akymyIaTOPn Tny AAA BuaaneHi a6o po3paJxehi DoBwe HIX 15 cekyH, HanaTuBaHHra roHHnka 6dyb bTpaueHi. Pn BuaJIeHHi akymyIaTopa 18 B hanaTuBaHH 36epiraotbcra.
IDATKOBINPEXIM
ДиВ.306p.3,4.
Pnpctpi MoKe 6yTN BnKOpncTaHn JIK NocnIOBau DnA MP3-nIeepiB, nporpaBaiv KOMNaKT-DnCKiB, CmApTfoHIB, nHaHWeTHnx PIK Ta iHxMzHnX npcTpoB.
3OBHIHIN DnHAMik He 6ynde npaIOBaTn.
BKNKOPUCTAHN NO3HAUYEO USB-NOPTY DnA 3APJXKAHH
ДиВитбmaМалJOHOK5.
I03haueHm USB-nopT 3a6e3neuyc XnBnEHHa 2 A ДЯЗЗAPJXKANHMObIbHoro TelefoHy, MP3-nNeepy, nHaHweta, Ta iHux USB-npncTroib.
YBAGA
Cnpo6a 3apdnt npncptpi knn notpe6e 6inbe HIX 2 A moKe noWKoDHT npnaHauhen dIra 3apdxkHHA USB-nopT ta/a6o doatkoBn npncptpi.
-
3'cHaTe OINH KHeu USB-Ka6eIO (He Ine y KOMnIeKti) do USB- npncTpoio.
-
3'eHaTe iHnKHeCb USB-ka6en (He y kOmnnekti) do USB-nopTa npn3haeHoro dna 3apJxKaHH, uoB noaTu 3apJxKaHH npucTpo.
PIMITKA:USB-nopTp npn3Haehn dnn 3apJxKaHHa3a6e3neueyeknBHeHHnIe nIpiKIOUeHOrnpnCTPO;BH He MaE XoDnX BnactuBOcTe nIpa3a6e3neueHH nepeaui daHx.
KoJI npicpi npaioe Ha akymyIopax, USB-nopt npn3haeHH nIpaJxKaHnnpOIOBxyBaTMme fynkiohyBatn npotrom np6n3HO 1 roHNn nicra BmKHeHH npictpo. KaIO npictpi 3aIIuHaetbcr HeAKTINHM npotrom cboRo yacy, 3apJkaHH 6yde npinnHeHo. BKnouHTb npicpi JnBIOBHeHH npoccy.
BKNKOPUCTAHHЯДODATKOBOFO PNUCTPOIO 3 BLUETOOTH (HEIIDE B KOMJIJEKTI) I3 PNCTPOECM
ДиВитбmaJIJOHOK6.
- Hatncitb MODE nokn BLUETOOTH-pekm He BNDINITbcra.
ПРИМITA:
- Kony npicptoi o6paHO peKIM BLUETOOTH, npicpti 6yde wkaTn 3'EnHaHHa 3 BLUETOOTHcymichm npicctpoem Ta B6yde 6JImaTn Ha PK-dncnei.
- Pnucpii 6yide ABTomuHNO uKaTn 3'edHaHHa 3 npucptoem 3 kKIM 6yno 3'edHaHHa OCTaHHbO ra. Raio 3'edHaHHa He 6yno npotrarom octaHHix 5 cekHy, npucpii noHe noWyk iHux BLUETOOTH-cymichnx npucptoB.
BLUETOOTH-cymichi npctpoi MaHOb 3haxoINTncb Ha BiDcTaH He 6Bue JK 10M (30 cyTIB) BiD OCHOBHOro npCTPOTo Ta HanaTobahi Ha cKaHyBaHHr/NouK dIg 3'eHAnHHa.
2.Obepitb "Ryobi Stereo" 3i cncky doctynnix BLUETOOTH-cirhanib Ha daTkoBomy npictpoi
Дя 3'Ендану Ддатково Та OсовHorо npictpoib. 3'EDhanHHe notpe6y napoi a60 PIN-koIy.
PIMITKA:
KoIIN OOnaTkoBn npCTpiyycniuHO 3'eHaHo i3 paio, BEPepeTaHe 6JImaTu.
- Kojn doaTkoBn npictpi niknoHcNo do paio, inoopmaia 3'edhaHH 6yde 36epexeHa B naM'atpiio.
- Hata Ta Dnna nepexoyd no nonepedhboi a6o hactynhoi dopixknpn notokobin nepedaqui ayio 3 npncptpo 3 niTpumkoIO BLUETOOTH.
- Hatncitb Ta BiDnyctiB PRESET npeMnKaHHa MIX nay3oIO Ta nporpaBaHHa ayio.
ПРИMITKA:
LICOMaHmMOxTybHeNiITpMByBaTncb npNCtpoEM BLUETOOTH a6o daTkom.
3a3BnuayynpaBnHHBAcix nID'eHaHINX BLUETOOTH npncTroOBMOKe BVKOpNCToByBaTncb TaKoN iD yac po60tni 3 paio.
- ruyhictbdoatkoBOrnpnctpoHO3'edHaHOrO 3cMM npnctpoem MOKe peyIIOBaTncb 3a DOONOMoTOpeyIITopapryHOcti a6o HaTnCKaHHaM a6o Ha oCHOBHOMy npnCTpoI.
- Hatnchit Ta ytpmyte PRESET nra BiD'edHnBn Bcix BLUETOOTH cymicn npncptoiB.
PIMITKA: Koli npicpti BiD'edHaHO, bE noyHe 6nmatn Ha PK-dncnnei Ta npicpti noyHe nowyk IHxN DoaTkoBx npicctpoIB.
CKIADHIN THyUKN FM-PAIQOPNIMAY
INBITcMAJIIOHOK7.
DnpeynobHna 3ab Ta eektpnHoro Wymy, BNTaHtB rhykM FM-paionpmau abo nepemictiB npctpiHa Bnue Micce. KOn He BnKOpncToByeTbcr FMnpMaay cKaadaetbcra Ta npnbnpaetbcr y6ik.
OECJNYTOBYBAHHI
A NONEPEIXEHNA
IpoodyKT He NOBHeH 6ytN pIKNoUeHn Do DKepeNaKIBNeHHa, KOJI Bn 3bnpaCte Detani, peryIIOcTe, YnCTnte, npOBODnte texHicYe o6cnyroByBaHH a60 KOJI npOdyKT HE BnKOpNCtOByeTbcr. BiKnHOeHHa IpoodyK TY DonOMoXe yHnKHyTN BnnaKobORo 3anycky, AKN MoXe npn3BeCTn Do cepno3HNx TpaBM.
He BnKOpNCToBnyTe po3uHHNk nIy OunHn HnnactMacobux deTanei. Barato nIactNKIB cnPnHnTnBi do yUkoJKeHb BiD pi3Hnx TnIIB
TEXHUYHX PO3HHNKIB Ta MOKytb 6yTN NOWKOJKeHi npn IX BUKOPNCtAHHI. BUKOPNCTOByte YNCTI rAHYPKN DnBnAeHnHb6pydny, nUy, mCna, MaCTnA iT.D.
A NOIPEKHEHH
Hikon He Do3B0JrTe rIbMIBHi piDnHi, 6eH3NHy, npOyKtAm Ha OCHOBi HApTn, i npOHkaOUM Macnam BCTynaTN B KOHTAKT 3 NpactIKOBIMn DeTaNMy. XiMiHi peOBOHN MOKyTB NOWKOADTN, NOCIA6NTn a6o 3HmUHTN PnACTIK, kAn MoKE pPbEcTn DO cepNo3HOITpaBMn.
PnO6cIyROBaHHI BIKOpncTObyIte TINbKn OPurHAnbHi 3anacHI YAcTHNI BnPo6Nka. BIKOpncTahHr 6yDbKnx IHuNX DeTaleM MoKe CTBopNTn He6e3neKy a6o CnpuHNHT N0wKOJKeHHN pOdyKTy.
3AXNCT HABKONIHbOTo CEPEIOBNUa.

epeo6nIte cnpOBHy 3amictb ytni3aui kocti BiXODIB.MaunH, obnadHaHH Ta KOBKa NOBnHi 6yTN BiDCOPToBaHI dny XhBoI nra HABKONuHbOrO CEpeoBnua niaui.
CIMBOJIN

PonepexdkeHHa 6e3neKn

CEBIDIOBIDHICb

Ebpa3iIcbkN 3HaK BiIDNOBIDHOCTI

001
UkpaHcbKm 3HaB KbiNObiHocti

BybnaCKa, yBaXHo npOHTaITe IHCTpyKuIO nepe3anyckOM npOdykTy.

BiXxOJn eJekTpoTeXHcHoi npOdyKcii He cnid BnKnDaTn pa3om i3 no6yTOBmBiXxoAm. Byb Iacka, nepepobnTe Tam, De HABHe yCTaTKyBaHHa. NpebpTE 3 BaunM MicceBm opraHom BnaI abo npOdaBcEm dJa KOHCyIbTaui 3 npBodny pepeo6kn.
CNMBOJIINBLIIEIHCTPYKLIT3CKCNIYATAU

3anacni detani a6o npnhaneknocti npodaotbcra OkpemO
HnKyeBka3aHi nonepdKaIbHi cNoBa Ta CmB0JI NoAChIOyT bPiBeHb Pn3NkPy npnpoBoTI 3cIM npnnaDom.
HE6E3NEKA
Bka3ye Ha HEMnHyue He6e3neHny CNTyaIIO, RaKa, KaIO ii He yHNKHTN, MoKe npIN3BeCTN Do CmepTi a6o cepNo3Hnx TpaBM.
NONEPEKHEHH
Bka3ye Ha noTeHuiHo Hebe3neHu cyTuayiio, jka, kkuo II He yHNKHTN, MoKe npn3BecTN do cMeptI abo cepno3hIX TpaBM.
yBARA
Bka3ye Ha noTeHciH Ho He6e3neHy cnTuaCiIO, kKa, kKIo ii He yHnKHyTN, MoKe npu3BeCTN do cepedhboI abo IerKoi TpaBMn.
YBARA
(Be3 Cnmbony nonepedxekHn np He63neky) Bka3ye ha cnTyauio, kKa MoKe npnbEcTn Do MaTepiJbHnx 36ntkIB.
In addition to any statutory rights resulting from the purchase, this product is covered by a warranty as stated below.
- The warranty period is 24 months for consumers and commences on the date the product was purchased. This date has to be documented by an invoice or other proof of purchase. The product is designed and dedicated to consumer and private use only. So there is no warranty provided in case of professional or commercial use. This warranty applies only on new products.
- There is a possibility to extend for a part of the range of power tools (AC/DC) the warranty period over the period described above using the registration on the www.ryobitools.eu website. The eligibility of products for extended warranty is clearly displayed in stores and / or on packaging and is contained within the product documentation. The end user is required to register his/her newly-acquired products online within 30 days from the date of purchase. The end user may register for the extended warranty in his/her country of residence if listed on the online registration form where this option is valid. Furthermore, end users must give their consent to the storage of their personal data that is required to be entered online. They must also accept the terms and conditions. The registration confirmation receipt, which is sent out by e-mail, and the original invoice showing the date of purchase will serve as proof of the extended warranty.
-
The warranty covers all defects of the product during the warranty period due to faults in workmanship or material at the purchase date. The warranty is limited to repair and/or replacement and does not include any other obligations including but not limited to incidental or consequential damages. The warranty is not valid if the product has been misused, used contrary to the instruction manual, or has been incorrectly connected to a power supply. This warranty does not apply to:
-
any damage to the product that is the result of improper or lack of maintenance
- any product that has been altered or modified
- any product where original identification (trade mark, serial number) markings have been defaced, altered or removed
- any damage caused by non-observance of the instruction manual
- any product not displaying the CE approval mark on the rating plate
-
any product that has been attempted to be repaired by a non-authorised warranty service centre or without prior authorisation by Techtronics Industries
-
any product connected to improper power supply (amp, voltage, frequency)
-
any damage caused by external influences (water, chemical, physical, shocks) or foreign substances
normal wear and tear spare parts - inappropriate use, overloading of the tool
-use of non-approved accessories or parts -
Power tool accessories provided with the tool or purchased separately, including but not limited to screw driver bits, drill bits, abrasive discs, sand paper and blades, lateral guide, etc.
-
Components (parts and accessories) subject to natural wear and tear, including but not limited to service & maintenance kits, carbon brushes, bearings, chuck, SDS drill bit attachment or reception, power cord, auxiliary handle, transport carry case, sanding plate, dust bag, dust exhaust tube, felt washers, impact wrench pins & springs, etc.
-
For servicing, the product must be sent or presented to a RYOBI authorised service station listed for each country in the following list of service station addresses. In some countries your local RYOBI dealer undertakes to send the product to the RYOBI service organisation. When sending a product to a RYOBI service station, the product should be safely packed without any dangerous contents such as petrol, marked with sender's address and accompanied by a short description of the fault.
- A repair / replacement under this warranty is free of charge. It does not constitute an extension or a new start of the warranty period. Exchanged parts or products become our property. In some countries delivery charges or postage will have to be paid by the sender. Your statutory rights arising from the purchase of the product remain unaffected
- This warranty is valid in the European Community, Switzerland, Iceland, Norway, Liechtenstein, Turkey and Russia. Outside these areas, please contact your authorised RYOBI dealer to determine if another warranty applies.
AUTHORISED SERVICE CENTRE
To find an authorised service centre near you, visit http://en.ryobotools.eu/ header/service-and-support/service-agents

RYOBI CONDITIONS D'APPLICATION DE LA GARANTIE
UCIOBNA BANIDHOCT HA TAPAHUNRA HA RYOB
B DonbIHNHEMe KbM kAHOHYCTAHOBHEnI pNBA, pON3TNHuaIOn tOKynkATA, TOnI pNDyKt e 06bXaHATOr t OPaHuaI, KAKTo E NIOKeHO NO-NOy.
-
-
-
-
-
-
-
-
-
-
-
-
-
-
-
-
-
-
-
-
-
-
-
-
-
-
-
-
-
-
-
-
-
-
-
-
-
-
-
-
-
-
-
-
-
-
-
-
-
-
-
-
-
-
-
-
-
-
-
-
-
-
-
-
-
-
- 2. 3. 4. 5. 6. 7. 8. 9. 10 11. 12. 13. 14. 15. 16 17. 18 19 20 21 22 23 24 25 26 27 28 29 30 31 32 33 34 35 36 37 38 39 40 41 42 43 44 45 46 47 48 49 50 51 52 53 54 55 56 57 58 59 60 61 62 63 64 65 66 67 68 69 70 71 72 73 74 75 76 77 78 79 80 81 82 83 84 85 86 87 88 89 90 91 92 93 94 95 96 97 98 99 00 01 02 03 04 05 06 07 08 09 10 11 12 13 14 15 16 17 18 19 20 21 22 23 24 25 26 27 28 29 30 31 32 33 34 35 36 37 38 39 40 41 42 43 44 45 46 47 48 49 50
-
-
-
-
-
-
-
-
-
-
-
-
-
-
-
-
-
-
-
-
-
-
-
-
-
-
-
-
-
-
-
-
-
-
-
-
-
-
-
-
-
-
-
-
-
-
-
-
-
-
-
-
-
-
-
-
-
-
-
-
-
-
-
-
-
- CbIeCTByBa Bb3MOXHOCT 3a yDblnKabeAHa Ra papaHIOHN HcPOK 3a cact OT dNan3OHa HA rapaHIOHTA Ha eNEKTpueeckm HNCTpyMeHTn (AC/ DC) cIe, m3THuHETO HA ONHCANHY Tuk Ype3 pernctpauqna Ha ye6 caTnaw.ryobitooels.eu.B mara3INHte N/Inn Ha onakOBkATA NnBtpe B DOkyMeNTAUHrta HA npOyKTa E noK3AHO RCHO DAJI INHCTPYMeHTb OTROBAPn HA yCNOBHTA 3a TAKOBaYbLJKNABAHe HA rapaHIOHNHPOCK. KpaHnT Notpe6BnENT P7RbBA Da pERCTPnPA CBOnte HOBNPnID0BnTT HNCPTPyEMTN OHnH B PAMKITE AHO 30 DnH OAtDATA Ha NOKNYkA. KpaHnT Notpe6BnENT Moke Da ce PERCTPnPA 3a YdblnKeHa raHapunzur B Dpkabata CN Ha npe6BnBABeA, aoE noCeHOH B BB FOPMylnPa 3a OHnH PernCTpaUN KaTO MRCTO, KbTeTo TaHI OnUe E BAInDHa. Ocehen ToBa kpaHnTE NoPE6BnENT P7RbBA Da dADT CbLnAceto Cn 3a CxPAnHeNe HA daHNHE, KOVTo Ca 3aDblNKeTIHN 3a NonPBNAe OHnH, n TPRbBA Da npHemat O6bnTE YcNObN. IOnyueHOTo NOTBpKJeHHe 3a pernCTpauqna, nIPATEHO NO eNEKTOHNA Noua, oOpMHANHATA qAktypa, NOK3BaUa DaTATA Ha NOkynka, ue cnykAT KAto DOKa3aTeNCTBO 3a yDblNKeHATA rapaHIN.
-
Fapahneta ToKpmba BcNkH DeEeKTH Ha npOyKaT no BpeMe Ha rapaunonHnna CPOK, KOTo CeIbNkAT Ha npObeMnB Hmabotkata mIn MATEpanite KbM MOMHe HA NOkyKaT. FapahnTa e OprAnHne Ho peMOHT N/IN 3AMHa HE BKNIQBaDpyr 3AaBKeHN, BKIOHneTIHO HO He cAmO, CUYaHn INN KOBeHN IeTN. FapahnTa e HeBaHnHa, aKO npOyKtB eIN0N3BaHn HENpABnHNO INN B pOtnIBOpene C pbKoBOCTBOTO C INTHcyptKUn, KaKTo IN aKO eCBbp3AHn HENpABnHn. Ta3n rapaunH He BAKn 3a:
-
费TINo npodykTa B pe3ynta HnHnpabunHa npocnnaKtka
- npOdykTH, KOnTO ca 6nHn H3MeHeHn Hn MoDnΦnUpaHn
- npdyK, pki KOTo opnHAnHInTe MapKnpoBk 3a NHeHTnFikaua (TbPBOCKa MaKp, cpeHn HmOp) ca n3TpTu, PpOMeHEn HnnpEmaxHaT
-IOBpeIa, npMnHEHa OT HeCnA3BaHe Ha pbKOBoDCTBOTO C HCTpyKUIN - npOdyK T 6e3 CE MapKnpOBka
-
npdkyKT, 3a KOHTO e HnapabeH ONNT 3a peMOHT OT hKBAHINPHUAPn CNEuMaNCT mN 6e3 npedBapTeHNO paapeWeneOT Techtronic Industries.
-
npOdyKT, Cbbp3aH KbM HEnoXoJyio eNekTpo3axpaHbaHe (amnpaK, BONTaK, YecToTA)
-CUETI,IPMNHEHNEOTBBLHNMBINNHA(XMHMN,ΦN3NH,Nyapn) NmHYNKDNBEUCECTBA
- HopMaHHO 3HOCBaHe Ha pe3epBHN YacT
-HeNoDxOJa yNtpe6a, npTeOBapBaHe Ha HnHCTpyMeHTa
- IN3no3BaHe Ha HeoO6peHn Akcecoapn NIN YactN
AKececoapnte 3a enektpnueckn Hnctpymehc a npedocabeHn C nHCTpyMeHTn cne KynyBaT OTeNHO. TeNn kNIOeHN BKNIOvBAT, HO He camo, HakpaiHHu 3a OTBePTKa, CBpeJa, abpa3INBn DnCKOBe, IUKpyKa n octpeta, CTpaHNeHbOaJ
KOMHOHHTN (ChTn n Akecoapn),NoDIOXHEHn EAeCTeBHO n3HOCABe, BKNIOHTENHO HO He CaMO, KOMNIKETN 3a 06cnyKaBaHe nNOdPbJkHa, KAp6OBOH NcTeKn, NaReepn, NaTOPHNk, PnCTABKa cbc CpeIPO SDS INn pInemHO yctPoIcTBo, 3axpaHbaa Ka6en, cIOMarATEHn PbKOXBtKA, KYTRN 3a TpAHCNOPTnpAhe, UINΦOBbHu nAACTNaTH, TOp6a 3a npax, Tpb6a 3a OTBeJAnHe Ha npax, PhINOpBOWaBn, uHbToE n npyKHHn 3a BnHTOBePTn n dp.
4.3a 06cnykahe npdyktbT pr6ba da ce n3npatnnnna 3aHece Ha otpninapn cepbnn ha RYOBI, noocohn 3a BCNA dbpkabBa CneHHN CHNCbK c aadpcnHa cepbnn. B HkON bPakBn MECTHnR TpROBeu Ha RYOBI noema OTOBOPHCCTTa da n3npnat npOyKTdo cepBNeH CEHTbp Ha RYOBI. PnHnPaanhe Ha npOyKT do cepBNi Ha RYOBI toh Tpr6ba Da e onakoban 6e3oNaCHO onaCHO cbdpxahme, Hanp. 6eHN, da e Mapknch c apeca Ha noDateH n npDpyxeh O kpatko cnncahne Ha nobpepaTa.
5.PeMOHTbT/3aMnHATA NO CnHATA Na TaHn RAPaHnA CA63nNTHn. Te He BOJr DO yBnKbAbaHe Nm NOHOBaHE BA H raPauHIOHNHc PcOK. CMeEHnTE qACTn INn INHCTpMeHTn CTabAT Haa Oco6CTBeHOCT. B HAKOM DpXbAa TAKCtne 3a DOctBaKa INn INnpaHahe TPr6Ba Da ce INaTAYOT NoTaTeN.3aKHOyCtAHoBHeNTb BN pPaBA, npOnTInuAaONo t3aKynYBaHETO HA INHCTpyMeHTa, OCTABAT HEACERHaTI
6. Ta3n rapaHua e BaIHa nBa Ebponeckata obuHocT, WBeuapnA, NcnaHnDn, HopBrrn, NixTeuHauN, Typua n PyCnu. IbBbN Te3n oblactn ce cBbPkeTe C yIbIbHOMoUeHH TaProeHu RAYOBI, 3a da ce yctahOBn dann e npniOnkma Dpyra rapaHua.
YITbJIHOMOUEHCEPBUN3EHUEHTbP
3a da HamepuTe yIbIhOMnIeH cepBn3eH ueTbp 6m3o do Bac, noceteTe http://en.ryobitools.eu/header/service-and-support/service-agents.
UK
TAPAHTIHIMMOBINI RYOB
Okpim 3araHOM yCTaHOBNEHMX 3akoHOM npab, 10 CTocyHbCn NOKynK, cen npncptpi nokpmbaeTcR rapaHTieO, 10 3a3aHaeHo HMKue.
- RapaHTHmHn nepioD nIra CNOXbAHBCKLAdac 24 Muci i noHaCTbC3 MoMENTy npDbaHHa bOTo pNcTPOo. Lda TADA NOBHnBA 6yTH3AzoKUMTEHOY aRapaHTHnHOy TaHOJHO AEO KcYE. Lei npCTp6yBpo3oPbENHI i np3hauHEHH TINbKn DnRA CNOXbVOrO Ta npBaTHoro BHKOpNCtAHnH. Y pasi npOpeciHOrO aBO KOMepuHOrO BHKOpNCtAHnH bOTo npCTpOIO, BIn BTpaue rapaHTIO.
- lChy MocnBtB noobKHTn rapaHIN nepiO dnn qactHH JInHKn ENEKTPOHCTPMMTIN (pepeHHORo/NoCTIHORo cTpyM), noHaD nepiO oncaHN Bmte 3a donomorIO pcectpaui Ha caaiIww.ryoibtools. eu.PnCTpOJI, kAI MAOTb npAbo H naOBeHHra rapaHTIHORo nepiO, Maotb Ytki No3AnHKU Odo UBO B Mar3AHx I / afo HA ynaKOBuI / Ta DOkymeHTAU II do npCTpOIO.KIHueBNI KOPcTByau NnoHNHE 3apecTpyBaTu Horo/II HOBOpNdiabHn npCTpIOnnHnnpOTAROM 30 dHIB 3Datn NOKynK. KHeJBeu KOpCtByau Moke 3apecTpyBatncd nOdoBKeHHra paoTHIRHO nepoiO B CBoI KpaHI NOCTIHORo nepe6yBaHHA, kku BOH eOCNTYHO U BidNOBIDHOnUIHnHOF omPN peCCTpaui. Kpm TOrO, KInHeB iKopCtByau NoBHHi datn CBOIO 3roHy DA 36EpiRanH daHNX, kI Heo6XiHJn DnBBeDHnOHnA, a TAKOX BOH NoBHHPi npHnHTn npabla Ta yMOBN. OTPMaHn H niD TBepKeHHa peCtpaui, kke BiDpABNeTcBA Ha adpecy eneKTPHOHoi noHTN, Ta opHrHan rapaHTIHORo TanaOH i 3a3aHuHo IO DaTOO NOKynK 6yde cnTyBAtn DOKASOMNoDBKEHOI rapaHTII.
-
RapaHTI NOUHIOCTbCn Hc Bc DeEeKTH npNCTPO IpO TPOr mRAPaHTIHHO TepMIHY Odo HeDOTPMAAHH CTAdAaptB BnO6HNTBa ABO MATEPIAN H DaTy PnIDbAHNAR. RapaHTI OMOxEYcpeMTOHm Ta/Abo 3AmiHO, Ta HE BKNHOAc B Ce6e 6yDb-RAHX INHUX 306OB3AHB, B TOMY UCNJI, Ane Heo6MeKeHa y pasi BNpADKBONX Ta NoaBbUNX NNOKOKeHb. RapaHTI He Die, JAKUO nPNCPTBI BNKOPNCTOBVBABCHENAEXKHM UINOM, BCyNEpeu IcHTpykui 3 EcKnpyataui 6o Byb HnepaBnBnHO NIKNHOeHn Do MEpeKJ DaHa rapaHTI He NOUHPOETCb Ha:
-
npntpo, 00 6ynn nookdkeni y peynbati HnpabunbHoro texHHORO 06cnyOByBaHHa;
- npncTpoi, 0o 6yHn BINO3MInHei afo MoNIOKOBaHI;
- NpIcPTOPI, OprHIIaBHe IeIthIbKauJIeTH (TObpArH 3nAck, cepIHHN HOpMeP) MapKByBaHHN kIXy NOnciQdoKeHe, 3mIEHe A60 BIVdaneHo:
-6yba-jaki noUKkOkeHHa 3anOJIHHe NDOTPMHaHMMI HCTpyKJI 3 eknylauataiJ.
- npncTpo, 10 He MaHb MapkyBaHHr CE;
- npiCTPOI, 0G 6yTbI BIDPEMOHOTBOHIE KABJIAFIKOBAHIM FAXIBEM a603a BIDCYTHOCTI NONEPEDHORO DOZBONY I DTechtronic Industries;
- npmCTpO, nIqKIOUeHO JIo HeBIOIOBIDHOrO JKepePAnJXIBNENHc (CnA ToK, HApNyEkenH, NactoT);
-6ybi-riKOIOKODJEHHCnPNHHeH3OBIHIMBNNBOM(XiHMHN,ΦIiHUM,CTPbKMABHNpyr)a60CTOPHOHHMePOEHOBHAMA;
-HopMaJIbHy amOpTn3auiO 3anachnx qactnH;
-HeBIDNOBIIDHE BUKOPNCaHHN,pepeBaHTaXeHHN pncTpoIO;
-BNKOpNCTaHHH HeniTBePKeHXx 3anachHX yacTHn abo akceCyapib;
- npnnaa da enektpoHCTpymehy, nooccthaactbca pa3om 3 npnctpoem a60 kynyotc8OkPMeO. Taki BNHTK BPAXOBYtB ane He c obmekeHHMn Dn HAKoHeHvIKH BnkyptOK, CbepeJ, abpa3nBHX DNCKB, HkDaCHOrHO nanepy To ne3, bHmN HaprrnMHx
KOMNOHEHTN(CHACTHIN Ta npnlaDra 3 ypaxyBaHHM HopMaIbHOrO 3HOuBaHHB, BpaxoByOuHa, Ane 63 OBeMeJHHa KOMnTeKn TPOpIaNtIKNa TExHIVORo 06CNYRoBuAHn, ByrInhuiTKe, NiUIMNHKN, NaTPOHn, KpInneHnA b6o npmOS SD cepen, KaBeni XJBHeHHN, DOdATKOBI pyKoRTKn, YoXn DnI TraHCNPOTyBAHH, UldyBaJIbHi NnactHn, MiXk DNl 3bOpYnny, TybKn BxNOnny, FeptoiB kinsur, uTIpi IpyKHHn RaikBopeTy I.d.
4.ДЯбocrytobvbaHnna,псntpimmae6bTnBIDnpaJIeHnaboNoAHmdoOdHOro3aBTOPcBOAHNCEPCBICHNceHTPiRYOBI,kIpeNpIeHnDnKoKHOI KpaIHnHaCTynHOMypeNpIkyAapcCEpBICHNzEHTPiR.YdeKHXKpAlHxMciueBnIMnepRYOBITso6OB3aYtebcsBaIPaBNnnpCtPIDocepBICHOZHTpyRYOBI.PnBIDnpaBHeHHnpCTPOOdoCEpBICHOZHTpyRYOBI,pncTpimMa6bTnHAdHIOyNAkoBAMn636yJb-koHOHe6BeaNEHORBGMIcy,HApNKnad6Eh3Hy,3no3aHuEOAnDpecoB0BiDnpaBHnKa Ta cyPnoBoDxByBaTHncKOPOTKMOniNCHEpABHOcti.
5.Pemont /3aHmBA BIDNOBIDHO do uei rapaHTI 3dINCHOeTcB 63KoUToBO.
Le He e OCHOBO Dn noDgXeHHA 60 noatky HOBOro rapaHTIHorO
neIOy. 3aMHeH CTAHNn A50 npnaadinpexpEOEETb DO bNAChOTCI
KOMnAH.IY DEKIMK KpAlHX BAPCTBC DoCTABKn A60 NOuTOBI Bnpatn
NoBHNI 6yTN CnAeBnBipAHKM. 3araIbHO BCTAHOBEni npaba
NOynPAn HA nPrCTPI 3aIIHAAOTCB EMeHHMM
6. Lra rapahtir dic B Cbponehckomy Coo3i, UBeuapii, IcnaHdi, Hopberii, lixtenltehi, TypeunHH ta Pocii. 3a Mekamn uix 30h, 6yNb nacka, 3eepitbcdo ophiuiHoro dunepa RYOBI, uoB bniHaHTN, qn 3actocobyctbca Hua rapahtir.
ABTOPN3OBAHI CEPBICI UEHTPN
Declaration of conformity
Frequency band: 2.402 GHz - 2.480 GHz
Radio-frequency power: 0,93 dBm
Software version: SPKV002
Hereby, Techronic Industries GmbH declares that the radio equipment type R18RH is in compliance with Directive 2014/53/EU. The full text of the EU declaration of conformity is available at the following internet address: http:// de/services.ryobitools.eu

DECLARATION DE CONFORMITE
Frequency band: 2.402 GHz - 2.480 GHz
Radio-frequency power: 0,93 dBm
Software version: SPKV002
Hereby, Techronic Industries GmbH declares that the radio equipment type R18RH is in compliance with Directive 2014/53/EU. The full text of the EU declaration of conformity is available at the following internet address: http:// de/services ryobitools.eu

Softwareversion: SPKV002
Softwareversion: SPKV002
Techronic Industries GmbH erklærhermed, at radioudstyret type R18RH er i overensstemmelse med Direktiv 2014/53/EU. Den fulde ordlys at EU Overensstemmelseserklaeringen kan findes pa folgende internetadresse: http:// de services.rybitools.eu

Konformitetsdeklaration
Programvaruversion: SPKV002
The BLUETOOTH word mark and logos are registered trademarks owned by Bluetooth SIG, Inc. Other trademarks and trade names are those of their respective owners.
(FR) DÉCLARATION DE LICENCE BLUETOOTH
(UK) BLUETOOTH JIULEH3IHA 3ABA
Cno BO BLUETOOTH Ta Iorotnn E 3apeeTpoBaHmN ToproBmM Mapkam, 10 HaenKaTb KOMnaii Bluetooth SIG, Inc. Hwi ToproBi Mapp Ta NaMeHyBaHHa HaneKaTb BiNoBIDHM BnaCHKam.