PSU 418 - Pressure washer Kärcher - Free user manual and instructions
Find the device manual for free PSU 418 Kärcher in PDF.
User questions about PSU 418 Kärcher
0 question about this device. Answer the ones you know or ask your own.
Ask a new question about this device
Download the instructions for your Pressure washer in PDF format for free! Find your manual PSU 418 - Kärcher and take your electronic device back in hand. On this page are published all the documents necessary for the use of your device. PSU 418 by Kärcher.
USER MANUAL PSU 418 Kärcher
H.Jenner

Chairman of the Board of Management
S. Reiser

Director Regulatory Affairs & Certification
71364 Winnenden (Germany)
Tel.: +49 7195 14-0
Fax: +49 7195 14-2212
Winnenden, 2021/09/01
Contents
General notes. 10
Intended use. 10
Environmental protection. 10
Accessories and spare parts 10
Scope of delivery. 10
Symbols on the device 10
Hazard levels. 10
Safety information 10
Description of the device 12
Installation 12
Initial startup 12
Operation 12
Transport 12
Storage. 12
Care and maintenance 13
Troubleshooting guide 13
Warranty 13
Technical data 13
EU Declaration of Conformity. 14
General notes

Read these safety instructions, these original instructions, the safety instructions provided with the battery pack and the original instructions supplied with the battery pack/standard
charger before using the device for the first time. Act in accordance with them. Keep the booklets for future reference or for future owners.
In addition to the notes in the operating instructions, you also need to take into consideration the general safety regulations and accident prevention guidelines applicable by law.
Intended use
The cordless pressure sprayer is intended for outdoor use in a well-ventilated area. The product is for spraying household and garden chemicals such as insecticides, fungicides and fertilisers. The product can also be used for watering plants. Do not use the product for purposes other than those mentioned above. The product must not be used by children or by persons who are not wearing adequate personal protective equipment and clothing.
Always observe the regionally applicable regulations.
Environmental protection

The packing materials can be recycled. Please dispose of packaging in accordance with the environmental regulations.

Electrical and electronic devices contain valuable, recyclable materials and often components such as batteries, rechargeable batteries or oil,
which - if handled or disposed of incorrectly - can pose a potential danger to human health and the environment. However, these components are required for the correct operation of the device. Devices marked by this symbol are not allowed to be disposed of together with the household rubbish.
Notes on the content materials (REACH)
Current information on content materials can be found at: www.kaercher.de/REACH
Accessories and spare parts
Only use original accessories and original spare parts. They ensure that the appliance will run fault-free and safely.
Information on accessories and spare parts can be found at www.kaercher.com.
Scope of delivery
The scope of delivery for the appliance is shown on the packaging. Check the contents for completeness when unpacking. If any accessories are missing or in the event of any shipping damage, please notify your dealer.
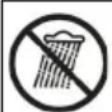
Symbols on the device
|  | General warning symbol |
|  | Read the operating instructions and all safety instructions before operating the device for the first time. |
|  | Wear non-slip, sturdy gloves when work- ing with the device. |
|  | Wear suitable eye protection when work- ing with the device. |
|  | Wear non-slip safety shoes when work- ing with the device. |
|  | Wear a mouth-nose mask when working with the device. |
|  | Do not subject the device to rain or moist conditions. |
Hazard levels
△DANGER
- Indication of an imminent threat of danger that will lead to severe injuries or even death.
WARNING
- Indication of a potentially dangerous situation that may lead to severe injuries or even death.
CAUTION
- Indication of a potentially dangerous situation that may lead to minor injuries.
ATTENTION
- Indication of a potentially dangerous situation that may lead to damage to property.
Safety information
General safety instructions
DANGER · Risk of acid burns. Never point the nozzle at a person or an animal. Never allow the jet to come into direct contact with your skin. · Danger of
burns. This device must not be used for spraying flammable paints or solvents with a flash point < 21^ .
WARNING. When spraying, make sure that the work area is adequately ventilated. Risk of acid burns. Always hold the spray lance in position during use. Danger of explosion. Never use the device in areas where there is a risk of fire or explosion. Risk of injury. Pay attention to any danger from the fluid being sprayed and consult the markings on the container or the information supplied by the manufacturer. Do not spray any fluid that you do not know is dangerous and/or harmful.
General Power Tool Safety Instructions
WARNING
- Read all safety warnings and all instructions.
Failure to follow the warnings and instructions may result in electric shock, fire and/or serious injury.
Save all warnings and instructions for future reference.
The term "power tool" in the safety instructions refers to your mains-operated (corded) power tool or battery-operated (cordless) power tool.
1 Work safety
a Keep your work area clean and well-lit. Untidy or unlit work areas can lead to accidents.
b Do not operate power tools in explosive atmospheres, such as in the presence of flammable liquids, gases or dust. Power tools create sparks which may ignite the dust or fumes.
c Keep children and bystanders away while operating a power tool. Distractions can cause you to lose control of the device.
2 Electrical safety
a Avoid body contact with earthed or grounded surfaces such as pipes, radiators, ranges and refrigerators. There is an increased risk of electric shock if your body is earthed or grounded.
b Do not expose power tools to rain or wet conditions. Water entering a power tool will increase the risk of electric shock.
3 Personal safety
a Stay alert, watch what you are doing and use common sense when operating a power tool. Do not use a power tool while you are tired or under the influence of drugs, alcohol or medication. A moment of inattention while operating power tools may result in serious personal injury.
b Use personal protective equipment and always wear safety goggles. Protective equipment such as dust mask, non-skid safety shoes, hard hat, or hearing protection used for appropriate conditions will reduce the risk of personal injuries.
c Prevent unintentional starting. Ensure that the power tool is switched off before connecting the power supply and/or battery pack, picking up or carrying the tool. Carrying power tools with your finger on the switch or connecting the power supply to a device that is already switched on can lead to accidents.
d Remove any adjusting key or wrench before turning the power tool on. A wrench or a key left attached to a rotating part of the power tool may result in personal injury.
e Do not overreach. Keep a firm footing and maintain your balance at all times. This ena-
bles better control of the power tool in unexpected situations.
f Wear suitable clothing. Do not wear loose-fitting clothing or dangling jewellery. Keep your hair, clothing and gloves away from moving parts. Loose clothes, gloves, jewellery or long hair can be caught in moving parts.
4 Power tool use and care
a Do not overload the device. Use the correct power tool for your application. The correct power tool will do the job better and safer at the rate for which it was designed.
b Do not use the power tool if the switch does not turn it on and off. Any power tool that cannot be controlled with the switch is dangerous and must be repaired.
c Disconnect the plug from the power source and/or the battery pack before making any adjustments, changing accessories, or storing the device. Such preventive safety measures reduce the risk of starting the power tool accidentally.
d Store unused power tools out of the reach of children. Do not allow persons unfamiliar with the device or these instructions to operate the device. Power tools are dangerous in the hands of untrained users.
e Maintain power tools. Check for misalignment or binding of moving parts, breakage of parts and any other condition that may affect the power tool's operation. If damaged, have the power tool repaired before use. Many accidents are caused by poorly maintained power tools.
f Use the power tool, accessories and tool bits etc. in accordance with these instructions, taking into account the working conditions and the work to be performed. Use of the power tool for operations different from those intended could result in a hazardous situation.
5 Use and care of battery packs
a Only charge the battery pack with the chargers approved by the manufacturer. Chargers that are not suitable for the corresponding battery pack may cause a fire.
b Only use the device with a suitable battery pack. Using a different battery pack may cause injury or fire.
c When not in use, keep the battery pack away from metallic objects such as paper clips, coins, keys, nails, screws or other small metallic objects that may cause a short-circuit. A short circuit can cause a fire or explosion.
Under certain circumstances, fluid may escape from the battery pack. Avoid contact. If you come into contact with the fluid, rinse the corresponding skin thoroughly with water. If you get the fluid in your eye, seek medical attention immediately. Battery fluid can cause rashes and burns on the skin.
6 Service
a Have your power tool serviced by a qualified repair person using only identical replacement parts. This will ensure that the safety of the power tool is maintained.
Description of the device
Illustration A
1 Battery pack mounting
② Power switch
③ Lockable spray trigger
Spray lance
⑤ Spray nozzle
⑥ Filling nozzle with measuring cup
Hose connection
Hose
9Shoulder strap support
10Tank
1 Lock latch
12^ Battery Pack Battery Power 18V
^13 Quick Charger Battery Power 18V
Shoulder strap
- Not included in the scope of delivery.
Installation
Mounting the spray lance and hose
- Connect the spray lance to the handle and screw it tight.
- Turn the spray lance until it is aligned with the handle pointing downwards. Illustration B
- Push the nut of the hose on to the device and tighten it.
Illustration C
Note
Check the tight fit of the spray lance.
Note
When putting on the housing, make sure that the short hose on the device is inserted into the hole on the tank.
Initial startup
Filling the tank
- Unscrew the measuring cup.
- Fill the tank with the desired amount of water (up to 4 litres).
- Using the measuring cup, measure the desired amount of fluid/additive (up to 120ml ) and carefully pour it into the tank.
Illustration G
- Rinse the measuring cup with clear water and screw it back on.
Note
Hold the device horizontally with the tank completely filled to prevent any leakage through the intake opening.
Clipping in the shoulder strap
- Clip the shoulder strap into the clips on the housing.
Note
Make sure that the shoulder strap is clipped in correctly.
Installing the battery pack
- Push the battery pack into the receptacle in the device until it audibly locks in place.
Illustration J
Venting the pump
- Unscrew the spray lance from the gun.
- Actuate the power switch.
- Press the spray trigger for at least 10 seconds until the system is vented.
- Switch off the device.
- Refitting the spray lance
Operation
Note
During operation of the device, the battery is discharged with small currents. This can lead to inaccuracies in the remaining run time on the battery display. To determine the battery capacity, briefly interrupt the current draw and read the battery capacity displayed in %
Operation
- Remove the spray lance.
- Press the power switch.
Illustration D
The device starts up.
- Press the spray trigger to spray or push it forwards for continuous operation.
Illustration E
Note
The spray actuation button is now locked.
Note
Make sure that the spray actuation button is not locked before mounting the battery pack.
4. To stop the spraying process, release the spray actuation button or, in continuous operation, push it back to stop it.
Setting the spray jet
- Turn the nozzle to adjust the spot or spray jet Illustration F
Transport
CAUTION
Failure to observe the weight
Risk of injury and damage
Be aware of the weight of the device during transportation.
ATTENTION
Uncontrolled startup
Risk of injury and damage
Remove the battery pack from the device before transport.
Empty the device completely prior to transport.
- Secure the device against slipping and tipping over when transporting in vehicles.
Storage
CAUTION
Failure to observe the weight
Risk of injury and damage
Be aware of the weight of the device during storage.
CAUTION
Uncontrolled startup
Risk of injury and damage
Remove the battery pack from the device before storage.
ATTENTION
Store the device in a dry, well ventilated location out of the reach of children. Keep the device away from corrosive substances such as garden chemicals.
- Clean the device.
- For space-saving storage, unscrew the spray lance and press it into the lance clip on the battery slot. Illustration H
- Press the lance handle into the device handle.
Care and maintenance
CAUTION
Uncontrolled startup
Risk of injury and damage
Remove the battery from the device before any work.
ATTENTION
Do not use solvents to clean the plastic parts, as they corrode the materials used on the device. Remove dirt such as dust, oil and lubricants with a clean cloth.
Cleaning the tank
-
Remove the battery pack.
-
Open the lock latches and remove the tank.
Illustration I
-
Drain the tank content.
-
Clean the outside of the tank with a clean, dry cloth.
- Fill the tank one third with clean water
- Connect the tank to the motor casing.
- Reinsert the battery.
- Spray the tank content until it is completely empty.
- Repeat this procedure several times.
Emptying the tank
- Remove the battery pack.
- Open the lock latches and remove the tank.
Illustration I
- Drain the tank content
Clean the nozzle
- Remove the battery pack.
- Unscrew the nozzle from the spray lance.
- Push a thin wire through the slotted holes to remove residues.
Illustration K
- Rinse the nozzle with clean water.
- Dry the nozzle with a clean, dry cloth and refit the nozzle.
Troubleshooting guide
Malfunctions often have simple causes that you can remedy yourself using the following overview. When in
doubt, or in the case of malfunctions not mentioned here, please contact your authorised Customer Service.
| Fault Cause Rectification | ||
| Device does not spray No | zzle is clogged 1. Clean the nozzle | |
| Hose is clogged 1. Clean hose | ||
| Tank is empty 1. Fill tank | ||
| Air in the system 1. Vent pump (see chapter "Venting the device") | ||
| Motor not running Battery | is empty 1. Battery charging | |
| Battery missing or battery not inserted correctly | 1. Insert the battery correctly | |
| Battery is too cold or too hot 1. Store the battery indoors or let it cool down | ||
| Device switches itself off | Circuit breaker has switched off | 1. Wait until the circuit breaker switches the device back on again |
| Battery cannot be charged | Battery contacts are soiled | 1. Clean battery contacts |
| Battery or charger defective | 1. Replace necessary part (only use original accessories from the manufacturer) | |
| Battery is too hot | 1. Allow the battery to cool down | |
| Battery operating time drops significantly | Battery is discharged because it has not been used for a while | 1. Battery charging |
| Battery service life has expired | 1. Replace battery (only use original accessories from the manufacturer) |
Warranty
The warranty conditions issued by our relevant sales company apply in all countries. We shall remedy possible malfunctions on your appliance within the warranty period free of cost, provided that a material or manufacturing flaw is the cause. In a warranty case, please contact your dealer (with the purchase receipt) or the next authorised customer service site.
(See overleaf for the address)
Further warranty information (if available) can be found in the service area of your local Kärcher website under "Downloads".
Technical data
PSU 4-18
Device performance data
Working voltage of the battery V 18
Determined values in acc. with EN 60745-1
Sound pressure level L_pA dB(A) 77
Sound power level L_WA dB(A) 90
Hand-arm vibration value m/s2 <2,5
Working pressure (max.) bar 3
Flow rate (max.) I/h 30
Dimensions and weights
| PSU 4-18 | |
| Hose length cm 120 | |
| Length of telescopic spray lance cm 45 - 75 | |
| Weight (without battery pack) kg 2.4 | |
| Length x width x height mm 750 x | 185 x365 |
Subject to technical modifications.
EU Declaration of Conformity
We hereby declare that the machine described below complies with the relevant basic safety and health requirements in the EU Directives, both in its basic design and construction as well as in the version placed in circulation by us. This declaration is invalidated by any changes made to the machine that are not approved by us.
Product: Plant sprayer battery
Type: 1.145-xxx
Currently applicable EU Directives
2006/42/EC (+2009/127/EC)
2014/30/EU
2011/65/EU
Harmonised standards used
EN 60745-1
EN 50580:2014
EN 62233: 2008
EN 55014-1:2017 + A11:2020
EN 55014-2: 2015
ENIEC63000:2018
The signatories act on behalf of and with the authority of the company management.

H.Jenner
Chairman of the Board of Management

S. Reiser
Director Regulatory Affairs & Certification
Documentation supervisor:
S. Reiser
Alfred Karcher SE & Co. KG
Alfred-Karcher-Str.28-40
71364 Winnenden (Germany)
Ph.: +49 7195 14-0
Fax: +49 7195 14-2212
Winnenden, 2021/09/01
Contenu
Remarques generales. 14
2006/42/CE (+2009/127/CE)
2014/30/UE
2011/65/UE

H.Jenner
Chairman of the Board of Management

S. Reiser
Director Regulatory Affairs & Certification
Responsible de la documentation :
S. Reiser
Alfred Karcher SE & Co. KG
Alfred-Karcher-Str.28-40
71364 Winnenden (Germany)
Tel.: +49 7195 14-0
Télécopie:+49719514-2212
Winnenden, le 01/09/2021
Indices

H.Jenner
Chairman of the Board of Management

S. Reiser
Director Regulatory Affairs & Certification
71364 Winnenden (Germany)
Tel.: +49 7195 14-0
Fax: +49 7195 14-2212
Winnenden, 01/09/2021
2006/42/CE (+2009/127/CE)
2014/30/UE
2011/65/UE

H.Jenner
Chairman of the Board of Management

S. Reiser
Director Regulatory Affairs & Certification
Responsible de documentacion:
S. Reiser
Alfred Kärcher SE & Co. KG
Alfred-Karcher-Str.28-40
71364 Winnenden (Germany)
Tel.: +49 7195 14-0
Fax: +49 7195 14-2212
Winnenden, 01/09/2021
Indices
Indicaoesgerais 29
2006/42/CE (+2009/127/CE)
2014/30/UE
2011/65/UE
Chairman of the Board of Management

S. Reiser
Director Regulatory Affairs & Certification
Winnenden, 01/09/2021
Inhoud

Chairman of the Board of Management

S. Reiser
Director Regulatory Affairs & Certification
71364 Winnenden (Germany)
Tel.: +49 7195 14-0
Fax: +49 7195 14-2212
Winnenden, 2021/09/01
Icindekiler
2006/42/AT (+2009/127/AT)
2014/30/AB
2011/65/AB

H.Jenner
Chairman of the Board of Management

S. Reiser
Director Regulatory Affairs & Certification
Winnenden, 2021/09/01
Innehäll
Allman information. 43
Avsedd anvandning. 43
Miljöskydd. 43

H. Jenner
Chairman of the Board of Management

S. Reiser
Director Regulatory Affairs & Certification
Dokumentationsbefullmaktigad:
S. Reiser
Alfred Karcher SE & Co. KG
Alfred-Karcher-Str. 28 - 40
D-71364 Winnenden (Germany)
Tfn: +49 7195 14-0
Fax: +49 7195 14-2212
Winnenden, 01.09.2021
Sisaltö
Yleisia ohjeita 47
Maaraystenmukainen kaytto 47
Chairman of the Board of Management

S. Reiser
Director Regulatory Affairs & Certification
71364 Winnenden (Germany)
Puh.: +49 7195 14-0
2006/42/EF (+2009/127/EF)
2014/30/EU
2011/65/EU
Anvendte harmoniserte standarder
EN 60745-1
EN 50580:2014
EN 62233: 2008
EN 55014-1:2017 + A11:2020
EN 55014-2: 2015
ENIEC63000:2018

H.Jenner
Chairman of the Board of Management

S. Reiser
Director Regulatory Affairs & Certification
71364 Winnenden (Germany)
TIf.: +49 7195 14-0
Winnenden, 2021/09/01
Indhold
Relevant EU-directtiver
2006/42/EF (+2009 / 127 / EF)
2014/30/EU
2011/65/EU

Chairman of the Board of Management

S. Reiser
Director Regulatory Affairs & Certification
71364 Winnenden (Germany)
TIf.: +49 7195 14-0
Fax: +49 7195 14-2212
Winnenden, 2021/09/01
Sisukord
Uldised juhised 61
Nouetekohane kasutamine 61
Keskkonnakaitse 61
Lisavarustus ja varuosad. 61
Tarnekomplekt 61
Uldised ohutusjuhised

H.Jenner
Chairman of the Board of Management

S. Reiser
Director Regulatory Affairs & Certification
Dokumentatsioninovolinik:
S. Reiser
Alfred Kärcher SE & Co. KG
Alfred-Karcher-Str. 28 - 40
71364 Winnenden (Germany)
Tel: +49 7195 14-0
Winnenden, 2021/09/01
Satures
Visparigas norades 65
Chairman of the Board of Management

S. Reiser
Director Regulatory Affairs & Certification
Pilvarotais sagatavot dokumentaciju:
S. Reizers (S. Reiser)
Alfred Kärcher SE & Co. KG
Alfred-Karcher-Str. 28 - 40
71364 Winnenden (Vacija)
Talr.: +49 7195 14-0
Fakss: +49 7195 14-2212
Vinendene (Winnenden), 01.09.2021.
Turinys

H.Jenner
Chairman of the Board of Management

S. Reiser
Director Regulatory Affairs & Certification
2006/42/WE (+2009/127/WE)
2014/30/UE
2011/65/UE
Chairman of the Board of Management

S. Reiser
Director Regulatory Affairs & Certification
Administrator dokumentaci:
S. Reiser
Alfred Karcher SE & Co. KG
Alfred-Karcher-Str. 28 - 40
71364 Winnenden (Germany)
Tel.: +49 7195 14-0

H.Jenner
Chairman of the Board of Management

S. Reiser
Director Regulatory Affairs & Certification
Winnenden, 2021/09/01
Obsah
Obecné poukyny 84
Pouzitivsouladusurcenim 84
Ochrana zivotniho prostfedi 84
Prislustenvi a nahradni dily. 84
Rozsah dodávky. 84
Symboly na pristroji 84
Stupne nebezpeci 85
2006/42/ES (+2009/127/ES)
2014/30/EU
2011/65/EU

H.Jenner
Chairman of the Board of Management

S. Reiser
Director Regulatory Affairs & Certification
Zmocnelec pro dokumentaci:
S. Reiser
Alfred Kärcher SE & Co. KG
Alfred-Karcher-Str.28-40
Winnenden, 2021/09/01
Obsah
2006/42/ES (+2009/127/ES)
2014/30/EU
2011/65/EU
Chairman of the Board of Management

S. Reiser
Director Regulatory Affairs & Certification
71364 Winnenden (Germany)
Tel.: +49 7195 14-0
Fax: +49 7195 14-2212
Winnenden, 01.09.2021
Kazalo
Splošna navodila 93
Namenska uporaba 93
Zašcita okolja 94
Pribor in nadomestni deli. 94
Obsegdobave. 94
Simboli na napravi 94
2006/42/ES (+2009/127/ES)
2014/30/EU
2011/65/EU
Chairman of the Board of Management

S. Reiser
Director Regulatory Affairs & Certification
Pooblascena oseba za Dokumentaciono:
S. Reiser
Alfred Karcher SE & Co. KG
Alfred-Karcher-Str.28-40
Directive UE relevante
2006/42/UE (+2009/127/UE)
2014/30/UE
2011/65/UE
Norme armonizate aplicate
EN 60745-1
EN 50580:2014
EN 62233: 2008
EN 55014-1:2017 + A11:2020
EN 55014-2: 2015
EN IEC 63000:2018

H.Jenner
Chairman of the Board of Management

S. Reiser
Director Regulatory Affairs & Certification
Insarcinat cu elaborarea documentatione:
S. Reiser
Alfred Kärcher SE & Co. KG
Alfred-Karcher-Str.28-40
71364 Winnenden (Germania)
Tel.: +49 7195 14-0
Fax: +49 7195 14-2212
Winnenden, 2021/09/01
Sadržaj
Opé napomene 103
2006/42/EZ (+2009/127/EZ)
2014/30/EU
2011/65/EU
Primijenjene uskladene norme
EN 60745-1
EN 50580:2014
EN 62233: 2008
EN 55014-1:2017 + A11:2020
EN 55014-2: 2015
ENIEC63000:2018
Chairman of the Board of Management

S. Reiser
Director Regulatory Affairs & Certification
Winnenden, 01.09.2021.
Sadržaj
Opste napomene. 107
Namenska upotreba. 107
Zastita zivotne sredine 107
Priborirezervndelovi 108
Obim isporuke 108
Simboli na uredaju 108
Stepeni opasnosti 108
Sigurnosne napomene. 108
Opis uredaja 109
Montaza 109
Pušanje u pigeon 109
Rad. 110
Transport 110
Skladistenje 110
2006/42/EZ (+2009/127/EZ)
2014/30/EU
2011/65/EU
Primenjene harmonizovane norme
EN 60745-1
EN 50580:2014
EN 62233: 2008
EN 55014-1:2017 + A11:2020
EN 55014-2: 2015
EN IEC 63000:2018
Potpisnici deluju po nalogu i uz punomoc upravnog odbora.
Lice ovlasceno za Dokumentaciju:
S. Reiser
Alfred Karcher SE & Co. KG
Alfred-Karcher-Str. 28 - 40
71364 Winnenden (Germany)
Tel.: +49 7195 14-0
Winnenden, 2021/09/01
περιεχόμενα
EVIKc UTOeEIG 112
Chairman of the Board of Management

S. Reiser
Director Regulatory Affairs & Certification
YTEUBOVOC TEXVIKOUΦaKeλou:
S. Reiser
Alfred Karcher SE & Co. KG
Alfred-Karcher-Str.28-40
71364 Winnenden (Germany)
TnA: +49 7195 14-0
Φaξ: +49 7195 14-2212
Winnenden, 2021/09/01
CopepkaHne
O6uye yka3aHnra. 117
IcnoJIb3ObaHne no Ha3HaueHnIO 117
3aunTaOkpykaIOuei cpebl 117
PpHaIeXHcTn 3aNaChbIe YacTn. 117
KoMnJIeKT NoCTaBKn 117
CnMBoJI Ha yCTpoNCTBe 117
CTeneHb onachocTn 118
Yka3aHnno TEsHnke 6e3oNaChocTn 118
OncanHe yctpoNCTBa 119
C6opka 120
BBoD B 3KcPnyatauH0 120
3Kcnnyatau 120
TpaHcnpOpTnPoBka. 120
Xpahene 120
YxOД n TeXnHueckoe obcnyKbHaHne 121
Pomoub npn HeucnpabHocTEx 121
Tapaantna 121
Texnueckne xapaKTepeNCTnKn 122
DeknapaunO COOTBETCTBUN CTAHapTAM EC.... 122
06üne yka3aHn

IpeepnepBbIM npmHeHem yctpoNCTBa Heo6xOIMO O3HaKOMNTbcr C yka3aHnMaMn NO Texnke 6e30NaChocTn, opnHaJIbHoH INcTpykCneNo 3KcnNyatau, a TaKke
npnnaeraembIMyka3aHnmaNnoTexHKe 6e3oNaCHOCTn
OpnnHaJIbHOINHCTpyKUneI NO 3KcNlyaTAtuNN
AkkymJYTopHOrO 6NoKa / CTaHapTHOrO 3apJHOrO
yCTpoCTBa.DeInCTBOBaTbB COOTBETCTBnC HNM.
CneJyET coXpaHnTB DOKyMeHTaUNo DnA DaJIbHeJWeO
NoJIb3OBAHn NII DNn CNeDyUoTeo BnADeNbCa.
HApJy Cyka3aHnMaM, CoDEpXaUmncsB INHCTpyKUnn
NO 3KcNlyaTaun, Co6NJDaTb TAKKe O6Une
3aKOHOdaTeNBhIE NOLOXeHnN NO TexHKe
6e3oNaCHOCTn INpeD0TbPaUeHNIO HeCuaCTHbIX
cLyuaeB.
IcnoJb3OBAHHe NO Ha3HaueHHIO
AkkymyIaTOHoe yCTPOINCTBO paCNbIeHnno IaBHeHem PpeHa3NaueHo DnI NcONb3OBaHN B XopoIo npoBeTpnaeMbIX MecTax Ha OTkpBTOM BO3dyxe. YCTPOINCTBO ppeHa3NaueHo dIpaCbIeHnN 6blTOBbIX IN CaIOBbIX XMMKATOB, TaKnx KaK INHCEKTNUndbl, FyHnUndbl n yDObpeHn.
YcTPOIcTBo MOKHO NcONb3OBAb TaKKe IJnNoNBA pacten. He nCOnb3yIte ycTPOIcTBo IJnApyrnx ceJe,OTNNHbIX OT BIIweyKa3aHHbIX.YcTPOIcTBO
3anpeeHIOHCNOBtBTeTMMNIMaM,He
mMeHOUMIPOXOJaueOJeKdbI NPOXoJxnx
cpeCTb INHNBnDyAaBHOIN3aunTBi.
Bcerdaco6nOaIteDeIcTBYIOune pernoHaNbHbIe
npedncaHna.
3aunTa Okpyxauouei cpebl
YnakoBouHbIe MaTePnaJIbI NOdaIOTcB TOpNCHoInepepa6OtKe. YnakoBky Heo6xOIMo yTININ3InpObaTb 6ez yUepe6a IJIA OKpyKaIOuEi Cpebl.
3JIeKtpnueckne n 3JIeKtpoHHbI ycTpoNCTBa YacTo cOepKAT CEHHbI MaTePnaJIbI, IpnuOHDhIE JIyBTOpNHHOH nepepa6OTKn, IN 3aYAcTyIO TaKHe KOMNoHEHTbl, KaK 6aTapeu,
akymyITopbI INM MacNo, KOtOpBie npn HnpabNlbHom 6paueHnn INn HeHaJnxKaUeYtIN3aunnpedctabnIOT NOTeHnAInbHyO ONaCHocTb DnIg 3DopOBBy N OKpykaUoSe Cpebl. Tem He MeHee, daHhBe KOMnoHEHTbl Heo6XOnMbI dIpnabNbHO pa60bl yCTpoiCTBa.YCTpoiCTBa, 603NaeHHbIe 3TNM CmBOIOM, 3anpeUeHO YtINn3nPoBaTB BMeCTe C 6bITOBbIM OTxODAMN.
Yka3aHnI IO KOMIOHeHTam (REACH)
Дяп получени akтуально Инфорmaци о kompohteхсm. www.kaercher.de/REACH
He noDBepraTe yCtpoiCTBO BO3JeIcTBIO DOxJa IJN BbICOKO BJIaXHOCTN.
CTeneHb onaCHOCTN
ONACHOCTb
- Yka3aHue omHocumelbHo HenocpecdmbeHHo ap03aueu onachocmu, Komopar npusodum K mJKeBIM mpaMam unu K Cmepu.
△PENDyUNPEXKDEHNE
- Yka3aHue omHocumelbHO 603MOxHou nomeHuaJIbHO onaCHO cumyaauu, KOMOPa moXem npueecMu K mJKeJIbIM mpaemam UJU K cMepmu.
△OCTOPOXHO
- Yka3aHue Ha nomeHuzaIbHo onachHyIO cumyaIuO, komopra MoKem npueecMu K nonyuEhuO ne2kuxmpaM.
BHIMAHHE
- Yka3aHue omHocumelbHo e03MoXHou nomeHuaIbHO onachou cumyaIuu, kOmpa moKem noBneYb 3a cobou MamepuIbHi yuep6.
Yka3aHnno TeXnKe 6e3OnacHOCTn
06uye yka3aHnno TeXnKe 6e3onacHOCTn
ONACHOCTb·Onachocmb noIyueHuaXumueckoO oxo2a.Hko2a He HanpaBnme connoHa yenobeka unu xueomhoe. Hko2a He donyckaume npmo2o KOHMakma cmpyu c koxeU. Onachocmb oxo2a.DanHoe ycmpoucmeo HeJIb3ra Ucnonb30abmbdna pacblneHura ne2koeocnnaMeHryouuxcKpacok unu pacmboOpumeneu c memnpamypou BCnbIwku < 21^.
△ PEPdynpeKDEHNE·pu
pacnbilehuo obecneyme docmamoyHy oehmuiu pa6oey 30hI. Onachocmb noJyueHu xumueckoo okoa.Bo 6pemucnoB3o8aHua 6ce2da depxume pacbnlumenbhyo mpy6ky e HxKHom nonoKeHu. .Onachocmb 3pb1Ba. Huko2da He uCnObl3yUme ycmpoucMBO 63pB6oONaChbix u noXapOONaChbIX Mecmax. .Onachocmb mpaemupo8aHua. TomHume o6 onachocmu, ucxodae om pacnbInreMou kudkocmu, u O3hakombmecb c Mapkuop8kOu Ha KOHMeUHepe unu uHOpMauee, npedocmaeneHHou npou3eodumenm.
He pacbIyIme kudKocmb, ecn Heu3ecmHo, enrremca nu OHa onachou u/Unu bpehdou.
06uhe yka3aHnno TeXnke 6e3oNaCHocTnp np pa6Ote c 3JeKtpnuecknMuHhCTpyMeHTamN
△NPEDyINPEXDEHNE
O3HaKombmecb co eceMu yka3aHuaMu no mexHuke 6e3oNaChocMu u unCmpykuiaMu. Hecobnoidue yka3aHu no mexHuke 6e3oNaChocMu u unCmpykuu moKem npueecMu K nopaxHeUo 3neKmpuueckum mokom u/Unu noluyehuO cepbe3hBix mpaem. CoxpaHmae 0ce
yka3aHn no mexHuke 6e3onacHocmu
UHcmpykuuu dna daIbHeuweo ucnonb30euaHua. Tepmuh «3neKmpouHcmpymeh», ucnonb3yeMbui 6 yka3aHuRx no mexHuke 6e3oNaChocMu, o6o3Haayem 3neKmpueeckue uncmpyMeHmbi, pa6omaiuue om cemu (c cemeebim KaBeMe) u akkyMjramOpHbie 3neKmpueeckue uncmpyMeHmbi (6e3 cemee2o Ka6eJ).
1 Be3onacHocTb Ha pa6ooy MeCTe
a Heo6xOJIMo copeKaatb pa6oyu 30Hy B uHCTOTE n o6ecneuHTb ee DOCTaTOUHOE OCBeueHHe. BecnopraDok e pa6oux 30hax unu omcymcBue ceema Mozym npueecmu K HecyacmHbIM cnuyaM.
b 3anpeueho pa6oTaTb 3neKtpoHnCTpyMeHTOM BO B3pbIBOONaCHbIX 3OHax, rHe HaxOJrTcB OBCJIaMeHraUOuNecr XndKoCTn, ra3bl NII Nblb. 3neKmpouHcmpyMeHmbl co3daHom uckpbI, Komopbie Moaym cmmb npuHoIEOCNIaMeHnur nblu unu napoe.
c Bo BpemnnoB3OBAHn 3neKtpoHnCTpyMeHTa DeTm NpyrM INucaM 3anpeueHo HaxOuNTbcraB pa6oey 30He. OmeneKaacb, MoXHO nomepmb KOHmpoJIb Had UHCmpyMeHmOM.
23neKtpo6e3onacHOctb
a N36eRaTe Φn3nueckoro KOHTaTa C 3a3eMJIeHHbIMN NOBepxHOCTaMn, HAnpImep, Tpy6amn, paHaTOpAMn OTOnJIeHnra, pIITAmn XOJODINbHNKamn. Ecnu meNo 3a3eMNeHo, cyuecmeyem ebICOKu puCK nopaxHeHna 3neKmpuueckum mokom.
b Bepernte 3neKtpOnHcTpyMeHTbI OTdoxJn Bnarn. NonaadHue 60dbI 6 3neKmpounHcmpyMeHm no8biwaem puck npaxKeHra 3neKmpuueckum mokom.
3 Be3oNaChocTb Nm
a BydBe BHMaTeJbHbI, CJeDnte 3a CBOIMN DeiCTBnA M N pa6oTe c 3NeKTPoHnCtpymeHTOM npuCTynaTe C RCHbIM CO3HaHMe. He nCnoJIb3yIte 3NeKTPoHnCtpymeHT B COCTOAHm yCTaIOCTn IIN NOB BNIAHNEM HApKOTIKOB, aNKOROJIg IIN JekapCTBeHHbIX npenapaTOB. Maneuwae HeOCmOpOxHocmb npu NpIb308aHuU 3NeKmpouHcmpymeHMom MoXem npuuecmu K Cepbe3HbIM mpaemam.
b IcnoJb3yIte cpeCDtBa nHdNBduaJIbHOJ 3aunTbI N B O6ra3TeJbHOM nopAKe- 3auntHbIe OuyKn. IcnoJb3o8aHue cpeDcmu HduBuayalbHOJ 3auumbl, makux KaK npomueonblneBou pecnupamop, HeckOJIb3raua mpaemBoe3oNaChnA OBy6, kacka unu npomueoWymHbE HayuHukU, 3aBucUMOCMu om buda u UcNoJb3o8aHua 3NeKmpouHcmpymHa, Chxkaem puck nOnyuHeu mpa6M.
c He donyckaTe HekoHTpOnpyemoro BKnIOUeHn. Npeed Tem KAK NOkNIOuHTb 3NeKTPoHHCTpyMeHT K HcTOOHky NHTAHn I/ nnn aKKMyJrTOpY, B3rTp erO nn nepeHeCTn, y6eDntEcB, YTO OH BbIKIOUeH. Ecnu npu nepenocke 3neKmpouHcmpymema ebl depxKume naue Ha bIKIOUamene unu noDKKIOUaeme BKNIOUeHHbI UHCMPyEmH K UcmoHukny numahure, 3mo MOxem npueecmu K HeecacmHbIM cnuyaM.
d Ipeed BkIIOUeHHeM 3NeKTPoHCTpyMeHTa cJeDyET y6paTb peryJInpOBOuHbIE HNCTpyMeHTbI INn raeuHbIe KJIouH. IHcmpymEh m UUN KJIou, Haxoduauc8 O epauaouecra demaru, Moxem npueecmu K mpaemupoeaHIO.
e N36eraTe HeecTeCBeHHoro NOIOXeHnKopnyCa BO BpempaBtI.CJeDnte 3a yCTOnuBBbIM NOIOXeHnEM n DepXHTe paBHOBecne.3mo no38oJern Lyuwe KOHmpoupoabmb 3NeKmpounHcmpymEm 8 HnpeDuDeHHbix cumyaucx.
f Ncnoj3yIte noxOaIyIO odexIy. He HadeBaTe Cbo6oHyIO odexIy nIy ykpaWeHn. He donyckaIte KOHTAKTa BOIoc, Odekbl I nepuTOK C NOBHXHBIMN qactmN. Cbo6oHa oDeXda, nepyamku, ykpaWeHn UU dJIUNHbIe eoIocbl Mozym 6bImb 3ax6aueHbI NOEUXHBIMU demaIMy.
4Применнe nO6cnykBaHne 3JIeKTPoHHCTpyMeHTa
a He donyckaTe neperpy3kn HnctpymeHa.
IЯ BbInonHHeHra pa60tbl nCnoB3yIte
IpeHa3NaueHHbI dIra 3TOrO
3NeKtpoHnCTpymeHT. Ipu uCNoB3O8aHuu
nodxodaezo 3neKmpouHcmpymeHa
obecneueBaemc 6Oone Kaecm8eHhoe U
6e3onachoe BbInonHeHue pa6om b yka3aHHou
6bnacmu npumehHua.
3anpeueho noIb3oBaTbcra 3neKtpoHnCTpyMeHTOM C NOBpeXdeHHbIM BbIKJIOyateJeM. 3neKmpouHcmpyMeHm, KOMopbiu He 6knOHaemc uUHe 6bnOHaemc, npedcmabnem onachocmb u doJxhen 6blmb ompeMoHmupoeah.
c Ipeed BbInonHeHnem HacTpoek HNCTpyMeHTa, 3AmeHOJ KOMNKeKTyIOuNX Yacte NIN OTKnAdbiBaHHem HNCTpyMeHTa BbIHbTe WTeNCelbHyO BuNKy N3 PO3eTKN NII CNHMNTe aKKymyIaTOP. 3ma Mepa npedocmopoxKnoCmu npedomspauzaem HepehamepeHHoe ekIoueHue 3neKmpouHcmpyMeHma.
d HencnoIb3yeMbIe 3neKtpoHnCTpyMeHTbIXpaHInTe B HeNoctynHom dIaDeTeMceTe.He No3BOnJaIte pa6OtaTb C nHCTpyMeHTOMnUam,KOTOpbIE He yMeOT C HmOBpaAutaBcra HNI He O3HaKOMnncbC DaHHbIMNnHCTpyKzmaN.3neKmpouHcmpyMeHmbI npedcma6JIomONachocMb,ecNuUCNOb3yIOmCraHeONbIMHbIMUNoNb30aMeJMa.
e 3NeKtpoHnCTpyMeHTb Tpe6yIOT TuaTeNbHorO yXoJa. PpOBepaTe 6e3ynpeuHOCTb pa6OtB I BceX NOBHXbIX Yactei, OTCyTCTBne 3aknnHBaHn, NOLOMKn IIN NOBpeXdEHn DeTaJe, HApYsaUox HOpMaIbHyIO pa6Ory 3NeKtpoHCTpyMeHTa. Ipeed nCNoJIb3OBAHnEM NHCtpyMeHTa IOBpeXdEHbIE DeTAnN DOJXbIb 6bITb OTpeMOHTPOBaHbI. PpuHouMHosux HeycacmHbIX cnyae8 reJeemcra HedocmamOHoe mexHuueckoe o6cnykueaHue 3NeKmpouHcmpyMeHmo8.
f 3NeKtpoHnCtpymENT, KOMNJIeKTyIOUne Yactn, pa6OCh INHCTpyMeHT n T. n. DOJXHBi NcNoJIb3OBaTbcra B COOTBETCTBm C daHHbIMn INHCTpyKcIyAmn. Pp n 3tOM Heo6xOdmo
yUHTbIBaTpb6OueYcIOBnI BVDblIOJIHReMo pa6Otbl. IcNoIb308aHue 3NeKmpouHcmpymHaMe e cIeJx, omluayuuxcxompeDycMompeneHbIX, MoKem npueecmu K eo3HukHObeHuO onachbix cumyaui.
5 IcnoIb3ObaHne n 06cnyxuBaHne aKKyMylrTophbx6JOKOB
a 3apjkaTe aKKyMnyTOpHbI 6JOK TOnbKO c NOMOsbIO DOnyUeHHbIX npOn3BOdnteJeM 3apJnHbIX yCtpoiCTB. 3apJhHe ycmpoucmea, He npu2oDbIe dna coomeemcmeyUoce2o aKKyMnymopHO2O 6noka, Mozym npueecmu K Bo3HuKHObeHuIO noxapa.
b NcnoB3yIte yctpoiCTBO TOnbKO c NOxOJaUM AKKymJYrTOpOM. IcnoB3oBaHue dpy2ux aKKymJyrrOpHbIX 6nOKo8 MoKem npueecMu KmpaBmUpoBaHuU o onachocMu 803HukHOeHua NoXapa.
c He xpaHnte HeucnoJIb3yeMbI aKKyMyJrTOp pAOM c KaHceJIaRcKIMN cKpeKNaMn, MOHeTaMn, KJIouaMn, INoJIkAMn, BnHTaMn IIN dpyrUm MeJIKMm MeTaJIInueCKMn NpeJMeTaMn, KOToPbIE MoryT npNBecTu K KopOTKOMy 3AmbIkaHNU. KopomKoe 3AmbIkaHue MoXem npueecMu K noXapy Unu E3pbIeY.
d Pn onpeJeHbIX o6CToTeNbCTBax n3 aKKymyIaTopa MoKeT BbITEKaTb XNIOKcTb. N36eraIte KOtAkaTc Hne. Pn KOHTaKe T c XNIOKcTbIO TuaTeNbHO CMOITe ee BOOn. Pn nonaHaHH XNIOKcTb B rna3a 6paNTecb K BpaY. 3JNEkmpoNum MOXem 6bl36amcbllb U OXO2U KOxU.
6 CepBnC
a PemOHr 3JIeKTPoHcTpyMeHTa DOJXeH BbINOJIHrTBc TOLbKO KBaIINФИцPoBAHHbIM CNEUHaJIHCTAMN I TOlbKO C NcOJIb3OBaHHeM OpRnHaJIbHbIX 3aNaChbIX YacTei. TeM caMbIM apaahmupyemc 6e3onachocmb UHCmpyMeHma.
OnncaHne ycTpoNcTba
PncyHOK A
① OTCekДЯ AkKymyTOpHOrO 6noka
2BbIKIIOuAteIb yCtpoIcTba
ΦHKcnpyembl ΚIeMeHT BkJIIOHeHn paCbJIeHn
4PacnbJIInTeIbHaTpy6Ka
5 PacnbinteHbHOe CONNO
⑥ 3aINBHOI naTpy6OK C MepHbIM CTaKaHOM
⑦ Touka noDcoeHHeHnJwJaHra
8uHaHr
KpenneHne nIeYeBoro peMHra
10Bak
13aMbikaiouaHaKaia
12*AkkymyTOpHbI 6nok Battery Power 18V
13 *BbIcTpo3apArdHoe yCtpoIcTBo Battery Power 18V
14 PneheBoPpeMeHb
- He BXOДNT B KOMПЛЕКТ NOCTABKN.
C6opka
MOHTAX paCnblntelbHOn Tpy6Kn n IJnaHra
- YctaHOBInTe paCnblInTeIbHyIO Tpy6Ky Ha pyKoTky 3aTAYHtE.
- NObepHnTe pacnbInnteBHyIO Tpy6Ky TaK, YTo6bl pyKoRTka 6bIa HAnpaBnHeA Bn3.
PucyHok B
- YctaHOBNTe raiKy IJNAHra Ha ycTPOIcTBO IN 3aTRAHNTE.
PncyHOK C
PpumeyaHue
PnoepeMbme npouHocmb KpenneHua paCnblumenbHoU mpy6ku.
PpumeyaHue
Ipu ycmaHOeke Kopnyca y6edumecb, ymo KOpomkuu wnaHa Ha ycmpoucmee cmaaene H ombepcmue Ha bake.
BBoD B 3KcnpnyaTaunio
3aNoJIHeHne 6aka
- OtkpyTne MEPnHbI cTaKaH.
- 3aONHnTe 6ak Heo6xOIMMbIM KOINueCTBOM BOdbI (do 4 nITPOB).
- C nOMObMo MEPHO cTaKaHa OTMepbTe Heo6xoJIMoe KOJIuYeCTBO JNkIOcTn/IO6aBKn (do 120 mI) n aKKypaTHo 3aJeIe Te ee B 6ak. PucyHok G
- ПомоTe Мернь CTaKaH YnCToN BODO N 3akpyTnte erO o6paTHo.
PpumeyaHue
Depkume ycmpoucmeo c nonHocmbio 3aonneHHbIM bakom 2opuzohmanbHO, ymo6bl npedomepammb ebuiuehue uepe3 ecablaiaouee omeepcmue.
3akpenenne nneBoropemn
- 3akpenTe pneheBoi peMeHb B 3axmMax Ha Kopnyce.
PpumeyaHue
Y6eumecb, ymo nneueo puemh 3akpenn en npabunbHO.
YctaHOBKa aKKyMnyTOpHOro 6Joka
- 3aDbHbTe aKkymyTOpHbI 6nok B oTcek yctpoiCTBa TAK, YTO6bl OH 3aФNKCupOBaNCra CO CJblIMMbIM UeJIYKOM.
PucyHok J
YdaJIeHHe BO3dUxa N3 HAcoca
- Otkpytnte ctpyHny Tpy6ky OT nctOneta.
- Haxmte BbIKIOaTeIb yCTpoNCTBa.
- Haxmte 3nemeht BkHoueHHpaCnblneHHy ydepKbauTe ero haxKaTbIM He MeHee 10 cekyHdTo Tex nOp, NOKa N3 CNCTEmb He BbIeT BO3dyX.
- BbIKHIOHTe yCTpOcTBO.
- YcTaHOBnTe CtpyHyIO Tpy6Ky
3KcnJnyatauia
PpumeyaHue
Bo epempa6ombyycmpoicmeaakymyarnop pa3pxaemcna6bwhumu mokamu. N03momy uhdukamop ypo8n 3apra doa moxem hemouho nokaibamb ocmaeeecepema pa6ombi. Ymo6bl onpedenumb emkocmb akymyarnopa, Hehadozo nppeamb nompebnue meka u chumamb om6paXaemyo emKocmb akymyarnopa %
3Kcnnyatauia
- CHIMnTe paCnblnteBHyTOtpy6ky.
- HaxMNTe BbIKIOuATEteIb yCTpOcTBA. PucyHOK D
YcTPOINCTBO3anyckaetca.
- HaxmTe 3IeMeHT BkIIOUeHn paCbIJIeHn, YTo6bl HaatB IpoceCC paCbJIeHn, NIN CDBNHe erO Bnepei, YTO6bl Haatb HenpepbIBhIn peKIM pa60TbI.
PucyHok E
PpumeyaHue
3a6nokupoeah.
PpumueaHue
Ipepe ycmaHOeKOa aKKymnamopHOzo 6noka y6edumecb, ymo 3neMeHm 8KIOHeHu paCnblHeHu He 3a6nokupoeh.
4. 4T06bI ocTaHOBnTB npoecc pacnbIeHnra, OTNcyTInTe 3JIeMeHT BKNIOUeHnra pacnbIeHnra. 4T06bl octaHOBnTB HeNPpepbIBhBn peKIM pa6ObTI, CDBINbHe 3JIeMeHT BKNIOUeHnra pacnbIeHnra Ha3aD.
PergunpoBka cTpyu
- ПовернITE соно дя посяключени Ha toychyIo nIII paCnblIeHHyIO cTpyIO PucyHok F
TpaHcnpTnOpBka
OCTOPOXHO
HecobJIOdeHue beca
Onachocmb nonyuhenma mpaem u noepexkdehu Bo epemmpaehcpmupoeku yumbiamb bec ycmpoucmea.
BHIMAHNE
Hekohmponupyembl 3anyck
OnachocmbmpaBmupoBaHua u nopekdeHua Pered mpaHcnpmuOpko u36LeKume aKKymyJmop u3 ycmpoucmea.
IpeedmpaHcnpmuOkoonHocmbo onopoxhume ycmpoucmgo.
- Ipn TpaHCnOpTnPOBKe yCTpoIcTBa B TpaHCnOpTnBix CpeIcTBax 3aΦNKcPuyTe erO tCKoJIbXeHnI n ONpOKuDIBaHnI.
XpaHeHne
OCTOPOXHO
Hecobnoidhebeeca
Onachocmb noyuehnmaepum u noepexdehu Bo 6pem xpaehn yumbamb bc ccmpoucmea.
OCTOPOXHO
Hekohmpolupyembl 3anyck
Onachocmb mpaemupo8aHua u nopekdeHua Pered xpanHeuem ebihme akKymyIamop u3 ycmpoucmea.
BHIMAHNE
XpaHumb ycmpoucmeo b cyxom u xopowo npoeempuaemom Mecme, he docmynHom dna deme. Depxamb ycmpoucmeo nodaNbwe om beuecm, 6b3b8aouux Koppo3uO, maux kaK caoobie xumukambl.
- OuHCTnTe yCTPOINCTBO.
2.ДЯ KOMNaKTHORO XpaHEnI OTKpyTITepacNbIINTeJbHyIO Tpy6Ky I BCTaBbTe B 3axIMДЯpacNbIINTeJbHOI Tpy6Kn Ha OTceKe dЯakymyIaTOPHoro 6noka.
Pucyok H
- BctabBte pykoTky Tpy6Kn B pykoTky yctpoiCTba.
YxOД n TexHnueckoe 06cJnyXnBaHne
△OCTOPOXHO
HeKoHmpOIpUpyEmbI 3anyck OnacHocmb mpaMupObaHua u noepexdeHua Pered ebInonHeuem IIObIx paBom ebInbme aKKyMylmop u3 ycmpoucmba.
BHIMAHHE
He ucnonb3oebam dny oucmcku nlaemukobex demaneu pacmbopumenu, mak kak Ohu pa3pywaiom Mamepuanbl, u3 komopbix u32omoeNo ycmpoucm8o. Ydanumb 3aepnHure, makue kak nbilb, macno U cma30hble Mamepuanbl, yucmoi mkaHbo.
OuNTka 6aka
- YdaJInte aKKMyIaTOpHbI 6JIOK.
- OtkpoTe 3aMbIkaHoune HaKJIaKn n CHMnTe 6ak. PucyHok I
-
CneTe coedeKmOe 6aka.
-
OuHCTIe BHeUHIO NOBepxHOCTb 6aKa YnCToN CyXoT KHaHbIO.
- 3aONHnTe 6ak Ha TpeTb YNCTOJ BOIOI.
- CoeHHHe 6aK c Kopnycom DnraTeJIa.
- YctaHOBnTe aKKymyIaTOp.
- PacnbInTe Bce copeKmoe 6aka.
- NOBTOPTE daHHbI npocecc HeckoIbKO pa3.
OnopoxHeHne 6aka
- YdaJInte aKKMyJrToPbHbI 6JOK.
- OTKpoTe 3aMbIkaIOuIe HaKJIaIKN n CHIMnTe 6aK PucyHok I
- CneTe coDepeXmOe 6aka
Ouuctka conna
- YdaInte akkymyIaTOpHbI 6nK.
- OtkpyTne coTNO OT pacbInTeBHO Tpy6Kn.
- Пюденисту узкун повоноку чере пюдовьные OTверстиг, утобы удалиь остатки. Pucyнok K
4.ПомоTe coNToчсToBdoI. - BbITpnte CoNIO YnCTOy CyXoY TkaHbIu N yCTaHOBNTe CoNIO Ha MecTo.
POMOuB npn HEncnpaBHOCTX
3aactyHHeNCpabHocTn HMeIOT npocTbe npuHHbI, n03tomy C NOMOsbHcNeDyUoero 630paNX MOxHO yctpaHb camocToTeBHO. B cnyae comHenra nn
BO3HKnHOBeHHn HeONncaHHbX 3DeCb HEnCnpaBHOCTe CNe dyet O6paatbcra B ynonHomOeHHyocnyK6y cepBucHOro 06cnykmbaHna.
Chairman of the Board of Management

S. Reiser
Director Regulatory Affairs & Certification
Лицо, OTBETCTBeHHoe 3a BeDeHne ДOKум entaun:
II. Pau3ep (S. Reiser)
Alfred Kärcher SE & Co. KG
Alfred-Karcher-Str.28-40
71364 Winnenden (Germany)
Ten.: +49 7195 14-0
_aKc: +49719514-2212
r.BHHHeHdEh,01.09.2021
3Mict
3araJIbHI Bka3iBKn. 122
BukopucTahnHa 3a npu3HaueHnAm 122
Oxopoha doBkiJnla 123
Ppuna Ta 3anaChi Detani 123
KOMJIeKT NOCTaBKn 123
CnmboHa npicptoi 123
CTynihb He6e3nekn 123
Bka3iBkn 3Texhikn6e3neKn 123
Onc npictpo 125
36upaHnHa 125
BBeHb Beknnyataio 125
Eknnnyataia 125
TpaHcnpTyBaHHa 126
36epirannn 126
Iorrri TeXHnHe 06cnyroBaHHa 126
Dionomora y paazi HecnpaBHOCTeI 126
Tapantia 127
Texhi xiapaktepcntkn 127
Ieknapaia npo BiinobiHicb cTahapam EC. 127
3araJIbHI Bka3IBKN

IpeepnBVKOPNCaHnmpntpoC1iO O3HaOMNTNc3 LMM Bka3iBkAm 3Texhki6e3neK,ciio opirihbHOIO IHCTpyKciEo 3 ekcnnyataJI, Bka3iBkAm 3
Texhki 6e3neK, oO OdaIObCra Do akymyIaTOHORo
6noka, a TAKOX i3 opnirnaIbHOIO IHCTpykciEIO 3
eknlyataii akymyIaTOHORo 6noka / cTaNapTHoro
3apndHOrO npncTroIO. DIAIT N BiNobiHO Do HIX.
Dokymentn 36epiraTn dnn noaJIbWoTO KOpNCTyBaHH
abo nlaHAcTyHOrO Bnachnka.
Pa3om i3 Bka3iBkAmn B ciN IHCTpykciII 3 ekcnnyataui
cIId BpaxOByBaTn 3araJIbHi 3akoHOaBHi NonoKeHH
IoTO Texhki 6e3neK Ta nonepedXeHH HeuacHX
BUNaIKIB.
BnKOpncTaHHa 3a npn3HaueHHaM
Be3dpoTOBn HAnipHn po3nnIIOBaH np3NaeHn dJa BVKOpNCTaHHa 3a Mekamn npmiiueh b y HaJIeXHO BeHTnIbOBAHN 3oHaX. Bpi6 np3NaeeHn dJa PO3npNcKByBaHHra N6byTOBnx Ta caDobHX XIMiHnx peYOBnH, HApNKnAd IHceKTnCnIDIB, FyHriuNDb Ta Do6pNbA. PInCTpi TAKOX MOxHa BVKOpNCTOBvBATn DnI NOINBy pocnH. He cniD 3aCTOCOBvBATn Bpi6 dJa 6ydb-ax INxu xine, OKPIM 3a3NaeeHx Bnue. PInCTpi He MoxHa BVKOpNCTOBvBATn DiTAM a60
oc6am, kI He Hoc8b BiIDNOBIDHNX 3ac06IB iHINBIyAJIbHoro 3axNCTy Ta 3axNCHORO OJry. 3aBXdIOtpmMyTecb npabn, YHHnx y BaWOMy periohi.
Oxopoha doBkiiIJIa

NakybaJIbHi MaTepiAn IpnIaTHIO Bo BToPnHooi nepepo6Kn. YnaKOBky Heo6xIDHO yTuIN3yBaTn 6e3 uKoDn Dn DOBkiJIIJ.

EneKtpuHi Ta eNeKtpoHHI npucTpoMiCTaTb ciHHi MaTepiAHI, kI npuaTHIO BO BTOpHHOi nepepo6Kn, i cacto KOMnOHeHTN, kK-OT 6atapei, akymyIaTOp Nm MacTuNo, kY p3i
HnnpabnboHO NOBdoKeHHa 3 HmN a6o
HnnpabnboHO yTnIi3aui MoKyb CTBopNTn NOTeHiHy
He6e3neky dny 3dopoB' nOuHN Ta DOBknna. Ondak
ci KOMnoHEHTn Heo6xDiH iJn HanexKHO eKnnyataui
npncptoi. Pnncptoi, no3Haehi cIM CnMBONom,
3a6bOpOHcTBc yTnIi3yBaTu pa30 m I NobyTOBM
cmTTAM.
Bka3iBkn 0do kOmnoHeHtIB (REACH)
AkyaJIbHI BiOMOCTI npo KOMnoHEHn HaBeHeHi Ha caTti: www.kaercher.de/REACH
PpnaT Ta 3anachi deTani
CnD BnKOpNCToBbATN NlWe opRiHaJIbHe npNJaIaTa opRiHaJIbHI 3anachi YactHH, TOMy IIO camE BOHrapaHTyOHT 6e3neHy Ta 6e3nepe6iHy ekcnlyataio npncTPOJ.
IhOpMaiaJIOO npuaJaTa 3aNaChnx YaCTnH MICITbCnHa caNti www.kaercher.com.
KOMNJIeKT NOCTaBKn
KomnneKtaui npuctpo 3aHaueHa Ha ynaKOBu.i. Ii d
yac po3nakyBaHH npuctpo npeBipntu
komnkeTauio. Y pa3i Hectayi npuaadra 60
ykoJxHb,OTPMAHx Ni d Yac TpaHCnpTyBaHH,
cnid nobIDomTu npue ce ToproBehni opraHiaui, kA
npDana npucptpi.
CnmboHnHa npncTpoi
| 3aaraibnii 3naK pOnepeJxHnR | |
| Перед уваDEннЯВЕСКПУАТAZIЮ OЗнайOMITINCSB 3 iNCTpyKUJIeTO 3 EKCПЛYATAZII TAT yCIMBAZIBKAMN 3 TEXHIXI 6e3NeKn. | |
| ПiД час ровоти 3 писстpoЕМ ВИКОПICTOBуйTe HeKOB3Hi MiiChI 3axHcHIpуКавицI. | |
| ПiД час ровоти 3 писстpoЕСпID KОПICTYВATИСЯ 3acOБамп Ддя 3axHcTUpоeн. | |
| ПiД час ровоти 3 писстpoЕМ ВИКОПICTOBуйTe HeKOB3He 3axHcHEpB3yTTI. | |
| ПiД час ровоти 3 писстpoЕМ KОПICTYВATИСЯ 3axHcHIO МACKОЮ Ддя 6bIuUy. |
3axuata npncpti BID BnInBy douy Ta BOJOrn.
CTyniHb He6e3neKn
△HE6E3NEKA
Bka3i8ka uo do He6e3neku, Ka 6e3nocepeHbo 3aepky ma npu3eodumb do mKux mpaem cu cmepi.
△NONEPEDKEHH
Bka3iBa Ka odo nomeuui Ho moKnueoI He63neHoi cumyaui, 0o MoKe npu3eecmu do mXkuxmpaM Yu cmepmi.
△OSEPEXHO
Bka3iBa Ka odo nomeHuiHo He6e3neHoi cumyaui, k a Moke cnpuuhumu ompumahnna ne2kux mpaem.
yB4A
Bka3i8ka uodo moxJueo i nomehuiHo He6e3neuHoi cumyaui, oO MoKe cnpuuhumu MamepiabHi 36umku.
Bka3iBkn 3 texhikn 6e3nekn
3araJIbHI BkA3iBKN 3TexHikn 6e3neKn
HE6E3NEKA · He6e3neka ximiuhux onikie. Hikolu He cnprmoeyama coIIO Ha IIOduHy qu mbapunhy. Hikolu He donyckamu npMo2o KOhmaMy cmpymen3i ukiopo. · He6e3neka oniky. Leu npucmpiu He moKHa eukopucmooyama dna po3nueHHn ne2ko3aumcux ap6 a6o po3huHukie 3 memnpamypoO cnaaxy < 21^.
PONEPENHEHMpekoHAMUC,uo pOboa 30HaMaDocmamHoo eemunauio. He6e3neka ximuHux onikie.Iid yac buKOpucmaHH 3a6kdu mpuamu po3nunIObay HaneXHomy nooKeHHi. He6e3neka eubxy. HikonuHe buKOpucmoyeamu npucpiu y nokexo-ma eubxohoe3neuHX 3oHax. He6e3nekampaBMyeaHH. 3BaJAmu Ha moKluey He6e3neky, kY MoKe cnpuuhumu po3nuloeha piDua, ma 3eepmamU yba2y Ha cumBoNu Ha KOhmeuHepi a6o Ha iHopMaui, hadoHy eupobHukom. He po3nuloeamu piDuHu, npo He6e3neHicmb ma/a6o wkiDnueicmb kuxy bac Hemac KODHOI HOpmaui.
3araIbHI Bka3iBKn 3 TexHikn 6e3neKn iN qac po6oTn 3 eNeKtpuHmIn HcTpymeHTamn
△NONEPEDKEHH
O3haOMmecb 3 ycima 6ka3iKaMu 3 mexHku 6e3neku ma ihcmpykuiMa. HedompumHa Hkazibok 3 mexHku 6e3neku ma ihcmpykui Moke npu3becmu do ypaxeHHa eekmpuyHum cmpyMom ma/abo ompumHaHH mJKKux mpaem. 36epiaume yci ekazieku 3 mexHku 6e3neku ma ihcmpykui dna nodaIbwooEukopucmaHH.
Tepmin «enekmpoiHcmpymem», uo bukopucmoeyembc y ekaziekax 3 mexhiku 6e3neku, o3haue eenekmpuHi ihcmpyMeHmu, uo npauioomb eid mepexi (i3 mepexHum ka6eJe), ma akymyamopHi eenekmpuHi ihcmpyMeHmu (6e3 mepeXho2o ka6eIIO).
*He BxOoNTb Do KOMnNEkTy NoCTaBKn.
36upaHnHa
MOHTAK po3nHIOBaayiJHaHa
- PpueDHaTn po3nnJIOBaU do pyuKn i MiuHO 3aKpyTNTN.
- 06epTaTn po3nHOBa, DOKN Ioro pyka He 6yde cnprMOBaHa BHN3. ManHOK B
- HacyHyTu raiKy uHaHa npucTp i 3aTyrHytii. ManHOHc
Bka3ieKa
Ipeepumu uinbHicmb nocadku po3nunoea. Bka3ieKa
YcmaHOeJIIOUO KOpNyc, nepeKoHaMucra, zo Kopomkuu wnaHn Ha npucmpoi ecmaeneHu y omeip 6aka.
BVeDENH B eKcnNyaTaucio
3anOBHeHH6aka
- BiD'EDHaTNI MIPHy EMHICTb.
- HanobHHTn 6ak nOTpi6HO KINbKicTIO BOu (Oo 4 NItpiB).
- 3a donomoroHmipHOi EMHOi BiMiprTHn NOTp6Hy KjIbKicTb piINHn/IO6ABKn (do 120 m) i o6epeXHo HAJNTn II B 6ak. ManpoHK G
- Помпг Мірну EMHICTb YHCTOIO BOJOI i 3HOBy npHKpyTNII Ha Micce.
Bka3ieka
Ppu uikom 3anoheHomy 6ky cnid mpumam npucpiu zoupoHmaIbHo, 0o6 3ano6iamu eumikaHH pduHu uepe3 cMOKyBaIbHu omeip.
3acti6aHHnIneyOBoro peMeH
DorjiaTexhichne 06cnyroByBaHHa
OSEPEXHO
Chairman of the Board of Management

S. Reiser
Director Regulatory Affairs & Certification
Ocoba, BiinobiaJbHa 3a BeDeHHa DOkymeHTaui:
II. Pau3ep (S. Reiser)
Alfred Karcher SE & Co. KG
Alfred-Karcher-Str. 28 - 40
71364 Winnenden (Germany)
Ten.: +49 7195 14-0
_aKc: +49719514-2212
M. BiHHHeHdeH, 01.09.2021
Ma3MyHbI
Kannbl Hucaynap. 128
MaKcaTbHa cAeKeC KOJaHy 128
KopwaFAn opTaHbI KopFay 128
KepeK-kaPak KHe KocanKbI 6eJIweKTeP 128
Kerkiim Kinaharbl 128
KypbIITbIaRbI 6eIriep. 128
Kayincizdk Hycaynapbl 129
KypbIJIbIbIbIH CnIaTTamacbl 130
OpHaTy 130
Painanahyra eHri3y 130
PaiandaHny. 130
TacbImaIay. 131
CaRTay 131
Kytim KHeTexHnKaIbIK KbI3MeT KepeTy 131
Keepinepe6oIraHdaKEMekany 131
Kenjik 132
TexHnKaJIbIK MaJLyMaTTap 132
EO cTanapTapbHa cKeCTiri typabI
deklapaia 132
XaJInnbI HycKaynap

KpybIrfHbI aIraa naIdaIaHap anDbIHda
aKKymyTOp KINHa HkaOca bepinTeIH OcbI
Kayinci3IK HcaynbIFbIMeH,OCbl naIdaIahy
KeHHderITynHcKaanBHKcayNbIFbIMeH,
Kayinci3ik TexHnKacbl XeHiHderi HcyayIbIbIMeh,
XaHe aKKyMyJrTOp KUnHaftBn/CTaHdapTTb 3aprTay
KpbIrfCbIH naJaIaNHy BoBuHwa Koca 6epinTeIH
TynHcKaIbIK HcyaylbIKneh TaHbcIbI3. KeiHHen
opeKeTetIH3. ByKnETTepDi KeiHipeK naJaIaNHy yWIn
Hemece KeiHI ni neLepi yWIn YCTaHbI3.
PaianaHy BoiBHa HcyKaybikTaBly Hcaynapra Kocimha KpybInf bnaDanaHbIaTbH endiKayinc3dk TexHKacbl MeH KaYbIbXaFdaNapdbH anDbH anydbH Kaanbl HcyKaynapbH caKTay KepeK.
MaKcaTbIHa cEiKeC KOJaHy
KbCIM acTbIHdaftb CbIMCb3 6ypIKkIiXaKcbI
XeJTeInTeIH Jepderi aUbIK ayada KOndHyfa
apHaIraH. OHIM INCEKTNUIDTeP, FyHrNtIDTeP MeH
TbHaNTbIITAP CnAKTbI TpyMbICTbIK XHe BaKaua
XMnKaTTapBbH 6ypKyre apHaJIFaH. OhIMDi ECIMdkTepdi
cyapy ysiH de KOndaHyfA 6OJaDbI. OhIMDi KOFapblDa
aTbIraHHaB 6acka MaKcTneH KOndaH6aHb3. OhIMDi
6anaIapFa Hemece BenrIeHReH XeKe KopFaHbIC
KabdbfMeH KmiXoK aadMdapFa KOndaHyfA TbIBIM
CaJIbHaDbI.
OpaBIM KOndaHbICTafta aMaKTbIK epeKeJepDi CaKaTahB3.
KopwaFAH opTaHbI KOPFAY

OpaybI MaTePnAnDapBHy yTnIn3aunnaayFa 6oNaDbI. OpaybIuTApDbI KopwaRaH opTaF aKayinci3 TypDe yTnIn3aunnaHbI3.

3NeKtpIik KHe 3NeKtpOHHbIK 6yHbIMdapdbIH KypamblHa KaTe KOJaHy Hemece yTnJn3aunay HtNKeCihde aam
DeHcaynbfbHa XHe KOpwaHaOpTaKaYin
TeHdipyblkTmAn,kyhblKaiaTa eHdeMnmi MaTePnAnDap kHe 6atapeanap,akKymyIaTOpnap Hemece MaCnAeTb6eJWeKTepe Kni Ke3deci. Anaada,ataaMbI6eJWeKTepe6yIMdbTnicHwe
naDanaHy yuih kaxet 60nabI. OcbI TaH6aMeH
6enrineHren KypblfblapdbI yu KOkbictapbImeH biPre
Tactayfa 6oJMaNdbI.
Kypamdaftb3aTatap6oBbHuaHyckaynap (REACH)
BiyibHbIH KypaMbIHdafbl 3aTTap TpyaIbI coHbI mAmimetTepdi MbHa MeKeHka B0bHwa Tabyra 6oNaIbI: www.kaercher.de/REACH
KepeK-Jkapak XaHe KocalKbI 6eJWeKTeP
Tek TynHcyKaJIbI KepeK-JkapA Hemece KocaJIbI 6eJWeKeTpdi naJdaNaHbIHbI3, c6e6i on KypaJIdbIH Kayinci3 KHe anatcbI3 Kymblc icTeyIe KeninDik 6oJaBl.
Kepek-kaapKapMeH Kocankb6JIWeKTeP TypaIbI aKnapaTwww.kaercher.com Be6-caHTbIHda KOJKeTIMdi.
Xetki3jinm XnHafbbl
BiybIMhbiH XeTki3iJIM XINHaftoaybiHTbH YcTiHe KepceTirreH. BybIMdbI opaybiTuH WbIFapraHa JxNHaKTBH TobnIKbTFbIH TeKcepIn WbIFbHb3.KepekXapakTap XeticnereH HemeCe TacbImaJday Ke3iHde 3aKbIMap TureH KaFdaJa, DnJepiHi3re xa6apnaCbiHb3.
Kypblfbldafl6enrinep
|  | Жалны сеньгici |
|  | Паидалиу щадында НUCKayлькту кээне барнык kayinci3дik НUCayларын OKыныз. |
|  | Курсынтымен жуMbIC icteу ke3iнde сырсымайтын кээне Берік колган кинiz. |
|  | Курсынтымен жуMbIC icteren Ke3de ke3 кор fraнысын Кинiz. |
|  | Курсынтымен жуMbIC icteren Ke3de Тайданамайтын кор fraныс的一项kimiн пайданынпьiz. |
|  | Курсынтымен жуMbIC icteren Ke3de aybiz 6eH мурсынды яабатын мackаны Кинiz. |
|  | Курсынтыны яданыр Нemece bɪnfəл каfordайларfra уш�ратпанiz. |
Kayin DeHreInepi
KAYIN
- Aybp Kapakammahyra Hemece oImae anapbic corambih mikeeKayin bouhua hycay.
△ECKEPTY
- Ayibj kapaakammahyra Hemece enimae anapbin corybMyMKiH Kayinmi Kardau 6ouhwa Hyckay.
△ABAHJIAHbI3
- KeHin kapaKammaHyra anapBn corybl bkmuman Kayinmi kardau boBuHwa Hycay.
HA3AP AYdAPbIHbI
- Mamepuanbik 3uHra anapbin corybl bikmuman Kayinmi kardau boibihwa hcyay.
Kayinci3dk HycKaynapbI
TexHnKaJIbIK Kayinci3dik 6oBbIHwa KaJIbI Hyckaynap
KAYIN·XUMUJIbIK KYIO KAYNI 6ap.
CanmamahbI eukkawah adamapra Hemece KaHyapnapra 6farbimmaHbI. Ew kardauda
arbiHHbH mepiHizze mikeneu muioHe kon 6epMeH3.
Kyuiik Kayni. Byn KypbInfbHb mymaHy meMnepamypacbl < 21^ bOnamblm mymaHbiu 6oynapdb HeMece epimkiuumepdi 6ypky yuih Kondahyra 6onmaudbl.
ECKEPTY Bypky Ke3iHde Xymbic
aMarmbHbH JAKcbj KeendeminemHHe Ke3 KEmki3iHi3.
Xumuynki Kyuoyayi6ap. Bypikkui mi kondahy ke3ihde epdaubim ophbiHa ycmha3. KApbInbc kayni. EwkaaH KpybnfBhlEpm Hemece Xapblbc kayni 6ap xepnepde kondaha3. Kapakam any kayni. Bypkinemih cyubkmkman mybHaumbin kayinmi eckepin3 xhe KOHMueHepdezi maHbamaanapra Ha3ap aydpbH13 Hemece eHDipyu ycBHraaknapammbi kappaH3. Cyubkmkbmhi Kayinmi XHe/Hemece 3uHdbI BonraHbH 6inmeeh3, OHb6ypkmeHi3.
3JIeKTp KypaIapbIhBIn XaIIbI Kayinci3diK epexenepi
△ECKEPTY
- Bapnbik kayinci3diK epekenepiH kHe HcyckaynapdbI OKbIN WbIFbHbI3.
Hyckaynap MeH Kayinci3diK mexHukacbI 6oubiHwa HyCKaynbkmbl caKmamay 3neKmp mo2bHbIH corybHa JHe/HeMece aybip japaKaMaKa 0kenyi MymkiH. Bonawak yuin 6apNbIK Kayinci3diK nen HyckaynapbI caKmaHbI3.
Kayincidik mexhukacbi 6oubihwa Hyckaynbikma KOndaHbnambln H3neKmp KypalblmepMuHI 3neKmp KyambmeH kymbic icmeumih 3neKmp KypaIapbHa (Kyam cbIMb6ap) XHe aKKyMyJrnapbIK 3neKmp KypaIapbHa (Kyam cbIMbXoK) Kambicmbi.
1 Kymbic opHbIbH kayinci3di
a Kymbc opHbIH Ta3a yctHaB13 XHe KaKcbI XapbIKTaHDbIpYbIH 6onybIH KaDaranaHb13. Ta3a emec XeHe KapbikmaHoBipbIMarAH Kymbc opbHApbl anammapra eKeNyi MymKiH.
b 3NeKtp KypaJIMeH TyTaHbIw cyIbIKbIKTap, ra3dap HeMece WaHdap 6ap bIKTmAn JApblfbiW opTada XyMbic icTeMeHi3. 3NeKmp KypaIbI waHdbI HeMece 6yobI mymaHdbipybi MyMKIn yuKbIHadap wIFapaDbI.
c 3neKtp KypanbIH naIdaIaHy Ke3IHde 6anaIap MeH 6acka aIamApdbI anbc YcTaHbI. AAnHaaraHa KaPbInFbIHbI 6acKapa anMaui KaIyblbI3 MyMKiH.
23neKtpnik Kayinci3ik
a DeHeHIn Ky6bIpnap, XblItKbiWtap, neWtep MeH ToHa3bITKbiWTap CNaKTbI Jepre TyBbIKtaJrH 6eTpeMhen BaJnAbHybCByH 6oNdbipMaHbI3. Eaep deHeHizH Jepze myu bkmanybi opbH anca, 3neKmp mo2bHbIH cory Kayni Jorapbl.
b 3NeKtp KypaIdapbIH XaH6bIpHaH HeMece bINFaIaHa CaKTaHbI. CybIH 3neKmp
KypaIbHa eHyi 3neKmp mo2bIHbIH cory KayniH apmmbipadbl.
3AaamapdbH kayinci3dirI
a Myknt 60nbHb3, He icten KaTkaHbHb13fa Ha3ap aydapbHb3, cohIme KaTap 3JekTp KypanbIme Jymbic iTey 6apbcihda Akbnfka KOhbIMdbi 60nbHb3. Wapwaeh Hemece eciptki, ankorolb Hemece depiDpmeK acepi 6ap Ke3de 3JekTp KypaJIbH KOJaHa6aHb3. 3neKmp KypaIbIH naudanaHraH Ke3de 6auKaMaui Kany cmi aybp JapaKaamnapra akenyi MymkiH.
bKeke KopraHbIC Kaa6dbfBih XaHe yHemikayinci3dk Ke3iJdpirih naJaHaHbIb3.3neKmp KypanbHbIH mypi MeH KondaHbcIhaBaunahcmbi waH MaKacbl,cbipraHaydaH KopraumbIH aK KuIM, kamaHwnrnanap HEmecKynak KopraHbCIB CuRkmbi Xeke KopraHy KypandapbIH KUO Jkapam any KayinH a3aMaDbI.
c Ke3deucoK icke Kocyaan aynak 6oNbHb13. Kyat Ke3iHe XeHe/Hemec 6aTapeera Kocy, any Hemece TaCbImaJday aIdbIHda 3JeKtp KypaNbHbH eWipinreHH TeKcepH3. 3NeKmp KypaIbbl anbl KypaeHde caycarbHbI3dbbl aybcmblpfbUka KoUcaHbI3 HeMece KypblfBbHbl Kyam Ke3iHe KoccaHbI3, 6yn anamka ce6en 6onybl MymkH.
d 3NeKtp KypaIbIH KOcNac 6ypbIH peTtey KypaIaIbIH Hemece kiTTTepDi anbIn TactaHbI. KypaIbIH auHaMaNbI bEniizHe opHaNaCKaH KypaI Hemece kINm JapaKaMaKa eKeNyI MymKiH.
e DeHeHIN dypbc eMec KaNNbIH 6oNdbipMaHbI3. Kayinci3 TipeKti KaMTaMaCbI3 etiHi3 XaHE apdaiBIM Tene-TeHdiKTI yCTaHbI3. Byn Kymnezen H kardaunapda 3neKmp KypanbH JkaKcbI backapyfmaYMkiHoi6peedi.
f Tnicti KNIIM KNIH3.KeH KIM MeH 3eprepnik 6yHBIMapdbI KIMHei3.WaHTapbIHbI3dbI XaHE KOJFANTapdbI Ko3FaImaJIbI 6oNikTepeH aJIbc yCTaHbI.KeH KuIMdepdi, KOJrannmapdbI, 3epzepnk 6yubIMapdbI Hemece y3bH WawmbI XbINXbIMaJIbI 6eWueKmep ycman anybi MyMKH.
4 3neKtp KypaIbIn naIdaNaHy XHe eHdey
a KypbInfbHbI Wamaadh TbIC xykTeMeHi3. KymbcHBi3 ywiH Tnicti 3neKtp KypalbiH naDanaHbHbI3.Tuicmi 3neKmp KypalbImeH Kepceminae H Kyam duana3oHbHa KaKcbi XaHe Kayinc3 Kymbc KacaucbI3.
b AybcIbIprBbIbI aKaynbI 3neKtp KypanbIN naDanaH6aHbI. Kocy HeMece eWipy MymKiH eMec 3neKmp Kypanbl Kayinmi XeHe KeHDoenyi KepeK.
c KypbIrfBa KaHdA da 6ip petTeynep Xacamai Typbin, KocbIMwa 6eJIweKTePdi aybICTbIpbIN HeMece KypblfBHIa ABiCKa KOImacTaH 6ypbIH wTeKepePi po3eTKacBHaH aXbIpaTbIHb3 XHe/Hemece akKMyJrTOpDbI WbIFapBih3. Byn caMbIK wapacbi 3neKmp KypaIbIH Ke3deEUCoK bacmaNyBHa JoI 6epMeudi.
d NaandaHaNbIMaTbIH 3eKtp KypanapbH 6anaIapdbIH KObl XeTneTIH Xepde caKaTaHbI3. KypblfBImEH TaHbIC eMec Hemece ocbI HyckaynapDbIOkbIMarAH aamdpra KypblfBHBn naDaAnaHyra pykcat 6epMeHi3.
3neKmp Kypandapbl moxipubci3 adamapobH naudanahybl yuih Kayinmi.
e 3neKtp KypanapbH ykbntb YcTaHbI3. Ko3ranaTbH 6nIKTeepin Dypbc Kymbic icten TyprabHIn Xhe KeNTen In KaImaraHbIH, 6yn 6nweKtep 3neKtp KypanbHbIH KymbicHa HkcaH KeTIpyi yih IN KETIKTI 3aKbIMaMaHaBH Hemece 6ynihereHH TeKcepH3. KypbINfbHbI naDanaH6ac 6ypbH 6yInHRe H 6nweKtep XeHdEnreH 6onybKepeK. Dypbc Kymbic icmememin HneKmp KypandapbHbIH candapbHaH Kenmezeh anammap naDa bOnadbl.
f OcbI Hcykaynapra caiKec 3JKeTp KypaIapbIH, akceccyapnpdbi, kipictipy KypaIapbIH XaHE T.6. naDaIaNbIHbI3. XymbcXaFdaIapbHa XaHe opbHdIaTbIH KbI3MeTke Ha3ap aydpbIHbI3. 3Jekmp KypandapbIH bacaMcammapda naudanahy Kayinmi Xardaunapra eKenyi MymkIN.
5 AkymyIaTOp KHaBbH naJaIaHy XeHe KyTy
a AkkymyIaTOp TK eHdpuyi 6eKITKeH 3apdTay KypblfbnapbIme 3apdTaHb13. Tuicmi akkymyIaMop XuHaBbHa ca KeJmeUmiH 3apdmay Kypblfbnapb epmke eKeNyi MymKiH.
b KypbInfbHbTek KaHa Tnicti akKymyIaTOp XnHaBImeH naDaJaHaBHyb3. Baca aKKMyJmop XuHaBIn naDaJAnhy Jkapakammaya Hemece epmke ce6enui 6onybl MYMKIH.
c AkkymyIaTOp XnHaBbI naDanaHbImarAH Ke3De, KbICKa TynbIKTaIyFa ce6en 6oNaTbIH KbICKbIHTap, MOHeTanap, KiTTep, WeroIep, 6paHdaJAP HeMece 6acka da waFBH MetaJI3aTTap CnKbTI MeTAJI 3aTTapdA h AJbcIpaK YCTaHbI3. KbICKa myuBikMaIy epmke Hemece JApblbICKa aIbIN KeNyi MymKiH.
d Benrini 6ip kzaIaInapda cybIKTBiK aKKyMnTOp KINHaFBiHah WbIFybl MYMKIH. KOHTAKTIeH ayIak 6oNtihb13. CyBikTBiKNeH 6aIIaHbICTa 6ONFaH Ke3de cyDbI MyKnAT waibHb13. Ke3iH3re cybIKTBk TYCCE,pepey dApirepre xa6apnaCbHb13.AKKyMnTmOp cyuikmbfbi mepiide 6epmnep mydbipbn, Kyudipyi MYMKIH.
6 Kbi3MeT KepeTy
a 3NeKtp KypanbHbI3dbI 6iNikTi MaMaHap raHa, TeK TynHycka KocaNkbI 6eJWeKTepeMeH raHa KeHneDi. ByN KypblrBbHbIH Kayinci3diKaMMamacbI eminaeHHe Kenindik Bepeidi.
KypblJfblHbIH CNnattamacbl
Cypet A
① Copy Ky6bipwerin Kocy
(2) A K b I p a T k b I U
③ Békityre 60naTbH 6ypkydi icke kocy Tetiri
4bypikkiu
⑤Bypikkiu canTama
⑥ Θπueyiu cTaKaHb6ap KyIO MoHbI
7UnaHriXanrafbbiBb
8UnaHr
9 Nblk 6enirih yctarbibl
10Bak
1 Kybntay bcbipMacbi
12*AkkymyIaTOp XHaftbHbI 6atapeKyaTb18B
13*KbIaam 3apraTarbi6atapeykaTbi 18B
14 NbIK 6eJdi
*Ketkiimim XnbIHTbIFbHa kipMei.
OpHaTy
Bypikkiu neH wJahRHi MoTakkay
- Bypikkiwi TyTKara opHaTbIn, MblkTan 6ypan 6ekirihi3.
- Bypikkiwi, on TyTKaMeH 6ipre TEmeH kapan TypFaHwa 6ypaHbI3. Cypert B
- ⅢnahriHrHraikacbIH Kypblrfa cbipblHbI3 XaHE 6ypan 6ekiriH3.
Cyper C
Hycay
Bypikkiuwmih6epik 6ekiminaeHH mekepiH3.
Hycay
Kopnycmbi opHamKaH Ke3eKe KpybInrRbIarbl Kbicka Wnana 6akmaftbCaHbInayra CanbHraHbHa Ke3 Xemki3iH3.
Paindaanhya eHri3y
BaKTBToJrTbIpy
- Θπωeiyις ὅτακαнόβι δύραπ υυβαρανήβι.
- BaKa KaKeTTi MeJIWepeDe cy KyIbIbI3 (4 Jntpre deH).
- Θιληγίως ΚτακαHHbɪN ΚεmerɪmeH CγιβɪKTbɪK TBɪH/ KocnaHbɪŋ Kαχettɪ Mænʌpeɪŋ Σπuːeɪzɪs (eɪ ᶅδi 120 m) XəHe Ohɒbɪ 6aKa Ka a bɪnʌn Kǔnbɪbɪʒ.
Cyper G
Bypkyoi 1cke Koc myuMeci eHdi KyIbInmaybl.
HycKay
Akkymyramop xuHaBih ophamnac 6pybH 6ypkydi icke Kocv myumecin H Kybnimha6araHbHa Ke3 Xemki3iH3.
4.Бурку npoцecin ToKtaTy yuHn 6bpykdi icke Kocy TeTirih xi6epiH3 Hemece aay TAY yuH y3dkci3 KymbcpeKIMHde KbICbIM acTBHa apTKa Kaapan KblJXbITbHbI3.
Bypky afbihbH peTrey
- HykTei Hemece 6ypikkiu afbHdbpeTey yuiH canTaMaHb6ypay Cypet F
TacbImaJnay
△ABAIJIAHbI3
CanmaKmbiH caKmamaybi
Kapakam any KHe KpybIrfbIh3aKbIMday Kayni TacbImanay Ke3IHoe KpybIrfbIHbIH cAmarbiH ecepehi3.
HA3AP AYdAPbIHbI
BaKbIaH6aumbIn icKe Kocy
KapakamanyKeHe KypblfBhl3aKbImdayKayni TacbMaJlaydaH 6ypbHaKKyMynAmOpdbI KypblfBldah Wbifapblh13.
TacbImaIay anbIHda KypbIrfbHbI moIbikmau bocambih3.
KəJIk KypaIapbIHa TaCbIMaNay Ke3iHne, KypblrBbIcblpraHaydaH XaHe eHKeIODeH KopraHbI3.
CaKray
△ABAHJIAHbI3
CanmaKmbiH caKmamaybi
Kapaam any KHe KypbIrfiHbI 3aKbIMday Kayni TacImanay Ke3iHde KypbIrfiHbIH CanMarbiH ecepiH3.
△ABAHJIAHbI3
BaKbIaHa6aumbIH icKe Kocy
Kapakam any KHe KypblfblHb3aKbImday Kayni CaKmaydaH 6ypbIH aKKMynmaOpdb1 KypblfblDaH wbIFapblbI3.
HA3AP AYdAPbIHbI
KypbInrHb6anaapdbHKnblXemneumH KpyraK XaHe XaKcbXeDeminimH Kepde caKaMaHbI3. KypbInrHb6ay-bakwa xumukamcuKaMbIXemip 3ammapdaH aynak ycmaHbI3.
- KypbIINfblHbI Ta3aJaHbI3.
-
Boc opbH yHemDen caKay yuH 6ypikKiTu 6ypan 1bIfapbIb3 Da, akkMyJrTop caHbIaYbIHArbl YUHTbIK KbICKblbIH 6acbHb3. Cypet H
-
YwTbIK TYTKacBih KpybJfbl TYKacBiha 6acBih3.
Kytim XaHe TexHnKaIbIK KbI3MeT Kepcety
△ABAHJIAHbI3
BaKbIaHaBmBIn icKe Kocy
JapaKaam any KeHe KpybIrfHbI 3aKbIMday Kayni
Ke3 KeNaeH KyMbICmapDbI emKi36ec 6pybIH
aKKMyTnMopDbI KpybIrfDah WblrFapBbH3.
HA3AP AYdAPbIHbI
Pnacmuk 6enwekmpoi ma3anay yuih epimkiuimepoi KOndaHbHa3,ce6e6i onap KypblfBida KOndaHbIaMbiH Mamepuandapdb3akBIMdaybl MYMKIH. Ta3a wSybepeKneH waH,maJxHe Maunay Mamepuandapbl cuaKmbi Kipnpdi anbl macmaHb3.
BakTbTa3aJay
- AkkyMnyIaTOp XnHaftbH anbIn TaTcTaHbI3.
- KjIbInTay bIcIbIPMaIapbIH aIbIN, 6aKtbl WbIFapbIN aJIbIHbI3. CypTe I
- BakiindericiTerinTacTaHbI3.
- BaKtbIH cbIpTBIH Ta3a, KypraK Wy6epeKeH Ta3anaHbI3.
- BaKThbH yWTeH 6ip 6eNirIH Ta3a CymEH TOITbIPbIHbI3.
- BaKtbl Ko3raTbIi KOpnyCbHa KaJFaHbI3.
- AkkmynTOpDkaTa caNbHb3.
- Baikihdericih ToIbIFImeH TaYcbInraHa 6ypkiH3.
- Byn apeketri bipehepe pet KaTajlaHbI3.
Baktb6ocaty
- AkkyMnyIaTOp XnHaftbH anbIn TaTcTaHbI3.
- KjIbInTay bICbIPMaIapbIH aUbIN, 6aKtbl WbIrApbIn aNbIHbI3. Cypet I
- Bakiiniericih Tery
CanTaMaHbI Ta3aJay
- AkkyMnyIaTOp XnHaFbH anbIn TactaHbI3.
- BypikkiwTeH canTamaHb 6ypan wifapbHb3.
- KaIdbIbTapDbI Ketipy yIiH xIiHKe cbIMdbI y3bIH caHbInay apKbInbI eTKi3iHi3. Cypet K
- CanTaMaHbTa3a CymeH WaaBihb3.
- CanTamaHbI Ta3a, Kypfak uSybepeKeNeh KeNTipiHiz XHe canTaMaHbI KaTadaH MoHTaKaDaHbI3.
Kepepriep 6oJFaHda KeMeK any
Kemwiikteprin ce6e6in actbda Kepcetiren ti3imre caikec 03iH3 kOa anyibHb3 MymkiH. KydkTI
Xaardaanapda Hemece ocBHa aatlanr h emec ce6e6i
Xaardaanapda KbImet Kepcety 6enimiH aphabl
Maamahdpbmeh xaabpnaacbHb3.
| Kate Ce6e6i JxOu | ||
| Kурьлгы 6уркimейдì | Cantama 6iteJreH | 1. CanTamahbI ta3anay |
| Шанг 6iteJreH | 1. Шангini ta3anay | |
| Бak 6oc | 1. БaКТы TОЛТыру | |
| Жуйedes aya 6ap | 1. CopfыДан aya shyIarpy («СорфыДан aya shyIarpy» taraybyH karpaHbI3) | |
| КозraJIТКыИsh JxUМыС icTeMeиdi | АKKумЛЯТOPdbI H 3apяды JxOK | 1. AkkymулЯТOPdbI 3apяДтay |
| АKKумЛЯТOP JxOK HeMece akKумЛЯТOP duYpbIC opHaTbIJaMaFaH | 1. AkkymулЯТOPdbI duYpbIC opHaTу | |
| АKKумЛЯТOP TbIM cybIK HeMece TbIM bICTbIK | 1. AkkymулЯТOPdbI у№ ceKtay HeMece cybITy | |
| Курьлгы ewsīn kaIaNdBi | СakТандырfbIsh axbipatkbIsh icTeH šbIKMbI | 1. СаKaТандырfbIsh axbipatkbIsh KурьlNfBHybI KaɪTa KɔckaHaWa KúTy |
| АKKумЛЯТOP 3aRydталmaïdBi | АKKумЛЯТOP koHTaKTiJepi kip | 1. AkkymулЯТOP koHTaKTiJepi h ta3anay |
| АKKумЛЯТOP HeMece 3apяДтafbIsh akaylBi | 1. КaxketTi 6eJIeIeKtI aybIcTbIpy (Tek eHdIPuyi iYcbIHraH TynHycKa KepeK-жарakTapdbI паданынbIbI3) | |
| АKKумЛЯТOP TbIM bICTbIK | 1. AkkymулЯТOP cybITy | |
| АKKумЛЯТOPdbI IN JxUМыС yAkBiTbI aiTapNbIrkTai TeMeHdei | АKKумЛЯТOP 3apяды TayCbIJIfAH, ce6ebi oJ y3ak yakblT paɪdaɪaHaHbIJaMaFah | 1. AkkymулЯТOPdbI 3apяДтay |
| АKKумЛЯТOPdbI IN KbI3mET eTu MEP3imi 6iTTI | 1. AkkymулЯТOP aybIcTbIpy (Tek eHdIPuyi iYcbIHraH TynHycKa KepeK-жарakTapdbI падаHaHbIbI3) |
KenindiK
Oe ende xeepriikti dinctpmbotnap 6epren keninik
waapTtapbkoNdaHbIaNb. BmybIMma MaTePnAldbIK
Hemece eHdiipictik akaynap aHbIKtanfah XafdaiDa,
BkTImaIakaynapdbi KeniDik MEP3imi iwiHne aKbIcbl3
XeHneMIs. KeniDik Mep3imHe Hapa3bInbIKTapbIH3
6oNca, 6yibIMdbi catKaH cayda MekeMeciHe Hemece
XaKbHaftbE kInETTI Kbi3Met KepCetTy opHbHa
Ty6ipteKti KepCetin xa6apnacbHbI3.
(MeKeHHaBIM3 apTKbl 6eTTe)
KeninikTypanbI KOcbIMua aknapaTTbI (6ap Bonca)
XepriniKi Karcher Be6-caTbIHbN KyKteynep
6enimHderi KbI3Met KepCetTy 6enimHde Ta6yra 6oNaDbI.
UbIrapy KyHi fmpMaIbIK TaTaNwada MM/YYY
niuimHde KepCetineDi, MyHa MM - eHdpic aibl, YYYYY
- WbIFapblrFaH Xblnb HeMece KoDTanfAH Tpyde.
Xeke caHapabHm MaBihAcbl KeNeciDe 6oNaDbI:
MbCaJIb: 30290
3 Θндірілгін кыліп
0 ΘHdpinre facbipbl
2 ΘHπiπIeH OHHbIbIbIK
9 Θндірін'ren aиьіньін ekінші caны
0 ΘHπiπeH aHbHbH 6piHs iCaHs
CoHbImeH 6yI MbIcAJa 30290 KoIbI 09/(2)023 eHdiipJIre KHyIH 6iJipeJI.
TexHnKaJIbIK MaFJyMaTTap
PSU 4-18
| КурьлфынTechнoksakcmaTamaLapbI | ||
| ЖуMbIC Kepehyi | V | 18 |
| EN 60745-1 cTaHdApTbIHа сайкес ecenTeiHetIHmэндер | ||
| ДыбIC КысынБИн DeHreи LpA | dB(A) | 77 |
| ДыбICTbIK УвынДын DeHreи LынFaL TapaTkblTbIK | dB(A) | 90 |
Chairman of the Board of Management

S. Reiser
Director Regulatory Affairs & Certification
KykaTamaHbI Kypri3eTI yekineTTi Tynfa:
C. Pai3ep
Alfred Karcher SE & Co. KG
Alfred-Karcher-Str.28-40
71364 Winnenden (Германя)
Ten.: +49 7195 14-0
TeJeBaKc: +49 7195 14-2212
Winnenden, 2021/09/01
CbDbpXaHne
O6uynka3aHnna 133
CTeNEHnHa onaCHOCT 134
Yka3aHn 3a6e3oNaChocT. 134
OncanheHaypeda 135
MoHTax 135
Iyckane B ekcnnoatauia 135
Eknpnoatau 136
TpaHcnpToPAne 136
CbxaheHne 136
Pnka n noDpBxka 136
Pomou npn Henn3npaBHOCTN. 137
Tapaunra 137
Texnueckn daHHn 137
Ieknapaun3a cboTBcTbne Ha EC 138
06znyka3aHn

Ppei npBBOTo n3noJ3BaHe Ha ypeJa npOyeTeTe Te3n Yka3aHn 3a 6e3oNaCHOCT, TOBaOpINHaIHO pKOBODCTBO 3a EKCNIOatau, PpNIOKeHInTe KbM
akymylnupaata6batepyka3aHnna 3a 6e3oNaChoc n npIIOXeHOOpINHaHNO pKBOOCTBO 3a eknloataun Akymynpa7a 6atepy/CTanapTHO 3apnHO yctpoCTBO. IpoueinpaTe cboTBHeTO. 3anaTe KnKKNTe 3a NocneBaUo n3no3BaHe nn 3a CneDbauu co6cTBHeNK.
Ocben yka3aHnraTb pbKOBOcTBOTO 3a ekCnloatauia, Tp6Ba Da cna3BaTe n O6UOBaINdHnTe 3aKOHOBn npednncaHn 3a 6e3OnacHOCT n N36yRbaHe Ha 3JIOJnyKn.
YnoTpe6a no npedHa3HaueHne
Бe3ka6eHnHrT ypeI 3a npbckaHne noI haJraHe e npedHa3HaueH 3a ynoTpE6a Ha OTKpIto B 3oHa cdo6pa BeHTnlaucn. IpoDyKtBt e npedHa3HaueH 3a pa3npbckBaHe Ha 6ntOBn I rpaINHcKn XIMUeCKn npenapatN kato IHcKeTnCUnI, fYHNuUNI IN TopOBe. IpoDyKtBt MoKe Da ce n3POn3Ba N 3a HAnOBAHe Ha pacteHnI. He n3POn3BaIte npOdyKt a 3a pa3nUHn OT
ropecnomeHaTe uei. IpoodykTB He Tp86Ba da ce n3noJ3Ba OT deua nn OT Xopa, KOHT He Hocrt noxodjnn NnHn npedna3Hn CpeDCTBa n 06neKIO. BnHar cna3BaTe BaJnHnTe Ha MrcTO pa3npope6n.
3aunTa Ha OKoJHaTa cpeDa

OnakOBbHInTe MaTePnAnNoDnExKat Ha peuKlnpahe. MoJia, n3XBpJnTe onakOBknte no Cbo6pa3EH cOKoHaTcpeDa HauH.

EneKtpnuecknte n eJektpoHHnte ypein cbdbpxat ceHHN MaTePnaH, NOIeXaun Ha peuiklnpahe, a YecTo N CbCTaBHn YacTn, HApN. 6aTePnn, akymlaTopHn 6aTePnn IIN MacNo,
KoITo npn HnepaBnHb 6opabe He nIn n3XbbpnaHe MORaT da npdeCTabnBaT nOteHuaHa onaCHOCT 3a OOBeWKOTo 3npabe N 3a OKoJIHaTa Cpea.3a npaBnHTO ΦyHKUOnHpaHe Ha ypeDa BCE nak Te3n CBCTABN Yactn Ca Heo6xOdMn. O6o3NaYeHnte CTo3n CmBOJ ypeDn He Tp86Ba Da 6bDat n3XBbpnHn 3aeDn C 6ntOBnTe OTnAbu.
Yka3aHnra 3a cbCTabHn BeuecTba (REACH)
AkyaHa HnHOpMaun 3a cbCTabKnTe ue HaMepeTHe Na HHTepHET CTpaHnua: www.kaercher.de/REACH
Akecoapn npe3epBn qactn
I3noI3BaIe cAmO opuHaHnHn Akcecoapn OpunHnHn pe3epBn YacTn, NO To3n Hayn HocrypBaTe 6e3oNaChHaTa N 6e3npo6nemHa EKcNIOataaHa hypea.
HOpMaun OTHoCHO akcecoapn npe3epBHN qactn 1e HamepuTe Tk: www.kaercher.com.
06XBaT Ha DoCTaBka
0xbatbHa nOCTaKaTa Ha ypea e n3o6pa3eH Bbpxy onakOBkata. Pn pa3oNAKOBAHe npOBepete cbDbpkaHeTo 3a qAIOCT. Pn nnCBAuAn akCEcoApn nn Pnp TpaHCNOPTHN UeTN, MoN, o6bphTe ce KbM Baun DaNCTPN6byTop.
CnmboNn Bbpxy ypeDa
MOnTnpaHe Ha akymylnupaaata 6aTepeia
- ΠbXHeTe akymylnpaaTa 6aTePnB rHe3doTo Ha ypeJa, dOKaTo ce qnknpa c upaKbaHe. Urgya J
06e3Bb3dyywbaHe Ha NOMnata
- Pa3BnTe Tpb6ata 3a pa3npbckBaHe OT Nuctoneta.
- Hatahe Te npekbcbaHa ypeja.
- HatncheTe nyckoboto yctpoicTBO 3a npbckane 3a Han-Majko 10 cekyHn,doKaTO cnCTemata ce 06e3Bb3dywn.
4.ИЗклочеу урда. - MoHTnpaIte OTHOBo Tp6aTa 3a pa3npckBaHe
Eknpnoataa
Yka3aHue
No epeme Ha pa6oma Ha ycmpoucmeomo bamepura mce pa3pekda c manku mokoe. Toea moke da doede do hemouhcmu e ocmabaumo epeme Ha ducnner Ha bamepura. 3a da onpedenume kanaumema Ha bamepura, npekbcheme 3a kpmko meanehemo ha mok u omvememe nokaahna kanaumem Ha bamepurae 念
Eknpnoataua
- Cbane npbckaata Tpb6a.
- HATINCHETe npeKbcBaHa Ha ypeJa. Urypa D YpeBbT cTApTnpa.
- Hatnche Te npckobTo yctpoictBO 3a npbckane, 3a Da npbckate NnU qpe3 HataNcKaHe HappeIro HactpoTe 3a HenpeKbchAT peXIM.
Hrypa E
yKa3aHue
Cea 6ymoHb m 3a 3adeucmeaHe Ha npbckaHemo e 6nokupaH.
yKa3aHue
Ysepe me ce, ye 6ymohb m 3a 3adeucmbaHe na npckahemo He e 6nokupaH, npedu da Mohmupame akmynpauama 6amepu.
4. 3a da cnpeTe npoecca Ha npbckaHe, OTnycHete 6byOHa 3a 3aDenCTBaHe Ha npbckaHTo INN, B HnpeKbCHat pexm rHaTNCHe Ta3aI, 3a da cnpeTe npbckaHTo.
HactpoKa Ha cTpyTa 3a pa3npbckBaHe
- 3aBbPteTe IIO3aTa, 3a Da HacTpOte TOKOBa CtpyI INIcTpyra pa3npckBaHe FnrypaF
TpaHcnpTupaHe
△NPEJNA3JIINBOCT
Hecb6nodaaeHa meznomo
Onacnoc om HapaHaaHua u nopedu
Ipu mpaHcnpmupane cb6nOdaeaume meJnomo Ha
ypeda.
BHIMAHHE

H.Jenner Chairman of the Board of Management

S. Reiser
Director Regulatory Affairs & Certification
Пьномошник NOДOKум entaцета:
S. Reiser
Alfred Kärcher SE & Co. KG
Alfred-Karcher-Str. 28 - 40
71364 Winnenden (Germany)
Tei.: +49 7195 14-0
c: + 49719514 - 2212
BnHeHdEn,2021/09/01
目次
一般的办注意事项 138
規定に沿った使用 138
環境保護 138
亚克沙尼一卡萨巴一 138
同橱品 139
機器上のシングル 139
七卡尼日尔. 139
安全注意事项 139
機器に説明 140
取付 140
setto 140
操作 141
搬送 141
保管 141
手入扎と米ンテんス 141
障害發生時のサロト 141
保证 142
テク二力ルデー夕 142
EU准抛宣言 140
一般的注注意事项

http://www.kaercher.com/jp/
SPLRE-1ANsSg3o3o3o3o3o3o3o3o3o3o3o3o3o3o3o3o3o3o3o3o3o3o3o3o3o3o3o3o3o3o3o3o3o3o3o3o3o3o3o3o3o3o3o3o3o3o3o3o3o3o30
注意事项
Jzoeill aeiol aaiiI clalogll
川
gsslll kss s lalalalb ggsd y s
Ic Iba 11111111111111111111111111111111111111111111111
Oio oos nogk ldoic Jlae oon dnoan alalll OjLg
aac ag aodaaasall algall cgcncgc>lc llacUl
aagaae eae no agaiaaall glaxw all > .g.
daea cllac aao jg ggo golg
(acllll aee aee aee)
(0g) 2n) 2n) 2n) 2n) 2n) 2n) 2n) 2n) 2n) 2n) 2n) 2n) 2n) 2n) 2n)
aJU
| PSU 4-18 | ||
| 18 V | اللهالله | |
| EN 60745-1 | اللهالله | |
| 77 dB(A) | LA LDA LDA LDA LDA LDA LDA LDA LDA LDA LDA LDA LDA LDA LDA LDA LDA LDA LDA LDA LDA LDA LDA LDA LDA LDA LDA LDA LDA LDA LDA LDA LDA LDA LDA | اللهالله |
| 90 dB(A) | LWA LWA LWA LWA LWA LWA LWA LWA LWA LWA LWA LWA LWA LWA LWA LWA LWA LWA LWA LWA LWA LWA LWA LWA LWA LWA LWA LWA LWA LWA LWA LWA LWA LWA | |
| <2,5 m/s2 | اللهالله | |
| 3 bar | (,) | |
| 30 l/h | (,) | |
| 120 cm | اللهالله | |
| 45 - 75 cm | اللهالله | |
| 2,4 kg | (,) | |
| 750 x mm | IL | |
| 185 x | IL | |
| 365 | IL | |
Jai
aai
jglolcpc
JU U JU JU JU JU
jgl//jgolcfoJc jai/uc
4
P 1
JUUUUUUUUU
j1j11jai j0a11la11j>1
alai jloai jg/1g a
alai xic ullaiUg Ujjul jjJl o
J
#
aai
j01/0C1p2c
JUUUUUUUUUUUUU
jz/1i9 ocljocjxil
4a
a2019 1
Jolul jolil, jolil
jlll j 1111
4
JlebU USo.1g o4> a98j13 oI USo jIg2II U
jgal jol jll auaa/ jgl/1. a//
g( x) = h^ ( x) - g( 0)
jIJI 1
L 2.
aJlal aia jll
a>la|0gH
jglj jao 3
aLg aLJI
a
P 1
1100 111 120
j4 = 1( j - 1) ( j2 + 1) ( j - 1) ( j - 1) ( j - 1)
4u
oiJUaCswlllclj>Uulabuixs aio slgo pdo
15wll alljb p9 jg/ll 9 aoduaa/ slga/ zaiuw slgal
aaij jiaeaeepoixwipuuiill 1009 cii/ jie//
山
aJbJI aJIcJI J|1.
12j = 11 ②
J
J
(4)aagjallolalaaSgjllllo
- Jks
jul jllgul (J0 120) aIol! alg/ Jlll
a>la!oG
a.sj oclg all clll Jscall 4
gial lolai jiao 1110s loic 9/5uiv jq211 cluo1
bai//a#j0
aJl p|j>
.1
J
2020 J5u u 101
aJlallaLc
JjJlJUJUJU Jco aJIaJIaIc 1
a>la ogd
aaiolclg
- 1
jglzliuoo Jw .2
jU 10dJlsljIb
pulai aegi
jIgJ1 Jbi4.
.1JU 5
J
J
.02/1JJI//wAaJIbI//gpi jge//jdi ci
a//jzai//g 9 a9 c Jli d
g291,ajjla//awj201,ajjla//awl,
a29/aa// aJb// aew pXw// oJxj// aJ// Jllp//
jia//jai//gagia//auiill
J
.1J 1
jglj jz 2.
a|la|oogD
- an + 1 = 2an3 + 2a_n > 1
pUJI IaiaI aai gil wlll 3aia
Jauill
a>la] oga E
-
-
-
-
-
-
-
-
-
-
-
-
-
-
-
-
-
-
-
-
-
-
-
-
-
- 1
-
-
-
-
-
-
-
-
-
-
-
-
-
-
-
-
-
-
-
-
-
-
-
-
0000
J
a 1
jllclg jJl Jj> jll aLc 1
aJl Jn no 1alll aai jll
cJg aJIaJIJIJIJIgIgJIgJIgJIgJIgJIgJIgJIgJIgJIgJIgJIgJIgJIgJIgJIgJIgJIgJIgJIgJIgJIgJIgJIgJIgJIgJIgJIgJIgJIgJIgJIgJIgJIgJIgJIgJIgJIgJIgJIgJIgJIgJIgJIgJIgJIgJIgJIgJIgJIgJIg
glaal gla jglal dla l aol 1011 jai gia oio abluu UU uU. jai 1
12a aodssllj yajyrgsU gU U jyj 0d Jn jgJl pddwip u J Cawu U. JabU Jgloo oolj gogj gl jlgjnnalao jgolz wI golzwi/13/0jzaiy
oJU 10u JU 10u U 10u 10u 10u 10u 10u 10u 10u 10u 10u 10u 10u 10u 10u 10u 10u 10u 10u 10u 10u 10u 10u 10u 10u 10u 10u 10uu u u u u u u u u u u u u u u u u u u u u u u u u u u u u u u u u u u u u u u u u u u u u u u u u u uuuuuuuuuuuuuuuuuuuuuuuuuuuuuuuuuuuuuuuuuuuuuuuuuuuuuuuuuuuuuuuuuuuuuuuuuuuuuuuuuuuuuuuuuuuuuuuuuuuuuuuuuuuuuuuuuuuuuuuuuuuuuuuuuuuuuuuuuuuuuuuuuuuuuuuuuuUU
Jasllgjbrill jaiy jaiy lgl g 1g//Jiai//.gplalll JlaicUg
/Scay /aiaia//c0laiau// ail5//
ofo//s2y
Lblll
J 10000000000000000000000000000000000000000000000000000000000000000000000000000000
.0jgall jagwaaegaoa aaj
m = 32 ;
clae//aollw//s/la/ gca
J 1
gazy baid>1.0u> 1/9//9 aillgs aee
Jaiuall laldeilg aollll blij
aolxiw/ pui sill, "aiis o1" 2laan / wpi
pIeWl IeWu Pw/ /aIyRgU//gU/ J, aollU/ bIwJ
// 1111111111111111111111111
(j5 15g)aJbUy lghwpu
1Joljso
a aabioi oai
oolll1p0g jogai/5jgUJ 1a aolll Jaill
f 10g 10g 10g 10g 10g 10g 10g 10g 10g 10g 10g 10g 10g 10g 10g 10g 10g 10g 10g 10g 10g 10g 10g 10g 10g
Jlaii 1g jgjg jie g jie Lg
Jie//jie//g/1g//jie//g//
.
c0dU plxsws
1c ojka//j/269//jgaw//52o j/sa.ajj
1,2,3
aJll aUwU 2
a. liuljiao
o 1000000000000000000000000000000000000000
c. gll l.lu c aoosblaa gl aal y
aillsslll
3
pOg JAc sI pAALL iC jzJl gio g 1s
13 aU gU olUl pOu U ailluea uU gU olUl
aU gU gl g2S U,dlal all t cG l leo C
aill 1/05U/lo 1/2wU/uc oU/ps aBzJ/
a1 = 2,a2 = - 4,
aag aig aaij bui b
aola//jao aolgl//aaxw//1/rea//v//p
g/aollw/0j>aaJjuc aollw/aj>1,la//no a//
w>Ug UoU Jb>oo Jla. uU aJla>0j>1
aIyS/101/101/12xw/g 8g
aui 10u u u u u u u u u u u u u u u u u u u u u u u u u u u u u u u u u u u u u u
goj jUySll JUJU Uo 20 gOgogj aalso
olulJaxcSj.lgla>gl JgJusg aJll
guy caggljcllaal ldeeolcogg aill
JUOWULI JSSJNJJSLJGL
uol ool. p aabll paewll oioog xie e
jgJgJgJgJgJgJgJg
U>11 aIys//0/u 4211 aIys//u
.aaegiaI
gaiiaolalssu sui U. aawllo uuulsui|f
Ua auiuuiuuiuuiuuiuuiuuiuuiuuiuuiuuiuuiuuiuuiuuiuuiuuiuuiuuiuuiuuiuuiuuiuuiuuiuuiuuiuuiuuiuuiuuiuuiuuiuuiuuiuuiuuiuuiuuiuuiuuiuuiuuiuuiuuiuuiuuiuuiuuiuuiuui uuuuuuuuuuuuuuuuuuuuuuuuuuuuuuuuuuuuuuuuuuuuuuuuuuuuuuuuuuuuuuuuuuuuuuuuuuuuuuuuuuuuuuuuuuuuuuuuuuuuuuuuuuuuuuuuuuuuuuuuuuuuuuuuuuuuuuuuuuuuuuuuuuuuuuuuuuuuuUU
www.kaercher.com g9g
pwllo
g>g>g jL.og,ll Jc gao jgeJl aaiu sgi20 gaiaaii aiaaijag .gaii iagaii aig 1gaii jaiiaiaocn cci ci ai

THANK YOU!
MERCI! DANKE! iGRACIAS!

Register your product and benefit from many advantages.
www.kaercher.com/welcome


Rate your product and tell us your opinion.
www.kaercher.com/dealersearch