
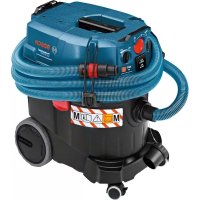
GAS 35 AFC - Vacuum Cleaner BOSCH - Free user manual and instructions
Find the device manual for free GAS 35 AFC BOSCH in PDF.
 FR
FR
 BG
BG
 CS
CS
 DA
DA
 DE
DE
 EL
EL
 EN
EN
 ES
ES
 ET
ET
 FI
FI
 HU
HU
 IT
IT
 KK
KK
 KO
KO
 LT
LT
 LV
LV
 MK
MK
 NL
NL
 NO
NO
 PL
PL
 PT
PT
 RO
RO
 RU
RU
 SK
SK
 SL
SL
 SV
SV
 TR
TR
 UK
UK
| Product type | Wet and dry vacuum cleaner |
| Brand | Bosch |
| Model | GAS 35 AFC |
| Rated voltage | 220-240 V (110 V model available) |
| Frequency | 50-60 Hz |
| Nominal power consumption | 1 200 W (1 000 W for 110 V) |
| Gross tank capacity | 35 L |
| Net capacity (liquids) | 19 L |
| Dust bag volume | 19 L |
| Max vacuum (vacuum cleaner) | 230 hPa |
| Max vacuum (turbine) | 254 hPa |
| Max air flow (vacuum cleaner) | 36 L/s (0.036 m³/s) |
| Max air flow (turbine) | 74 L/s (0.074 m³/s) |
| Max suction power | 1 380 W |
| Active surface of pleated filter | 0.615 m² |
| Filtration class | M (according to IEC/EN 60335-2-69) |
| Weight (according to EPTA 01:2014) | 12.4 kg |
| Protection rating | IPX4 |
| Sound pressure level | 70 dB(A) (typical), K = 3 dB |
| Vibrations (total value) | < 2.5 m/s² |
| Automatic filter cleaning | AFC (Automatic Filter Cleaning) can be activated/deactivated |
| Socket for power tool | Yes, with grounding, max power 2 200 W (230 V) |
| Compatible hose diameters | 15 mm, 22 mm, 35 mm |
| Suction materials | Dry dust (class L/M), non-flammable liquids, air-water mixtures |
| Filter maintenance | Manual or automatic cleaning via AFC; washable with water (PES/PTFE) |
| Safety functions | Automatic shut-off when tank is full (liquids), air flow monitoring, level detection |
Frequently Asked Questions - GAS 35 AFC BOSCH
User questions about GAS 35 AFC BOSCH
0 question about this device. Answer the ones you know or ask your own.
Ask a new question about this device
Download the instructions for your Vacuum Cleaner in PDF format for free! Find your manual GAS 35 AFC - BOSCH and take your electronic device back in hand. On this page are published all the documents necessary for the use of your device. GAS 35 AFC by BOSCH.
USER MANUAL GAS 35 AFC BOSCH
Safety information for vacuum cleaners

Read all the safety information and instructions. Failure to observe the safety information and follow instructions may result in electric shock, fire and/or serious injury.
Save all warnings and instructions for future reference.
This vacuum cleaner is not intended for use by children or persons with physical, sensory or mental impairments. It should not be used by persons who have insufficient experience and knowledge. Otherwise, there is a risk of operating errors and injuries.
Supervise children. This will ensure that children do not play with the vacuum cleaner.
WARNING
Never vacuum material that contains asbestos. Asbestos is a carcinogenic substance.
nogenic substance.
WARNING
Only use the vacuum cleaner if you have been adequately informed
about the use of the equipment, the substances to be vacuumed, and how to dispose of these safely. Thorough in
struction on how to use the equipment prevents accidental misuse and injuries.
WARNING
The vacuum cleaner is suitable for vacuuming dry substances, and
can also be used to vacuum liquids when taking appropriate measures. The penetration of liquids increases the risk of an electric shock.
Do not use the vacuum cleaner to vacuum combustible or explosive liquids, such as petrol, oil, alcohol, or solvents. Do not vacuum hot or burning dust. Do not operate the vacuum cleaner in areas subject to explosion hazards. Dust, vapors, and liquids can ignite or explode.
WARNING
Only use the socket for the purpose stipulated in the operating
manual.
WARNING
If you notice a foam or water leak, switch off the vacuum cleaner im
mediately and empty the container. Otherwise, the vacuum cleaner can become damaged.
NOTE: The vacuum cleaner must only be stored indoors.
NOTE: Clean the liquid fill level sensors regularly and check whether they are damaged. Otherwise, the equipment may not function properly.
If operating the vacuum cleaner in a damp location is unavoidable, use a residual current device (RCD). Use of an RCD reduces the risk of electric shock.
Connect the vacuum cleaner to a properly earthed power supply system. The socket and extension cable must have a fully functioning protective conductor.
Always check the vacuum cleaner, cable and plug before use. Do not use the vacuum cleaner if you discover any damage. Do not open the vacuum cleaner yourself. It should be repaired exclusively by a qualified professional using only genuine spare parts. Damaged vacuum cleaners, cables and plugs increase the risk of electric shock.
- Do not crush the cable or run the device over it. Do not pull on the power cable to pull the plug out of the socket or to move the vacuum cleaner. Damaged cables increase the risk of an electric shock.
Pull the plug out of the socket before cleaning or performing maintenance on the vacuum cleaner, making tool adjustments, changing accessories or putting away the vacuum cleaner. This safety measure prevents the vacuum cleaner from being started accidentally.
Ensure that the workplace is well ventilated.
The vacuum cleaner should be repaired exclusively by a qualified professional using only genuine spare parts. This will ensure that the safety of the vacuum cleaner is maintained.
WARNING
The vacuum cleaner contains dust particles that pose a risk to health.
Emptying and maintenance procedures, including the disposal of dust collectors, should only be carried out by
professionals. Suitable protective equipment is required. Do not operate the vacuum cleaner without the complete filter system. Otherwise, you are putting your health at risk.
Before using the equipment for the first time, check that the vacuum hose is in perfect condition. Leave the vacuum hose fitted to the vacuum cleaner while doing this so that no dust escapes accidentally. Otherwise, you may end up inhaling dust particles. Do not sit on the vacuum cleaner. You can damage the vacuum cleaner this way. Take care when using the power cable and the vacuum hose. Improper use of these can put other people at risk. Do not clean the vacuum cleaner by spraying a jet of water directly at it. Water entering the top of the vacuum cleaner will increase the risk of electric shock.
Products sold in GB only:
Your product is fitted with a BS 1363/A approved electric plug with an internal fuse (ASTA approved to BS 1362).
If the plug is not suitable for your socket outlets, it should be cut off and an appropriate plug fitted in its place by an authorized customer service agent. The replacement plug should have the same fuse rating as the original plug.
The severed plug must be disposed of to avoid a possible shock hazard and should never be inserted into a mains socket elsewhere.
Symbols
The following symbols may provide you with important information pertaining to the use of your dust extractor. Please take note of the symbols and their meaning. Knowing what these symbols mean will help you to use your extractor more effectively and more safely.
Symbols and their meaning

WARNING! Read all the safety and general instructions. Failure to observe the safety information and follow instructions may result in electric shock, fire and/or serious injury.
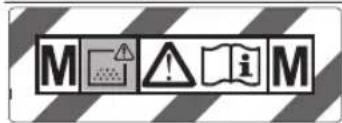
Dust extractor from dust class M in accordance with IEC/EN 60335-2-69 for the dry extraction of harmful dusts with an exposure limit of ≥ 0.1 mg/m³
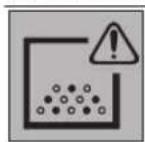
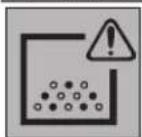
WARNING! The dust extractor contains dust particles that pose a risk to health. Emptying and maintenance procedures, including the disposal of dust containers, should only be carried out by professionals. Suitable protective equipment is required. Do not operate the dust extractor without the complete filter system. Otherwise, you are putting your health at risk.
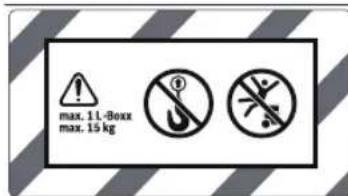
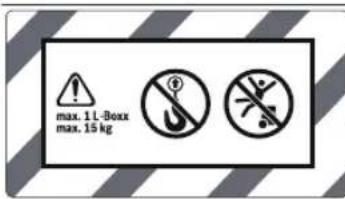
! Only attach a maximum of one L-Boxx. max. 1 L-Boxx. The weight of the L-Boxx along with its contents must not exceed 15 kg. max. 15 kg

Do not hang the dust extractor on a crane hook, e.g. in order to transport it. The dust extractor is not suitable for moving with a crane. There is a risk of injury and damage if you do this.

Do not sit or stand on the dust extractor. The dust extractor may tip over and become damaged if you do this. This poses a risk of injury.
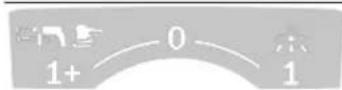
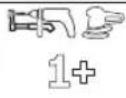
Automatic start/stop
Extracting dust that accumulates from working power tools. The dust extractor switches on automatically and off again with a time delay.
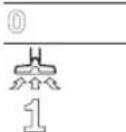
Switching off
Vacuuming up dust deposits
Symbols and their meaning
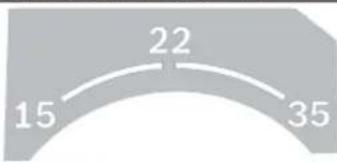
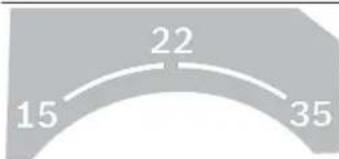
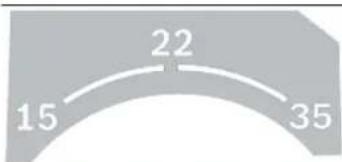
15 Volume flow monitoring for a hose diameter of 15 mm 22 Volume flow monitoring for a hose diameter of 22 mm 35 Volume flow monitoring for a hose diameter of 35 mm
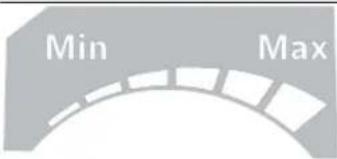
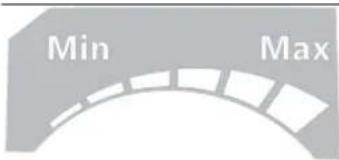
Min./max. Continuous regulation of suction power:
Maximum suction power for applications with a high level of dust generation - Reduced suction power for applications with a low level of dust generation, and also to regulate the suction between the connected power tool and the surface of the workpiece, for example (e.g. when sanding)
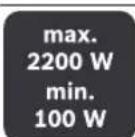
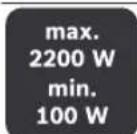
Permitted connected load of the connected power tool (country-specific)
AFC Automatic filter cleaning
Product Description and Specifications
Intended Use
The tool is intended for collecting, vacuuming, conveying and separating wood chips as well as non-flammable dry dust types, non-flammable liquids and a mixture of water and air. The dust extraction capability of the dust extractor has been tested and corresponds to dust class M. It is suitable for the increased demands in professional use, e.g. in trade, industry and workshops.
Dust extractors from dust class M in accordance with IEC/EN 60335-2-69 may only be used to vacuum and extract harmful dust with an exposure limit of ≥ 0.1 mg/m³
Only use the dust extractor if you can fully evaluate all functions and carry them out without restrictions, or if you have received corresponding instructions.
Product features
The numbering of the product features refers to the representation of the vacuum cleaner on the graphic pages.
(1) Container (2) Sealing plug for extraction connection (3) Hose adapter (4) Holder for vacuum hose (5) Socket for power tool (6) Volume flow controller
(7) Mode selector switch (8) Suction power regulator (9) AFC button (10) Carrying handle (11) L-Boxx holder (12) Top part of vacuum cleaner (13) Catch for top part of vacuum cleaner (14) Wheel (15) Castor brake (16) Castor (17) Cable holder (18) Closing flap for filter cover (19) Holder for suction tubes (20) Holder for crevice nozzle/curved nozzle (21) Holder for floor nozzle (22) Dust extraction adapter (23) Curved nozzle (24) Vacuum hose (25) Disposal bag (26) Flat-pleated filter (PES) (27) Crevice nozzle (28) Rubber lip (29) Brush inserts (30) Floor nozzle
20|English
(31) Suction tube (35) Control LED (32) Adapter for vacuum hose holder (36) Filter cover (33) Snap fastener (37) Fill level sensors (34) False air intake
Technical data
| Wet/dry dust extractor GAS 35 M AFC | |||
| Article number | 3601 JC3 1.. 3601 JC3 170 | ||
| Rated voltage V 220-240 110 | |||
| Rated power input W 1200 1000 | |||
| Frequency Hz 50-60 50-60 | |||
| Container volume (gross) I 35 35 | |||
| Net volume (liquid) I 19 19 | |||
| Dust bag volume I 19 19 | |||
| Max. vacuum A) | |||
| -Dust extractor hPa 230 211 | |||
| -Turbine | hPa 254 242 | ||
| Max. volume flow rate A) | |||
| -Dust extractor l/s | 36 | 31 | |
| m³/s | 0.036 | 0.031 | |
| -Turbine | l/s | 74 | 71 |
| m³/s | 0.074 | 0.071 | |
| Max. suction power | W 1380 1150 | ||
| Area of pleated filter | m² | 0.615 | 0.615 |
| Dust class | M | M | |
| Weight according to EPTA-Procedure 01:2014 | kg | 12.4 | 12.4 |
| Protection class | ±/I | ±/I | |
| Protection rating | IPX4 | IPX4 | |
A) Measured using a vacuum hose 3 m long and 35 mm in diameter
The specifications apply to a rated voltage [U] of 230 V. These specifications may vary at different voltages and in country-specific models.
| Automatic start/stop | ||
| Rated voltage | Maximum power | Minimum power |
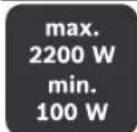
| 230 V | 2200 W | 100 W |
Permitted connected load of the connected power tool.
These values can differ for other country-specific models. Please take note of the information on the socket of the dust extractor.
Noise/Vibration Information
Noise emission values determined according to EN 60335-2-69.
Typically the A-weighted sound pressure level of the dust extractor is 70 dB(A). Uncertainty K = 3 dB. The noise level when working can exceed 80 dB(A).
Wear hearing protection
Total vibration values ah (triax vector sum) and uncertainty K determined according to EN 60335-2-69: ah < 2.5 m/s2 , K = 1.5 m/s2 .
Assembly
Pull the plug out of the socket before carrying out any work on the dust extractor.
Fitting the holder for the vacuum hose (see figure A)
- Slide the holder (4) for the vacuum hose firmly into the corresponding adapters (32) from above until they click into place.
Fitting the vacuum hose (see figure B)
- Attach the vacuum hose (24) to the hose adapter (3) and turn it clockwise as far as possible.
Note: The friction generated by the dust in the vacuum hose and accessory during extraction causes an electrostatic charge that the user may experience as static discharge (depending on environmental factors and their physiological state).
Bosch generally recommends using an anti-static vacuum hose (accessory) to vacuum up fine dust and dry materials.
Fitting the vacuuming accessories (see figure C)
The vacuum hose (24) is equipped with a clip system which can be used to connect vacuuming accessories (dust extraction adapter (22), curved nozzle (23)).
Fitting the dust extraction adapter
- Push the dust extraction adapter (22) onto the vacuum hose (24) until you hear both snap fasteners (33) on the vacuum hose engage.
- To remove the adapter, press the snap fasteners (33) inwards and pull apart the components.
Fitting the nozzles and tubes
- Push the curved nozzle (23) onto the vacuum hose (24) until you hear both snap fasteners (33) on the vacuum hose engage.
- Then attach the required extraction accessory (floor nozzle, crevice nozzle, suction tube, etc.) firmly to the curved nozzle (23).
- To remove the accessory, press the snap fasteners (33) inwards and pull apart the components.
Inserting/removing the disposal bag or dust bag (dry extraction) (see figures D1-D2)
A disposal bag (25) or dust bag must be used for the dry extraction of dust class M materials.
Insofar as materials with or without an exposure limit of ≥ 1 mg/m³ (dust class L materials) are extracted, these can be sucked straight into the container.
Note: If using a paper filter bag, you must make sure that automatic filter cleaning (AFC) is switched off; you should also do the same if using a fleece filter bag (see "Automatic filter cleaning (see figure H)", page 23).
WARNING
The vacuum cleaner contains dust particles that pose a risk to health.
Emptying and maintenance procedures, including the disposal of dust collectors, should only be carried out by professionals. Suitable protective equipment is required. Do not operate the vacuum cleaner without the
complete filter system. Otherwise, you are putting your health at risk.
Inserting the disposal bag
- Open the catches (13) and remove the top part of the vacuum cleaner (12).
- Insert the disposal bag (25) into the container (1) with the inlet facing forwards.
- Pull the inlet over the connection flange and all the way into the recess of the connection flange.
- Make sure that the disposal bag (25) touches all the inside walls of the container (1). Fold the rest of the disposal bag (25) over the edge of the container (1). Put the top part of the vacuum cleaner (12) on and close the catches (13).
Removing and sealing the disposal bag
- Open the catches (13) and remove the top part of the vacuum cleaner (12).
- Pull the full disposal bag (25) backwards out of the connection flange.
- Carefully take the disposal bag (25) out of the container (1) without damaging it. When doing so, make sure that the disposal bag does not scrape against the connection flange or other sharp objects.
- Remove the adhesive strip cover and tape up the disposal bag. Then tie up the disposal bag (25) below the inlet using the adhesive strip cover that has been removed.
Changing/inserting the dust bag (accessory)
- Open the catches (13) and remove the top part of the vacuum cleaner (12).
- Pull the full dust bag backwards out of the connection flange. Close the opening in the dust bag by turning down the top. Take the closed dust bag out of the container (1).
- Place the new dust bag over the vacuum cleaner's connection flange. Make sure that the entire length of the dust bag touches the inside wall of the container (1). Put the top part of the vacuum cleaner (12) on and close the catches (13).
Fitting the rubber lip (wet extraction) (see figure E)
Note: The requirements for the degree of penetration (dust class M) have only been verified for dry extraction.
- Use a suitable tool to lift the brush inserts (29) out of the floor nozzle (30).
- Place the rubber lips (28) in the floor nozzle (30).
Note: The textured side of the rubber lips must be facing outwards.
Attaching the L-Boxx (see figure F)
- Click the L-Boxx onto the adapters (11).
You can attach an L-Boxx to the top part of the dust extractor for transporting the extractor and to provide space-saving storage for extractor accessories and/or the power tool.
Do not carry the dust extractor by the carrying handle of the attached L-Boxx. The dust extractor is too heavy for the carrying handle of the L-Boxx. There is a risk of injury and damage if you do this.
Operation
Pull the plug out of the socket before cleaning or performing maintenance on the vacuum cleaner, making tool adjustments, changing accessories or putting away the vacuum cleaner. This safety measure prevents the vacuum cleaner from being started accidentally.
Start-up
Pay attention to the mains voltage. The voltage of the power source must correspond with the information on the type plate of the dust extractor. Chargers labelled as 230V can also be operated with 220V . Make sure you inform yourself about the applicable regulations/laws on how to handle harmful types of dust in your country.
The dust extractor may be used for vacuuming and extracting the following materials:
Dusts with an exposure limit of ≥ 0.1mg / m3 ▶ Products that are only sold in AUS and NZ: Use a residual current device (RCD) with a nominal residual current of 30 mA or less.
The dust extractor must categorically not be used in potentially explosive areas.
To ensure optimum suction power, you must always fully unwind the vacuum hose (24) from the top part of the dust extractor (12).
Dry vacuuming
Vacuuming up dust deposits
- Adjust the volume flow controller (6) to suit the hose diameter used.
- To switch on the dust extractor, set the mode selector switch (7) to the "extraction" symbol.
- To switch off the dust extractor, set the mode selector switch (7) to the "switch off" symbol.
The dust extractor is fitted with airflow monitoring. In the "vacuuming" operating mode, the volume flow monitoring is fixed to a value of 20m / s , irrespective of the setting of the volume flow controller (6).
If the value falls below this, e.g. due to accumulated dirt in the vacuum hose, a full dust bag or a clogged flat-pleated filter, an audible alarm signal will sound. In this case, switch off the dust extractor and check it as described in the "Rectifying faults" section.
Extracting dust that accumulates from working power tools (see figure G)
There must be a sufficient air exchange rate (L) in the room when the exhaust air comes back into the room. Be aware of the corresponding national regulations.
The dust extractor has an electric socket with a protective earth contact (5), which can be used to connect an external power tool. Observe the maximum permitted load of the connected power tool.
In order for sufficient dust transport to be ensured at the extraction point, the volume flow must not fall below the minimum specified for the connected power tool.
Hose diameter Volume flow setting
| 35 mm 57.9 m | 3/h |
| 22 mm 41.2 m | 3/h |
| 15 mm 12.7 m | 3/h |
- Adjust the volume flow controller (6) to suit the hose diameter used. -Fit the extraction adapter (22) (see "Fitting the dust extraction adapter", page 21).
- Insert the extraction adapter (22) into the dust extraction outlet of the power tool.
Note: When working with power tools that have a low air feed into the vacuum hose (e.g. jigsaws, sanders, etc.), the false air intake (34) of the dust extraction adapter (22) must be opened. This will ensure that the automatic filter cleaning function works correctly.
To do this, turn the ring above the false air intake (34) until the opening is at its maximum size.
- To activate the automatic start/stop
1+
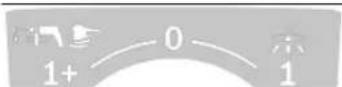
function of the dust extractor, set the operating mode selector switch (7) to the "automatic start/stop" symbol. In this operating mode, the volume flow is electronically monitored according to the setting of the volume flow controller (6).
Sufficient dust transport is ensured when the setting is correctly selected.
- To activate the dust extractor, switch on the power tool that is plugged into the electric socket (5). The dust extractor will start automatically.
- To stop dust extraction, switch the power tool off. The automatic start/stop run-on function will run for up to 15 seconds longer in order to extract the remaining dust from the vacuum hose.
- To switch off the dust extractor, set the mode selector switch (7) to the "switch off" symbol.
If the acoustic warning signal sounds, the dust extractor must be checked as described in the "Rectifying faults" section.
Wet vacuuming
Do not use the vacuum cleaner to vacuum combustible or explosive liquids, such as petrol, oil, alcohol or solvents. Do not vacuum hot or burning dust. Do not operate the vacuum cleaner in areas subject to explosion hazards. Dust, vapours and liquids can ignite or explode.
solvents. Do not vacuum hot or burning dust. Do not operate the vacuum cleaner in areas subject to explosion hazards. Dust, vapours and liquids can ignite or explode.
The vacuum cleaner must not be used as a water pump. The vacuum cleaner is designed for vacuuming air and vacuuming water mixtures.
Note: The requirements for the degree of penetration (dust class M) have only been verified for dry extraction.
Remove the disposal bag (25) or dust bag if necessary.
- Remove the disposal bag (25) or dust bag if necessary.
Note: Use a wet filter bag (accessory), which separates liquid from solids, to make disposal easier when vacuuming water-solid mixtures.
- Fit the rubber lip (28) in the floor nozzle (30) (see "Fitting the rubber lip (wet extraction)", page 21).
- Switch off the automatic filter cleaning (AFC) (see "Automatic filter cleaning (see figure H)", page 23).
Vacuuming up liquids
- To switch on the dust extractor, set the mode selector switch (7) to the "extraction" symbol.
The dust extractor is equipped with fill level sensors (37). The dust extractor shuts down if the maximum fill level has been reached. Set the mode selector switch (7) to the "switch off" symbol.
Note: When extracting non-conductive liquids (e.g. drilling emulsion, oils and fats), the dust extractor will not switch off when the container is full. The fill level must be constantly monitored and the container emptied in good time.
If the acoustic warning signal sounds during wet extraction, the operating reliability of the dust extractor is not affected. No measures to rectify the fault are necessary.
- To switch off the dust extractor, set the mode selector switch (7) to the "switch off" symbol.
- To transport the dust extractor, screw the sealing plug (2) onto the hose adapter (3). Empty the container (1).
To prevent mould growth after wet extraction:
- Remove the flat-pleated filter (26) and leave this to dry thoroughly.
- Remove the top part of the dust extractor (12), open the filter cover (36) and leave both elements to dry thoroughly.
Automatic filter cleaning (see figure H)
When automatic filter cleaning (AFC) is active, the flat-pleated filter (26) is cleaned every 15 seconds using blasts of air (pulsating noise).
The filter cleaning function should be used regularly, and at the very latest when the suction power is no longer sufficient.
Regular use of the filter cleaning function will increase the service life of the filter.
In order to achieve an optimum filter service life, deactivate the automatic filter cleaning function only in exceptional cases, e.g. when vacuuming pure liquids or using a paper filter bag.
A flat-pleated filter with surface dirt is still fully functional. It is not necessary to clean the flat-pleated filter manually by shaking or blowing it out; this may even damage the filter.
Note: The automatic filter cleaning function is switched on by default when the dust extractor leaves the factory.
It is only possible to switch the automatic filter function on or off when the tool is switched on.
- Deactivating AFC
Press the AFC button (9).
The control LED (35) will go out.
Activating AFC
Press the AFC button (9).
The control LED (35) will light up green.
Maintenance and service
Maintenance and cleaning
Pull the plug out of the socket before cleaning or performing maintenance on the vacuum cleaner, making tool adjustments, changing accessories or putting away the vacuum cleaner. This safety measure prevents the vacuum cleaner from being started accidentally. To ensure safe and efficient operation, always keep the dust extractor and the ventilation slots clean. Wear a dust mask when servicing and cleaning the vacuum cleaner.
In order to avoid safety hazards, if the power supply cord needs to be replaced, this must be done by Bosch or by an after-sales service centre that is authorised to repair Bosch power tools.
For the user to carry out maintenance, the dust extractor needs to be disassembled, cleaned and maintained as far as this is possible without endangering maintenance personnel or other persons. Before disassembly, the dust extractor should be cleaned to prevent any potential hazards. The room in which the dust extractor is disassembled should be well ventilated. Wear personal protective equipment while carrying out maintenance. After completing maintenance, the maintenance area should be cleaned.
An inspection regarding the dust extraction capability must be carried out at least once a year by the manufacturer or someone who has been trained, e.g. to check for filter damage, that the vacuum cleaner is tight and that the control unit is functioning correctly.
Class M dust extractors that have been in dirty environments should have their exteriors, as well as all their components, cleaned or treated with sealant. When performing maintenance and repair work, all dirty parts that cannot be cleaned satisfactorily must be disposed of. Such parts must be disposed of in impermeable bags in accordance with the valid provisions for disposing of such waste.
24 | English
Removing/changing the flat-pleated filter (see figures I1-I2)
Suction power is dependent on the condition of the filter. Therefore, the filter should be cleaned regularly. If the flat-pleated filter (26) becomes damaged, replace it immediately.
- Pull on the closing flap (18) and open the filter cover (36).
- Hold the flat-pleated filter (26) by the supports and take it out from above.
- Use a damp cloth to remove any dust and dirt that accrues around the closing edge of the filter cover (36) when removing the flat-pleated filter (26). PES and PTFE flat-pleated filters can be rinsed out under running water.
- Insert the cleaned (or a new) flat-pleated filter (26), ensuring that it is positioned correctly and securely.
- Close the filter cover (36) again (must audibly click into place).
Cleaning the container
Wipe the container (1) from time to time using a non-abrasive off-the-shelf cleaning product and leave it to dry.
Cleaning the fill level sensors (see figure J)
Make sure that the fill level sensors are cleaned (37) occasionally.
- Open the catches (13) and remove the top part of the dust extractor (12).
- Clean the fill level sensors (37) using a soft cloth.
Put the top part of the vacuum cleaner (12) on and close the catches (13).
Storage and transport (see figure K)
- Wrap the power cable around the cable holder (17).
- Insert the accessory into the holders provided for it: Suction tubes (31) into the holders (19), crevice nozzle (27) into the holder (20), floor nozzle (30) into the holder (21).
- Open the elastic bands of the vacuum hose holder (4) and wrap the vacuum hose (24) around the top part of the dust extractor in the holder (4). Hook the elastic bands back in.
- Click the L-Boxx onto the holders (11). Before transporting the dust extractor, remove any full disposal bags/dust bags and empty any liquids that have been absorbed, in order to avoid placing unnecessary strain on the back and prevent injury. Only ever carry the dust extractor by the carrying handle (10).
- To transport the dust extractor, screw the sealing plug (2) onto the hose adapter (3).
- Store the dust extractor in a dry room and secure it so that it cannot be used by unauthorised persons. Put the castor brake (15) down to hold the castors (16) in place.
Rectifying faults
If a fault (e.g. a filter damage) occurs, the vacuum cleaner must be switched off immediately. The fault must be repaired before resuming operation.
| Problem Corrective measures | |
| The suction turbine will not switch on. | - Check the mains cable, mains plug, fuse, socket and fill level sensors (37). |
| The mode selector switch (7) is set to "automatic start/stop". | |
| - Set the mode selector switch (7) to the "vacuuming" symbol or switch on the power tool plugged into the electric socket (5). | |
| The suction turbine switches off. | - Empty the container (1). |
| The suction turbine will not switch on again after emptying the container. | - Switch the dust extractor off and wait five seconds before switching it back on. |
| - Clean the fill level sensors (37) and the space between the fill level sensors (37) using a brush. | |
| The suction power is decreasing. | - Remove any blockages from the vacuum nozzle, suction tube (31), vacuum hose (24) or flat-pleated filter (26). |
| - Change the disposal bag (25) or dust bag. | |
| - Make sure the filter cover (36) is engaged correctly. | |
| - Place the top part of the dust extractor (12) on correctly and close the catches (13). | |
| - Change the flat-pleated filter (26). | |
| Dust is escaping when vacuuming | - Check that the flat-pleated filter (26) has been fitted correctly. |
| - Change the flat-pleated filter (26). | |
| Automatic switch-off (wet extraction) is not working. | - Clean the fill level sensors (37) and the space between the fill level sensors (37) using a brush. |
Problem Corrective measures
| Automatic switch-off will not work in the presence of non-conductive liquids or foaming. - Check the fill level regularly. | |
| Acoustic warning signal sounds. Suction power setting too low. | - Set the suction power regulator (8) to a higher setting. |
| Hose diameter setting is wrong. - Set the volume flow controller (6) to the correct vacuum hose diameter. | |
| Vacuum hose (24) is blocked or twisted. - Remove blockage or untwist hose. | |
| Disposal bag/dust bag full. - Change the disposal bag (25) or dust bag. | |
| Flat-pleated filter (26) is dirty. - Clean or change the flat-pleated filter if required. | |
| The airflow supplied by the connected power tool is insufficient. - Open the false air intake (34) on the extraction adapter (22): Turn the ring on the extraction adapter until the false air intake is fully open. - Open the false air intake on the power tool if there is one. | |
| Malfunction of the monitoring electronics. - Contact an authorised Bosch after-sales service centre. | |
| The automatic filter cleaning function is not working. | - Activate the automatic filter cleaning function (press the AFC button (9)). - Connect the vacuum hose (24). |
| The automatic filter cleaning function will not switch off. | - Contact an authorised Bosch after-sales service centre. |
| The automatic filter cleaning function will not switch on. | - Contact an authorised Bosch after-sales service centre. |
Accessories
| Accessory number | |
| Paper filter bag (dry) 2 607 432 035 | |
| Fleece filter bag (dry) 2 607 432 037 | |
| Wet filter bag (wet) 2 607 432 039 | |
| Disposal bag (PE) (dry/wet) 2 607 432 043 | |
After-sales service and advice on using products
Our after-sales service responds to your questions concerning maintenance and repair of your product as well as spare parts. You can find explosion drawings and information on spare parts at: www.bosch-pt.com
The Bosch product use advice team will be happy to help you with any questions about our products and their accessories.
In all correspondence and spare parts orders, please always include the 10-digit article number given on the nameplate of the product.
Great Britain
Robert Bosch Ltd. (B.S.C.)
P.O.Box 98
Broadwater Park
North Orbital Road
Denham Uxbridge
UB95HJ
At www.bosch-pt.co.uk you can order spare parts or arrange the collection of a product in need of servicing or repair.
Tel. Service: (0344) 7360109
E-Mail: boschservicecentre@bosch.com
Ireland
Origo Ltd
Unit 23 Magna Drive
Magna Business Park
City West
Dublin 24
Tel. Service: (01) 4666700
Fax: (01) 4666888
Australia, New Zealand and Pacific Islands
Robert Bosch Australia Pty. Ltd.
Power Tools
Locked Bag 66
Clayton South VIC 3169
Customer Contact Center
Inside Australia:
Phone: (01300) 307044
Fax: (01300) 307045
Inside New Zealand:
Phone: (0800) 543353
Fax: (0800) 428570
Outside AU and NZ:
Phone: +61 3 95415555
www.bosch-pt.com.au
www.bosch-pt.co.nz
Republic of South Africa
Customer service
Hotline: (011) 6519600
Gauteng - BSC Service Centre
35 Roper Street, New Centre
Johannesburg
Tel.: (011) 4939375
Fax: (011) 4930126
E-mail: bsctools@icon.co.za
KZN - BSC Service Centre
Unit E, Almar Centre
143 Crompton Street
Pinetown
Tel.: (031) 7012120
Fax: (031) 7012446
E-mail: bsc.dur@za.bosch.com
Western Cape - BSC Service Centre
Democracy Way, Prosperity Park
Milnerton
Tel.: (021) 5512577
Fax: (021) 5513223
E-mail: bsc@zsd.co.za
Bosch Headquarters
Midrand, Gauteng
Tel.: (011) 6519600
Fax: (011) 6519880
E-mail: rbsa-hq.pts@za.bosch.com
Disposal
The vacuum cleaner, its accessories and packaging should be recycled in an environmentally friendly manner.

Do not dispose of the vacuum cleaner along with household waste.
Only for EU countries:
According to the European Directive 2012/19/EU on Waste Electrical and Electronic Equipment and its implementation into national law, vacuum cleaners that are no longer usable must be collected separately and disposed of in an environmentally friendly manner.
French
Automatic Filter Cleaning
AFC
Automatic filter cleaning (AFC = Automatic Filter Cleaning)
Calle Robert Bosch No. 405
C.P. 50071 Zona Industrial, Toluca - Estado de Mexico
Tel.: (52) 55 528430-62
Tel.: 8006271286
Automatic Filter Cleaning
AFC
The vacuum cleaner must not be used as a water pump. The vacuum cleaner is intended for suction of an air/water mixture.
Note: The requirements regarding transmission rate (dust class M) are only documented for dry suction.
Bosch Service Center
Telegrafvej 3
2750 Ballerup
On www.bosch-pt.dk you can order spare parts online or create a repair order.
Tel. Service Center: 44898855
Fax: 44898755
E-Mail: vaerktoej@dk.bosch.com
Disposal
(22) Suction adapter
(33) Push button
(23) Bent nozzle
Bosch Service Center
Telegrafvej 3
2750 Ballerup
Denmark
Tel.: (08) 7501820 (within Sweden)
Fax: (011) 187691
Disposal
AFC Automatic Filter Cleaning (AFC = Automatic Filter Cleaning)
Changing/replacing the dust bag (accessory)
The L-Boxx can be stacked.

The weight of the L-Boxx with its contents must not exceed 15 kg.

Do not lift the vacuum cleaner, e.g. by the handle, with a crane. The vacuum cleaner must not be lifted with a crane. Risk of injury and damage.
Automatic start/stop
The appliance is not suitable for professional use. The appliance is operated automatically and is switched off automatically after each operation.
Switching off
Appliance Appliance
108|Greek
Information about noise and vibration
Noise emission values determined according to EN 60335-2-69.
The A-weighted sound pressure level of the appliance is typically 70 dB(A). Uncertainty K = 3 dB. The noise during operation may exceed 80 dB(A).
Operation with the vacuum cleaner
Remove, when necessary, the dust bag (25) or the dust bag.
Note: For easier removal, use the vacuum cleaner for wet-dry vacuuming alternatively
Wet filter (accessory), which separates the liquid from the solid materials.
Place the wet filter (28) in the collection container (30) (see "Placing the wet filter (wet vacuuming)" (see figure E), section 11). - Activate the automatic filter cleaning (AFC) (see "Automatic filter cleaning (see figure H), section 112).
Wet vacuuming
To switch on the appliance, set the mode selector switch (7) to the symbol "Vacuuming". The appliance is equipped with level sensors (37). The appliance switches off automatically when the maximum liquid level is reached. Set the mode selector switch (7) to the symbol "Switching off"
Note: When vacuuming liquids (e.g., water-based detergents, oil and grease), the appliance does not switch off in case of liquid in the container. The liquid level must be checked continuously and the container must be emptied in time.
If the filter is not cleaned regularly, there is a risk of malfunction of the device. It is not necessary to take any special measures.
-To clean the filter, remove the front cover (7) or the filter cleaning lever. -Insert a cloth (2) into the slot of the filter housing (3). -Empty the container (1).
To avoid the creation of dust during dry cleaning:
-Remove the filter (26) and let it dry. Remove the filter cover (12), open the filter cover (36) and let both dry.
Automatic filter cleaning (Basic version H)
With automatic filter cleaning (AFC = Automatic Filter Cleaning), the filter (26) is cleaned every 15 seconds (approx.).
If the suction power is no longer sufficient, the filter must be cleaned. With regular filter cleaning, the filter's lifespan is increased.
To achieve a long filter lifespan, deactivate the automatic filter cleaning only in exceptional cases, e.g., when suctioning liquids with a paper filter.
A surface-cleaned filter is fully functional. A manual cleaning of the surface filter with a soft brush or vacuum is not
necessary and can even damage the filter.
Note: The automatic filter cleaner is activated when the appliance is switched on.
The activation/deactivation of the automatic filter cleaner is only possible when the appliance is switched on.
-Deactivating AFC
Press the AFC button (9).
Removal/replacement of the surface filter (see figures 1-12)
Havappopnikikavotnta eapatal ano tvkataan tou piaItpou. KaapiTe y' auto TaKtikaTo piaItpo.
Avtikataotate aoeoc eva xalaogevo emineo nuxto pihtpo (26).
- Tpaβhξε ΟΟ κλειστρο (18) και αυοίξετο το καλμμα του φιατρου (36). -PiadoTe to eniineo muxto foTPO (26) ano Tc veupoeic kai byaTe to eo npoc ta enavw. Anopakvete n kovn kai npunavon, no npokuntkata nvy apaipoeon tou eninebou nuxwotou piaTpou (26), me eva uypo navi ano tvn akn kaeiaiqaToc Tou kaAmuatoc Tou piaTpou (36).
Ta enine6a muxwta pfipra PES kal PTFE umopov va enluoov kato npoxouevo vp.
TOnoTeTne eva veno kaOap o enine60 nTuXto pIAtpo (26) kal npooEe E6w Tny aQpaAkn Kal Owtn npooapouyn. -Kaeiote EaVTo KaAmuTou pIATPO (36) (npene va aopaioe i e Tov xapakntipoiKo hxo).
- Yogun toz olusumu iceren uygulamalar icin maksimum emme performance
- Düşük toz olusumu iceren uygulamalar ve orn.®,®,®,®,®,®,®,®,®,®,®,®,®,®,®,®,®,®,®,®,®,®,®,®,®,®,®,®,®,®,®,®,®,®,®,®,®,®,®,®,®,®,®,®,®,®,®,®,®,®,®,®,®,®,®,®,®,®,®,®,®,®,®,®,®,®,®,®,®,®,®,®,®,®,®,®,®,®,®,®,®,®,®,®,®,®,®,®,®,®,®,®,®,®,®,®,®,®,®,®,®.
- aletiyle is parçasi yüseyininarasindaki emme gućünü ayarlamak icin (örn. zimparalama) Düşük emme performansı
Robert Bosch Sp. z o.o.
Bosch Service Center PT
K Vapence 1621/16
692 01 Mikulov
Na www.bosch-pt.cz si si muzete objednat opravu Vaseho stroje nebo nahradni dily online.
Automatic Filter Cleaning
AFC
Maintenance technical documentation
It is recommended to clean the instrument after each use.
Storage
- Store in a dry place - Store away from heat sources, elevated temperatures, and direct sunlight - Avoid sharp temperature changes during storage - Storage without packaging is not allowed - For detailed storage requirements, see GOST 15150 (condition 1)
Transportation
Categorically not allowed: dropping or any mechanical impact on the packaging during transportation - During unloading/loading, it is not allowed to use any type of equipment that operates by clamping the packaging - For detailed transportation requirements, see GOST 15150 (condition 5)
Safety instructions for vacuum cleaners

Read all safety instructions and instructions. Failure to follow safety instructions and instructions may result in electric shock, fire, and/or serious injury.
Electric shock, fire, and/or serious injury.
Keep these instructions and instructions for future use.
This vacuum cleaner is not intended for use by persons (including children) with reduced physical, sensory, or mental capabilities, or lack of experience and knowledge, unless they have been given supervision or instruction concerning use of the appliance by a person responsible for their safety.
Do not leave children unattended. They should not play with the vacuum cleaner.
WARNING
Never vacuum materials containing asbestos. Asbestos is considered carcinogenic.
carcinogen.
Use the vacuum cleaner only as described in this manual.
Use the vacuum cleaner only as described in this manual. Sufficient information about the collected materials and their safe disposal is provided. Careful reading of the instructions reduces the risk of incorrect operation of the device.
WARNING
The vacuum cleaner is intended for collecting dry materials, and with appropriate precautions, it can also be used for collecting liquids. Penetration of water into the electrical appliance increases the risk of electric shock.
Do not use the vacuum cleaner to collect flammable or explosive liquids, such as gasoline, oil, alcohol, or solvents. Do not vacuum up flammable or explosive dust. Do not use the vacuum cleaner in explosive atmospheres. Dust, vapors, or liquids may ignite or explode.
WARNING
Use the vacuum cleaner only as described in the instruction manual.
WARNING
Before emptying the vacuum cleaner or performing maintenance, always unplug it from the power outlet.
The vacuum cleaner may be damaged.
ATTENTION! Store the vacuum cleaner only indoors. ATTENTION! Regularly check the filter for damage. Damage can negatively affect the functionality of the device. If it is unavoidable to use the vacuum cleaner in a damp room, plug the electrical appliance into a socket protected by a residual current device (RCD). The use of an RCD reduces the risk of electric shock. Connect the vacuum cleaner to a properly grounded outlet. The plug and socket must be in good condition and properly grounded. Before each use, check the vacuum cleaner, power cord, and plug for damage. Do not use the vacuum cleaner if damage is detected. Do not open the vacuum cleaner yourself; repairs should only be carried out by qualified personnel using original spare parts. Damaged vacuum cleaners, cords,
and plugs increase the risk of electric shock.
Do not run over or crush the cord. Do not pull the cord to unplug the vacuum cleaner from the outlet. A damaged cord increases the risk of electric shock. Before cleaning, adjusting, or replacing accessories, and before storing the vacuum cleaner, unplug it from the outlet. This precaution prevents accidental starting of the vacuum cleaner. Ensure good ventilation at the workplace! Repairs of the vacuum cleaner should only be carried out by qualified personnel using original spare parts. This ensures the safety of the vacuum cleaner.
Do not use or store the cord. Do not pull the cord to unplug the appliance from the outlet. A damaged cord increases the risk of electric shock. Before performing maintenance or cleaning the vacuum cleaner, adjusting it, or replacing accessories, unplug the appliance from the outlet. This precaution prevents accidental activation of the vacuum cleaner. Ensure good ventilation at the workplace! Repair of the vacuum cleaner may only be carried out by qualified personnel using original spare parts. This ensures the safety of the vacuum cleaner.
The vacuum cleaner contains dust that is hazardous to health. Emptying and maintenance procedures, including the removal of the dust container, may only be carried out by specialists. Appropriate protective equipment is required. Do not operate the vacuum cleaner without the complete filter system. Otherwise, you will endanger your health.
Before commissioning, check the flawless condition of the suction hose. Leave the suction hose connected to the vacuum cleaner so that dust cannot escape accidentally. Otherwise, you could inhale dust. Do not sit on the vacuum cleaner. This could damage the vacuum cleaner. Handle the mains cable and suction hose carefully. Otherwise, you could endanger other people. Do not rinse the vacuum cleaner with a direct stream of water. Water penetrating the vacuum cleaner lid increases the risk of electric shock.
Symbols
The following symbols may be important for operating your vacuum cleaner. Remember the symbols and their meaning. Correct understanding of the symbols will help you use the vacuum cleaner better and more safely.
Symbol / Meaning
WARNING! Read all safety instructions and instructions. Failure to follow the safety instructions and instructions may result in electric shock, fire and/or serious injury.

Vacuum cleaner class in accordance with IEC/EN 60335-2-69 for dry dust removal hazardous to health with a limit value for exposure to dust of ≥ 0.1mg/m3
Symbols / Meaning
WARNING! The vacuum cleaner contains dust that is hazardous to health. Emptying and maintenance procedures, including the removal of the dust container, may only be carried out by specialists. Appropriate protective equipment is required. Do not operate the vacuum cleaner without the complete filter system. Otherwise, you will endanger your health.
Do not install more than one L-Boxx.
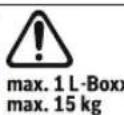
The mass of the L-Boxx together with its contents must not exceed 15 kg.
Do not hang the vacuum cleaner on a crane hook, e.g., for transport. The vacuum cleaner is not suitable for lifting by crane. This could result in injuries and damage to the vacuum cleaner.

Do not sit or stand on the vacuum cleaner, and do not use it as a step ladder. The vacuum cleaner could tip over or be damaged. There is a risk of injury.

Automatic on/off
The vacuum cleaner switches on automatically when power tools are used; switching off occurs with a time delay.
Switching off
Suction mode
Collection of dust deposits
Min/Max
Smooth regulation of suction power:
- Maximum suction power for use under conditions of heavy soiling - reduced suction power for use under conditions of light soiling. Power adjustment between the connected power tool and the surface being processed (e.g., when sanding).
Indication of the maximum permissible total power consumption of the connected power tool (depending on the country)
AFC
Automatic filter cleaning (AFC = Automatic Filter Cleaning)
Product description and services
Intended use
The power tool is intended for collecting, vacuuming, and conveying wood dust, as well as non-flammable dry dust, non-flammable liquids, and water-air mixtures. The vacuum cleaner is designed for checking the dust class. It corresponds to dust class M. It is suitable for increased loads during industrial use, e.g., in trade, industry, and workshops. The vacuum cleaner of dust class M in accordance with IEC/EN 60335-2-69 is permitted only for removing hazardous dust with an exposure limit value of ≥ 0.1 mg/m³.
Use the vacuum cleaner only if you have fully familiarized yourself with all functions and are able to use them without any restrictions, following the corresponding instructions.
Numbered component parts
The numbering of the component parts is based on the illustration on the page with the figures.
(1) Container (2) Suction hose connection (3) Suction hose (4) Nozzle holder (5) Socket for power tool (6) Air flow regulator (7) Mode selector (8) Suction power regulator (9) AFC button (10) Handle for carrying
(11) L-Boxx mounting (12) Vacuum cleaner lid (13) Lid lock (14) Wheel (15) Swivel wheel brake (16) Swivel wheel (17) Cable holder (18) Filter cover latch (19) Accessory holder (20) Crevice nozzle holder (21) Floor nozzle holder (22) Dust filter (23) Crevice nozzle (24) Dust filter (25) Dust bag (26) Flat pleated filter (PES filter) (27) Upholstery nozzle (28) Rubber edge (29) Additional brushes (30) Floor nozzle (31) Suction hose (32) Mounting for suction hose holder (33) Push button (34) Exhaust air opening with cap (35) Control lights (36) Filter cover (37) Level sensors.
Technical data
Note: The structured side of the rubber edges must face upward.
Installing the L-Boxx (see fig. F)
- Place the L-Boxx on the mounting (11).
For transporting the vacuum cleaner and for saving space when storing the vacuum cleaner or power tool, the L-Boxx can be installed on the vacuum cleaner lid.
Do not carry the vacuum cleaner by the handle of the installed L-Boxx. The vacuum cleaner is too heavy for the L-Boxx handle. This could result in injury or damage to the vacuum cleaner.
Working with the tool
Before any work on the vacuum cleaner itself, such as setting, cleaning, or maintenance, or before storing it, unplug the power cord from the outlet. This precaution prevents unintentional starting of the vacuum cleaner.
Switching on the power tool
Observe the mains voltage! The voltage of the power source must match the data on the rating plate of the vacuum cleaner. Charging devices rated for 230 V can also operate on 220 V. Check the applicable regulations/legal requirements in your country regarding handling of hazardous substances.
The vacuum cleaner can be used for collecting the following materials:
Dust concentrations ≥0.1 M/m³
Do not use the vacuum cleaner in potentially explosive rooms. To ensure optimal suction power, the hose (24) must always be fully unwound from the vacuum cleaner lid (12).
Dry vacuuming
Collecting dust deposits
Set the air volume regulator (6) to the hose diameter being used.
166|Russian
To switch on the vacuum cleaner, set the mode switch (7) to the symbol "Vacuuming mode". To switch off the vacuum cleaner, set the mode switch (7) to the symbol "OFF".
The vacuum cleaner is equipped with an air flow monitor. The air flow monitor is set at the factory for "Vacuuming with the vacuum cleaner" to at least 20 m/s, regardless of the position of the air volume regulator (6).
If this value is practically lower, e.g., if the suction hose, filter bag, or filter is blocked or damaged, an acoustic warning signal sounds. In such a case, switch off the vacuum cleaner and check it as described in the section "Troubleshooting".
Removing dust from power tools (see fig. G)
If the exhaust air is discharged into the room, the room must have sufficient air exchange (L). Pay attention to the corresponding regulations applicable in your country.
The vacuum cleaner has a socket with a protective contact (5). An external power tool can be connected to it. Note the maximum permissible power consumption of the connected power tool.
To ensure sufficient transport of dust in the suction hose, the minimum air flow rate of the connected power tool must be at least the prescribed value.
Hose diameter set values
| noTOKa BO3dUxHa | |
| 35 MM 57,9 M | 3/4 |
| 22 MM 41,2 M | 3/4 |
| 15 MM 12,7 M | 3/4 |
- Set the air volume regulator (6) to the hose diameter being used. - Mount the suction hose adapter (22) (see "Installing the suction hose adapter", page 164).
- Insert the adapter (22) into the suction hose of the vacuum cleaner.
Note: When working with power tools that supply little air, e.g., jigsaws, sanders, etc., it is necessary to open the air vent with the cap (34) on the suction adapter (22). Only in this way can the automatic filter cleaning function work reliably.
To do this, turn the ring over the air vent with the cap (34) until the vent is open to the required size.
To activate the automatic on/off of the vacuum cleaner, set the mode switch
(7) to the symbol "Automatic on/off". In this mode, the air flow is controlled electronically according to the setting of the air flow regulator (6). With the correct setting, sufficient dust transport is ensured.
To switch on the vacuum cleaner, switch on the power tool connected to the socket (5). The vacuum cleaner starts automatically. Switch off the power tool to stop the vacuuming. The function continues to operate for approx. 15 seconds after switching off to remove residual dust from the suction hose.
To switch off the vacuum cleaner, set the mode switch (7) to the symbol "Off".
If a warning signal sounds, the vacuum cleaner must be checked as described in the section "Troubleshooting".
Vacuuming up liquids
Do not vacuum up flammable or explosive liquids such as petrol, oil, alcohol, or solvents. Do not vacuum up hot or glowing dust. Do not use the vacuum cleaner in explosive environments. Dust, vapors, or liquids may ignite or explode. It is not recommended to use the vacuum cleaner as a water pump. The vacuum cleaner is intended for vacuuming up a water-air mixture.
Note: The requirement for dust class M is only confirmed for dry vacuuming.
Operation for vacuuming up liquids
If necessary, replace the dirt bag (25) with the dust bag.
Note: For collecting liquids, use the wet filter (accessory) which separates liquid from solid materials.
Insert the rubber lips (28) into the floor nozzle (30) (see "Installing the rubber lips (vacuuming up liquids)" (see Fig. E, page 165). Switch off the automatic filter cleaning (AFC) (see "Automatic filter cleaning" (see Fig. H), page 167).
Liquid capacity
For wet vacuuming, set the mode switch (7) to the symbol (wet vacuuming).
The vacuum cleaner is equipped with a liquid level sensor (37). When the maximum fill level is reached, the vacuum cleaner
switches off. Set the mode switch (7) to the symbol "Off".
Note: When vacuuming non-conductive liquids (e.g., soapy water, oil, or consistent lubricants), the vacuum cleaner does not switch off when the container is full. The fill level must be checked regularly and the container emptied in time.
If a warning signal sounds during wet vacuuming, this does not indicate a reduction in the suction power of the vacuum cleaner. No measures to eliminate the malfunction need to be taken.
- To switch off the vacuum cleaner, set the mode switch (7) to the symbol "Off". - For transporting the vacuum cleaner, hook the carrying handle (2) onto the suction tube (3). - Empty the container (1).
To prevent mold formation after vacuuming liquids:
- Remove the pleated filter (26) and let it dry thoroughly. - Remove the vacuum cleaner lid (12), open the filter cover (36), and let both parts dry thoroughly.
Automatic filter cleaning (see Fig. H)
During automatic filter cleaning (AFC = Automatic Filter Cleaning), the pleated filter (26) is cleaned every 15 seconds by means of air pulses (pulsating).
The automatic filter cleaning must be switched on no later than when the suction power becomes insufficient.
Frequent use of filter cleaning increases the service life of the filter.
To extend the service life, switch off the automatic filter cleaning only in exceptional cases, e.g., when vacuuming cement dust or when using a paper bag. Contamination on the outside of the filter does not affect its functionality. Manual cleaning of the filter by beating or blowing out is not only unnecessary, but can also damage the filter.
Note: The automatic filter cleaning is switched on at the factory.
Turning on/off the automatic filter cleaning is only possible when the tool is switched on.
- Turning off AFC
Press the AFC button (9).
The control lamp (35) goes out.
- Turning on AFC
Press the AFC button (9).
The control lamp (35) lights up green.
Maintenance and service
Maintenance and cleaning
Before carrying out any maintenance and cleaning work on the vacuum cleaner, adjusting it, changing accessories, or before storing it, pull the plug out of the socket. This precaution prevents the vacuum cleaner from being switched on unintentionally. To ensure efficient and safe operation, keep the vacuum cleaner and the ventilation slots clean. When cleaning the vacuum cleaner, wear a protective mask.
If replacement of the filter is required, to avoid danger, contact Bosch directly or an authorized Bosch service center for power tools. When carrying out maintenance work on the vacuum cleaner, it must be disassembled, cleaned, and maintenance work must be carried out without endangering the maintenance personnel or other persons. Before disassembly, the vacuum cleaner must be cleaned to prevent possible dangers. The room in which the vacuum cleaner is disassembled must be well ventilated. When carrying out maintenance work, wear personal protective equipment. After carrying out maintenance work, the area where maintenance was carried out must be cleaned. At least once a year, a trained specialist must carry out a technical inspection of the power tool for the quality of dust collection and the integrity of the filter, the tightness of the vacuum cleaner, and the proper functioning of the control device. In vacuum cleaners of class M, which are in a contaminated environment, the external surface and all parts of the power tool must be cleaned or treated with sealant. When carrying out maintenance and repair work, all contaminated parts that cannot be cleaned properly must be disposed of. Such parts must be disposed of in impermeable bags in accordance with the applicable regulations for the disposal of such waste.
Removal/replacement of the flat pleated filter (see Fig. I1-I2)
The suction power depends on the condition of the filter. Therefore, clean the filter regularly.
A damaged flat pleated filter (26) must be replaced immediately.
- Pull the latch (18) and open the filter cover (36). - Take the flat pleated filter (26) by the sides and remove it by pulling it upwards. - Dispose of the dust and dirt adhering to the flat pleated filter (26) at the edge of the filter cover (36).
050050 AImTaB,Ka3axCTaH
Cnyke6haJn. noUta: service.pt.ka@bosch.com
OΦηιαλήνβύν Βεδ-σατ: www.bosch.com, www.bosch- pt.com
Yttnn3aun
OcnyBwne Cb0n Cpok nbineoc, npHaJneXHocn u yNaKOBky cNeyet cBaTb Ha ekONOrHeckn UcctypeuPKyIaHIO OTxOIOB.

He bIb6paBbAte nbIeCoc B bItoBoM MycOp!
TolbkoДЯСТРан-ЧЕнов EC:
BcoOTBeTCTBnC EbponeckoHneKTHBOI
2012/19/EC 6o8pTa6oTaNHHbIX 3eNKeTpucecknx HneKtpOHnHbIX np6opax H ee ppe6pa3OBaHNem BHaONHOJIbHOe 3aKOHOATENbCTBO HenPnroDhIE PbIeNCocB Heo6xoJMo CO6HpTaOTeNBHO nCdaBaTb Ha 3KoNOrHueckn UcctyIO nepepa6Otky.
YkpaIHcbka
Bka3iBkn 3 Texhikn 6e3neKn dny BIDCMOKTyBauiB

IproountaTe Bci 3actepexhen I BkazIKH. HeBkoHAnHBAk3iBOK 3Texhikn 6e3neKn Ta IHCTpyKcij MOKe np3BecTn Do ypaKeHH eNEkTPnuHM CtpyMOM, noxekjTa/a60
Baxknx Cepno3HnTpaBM.
I6pe 36epiraTe Ha Maia6yTHc ci nonepeXeHHa BkazibKn.

Cen nnoocmok He po3paxoBAHnHa BnKOpNCtAHNdIbMn iocobamn 3 06mexeHmNphi3nUHMn,ceHCOPHMn a60po3ymOBHMn 3i6HoCTaMn a60HeNoCTaTHim DocBIDom i
Attention. Possible
incorrect use and unsafe handling of the tool.

Attempt to drink. Do not
must be done with the tool.
WARNINGS
WARNINGS
Never collect materials
containing asbestos. Asbestos
is a carcinogen.
Use the tool
only for its intended purpose.
Use of the tool, materials, and collection must be done in a safe manner. Carefully
read the instructions to reduce the risk of incorrect use of the tool and the risk of injury.
WARNINGS
The tool is intended for
36npanHH cyxHx MaTepiAIB, a npn BxHBaHHi BiNobiDnHex 3axoDIB -
TakoKdN BCMOKTyBaHH pIDH. NotpanHnH pINH B eNEKTpoiHCTpyMeHT nIDBnUyE pN3NK ypaXeHH eNEKTpNHMM CTpyMOM.
He BCMOKTyIe NnOcMOKOM rOpOci a6o Bu6yXoH6e3neuHi piHH, HapnPKAd, 6eH3HH, OINBy, cNHP, po3UnHHNK. He BCMOKTyTe rapaun nn Ta nH, 10 roptb. He BHKOPCTOByTe NnOCMOK y npmIueHNx, de icHy e He6e3neKa Bu6yxy. nI, npa 60 pJHH MoKyTB 3aropTncA 60 Bu6yxatn.
NONEPE- DKEHHA
ONONEPE- DXKEHH
BnKOpHCTOByIte po3eTky Iaue B 3a3aueehnx B IHcTpykuii 3 ekCnnyatauii. HeraiHO BMKHITb NIOCMOK npn BHTiKaHHi nIH a6o BOH i cnopoXhltb cMHiCTb.IHaKue
NIOCMOKMOXKEIOWKOJNTCA
YBATA!IINIOcMOKdo3BOJnEe36epiraTHnue B npmiiueHHx. YBAGA!PerynnpHO ouuaaTe daTuNK pIBH piHH Ta nepebipnTe ix Ha HauhBiCTb noKoJxHe. BOH MoKyTb HeaTINBO BnInHyTH Ha FyHKIOHaJIbHy 3daTHICTb. Akyo He MoXHa 3ano6iTH BHKOpHCTAHIO NHOCMOy BOIOrOMy cepeoBHI, BHKOpHCTOBYe npHcTpi3axnCHOROBHMKHeHH.BHKOpHCTAHNpyncPoTO 3axnCHOROBMMKHeHH3MeHwye pN3NK ypaKeHHeNEkTPuHNM CTpymOM. PiiEeHnne Hnncmokdo3aemneHOHnHexHM HnHOM MepeKi.Bpo3euiBnOobKyBaI Ma6yTN cnpaBHH 3axnCHn npoBj. KoXhoro pa3y nepei BHKOpncTahHm nepebipnTe nHnocMOK, Ka6eIb iWtencelb. He KOpNCTyTEcA nnocMOKOM y pa3i BnBLeHHaNOkOxKeHb. He po3KpHBaTe NINOcmok camocTiHo, HOro peMOHT Do3BOJIaTcBcRA BKNOHyBaTH IHe KBanifIKOBAHOMy nepcoHany iINHe 3 BHKOpncTahHM opriHaIbHX 3aunactHH. POnKoJKeHHn NINOcmok, uHyp a60 Wtencelb 36InbUye p3nK ypaKeHHaEneKtpuHMM CTpyMOM. He nepeixkkaite uepe3 shypt a He ctnckaite horo. He TaHrHt b 3a wHyp, uo6 BuTnHyTH wTeNCenb 3 po3eKn abo nepemictHTN HNOCMOK. NooKOJKeHH enektpokaeb 36inbWye He6e3neky ypaKeHH erektpnHm CTpyMOM. BntarHtBwtencb3po3eKn,neuHXBVKohyBaTH p0oTH 3TexHOrOobcnyroByBaHHaOouHeHH HanaTObyBaTHnnnOCMOK,MiHTNpnaJaA a6o nepuHX BiKaIactn nnocMOK.Li nonepeJkyBaHbHi
3axoJn 3TexHik6e3neKn 3MeHsuHTb pH3NK BnnapKOBOrO 3anyCKy NINOCMOka.
Cniikkyte 3a do6poBENTnnaic Ho pa6oOmy micui. Pemont NINOCMOKA DO3BOJETbcB HKOHyBaTH NIMe KBanifikOBaHOMy nepcohany i NIMe 3 BHKOPNCtAHNM opHirahbHNX 3anYactHH. LHM 3a6e3neuyTcB 36epexehn H NINOCMOKOM Horo 6e3neuHX BnactHBocTei.
ANONEPE- DKEHHA
HINOCMOICHTbWKIDHBN Dn3doPOB'nn. PpoedypcnCnoPOXHEHH TaTexHIOHORO
06cnyrobybHHBKNIOaHUNBnDAIeHHE MHOCTI pnnny, moXHa IPOBOHT NIIwe cHnAMn faxIBIB. Heo6xIDHe BIDNOBIDHE 3axNCHE CNOPAIXeHH. He ekCnpyatyte NINOCMOK 6e3 nobHOi fInbtpybanhoi cnCTemn. IHakUe BN HapaXaTmTe Ha He6e3neky CBOc 3dopOV'
Pepedeknnyataucie nepebipahte 63doraHHN CTAH BIDCMOKTyBaHBOHO WAnHa. He BiDcHyHTe npu bomy BIDCMOKTyBaHn HnAHR,IO6 nHHe mIR HEHaBMNCHE BnCNNaTHC.IHaKHe BmMOKeTe BnXHyTN IIIN. He cidaTe ha nnoocmok. LIM Bn moxete nooKoHn nnocmoK. 06epeKHO NOOBbTEc3 MEpeXHMM Hypom Ta BIDCMOKrYBaBnHM 1HaKWe Bm MoKTe Hapa3uTH iHux oc6 Ha He6e3neky. He ouhauite nnnocMK nid npmaHm ctpymem BOHN. NoppannHaBBOIN B KPNKUy nnoocMoka 36inbWye pN3NK ypaXeHH eNEkTPnuHm ctpymom.
CIMBOJH
The instructions and warnings given in this manual must be followed when using the vacuum cleaner. Follow these instructions and values. Failure to follow the instructions given in this manual may result in incorrect and unsafe use of the vacuum cleaner.
SYMBOLS AND THEIR MEANINGS


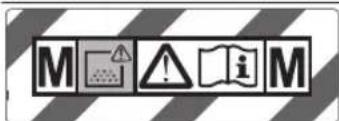
WARNING! Read all safety warnings and instructions. Failure to follow the safety instructions and instructions may result in electric shock, fire and/or serious injury.
This vacuum cleaner is intended for dry vacuuming of carpets and hard floors with a dust class limit value of ≥0.1 mg/m³ according to IEC/EN 60335-2-69.
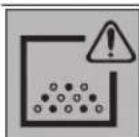
WARNING! The vacuum cleaner contains dust hazardous to health. Emptying and maintenance, including changing the dust bag, may only be carried out by trained specialists. Appropriate protective equipment is required. Do not operate the vacuum cleaner without the complete filter system. Otherwise you endanger your health.
172|Ukrainian
SYMBOLS AND THEIR MEANINGS
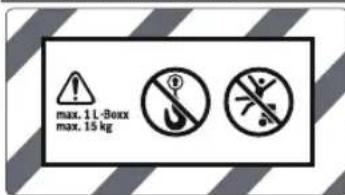
Do not install more than one L-box.

The L-box with a full dust bag must not exceed 15 kg.

Do not lift the vacuum cleaner by the handle, e.g., for
transport. Vacuuming with the handle attachment. There is a risk of injury and damage.
Do not stand or sit on the vacuum cleaner, and do not use it as a step. Otherwise the vacuum cleaner may tip over and be damaged. There is a risk of injury.
Automatic start and stop
When vacuuming with power tools, the vacuum cleaner automatically switches on with a set delay and switches off again
Switching off
Use of the appliance
Use of the appliance, accessories
15 nozzle for vacuuming carpets with a diameter of 15 mm
22 nozzle for vacuuming carpets with a diameter of 22 mm
35 nozzle for vacuuming carpets with a diameter of 35 mm
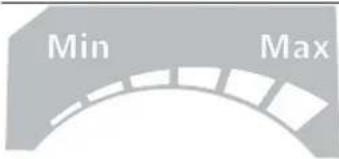
Min/Max adjustment of suction power
Maximum suction power when used in conditions of heavy soiling; reduced suction power when used in conditions of light soiling, e.g., when adjusting the suction power between the connected electric tool and the workpiece surface (e.g., during sanding)
max. 2200W min. 100W
Data on the maximum permissible total connected power of the connected electric tool (depending on the country)
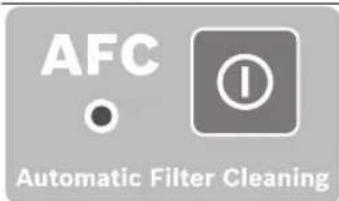
AFC Automatic Filter Cleaning (AFC = Automatic Filter Cleaning)
Mounting of nozzles and tubes
Push the nozzle (23) onto the suction hose (24) until the button (33) on the suction hose clicks into place. Then push the required accessory for suction (floor nozzle, crevice nozzle, suction brush) onto the nozzle (23). To release, press the button (33) inward and pull the elements apart.
Inserting/removing the filter bag for dry vacuuming (see fig. D1-D2)
For dry vacuuming of materials that belong to dust class M, it is mandatory to insert the filter bag (25) or a paper bag.
Materials with an exposure limit value of ≥1 mg/m³ (according to dust class L) and which can be vacuumed directly into the container.
WARNING: Use of the dust filter bag is mandatory, and it is recommended to use the dust filter bag to activate the automatic filter cleaning (AFC) (see "Automatic filter cleaning (AFC)" on page 177).
BEFORE USE
The vacuum cleaner contains health hazards. Please read the storage and maintenance
instructions carefully before using the appliance. Improper use may cause injury. Do not operate the vacuum cleaner without the complete filter system. Otherwise, you may endanger your own health.
Installing the dust bag
-Open the latches (13) and remove the vacuum cleaner lid (12). -Place the dust bag (25) with the inlet opening facing the front of the appliance (1). -Press the inlet opening onto the suction pipe until it locks into the suction channel. -Make sure that the dust bag (25) is completely attached to the inner walls of the container (1). -Fold the edge of the dust bag (25) over the rim of the container (1). -Place the vacuum cleaner lid (12) on and close the latches (13).
Attention when closing the dust bag
Open the latches (13) and remove the vacuum cleaner lid (12). -Remove the full dust bag (25) from the suction channel by pulling the bag backwards. -Dispose of the dust bag (25) with the container (1), but do not crush the bag. Be careful not to damage the dust bag with the suction opening or other sharp objects. -Remove the sealing clip from the holder and close the dust bag. Then insert the dust bag (25) with the inlet opening using the sealing clip removed from the holder.
Installing the motor protection filter (accessory)
-Open the latches (13) and remove the vacuum cleaner lid (12). -Remove the full dust bag from the suction channel by pulling the bag backwards. Close the opening of the bag by placing the lid on. Remove the closed bag from the container (1). -Insert a new bag into the suction channel of the vacuum cleaner. Make sure that the bag is completely attached to the inner wall of the container (1). -Place the vacuum cleaner lid (12) on and close the latches (13).
Installing the rubber gasket (for wet vacuuming) (see Fig. E)
Note: For wet vacuuming, the filter bag must be removed.
-Using the accessory tool, remove the insert plate (29) with the help of the nozzle (30). -Insert the rubber gasket (28) into the nozzle (30).
Note: The structured rubber gasket must be facing upwards.
Installing the castors (see Fig. F)
Install the L-Boxx case on the hook (11). For transportation, the vacuum cleaner and/or power tool can be stored in the L-Boxx case when the device is kept in the case.
Do not carry the vacuum cleaner with the L-Boxx case installed. The L-Boxx case handle is not designed for carrying the vacuum cleaner. There is a risk of injury and damage.
Operation
Before inserting the plug into the socket, before performing maintenance or cleaning, before adjusting the nozzle, or before removing the nozzle, pull the plug out of the socket. These safety precautions reduce the risk of accidental starting of the nozzle.
Starting operation
Pay attention to the mains voltage! The voltage of the power source must match the data on the rating plate of the vacuum cleaner. Devices designed for 230 V can also operate on 220 V. Please observe the regulations concerning handling of electrical devices in your country.
The vacuum cleaner can be used for vacuuming the following materials:
- Fine dust with a dust class of ≥0.1 mg/m³
Do not work with the vacuum cleaner in rooms where there is a risk of explosion.
To achieve maximum vacuuming power, the vacuuming hose (24) must be completely unwound from the reel.
Dry vacuuming
Vacuuming with the hose
Install the regulator nozzle. The required air flow is set with the regulator.
- To switch on the vacuum cleaner, set the rotary switch (7) to the symbol "Vacuuming". - To switch off the vacuum cleaner, set the rotary switch (7) to the symbol "Off".
The vacuum cleaner is equipped with an air flow controller. The air flow controller is set to "Vacuuming" position at the factory to 20 m/s regardless of the setting.
0
176|Ukrainian
Set the air flow regulator (6).
If the extracted air is contaminated, e.g., when vacuuming up dust, sand, or plaster debris, the filter may become clogged. In this case, a warning signal will sound. In such a case, turn off the vacuum and check the filter as described in the "Troubleshooting" section.
Vacuuming with power tools (see Fig. G)
When using the appliance, ensure sufficient air exchange (L) if the exhaust air is directed back into the room. Observe the relevant regulations in your country.
The vacuum has an integrated socket with a protective contact (5). You can connect an external power tool to it. Observe the maximum permissible power consumption of the connected power tool. To ensure sufficient transport of dust from the vacuuming location, the air flow rate for the connected power tool must not be less than the minimum value.
| ДIAMETР ШANTRA HANASTOBANIЗАСЕСHA notoky nobITPA | |
| 35 MM 57,9 M | 3/rog. |
| 22 MM 41,2 M | 3/rog. |
| 15 MM 12,7 M | 3/rog. |
Set the air flow regulator (6) to the required value. Use a vacuum hose with a nominal diameter (22) (see "Connecting the vacuum hose", page 174). Insert the vacuum hose (22) into the outlet of the power tool.
When working with power tools that have a low air flow rate (e.g., orbital sanders, polishing machines), it is necessary to open the air flow regulator (34) on the vacuum hose (22). Under such conditions, automatic filter cleaning may not work properly.
To do this, turn the ring on the air flow regulator (34) until the opening is at its maximum.
-1063aiaHTNABOMaTHHeBMKaHH/
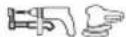
When the vacuum is switched on, set the mode switch (7) to the "Auto" symbol. In this operating mode, the air flow is controlled electronically according to the setting on the air flow regulator (6). With the correct setting, sufficient dust transport is ensured.
-106yBIMKHYTNIOCMOK,yBIMKHTb nIKIOUeHNO pO3eTKN(5)eNEKTPOiHCTpyMeH.BICMOKTyBaABTOMaTHNO NOuHHe npaIOBaTH.
-BIMKHTbeeneKtpoiHCTpymeHT,06BIDCMOKTyBaHHnnpnnnnnoocb.
The functions of the automatic filter cleaning are ensured during operation. The cleaning cycle lasts about 15 seconds. During this time, the vacuum continues to operate normally.
To switch on the vacuum cleaner, move the mode switch (7) to the symbol "ON".

If you hear a warning sound, the filter needs to be checked as described in the section "Troubleshooting".
Vacuuming
Do not vacuum with the vacuum cleaner or with accessories that are flammable or explosive, such as gasoline, oil, alcohol, solvents. Do not vacuum hot ashes or glowing embers. Do not use the vacuum cleaner in places where there is a risk of explosion. Dust or liquids may ignite or explode. The vacuum cleaner must not be used as a water pump. The vacuum cleaner is intended for vacuuming dry dust.
Note: The filter is suitable for dry vacuuming only.
Operation with wet vacuuming
If necessary, insert the filter bag (25) or the foam filter.
Note: To vacuum liquids, use the wet filter (accessory) to prevent damage to the motor.
Insert the crevice nozzle (28) into the upholstery nozzle (30) (see "Installing the crevice nozzle (wet vacuuming)" (see Fig. E), page 175). - Activate the automatic filter cleaning (AFC) (see "Automatic filter cleaning" (see Fig. H), page 177).
Assembling
To switch on the vacuum cleaner, move the mode switch (7) to the symbol "Vacuuming". Vacuuming begins immediately. The maximum suction power is reached. Move the mode switch (7) to the symbol "ON". Note: The suction power is not adjustable (e.g., for carpets, hard floors, or upholstery). The vacuum cleaner will not turn on if the container is full. It is necessary to check the water level regularly and empty the container. If a warning sound is heard during wet vacuuming, it does not indicate a decrease in performance. No action is required to eliminate the malfunction. - To switch off the vacuum cleaner, move the mode switch (7) to the symbol "OFF".
For transporting the vacuum cleaner, screw the handle (2) onto the suction tube (3). - Empty the container (1).
After vacuuming, to prevent the formation of odors:
- Remove the filter cover (26) and let it dry thoroughly. - Remove the filter (12), open the filter cover (36) and let it dry thoroughly.
Automatic filter cleaning (see Fig. H)
The automatic filter cleaning (AFC = Automatic Filter Cleaning) of the filter (26) is performed every 15 seconds. The absence of air supply (pulsation) is checked.
The filter function requires maximum performance when the suction power is not sufficient.
With regular use of the filter cleaning, the filter's service life is extended.
To achieve the optimal service life of the filter, we recommend automatic filter cleaning in special cases, e.g., when suctioning dust or when using powder filters.
A clogged filter reduces the filter's performance. Cleaning the filter by tapping or blowing out is not only unnecessary but can also damage the filter.
Note: The automatic filter cleaning is activated at the factory.
The automatic filter cleaning can be switched on even when the instrument is switched on.
- Switching on AFC
Press the AFC button (9).
The control lamp (35) goes out.
- Switching off AFC
Press the AFC button (9).
The control lamp (35) lights up green.
Maintenance and service
Maintenance and cleaning
Before starting any work on technical maintenance, cleaning, or replacing the filter, or before switching it on, take precautionary measures to reduce the risk of accidental start-up. For safe operation, keep ventilation openings clean. During maintenance of the vacuum cleaner, remove the dust bag.
If you need to replace cables, this should be done by Bosch or in a Bosch service center for power tools to avoid hazards. During technical maintenance, the user of the vacuum cleaner must disconnect it, clean it, and perform possible technical maintenance work without endangering the maintenance personnel or other persons. Before dismantling the vacuum cleaner, read the instructions to prevent possible hazards. The room in which the vacuum cleaner is being dismantled must be well ventilated. During technical maintenance, wear personal protective equipment. After technical maintenance, clean the area where the maintenance was performed.
If necessary, the manufacturer or their authorized representative must carry out an inspection of the device, e.g., checking the filter, the cleanliness of the vacuum cleaner, and the functionality of the control device.
In vacuum cleaners of class M, which are marked with a symbol for dusty environments, it is necessary to clean the outer surface and all parts of the power tool or seal them hermetically. During technical maintenance and repair work, all dusty parts that cannot be completely cleaned must be disposed of. Such parts must be disposed of in sealed bags in accordance with the regulations for the disposal of such waste.
Removal/replacement of the flat pleated filter (Fig. L1-12)
The frequency of maintenance depends on the condition of the filter. Check the filter regularly.
Replace the damaged flat pleated filter (26).
- Pull the latch (18) and open the filter cover (36). - Remove the flat pleated filter (26) by the handle, pulling it out. - Carefully check the filter for damage before removing the flat pleated filter (26) from the filter cover (36).
Flat pleated filters made of PES (polyester) and PTFE (polytetrafluoroethylene) can be washed under running water.
Insert the new or cleaned flat pleated filter (26), ensuring it is correctly seated. - Close the filter cover (36) (it should click into place).
Cleaning
- Wipe the container (1) with a damp, non-abrasive cloth and let it dry.
Cleaning the tank (Fig. J)
Clean the tank (37) with a damp cloth.
- Open the locks (13) and remove the pump cover (12). - The filler level (37) should be soft. - Install the pump cover (12) and close the locks (13).
Storage and transportation (see fig. I, K)
- Wind the cord around the cord holder (17). Insert the accessories intended for dry vacuuming: the suction hoses (31) into the hose (19), the crevice nozzle (27) into the hose (20), and the upholstery nozzle (30) into the hose (21). - Open the elastic straps of the dry vacuum cleaner (4) and place the dry vacuum cleaner (24) around the dry vacuum cleaner hook (4). Insert the elastic strap into place.
- Install the case L-Boxx on the holder (11). - When transporting, the vacuum cleaner must be empty or the collected dirt must be removed so as not to tear the filter. Carry the vacuum cleaner by the handle (10). - For transport, wind the cord (2) around the cord holder (3). - Keep the vacuum cleaner away from rain and moisture. Store it indoors. - To fix the telescopic tube (16), lower the telescopic tube (15) to the base.
Troubleshooting
In case of malfunction (e.g., clogged filter), the vacuum cleaner must be turned off immediately. Before turning it on again, the malfunction must be eliminated.
Problem
| BvdCMOKTyBaJbHa Tpy6iHa He 3aIyckaεTbCra. | -ПepebiTe ShHyp JxHbHeHnHa, StTencelb, 3anobixHnK, pozetkU i daTchNK pIBHn 3aIPOBHIOBAHHa (37). |
| ПepeMnKau peXmMivpo60tn (7) BCTaHOBLeHnHa cIbOMoN«ABTomATnKa nycuTa 3aynHKn». -ВсТанOBiTbpepeMnKaupeXmMivpo60tn (7) Ha cIMBOl «PexHm BCMOKTuBaHHa abo yBImKHtB niKlnOueHnDo pozetkU (5) eNeKtpoiHCTpyment. | |
| BvdCMOKTyBaJbHa Tpy6iHa BIMnKAcTbCra. | -Спорожнltь emHicTb (1). |
| Пися спорожненя emHocTi BvdCMOKTyBaJbHa Tpy6iHa He BIMnKaεTbCra. | -ВIMKHltb ПИLOCMOKЗауКaite 5 cekyHd, uepe3 5 cekyHd 3HOB yBIMKHltb Horo. |
| -ОчиртБдатчNKPIBHAЗANOBHIOBAHHa (37), a TAKOJ Pioctip MIX dAtchKamn PIBHAЗANOBHIOBAHHa (37) 3a DOonomOTOO uizITKN. | |
| ЗMuHsuEыбЯnotyxHicTb BcMOKTyBaHHa. | -ВиДалITb 3azmiiHHeH3i BcMOKtyBaJIbHoI Hacadkn, BcMOKtyBaJIbHoI Tpy6n (31), BvdCMOKTyBaJIbHOrO shaHra (24)abo pIaCKORO cKnaIauctorO φiNbTpA (26). -ЗamHltb pAkET ДЯ CMITTЯ (25)abo miIouk DЯ pIlyny. |
| -ПразВиьНВСТанOBiTb KpIshKу φiNbTpA (36). -ПразВиьНВСТанOBiTb KpIshKу пINOCMOKA (12) i 3akprHte 3AMKN (13). -ЗamHltb пIaACKIck sKnaIauctIy φiNbTp (26). | |
| Пid acв ВdCMOKTyBaHHa 3 ПИLOCMOKa pOZIIaETbCra ПИ | -ПepeBiTe пРавиьHicTb BcTAHOBLeHnHa pIaCKORO sKnaIauctorO φiNbTpA (26). -ЗamHltb пIaCKIck sKnaIauctIy φiNbTp (26). |
| АВТмATиЧЕ ВIMКнЕнн (ВОлore ВvdCMOKTyBaHHa) He cnpaCbOBye. | -ОчиртБдатчNKPIBHAЗANOBHIOBAHHa (37), a TAKOJ Pioctip MIX dAtchKamn PIBHAЗANOBHIOBAHHa (37) 3a DOonomOTOO uizITKN. YВИнаду рIDIN, Уо He npOBODaTb eNeKTPriKу,aboПри уТВОЕHи pIlyn ABTomATиЧe ВIMNKAHHЯ He npaIoo. -ПостIHNo pepeBipRЯte pIbeH b 3aONOBHHeHn. |
| ЛунacnonepedjxvBaJIbHn CnHnAn. BcTahOBHeHa 3aHaITo Mala NotyxHicTb BCMOKTyBaHHa. | |
| -ВсТанOBiTb peryIaTOp notyxHocTi BcMOKTyBaHHa (8)Ha bIbSe 3NaUeHnHa. | |
| ВсТанOBleHn He npavBILhni DiAmTp UlaHra. | |
| -ВсТанOBiTb peryIaTOp notoxy nobITpy (6)Ha npavBILhni DiAmTp UlaHra. | |
| ВvdCMOKTyBaJIbHn ShaHr (24)ЗabtNi abO nepeRhytNi. -YcHbTe zacmiueHnAbOpeRTHn. | |
| ПakET不断增强/МIwok不断增强/ПИу nobHn. | |
Problem elimination
| - 3amɪhɪt b naket dlya cmiɪtla (25) abo miːwok dlya pniу. | |
| Плackн sckla'da'th φiNbTp (26) 3abpydneHn. | |
| - OvnctiB pIaackn ckla'da'th φiNbTp abo 3a notpebni 3amɪhɪt b noRo. | |
| Чepeз пд'еданн eilektroiHCTpymert npoxodntb he doctaTHi noTik nobitpy. | |
| - BiDkrHite OTbip dlya nobitpy i3 3aflnyukoIO (34) ha BiDCMOKtyBaJIbHOMy adanterpi (22): nobertai Te kInbSe Ha BiDCMOKtyBaJIbHOMy adanterpi, noKn OTbopi dlya nobitpy i3 3aflnyukoIO He 6yde nobHicTb BiDkrHtn. | |
| -Якso e: BiDkrHite OTbip dlya nobitpy i3 3aflnyukoIO Ha eilektroiHCTpymerti. | |
| 36iB pOBoTi KoHTpOJIHOi eilektroHnIKi. | |
| - 3BepHITbcB a ABTopH3OBAHy cepBICHy MaJcTePHIO Bosch. | |
| АВТOMATИСЕОУДСЕСЕСЕСЕСЕСЕСЕСЕСЕСЕСЕСSEСЕСЕСSEСSEСSEСSEСSEСSEСSEСSEСSEСSEСSEСSEСSEСSEСSEСSEСSEСSEСSEСSEСSEСSEСSEСSEСSEСSEСSEСSEСSEСSEСSEСSEСSEСSEСSEСSEСSEСSEСSEСSEСSEСSEСSEСSEСSEСSEСSEСSEСSEСSEСSSECSSECSSECSSECSSECSSECSSECSSECSSECSSECSSECSSECSSECSSECSSECSSECSSECSSECSSECSSECSSECSSECSSECSSECSSECSSECSSECSSECSSECSSECSSECSSECSSECSSECSSECSSECSSECSSECSSECSSECSSECSSECSSECSSECSSECSSECSSECSSECSSECSSECSSECSECSSECSSECSSECSSECSSECSSECSSECSSECSSECSSECSSECSSECSSECSSECSSECSSECSSECSSECSSECSSECSSECSSECSSECSSECSSECSSECSSECSSECSSECSSECSSECSSECSSECSSECSSECSSECSSECSSECSSECSSECSSECSSECSSECSSECSSECSSECSSECSSECSSEcsCSSECSSECSSECSSECSSECSSECSSECSSECSSECSSECSSECSSECSSECSSECSSECSSECSSECSSECSSECSSECSSECSSECSSECSSECSSECSSECSSECSSECSSECSSECSSECSSECSSECSSECSSECSSECSSECSSECSSECSSECSSECSSECSSECSSECSSECSSECSSECSSECSSECSseCSSECSSECSSECSSECSSECSSECSSECSSECSSECSSECSSECSSECSSECSSECSSECSSECSSECSSECSSECSSECSSECSSECSSECSSECSSECSSECSSECSSECSSECSSECSSECSSECSSECSSECSSECSSECSSECSSECSSECSSECSSECSSECSSECSSECSSECSSECSSECSSECSSECSSELCSSECSSECSSECSSECSSECSSECSSECSSECSSECSSECSSECSSECSSECSSECSSECSSECSSECSSECSSECSSECSSECSSECSSECSSECSSECSSECSSECSSECSSECSSECSSECSSECSSECSSECSSECSSECSSECSSECSSECSSECSSECSSECSSECSSECSSECSSECSSECSSECSSECS SECSSECSSECSSECSSECSSECSSECSSECSSECSSECSSECSSECSSECSSECSSECSSECSSECSSECSSECSSECSSECSSECSSECSSECSSECSSECSSECSSECSSECSSECSSECSSECSSECSSECSSECSSECSSECSSECSSECSSECSSECSSECSSECSSECSSECSSECSSECSSECSSECSSECSSSECSSECSSECSSECSSECSSECSSECSSECSSECSSECSSECSSECSSECSSECSSECSSECSSECSSECSSECSSECSSECSSECSSECSSECSSECSSECSSECSSECSSECSSECSSECSSECSSECSSECSSECSSECSSECSSECSSECSSECSSECSSECSSECSSECSSECSSECSSECSSECSSECSseCSCSECSSECSSECSSECSSECSSECSSECSSECSSECSSECSSECSSECSSECSSECSSECSSECSSECSSECSSECSSECSSECSSECSSECSSECSSECSSECSSECSSECSSECSSECSSECSSECSSECSSECSSECSSECSSECSSECSSECSSECSSECSSECSSECSSECSSECSSECSSECSSECSSECSSECISSCSECSSECSSECSSECSSECSSECSSECSSECSSECSSECSSECSSECSSECSSECSSECSSECSSECSSECSSECSSECSSECSSECSSECSSECSSECSSECSSECSSECSSECSSECSSECSSECSSECSSECSSECSSECSSECSSECSSECSSECSSECSSECSSECSSECSSECSSECSSECSSECSSECSseCISSCSECSSECSSECSSECSSECSSECSSECSSECSSECSSECSSECSSECSSECSSECSSECSSECSSECSSECSSECSSECSSECSSECSSECSSECSSECSSECSSECSSECSSECSSECSSECSSECSSECSSECSSECSSECSSECSSECSSECSSECSSECSSECSSECSSECSSECSSECSSECSSECSseCISSCISSCSECSSECSSECSSECSSECSSECSSECSSECSSECSSECSSECSSECSSECSSECSSECSSECSSECSSECSSECSSECSSECSSECSSECSSECSSECSSECSSECSSECSSECSSECSSECSSECSSECSSECSSECSSECSSECSSECSSECSSECSSECSSECSSECSSECSSECSSECSSECSSECSSELCSCECSSECSSECSSECSSECSSECSSECSSECSSECSSECSSECSSECSSECSSECSSECSSECSSECSSECSSECSSECSSECSSECSSECSSECSSECSSECSSECSSECSSECSSECSSECSSECSSECSSECSSECSSECSSECSSECSSECSSECSSECSSECSSECSSECSSECSSECSSECSSECSSECSSECS |
Accessories
The filter must be cleaned regularly to maintain optimal performance.
Before cleaning, turn off the vacuum cleaner and unplug it from the power outlet. Do not use harsh chemicals that may cause damage. Clean the filter with a soft brush or by tapping it gently. If the filter is damaged, replace it with a new one.
The filter should be cleaned when it is visibly dirty or when suction power decreases. To clean the filter, tap it gently or use a soft brush. Do not wash the filter with water. If the filter is very dirty, it may be washed with water, but let it dry completely before reinstalling. Do not use the vacuum cleaner without the filter. If the filter is damaged, replace it with a new one. The filter should be replaced at least once a year. If the vacuum cleaner is used frequently, replace the filter more often.
Replacement
The filter can be replaced by the user. The replacement filter and other accessories are available from your dealer. The dealer will help you choose the correct replacement filter.
Replacement of the filter


DANGER! Read the safety instructions and all warnings carefully. Failure to follow the safety instructions and warnings may result in electric shock, fire, and/or serious injury.
This appliance is intended for commercial use, for example in hotels, schools, hospitals, factories, shops, offices, and rental businesses. It is not intended for use by young children or infirm persons without supervision.
DANGER! Do not use the appliance to vacuum up water. Do not use it to vacuum up flammable or combustible liquids, such as gasoline, or use it in areas where such liquids may be present. Do not use the appliance near flammable gases or vapors. Failure to follow these warnings could result in fire or explosion.
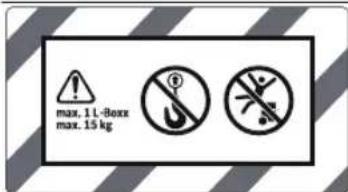

Only use the L-Boxx.
max. 1 L-Boxx max. 15 kg
The L-Boxx and its contents must not weigh more than 15 kg.
182|Kazakh
Ventilation and its maintenance

For cleaning, use a dry cloth.
The appliance must be cleaned regularly. There is a risk of fire and electric shock.

Do not open, disassemble, or repair the appliance.
The appliance may only be cleaned or maintained by qualified personnel. There is a risk of fire.
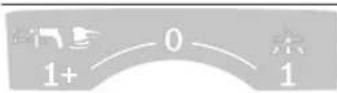

Automatic shut-off
The appliance automatically switches off when the dust bag is full or when the air flow is blocked. The indicator lamp lights up.

Cleaning

Copy
KHHanraHwahdbicopy
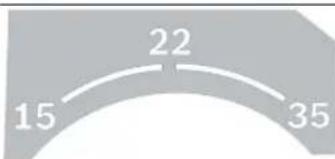
15
15 mm main diameter with a flange
22
22 mm main diameter with a flange
35
35 mm main diameter with a flange
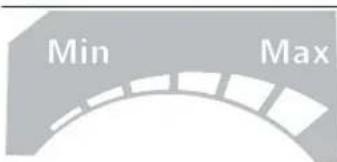
Min/Max
Copy for the built-in extractor:
max. 2200 W min. 100 W
For the built-in extractor, the copy is intended for the maximum and minimum copy values.
For the built-in extractor, the copy is intended for the maximum and minimum copy values, and the copy is adjusted between the electrical connection and the control panel (e.g., for the exhaust air mode).
The copy is adjusted according to the permissible electrical connection values (see the table).


Automatic Filter Cleaning
Cy3rihi aBTOMaTbI Tpyde Ta3anay (AFC = Automatic Filter Cleaning)
Θhim KxHe Kyat CnnaTamaCbI
MaKcaTbI 6oYbIHwa KOJaHy
KypbIbI afaW KOHKnbl KHe KaHbAaBnIH Kpyfak WAnbl, KaHbAaBnIH CybIKbTbKTapDbl XHe cy MeH aya KocbHbCbl H any, copy, TaBImaNay XHe axbipatyfa apHaHan. 1haCOPbTa WAnHH naJa 6Onyb TeKcepin, on M Waan KnaCbHa caikec KeenDi. On KcinopbHdapda, MbCaNbl, We6epxana, eHepKcinte XHe 3aybTTapDa naJaAnHyFa KoBnAaBH Xorapbl TanaTAPra caiKeenDi.
IEC/EN60335-2-6960bHwaMKnacbHaftb waHcOpfblTapIbTeKweKTIKmHi≥0,1MR/M6oNFaH deHCaybIKKa 3HHbIwHbI copy yuHn naaHaFy 6oNabl.
山hCopfbiTbTEK6apblkKb3MeTepdiToBb6afan, WkTeyciOpbHda anaTbH 60nFaHa HeMece Tnicti HcKayblkTapblaHancoH naDaHaYekeK.
Kepceinre H Kypamdb6nwekTeP
Kpcetinre Hcpamac 6bniktepiH hemipnepi cpeTepi 6ap bettepneri wahcopfbtih CnataTamacbHa Heriaenren.
(1) KoHTeHep (2) ⅢaHcopFbIⅢxJaNFaFbIbHa aPhaNFaH TbIfBbH (3) ⅢnHaH KBicBblwbl (4) CopfbwwnahrYCTafblwbl (5) ΘneKtp KpypaNbHbH p03eTkacbl (6) Aya afbhhi peTteri (7) KymbcpeKmdeepin aybctbpbn-KCKbi (8) Copy kyatbH peTterii (9) AFC tyMeci (10) TyTkα (11) L-Boxn natpohbl (12) WaHcopFbIbHTbIH KofapFbI 6eNiri (13)WahcopfbwXofapfb6enirihKynnnb (14) Kyripridhenrenek (15) Baskapy dHreineriHt texeriwi (16) Baçkapy dəhreeri (17) Ka6enb yCtAfIbIbI
(18)Cy3ri KaTAMacBihBn nactHaCbi (19) Copy Ky6bipnapbHa apHaNFaH yTaFbIi (20) Tecik KOHdbipMa/KHcaiFaH KOHdbipMaFA apHaHaH yCTaFbIu (21) Edehik canTamaFa aHaHaFa YCTaFbH (22) Copy aanrepi (23) KncaiFaH KOHdbipMa (24) Copfbii winaH (25)KokbcKa6bl (26)KannakKaTnapnbCy3ri (19C) (27) Tecik konhdbipma (28) Pe3eHKe KneK (29) KbyIbnwakTbIX konJIap (30) EeHnik canTama (31) Copy ky6bipb (32)UHaHcTaftbIbIbIHnNaTpoHbI (33) BaTbIpa (34) KocbIMwa copy caHb/nybl (35) BaKbInay JapblKnIOdbI (36) Cy3rkiKanTamacbi (37) Tontbipy deHreinHn DaTukkTepi
TexHnKanbIK mAnimetTep
| ылгалды/кypрахшансорfbи Gas 35 M AFC | ||
| Өнím Немірì | 3 601 JC3 1.. 3 601 JC3 170 | |
| ЖуMbіс керneyі B 220-240 110 | ||
| HOMINAДы Тутbingілaitын КуатВt 1200 1000 | ||
| Жиілік Гц 50-60 50-60 | ||
| Контейнера Көлөмі (бpyтTO) п 35 35 | ||
| НетTO салмâь (сүүлүй) п 19 19 | ||
| Шан XXИнAFБИ 斯 KAPIТьн Kөлөмі п 19 19 | ||
| МамС. ТЕМЕнгі КысьМ^A^I | ||
| - Шансорfbи rПа 230 211 | ||
| - Турбин a rПа 254 242 | ||
| МамС. Көлөмі aftbH^A^I | ||
| - Шансорfbи | n/c | 36 |
| M³/c | 0,036 | |
| - Турбинa | n/c | 74 |
| M³/c | 0,074 | |
| МамС. copy Куаты | Вт 1380 1150 | |
| Катnapсы cyзгі audаны | M² | 0,615 |
| Шан Клась | M | |
| Салмâь EPTA-Procedure 01:2014 саï | КГ | 12,4 |
| Корphaльс Клась | ±/I | |
184|Ka3aK
Kymbic KepHeyi MaKcHMaIdbI KyaT MHHMaIdbI KyaT
230B2200Br100Br
Connect the device to a power outlet with a grounding contact. Before use, check the device for damage. The device must be grounded.
Do not use the device if it is damaged.
The device complies with the requirements of EN60335-2-69 and the essential requirements of the EU Directives.
The noise level at the workplace can exceed 70 dB(A). The measurement uncertainty is 3 dB. The actual noise level can be up to 80 dB(A).
Keep your hands away from the rotating parts!
The vibration level (vector sum) and the measurement uncertainty according to EN 60335-2-69: a<2.5 m/s², K=1.5 m/s².
Mounting
Disconnect the plug from the power outlet before any work on the device.
Installing the suction hose (see figure A)
Insert the suction hose (24) into the connection piece (32) until it engages.
Installing the suction hose (see figure B)
Insert the suction hose (24) into the hose connector (3) and secure it with the locking screw.
Note: If the suction hose is damaged or worn, there is a risk of electric shock. Replace it immediately with a new hose.
Only use Bosch anti-static suction hoses (accessories) for vacuuming dust or fine materials.
Installing the suction hose (see figure C)
Remove the copy protection (24) by copying the key characters (according to the alternative (22), written confirmation (23)) to the container.
Copy alternative
-Copy alternative (22) copy the number (24) copy the number of the container (33) to ensure the safety of the container. -The container number (33) must be written clearly.
Install the bypass devices
-Written confirmation (23) copy the number (24) copy the number of the container (33) to ensure the safety of the container. - Then install the required copy protection (electronic confirmation, test confirmation, copy seal, etc.) into the written confirmation (23). -The container number (33) must be written clearly.
Install/remove the cable or chain lock (bypass copy) (see D1-D2)
The bypass copy is installed on the cable (25) or chain lock.
If the container is loaded with a load of 1 ton or more (L or class B), the container must be secured.
Note: The container must be placed on a flat surface (AFC) when the cable is being pulled, and the container must be placed on a flat surface when the cable is being pulled (see, Note: The container must be placed on a flat surface (see Fig. 187).
EXPERT
The expert must be present when the container is opened.
When opening the container, the container must be placed on a flat surface. The container must be secured against tipping. The expert must be present.
The container must not be opened. The expert must be present when the container is opened.
Install the cable
-Install the hooks (13) on the lifting eyes (12). -Insert the cable (25) into the container (1) through the opening. The cable must be pulled through the opening. The cable (25) must be secured with the hooks (13). -Install the lifting eyes (12) on the hooks (13).
-The culture (13) is placed in the filter (12) with the lid closed. -Only the switch (25) is turned on. -The switch (25) is turned on without opening the container (1). The switch is placed on the plane and no other actions are performed. -The container is closed with the lid. After that, the switch (25) is turned off. Then the switch (25) is turned on again with the container lid closed.
Switch setting/position (as needed)
-The culture (13) is placed in the filter (12) with the lid closed. -Only the switch is turned on, not the fan. The switch is turned on. The switch is turned on with the container (1) closed. -The switch and the fan are turned on together. The switch is turned on only when the container (1) is closed. -The filter (12) is placed with the culture (13) inside.
Reserve for the reactor (optional) (see section E)
Note: For the reactor to operate, the following items (list) are required for the optional kit. -The kit (29) is placed in the reactor and the sensor (30) is installed. -The reserve for the reactor (28) is connected to the sensor (30).
Note: The reserve for the reactor must be placed vertically.
L-Box weep hole (see section F)
-The L-Box is installed (11).
The filter must be cleaned and replaced. For cleaning and/or replacing the filter, the L-Box weep hole is used.
The L-Box is removed from the filter. The L-Box is removed for cleaning. There is a risk of damage.
Disposal
The filter, the switch, the container, and the filter must be disposed of properly. This disposal method is not allowed.
Disposal instructions
Attention! The filter must be disposed of properly. The filter must be disposed of in accordance with local regulations. The filter must be disposed of in accordance with the manufacturer's instructions.
WahcnpfblttemeHderi matepnaIapdbcopy yuH naJanahyra 60nabI:
-1JIeKtiK mHi≥0,1Mr/M 6oNfah WaH
UaHcOpfbltbeewkaanXapbnyKayni6apxepnepne naIanaHaB3.
OHTaHbI copy KyaTbIH KaTAMacbI3 ety Wih CopFbIw WnaHriHI (24) wHcOpFbIx XofapFb6eirHeH (12) TOnbIK aJIbHI3.
KypraK copy
XHHaHFaH 1aHaDbI copy
Aya aFbHbH peTteriUti (6) naDanaHaBInFaH UNaHr DnAmetpiHe caI petTeH3.
-ⅢaHcOpfblWtblickeKocy yuiH, KymbicpeKHMdepiH aybIcTbpBn-KCKblWtbl(7)"Copy"6enricie XblXblTbH3. -ⅢaHcOpfblWtbl eUipy yuH,Kymblc peKmDepiaybIcTbpIN-KoCKblwTb1 (7) "Ouipy"BenricHeXbIKNbITbHb3.
Wahcnpfbiw aya afbHbH 6aKbIay KpaIbIme KaabkTaNFaH. Aya afbHbH 6aKbIay KpaIbI "Copy"Kymblc peKmHHe 20 m/c WAMacbHa peTtenRe, 6yI aya afbHbH peteriTuH (6) KyiHe 6aNanbictb 6oMaJdbI. Erep 6yI MHTeMeHDece, MbCanb, copfbiu WnAhrideri copBlnFaH, TOnFaH wAn Ka6b HemeCe KocBlnF annnak Katnapbn cy3r ce6beHEn, d6bCtBk CnHan bepinei. Byn KafdaJa WAnCpFbiWtBu eWipin, "AkaynbKapDbI KoIO" TapaybHDa cInnTaTaNFaHdai TekcepiH3.
XymbiciptenTpyraH3neKtp KypandaPbHaH WbIKKaH waHbI copy (G cypetih kapaHbI3)
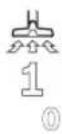
186|Ka3aK
Aya 6enme 6bikca 6enme 6eepn k ay a nmacy Kepcetki (L) 6onyb Kepek. Ticti 3aHapfa Ha3ap aydpblb13.
UHaHcOpfB1wka Kepre KocbInraH po3eTka (5) KipikTipinreH. OcbJxepre cbiptkbl 3neKTP KypanbH JxanFayra 60anaBl. KaIraFaHAn 3JeKTP KypaBbHbM MaKcHmAnDp KyKcat etinreKocbInbIM KyaTbHa Ha3ap aydApbHb3.
Copy opHbHaJa KeTKiIKI TaaHHbIH TacbImaHaHybIH KaMTamacbl3 ety yuH ay aafbHb KocbIFaH 3neKtp Kypalbl yuH MmHMnAaBla ay aefbHbHaH KEM 60nMaybKepek.
māHì
Uanr dnametpi Aya afbihbnh pettenren
| 35 MM 57,9 M | 3/caF |
| 22 MM 41,2 M | 3/caF |
| 15 MM 12,7 M | 3/caF |
Aya afbHbH petteri(6)naDanaHbInfah WnAnr DnAmetpihe caI petteH3. -Copy aanTepiH (22) opHaTbIb3 (kapaHbI3,Copy aanTepiH opHaty, 5et 184). - Copy aanTepiH (22) 3neKtp KypaIbIbIH, copy wTyepiHe caIbIHbI3.
Hyckay: copfblw lnaHrre aya kipici a3 bonran 3neKtp Kypanapbmeh xmbic icterehne (Mbicnla, kyaapa, axkapnafblw T.6.), kocbimwa aya cahblaybi (34) copy aanantepinde (22) aushk bonybl niic. Tek ocblainu cyarhi ABTomattby Typde Ta3anay fynkunrcb1 akaycb3 kymbic icteyi MymkiH.
On yuin Kocimwa aya cahbnaybHbH (34) yciHderi caKHaBcHbNay 6apbHwa aubnFaHwa 6paHbIa.
-ⅢaHcOpfblWtBih icke Kocy/ToKtaty abTomAtnKacbH icke Kocy yuH KyMbic pexHMepiH aybCTbPbH-KOCKblTbI (7) "ICke Kocy/ToKtaty aBTOMaTHKaCb" 6enriche opHaTbHb3. OcbjxmbicpekmmHdeayaafbHb peTteriUteri6napaTePcrecaKec 3nEeKToPonBkTpyd6akblnaHaBb.Lybpbc TaHaFaH npaMeTpde XekTKinKiTaH TaBImaHaNyKaMTaMaCb3etineJi. - WAnCOPFbIbTb KOnDaHbIcKa eHri3y yWIn po3eTKaFa (5) KaIFaHFaH 3NeKtp KypaIbH icKe KocbIbI3. WAnCOPFbIa BTOMaTTb Tpyde icKe KocblaBl. -3neKtp KypalbH eWipin, copybl TOKtaTbHb3. Icke Kocy/TOkTaTy aBtOMaTHKaCbI cOpFbI WnHaRrIe KaIFaH WaHbI cOpBIn WbIfApY yWIn 15 cekyHka DeHH KocbIMwa Kymblc ICTeNl. -ⅢaHcopfblWbIeWipy yuiH,XYMbICpeXMMepiH aybiCTbIpbIN-KOCKblWbI (7) "Owipy"BenricHe XblNkbITbIHbI3.
ErepIbIbIcTbIK CnHAnBepince,waHcOpFbIHTbI "AkaYnbIKTapdbI XoIO"TapaybiHaCnnaTTaNfAHaDai TeKcepy KepeK.
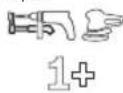
blnfan wahccopy
- WAnCOPfBUnH6e3HN, MaJ, anKorONb, epitKiWTe p CnKtbl XaHbIi HEmec XapblaNtblH cyblIKbIKTapbl copMaHbI3. bIcTbIK HeMece XaHaTbIH 1wHapbl copMaHbI3. XApbly Kayni 6ap 6enmepe WaCOPfBUnH naDanaH6aHbI3. 1wHap, 6ynap HEmec cyblIKbIKTapKaHybl HEmec XapblNy MyMKIH. Wahcopfbtbcopfbpetinhe naDanahyfa 60MaIbI. Wacopfbaya aye He cy KocnacbH copyFa apHaHaH.
Hcy:ETki3y Dehreine KoBbnaTbH TananTap (L 1aHa KlaCbl) Kpyrak copy yHKuncbl yiwH fHa pactnbl.
blnfaanacopy andbihdahbl jymbic kaamapbbl
KaKET60nca, KOKbc Ka6bH (25) HeMece WaH XHaFbI W KaNTbl WbIfapbln abHb3.
Hyckay: cy MeH KaTbI 3aTTek KocbIHbICbIH copy Ke3iHne OHai KObkIcKa Tactay yuiH bINFaI cy3ri Ka6bIH (KepeKkaPak) naJdanaHbIHbI3, ON CybIKbIKbI KaTTa 3aTTeKTepeH aKbIpaTaIbl.
- Pe3eHke KneKTI (28) eDeHik CanTamaFA (30) opHaTbIbI3 (kapaHbI3, Pe3eHke KneKTI opHaty (bIraIbI copy) (E cypetIH kapaHbI3), Ber 185). -Cy3riHl ABToMaTbI Type Ta3anay (AFC) FyHKUncBn OwipiH3 (KapaHb3, Cy3riHl ABToMaTbI Type Ta3anay (H CypetIH KapaHb3), Bet 187).
CytbIKtbIKTapbl copbn any
-ⅢaHcopFbIITb icke kocy ywH JyMbIC peKHMepiH aybIcTbIpbIIN-KOCKblITb (7) "Copy" genricHe XblIKbITbIHb3.
WahcnpfbiTOnbtpy DeHreEHHDatNkTepeMeH (37) Ka6dbkTAnFaH. MakcmanDbI TOnbtpy 6nKtiriHe XetCe, WahcnpfbiU OWei. Kymbc pexmdePi aybictbPbIn- KOKcbuHTb (7)"Owipy"6enricHe KbNkbTbHb3.
Hcy:TKOTK36eTINCYbIKTBkTapblc0yKe3IHn (MbCaIb,6yPbIay 3MylbcNcBcbl,MaInap) 7AHCOPfbI KOTHeHepDITOnbl KyIHDe Ewnei. TOnTbpy DeHreIn Hkyeni Typde TeKcepy XeHE KOHTeHepDi dep Ke3IHpe Bocaty Kepek.
blnfan wah copy ke3iHde db6bctbK cnHan 6epince, waHCOPfblwTbH jxmbic kayinci3diT ToMeHdEmei.
Akybnkblkojo ywih ewhkaHdai wapa Konlahy KaKeTe mec.
-ⅢaHcOpfbIbIbIeipy yIiH xMyBicpeKHMepiH aybiCTbipIn-KockblTbI (7) "Owipy"6enricine XblXbITbIH3. -ⅢaHcOpfblTbTacbImanayyHHtbfbHdb(2)wnahnatpohha(3)6ypan6ekitiH3. -KoHTeHepdi(1)6ocatbHb3. blHan wah copraHHa KeIH 3eH bacydbH anDbH any yuH: - Kannak Katnapbl cy3riH (26) wlrapbn, OHb KaKcblankentipih3. -ⅢaHcOpfbTbH KOFapfb6eHirH (12) anb, cy3i KaTAmacbiH (36) aBbHb3 XHe eKeyiH de KaKcbIan KeTIpih3.
Cy3rihi ABTomattbI Tpyde Ta3anay (H cypetin kapaHb13)
Cy3rihi aBTomatbI TypDe Ta3anay (AFC = Automatic Filter Cleaning) ke3iHne jaxnak kAtnapnb cy3ri (26) 6ykin 15 cekHyd bobl aya cokkbicbl apkbl Ta3anaHaBbl (mnylbctik wbyln).
Copy KyatbI KTeKtkiNikci 60nca, cy3rHi Ta3anay KaKeT.
Cy3ri Ta3anaydbI JyHEnI Type naiDanaHy apKacbHda cy3riHH naDanaHy Mep3iMyapadbl.
Cy3rHIN OHtaNbI naDanaHy MEP3IMHe KOJ XeTKi3y yuHIn cy3rHIn ABOMaTTbI TypDe Ta3anay fYHKUncBtHcTe EpeKlWe KaFdaFaHa eWipHl3, MbCaNbI, Ta3a CybIKTbIKTbI copy Hemece KaFa3 cy3ri Ka6bHn naDanaHy Ke3iHne.
BetnactaHfahKannakKaTnapnbCy3riTobnkTaKymbicka Ka6ineTT. KannakKaTnpblCy3riHi KaBnHEmeceyplen Ta3apTyKepeKEmecKHeMeMyHdaepeKeTepdeN cy3rire 3aKbIMTHIOI MymKiH.
Hcy: cy3rihi ABTomAtb TyPe Ta3aIay fyHKnncbl 3aybTTa KocblnaBl.
Cy3rHI ABOMaTTb Type Taanay FyHKUncBcH TEK Kpyblfbl kocynb BonFaHa kocyfa/ewipyre 60nabbl.
-AFCfynKcuncbInaXbipaty
AFC TYIIMEciH (9)6abihbi3
BaKbInay kapbIKnOdbI (35) eWesi.
-AFCfynkunacbHickeKocy
AFC TYMecin(9)6acbIbI3.
BaKbInayJkaBkDIOBbl(35)XacBInTycnEnKaHaDbI.
TexHnKaIbIK Kytim XaHe KbI3Met Kcpcty
KbI3MeT KepCeTy XeHcTa3aNay
KypbInfbHbI petTey,ka6dbik 6eWKeTepi in aImactbipy Hemece wahcOpfbuTbI anbIN KOHOaH anDbIH aBipbl po3EKdAH bIrapbHbI. OcbI caKTbIK waapcbl wahcOpfbuTbIH 6aKaycbI KocblyibaHa kon 6epMeJI. DpybcXeHcHIMiICTeyIyHwHacPbHnEH XeNTKlWCaHbInaynapbIH Ta3aYCTaHb13. WahcOpfbHtby KytHy Hemece Ta3anayda WAnTyKbIMackacbiH KIni3.
Erep 6aIaNbIc cbIMbH aIImactbpy KaKet 60nca, KayinciaIKTHeMeHdeyIne Kon 6epMey yuHIOcb Kymbc TEC Bosch KOMpaHncBHe Mece Bosch 3JekTp Kypanapbl 6oBbHsA eKInETi Kb3Met KepCety optabikTapbHa Jkypri3inyTic.
山hCopfblbKbi3METKpceTeIH Kbi3METKepeH MeH e3re aadamapfaKayin TydbPmaTbH pette akbipaTy, Ta3anay XHe Kbi3MET Kepecy Kepek. bKtImaI TAYeKeIepre Xon 6epmey yuiH, wAHCopfbuTb6eWKeTey aDihTa3anay Kepe. LhCOPfblb6eWKeTey KxMbICeTKi3iNetIH 6nmeXakcbxKeJeTiny KepeK. Kbi3MET KepeCy Ke3iHne Xke KoprAahbcXa6DbFbH KniH3. Kbi3MET KepeCTeH COH Kbi3MET KepeCy aMafBbH Ta3anay KepeK.
KbIbHa bip pet eHdpyHHeMece tancbipbc anFaH aam
cy3riH 3aKbIMdAlyb, WaHcOpFbIka aya KipMeTINdiRi KaHe 6aBnay KpyblfbcHbH JxMlbic Icteyi CnKtBlaHaFa KaTbICrTeKcepy XyMbICTapbHOpbHdaybl KaKeT.
TactaHfopTadaTyPfAH KnaCbHdaFbl waHcOpFbiWtapDbH cbiptkBj XaFbXaHe 6apbnk MaunHa 6oNikTepi Ta3anaHbIn, repMeTHKnEeHDenyI Tnic. Kbi3Met KepeCyTeYxHe XeHDey XyMbICTapBH opBHday Ke3iHne Ta3anaHbAynBH 6oNikTeppdi AnbTactay KepeK. Byn 6oNikTeepi eTKi36eHIN KaNTapDa KaNbltapBki KOIO 6oNbiHwa KondaHbInaBH 3AndapFa caTactay KepeK.
Kannak katnapnb cy3rihi wbfrapy/anMaCTbipy (I1-I2 cypTrepin kapaHb3)
Copy KyataCy3i KyiHe 6aHaHbICTb 60nAbc. Cy3riHi Kyyeni Tpye Ta3anaHbI3.
3aKbIMdaIHaH KaIINaK KatnapbI cy3riHi (26) Depey aMMAcTbIpbHbI3.
The container (18) must be installed, the water supply (36) must be connected. - The water supply hose (26) is connected to the tap, it must be checked for leaks. - The water supply hose (26) must be connected to the water supply (36) using the supplied gasket. The water supply and drain hoses must be installed correctly. The water supply hose (26) must be replaced if it is damaged or worn. - The water supply (36) must be connected to the water supply (36) using the supplied gasket.
Container installation
-The container (1) must be installed according to the standard installation instructions.
Filling the detergent, see instructions (J)
Fill the detergent dispenser (37) as described.
-The detergent (13) must be placed in the detergent compartment (12). - Fill the detergent dispenser (37) with the recommended amount. - Replace the detergent compartment (12) and close the detergent drawer (13).
Maintenance and cleaning (see instructions K)
-The filter must be cleaned (17). - The necessary parts must be cleaned: the detergent drawer (31)-(19), the drain pump filter (27)-(20), the water inlet filter (30)-(21). - The drain pump (4) must be cleaned by removing the drain pump filter (24) and cleaning the drain pump (4). The filters must be cleaned.
188|Kazakh
-The water inlet hose (11) must be checked. - The detergent must be placed in the detergent compartment (12) and the detergent drawer (13) must be closed. - The detergent must be placed in the detergent compartment (12) and the detergent drawer (13) must be closed. - The detergent must be placed in the detergent compartment (12) and the detergent drawer (13) must be closed.
-The detergent must be placed in the detergent compartment (12) and the detergent drawer (13) must be closed. - The control panel (16) must be closed with the control panel cover (15).
Drain hose connection
If the drain hose is too long, it must be shortened. The drain hose must be connected to the drain pipe.
Drain hose connection
| Copy typbina kizmibic ictemeyn typ. - Jezilinik kabebidi, jezilinik ausha,bcaktahdipfbtbi,pozetkahbi xhe tontbipy dehreiniH daTukkteri (37) Tekcepin3. Jxmbic pejkmdepin aybictbipbH-KockbH (7)"Icke Kocy/ToKtaty abTomatnacbi" pejkmHde Typ. - Jxmbic pejkmdepin aybictbipbH-KockbH (7)"Copy" beNricHe opHaTbHb3 Hemece pozetkaf (5) KaJfAHAN 3neKTP KypalbH icKe KocbHb3. | |
| Copy typbina eushi. - KontheHepdi (1) bocatbHb3. | |
| Copy typbina kontheHep bocatbHannah keiH de jxmbic ictemeyn typ. - ΜaHcnpfbtsb eupipin, 5 cekyHd kyTin3, 5 cekyHd etkeHHen keiH kaHTa KocbHb3. | |
| - Tontbpy dehreinH daTukkteri (37) XeHe daTukkteri (37) 6oc opbHn KbIIwaknen Ta3alaHb3. | |
| Copy kuytBti TemeHedii. - Copy cantamacbiH, copy kubpbH (31), copfblu shaHri (24) Hemece jaxnak katnapbI cy3rH (26) XInaHbI KaFAn KipDeH Ta3apbHb3. | |
| - Kokbc Ka6bH (25) Hemece lau XInaHbI KaNTbI aImactbipbHb3. | |
| - Cy3r KaTAMACbiH (36) dypbc 6ekiriH3. | |
| - ΜaHcnpfbtsb jXofapbI 6eJIirH (12) dypbc opHaTbH, kYbIITapbH (13) XaybH KoBbHb3. | |
| - Kallnak katnapbI cy3rH (26) aImactbipbHb3. | |
| Lshn copy kezihne shaH shbHn jAtbip - Jaznak katnapbI cy3rH (26) dypbc opHaTbHFAH Hekcepin3. - Kallnak katnapbI cy3rH (26) aImactbipbHb3. | |
| Θwipy abTomatnacbi (bllfam shaH copy) jxmbic ictemeyn typ. - Tontbpy dehreinH daTukkteri (37) XeHe daTukkteri (37) 6oc opbHn KbIIwaknen Ta3alaHb3. | |
| CytbIKbIKap Tok 0TKi36eHIN 6onca Hemece Ke6ik naJa 6onca, eWipy abTomatnacbi jXyMbic ictemeyni. | |
| - Tontbpy dehreinH jXyHEnI TpDc boklanaHb3. | |
| ДьбICTbI eckey CngHbI bepinei. TbIM TcMeH copy kuytBIO pOHTBnFAH. | |
| - Copy kuytBnIO petteriSt (8) XOfapbIpaK MOnHe opHaTbHb3. | |
| Дурс emec xlnarDr nAmetpi opHaTbHnA. | |
| - Aya aByHbH petteriSt (6) copy xlnarHInH dypbc dImaTePiHe caJKeC opHaTbHb3. | |
| Copfbl Wlnahr (24) 6iteRhen Hemece 6yKtenReH. | |
| - BiteNlcti Hemece 6yKtenHyd i KetipHiz. | |
| Kokbc Ka6bI/whn XInaHbI KIan ToBn KeTTI. | |
| - Kocbc Ka6bH (25) Hemece xlnaHnH KIanTbI aImactbipbHb3. | |
| Kallnak katnapbI cy3r (26) NaCTaHFaH. | |
| - XaONAK katnapbI cy3rH In TzalaHbI Hemece KaKet 6onca, aImactbipbHb3. | |
| KaalraHafn 3neKtp KuyaBnAp ApKbIb I KETKIniKTI aya aByHbI otne JxTaBIP. | |
| Акayлькшewim | |
| - Косы мда уа саны layingи (34) copy щадалгіпide (22) ausыніз: copy аадаллетідіясініауа саны layingи толысыmen ausылfaша 6уран Турыніз. | |
| - Бар бүлүа: олект күралынін косы мда уа саны layingи ausыніз. | |
| Бakсы lay олекtronikасы kate жуmbіс ICTEN TYP. | |
| - Bosch о kinetті сөрвістік ортайыніх xa\-барлacrьніз. | |
| Сүгіні自動аты Турді тазалay Функц�аы Кжмьсістемі Тур. | - Сүгі тазалay Функц�аыніstік косыніз (AFC Түмесін (9) 6ausыніз). |
| - Copыш онлайн(rɪi (24) калгəніз. | |
| Сүгіні自動аты Турді тазалay Функц�аын Бшіру мүмін emec. | - Bosch о kinetті сөрвістік ортайыніх xa\-барлacrьніз. |
| Сүгіні自動аты Турді тазалay Функц�аын Ксocу мүмін emec. | - Bosch о kinetті сөрвістік ортайыніх xa\-барлacrьніз. |
Necessary parts
| Kepek-japak hemipi | |
| Karaa cyariki ka6bi (kyprak) 2 607 432 035 | |
| ToKbImaIbCyariki Ka6bi (kyprak) 2 607 432 037 | |
| blrflan cyariki ka6bi (blrflanbl) 2 607 432 039 | |
| KoKbic ka6bi (ПЗ) (kyprak/ bInflaIbbl) 2 607 432 043 |
The service life of the device depends on the conditions of use.
The service life of the device is determined by the manufacturer and is indicated in the technical data. For questions about the service life of the device, contact the manufacturer's service department.
www.bosch-pt.com
Bosch service centers will answer your questions about the device and its accessories.
Questions about the device and its accessories can be sent to the manufacturer's service department within 10 days of the date of purchase.
Compliance with the norms and rules of electrical safety during operation and maintenance of the device is the responsibility of the owner. The device must be operated only by authorized service centers of "Robert Bosch" or its authorized service organizations. Unauthorized repair or modification of the device is prohibited. The device must be used in accordance with the instructions for use.
Kazakhstan
Service centers for the device:
"Robert Bosch" GmbH
Ltd.
Republic of Kazakhstan
050012
Murazbaev St., 180
"Termes" 50, 7th floor
Tel.: +7 (727) 331 31 00
Kc: +7 (727) 2330787
E-Mail: ptka@bosch.com
You can find the service centers and collection points for your tools and accessories at: www.bosch-professional.kz
Disposal
Power tools, accessories and packaging should be sorted for environmentally friendly recycling.

Do not dispose of power tools into household waste!
Only for EU countries:
According to the European Directive 2012/19/EU on waste electrical and electronic equipment and its implementation in national law, power tools that are no longer usable must be collected separately and disposed of in an environmentally correct manner.
According to the European Directive 2012/19/EU on waste electrical and electronic equipment and its implementation in national law, power tools that are no longer usable must be collected separately and disposed of in an environmentally correct manner.
Romanian
Power tool service
Strada Horia Macelariu Nr. 30-34, sector 1
013937 Bucharest
Order the maximum only in L-Boxx.
The L-Boxx with its contents must not exceed 15 kg.

Do not use the vacuum cleaner for crane hooks, e.g. for transport. The vacuum cleaner must not be hung on a crane. There is a risk of injury and damage.

Do not throw or drop the vacuum cleaner. The vacuum cleaner may tip over and be damaged. There is a risk of injury.
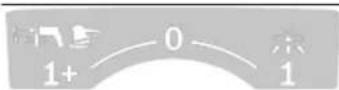
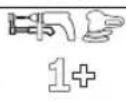
Start/stop automatic
Suction of dust from work and electric tools
| CIMBOЛN TJAХHOTO 3HAUHENE | ||
| 15 | Прахосмукачкatinga abTomatniho ce BkniuoyBa n ce i3KniuoyBa C BpeMeBO Збавянe | |
| 22 | Изκлочьанe | |
| 35 | Смуне Измуквае на havingbpaиnpaxовe | |
| Min Max | 15 | Следене на обемни посok за диматур нашианга от 15 mm |
| 22 | Следене на обемни посok за диматур нашианга от 22 mm | |
| 35 | Следене на обемни посok за диматур нашианга от 35 mm | |
| Min/Max | Бezstelenно ретулиране на с铝合金а на ИЗсмуквае: - м akсимална смукателna мошноct за приложения с rolюmo obpla- Зувае на прах - нама的答案смукателna мошноct за приложения с малко obразува- He Na прах и нар. за ретулиранe на засмукваша на с铝合金 мени Свьрзваня有很大 Ктоюнскру金融市场 和 NobbyхонтMuent (слесифчни (Hanр. пriшайфанe) | |
| max. 2200 W min. 100 W | Дашил Задустима т'mошноct на Свьрзванe有很大 Ктоюнскру金融市场 (слесифчни ЗА OTделнITE Дьржави) | |
| Automatic Filter Cleaning | AFC AВТOMATино поисвае на phиль耗费a (AFC = Automatic Filter Cleaning) | |
Description of the product and functions
Intended use of the electric tool
The device is intended for collecting, suctioning, and disposing of dry dust, as well as non-flammable dry dust, non-flammable liquids, and water-dust mixtures. The vacuum cleaner has been tested and certified and complies with the dust class M. It is suitable for increased exposure during professional use, e.g. in trade and industry, and for workers.
Vacuum cleaners of dust class M according to IEC/EN 60335-2-69 may only be used for suctioning and vacuuming of dusts hazardous to health with a limit value of exposure ≥ 0.1mg / m3
Use the vacuum cleaner only after you have familiarized yourself with all its functions and have received the corresponding instructions for this.
Illustrated elements
The numbering of the illustration and the components refer to the graphic pages of the vacuum cleaner.
(1) Container (2) Cap of the opening for the incoming air flow (3) Filter (4) Holder for the filter (5) Contact for electric tool (6) Regulator for air volume (7) Switch for operating mode (8) Regulator for suction power (9) AFC button (10) Handle for carrying (11) L-Boxx adapter (12) Cap of the vacuum cleaner (13) Brackets for holding the cap of the vacuum cleaner (14) Water nozzle (15) Spiral hose (16) Control hose (17) Holder for the power cord (18) Closing of the filter cover
202|Bulgarian
(19) Holder for the hose (20) Holder for the nozzle/floor nozzle (21) Holder for the nozzle (22) Filter for dust (23) Nozzle (24) Hose of the vacuum cleaner (25) Button for blowing (26) Flat filter (PES) (27) Nozzle (28) Rubber lip
(29) Crevice nozzle (30) Nozzle for water (31) Hose for suctioning (32) Adjustment for the suction power of the vacuum cleaner (33) Button for pressing (34) Opening for exhaust air (35) Control light (36) Filter cap (37) Sensors for the degree of clogging
| ПрахOSCукачka за мokро/cухо засмухвае GAS 35 M AFC | ||
| Каталожен Home | 3601 JC3 1.. 3601 JC3 170 | |
| Номинално наразжени V 220-240 110 | ||
| Номинално консуmpлара мошост W 1200 1000 | ||
| Чеб耗费 Hz 50-60 50-60 | ||
| ОБем на kon'tейнера (бруто) I 35 35 | ||
| Нетен обем (teчост) I 19 19 | ||
| ОБем на прахочьовпелна торба I 19 19 | ||
| Мамс. Ваду'mA) | ||
| - ПрахOSCукачka hPa 230 211 | ||
| - ТурбINA | hPa 254 242 | |
| Мамс. обемен поокA) | ||
| - ПрахOSCукачka | I/s | 36 |
| m³/s | 0,036 | |
| - ТурбINA | I/s | 74 |
| m³/s | 0,074 | |
| Мамс. смухATEЛна мошост W 1380 1150 | ||
| Плоси на有很大атя phintbp | m² | 0,615 |
| Прахов Клас | M | |
| Маса съласно EPTA-Procedure 01:2014 | kg | 12,4 |
| Клас на зашита | ⊕/I | |
| Вид зашита | IPX4 | |
Measured with the vacuum cleaner at 0.35 mm and 3 m. The values given are valid for the nominal voltage [U] of 230 V. The flow rate and the voltage can vary depending on the specific measurements.
| АВТOMАПКА CTAPТ-СТОП | ||
| Номинално наразжени | Мakсимална мошноct | Минимална мошноct |
| 230 V | 2200 W | 100 W |
Values for the permissible power of the connection for electric tools. When using specific tools, the values may deviate. The values given above are for guidance and are not binding.
Standard for the extraction and selection
The values for the emissions are set according to EN 60335-2-69.
The equivalent A-weighted sound pressure level generated by the vacuum cleaner is typically 70 dB(A). The uncertainty K = 3 dB. The sound pressure level during operation may exceed 80 dB(A).
Mounting of the nozzles and tubes
Insert the nozzle (23) into the tube (24) until the button (33) on the tube engages. Then insert the desired accessory (floor nozzle, crevice nozzle, tube, etc.) onto the nozzle (23).
For disassembly, press the button (33) and pull the parts apart from the other components.
Connecting/disconnecting the suction hose for the vacuum cleaner (dry vacuuming) (see Fig. D1-D2)
For dry vacuuming of materials with a dust class up to M, the suction hose (25) must be used with the vacuum cleaner.
If materials are vacuumed without a limit value for the emission of dust ≥ 1 mg/m³ (according to dust class L), it can be vacuumed directly into the container.
Note: When using a hose with a filter bag, it must be replaced, and when using a hose with a filter, it is recommended to switch off the automatic filter cleaning (AFC) (see Fig. H, page 205).
The vacuum cleaner is equipped with a device for adjusting the suction power. Set the suction power according to the requirements.
The vacuum cleaner must only be used by trained personnel. Appropriate protective equipment is required. Do not use the vacuum cleaner without a filter system. In case of malfunction, contact the manufacturer.
Removing the fabric bag for dust
-Open the clamps (13) and lift the upper part of the vacuum cleaner (12). -Place the fabric bag for dust (25) into the container (1) with the opening facing up. -Pull the opening over the flange until it fits properly. -Make sure the fabric bag for dust (25) is well attached to the inner walls of the container (1). -Fold the remaining part of the fabric bag for dust (25) over the rim of the container (1). -Place the upper part of the vacuum cleaner (12) and close the clamps (13).
Removing the fabric bag for dust
-Open the clamps (13) and lift the upper part of the vacuum cleaner (12). -Pull the fabric bag for dust (25) back off the flange. Remove the fabric bag for dust (25) from the container (1) carefully to avoid damage.
The fabric bag for dust should not be used with the supplied flange or other accessories.
Pull the cover with the sealing tape and remove the fabric bag for dust.
Follow the fabric bag for dust (25) under the opening for air with the cover with the sealing tape.
Replacement/Installation of the dust bag (accessory)
-Open the clamps (13) and lift the upper part of the vacuum cleaner (12). -Pull the dust bag back off the flange. Close the opening of the dust bag with the cap provided and remove the dust bag from the container (1). -Insert a new dust bag onto the flange of the vacuum cleaner. Make sure the dust bag fits tightly against the inner wall of the container (1). -Place the upper part of the vacuum cleaner (12) and close the clamps (13).
Installing the rubber gaskets (wet cleaning) (see fig. E)
Note: The degree of permeability of the filter (class of dust) is indicated only for dry cleaning.
-Pull the filter with the grille (29) with a suitable tool from the base (30). -Place the rubber gaskets (28) into the base for the floor (30).
Note: The structured side of the rubber gaskets must face up.
Open the box (see fig. F)
Accessory L-Boxx for the vacuum cleaner (11).
For transporting the vacuum cleaner and for a clean place to store it, you can order the top part of the L-Boxx vacuum cleaner.
Do not carry the vacuum cleaner by the handle of the L-Boxx. The vacuum cleaner is too heavy for carrying by the L-Boxx. There is a risk of injury and damage.
Working with the power tool
Before performing maintenance or cleaning the vacuum cleaner, before adjusting settings, changing accessories, or storing the vacuum cleaner, unplug the cable from the outlet. These precautions prevent accidental starting of the vacuum cleaner.
Switching on/off
Pay attention to the mains voltage! The mains voltage must match the data on the rating plate of the vacuum cleaner. Devices marked with 230V can be connected to a 220V mains supply. Inform yourself about your local regulations/laws regarding working with dust hazardous to health.
The vacuum cleaner is suitable for vacuuming the following materials:
-Dust with an explosion limit of ≥ 0.1 mg/m³. Do not use the vacuum cleaner in rooms with an increased risk of explosion. To achieve the optimal degree of vacuuming, you must fully extend the hose (24) from the top part of the vacuum cleaner (12).
Dry vacuuming
Vacuuming of dry dust
-Set the volume flow regulator (6) to the diameter of the hose used. -To switch on the vacuum cleaner, turn the mode selector switch (7) to the symbol "Vacuuming". -To switch off the vacuum cleaner, turn the mode selector switch (7) to the symbol "Off".

The vacuum cleaner has a sensor for the air flow speed. In "Vacuuming" mode, the volume flow is set to a fixed speed of 20 m/s regardless of the position of the air flow regulator (6).
If the air flow speed falls below this value, e.g., due to clogging in the hose, due to a full dust bag, or due to blockage of the filter, an acoustic warning signal sounds. In such cases, check the power tool as described in the section "Troubleshooting".
Vacuuming dust from power tools (see Fig. G)
To prevent air from entering the room, it must be ensured that sufficient and intensive ventilation is provided in it (L). Follow the applicable national regulations.
In the vacuum cleaner, a contact for the power cord (5) is provided. You can connect a power tool to it. Follow the specified power rating for the maximum power of the connected power tool.
To ensure sufficient and intensive suction of fine dust, the air flow must not be lower than the minimum permissible for the corresponding power tool.
Note: The automatic filter cleaning is factory enabled.
Enabling/disabling the automatic filter cleaning is possible only when the device is switched on.
-Activating AFC
Press the AFC button (9).
The control lamp (35) lights up.
-Activating AFC
Press the AFC button (9).
The control lamp (35) lights green.
Maintenance and service
Maintenance and cleaning
Before performing technical maintenance or cleaning the vacuum cleaner, before adjusting the device, replacing accessories, or storing the vacuum cleaner, disconnect the cord from the outlet. This precaution prevents accidental switching on of the vacuum cleaner. For quality and safe operation, keep the vacuum cleaner and the ventilation openings clean. Perform maintenance and cleaning of the vacuum cleaner with a dust mask.
When replacement of the supply cord is necessary, it must be performed by an authorized service center for Bosch power tools to ensure the safety of the Bosch power tool.
The vacuum cleaner must be unpacked, placed and serviced in such a way that, as far as possible, the health of the person servicing it is not endangered. Before unpacking, the vacuum cleaner must be placed so that any potential hazards are avoided. The room in which the vacuum cleaner is unpacked must be well ventilated. During repair, use protective equipment. After technical servicing, the work area must be cleaned.
At least once a year, a check must be carried out regarding electrical safety by the manufacturer's representative or a qualified technician, e.g., for possible damage to the filter, the tightness of the vacuum cleaner, and the proper functioning of the control module.
For vacuum cleaners of class M, which have been used in dusty environments, the external surfaces and all parts must be cleaned. When carrying out technical servicing and repair, all dusty parts that
cannot be cleaned satisfactorily must be removed and replaced with new ones. Such parts must be disposed of in leak-proof bags in accordance with the applicable regulations for disposal of the relevant waste.
Removal/installation of the flat filter (Fig. 11-12)
The suction power depends on the condition of the filter. Therefore, clean the filters regularly.
Replace damaged flat filters (26) immediately.
-Open the filter cover (18) and remove the flat filter (36). -Grasp the flat filter (26) and pull it out. -Remove the dust and dirt that have accumulated on the flat filter (26), using a soft brush from the filter cover of the filter (36).
The PES and PTFE flat filters can be washed with running water.
-Insert the new, cleaned flat filter (26) and make sure it fits correctly in the slot. -Close the filter cover (36) again (it must click audibly).
Emptying the container
Service scule electrice
Strada Horia Macelariu Nr. 30-34, sector 1
013937 Bucuresti, Romania
Tel.: +359 (0) 700 13 667 (Bulgarian)
Phone: +40212331313
Email: BoschServiceCenterBG@ro.bosch.com
www.bosch-pt.com/bg/bg/
Disposal.
The packaging, accessories, and packaging materials must be handed over for recycling in accordance with the regulations in force.

Do not dispose of the product with household waste!
Only for EU countries:
According to European Directive 2012/19/EC on waste electrical and electronic equipment, and in accordance with national legislation, products that can no longer be used must be
collected separately and handed over for recycling in accordance with the regulations in force.
Macedonian
Safety instructions for use

Read all safety instructions and warnings. Failure to follow the safety instructions and warnings may
result in electric shock, fire, and/or serious injury.
Keep all safety instructions and warnings for future reference.
This appliance is not intended for use by persons (including children) with reduced physical, sensory or mental capabilities, or lack of experience and knowledge, unless they have been given supervision or instruction concerning use of the appliance by a person responsible for their safety. Children should be supervised to ensure that they do not play with the appliance.
Do not leave children unattended. This will ensure that children do not play with the appliance.
WARNING: Do not use materials containing asbestos. Asbestos is carcinogenic.
WARNING: REPAIR
Use the appliance only if you have sufficient information for its use, for
the material being used and its safe handling. The detailed instructions indicate the danger of improper use.
WARNING: REPAIR
When using the appliance, use appropriate additional measures
for handling the liquid. The liquid increases the risk of electric shock.
Do not use flammable or explosive liquids, e.g. gasoline, oil, alcohol, solvents. Do not use acid or flammable powder. Do not use the appliance in spaces where there is a risk of explosion. Doors, windows or liquids may ignite or explode.
WARNING: REPAIR
Use the connector only for the intended purpose specified in the instructions for use.
WARNING: REPAIR
Use the appliance only if the device and the cord are in good condition.
Check the container. Never use the appliance if it is damaged.
WARNING! Before using the device, read the instructions carefully. WARNING! Regularly check the sensors for the level of fullness and verify that they are intact. Otherwise, the function may be impaired. Since the use of the device in damp environments cannot be avoided, use a protective switch for differential current. The use of a protective switch for differential current reduces the risk of electric shock. Connect the device to a properly grounded outlet. The plug and the extension cable must have functional protective conductors. Before use, check the device, the cable, and the plug. Do not use the device if it is damaged. Do not open the device yourself and leave it for repair to qualified personnel, using only original spare parts.
The device, cable, and plug increase the risk of electric shock.
Do not overload or crush the cable. Do not pull the cable to remove the plug from the connector or to move the device. The device and cable increase the risk of electric shock. Remove the plug from the connector before cleaning or maintaining the device, before repairing the device's supplies, replacing parts, or adjusting settings. These precautions prevent unintentional starting of the device. Ensure good ventilation of the work area. The device should only be repaired by qualified personnel with original spare parts. Only in this way will you be safe with the device.
PRE-COMMISSIONING
The device contains dust that is hazardous to health. Emptying and cleaning, as well as
the disposal of the container must only be carried out by trained personnel. Appropriate protective equipment is required. Do not use the device without the complete filter system. Otherwise, you endanger your health.
Before use, check that the suction hose is in perfect condition. When installing the hose on the device, make sure that no dust escapes. Otherwise, you may inhale dust. Do not use the device as a seat. You may damage the device. Use the flexible hose and the suction hose carefully. Be careful not to put other people in danger. Do not clean the device with direct water spray. Water entering the upper part of the device increases the risk of electric shock.
Symbols
Follow the symbols of great importance for the use of your device. Remember the symbols and their meaning. The correct interpretation of the symbols helps you to use the device properly and safely.
Symbols and their meaning


WARNING! Read the safety instructions and warnings.
Failure to follow the safety instructions and warnings can result in electric shock, fire, and/or serious injury.
Symbols and their meaning
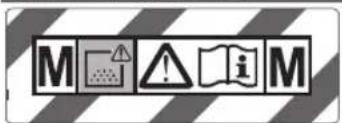
The device is for dust class M and complies with IEC/EN 60335-2-69 for vacuum cleaners for hazardous dust, with a limit value of ≥ 0.1mg / m3.
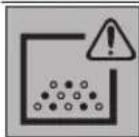
The appliance is intended for collecting leaves and is not dangerous to health. The differences in design and maintenance, as well as the washing and cleaning of the collection container, must only be carried out by qualified personnel. Appropriate protective equipment is required. Do not use the appliance without a complete filter system. Do not endanger your health.
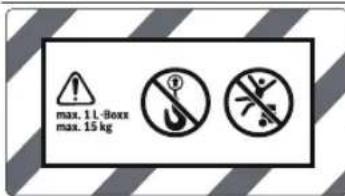
Operating instructions for maximum load. max. 1L - Box 15kg

Do not lift the appliance, e.g., during transport, with a crane hook. The appliance is not suitable for transport with a crane. There is a risk of injury and damage.

Do not use the appliance as a climbing aid, and do not step on it. The appliance may tip over. There is a risk of injury.
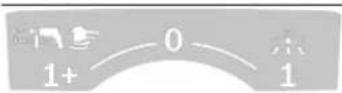
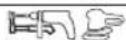

Start/Stop automatic
The appliance switches on and off automatically when the power tool is operated.
0 Off

Off
On
On with automatic start
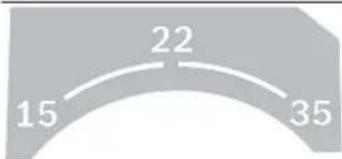
15 Control of the air flow for pipe diameter from 15 mm 22 Control of the air flow for pipe diameter from 22 mm 35 Control of the air flow for pipe diameter from 35 mm
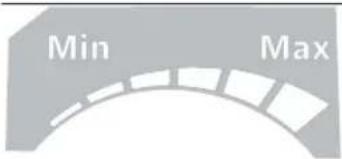
Min/Max suction power control:
Maximum suction power when working, which creates a large amount of leaves. Minimum suction power when working, which creates a small amount of leaves. For adjusting the suction power, use the switch between the connected electric tool and the surface to be processed (e.g., for vacuuming).
max. 2200W min. 100W
The permissible connection voltage of the connected electric tool depends on the country.
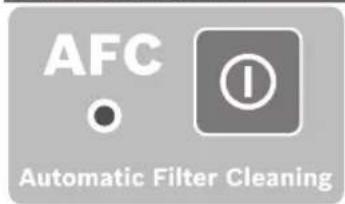
AFC
AUTOMATIC FILTER CLEANING (AFC = Automatic Filter Cleaning)
Product description
Intended use
The device is intended for collecting, vacuuming, transporting, and cleaning dry, non-flammable dusts, non-hazardous substances, and non-hazardous liquids from water and air. The vacuum cleaners are tested for safety and comply with the safety class. The device is suitable for use in commercial use, e.g., in hotels, schools, hospitals, factories, and workshops.
Vacuum cleaner of safety class I according to EC/EN 60335-2-69 must be used for vacuuming and blowing dusts hazardous to health with a limit value of exposure ≥ 0.1 mg/m³.
The user of the vacuum cleaner is responsible for any malfunctions or damages caused by improper use or unauthorized modifications.
Component illustration
The numbering of the individual components is described in the illustration on the following page.
(1) Hose (2) Suction tube for blowing (3) Filter bag (4) Handle for carrying (5) Electric cord (6) Suction power regulator (7) Switch for automatic mode (8) Suction power regulator
(9) AFC button (10) Nozzle for crevices (11) L-Boxx adapter (12) Upper part of the vacuum cleaner (13) Filter cover of the vacuum cleaner (14) Rotor (15) Indicator for filters (16) Filter for changing direction (17) Holder for the hose (18) Lock for the filter cover (19) Hose holder (20) Plastic bag for dust / disposable bag (21) Cloth bag (22) Adapter for vacuuming (23) Cloth bag (24) Suction hose (25) Air outlet grille (26) Filter (PES) (27) Dust bag (28) Rubber lip (29) Brushes (30) Floor nozzle (31) Suction tube (32) Handle for the suction tube (33) End of the suction tube (34) Air inlet (35) Control LED light (36) Filter cover (37) Level sensor for fullness
Technical data
| Всисьч за мokро/cув всисьвае GAS 35 M AFC | |
| Б Proj на дeЛ/артукл | 3601JC31..3601JC3170 |
| Номинален наочи V 220-240 110 | |
| Номинална щачна W 1200 1000 | |
| Ф reproveнциja Hz 50-60 50-60 | |
| Волуmen на садот (бруто) | 35 35 | |
| Нeto Волуmen (teчноct) | 19 19 | |
212 | Macedonian
| Всисвач за мokро/cув Всисвалье GAS 35 M AFC | ||
| Волимен на песа差别 пав I 19 19 | ||
| Мakc. поочисторik | ||
| - Всисвач hPa 230 211 | ||
| - ТурбINA hPa 254 242 | ||
| Мakc. Валименский позок | ||
| - Всисвач I/s | m³/s | 36 31 |
| 0,036 0,031 | ||
| - ТурбINA I/s | m³/s | 74 71 |
| 0,074 0,071 | ||
| Мakc. КалачтET на Всисвалье W 1380 1150 | ||
| Повшина на habралиOT Фптор m | 2 | 0,615 0,615 |
| Класа на пав М M | ||
| Текина соглесно EPTA-Procedure 01:2014 | kg | 12,4 12,4 |
| Класа на заштITA | #/I #/I | |
| Вид на заштITA | IPX4 IPX4 | |
A) With suction hose Ø 35 mm and 3 m, the device must be connected to a power supply of 230 V. The power consumption may vary depending on the voltage in the respective country.
| Стат/Стол abTomатika | ||
| HommaJIeH haIOn | мakcmaJIHa jaUHa | mHHMaJIHa jaUHa |
| 230 V | 2200 W | 100 W |
Warning: The extension cable must be connected to the grounded electrical outlet. The appliance is specially designed for floor cleaning and can be used safely. The extension cable must be checked for damage.
Information about the brush/nozzle
The values for the brush are determined according to EN 60335-2-69.
The sound pressure level of the appliance is rated at 70 dB(A) with a tolerance K = 3 dB. The sound pressure level during operation may exceed 80 dB(A).
Wear hearing protection!
The vibration emission value a (vector sum of three directions) with uncertainty K is given in accordance with EN 60335-2-69: a < 2.5 m/s², K = 1.5 m/s².
Assembly
Before any maintenance, disconnect the appliance from the power supply.
Mounting the suction hose (see Figure A)
Insert the hose (4) for the suction device from above into the provided holder (32) until it clicks into place.
Mounting the suction tube (see Figure B)
- Place the suction tube (24) onto the hose connector (3) and turn it clockwise to the stop.
Note: During suction, due to the movement of the hose and the suction accessories, electrostatic charging may occur, which the user may feel as a static discharge (depending on the ambient and body humidity). In principle, we recommend an antistatic suction hose (accessory) when vacuuming fine dust or similar materials.
Mounting the suction accessories (see Figure C)
The suction tube (24) is equipped with a locking system, to which the suction accessories (floor nozzle (22), crevice nozzle (23)) can be attached.
Mounting on the service filter
-Place the service filter (22) on the service head (24), until both clamping levers (33) snap into place on the service head. -For removal, press both clamping levers (33) inward and pull out the filter elements.
Mounting the filter elements
-Place the folded filter (23) on the service head (24), until you hear both clamping levers (33) snap into place on the service head. -Then attach the appropriate service equipment (e.g., filter, filter for dust, service hose, etc.) to the folded filter (23). -For removal, press both clamping levers (33) inward and pull out the filter elements.
Inserting/Replacing the filter bag for dust (service of dust materials) (see D1-D2)
For servicing dust materials in accordance with dust class L, you must insert a filter bag (25) or a dust bag.
If dust materials without or with a limit value of exposure ≥ 1mg / m3 (in accordance with dust class L) are to be serviced, they can be serviced directly into the container.
Note: When using the filter bag, the filter bag must be used, and when using the flat filter, you must switch off the automatic filter cleaning (AFC) (see, Automatic filter cleaning (AFC), page 215).
REPLACING
Servicing dust that is hazardous to health. Differences and handling, as well as disposal
The container for collecting dust may only be emptied by trained personnel. Appropriate protective equipment is required. Do not use the service without a complete filter system. Do not endanger your health.
Inserting the filter bag
-Open the clamps (13) and remove the upper part of the service head (12). -Place the filter bag (25) with the opening for filling facing up into the container (1). -Pull the opening for filling over the guide ring until the end. -Check that the filter bag (25) is completely seated on the inner walls of the container (1). -Place the remaining part of the filter bag (25) over the rim of the container (1).
-Insert the upper part of the service head (12) and close the clamps (13).
Remove the filter bag and close
- Open the filler opening (13) and pull out the filter (12). - Avoid spilling fuel when removing the filter (25) if the pump is tilted. Carefully remove the filter (25) from the tank (1) without damaging it. Make sure the filter does not touch the pump housing or other sharp objects. - Remove the cap with the sealing ring and insert the filter. Then press the filter (25) into the opening for filling with the removed cap and sealing ring.
Replacing/Installing the Right Filter (Optional)
- Open the filler opening (13) and pull out the upper part of the filter (12). - Avoid spilling fuel when removing the filter. Close the opening of the right filter by closing the cap. Remove the closed right filter from the tank (1). - Place the new right filter on the pump housing. Check that the filter is seated correctly and fits tightly against the inside of the tank (1). - Insert the upper part of the filter (12) and close the closures (13).
Installing the Rubber Strip (For Wet Materials) (See Figure E)
Note: The pre-separator (right filter class) is intended only for use with wet materials.
- Remove the cap (29) with the appropriate tool from the raised base (30). - Place the rubber strip (28) into the raised base (30).
Note: The structured side of the rubber strip must face outward.
Attaching the L-Boxx (See Figure F)
- Attach the L-Boxx to the holders (11).
For transporting the vacuum for simple cleaning of the device, you can attach the L-Boxx to the upper part of the vacuum.
Do not carry the vacuum by the handle when the L-Boxx is attached. The vacuum is not intended for carrying the L-Boxx. There is a risk of injury or damage.
Operation
Remove the dirt collector before vacuuming or cleaning the vacuum, before adjusting the settings of the device, before replacing parts, or before troubleshooting. These safety measures prevent unintentional starting of the vacuum.
Switching On/Off
Pay attention to the electrical voltage! The voltage of the power source must match the voltage indicated on the rating plate of the vacuum. It is marked 230 V and can also be used with 220 V. Inform yourself about the relevant regulations/laws in your country regarding the handling of electrical equipment.
Instructions for use and maintenance of the suction materials:
- Dust with harmful effects on health ≥ 0.1 mg/m³ In such cases, the vacuum cleaner must not be used in spaces where there is a danger of explosion. To ensure optimal performance of the vacuum cleaner, you must regularly empty the dust container (24) from the front side of the vacuum cleaner (12).
Suction of dry materials
Suction of wet materials
- Set the air volume regulator (6) to the diameter of the hose. - To turn on the vacuum cleaner, set the mode selector switch (7) to the "Suction" position. - To turn off the vacuum cleaner, set the mode selector switch (7) to the "Off" position. The vacuum cleaner is equipped with air volume control. The air volume control is set to a flow rate of 20 m/s, regardless of the position of the air volume regulator (6). If this speed is exceeded, e.g., due to coarse dirt in the suction hose, the filter cleaning interval is shortened, and an acoustic signal for cleaning is triggered. In this case, turn off the vacuum cleaner and check as described in the section "Cleaning the filter".
Suction of dust created during work with power tools (see figure G)
There must be a sufficient air flow (L) in the room to extract the extracted air back into the room. Observe the relevant regulations in your country.
The vacuum cleaner has a built-in safety socket (5). You can connect a power tool to it.
Observe the maximum permissible power of the connected power tool.
To enable proper transport of the dust to the suction point, the minimum air flow for the connected power tool must not be undershot.
Diameter of the hose Set the air flow rate
| 35 mm 57,9 m | \( {}^{3}/\mathrm{h} \) |
| 22 mm 41,2 m | \( {}^{3}/\mathrm{h} \) |
| 15 mm 12,7 m | \( {}^{3}/\mathrm{h} \) |
- Set the air volume regulator (6) to the diameter of the hose. - Mount the suction adapter (22) (see "Mounting the suction adapter", page 213). - Insert the suction adapter (22) into the suction openings of the power tool.
Note: When working with power tools, the air flow through the suction hose is low (e.g., sawdust, shavings, etc.). The opening for additional air (34) on the suction adapter (22) must be opened. Only in this way can the filter cleaning function work without problems. Therefore, close the opening for excess air (34) only when the maximum opening is formed.
- For switching on/off
Automatic vacuum cleaner, set the mode selector switch (7) to the "Auto" position.
Turn on the device, turn on the electronic control according to the regulator's position (6). If the pump is correctly selected, proper transfer of rights is enabled.
- For use, connect the device to the power supply (5) by plugging in the power cord. The device turns on automatically when it starts working.
- Turn off the power supply to stop the device.
Function for automatic start/stop The automatic start function continues to work for 15 seconds to allow the remaining liquid to be sucked from the specified area.
- To turn off the device,
set the operating mode selector (7) to the "Off" position.
If the warning signal sounds, you must check the device as described in the section "Troubleshooting".
1+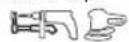
Suction of wet materials
Do not use the device to vacuum flammable or explosive substances, e.g. gasoline, alcohol, solvents. Do not vacuum liquids or flammable substances. Do not use the device in spaces where there is a risk of explosion. Dust, vapors or liquids may ignite or explode. The device must not be used as a water pump. The device is intended for vacuuming mixtures of air and water.
Note: The setting for degree of protection (protection class IP) is only intended for vacuuming wet materials.
Working with the device for vacuuming wet materials
- If necessary, remove the filter bag (25) or the dirt bag.
Note: For easier removal, when vacuuming mixtures of water and solid materials, use the foam filter (accessory), which will separate the water from the solid materials.
- Insert the rubber nozzle (28) into the floor nozzle (30) (see "Inserting the rubber nozzle (vacuuming wet materials)" (Fig. D), page 213). - Turn off the automatic filter cleaning (AFC) (see "Automatic filter cleaning (AFC)" (Fig. C), page 215).
Maintenance
To activate maintenance, press and hold the button for selecting the operating mode (7) and set it to the "Maintenance" position.
Maintenance is determined by the sensor for the degree of fullness (37). When the maximum degree of fullness is reached, maintenance is activated. Press and hold the button for selecting the operating mode (7) and set it to the "Exclusion" position.
Note: When servicing non-conductive materials (e.g., foam, dust from sanding, oils, and greases), the sensor must not be activated during the emptying process. The degree of fullness must be checked regularly and the container emptied in time. If during servicing of the filter material an acoustic signal for emptying occurs, the safety of the sensor function is not compromised. No measures are required to eliminate the interference.
To deactivate maintenance, press and hold the button for selecting the operating mode (7) and set it to the "Exclusion" position. - For transport, close the clamps (2) on the suction hose (3). - Empty the container (1).
To prevent the formation of dust when servicing wet materials: - Remove the filter (26) and let it dry well.
- Remove the upper part of the maintenance (12), open the cap of the filter (36) and let it dry well.
Automatic filter cleaning (see figure H)
When automatic filter cleaning (AFC = Automatic Filter Cleaning) is activated, the filter (26) is cleaned every 15 seconds with compressed air (pulsating sound).
After the suction duration has elapsed, the filter cleaning must be activated.
Regular filter cleaning increases the service life of the filter.
To achieve a long service life of the filter, deactivate the filter cleaning only in exceptional cases: e.g., when suctioning clean liquids or when using a paper filter bag.
Since the filter is removed from the surface, it is still easy to clean. Cleaning the filter by knocking or blowing out is not necessary and can damage the filter.
Note: The automatic filter cleaning is always activated.
The activation/deactivation of the automatic filter cleaning is possible only when the device is switched on.
Press the ON/OFF button (9).
The control LED (35) goes out.
Press the ON/OFF button (9).
The control LED (35) lights up green.
Maintenance and service
Maintenance and cleaning
Remove the plug from the connector before cleaning or servicing the appliance, before replacing parts or adjusting. These measures prevent unintentional starting of the appliance. Clean the appliance and the ventilation openings so that it can work well. The service life of the appliance is protected from dust.
If it is necessary to use an extension cable, then buy it from Bosch or an authorized Bosch dealer to avoid endangering safety.
For cleaning the housing, the appliance must be disassembled, cleaned and reassembled, if possible, without causing danger to personnel.
This applies to other parts as well. Before disassembly, the appliance must be cleaned to avoid dangerous situations. The room where the appliance will be disassembled must be well ventilated. During maintenance, wear protective clothing. After maintenance, clean the room where you worked.
At least once a year, it is necessary to perform a technical check by the manufacturer or an authorized service center, e.g., to check the safety-relevant components, that the appliance is in good condition and the function of the control device.
For appliances of class M that are used in a dirty environment, the exterior and all machine parts must be cleaned or treated with a cleaning agent. Before performing any maintenance work, all parts that cannot be sufficiently cleaned must be removed. Such parts must be disposed of in an impermeable container in accordance with the regulations for disposal of such waste.
Replacing the filter (see Fig. I1-12)
Check the filter for damage. Replace the filter if necessary.
Then replace it with a new filter (26).
-Avoid contact with the closing mechanism (18) and open the filter cover (36). -Pull the filter (26) out, hold it and remove it. -Dispose of the dirty filter properly, following the instructions on the filter cover (36). For PES and PTFE filters, they can be cleaned under running water. -Insert the new filter (26) and press it down well. -Close the filter cover (36) again (until it clicks).
Cleaning the vacuum cleaner
Clean the vacuum cleaner body with a soft, damp cloth and mild cleaning agent, then let it dry.
Cleaning the water level sensors (see figure J)
Temporarily remove the water level sensors (37).
-Open the locking mechanism (13) and pull out the water tank (12). -Clean the water level sensors (37) with a soft cloth. -Insert the water tank (12) back and close the locking mechanism (13).
Storage and transport (see figure K)
-Wind the power cord around the cord hooks (17). -Check that the accessories are in their proper holders: the crevice nozzle (31) in the holder (19), the floor nozzle (27) in the holder (20), and the upholstery nozzle (30) in the holder (21). -Open the locking clips on the suction hose (4) and place the suction hose (24) on the upper part of the vacuum cleaner in the holder (4). Close the locking clips again. -Check that the L-bow is in the holder (11). -Empty the dirt container. If the dirt container is not emptied, the suction power will decrease and there is a risk of blockage. Carry the vacuum cleaner only by the carrying handle (10). -For transport of the vacuum cleaner, wind the cord (2) around the cord hooks (3). -Store the vacuum cleaner in a dry place, protected from frost. -To fix the tubes (16), attach them to the tube holder (15).
Troubleshooting
If a defect occurs (e.g., a clogged filter), the vacuum cleaner must be switched off immediately. The defect must be rectified before restarting.
Problem solving
| Турбината за BCSCYBA№ He pa60н. -iproberete roстунот Кабел, пгклuyокот застуja, оснгуразуанot, пгклuyницета и сенистуота 3a на понен�ост (37). | П配电ичыот за ИЗБор на реким Ha pa60ta (7) сTown на „Стар/Стог ватиka“. -Проботе ro пгклuyыот за ИЗБираье Ha реким Ha pa60ta (7) на ознakатa „ВSCSуваьe" одн. ВКлuyе т go пгклuyниot eilektprueн anat ha пгклuyницета (5). |
| Турбината за BCSCYBA№ ce Исклuchува. | -Искралене go садOT (1). |
| Турбината за BCSCYBA№ NOBtopHo пу pa60н и по пра3неньeto Ha садOT. | -Исклuyete go BCSCYBaOT и поЕкajte 5 cekyнд, по 5 cekyнд NOВtopHo ВКлuyete. |
Problem solving
| -Сенистума соклеса на Налонеост (37) Кто и Новно менистума ворота (37) Исучате Гго соклеса на Налонеост (37) Кто и Новно менистума ворота (37) -Од��ограда на Налонеост (31), цевота 3a BCSCYBAJBe (24) пони наслеговпфелтет (26). -Заменею постувашие Гго соклеса на Налонеост (37) -Празвлино постувашие Гго соклеса на Налонеost (37) -Празвлино постувашие Гго соклеса на Налонеost (37) -Заменею постувашие Гго соклеса на Налонеost (37) -Заменею постувашие Гго соклеса на Налонеost (37) -Заменею постувашие Гго соклеса на Налонеost (37) -Заменею постувашие Гго cынша на Налонеost (37) -Заменею постувашие Гго соклеса на Налонеost (37) -Заменею постувашие Гго соклеса на Налонеost (37) -Заменею постувашие Гго соклеса на Налонеost (39). | |
| Сейser央да на BCSCYBAJBe. -Од��ограда на Налонеост (37) Кто и Новно менистума ворота (37) -Заменею постувашие Гго соклеса на Налонеost (37) -Заменею постувашие Гго соклеса на HANONHOT (37) -Заменею постувашие Гго соклеса на HANONHOT (37) -Заменею постувашие Гго соклеса на HANONHOT (37) -Заменею постувашие Гго соклеса на HANONHOT (37) -Замене nou на Налонеost (37) -Замене nou на Налонеost (37) -Замене nou на Налонеost (37) -Замене nou на Налонеost (37) -Замене nou на HANONHOT (37) -Замене nou на HANONHOT (37) -Замене nou на HANONHOT (37) -Замене nou на HANONHOT (37) -Замене nou на HANONHOT (37) -Замене nou на HANONHOT (37) -Замене nou на HANONHOT (37) | |
| ИзLER央да на BCSCYBAJBe. -Од��ограда на Налонеost (37) Кто и Новно менистума ворота (37) -Заменею постувашие Гго соклеса на Налon德 (37) -Заменею постувашие Гго соклеса на HANONHOT (37) -Замене nou на Налон德 (37) -Замене nou на HANONHOT (37) -Замене nou на HANONHOT (37) -Замене nou на HANONHOT (37) -Замене nou на HANONHOT (37) -Замене nou на HANONHOT (37) -Замене nou на HANONHOT (37)\n | |
| Сейser央да на BCSCYBAJBe. -Од��ограда на Налон德 (37) Кто и HINьно менистума ворота (37) -Заменею постувашие Гго соклеса на Налon德 (37) -Заменею постувашие Гго соклеса на HANONHOT (37) -Заменею постувашие Гго соклеса на HANONHOT (37) -Замене nou на Налон德 (37) -Замене nou на HANONHOT (37) -Замене nou на HANONHOT (37) -Замене nou на HANONHOT (37) -Зamensею постувашие Гго соклеса на Налon德 (37) -Заменею постувашие Гго соклеса на HANONHOT (37) -Замене nou на Налон德 (37) -Замене nou на HANONHOT (37) -Замене nou на HANONHOT (24) e 3ATHATO Или CBNTKAGO. -Од��ограда на Налон德 (37) -Заменею постувашие Гго соклеса на Налон德 (37) -Заменею постувашие Гго соклеса на HANONHOT (37) -Заменею постувашие Гго соклеса на HANONHOT (37) -Заменею постувашие Гго соклеса на HANONHOT (37) -Замене团员 Гго соклеса на HANONHOT (37) -Замене团员 Гго соклеса на HANONHOT (37) -Замене团员 Гго соклеса на HANONHOT (37) -Замене团员 Гго соклеса на HANONHOT (37) -Замене团员 Гго cынша на Налон德 (37) -Замене团员 Гго соклеса на HANONHOT (37) -Замене团员 Гго соклеса на HANONHOT (37) -Замене团员 Гго соклеса на HANONHOT (37) -Замене团员 Гго соклеса на HANONHOT (37) | |
| Сейser央да на BCSCYBAJBe. -Од��ограда на Налон德 (37) Кто и HINьно менистума ворота (37) -Заменею постувашие Гго соклеса на Налon德 (37) -Заменею постувашие Гго сокл雷斯а на HANONHOT (37) -Заменею постувашие Гго сокл雷斯a на HANONHOT (37) -Заменею постувашие Гго сокл雷斯a на HANONHOT (37) -Заменею постувашие Гго сокл雷斯a на HANONHOT (37) -Заменею постувашие Гго сокл雷斯a на HANONHOT (37) | |
| СIELLEDA THERA NO. 10000000000000000000000000000000000000000000000000000000000000000000000000000000000000000000000000000 | |
| СIELLEDA THERA NO. 10000000000000000000000000000000000000000000000000000000000000000000000000000000000000 | |
| СIELLEDA THERA NO. 1100000000000000000000000000000000000000000000000000000000000000000000000000000000000000000000000000 |
Equipment
| Бpoj ha onpeMa | |
| Ха rtиени Amплтетр Вразкчka (суво) 2 607 432 035 | |
| Платни Amплтетр Вразкчka (суво) | 2 607 432 037 |
| Бpoj ha onpema | |
| Фильпер в两年前 за влажно BCИСУВане (мokpo) | 2607 432 039 |
| В两年前 за о:tпад (PE) (сув/ мokpo) | 2607 432 043 |
218 | Serbian
Service department and advice on use
The service department will answer your questions regarding repairs and maintenance of your product, as well as spare parts. You will also find exploded views and information on spare parts at: www.bosch-pt.com
The Bosch advice team will help you with any questions about our products and accessories.
For all warranty and spare parts claims, please quote the 10-digit number from the product nameplate.
Macedonia
D.D. Enkips
Saba Kovačević 47H, no. 3
1000 Skopje
E-mail: dimce.dincev@servis-bosch.mk
Internet: www.servis-bosch.mk
Tel./Fax: 02/2467610
Mobile: 070595888
D.I.T.Y. RODKA
Janukrovski 66; T.L. Autokomandacija 69
E-nowta: servisrojka@yahoo.com
Ten: +389 2 3174-303
Mo6: +389 70 388-520, -530
OttpaHyBaBe
BcncyBaOT, onpemaTn am6bnaxKe Tpe6a da se OTCpaHaT Ha ekONoUKn pHpaTnB HauH.

He ro φρηajre BCnCyBauyot BOДOMaшнага KaHTa 3a OTnAOu!
Cama 3a 3emjnte oEY:
CnopeE BpOnckata peryNaTHBa 2012/19/EY3a eNEKtpnHn ENEKtpoNcK npEnn HNBHa HauHOHaHa ynotpe6a, BCNCyBaunte wTO ce BOH ynotpe6a mopa oDdEnHO da se cobraat n da se peuKnnpaat Ha ekOLOwKn npHpaTnB HauHH.
Srpski
Sigurnosne napomene za usisivač

Procitajte sva upozorenja i uputstva.
Propusti u pošovanju napomena za sigurnost i uputstava mogu da prouzrokuju elektrčni udar, požar i/ili teške povrede.
Cuvajte svu upozorenja i uputstva za buducnost.
Ovaj usisivač nods predviden za to da ga koriste deca i lica sa
by persons with reduced physical, sensory, or mental capabilities or lack of experience and knowledge. Otherwise, there is a danger of incorrect handling and injury.
Supervise children. This will ensure that children do not play with the vacuum cleaner. WARNING Never vacuum materials containing asbestos. Asbestos is considered
a carcinogen.
WARNING Use the vacuum cleaner only if you have received sufficient information about
Automatic Filter Cleaning
AFC
Automatic Filter Cleaning (AFC = Automatic Filter Cleaning)
| 15 | 高斯専種は15mm wide wide wide wide wide wide wide wide wide wide wide wide wide wide wide wide wide wide wide wide wide wide wide wide wide wide wide wide wide wide wide wide wide wide wide wide wide wide wide wide wide wide wide wide wide wide wide wide wide wide wide wide wide wide wide wide wide wide wide wide wide wide wide wide wide wide wide wide wide wide wide wide wide wide wide wide wide wide wide wide wide wide wide wide wide wide wide wide wide wide wide wide wide wide wide wide wide wide wide wide width width width width width width width width width width width width width width width width width width width width width width width width width width width width width width width width width width width width width width width width width width width width width width width width width width width width width width width width width width width width width width width width width width width width width width width width width width width width width width width width width width width width width width width width width width width width width width width width width width width width | ||
| 22 | 高斯専種は22mm wide wide wide wide wide wide wide wide wide wide wide wide wide wide wide wide wide wide wide wide wide wide wide wide wide wide wide wide wide wide wide wide wide wide wide wide wide wide wide wide wide wide wide wide wide wide wide wide wide wide wide wide wide wide wide wide wide wide wide wide wide wide wide wide wide wide wide wide wide wide wide wide wide wide wide wide wide wide wide wide wide wide wide wide wide wide wide wide wide wide wide wide wide wide wide wide wide wide width | ||
| 35 | 高斯専種は35mm wide wide wide wide wide wide wide wide wide wide wide wide wide wide wide wide wide wide wide wide wide wide wide wide wide wide wide wide wide wide wide wide wide wide wide wide wide wide wide wide wide wide wide wide wide wide wide wide wide wide wide wide wide wide wide wide wide wide wide wide wide wide wide wide wide wide wide wide wide wide wide wide wide wide wide wide wide wide wide wide wide wide wide wide wide wide wide wide wide wide wide wide wide wide wide wide wide width | ||
| Min/Max | Must be a double-digit number. | ||
| - 週日一大早起床时必须携带的物品 | |||
| - 週日一大早起床时必须携带的物品 | |||
| - 週日一大早起床时必须携带的物品 | |||
| max. 2200 W min. 100 W | |||
| AFC | |||
a 8.10


IEC/EN60335-2-69 standard, with a distance of 0.1 ≤ a > between parts.

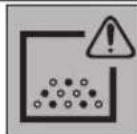
15
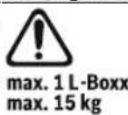
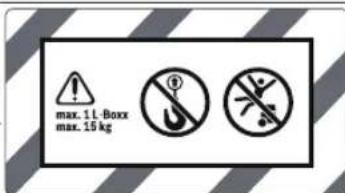


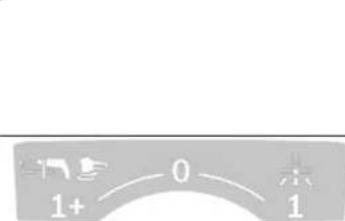
(AFC = Automatic Filter Cleaning)
AFC
AFC


Automatic Filter Cleaning
L-BOXX
__SUPPIMER__
.3p/p00,1≤
35 Jai bai wai jgj g jwai (A
103Ugagg po
aaii jiljllg glll 230 [U]
.
aalabawaaaggagalllllalololololololololololololololololololololololololololololololololol
gJgljI) bawU ggbj Jola uSji
(A)
joo bawl oobyolal (4)olol
.(32)aaoaoljgolg1
(Bgjgljbl)bawl ggbj uSj
(3) pgbjI jolc (24) baiI pgbj
.ajllgacawlljlaocdojoljog
aJawl (25) aJauuU uS buy p 1000
.1) agl j 0g lal jll s a j .bll Jog aow lc ydl jll s cssj p
-1cglgj0jwluo kowuJSo
M. 1000000000000000000000000000000000000000000000000000000
I (AFC) julu u logg 1 aabll aag g
aJwlaal jalaI uS pI saiI aI
a bll a b g, jbl) 1 Jg
.(285 aai,("H ojgall jil) jll uLogig
jLc abalIgai
Jg j
aaii jlll 10 no jllgagagagagagagagagagagagagagagagagagagagagagagagagagagagagagagagagagagagagagagagagagagagagagagagagagagagagagagag
JolSLJI pIJI pUJI jgs abaluI Jusuu
.
aJill uS uS
(1) LcS agsio
JU Juaaagull aawmu Jall qaiq
Jwogill aaw js
Iolai (25) 1
.1)LgUdAulUJJU
aaglaagg25) aasaa
11
10g(12)abaiu(5gljJU
13(0.9x)
J (Automatic Filter Cleaning
1gll 2aawlg aij 15 1S (26) abww
( Δadl 0 - Δadl 0) = 2Δ
__SUPPIMER__
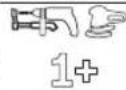
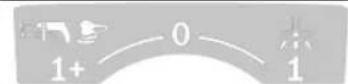
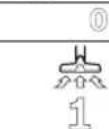
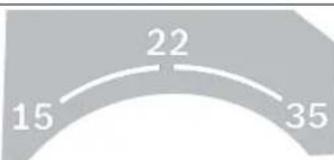
Min/Max
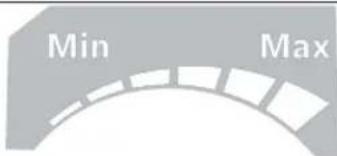
(AFC = Automatic Filter Cleaning)
AFC


Automatic Filter Cleaning
(9)
JajgJa>ogaaaaiws (10)
L-Boxx oJμS (11)
ossoycaaa (12)
OuSo Syl CawoC
乙 (14)
jw (15)
j(16)
J5S0xj128; (17)
julwosoo (18)
Sso aljoo joo (19)
SswjJy/ SgDjLjxOxJx
... JjLiSjOiJjQj (21)
(\omega \omega \omega \omega \omega \omega \omega \omega \omega \omega \omega \omega \omega \omega \omega \omega \omega \omega \omega \omega \omega \omega \omega \omega \omega \omega \omega \omega \omega \omega \omega \omega \omega \omega \omega \omega \omega \omega \omega \omega \omega \omega \omega \omega \omega \omega \omega \omega \omega \omega \omega
(23)
a 0 ≤ S 0( 2π )
all (25)
(PES) 10
(27)
Syyaw (28)
a sla jgi (29)
(30)
Jw(31)
Ss Ssiw osjg o
Saaos
a 1a 2a3 (34)
sUJU (35)
(36)
yueo 37
Jg g Ugs
olswjolawl jIgo
IEC/EN60335-2-69M
The dust concentration shall not exceed 0.1 mg/m³.
The dust concentration shall be measured at the outlet of the filter.
ab ≥ 0 (1)
Julil sl 2
(3)
SsO Sslw oxjg:0
(5)
(6)
sJwol sIgWgJyLd
uJgOuSau (8)
jü
| GAS 35 M AFC | ji/ɪsʌbɪsɪsɪə | ||
| 3601 JC3 170 | 3601 JC3 1.. | ɔsɪnərə | |
| 110 | 220-240 | V | gʊlɪzʌləsɪ |
292|f
| GAS 35 M AFC | μ/ικίας Σιδησον | ||
| 1000 | 1200 | W | φرطَتِيرِهُ نَعْلِي |
| φرطَتِيرِهُ | |||
| 35 | 35 | I | (,)الْعَنْمَبَعْفَسَة |
| 19 | 19 | I | (,)الْعَنْمَبَعْفَسَة |
| 19 | 19 | I | الْعَنْمَبَعْفَسَة |
| IA φرطَتِيرِهُ | |||
| 211 | 230 | hPa | ριδύ - |
| 242 | 254 | hPa | ηργίη - |
| IA φرطَتِيرِهُ | |||
| 31 | 36 | l/s | ριδύ - |
| 0,031 | 0,036 | /s³m | |
| 71 | 74 | l/s | ηργίη - |
| 0,071 | 0,074 | /s³m | |
| 1150 | 1380 | W | φرطَتِيرِهُ مَعْس |
| 0,615 | 0,615 | m | سَعَتَسَعَتَسَعَتَسَعَتَسَعَتَسَعَتَسَعَتَسَعَتَسَعَتَسَعَتَسَعَتَسَعَتَسَعَتَسَعَتَسَعَتَسَعَتَسَعَتَسَعْ |
| M | M | λελ | |
| 12,4 | 12,4 | kg | EPTA-Procedure 01:2014 ψرطَتِيرِهُ |
| I/⊕ | I/⊕ | λελ/λελ | |
| IPX4 | IPX4 | ηργίη | |
| العربية | العربية | العربية |
| W 100 | W 2200 | V 230 |
.
0siSo Jlajg] gj gjgcds
du jucg sds dss ygwhjab.
joljglg jglgbjblolglb
aaij(1)oSiO
g jjS 12)0si So yu C
.13
()(uS)Uw2aJjJg
(Egai duiS
g jS (w) (s gjg aJs bgojo bJw:di
Comega and jbj Ssa 15mu (Mj
jjjwlll j1 29) wg
5.5.3.0( )
J30UJJUJ28USS
A
(FgajdssEgaj) L-Boxx jSjLj
JJ110JJJ L-Boxx
LgJgGgDgQgOgOgJai g Jg
jIg jOiso caleio sIqipim
jUoSiO LlBoxjIgJ
.
JooL-Boxxdjblso
juSiWJluwL-Boxx aW sI y siSo.
.1Jgag g 1wI y
oLswu jksj
Ujli 5gJ pSoo I (Ogic g uSdo UgI SgUjli
.23 2
-51
__SUPPIMER__
.
__SUPPIMER__

__SUPPIMER__
jUg220 V. jU kJ jU Ug
4a 50
bjo joo Ujjg jilg jI JU
SgE1bI GwS ggsgssd
jglgo g jgglgjglg0siSojl
:goj o slaiw
3
-<jlaaiSjpoJda
oJaiJiai jbs (sJusgilsojLs o siOj
.
uSo Silw Jinyu, duiy jL (aai)24(
osiso yu Cawg jgs Jols aamog)12
.
Suuu
A

J
①
.
16.4.4.5.6.7.8.9.10
15 (26) (Filter Cleaning)
| 2607 432 035 | (sus) sislc allj aas |
| 2607 432 037 | (sus) s2ai allj aas |
| 2607 432 039 | (j) wlog jilq aas |
| 2607 432 043 | (j/sus)(PE) allj aas |
www.bosch-pt.com:
- SAFETY INFORMATION FOR VACUUM CLEANERS
- WARNING
- SYMBOLS
- SYMBOLS AND THEIR MEANING
- AUTOMATIC START/STOP
- SWITCHING OFF
- PRODUCT DESCRIPTION AND SPECIFICATIONS
- INTENDED USE
- PRODUCT FEATURES
- ENGLISH
- TECHNICAL DATA
- NOISE/VIBRATION INFORMATION
- ASSEMBLY
- FITTING THE HOLDER FOR THE VACUUM HOSE (SEE FIGURE A)
- FITTING THE VACUUM HOSE (SEE FIGURE B)
- FITTING THE VACUUMING ACCESSORIES (SEE FIGURE C)
- FITTING THE DUST EXTRACTION ADAPTER
- FITTING THE NOZZLES AND TUBES
- INSERTING/REMOVING THE DISPOSAL BAG OR DUST BAG (DRY EXTRACTION) (SEE FIGURES D1-D2)
- THE VACUUM CLEANER CONTAINS DUST PARTICLES THAT POSE A RISK TO HEALTH
- INSERTING THE DISPOSAL BAG
- REMOVING AND SEALING THE DISPOSAL BAG
- CHANGING/INSERTING THE DUST BAG (ACCESSORY)
- FITTING THE RUBBER LIP (WET EXTRACTION) (SEE FIGURE E)
- ATTACHING THE L-BOXX (SEE FIGURE F)
- OPERATION
- START-UP
- DRY VACUUMING
- VACUUMING UP DUST DEPOSITS
- EXTRACTING DUST THAT ACCUMULATES FROM WORKING POWER TOOLS (SEE FIGURE G)
- WET VACUUMING
- REMOVE THE DISPOSAL BAG (25) OR DUST BAG IF NECESSARY
- VACUUMING UP LIQUIDS
- AUTOMATIC FILTER CLEANING (SEE FIGURE H)
- MAINTENANCE AND SERVICE
- MAINTENANCE AND CLEANING
- REMOVING/CHANGING THE FLAT-PLEATED FILTER (SEE FIGURES I1-I2)
- CLEANING THE CONTAINER
- CLEANING THE FILL LEVEL SENSORS (SEE FIGURE J)
- STORAGE AND TRANSPORT (SEE FIGURE K)
- RECTIFYING FAULTS
- PROBLEM CORRECTIVE MEASURES
- ACCESSORIES
- AFTER-SALES SERVICE AND ADVICE ON USING PRODUCTS
- GREAT BRITAIN
- IRELAND
- AUSTRALIA, NEW ZEALAND AND PACIFIC ISLANDS
- REPUBLIC OF SOUTH AFRICA
- CUSTOMER SERVICE
- KZN - BSC SERVICE CENTRE
- WESTERN CAPE - BSC SERVICE CENTRE
- BOSCH HEADQUARTERS
- DISPOSAL
- ONLY FOR EU COUNTRIES
- FRENCH
- AFC
- CHANGING/REPLACING THE DUST BAG (ACCESSORY)
- INFORMATION ABOUT NOISE AND VIBRATION
- OPERATION WITH THE VACUUM CLEANER
- AUTOMATIC FILTER CLEANING (BASIC VERSION H)
- DEACTIVATING AFC
- REMOVAL/REPLACEMENT OF THE SURFACE FILTER (SEE FIGURES 1-12)
- MAINTENANCE TECHNICAL DOCUMENTATION
- STORAGE
- TRANSPORTATION
- SAFETY INSTRUCTIONS FOR VACUUM CLEANERS
- USE THE VACUUM CLEANER ONLY AS DESCRIBED IN THE INSTRUCTION MANUAL
- BEFORE EMPTYING THE VACUUM CLEANER OR PERFORMING MAINTENANCE, ALWAYS UNPLUG IT FROM THE POWER OUTLET
- THE FOLLOWING SYMBOLS MAY BE IMPORTANT FOR OPERATING YOUR VACUUM CLEANER. REMEMBER THE SYMBOLS AND THEIR MEANING. CORRECT UNDERSTANDING OF THE SYMBOLS WILL HELP YOU USE THE VACUUM CLEANER BETTER AND MORE SAFELY
- WARNING! READ ALL SAFETY INSTRUCTIONS AND INSTRUCTIONS. FAILURE TO FOLLOW THE SAFETY INSTRUCTIONS AND INSTRUCTIONS MAY RESULT IN ELECTRIC SHOCK, FIRE AND/OR SERIOUS INJURY
- WARNING! THE VACUUM CLEANER CONTAINS DUST THAT IS HAZARDOUS TO HEALTH. EMPTYING AND MAINTENANCE PROCEDURES, INCLUDING THE REMOVAL OF THE DUST CONTAINER, MAY ONLY BE CARRIED OUT BY SPECIALISTS. APPROPRIATE PROTECTIVE EQUIPMENT IS REQUIRED. DO NOT OPERATE THE VACUUM CLEANER WITHOUT THE COMPLETE FILTER SYSTEM. OTHERWISE, YOU WILL ENDANGER YOUR HEALTH
- MIN/MAX
- PRODUCT DESCRIPTION AND SERVICES
- NUMBERED COMPONENT PARTS
- INSTALLING THE L-BOXX (SEE FIG. F)
- WORKING WITH THE TOOL
- SWITCHING ON THE POWER TOOL
- COLLECTING DUST DEPOSITS
- RUSSIAN
- REMOVING DUST FROM POWER TOOLS (SEE FIG. G)
- OPERATION FOR VACUUMING UP LIQUIDS
- LIQUID CAPACITY
- AUTOMATIC FILTER CLEANING (SEE FIG. H)
- TURNING OFF AFC
- TURNING ON AFC
- REMOVAL/REPLACEMENT OF THE FLAT PLEATED FILTER (SEE FIG. I1-I2)
- YTTNN3AUN
- TOLBKOДЯСТРАН-ЧЕНОВ EC
- YKPAIHCBKA
- BKA3IBKN 3 TEXHIKN 6E3NEKN DNY BIDCMOKTYBAUIB
- CEN NNOOCMOK HE PO3PAXOBAHNHA BNKOPNCTAHNDIBMN IOCOBAMN 3 06MEXEHMNPHI3NUHMN,CEHCOPHMN A60PO3YMOBHMN 3I6HOCTAMN A60HENOCTATHIM DOCBIDOM I
- ATTEMPT TO DRINK. DO NOT
- WARNINGS
- NONEPE- DKEHHA
- ONONEPE- DXKEHH
- ANONEPE- DKEHHA
- CIMBOJH
- SYMBOLS AND THEIR MEANINGS
- MOUNTING OF NOZZLES AND TUBES
- INSERTING/REMOVING THE FILTER BAG FOR DRY VACUUMING (SEE FIG. D1-D2)
- BEFORE USE
- INSTALLING THE DUST BAG
- ATTENTION WHEN CLOSING THE DUST BAG
- INSTALLING THE MOTOR PROTECTION FILTER (ACCESSORY)
- INSTALLING THE RUBBER GASKET (FOR WET VACUUMING) (SEE FIG. E)
- INSTALLING THE CASTORS (SEE FIG. F)
- STARTING OPERATION
- VACUUMING WITH THE HOSE
- UKRAINIAN
- VACUUMING WITH POWER TOOLS (SEE FIG. G)
- VACUUMING
- OPERATION WITH WET VACUUMING
- ASSEMBLING
- SWITCHING ON AFC
- SWITCHING OFF AFC
- REMOVAL/REPLACEMENT OF THE FLAT PLEATED FILTER (FIG. L1-12)
- CLEANING
- CLEANING THE TANK (FIG. J)
- STORAGE AND TRANSPORTATION (SEE FIG. I, K)
- TROUBLESHOOTING
- PROBLEM
- PROBLEM ELIMINATION
- REPLACEMENT
- REPLACEMENT OF THE FILTER
- VENTILATION AND ITS MAINTENANCE
- ΘHIM KXHE KYAT CNNATAMACBI
- MAKCATBI 6OYBIHWA KOJAHY
- KEPCEINRE H KYPAMDB6NWEKTEP
- KYMBIC KEPHEYI MAKCHMAIDBI KYAT MHHMAIDBI KYAT
- DO NOT USE THE DEVICE IF IT IS DAMAGED
- KEEP YOUR HANDS AWAY FROM THE ROTATING PARTS
- MOUNTING
- INSTALLING THE SUCTION HOSE (SEE FIGURE A)
- INSTALLING THE SUCTION HOSE (SEE FIGURE B)
- INSTALLING THE SUCTION HOSE (SEE FIGURE C)
- COPY ALTERNATIVE
- INSTALL THE BYPASS DEVICES
- INSTALL/REMOVE THE CABLE OR CHAIN LOCK (BYPASS COPY) (SEE D1-D2)
- EXPERT
- INSTALL THE CABLE
- SWITCH SETTING/POSITION (AS NEEDED)
- RESERVE FOR THE REACTOR (OPTIONAL) (SEE SECTION E)
- L-BOX WEEP HOLE (SEE SECTION F)
- DISPOSAL INSTRUCTIONS
- KYPRAK COPY
- XHHAHFAH 1AHADBI COPY
- KA3AK
- BLNFAN WAHCCOPY
- BLNFAANACOPY ANDBIHDAHBL JYMBIC KAAMAPBBL
- CYTBIKTBIKTAPBL COPBN ANY
- CY3RIHI ABTOMATTBI TPYDE TA3ANAY (H CYPETIN KAPAHB13)
- TEXHNKAIBIK KYTIM XAHE KBI3MET KCPCTY
- KBI3MET KEPCETY XEHCTA3ANAY
- KANNAK KATNAPNB CY3RIHI WBFRAPY/ANMACTBIPY (I1-I2 CYPTREPIN KAPAHB3)
- CONTAINER INSTALLATION
- FILLING THE DETERGENT, SEE INSTRUCTIONS (J)
- MAINTENANCE AND CLEANING (SEE INSTRUCTIONS K)
- KAZAKH
- DRAIN HOSE CONNECTION
- NECESSARY PARTS
- THE SERVICE LIFE OF THE DEVICE DEPENDS ON THE CONDITIONS OF USE
- WWW.BOSCH-PT.COM
- KAZAKHSTAN
- ROMANIAN
- DESCRIPTION OF THE PRODUCT AND FUNCTIONS
- INTENDED USE OF THE ELECTRIC TOOL
- ILLUSTRATED ELEMENTS
- BULGARIAN
- STANDARD FOR THE EXTRACTION AND SELECTION
- MOUNTING OF THE NOZZLES AND TUBES
- CONNECTING/DISCONNECTING THE SUCTION HOSE FOR THE VACUUM CLEANER (DRY VACUUMING) (SEE FIG. D1-D2)
- THE VACUUM CLEANER IS EQUIPPED WITH A DEVICE FOR ADJUSTING THE SUCTION POWER. SET THE SUCTION POWER ACCORDING TO THE REQUIREMENTS
- REMOVING THE FABRIC BAG FOR DUST
- REPLACEMENT/INSTALLATION OF THE DUST BAG (ACCESSORY)
- INSTALLING THE RUBBER GASKETS (WET CLEANING) (SEE FIG. E)
- OPEN THE BOX (SEE FIG. F)
- WORKING WITH THE POWER TOOL
- SWITCHING ON/OFF
- VACUUMING OF DRY DUST
- VACUUMING DUST FROM POWER TOOLS (SEE FIG. G)
- REMOVAL/INSTALLATION OF THE FLAT FILTER (FIG. 11-12)
- EMPTYING THE CONTAINER
- MACEDONIAN
- SAFETY INSTRUCTIONS FOR USE
- WARNING: REPAIR
- PRE-COMMISSIONING
- WARNING! READ THE SAFETY INSTRUCTIONS AND WARNINGS
- START/STOP AUTOMATIC
- OFF
- ON
- PRODUCT DESCRIPTION
- COMPONENT ILLUSTRATION
- INFORMATION ABOUT THE BRUSH/NOZZLE
- WEAR HEARING PROTECTION
- MOUNTING THE SUCTION HOSE (SEE FIGURE A)
- MOUNTING THE SUCTION TUBE (SEE FIGURE B)
- MOUNTING THE SUCTION ACCESSORIES (SEE FIGURE C)
- MOUNTING ON THE SERVICE FILTER
- MOUNTING THE FILTER ELEMENTS
- INSERTING/REPLACING THE FILTER BAG FOR DUST (SERVICE OF DUST MATERIALS) (SEE D1-D2)
- REPLACING
- INSERTING THE FILTER BAG
- REMOVE THE FILTER BAG AND CLOSE
- REPLACING/INSTALLING THE RIGHT FILTER (OPTIONAL)
- INSTALLING THE RUBBER STRIP (FOR WET MATERIALS) (SEE FIGURE E)
- SUCTION OF DRY MATERIALS
- SUCTION OF WET MATERIALS
- SUCTION OF DUST CREATED DURING WORK WITH POWER TOOLS (SEE FIGURE G)
- FOR SWITCHING ON/OFF
- TURN OFF THE POWER SUPPLY TO STOP THE DEVICE
- WORKING WITH THE DEVICE FOR VACUUMING WET MATERIALS
- MAINTENANCE
- REPLACING THE FILTER (SEE FIG. I1-12)
- CLEANING THE VACUUM CLEANER
- CLEANING THE WATER LEVEL SENSORS (SEE FIGURE J)
- PROBLEM SOLVING
- SERBIAN
- SERVICE DEPARTMENT AND ADVICE ON USE
- MACEDONIA
- OTTPAHYBABE
- CAMA 3A 3EMJNTE OEY
- SRPSKI
- SIGURNOSNE NAPOMENE ZA USISIVAČ
- PROCITAJTE SVA UPOZORENJA I UPUTSTVA
- OVAJ USISIVAČ NODS PREDVIDEN ZA TO DA GA KORISTE DECA I LICA SA
- GJGLJI) BAWU GGBJ JOLA USJI
- (A)
- (BGJGLJBL)BAWL GGBJ USJ
- AJILL US US
- JG G UGS
- OLSWJOLAWL JIGO
- ()(US)UW2AJJJG
- (EGAI DUIS
- (FGAJDSSEGAJ) L-BOXX JSJLJ
- OLSWU JKSJ
- SUPPIMER
- SUUU
Brand : BOSCH
Model : GAS 35 AFC
Category : Vacuum Cleaner