CSX3000 - Saw EGO - Free user manual and instructions
Find the device manual for free CSX3000 EGO in PDF.
Frequently Asked Questions - CSX3000 EGO
User questions about CSX3000 EGO
0 question about this device. Answer the ones you know or ask your own.
Ask a new question about this device
Download the instructions for your Saw in PDF format for free! Find your manual CSX3000 - EGO and take your electronic device back in hand. On this page are published all the documents necessary for the use of your device. CSX3000 by EGO.
USER MANUAL CSX3000 EGO
EN Cordless top handle chain saw 7
DE Akku-top handle kettensage 14
FR Scie a poignee superieure sans fil 21
ES Motosierra dePGA a bateria de 28
PT Motosserra dePGAa sem fios de 36
IT Motosegada potatura cordless 43
NL Accu-tophandle kettingzaag 50
DK Ledningsfri sav med tophandtag 57
SE Batteridriven tophandssag 64
Residual risk! People with electronic devices, such as pacemakers, should consult their physician(s) before using this product. Operation of electrical equipment in close proximity to a heart pacemaker could cause interference or failure of the pacemaker.
SAFETY SYMBOL
The purpose of safety symbols is to attract your attention to possible dangers. The safety symbols and the explanations with them deserve your careful attention and understanding. The symbol warnings do not, by themselves, eliminate any danger. The instructions and warnings they give are no substitutes for proper accident prevention measures.
WARNING: Be sure to read and understand all safety instructions in this Operator's Manual, including all safety alert symbols such as "DANGER," "WARNING," and "CAUTION" before using this tool. Failure to follow all instructions listed below may result in electric shock, fire, and/or serious personal injury.
SYMBOL MEANING
This page depicts and describes safety symbols that may appear on this product. Read, understand, and follow all instructions on the machine before attempting to assemble and operate it.
SAFETY SYMBOLS

Safety Alert

Wear heavy-duty work gloves made of durable material.

Wear non-slip safety footwear.

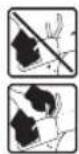
Be Aware of Kickback- Contact of the guide bar tip with any object should be avoided

Guide Bar Tip Kickback- Tip contact can cause the guide bar to move suddenly upward and backward, which can cause serious injury.

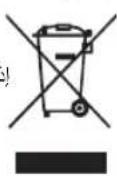
Waste electrical products should not be disposed of with household waste. Take to an authorized recycler.
V Volt

Direct Current CE

To reduce the risk of injury, user must read and understand operator's manual before using this product.

Wear snug-fitting clothing. Do not wear a scarf, necktie or jewelry.

Wear close-fitting safety glasses, earplugs or ear muffs and a safety hard hat with chin strap.

Two Handed Hold- Always use two hands when operating the chain saw.

The information of guide bar.

Do Not Expose To Rain.

Noise

EN SPECIFICATIONS
| Voltage | 56 V | |
| Recommended Operating Temperature: | -15°C-40°C | |
| Recommended Storage Temperature: | -40°C-70°C | |
| Optimum Charging Temperature | 5°C-40°C | |
| Cutting Length 300 mm | ||
| Chain speed 20 m/s | ||
| Chain Pitch | 3/8" (9.5mm) | |
| Chain Gauge 1.1 mm | ||
| Saw Chain Type | AC1200(Recommend) AC1400 (Compatible) AC1600 (Compatible) | |
| Guide Bar Type | AG1200(Recommend) AG1400(Compatible) AG1600(Compatible) | |
| Weight (without battery pack, chain sheath) | 3.5 kg | |
| Measured sound power level LWA | 98.8 dB(A) K=3 dB(A) | |
| Sound pressure level at working position LPA | 88.1 dB(A) K=3 dB(A) | |
| Guaranteed sound power level LwA (according to 2000/14/EC) | 102 dB(A) | |
| Vibration ah | Front Handle | 1.73 m/s2K=1.5 m/s |
| Main Handle | 2.21 m/s2K=1.5 m/s | |
DESCRIPTION
KNOW YOUR CHAIN SAW (Fig. A1)
- Saw Chain
- Kickback Brake Paddle
- Locking Tongue
- Main Handle
- Variable-Speed Trigger
- Eyelet
- Battery Indicator
- Low Oil-Indicator
- Front Handle
- Oil Tank Cap
- Guide Bar
- Lubricating Hole
- Sprocket
- Tensioning Screw
- ON-OFF Safety switch
- Guide Bolt
17.Bar Nut - Side Cover Assembly
- Oil-Flow Adjustment Screw Cover
- Dust Removal Cover
- Ejection Mechanism
- Electric Contacts
- Battery Realese Button
- Belt Hook
- Buckle
- Strap
- Strop
- Ring 1
- Saw Hook
- Power Plug
- Ring 2
- Chain Sheath
- Combi-Wrench
PACKING LIST (FIG. A1)
ASSEMBLY
ASSEMBLING/ DISASSEMBLING THE BAR AND CHAIN
WARNING: Always disconnect the power plug, and wear protective gloves before you assemble or do maintenance on the product.
WARNING: Read all safety warnings, instructions, illustrations and specifications provided with this power tool. Failure to follow all instructions listed below may result in electric shock, fire and/or serious injury.
Save all warnings and instructions for future reference.
- Ensure the kickback brake paddle is set to position.

- Unscrew the bar nut (A-17) anticlockwise to take off the side cover assembly (A-18).
- Lay the saw chain in a loop on a flat surface and straighten any kinks (Fig. B1).
- Place the drive links (B-1) into the groove (B-2) on guide bar and make the chain a loop at the back of the guide bar (Fig. B2).
- Hold the chain in position on the guide bar and place the loop around the chain sprocket (B-3) of the power head and check the following items (Fig. B3):
a) Chain drive links are seated in the teeth of chain sprocket (B-3).
b) Tensioning screw (B-4) and guide bolt (B-5) locates in the slot of guide bar. Tensioning pin (B-6) is engaged in the hole of guide bar.
NOTICE: Make sure that the direction of the arrows on the saw chain teeth is always facing forward (Fig. B3).
- Refer to the section "TENSIONING THE SAW CHAIN" to ensure the chain is properly assembled without binding.
-
Align two guide rods (B-7) of the side cover assembly with respective holes (B-8) in the saw, then fit the side cover assembly (Fig. B4).
-
Tighten the bar nut.
| B-1 | Drive Links B-5 Guide | Bolt | |
| B-2 | Groove B-6 Tensioning | Pin | |
| B-3 | Chain Sprocket B-7 Gu | de Rods | |
| B-4 | Tensioning Screw B-8 | Holes |
NOTICE: If the guide bar needs to be replaced, disassemble the side cover assembly and reassemble it with the new guide bar as Fig. C shown.
OPERATION
APPLICATION
This chain saw is designed specifically for in-tree surgery and maintenance.
This saw should only be used by persons who are specially trained in tree maintenance work.
NOTICE: Recommendation that the first-time user should, as a minimum, practice cutting logs on a saw-horse or cradle.
TENSIONING THE SAW CHAIN
WARNING: Never touch or adjust the chain while the motor is running. The saw chain is very sharp; always wear protective gloves when performing maintenance to the chain.
The saw chain expands or contracts during normal saw operation. Chain tension changes as a result. Check chain tension regularly during operation and readjust if necessary.
- Switch off the chainsaw, engage the chain brake and disconnect the power plug.
- Loosen the bar nut, so that the guide bar can move freely for future adjustment.
- Hold the bar nose up, and adjust the tension screw until the following points apply:
a) Chain sag in the center of the bar is around: 1 - 2 mm (Fig. D).
b) Disengage the chain brake, ensure chain can be pulled along the bar with two fingers.
NOTICE: Carefully perform this step to avoid personal injuries, Due to this DC motor contains magnetic material, compare with conventional gasoline chain saw, when you run the saw chain by two fingers, you'd feel a certain amount of resistance. It is not as smooth as you do with gasoline chain saw.
- Hold the bar nose up and tighten the bar nut.
NOTICE: If chain sag in the center of the bar is not
1 - 2 mm, readjust chain tension.
FILLING OILTANK
- Disconnect the power plug from the chain saw.
-
Position the chain saw on its side on a firm, flat surface, so that the oil-tank cap is facing upwards. Open the oil-tank cap. If it is too tight, use the slot-head of the combi-wrench (provided) to loosen it (Fig. E).
-
Carefully pour the oil into the oil tank. Fill to the bottom of the fill neck. Wipe off any excess oil and close it.
NOTICE:
The chain saw is not filled with oil at the time of purchase. It is essential to fill the tank with oil before use. The chain is automatically lubricated with chain oil during operation.
It is specially designed to provide low friction and faster cuts.
- Never use oil or other lubricants not specifically designed for use on the bar and chain. This can lead to a clogged oil system, which may cause premature wear of the bar and chain.
EN
ADJUSTING OIL-FLOW (Fig. F)
This saw is equipped with an Oil-Flow Adjustment Screw (F-1), located on the bottom of the tool, it is used to adjust the oil flow for lubricating the chain, bar and cutting system. Increasing or reducing the oil-flow in the direction of arrows as marked on the housing.
LED INDICATOR ON THE CHAIN SAW
The chain saw is equipped with 2 LED indicators to indicate oil status and the charge level of the battery pack(s).
| LED indicator Meaning | Action | ||
| Low oil-indicator(A-8) | Flashing red | Oil shortage | Fill the oil tank |
| Off Has the oil / | |||
| Battery indicator(A-7) | Shining green | Battery pack has the power | / |
| Flashing green | Battery pack is nearly depleted and needs to be charged immediately. | Charge the battery | |
ATTACHING THE BATTERY HOLSTER TO THE CLIMBING HARNESSE
This chainsaw comes with a battery holster, it is used to carry the battery pack and allows to be attached to the climbing harness (not provided).
NOTICE: Fastening the battery holster firmly onto the climbing harness, prior to wear the climbing harness.
- Seek a preferable point for hanging this battery holster on the climbing harness, hang the battery holster on the climbing harness by using the belt hook (G-1) (Fig. G1).
- Wrap the belt around the climbing harness to fix battery holster in place (Fig. G2 & G3).
- Attach two rings (G-2) of safety strop to the climbing harness by using two karabiners (not provided), as shown in Fig G4.
G-1 Belt Hook G-2 Rings
NOTICE:
- When climbing the tree, attaching the ring 1 & 2 of the safety strop to the climbing harness by using karabiners(not provided) (Fig. G5).
- When the tool is in use, detach the ring 2 from the climbing harness, hold the saw by two hands to perform your cutting (Fig. G6).
SECURING THE SAW TO BATTERY HOLSTER
Attach the saw hook (H-2) of safety strop to the eyelet (H-1) (Fig. H).
H-1 Eyelet H-2 Saw Hook
INSTALLING/REMOVING BATTERY PACK
NOTICE: Fully charge the battery pack before its first use.
To Install (Fig. 11)
Align the ribs of the battery pack with the mounting slots then slide the battery pack into the battery holster until it snaps into position.
To Remove (Fig. 12)
Press the battery release button with your thumb to remove the battery pack.
STARTING/STOPPING THE CHAIN SAW
To Start
- Align the "▲" marks on the power plug(J-2) and the chain saw's electric socket(J-1), then insert the plug into the chain saw until the GREEN seal on the plug COMPLETELY disappears into the socket (Fig.J1).
- Push the "ON/OFF" switch to position "ON" (Fig. J2).
- Pull the kickback brake paddle towards the main handle to the position.
- Move the locking tongue (J-3) forwards and then press the variable-speed trigger (J-4). The more you pull up the variable-speed trigger, the higher rotating speed the saw chain is (Fig. J3).
| J-1 | Electric Socket | J-3 | Locking Tongue |
| J-2 | Power Plug | J-4 | Variable-speed Trigger |
To Stop
- Release the variable-speed trigger to stop the chain saw.
NOTICE: The saw chain will continue to rotate for a short while after the variable-speed trigger is released. Take care to avoid contact after releasing the variable-speed trigger and when setting down the chain saw.
- Push the kickback brake paddle forward to the brake position "B".
- Turn the "ON-OFF" switch to position "OFF".
WARNING: Always disconnect the power plug from the chain saw during work breaks and after finishing work.
PREPARATION FOR CUTTING
Proper Grip On Handles (Fig. K)
Wear non-slip gloves for maximum grip and protection
Always grasp the front handle with the left hand and the main handle with the right hand.
The fingers should encircle the handle, with the thumb wrapped under the front handle.
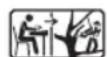
WARNING: Never use a left-handed (cross-handed) grip, or any stance which would place your body or arm across the chain line.
WARNING: Do not operate the trigger switch with your left hand and hold the front handle with your right hand. Never allow any part of your body to be in the chain line while operating a chain saw (Fig. L).
CHECKING CHAIN LUBRICATION (Fig. M)
NOTICE: Ensure oil tank of the chain saw have been filled with proper volume of chain oil.
- Hold the guide bar above a light colored surface.
- Switch on the saw. You will see a clear line of oil on the light colored surface after 1 minute, if Chain lubrication is operating properly.
- If chain oil is still not visible on the light colored surface, Refer to the section "ADJUSTING OIL-FLOW" to adjust it
WARNING: When working or climbing, it is recommend to use the additional support, such as foot stirrup, adjustable lanyard to prevent a swing or a cutting accident.
Before using it, please check following points:
- Check the wear marks on the chain sprocket (N-1), If wear marks are deeper than 0.5mm : contact your EGO servicing dealer to replace the chain sprocket.
- Also check the braking system, if wear marks on the brake lining (N-2) are uneven, contact your EGO servicing dealer to replace the brake lining must be replaced (Fig. N).
N-1 Chain Sprocket N-2 Brake Lining
Check the guide bar see related section: GUIDE BAR MAINTENANCE
Check the saw chain see related section: CHAIN MAINTENANCE
Testing the chain brake see related section: KICKBACK SAFETY DEVICES ON THIS
CHAIN SAW
Check the controls see related section: STARTING/STOPPING THE CHAIN SAW
Check the chain lubrication see related section: CHECKING CHAIN LUBRICATION
EN
MAINTENANCE
CLEANING
After each use, clean debris from the chain and guide bar with a soft brush. Wipe the chain saw surface with a clean cloth moistened with a mild soap solution.
For deep clearing, remove the side cover assembly, take down the guide bar and saw chain and then use a soft brush to thoroughly remove debris from the guide bar, saw chain, and the drive sprocket on the chain saw power head.
Always clean out wood chips, saw dust, and dirt from the guide bar groove when replacing the saw chain.
REMOVE DUST
- Disconnect the power plug, allow the chain saw to cool and tighten the oil-tank cap.
- Engage the saw brake
- Use combi-wrench (provided) to loosen the screw of dust removal cover (0-1) to open it (Fig. 01).
- Clean up the sawdust and chips accumulated in the cooling fin by using compressed dry air, blow it from the opposite side air inlet (0-2) (Fig. 02).
0-1 Dust Removal Cover 0-2 Air Inlet
GUIDE BAR MAINTENANCE
When the guide bar shows signs of wear, disassemble it from the chain saw power head and reverse it for reassembly (Fig.P1), in which case it will distribute the wear for maximum bar life.
The bar should be cleaned (including bar rails (P-1) and lubricating hole (P-2) every day of use and checked for wear and damage (Fig. P2).Feathering or burring of the bar rails is a normal process of bar wear. Such faults should be smoothed with a file as soon as they occur. A bar with any of the following faults should be replaced.
EN
Wear inside the bar rails which permits the chain to lay over sideways.
Bent guide bar.
- Cracked or broken rails.
Spread rails.
The guide bar has a sprocket at its tip. The sprocket must be lubricated weekly with a grease syringe to extend the guide bar life (Fig. P3 & P4). Tum the nose sprocket (P-3) while pumping the translucent yellow, translucent red or translucent grease into the lubricating hole (P-4) until the entire sprocket has new grease. Do not push dirt into the hole.
| P-1 | Bar rails P-3 Sprocket | |
| P-2 | Lubricating Hole P-4 Lubricating Hole |
CHAIN MAINTENANCE
Use only low-kickback chains on this saw. This fast cutting chain will provide kickback reduction when properly maintained.
A properly sharpened saw chain cuts through wood effortlessly, even with very little pressure. Never use a dull or damaged saw chain. A dull saw chain cutter leads to increased physical strain, increased vibration load, unsatisfactory cutting results, and increased wear.
For smooth and fast cutting, the chain needs to be maintained properly. The chain requires sharpening when the wood chips are small and powdery, the chain must be forced through the wood during cutting, or the chain cuts to one side. During maintenance of your chain, consider the following:
- Improper filing angle of the side plate can increase the risk of a severe kickback.
- Depth gauge clearance. Too low increases the potential for kickback. Not low enough decreases cutting ability.
If cutter teeth have hit hard objects, such as nails and stones, or have been abraded by mud or sand on the wood, have the chain sharpened by a qualified service technician.
NOTICE: it is recommended to have sharpening and maintenance of the saw chain performed by authorized service centers.
TRANSPORTING AND STORING
- Do not store or transport the chain saw when it is running. Always disconnect the power plug before storing or transporting.
Always place the guide bar sheath on the guide bar and chain before storing or transporting the chain saw. Use caution to avoid the sharp teeth of the chain.
Clean the chain saw thoroughly before storing. Store the chain saw indoors, in a dry place that is locked and/or inaccessible to children. - Keep away from corrosive agents such as garden chemicals and de-icing salts.
Protecting the environment
WEEE (Waste Electrical and Electronic Equipment) Do not dispose of electrical equipment, used battery and charger into household waste! Take this product to an authorized recycler and make it available for separate collection. Electric tools must be returned to an environmentally compatible recycling facility.
TROUBLESHOOTING
EN
| PROBLEM CAUSE SOLUTION | ||
| Motor does not start. | The power plug of battery holster is attached to the chain saw. No electrical contact between the battery holster and battery. The locking tongue is not folded up. The “ON-OFF” switch is positioned “OFF”. Chain brake is engaged. | not Insert the power plug of battery holster to the chain saw. Detach battery, check contacts and reinstall the battery pack. Fold up the locking tongue before starting. Turn the “ON-OFF” switch to “ON”. Pull the chain kickback brake paddle backward toward the top handle, arriving at the operating position. |
| Chain saw stops running during working. | The battery pack or chain saw is too hot. The chain saw is overloaded. Too much bits of wood blocks the ventilation channel. The battery pack is depleted. | Cool the battery pack or chain saw. Decrease the load. Clean the dust refer to the “REMOVE DUST” part. Charge the battery pack. |
| Chain brake does not engage. | Debris preventing full movement of chain kickback brake handle. Possible chain brake malfunction. | Clean debris from external chain brake mechanism. Contact EGO Customer Service for repair. |
| No oil lubrication when cutting. | Chain oil tank is empty. The oil outlet of chain bar is blocked. Oil solidification in low temperature. | Filling bar and chain lubricant. Clean up the dust in the oil outlet. Change the proper lubricating oil(suit for low temperature). |
| Low oil-indicator flashes in red color or showing abnormal light while the oil tank filled with oil. | Special use angle of the machine causing the oil in the oil tank not enter to enter the oil pipe. The category and color of oil is not recommended. Low oil-indicator still flashing red. | Place the chain saw flat and try again. Use the recommended translucent yellow, translucent red or translucent oil Contact EGO Customer Service for repair |
| Low oil-indicator does not work while the oil tank is short of oil. | The category and color of oil cannot be identified. A small amount of oil still in the oil tank or oil pipe. Low oil-indicator still not work for the above reasons. | Use the recommended translucent yellow, translucent red or translucent oil. Use chain saw for a while and then observe low oil-indicator again. Contact EGO Customer Service for repair. |
WARRANTY
EGO WARRANTY POLICY
Please visit the website egopowerplus.com for full terms and conditions of the EGO Warranty policy.
H-1 Dse H-2 Karabiner
ANBRINGEN/ABNEHMEN DES AKKUPACKS
m = 311 ;
INSTALLER/RETIRER LA BATTERIE
Installation (Image 11)
LISTA DE PEÇAS (IMAGEM A1)
MONTAGEM
MONTAR/DESMONTAR A BARRA E A CORRENTE
MANUTENÇA DA CORRENTE
INHOUD VAN DE VERPAKKING (AFB.A1)
MONTAGE
MONTEREN/DEMONTEREN VAN HET ZAAGBLAD EN DE KETTING
WAARSCHUWING: Lees alle
GOR DIG BEKENDT MED DIN MOTORSAV (fig.A1)
m = 311 ;
WARNING: When working or climbing, it is recommend to use the additional support, such as foot stirrup, adjustable lanyard to prevent a swing or a cutting accident.
VEDLIKEHOLD AV SVERDET
VEDLIKEHOLD AV KJEDE
Bruk kun kastreduserte kjeder på这部分 sagen. Dette raske sagkjedet vil gi kastreduksjon när det er riktig vedlikeholdt.
JaIee npBBeHeIO36paXeHHe I ONcAHHe CNMBONOB 6e30NaCHOCTN, KOToPbIE MOrT pNcYTCBOBaTb Ha daHHOM yCtpoCTBe. Pepe c6opKo INn INcNoJIb3OBAHNEM BHIMaTeNbHO npOHTaIte BCE IHcTpyKuIN, npBBeEHbIe Ha yCtpoCTBe, n coBnIOdaNTe INx.
CIMBOLI B30NACHOCTN

PpeDynpexkdeHme o6 onachoctn

IcnoB3yTe ToTCTbe paOchne nepaTkn n3 npoHOro MaTePnAna.

IcnoJIb3yIte HeCKoJIb3Kyo 3aUInTHyo 05yBb.

OCTeperaTecb OTaH. He npKacaiTeCb KOHNKOM 1HHbIK KAKIM-NI6o PpeDMaM.

OTdau KOHnKa 1nnbI. Pn cnpNKoCHOBHm KOHnKa 1nnbI C NOCTOPOHHMNI PpeMTeAMN INCTpyMeHT MOXET pe3KO DEpHyTBcBAEpx Ha3a, YTO MOXET pINBECTN K TAgKeJIbIM TpaBMam.
HeNcPabHbIe 3NeKtpnueckMe yCtpoCTBa HEnb3B BbIbpaBbTa BmEcTe C bItOBbIM MycOpOM. CdaBaAte INx B ABTOp3ObaHbIe NyHkTbI c6opa n yTIN3aUN.
V
BolbT
IOCTOHHbI TOK

YTo6bI yMeHbIITb pNCK NOnyueHnra TpaBM, nepeI nCNoJIb3OBAHmE yCTPOJcTBA Heo6xOIMNO npOHHTaB I NOHrBY pyKOBOcTBO No 3KcnNyatauM.

IcnoB3yIte nIIOTHo oIbnerAoUyO OeJy.He HaeBaIte 7apbbI, ranCTyKm IyKpaAeHnA.

Hocnte nIOTHO npnerraIOUne 3aunTHbIe OUKN, 6epyUN Nn HAYuHNK IN 3aunTHyO KACKY c peMeWKOM Ha noDobopOnke.

DépKNTe DByM pykAMn. Ppi pa6ote BcERda dépkNTe ceHny nIy DByM pykAMn.

HOpMaun o uHe.

He octablaite noi doxidem.

LwM
C
TEXHNUECKNEXAPAKTEPNCIKN
CBOPKA IN PA3BOPKA UINHbI NUEIN
PNEpyPExEHN. Peep c6opko nn 06cnykuaHem yctpoCTBa Bcerda OTOOeHHnTe pa3bem nHTAHn HndeaBte 3aunTHbe nepuATKn.
I PEPDyPEXDEHNE. IpoHTaTe BCE npabnla 6e3oNaChOCTn, HNCTpyKuIN, INIOCTpaUN n CneunpKaUIN, npuaRaemBie K ATOMy 3NeKTPOINHCTpyMeHTy. HeBbINOJIHeHne N3IOKeHHbIX HNXe INCTpyKuIM MOXET npINBECTN K nopaxeHNO 3NeKTPNueCKIM TOKOM, NOxapY u (nN) TjXeNBIM TpaBMam.
CoxpaHnTe Bce npedynpekdeHn HnCTpyKmN dnn HCnonb3OBaHnB 6yduem.
1.Y6eNTecb,HTOpykaIeHOROTOPMO3aHaxoNTcB NOIOXKeHN
2. OTKpyTte raKy uHHbI (A-17) npOTNB YacOBO bCTpeJKN, qTO6bI cHrTB 6OKOByo KpbIuKy B c6ope(A-18).
3. Pa3noKInTe nIbHyNo cIb neTneHa nnocKoINOBepxHOCTn npacpmaTte Bce nepen6bl (Pnc.B1).
4. NomeCTIte npBnBOHbIe 3BeHbIeenn (B-1) B na3 (B-2) mHbI n OTTReHITe cenb B 3aDHeY qACTn WInHbI (Pnc. B2).
5.YdepxnbaryeBbOHNNOJIOKeHnHa shHe, NOMECTHTeNETNHOHA3y6uatoeKoneco(B-3) cnIOBORo 6Ioka.3aTeM npOBpe TneDyUoee(Pnc. B3).
a) PnBODHbE 3BHebIe nn paCNOXeHbHa 3y6qax 3y6qatoro kOleca (B-3).
b)BHT HATJXHITENI (B-4) 60NT HAnpaBnIOUeB (B-5) pACNOIOKeHbIB HAnpaBnIOUeWuHb.I WTHCT HATJXHENI (B- 6) BxOHT BOTBepCTne HAnpaBnIOUeWuHbI.
PIMMEUHNE.Y6eNTcB,HTOCTpeJIKNHa3y6bX nIbHOI cENn HapBaJIeHbI Bnepei (Pnc.B3).
- Y6eTeTcB, 70 TceN npaBnBHo yCTaHObNeHa 6e3 nepeRn6oB.Cm.pa3dE«HATXKEHNE LENI
- BbipOBHnTe Dba HnpaBnHOuNX CtepXHn (B-7) 6OKOBOI KpbIuKn C COOTBeTCTByIOuMMN OTBepCTnMn (B-8) B Kopnyce N yctaHOBnTe Ha MeTo 6OKOByo KpbIuKy (Pnc.B4).
- 3aTnHTe raKy uHbI.
HATXHEHENIJIbHOJUENI
PENPYPEXJEHNE.HKoRda He npnKaacaiTecb Kcenn Hpepynpyte ee, KOrda Dmrgatene pa6otaet. LcnbnnbOChbOCTpa.PnBbINOnHeHHN OScnyxBaHnA cennBCeTaHaDeBaHTe 3aunThbe nepuAtk.
B npouecce HopmaIbHoi pa60tbi nIbI niNbHaer cIeNb MoKeT pacuipraTbc rIN CxKImaTbcR. B pe3yJIbTaTe N3MeHReTcR hataKeHne cIeN. PeryIpaHO npOBepaTe HataKeHne cIeN BO BPempa60tbi n pIn Heo6XoDMOCTn perynpuyte.
- BbIKIOHHTe 6eH3OINJy, BKNIOHTe TOPMO3 cENI NOTCOEHNHTe BNKY NTAHNIA.
- Ocna6bTe raKy uHbI, YTO6bI uHa MOrJa CBO6oHDoBnraTbcr dner perynpOBKn.
3.YepxNBAIHNHY KOHcOM BBepx,OTperpyIpyTe BnHT HATAKHeNA TAKIM O6pa3OM,YTObI BblIOJIHRAINCb CNeDyUOUINE YCJIOBIA.
a) PpOBuCAHHe cENB CEHTpe WnHbI COCTABnREt OKOIO 1-2 MM (Pnc. D).
b) OTKHIOHTe TOPMOI ZENI y6eINTEcB, YTO ZENb MOXHO IPOTAYHyTb NO WIIHE DByMn NaIbCuMn.
PIMMEYAHNE. BbINONHnIe 3OT WAr OCTOPOKHO, Uo6bI N36EkaTb TpaBM. B OTNIHne OT o6bIyHoi BeH3OHNbI DBIRATeJI NOCTOHHORTO TOKA CODEPKNT MaHHT, NO3OTOMy PnIPOTRAHANI CEIN DByMn NaIbCaMn Bbl NoCyBCTByTe ONpeDeneHoe CONpTNBHeHne. 3To HE TAK JERKO, KAK Ha O6bIyHoi BeH3OHNIE.
- YdepKnBAA HNY KOHcOM BBepx, 3aTaNTE raKy HINbI.
PIMMEUHNE.Ecnn npobucnne cenn B ceHTpe uHHHe COCTABnE1-2 MM,CHOBA OTperpynpyTe HATXKeHNe cen.
3ANIOJIHEHNE PE3EPBYAPA JIMMACNA
1.OTcoeINHITe BUNKy NHTAHN OTOENHOI NIIbI.
2.ПОLOKNTe cENHIO nIy Ha 6OK Ha TBepyHO nIOCKYIO NOBExPOCTb TAK, YTO6bI KpbIuKa pe3epByapa dIa Macnla 6blna O6paueHa BBeP. OTKpOte KpbIuKy pe3epByapa dIa Macna.EcIN OHa 3akpyeHa CnUkOM Tyro,OclabTe ee c NOMOuI npInarAemoro KOMbHnPoBaHHOrO KluOa (Pnc.E).
- AkkypaTHO 3aJIeTe MaCNo B pe3epByap. 3anOHnTE pe3epByap DO HIXHe NactN 3aJIINBHO rOpNOBHbI. BbITPte npONTOE MaCNo I 3akpOte KpbIuKy pe3epByapa.
ПИМЕЧАНЕ.
■Пина He 3anpaBnIeTcMaCNoM Ha 3aBoJe.пeped nCIOJIb3OBAHnEM mHCTpyMeHTA Heo6xOJIMo 3aNITb B Hero MacNo. LcIb aBTOMaTHueCKn Cma3bIbAeTcR MaCNoM Bo BpeMЯ nCIOJIb3OBAHnIa.
OHa cneuaJIbHO pa3pa6oTaHa IJN oBeceueHn Hn3KOro TpeHn n 6bICTpo pe3Kn.
HkoIa He nCnoJb3yTe MaCnO npDpyrNe Cma3oHbIe MaTePnaJIb, He npEpaHa3NaYeHHbIe CneUaJIbHO DnA Wn H ceneB. B npOTnBHom Cnyuae Bo3MOxHO 3acOpHe MAcNHOcTcEMbl, YTO MOKeT pINBeCTN K npExDeBPemEHOMy N3HOCy WnHbI u cENII.
PEYUNPOBKAIODAUHMACNA(Pnc.F)
JaHHe yctpoCTBO IMeET BHT peryIpOBKn noaH MaCna (F-1), pacnoJIOKeHHb CHN3y.3TOT BHT nIcNoJIb3yETc dI pyERIpOBKn IOTOKa MacnA dI cMa3Ku CEIN, uHbI upeKyue CnCTeMbI. HanpaBHeHne dIy yBeMueHn nn yMeHbWeHn NOtOKa MaCna yka3aHO CTpeKkAmn Ha Kopnyce.
CBETOIMODHbIE INHIMKATOPbI
YCTPOCTBO OCHaIeHO DByM CBeTOnIOHbIMN HINIKaTOPaMn, KOTOpBie OTo6paXaHOT COCTOHNcCTEmblcMa3Kn YpOBeHb 3apJa aKkyMyJrTOpa.
PIMMEUAHNE. Ipeep nepBbim NcnoB3ObaHnEMIIOHOCTbIO 3apJdTe aKKMyJrTOp.
UctahOBka(Pnc.11)
CoBmecttepe6paakymyTTopaMOHTaKbIMnna3AMn 3aTeM BCTabTe AKKMyTOpBΦyTlAp Do ueJIka.
U3BneHne(Pnc.12)
Haxmte KhoNky dKcaun aKymyTTopa N3BneKeit eAkkymyTOp.
3ANYCKIOCTAHOBKA CEINHOI NJIbI
3anyck
- CoBMeCTIe MeTKH BUNKe J-2 npa3beMe nTuTAnJrJ-1, 3aTeM BCTaBbTe BUNKy B pa3BeM TAKIM 06pa3OM, YTO6bl 3EJIeHbIy yNtOHTnTeNb Ha BUNKe IIOJIHOCTbIO BOwen B pa3BeM (Pnc.J1).
- IpebeDte nepeKIOuATEb B nonOxHeNc ON (BKJI) (Pnc.J2).
- Nepemecnte pyky cenHoro TOpMo3a B CTopoHy OCHOBHOI pyKoTKn B NOJKeHne
4.ПелемстITE 3anopHbIЯ3bIyokJ-3Вpei nHaKmTe Ha KypKOBbI peYnTOp ckopoCTN J-4.Yem CInbHee HaxaTne Ha KypOK,TeM BoJIbIeckopoCTb BpaueHnA uei (Pnc.J3).
POLITYKA GWARANCYJNA EGO
SEZNAMTE SE S VASI RETEZOVOU PILOU (Obr. A1)
H-1 Očko H-2 Hák Píly
INSTALÁCIA/VYBRATIE AKUMULÁTORA
CITITIMANUALULDEINSTRUCTIONSIUNI
Riscuri reziduale! Persoanele cu dispositive electronic precum stimulatoare cardiace ar trebui sa se consulte cu medicul (medicii) inante de a utiliza acest produs. Functionarea echipamentelor elecrice imediata apropiere a unui stimulator cardiac ar putea provoca interferente Sau defeciuni ale stimulatorului cardiac.
SIMBOL DEEE
INDEPARTAREA PRAFULUI
H-1 Asa H-2 Pjuklo kablys
SUDÉTINÉS BATERIJOS | STATYMAS IR ISÉMIMAS
PASTABA: Pries naudodami sudétine baterija pirma karta visiskai ja ikraukite.
statymas (11 pav.)
Itaiky kite sudetines baterjos ikyas l baterijos deklo griovelius ir stumkite zemyn, kol baterija uzsfiksuo.
Isemimas (12 pav.)
G-1 Akyiotpo Cwngs G2AakTuai
ZHMEIΩEH:
YAG DEPOSUNUN DOLDURULMASI
LUGEGE KASUTUSJUHENDIT
H-1 Auguke H-2 Sae konks
AKUPLOKI PAIGALDAMINE/EEMALDAMINE
CIMBOJN,IOCTOCYOTbCBAE3NEKIN

PonepeJxKeHnHa 0do6e3neKn

Haiaraate ypi kpo6oipykaBnKn 3MiHoro MaTepiany.

HaJaaiTe HeKOB3He 3axHcE B3yTTA

OctepiraTecra BiDaui - Heo6xidno yHkKatn KOHTAKTy KINuKa HAprrMHOI 36yDb-ram npedmetom

BiDau KINHKA HAnpMHOI WHH-KOHTAKI3 KINKOM MOKE IPN3BecTN DO TORO,IOHANPMA WHaMOKe paTTOBO pyxATNCBROPYiHAaI,IO MOKe CNpNHNITCepNo3Hy TpaBMy.

BixOeIeKTPuHnx BnPo6iB He CnID BnKdAtn pa3OM iNobyTOBM CMITTM.3BepHTbc4do ABTopu3OBaHOro NyHKTy nepepo6Kn.
V
BolbTu
PocTINHn CTpyM

3MeHHTn pN3NK TpaBM, KOpICTyBaH IOBHHO 03HaOMITNCI 3 IHCTpyKlciIO KOpICTyBaHa IpeE BIKOPINCTAHM LbTO BINO6y.

Hocitb6jraouy oJr. He hociTb apf, KpaBatky a6o npKpacn.

Hocitb npinacobahi 3axnchi okynapn,6epyui a6o habyuHKn Ta 3axnchky kacky 3 pemHcem Ha nid6opidi.

TpmaTe o6oma pykami-niicacpo6oTn3 IaHIOROBOI NIOIO 3aBXKn TpMaTe II O6oma pykami.


HΦopMaizipnoHaPpMHyuHny

He 3aIIaIeTI nID doUcEM.

Uym
C
CE
TEXHICHI XAPAKTEPNUKNI
PIMITKA. KIO npOBcaHHaHOra B cHTpi WnH He ctaHOBt b 1-2 MM, BiDpeYIOte HaTg NaHOra.
3ANOBHEHHBAUKAДMACTNIA
- Biédnaite kaebj kNbneHnB BiJ nauqroBoi nnn
- POKnaDITb NaHIOrOBy NnHy Ha 6k H Ta TBepy NIOCKy NOBepxHIO TAK, Uo6 KpnUka 6aKa DnA MaCTIna 6yn3BepHeHa Bropy. BiKpIte KpnUky 6aKa DnA MaCTIna. RaKo BOHa 3aHaTTO TyA, BnKOpNCTOByTe UiueBy rONOBKy KOM6HOBaHOrO KInOVA (BXoDnTb y KOMnJIeKT), Uo6 NoCIA6NTI II (PNC.E).
- 06epeKHO 3aIIMTe MaCTnIO B 6aOcK. 3anOBHITb Do HxKHeOJI cactHNI 3aINBHOI roPNOBHNI. IpoTpiB NaIMNtOK MaCTnIa I 3akpNIte.
IPMIMTKA.
JaHOrOBA NINHe HAnOBHeHa MaTInOM y MOMeHT nOKyIKN. Ipeep BnKOpNCtAHHHr Heo6xIDHO 3aIOBHNtB 6aOK MactINOM. JaHcIg ABToMaTHUHO 3MaUyETbCMACTINOM DnJ NaHOra NiJ vac po6OTN.
BoHO CneuianbHo po3pObeHe, 06 3a6e3neHTn H3bKe TepT i WbUdwe piaHHa.
HikonHe BnKOpNCTOByTe MaTNO a6o inwi MaTINbHI MaTePianH, He np3Haehi CneJIaIbHO dRnBnKOpNCTAHHa WnHi Ta NaHIO3i. Lc MoKe np3BeCtNo 3acMueHH MaCnaHOI CNTeMn, 0o MoKe cnpuHHTn Npepauchn 3HOC WnHn i NaHOrA.
PERYUNIOBAHHI NOTOKY MACTINNA (pnc.F)
Lra nna ochaeta rBNHTOM peryIOBAHH NOK TYMACTNIA (F-1), po3TaWOBAHm y HxHHi qACTnHi IHCTpyMeHTa, BIn BVKOpNCTOBycBcR dNppeYRIOBAHNO TOKy Mactnla dN 3MaJeeHH JAnHOra, WHN i pIKyOi CNTEm. 36IbSeHH a60 3MeHWeHH NOTKY MaTINBa HAnpymky, 3a3HaueHomy CTpiKamHa Kopnyci.
CBITIOIOHINIHDKATOP HA JIAHUCOIBI NNI
JaHIOROBa NINa OCHaIeHa 2 INdNkATOpAMn, Aki BkA3yIOTb CTah MaCTIna Ta pIBeHb 3apJy aKymIaTopa(-iB).
YcTaHOBHeHH (PNC.11)
Bupinpe6paakmyaTOpHoiBaTapei3OTbopamn dnnkpinneHHa notim 3acyhthe akmyaTOpHy baTapeo ydytnap nAakmyaTOpA,doKnBOHa He 3aqiKcyetbcra Ha CBOcMy Micci.
3HATT (pnc.12)
HaTnCHiB KHONKy 3BilbHeHHa kMyIyIToPA Ta BnTnHItb akymyIyTopHy 6aTapeio.
3ANYCK/3YINHKA JAIHJIOBOI INN
3anyck
1.CymictbMtK « a enektpnHi Bnui (J-2) Ta po3'emix HnBHeHHa (J-1) naHporOoi nnn,notim BCTABTE BNIKY BnaHporOBy nny,doKN 3EJIeHni yuINbHOBaHa BnuiPi OBHICTIO He 3nKHe B po3'emi (pnc..J1).
2. YctahOBiTB nepeMnKaU «ON/OFF» y noNoXeHHRA «ON» (pnc.J2).
3. Notaryntb pyky ranbma BiDaui B Hanpmy OCHBOHoi pykOaTKB PO6Oe noToxKeHHa.
4. Nepemictb 3anipn H3nyok (J-3) Bnepe,notim HAHTCHITb NcKOBn nepmka3i 3minHOO WbNdkicTIO (J-4).L0 CnBhIe BN HATNCaTe Ha nyckOBn nepmka3i 3mHNOU WBnDkICTO TO BUNe WbNdkicTB o6epTaHHn HbHoro JAnuJora (pnc.J3).
HOBepHtB HOCOBy 3ipOuy (P-3), nepeKaHyOnu HAniBnpo3ope XOBTe, HaniBnpo3ope YepBOHe a6o HaniBnpo3ope MaCTInIO B MaCTInbHm OTBip (P-4), DOKN BcR 3ipoKHa He OTPMaE HOBe MaCTInIO. He 3aUToBxYIte 6pyD B OTBip.
| P-1 | Нараямнишини P-3 3iρчka | |
| P-2 | Зmaцувальный OTbip P-4 3maцувальный OTbip |
OBCJYROBYAHHJIAHUORA
BnKopnCTOByIe 3 LjEIO NIIIO JAnHOrn 3 HN3bKOIO BIDaHeo. Lei WbNdknn piaIbHnn IaHcTg 3a6e3neHTb 3MeHJHeHH BIDaHi 3a yMOBN npabInbHorO o6CNYrOByBaHH.
3PabnHbHO 3aTOeHm nHbHn IaHcIg po3p3ae depeBO 6e3ycnb, habIty pasi dyke HebeNkoTccky. HikOnn He BIKOPNCOBYte Tynn a6o NooKOJKeHm nHbHn IaHcIg. Tynn piaJIbHn IaHcIg npINBOIT do 36IbWeHH qI3uHoro HabaHTaxeHH, 36IbWeHHBipauHOrHO HabaHTaxeHH, He3adOBiNbHorO pe3yIbTaTy piAHH Ta NiDbNueHoR 3Hocy.
InnBHO I WBNKOHO piaHHaHn Hae6xIDHO 0cbnyOBbATn HaneKHM YINHom. NaHcH BmMara3arOCTpeHH, KOJI Tnpca dp6Ha i npoWkoNODi6Ha, NaHcH He6xIDHO CNOIO npoBOOHTn NO DepeBy NiJac piaHHa 6o NaHcH pike 3 Ondiei CTOPHN. Nd vac 0cbnyOBbAHNaHcHra He6xIDHO BpaxOBbATn Take:
PONEPEDKEHHpeKOMeHdyETbcnpoBOdntu 3aToCyBaHH TaOcnyTOBvBaHH NnIbHO rAnzura B ABTOPn3OBaHNx cepBICHx ueHTpax.
TPAHCTIOPTYBAHHJA35EPIAHH
He 36epiraTe Ta He nepemiuuyte NaHcOroBy nHy, KOIN BOHa npaioC. Npeed 36epirAHnM a6o TpaHcnOpTyBaHHm 3aBdN BIDeHyte UHPxNBHeHH.
3aBKn HaknaaTe 3axnchy oboHky Ha HanpMaHy WnHy Ta NaHOr, nepW Hix 36epirAtn a60 TpaHCnopTyBaTu NaHcRorOBy nny. ByDte 6epeKHi, Uo6 yHKaTn roctpnx 3y6uB naHcRa.
Ipe36epirAHm cnd peTebHO OHCTNTn NaHOrOby nny. 36epiraTe naHcIorOBy nity B Micui, HeoctynHomy dna ditee.
Tpmaite noanikopozhiHi areHTn, taki k caoobi ximikatn ta coJI npOTn oKeJeI.
3axnct doBknII
m = 311 ;
WEEE (Bixxodn eneKtpnHoro Ta eNektpoHHoro yctatkyBaHH) He BkndaIte eneKtpnHe 6bnaHaHH, akymyTOp i 3apdHm npcTpi y no6yToBI bIXdoH! BiDneCtB cei Bnp6 ABtopn3OahOMy nepepo6Hkyu HadaTe NOro DnA po3DInbHoro 3bipAHn. ENeKtpoINCTpyMeHTn Heo6xIDNo NOBepHyTN B nIDnpwEMCTBO, 00 3aMaaCTbcae ekonoiHNO 6e3neHIO nepepo6koHO.
UK
UCYHEHHH HECPABHOCTEIN
Hocete nIbTHo npInenHaIO 6bnKNo. He Hocete 7aIIOBE, OIbPNiCn nn 6kKyTa

Hocete nIbTHo NOCTaBeHn npEpa3Hn OUYna, aHTIOHO HIN TAN 3a yuN INpeDna3Ha Kaca c pEmbk 3a 6paMkata

ДрькTe Cдeрьe - BнаниИЗПОЗБaIte ДeВрьe, korato pa6oTIne C bepNKHnI TpnoH.

INHopmaa3aBodeaTaShHa
He n3naraTe Ha IbXJ.

山yM
CC
BG
CNEUINΦUKALUN
- 3aPbXTe HocHa HnHaTa Harope N 3aterHeTe rKaTHa HnHata.
BENEXKAA: Ako npOBuBaHTo Ha Bepurata B CpeDAta Ha uHaTa He e 1-2 mm, peryInpaiTe OTHOBO oBtraHTo Ha Bepurata.
HANTBJBAHE HA MACJIENIPE3EPBOAP
1.ИЗbaDEteцencelaOTBepnKHHTpnoH
2. Tocabete BepnKnna TpnoH cTpaHnHO bpxy TBbpda, paBHa NOBpxHocT, Taka He KanaKnata Ha MacneHnpe3epBoap da e HacOeHa Harope. OTBopTe KaNaKATA Ha MacneHnpe3epBoap. Ako Ta e TBpde 3aterHata, nInon3BaIte rIaBaTa C npope3 Ha KOM6HHpanHraeueh KInou (npedocBaH) n Ja paXla6eTe (PhiR.E)
3. BHIMATEJHO HANbHHeTe MACNo B MacNeHnpe3epBoap.HanbHHeTe Do bHOTo Ha TbPLOBnHaTa3a NbHeHe.N36bpWete BCaKO 3NnHo MaCNo n 3aTBopTe.
SEJIENKKA:
BepKHNrT TPOH He e HAnbJIHeH C MacNo NO BpeMeTo Ha NOKyNkata. N3KJIOUHTeH No BaxHo e Da HAnbJHnTe pe3epBoaapc MacNo Ipedn ynoTpe6a.Beprata ce cMa3Ba ABTomatuHc BepKHO MacNo No BpeMe Ha pa60ta.
To e cneuaHNO npoeKtpaHO 3a da npedocTabn Hnck TpneH nno-6b30 p3aHe.
HnKora He n3non3BaIte MacNo IIN dpyn CMA3OHN cpeCTBa, KOIno He ca CneuMaHIO npoeKTnpAHN 3a ynoTpe6a Ha uHnHaTa N Bepurata. Toba MoKe da IOBede Do 3anyuBaHe Ha MaCneHaTa CNCTema, KoETO MOKe Da pinyuHn IpexJeBpEmHo N3HOcbAe Ha uHnHaTa N Bepurata.
PERYJINPAHE HA MACJIENHNIOTOK (Nr.F)
To3n TpnoH e o6opuyBaH c BnHT 3a perylnpahe Ha Maclenen HIOK (F-1), HAMPAuCe Ha DbHOTo Ha INCTpyMeHtA, KOTo CE N3No3Ba 3a perylnpahe Ha Maclenen NOTOK 3a CMA3BaHe Ha Bepurata, UINHaTaN CNTemata 3a P3aHe. YBeIuYabeHe IIN HamaJIbaHe HA Maclenen IOTOK B NOCOKaTa Ha CTpeIKNITe MapKnpaHn Bbpxy Kopnyca.
CBETOIOHOENHIMNKATOPHA BEPNXHHN TPOOH
BepnHnT Tpnoe o6opyDbHa c 2 CBeToIONoHn HnNkAtoP a3 noka3BaHe Ha cbctoHneTo Ha 3apraDa B akymnatopHaTa(nte) 6atepnu(n).
I PEPDyPENPEXDEHNE: HnKora He n3non3BaTe
3axbaT 3a JRAbPA bKa (KpbCTocAH pBcE) Nn KaKBATO n da e I03a, KOrTO Oe NOCTABN BaaTeO TAno Nn PBka Hnd JINHnraTa Ha Bepnrata.
A PEPdynpeXeHHe: He paobotete c
npeBknHouBaTeHNnCnycbkCJyBaTaCNpkaN dpXkTe npdHaTpaKoXBaTKCaDcHata CNpka.He No3BOJIraIte HNKORA YACTOT TAYOTO Bn Da E B NHHaRaHa Beprata, Korato pa60nte C BepnKnH TpnoH (Fnr.L).
IPOBEPKA HA CMA3BAHETO HA BEPNFATA (M)
БЕLEЖKA:Увете с,Ч.Маclenггпрзерьога на Вержнг Трон e Пьлсн Cпдхогияп обем Вержнho Macno.
1.Дьжte BodeaTa WHa Ha CBETno OcbeteHaT aOBbpxHOCT.
2. BkHouTe TpnoHa. Ⅲe BnDnte Ra Cha JINHn Ha MacNtO B CBeTNO OuBeTeHaTa NOBbPxHOCT CneI 1 MNHyTa, aKO CMa3BaHeTo H Baeprata fYHKUHOHPa npabNJHO.
3.AkoBepnKHOToMaCNoBceOSeHeCeBnKaBa CBetIIO OuBeTeHaTa NOBbPxHocT,BNKTe pa3Je "PERYUNPAHE HA MACJIENI NOTOK",a da ro perynipate.
PABOTABbPBOTO
A NPEyPExEHE: KOrato pa6oTne nnCe kATEpnte, npenopbYBaMe da n3nON3BaTe DOJbJIHNTeHa onopa KaTO HApNIMep CTrpeMe, peryNpyeM KOaH, 3a da npedToBpaTne IIOoneHe nn 3IOnOlyka npi Pra3He.
Ipei Da ro n3non3BaTe, MoJa, npOBepe CneHnTe TOckn:
PpOBepeMapKpOBKte3aN3HocBaHeHaBepxHTo 3b6Ho KOJeNo (N-1).Ako MapKpOBKte3a N3HOBAe ca no-db5oKn OT 0,5mm:cbpxKeTece CcBc BcOra cepBn3eH npEcdTaBnten Ha EGO,3a da3aMeHN BepxHTo 3b6Ho KOJeNo.
PpOBepe CbIIO nCnnpaHATA cIcTeMa, aKO MapKpOBKInTE Ha cnnpaHATA HknaJa (N-2) ca HepaBHomePH, CbpxTe Ce cbc CBOA cepBn3eH npEcdTaNrten Ha EGO, 3a da 3ameHn CnpaHATA HknaJa. (Fir. N)
aogoo3oBssm6smo (ugn.A1) foos
gmoob 8x30ab 8o8a8gbob/ambb6bfo
A 886mbo88: g03c003ob sdo600
g6bBb68o, G0s000 qdo80
bgmoosd580, b55d ssyymo8 sb8y6mgo
686m6b bcmbsymy.
A 8gmooboggs: g0s600 sJgdo
bgmsymlos6 03gdoomg y3gms
gmoabogds doonooos, obuogos
oogos,
bsnoogos 03g03g03g03.
Bdoaagmo 93cns oblodcoo
gyeogmgsd agbdecmssdmoqomb
cmoa 030, b5ds60 0s/sd moogfmo
ugombo 030.
065b00 y3c0 do000gds 05b6j3os
usdmsccog dmygobouo3ol.
- 0067425000600b06b0b03939d0b 0867425000600060039350000 39686888
- Gooosogom gmoob 8560 (A-17) bssnoob bsfoosgogm doadsogogoo,
oosdmbss 830000s bgo (A-18). - aonssgno xj3ob d6ygo 60y
60s3066 gos s5bfo6o 60abog
80sb6h6o3. (6b.B1) - aosomgbox gob ddoaogggeo
6amgo (B-1) dool boogmoo (B-2)
Qoo ofofooo 60d x30 oo308s
doob 355 dbocps5. (5b.B2) - 0000000000000000000000000000000000000000000000000000000000000000000000000000000000000000000
a) xg3ob dsmdsg8gmo 6gmo8o
doomsgycos bgoab 8ogosbB (B-3)
V300g0.
b) gdsgdsgo b6sbo (B-4) os dgmo 5630 (B-5) dmoosglgymoos b6bo 12005uogdo. gdsdgofo (B- 6) bsaycoosbgobdmoobogydo.
a50a35: 600000, 600ob0b
doaomngos b0b0b x330b 80000
yogmoogob dooogmoogb6b (63b.B3).
-
obocogbodos,bgobol xg30abdoqagbol oBcogdoss,csos osfofofofofofofofofofofofofofofofofofofofofofofofofofofofofofofofofofofofofofofofofofofofofofofofofofofofofofofofofofofofofofofofofofofofofofofo
-
3g0000000000000000000000000000000000000000000000000000000000000000000000000000000000000000
- amgtoomdoomol j5b0.
| B-1 | dδδδδδδδδδδδδδδδδδδδδδδδδδδδδδδδδδδδδδδδδδδδδδδδδδδδδδδδδδδδδδδδδδδδδδδδδδδδδδδδδδδδδδδδδδδδδδδδδδδδδ | |
| B-2 | bδδδδδδδδδδδδδδδδδδδδδδδδδδδδδδδδδδδδδδδδδδδδδδδδδδδδδδδδδδδδδδδδδδδδδδδδδδδδδδδδδδδδδδδδδδδδδδδδδδδ δδδδδδδδδδδδδδδδδδδδδδδδδδδδδδδδδδδδδδδδδδδδδδδδδδδδδδδδδδδδδδδδδδδδδδδδδδδδδδδδδδδδδδδδδδδδδδδδδδδδdelta | |
| B-3 | xδδδδδδδδδδδδδδδδδδδδδδδδδδδδδδδδδδδδδδδδδδδδδδδδδδδδδδδδδδδδδδδδδδδδδδδδδδδδδδδδδδδδδδδδδδδδδδδδδδδ B-4 | ωδδδδδδδδδδδδδδδδδδδδδδδδδδδδδδδδδδδδδδδδδδδδδδδδδδδδδδδδδδδδδδδδδδδδδδδδδδδδδδδδδδδδδδδδδδδδδδδδδδδð |
g60a35: aybgbol dgmo bsfoanogab
g63mbs, amlugboa dsl 839Gooos bgyo 95
bgmsbsssy33om oobssmo dgmo, GmG
55b.C-bg molsb83g2do.
d3mgsos
aogogos
bgbols 1300gogogog g5303000s b00gbdol Oogol mobogols os dmogobogol.
gbsbdoaemooo odofoobdo 6
ogodmoos odss aodnyggoomn, 6dggmoos
8cgoomso adgon agwssdoan dmdboos.
ag6035: 603006060606060606060606060606060606060606060606060606060606060606060606060606060606060606060606060606060
bobs x330s amfo30s 65b6jGos
A 8gobogos: sboagb0
s6 gssygmnoo x530 mgs doymno
aodmo. bmbol xg30 dmo6 bsmos;
yogcogol yooanog oasdgso bcmosdsg
dsbg bngol bsgholsb.
bgbol xs30 gsmomggos 6 0yddg
bmdsemyo gdmygbsol. agoeo 03mgo
xjcbol osdgyemn. 6gymnme
gdamgxxjcb ogdymnbgmsbmy
sdmygbsols gsssgyemnog onl.
- aamooog bo gbo, baooog x330b agbofo sa dmooog qgob B5a
- dgydgoo dgol jfo oug, ma bgbols dgmoosgogmdoedsgodgdo
- qofoqoqo 0g00000000000000000000000000000000000000000000000000000000000000000000000
a) Xs30b 6do00s doqoob 656do s6ob 0ssb008oo:1-2dd (6sb.D)
b) a00000 x330ab 0g60,00000 000000000000000000000000000000000000000
g6035: gnoobocoo 2sulwgeo 680
36600 gosbsbogbol os300s bssco8c0
gogdo 960ab sd d630b agdsygbemdo
60b 6d50ggo ygmgy50,6mgo
3gymgo 30 g506bgdmdgs3xg3ob
bgbo5g 60000000000
ssub3308sb: moggluogbmbol xg33
gossmoosgmo 6000000,ogdbmob
33070f 605085b. j do6m8s obgo32
goyg3mmggmo sss,6mgo 3ggo86o3
86606b mdg3g xg3ob g6bolo3ob.
- qofoqoo dg00 6b3000 b000 qs
qfoqoo dg00 J550.
g60a3b5: yxg30u Bdoamw doqo 6060
s601-2dd,og3cogm godogol
gnoofoosogoofoagoofoobfo
o00s bds2000g 030b030b 86300300
3000u, a0n 856g am6g8d9.
-
030300 lsb6b3200 s980000 33d005000b d0000b 5bd053000g000000 d006000 030000b d055000 b5ds86ob (G-1) 53858800m. (5sb. G1)
-
0ssbgoo jdsso bdoosgogbg Gs30aboo3ob 6630800 g0000600060006000600060006000600060006000600060006000600060006000600060006
- 0000000000000000 (G-2)
00000000000000000000000000000000000000000000000000000000000000000000
G-1 g3g0abbs86o G-2 68888
g60836:
bgyg ygggdo gdo gdo 10000000000000000000000000000000000000000000000000000000000000000000000000000000
Gogusgoggogbgbvymabgbm
6000#230cbgsgogbo
6000bgmoobgogdsd (5b.G6).
bngboa odaegos sgyoogol aocooos
dosagon cnofoobgol oo3
doomssbgmoaogboab (H-2)
gbsdsob (H-1). (5sb. H)
H-1 b6b36g3o H-2 b96bob 3a7340
3g000000000000000000000000000000000000000
2050365: b6gogoo 00000000000000000000000000000000000000000
gssd65ggsg (sbb.11)
yuyuymnmo ydngmnoo u wdoagmo
doymnoombo bslgogoo;Bulgoo
sydngmofo asmoosao, lssd xxogoo
aBssbb6gwsog (6sb.12)
gooos ydggosomol gdoogos 300000000000000
xgno bmbol Bm03s/8dm03s
Baboo000
- 8y6b000" a056g000000000000000000000000000000000000000000000000000000000000000000000000000000000000000
- 0000000000000000“ON/OFF”0000000000000000“ON”30000000 (586.J2).
-
aagbgo bngboa ygodol agbogof 0800 bngbou obs lubcogob395 3600sdo.
-
300000000000000000000000000000000000000000000000000000000000000000000000000000000000000
| J-1 | ### | J-3 | ### |
| J-2 | ### | J-4 | ### |
golgojogocn
- 100000000000000000000000000000000000000000000000000000000000
a0035x336b6b0a06b600ab3
000000b0b0b0a06g0000
60006b0b0b0a06g0008
60006056000000a06g08b6b6b6b6
6000605b6b6b6b6b6b6
60088 - 0ssgoo b6b0s yGoo oobos 0800o 000000000000000000000000000000000000000
- 0000000000000000“ON/OFF”0000000000000000“OFF”00000000
8860b008: y0300030u 886000
33000000x33000000 b0605
g060000s u 5 uaydum quo08080808080830.
fobogolbogos
Baaag Baaeggs Lsbgegogg (5b. K)
Bog300 aomjogob usfoosdagm gmoosda8o aybodsgno amogobgs ygssboaogobots.
y03000000b Bgogoofoobls bbsgogno 1s6gbbsbgcoosdoohooosu bbsgogno - 4s6x365s.
oogoo 600s agomb bbsgng, 600s ooofoobsbggogobd00s absoob.
A aagboogos: salsmogu gdoomgfoa
asbgbs-bcmo (sgs56ggaoyco) 036
56gabodogbo bbs 3mboc,6mdco8
dmyemgbu md3bblbgybmsb 5d3e3b x30b
bsbobgjf36o3.
A aogobocg: 6d aosssbmo Moag
aogbbs bga, bma f05 bsbgmgb 30 -
aogbbs. smbogb qo2do 100b0b00
amgmoq bsfoa o30ab
omogbsb gmbol samygbools (Sb. L).
KA
Xg3obagbogobagomgds(6b.M)
960835:cos670g6000,600xg340
bgobb gnoob bs3go bsbsg bnoob bsnsbsqom
anggmo00.
- 000000000000000000000000000000000000000000000000000000
- 86000000000000000000000000000000000000000000000000000000000000000000000000000000000000000
- 0gXsJ3ob gnoob bmo xo6 36
B5b208 yGob 800306bg, doadmgo
Bos, "gnoob Gob 688mogds",
600s 805u6mno gnoob doomggs.
bgmbol ssammyg6gs b9b slgcmol a00b33sao
A aagnoobogos:agssdobs 56 m30sbu
206B30 sddmooy5moo gdsydoo 5sygfo,
dsmoos, gbou y680, ngmoogos
2300, 600s 0300s 60cogmoos 60sfo
f6bms 5 fno bcoo bosbol dgybs.
ydygbsdgyb0n 8a000000000000000000000000000
0000000000000000000000000000000000000000000
sboymo 330m0b6580.ogobso 0.5
88-9g 90o boqdo1ss: qg3do600
888b EGO aadwab6gob 6666x30
88oc55ob agbs32e
s30 2000000000000000000000000000000000000000000000000000000000000000000000000000000000
N-1 300600605 N-2 5826670060
bgbol dgobagbsdfoogoo oboog
aegoo bgo:gbols dgob
gubogos
bogobxgobagusamgogosobogogogogogogogogogogogogogogogogogogogogogogogogogogogogogogogogogogogogogogogogogogogogogogogogogogogogogogogogogogogog
bmbolxg30abgbmngolglssamggccog
obomgoadgogogogogos:
Xg3g6b668g
bdoomooo oomgobagusamfoaomoo oboomgoadogao bdoos: xdsygo bmbob Bssmgs/8dmoong
xg30b agbgog3ob bsobbob agbsafoagocs oboogogogogogogogogogogogogogogogogogogogogogogogogogogogogogogogogogogogogogogogogogogogogogogogogogogogogogogogogogogogogogogogogogogogog
m3ms
8888500
yagmo yadmygobob gdoaogdoasgogm 6666
xab do dcmb 60000000000000
xagmo bgbobbgos300bgyos,500
jugocoomo os 6000016666666666.
Lsogd3cosofo600ab600,ambg600
b6bu 896000s bgyo,do000bgb0s
x33000do008do00y600do000
35xo,600s Lsgd3coso do8000
56868o dgoos5,bmbols x33005
6666666666
yogomngol saofo6gog
5bgyo gdyo dgoboggy 5,
mogbG 3000 bnb0x3b.
036ab85gubg2g3gds
- abubgfoom yagcog, gocgog bgtb 80000000000000000000000000000000
- Bbongo bgbobd gbo
- 30000000000000000000000000000000000000000000000000000000000000000000000000000000000000
- 356060000000000000000000000000000000000000000000000000000000000000000000000000000000000000000
n nn nnn nnn nnn nnn nnn nnn nnn nnn nnn nnn nnn nnn nnn nnn nnn nnn nnn nnn nnn nnn nnn nnn nnn nnn nnn nnn nnn nnn nnn nnn nnn nnn nnn nnn nnn nnn nnn nnn nnn nnn nnn nnn nnn nnn nnn nnn nnn nnn nnn
A
Inon uH9
nnnnnnnnnnnnnnnnnnnnnnnnnnnnnnnnnnnnnnnnnnnnnnnnnnnnnnnnnnnnnnnnnnnnnnnnnnnnnnnnnnnnnnnnnnnnnnnnnnnnnnnnnnnnnnnnnnnnnnn
ninn
y,niyn7i0n nn nnnn nan y Tnn nn nn nn nn nn nn nn nn nn nn nn nn nn nn nn nn nn nn nn nn nn nn nn nn nn nn nn nn nn nn nn nn nn nn nn nn nn nn nn nn nn nn nn nn nn nn nn nn nn nn nn nn nn nn nn nn nn nn nn nn nn nn nn nn nn nn nn nn nn nn nn nn nn nn nn nn nn nn nn nn nn nn nn nn nn nn nn nn nn

17 1X.0917 000 17 000 1N 0

TINN,NNN Nn nn nnn 77
yNn nn nn nn nn nn nn nn nn nn nn nn nn nn nn nn nn nn nn nn nn nn nn nn nn nn nn nn nn nn nn nn nn nn nn nn nn nn nn nn nn nn nn nn nn nn nn nn nn nn nn nn nn nn nn nn nn nn nn nn nn nn nn nn nn nn nn nn nn nn nn nn nn nn nn nn nn nn nn nn nn nn nn nn nn nn nn nn nn nn nn nn nn nn

yuynn -nynnn nn nnnnnnnnnnnnnnnnnnn
nnn

nnn nn n onn n 7

nnnnnnnnnn nnnnnnnnnnnnnnnnnnnnnnnnnnnnnnnnnnnnnnnnnnnnnnnnnnnnnnnnnnnnnnnnnnnnnnnnnnnnnnnnnnnnnnnnn

-1n7 nnn nn nnnnnnnnnnnnnnnnnnnnnnnnnnnnnnnnnnnnnnnnnnnnnnnnnnnnnnnnnnnnnnnnnnnnnnnnnnnnnnnnnnn

ann ann ynn


y

CE
ynnn nn nnnn nn nnnn nn nnnn nn nnnn nn nnnn nn nnnn nn nnnn nn nnnn nn nnnn nn nnnn nn nnnn nn nnnn nn nnnn nn nnnn nn nnnn nn nnnn nn nnnn nn nnnn nn nnnn nn nnnn nn nnnn nn nnnn nn nnnn nn nnnn nn nnnn nn

nwn nn nnnnnnnnnnnnnnnnnnnnnnnnnnnnnnnnnnnnnnnnnnnnnnnnnnnnnnnnnnnnnnnnnnnnnnnnnnnnnnnnnnnnnnnnnnnnnnnnnnnnnnnnnnnnnnnnnnnnnnnnnnnnnnnnnnnnnnnnnnnnnnn

0711
V
HE
216
D'079n
| ' ' | ' ' | |
| -15°C-40°C | ||
| -40°C-70°C | ||
| 5°C-40°C | ||
| n" n 300 | ||
| n" n/ n 20 | ||
| (n" n 9.5) ' ' n 3/8 | ||
| n" n 1.1 | ||
| LWA | LWA | (γ"n) AC1200 (D"n) AC1400 (D"n) AC1600 |
| LWA | (γ"n) AG1200 (D"n) AG1400 (D"n) AG1600 | |
| LWA | λ" n 3.5 | |
| LWA | LWA | 98.8 dB(A) K=3 dB(A) |
| LWA | LWA | 88.1 dB(A) K=3 dB(A) |
| LWA | LWA | 102dB(A) |
| LWA | LWA | 2" "n" n 1.73 " " n" n 1.5=K |
| LWA | LWA | 2" "n" n 2.21 " " n" n 1.5=K |
n nn nnnnnnnnnnnnnnnnnnnnnnnnnnnnnnnnnnnnnnnnnnnnnnnnnnnnnnnnnnnnnnnnnnnnnnnnnnnnnnnnnnnnnnnnnnnnnnnnnnnnnnnnnnnnnnnnnnnnnnnnnnnnnnnnnnnnnnnnnnnnnnnnnnnnn
yynnnn nn nnnn no nnynnn nn nnnnn nn nnnnn nn nnnnn nn nnnnn nn nnnnn nn nnnnn nn nnnnn nn nnnnn nn nnnnn nn nnnnn nn nnnnn nn nnnnn nn nnnnn nn nnnnn nn nnnnn nn nnnnn nn nnnnn nn nnnnn nn nnnnn nn nnnnn nn nnnnn nn nnnnn nn nnnnn nn nnnnn nn nnnnn nn nnnn nn nannn nn nannn nn nannn nn nannn nn nannn nn nannn nn nannn nn nannn nn nannn nn nannn nn nannn nn nannn nn nannn nn nannn nn nannn nn
XIN
(A1)
non 1
nynnnnnnnnnnnnnn n 2
77 17.3
nunnt 4
nannnnn n 5
n.6
7710 1111X .7
n nnnnnnnnnnnnnnnnnnnnnnnnnnnnnnnnnnnnnnnnnnnnnnnnnnnnnnnnnnnnnnnnnnnnnnnnnnnnnnnnnnnnnnnnnnnnnnnnnnnnnnnnnnnnnnnnnnnnnnnnnnnnn
nntn.9
n nn noon.10
nnn vin .11
n.12
y7y.13
nnn nn.14
n nn 15
nnn n.16
DIN DIX .17
Tn noon.18
nnn nn noon .19
nnon non .20
nun.21
yun.22
nnonnnyn23
mian 24
25
26
pan.27
1nyu.28
111.29
nnn .30
2nyo.31
munu 32
wnn.33
(A1)
#
mwnnnn nn nnnn
wnnnn nn nnnn nn nn nn
nnnnn nnnnn nn nnnnnnnnnnnnnnnnnnnnnnnnnnnnnnnnnnnnnnnnnnnnnnnnnnnnnnnnnnnnnnnnnnnnnnnnnnnnnnnnnnnnnnnnnnnnnnn
y
nx, ninnn nnrN 7x nnn

By TnD'79ionn D'U9nn nnnn, ninn
non ninn nnnnn 111
n nn nnnnnnnnnnnnnnnnnnnnnnnnnnnnnnnnnnnnnnnnnnnnnnnnnnnnnnnnnnnnnnnnnnnnnnnnnnnnnnnnnnnnnnnnnnnnnnnnnnnnnnnnnnnnn
y
n 1
N
nONJUNI (A-17) 0nn DIN NIKIN .2
(A-18) Tn nn noon nn
nwn nn nnnnnnnnnnnn 3
(B1)
(B-2) n (B-1) nn n nn. 4
1
(B2)
HE
三GO
nnn nn nnnnnnnnnnnnnnnnnnnnnnnnnnnnnnnnnnnnnnnnnnnnnnnnnnnnnnnnnnnnnnnnnnnnnnnnnnnnnnnnnnnnnnnnnnnnnnnnnnnnnnnnnnnnnnnnnnnnnnnnnnnnnnnnnnnnnnnnnnnnnnn
yDyDyDyDyDyDyDyDyDyDyDyDyDyDyDyDyDyDyDyDyDyDyDyDyDyDyDyDyDyDyDyDyDyDyDyDyDyDyDyDyDyDyDyDyDyDyDyDyDyDy
(B-5) nnnn (B-4) nn (b) nn nn nn nn nn nn nn nn nn nn nn nn nn nn nn nn nn nn nn nn nn nn nn nn nn nn nn nn nn nn nn nn nn nn nn nn nn nn nn nn nn nn nn nn nn nn nn nn nn nn nn nn nn nn nn nn nn nn nn nn nn nn nn nn nn nn nn nn nn nn nn nn nn nn nn nn nn nn nn nn nn nn nn nn nn nn nn nn nn nn nn nn nn nn nn nn nn nn nn nn
y
(B3)
n 100nnnnnnnnnnnnnnnnnnnnnnnnnnnnnnnnnnnnnnnnnnnnnnnnnnnnnnnnnnnnnnnnnnnnnnnnnnnnnnnnnnnnnnnnnnnnnnnnnnnnnnnn
noon (B-7) nnnn nn nnnn 7
(8-8) nnnn nn nn nnnn
. Tnn noon nn nn nn nn nn nn nn nn nn nn nn nn nn nn nn nn nn nn nn nn nn nn nn nn nn nn nn nn nn nn nn nn nn nn nn nn nn nn nn nn nn nn nn nn nn nn nn nn nn nn nn nn nn nn nn nn nn nn nn nn nn nn nn nn nn nn nn nn nn nn nn nn nn nn nn nn nn nn nn nn nn nn nn nn nn nn nn nn nn
.0000 8
| הכלהה הכלהה הכלהה הכלהה הכECH הכECH הכECH הכECH הכECH הכECH הכECH הכECH הכECH הכECH הכECH הכECH הכECH הכECH הכECH הכECH הכECH הכECH הכECH הכECH הכECH הכECH הכECH הכECH הכECH הכCH הכECH הכECH הכECH הכECH הכECH הכECH הכECH הכECH הכECH הכECH הכECH הכECH הכECH הכECH הכECH הכECH הכECH הכECH הכECH הכECH הכECH הכECH הכECH הכECH הכech הכECH הכECH הכECH הכECH הכECH הכECH הכECH הכECH הכECH הכECH הכECH הכECH הכECH הכECH הכECH הכECH הכECH הכECH הכECH הכECH הכECH הכECH הכECH הכECH הכUCH הכECH הכECH הכECH הכECH הכECH הכECH הכECH הכECH הכECH הכECH הכECH הכECH הכECH הכECH הכECH הכECH הכECH הכECH הכECH הכECH הכECH הכECH הכECH הכECH הכEH הכECH הכECH הכECH הכECH הכECH הכECH הכECH הכECH הכECH הכECH הכECH הכECH הכECH הכECH הכECH הכECH הכECH הכECH הכECH הכECH הכECH הכECH הכECH הכECH הכ(CH) - -1 -2 -3 -4 -5 -6 -7 -8 -9 -10 -11 -12 -13 -14 -15 -16 -17 -18 -19 -20 -21 -22 -23 -24 -25 -26 -27 -28 -29 -30 -31 -32 -33 -34 -35 -36 -37 -38 -39 -40 -41 -42 -43 -44 -45 -46 -47 -48 -49 -50 -51 -52 -53 -54 -55 -56 -57 -58 -59 -60 -61 -62 -63 -64 -65 -66 -67 -68 -69 -70 -71 -72 -73 -74 -75 -76 -77 -78 -79 -80 -81 -82 -83 -84 -85 -86 -87 -88 -89 -90 -91 -92 -93 -94 -95 -96 -97 -98 -99 -100 -101 -102 -103 -104 -105 -106 -107 -108 -109 -110 -111 -112 -113 -114 -115 -116 -117 -118 -119 -120 -121 -122 -123 -124 -125 -126 -127 -128 -129 -130 -131 -132 -133 -134 -135 -136 -137 -138 -139 -140 -141 -142 -143 -144 -145 -146 -147 -148 -149 -150 -151 -152 -153 -154 -155 -156 -157 -158 -159 -160 -161 -162 -163 -164 -165 -166 -167 -168 -169 -170 -171 -172 -173 -174 -175 -176 -177 -178 -179 -180 -181 -182 -183 -184 -185 -186 -187 -188 -189 -190 -191 -192 -193 -194 -195 -196 -197 -198 -199 -200 -201 -202 -203 -204 -205 -206 -207 -208 -209 -210 -211 -212 -213 -214 -215 -216 -217 -218 -219 -220 -221 -222 -223 -224 -225 -226 -227 -228 -229 -230 -231 -232 -233 -234 -235 -236 -237 -238 -239 -240 -241 -242 -243 -244 -245 -246 -247 -248 -249 -250 -251 -252 -253 -254 -255 -256 -257 -258 -259 -260 -261 -262 -263 -264 -265 -266 -267 -268 -269 -270 -271 -272 -273 -274 -275 -276 -277 -278 -279 -280 -281 -282 -283 -284 -285 -286 -287 -288 -289 -290 -291 -292 -293 -294 -295 -296 -297 -298 -299 -300 -301 -302 -303 -304 -305 -306 -307 -308 -309 -310 -311 -312 -313 -314 -315 -316 -317 -318 -319 -320 -321 -322 -323 -324 -325 -326 -327 -328 -329 -330 -331 -332 -333 -334 -335 -336 -337 -338 -339 -340 -341 -342 -343 -344 -345 -346 -347 -348 -349 -350 -351 -352 -353 -354 -355 -356 -357 -358 -359 -360 -361 -362 -363 -364 -365 -366 -367 -368 -369 -370 -371 -372 -373 -374 -375 -376 -377 -378 -379 -380 -381 -382 -383 -384 -385 -386 -387 -388 -389 -390 -391 -392 -393 -394 -395 -396 -397 -398 -399 -400 -401 -402 -403 -404 -405 -406 -407 -408 -409 -410 -411 -412 -413 -414 -415 -416 -417 -418 -419 -420 -421 -422 -423 -424 -425 -426 -427 -428 -429 -430 -431 -432 -433 -434 -435 -436 -437 -438 -439 -440 -441 -442 -443 -444 -445 -446 -447 -448 -449 -450 -451 -452 -453 -454 -455 -456 -457 -458 -459 -460 -461 -462 -463 -464 -465 -466 -467 -468 -469 -470 -471 -472 -473 -474 -475 -476 -477 -478 -479 -480 -481 -482 -483 -484 -485 -486 -487 -488 -489 -490 -491 -492 -493 -494 -495 -496 -497 -498 -499 -500 -501 -502 -503 -504 -505 -506 -507 -508 -509 -510 -511 -512 -513 -514 -515 -516 -517 -518 -519 -520 -521 -522 -523 -524 -525 -526 -527 -528 -529 -530 -531 -532 -533 -534 -535 -536 -537 -538 -539 -540 -541 -542 -543 -544 -545 -546 -547 -548 -549 -550 -551 -552 -553 -554 -555 -556 -557 -558 -559 -560 -561 -562 -563 -564 -565 -566 -567 -568 -569 -570 -571 -572 -573 -574 -575 -576 -577 -578 -579 -580 -581 -582 -583 -584 -585 -586 -587 -588 -589 -590 -591 -592 -593 -594 -595 -596 -597 -598 -599 -600 -601 -602 -603 -604 -605 -606 -607 -608 -609 -610 -611 -612 -613 -614 -615 -616 -617 -618 -619 -620 -621 -622 -623 -624 -625 -626 -627 -628 -629 -630 -631 -632 -633 -634 -635 -636 -637 -638 -639 -640 -641 -642 -643 -644 -645 -646 -647 -648 -649 -650 -651 -652 -653 -654 -655 -656 -657 -658 -659 -660 -661 -662 -663 -664 -665 -666 -667 -668 -669 -670 -671 -672 -673 -674 -675 -676 -677 -678 -679 -680 -681 -682 -683 -684 -685 -686 -687 -688 -689 -690 -691 -692 -693 -694 -695 -696 -697 -698 -699 -700 -701 -702 -703 -704 -705 -706 -707 -708 -709 -710 -711 -712 -713 -714 -715 -716 -717 -718 -719 -720 -721 -722 -723 -724 -725 -726 -727 -728 -729 -730 -731 -732 -733 -734 -735 -736 -737 -738 -739 -740 -741 -742 -743 -744 -745 -746 -747 -748 -749 -750 -751 -752 -753 -754 -755 -756 -757 -758 -759 -760 -761 -762 -763 -764 -765 -766 -767 -768 -769 -770 -771 -772 -773 -774 -775 -776 -777 -778 -779 -780 -781 -782 -783 -784 -785 -786 -787 -788 -789 -790 -791 -792 -793 -794 -795 -796 -797 -798 -799 -800 -801 -802 -803 -804 -805 -806 -807 -808 -809 -810 -811 -812 -813 -814 -815 -816 -817 -818 -819 -820 -821 -822 -823 -824 -825 -826 -827 -828 -829 -830 -831 -832 -833 -834 -835 -836 -837 -838 -839 -840 -841 -842 -843 -844 -845 -846 -847 -848 -849 -850 -851 -852 -853 -854 -855 -856 -857 -858 -859 -860 -861 -862 -863 -864 -865 -866 -867 -868 -869 -870 -871 -872 -873 -874 -875 -876 -877 -878 -879 -880 -881 -882 -883 -884 -885 -886 -887 -888 -889 -890 -891 -892 -893 -894 -895 -896 -897 -898 -899 -900 |
79,nnn nn n 7yX:nyn nn nn nn nn nn nn nn nn nn nn nn nn nn nn nn nn nn nn nn nn nn nn nn nn nn nn nn nn nn nn nn nn nn nn nn nn nn nn nn nn nn nn nn nn nn nn nn nn nn nn nn nn nn nn nn nn nn nn nn nn nn nn nn nn nn nn nn nn nn nn nn nn nn nn nn nn nn nn nn nn nn nn nn nn nn nn nn nn nn nn nn nn nn nn nn nn
nyon
DUV
.
y

n nn nnnnnnnnnnnnnnnnnnnnnnnnnnnnnnnnnnnnnnnnnnnnnnnnnnnnnnnnnnnnnnnnnnnnnnnnnnnnnnnnnnnnnnnnnnnnnnnnnnnnnnnnnnnnnnnnnnnnnnnnnnnnnnnnnnnnnnnnnnnnnnnnn
nonnnnnn
n nn nnnnnnnnnnnnnnnnnnnnnnnnnnnnnnnnnnnnnnnnnnnnnnnnnnnnnnnnnnnnnnnnnnnnnnnnnnnnnnnnnnnnnnnnnnnnnnnnnnnnnnnnnnnnnnnnn
yynn nn nnnn nn nnnn nn nnnn nn nnnn nn nnnn nn nnnn nn nnnn nn nnnn nn nnnn nn nnnn nn nnnn nn nnnn nn nnnn nn nnnn nn nnnn nn nnnn nn nnnn nn nnnn nn nnnn nn nnnn nn nnnn nn nnnn nn nnnn nn nnnn nn nnnn nn nannn nn nnnn nn nnnn nn nnnn nn nnnn nn nnnn nn nnnn nn nnnn nn nnnn nn nnnn nn nnnn nn nnnn nn nnnn nn nnnn nn nnnn nn nnnn nn nnnn nn nnnn nn nnnn nn nnnn nn nnnn nn
nwn nn nnnnnnnnnn 1
ynnn nn n 2
n nn nnnnnnnn .3
2-1: ywn nnn nnynn (a .D n
yin yin in yin nynn nn (b
yTIN ,DNNN DDC NNNN NNNN NNNN NNNN NNNN NNNN NNNN NNNN NNNN NNNN NNNN NNNN NNNN NNNN NNNN NNNN NNNN NNNN NNNN NNNN NNNN NNNN NNNN NNNN NNNN NNNN NNNN NNNN NNNN NNNN NNNN NNNN NNNN NNNN
2-1 nnnn nn nynnnyn nx:nytn.
inwnn
wnnnn nn nn nnnn nn nnn .1
wnnnn n,010n IN nnnn nn nnnn A 7n nn nnnn nnnn nnnn nnnn nnnn nnnn nnnn nnnn nnnn nnnn nnnn nnnn nnnn nnnn nnnn nnnn nnnn nnnn nnnn nnnn nnnn nnnn nnnn nnnn nnnn nnnn nnnn nnnn nnnn nnnn nnnn nnnn nnnn nnnn nn
:NIINNITINNNNINN,ININ
n nn nnnn nn nnnn nn nnnn nn nnnn nn nnnn nn nnnn nn nnnn nn nnnn nn nnnn nn nnnn nn nnnn nn nnnn nn nnnn nn nnnn nn nnnn nn nnnn nn nnnn nn nnnn nn nnnn nn nnnn nn nnnn nn nnnn nn nnnn nn nnnn nn nnnn nn nannn nn nnnn nn nnnn nn nnnn nn nnnn nn nnnn nn nnnn nn nnnn nn nnnn nn nnnn nn nnnn nn nnnn nn nnnn nn nnnn nn nnnn nn nnnn nn nnnn nn nnnn nn nnnn nn nnnn nn nnnn nn nnnn nn nnnn nn nnnn nn nnnn nn nennn nn nnnn nn nnnn nn nnnn nn nnnn nn nnnn nn nnnn nn nnnn nn nnnn nn nnnn nn nnnn nn
y n nn no n nn no nn no n nn nnnn nn (N-2) nn nn (N).nn nn nn nn nn nn nn EGO
nN-2nnwn nN-1
nnn nn nnnnnnnnnnnnnnnnnnnnnnnnnnnnnnnnnnnnnnnnnnnnnnnnnnnnnnnnnnnnnnnnnnnnnnnnnnnnnnnnnnnnn
nun
n nn nnnnnnnnnnnnnnnnnnnnnnnnnnnnnnnnnnnnnnnnnnnnnnnnnnnnnnnnnnnnnnnnnnnnnnnnnnnnnnnnnnnnnnnnnnnnnnnnnnnnnnnnnnnnnnnnnnnnnnnnnnnnnnn
n nn nnnnnnnnnnnnnnnnnnnnnnnnnnnnnnnnnnnnnnnnnnnnnnnnnnnnnnnnnnnnnnnnnnnnnnnnnnnnnnnnnnnnnnnnnnnnnnnnnnnnnnnnnnnnnnnnnnnnnnnnnnnnnnn
PAN
nnn nnn nn nn nn nn 1 nn nn noon nn nn nn nn nn nn nn nn nn nn nn nn nn nn nn nn nn nn nn nn nn nn nn nn nn nn nn nn nn nn nn nn nn nn nn nn nn nn nn nn nn nn nn nn nn nn nn nn nn nn nn nn nn nn nn nn nn nn nn nn nn nn nn nn nn nn nn nn nn nn nn nn nn nn nn nn nn nn nn nn nn nn nn nn nn nn nn nn nn nn nn nn nn nn nn nn
nwnnnn (0-1) nnon noon nn .(O1nx) mix nnn
10000000000000000000000000000000000000000000000000000000000000000000000000000000000
| N-1 | N-2 | N-3 | N-4 |
nnnnn nn nnnn
n (P-1) nnn nn (P-2) nnn n n (P-3) nnn n (P-4) nnn n (P-5) nnn n (P-6) nnn n (P-7) nnn n (P-8) nnn n (P-9) nnn n (P-10)
nnn nn nnnnnnnnnnnnnnnnnnnnnnnnnnnnnnnnnnnnnnnnnnnnnnnnnnnnnnnnnnnnnnnnnnnnnnnnnnnnnnnnnnnnnnnnnnnnnnnnn
HINNINIOIIOIOIOIOIOIOIOIOIOIOIOIOIOIOIOIOIOIOIOIOIOIOIOIOIOIOIOIOIOIOIOIOIOIOIOIOIOIOIOIOIOIOIOIOIOIOIOIOIOIOIOIOIOIOIOIOIOIOIOIOIOIOIO
Lis piaiie 1aia jaiy Jaiy Ikiy

a 1

aill iie 1

a 1

joll

a 15111111111111111111111111111


V
CE 20000000000000000000000000000
C
223
AR
Jiai jia jia jie jie jia

1 1
g 1
Juslll
aalw, ydyd yall, aalld l d baa
a 1
Aldalallge allll Jae jiiie
jag jiall gall jai jai jai alal
i 1
jij 12 a b c d e f g
Jd, dudulldal 1
2
yjbdo ybncl j 1
J 3
1
2-1:
.(D
aui (b)
y
Aaalal 1
1sgo 5g jaiannn Julll Jall all Jall lss
sic jyjzjly Jall gall glall jlll a jia jai jai jai
aaln jnnn nnnn nnne aannn
J 126
aalalalalalalalalalalalalalal
2-1 1
aalalil 1
yjll jz
Jlll Jlll jia 1
Jy 2
i, jj j j j j j j j j j j j j j j j j j j j j j j j j j j j j j j j j j j j j
jIyJ 1
(E)4()
3
aai gai jiei yjil jao sll jcys
4k = 3
e 1
(2) a1 = 2,a2 = - 4
4k = 2
21 1 1 1 1 1 1 1 1 1 1 1 1 1 1 1 1 1 1 1 1 1 1 1 1 1 1 1 1 1 1 1 1 1 1 1 1 1 1 1 1 1
2a2 1 a 1 1 1 1 1 1 1 1 1 1 1 1 1 1 1 1 1 1 1 1 1 1 1 1 1 1 1 1 1 1 1 1 1 1 1 1 1 1
JyI 1 (H-2) JI (H-1)
Jullal 1-2 H-1
a1j111 40g2g13/1.5
aJal gaii jai Jai Sll yjai jai i a gao jai 1
(11)
Jus 10000000000000000000000000000000000000000000000000
(12)
aaiiie
Jusull Jusll Jusy
(J-2) aalg ggsyggalgg 1
J (J-1) glalall yglalll g
el alall g i! glalall g
(ON/OFF)/(J2)《ON》
aai aai iiaai jai jai jai jai jai jai jai jai jai jai jai jai jai jai jai jai jai jai jai jai jai jai jai jai jai jai jai jai jai jai jai jai jai jai jai jai jai jai jai jai jai jai jai jai jai jai jai jai
JJI 15 JIJI (J-3) JAIJ 4
JIIJ CAAJ LAK. (J-4) SjaiAI ae aal jSjaii
ae Jau JALK. (JL) y suiAI ae aal jSjaii
(J3 JAIAI) JAIAI AALU
aalalalalalalalalalalalalalalal
a 3
aill gic baiil (cijil bai)
a
a 1
aaii iiaai aiee
- (N-1) 1111111111111111111111111111111111111
SsIgJSLl Cldle ciss lgl jol gll pbl w
EGO aJg j 10
(N Kill) 10
Jalil jll N-2 alalil jnil N-1
gall all jy fucu sls jp s juaal alld g yll 2aell jnall w jll juaill alld gill qnnl lal
aljol jaiil jg
jlll alulu juiiul elil 4g sll i g y g n e g
1
1
cu jil jia cbe
Jidell 10jia jao .2
102 3 (O1) (O-1)
4
j 1
.(O2)(0-2)
10 1
4g 4
J 1000000000000000000000000000000000000000000000000000000
(1-1) 1000000000000000000000000000000000000000000000000000000000000000000000000
aaii aai iiaai aiiaai aiiaai aiiaai aiiaai
a aai
aaiy aaii yaaaiy
Jalal
- Juaaal 130 8 aiaaii yaiy jaiy jaiy jaiy
aaii aaiiaai iaiii jaiil jaiil 1
三GO
sie sie cie jn nn nnnnne baii iinssgannnllnnaaal alnuu 1 oda yj tia aulauy laeall no sns gaiy 1 ksi ydiag aiaa aiaaa aai aai 1 1 1 1 1 1 1 1 1 1 1 1 1 1 1 1 1 1 1 1 1 1 1 1 1 1 1 1 1 1 1 1 1 1 1 1 1 1 1 1 1 1 1 1 1 1 1 1 1 1 0
yisilgai
aJ 1 J aJ 1 J aJ 1 J aJ 1 J aJ 1 J aJ 1
aill jai
Jgssy 1/2 jz 1jz 1jz 1jz 1jz
aia 15
yLaiia 1
1 254 1000
i 1
sale! jya all iay jy Jaiy jiai jiaia jay jall iia jay jay jay jay jay jay jay jay jay jay jay jay jay jay jay jay jay jay jay jay jay jay jay jay jay jay jay jay jay jay jay jay jay jay jay jay jay jay jay jay jay jay jay jay jay jay jay jay jay jay j
y

g 1
| الله | الإستعمال | |
| الله الله الله الله الله الله الله الله الله الله الله الله الله الله الله الله الله الله الله الله الله الله الله الله الله الله الله الله الله الله الله الله الله الله AL AL AL AL AL AL AL AL AL AL AL AL AL AL AL AL AL AL AL AL AL AL AL AL AL AL AL AL AL AL AL AL AL AL AL AL AL AL AL AL AL AL AL AL AL AL AL AL AL AL Al Al Al Al Al Al Al Al Al Al Al Al Al Al Al Al Al Al Al Al Al Al Al Al Al Al Al Al Al Al Al Al Al Al Al Al Al Al Al Al Al Al Al Al Al Al Al Al Al Al AL AL AL AL AL AL AL AL AL AL AL AL AL AL AL AL AL AL AL AL AL AL AL AL AL AL AL AL AL AL AL AL AL AL AL AL AL AL AL AL AL AL AL AL AL AL AL AL AL CAL AL AL AL AL AL AL AL AL AL AL AL AL AL AL AL AL AL AL AL AL AL AL AL AL AL AL AL AL AL AL AL AL AL AL AL AL AL AL AL AL AL AL AL AL AL AL AL AL AL ALA AL AL AL AL AL AL AL AL AL AL AL AL AL AL AL AL AL AL AL AL AL AL AL AL AL AL AL AL AL AL AL AL AL AL AL AL AL AL AL AL AL AL AL AL AL AL AL AL AL (AL) AL AL AL AL AL AL AL AL AL AL AL AL AL AL AL AL AL AL AL AL AL AL AL AL AL AL AL AL AL AL AL AL AL AL AL AL AL AL AL AL AL AL AL AL AL AL AL AL AL AL | AL AL AL AL AL AL AL AL AL AL AL AL AL AL AL AL AL AL AL AL AL AL AL AL AL AL AL AL AL AL AL AL AL AL AL AL AL AL AL AL AL AL AL AL AL AL AL AL AL AL | |
| AL AL AL AL AL AL AL AL AL AL AL AL AL AL AL AL AL AL AL AL AL AL AL AL AL AL AL AL AL AL AL AL AL AL AL AL AL AL AL AL AL AL AL AL AL AL AL AL AL Al | AL AL AL AL AL AL AL AL AL AL AL AL AL AL AL AL AL AL AL AL AL AL AL AL AL AL AL AL AL AL AL AL AL AL AL AL AL AL AL AL AL AL AL AL AL AL AL AL AL CAL | |
| AL AL AL AL AL AL AL AL AL AL AL AL AL AL AL AL AL AL AL AL AL AL AL AL AL AL AL AL AL AL AL AL AL AL AL AL AL AL AL AL AL AL AL AL AL AL AL AL CAL AL | AL AL AL AL AL AL AL AL AL AL AL AL AL AL AL AL AL AL AL AL AL AL AL AL AL AL AL AL AL AL AL AL AL AL AL AL AL AL AL AL AL AL AL AL AL AL AL AL CAL |
Jaaal
EGO
EGO jn a y a a a a a a a a a a a a a a a a a a a a a a a a a a a a a a a a a a a a a a