Exercise Monitor E202 - Exercise bike Energetics - Free user manual and instructions
Find the device manual for free Exercise Monitor E202 Energetics in PDF.



Frequently Asked Questions - Exercise Monitor E202 Energetics
User questions about Exercise Monitor E202 Energetics
0 question about this device. Answer the ones you know or ask your own.
Ask a new question about this device
Download the instructions for your Exercise bike in PDF format for free! Find your manual Exercise Monitor E202 - Energetics and take your electronic device back in hand. On this page are published all the documents necessary for the use of your device. Exercise Monitor E202 by Energetics.
USER MANUAL Exercise Monitor E202 Energetics
text_image
Exercise MonitorExercise Monitor E-202
Instruction Manual
text_image
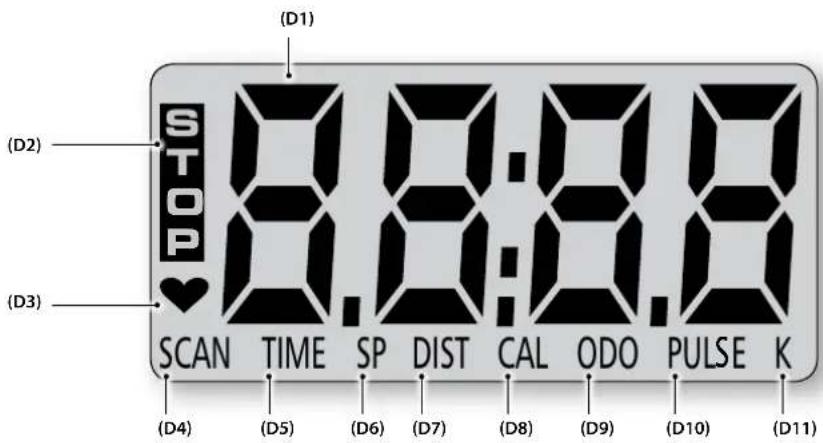
(D1) (STOP ♥) 8:00:00 (D2) (D3) SCAN TIME SP DIST CAL ODO PULSE K (D4) (D5) (D6) (D7) (D8) (D9) (D10) (D11)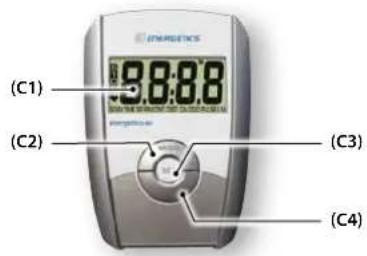
text_image
(C1) 9:30:00 C2 (C2) C3 (C3) (C4)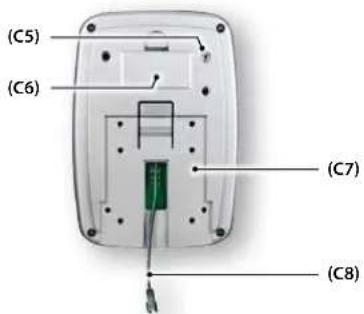
text_image
(C5) (C6) (C7) (C8)Content
Introduction 02
Legend 03
The display and it's symbols 03
The computer housing 03
Assembly and activation 04
Connecting the computer 04
Computer activation 04
Start, control and signals 04
Sleep mode 04
Quick start 05
Basic values and settings....05
Display and key functions 06
Display mode/settings mode 06
Set values - SET-key 06
Value presentation on the main display 06
Training – functions and settings....07
Individual settings/training parameters 07
Heart rate and heart rate measurement 10
Pause/ interrupt exercise and reset 11
Count down or up count of input values 11
Safety 11
Frequently asked questions 12
Service 12
Troubleshooting 12
Care 13
Maintenance 13

ENERGETICS
User Manual
Introduction
Dear customer
We thank you for choosing ENERGETICS Fitness Equipments.
The computer offers the standard functions necessary to control your easily control your training and design your work outs.
The various values collected during exercise are being scanned through on the display. You can also choose to see a specific value individually at any time during exercise.
Especially the measurement and display of your current heart rate offers you the possibility to gear your work out toward important fundamentals for effective training as determined by sports science.
Before you start your work out please read the computer manual carefully.
We wish you success and continued enjoyment using your
ENERGETICS Fitness Equipment.
Your ENERGETICS-Team
Legend

Mode-press key

Set-press key

Reset-press key
The display and it's symbols
(D1) Main Display – scanning through various settings and important values
(D2) STOP – data collection interrupted, no activity
(D3) ♥ blinking: transmission of heart rate active
(D4) SCAN – data collection active
(D5) TIME – training session (minutes)
(D6) SP - speed (kilometre/hour)
(D7) RPM – cadence (pedal revolutions/minute)
(D8) DIST – distance covered in kilometres
(D9) CAL – calories used measured in kilojoules
(D10) ODO – total distance in kilometres
(D11) PULSE – current heart rate in beats per minute
(D12) K - unit used for measurement (kilometre) or kilometre/hour
The computer housing
Front
(C1) Display – shows all important measured and calculated values and functions
(C2) MODE – scans through a variety of display functions during the work out
(C3) SET – confirm the selection of a program or value
(C4) RESET
- brief key touch: reset chosen value (to 0)
- long key touch (min. 2 seconds): reset all function, the computer restarts, information not saved is lost
Back
(C5) PULSE INPUT – connector for the hand pulse sensors of your device
(C6) Battery compartment
(C7) Insert mount – mount to attach the computer with tapped holes for the fixing bolts
(C8) Connecting cable – data line

ENERGETICS
User Manual
Assembly and activation
Connecting the computer
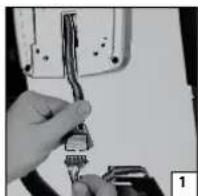
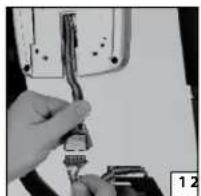
Data cable: Connect the data cable coming from the equipment with the one coming from the computer [1].
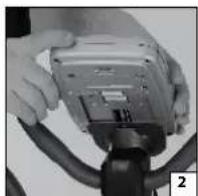
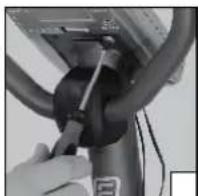
Mounting: Attach the computer to the mount on the equipment. Carefully slide the insert sleeve on the back of the computer over the mount on the centre post [2].
Pay attention not do damage the data cable when sliding the computer housing over the mount.
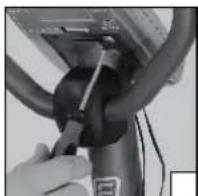
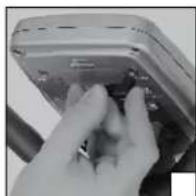
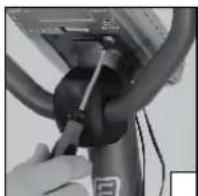
Then you fasten the four fixing bolts [3].
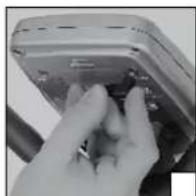
Hand pulse sensors: Plug the hand pulse cable into the connector on the back of the computer [4].
Power supply: The computer is powered with two batteries. Make certain that the batteries are inserted correctly (polarity +/-).
Computer activation
The computer can be activated by pressing any key or when the user starts to pedal.
Start, control and signals
The computer starts with a short beep tone and the standard settings. The user can start to input his settings.
Sleep mode
Should the E-202 not receive a signal for more than 4 minutes it changes into the sleep mode. The display turns dark. To start again press any key or start to pedal.
Input program settings are deleted.
natural_image
Close-up of a hand holding a cable or connector, with no visible text or symbols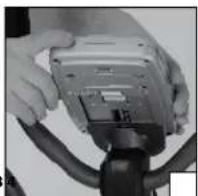
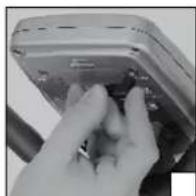
! If the computer does not receive a signal for more than 4 minutes the sleep mode is activated.
Quick start
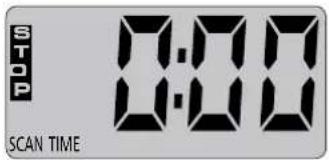
Press any function key. The computer will sound a beep tone and start automatically with the preset values.
text_image
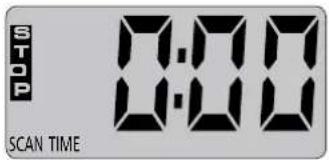
STOP 0:00 SCAN TIMEStart to pedal. The display will scan through the current values of the various read outs: workout time (TIME), calories used (CAL), travelled total kilometres (ODO), speed (SP), workout distance (DIST) and while holding the handpuls sensors your current heart rate (PULSE).
Start the workout, select a program, input individual settings
To start you proper training and input your individual settings, press the MODE-key until the appropriate setting function is reached.
Carefully read this manual and input the desired settings.
! Reset all settings – RESET
To return the computer to its original settings press the function key RESET 2 seconds until you hear the beep tone and the original values are displayed.
Basic values and settings
| Explanation Adjustable | ||
| Workout time (TIME) | Setting/shows workout time in minutes, yes | |
| Workout distance (DIST) | Setting/shows workout distance in kilometres, yes | |
| Calories used (CAL) | Setting/shows calories used in kilojoules during the workout session. | ycs |
| Heart rate (PULSE) | Setting/shows heart rate in beats per minute, no | |
| Speed (SP) | Read out of the current speed in kilometres per hour (kph). | no |
| ODO Read out of total kilometres travelled (km), no | ||


ENERGETICS
User Manual
Displays and key functions
Display mode/settings mode
The display shows SCAN. During the work out the computer is always in the display mode.
To change to the settings mode press the MODE-key. SCAN disappears from the display.
! During the work out you can switch to the settings mode. This is only possible while idle. When the display shows STOP the mode can be changed by pressing the MODE-key.
Set values - SET-key
With the function key SET the training parameter are input (workout time, workout distance and calories used).
• Single key depression: Setting increases by one value.
- Press key 2 seconds: The display starts scanning through the values quickly upward. Stop by pressing the SET-key again.
! Settings cannot be adjusted downward. If to high of a value has been input the setting has to be started over at 00. To do this press the RESET-key, the display will return to 00.
Value presentation on the main display
The read out on the main display alternates every 6 seconds among the various values.
During the work out you are in the display mode and can choose the values to be displayed by pressing the MODE-key.
Training – functions and settings
Endurance training on this trainer using the E-202 computer, which offers heart rate monitoring, is easy on your heart and joints. It is sensible basic training to increase fitness. This happens with regular exercise – the body becomes slowly adjusted to the at first unusual strain.
The E-202 allows you complete freedom in the design of your work out. The workout time, workout distance as well as the calories to be used can be selected and monitored though out the work out session.
The current heart rate can be monitored and the effort adjusted accordingly. The effort is adjusted by increasing or decreasing the resistance or changing the cadence:

Important information for the use of this fitness equipment can be found in the training guide on the ENERGETICS CD "Personal Training Instruction".
Individual settings/training parameters
The for your workout essential training parameter can be individually set. They are:
TIME workout time
DIST rkout distance
CALories used
! Has one of the preset values (time, distance, calories) reached the value of 00 a beep tone sounds and the display changes to the value that has just reached 00. The display continues showing this value until the MODE-key is pressed. The display changes to the customary read outs and the particular value now counts upward.
Setting and selection of the training parameters
The computer is in the display mode, when it restarts form the sleep mode, or the values have been reset using the die RESET-key or during the workout. The display shows SCAN.
By pressing the MODE key you enter the setting mode. SCAN is no longer displayed.
When in the display mode the readout of the individual parameter blink, in the setting mode they do not.
You will see the readout STOP (no activity) and in the main display the value for the selected workout time (TIME).
The readouts for other the parameters (distance and calories) to be set can be reach by pressing the MODE-key again. The computer will also show parameters that cannot be set (ODO, heart rate, speed). These can be skipped by pressing the MODE-key.

ENERGETICS
User Manual
! During the workout the settings can only be changed when the unit is idle. Changes can be made only when STOP appears, using the MODE and SET-key.
Setting of functions
Start the computer by pressing any key. The computer scans through all values (showing each for 6 seconds). The computer is in the display mode.
! Depending on which value is displayed when the MODE-key is pressed and the setting mode is entered, the sequence of the settings is changed.
- To change into the setting mode press the MODE-key, SCAN is no longer visible.
- Press the MODE-key again and the workout time is displayed. Press the SET-key until the desired time in displayed.
- When the workout time is set press the MODE-key. Now calories (CAL) is displayed. Press the SET-key until the desired Kilojoules value to be used is displayed.
• After the calorie value is set press the MODE-key four times. The display will switch to ODO (not adjustable), then PULSE (not adjustable), then speed (not adjustable) and finally workout distance. Press the SET-key until the desired workout distance is displayed.
- When the workout distance is set press the MODE-key. The computer switches back to the display mode.
Now the workout can begin.
TIME workout time
A workout time between 1 and 99 minutes can be selected. The time can be entered in increments of one minute.
If a value for time is entered, the time will count down to 0. A beep tone signals when 0:00 is reached.
If the value of the setting is left at 0:00, the time counts up and the current value is displayed.
CALories used
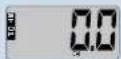
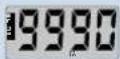
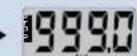
Shows the approximate value of kilojoules used. The kilojoules to be burned during the work out can be selected between 1.0 and 9990 and entered in increments of 1 and 10.
- Entered in increments of 1 kilojoule up to the value of 1000 kilojoules
• Above 1000 kilojoules in increments of 10 kilojoules
If a value is entered the kilojoules used count down. A beep tone signals when 0.0 value is reached.
If the value of the setting is left at 0.0, the kilojoules used counts up and the current value is displayed.
! The computer uses kilojoules as unit to measure energy used. Calories and kilojoules are terms that are sometimes confused or wrongly interpreted.
Conversion:
1 kilojoule = 0,239 kilocalories
1 kilocalorie = 4,189 kilojoules
DIST rkout distance
A workout distance can be selected between 0,1 km and 999 km.
- Entered in increments of 0,1 up to a value of 100 kilometres
• Above 100 Kilometres increments of 1,0 kilometres
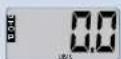
If a value for distance is entered the kilometres travelled count down. A beep tone signals when 0.0 is reached.
If the value of the setting is left at 0.0, the distance counts up and the current value is displayed.
1

2




3




4



5




ENERGETICS
User Manual
Heart Rate and heart rate monitoring
The computer monitors the heart rate via the hand pulse sensors. The heart rate is displayed in beats per minute.
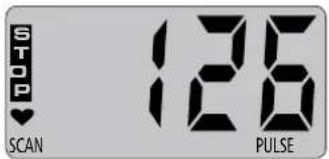
text_image
STOP SCAN 126 PULSE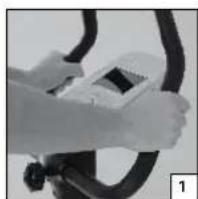
natural_image
Close-up of hands operating a small electronic device on a circular device (no visible text or symbols)Measurement via hand pulse sensors: Sensors to record heart rate from the palms are located on the handlebars. For recording to take place both palms have to be in contact with the sensors simultaneously [1].

Important information to determine your correct and optimal heart rate as well as the heart rates proper application during the workout can be found in the training guide on the ENERGETICS CD "Personal Training Instruction".

Hand pulse sensor record the variation in resistance, which is created by the pulsation of the blood flowing through the palms. Movement on the handgrips, friction, moisture perspiration will influence the transmission. There are among the appreciable physiological differences in the characteris- of the resistance change. For some people the resistance is to be even be measured. In this case the computer will show heart rate.
All these factors influence the measurement, which makes it imprecise and it should only be used for orientation.
If the hands are dry at the beginning of the workout the hand pulse sensors might not pick up a signal at all or register a faulty one. Usually it is sufficient to moisten the palms to correct this.
The values that are measured and calculated here are not based on medically valid measuring methods. The values therefore might not be accurate. Please contact your physician for a medically valid measurement.
The heart rate measurement using the hand pulse sensors is not fit for medical purposes!
Pause/interrupt exercise and reset
To interrupt the workout for a short period it is not necessary to press a key. When the unit is idle there are no values recorded.
Reset all settings – RESET
- To return the computer to its original settings press the function RESET for two seconds until a beep tone sounds and the read outs on the display show the original values.
Count down or up count of input values
If no values are set prior to your workout, one or more values remain at 0, the values are recorded starting at 0 and the current value is displayed.
You can choose to input values for workout time, workout distance or calories used. When a value is entered the program will count down during your training until 0 is reached.
It will rarely be the case that two or more input values will reach 0 simultaneously. If one value reaches 0 a beep tone sound and the display changes to show this particular value. This value will be displayed constantly until the MODE-key is pressed to switch back to the usual display sequence. The value will now count up from 0 and the current value be displayed.

Important information about the use of this equipment as well as a detailed training manual can be found in the training guide on the ENERGETICS CD "Personal Training Instruction".
Safety
Our recommendation: Get a physician's advice before you start your training.
- Train regularly and over an extended period of time.
- Wear comfortable, breathable clothing.
- Wear non-sliding sneakers. Never train bare footed, this could result in injury, especially to your toes.
- Do not consume a heavy meal within one hour prior or after your workout.
- Drink plenty of fluids.


ENERGETICS
User Manual
Frequently asked questions
How are the computer settings reset?
- Reset: Hold the RESET-key for a minimum of 2 seconds and all functions will be reset. Information not saved will be lost.
- Power supply: If removing the batteries from the back of the computer disconnects the power supply, all functions are reset and information not saved it lost.
Can the workout/program be interrupted?
The training is interrupted when the computer no longer receives a signal from the unit, the values will no longer be recorded. You can resume training and the values continue counting.
If the training is interrupted for more than 4 minutes the computer stops and all values recorded so far are lost.
Heart rate monitoring – can chest strap and hand pulse sensors be used at the same time?
The E-202 has no receiver for a chest strap signal.
Service
Troubleshooting
Computer display is not working
- The computer might not be getting power. Check if the batteries are inserted properly.
• The batteries might need to be replaced. - Contact your local ENERGETICS-dealer if you have checked all connections and the display is still not working.
The computer does not show values during the workout
- Check if the data cable is connected properly.
Heart rate (PULSE) shows no or incorrect read out
- Check if your palms have proper contact with the sensors. Both palms have to be in contact with the sensors simultaneously. The display may be on a slight delay.
- Check all cable connections.
• Try moistening your hands if they are dry.
The computer has shut down
In rare cases the computer might shut down, mainly because of sudden changes in the electrical current or static discharge. Normally the E-202 restarts on its own.
If this should not occur a restart can be performed by removing the batteries for a moment and reinserting them.
Care
Take care that to avoid any moisture penetration. Clean the computer with a lightly dampened cloth. Do not use abrasive cleaning solutions.
Maintenance
There is no need for special maintenance. Regularly check that all bolts and connections have a tight fit. Exchange any defective parts immediately. For assistance contact your local ENERGETICS-dealer.


ENERGETICS
User Manual
Inhalt
Einführung 02
Zeichenerklärung 03
natural_image
Close-up of a hand holding a connector with a cable, next to an electronic device (no visible text or symbols)
natural_image
Close-up of hands holding a small electronic device connected to a cable (no visible text or symbols)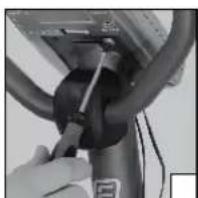
natural_image
Close-up of a hand using a tool to adjust or install a mechanical component (no visible text or symbols)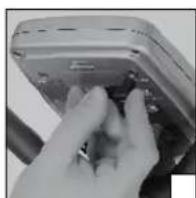
natural_image
Close-up of a hand pressing a button on a device (no visible text or symbols)natural_image
Close-up of hands operating a stationary bike with a handheld device (no visible text or symbols)natural_image
Close-up of a hand holding a connector with a cable, next to an electronic device (no visible text or symbols)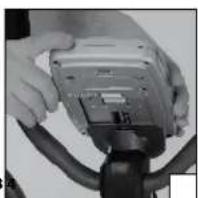
natural_image
Close-up of hands holding a small electronic device connected to a cable (no visible text or symbols)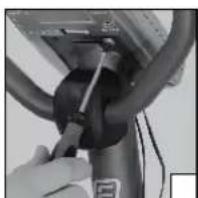
natural_image
Close-up of a hand using a tool to adjust or install a mechanical component (no visible text or symbols)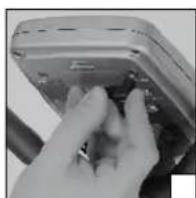
natural_image
Close-up of a hand pressing a button on a device (no visible text or symbols)natural_image
Close-up of a hand using a small electronic device to interact with a black circular device (no visible text or symbols)ENERGETICS Fitness Equipment.
Ditt ENERGETICS - Team
Funktioner

Mode/Funktionsläge

natural_image
Close-up of a hand holding a cable or connector, with no visible text or symbols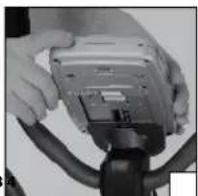
natural_image
Close-up of hands using a resistance band device on a circular mechanical component (no visible text or symbols)natural_image
Close-up of a hand holding a connector with a cable, next to an electronic device (no visible text or symbols)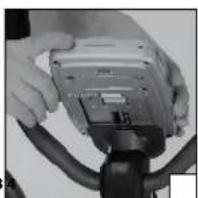
natural_image
Close-up of hands holding a small electronic device connected to a cable (no visible text or symbols)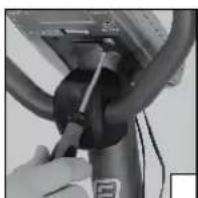
natural_image
Close-up of a hand using a tool to adjust or install a mechanical component (no visible text or symbols)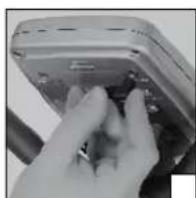
natural_image
Close-up of a hand pressing a button on a device (no visible text or symbols)natural_image
Close-up of a hand using a resistance band device on a circular motor (no visible text or symbols)natural_image
Close-up of a hand holding a connector with a cable, next to a device component (no visible text or symbols)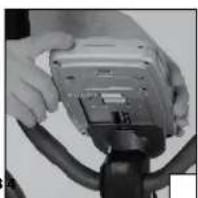
natural_image
Close-up of hands holding a small electronic device connected to a cable (no visible text or symbols)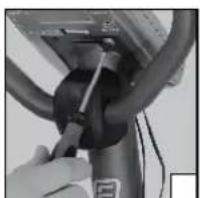
natural_image
Close-up of hands using a tool to adjust or install a mechanical component (no visible text or symbols)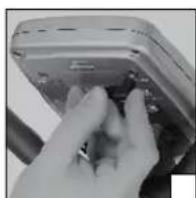
natural_image
Close-up of a hand pressing a button on a device (no visible text or symbols)natural_image
Close-up of a person using a resistance band device on a circular mechanical component (no visible text or symbols)natural_image
Close-up of a hand holding a connector with a cable, next to a device component (no visible text or symbols)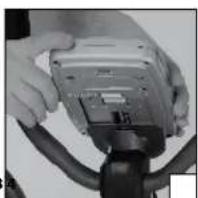
natural_image
Close-up of hands holding a small electronic device connected to a cable (no visible text or symbols)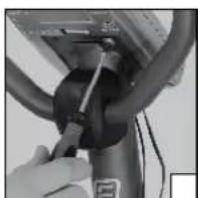
natural_image
Close-up of a hand using a tool to adjust or install a mechanical component (no visible text or symbols)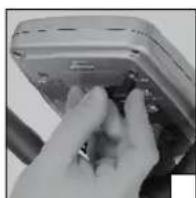
natural_image
Close-up of a hand pressing a button on a device (no visible text or symbols)natural_image
Close-up of hands operating a bicycle tire with a small electronic device (no visible text or symbols)De computer is vastgelopen
natural_image
Close-up of a hand holding a connector with a cable, next to a device component (no visible text or symbols)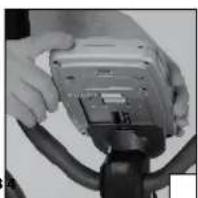
natural_image
Close-up of hands holding a small electronic device connected to a cable (no visible text or symbols)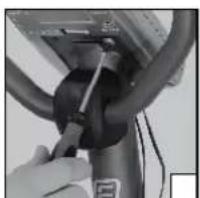
natural_image
Close-up of hands using a tool to adjust or install a mechanical component (no visible text or symbols)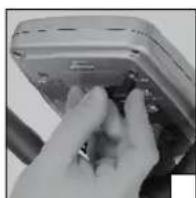
natural_image
Close-up of a hand pressing a button on a device (no visible text or symbols)natural_image
Close-up of hands operating a bicycle tire with a small electronic device (no visible text or symbols)natural_image
Close-up of a hand holding a connector with a cable, next to a device component (no visible text or symbols)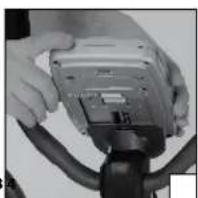
natural_image
Close-up of hands holding a small electronic device connected to a cable (no visible text or symbols)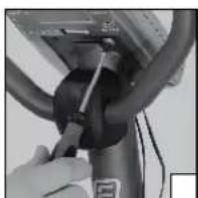
natural_image
Close-up of a hand using a tool to adjust or install a mechanical component (no visible text or symbols)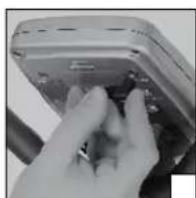
natural_image
Close-up of a hand pressing a button on a device (no visible text or symbols)natural_image
Close-up of hands operating a stationary bike with a white seatbelt (no visible text or symbols)natural_image
Close-up of a hand holding a connector with a cable, next to a device component (no visible text or symbols)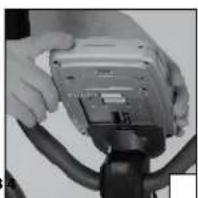
natural_image
Close-up of hands holding a small electronic device connected to a cable (no visible text or symbols)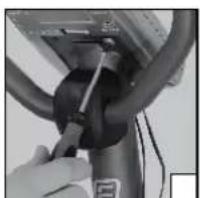
natural_image
Close-up of hands using a tool to adjust or install a mechanical component (no visible text or symbols)
natural_image
Close-up of a hand pressing a button on a device (no visible text or symbols)natural_image
Close-up of hands using a bicycle pedal device on a black bicycle wheel (no visible text or symbols)natural_image
Close-up of a hand holding a connector with a cable, next to an electronic device (no visible text or symbols)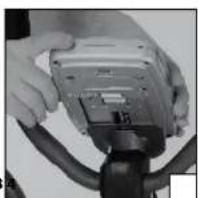
natural_image
Close-up of hands holding a small electronic device connected to a cable (no visible text or symbols)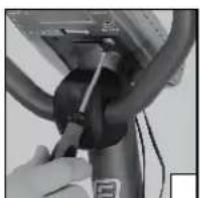
natural_image
Close-up of hands using a tool to adjust or install a mechanical component (no visible text or symbols)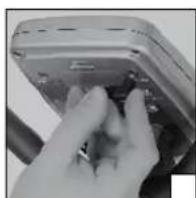
natural_image
Close-up of a hand pressing a button on a device (no visible text or symbols)natural_image
Close-up of hands operating a bicycle tire with a small electronic device (no visible text or symbols)ENERGETICS Fitness Equipment.
natural_image
Close-up of a hand holding a connector with a cable, next to an electronic device (no visible text or symbols)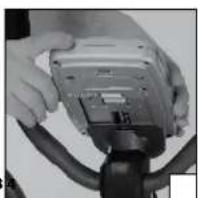
natural_image
Close-up of hands holding a small electronic device connected to a cable (no visible text or symbols)
natural_image
Close-up of hands using a tool to adjust or install a mechanical component (no visible text or symbols)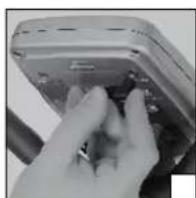
natural_image
Close-up of a hand pressing a button on a device (no visible text or symbols)natural_image
Close-up of hands operating a bicycle steering wheel (no visible text or symbols)natural_image
Close-up of a hand holding a connector with a cable, next to a device component (no visible text or symbols)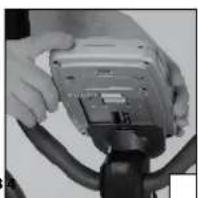
natural_image
Close-up of hands holding a small electronic device connected to a cable (no visible text or symbols)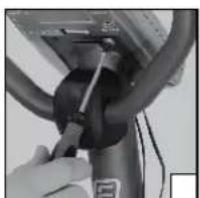
natural_image
Close-up of hands using a tool to adjust or install a mechanical component (no visible text or symbols)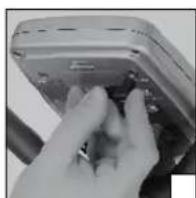
natural_image
Close-up of a hand pressing a button on a device (no visible text or symbols)natural_image
Close-up of hands using a stationary bike with a small object on the wheel (no visible text or symbols)natural_image
Close-up of a hand holding a connector with a cable, next to a device component (no visible text or symbols)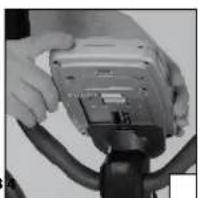
natural_image
Close-up of hands holding a small electronic device connected to a cable (no visible text or symbols)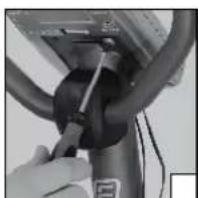
natural_image
Close-up of a hand using a tool to adjust or install a mechanical component (no visible text or symbols)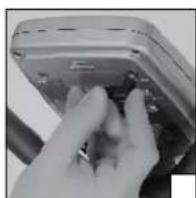
natural_image
Close-up of a hand pressing a button on a device (no visible text or symbols)natural_image
Close-up of a hand using a small electronic device to interact with a black circular device (no visible text or symbols)natural_image
Close-up of a hand holding a connector with a cable, next to a device component (no visible text or symbols)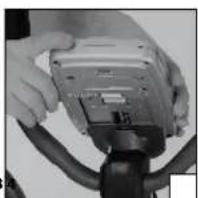
natural_image
Close-up of hands holding a small electronic device connected to a cable (no visible text or symbols)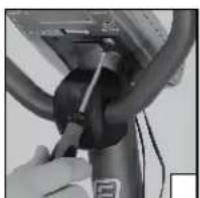
natural_image
Close-up of hands using a tool to adjust or install a mechanical component (no visible text or symbols)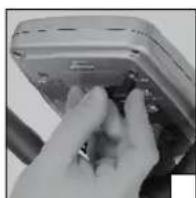
natural_image
Close-up of a hand pressing a button on a device (no visible text or symbols)natural_image
Close-up of hands operating a bicycle tire with a small electronic device (no visible text or symbols)natural_image
Close-up of a hand holding a connector with a cable, next to an electronic device (no visible text or symbols)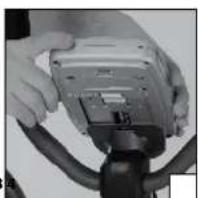
natural_image
Close-up of hands holding a camera module with cables (no visible text or symbols)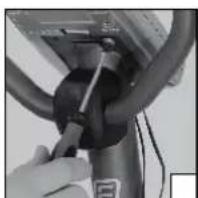
natural_image
Close-up of a hand using a tool to adjust or install a mechanical component (no visible text or symbols)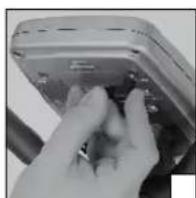
natural_image
Close-up of a hand pressing down on a small electronic device (no visible text or symbols)natural_image
Close-up of hands operating a bicycle steering wheel (no visible text or symbols)natural_image
Close-up of a hand holding a connector with a cable, next to a device component (no visible text or symbols)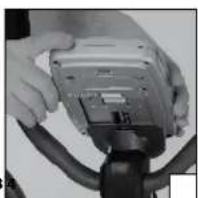
natural_image
Close-up of hands holding a small electronic device connected to a cable (no visible text or symbols)
natural_image
Close-up of a hand using a tool to adjust or install a mechanical component (no visible text or symbols)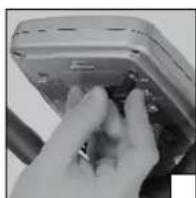
natural_image
Close-up of a hand pressing a button on a device (no visible text or symbols)natural_image
Close-up of hands operating a bicycle steering wheel (no visible text or symbols)natural_image
Close-up of a hand holding a connector with a cable, next to a device component (no visible text or symbols)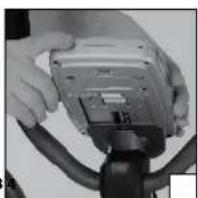
natural_image
Close-up of hands holding a small electronic device connected to a cable (no visible text or symbols)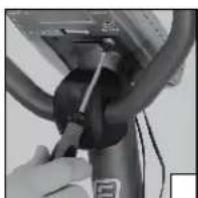
natural_image
Close-up of a hand using a tool to adjust or install a mechanical component (no visible text or symbols)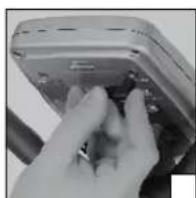
natural_image
Close-up of a hand pressing a button on a device (no visible text or symbols)natural_image
Close-up of hands using a resistance bike with visible wheel and seat (no text or symbols)natural_image
Close-up of a hand holding a connector with a cable, next to an electronic device (no visible text or symbols)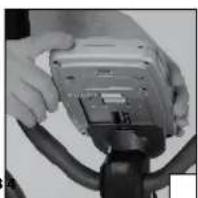
natural_image
Close-up of hands holding a small electronic device connected to a cable (no visible text or symbols)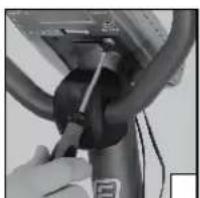
natural_image
Close-up of hands using a tool to adjust or install a mechanical component (no visible text or symbols)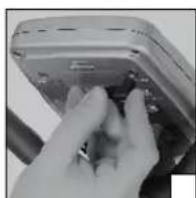
natural_image
Close-up of a hand pressing a button on a device (no visible text or symbols)! Ako računalo duže od 4 minute ne dobiva nikakav signal, automatski prelazi u mod mirovanja.
Brzi start
natural_image
Close-up of hands operating a bicycle steering wheel (no visible text or symbols)natural_image
Close-up of a hand holding a connector with a cable, next to an electronic device (no visible text or symbols)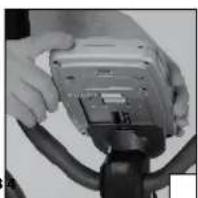
natural_image
Close-up of hands holding a small electronic device connected to a cable (no visible text or symbols)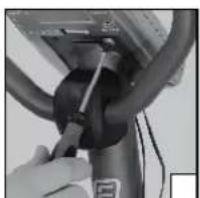
natural_image
Close-up of hands using a tool to adjust or install a mechanical component (no visible text or symbols)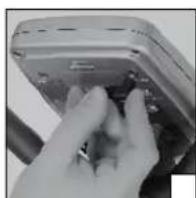
natural_image
Close-up of a hand pressing a button on a device (no visible text or symbols)Start, kontrola, signalni ton
Računar se pusti kratkim signalnim tonom i standardnim namještanjem. Možete vršiti namještanje.
Režim mirovanja
Ako Vaš E-202 za vrijeme duže od 4 minute ne dobije signal, automatski se prebaci u režim mirovanja. Displej je taman. Opet ga pustite pritiskom na tipku ili pedalo. Namještanje programa koje ste napravili se vrati u početno stanje.
! Kad računar za vrijeme duže od 4 minute ne dobije signal, automatski se prebaci u režim mirovanja.
Brzo puštanje
natural_image
Close-up of hands operating a bicycle steering wheel (no visible text or symbols)Mjerenje pomoću senzora ručnog pulsa: Osjetila za snimanje pulsa iz dlana nalaze se na upravljaču. Kako bi se snimanje odvijalo, potrebno je obje ruke istodobno priložiti na senzore [1].

Važne upute za namještanje srčane frekvencije, koja je za Vas ispravna/optimalna te isto za upotrebu vrijednosti srčane frekvencije prilikom treninga naći ćete u uputstvu za trening na CD ENERGETICS „Personal Training Instruction“.

natural_image
Close-up of a hand holding a connector with a cable, next to an electronic device (no visible text or symbols)
natural_image
Close-up of hands holding a small electronic device connected to a cable (no visible text or symbols)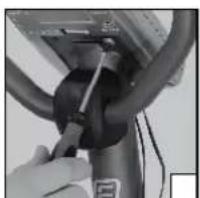
natural_image
Close-up of hands using a tool to adjust or install a mechanical component (no visible text or symbols)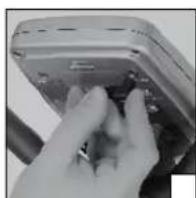
natural_image
Close-up of a hand pressing a button on a device (no visible text or symbols)! Ako računar ne prima signal duže od 4 minuta, automatski će se prebaciti u mod mirovanja.
Brzi start
Pritisnite bilo koji funkcijski taster. Oglasice se signalni ton. Računar se automatski pali sa prepodešenim vrednostima.
text_image
STOP 0:00 SCAN TIMEZapočnite kretanje. Na ekranu se prikazuju razne vrednosti naizmenično: trajanje treninga (TIME), potrošene kalorije (CAL), ukupno pređeni put (ODO), brzina (SP), pređena deonica u toku treninga (DIST) i ako uhvatite senzore pulsa ruke, Vaš trenutni puls (PULSE).
natural_image
Close-up of hands operating a bicycle tire with a small electronic device (no visible text or symbols)Merenje pomoću senzora pulsa ruke: Oba
senzora za očitavanje pulsa preko dlanova nalaze se na kormanu. Kako bi se puls očitao, moraju obe ruke da istovremeno budu na senzorima [1].

Važni saveti u vezi sa određivanjem odgovarajućeg/ optimalnog pulsa kao i u vezi sa primenom vrednosti pulsa tokom treniranja mogu da se nadu u Uputstvu za treniranje na ENERGETICS CD-u „Personal Training Instruction“.

Senzori pulsa ruku mere promenu u otporu na dlanovima ruku koja nastaje kao posledica rada srčanog mišića.
Pomeranje na ručkama, trenje, vlaga/znoj mogu da utiču enos. Isto tako postoje i od osobe do osobe vidne psihološki ljene razlike u visini tih promena u otporu. Kod nekih osoba promene izuzetno male. U takvim slučajevima može se da računar ne može da meri puls.
Svi pomenuti faktori utiču na merenje, stoga je ono relativno neprecizno i služi samo kao orijentaciona vrednost.
Ako su Vam na početku treninga ruke potpuno suve, može doći do smetnji ili prekida u prenosu pulsa. Najčešće pomaže ako ruke malo navlažite.
Vrednosti koje prikazuje računar nisu nastale kao rezultat medicinskih merenja. Stvarne vrednosti mogu donekle da odudaraju od prikazanih. Ukoliko želite tačna medicinska merenja potrebno je da stupite u kontakt sa svojim lekarom.
Merenje pulsa preko senzora pulsa ruku nije predviđeno da se koristi u medicinske svrhe!
Pauza/prekid treninga i resetovanje
Ako poželite da na kratko prekinete trening nije potrebno da da nešto posebno nameštate niti da pritiskate tačno određene tastere. Ako je trenažer u mirovanju, vrednosti se ne broje.
Resetovanje svih podešavanja – RESET
Ako želite da računar vratite na osnovna podešavanja, pritisnite taster RESET i držite ga barem 2 sekunde dok ne začujete signalni ton i na ekranu ne ugledate početne vrednosti.
natural_image
Close-up of a hand holding a connector with a cable, next to an electronic device (no visible text or symbols)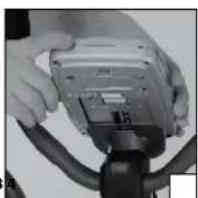
natural_image
Close-up of hands holding a device with cables (no visible text or symbols)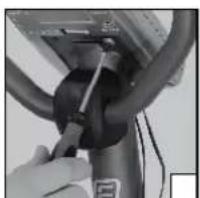
natural_image
Close-up of hands using a tool to adjust or install a mechanical component (no visible text or symbols)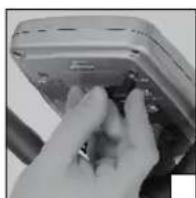
natural_image
Close-up of a hand pressing a button on a device (no visible text or symbols)natural_image
Close-up of a hand using a resistance band device on a circular motor (no visible text or symbols)natural_image
Close-up of a hand holding a connector with a cable, next to an electronic device (no visible text or symbols)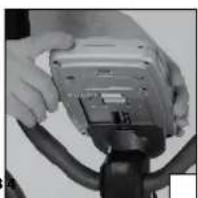
natural_image
Close-up of hands holding a small electronic device connected to a cable (no visible text or symbols)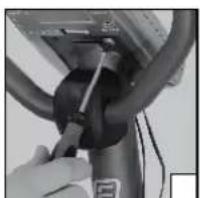
natural_image
Close-up of hands using a tool to adjust or install a mechanical component (no visible text or symbols)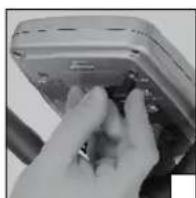
natural_image
Close-up of a hand pressing a button on a device (no visible text or symbols)Start, verificare, ton semnalizare
natural_image
Close-up of hands using a small electronic device on a curved mechanical component (no visible text or symbols)natural_image
Close-up of a hand holding a connector with a cable, next to a device component (no visible text or symbols)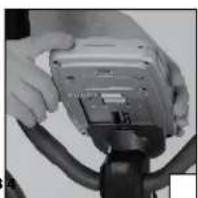
natural_image
Close-up of hands holding a small electronic device connected to a cable (no visible text or symbols)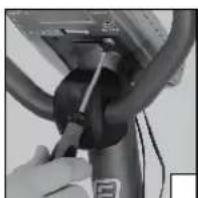
natural_image
Close-up of a hand using a tool to adjust or install a mechanical component (no visible text or symbols)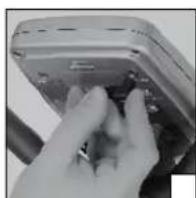
natural_image
Close-up of a hand pressing a button on a device (no visible text or symbols)natural_image
Close-up of hands operating a bicycle tire with a small electronic device (no visible text or symbols)natural_image
Close-up of hands holding a cable or connector with a bracket (no visible text or symbols)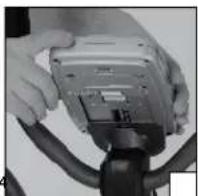
natural_image
Close-up of hands operating a stationary bike with a wheel (no visible text or symbols)natural_image
Close-up of a hand using a tool to adjust or install a mechanical component (no visible text or symbols)