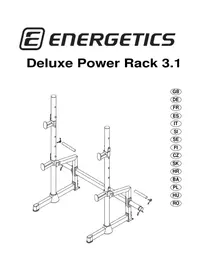
USER MANUAL Deluxe Power Rack 3.1 Energetics
Deluxe Power Rack 3.1
natural_image
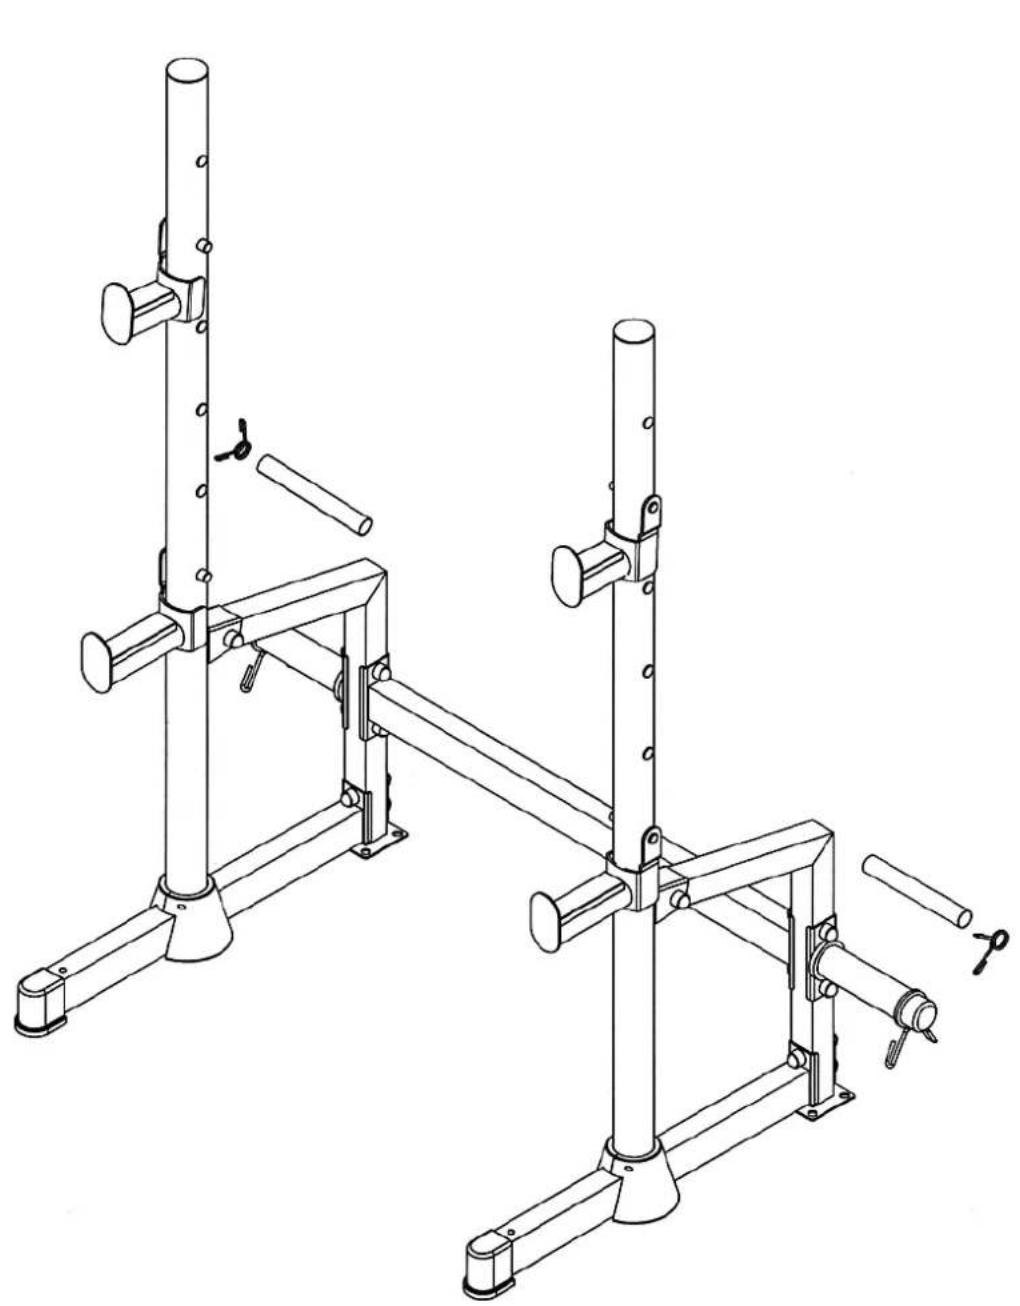
Technical line drawing of a mechanical clamp or support structure with vertical and horizontal components (no text or symbols)
Table of contents - Inhaltsverzeichnis - Tables des matières - Tabla de contenidos - Indice - Kazalo vsebine - Innehållsförteckning – Sisältö – Obsah - Obsah – Sadržaj – Sadržal – Spis treści – Tartalom – Continut
- English P. 3
- Deutsch P. 7
- Français P. 11
- Español P. 15
- Italiano P. 19
- Slovensko P. 23
- Svenska P. 27
- Suomi P. 31
- Česky P. 35
- Slovensky P. 39
- Hrvatski P. 43
- Bosanski jezik P. 47
- Polski P. 51
- Magyarul P. 55
- Românește P. 59
GB © The owner's manual is only for the customer reference. ENERGETICS can not guarantee for mistakes occurring due to translation or change in technical specification of the product.
DE © Die Gebrauchsanweisung dient nur zur Referenz für den Kunden. ENERGETICS übernimmt keine Haftung für Fehler die durch Übersetzung oder technische Änderungen des Produkts entstehen.
FR © Le manuel d'utilisation ne sert que d'information au consommateur. ENERGETICS ne peut être tenu responsable pour d'éventuelles erreurs de traduction, ou pour d'éventuelles modifications techniques du produit.
ES © El manual del usuario es sólo para referencia del cliente. ENERGETICS no se hace responsable de los errores que se produzcan debido a la traducción o cambio de las especificaciones técnicas del producto.
IT © Il presente manuale è solo per riferimento dell'acquirente. ENERGETICS non può garantire per errori occorsi durante la traduzione o cambiamenti nelle specifiche tecniche del prodotto.
SI © Ta navodila so samo za kupca. ENERGETICS ne more garantirati za napake, ki se pojavijo zaradi prevajanja oziroma zaradi spremembe tehnične specifikacije proizvoda.
SE © Bruksanvisningen är enbart avsedd som upplysning till kunden. ENERGETICS avsåger sig ansvar för ev. felaktigheter till följd av översättningsfel eller tekniska ändringar på produkterna.
FI © Nämä käyttöohjeet ovat ainoastaan asiakasta varten. ENERGETICS ei takaa kielenkäännöksestä tai tuotteen teknisistä muunnoksista johtuvia virheitä.
CZ © Návod k použití je pouze doporučení pro zákazníky. ENERGETICS nepřebírá žádné ručení za chyby způsobené překladem či změnami v technické specifikaci výrobku.
SK © Tento návod je určený len pre potrebu zákazníkov. ENERGETICS nezodpovedá za chyby, ktoré sa môžu vyskytnúť kvôli chybnému prekladu alebo zmenám v technickej špecifikácii produktu.
HR © Uve upute za uporabu služe samo kao pomoć kupcu. ENERGETICS ne preuzima na sebe nikakvu odgovornost u slučaju greški nastalih prilikom prevođenja teksta ili tehničkih promjena u izradi.
BA © Uputstvo za korišćenje je samo preporuka za kupce. ENERGETICS ne preuzima nikakvu garanciju za greške prouzročene prilagođavanjem ili izmjenama u tehničkoj specifikacji proizvoda.
PL © Instrukcja obsługi jest informacja dla klienta. ENERGETICS nie ponosi odpowiedzialności za usterki powstałe w wyniku tłumaczenia lub technicznych zmian produktu.
HU © A vásárlók számára a jelen használati utasításnak csak ajánló jellege van. Az ENERGETICS cég nem vállal kezességet olyan jellegű hibákért, amelyek az eredeti szöveg fordításából, illetve a termék módosított műszaki specifikációjából származnak.
RO © Instrucțiunile de utilizare sunt doar recomandări pentru cumpărători. ENERGETICS nu preia nici un fel de garanție pentru greșelile datorate traducerii sau modificărilor în specificația tehnică a produsului.
Congratulations on your purchase of an ENERGETICS home fitness tool. This product has been designed and manufactured to meet the needs and requirements of in-home use. Please carefully read the instructions prior to assembly and first use. Be sure to keep the instructions for reference and/or maintenance. If you have any further questions, please contact us. We wish you lots of success and fun while training,
Your E ENERGETICS - Team
Warranty
ENERGETICS offers high quality home exercisers that have been tested and certified according to European Norm EN 957.
Safety Instructions
Before you start training with the equipment, please read the instructions carefully.
Be sure to keep the instructions for information, in case of repair and for spare part delivery.
- This training equipment is not suitable for therapeutic purposes
- This training equipment is made for home use only.
- Follow the steps of the assembly instructions carefully.
- Use only original parts as delivered.
- Before the assembly, be sure to check if delivery is complete.
- For assembly, use only suitable tools and ask for assistance with assembly if necessary.
- Place the bench on an even, non-slippery surface. Because of possible corrosion, the usage of the equipment in moist areas is not recommended.
- Check before the first training and every 1-2 months that all connecting elements are tight fitting and are in the correct condition.
- Replace defective components immediately and/or keep the equipment out of use until repair.
- For repairs, use only original spare parts.
- In case of repair please ask your dealer for advice
- Avoid the use of aggressive detergents when cleaning the item.
- Ensure that training starts only after correct assembly and inspection of the product.
- For all adjustable parts be aware of the maximum positions to which they can be adjusted/tightened to.
- The equipment is designed for adults. Please ensure that children use the device only under the supervision of an adult.
- Ensure that those present are aware of possible hazards, e.g. movable parts during training.
- Consult your physician before starting with any exercise programme. He can advise on the kind of training and which impact is suitable.
- Warning: incorrect/excessive training can cause health injuries.
- Please follow the advice for correct training as detailed in training instructions.
This bench is made for home use only and tested up to a max weight of 150 kg.
Training Instruction
Which program is best for you?
Which type of workout you pursue and which program you follow depends on your motivation level, available time, fitness level and goals. The following will help you decide:
STRENGTH TRAINING PROGRAMS
Best Suited For Individuals Who:
- Wish to keep aerobic and strength programs separate
- Want to train 3 or more days per week
- Want to workout at a high intensity for improved muscle definition
- Want to do multiple sets
Intensity of Weight: High/Moderate
Repetitions: * 8-12
Rest Periods: 30 seconds to 2 minutes
Sets: * 1 to 3
Recommended Days Per Week: 2 to 3
Important: To provide a total fitness regimen, 2 to 3 days of aerobic activity should be performed in addition to the 2 to 3 days of strength training workouts.
CIRCUIT TRAINING PROGRAMS
Best Suited For Individuals Who:
- Want to combine aerobic and strength training
■ Have only 3 days per week to train
- Want a more general conditioning workout
- Have had trouble adhering to a program in the past
Intensity of Weight: Moderate/Low
Repetitions: * 15-20
Rest Periods: Very little
Sets: * 1
Recommended Days Per Week: 3
Important: Vary your program from time to time to avoid staleness and to rest muscles and joints from repetitive and possible excessive use.
Strength Trainers
- Once a week do a circuit training workout.
■ Break your week up:
- One day strength training
- One day aerobic training
- One day circuit training
Avoid muscle staleness and enhance your aerobic fitness by performing one week of circuit training after every 6 to 8 weeks of strength training.
Circuit Trainers
- If desired, do aerobic workouts every other day and between circuit training workouts.
Remember to rest at least one day per week.
- Include one strength training or aerobic workout in your weekly program.
*Repetitions: The number of times you perform a specific exercise.
*Sets: The number of times a given number of repetitions is performed (2 sets of 12 repetitions).
Care and Maintenance
- The home exerciser should not be used or stored in a moist area because of possible corrosion.
- Check at least every 4 weeks that all connecting elements are tightly fitted and in good condition.
- In case of repair please ask your dealer for advice.
- Replace defective components immediately and/or keep the equipment out of use until repair.
- Only use original spare parts for repair.
- Use a damp cloth to clean the Home Exerciser and avoid the use of aggressive detergents when cleaning the Home Exerciser.
- After exercising, immediately wipe of the sweat; perspiration can ruin the appearance and proper function of the Home Exerciser.
Assembly notes
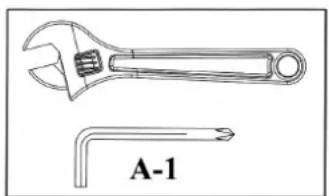
- The following tools are required for assembly: Two adjustable wrenches and Allen Wrenches.
- Always only use Carriage Bolt to insert through the SQUARE hole on component that needs to be assembled. Attach washer only to end of the Carriage Bolt.
- Always only use Allen Bolts or Hex Bolts insert through the ROUND hole on component that need to be assembled.
- Always wait until all bolts are installed to the component and then fasten the bolts. Do not fasten each bolt right after it is installed.
- ASSEMBLED DIMENSION: L 150 x W 80 x H 158 cm
Symbols shown in Assembled Instruction:
natural_image
Technical illustration of an adjustable wrench and a U-shaped tool labeled A-1 (no text or symbols on the tools themselves)
Fasten Nuts and Bolts.
After all components and hardware have been assembled in current and previous steps. Securely tighten all Nuts and Bolts.
NOTE: Do not over tighten any component with pivotal function. Make sure all pivotal components are able to move freely.
text_image
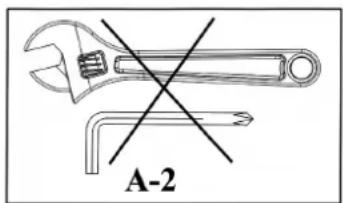
A-2
Do not tighten all Nuts and Bolts in this step yet.
When Fasten Nuts and Bolts symbol appeared in next step, then make sure to fasten all Bolts that have been installed.
Part list – DPR 3.1 - 2010
| NO. DESCRIPTION SIZE QTY | | |
| 1 UPRIGHT BEAM 2 | | |
| 2 BASE FRAME 2 | | |
| 3 CROSS BRACE 1 | | |
| 4 REAR SUPPORT 2 | | |
| 5 WEIGHT POST 2 | | |
| 6 RIGHT BAR CATCH 1 | | |
| 7 RIGHT SAFETY CATCH 1 | | |
| 8 LEFT BAR CATCH 1 | | |
| 9 RIGHT SAFETY CATCH 1 | | |
| 10 BRACKET | 75mm x 45mm | 2 |
| 11 URIGHT BEAM BASE COVER CAP | 4 | |
| 12 END CAP | ∅ 60mm | 2 |
| 13 END CAP | 40mm x 60mm | 2 |
| 14 OLYMPIC SLEEVE | ∅ 50mm x 210mm | 2 |
| 15 END CAP | ∅ 25mm | 2 |
| 16 BOLT COVER CAP | | 18 |
| 17 WEIGHT POST SLEEVE | ∅ 27mm | 2 |
| 18 RUBBER BUMPER | 90mm x 40mm | 2 |
| 19 RUBBER BUMPER | 140mm x 50mm | 2 |
| 20 SPRING CLIP | ∅ 49mm | 2 |
| 21 SPRING CLIP | ∅ 24.5mm | 2 |
| 22 HEX BOLT M10 x 60mm 2 | | |
| 23 HEX BOLT M10 x 65mm 8 | | |
| 24 HEX BOLT M10 x 75mm 4 | | |
| 25 AIRCRAFT NUT | M10 | 12 |
| 26 WASHER | ∅ 10mm | 26 |
| 27 END CAP | ∅ 19mm | 16 |
| 28 PHILIPS SCREW | STE2.9 x 13mm | 4 |
natural_image
Illustration of an adjustable wrench and a separate L-shaped tool labeled A-1 (no text or symbols on the wrench itself)
natural_image
Technical illustration of an adjustable wrench and a separate L-shaped tool labeled A-1 (no text or symbols on the wrench itself)
natural_image
Technical illustration of an adjustable wrench and a separate L-shaped tool labeled A-1 (no text or symbols on the wrench itself)
natural_image
Illustration of an adjustable wrench and a separate L-shaped tool labeled A-1 (no text or symbols on the wrench itself)
Serrate i dadi e le viti.
natural_image
Illustration of an adjustable wrench and a separate L-shaped tool labeled A-1 (no text or symbols on the wrench itself)
repetitioner: * 8-12
paus: 30 sek - 2 minuter
set: * 1 - 3
natural_image
Illustration of an adjustable wrench and a separate wrench labeled A-1 (no text or symbols on the wrench itself)
natural_image
Illustration of an adjustable wrench and a separate L-shaped tool labeled A-1 (no text or symbols on the wrench itself)
natural_image
Illustration of an adjustable wrench and a separate L-shaped tool labeled A-1 (no text or symbols on the wrench itself)
natural_image
Line drawing of an adjustable wrench and a separate L-shaped tool labeled A-1 (no text or symbols on the tools themselves)
Dotiahnite matice a skrutky.
natural_image
Line drawing of an adjustable wrench and a separate wrench labeled A-1 (no text or symbols on the wrench itself)
Zavrtanje vijaka i matica
natural_image
Illustration of an adjustable wrench and a separate L-shaped tool labeled A-1 (no text or symbols on the wrench itself)
Stegnite matice i vijke.
Nakon toga što ste u ovom i prethodnim koracima montirali sve komponente i vijke, možete sve matice i vijke stegnuti.
Napomena: Pazite da podesive dijelove ne stegnete previše čvrsto. Podesivi dijelovi moraju se slobodno kretati.
text_image
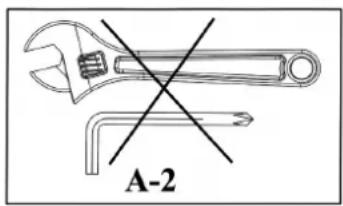
A-2
U ovom koraku matice i vijke ne stežite.
Kada se u narednom koraku pojavi simbol “Stegnuti” (vidi gore), stegnite sve stavljene vijke.
Spisak rezervnih dijelova – DPR 3.1 - 2010
| BR. OPIS VELIČINA KOM | | |
| 1 Vertikalni okvir 2 | | |
| 2 Osnovni okvir 2 | | |
| 3 Poprečni podupirač 1 | | |
| 4 Zadnji podupirač 2 | | |
| 5 Držač utega 2 | | |
| 6 | Desni držač za odlaganje šipke podupirača, kratki | | 1 |
| 7 | Desni držač za odlaganje šipke podupirača, dugi | | 1 |
| 8 | Lijevi držač za odlaganje šipke podupirača, kratki | | 1 |
| 9 | Lijevi držač za odlaganje šipke podupirača, dugi | | 1 |
| 10 Metalna pločica 75mm x 45mm 2 | | |
| 11 Donji pokrov 4 | | |
| 12 Krajnji pokrov | ∅ 60mm | 2 |
| 13 Krajnji pokrov | 40mm x 60mm 2 | |
| 14 | Čahura za držač utega, velika | ∅ 50mm x 210mm | 2 |
| 15 Čep | ∅ 25mm | 2 |
| 16 Kapica matice | | 18 |
| 17 | Čahura za držač utega | ∅ 27mm | 2 |
| 18 Gumeni prigušivač | 90mm x 40mm 2 | |
| 19 Gumeni prigušivač | 140mm x 50mm | 2 |
| 20 Elastična spona, velika | ∅ 49mm | 2 |
| 21 Elastična spona, mala | ∅ 24.5mm | 2 |
| 22 Vijak | M10 x 60mm | 2 |
| 23 Vijak | M10 x 65mm | 8 |
| 24 Vijak | M10 x 75mm | 4 |
| 25 Sigurnosna matice | M10 | 12 |
| 26 Podloška | ∅ 10mm | 26 |
| 27 Čep | ∅ 19mm | 16 |
| 28 Vijak | STE2.9 x 13mm | 4 |
natural_image
Technical illustration of an adjustable wrench and a separate L-shaped tool labeled A-1 (no text or symbols on the wrench itself)
natural_image
Illustration of an adjustable wrench and a separate L-shaped tool labeled A-1 (no text or symbols on the wrench itself)
natural_image
Illustration of an adjustable wrench and a separate L-shaped tool labeled A-1 (no text or symbols on the wrench itself)