
CST 3018 - CST 3518 - Chainsaw GARDENA - Free user manual and instructions
Find the device manual for free CST 3018 - CST 3518 GARDENA in PDF.




| Product type | Electric chainsaw |
| Brand | Gardena |
| Model | CST 3018 / CST 3518 |
| Weight (empty) | 5.4 kg (CST3018) / 5.5 kg (CST3518) |
| Rated power | 1.8 kW |
| Rated voltage / Frequency | 230 V ~ 50 Hz |
| Oil tank capacity | 180 cm³ |
| Guide bar length (max) | 300 mm (CST3018) / 350 mm (CST3518) |
| Chain pitch | 3/8 inch |
| Chain gauge | 1.3 mm |
| Idle cutting speed | 10 m/s |
| Guaranteed sound power level | 108 dB(A) |
| Sound pressure level (LpA) | 95 dB(A) (uncertainty K=2.5 dB) |
| Hand/arm vibration (a_h) | 3.4 m/s² (uncertainty K=1.5 m/s²) |
| Protection class | II (double insulation) |
| Chain brake | Yes, inertia-activated and by front hand guard |
| Chain lubrication | Automatic, via oil pump |
| Chain tensioner | Tool-free, external pre-tensioning wheel |
| Bumper spike / Spike | Yes |
| Routine maintenance | Regular cleaning of ventilation slots, guide bar lubrication, chain sharpening with 4 mm round file every 2-3 hours |
| Periodic servicing | Every 30 hours of use by an authorized service center |
| Spare parts | Chain, guide bar, drive sprocket - available at authorized service centers (chain and guide bar not covered by warranty) |
| Storage / Transport | Allow to cool, put on protective cover, store in a dry and cool place out of reach of children |
Frequently Asked Questions - CST 3018 - CST 3518 GARDENA
User questions about CST 3018 - CST 3518 GARDENA
0 question about this device. Answer the ones you know or ask your own.
Ask a new question about this device
Download the instructions for your Chainsaw in PDF format for free! Find your manual CST 3018 - CST 3518 - GARDENA and take your electronic device back in hand. On this page are published all the documents necessary for the use of your device. CST 3018 - CST 3518 by GARDENA.
USER MANUAL CST 3018 - CST 3518 GARDENA
CST 3018 Electric Chainsaw
Art. 8864
CST 3518 Electric Chainsaw
Art. 8860
D Betriebsanleitung
Elektro-Kettensäge
GB Operating Instructions
Electric Chainsaw
F Mode d'emploi
Original Instructions. Read before use and retain for future reference.
F RENSEIGNEMENTS IMPORTANTS
MANUAL DE INSTRUCTIONS
EST Algsed juhised. Enne seadme
Example of identification label
1) Guaranteed sound power according to directive 2000/14/EC 2) Class II tool 3) CE marking of conformity 4) Rated frequency 5) Rated power 6) Alternating current 7) Rated voltage 8) Product code 9) Year of manufacture 10) Maximum length of guide bar 11) Manufacturer's name and address 12) Model
B. SAFETY PRECAUTIONS
MEANING OF SYMBOLS





Warning!
Read the instruction manual carefully
Protective boots
Protective goggles or visor, protective helmet and hearing protection
Protective cut-proof gloves
Protective long, cut-proof trousers
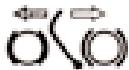
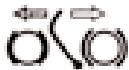
Chain brake: deactivated, activated
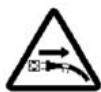
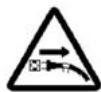
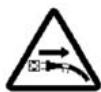
Remove plug from the mains immediately if the cable is damaged or cut
Keep bystanders away
General Power Tool Safety Warnings

WARNING Read all safety warnings and all
instructions. Failure to follow the warnings and
instructions may result in electric shock, fire and/or serious injury.
Save all warnings and instructions for future reference.
The term "power tool" in the warnings refers to your mains-operated (corded) power tool.
1) Work area safety
a) Keep work area clean and well lit. Cluttered or dark areas invite accidents. b) Do not operate power tools in explosive atmospheres, such as in the presence of flammable liquids, gases or dust. Power tools create sparks which may ignite the dust or fumes. c) Keep children and bystanders away while operating a power tool. Distractions can cause you to lose control.
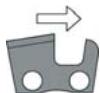


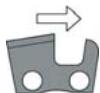
Correct direction of the cutting teeth.
Always grip the machine with two hands


Kickback danger


Do not expose to rain or moisture.


Chain oil

Refrain from

Turn the machine off

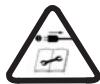
Disconnect the plug before adjusting or cleaning.

Risk of electric shock
2) Electrical safety
a) Power tool plugs must match the outlet. Never modify the plug in any way. Do not use any adaptor plugs with earthed (grounded) power tools. Unmodified plugs and matching outlets will reduce risk of electric shock. b) Avoid body contact with earthed or grounded surfaces such as pipes, radiators, ranges and refrigerators. There is an increased risk of electric shock if your body is earthed or grounded. c) Do not expose power tools to rain or wet conditions. Water entering a power tool will increase the risk electric shock. d) Do not abuse the cord. Never use the cord for carrying, pulling or unplugging the power tool. Keep cord away from heat, oil, sharp edges or moving parts. Damaged or entangled cords increase the risk of electric shock. e) When operating a power tool outdoors, use an extension cord suitable for outdoor use. Use of a cord suitable for outdoor use reduces the risk of electric shock.
f) If operating a power tool in a damp location is unavoidable, use a residual current device (RCD) protected supply. Use of an RCD reduces the risk of electric shock. 3) Personal safety a) Stay alert, watch what you are doing and use common sense when operating a power tool. Do not use a power tool while you are tired or under the influence of drugs, alcohol or medication. A moment of inattention while operating power tools may result in serious personal injury. b) Use personal protective equipment. Always wear eye protection. Protective equipment such as dust mask, non-skid safety shoes, hard hat, or hearing protection used for appropriate conditions will reduce personal injuries. Obtainable from a workwear supplier. c) Prevent unintentional starting. Ensure the switch is in the off-position before connecting to power source and/or battery pack, picking up or carrying the tool. Carrying power tools with your finger on the switch or energising power tools that have the switch on invites accidents. d) Do not overreach. Keep proper footing and balance at all times. This enables better control of the power tool in unexpected situations. e) Dress properly. Do not wear loose clothing or jewellery. Keep your hair, clothing and gloves away from moving parts. Loose clothes, jewellery or long hair can be caught in moving parts. 4) Power tool use and care a) Do not force the power tool. Use the correct power tool for your application. The correct power tool will do the job better and safer at the rate for which it was designed. b) Do not use the power tool if the switch does not turn it on and off. Any power tool that cannot be controlled with the switch is dangerous and must be repaired. c) Disconnect the plug from the power source before making any adjustments, changing accessories, or storing power tools. Such preventive safety measures reduce the risk of starting the power tool accidentally. d) Store idle power tools out of the reach of children and do not allow persons unfamiliar with the power tool or these instructions to operate the power tool. Power tools are dangerous in the hands of untrained users. e) Maintain power tools. Check for misalignment or binding of moving parts, breakage of parts and any other condition that may affect the power tool's operation. If damaged, have the power tool repaired before use. Many accidents are caused by poorly maintained power tools. f) Keep cutting tools sharp and clean. Properly maintained cutting tools with sharp cutting edges are less likely to bind and are easier to control. g) Use the power tool, accessories and tool bits etc. in accordance with these instructions, taking into account the working conditions and the work to be performed. Use of the power tool for operations different from those intended could result in a hazardous situation.
5. Service
a) Have your power tool serviced by a qualified repair person using only identical replacement parts. This will ensure that the safety of the power tool is maintained.
Chain saw safety warnings:
- Keep all parts of the body away from the saw chain when the chain saw is operating. Before you start the chain saw, make sure the saw chain is not contacting anything. A moment of inattention while operating chain saws may cause entanglement of your clothing or body with the saw chain.
- Always hold the chain saw with your right hand on the rear handle and your left hand on the front handle. Holding the chain saw with a reversed hand configuration increases the risk of personal injury and should never be done.
- Hold the power tool by insulated gripping surfaces only, because the saw chain may contact hidden wiring or its own cord. Saw chains contacting a "live" wire may make exposed metal parts of the power tool "live" and could give the operator an electric shock.
- Wear safety glasses and hearing protection. Further protective equipment for head, hands, legs and feet is recommended. Adequate protective clothing will reduce personal injury by flying debris or accidental contact with the saw chain. Obtainable from a workwear supplier.
- Do not operate a chain saw in a tree. Operation of chain saw while up a tree may result in personal injury.
- Always keep proper footing and operate the chain saw only when standing on fixed, secure and level surface. Slippery or unstable surfaces such as ladders may cause a loss of balance or control of the chain saw.
- When cutting a limb that is under tension be alert for spring back. When the tension in the wood fibres is released the spring loaded limb may strike the operator and/or throw the chain saw out of control.
- Use extreme caution when cutting brush and saplings. The slender material may catch the saw chain and be whipped forward toward you or pull you off balance.
- Carry the chain saw by the front handle with the chain saw switched off and away from your body. When transporting or storing the chain saw always fit the guide bar cover. Proper handling of the chain saw will reduce the likelihood of accidental contact with the moving saw chain.
- Follow instructions for lubricating, chain tensioning and changing accessories. Improperly tensioned or lubricated chain may either break or increase the chance for kickback.
- Keep handles dry, clean and free from oil and grease. Greasy, oily handles are slippery causing loss of control.
- Cut wood only. Do not use chain saw for purposes not intended. For example: do not use chain saw for cutting plastic, masonry or nonwood building materials. Use of the chain saw for operations different than intended could result in a hazardous situation.
Causes and operator prevention of kickback:
Kickback may occur when the nose or tip of the guide bar touches an object (Fig B3), or when the wood closes in and pinches the saw chain in the cut.
Tip contact in some cases may cause a sudden reverse reaction, kicking the guide bar up and back towards the operator.
Pinching the saw chain along the top of the guide bar may push the guide bar rapidly back towards the operator.
Either of these reactions may cause you to lose control of the saw which could result in serious personal injury. Do not rely exclusively upon the safety devices built into your saw. As a chain saw user, you should take several steps to keep your cutting jobs free from accident or injury.
Kickback is a result of tool misuse and/or incorrect operating procedures or conditions and can be avoided by taking proper precautions as given below:
- Maintain a firm grip, with thumbs and fingers encircling the chain saw handles, with both hands on the saw and position your body and arm to allow you to resist kickback forces. Kickback forces can be controlled by the operator, if proper precautions are taken. Do not let go of the chain saw.
- Do not overreach and do not cut above shoulder height. This helps prevent unintended tip contact and enables better control of the chain saw in unexpected situations.
- Only use replacement bars and chains specified by the manufacturer. Incorrect replacement bars and chains may cause chain breakage and/or kickback.
- Follow the manufacturer's sharpening and maintenance instructions for the saw chain.
Decreasing the depth gauge height can lead to increased kickback.
Additional Safety Recommendations
- Manual use. All persons using this machine must read the user manual completely with extreme care. The user manual must be included with the machine in the case of sale or loan to another person.
- Precautions prior to machine use. Never permit this machine to be used by any persons who are not perfectly familiar with the manual instructions. Inexperienced persons must follow a training period operating on a saw horse only.
- Control checks. Check the machine with care before use each time, especially if it has been subject to strong impact, or if it shows any signs of malfunction. Perform all operations described in the chapter "Maintenance & Storage - Before each use".
- Repairs and Maintenance. All the machine parts that can be replaced personally, are clearly explained in the "Assembly / disassembly" instructions chapter. Where necessary, all other machine parts must be replaced exclusively by an Authorised Service Centre.
- Clothing. (fig B1) When using this machine the user must wear the following approved individual protective clothing: close-fitting protective clothing, safety boots with non-slip soles, crushproof toe protectors and cut-proof protection, cutproof vibration-proof gloves, protective goggles or safety visor, ear protection muffs and helmet (if there is any danger of falling objects). Obtainable from a workwear supplier.
- Health precautions - Vibrations and Noise levels. Please be aware of noise restrictions in the immediate area. Prolonged machine use exposes the user to vibrations that can generate "white finger phenomenon" (Raynaud's Phenomenon), carpal tunnel syndrome and similar disturbances.
- Health precautions - Chemical agents. Use oil which is approved by the manufacturer.
- Health precautions - Heat. During use, sprocket and chain reach very high temperatures, take care not to touch these parts while hot.
Transport and storage precautions. (fig B2) Each time the work area is changed to another location, disconnect the machine from the mains supply and activate the chain brake lever. Mount the guide bar cover guard each time before transporting or storage. Always carry the machine by hand with the bar facing backwards, or when transporting the machine in a vehicle, always attach it securely to prevent damage.
Kickback reaction. (fig B3) The kickback reaction consists of a violent upwards-reverse action of the bar towards the user. This generally occurs if the upper part of the bar nose (called the "kickback danger zone") (see red marking on the Guide Bar) comes into contact with some object, or if the chain is blocked in the wood. Kickback can make the user loose control of the machine provoking dangerous and even fatal accidents. The chain brake lever and other safety devices are not sufficient to protect the user against injury: the user must be well aware of the conditions that can provoke the reaction, and prevent them by paying very close attention according to experience, together with prudent and correct machine handling (for example: never cut several branches at a time because this can cause accidental impact on the "kickback danger zone".
Work area safety
- Never allow children or people unfamiliar with these instructions to use the product. Local regulations may restrict the age of the operator.
- Only use the product in the manner and for the functions described in these instructions.
- Check the whole work area carefully to check for any danger source (e.g.: roads, paths, electric cables, dangerous trees, etc).
- Keep all bystanders and animals well clear of the work area (where necessary, fence off the area and use warning signs) at a minimum distance of 2.5 times the trunk height; in any case no less than ten metres.
- The operator or user is responsible for accidents or hazards occurring to other people or their property.
Electrical safety
- It is recommended that you use a Residual Current Device (R.C.D.) with a tripping current of not more than 30 mA. Even with a R.C.D. installed, 100% safety cannot be guaranteed and safe working practice must be followed at all times. Check your R.C.D. every time you use it.
- Before use, examine the cable for signs of damage or ageing. If the cable is found to be defective, take the product to an Authorised Service Centre and have the cable replaced.
- Do not use the product if the electric cables are damaged or worn.
- Immediately disconnect from the mains electricity supply if the cable is cut, or the insulation is damaged. Do not touch the electric cable until the electrical supply has been disconnected. Do not repair a cut or damaged cable. Take the product to an Authorised Service Centre and have the cable replaced.
- Always make sure that the cable/extension cord is kept behind the user, ensuring that it does not create a source of danger for the user or for other persons, and check that it cannot be damaged (by heat, sharp objects, sharp edges, oil, etc).
- Position the cable so that it will not be caught on branches and the like, during cutting.
- Always switch off at the mains before disconnecting any plug, cable connector or extension cable.
- Switch off, remove plug from mains and examine electric supply cable for damage or ageing before winding cable for storage. Do not repair a damaged cable. Take the product to an Authorised Service Centre and have the cable replaced.
- Remove the plug from the mains before leaving the product unattended for any period.
- Always wind cable carefully, avoiding kinking. 11.Use only on AC mains supply voltage shown on the product rating label. 12.The chainsaw is double insulated to EN60745-1 & 2-13.
Cables
- Mains cables and extensions are available from your local Approved service centre
- Only use approved extension cables
- Extension cables and leads should only be used if they are designed for outdoor use and comply with H07 RN-F or IEC 60245 designation 66.
- If you want to use an extension cable when operating your product, only the following cable dimensions should be used:
- 1.0 mm2 : max length 40 m
- 1.5mm2 : max length 60 m
- 2.5 mm² : max length 100 m
C. SAFETY EQUIPMENT DESCRIPTION
SWITCH BLOCK
Your machine is equipped with a device (fig.1A) that when deactivated, stops the switch from being pressed thus preventing accidental start-up.
Your machine is equipped with a device that blocks the chain immediately as soon as the switch is released; If this device should not work at any time, the machine must NOT be used and must be taken to an Authorised Service Centre.
The front hand guard (fig.1B) is designed to prevent your left hand from coming into contact with the chain (on condition that the machine is held correctly according to instructions). The front hand guard also acts as a chain brake, including a device that stops the chain in less than 0.15 of a second in the case of kickback. The chain brake is released when the front hand guard is pulled backwards and clicked in position (fig.2). The chain brake is activated when the front hand guard is pushed forward and the chain is stopped (fig.3). The chain brake can be activated using the left wrist by pushing forwards, or when the wrist comes into contact with the front hand guard as a result of kickback.
When the machine is used with the bar in horizontal position, for example during tree felling, the chain brake offers less protection.(fig.4).
N.B.: When the chain brake is activated, a safety switch cuts off all current to the motor.
Releasing the chain brake whilst the switch is held will start the product.
CHAIN CATCHER
This machine is equipped with a chain catcher (fig.5) located under the sprocket. This mechanism is designed to stop the backward chain movement in the case of chain breaking or derailing. These situations can be avoided by ensuring correct chain tension (Refer to chapter "D. Assembly/disassembly").
REAR HAND GUARD
This acts to protect (fig.6) the hand in the case of chain breaking or derailing.
D. ASSEMBLY / DISASSEMBLY
BAR AND CHAIN ASSEMBLY
Take great care when assembling to ensure this is performed correctly.
Remove the plug from the power supply before working on the product.
- Check that the chain brake is not activated. If so, deactivate it.
2a & 2b. Flip out the bar retaining inner knob and rotate in an anti-clockwise direction to remove the drive sprocket cover.
A Wear Gloves.
3 Position the chain over the bar, starting at the nose sprocket, fitting it into the guide bar groove. Ensure that the sharp side of the cutting teeth face in a forward direction on the upper part of the bar.(see markings on the bar) 4. Mount the bar on the bar retaining screw ensuring it is as far back towards the drive sprocket as possible Position the chain over the drive sprocket and pull the guide bar forward to pre-tension the chain. 5. Replace the drive sprocket cover and turn the bar retaining inner knob in a clockwise direction until loosely tightened. 6 & 7. To tension the chain, turn the chain tensioner outer knob in a clockwise direction. Tension the chain until the tension is correct. To check the tension, pull the chain away from the bar and ensure gap measures approx 2-3mm. To reduce tension turn in an anti-clockwise direction. (when performing this operation, keep the bar nose raised upwards) 8a & 8b. When the tension is correct turn the bar retaining inner knob in a clockwise direction until securely tightened and flip back into position to secure.
Tensioning the chain too tightly will overload the motor and cause damage. Insufficient tension can provoke chain derailing, whereas a chain tightened correctly provides the best cutting characteristics and prolonged work life. Check the tension regularly because the chain length tends to stretch with use (especially when the chain is new; after the first assembly, the chain tension must be checked after a few minutes machine operation); in any case do not tighten the chain immediately after use, but wait until it cools down.
Warning:- The chain and guide bar can become very hot
E. START-UP AND STOPPING
Start-up: grip both handles firmly, release the chain brake lever whilst ensuring hand is still on front handle, press and maintain the switch block (fig E1) pressed in, then press the switch (fig E2) (at this point the switch block can be released).
Stopping: The machine will stop whenever the switch is released or by activating the chain brake.
F. BAR AND CHAIN LUBRICATION
ATTENTION! Insufficient lubrication will provoke chain breaking and can cause serious injury.
Refer to "Maintenance & Storage" for indications on ensuring that the chain oil is sufficiently distributed.
Choice of chain oil
Use oil which is approved by the manufacturer.
We advise the use of bio chain oil which is biologically degradable.
Filling oil tank
Unscrew the oil tank cap, and fill the tank taking care not to spill any oil (if this occurs clean the machine carefully) and then screw the cap back on tightly.
G. MAINTENANCE AND STORAGE
Before performing any maintenance or cleaning, remove the plug from the mains.
ATTENTION! In cases where work environments are particularly dirty or dusty, the operations described must be performed more frequently than mentioned in the instructions.
Before each use
Check that the chain oil pump functions correctly: direct the bar towards a clear surface at a distance of about 20 centimetres; after the machine has run for about a minute, the surface should show clear traces of oil (fig.1).
Check that excessive strength is not needed for activating and deactivating the chain brake. Also check that it is not activated too easily and that it is not blocked. Then check chain brake function as follows: release the chain brake, grip the machine correctly and start up the machine, activate the chain brake by pushing the front hand guard forward with the left wrist or arm but without removing the hand from the handle (fig.2). If the chain brake is working correctly, the chain should be stopped immediately.
Check that the chain is sharpened correctly, in good working condition and that the tension is correct. If the chain is irregularly worn, or if the cutting teeth are only 3 mm long, the chain must be replaced (fig.3).
Clean the air vents regularly to prevent motor overheating (fig 4).
Check that the switch and switch block function correctly (to be performed with the chain brake released): press the switch and the switch block and ensure that they return to idle position as soon as they are released; check that it is impossible to press the switch without activating the switch block.
Check that the chain catcher and the right hand guard are in correct condition without any visible faults such as damaged material.
Every 2-3 hours of use
Check the bar condition, if necessary clean the lubrication holes (fig.5) and the guide grooves (fig.6) carefully; If the groove is worn or shows signs of deep notching, it must be replaced. Clean the drive sprocket regularly and check that it has not been subject to excess wear (fig.7). Lubricate the nose sprocket with bearing grease through the hole shown in the illustration (fig.8).
Chain sharpening
Contact an Authorised Service Centre regarding any problems with sharpening the chain.
The chain needs to be correctly sharpened. A wrongly sharpened chain can cause kickback and a high risk of injury.
If the chain does not cut correctly, or requires hard bar pressure against the wood, and if the sawdust is very fine, this is a sign that it is not sharpened correctly. If the cutting action produces no sawdust, this means the cutting edge has been worn completely and the chain is pulverising the wood during cutting. A well-sharpened chain crosses through the wood without effort or pressure and produces large long wood shavings.
The cutting side of the chain is composed of the cutting link (fig.9) with a cutting tooth (fig.10) and a cutting limit gauge (fig.11). The difference between these determines the cutting depth; a file guide and a 4mm diameter round file are needed to obtain good sharpening results; Follow the instructions below: Once the chain has been mounted and the tension is correctly adjusted, and the chain brake is activated, position the file guide perpendicular to the bar as shown in the illustration (fig.12), filing the cutting teeth at the angle shown (fig.13A & 13B), always working from the interior towards the exterior, lessening the pressure during the return stage (it is very important to follow the instructions perfectly: excessive or insufficient sharpening angles or an incorrect file diameter will increase the risk of kickback.) To obtain higher precision on side angles, it is advisable to position the file so that it exceeds the upper cutter by about 0.5 mm. File all the teeth on one side first, then turn the machine over and repeat the operation. Make sure that after sharpening operations, all teeth are the same length and that the height of the depth gauge is 0.6 mm lower than the upper cutter: check the height using a proper template and file (with a flat file) all protruding parts, rounding off the front part of the depth gauge (fig.14), paying attention to not file the kickback protection tooth (fig.15)
Every 30 hours of use.
Take the machine to the Authorised Service Centre. Storage/Transport
Allow the product to cool down and place the cover over the bar and chain.
Store the product in a cool, dry place and out of reach of children. Do not store outdoors.
Ensure the oil does not leak out from the product.
H. CUTTING TECHNIQUES
(fig.1) When using the machine, prevent:
- cutting in conditions where the trunk could split during cutting (wood under pressure, dry dead trees, etc): sudden splitting can be very dangerous.
- the bar or the chain from becoming blocked in the cutting notch: if this should occur, disconnect the machine from the main electricity supply and try to raise the trunk using an appropriate tool as a lever; do not attempt to free the machine by shaking or pulling as this could cause damage or injury.
- situations that can lead to kickback reactions.
- using the product above shoulder height
- cutting wood with foreign objects e.g. nails. Never use the machine in earth or stones, this leads to immediate wear of the chain.
(fig.1) During machine use:
- When cutting on sloping ground, always work uphill of the trunk to avoid being hit if the trunk should roll downhill.
- When felling trees, always finish the job: a partially cut tree could break and fall.
- At the end of each cutting operation the user will notice a considerable change in the strength necessary for controlling the machine. Great care must be taken not to loose control.
Below is a description of two different types of cutting operation:
Cutting action by pulling the chain (from top to bottom) (fig.2) can lead to dangerous sudden movement of the machine towards the trunk with consequential loss of control. Where possible, use the spiked bumper during cutting operations.
Cutting action pushing the chain (from bottom to top) (fig.3) will lead to the danger of a sudden movement of the machine in the direction of the user, with the risk of hitting the user, or an impact of the "kickback danger zone" on the trunk resulting in strong kickback; extreme care must be taken when cutting in this manner.
The safest method for using the machine, is to block the log on a sawhorse, cutting from top to bottom, on the portion outside the sawhorse. (fig.4)
Spiked bumper use.
Where possible, use the spiked bumper to ensure safer cutting action: plant it in the bark or surface of the trunk in order to maintain more control over the machine.
Below are descriptions of typical cutting procedure to be adopted for specific situations. However, these should be assessed each time to calculate whether the method is most suitable or not. In order to use a method with the least possible risk.
Trunk on the ground. (Risk of touching the ground with the chain once the bar has passed trough the trunk). (fig.5)
Cut from top to bottom through the whole trunk. Towards the end of the cut, proceed very carefully to prevent the chain from hitting the ground. If possible, cut 2/3 of the trunk, roll it over, and cut the remaining third from top to bottom to limit the risk of the chain touching the ground.
Trunk supported at one end only (Risk of trunk breaking during cutting action). (fig.6)
Begin the cut from underneath for about 1/3 of the diameter, and then finish the cutting action from the top to meet the undercut.
Trunk supported at both ends. (Risk of pinching the chain). (fig.7)
Begin the cut from above for about 1/3 of the diameter, and then continue from underneath to meet the overcut.
Trunk laying on a slope. Always stand on the uphill side of the log. When 'cutting through', to maintain complete control, release the cutting pressure near the end of the cut without relaxing your grip on the chainsaw handles. Do not let the chain contact the ground.
Tree felling.
ATTENTION: Never attempt to fell a tree if you do not have the necessary experience, and in any case never fell trees that have trunks with a diameter larger than the length of the bar! This operation is reserved for expert machine users with adequate equipment.
When felling a tree, the aim is to have the tree fall in the most convenient position for the following climbing and bucking operations. (Avoid trees falling on top of other trees: Felling trees that are entangled with other trees is a very dangerous operation).
First of all decide which is the best direction for the tree to fall by evaluating the following: objects or other plants around the tree, the inclination, the curve, wind direction, and greatest branch concentration. Take into account dead or broken branches that may break off during felling creating a further danger risk.
ATTENTION! During tree felling operations in critical conditions, always remove ear protection immediately after cutting operations to be able to listen for unusual noises and any warning signals.
Preliminary cutting operations and identifying the retreat path.
Eliminate any branches that interfere with the job (fig.8), starting from top to bottom, and then, always keeping the trunk between the user and the machine eliminate the more difficult branches afterwards, piece by piece. Eliminate all plants that interfere with work operations and control the area for possible obstacles (rocks, roots, ditches, etc.) when planning the retreat path (to follow during tree fall); Refer to the illustration (fig.9) for the directions to be maintained (A. predicted tree fall direction. B. Retreat path. C. Danger zone).
FELLING CUTS (fig.10)
In order to ensure that the user has complete control over the tree fall, the cutting instructions are as follows:
The cut that controls the fall direction of the tree is to be executed first: First of all cut the UPPER PART of the directional notch on the side the tree must fall. Remain on the right hand side of the tree and cut using the chain pull method; then cut the LOWER PART that must meet the end of the upper part. The depth of the directional notch must be 1/4 of the trunk diameter, with an angle of at least 45° between upper and lower cut. The meeting point between the two sides of the notch is called "directional cut line." This line must be perfectly horizontal at right angles (90°) to the felling direction.
The felling cut that provokes the tree fall is performed at 3 to 5 cm above the lower part of the directional felling cut line, finishing at a distance of 1/10 of the trunk from the notch. Remain on the left hand side of the tree and cut using the chain pulling method and the spiked bumper. Check that the tree does not move in a direction other than that predicted for the fall. As soon as possible insert a felling lever or wedge into the cut. The uncut part of the trunk is called the "hinge", as it is intended to guide the tree as it falls; in cases where the cuts are not sufficient, not straight, or have been cut through completely, the tree fall cannot be controlled (extremely dangerous!). For this reason the various cuts must be performed with great precision.
When cutting operations are completed the tree will begin to fall. Where necessary help tree fall using wedges or felling levers.
Limbing
Once the tree has been felled, the trunk must be limbed: in other words, the branches are removed from the trunk. Do not underestimate this operation because the large majority of kickback accidents occur during this stage. For this reason pay close attention to the position of the bar nose during cutting operations and always work on the left hand side of the trunk.
ENVIRONMENTAL INFORMATION
This section contains information useful for maintaining the characteristic of ecocompatibility included in the origin design of the machine, and as regards proper use and disposal of chain oil.
USE OF THE MACHINE
The operations of filling the oil tank should be carried out in such a way as to avoid spilling oil and contaminating the soil and the environment.
DISPOSAL
Do not dispose of the machine inappropriately when it is no longer usable. Deliver it to an authorized organization for proper disposal in compliance with the regulation in force.
The symbol on the product or on its packaging indicates that this product may not be treated as household waste. Instead it shall be handed over to the applicable collection point for the recycling of electrical and electronic equipment. By ensuring this product is disposed of correctly, you will help prevent potential negative consequences for the environment and human health, which could otherwise be caused by inappropriate waste handling of this product. For more detailed information about recycling of this product, please contact your local council office, your household waste disposal service or the shop where you purchased the product.
The chain and chain guide are consumables and are not covered by the guarantee.
| TROUBLESHOOTING TABLE | |||||
| Motor does not start | Motor turns with difficulty or loses power | The machine starts but does not cut properly | Motor turns improperly or at reduced speeds | Braking devices do not stop the chain properly | |
| Make sure the main line is powered | ● | ||||
| Make sure the machine is properly plugged in | ● | ||||
| Make sure your cable/ext. cord is not damaged | ● | ||||
| Make sure that chain brake is not activated | ● | ||||
| Check that chain is properly assembled and tensioned | ● | ● | |||
| Check chain lubrication as in chapters F and G | ● | ● | |||
| Make sure that the chain is sharp | ● | ||||
| Contact your authorised centre | ● | ● | ● | ● | |
EU Declaration of Conformity
The undersigned Husqvarna AB, S-561 82, Huskvarna, Sweden, hereby certifies that, when leaving our factory, the units indicated below are in accordance with the harmonised EU guidelines, EU standards of safety and product specific standards. This declaration becomes void if the units are modified without our approval.
Description of Unit: Chainsaw
Type(s): CST3018, CST3518 - CS = Chainsaw
Year of CE Marking: 2009
EU Directives:
2006/42/EC, 2004/108/EC, 2000/14/EC, 2011/65/EU
Harmonised EN:
EN60745-1, EN60745-2-13, EN50366, EN55014-1, EN61000-3-2, EN61000-3-11
Notified Body that carried out the EC type-examination: MEEI Kft., 1007
Vaci ut 48/a-b
1132 Budapest
Hungary
Certificate no. M3 69240048
UIm 15/02/2013
Peter Lameli
Global R & D Director - Hand Held
Keeper of technical documentation

| Type | CST3018 | CST3518 |
| Art. No. | 8864 | 8860 |
| Dry Weight (kg) | 5.4 | 5.5 |
| Power (kW) | 1.8 | 1.8 |
| Oil tank volume (cm3) | 180 | 180 |
| Chain pitch (inches) | 3/8 | 3/8 |
| Chain gauge (mm) | 1.3 | 1.3 |
| Maximum length of guide bar (mm) | 300 | 350 |
| Measured Sound Power LwA2) (dB(A)) | 106 | 106 |
| Guaranteed Sound Power LwA2) (dB(A)) | 108 | 108 |
| Sound pressure LpA1) (dB(A)) | 95 | 95 |
| Uncertainty KpA (dB(A)) | 2.5 | 2.5 |
| Hand / arm vibration ah1) (m/s2) | 3.4 | 3.4 |
| Uncertainty Ka h (m/s2) | 1.5 | 1.5 |
| Mains-Impedance Zmax (Ω) | 0.382 | 0.382 |
| Cutting Speed (m/s) | 10 | 10 |
1) Working area related emission characteristic level LpA according to EN60745-2-13 given in the table.
Vibration value a, according to EN60745-2-13 given in the table.
The declared vibration total value has been measured in accordance with a standard test method and may be used for comparing one tool with another.
The declared vibration total value may also be used in a preliminary assessment of exposure.
Warning:
The vibration emission during actual use of the power tool can differ from the declared total value depending on the ways in which the tool is used.
Operators should identify safety measures to protect themselves that are based on an estimation of exposure in the actual conditions of use (taking account of all parts of the operating cycle such as the times when the tool is switched off and when it is running idle in addition to the trigger time).
2) The Noise Level LWA values according to 2000/14/EC are given in the table.
Conformity Assessment Procedure.. Annex V
EN 61000-3-11 Compliance statement
Depending on the characteristics of the local electricity supply network, use of this product may result in short voltage drops at the instant of switching on. This may influence other electrical equipment, e.g., a momentary dimming of a lamp. If the Mains impedance Zmax of your electricity supply is less than the value shown in the table (applicable to your model), then these effects will not occur. The value of the network impedance may be determined by contacting your electricity supply authority.
A. GENERAL DESCRIPTION
EU DECLARATION OF CONFORMITY
Type CST3018, CST3518-CS=Chainsaw
Director R&D International - portable
Keep the technical documentation

REAR HAND GUARD
Type CST3018, CST3518-CS=Chainsaw
G. MAINTENANCE AND STORAGE
Before performing maintenance or cleaning, unplug the unit from the mains.
Type CST3018, CST3518-CS=Chainsaw
For CE marking. 2008
EU directives:
2006/42/EC, 2004/108/EC, 2000/14/EC, 2011/65/EU
Harmonized EN
EN60745-1, EN60745-2-13, EN50366, EN55014-1, EN61000-3-2, EN61000-3-11
Type CST3018, CST3518-CS=Chainsaw
Director Global I+D - Portable
Type CST3018, CST3518-CS=Chainsaw
RIGHT HAND GUARD
Type CST3018, CST3518-CS=Chainsaw
RIGHT HAND GUARD
It serves to protect (fig.6) the hand in case of chain breakage.
D. ASSEMBLY/DISASSEMBLY
ASSEMBLY OF BAR AND CHAIN
Type CST3018, CST3518-CS=Chainsaw
Remove the protective cover from the guide bar
Storage/Transport
B. SAFETY PRECAUTIONS
MEANING OF SYMBOLS







ATTENTION
ATTENTION: LIRE ATTENTIVEMENT LE MANUEL
Définition des symboles de sécurité
Lunettes de sécurité et de protection
Gants de protection contre les coupures
Bottes de sécurité contre les coupures
Frein Désactivé, activé
Débranchez immédiatement la fiche de la prise en cas de dommage ou de coupure du câble
Rayon de la zone de travail
Mesures de sécurité de base lors de l'utilisation d'un outil électrique

AVERTISSEMENT: Lisez toutes les consignes de sécurité et toutes les instructions.
Le non-respect des consignes de sécurité et des instructions peut entraîner une électrocution, un incendie et/ou des blessures graves.
Conservez toutes les consignes de sécurité et toutes les instructions pour référence future.
Le terme "outil électrique" dans les consignes de sécurité fait référence aux outils alimentés par le secteur (avec fil) ou par batterie (sans fil).
1) Sécurité de la zone de travail a) Gardez la zone de travail propre et bien éclairée. Les zones encombrées ou sombres sont sources d'accidents. b) N'utilisez pas d'outils électriques dans des atmosphères explosives, comme en présence de liquides, de gaz ou de poussières inflammables. Les outils électriques créent des étincelles qui peuvent enflammer les poussières ou les vapeurs. c) Tenez les enfants et les personnes à l'écart lorsque vous utilisez un outil électrique. Les distractions peuvent vous faire perdre le contrôle de l'outil.


Direction of the cutting tooth
Always use both hands
Danger of kickback
Do not leave the tool in the rain
Machine oil


Do not...
Turn off the machine
Disconnect the plug from the socket before making adjustments or repairs

Risk of electric shock
Safety precautions when working with electricity: a) Keep electric tools away from sockets. Never modify the plugs or adapters of electric tools in any way. Unmodified plugs and matching sockets reduce the risk of electric shock. b) Avoid contact with grounded surfaces, such as pipes, radiators, refrigerators. There is an increased risk of electric shock if your body is grounded. c) Do not expose electric tools to rain or wet conditions. Water entering an electric tool will increase the risk of electric shock. d) Do not abuse the cord. Never use the cord for carrying, pulling, or unplugging the electric tool. Keep the cord away from heat, oil, sharp edges, or moving parts. Damaged or entangled cords increase the risk of electric shock.
3) When working with a power tool outdoors, use an extension cord suitable for outdoor use. Using a cord suitable for outdoor use reduces the risk of electric shock. f) If operating a power tool in a damp location is unavoidable, use a residual current device (RCD) protected supply. Use of an RCD reduces the risk of electric shock. 3) Personal safety a) Stay alert, watch what you are doing and use common sense when operating a power tool. Do not use a power tool while you are tired or under the influence of drugs, alcohol or medication. A moment of inattention while operating power tools may result in serious personal injury. b) Use personal protective equipment. Always wear eye protection. Protective equipment such as dust mask, non-skid safety shoes, hard hat or hearing protection used for appropriate conditions will reduce personal injuries. c) Prevent unintentional starting. Ensure the switch is in the off-position before connecting to power source and/or battery pack, picking up or carrying the tool. Carrying power tools with your finger on the switch or energising power tools that have the switch on invites accidents. d) Do not overreach. Keep proper footing and balance at all times. This enables better control of the power tool in unexpected situations. e) Dress properly. Do not wear loose clothing or jewellery. Keep your hair, clothing and gloves away from moving parts. Loose clothes, jewellery or long hair can be caught in moving parts. 4) Power tool use and care a) Do not force the power tool. Use the correct power tool for your application. The correct power tool will do the job better and safer at the rate for which it was designed. b) Do not use the power tool if the switch does not turn it on and off. Any power tool that cannot be controlled with the switch is dangerous and must be repaired. c) Disconnect the plug from the power source and/or the battery pack from the power tool before making any adjustments, changing accessories, or storing power tools. Such preventive safety measures reduce the risk of starting the power tool accidentally. d) Store idle power tools out of the reach of children and do not allow persons unfamiliar with the power tool or these instructions to operate the power tool. Power tools are dangerous in the hands of untrained users. e) Maintain power tools. Check for misalignment or binding of moving parts, breakage of parts and any other condition that may affect the power tool's operation. If damaged, have the power tool repaired before use.
Most accidents occur due to poor maintenance of the power tool. f) Check that the power tool is switched off before inserting the tool, and check that the tool is in good condition, with no damaged edges, before use. g) When using the power tool, with accessories, inserts, etc., according to these instructions, take into account the working conditions and the work to be performed. Using the power tool for purposes other than those for which it was intended may lead to dangerous situations.
- Maintenance
a) Maintenance of your power tool should be carried out by qualified repair personnel using only identical spare parts. This will ensure the safety of the power tool.
Safety rules for the use of the circular saw
Keep the chain saw away from your body as much as possible. Before using the saw, make sure it does not come into contact with anything. Carelessness during use of the chain saw can lead to jamming of the saw and serious injuries. Always hold the saw handle with your right hand and the front handle with your left. The reverse position of the hands when holding the chain saw is dangerous and must never be used. Hold the saw only by the insulated gripping surfaces, as the saw chain may come into contact with hidden wiring or its own cord. If the saw chain comes into contact with a live wire, the metal parts of the saw may become live and the operator could receive an electric shock. Use protective equipment for your eyes, hands, legs, and feet. In addition, it is recommended to use protective equipment for your head, hands, legs, and feet. Proper protective clothing reduces the risk of injury from flying debris or accidental contact with the chain. Available at hardware stores. - Do not work with the saw on a tree. Working with the saw on a tree can lead to serious accidents. Always maintain a secure footing and operate the chain saw only when standing on a firm, stable, level surface. Slippery or unstable surfaces, such as ladders, can cause loss of balance or control of the chain saw. - When cutting a branch under tension, be prepared for it to spring back. When the tension in the wood fibers is released, the spring-loaded branch may strike the operator or cause loss of control of the saw. Use extreme caution when cutting small branches. A falling branch can catch the saw, pulling it away from the operator or causing loss of balance. - Carry the chain saw by the front handle, with the saw turned off and as far away from your body as possible. When transporting or storing, always use the chain saw guard. Proper handling of the saw reduces the risk of accidental contact with the moving chain. Lubricate and tension the chain, and also replace the saw components as indicated in the manual. Improper tensioning or lubrication of the chain can result in damage or kickback of the saw.
Then make sure that the saw chain is always sharp, clean, and properly tensioned. A dull chain is slippery, which can cause loss of control of the saw. Use the saw only for cutting wood. Do not use the saw for purposes not specified in this manual. For example, do not use the saw to cut plastic, masonry, or non-wood building materials. Using the saw for purposes other than those for which it was designed can lead to dangerous situations.
Kickback occurs when the upper part of the guide bar comes into contact with an object (Fig. B3) or when the saw gets caught in the wood.
Kickback occurs when the upper part of the guide bar comes into contact with an object (Fig. B3) or when the saw gets caught in the wood.
In some cases, contact of the kickback zone with the object can cause a sudden reverse reaction, which throws the saw back towards the operator.
The tool must be used only for its intended purpose. In each of the specified cases, it is possible to lose control of the tool and cause injury. Do not touch the tool and the protective devices. Working with the tool requires taking the necessary precautions to avoid dangerous situations.
Kickback can occur as a result of improper or incorrect use of the tool under certain conditions and can be prevented by observing the appropriate precautions described below.
Keep a firm grip, use the auxiliary handle if provided, and position your body and arms to resist kickback forces. The kickback force can be controlled by the operator if proper precautions are taken. Do not let go of the tool. Do not overreach. Performing these requirements helps prevent accidental contact with the rotating chain and allows better control of the tool in unexpected situations. - When replacing, use only the specified guide bars and chains. Incorrect replacement bars or chains may cause chain throw or chain breakage. - Perform maintenance and sharpening of the chain according to the manufacturer's instructions. Wear of the depth gauge limiters can lead to increased kickback.
Additional safety recommendations
PROTECTION OF THE HANDS
The tool may kick back if the nose of the guide bar touches an object or if the chain is pinched.
ASSEMBLY / DISASSEMBLY
Installing the bar and chain
Follow the manual to avoid errors during installation.
Disconnect the tool from the power supply before performing any work on the tool.
- Make sure the chain brake is not activated. Activate the brake if necessary.
2a and 2b. Loosen the nuts of the tensioning mechanism and turn it counterclockwise to remove the cover of the drive sprocket.
Put on the gloves
3 IpoJoxnTeIeN BOKyRtUHbI, HauHHa C BepxHeI e qACTH, TAKHM o6pa3OM, UTo6bl cIb pa3MeuaIacB. B HapraJIaIOUeM JeKo6e 5uHbI.
06patHTe BHIMAHNE, YTO6b3y6b3a H a BepxHem Kpae 1HHb 6bJIH nHaPabJIeHb bCTOPoHy BpaIeHnI cENI (CM. 06O3aHaeHne H a NIIH)
4. YCTAHOBHTI SHNY Ha BINT HATJARHORO MEXAHN3Ma TaHKM 06pa3OM, YTObI OHa paCNOIaIaNcB KaK MOHHO 6JIHKe K BDeUyIe 3EzDOHTYE. IPOJIOHNTe cIb BOKpyr 3Be3doQH N IOTAHNTe HAnpABIAUOYIO SHNY Ha C6EB, YTObI pPeDHaTnHYb cIbN.
5. YctAHOBHTe Na MeCTO KpbIbUky BeDyUey 3BcE3doUKN i CJIeRHa 3aTARHtE, BpaIaIg KJIIOu HATRAKHOrO MEXAHN3Ma NO YacBOB O CTpeJIke.
6 n 7. 7tobb Hatahytb ceb, bpaaate HaTaeHntelb cen no yacobO CTpeKe. HataRbAte cenb, noka Oha He 6ydtet HataHTaB V hyno CTeneHH. Tc0bI npOBepHb TaTaeKHe, OTTHnTe cen ot hnbln y6e1nctbc, YTO 3a3Op coCTabJIET 2-3 MM. Tc0bI ocLbAshtc bce, Bpaaate HaTaeHnTe pOTINb YacobO CTpeKn. (HaTaeNba II Nc ocLbAer 12-3 MM. Tc0bI ocLbAshtc bce, Bpaaate HaTaeHnTe pOTINb YacobO CTpeKn. (HaTaeNba II Nc ocLbAer 12-3 MM. Tc0bI ocLbAshtc bce, Bpaaate HaTaeHnTe pOTINb YacobO CTpeKn.(HaTaeNba II Nc ocLbAer 12-3 MM. Tc0bI ocLbAshtc bce, Bpaaate HaTaeHnTe pOTINb YacobO CTpeKn. (HaTaeNba II Nc ocLbAer 12-3 MM. Tc0bI ocLbAshtc bce, Bpaaate HaTae HnTe pOTINb YacobO CTpeKn. (HaTaeNba II Nc ocLbAer 12-3 MM. Tc0bI ocLbAshtc bce, Bpaaate HaTaeHnTe pOTINb YacobO CTpeKn. (HaTaeNba II Nc ocLbAer 12-3 MM. Tc0bIocLbAshtc bce, Bpaaate HaTaeHnTe pOTINb YacobO CTpeKn. (HaTaeNba II Nc ocLbAer 12-3 MM. Tc0bIocLbAshtc bce, Bpaaate HaTaeHnTe pOTINb YacobO CTpeKn. (HaTaeNba II Nc oc
8a n 86. Turn the tension knob clockwise until it stops, then check the reliability of the fixation.
Excessive tension on the chain will overload the engine and may cause damage. A loose chain can come off, while optimal tension ensures better performance and longer service life. Regularly check the chain tension, as it may stretch with use (especially on new electric chainsaws; after the first installation, check the chain tension every few minutes of operation); never tension the chain immediately after use. Wait for it to cool down.
E. START AND STOP
Start: Firmly hold both handles, release the brake lever; at the same time, make sure that your hand is still on the front handle, press and hold the switch button, then press the switch (at this moment the switch button may be released).
Stop. The electric stop is activated when the button is released or when the brake is activated.
Lubrication of the chain and the saw
WARNING! Insufficient lubrication can cause the chain to break, which may result in serious injury.
As indicated in the maintenance manual, the chain oil must be applied in sufficient quantity.
Choice of chain oil
Use the oil recommended by the manufacturer. We recommend using biodegradable chain oils.
Filling with oil
Tighten the oil reservoir cap, fill the reservoir so that oil does not leak out (if this happens, carefully wipe the engine) and close the cap well.
Before performing any type of technical maintenance or cleaning, disconnect the spark plug from the power supply. ATTENTION! During operation, especially in dusty conditions, the described operations must be performed with greater frequency than specified.
Before each use
Check that the oil pump is working correctly: point the nozzle towards a light surface, at a distance of twenty centimeters; after a minute of machine operation, fresh oil stains should appear on the surface (Fig. 1). Check that the chain brake engages and disengages with sufficient force, not too much force, and that it does not lock. Then it is necessary to check the operation as follows: disengage the chain brake, properly grasp the machine handle and start it, engage the chain brake by pushing the front guard with your left hand, without releasing the handle (Fig. 2). If the chain brake does not work, the chain must be immediately locked. Check that the chain is in good condition and properly tensioned; if it is worn unevenly or has teeth of only 3 mm, it should be replaced (Fig. 3).
Regularly clean the ventilation slots to avoid engine overheating. (Fig. 4)
Check the operation of the switch and the switch lock (must be performed with the chain brake disengaged): turn on the switch and the switch lock and check that they return to the rest position as soon as you release them; check that without engaging the switch lock, it is impossible to turn on the switch.
Check that the stop lever and the right handle guard are intact and have no visible damage, i.e., damage to the material.
Every 2-3 hours of operation
Check the knife; if necessary, carefully clean the lubrication holes (Fig. 5) and the guide bar groove (Fig. 6); if it is worn or has excessive play, replace it. Regularly check the chain tension and its wear. Lubricate the sprocket with bearing grease through the indicated hole (Fig. 8).
Mystery
If you have any questions or difficulties, contact an authorized service center.
Use the tool correctly; otherwise, a strong kickback may cause injury.
If the saw chain is placed on the bar and does not form a very thin strip, this indicates that it is poorly sharpened. If the strip does not form, the chain is completely dull and during cutting it will deform the bar. A well-sharpened chain should protrude from the bar and form a large and long strip. The cutting part of the chain consists of three elements: the cutter (Fig. 9), the depth gauge (Fig. 10), and the depth gauge limiter (Fig. 11). The difference in level between these elements determines the cutting depth; to achieve good sharpening, a guide file with a round file diameter of 4 mm is necessary. Follow the instructions given below: with the chain mounted and correctly tensioned, set the chain brake, install the guide file as shown in the figure, move the file (Fig. 12), and work on the cutter teeth at the angle indicated in the figure (Fig. 13A, 13B), performing sharpening from the inner side of the brake to the outer side and checking on the return stroke (it is very important to follow the instructions: excessive or insufficient sharpening angles or the diameter of the file guide will cause the chain to kick back. To make the angles more accurate, it is recommended to position the file so that it protrudes vertically above the top plate by about 0.5 mm. First, sharpen all teeth on one side, then turn the chain and repeat the operation. Check that after sharpening all teeth have the same length and that the depth gauge limiters are at 0.6 mm below the top plate: check the height using the file guide (see the file guide), the protruding part, then tighten the front part of the depth gauge limiter (Fig. 14), being careful not to set the teeth too low to avoid kickback (Fig. 15).
After 30 hours of operation.
Take the electric tool to an authorized service center.
Storage/transport
Clean the tool and let it cool, then put the protective cover on the guide bar and chain. Store the device in a cool, dry, inaccessible place. Storage in the open air is prohibited. Make sure there are no oil leaks.
H. CUTTING TECHNIQUE
During work, avoid: (Fig. 1)
- Cutting in situations where the chain may break inside the cut (wood under tension, dry wood, etc.): an unexpected break can be dangerous. - If the chain jams during cutting: if this happens, turn off the machine and remove the plug, then try to free the bar by applying force with a suitable tool; do not try to free the machine by shaking or pulling it, as you may damage the machine or injure yourself.
- Situations that may cause kickback.
- Using the saw at heights above shoulder level - cutting wood with foreign objects in it, such as nails. Do not allow the working chain to come into contact with the ground or stones, as this will instantly dull the chain.
During work: (Fig. 1)
Always position yourself under the trunk, working, observing in front of the trunk, so that the tree cannot hit you when it falls.
Before felling a tree, always finish your work: a partially cut tree can break. After each cut, you will notice a significant change in the required holding force of the machine; maintain increased caution to avoid losing control. The following text describes two types of cuts:
Cut with a wedge from above (top to bottom) (fig. 2), creating a risk of uncontrolled machine movement towards the trunk and loss of control. If possible, use a two-sided cut.
Cut with a wedge from below (bottom up) (fig. 3): risk of sudden machine displacement towards the operator, with risk of impact, loss of contact of the cutting part with the trunk, followed by a reverse impact; maintain increased caution during the cut.
The most common way to use the machine is to block the trunk on sawhorses, cutting from top to bottom, working with the bar. (fig. 4)
Using the hook
When possible, use the hook for a more secure cut: insert the hook into the bark or into the surface part of the trunk to better control the machine.
The following are typical procedures used in certain situations. However, each time it is necessary to assess how the described situation matches your specific case, and how to perform the cut with minimal risk.
Trunk on the ground (risk of touching the ground at the end of the cut). (fig. 5) Cut from top to bottom through the entire trunk. Act with caution at the end of the cut to avoid contact with the ground. If possible, finish the cut at 2/3 of the trunk thickness, turn the trunk over and split the remaining part from top to bottom, to limit the risk of contact with the ground.
Trunk lying on the ground with one end (risk of breakage during the cut) (fig. 6)
Start the cut from below at about 1/3 of the diameter, finish the cut from above, directing it towards the already made cut.
Trunk lying with both ends
(risk of pinching) (fig. 7)
Start the cut from above at about 1/3 of the diameter. Finish the cut from below, directing it towards the already made cut.
Trunk on a slope. Stand on the uphill side. To achieve full control during a through cut, it is necessary to cut the trunk further towards the end of the cut, without loosening the grip on the handles. Do not allow the saw to touch the ground.
BaIIka dpeBbeB
WARNING! Do not attempt to make a cut if you do not have sufficient experience, and in any case never cut a trunk with a diameter exceeding the length of the bar. This operation is performed only by experienced users with appropriate accessories.
The purpose of the cut is to make the tree fall in the desired direction for the subsequent processing of the trunk. (Avoid situations where the tree, when falling, gets caught on another tree. This is dangerous and can cause the tree to fall unexpectedly.)
You must determine the best direction of fall, assessing: what is around the tree, its lean, bend, wind direction, and the concentration of branches.
Do not neglect dry or broken branches that may break off during the fall of the tree and pose a danger.
WARNING! During the operation of the saw in critical conditions, immediately put on protective equipment after the cut, to determine the unusual mind and possible unforeseen signals.
Preliminary operations before the main cut
Remove branches that interfere with the work (fig. 8), starting from the top down, so that the trunk is between you and the saw. Remove the most complex branches first. Remove the undergrowth and check for possible obstacles (stones, roots, stumps, etc.) to have an escape route (used during the fall of the tree); you should look at the figure (fig. 9) to determine the direction to follow (A direction, planned for the fall of the tree. B. Escape route. C. Danger zone)
FELLING THE TREE (fig. 10)
In order to ensure control over the direction of the tree's fall, you must perform the following steps:
The felling cut, made first, determines the direction of the tree's fall: make the upper part of the felling cut on the side where the tree should fall. Stand to the right of the felling cut with a pulling saw. Then make the lower part of the felling cut, which should end at the end of the upper part. The depth of the felling cut should be about 1/4 of the trunk diameter, with an angle between the upper and lower cuts of at least 45°. The meeting of the two cuts is called the 'line of the felling cut'. The line must be perfectly horizontal and at a right angle (90°) to the direction of the fall. The felling cut, which fells the tree, is made at a height of 3-5 cm above the lower part of the felling cut line and ends at 1/10 of the trunk diameter. You should stand to the left of the tree and cut with a pulling saw, using a wedge. Check that the tree does not lean in a direction different from the intended direction of the fall. As soon as possible, insert a wedge into the cut. Do not cut through the trunk completely; it serves as a support and acts as a 'hinge' that guides the tree during the fall; in case the hinge is insufficient, not straight, or not completely intact, there is no possibility of controlling the fall of the tree (very dangerous!). Therefore, it is necessary that the different cuts be made with great care.
The felling cut should be made only when the fall is required; if necessary, use a wedge or a felling lever.
Limbing
After the tree has been felled, proceed to limbing, i.e., removing branches from the trunk. Do not underestimate this operation, because a large number of accidents caused by a branch striking back occur precisely during limbing; therefore, it is necessary to pay close attention to the position of the saw and to work with the trunk between you and the saw.
ENVIRONMENT
This chapter provides information on the environmental characteristics of the machine, established at the design stage, as well as instructions for proper use of the machine and for the disposal and recycling of waste oils.
Use of the machine
The oil filling operation must be carried out in such a way as to avoid spilling oil into the environment.
PERIODS OF PROLONGED NON-USE
In case of prolonged non-use, drain the contents from the oil tank.
DISPOSAL
Do not throw the machine into the environment; dispose of it at an authorized collection point, in accordance with current legislation.

This product indicates that it should not be disposed of with household waste. Instead, it should be taken to a collection point for recycling of electrical and electronic equipment. By ensuring this product is disposed of correctly, you will help prevent potential negative consequences for the environment and human health, which could otherwise be caused by inappropriate waste handling. For more detailed information about recycling of this product, please contact your local council office, your household waste disposal service, or the shop where you purchased the product.
The wearing parts are consumable materials, and the warranty does not cover them.
TROUBLESHOOTING TABLE
C. DESCRIPTION OF SAFETY DEVICES
CHAIN BRAKE
Your device is equipped with a device (figure 1A) that, when switched off, prevents accidental starting if the switch is pressed.
OPERATION OF THE BRAKE WHEN
RELEASING THE SWITCH
Your device is equipped with a device that blocks the chain immediately when the switch is released. If at any time this device does not work, you MUST NOT use the device and you should take it to an authorized service center.
FRONT HAND GUARD / CHAIN BRAKE LEVER
The front hand guard (figure 1B) is designed to prevent your left hand from coming into contact with the chain (provided you hold the device correctly according to the instructions). The front hand guard also acts as a chain brake, activating the device that blocks the chain in less than 0.15 seconds in the event of a kickback. The chain brake is released when the front guard is moved backward and clicks into position (figure 2). The chain brake is activated when the front hand guard is moved forward and the chain stops (figure 3). The chain brake can be activated
by using your left wrist to move it forward, or if your wrist comes into contact with the front hand guard due to kickback.
When using the device and the bar is in a horizontal position, for example when felling trees, the chain brake provides less protection (figure 4).
Note: When the chain brake is activated, the safety switch cuts off the power supply to the motor.

16) TROUBLESHOOTING
(3) Left-hand lever
17) Washer
4) Oil level indicator in oil bath
18) Front cover
(5) Adjustable stops
(19) Tension plate for lever
6) Plug
(20) Locking plug
7) Oil bath cover
(21) Cover for pulley
8) Front handle
22) Lever
9) Rod for lever of lever-type brake
23) Guide
10) Gear teeth
11) External handle tensioning
(25) Tensioning screw
12) Internal handle retention
(26) Drive gear
13) Handle stop
27) Cutting link
14) Tensioning screw cover
28) Tensioning gear
(29) [Retaining screw]
30) Cable strain relief
31) Lubricator
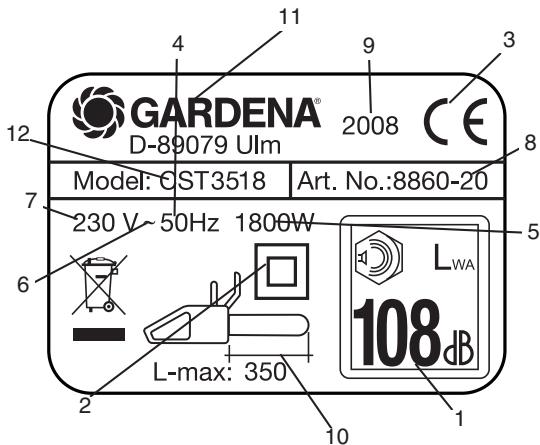
Identification plate
1) Guaranteed sound power level in accordance with Directive 2000/14/EC (2) Instrument Class II 3) CE conformity marking (European quality directives) 4) Nominal frequency (5) Nominal power (6) Current consumption 7) Nominal voltage 8) Test code (9) Year of manufacture 10) Maximum length of guide bar 11) Manufacturer's name and address 12) Model
B. Safety measures
3HAUEHH CIMBOJIB





PonepedkeHH
Please read the manual carefully before use.
Safety precautions
Safety glasses or face shield; safety shoes and protective clothing
Gloves to protect hands from cuts
Respirator for protection against fumes
Switch: off, on
Disconnect the cable, unplug the mains plug
Do not allow other persons to be near you
Safety rules for working with electrical equipment
WARNING. Read all safety rules and instructions carefully.
Failure to follow the instructions may result in electric shock, fire and/or serious injury.
Keep these safety instructions and instructions for future reference.
The term "electrical equipment" in the safety rules refers to electrical equipment that operates on electricity.
1) Work area safety a) The work area must be kept clean and well lit. Cluttered or dark work areas can lead to accidents. b) Do not operate power tools in explosive atmospheres, such as in the presence of flammable liquids, gases, or dust. Power tools create sparks which may ignite the dust or fumes. c) Keep children and bystanders away while operating a power tool. Distractions can cause you to lose control.


Follow the instructions
Hold the tool with both hands


Electrical safety


Do not expose to rain or wet conditions


Lubricating oil

Keep away

Switch off the tool

Adjust the speed with the regulator.

Electrical shock hazard
2) Electrical safety
a) Power tool plugs must match the outlet. Never modify the plug in any way. Do not use any adapter plugs with earthed (grounded) power tools. Unmodified plugs and matching outlets will reduce risk of electric shock. b) Avoid body contact with earthed or grounded surfaces, such as pipes, radiators, ranges and refrigerators. There is an increased risk of electric shock if your body is earthed or grounded. c) Do not expose power tools to rain or wet conditions. Water entering a power tool will increase the risk of electric shock. d) Use the correct power tool. Never carry, pull, or unplug the power tool by its cord. Keep cord away from heat, oil, sharp edges or moving parts. Damaged or entangled cords increase the risk of electric shock.
3) Personal safety
a) When using the power tool, use the appropriate personal protective equipment. Using the tool for purposes other than those intended increases the risk of electric shock. b) Do not use the power tool in damp or wet environments. Use a residual current device (RCD) to protect against electric shock. Using an RCD reduces the risk of electric shock. c) Be careful, do not use the tool if you are tired or under the influence of drugs, alcohol, or medication. A moment of inattention while operating the power tool may result in serious personal injury. d) Use personal protective equipment. Always wear eye protection. Protective equipment such as dust masks, non-skid safety shoes, hard hats, or hearing protection used for appropriate conditions will reduce personal injuries. e) Prevent unintentional starting. Ensure the switch is in the off-position before connecting to power source and/or battery pack, picking up or carrying the tool. Carrying power tools with your finger on the switch or energising power tools that have the switch on invites accidents. f) Do not overreach. Keep proper footing and balance at all times. This enables better control of the power tool in unexpected situations. g) Dress properly. Do not wear loose clothing or jewellery. Keep your hair, clothing and gloves away from moving parts. Loose clothes, jewellery or long hair can be caught in moving parts. h) If devices are provided for the connection of dust extraction and collection facilities, ensure these are connected and properly used. Use of dust collection can reduce dust-related hazards. 4) Power tool use and care a) Do not force the power tool. Use the correct power tool for your application. The correct power tool will do the job better and safer at the rate for which it was designed. b) Do not use the power tool if the switch does not turn it on and off. Any power tool that cannot be controlled with the switch is dangerous and must be repaired. c) Disconnect the plug from the power source and/or the battery pack from the power tool before making any adjustments, changing accessories, or storing power tools. Such preventive safety measures reduce the risk of starting the power tool accidentally. d) Store idle power tools out of the reach of children and do not allow persons unfamiliar with the power tool or these instructions to operate the power tool. Power tools are dangerous in the hands of untrained users. e) Maintain power tools. Check for misalignment or binding of moving parts, breakage of parts and any other condition that may affect the power tool's operation. If damaged, have the power tool repaired before use. Many accidents are caused by poorly maintained power tools.
e) The cutting tools must be sharp. Properly sharpened cutting tools reduce the risk of injury and make them easier to control. f) Use power tools, accessories, and parts in accordance with their instructions, taking into account working conditions and the work to be performed. Using power tools for operations different from those for which they were intended could result in hazardous situations.
5. Service
a) Repair of the power tool must be carried out by qualified personnel using only original spare parts. This will ensure the safety of the power tool.
Safety instructions for working with the hedge trimmer
During work, keep the hedge trimmer firmly with both hands. Before starting the hedge trimmer, make sure that the cutting device is not touching anything. While working with the hedge trimmer, keep it away from your body and do not touch the cutting device with your hands or feet. Never hold the hedge trimmer by the cutting device, as this increases the risk of injury. Keep the power tool below shoulder level, as the cutting device may come into contact with hidden wiring or its own cord. Blades that come into contact with live wires may electrify exposed metal parts of the power tool and could cause the operator to be electrocuted. Use protective goggles and hearing protection. Before starting work, put on protective equipment for the head, hands, and feet, and wear protective clothing. Proper protective equipment will reduce the risk of injury from flying debris or accidental contact with the hedge trimmer. All this can be ordered from the supplier. Do not work with the hedge trimmer while standing on a ladder. This could lead to injury. Always maintain a stable stance and work with the trimmer only when standing on a firm, level surface. Slippery or unstable surfaces, such as ladders, can lead to loss of balance and control of the hedge trimmer. When cutting branches under tension, be prepared for them to spring back. When cutting branches under tension, be aware that they may spring back and hit you, causing loss of control of the trimmer. Be especially careful when cutting branches under tension. The blade may get caught in the branch, and then it may pull you or cause you to lose balance. Carry the hedge trimmer by the front handle with the blade turned away from you. When transporting or storing the hedge trimmer, always keep the blade covered with the guard. Proper use of the trimmer will reduce the risk of accidental contact with the moving blade. Follow the manufacturer's instructions for adjusting, tensioning, and replacing the blade. Do not attempt to adjust the blade while it is running. Improper adjustment of the blade may cause it to break or increase the risk of kickback. Always ensure that the blade is properly tensioned before use. Use only the recommended spare parts and accessories.
Pilnі te nіdervu. Zastosuvte lanziuhovu pіnnyu tilky za pryznachennyam. Naprуklаd: ne rіzhte plastyk, kamin ta hіnші budіvelnі materіaly, kotrі ne e derevynnym.
Vpokrіstannya lantsiuhovoi pіnky robit, vуdіmіnnykh tіlky, dlya knykh pryznacheno, mozhe pryzvesty do nebezpechnykh sytuatsіy.
Prynnyp vіdskoku pіlky i yak yoho zapobіhty
Vіdskok pіlky mozhe statysya, koly perednіy kray pіlky tоrkaєtsya abo koly pіlka pіd chas ріzannya zаpynаєtsya, zаchіplаyuchysya za dеrеvynu.
Kontakt z perednіm krayem pіlky u deyakykh vydakh sprynіnnya patоnby zvorotnіy reаktsіyu, vіdskok yоho vynykає vгору ta nazad u nапрямku do korystuvаchа.
Zаchіplennya lantsiuha za vеrkhnyu chastynu pіlky mozhe vуdko vуtоvхnuty yоho nazad na korystuvаchа.
Budь-ka z tsykh reаktsіy mozhe sprychnyty vtratu kontrolyu nad pіlkoyu i pryzvesty do serioznoi travmy. Ne pokladaytesya tilky na zapobіzhnі prystroi, yakі mozhutь zаpоbіhty vіdskoku. Korystuyuchysь pіlkoyu, mayte vklyuchy neobхіdnі zаhody, aby zapobіhty nechasnomu vіdskoku ta travmі.
Vіdskok pіlky — tse naslіdok nepravylnoho korystuvannya abo nepravylnoї tekhniky роботи, i yoho mozhna unyknuty, vzyavshy do uvаhy navedenі nyzhche perestorohy.
Mіtsno trymaite pіlku za rуchky oboma rуkamy i tak roztashuyte svоє tіlo ta rуky, shchob vуtrymuvaty sylу vіdskoku. Dotrymuyuchysь nаdіynykh zаstoroh, korystuvаch mozhe kontroliuvaty sylу vіdskoku. Ne dopuskayte pіlky v rуkakh. Ne prostyagayte pіlku nаdto vуsoko vid sebe і ne pіdnіmayte yії vуshche za vуsotu pіlеch. Uсі ці zаhody mozhutь zapobіhty nechasnomu kontaktu kіnсі pіlky і kаrаї kontroliuvaty yії u neпередбачуваних sytuatsіyakh. - Lantsiuh ta lantsiuhovі zаmіnyuyte lіsh nіzh, nіzh pryznacheno dlya роботи. Nevіdpovіdnі lantsiuhy ta lantsiuhovі mozhutь pryzvesty do rozryvu lantsiuha ta vіdskoku pіlky. - Dotrymuytesь іnstruktsіy vyrobnyka shchodo zatostruvannya ta obslugovuvannya pіlky. Zміna prуznachennya pіlky mozhe pryzvesty do znyzhennya bezpeky.
Dodatkovі pravyla z tekhnіky bezpeky
- Vykorystannia posіbnyka. Vсі, khto vykorystovuє tsyu pіlku, maють уважно і повністю прочитати посібник з користування. Після продажу або передачі пілки посібник з користування повинен надаватися разом з пілкою.
- Zasterezhennya pered posоbоvуannям pіlky. Люди, не допущені до роботи з пілкою, повинні ознайомитися з інструкціями з посібника. Неосвідчені особи повинні пройти період навчання, працюючи тільки з деревом, наданим на раму. 3. Контрольні перевірки. Перед кожним використанням ретельно перевірте пілку, особливо коли вона надто трясеться або застрягла, чи вона неправильно працює. Виконайте всі її, описані в розділі "Обслуговування та зберігання - Перед кожним використанням". 4. Ремонт та обслуговування. Всі деталі пілки, які можна замінити самостійно, описані в розділі "Збирання та розбирання". Якщо треба поміняти інші деталі пілки, звертайтеся до уповноваженого центру обслуговування.
- When working with the saw, the user must wear the following protective equipment: safety goggles, protective gloves, protective clothing that covers the arms and legs, non-slip footwear, a dust mask, and hearing protection (if the noise level exceeds the permissible limits). All of this can be ordered from the equipment supplier.
- Medical contraindications - vibrations. The saw produces vibrations. Please familiarize yourself with the limitations of vibration exposure in your country. Working with the saw may aggravate vibration-related diseases, such as Raynaud's phenomenon, carpal tunnel syndrome, and other similar health disorders.
- Medical contraindications - chemical reactions. Use only the oil recommended by the manufacturer.
- Medical contraindications - heat. During operation, the saw and the chain become very hot, so do not touch them until they have cooled down.
Storage and transportation. (Figure B2) Immediately after finishing work, turn off the saw and disconnect it from the power source. Always store the saw in a safe place. When transporting, carry the saw by the handle with the bar facing backward, and secure it to prevent it from falling.
High-voltage lines. (Voltage B3) High-voltage lines are dangerous and can cause serious injury or death. They are located above and below in the direction of use. Take precautions when working near the upper part of the line (which is called the "danger zone of high-voltage lines") (marked with a warning sign on the line) before any work or when working in the countryside. High-voltage lines can cause serious injury to the user, loss of control over the tool, and lead to dangerous falls, even with fatal consequences. The use of a residual current device on the device is safe and is not a sufficient measure to protect the user from injury: the user must be aware of the conditions that can cause the high-voltage line to activate and prevent them, always keeping their attention, in accordance with the instructions and together with the safety measures for correct use (note: never cut several lines at once, as this can cause the tool to be thrown into the "danger zone of high-voltage lines").
Safety of the working area.
- Never allow people who are not familiar with these instructions to use this tool. According to local laws, the age of persons allowed to use this tool may be restricted.
- Use the tool only for the purpose and in the manner described in these instructions. Before use, check the entire working area for any sources of danger (e.g., roads, glass, electrical cables, dangerous trees, etc.)
- Do not allow bystanders and animals to be in the working area (if necessary, install warning signs at a distance of at least 2.5 times the height of the tree, but in any case not less than 10 meters. The operator is responsible for accidents or injuries to third parties or their property.
Electrical safety
- It is recommended to use a residual current device with a tripping current not exceeding 30 milliamperes. Even with a residual current device, it is impossible to guarantee 100% safety, so during work, the operator must be extremely careful. Before use, check the residual current device. 2. Regularly inspect the power cord for damage. If the power cord is damaged, have it replaced by an authorized service center.
- Do not use the tool if the electrical cable is damaged or worn.
- Immediately disconnect the plug from the socket if the cable is cut, damaged, or its insulation is damaged. Do not touch the electrical cable with wet hands. Do not repair the plug or damaged cable. Have the tool repaired by an authorized service center. 5. Make sure that the cable is not pinched or twisted and does not create a danger for the user or others, and that it cannot be damaged (by heat, sharp objects, edges, oil, etc.);
- Position the cable so that it is not pinched during work.
7.3 Before performing any maintenance, unplug the tool from the socket, disconnect the cable, and clean it. 8. To replace the cable: remove the plug from the socket, remove the plug from the socket, and disconnect the cable. Do not damage the cable. Do not use a damaged cable. Return the tool to an authorized service center for cable replacement. 9. Before using the tool without supervision, remove the plug from the socket and disconnect it from the power supply. 10. To avoid damaging the cable, avoid kinking it. 11. Connect only to sockets with a voltage that matches the value indicated on the nameplate. 12. The tool has been designed in accordance with EN60745-1 and EN60745-2-13. Under no circumstances should the grounding be disconnected.
Cable
- The cable can be replaced or repaired at a local authorized service center.
- Use only approved extension cords.
- Use only approved extension cords and clamps intended for this purpose. 4. If you need to use an extension cord during work, use only those with the following cable sizes:
-1.0mm²: max. length 40m -1.5mm²: max. length 60m -2.5mm²: max. length 100m
C. SAFETY DEVICES
BLOCKING BUTTON
The lock button (Figure 1) keeps the tool in the off position when it is not in use, preventing accidental start-up.
FOR THE TRIGGER SWITCH TO BE RELEASED
Press the lock button, then release the trigger. If the trigger does not release properly, do not use the tool and return it to an authorized service center for repair.
TRIGGER LOCK / TRIGGER SWITCH
The trigger lock (Figure 2) is designed to keep the trigger switch in the on position (provided the trigger is held correctly according to the instructions). The trigger lock also acts as a safety switch, which, when the trigger is released, turns off the tool within 0.15 seconds. The trigger switch turns off when the trigger lock is pulled back and locked in that position. The trigger switch turns on when the trigger lock is pushed forward, and then the tool turns on (Figure 3). The trigger switch can be activated by pressing the trigger forward until it contacts the trigger lock, resulting in the tool turning on.
When the tool is used in a horizontal position, such as during demolition work, the trigger lock provides additional protection. (Figure 4).
Note: The trigger lock activates only when the trigger is released, preventing accidental start-up.
BilnyckaHHI JaHcIOROBO rAJIbMa nID yac UyTnMyBaHHa BmHKaHa 3aNcyCTNtB NINHy y pO6Ty.
OBMEKHYBAUJIAHLIOFA
Dany NiNky OChaNeO 6MekyBaHem LaHcIora (MaHIOK 5), PO3MiueHnIM iD 3ipOchUo. Lc EmaxaH3MpriHaHcENO IJr 3ynPiHHpyx LaHcIora Ha3ad y pa3i pO3pNBy IaHcIgura YN IHO r CXoJdKeHH 3 WnHi. TAnX CNTyaui MoKHa YNHKnHTn, npABInbHO BIDpeRyIIOBabWu HATar LaHcIora (DNiBtbcYPO3diI "36HparrTa P036bparrHa")
IHTOK3ADHbOIPyKn
Ioro npn3naeHHra 3axnCT pykn (MaIOHOK 6) y pazi po3pNBy IaHcUora YI Noro CXODKeHHra 3 IHNH.
G. OBCJIYROBYAHHRA T3BEPI RAHHA
Peed BnKoHaHnM 6yDb-JaKOro 06cJyROyBaHHa YU OHuEHHa BmIMtB bNlHy 3 pOeTbMpeXei.
YBAIAYpa3i,KoJIINBPO6HnuecepeDObNusE yJHe 3aJIeNeHc 3a6pUHHe,ONiCaHI onepaui C1d BVKOHyBaTHnAcTlHe,HIX peKOMeHDoBaHO yCbOMy noci6HNY.
Peped KOHHM BHKOPHCTAHH
Ipebeipte, 10 hacoc 3maueHnnaHauoja fynHKIOHOye npabINbHO: cnprmyte shHy na HcNCTy noBepxHO bHaDCTaHb6NtBuKo 20 cAHTIMETPIB; nicra TORO, kN NIIa nponpaioe 3 XBNiHny, Ha Tii noBepXHI IOBaUHTe RCHcI dMacl (MAJIOHOK 1). IpekoHaNTecB, 10 dy AKTbuaqT Ta deAKTNbauq laHauoHONOBORo rALbMa He TReba6 BBAATNCb DO hAdmPHOI CNI. TaOHKepeBIpTe, 10 BOHO hADTo leTKo He aHTBByEcbS cI He 6LOkyEcbS. Notim pebeipte FYNKIO LAHIOZOBORO rALbMa, JK NADeBeHO HNkYe: BiDnyctITb LaHIOZOBe raJIbMo, npABInbHO B3bMItb NlNHy I zAncyTb II B pO6OTy, aHTBHyTe LAHIOZOBORO rALbMa, 10TOXBHyBUN IINBM 3an'YCTRM yI pyKO UNTOK nepeDhbOIpyKn Bpebed i He 3IimaOny pKy 3 pyHN (MAJIOHOK 2). KaIO OlanIOBORe rALbMO npaIOe npabINbHO, LAHIOr HeraHo 3zynHHbTcB.
YneBHITcB, 10 JaHIOr HArOCTpeHO npabInbHO,BiH y do6pOMy Po6oHOMy CTahI i HataR Iyo npabInbHN. JKIO nnAiou3HOwEytbc HeripBHomipHO a60 JaHIO p3zI 3aBDOBKKn Ilnse 3 MM, LaHIOr CnID 3amIHHT (MaIOHOK 3).Jnla 3anobirAHNHe neperpipy DbrvHa pyerLyHPO OOnuYte NoBIPTPAHOTOBPI (MaIOHOK 4).
IpebeipTe, 0o BMnKaTu ta 6IoKbVaHnHaBMnKaaCyHKNUOHyOTb paBmNtBHO (BIOHOyETbC3i 3BiJIbHeHm LaHcUOrOBM rAJIbMOM): HaTNCiTiB BMnKaTu 6IoKbVaHnHaBMnKaua i IpekoHaNTcBc, 10o BOHn NOBePtaOtBcB H ePo6Oe NIOLOHeHHa Opa3ay K NicLraBlNuJeHHa; nepebiTe, 10o HEMOKJIbNO HATnCHYTN BmNkau Be3 aKTNbaui II 6IoKbVaHnBaMHnKaHa.
YNeBHItbC, 10cO6MeKHyBaJHAnLIOrTa TaIHTOK npaOBI pykN y HopMaJIbHOMy CTaHI 63BnDMHX HeoLIKIIb, JIK-OT NOnHODKeHOrO MATEpIAJy.
Yepees KoxnHi 2-3 roDHH np60TN.
Ipebeipte cTah 1nHn,3a notpe6n peTeIbHo ONUCTITb 3MaUyBaIbHI OTBOPN (MaIOHOK 5) Ta na3n UINH (MaIOHOK 6). RaKo naa 3HOseHn a60 BNAJIeO 03NaHKn IIn6OKHX npocHeh, Ioro CnId 3AmHn. PeryIraPNO uCtITb TARBOy 3ipoOHy Ta nepeBipRite, IO6 BOHa He HApTO 3HOcINacr (MaIOHOK 7).3MaCTITb nepeDIO 3ipoOHy KOHCINTeHTHM MACOM Yepe3 OTBOpN, NOKa3aHi Ha MaIOHOK (MaIOHOK 8).
To adjust the saw for cutting wood, contact the authorized service center.
It is necessary to adjust correctly. A correctly adjusted saw can reduce the risk of kickback and the risk of injury.
The saw does not cut properly and you need to press hard on the saw and the wood or the saw jumps out of the cut - this means it is adjusted incorrectly. If during cutting the saw does not produce chips at all, this means that the saw blade is heavily worn and that the saw during cutting grinds the wood into powder. A properly adjusted saw should pass through the wood without effort and produce large shavings from the wood.
The cutting part of the saw consists of the cutting blade (Figure 9), the blade (Figure 10), and the depth limiter (Figure 11). The difference between them determines the cutting depth, the rake angle, and the circular grinding of the teeth with a diameter of 4 mm. To achieve good results when sharpening, follow the instructions below: Place the blade flat, correctly set the angle, and apply the saw blade. Position the grinding wheel perpendicular to the blade, as shown in the figure (Figure 12), and grind the teeth at the indicated angle (Figures 13a and 13b). This ensures the correct rake angle and the changing of the teeth after each sharpening (it is very important to follow the instructions). Too much or insufficient sharpening angles or incorrect grinding diameter increase the risk of kickback. To achieve high accuracy at the edges, it is recommended to position the grinding wheel so that it extends beyond the top edge by about 0.5 mm. First, grind all the teeth on one side, then turn the saw and repeat the operation. It is recommended that after sharpening, all teeth have the same length and that the height of the depth limiter is about 0.6 mm less than the top of the teeth. Check the height with the help of the included gauge (flat gauge) for all parts that protrude, rounding the front part of the depth limiter (Figure 14) and pay attention to the fact that the teeth may be hooked during cutting (Figure 15).
Every 30 hours of operation.
Return the saw to the authorized service center.
Storage/transportation
Before storage, cool down the saw, put on the blade guard, and the saw.
Store the tool in a cool, dry place away from children. Do not store outdoors.
Make sure that oil does not leak from the tool.
H. TECHNICAL DATA
-Situations that may cause kickback
Using the tool above shoulder height;
Cutting wood with side objects, such as branches.
Never use the tool on the ground or on a ladder, as this can lead to serious injury.
(Figure 1) When using the saw:
- Always hold the saw on both sides of the workpiece, away from your body, so that if it binds, it kicks back and does not hit you;
- When cutting trees, support the workpiece until the cut is complete, as the tree may split and fall;
- At the same time, when pushing the saw, remember to maintain a firm grip and the necessary control over the saw. You must be very careful not to lose control.
Below are described two different types of sawing procedures.
Sawing with the saw hanging (top down) (Figure 2) can lead to an uncontrolled kickback of the saw towards the user. Be careful not to lose control of the saw. If possible, use the spike bumper when sawing.
Sawing with the saw hanging (bottom up) (Figure 3) can lead to an uncontrolled kickback of the saw towards the user, with a risk of impact injury to the user or bystanders. The saw may be thrown violently; use caution when sawing in this manner.
The safest way to use the saw is to place the saw on the workpiece, guiding the saw with both hands on the workpiece. (Figure 4)
Using the spike bumper
If possible, use the spike bumper for safe operation: place it against the workpiece surface before starting the cut to have better control over the saw.
Below are described typical sawing procedures that can be applied in specific situations. However, these situations should be assessed to determine which method is most appropriate and to use the method with the least risk.
Workpiece on the ground. (Risk of the saw touching the ground immediately after cutting through the workpiece). (Figure 5)
Saw from top to bottom through the entire workpiece. The cut should be made very carefully to avoid cutting into the ground. If possible, cut the workpiece to 2/3, then turn it over and cut the remaining third from top to bottom to avoid the saw touching the ground.
Workpiece supported at both ends (using a sawhorse or similar support during sawing). (Figure 6)
Position the saw at the bottom, about one third of the diameter, and finish the cut from top to bottom to meet the saw.
The chainsaw is intended for cutting wood. (See replacement of the guide bar). (Fig. 7)
Distribute the chain lubrication evenly over the third diameter and then tighten the chain tensioner until it contacts the chain.
The guide bar is on the side. Tighten the chain on the "front side of the bar". When the chain is properly tensioned, to maintain even control, loosen the chain tensioning screw slightly, while keeping the chain in place. Do not allow the chain to contact the ground.
Felling technique
WARNING: Do not attempt to fell a tree unless you have the necessary experience. Do not fell trees with a guide bar diameter larger than the length of the bar! Before felling, make sure you have the proper protective equipment.
Felling a tree, make sure it falls in the desired direction, and that it can be cut and processed on site. (Check the tree for leaning, damaged or rotten wood, and for branches that may break off during felling, creating additional hazards).
First, check the direction of the tree's fall, and estimate the following: the tree's lean, the wind direction, and the heaviest concentration of branches. Take into account dead and broken branches that may fall during felling, creating additional hazards.
WARNING: When felling trees in critical conditions, always wear hearing protection immediately before starting the saw, so that you are not distracted by noise and can be warned of dangers.
The chain and guide bar are wear parts, and are not covered by the warranty.
| СПИСОК HECРAPBHOCTÉN T A MOHЛINВHX ПИЧИN | |||||
| Двигун не заусанья | Двигун пацюс 3 натугою чи втураецnotужнICTь. | Плеса заусанья, ое пilaшиог. | Двигун пацюс Нерравлино чи заMuMuMuMuMuMuMuMuMuMuMuMuMuMuMuMuMuMuMuMuMuMuMuMuMuMuMuMuMuMuMuMuMuMuMuMuMuMuMuMuMuMuMuMuMuMuMuMuMuMuMuMuMuMuMuMuMuMuMuMuMuMuMuMuMuMuMuMuMuMuMuMuMuMuMuMuMuMuMuMuMuMuMuMuMuMuMuMuMuMuMuMuMuMuMuMuMuMuMuMuMoMuMoMuMoMuMoMuMoMuMoMuMoMuMoMuMoMuMoMuMoMuMoMuMoMuMoMuMoMuMoMuMoMuMoMuMoMuMoMuMoMuMoMuMoMuMoMuMoMuMoMuMoMuMoMuMoMuMoMuMoMuMoMuMoMuMoMuMoMuMoMuMoMuMoMuMoMuMoMuMoMuMoMuMoMuMoMuMoMuMoMuMoMuMoMuMoMuMoMuMaMaMaMaMaMaMaMaMaMaMaMaMaMaMaMaMaMaMaMaMaMaMaMaMaMaMaMaMaMaMaMaMaMaMaMaMaMaMaMaMaMaMaMaMaMaMaMaMaMaMaMaMaMaMaMaMaMaMaMaMaMaMaMaMaMaMaMaMaMaMaMaMaMaMaMaMaMaMaMaMaMaMaMaMaMaMaMaMaMaMaMaMaMaMaMaMaMaMaMa MaMaMaMaMaMaMaMaMaMaMaMaMaMaMaMaMaMaMaMaMaMaMaMaMaMaMaMaMaMaMaMaMaMaMaMaMaMaMaMaMaMaMaMaMaMaMaMaMaMaMaMaMaMaMaMaMaMaMaMaMaMaMaMaMaMaMaMaMaMaMaMaMaMaMaMaMaMaMaMaMaMaMaMaMaMaMaMaMaMaMaMaMaMaMaMaMaMaMaMa.MaMaMaMaMaMaMaMaMaMaMaMaMaMaMaMaMaMaMaMaMaMaMaMaMaMaMaMaMaMaMaMaMaMaMaMaMaMaMaMaMaMaMaMaMaMaMaMaMaMaMaMaMaMaMaMaMaMaMaMaMaMaMaMaMaMaMaMaMaMaMaMaMaMaMaMaMaMaMaMaMaMaMaMaMaMaMaMaMaMaMaMaMaMaMaMaMaMaMaMaMiMaMiMiMiMiMiMiMiMiMiMiMiMiMiMiMiMiMiMiMiMiMiMiMiMiMiMiMiMiMiMiMiMiMiMiMiMiMiMiMiMiMiMiMiMiMiMiMiMiMiMiMiMiMiMiMiMiMiMiMiMiMiMiMiMiMiMiMiMiMiMiMiMiMiMiMiMiMiMiMiMiMiMiMiMiMiMiMiMiMiMiMiMiMiMiMiMiMiMiMiMi MiMiMiMiMiMiMiMiMiMiMiMiMiMiMiMiMiMiMiMiMiMiMiMiMiMiMiMiMiMiMiMiMiMiMiMiMiMiMiMiMiMiMiMiMiMiMiMiMiMiMiMiMiMiMiMiMiMiMiMiMiMiMiMiMiMiMiMiMiMiMiMiMiMiMiMiMiMiMiMiMiMiMiMiMiMiMiMiMiMiMiMiMiMiMiMiMiMiMiMiMirMirMirMirMirMirMirMirMirMirMirMirMirMirMirMirMirMirMirMirMirMirMirMirMirMirMirMirMirMirMirMirMirMirMirMirMirMirMirMirMirMirMirMirMirMirMirMirMirMirMirMirMirMirMirMirMirMirMirMirMirMirMirMirMirMirMirMirMirMirMirMirMirMirMirMirMirMirMirMirMirMirMirMirMirMirMirMirMirMirMirMirMirMirMirMirMirMirMirMir Mir Mir Mir Mir Mir Mir Mir Mir Mir Mir Mir Mir Mir Mir Mir Mir Mir Mir Mir Mir Mir Mir Mir Mir Mir Mir Mir Mir Mir Mir Mir Mir Mir Mir Mir Mir Mir Mir Mir Mir Mir Mir Mir Mir Mir Mir Mir Mir Mir Mir Mir Mir Mir Mir Mir Mir Mir Mir Mir Mir Mir Mir Mir Mir Mir Mir Mir Mir Mir Mir Mir Mir Mir Mir Mir Mir Mir Mir Mir Mir Mir Mir Mir Mir Mir Mir Mir Mir Mir Mir Mir Mir Mir Mir Mir Mir Mir Mir Mir MirMir Mir Mir Mir Mir Mir Mir Mir Mir Mir Mir Mir Mir Mir Mir Mir Mir Mir Mir Mir Mir Mir Mir Mir Mir Mir Mir Mir Mir Mir Mir Mir Mir Mir Mir Mir Mir Mir Mir Mir Mir Mir Mir Mir Mir Mir Mir Mir Mir Mir Mir Mir Mir Mir Mir Mir Mir Mir Mir Mir Mir Mir Mir Mir Mir Mir Mir Mir Mir Mir Mir Mir Mir Mir Mir Mir Mir Mir Mir Mir Mir Mir Mir Mir Mir Mir Mir Mir Mir Mir Mir Mir Mir Mir Mir Mir Mir Mir MirMirMir Mir Mir Mir Mir Mir Mir Mir Mir Mir Mir Mir Mir Mir Mir Mir Mir Mir Mir Mir Mir Mir Mir Mir Mir Mir Mir Mir Mir Mir Mir Mir Mir Mir Mir Mir Mir Mir Mir Mir Mir Mir Mir Mir Mir Mir Mir Mir Mir Mir Mir Mir Mir Mir Mir Mir Mir Mir Mir Mir Mir Mir Mir Mir Mir Mir Mir Mir Mir Mir Mir Mir Mir Mir Mir Mir Mir Mir Mir Mir Mir Mir Mir Mir Mir Mir Mir Mir Mir Mir Mir Mir Mir Mir Mir Mir Mir Mir mir Mir Mir Mir Mir Mir Mir Mir Mir Mir Mir Mir Mir Mir Mir Mir Mir Mir Mir Mir Mir Mir Mir Mir Mir Mir Mir Mir Mir Mir Mir Mir Mir Mir Mir Mir Mir Mir Mir Mir Mir Mir Mir Mir Mir Mir Mir Mir Mir Mir Mir Mir Mir Mir Mir Mir Mir Mir Mir Mir Mir Mir Mir Mir Mir Mir Mir Mir Mir Mir Mir Mir Mir Mir Mir Mir Mir Mir Mir Mir Mir Mir Mir Mir Mir Mir Mir Mir Mir Mir Mir Mir Mir Mir Mir Mir Mir Mir Mir Mir mir Mir mir Mir Mir Mir Mir Mir Mir Mir Mir Mir Mir Mir Mir Mir Mir Mir Mir Mir Mir Mir Mir Mir Mir Mir Mir Mir Mir Mir Mir Mir Mir Mir Mir Mir Mir Mir Mir Mir Mir Mir Mir Mir Mir Mir Mir Mir Mir Mir Mir Mir Mir Mir Mir Mir Mir Mir Mir Mir Mir Mir Mir Mir Mir Mir Mir Mir Mir Mir Mir Mir Mir Mir Mir Mir Mir Mir Mir Mir Mir Mir Mir Mir Mir Mir Mir Mir Mir Mir Mir Mir Mir Mir Mir Mir Mir Mir Mir Mir mir MirMir Mir Mir Mir Mir Mir Mir Mir Mir Mir Mir Mir Mir Mir Mir Mir Mir Mir Mir Mir Mir Mir Mir Mir Mir Mir Mir Mir Mir Mir Mir Mir Mir Mir Mir Mir Mir Mir Mir Mir Mir Mir Mir Mir Mir Mir Mir Mir Mir Mir Mir Mir Mir Mir Mir Mir Mir Mir Mir Mir Mir Mir Mir Mir Mir Mir Mir Mir Mir Mir Mir Mir Mir Mir Mir Mir Mir Mir Mir Mir Mir Mir Mir Mir Mir Mir Mir Mir Mir Mir Mir Mir Mir Mir Mir Mir Mir Mir mir mir mir mir mir mir mir mir mir mir mir mir mir mir mir mir mir mir mir mir mir mir mir mir mir mir mir mir mir mir mir mir mir mir mir mir mir mir mir mir mir mir mir mir mir mir mir mir mir mir mir mir mir mir mir mir mir mir mir mir mir mir mir mir mir mir mir mir mir mir mir mir mir mir mir mir mir mir mir mir mir mir mir mir mir mir mir mir mir mir mir mir mir mir mir mir mir mir mir mirmir mir mir mir mir mir mir mir mir mir mir mir mir mir mir mir mir mir mir mir mir mir mir mir mir mir mir mir mir mir mir mir mir mir mir mir mir mir mir mir mir mir mir mir mir mir mir mir mir mir mir mir mir mir mir mir mir mir mir mir mir mir mir mir mir mir mir mir mir mir mir mir mir mir mir mir mir mir mir mir mir mir mir mir mir mir mir mir mir mir mir mir mir mir mir mir mir mir mir mir Mir mir mir mir mir mir mir mir mir mir mir mir mir mir mir mir mir mir mir mir mir mir mir mir mir mir mir mir mir mir mir mir mir mir mir mir mir mir mir mir mir mir mir mir mir mir mir mir mir mir mir mir mir mir mir mir mir mir mir mir mir mir mir mir mir mir mir mir mir mir mir mir mir mir mir mir mir mir mir mir mir mir mir mir mir mir mir mir mir mir mir mir mir mir mir mir mir mir mirmirmir mir mir mir mir mir mir mir mir mir mir mir mir mir mir mir mir mir mir mir mir mir mir mir mir mir mir mir mir mir mir mir mir mir mir mir mir mir mir mir mir mir mir mir mir mir mir mir mir mir mir mir mir mir mir mir mir mir mir mir mir mir mir mir mir mir mir mir mir mir mir mir mir mir mir mir mir mir mir mir mir mir mir mir mir mir mir mir mir mir mir mir mir mir mir mir mir mir mirmir Mir Mir Mir Mir Mir Mir Mir Mir Mir Mir Mir Mir Mir Mir Mir Mir Mir Mir Mir Mir Mir Mir Mir Mir Mir Mir Mir Mir Mir Mir Mir Mir Mir Mir Mir Mir Mir Mir Mir Mir Mir Mir Mir Mir Mir Mir Mir Mir Mir Mir Mir Mir Mir Mir Mir Mir Mir Mir Mir Mir Mir Mir Mir Mir Mir Mir Mir Mir Mir Mir Mir Mir Mir Mir Mir Mir Mir Mir Mir Mir Mir Mir Mir Mir Mir Mir Mir Mir Mir Mir Mir Mir Mir Mir Mir Mir Mir Mir Mir MR MR MR MR MR MR MR MR MR MR MR MR MR MR MR MR MR MR MR MR MR MR MR MR MR MR MR MR MR MR MR MR MR MR MR MR MR MR MR MR MR MR MR MR MR MR MR MR MR MR MR MR MR MR MR MR MR MR MR MR MR MR MR MR MR MR MR MR MR MR MR MR MR MR MR MR MR MR MR MR MR MR MR MR MR MR MR MR MR MR MR MR MR MR MR MR MR MR MR MRMR MR MR MR MR MR MR MR MR MR MR MR MR MR MR MR MR MR MR MR MR MR MR MR MR MR MR MR MR MR MR MR MR MR MR MR MR MR MR MR MR MR MR MR MR MR MR MR MR MR MR MR MR MR MR MR MR MR MR MR MR MR MR MR MR MR MR MR MR MR MR MR MR MR MR MR MR MR MR MR MR MR MR MR MR MR MR MR MR MR MR MR MR MR MR MR MR MR MR MR MB MB MB MB MB MB MB MB MB MB MB MB MB MB MB MB MB MB MB MB MB MB MB MB MB MB MB MB MB MB MB MB MB MB MB MB MB MB MB MB MB MB MB MB MB MB MB MB MB MB MB MB MB MB MB MB MB MB MB MB MB MB MB MB MB MB MB MB MB MB MB MB MB MB MB MB MB MB MB MB MB MB MB MB MB MB MB MB MB MB MB MB MB MB MB MB MB MB MB MBMB MB MB MB MB MB MB MB MB MB MB MB MB MB MB MB MB MB MB MB MB MB MB MB MB MB MB MB MB MB MB MB MB MB MB MB MB MB MB MB MB MB MB MB MB MB MB MB MB MB MB MB MB MB MB MB MB MB MB MB MB MB MB MB MB MB MB MB MB MB MB MB MB MB MB MB MB MB MB MB MB MB MB MB MB MB MB MB MB MB MB MB MB MB MB MB MB MB MB MB NB MB MB MB MB MB MB MB MB MB MB MB MB MB MB MB MB MB MB MB MB MB MB MB MB MB MB MB MB MB MB MB MB MB MB MB MB MB MB MB MB MB MB MB MB MB MB MB MB MB MB MB MB MB MB MB MB MB MB MB MB MB MB MB MB MB MB MB MB MB MB MB MB MB MB MB MB MB MB MB MB MB MB MB MB MB MB MB MB MB MB MB MB MB MB MB MB MB MB MB BB MB BB BB BB BB BB BB BB BB BB BB BB BB BB BB BB BB BB BB BB BB BB BB BB BB BB BB BB BB BB BB BB BB BB BB BB BB BB BB BB BB BB BB BB BB BB BB BB BB BB BB BB BB BB BB BB BB BB BB BB BB BB BB BB BB BB BB BB BB BB BB BB BB BB BB BB BB BB BB BB BB BB BB BB BB BB BB BB BB BB BB BB BB BB BB BB BB BB BB BB BBBB BB BB BB BB BB BB BB BB BB BB BB BB BB BB BB BB BB BB BB BB BB BB BB BB BB BB BB BB BB BB BB BB BB BB BB BB BB BB BB BB BB BB BB BB BB BB BB BB BB BB BB BB BB BB BB BB BB BB BB BB BB BB BB BB BB BB BB BB BB BB BB BB BB BB BB BB BB BB BB BB BB BB BB BB BB BB BB BB BB BB BB BB BB BB BB BB BB BB BB BBA BA BA BA BA BA BA BA BA BA BA BA BA BA BA BA BA BA BA BA BA BA BA BA BA BA BA BA BA BA BA BA BA BA BA BA BA BA BA BA BA BA BA BA BA BA BA BA BA BA BA BA BA BA BA BA BA BA BA BA BA BA BA BA BA BA BA BA BA BA BA BA BA BA BA BA BA BA BA BA BA BA BA BA BA BA BA BA BA BA BA BA BA BA BA BA BA BA BA BA BA NA NA NA NA NA NA NA NA NA NA NA NA NA NA NA NA NA NA NA NA NA NA NA NA NA NA NA NA NA NA NA NA NA NA NA NA NA NA NA NA NA NA NA NA NA NA NA NA NA NA NA NA NA NA NA NA NA NA NA NA NA NA NA NA NA NA NA NA NA NA NA NA NA NA NA NA NA NA NA NA NA NA NA NA NA NA NA NA NA NA NA NA NA NA NA NA NA NA NA NA Na NA Na NA Na NA Na NA Na NA Na NA Na NA Na NA Na NA Na NA Na NA Na NA Na NA Na NA Na NA Na NA Na NA Na NA Na NA Na NA Na NA Na NA Na NA Na NA Na NA Na NA Na NA Na NA Na NA Na NA Na NA Na NA Na NA Na NA Na NA Na NA Na NA Na NA Na NA Na NA Na NA Na NA Na NA Na NA Na NA Na NA Na NA Na NA Na NA Na NA NA Na NA Na NA Na NA Na NA Na NA Na NA Na NA Na NA Na NA Na NA Na NA Na NA Na NA Na NA Na NA Na NA Na NA Na NA Na NA Na NA Na NA Na NA Na NA Na NA Na NA Na NA Na NA Na NA Na NA Na NA Na NA Na NA Na NA Na NA Na NA Na NA Na NA Na NA Na NA Na NA Na NA Na NA Na NA Na NA Na NA Na NA Na NA Na NA NaNA Na NA Na NA Na NA Na NA Na NA Na NA Na NA Na NA Na NA Na NA Na NA Na NA Na NA Na NA Na NA Na NA Na NA Na NA Na NA Na NA Na NA Na NA Na NA Na NA Na NA Na NA Na NA Na NA Na NA Na NA Na NA Na NA Na NA Na NA Na NA Na NA Na NA Na NA Na NA Na NA Na NA Na NA Na NA Na NA Na NA Na NA Na NA Na NA Na NA NaNANaNA Na NA Na NA Na NA Na NA Na NA Na NA Na NA Na NA Na NA Na NA Na NA Na NA Na NA Na NA Na NA Na NA Na NA Na NA Na NA Na NA Na NA Na NA Na NA Na NA Na NA Na NA Na NA Na NA Na NA Na NA Na NA Na NA Na NA Na NA Na NA Na NA Na NA Na NA Na NA Na NA Na NA Na NA Na NA Na NA Na NA Na NA Na NA Na NA Na NA N A N A N A N A N A N A N A N A N A N A N A N A N A N A N A N A N A N A N A N A N A N A N A N A N A N A N A N A N A N A N A N A N A N A N A N A N A N A N A N A N A N A N A N A N A N A N A N A N A N A N N A N A N A N A N A N A N A N A N A N A N A N A N A N A N A N A N A N A N A N A N A N A N A N A N A N A N A N A N A N A N A N A N A N A N A N A N A N A N A N A N A N A N A N A N A N A N A N A N A NA N A N A N A N A N A N A N A N A N A N A N A N A N A N A N A N A N A N A N A N A N A N A N A N A N A N A N A N A N A N A N A N A N A N A N A N A N A N A N A N A N A N A N A N A N A N A N A N A N A N ANA N A N A N A N A N A N A N A N A N A N A N A N A N A N A N A N A N A N A N A N A N A N A N A N A N A N A N A N A N A N A N A N A N A N A N A N A N A N A N A N A N A N A N A N A N A N A N A N A N A A N A N A N A N A N A N A N A N A N A N A N A N A N A N A N A N A N A N A N A N A N A N A N A N A N A N A N A N A N A N A N A N A N A N A N A N A N A N A N A N A N A N A N A N A N A N A N A N A N A A.NA N A N A N A N A N A N A N A N A N A N A N A N A N A N A N A N A N A N A N A N A N A N A N A N A N A N A N A N A N A N A N A N A N A N A N A N A N A N A N A N A N A N A N A N A N A N A N A N A N A NO N A NO N A NO N A NO N A NO N A NO N A NO N A NO N A NO N A NO N A NO N A NO N A NO N A NO N A NO N A NO N A NO N A NO N A NO N A NO N A NO N A NO N A NO N A NO N A NO N A NO N A NO N A NO N A NO N A NO N A NO N A NO N A NO N A NON A NO N A NO N A NO N A NO N A NO N A NO N A NO N A NO N A NO N A NO N A NO N A NO N A NO N A NO N A NO N A NO N A NO N A NO N A NO N A NO N A NO N A NO N A NO N A NO N A NO N A NO N A NO N A NO N A NO N A NO N A NO N A NO N A NO NA NO N A NO N A NO N A NO N A NO N A NO N A NO N A NO N A NO N A NO N A NO N A NO N A NO N A NO N A NO N A NO N A NO N A NO N A NO N A NO N A NO N A NO N A NO N A NO N A NO N A NO N A NO N A NO N A NO N A NO N A NO N A NO N A NO N ANO N A NO N A NO N A NO N A NO N A NO N A NO N A NO N A NO N A NO N A NO N A NO N A NO N A NO N A NO N A NO N A NO N A NO N A NO N A NO N A NO N A NO N A NO N A NO N A NO N A NO N A NO N A NO N A NO N A NO N A NO N A NO N A NO N A NO NO N A NO N A NO N A NO N A NO N A NO N A NO N A NO N A NO N A NO N A NO N A NO N A NO N A NO N A NO N A NO N A NO N A NO N A NO N A NO N A NO N A NO N A NO N A NO N A NO N A NO N A NO N A NO N A NO N A NO N A NO N A NO N A NO N A No N No No No No No No No No No No No No No No No No No No No No No No No No No No No No No No No No No No No No No No No No No No No No No No No No No No No No No No No No No No No No No No No No No No No No No No No No No No No No No No No No No No No No No No No No No No No No No No No No No No No NoNo No No No No No No No No No No No No No No No No No No No No No No No No No No No No No No No No No No No No No No No No No No No No No No No No No No No No No No No No No No No No No No No No No No No No No No No No No No No No No No No No No No No No No No No No No No No No No No No No No No No no no no no no no no no no no no no no no no no no no no no no no no no no no no no no no no no no no no no no no no no no no no no no no no no no no no no no no no no no no no no no no no no no no no no no no no no no no no no no no no no no no no no no no no no no no no no no no no no no no no no n a b b b b b b b b b b b b b b b b b b b b b b b b b b b b b b b b b b b b b b b b b b b b b b b b b b b b b b b b b b b b b b b b b b b b b b b b b b b b b b b b b b b b b b b b b b b b b b b b b b b b ba ba ba ba ba ba ba ba ba ba ba ba ba ba ba ba ba ba ba ba ba ba ba ba ba ba ba ba ba ba ba ba ba ba ba ba ba ba ba ba ba ba ba ba ba ba ba ba ba ba ba ba ba ba ba ba ba ba ba ba ba ba ba ba ba ba ba ba ba ba ba ba ba ba ba ba ba ba ba ba ba ba ba ba ba ba ba ba ba ba ba ba ba ba ba ba ba ba ba ba BA BA BA BA BA BA BA BA BA BA BA BA BA BA BA BA BA BA BA BA BA BA BA BA BA BA BA BA BA BA BA BA BA BA BA BA BA BA BA BA BA BA BA BA BA BA BA BA BA BA BA BA BA BA BA BA BA BA BA BA BA BA BA BA BA BA BA BA BA BA BA BA BA BA BA BA BA BA BA BA BA BA BA BA BA BA BA BA BA BA BA BA BA BA BA BA BA BA BA TA TA TA TA TA TA TA TA TA TA TA TA TA TA TA TA TA TA TA TA TA TA TA TA TA TA TA TA TA TA TA TA TA TA TA TA TA TA TA TA TA TA TA TA TA TA TA TA TA TA TA TA TA TA TA TA TA TA TA TA TA TA TA TA TA TA TA TA TA TA TA TA TA TA TA TA TA TA TA TA TA TA TA TA TA TA TA TA TA TA TA TA TA TA TA TA TA TA TA TA Ta Ta Ta Ta Ta Ta Ta Ta Ta Ta Ta Ta Ta Ta Ta Ta Ta Ta Ta Ta Ta Ta Ta Ta Ta Ta Ta Ta Ta Ta Ta Ta Ta Ta Ta Ta Ta Ta Ta Ta Ta Ta Ta Ta Ta Ta Ta Ta Ta Ta Ta Ta Ta Ta Ta Ta Ta Ta Ta Ta Ta Ta Ta Ta Ta Ta Ta Ta Ta Ta Ta Ta Ta Ta Ta Ta Ta Ta Ta Ta Ta Ta Ta Ta Ta Ta Ta Ta Ta Ta Ta Ta Ta Ta Ta Ta Ta Ta Ta Ta-Ta-Ta-Ta-Ta-Ta-Ta-Ta-Ta-Ta-Ta-Ta-Ta-Ta-Ta-Ta-Ta-Ta-Ta-Ta-Ta-Ta-Ta-Ta-Ta-Ta-Ta-Ta-Ta-Ta-Ta-Ta-Ta-Ta-Ta-Ta-Ta-Ta-Ta-Ta-Ta-Ta-Ta-Ta-Ta-Ta-Ta-Ta-Ta-Ta-Ta-Ta-Ta-Ta-Ta-Ta-Ta-Ta-Ta-Ta-Ta-Ta-Ta-Ta-Ta-Ta-Ta-Ta-Ta-Ta-Ta-Ta-Ta-Ta-Ta-Ta-Ta-Ta-Ta-Ta-Ta-Ta-Ta-Ta-Ta-Ta-Ta-Ta-Ta-Ta-Ta-Ta-Ta-Ta-Ta-Ta-Ta-Ta-Ta-Ta-Ta Ta Ta Ta Ta Ta Ta Ta Ta Ta Ta Ta Ta Ta Ta Ta Ta Ta Ta Ta Ta Ta Ta Ta Ta Ta Ta Ta Ta Ta Ta Ta Ta Ta Ta Ta Ta Ta Ta Ta Ta Ta Ta Ta Ta Ta Ta Ta Ta Ta Ta Ta Ta Ta Ta Ta Ta Ta Ta Ta Ta Ta Ta Ta Ta Ta Ta Ta Ta Ta Ta Ta Ta Ta Ta Ta Ta Ta Ta Ta Ta Ta Ta Ta Ta Ta Ta Ta Ta Ta Ta Ta Ta Ta Ta Ta Ta Ta Ta TaTa Ta Ta Ta Ta Ta Ta Ta Ta Ta Ta Ta Ta Ta Ta Ta Ta Ta Ta Ta Ta Ta Ta Ta Ta Ta Ta Ta Ta Ta Ta Ta Ta Ta Ta Ta Ta Ta Ta Ta Ta Ta Ta Ta Ta Ta Ta Ta Ta Ta Ta Ta Ta Ta Ta Ta Ta Ta Ta Ta Ta Ta Ta Ta Ta Ta Ta Ta Ta Ta Ta Ta Ta Ta Ta Ta Ta Ta Ta Ta Ta Ta Ta Ta Ta Ta Ta Ta Ta Ta Ta Ta Ta Ta Ta Ta Ta Ta Ta Ta Da Da Da Da Da Da Da Da Da Da Da Da Da Da Da Da Da Da Da Da Da Da Da Da Da Da Da Da Da Da Da Da Da Da Da Da Da Da Da Da Da Da Da Da Da Da Da Da Da Da Da Da Da Da Da Da Da Da Da Da Da Da Da Da Da Da Da Da Da Da Da Da Da Da Da Da Da Da Da Da Da Da Da Da Da Da Da Da Da Da Da Da Da Da Da Da Da Da Da Da DA DA DA DA DA DA DA DA DA DA DA DA DA DA DA DA DA DA DA DA DA DA DA DA DA DA DA DA DA DA DA DA DA DA DA DA DA DA DA DA DA DA DA DA DA DA DA DA DA DA DA DA DA DA DA DA DA DA DA DA DA DA DA DA DA DA DA DA DA DA DA DA DA DA DA DA DA DA DA DA DA DA DA DA DA DA DA DA DA DA DA DA DA DA DA DA DA DA DA DA D DA DA DA DA DA DA DA DA DA DA DA DA DA DA DA DA DA DA DA DA DA DA DA DA DA DA DA DA DA DA DA DA DA DA DA DA DA DA DA DA DA DA DA DA DA DA DA DA DA DA DA DA DA DA DA DA DA DA DA DA DA DA DA DA DA DA DA DA DA DA DA DA DA DA DA DA DA DA DA DA DA DA DA DA DA DA DA DA DA DA DA DA DA DA DA DA DA DA DA GA GA GA GA GA GA GA GA GA GA GA GA GA GA GA GA GA GA GA GA GA GA GA GA GA GA GA GA GA GA GA GA GA GA GA GA GA GA GA GA GA GA GA GA GA GA GA GA GA GA GA GA GA GA GA GA GA GA GA GA GA GA GA GA GA GA GA GA GA GA GA GA GA GA GA GA GA GA GA GA GA GA GA GA GA GA GA GA GA GA GA GA GA GA GA GA GA GA GA GAGA GA GA GA GA GA GA GA GA GA GA GA GA GA GA GA GA GA GA GA GA GA GA GA GA GA GA GA GA GA GA GA GA GA GA GA GA GA GA GA GA GA GA GA GA GA GA GA GA GA GA GA GA GA GA GA GA GA GA GA GA GA GA GA GA GA GA GA GA GA GA GA GA GA GA GA GA GA GA GA GA GA GA GA GA GA GA GA GA GA GA GA GA GA GA GA GA GA GA GA YA Y Y Y Y Y Y Y Y Y Y Y Y Y Y Y Y Y Y Y Y Y Y Y Y Y Y Y Y Y Y Y Y Y Y Y Y Y Y Y Y Y Y Y Y Y Y Y Y Y Y Y Y Y Y Y Y Y Y Y Y Y Y Y Y Y Y Y Y Y Y Y Y Y Y Y Y Y Y Y Y Y Y Y Y Y Y Y Y Y Y Y Y Y Y Y Y Y Y Y YY Y Y Y Y Y Y Y Y Y Y Y Y Y Y Y Y Y Y Y Y Y Y Y Y Y Y Y Y Y Y Y Y Y Y Y Y Y Y Y Y Y Y Y Y Y Y Y Y Y Y Y Y Y Y Y Y Y Y Y Y Y Y Y Y Y Y Y Y Y Y Y Y Y Y Y Y Y Y Y Y Y Y Y Y Y Y Y Y Y Y Y Y Y Y Y Y Y Y Y.Y Y Y Y Y Y Y Y Y Y Y Y Y Y Y Y Y Y Y Y Y Y Y Y Y Y Y Y Y Y Y Y Y Y Y Y Y Y Y Y Y Y Y Y Y Y Y Y Y Y Y Y Y Y Y Y Y Y Y Y Y Y Y Y Y Y Y Y Y Y Y Y Y Y Y Y Y Y Y Y Y Y Y Y Y Y Y Y Y Y Y Y Y Y Y Y Y Y Y Y YY Y Y Y Y Y Y Y Y Y Y Y Y Y Y Y Y Y Y Y Y Y Y Y Y Y Y Y Y Y Y Y Y Y Y Y Y Y Y Y Y Y Y Y Y Y Y Y Y Y Y Y Y Y Y Y Y Y Y Y Y Y Y Y Y Y Y Y Y Y Y Y Y Y Y Y Y Y Y Y Y Y Y Y Y Y Y Y Y Y Y Y Y Y Y Y Y Y Y YYYYYYYYYYYYYYYYYYYYYYYYYYYYYYYYYYYYYYYYYYYYYYYYYYYYYYYYYYYYYYYYYYYYYYYYYYYYYYYYYYYYYYYYYYYYYYYYYYYYYYYYYYYYYYYYYYYYYYYYYYYYYYYYYYYYYYYYYYYYYYYYYYYYYYYYYYYYYYYYYYYYYYYYYYYYYYYYYYYYYYYYYYYYYYYYYYYYYYYYY YYYYYYYYYYYYYYYYYYYYYYYYYYYYYYYYYYYYYYYYYYYYYYYYYYYYYYYYYYYYYYYYYYYYYYYYYYYYYYYYYYYYYYYYYYYYYYYYYYYYYYYYYYYYYYYYYYYYYYYYYYYYYYYYYYYYYYYYYYYYYYYYYYYYYYYYYYYYYYYYYYYYYYYYYYYYYYYYYYYYYYYYYYYYYYYYYYYYYYYYyyYYYYYYYYYYYYYYYYYYYYYYYYYYYYYYYYYYYYYYYYYYYYYYYYYYYYYYYYYYYYYYYYYYYYYYYYYYYYYYYYYYYYYYYYYYYYYYYYYYYYYYYYYYYYYYYYYYYYYYYYYYYYYYYYYYYYYYYYYYYYYYYYYYYYYYYYYYYYYYYYYYYYYYYYYYYYYYYYYYYYYYYYYYYYYYYYYYYYYYZZZZZZZZZZZZZZZZZZZZZZZZZZZZZZZZZZZZZZZZZZZZZZZZZZZZZZZZZZZZZZZZZZZZZZZZZZZZZZZZZZZZZZZZZZZZZZZZZZZZZZZZZZZZZZZZZZZZZZZZZZZZZZZZZZZZZZZZZZZZZZZZZZZZZZZZZZZZZZZZZZZZZZZZZZZZZZZZZZZZZZZZZZZZZZZZZZZZZZZZZZZZZZZZZZZZZZZZZZZZZZZZZZZZZZZZZZZZZZZZZZZZZZZZZZZZZZZZZZZZZZZZZZZZZZZZZZZZZZZZZZZZZZZZZZZZZZZZZZZZZZZZZZZZZZZZZZZZZZZZZZZZZZZZZZZZZZZZZZZZZZZZZZZZZZZZZZZZZZZZZZZZZZZZZZZZZZZZZZZZZZZZZZZZZZZZZZZZZZZZZZzzzzzzzzzzzzzzzzzzzzzzzzzzzzzzzzzzzzzzzzzzzzzzzzzzzzzzzzzzzzzzzzzzzzzzzzzzzzzzzzzzzzzzzzzzzzzzzzzzzzzzzzzzzzzzzzzzzzzzzzzzzzzzzzzzzzzzzzzzzzzzzzzzzzzzzzzzzzzzzzzzzzzzzzzzzzzzzzzzzzzzzzzzzzzzzzzzzzzzzzzzzzzzzzzzzzzzzzzzzzzzzzzzzzzzzzzzzzzzzzzzzzzzzzzzzzzzzzzzzzzzzzzzzzzzzzzzzzzzzzzzzzzzzzzzzzzzzzzzzzzzzzzzzzzzzzzzzzzzzzzzzzzzzzzzzzzzzzzzzzzzzzzzzzzzzzzzzzzzzzzzzzzzzzzzzzzzzzzzzzzzzzzzzzzzzzzzzzzzzZZZZZZZZZZZZZZZZZZZZZZZZZZZZZZZZZZZZZZZZZZZZZZZZZZZZZZZZZZZZZZZZZZZZZZZZZZZZZZZZZZZZZZZZZZZZZZZZZZZZZZZZZZZZZZZZZZZZZZZZZZZZZZZZZZZZZZZZZZZZZZZZZZZZZZZZZZZZZZZZZZZZZZZZZZZZZZZZZZZZZZZZZZZZZZZZZZZZZZZZZZZZZZZZZZZZZZZZZZZZZZZZZZZZZZZZZZZZZZZZZZZZZZZZZZZZZZZZZZZZZZZZZZZZZZZZZZZZZZZZZZZZZZZZZZZZZZZZZZZZZZZZZZZZZZZZZZZZZZZZZZZZZZZZZZZZZZZZZZZZZZZZZZZZZZZZZZZZZZZZZZZZZZZZZZZZZZZZZZZZZZZZZZZZZZZZZZZzzZZzzzzzzzzzzzzzzzzzzzzzzzzzzzzzzzzzzzzzzzzzzzzzzzzzzzzzzzzzzzzzzzzzzzzzzzzzzzzzzzzzzzzzzzzzzzzzzzzzzzzzzzzzzzzzzzzzzzzzzzzzzzzzzzzzzzzzzzzzzzzzzzzzzzzzzzzzzzzzzzzzzzzzzzzzzzzzzzzzzzzzzzzzzzzzzzzzzzz. | ||
EC Declaration of Conformity
Signed for the company GARDENA Manufacturing GmbH, Hans-Lorenser-Str. 40, D-89079 Ulm (Germany), hereby declares that the product, after leaving the factory, is in conformity with the harmonized EC directives, EC safety standards, and the standards applicable to them. This declaration becomes void in the event of unauthorized modification of the product.
Product description: Chainsaw - chain saw
Type: CST3018, CST3518 - CS = Chainsaw
CE marking. 2009
Directives:
2006/42/EC, 2004/108/EC, 2000/14/EC, 2011/65/EU
Harmonized standards EN:
EN60745-1, EN60745-2-13, EN50366, EN55014-1, EN61000-3-2, EN61000-3-11
Registration authority, EC declaration of conformity. MEEI Kft., 1007
Vaciut 48/a-b
1132 Budapest
Hungary
Certificate No. M3 69240048
Date 15/02/2013
Peter Lameli
General Director for Research and Development
Works: portable tools
Keep technical documentation

Every 2-3 hours of use
For every 2-3 hours of use
Tip. CST3018,CST3518-CS=Chainsaw
Year of CE marking: 2009
EU Directives:
2006/42/EC, 2004/108/EC, 2000/14/EC, 2011/65/EU
Harmonized EN:
EN60745-1, EN60745-2-13, EN50366, EN55014-1, EN61000-3-2, EN61000-3-11
Explanation of the symbols
1) Rated power according to Directive 2000/14/EC (2) Instrument of Class II 3) CE marking for conformity 4) Nominal frequency 5) Nominal power 6) Nominal current 7) Nominal voltage (8) Product code 9) Year of manufacture 10) Maximum water pressure 11) Manufacturer's address 12) Model
B. Safety rules
Meaning of symbols



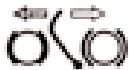
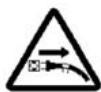


Attention!
Read the instruction manual carefully
Wear protective gloves
Wear protective goggles, wear helmet, wear hearing protection
Protective footwear required
Danger of tipping over


Do not climb on the machine


Oil for the hinge

Switch off the machine

Switch off the machine before adjusting the pressure.

Risk of electric shock
Safety of the work area
- Never allow children or people unfamiliar with these instructions to operate this product. Local regulations may restrict the age of the operator. 2. Use the machine only for the functions described in this manual.
- Check the work area carefully for hidden hazards (e.g., nails, screws), electric cables, dangerous steps, etc. 4. Keep other people and animals at a safe distance from the work area (if necessary, mark the area and put up warning signs) at a minimum distance of 2.5 times the height of the machine; in any case, not less than 10 meters.
- The operator of the machine is responsible for accidents or hazards that occur to other people on the property.
Electrical safety
- Use a residual current device (R.C.D.) with a rated current of not more than 30 mA. Even a residual current device (R.C.D.) cannot guarantee 100% safety; you must always follow the safety rules. 1. Test your R.C.D. every time you use the machine. 2. Check the power cable for damage or wear. If you find defects in the cable, take it to a certified service center to have it replaced. 3. Do not use the product if the electrical cables are damaged or worn. 4. Always disconnect the plug from the socket if the cable is cut or the insulation is damaged. Do not touch the electrical cable while it is still connected to the power supply. Repair or replace damaged cables. Take the product to an authorized service center for cable repair.
- Check the cable/plug for damage before each use, and make sure it does not pose a hazard to the user or other people, and ensure it cannot be damaged (by heat, sharp objects, sharp edges, oil, etc.);
- Place the cable so that it cannot be caught by the hooks or other objects during operation. 7. Before starting the product, make sure to remove the plug from the socket, and to disconnect the cable from the extension cord.
- Check the power cord and extension cord for damage before each use. Do not use the product if the cord is damaged. Take the product to an authorized service center for repair. 9. Disconnect the product from the power supply before any maintenance or cleaning. 10. When starting the product, hold it firmly and guide it carefully. 11. Use only the power source specified on the rating label of the product. 12. The motor is sufficiently protected according to EN60745-1 & EN60745-2-13. Under no circumstances should the grounding be connected to the product.
Cables
- The cable and extension cord can be damaged by sharp objects. 2. Use only approved extension cords.
- Extension cords must be used only if they are intended for outdoor use. 4. If you need to use an extension cord during operation, make sure to use only the following cable sizes:
-1.0 mm²: maximum length 40 m -1.5 mm²: maximum length 60 m -2.5 mm²: maximum length 100 m
C. DESCRIPTION OF THE SAFETY EQUIPMENT
Switch lock
Your machine is equipped with a device (Fig.1) that prevents accidental starting by requiring the switch to be pressed, thus preventing unintentional operation.
BLOCKING AND RELEASING THE SWITCH
Your machine is equipped with a device that blocks the switch when it is released; if this device does not work properly, the machine must not be used and must be taken to an authorized service center.
SWITCH LOCK / RELEASE BUTTON
The front handle (Fig.2) is adjustable to prevent contact between the two handles and the switch (in the position, the handles are correctly adjusted according to the instructions). The front handle also acts as a switch lock, including as a device that locks the switch for less than 0.15 seconds in case of reverse rotation. The switch and the handle are released when the front handle is pulled back and then locked in place. The locking of the switch is activated when the front handle is pulled back and the switch is released (Fig.3). The locking of the switch
can be activated by using the lock button or when the switch is released after being pressed, as a result of the front handle being pulled back.
When the chain is released with water in a horizontal position, for example during a fall on the ground, the chain blocking is slightly less protected. (Fig. 4).
N.B.: When the chain blocking is activated, the product is protected against sudden current supply to the motor.
Releasing the chain brake while the descent is being carried out would activate the product. CHAIN BRAKE
This machine is equipped with a chain brake (Fig. 5) placed under the bar. This mechanism is designed to stop the chain moving backwards in the event of a kickback and the chain is stopped in the event of a kickback. These situations can be avoided by correctly tensioning the chain (see section "D. Tensioning/Releasing").
CHAIN CATCH
This device is for catching (Fig. 6) the chain in the event of chain breakage or kickback.
D. TENSIONING / RELEASING
TENSIONING THE CHAIN
Be careful when tensioning, to ensure that the chain is correctly tensioned.
Disconnect the saw from the power supply before working on it.
1. Remove the chain guard if it is not activated. If it is, deactivate it. 2 & 2b. Turn the tensioning screw counterclockwise to loosen the bar and tighten the chain tensioning screw.
And the chain is correctly tensioned.
3. Place the chain on the bar as you tension the chain, and position it in the bar groove. Check that the sharp edges of the cutting teeth are facing forward in the direction of rotation of the bar. (See the arrow on the bar) 4. Lock the bar in place by tightening the bar nut, making sure that the bar is positioned correctly and the chain is properly tensioned. Place the chain on the tensioning sprocket and turn the bar forward to tension the chain. 5. Tighten both nuts on the tensioning sprocket and turn the tensioning screw clockwise to tension the chain, until it is snug. 6 & 7. To tension the chain, turn the tensioning screw clockwise. Tighten the chain until it is snug. To check the tension, pull the chain away from the bar and make sure the distance is about 2-3 mm. To reduce the tension, turn the tensioning screw counterclockwise. (When performing this operation, the bar is raised upward) 8a & 8b. When the tension is correct, tighten the bar nut and turn the tensioning screw clockwise to lock the bar in place, then turn the tensioning screw counterclockwise to release the tension.
Proper lubrication of the chain is essential for its normal and safe operation. Insufficient lubrication may cause the chain to jump or break, while if the chain is adjusted correctly, this can lead to premature wear and tear of the working parts. Check the lubrication regularly, as the chain tends to stretch with use (especially when the chain is new; after the first few hours of operation, the chain should be checked after every few minutes of work with the machine). In any case, do not leave the chain running after use, but wait until it cools down.
Warning: The chain and the bar may become very hot.
E. STARTING AND STOPPING
Starting: Hold the front handle with your left hand and the rear handle with your right hand, keeping the chain clear of the ground. Press the throttle trigger lock, then press the throttle trigger (Fig. E1), and then press the throttle trigger lock (Fig. E2) (at this point the throttle trigger lock can be released).
Stopping: The machine will stop when the throttle trigger is released or when the chain brake is activated.
F. CHAIN LUBRICATION
WARNING: Insufficient lubrication will quickly damage the chain and may lead to serious accidents.
Refer to the section "Filling and Storage" for instructions on how to ensure the chain oil is properly distributed.
Chain oil selection
Use oil that is approved by the manufacturer.
For the chain, it is recommended to use biodegradable chain oil.
Filling the oil reservoir
Unscrew the oil tank cap and fill the reservoir, being careful not to spill oil (if this happens, clean the machine thoroughly). Then close the cap securely.
Before performing any maintenance or cleaning, stop the engine and disconnect it from the power source.
WARNING: In case the working environment is particularly dusty, the maintenance intervals should be performed more frequently than those described in the instructions.
Before use
Check the oil level for the machine's proper operation: The machine must not be tilted to a surface at a distance of 20 centimeters; after the machine has been running for about a minute, the surface should show a clear trace of oil (Fig.1).
Check that the saw chain does not require excessive force to activate or deactivate the chain brake. Check that the chain brake is not activated too easily or is blocked. Then test the chain brake function as follows: Release the chain brake, hold the machine properly and switch it on, activate the chain brake by pressing the front hand guard forward with the left hand or thumb, but without touching the chain with the hand (Fig.2). If the chain brake functions properly, the chain should stop immediately.
Check that the saw chain is tensioned correctly, that it is at the proper working height, and that the tensioning is correct. If the chain is worn unevenly, or if the rivets are too loose or too tight, the chain must be replaced (Fig.3).
Set the idle speed adjustment screw so as to prevent the chain from moving at idle (Fig.4).
Check that the throttle and throttle lock function properly (to be done with the chain brake released: press the throttle and throttle lock and make sure they return to the idle position after being released; check that it is impossible to press the throttle without activating the throttle lock.
Check that the chain guard and the chain catcher are in proper condition without any damage or missing parts.
Every 2-3 hours of use
Check the condition and the oil level; if necessary, refill the oil tank (Fig.5) and carefully inspect the guide bar (Fig.6); if the bar is worn or shows signs of deep wear, it must be replaced. Refill the chain oil and check that it is sufficient and that the oil is being dispensed (Fig.7).
Lubricate the bar tip sprocket through the hole, as shown in the illustration (Fig.8).
Sharpening the saw chain
Refer to the section on sharpening the saw chain for problems related to chain sharpening.
The saw chain must be properly sharpened. An incorrectly sharpened chain can lead to a serious accident or injury.
If the chain cuts poorly or requires high pressure on the guide bar, or if the cutters are very dull, this is a sign that the chain is not properly sharpened. If the cutters are not sharp at all, this means that the chain has been worn out or the chain is damaged and needs to be replaced. A properly sharpened chain should cut through the wood with minimal effort and pressure, without dulling.
The blade is installed and adjusted according to the recommended blade (Fig.10) and the indicator for the cutting depth (Fig.10). The differences between the blades are the cutting depth; for good results, carefully follow the water for the blade or for the diamond disc 4 mm; follow the instructions below: After the blade is installed, the device is turned on, the adjustment is made and the blade is activated, set the water for the blade preliminarily and the water, as shown in the figures (Fig.12), while removing the blade at the end, as shown (Fig.13a&13b). When the blade is working, the initial pressure at the start (it is very important to follow these instructions strictly: for small or large cutting depth or for the blade diameter, the pressure is increased or decreased.) For the small cutting depths, the precision of the blade pages, the device is set so that the cutting starts with an opening of 0.5 mm.
Remove all the blades from the device, then turn the machine off and repeat the operation. Make sure that after the operation, all the blades are at the same height, the height indicator is 0.6 mm lower than the upper cutter; check the height as shown in the figure (Fig.14), while adjusting the height of the blade, as shown in the figure (Fig.15).
After every 30 hours of use.
Take the machine to an authorized service center.
Storage/Transport
Let the product cool down and set the water supply to the blade.
Store the product in a dry place, away from water. Do not leave it for storage.
Make sure that the oil does not leak from the product.
H. CUTTING TECHNIQUE
(Fig.1) Before using the machine, remember:
- to cut the material, the blade may break during cutting (first under pressure, drying, etc.): sudden breaking can be very dangerous.
- The water blade can be caught in the cutting area: if this happens, disconnect the machine from the electrical contact and try to remove the blade with a suitable tool; do not try to free the machine by pulling or tearing, as this may cause damage or injury. -Situations that may lead to a reaction or kickback. -Use the product at the height of the frame.
- to cut first with a guide or a template, e.g., a profile.
Never use the machine in a wet or damp place, this is absolutely necessary for its safety.
(Fig.1) During the use of the machine:
- When cutting on an inclined surface, work slowly and hold the saw firmly to avoid kickback if it jams.
- When you finish cutting, be careful to complete the work to the end: the partially cut wood may split and fall.
- At the end of each cutting operation, the user should notice a significant difference in the force needed to control the machine. You must pay attention and not forget the control.
Exposure under real operating conditions (as all working stages are taken into account
e.g., the tool is excluded during idle and standby periods,
in addition to the activation time).
2) Noise values according to 2000/14/EC, see table below.
Conformity assessment procedure..Annex V
EN 61000-3-11 Declaration of Conformity
Depending on the characteristics of the electrical supply network, the use of this product may cause voltage drops at the moment of switching on. This may affect other electrical equipment, e.g., at the moment of starting a lamp. If the impedance Zmax of your power source is lower than the value shown in the table for your model, the equipment must be connected. The impedance of the network can be determined by consulting your electricity supplier.
A. GENERAL DESCRIPTION
1) Cable
16) Guide bar chain
2) Rear handle
17) Guide bar
Husqvarna Australia Pty. Ltd.
Locked Bag 5
Central Coast BC, NSW 2252
Phone: (+61) (0) 24352 7400
customer.service
husqvarna.com.au
GARDENA Belgium NV/SA
BvI. "Andpen Jarnueb" N 72
1799 CoΦn
TeJ.: (+359) 02/9753076
www.husqvarna.bg
Canada / USA
GARDENA Canada Ltd.
100 Summerlea Road
Brampton, Ontario L6T 4X3
Phone: (+1) 905 792 93 30
info@gardenacadada.com
Chile
Antonio Martinic y Cia Ltda.
Cassillas 272
Centro de Cassillas
Santiago de Chile
Phone: (+56) 2 20 10 708
garfar_cl@yahoo.com
Costa Rica
Compania Exim
Euroiberoamericana S.A.
LosColegios,Moravia
Czech Republic/Slovak Republic
Husqvarna Cesko s.r.o.
GARDENA branch office
Tuřanka 1222/115
627 00 Brno
Phone: (+420) 548 217 777
Consumer Outdoor Products
Consumer Outdoor Products
Consumer Outdoor Products
Lautatarhankatu 8 B / P.O. Box 3
00581 HELSINKI
info@gardena.fi
France
GARDENA France
Immeuble Exposial
Aycliffe Industrial Park
Newton Aycliffe
County Durham, DL5 6UP
info.gardena@husqvarna.co.uk
Greece
HUSQVARNA EMAZ A.E.B.E.
Yπ/μa HΦaiotu 33A
B1. Πε. Kρωπιν
194 00 Kpwnti Attikns
V.A.T. EL094094640
Phone: (+30) 210 66 20 225
info@husqvarna-consumer.gr
Hungary
Northern Cross Business Park
North Road, Finglas
Dublin 11
Italy
23868 VALMADRERA (LC)
Phone: (+39) 0341.203.111
info@gardenaitalia.it
Japan
KAKUICHI Co. Ltd.
Sumitomo Real
Development Kojimachi
BLDG., 8F, 5-1 Nibanncyo,
Chiyoda-ku, Tokyo 102-0084
Phone: (+81) 33 264 4721
m_ishihara@kaku-ichi.co.jp
Latvia
Husqvarna Latvija
Consumer Outdoor Products
Bakuži iela 6
LV-1024 Riga
info@husqvarna.lv
Lithuania
UAB Husqvarna Lietuva
Consumer Outdoor Products
Ateities pl. 77C
LT-52104 Kaunas
centras@husqvarna.it
Luxembourg
Magasins Jules Neuberg
Husqvarna New Zealand Ltd.
PO Box 7643
Manukau City 2241
Phone: (+64) (0) 9 9202410
support.nz@husqvarna.co.nz
Norway
GARDENA / Husqvarna
Consumer Outdoor Products
Sales Office Norway
Kleverveien 6
1540 Vestby
info@gardena.no
Poland
Husqvarna Poland Sp. z o.o.
ul. Wysockiego 15 b
03-371 Warszawa
Sintra Business Park
02-08 Tat Ann Building
Singapore 577185
Phone: (+65) 6253 2277
shiying@hyray.com.sg
Slovenia
GARDENA d.o.o.
BrodiBne 15
1236 Trzin
Phone: (+386) 1 580 93 32
servis@gardena.si
South Africa
GARDENA
South Africa (Pty.) Ltd.
P.O.Box 11534
Vorna Valley 1686
Phone: (+27) 11 315 02 23
sales@gardena.co.za
Spain
GARDENA IBÉRICA S.L.U.
C/ Basauri, n° 6
La Florida
28023 Madrid
Phone: (+34) 91 708 05 00
Consumer Outdoor Products



- SAFETY PRECAUTIONS
- MEANING OF SYMBOLS
- GENERAL POWER TOOL SAFETY WARNINGS
- WORK AREA SAFETY
- ELECTRICAL SAFETY
- SERVICE
- CHAIN SAW SAFETY WARNINGS
- CAUSES AND OPERATOR PREVENTION OF KICKBACK
- ADDITIONAL SAFETY RECOMMENDATIONS
- CABLES
- SAFETY EQUIPMENT DESCRIPTION
- SWITCH BLOCK
- CHAIN CATCHER
- REAR HAND GUARD
- ASSEMBLY / DISASSEMBLY
- BAR AND CHAIN ASSEMBLY
- REMOVE THE PLUG FROM THE POWER SUPPLY BEFORE WORKING ON THE PRODUCT
- A WEAR GLOVES
- START-UP AND STOPPING
- BAR AND CHAIN LUBRICATION
- CHOICE OF CHAIN OIL
- FILLING OIL TANK
- MAINTENANCE AND STORAGE
- BEFORE EACH USE
- EVERY 2-3 HOURS OF USE
- EVERY 30 HOURS OF USE
- CUTTING TECHNIQUES
- (FIG.1) WHEN USING THE MACHINE, PREVENT
- (FIG.1) DURING MACHINE USE
- SPIKED BUMPER USE
- TREE FELLING
- PRELIMINARY CUTTING OPERATIONS AND IDENTIFYING THE RETREAT PATH
- FELLING CUTS (FIG.10)
- LIMBING
- ENVIRONMENTAL INFORMATION
- USE OF THE MACHINE
- DISPOSAL
- EU DECLARATION OF CONFORMITY
- WARNING
- EN 61000-3-11 COMPLIANCE STATEMENT
- GENERAL DESCRIPTION
- RIGHT HAND GUARD
- ASSEMBLY/DISASSEMBLY
- ASSEMBLY OF BAR AND CHAIN
- STORAGE/TRANSPORT
- ATTENTION
- KICKBACK OCCURS WHEN THE UPPER PART OF THE GUIDE BAR COMES INTO CONTACT WITH AN OBJECT (FIG. B3) OR WHEN THE SAW GETS CAUGHT IN THE WOOD
- PROTECTION OF THE HANDS
- INSTALLING THE BAR AND CHAIN
- DISCONNECT THE TOOL FROM THE POWER SUPPLY BEFORE PERFORMING ANY WORK ON THE TOOL
- PUT ON THE GLOVES
- START AND STOP
- LUBRICATION OF THE CHAIN AND THE SAW
- FILLING WITH OIL
- EVERY 2-3 HOURS OF OPERATION
- MYSTERY
- AFTER 30 HOURS OF OPERATION
- CUTTING TECHNIQUE
- DURING WORK, AVOID: (FIG. 1)
- DURING WORK: (FIG. 1)
- USING THE HOOK
- TRUNK LYING ON THE GROUND WITH ONE END (RISK OF BREAKAGE DURING THE CUT) (FIG. 6)
- TRUNK LYING WITH BOTH ENDS
- BAIIKA DPEBBEB
- PRELIMINARY OPERATIONS BEFORE THE MAIN CUT
- FELLING THE TREE (FIG. 10)
- ENVIRONMENT
- PERIODS OF PROLONGED NON-USE
- DESCRIPTION OF SAFETY DEVICES
- CHAIN BRAKE
- OPERATION OF THE BRAKE WHEN
- RELEASING THE SWITCH
- FRONT HAND GUARD / CHAIN BRAKE LEVER
- SAFETY MEASURES
- HAUEHH CIMBOJIB
- PONEPEDKEHH
- SAFETY RULES FOR WORKING WITH ELECTRICAL EQUIPMENT
- KEEP THESE SAFETY INSTRUCTIONS AND INSTRUCTIONS FOR FUTURE REFERENCE
- PERSONAL SAFETY
- PRYNNYP VІDSKOKU PІLKY I YAK YOHO ZAPOBІHTY
- DODATKOVІ PRAVYLA Z TEKHNІKY BEZPEKY
- SAFETY OF THE WORKING AREA
- CABLE
- SAFETY DEVICES
- BLOCKING BUTTON
- FOR THE TRIGGER SWITCH TO BE RELEASED
- TRIGGER LOCK / TRIGGER SWITCH
- OBMEKHYBAUJIAHLIOFA
- IHTOK3ADHBOIPYKN
- OBCJIYROBYAHHRA T3BEPI RAHHA
- PEPED KOHHM BHKOPHCTAHH
- YEPEES KOXNHI 2-3 RODHH NP60TN
- EVERY 30 HOURS OF OPERATION
- STORAGE/TRANSPORTATION
- TECHNICAL DATA
- (FIGURE 1) WHEN USING THE SAW
- USING THE SPIKE BUMPER
- FELLING TECHNIQUE
- EC DECLARATION OF CONFORMITY
- FOR EVERY 2-3 HOURS OF USE
- SAFETY RULES
- SAFETY OF THE WORK AREA
- DESCRIPTION OF THE SAFETY EQUIPMENT
- SWITCH LOCK
- BLOCKING AND RELEASING THE SWITCH
- SWITCH LOCK / RELEASE BUTTON
- RELEASING THE CHAIN BRAKE WHILE THE DESCENT IS BEING CARRIED OUT WOULD ACTIVATE THE PRODUCT. CHAIN BRAKE
- CHAIN CATCH
- TENSIONING / RELEASING
- TENSIONING THE CHAIN
- DISCONNECT THE SAW FROM THE POWER SUPPLY BEFORE WORKING ON IT
- AND THE CHAIN IS CORRECTLY TENSIONED
- STARTING AND STOPPING
- CHAIN LUBRICATION
- CHAIN OIL SELECTION
- FILLING THE OIL RESERVOIR
- BEFORE USE
- AFTER EVERY 30 HOURS OF USE
- (FIG.1) BEFORE USING THE MACHINE, REMEMBER
- (FIG.1) DURING THE USE OF THE MACHINE
- EN 61000-3-11 DECLARATION OF CONFORMITY
Brand : GARDENA
Model : CST 3018 - CST 3518
Category : Chainsaw