
THIH60 - Range hood THOMSON - Free user manual and instructions
Find the device manual for free THIH60 THOMSON in PDF.



| Product type | Cooker hood with induction hob |
| Brand | Thomson |
| Model | THIH60 |
| Dimensions (W x D) | 60 x 52 cm (approximate) |
| Power supply | 220-240 V ~ 50/60 Hz |
| Maximum total power | 7.4 kW (adjustable to 4.5 kW or 3.1 kW) |
| Number of cooking zones | 4 induction zones |
| Number of extraction speeds | 4 speeds + booster (5 min) |
| Extraction type | Extracting (external evacuation) or recirculating (internal recycling) |
| Grease filter | Metal, dishwasher safe |
| Active carbon filter | Regenerable in oven (200°C, 45 min) every 2-3 months |
| Hob functions | Power Booster, Bridge, Automatic Heat Up, Temperature Manager, Pause, Timer, Key Lock |
| Hood functions | Automatic operation, filter saturation indicator |
| Safety | Pan detection, automatic shut-off, key lock, residual heat indicator |
| Surface material | Ceramic glass |
| Installation | Flush mount in worktop (thickness 2-6 cm); requires an omnipolar switch |
| Cleaning | Clean after each use; do not use steam cleaner or abrasive sponges |
| Repairability index | Not specified |
| Weight | Not specified |
| Energy class | Not specified |
Frequently Asked Questions - THIH60 THOMSON
User questions about THIH60 THOMSON
0 question about this device. Answer the ones you know or ask your own.
Ask a new question about this device
Download the instructions for your Range hood in PDF format for free! Find your manual THIH60 - THOMSON and take your electronic device back in hand. On this page are published all the documents necessary for the use of your device. THIH60 by THOMSON.
USER MANUAL THIH60 THOMSON
- Residual Heat Indicator
- Temperature Manager (Warming Function)
Strictly observe the instructions in this manual. All liability is declined for any problems, damage or fires caused by failure to comply with the instructions in this manual. The device is intended for domestic use only, to cook food and extract the fumes generated by cooking. No other use is allowed (e.g. heating rooms). The manufacturer declines any liability for inappropriate use or incorrect control settings.
The device may have different aesthetic features with respect to the illustrations in this handbook, however the operating, maintenance and installation instructions remain the same.
- Read the instructions carefully: they contain important information on installation, operation and safety.
- Do not make electrical changes to the device.
- Before installing the device, make sure that none of the components are damaged. Otherwise, contact the dealer and do not continue with the installation.
- Check that the device is intact before proceeding with installation. Otherwise, contact the dealer and do not continue with the installation.

The parts marked with this symbol can be purchased separately from specialised dealers.

The parts marked with this symbol are optional accessories supplied only with some models and can be purchased from the websites www.elica.com and www.shop.elica.com.
1. SAFETY AND REGULATIONS

GENERAL SAFETY
Please note! Pay strict attention to the following instructions: - The device must be disconnected from the mains before carrying out any installation work. - Installation or maintenance must be performed by a qualified technician, in compliance with the manufacturer's instructions and local safety regulations. Do not repair or replace any part of the product unless specifically stated in the operating manual. - By law, the product must be earthed. - The power cable must be long enough to allow the product, built into the cabinet, to be connected to the mains. - In order for the installation to comply with current safety regulations, an approved omnipolar switch is required that guarantees complete disconnection from the mains in overvoltage category III, in accordance with the installation rules. - Do not use power strips or extension cords. - Once installation is complete, the electrical components must no longer be accessible by the user. - The product and its accessible parts get hot during use. Be careful not to touch the heating elements. - Ensure that children do not play with the product; keep children at a safe distance and supervise them as the accessible parts may become very hot during use. - For people with pacemakers and active implants, it is important to check,
Prior to using the induction hob, ensure that their pacemaker is compatible with the product. Do not touch the heating elements of the product during and after use. Avoid contact with kitchen towels or other flammable materials until all components of the product have sufficiently cooled; fire hazard. Do not place flammable materials on or near the product. Overheated fats and oils easily catch fire. Supervise the cooking of fatty or oily food. If the surface is cracked, switch the product off immediately to prevent the risk of electric shock. The product is not intended to be operated with an external timer or a separate remote control system. Unattended cooking on a hob with oil or fat can be dangerous and may cause a fire. The cooking process must be supervised. A short cooking process must be constantly monitored. NEVER attempt to put out fires using water. Instead, turn off the product and smother the flames, for example with a lid or a fire blanket. Fire hazard: do not place objects on the cooking surfaces. Do not use steam cleaners; risk of electric shock. Do not place metal objects, such as knives, forks, spoons, or lids on the hob because they could become hot. Before connecting the product to the mains: check the rating plate (on the bottom of the product) to ensure that the voltage and power correspond to the mains supply and that the power socket is suitable. If in doubt, consult a qualified electrician.
Important: After use, turn off the hob using its control device and do not rely on the pot detector. Prevent liquids from boiling over; therefore, turn the heat down when boiling or heating liquids. Do not leave the heating elements turned on with empty pots and pans, or without any cookware. Switch off the relevant cooking zone when you have finished cooking. Never use aluminium foil for cooking and never place products packaged in aluminium directly on the hob. The aluminium would melt and irreparably damage your product. Never heat a tin or can containing foods without opening it first: it might explode! This warning also applies to all other types of hobs. High power levels such as the Booster function should not be used to heat certain liquids, such as oil for frying. Excessive heat may be dangerous. In these cases, we recommend the use of a lower power level. The cookware must be placed directly on the hob and must be centred. Under no circumstances may any other objects be placed between the pot and the hob. If the temperature becomes high, the product automatically decreases the power level of the cooking zones. Before doing any cleaning or maintenance work, disconnect the product from the mains by disconnecting the plug or turning off the mains switch. For all installation and maintenance operations, always use work gloves. The product can be used by children over the age of 8 and by people with reduced physical, sensory or mental capabilities or without experience or the necessary knowledge, as long as they are properly supervised or have been instructed on how to safely use the product and understand the inherent dangers. Children must be supervised to ensure they do not play with the product. Cleaning and maintenance must never be performed by children unless they are
properly supervised. The room must be sufficiently ventilated when the product is used at the same time as other appliances that run on gas or other fuels. The product must be cleaned frequently both inside and out (AT LEAST ONCE A MONTH); always follow the instructions given in the maintenance manual. Failure to comply with the rules for product cleaning and the cleaning/replacement of filters, may create a fire hazard. Flambé cooking is strictly prohibited. Using a naked flame may damage the filters and cause a fire hazard, and must therefore be avoided under all circumstances. Extra care must be taken when frying to prevent the oil from overheating and catching fire. Please note! The accessible parts of the device may become hot when the hob is switched on. Please note! Do not connect the product to the mains until the installation is complete. The regulations laid down by local authorities must be strictly followed with regard to the technical and safety measures to be adopted for fume extraction. The extracted air must not be conveyed through the same ducts used to extract the fumes generated by the combustion of gas or other types of fuels. Never use the product without the grille properly installed! Only use the fastening screws supplied with the product for installation, or if not supplied, purchase the correct type of screws. Use screws of the right length, as indicated in the installation guide. When this product is used together with other devices powered with nonelectrical energy, the negative pressure of the room must not exceed 4 Pa (4 x 10⁻⁵ bar). This manual must be stored for future consultation at any time. If sold, transferred or moved, it must remain with the product.
- Range hoods and other cooking fume extractors may adversely affect the safe operation of appliances burning gas or other fuels (including those in other rooms) due to back flow of combustion gases. These gases can potentially result in carbon monoxide poisoning. After installation of a range hood or other cooking fume extractor, the operation of flued gas appliances should be tested by a competent person to ensure that back flow of combustion gases does not occur.
ELECTRICAL CONNECTION SAFETY
- Disconnect the product from the mains. - The installation must be carried out by professionally qualified personnel with knowledge of the regulations in force for installation and safety. - The manufacturer disclaims all liability for persons, animals or property if the guidelines provided in this chapter are not followed. - The power cable must be long enough to allow removal of the hob from the worktop. - Check that the voltage on the rating plate on the bottom of the product corresponds to that of the domestic environment where it will be installed. - Do not use extension cords. - The earth cable must be 2cm longer than the other cables. - If the product is not equipped with a power cable, use one with a minimum conductor diameter of 2.5mm2 for power up to 7200 Watt; for higher power levels, the diameter must be 4mm2 . - The temperature must not reach 50°C above room temperature anywhere along the cable. - The product is
intended to be permanently connected to the mains, therefore, make the connection to the mains using an approved omnipolar switch that guarantees complete disconnection from the mains in category III overvoltage conditions, and which is readily accessible after the installation.
- Please note! The interconnection cable must be replaced by the authorised customer service representative or by a person with similar qualifications.
- Please note! Before reconnecting the circuit to the mains power supply, make sure that it is working correctly, always check that the power cable is correctly installed.
POWER LIMITATION: the product is equipped with a Power Limitation function, which allows a maximum power limit to be set (kW).
The setting must be made when the product is connected to the mains or when the mains power itself is restored (within the following 2 minutes). Size the electrical system protection according to the selected Power Limitation level. For the Power Limitation setting sequence, see the Operation section of this manual.
WINDOWS KIT: The product can also be used in conjunction with a Window sensor KIT (not supplied by the manufacturer). If the Window sensor KIT is installed (only if used in DUCT-OUT mode), air extraction will halt every time the window in the room, on which the KIT is applied, is closed. The KIT must be electrically connected to the device by qualified and specialised technical personnel. The KIT must be certified separately in accordance with the safety standards for the component and its use with the device. Installation must be carried out in accordance with current regulations for domestic systems.
PLEASE NOTE: the wiring of the KIT to be connected to the product must be part of a certified safety extra-low voltage (SELV) circuit. The manufacturer of this device disclaims all liability for any inconvenience, damage or fires caused by defects and/or problems associated with the malfunction and/or incorrect installation of the KIT.
INSTALLATION SAFETY
- The electrical and mechanical installation must be performed by qualified personnel.
- Before starting the installation: After unpacking the product, check that it has not been damaged during transport and in the case of problems, contact your dealer or Customer Service, before proceeding with the installation; Check that the purchased product is the right size for the installation location; Check for accessories inside the packaging (placed there for ease of transport, such as bags containing screws, the warranty certificate, etc.). Remove and keep them safe; Also check that there is a power socket near the installation area. Preparing the cabinet for installation:
- The product cannot be installed above cooling appliances, dishwashers, heaters, ovens, washing machines and dryers; Create the cut-outs in the cabinet
before inserting the hob and carefully remove shavings or sawdust.
- The product is designed to be built into a worktop with a thickness of 2-6 cm in the case of TOP installation; 2.5-6 cm in the case of FLUSH installation.
The minimum distance between the hob and the wall must be at least 5 cm in front, at least 4 cm on the sides and at least 50 cm from overhead wall units.
NB = The recommended distances are given as examples: when planning the spaces, the indications of the kitchen manufacturer must be observed.
To optimise the recirculating installation, it is recommended to create a slot in the plinth, in which to insert a commercial grille. - Important: use a single component adhesive sealant (S) that can withstand high temperatures up to 250°C; before installation, the surfaces that need to be glued must be thoroughly cleaned, removing all substances that may compromise adhesion (e.g. release agents, preservatives, grease, oils, powders, old adhesive residue, etc.); the adhesive must be evenly spread along the entire perimeter of the frame; after gluing, leave the adhesive to dry for about 24 hours. - Please note! Failure to install screws and fasteners in accordance with these instructions may result in electrical hazards. - Note: for correct installation of the product, it is recommended to tape the pipes using an adhesive with the following characteristics: soft elastic PVC film, with acrylic-based adhesive; complies with DIN EN 60454 regulations; flame retardant; excellent resistance against wear; resistant to temperature fluctuations; can be used at low temperatures.
END-OF-LIFE DISPOSAL
This device is marked in compliance with the European Directive 2012/19/EC - UK SI 2013 No.3113, Waste Electrical and Electronic Equipment (WEEE).
Make sure that this product is disposed of correctly. The user helps prevent potential negative consequences for the environment and for health. The symbol on the product or accompanying documentation indicates that this product should not be treated as household waste but should be handed over at a suitable collection point for the recycling of electrical and electronic equipment. Dispose of it in accordance with local regulations for waste disposal. For further information about the treatment, recovery and recycling of this product, please contact your local authority, the collection service for household waste or the shop from where the product was purchased.
REGULATIONS
Device designed, tested and developed in compliance with regulations on:
- Safety: EN/IEC 60335-1; EN/IEC 60335-2-6, EN/IEC 60335-2-31, EN/IEC 62233; Performance: EN/IEC 61591; ISO 5167-1; ISO 5167-3; ISO 5168; EN/IEC 60704-1; EN/
IEC 60704-2-13; EN/IEC 60704-3; ISO 3741; EN 50564; IEC 62301. EN 60350-2; EMC: EN 55014-1; CISPR 14-1; EN 55014-2; CISPR 14-2; EN/IEC 61000-3-3; EN/IEC 61000-3-12.
RECOMMENDATIONS FOR USE
Recommendations for correct use in order to reduce the impact on the environment: When cooking begins, the device should be turned on at minimum speed, and left on for a few minutes even after cooking is complete. Increase the speed only if there is a large quantity of fumes and steam, using the Booster function only in extreme cases. To keep the odour reduction system running efficiently, replace the carbon filter/s when necessary. To ensure the high performance of the grease filter, clean it when necessary. To improve efficiency and minimise noise, use the maximum duct diameter indicated in this manual.
2. USE
USING THE HOB
The induction cooking system is based on the physical phenomenon of magnetic induction. The main characteristic of this system is the direct transfer of energy from the generator to the pot.
Benefits: When compared to electric hobs, your induction hob is: Safer: lower temperature on the glass surface. Faster: shorter food heating times. More accurate: the hob immediately reacts to your commands. More efficient: 90% of the absorbed energy is transformed into heat. Moreover, once the pot is removed from the hob, heat transmission is immediately interrupted, avoiding unnecessary heat loss.
USE OF COOKWARE
Cookware

Only use pots bearing this symbol.
Important:
To avoid permanent damage to the hob surface, do not use:
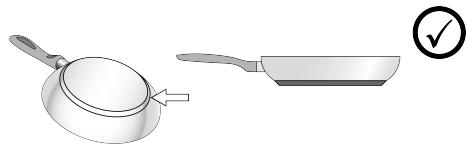
- cookware with a base that is not perfectly flat;
- metal cookware with an enamelled base;
- cookware with a rough base, to avoid scratching the hob surface;
- never place hot pots and pans on the surface of the hob's control panel.
- Not all induction pots work efficiently due to the base only partially consisting of ferromagnetic material! When purchasing pots or pans ensure that:
- the base is made entirely from ferromagnetic material. If this is not the case, heat transmission and uniformity will be less efficient, and the temperatures of the pot/pan surface may not be suitable for cooking.
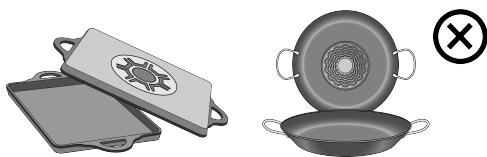
- The base does not contain aluminium: the cookware does not heat and may not be recognised by the inductors.
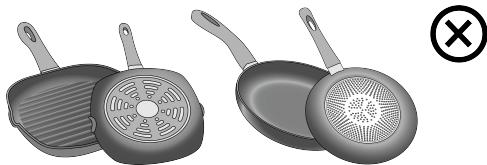
- Bases that are not flat or have rough surfaces.
- These lower the contact surface area between the inductor and the cookware, reducing efficiency and harming the cooking experience.
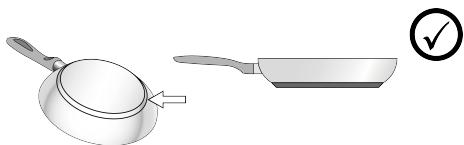
Pre-existing cookware
You can check if the pot material is magnetic simply by using a magnet. Pots are not suitable if they are not magnetically detectable. The indications from the previous paragraph also apply here.
Recommended pot bottom diameters
IMPORTANT: if the pots are not of the correct size, the cooking zones will not switch on. To see the minimum pot diameters for each individual zone, consult the illustrated section of this manual.
Energy saving
Use pots and pans with a bottom diameter equal to that of the cooking zone; use only pots and pans with flat bottoms; where possible, keep the lid on pots during cooking; cook vegetables, potatoes, etc. with a minimal amount of water to reduce cooking time; use the pressure cooker, as it further reduces energy consumption and cooking time; place the pot in the centre of the cooking zone drawn on the hob.
USING THE EXTRACTOR FAN
The extraction system can be used in the duct-out version with external evacuation, or in the recirculating version with filtering and internal recirculation.
Consult the website www.elica.com and www.shop.elia.com to view the full range of available kits for the various installations in both the recirculating and duct-out version.
Duct-Out Version:
Vapours are exhausted outside via a series of pipes (to be purchased separately). Connect the product to wall-mounted exhaust pipes and holes with a diameter equivalent to the air outlet (connecting flange). For more information on the pipes and their dimensions, see the page relating to accessories in the installation manual - Duct-Out version. The use of pipes and outlet holes in the wall with a smaller diameter will reduce the extraction performance and drastically increase the noise level. All responsibility in this regard is therefore denied.
For maximum extraction efficiency: We recommend a maximum pipe route length of 7 linear metres. We recommend using no more than two 90° bends along the entire 7 linear metres. Avoid drastic changes in the ducting diameter, seeking to maintain a diameter of Ø150 mm (or a rectangular section of 222×89 mm).
Recirculating Version:
The extracted air will be filtered in special grease filters and odour filters before being sent back into the room. The
product is supplied with all parts necessary for standard installation, with the air outlet positioned in the front part of the plinth. The product is equipped with a set of odour filters. For more information, see the page relating to accessories for the recirculating version (in the illustrated part of this manual).
3. OPERATION
CONTROL PANEL
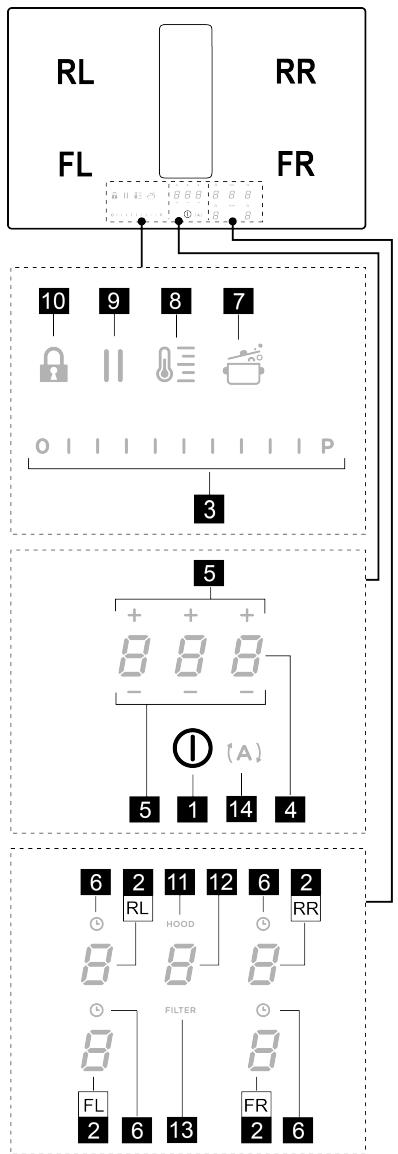
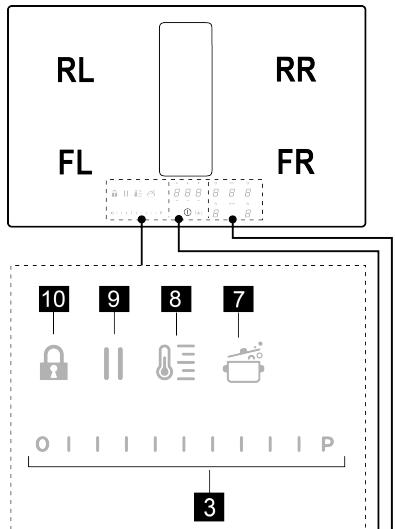
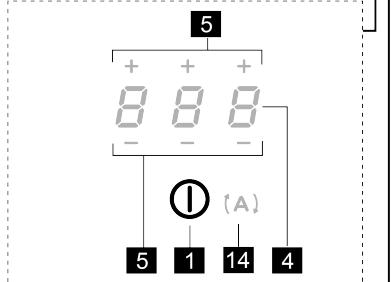
| T. | Function |
| 1 | ON/OFF of the hob / hob extractor fan |
| 2 | Selection of the cooking zones / Cooking zone display |
| 3 | Increase/decrease cooking power level and extraction speed (power) |
| Display the cooking power level and extraction speed (power) | |
| 4 | Activate "STAND ALONE" timer |
| Display : "STAND ALONE" timer / Cooking Zones Timer. | |
| 5 | Increase/Decrease "STAND ALONE" Timer time / Cooking Zones timer |
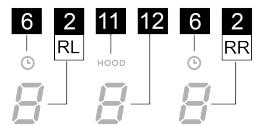
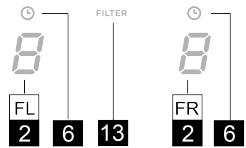
| 6 | Activation of Cooking Zones Timer |
| Indicator of Cooking Zones Timer active | |
| 7 | Automatic Heat Up Activation. |
| 8 | Temperature Manager activation (Warming Function) |
| 9 | Pause |
| 10 | Key Lock |
| 11 | Indicator Extractor active |
| Activation of Filter Saturation Indicator | |
| 12 | Extractor Selection/Activation |
| Extractor Display | |
| Display of Carbon/ceramic filter - Grease filter saturation | |
| 13 | Reset Filter Saturation |
| 14 | Activation of extractor automatic function |
THINGS TO KNOW BEFORE STARTING
All functions of this hob are designed to comply with the most stringent safety regulations. For this reason:
- Some functions will not be activated, or will be automatically deactivated, in the absence of pots on the burners or when they are poorly positioned.
- In other cases the activated functions will be automatically deactivated after a few seconds, if the specific function requires a further setting that has not been selected (e.g.: "Turning the hob on" without "Selecting the cooking zone" and the "Operating temperature", or the "Lock Function" or the "Timer" function).
Wait for the display to turn off before approaching the cooking zone.
Please note! In the case (for example) of prolonged use, the cooking zone may not immediately shut down because
it is in the cooling phase; the symbol H will appear on the cooking zone display to indicate that this phase is under way. Wait for the display to turn off before approaching the cooking zone.
COOKING ZONE DISPLAY
The following is shown on the cooking zone displays:
| Function | Value |
| Cooking zone on | 0 |
| Power Level | 1...9-P |
| Residual Heat Indicator | H |
| Pot Detector | U |
| Bridge Zone Function active | 7 |
| Temperature Manager Function active | 4 |
| Pause function | 11 |
| Automatic Heat UP function | 7 |
CHARACTERISTICS OF THE HOB
- Safe Activation
The product is activated only in the presence of pots on the cooking zone: the heating process does not start or is interrupted if there are no pots, or if these are removed.
- Pot Detector
The product automatically detects the presence of pots on the cooking zones.
- Safety Shut Down
For safety reasons, each cooking zone has a maximum operating time, which depends on the power level set.
- Residual Heat Indicator
When switching off one or more cooking zones, the residual heat is indicated with a specific visual signal on the display of the corresponding zone by the symbol H .
USING THE HOB
Note: Before activating any functions, the desired zone must be activated
Power-on
Briefly press (touch) ON/OFF (1) hob / extractor fan: the symbol lights up; If you continue to press: all the available functions will become visible for a few seconds, after which only the main ones will remain active; the other ones can be used, and will be activated, later, while using the device.
IMPORTANT: all the available functions will be illuminated with light intensity, which will become more intense only when they are activated.
Press again to turn off
Note: This function has priority over the others.
- Selecting the cooking zones
Briefly press (touch) the Selection/Display (2) area corresponding to the desired cooking zone.
Power Level
The hob features 9 power levels. Touch and slide your fingers along the Selection bar (3):
to the right to increase the power level;
to the left to decrease the power level.
The power level set will be displayed in the Selection/Display area (2)
Power Booster
The product features a supplementary power level (after level 3), which remains active for 5 minutes, after which the temperature returns to the previously set value.
Touch and slide your fingers along the Selection bar (3) (beyond level 0) and activate the Power Booster. The Power Booster level is indicated in the Selection / Display area (2) with the symbol
- Cooking Zone Timer
The Cooking Zone Timer function is a countdown that can be set, even simultaneously, on each cooking zone. At the end of the period set, the cooking zones switch off automatically and the user is notified with a dedicated acoustic signal.
Activation of the cooking zone timer function
- Touch (press) the Selection/Display area (2) (power level other than zero)
- Press (6) relating to the cooking zone
- Use the symbols — + (5) to set the duration of the Timer, which is shown in the Zone/Display (4); while setting, the symbol L (6) flashes.
Note: wait 10 seconds without pressing any other command, so that the Cooking Zone Timer will start.
Note: by pressing and holding (L) again, the cooking zone Timer is reset.
If desired, repeat the operation for several cooking zones:
Each cooking zone can have a different Timer set; in the display (4) the countdown of the cooking zone selected at that moment will appear; if no zone is selected, press the Display (4) to view the STAND-ALONE Timer countdown. The countdown display mode is the same as for the STAND-ALONE Timer (see STAND-ALONE Timer paragraph in the WEB version of this manual).
When the timer has finished the countdown, an acoustic signal sounds and the cooking zone switches off.
To switch off the Timer:
- select the cooking zone (2)
- set the duration of the Timer to 0.00, using
- (5).
Power Limitation
The Power Limitation function allows the product to be used while limiting its maximum absorption, adjusting the absorbed power in all active cooking zones, ensuring that the total absorbed power of the hob does not exceed the set maximum absorption level.
Note: the setting must be made with the hob switched off,
without pressing the ① ON/OFF (1) button, when the hob is connected to the mains, or reconnected to the mains, within the next 2 minutes.
To set the Power Limitation:
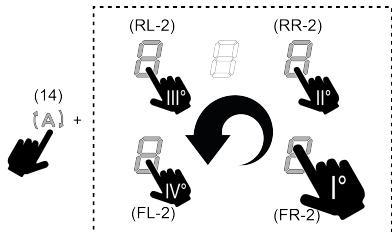
- press (A) (which will flash, only for the first 2 minutes after the product has been switched on)
- while continuing to hold down (A), press, one at a time, all the Selection/Display areas (2) of the cooking zones in a counter-clockwise direction starting from the front left zone (FR); a short acoustic signal will be emitted with each press and when all the Displays (2) have been pressed, it will be possible to release the key:
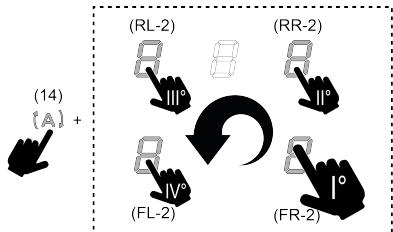
At this point, the Display (2) of the rear left zone (RL) will show, in alternating sequence, the symbols □ and □, indicating that the setting can be made. Select the Display (RL-2), then slide along the Selection bar (3) until the Display shows the symbols C and θ. The Display (FL-2) will show the current setting with the values in the table:
| Displayed value | Power (Kw) |
| 0 | 7.4 Kw (default setting) |
| 1 | 4.5 Kw |
| 2 | 3.1 Kw |
To change the Power Limitation setting:
- Press the Display (FL-2), then slide along the Selection bar (3) to set the new setting. To save the selection made, press the ON/OFF (1) button for 2 seconds; an extended audible signal will be emitted to confirm the setting.
Bridge Zones
Thanks to the Bridge function, the cooking zones can operate in a combined way, creating a single zone with the same power level. This function allows evenly distributed cooking with large-sized pots and pans.
It is possible to use the front cooking zone in combination with the corresponding rear one (to check which zones feature this function, see the illustrated part of this manual).
To activate the Bridge Function:
Simultaneously select both cooking zones you wish to use - the Display (2) of the "rear" cooking zone will show the symbol - using the Selection bar (3), it will be possible to set the operating Level (Power), which will be shown on the Display (2) of the "front" zone.
To disable the Bridge Function, simply repeat the activation procedure.
Note: the Cooking Zone Timer, activated during the Bridge Function, causes the automatic shut-down of both cooking zones, as in this case they are considered a single combined area.
Key Lock
The Key Lock allows you to lock the settings of the hob to prevent accidental tampering with the same, while leaving the set functions enabled.
Activation:
- Press (10). Repeat the operation to deactivate.
Note: if any other function is pressed while the Key Lock is active, the symbol Q will flash to indicate that the function is in use and must be deactivated if necessary in order to use the hob.
Automatic Heat Up
The Automatic Heat Up function allows the set power to be reached more quickly; with this function it is possible to cook food faster without the risk of burning it, insofar as the temperature does not exceed the set level. This function is
available for power levels from A to B.
Activation:
with the cooking zone on, press (7), the Display (2) will show a flashing symbol, alternating with the power set in the cooking zone.
By increasing the power level of the cooking zone: the Automatic Heat Up function remains active, with the new temperature setting;
By decreasing the power level of the cooking zone: the Automatic Heat Up function is deactivated.
Note: by selecting another cooking zone at the same time,
the symbol (7) will go back to being illuminated with
light intensity, and it will be possible to proceed, also for this zone, with the activation of the function; in any case, the function remains active in the zone in which it has already been set, as indicated in the Display (2).
- Pause
The Pause function allows active functions on the hob to be suspended, bringing the cooking power to zero.
Activation:
- press (9), the symbol will flash on the display (2). To deactivate the function:
press (9), the Selection bar (3) will light up.
- Press/slide on the Selection Bar (3) to deactivate the function.
Note: Deactivation restores the conditions of the hob before the pause; the hob continues to work with the same settings previously set.
Note: If after 10 minutes the Pause Function is not deactivated, the hob will turn off automatically.
Note: The Pause Function does not affect the extraction.
- "STAND ALONE" Timer
The Timer function is a countdown independent of the cooking zones (and the extraction zone).
The Timer is activated by pressing the Zone/Display (4).
Use the symbols — (5) to set the duration of the Timer, which is shown in the Zone/Display (4).
Note: Wait 10 seconds without pressing any other command, so that the countdown starts.
The Timer can be set up to a maximum of 1 hour and 59 minutes. The Zone/Display (4) will show the remaining time; an acoustic signal will be emitted at the end of the countdown.
Note: When the remaining time is less than 10 minutes, a fixed dot will appear in the timer after the first number.
| Displayed value | Remaining time |
| 135 | 1h and 35 min |
| 235 | 1min. and 35 sec. |
To switch off the Timer:
Select Zone/Display (4) - set the duration of the Timer to Zero 0.00, using - and + (5).
- Temperature Manager (Warming Function)
Temperature Manager is a control function that allows the maintaining of heat at a constant temperature, at an optimised power level; ideal to keep ready-cooked foods warm. The Temperature Manager function is activated the first time the key (8) is pressed.
The symbol L appears in the display (2) of the zone that is working in the Temperature Manager.
Note: by selecting another cooking zone at the same time, the symbol (8) will go back to being illuminated with light intensity, and it will be possible to proceed, also for this zone, with the activation of the function; in any case, the function remains active in the zone in which it has already been set, as indicated in the Display (2).
- Press (8) again to deactivate and switch off, until the level shown in the Display (2) is brought to .
Note: if there are several zones operating in Temperature Manager (Warming Function) mode, select the desired zone first using the Selection zone (2); the function can also be deactivated using the Selection bar (3), by bringing the Power Level to 0.
USING THE EXTRACTOR
- Switching the extraction system on:
- Switch on the hob as indicated in the "Power-on" chapter on "using the hob";
- Open the Flap; Touch the Selection zone (12) to activate the extraction system.
Note: The extractor zone is fitted with a mechanical rotating FLAP. The FLAP must be opened before switching on the hood to activate the extraction system. The hood has a sensor which when the extractor is on stops the motor automatically if the FLAP is closed. The suction function restarts only when the FLAP is reopened. See the instructions given in the illustrated part of this manual.
- Extraction speed (power):
The extractor has 4 speed (power) levels from to Touch and slide your fingers along the Selection bar (3): to the right to increase the power level, to the left to decrease the power level.
Note: The set power level will be displayed in the Selection/Display area (12).
Power Booster
The extractor is equipped with 1 additional extraction level called Power Booster; it is timed and it lasts 5 minutes.
To select it, touch and slide your fingers along the Selection bar (3) (beyond the level); this flashing symbol will be displayed:
Note: after five minutes, the power will return to the previously set level.
Automatic mode
The hood will turn on at the most suitable speed, adapting
the extraction capacity to the maximum cooking level used in the cooking zones.
When the cooking zones are switched off, the hood adapts its extraction speed, decreasing it gradually, to eliminate residual vapours and odours.
To activate this function:
Press (A) (14);
Repeat the operation to deactivate.
Note: if, during automatic operation, the speeds from to are selected using the Selection bar (3), automatic operation is interrupted; if, on the other hand, the Power Booster is selected, automatic operation will resume at the end of the timer and, in the meantime, the symbol (A) keeps flashing.
Note: if the hob automatically shuts down with Automatic mode active, the extractor fan will automatically turn off gradually.
- Filter saturation indicator
The hood indicates when filter maintenance is needed: For the carbon/ceramic odour filters, FILTER (13) lights up For the grease filter, FILTER (13) lights up and flashes
Note: this function is disabled by default (see how to enable it in the paragraph "Activation of filter saturation indicator")
- Reset filter saturation
After performing maintenance on the filters (grease and/or carbon/ceramic) press and hold FILTER (13); it will turn off and the indicator counter will restart.
- Activation of filter saturation indicator
Note: This indicator is normally deactivated.
To activate it, proceed as follows:
- Switch on the hob ①; with the extraction motor and cooking zones off, press the Selection zone (12).
- Press and hold HOOD (11) until the Display (12) shows the letters E and G flashing alternately.
E = carbon/ceramic odour filters; G = grease filters.
CARBON/CERAMIC ODOUR FILTERS
- Press the Display (12) when the letter E appears.
- Press FILTER (13) fixed light.
- Press and hold HOOD (11) again to confirm the activation of the carbon/ceramic odour filter.
GREASE FILTER
- Press the Display (12) when the letter G appears.
- Press FILTER (13) flashing light.
- Press and hold HOOD (11) again to confirm the activation of the grease filter indication.
POWER TABLE
| Power level | Cooking type | Use (based on cooking experience and habits) | |
| Max power | 8 | Heat quickly | raises the temperature of food in a short space of time to boiling point for water, or to quickly heat cooking liquids |
| 8.9 | Fry - boil | browning, starting cooking, fry frozen products, boil quickly | |
| High power | 7.8 | Brown - fry - boil - grill | browning, fast rolling boil, cooking and grilling (for brief periods, 5-10 minutes) |
| 6.0 | Brown - cook - stew - fry - grill | browning, slow rolling boil, cooking and grilling (for medium periods, 10-20 minutes), pre-heat accessories | |
| Medium power | 4.5 | Cook - stew - fry - grill | stewing, light rolling boil, cooking (for long periods), dressing pasta |
| 3.9 | Cooking - simmering - thickening - creaming | longer cooking (rice, sauces, roasts, fish) with accompanying liquids (e.g. water, wine, stock, milk), dressing pasta | |
| 2.3 | Cooking - simmering - thickening - creaming | longer cooking (volumes less than one litre: rice, sauces, roasts, fish) with accompanying liquids (e.g. water, wine, stock, milk) | |
| Low power | 1.2 | Melt - thaw - keep warm - stir | melting butter, gently melting chocolate, defrosting small products |
| 1 | Melt - thaw - keep warm - stir | keeping small portions of just-cooked food warm or main-taining dishes at serving temperature and creaming risot-tos | |
| OFF | 0 | Support surface | Hob in stand-by or off (possible presence of residual heat from the end of cooking, signalled by H-L-O) |
4. MAINTENANCE
Please note! Before any cleaning or maintenance, make sure the cooking zones are switched off and the heat indicator has turned off.

For product maintenance, see the images at the end of the installation marked by this symbol.
HOB MAINTENANCE
- Cleaning the induction hob
The hob must be cleaned after each use.
Important:
- Do not use abrasive sponges, scouring pads. Their use, over time, may ruin the glass.
- Do not use irritant chemical detergents such as oven sprays or stain removers. DO NOT USE STEAM JET CLEANERS!!!
After each use, leave the hob to cool and clean it to remove deposits and stains caused by food residue. Sugar or food with a high sugar content damage the hob and must be removed immediately. Salt, sugar and sand may scratch the glass surface. Use a soft cloth, paper towel or specific products to clean the hob (follow the Manufacturer's instructions).
Cleaning the liquid collection channel:
In the event large quantities of liquids accidentally spill out of the pots, they can be drained using the drain valve on the bottom part of the product so as to eliminate any residue and ensure maximum hygiene levels.
For a more complete and in-depth clean, the bottom collection channel can be completely removed.
Cleaning the metal grille
The grille must be washed by hand with hot water and neutral detergent, then dried thoroughly to prevent oxidation.
For cleaning, use ONLY a cloth moistened with neutral liquid detergents.
DO NOT USE CLEANING UTENSILS OR TOOLS!
Avoid the use of products containing abrasives. DO NOT USE ALCOHOL!
Grease filter maintenance:
Traps grease particles generated by cooking.
Must be cleaned once a month (or when indicated by the filter saturation indication system), with non-aggressive detergents, either by hand or in the dishwasher at low
temperatures and in a short cycle. When cleaned in the dishwasher, the metal grease filter may discolour, but its filtering characteristics remain unchanged.
Ceramic activated carbon filter maintenance (For Recirculating Version only):
Traps unpleasant odours generated by cooking. The product comes with a set of odour filters.
The saturation of the odour filters can occur after
somewhat prolonged use depending on the type of cooking and how regularly the grease filter is cleaned. The odour filters can be thermally regenerated every 2/3 months in an oven pre-heated to 200°C for 45 minutes. The correct regeneration of the filter ensures that it can constantly filter efficiently for 5 years.
Please note! Do not place the filters on the floor of the oven but rather in a tray, positioned at an intermediate height.
5. ASSISTANCE
TROUBLESHOOTING TABLE
| Informative code | Description | Possible causes | Solution |
| E-2 | The command zone switches off due to an excessively high temperature | The temperature inside the electronic parts is too high | Wait for the hob to cool before reusing it |
| E-3 | Container unsuitable | Loss of magnetic properties | Remove the pot |
| E-5 | Communication problems between the user interface and induction module | No power supply to the module; the power cable has not been connected correctly or it is faulty | Disconnect the hob from the electrical network and check the connection |
| For all other error signals | Call customer service and report the error code | ||
CUSTOMER SERVICE
Before contacting Customer Service
- Check that the problem cannot be solved by consulting the points in "Troubleshooting".
- Switch the device off and on again to see if the problem resolves itself.
If the fault persists after the above checks, contact the nearest Customer Service centre.
Residual Heat Indicator
- Temperature Manager (Warming Function)
Residual Heat Indicator
- Activation indicator filter saturation
- Temperature Manager (Warming Function)
HOOD MAINTENANCE
- Cleaning the hood:
PRODUCT DISPOSAL AT END OF LIFE
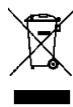
This appliance bears the symbol of the European Directive 2012/19/EU - UK SI 2013 No. 3113 on Waste Electrical and Electronic Equipment (WEEE).
Make sure that the disposal of this product is carried out correctly. The user contributes to preventing potential negative effects on the environment and health. The symbol above on the product or on the accompanying documents indicates that this product must not be treated as household waste but must be handed over to an appropriate collection point for the recycling of electrical and electronic equipment. The disposal of this product must be carried out in accordance with local regulations for waste disposal. For more detailed information about the treatment, recovery and recycling of this appliance, please contact your local city office, your household waste disposal service or the shop where you purchased the appliance.
Instructions for use and maintenance of the appliance.
- Safety: EN/IEC 60335-1, EN/IEC 60335-2-6, EN/IEC 60335-2-31, EN/IEC 62233. - Performance: EN/IEC 61591, ISO 5167-1, ISO 5167, ISO 5168, EN/IEC 60704-1, EN/IEC 60704-2-13, EN/IEC 60704-3, ISO 3741, EN 50564, IEC 62301. EN 60350-2. EN 55014-1, CISPR 14-1, EN 55014-2, CISPR 14-2, EN/IEC 61000-3-3, EN/IEC 61000-3-12.
INSTRUCTIONS FOR USE
To use the appliance correctly, follow the instructions below: Start by turning on the appliance, activate it at minimum speed and let it run for a few minutes even after the end of cooking. Adjust the speed only when necessary, using the booster function only in extreme cases. For better performance of the appliance, replace the filter (grease filter) when needed. To maintain the efficiency of the appliance over time, clean the filter regularly and also reduce noise levels by using the maximum diameter of the duct mentioned in this manual.
2. USE
USE OF THE HOB SURFACE
The operation of the appliance is based on the physical phenomenon of magnetic induction: direct transfer of energy to the pan placed on the hob.
Advantages: Compared to traditional electric hobs, induction cooking is: Safer: lower surface temperature. Faster: shorter cooking times. More precise: the hob responds instantly to your commands. More efficient: 90% of the absorbed energy is converted into heat. Additionally, by automatically detecting the pan on the hob, energy supply is interrupted and energy saving is achieved.
USE OF COOKWARE
Cookware

Bridge Zones [Bridge]
The Bridge function allows two cooking zones to operate simultaneously, creating a single large zone for elongated pans and griddles.
You can use a combined cooking zone for pans of different sizes (to maintain the temperature for both zones, this function is provided; consult the illustrated guide of this manual).
To activate the Bridge function:
SYNTHESIS OF THE PRODUCT
Cleaning the product:
For the cleaning [of the product], use exclusively a damp cloth with a mild detergent.
DO NOT USE ABRASIVE OR SHARP OBJECTS FOR CLEANING [THE APPLIANCE]!
Avoid using aggressive products for the environment [and] DO NOT USE ALCOHOL OR SPIRITS!
If the appliance is very dirty:
Remove the residues coming from cooking.
IMPORTANT: YOU MUST KNOW THIS BEFORE YOU START
Temperature Manager (Warming Function)
DISPLAY FOR COOKING ZONES
On the display for the different cooking zones, the following is shown:
| funksjon | Verdi |
| Kokesonen er på | Ø |
| Power Level (effektivå) | I...9-P |
| Residual Heat Indicator (restvarmeindikator) | H |
| Pot Detector (Kjeledetektor) | U |
| Bridge Zone aktiv | Ø |
| Temperature Manager (Temperaturkontroll) aktiv | U |
| Pausefunksjon | II |
| Funksjon Automatic Heat UP (Automatisk oppvarming) | Ø |
HOB FEATURES
- Safe Activation (safe start-up)
The product is activated only when pots/pans are placed on the zones. The heating phase will not start (or it will be interrupted) if there are no pots on the hob.
- Pot Detector (pan detector)
The product automatically registers pans when they are placed in one of the zones.
- Safety Shut Down
- Filter saturation indicator
The cooker hood flashes each time a filter change is required:
Charcoal/ceramic ODOR FILTER (13) lights up
MAINTENANCE OF THE HOB
MAINTENANCE OF THE EXTRACTOR HOOD
MAINTENANCE OF THE COOKING HOB
- Do not pour any liquids: if you pour them, the pan may not be recognized by the induction zones.
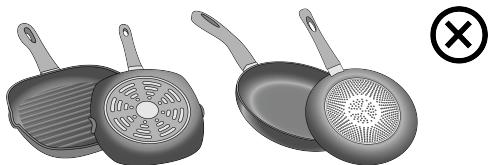
- Do not place pans with rough bases on the surface.
- Pans with a concave or convex base may reduce the efficiency and the cooking results.
Pans you already have
You can check the material of which the pans are made with a magnet. Pans that are not suitable do not attract the magnet. In that case, follow the instructions in the previous paragraph.
- Recommended minimum diameter of the base of the pans
IMPORTANT: if the pans are of the recommended size, the cooking zone will activate. To activate the minimum diameter of the pan, you need to
This appliance can be used by children aged from 8 years and above and persons with reduced physical, sensory or mental capabilities or lack of experience and knowledge if they have been given supervision or instruction concerning use of the appliance in a safe way and understand the hazards involved. Children shall not play with the appliance. Cleaning and user maintenance shall not be made by children without supervision.
- Energy efficiency
Use pans with diameters equal to the diameter of the cooking zone. Use only pans with flat bottoms. If possible, place the lid on the pan during cooking. Cook vegetables, potatoes, etc. with a small amount of water to reduce cooking time. Using the pan without a lid increases energy consumption and cooking time. Place the pan in the center of the cooking zone marked on the hob.
USE OF THE EXTRACTOR HOOD
The extraction system can be used in extraction mode with external evacuation or in filtering mode with internal recirculation.
Consult the pages www.elica.com and www.shop.elica.com to check the complete range of our accessories, so that you can perform different types of installation, both in the version with filter and in the one with extraction.
Extraction version:
The air is evacuated externally through a group of pipes (to be purchased separately). Connect the product to the pipes with a connector for the wall with a diameter equal to the pipe for the air inlet (connection flange). For more detailed information on the pipes and their dimensions, see the page dedicated to the accessories of the manual with instructions - extraction version. The use of pipes and connectors for walls with a smaller diameter reduces the extraction performance and significantly increases the noise. Consequently, any responsibility is declined regarding this.
To achieve maximum efficiency of the extraction: · A maximum trajectory of the pipes of 7 linear meters is recommended. · For a total of 7 linear meters, use a maximum of two 90° curves. · Avoid drastic changes and sections of the pipe, preferring a constant section, equal to 150 mm (or equivalent 222 x 89 mm).
Filter version
The sucked air will be filtered through special fat filters and carbon filters, before being reintroduced into the room. The product is supplied with everything necessary for standard operation with air outlet in the front part of the hood. The product is supplied with a carbon filter kit. For further information, see the page related to the accessories of the filter version (in the appendix of this manual).
3. OPERATION
CONTROL PANEL
| T. | Фунreichia |
| 1 | ON/OFF Ha плota 3a roтvehe/ acnipatopa 3a плota 3a roтvehe |
| 2 | Избор Ha зona Ha roтvehe / Диспел ha зona Ha roтvehe |
| 3 | УBELИЧАВЕ/Hamалявача Н моцноctы на rotвени и ckорoctа (moцноct) на acnnpaць. |
| Визуаллaitаць Na моцноctы на rotвени и ckорoctа (moцноct) на acnpaць. | |
| 4 | Актурахе на Timer "STAND ALONE" |
| Диспел : Timer "STAND ALONE" / Timer 3ona Ha rotвени. | |
| 5 | УBELИCHАВЕ/Hamалявача Н времeto Timer "STAND ALONE" / Timer 3ohan Ha rotвени |
| 6 | Актурахе Таймер 3ona 3a Гтвени |
| Индikатор Таймер 3ona 3a rotвени akтуber. | |
| 7 | Актурахе АВТOMATУно Hargяbahe (АВТOMATУно Hargяbahe). |
| 8 | Актурахе (Temnéратуpen менидър) (Warming Function) (Фунkedьяногагяbahe) |
| 9 | Пayза |
| 10 | Key Lock |
| 11 | Индikатор.akтуber АсnPа ratop |
| Актурахе Индikатор за задшвае на Фильтуп | |
| 12 | Избор/Актурахе acnPа ratop |
| Диспел АсnPа ratop | |
| Диспел за ровдане Фильър вьгелен/kepamyчен - Фильър мазнии | |
| 13 | Рecет 3адрьствае Фильтуп |
| 14 | Актурахе标明атчна Фунkedьяна на acnPа ratop |
WHAT YOU NEED TO KNOW BEFORE USING THE APPLIANCE
All functions of the hob are designed to meet the most stringent safety standards. This appliance is:
- The function can be activated or deactivated automatically depending on the position of the knob above the cooking zone. If the knobs are not correctly positioned, the function will be deactivated automatically after a few seconds, when the function is waiting for the required setting that has not been given (e.g., "Turn on the knob for cooking" without "Select the cooking zone" and "Working temperature", or "Function lock" or "Function timer").
Wait until the display turns off before approaching the cooking zone.
Warning! In case (for example) of prolonged use, it is possible that the cooking zone does not turn off immediately, as it is in the process of cooling down; on the display of the cooking zone, the symbol H appears, which indicates the ongoing process. Wait until the display turns off before approaching the cooking zone.
DISPLAY OF THE COOKING ZONE
The displays that refer to the cooking zones are shown:
| Фунreichnia | Стойост |
| Вкlioquena зona за rotвени | 0 |
| Power Level (Ниboa на Мошист) | 1...9-9 |
| Residual Heat Indicator (Индikatop за Oстычна Толлина) | H |
| Pot Detector (Дetectор 3a калки) | 4 |
| Фунreichnia Bridge зona ak independпана | 7 |
| Фунreichia Temperature Manager (Темпегатуpen Менидър) ak independна | 6 |
| Фунreichia Палда | 11 |
| Фунreichia Automatic Heat UP (АВТOMATУно Награванe) | 8 |
FEATURES OF THE HOB
Safe Activation (Safe Activation)
The product is activated only when the knob is placed on the cooking zone: the heating elements do not start or are interrupted in case of absence or removal of the knobs.
Pot Detector (Pot Detector)
The product automatically detects the presence of the knob on the cooking zone.
Safety Shut Down (Safety Shut Down):
Residual Heat Indicator (Residual Heat Indicator)
When one or more cooking zones are turned off, the presence of residual heat is signaled with a special visual signal on the display of the zone
zone, by means of the symbol H
USE OF THE HOB FOR COOKING
Note: In order to activate this function, first it is necessary to activate the desired zone.
Activation
Press (touch) briefly ON/OFF (1) on the hob/extractor: The symbol lights up; After prolonged pressing: All additional functions will become visible for a moment, after which they will remain active only the basic ones; the others can be used and will be activated subsequently, during the use of the device.
All: All additional and drying functions are
illuminated with a weak light, which will turn on only at the moment when they are activated.
Press again to deactivate
Note: This function has priority over all other functions.
On the cooking zone
Touch (press) the selection/display zone (2)
corresponding to the desired cooking zone.
Power Level
The hob is not equipped with a power level indicator. Touch and slide your finger along the selection zone (3):
to the right to increase the power level;
to the left to decrease the power level.
The set power level will be visualized in the selection/display zone (2).
Power Booster (increased power)
The product is equipped with an additional
power (level 5), which remains active for 5 minutes, after which the power returns to the previous level.
Touch the selection zone (3)
(level 5) to activate Power Booster (increased power). The Power Booster (increased power) is indicated in the selection zone.
Display (2) with the symbol
Timer zone
The timer zone function for cooking is a simple countdown, which can be set individually for each cooking zone. After setting the desired time, the cooking zones turn off automatically and the user is informed with a special acoustic signal.
Activating the timer zone function for cooking
- Touch the selection zone (3) (power level different from zero)
- Press (6) corresponding to the cooking zone
- Use the + symbol (5) to set the timer duration, which is displayed in the zone/display (4); during adjustment, the symbol
(6) flashes.
3a6eJekka: u4aKaIte 10 cKyHn 6e3 da HauCKaTe HNKaKba Dpyra KOMaHda, doKaTo TaMepbT 3oHa 3a TOrBeHe ce StapTnpa.
3abeneKka: HATNCKaIK OTHOBO npoDbIKNTeHNO (6),
TaMepbT Ha 3OHa THa roTBeHe Ce 3aHyIyBa.
Ako JeIaete, NOBTOpeTe onepaunra 3a noBuee 30Hn 3a roTBeHe:
Bcka 30ha 3a roTbeHe Bcka 30ha 3a roTbeHe moKe da Ima 3adaen pa3nuehen TaImepe; Ha dinCnpe8 (4) ue ce NoBn 6bpaTHO OTbpoBaHe Ha 3oHata 3a roTbeHe, N3bpaHa B To3n MOMeHT; aKO He e N3bpaHa HnTO eHna 3OHa, HATNCKaIK Bbpxy DcNpe8 (4) ce BN3yaJIn3upa O6bPAHTo OTbpoBaHe Ha TaIMepa STAND ALONE (CAMOCTORETEJIH). PekmbT Ha BN3yaJIn3aunr Ha OTbpoBaHe e CbUINr Ha TaIMepa STAND-ALONE (BNK naparpaФ TaIMep STAND ALONE nAnuH eBb BercnTa WEB Ha TOBA pblkoBOdCTBO).
Korato taImepbT e 3aBbPunn o6paTHo npe6pOraBaHe, ce N3daba eINH akCyTneH CNHaJ N 30HaT a 3a rotBeHe ce N3KJIUOyBa.
3a n3KJIIOUbaHTo Ha Timer:
- 36epete 30hata 3a rotbehe (2)
3aadaiTe npoIbIKNITeHocTtHa TaMepa Ha 0.00, nocpeDCTBOM - + (5).
Power Limitation (OrpanuHcHne Ha MoUHocTtA)
Функцят Power Limitation no3bOJЯBa da ce 3aJaDe ФунКционИранeto Ha npOуКТа, KaTO ce orpaHnUH HEROBATA MaKcIMmaHna abCOp6aZuN i KaTO ce peryIuPra MOUHocCTTa Ha abCOp6aZuN Ha BCuNkA kTINBn 30Hn 3a ROTBeNe, KATO ce HAnpabTu Taka, Ye obSuaT a bCOp6aZuN Ha nIPOTA, He NaDbNIbAba MAcKImaHnOTo 3aJaDeHo NHBo Ha abCOp6aZuN.
3a6eKka: HacTPOkata Tp8Ba da ce N3BbPn npn n3KnIyeh nIOT, 6e3 da ce HATNcKa 6yToHa ① ON/OFF (1) B MOMeHTa Ha CbP3BaHeTO Ha nIOTA 3a rotBeHe KbM eEKeTpUeCKaTa MpeXa, INI npN NOBtOHPo CbP3BaHe Ha cAmTa eEKeTpUeCKa MpeXa, Do cneDbaUHte 2 MNHyTN.
3a da ce hactpon Power Limitation (OrpaHneHne Ha MoUHOCT):
HATNCHETe(A)(KoITo 1ue Mira, cMo 3a NpBbnte 2 MNHYTN OI 3apekxdaneHO npOdyKTa)
A] npodblkabaiKa Da 3aIbpxaTe HATNCaT HATNCHEe EaHa No EaHa, BcNcK 30Hn Ha 36Op/ Dicnne (2) Ha 3OHHe 3a RotBeHe, no Nocoka Ha yacobhNKOBATA CTrpEKA, 3aOnuBAA Kt O ppeHata JraCha 3OHa (FR), PnP BCaKO HATNCKaHe 5e 6bDe I3dABAH KpaTbk 3ByKOB CInHaJI, CNeD KATO 6bDaT HATNCaTH T BcNcK Yicnne (2) 5e 6bDe Bv3MOKHO Da ce OCBOdo ByToHa:
BTO3N MOMENTIINCIIIEE(2)Ha 3aIHaTALIyBa 3OHa (RL) Ue NOKAXE CpeDyBaUaCe IocNeIOBaTeHHOCT CmBOJInTE 0 3a Da NOCOu,Ye e Bb3MOXHO da Ce n3Bbpun HAcTPoiKata.
- m36epete DnCnnei (RL-2) npexBpnete BnocneDCTBne JeHTATA 3a m36op (3), DOkATO Ha DnCnneI He 6bDat Bu3yaun3npaHn CNMBOINTE C
HaДиспгя (FL-2) ьe 6ьд e nokazana TekyuzaTa Nahtpoika cbc StoiHocHTe B tabnua:
Key Lock (3aKJIIOUBaHe Ha ByToHN)
Key Lock (3aKnUcbHe Ha ByToHn) no3B0JbA da ce 6bnKupat HactpoiKnTe Ha nIOta, 3a da Ce npedOTbPaTn CnyaHa Hameca, OCTabRkn AKTINBn Buee 3aadEHnte fynkui.
AknBnBaPahe:
HaTnchete (10) NobTopete onepaunra 3a da Bn3yaJIImnape.
3a6eKka: ako 6bJe HATNCHTA KOrTo n da e npya fynkunno Bpeme Ha Key Lock (3aKnUoyBahe Ha BytoHn)
aKTHBHeN,CNMBoJbT ,IeMira3a da nocOuH,YeФyHKnIraTa ce ynoTppeBa H EBEHTyaJIHO Tp6Ba Da b5DeH3KJIUoyeha,3a da Ce OKaKe B3deJeCTBne BbpxYPiota.
Automatic Heat UP (ABTOMATUHO HarpaBaHe)
Функцята Automatic Heat UP (АвтOMатино Harрьван) no3BOJЯBA Да ce DoCTHRe NO-6bp3O MOUHOCCTTа Ha 3aJaDEHnpeKIM; c Ta3n Функцяna ce pa3noJARc npedmCTBOTO DA ce NoCTHRe NO-6bp3r OToBHe, Ho 6e3 pNCK xpaHATA da 6bDe n3ropeHa, TbK KaTO TempePaTypata He hAdxBpIra Ta3n Ha 3aJaDEHO To HnBO. Ta3n Функцяna e
HANUHa 3a HNBaTa HA MOUHOCCT OIdo B
Aktunbupahe:
-OT BKNIOUeHa 3OHa 3a rotBeHe, HATNCHETe (7), Ha IINcPnEi (2) Ce BN3yauNImura Mrraua, KOrTO ce peNyBa C MoUHocTtA, 3aJaDeHa B 3OHATA 3a rotBeHe.
YBENUABaIKN HNBoTo Ha MouHocT Ha 3oHaTa 3a RotBeHe: fynKuJaTAt Automatic Heat Up (ABytMaTHNo HarpaBaHe) OCTaba aKTHbHa, C HOBaTn HAcTpOka Ha Tempepatypa;
The function Automatic Heat Up is activated by pressing the button for the cooking zone.
Note: If you select another zone at the same time,
the symbol (7) will light up again with a weak light, so you can set the function for this zone as well; the function remains active in the zone where it was already set, as shown on the display (2).
- Pause
The Pause function allows you to interrupt any active cooking function, temporarily setting the power to zero.
Activation:
Press (9), the symbol will appear on the display (2). To deactivate the function: ·Press (9) or turn the selection knob (3).
- Press/turn the selection knob (3) to deactivate the function. Note: Deactivation restores the conditions set before the pause, and the cooking continues with the previous settings. Note: If after 10 minutes the Pause function is not deactivated, the hob turns off automatically. Note: The Pause function does not affect the extractor hood.
- Timer “STAND ALONE”
The Timer function is an independent device for the cooking zones (not the extractor hood).
The timer is activated by pressing the zone/display (4) again.
Set the desired timer duration, which is shown on the zone/display (4). Note: Wait 10 seconds without pressing any other command to start the countdown. The timer can be set up to 1 hour and 59 minutes. On the zone/display (4), the remaining time will be shown; at the end of the countdown, an acoustic signal will be emitted. Note: When the countdown reaches 10 minutes, a fixed red dot appears next to the time.
| Визуалзира на с Todност Берeme | |
| 135 | 14. И 35 МИH. |
| 135 | 1МИH. И 35 сЕК. |
To switch off the timer: - Select the zone/display (4) and set the timer duration to zero.
The extractor hood is equipped with 4 speed levels (power) from 0 to
Touch and slide your finger on the selection knob (3): to the right to increase the power level, to the left to decrease the power level.
Indicator: illuminated icon showing power level in the selection/standby zone (12)
Power Booster (power boost)
The appliance is equipped with a 1 power level of increased suction, called Power Booster, i.e. with a preset time and duration of operation of 5 minutes.
To select it, press and hold the button on the selection strip (3) (the icon), and
the flashing symbol will be displayed.
Note: after the time of the temporary operation expires, the power returns to the previously set level.
-Operation in automatic mode
The appliance switches on at low speed, gradually increasing suction up to the maximum level of cooking, used in the cooking zone.
When the cooking zones are switched off, the extractor gradually reduces its suction speed, removing vapors and residual odors.
To activate this function:
Press (A) (14);
Press again to deactivate.
Note: if during the automatic operation a selection is made from the selection strip (3)
the speeds of the automatic operation are interrupted; if Power Booster is selected, the automatic operation is resumed after the indicated time, during which the symbol (A) remains lit.
Note: in case of switching off the hob with active automatic operation, the switching off of the extractor will occur automatically, gradually.
- Inductor top for filling the filter
The indicator shows when it is necessary to replace the filter:
TROUBLESHOOTING
TECHNICAL SERVICE
Before contacting technical service:
1. Make sure you are not able to solve the problem yourself based on the information in the "Troubleshooting" section. 2. Turn the appliance off and on again to make sure the fault is resolved.
If after these checks the fault is still present, contact the nearest technical service.
RO
Pans suitable for use
To avoid irreversible damage to the cooking surface, do not use cookware:
with uneven base; - metal with an enameled base; with a rough base - to avoid scratches on the glass surface; - never place hot pots or pans on the control panel surface. - Not all pans suitable for induction hobs work well enough because their base is not completely made of ferromagnetic materials! When buying cookware, check that: - The base is completely made of ferromagnetic materials. Otherwise, the efficiency and uniformity of heat transfer decrease, and the temperature of the cookware surface may be uneven.
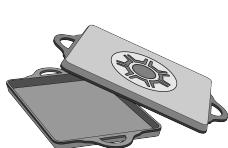
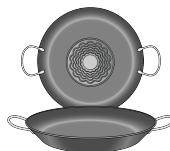

- The base does not contain aluminum: the cookware will not heat up with induction, or the hob will not detect it at all.
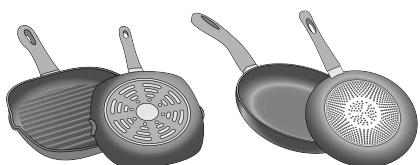

- The base is not uneven or rough. - This reduces the contact surface between the hob and the cookware, lowering heating efficiency and worsening cooking results.

Previously manufactured cookware
You can check if the material of the pan has magnetic properties using a simple magnet. Pans are not suitable for use if the magnet does not react to them. In this case, they are not suitable.
As indicated in the previous paragraph.
- Recommended pan diameters
IMPORTANT: If unsuitable pan diameters are used, the burner zones do not activate. To find out the minimum pan diameter for cooking on each zone, see the illustrated part of this manual.
- Energy saving
Use pots and pans with a diameter equal to the diameter of the cooking zone. Use only pots and pans with flat bottoms. Where possible, cover pots with lids during cooking. Cook vegetables, potatoes, etc. in a small amount of water to reduce cooking time. Use a pressure cooker; this significantly reduces energy consumption and cooking time. Place the pot in the center of the cooking zone marked on the surface.
USE OF THE EXTRACTOR HOOD
The extraction system can be used in extraction mode, with fumes expelled outdoors, or in filtering mode, with recirculation.
See www.elica.com and www.shop.elica.com to view the full range of kits for the various versions of the system, both filtering and extraction.

Extractor version:
Fumes are expelled outdoors through ducting systems (available for purchase separately). Connect the appliance to the exhaust pipes and to the wall openings having a diameter equal to the outlet opening (connecting flange). For more details on pipes and their sizes, see the accessories page of the installation and setup manual - extraction version with removal. Using exhaust pipes and wall openings with a smaller diameter will lead to a reduction in the performance of the extraction system and a significant increase in noise levels. Therefore, in such cases, the manufacturer declines all responsibility. To ensure maximum extraction efficiency: we recommend a maximum pipe length of 7 linear meters. For lengths over 7 linear meters, use a maximum of two 90° bends. Do not allow significant changes in the cross-section of the duct, maintaining 150 mm (for square cross-section, size 22 x 89 mm).

Filtering version:
The extracted air is filtered through special grease filters and then returned to the room. The appliance is supplied with all necessary components for standard installation with an outlet opening for air in
the front part of the furniture base. This appliance is equipped with a set of odor filters. For additional information, see the pages relating to the accessories of the filtering version (in the illustrated part of this manual).
3. OPERATION OF THE APPLIANCE
Controls
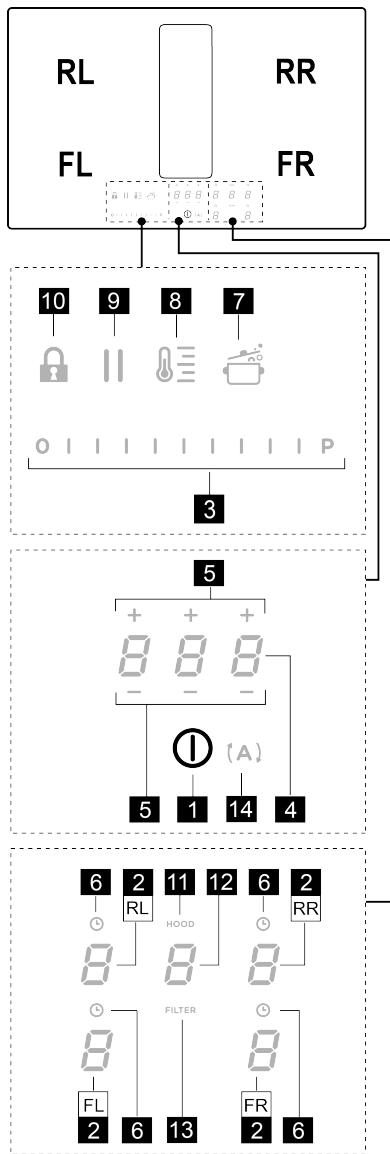
Each cooking zone has a maximum operating time, which depends on the set power level.
- Residual Heat Indicator (indicator of residual heat)
After switching off one or more cooking zones, the residual heat indicator shows a special signal on the display of the corresponding zone with a symbol.
USING THE COOKING SURFACE
Application: activating the hob functions
It is necessary to activate the required zone beforehand.
Switching on
Briefly press (touch) ① ON/OFF (on/off) (1) on the hob panel/extractor: the symbol ① lights up. If you continue pressing: after a few seconds all available functions become visible, after which only the main ones remain active; the others can be used, and they will be activated later, during the use of the device.
IMPORTANT: All available functions will be displayed with a slight brightness; the lighting will become brighter only when the function is connected to the zone.
Press the pictogram again to switch off the device.
Note: The duration of the function is proportional to all the others.
Selection of cooking zones
Touch (press) the selection/display area (2) corresponding to the required cooking zone.
Power Level (power level)
The cooking panel has 9 power levels. Touch and slide your finger along the selection panel (3):
Front panel for power level increase; front panel for power level decrease.
The power level indicator will appear in the Select/Deselect area (2).
Select/Deselect (2) with the symbol.
Timer for the steam function.
Note: The function does not affect the extraction.
Timer "STAND ALONE" (separate).
TABLE OF POWER LEVELS
CARE OF THE STEAM SURFACE
Cleaning the steam surface
The steam surface should be cleaned after each use.
Important:
Do not use abrasive sponges or scrapers. Their use, over time, can damage the glass. Do not apply aggressive chemical detergents, such as oven cleaners.
Dishwasher detergent.
Do not use steam cleaning devices!
After each use, allow the surface to cool and clean it of scale and food residues. Sugars and products with a high sugar content damage the steam surface and should be removed immediately. Salt, sugar, and sand can scratch the glass surface. Use a soft cloth, paper towels, or special products for steam surfaces (follow the manufacturer's instructions).
Drain the capacity for collecting waste:
If there is a strong leak of liquid from the cartridge, you can use the drain valve located in the lower part of the device, which allows you to remove any residue and carry out cleaning while maintaining maximum safety.
For easy filling, remove the
lower container.
Metal grid:
The grid should be washed with hot water and a neutral detergent, and carefully dried to avoid oxidation.
Care of the extractor
Cleaning the extractor:
For cleaning, use only a soft cloth moistened with a neutral detergent.
Do not use tools or any accessories for cleaning!
Avoid using abrasive agents. Do not use spray!
Care of the grease filter:
The grease filter catches the parts of grease that spray during cooking.
Cleaning should be carried out once a month (or when the filter clogging system activates) with non-abrasive cleaning agents, either by hand or in the dishwasher at a low temperature.
In a short cycle. If the metal grease filter is washed in the dishwasher, it may darken, but its filtering characteristics will not change at all.
By hood filter with activated carbon - Ceramic (only for induction cooktops):
Serves to eliminate unpleasant odors that form during cooking. This product is equipped with a set of deodorizing filters.
Saturation of deodorizing filters occurs after prolonged use, depending on the type of food and the intensity of use of the hood. Deodorizing filters can be regenerated thermally by heating them in an oven at 200°C for 45 minutes every 2-3 months. Proper regeneration guarantees constant filtration efficiency for 5 years.
Attention! Do not place filters on the burner, but put them on a baking sheet, which must be inserted in the middle position.
5. TECHNICAL SUPPORT
TROUBLESHOOTING TABLE
- If the appliance does not heat: The cookware is not suitable for induction, or it is not
detected;
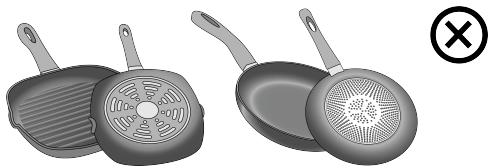
- The cookware is not ferromagnetic and has a rough surface; - The cookware changes the contact surface with the inductor, reducing heating efficiency and worsening cooking results.
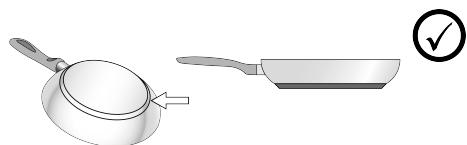
- Suitable cookware
You can check whether the pot material has magnetic properties with a simple magnet. Pots that do not have magnetism are not suitable for use. Also, in this regard, follow the instructions of the previous paragraph.
- Recommended pot diameters
IMPORTANT: pots that are not of the right size are not detected in the cooking zones. To find out the minimum diameter of cookware for cooking in each zone, see the illustration in this manual.
Energy saving
Use pans and pots with a bottom diameter that matches the diameter of the cooking zone. Use only pots and pans with a flat bottom. - The capacity of the pot should match the amount of food. Cook vegetables in a small amount of water to speed up cooking. Using a pressure cooker reduces energy consumption and cooking time. Place the pot in the center of the cooking zone indicated on the surface.
The system can be used in recirculation mode or in extraction mode with internal recirculation.
See the sites www.elica.com and www.shop.elica.com to discover the new range of kits for the various executions of the systems, both filtering and extraction.
Recirculation version:
The versions are supplied with external discharge through the air duct system (purchased separately). Pay attention to the choice of the discharge pipes and the openings in the
wall, which must have a diameter equal to the diameter of the outlet (flange). For more details on pipes and their dimensions, see the accessories page. Installation and assembly instructions - perform the discharge with the remote version. Using pipes and discharge openings of smaller diameter will lead to a reduction in extraction performance and a sharp increase in noise. In this case, the manufacturer is not responsible.
To ensure maximum extraction efficiency: - The recommended maximum pipe length is 7 linear meters. - It is recommended to use a maximum of two 90° elbows for a total length of 7 linear meters. - Avoid sudden changes in the duct cross-section, preferring a cross-section equivalent to 150 mm (or rectangular with dimensions 222 x 89 mm).

Press (8) to turn on and off, until the display (2) shows the level
Note: if in Temperature Manager mode (Warming Function) the right knob is off, first select the desired zone using the zone selector (2). The function can also be activated using the selector
(3), increasing the power level to
USE OF THE EXTRACTION
Turning on the extraction system:
- Turn on the hob surface, as indicated in the section "Turning on" "Use of the hob surface". Open the flap, which is located in the selection zone (12), to turn on the extraction system.
Note: The extraction system is equipped with a FLAP device with rotary mechanism. Before turning on the extraction, it is necessary to first open the flap, so as to activate the extraction system. The extraction hood is equipped with a sensor that, when the extraction system is connected, ensures automatic motor shutdown when the FLAP flap is completely closed. The extraction operates only after opening the FLAP. See also the instructions in the illustrated part of this manual.
- Extraction power (power):
The surface of the M6 4 speed (power) level of use depends on the
The burner must be adjusted using the selection buttons (3): turn right to increase the power level, turn left to decrease the power level.
Note: The power level setting is selected using the selection buttons (12).
Power Booster (power boost)
The knob has an additional power level called Power Booster. It depends on the time and material.
To activate it, turn the knob using the selection buttons (3) (see above), until the symbol P appears.
Note: After turning the knob back, the power returns to the previously set level.
- Automatic operating mode
The knob automatically adjusts the optimal power, reducing the power level to the maximum for cooking, which is used on the burners.
When the burners are turned on, the knob automatically adjusts its power level, gradually reducing it, thus eliminating burnt food and odors.
To activate the function:
Press (A) (14).
- Filter clogging indicator
The knob indicates when it is necessary to clean the filters:
For charcoal/ceramic filters for the hood: the FILTER indicator (13) lights up;
Clean the hood with a neutral detergent and dry it carefully to avoid oxidation.
CARE FOR THE EXTRACTOR HOOD
Cleaning:
Before cleaning, make sure to unplug the hood from the power supply.
DO NOT USE TOOLS OR SHARP OBJECTS DURING CLEANING!
Avoid using abrasive products. DO NOT USE SPONGES!
Grease filters:
They retain the grease produced during cooking.
They must be cleaned once a month (or when the filter saturation indicator system indicates the need), using neutral detergents, by hand or in the dishwasher at low temperature and with a short cycle. When washing in the dishwasher, the grease filter may discolor, but its filtering properties remain unchanged.
Charcoal filters (only for the filter version):
They absorb unpleasant odors caused by cooking. The choice of the filter set depends on the type of odors.
The saturation of the filters for odor absorption occurs after a certain period of use, depending on the type of cooking and the regularity of cleaning of the grease filter. The odor absorption filter can be regenerated thermally every 2-3 months, at a temperature of about 200 °C for 45 minutes. Proper regeneration guarantees effective filtering for about 5 years.
Warning! Do not place the filters on the bottom of the oven, but place them on a rack at medium height.
5. MAINTENANCE
If the problem persists, contact technical support.
- Before contacting support, try to resolve the problem yourself by following the instructions in the "Troubleshooting" section.
- Turn the device off and on to check if the problem is resolved.
If after all these checks the problem is not resolved, contact our technical support service.
This appliance is intended for household and similar non-commercial use. It must not be used for commercial or professional purposes, nor for drying clothes with fabric softener residues. This appliance is intended for indoor use only. It is not intended for outdoor use or for use in environments with high humidity or dust.
This appliance is not intended for use by persons (including children) with reduced physical, sensory or mental capabilities, or lack of experience and knowledge, unless they have been given supervision or instruction concerning use of the appliance by a person responsible for their safety.
- Children should be supervised to ensure that they do not play with the appliance. Do not touch the appliance with wet hands. Do not pull the power cord to disconnect the appliance. If the power cord is damaged, it must be replaced by the manufacturer, its service agent or similarly qualified persons in order to avoid a hazard.

This appliance is intended to be used in household and similar applications such as: staff kitchen areas in shops, offices and other working environments; farm houses; by clients in hotels, motels and other residential type environments; bed and breakfast type environments.
*: This appliance can be used together with the accessories specified in the instructions and available for purchase on the websites www.elica.com and www.shop.elica.com.
1. SAFETY PRECAUTIONS
SAFETY PRECAUTIONS
Warning! Keep the appliance out of reach of children: do not allow them to play with the appliance. The appliance must be installed by a qualified technician in accordance with the safety regulations in force. Incorrect installation may cause injury or damage. The appliance must be connected to the power supply only by a qualified electrician. The power cord must be connected to a socket with an earth connection. The appliance must be disconnected from the power supply before any cleaning or maintenance operation.
Automatic air switches. Before carrying out any work, disconnect the device from the power supply. After switching on, the electric shock protection must be checked. During connection, the contact of the switch may be live. Do not install the protective elements. Do not connect the wires without first disconnecting them; during connection, the switch contacts may be live, so do not touch the wires and do not connect them. For patients with cardio stimulators and implanted devices, it is necessary to check the operation of the cardio stimulator with this device. During adjustment and after it, do not touch the control elements. Do not touch the device with wet or other conductive materials; each component must be checked for damage before use. Do not use or touch the device with wet hands. The device emits high-frequency sound waves. Small parts should be kept away during adjustment. If the device is used for a long time, turn it off to avoid electric shock. This device is intended for use by qualified personnel or under the supervision of a specialist. The device can be used for continuous or intermittent operation. The device is designed for continuous operation. It is necessary to perform maintenance at regular intervals. To do this, turn off the device, do not touch the device with wet hands. Maintenance: check the wires for damage. Do not use the device if there is a risk of electric shock. Doctors, dentists, and other specialists should check the device for damage before use. To do this, turn off the device, do not touch the device with wet hands. Maintenance: check the wires for damage. Do not use the device if there is a risk of electric shock. Doctors, dentists, and other specialists should check the device for damage before use. To do this, turn off the device, and then connect the plug to the socket: the plug must be inserted into the socket and removed from the socket only by holding the plug (not the cable). If the device is not working, contact a qualified electrician.
After use, rinse with clean water and dry with a soft cloth. Do not use abrasive cleaners or solvents. When not in use, store the device in a dry place. Do not expose to high temperatures or direct sunlight. Use only the recommended accessories and spare parts. If the device is damaged, do not attempt to repair it yourself; contact a qualified service center. The device is suitable for all types of fuel. Booster
Функяпсьсснгдьхогары.TOK DeHrein TamaKtbl KbyIpya aphanfah MaCnKtbl CBykItbKTapdbkB3dIpyuWiiH naDanahyfa 60lmaidbl. UMaamadanTbcK b3yKayinti 60nyblMymkh.MyHmaJxagdaInapda TeMeH Kyat DeHrein naDanahybHb3dl YCbHaMb3. bIbicakr tikeen niCyip6TeHne opHaTbIyjXheOpTaRa TpaNaHbI Kepe.K EwKaHdAn XaFdaIa KaCTpeN MeH nIItaHbI apacbHaBaCKa 3aTTapDa KcMHaB3.Erep Temnepatypa XorapbInaca, eHMHH Nicipy 6eJIiTepHiH Kyat DeHrein abTomATb TyTpde TEmHeIe.i. Ta7anay Hemece TexHnKanblk KbIMET KePcETy BoBnHwa Ke3 KeTReH XyMbICTbl Xyprizep anDbHa aAhaHbPo3eTKaDah Taptbn Hemece XeJINIK AxbPaTbUbTI CeHdpin, KypblfHbI 3NeKTp XeNiciHen AxbpaTbH3. BApNbIK opAty XeHTKe KcPcETy XyMbICTapBn OpbHdaFah Ke3e Oekaaan Hcapan, coDaN-ak Qm3nKanblk, cey Hemece akBn-ON KabinETpe WkeTtenRn Andamap He Mece KypblfHbI naDanaHy aToxipnbEci Hemece KaKettri Binimi KOK aDAMap OanbpBn Kayinc3diHre Xayan BepeTih Backa aDAMhBb64b1aBb1c3 Hemece KypblfHbI KAYINC3 naDanaHy XeNE OHIN KayInTiRTH TcyHpy TpaBn Hyckaynap AnmaBHaHsa KOnDaHbAsy Kepe. BanaLapdbH eHMmeh OHNaMyBn KaDaranafon OTbIPbIB3. Ta7anay XeHE KcPcETy XyMbICTabPH BanaLap Tnicti 64b1aYcb3OpbHdAmaynapbI Kepe. Erep Ehim ra36EN Hemece backa OTBmEH XyMbIC icTeiTH e3RE KypblfHbIAPmEP Bp YaBtTA KOnDaHbIca, 6BeMne KxtkiRTI TyPe ZenDeTiny Kepe. ● OhmHI iwiH de, CbPTbN da XNI TzANANOTbpy Kepe (KEMIHDE BIP AINDA BIP PET); aPkaaH naDanaHy HcKaylbFbHa DApEiRtn HcKaylnpBbOyBb1aKepe. BalaanapdbH eHMmeh OHNaMyBn KaDaranafon OTbIPbIB3. Ta7anay XeHE KcPcETy XyMbICTabPH BanaLap Tnicti 64b1aYcb3OpbHdAmaynapbI Kepe. Erep Ehim ra36EN Hemece backa OTBmEH XyMbIC icTeiTH e9e KypblfHbIAPmEP Bp YaBtTA KOnDaHbIca, 6BeMne KxtkiRTI TyPe ZenDeTiny Kepe. ● OhmHI iwiH de, CbPTbN da XNI TzANANOTbpy Kepe (KEMIHDE BIP AINDA BIP PET); aPkaaH naDanaHy HcKaylbFbHdAbeepiRtn HcKaylnpBbOyBb1aKepe. BalaanapdbH eHMmeh OHNaMyBn KaDaranafon OTbIPbIB3. Ta7anay XeHE KcPcETy XyMbICTabPH BanaLap Tnicti 64b1aYcb3OpbHdAmaynapbI Kepe. Erep E him ra36EN Hemece backa OTBmEH XyMbIC icTeiTH e9e KypblfHbIAPmEP Bp YaBtTA KOnDaHbIca, 6BeMne KxtkiRTI TyPe ZenDeTiny Kepe. ● OhmHI iwiH de, CbPTbN da XNI TzANANOTbpy Kepe (KEMIHDE,BIP AINDA BIP PET); aPkaaH naDanaHy HcKaylbFbHa DApEiRtn HcKaylnpBbOyBb1aKepe. BalaanapdbH eHMmeh OHNaMyBn KaDaranafon OTbIPbIB3. Ta7anay XeHE KcPcETy XyMbICTabPH BanaLap TNicti 64b1aYcb3OpbHdAmaynapbI Kepe. Erep E him ra36EN Hemece backa OTBmEH XyMbIC icTeiTH e9e KypblfHbIAPmEP Bp YaBtTA KOnDaHbIca, 6BeMne KxtkiRTI TyPe ZenDeTiny Kepe. ● OhmHI IWI H de, CbPTbN da XINANANOTbpy Kepe (KEMIHDE,BIP AINDA BIP PET); aPkaaH naDanaHy HcKaylbFbHa DApEiRtn HcKaylnpBbOyBb1aKepe. BalaanapdbH eHMmeh OHNaMyBn KaDaranafon OTbIPbIB3. Ta7anay XeHE KcPcTyr RnE Hemece backa OTBmEH XyMbIC icTeiTH e9e KypblfHbIAPmEP Bp YaBtTA KOnDaHbIca, 6BeMne KxtkiRTI TyPe ZenDeTiny Kepe. BalaanapdbH eHMmeh OHNaMyBn KaDaranafon OTbIPbIB3. Ta7anay XeHE KcPcTyr RnE Hemece backa OTBmEH XyMbIC icTeiTH e9e KypblfHbIAPmEP Bp YaBtTA KOnDaHbIca, 6BeMne KxtkiRTl TyPe ZenDeTiny Kepe. BalaanapdbH eHMmeh OHNaMyBn KaDaranafon OTbIPbIB3. Ta7anay XeHE KcPcTyr RnE Hemece backa OTBmEH XyMbIC icTeiTH e9e KypblfHbIAPmEP Bp YaBtTA KOnDaHbIca, 4Pa (4 x 10⁻⁵ ap) DeHreinHe H acNaby Tnic. ● Byn HcKaylbKtbl Andafla Yakltta
The device must be installed in accordance with the safety rules. Before installation, it is necessary to check that all connections are correct.
ELECTRICAL SAFETY
- Electrical installation must be carried out by qualified personnel. - All work on the electrical equipment must be performed with the power disconnected, following the safety rules and regulations. - Do not touch the device with wet hands or when standing on a wet floor. - The device must be connected to a grounded power supply. - The grounding conductor must be connected to the grounding terminal of the device. - Use only the specified fuses. - The fuse must be rated at 2 cm from the device. - If the device is not equipped with a power cord, use a minimum conductor cross-section of 2.5 mm² for 7200 W; for higher power, use 4 mm². - The cable temperature must not exceed 50°C. - This device is intended for indoor use only; therefore, it must be installed in a location that is protected from moisture and dust, and it must be easily accessible for maintenance and repair.
Warning! Before connecting the cable, ensure that the power is turned off. - Warning! Do not connect the device to the power supply until all connections have been checked and the cable has been properly secured.
POWER LIMITATION: This device has a maximum power limit (kW) that must not be exceeded. The power limitation function is activated when the set limit is reached.
The device can be operated in continuous or intermittent mode (with a minimum of 2 minutes between cycles) to adjust the parameters. The electrical connection must be made in accordance with the safety and technical regulations. For power limitation parameters, refer to the device's technical documentation.
WINDOW SENSOR: The device can be connected to window sensors at the initial installation (by the installer). If the window sensor is not installed (only in DUCT-OUT mode), the window sensor function is disabled. The sensor must be installed by a qualified technician in accordance with the electrical safety regulations. This sensor is not intended for use with other devices.
The device must comply with safety standards and be certified accordingly. Installation work must be carried out by qualified personnel in accordance with the regulations.
NOTE: The device contains a safety extra-low voltage (SELV) circuit that must be certified. This circuit must not be connected to other devices or used for purposes other than those specified in the installation instructions. It must not be modified or used in any way that could compromise safety.
INSTALLATION SAFETY
- Installation of mechanical ventilation systems must be carried out by qualified personnel. Before installation: check the device for damage and identify any defects; do not install if the device or cables are damaged; install the device in accordance with the manufacturer's instructions; ensure that the device is suitable for the intended use (e.g., for bathrooms, kitchens, etc.). The device must be installed in a dry, safe location; the installation site must have an accessible electrical outlet.
Preparing the housing for installation:
- Do not install the device near flammable materials, gas appliances, stoves, fireplaces, or heating appliances; keep a safe distance from such sources and ensure proper ventilation.
- The device must be installed at a distance of 2-6 cm from the ceiling; the distance from the wall to the device must be at least 2.5-6 cm for proper installation.
The distance between the mounting holes must be at least 5 cm, and the distance from the edges must be at least 4 cm; the minimum distance from the floor must be 50 cm.
Important safety instructions: if the power cord is damaged, it must be replaced by the manufacturer, its service agent, or similarly qualified persons to avoid a hazard. - For installation of the ducted version, the electrical connection must be made by a qualified electrician. Note: If the device is installed in a room with a temperature above 250°C, it must be kept away from flammable materials (such as curtains, paper, cloth, plastic, etc.); the device must be installed at least 1 meter away from any heat source.
and must be kept; after installation, wait 24 hours before use.
Warning! Do not connect the device to the mains if the power cord is damaged. Note: For installation of the ducted version, the ducting must comply with DIN EN 60454 standards; the duct must be heat-resistant; the duct must be resistant to fire; the duct must be suitable for the temperature range; the duct must be made of non-flammable material, such as PVC.
STORAGE AND TRANSPORT

This device must not be disposed of with household waste. It must be disposed of separately in accordance with the European Directive 2012/19/EC and UK SI 2013 No.3113 on Waste Electrical and Electronic Equipment (WEEE).
This appliance is intended for use in household and similar applications such as: staff kitchen areas in shops, offices and other working environments; farm houses; by clients in hotels, motels and other residential type environments; bed and breakfast type environments. It is not intended for use by persons (including children) with reduced physical, sensory or mental capabilities, or lack of experience and knowledge, unless they have been given supervision or instruction concerning use of the appliance by a person responsible for their safety. Children should be supervised to ensure that they do not play with the appliance.
SCHEDULES
The following schedules must be observed:
- Safety: EN/IEC 60335-1; EN/IEC 60335-2-6, EN/IEC 60335-2-31, EN/IEC 62233; Performance: EN/IEC 61591; ISO 5167-1; ISO 5167-3; ISO 5168; EN/IEC 60704-1; EN/IEC 60704-2-13; EN/IEC 60704-3; ISO 3741; EN 50564; IEC 62301. EN 60350-2; • EMC: EN 55014-1; CISPR 14-1; EN 55014-2; CISPR 14-2; EN/IEC 61000-3-3; EN/IEC 61000-3-12.
OTHER PROPER USE
For proper use of the appliance, the following instructions must be followed: At the first installation, the appliance should be set to the lowest power level and then gradually increased until the desired level is reached. Only use the booster function when necessary, for example, when frying or boiling. For cooking, use the appropriate size of cookware. For best results, use the recommended cookware. To increase efficiency, use the maximum diameter of the cookware as indicated in this manual.
2. Use
INTENDED USE
The induction cooking zone is based on the principle of magnetic induction. This energy is transferred directly to the cookware without heating the glass surface.
Advantages: If you use electric pans, the induction hob: Safer: The surface temperature is lower. Faster: The pan heats up quickly. Efficient: Energy is transferred directly to the pan. Precise: The power is adjustable. When the pan is removed, the heating stops automatically.
CONTROLS
- Controls

Only this
has a mark
Extractor
KoJaHbIb13.
MaHbI3aIbI:
ПИТа бétиЕ ЗakыМ KeIMeyi YUH, Мынанapfa Tыьм CanbHaDJI:
- Tybi Teris emec bɪdɪcɪtəp; -Ty6i3MaIbDaHaHMetaIIbIbIcTap;
- nicipy naheiniHbetiHe cb3at Tycney ywiH ty6i Kejdip6dybp bIbictap;
- bICTbIK KcctpEndepjxKHe TaBanapblnIHTaHbH 6ackay naheiniH 6tine KOfora 6oMaDbI.
- INdkyuaybik KcTpeJnepDin 6apIbIbI TmIMdi eMec, eNtkehi OlandbH TY6i TEK JxapTbIaN JeppomarHnTTIK MATEpnaanan TpyaB! KcTpeJnep MeH tabanapdbI catbn anFaHda, MaHbIbI eckepih3: T6iToIbIfBImeH feppomarHHTtK MaTePnAanDaTH TpaIb. ΘuTnece, kblny 6epy xane 6ipKeNikn TmDiniri a3 60ana,b an KcTepeNdi/H tabaHbH 6teKTI Tempeatypacbi TaMaK Nicipy yuH jXeTkiNkC3 6Oly MymKiH

TBy6iHne aIHomnHbOImaybKepe,AnTnece bIbIC Kb36aBdJIxHe OHbINHykTopnap TaHbIMaybMyMkiH.
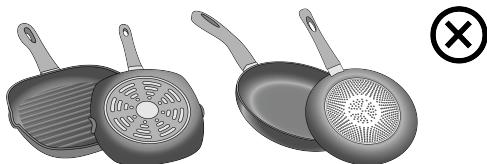
Tybitericemecesmeckeiip-6ydbypbibictap. - Onapиндунктор мен bidiьс apacbihdafbl 6aillanhbc6betinih ayadahbih aazitabbl, Tmimdiinikti TEmhendetedi
KHe nicipy canacbH naaapnatabl.
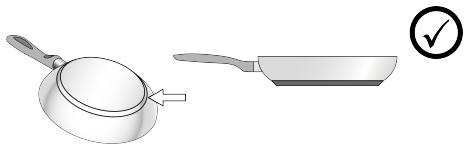
AaIbH aIa daIbHdIaHaB bIdbc
Koctpnelin MaTePnAbI MaHHTTI eKeHH TeKepy yuHJ KaFAna MaHHTTI naDanaHa anacb3. Kctpneldepre MarHIT Xabicnaca, Onap JapamaiB1. AnbHfI tapaydafti KepeTkiWtep ocbfahn da KaTbICTb eckepinyi Tnic.
- bldic actbihin Dpybc nanaMetpi
MAHbl3DbI:erepKcctprnepdybic eJneMde 6oJMaCA,nicipy6eNikTepi icke KocbImaDbI.0p6ip JKe6eBolkTIN MHNImaNbDi NmaMeTpnerin OcbI HcckaylbkTa6epiInrtenicti CypTepeH KapaHbI3.
KyaT YHEmdey
The diameter of the exhaust pipe must match the diameter of the hood's exhaust outlet. The pipe must be connected to the hood's exhaust outlet. During installation, the hood must be disconnected from the power supply. The installer is responsible for the correct installation and the electrical connection. The exhaust pipe must be connected to an outlet that is at least 150 mm in diameter. The pipe must not be connected to a duct that is used for other appliances.
INSTALLATION OF THE EXHAUST PIPE
This hood is designed to be used in recirculation mode or with an external exhaust duct. It can be used in both modes.
To see the full range of accessories available for this hood, please visit the websites www.elica.com and www.shop.elica.com.
Recirculation mode:
In this mode, the air is filtered through a charcoal filter (sold separately) and then returned to the room. The charcoal filter must be installed on the hood's motor unit. The filter and its supports must be installed according to the instructions provided with the charcoal filter. The filter must be replaced when it is saturated. The charcoal filter must be installed before using the hood in recirculation mode.
For the hood to work at its maximum efficiency, the exhaust pipe must be at least 7 meters long. If the pipe is longer than 7 meters, the hood's performance will be reduced.
The exhaust pipe must be installed with a minimum diameter of 150 mm (or 222 x 89 mm for rectangular pipes). The pipe must be installed without any bends or restrictions that could reduce the airflow.

Recirculation kit:
The recirculation kit includes a charcoal filter and the necessary supports. The filter must be installed according to the instructions provided with the kit. The charcoal filter must be replaced when it is saturated. For more information, please refer to the instructions provided with the kit.
3. USE
CONTROL PANEL
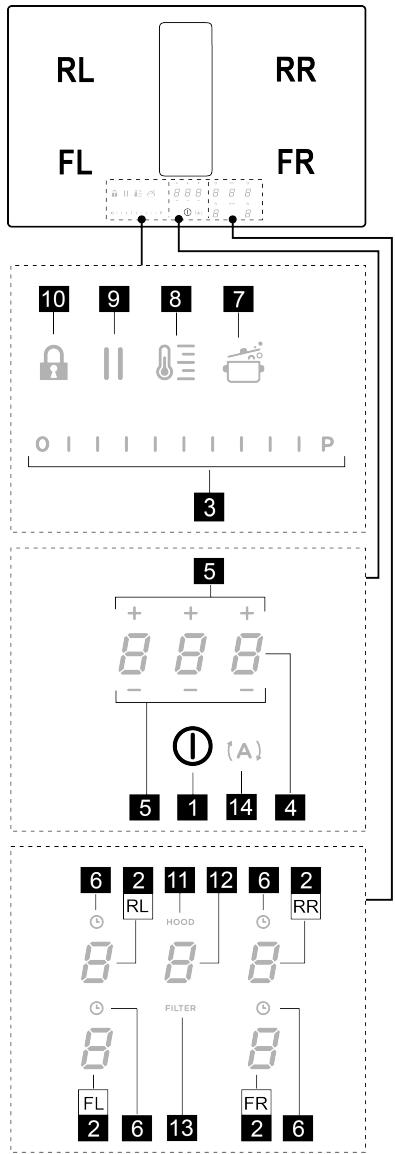
| T. | Кызmeti |
| 1 | Пису панелин/тугин сорfbлш кенидемкиш КOCY/ ΘШИРУ |
| 2 | Пису aiMaKaTpын тандay / Пису aiMaФындinспл徳и |
| 3 | Пису Катын Deнгейи Хае Туши copьи шылару Катын Дамдыларын (Катын) Кебайу/азаайу |
| Пису Катын Deнгейи Хае Туши copьи шылару Катын Дамдыларын (Катын) Керсөтү | |
| 4 | "STAND ALONE" таимерін icede кocу |
| Диспел: "STAND ALONE" таимері / nicipy аимakтарын таимері. | |
| 5 | "STAND ALONE" таимерін / nicipy aимakтары таймерін укытbing Кебайty/азаайty |
| 6 | Пису aимakтарын таимерін icede kocу |
| Пису aимakтары таимерін icede kocу иndікаторы | |
| 7 | Авtomаты Кыздырды icede kocу. |
| 8 | Теметараза ретTERIшін icede kocу (eckepту фунksцясы) |
| 9 | Кidiри耗 |
| 10 | Пэрпec Куллы |
| 11 | Ту Tin copышын Иndікаторы icede kocуны |
| Суztіrinрдін толfaxын 6ыдіретін Иndікаторын Косыллы | |
| 12 | Ту Tin copышыт taHdav/icke kocу |
| Ту Tin copыш диспелі | |
| Көмір/keesміка cyztін диспелі - Май сү RiciniH Тонуы | |
| 13 | Суztіrinін толfaxын Керсетetін Иndікаторыkaіta орнау |
| 14 | Ту Tin copышын АВТOMATы Функцясын icede kocу |
BEFORE USING THE HOOD, PLEASE READ THE FOLLOWING INSTRUCTIONS
All the functions of this hood are controlled by the touch controls. The controls are as follows:
If the hood is not installed correctly or is not installed at all, the functions may not work properly or may be damaged.
- Before using the cooking zones for the first time, read the instructions for use and the safety warnings carefully. The cooking zones can be controlled using the touch controls (marked: "Selecting the cooking zone" (Selecting the cooking zone) and "Operating temperature" (Operating temperature), "Lock Function" (Lock Function) or "Timer" (Timer) functions. You can select the cooking zone (Selecting the cooking zone) and "Operating temperature" (Operating temperature), "Lock Function" (Lock Function) or "Timer" (Timer) functions.
The cooking zone is switched on by touching the
corresponding touch control.
Attention! If the cooking zone is switched on accidentally (by mistake), the touch control may be touched unintentionally, which can cause burns, fire, or damage to the appliance. If the cooking zone is switched on accidentally, switch it off immediately.
Switching on the cooking zones
The cooking zones are switched on as follows:
| Кызmeti | М.н. |
| ТамакNICIPуаймafыкocуны | 0 |
| Куатденгей | 1...9-P |
| КалдыкЖылuyинданкаторы | H |
| Кэстэр anыктafыш | U |
| Көнір aймafынbIHФуннцясыб ebсеньд | 7 |
| Temпература peTTeriшФуннцясыкocуны | 0 |
| Кidiри耗функцясы | II |
| АВТOMATTы КыздIPуФункцясы | R |
TECHNICAL SPECIFICATIONS
Cooking zones
Only use cookware that is suitable for induction cooking zones: if the cookware is not suitable or is too small, the cooking zone will not heat up.
Residual heat indicators
The cooking zones are equipped with residual heat indicators.
Automatic switch-off
If the cooking zone is not switched off after a certain time, it will switch off automatically.
Touch controls
The touch controls are operated by touching the corresponding touch control.
Note: Before turning on the device, it is necessary to check the correct connection.
Turning on
Procedure for turning on/off the device
OFF (1) (On/Off) button (button): press the button; if you press and hold the button for a long time, all functions will be performed in sequence, then they will be turned off in the reverse order; the indicator will flash during the turning on/off process.
Note: All functions are controlled by pressing the button briefly, and by pressing and holding the button, they are controlled continuously.
For safety
Note: This function should be performed by qualified personnel.
Setting the parameters
Press the setting/selection (2) button to set the desired parameter.
Power supply
Connect the power supply to the socket (3) without pressing the button:
To turn on the power supply, press it;
To turn off the power supply, press it again.
The indicator for the power supply will light up.
(2) Kερçetinejdi
Kyat KyweiK
HIM 5 MHHY60bI Kocylb60aTbH KocblMa Kyat
deHreIHe ne (3 deHreIIne H KeiH), OaH KeiH TemnepaTpa aIdbIHfbl opHaTbJrFaH MAnHre KaIapbIaNbI.
CaycaKTapbIbI3db TaHday KonaIbI (3) 6oBbIMeH (2- DeHreJ KaHbIHdaIbI) XblNkblTbIn, Kyat KUweTIKiwiTi icKe KocbIbI3. Kyat apTbIpfbIuTH deHrei TaHday/kepcety aMmaFbHnda (2) 6eJIricMeH KepeTineDi
Pnicipy aIMaFbIbH TaMepi
"Ticipy aimafbIbIH Taimepi" fynHKUncbTi tnti eepip nicipy aimafbHa 6ip yaKbITa opHATya 6oNaTbH Kepi cAHay MymKIHir. Ke3eH coHbHa nicipy aimakTpbl ABTomaTTb Type De EweJi XHe naDanaHybifa apnAbbl Db6bCTbK CNHan bepinei.
Ticipy aIMaFbIHbIH TaMepiH icKe Kocy fHyKlmaCbl
-Taay/KepeTy aMaFbH (2) (HeIeH 6acaKa Kyat DeHreii) TyptiH3 (6acblH3)
KocbIyH aOH 2 MmHyT OKeHHe KEBIN ON/OFF (1) (Kocy/ewipy) TYMeCIn bacy apKblOpHaBlyTmic.
KyaTwekTeyIH opHaTy yuH:
(A) TYMeciH 6acbIb3 (ON Kypblfbi icke KocblfAH COH anfaKb2 MHHY 60bI JxblblbKTaiDb) (A) Tymecin bacin tybin, nicipy aMaKtapbHt H TaHay/Kepecy aMaKtapbHt (2) 6apbfbH 6ip-6ipnen cafat tinihe Kapcbi 6aftta bacin sbfHb3, 6acyd anbHfB OH xak aMaKtAH (FR) 6actah3; ap6ip bacyda db6ictb CnHan sbfAd, an 6apbIK dncnneep (2) bacInrah Ke3e, Tymehi xi6epye6 bonad:
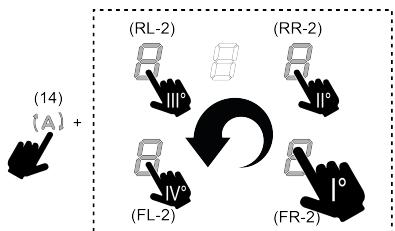
ocbKe3eapTKbcoJkaaMaKaTbH (RL)Dncnnei(2)
KeipHei, on napametpdi opnata 6epyre 6onatbHbH KepcTeY yuih XeHe 6enrinepi H Ke3eknen KepcTei. - (RL-2) (apTKbI con Jxak 2) dincnnein H TaHdAn, caycafbihb3dbI dncnneJe Cxhe 6enrinepi KepiHReHwe TaHday XonarFBI (3) 6oBIMeH cbPfTbHb3; Dncnnei (FL-2) (AaDbIHfbI con Jxak 2) afbIMdaFBI napametpdi MbHa kectedeI mHdepMeH Kepcetei:
- ABTomaTbI Kbl3bIpy
Automatic Heat Up (Auto Heat Up) function allows you to set the desired temperature for the dishes you are cooking; this function quickly heats the oven to the set temperature. This function is
suitable for dishes that require high temperatures. To use:
·Press the (7) button to select the cooking mode, then press the (2) button to set the desired temperature for the cooking mode.
When the cooking mode temperature is lower: "Auto Heat Up" function will heat to the minimum temperature;
When the cooking mode temperature is higher: "Auto Heat Up" function will heat to the maximum.
Example: with the same cooking mode, another
when you press the (7) button to select a different cooking mode, the function will automatically adjust to the appropriate temperature for that mode; if you press the (2) button, the function will set the temperature to the maximum.
Pause
The Pause function allows you to pause the cooking process and lower the oven temperature.
To use:
Press (9) button, then press (2) button to pause the function; press (9) button, then press (3) button to select the function to resume (3) button to start/stop.
Example: after the set time, the oven will automatically pause; the pause function will continue with the previously set parameters.
Example: if the "Pause" function is not activated after 10 minutes, the oven will automatically turn off.
Example: The Pause Function (Pause function) will not affect the cooking process.
"BOLEK" timer
The timer is set to the required time (or the remaining time) and the device starts operating.
Press the timer start/stop button (4).
The timer operating indicator (4) lights up and the countdown begins.
Note: If the set time is less than 10 seconds, the countdown starts immediately.
The timer can be set for a maximum of 1 hour 59 minutes. When the set time has elapsed, the timer stops and an audible signal sounds.
Note: If the set time is less than 10 minutes, the timer will count down in seconds and the last 10 seconds will be indicated by a beep.
| Kepceiinren MÖH | Kanfah yakbīT |
| 135 | 1 car 35 cek |
| 135 | 1 мин 35 cek |
To stop the timer:
Press the start/stop button (4).
Press and hold the + (5) button to reset the timer to zero.
Temperature retention (keep warm function)
The temperature retention function keeps the cooked food at the optimal temperature until it is served. This function is especially useful for keeping food warm on cold days. The "Temperature retention" function is activated by pressing the button (8).
The temperature retention function can be used with the timer function (2).
Note: If the temperature retention function is used with the timer, the timer will start counting down after the cooking time has elapsed. The temperature retention function will then keep the food warm until the timer reaches zero.
- To set the temperature retention time, use the timer buttons (2) and the + (8) button.
Note: If the "Temperature retention" (keep warm function) is used in combination with the timer, the timer will start counting down after the cooking time has elapsed.
The pedal, the brake pedal (2) must be pressed and held; the function is combined with the throttle pedal (3) The power is reduced without pressing the pedal.
PEDAL ADJUSTMENT
The pedal has two adjustments:
- Press the "Adjustment" button on the "Adjustment" panel to adjust the pedal; do not press it; The pedal has one adjustment for the throttle pedal (12).
Expert: The adjustment mechanism is activated by pressing. To adjust the pedal, press the pedal adjustment button. When the pedal is pressed, the motor will stop automatically. The pedal can only be adjusted when the pedal is pressed. Follow the instructions in this section.
- Pedal position (power):
The pedal has 4 positions (power) within 8 degrees.
Press the brake pedal (3) to increase: press it to increase the power, and press it to decrease the power.
Expert: The original power is adjusted by the pedal/brake pedal (12).
Power adjustment
The pedal has a "power adjustment" button that is connected to the pedal power; it creates a delay of 5 ms.
To adjust it, press the brake pedal (3) to increase (press the pedal); then release it:
Expert: After 5 minutes, the power will be adjusted to the original position.
- Automatic mode
The maximum power is adjusted to the pedal position and the pedal pressing actions are adjusted to the maximum power.
Ticipy aMakTapbI eWipinreH Ke3e, copbIn 1bIfapFbIbTH KbIaamDbIFb6iptiHden a3aibn, KaIbIK cy MeH nicti XOo yuH 6eIMdeNdi.
BvIyHkUJnHbKocYuHIN:
(A) (14) T未经会国
Akkipaty yuiin ocbi apekeTTi KaiTanaHbI3.
Eckeptne:erep aBOMATTbI JxMbIC abpbCbIHda XJHHe
apalbifbHdabfXblndaMdbkTap TaHday Xonafbl (3) KEMerImeh TaHdaNca, ABTomaTTbl XyMbIC TOKtaTbIaNbl; an erep, 6ip XaftbHaH, Kyat apTbIPbIaTaHanca, TaHmep yaBtbl aKaTaNFAH COH ABTomaTTbl XyMbIC xanFaCabi, coApada A)6enrici XblnbIKTAN TpaBl.
Eckeptne: erep nicipy naHeni abTomattbI jxMbic ictey pexkmi 6eIceHdi 6oIraH ke3e euipince, TYTH copfbltBuH JekndetKlui biptiH den ToKtaBdI.
Cy3riHH TonFaHbH KEpCeTeH INdNkATop
TyTIN TAPTKbIiTexHnKaJIbIK KytIM KePcETIyI KaKet 6oJFaH Ke3Di KePcTeDi:
Kemip/kepamika niC cy3rilepi yuiH FILTER (13) xama bI xhaadbl
MaCy3rici yuH FILTER (13) 7aMbI XaHaDbI XeHe XbInbJIbIKTaHbI
Eckeptne: 6ynФyHKUaIg aDenki napametp 60bHwa aKbIpaTybl 6oIaIb (ObI icKe Kocy KOnbln "Cy3riHi TOnfahBn KepeTeiH INDkATopblH icKe Kocblvbl" 6eNIMHeH KePiH3)
Cy3riHH tonFaHbIH Kepcetyi KaIa opHaTy
Cy3rillepre (MaJ XeHe/HemecE KEmip/KepaMnka) TexHnKaIbIK KbI3MeT KepcTeKEn COH, FILTER (13) TyIMeciH 6acBIn TpyBlnHbI3; OJ eWesi De, INHnKaTop caHaFbIbI KaIra 6bacTaanaIaIbI.
Cy3rinepeIN tonFaHbIN 6inipetIH INnKATopdbIH Kocblnybl
Attention: Before starting any work, read the safety instructions and the operating manual.
- install the filter in the direction of the arrow ①; - before starting the motor and the filter, check the tightness of the connections (12) and (13) according to the diagram. E = metal/ceramic filter elements; B = plastic filter elements;
METAL/CERAMIC FILTER ELEMENTS
Before starting, check the tightness of the connections (12) and the condition of the FILTER (13). To replace the metal/ceramic filter element, remove the plug (11) (dirt trap).
PLASTIC FILTER ELEMENTS
- before starting, check the tightness of the connections (12)
- and the condition of the FILTER (13).
- To replace the plastic filter element, remove the plug (11) (dirt trap).
MAINTENANCE
| Куат Deнгей | Пису турí | Пайданану (тамak дайындay тэхирбци менидөтөріпіе ьайлбіссы) | |
| Мakсимум lуат | 8 | Te3 Кыздыру | Тамak Temnéратурасын Кызka уakсы iшіндау су кай hay Нүк tecісін Deійн Keэтэрін Hemece tamak Cүйыксы lын Te3 Кыздырады |
| 8.9 | Кызу - Кайнау | Кызару, пису ді бастay, Кальpinfaн таfram'dapды Кызу, Te3 Кайнау | |
| Жолары lуат | 7.8 | Кызару - Кызу - Кайнау - otka Каektay | Кызару, Te3 Кайнау, пису жэноотka кастay (5-10 Мнун'tьк Kызka уakсы iшінда) |
| 6.8 | Кызару - пису - Бухъру - Кызу - otka Каektay | Кызару, bary Кайнау, пису жэноотka кастay (10-20 Мнун'tьк optаа уakсы iшінда), Косыmsa курал'dapды an'dынAna Кыздыру | |
| Ортау lуат | 8.5 | Пису - Бухъру - Кызу - otka Каektay | Бухъру, aazan kaинау, пису (узak уakсы), мakapон Туздыру |
| 3.9 | Пису - bary Кайнау - Кожлathу - көniриу | Узak пису (kyriш, coystap, Кызрллоган et, baik), сүйыксылкары, cy, shapan, copna, cyt), мakapон Tуздыру | |
| 3.8 | Пису - bary Кайнау - Кожлathу - көniриу | Узak пису (бір питдана зз келемер: куши, coystap, Кызрллоган et, baik), сүйыксылкары (мысалы, cy, shapan, copna, cyt) | |
| Тименri lуат | 7.2 | Еprit - Ховitt - Кызл kуде саскета - apanaactbyr | сapымады epity, уolkona'dы жайлар epity, shaftin ďимдердіховitt |
| 7 | Еprit - Ховitt - Кызл kудe саскета - apanaactbyr | Жанă пису taramьн, kiшке Нөлікөрін Кызл ldu ēстay Hemece taram'dы усынfyа boлatableн Темперауразда устару рур щөне крөм-pизотto | |
| ШIPY | 0 | Бétкбблкь колдay керсету | Пліта кутty_Hemecse ошічі рechимідe boлды (H-L-O.apылы синhal sebirnetih tamak писудане көин калуыМуMKIN Kaɪdski Kbɪz) |
4. TECHNICAL SERVICE
Warning! Any maintenance or repair work must be carried out with the motor switched off and the pressure indicator at zero.

For technical service, refer to the figures indicated in this manual.
TECHNICAL SERVICE OF THE DIRT TRAP
- Cleaning the dirt trap:
Cleaning must be carried out only with the system depressurized and the motor switched off.
Do not smoke or use open flames near the device!
Do not use abrasive cleaners or solvents. Do not use open flames near the device!
Maintenance and technical service:
During operation, the surfaces may become hot.
Aggressive chemicals may damage the device.
If the device is used at high temperatures, it may be necessary to use a special high-temperature lubricant (check the manufacturer's instructions for the correct type). When operating at high temperatures, the lubricant may evaporate, so it is necessary to check and replenish it regularly.
For technical service from the ceramic hob (only for repair purposes):
During operation, the surfaces may become hot. Use only original spare parts.
If the device has been used for a long time, the lubricants may need to be replaced. This should be done by a qualified technician. The lubricants should be replaced after 45 minutes at 200°C, or after 2/3 of the thermal cycle has elapsed. The lubricant should be checked and replaced if necessary.
Caution! The device is not a toy. Keep it out of reach of children.
5. MAINTENANCE SERVICE
ACCESSORIES LIST
| Акnapатулы КOD | Синоattamасы | БИКТМAN ce6entepi | Шewimi |
| E-2 | Плрмен aiMaMbIы šamадан тьсхолары Temnéраутalia 6aйнанысты ilшедi | Злесторды 6лшебердii iшин徏г Temnéрауда тьмхолары | Дайта пайданбас 6лbethп плітаны салынданын кгтлз |
| E-3 | Кontөнөр Üнесnéidi | Магнит bасneti xolalan | Кстрлді anын тастыз |
| E-5 | Пайдануши Interpeфсіmen Иndуckшь моулі apacbɪндаь 6aйнаны саaynapы | Мodyньг [уат кени тлран xol; ]уат кабел длрсжanelан hemecе alayы | Плітаны олестор кенин ралын таста, saйданыстыTekceрлз |
| Баcl a late си人格дары iшin | Тынчынлары lollday bIzhmetihe lollpay shaln, Iate kodы tura pany ecen sepiiz | ||
MAINTENANCE SERVICE FOR THE DEVICE
In case of malfunction, contact the service center.
- Do not use the device without the "Accessories" label attached.
TOMBEVENTILAATORI HOOLDUS
- Cleaning the downdraft ventilator
- Temperature Manager (Warming Function)
Temperature controller (heating function)
Temperature Manager is a control function that ensures heat is maintained at a constant temperature and optimized power level: ideal for keeping hot dishes ready. The Temperature Manager function activates by pressing the button once.
Power Level (power level)
The cooking zone has 9 power levels. Touch and slide your fingers along the Selection Bar (3):
- Residual Heat Indicator
- Temperature Manager (Warming Function)
Temperature Manager is a control function that allows maintaining heat at a constant temperature and with optimal
level, ideal for keeping hot prepared dishes. The Temperature Manager function is activated by first pressing button 3(8). On the display (2), the processing area with the Temperature Manager function shows a symbol.
Power Level (power level)
The hob has 9 power levels. Touch and slide your fingers along the selection bar (3):
to the right to increase the power level;
to the left to decrease the power level.
Power Booster
The product is equipped with an additional power level (boost), which remains active for 5 minutes, after which the power returns to the previous level.
Touch and slide your fingers along the selection bar (3) (beyond level 5) to activate the Power Booster.
The Power Booster level is indicated in the Selection/Display area (2) with the symbol
- Timer for the cooking zone
The cooking zone Timer function is a countdown that can be set, even simultaneously, on each cooking zone. At the end of the set time, the cooking zones automatically switch off and the user is alerted by a special acoustic signal.
Activating the Timer function
- Touch (press) the Selection/Display area (2) (power level different from zero)
Press (6) corresponding to the cooking zone
Use the symbols — + (5) to adjust the Timer duration, which is displayed on the Zone/Display
Power Booster
The vacuum cleaner is equipped with 1 additional suction level called Power Booster (boost). This is time-limited and lasts 5 minutes.
To select it, touch and slide your finger on the Selection Bar (3) (over the level), this flashing symbol appears.
Note: at the end of the measurement time, the power returns to the previously set level.
Automatic operation
The hood turns on at the most suitable speed, adapting the suction capacity to the maximum cooking level, which is used for cooking zones.
Residual Heat Indicator
Press again to turn off
Key Lock

Therefore, {10 < p ≤ 20}
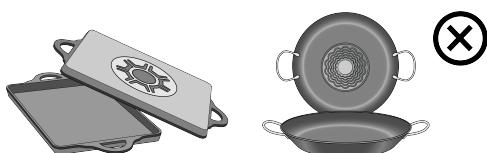
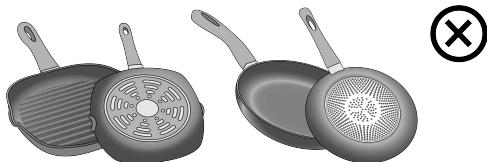
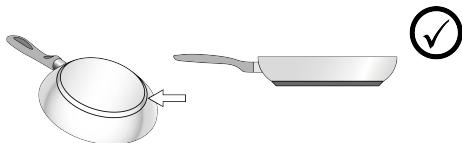
EN/IEC 60335-2-6. EN/ EN/IEC 60335-1:
EN/IEC 61591:IEC 60335-2-31 EN/IEC 62233
EN/ENIEC60704-1:ISO5168:ISO5167-3:ISO5167-1
EN 50564 :ISO 3741 EN/IEC 60704-3 :IEC 60704-2-13 EN :gss
EN/IEC:CISPR14-2:EN55014-2:CISPR14-1:55014-1
.EN/IEC 61000-3-12:61000-3-3
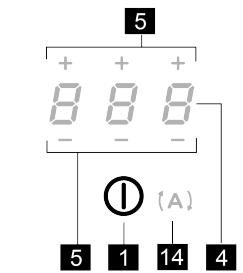
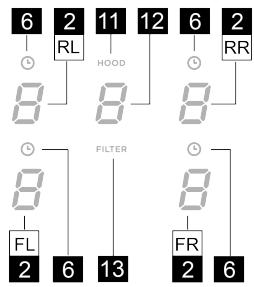
AeJauailll aal alaaaon ON/OFF (1) ①
Power Limitation 1
a a 1
()
aBabai baa (A) jll bc aall g aJauu u. gabai 2) auiu Juaia 100 jauu ie aaiyai yabiiy ou aeau wae 00 iue odai ouyo aoyo ayoi aaiin (FR)
jll jn nn (2) 1
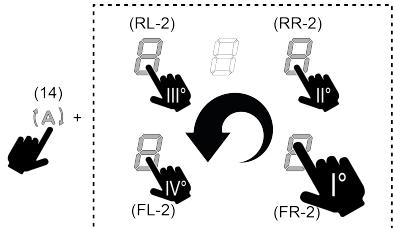
( 3) u 1 + u 2 + u3 = 6
g jll g jnnaa a bjj jnnnnaa
.
(2)
Power Booster
(Power Limitation)
a 8
(2)
a a a a a a a a a a a a (Key Lock)
Jn Jnnnnnnnnnnnnnnnnnnnnnnnnnnnnnnnnnnnnnnnnnnnnnnnnnnnnnnnnnnnnnnnnnnnnnnnnnnnnnnnnnnnnnnnnnnnnnn
Automatic Heat UP
UJusu Automatic Heat UP uuuu uuuu uuuu uuuu uuuu uuuu uuuu uuuu uuuu uuuu uuuu uuuu uuuu uuuu uuuu uuuu uuuu uuuu uuuu uuuu uuuu uuuu uuuu uuuu uuuu uuuu uuuu uuuu uuuu uuuu uuuu uuuu uuuu uuuu uu
B H 1
:Jusill
(2) auii (7) bc bai iao saeabiaio
a a a a a a a a a a a a a a a a a a a a a a a a a a a
aaiia iaii iaiii aaiin juiu uaiy iay gaiu aaij ic aaii iaii iaii iaii eai aiia Automatic Heat Up
auiis iaii pi jiebll aibio juswiy sgsina ziaic
Automatic Heat Up
joll jll jll jai g jai jaiabia jialic:
Saa aee
(2) and 4i jy iil yll ie lae
aLalaiiaabjlaJac lai Pausa ciall ililai jbiig
jai jai jai gabll jai jao jai baw
:
(2) 11
calal guljia
a
aFilter (13) aI aI aI aI aI aI aI aI aI aI aI aI aI aI aI aI aI aI aI aI aI aI aI aI aI aI aI aI aI aI aI aI aI aI aI
FILER (13)
(ajlll/1j0n jyss 1/jj0sall)
FiFITER (13)
山
caliljell jujal
Jus Jus Jus Jus Jus Jus Jus Jus Jus Jus Jus Jus
1
(12)
(12) HOOD (11)
B
H 1
:J
Clll 111111111111111
E (12) aai
Filter (13)
HOOD (11) 1
Clll 1
sll
yall
1 (12) 1
Aulol ool FILTER (13) 1b
HOOD (11) 1
.
yj 2
(3)
1
pilililil" (g " Jll) 1 Ld g cgsa g a Ls (g bll )
"Chall all 1
albi bui (12) jiyi yia bio uayy g ydi ci
biuill
Jua Suila Jg 10a 20joo bia iabio abdlo
aaii jia aai i jia jia jia jia jia jia jia jia jia jia jia jia jia jia jia jia jia jia jia jia jia jia jia jia jia jia jia jia jia jia jia jia jia jia jia jia jia jia jia jia jia jia jia jia
iLgolglj glal gglg 100
i i 1
gagaaal llaa ylll klll ayll glls oolr llaa
Therefore, {b} {i} = 1 / (2 - {b} {i})
1 4 2
8
3j j 10000000000000000000000000000000000000000000000
(12)
Power Booster
Power 1 2
5 420 1000
P 1
(14) (A)
1 1
(3) J 1
Power justif jjua Jusil alla g slg f Jusll 2000 zall agil ic alac cslwuy sLagy jusll Boster
13ga 12y A jolal ola oag cdoall a
Jilll lll Jilj jlr joc gblal yolal
J 1
Jzill jk, (gil) 1n Jl gull gll gll gll gll gll gll gll gll gll gll gll gll gll gll gll gll gll gll gll gll gll gll gll gll gll gll gll gll gll gll gll gll gll gll gll gll gll gll gll gll gll gll gll gll gll gll gll gll gll gll gell
XE.
A
Therefore, 12 divided by 24 equals 7 and 5/8.

1
Therefore, p does not divide a.
.
111
(4)
la 1
B. (204) 1234567890123456789012345678901234567890123456789012345678901234567890123456789012345678901234567890123456789
Jbcjg
90° 218x55mm
KIT0121002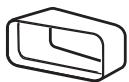
15° 227×94mm
KIT0126810
227x94mm
KIT0121015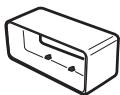
KIT0121001
227x94x80mm
223x59x72mm
KIT017352
222x89x500mm
KIT0121005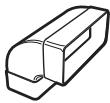
90° 227x94mm
KIT0121017
218x55mm
KIT0168750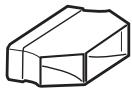
KIT0121013
KIT0161453
KIT0120991
222x89x1000mm
KIT0121012
218x55x500mm
218x55x1000mm
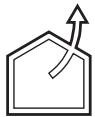

www.elica.com
www.shop.elica.com
KIT0185767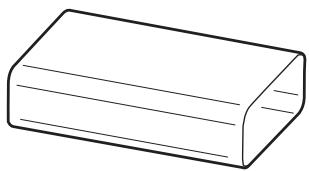
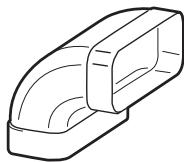

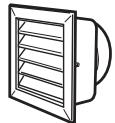
KIT0121010
190x190
0147mm
KIT0121009
INT 216x82mm EXT 290x160mm
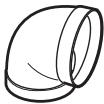
KIT0121006
90°
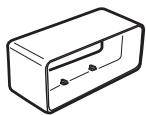
KIT0121001
227x94x80mm
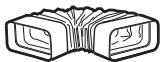
KIT0126810
227x94mm
KIT0121003
0158
59mm
KIT0173527
222x89x500mm
KIT0120991
222x89x1000mm
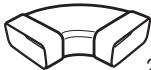
KIT0121004
90° 7x288x94mm

KIT0121008 227x94Ø153mm
KIT0120996
0150-500mm
KIT0121000
0150 - 1000mm
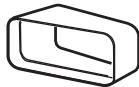
KIT0121002
15° 227x94mm
KIT0121005 90° 227x94mm
KIT0161453
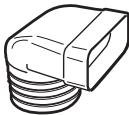
KIT0121007 227x94 0146mm
FRONT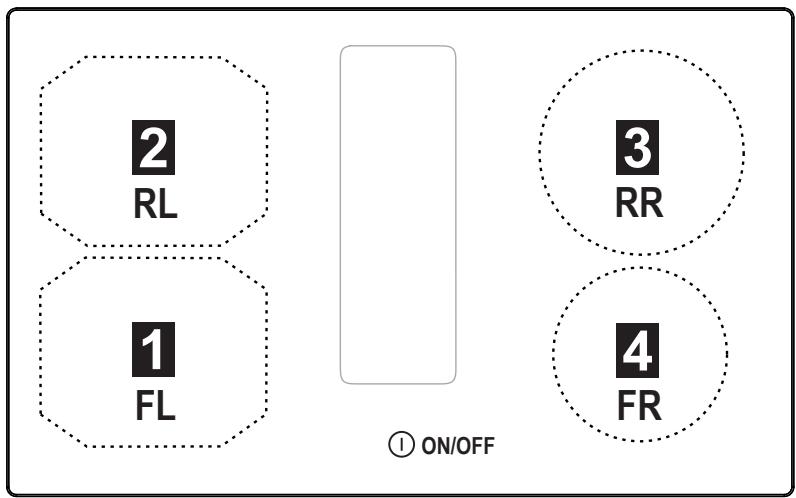

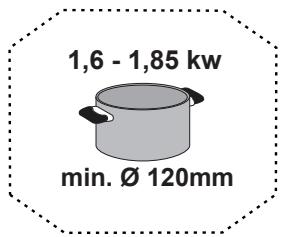
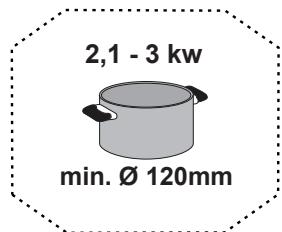


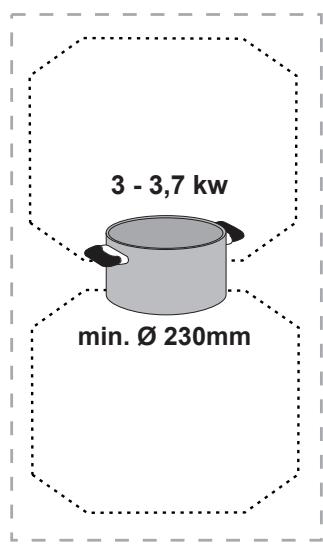

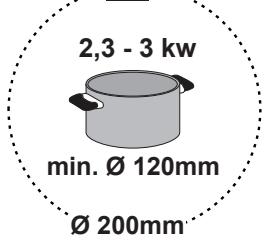
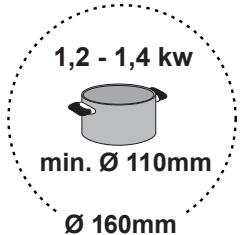


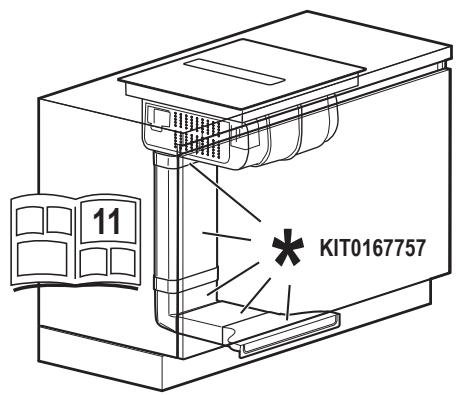
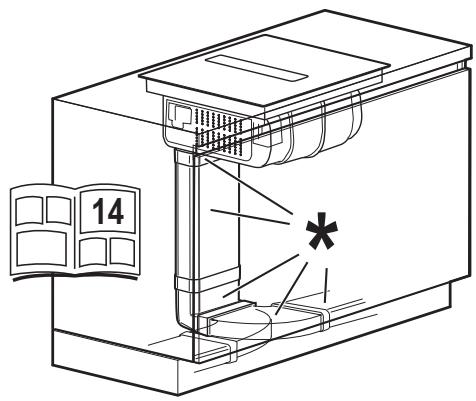
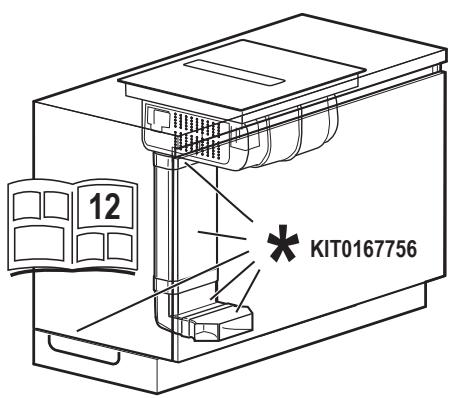
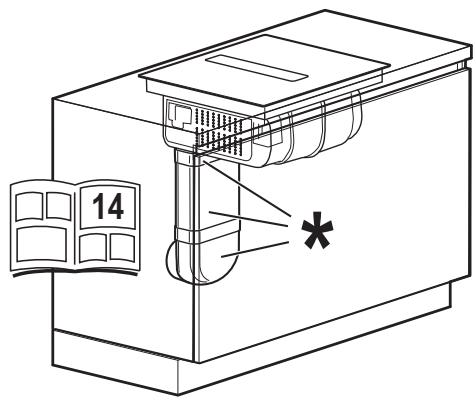
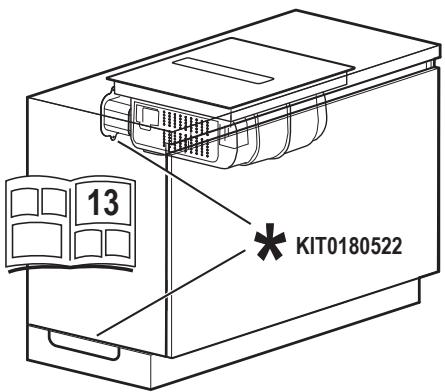
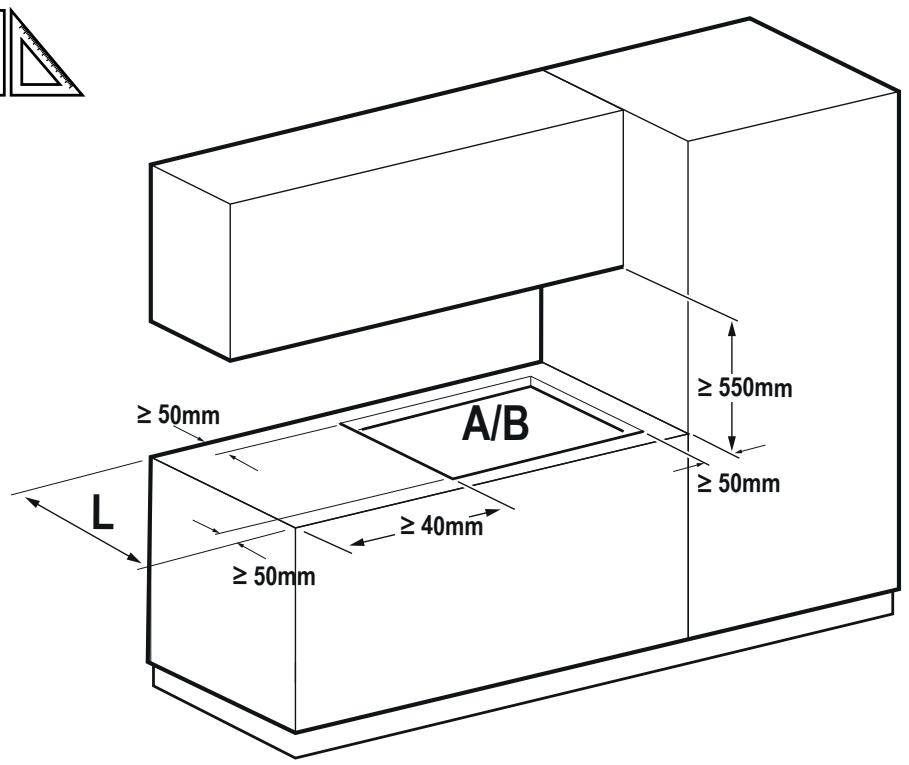
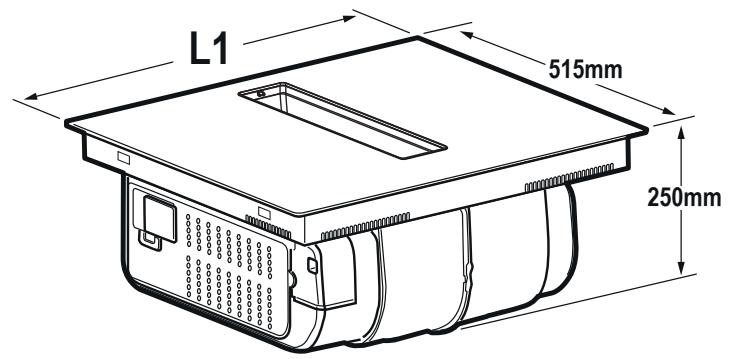
L1= 600mm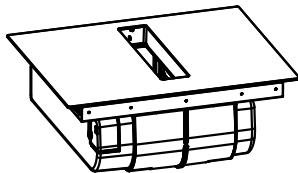
L1=720mm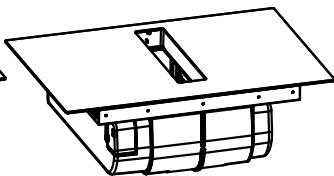
L1=830mm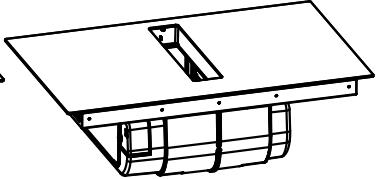
inst.A
inst.B
inst.A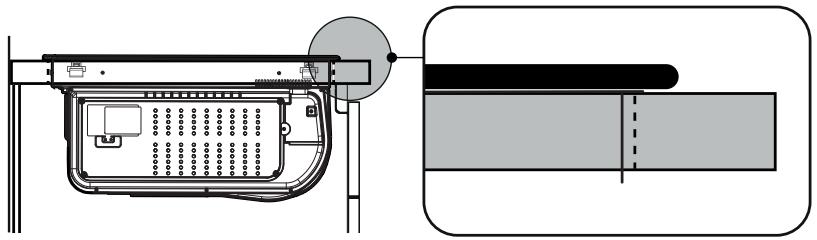
L1 = 600mm, L1 = 720mm
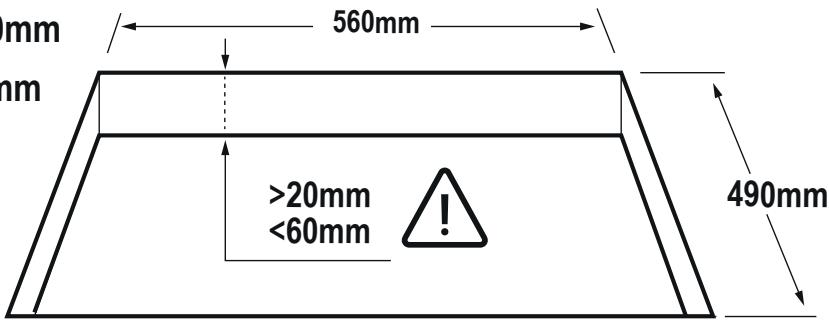
L1 = 830mm
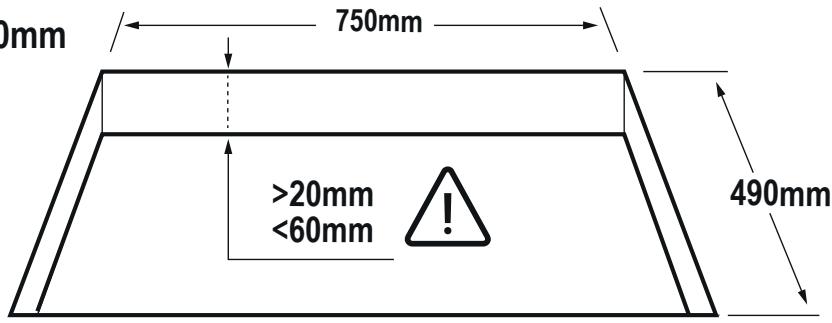
inst.B
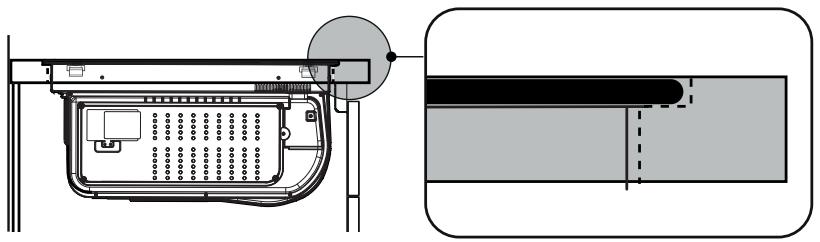
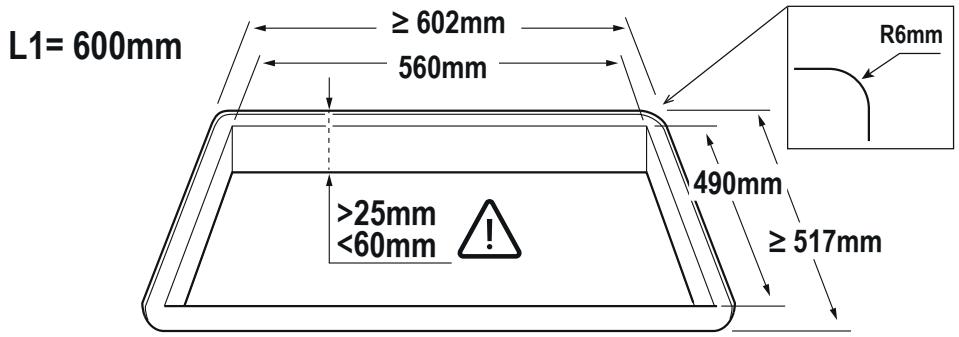

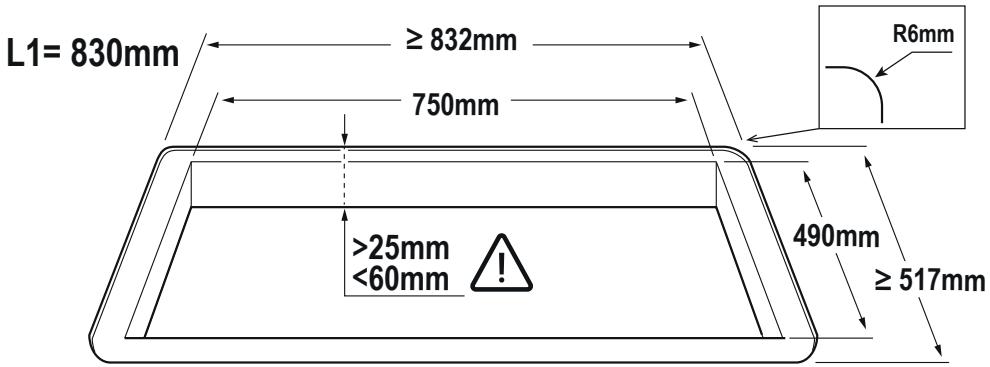
3.1
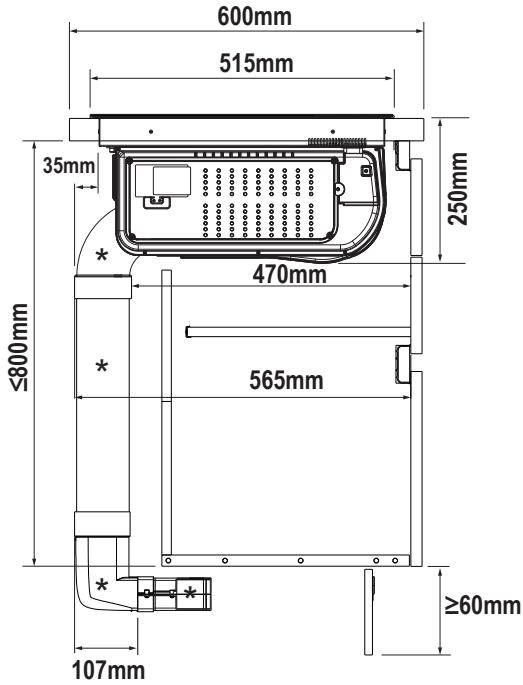
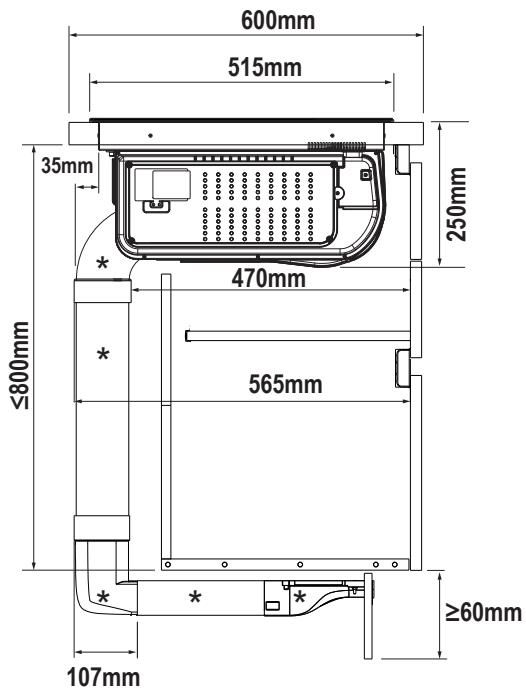

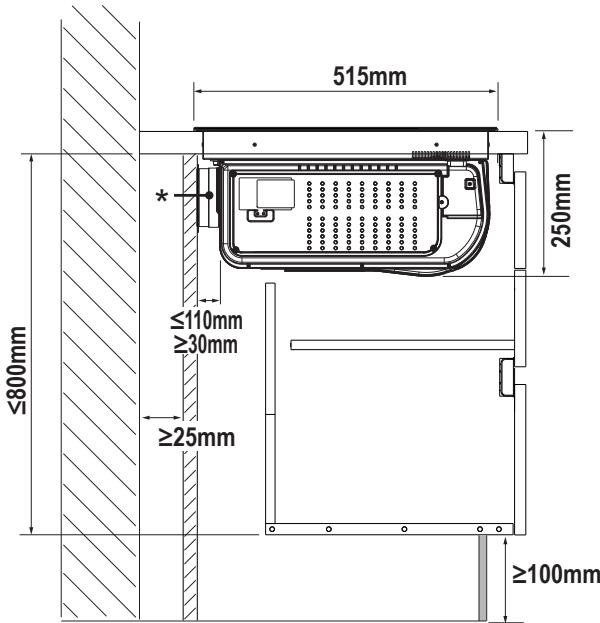
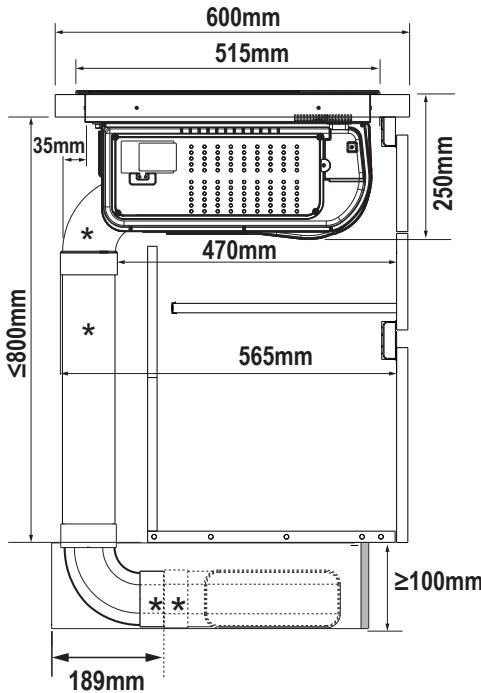
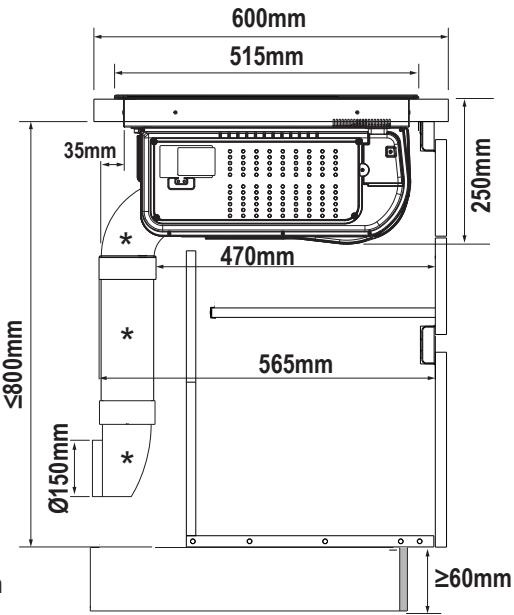
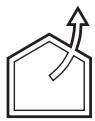
KIT WINDOW

V-Hz
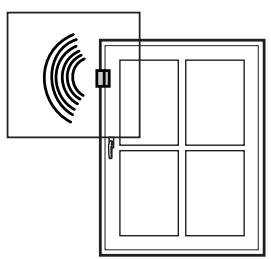
OFF
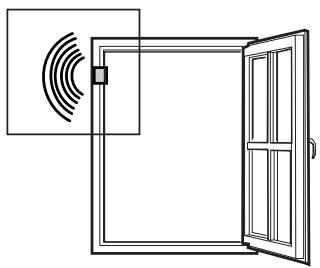
ON
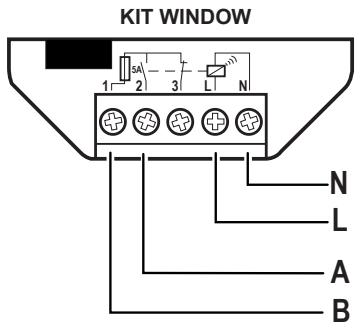
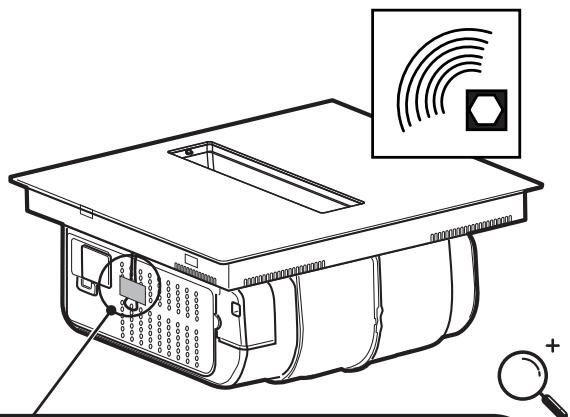
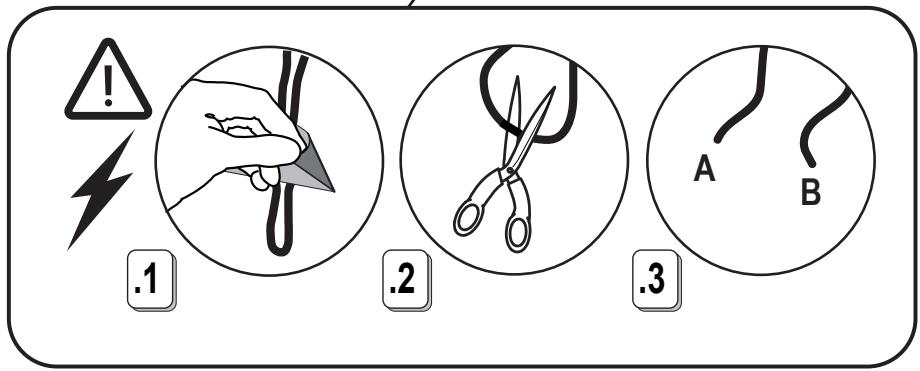
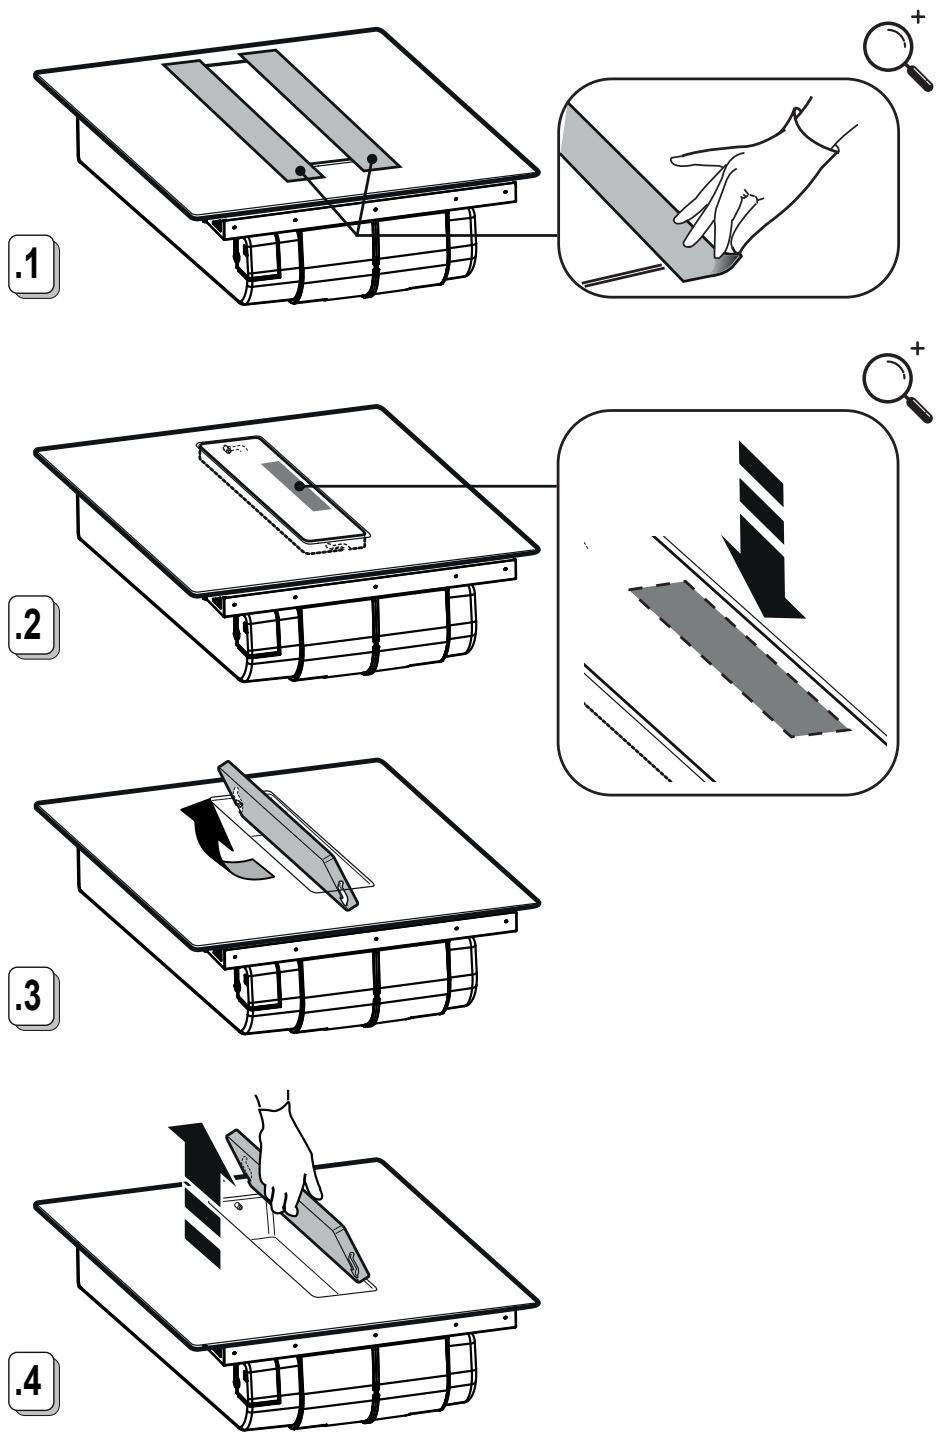

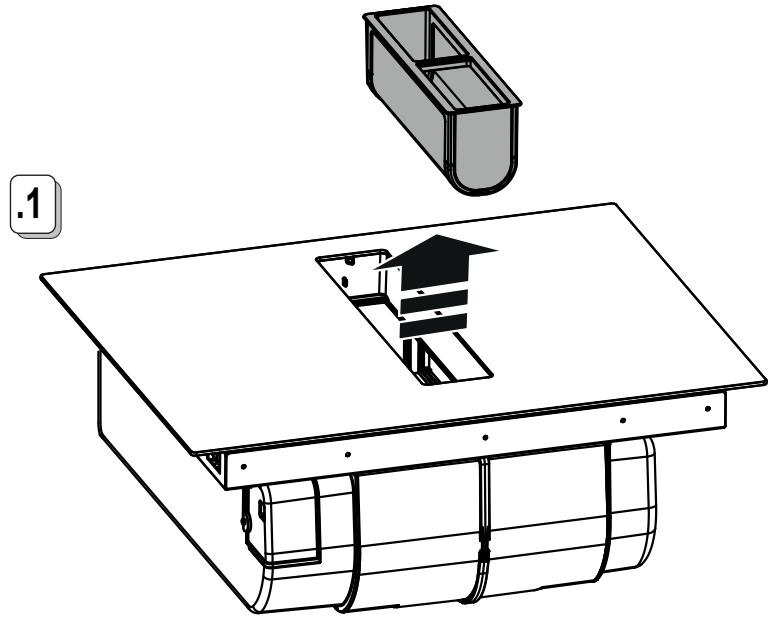
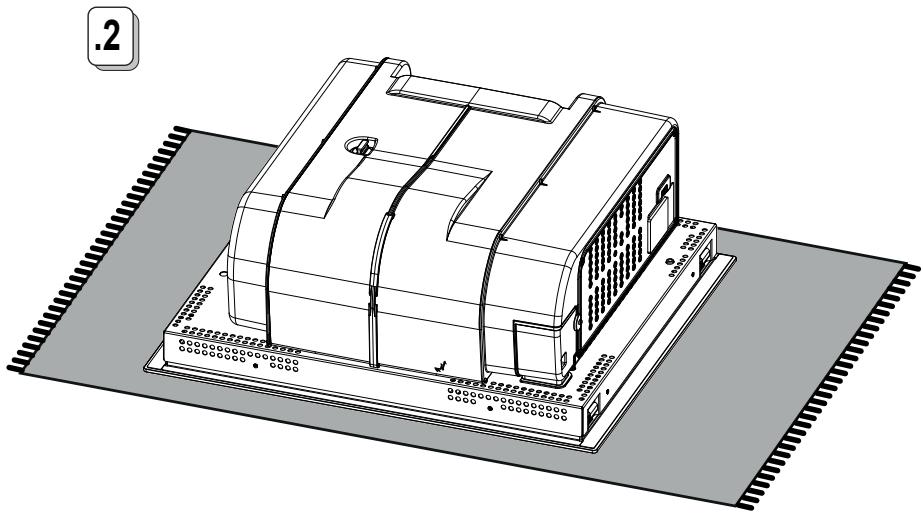
6.1
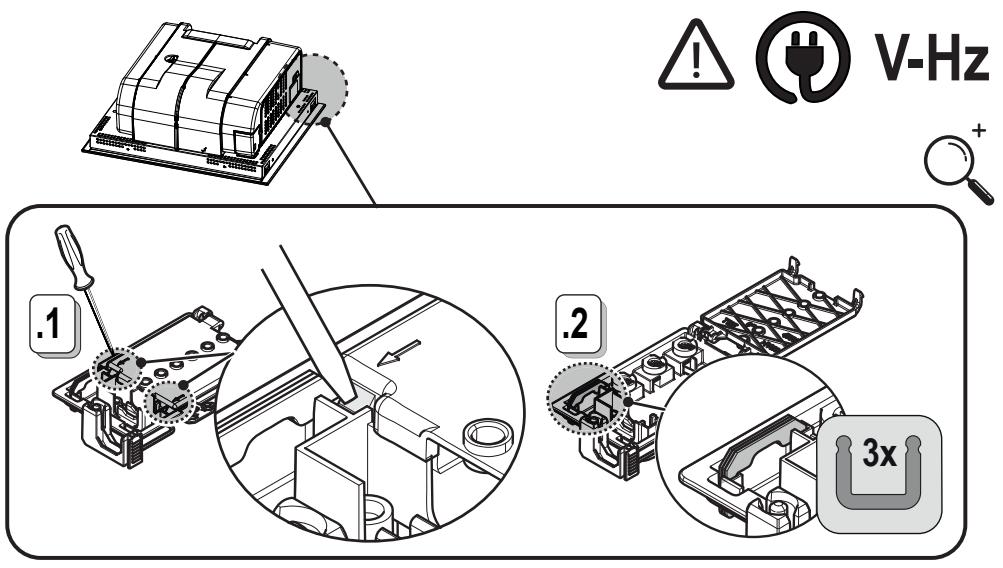
220V-240V~
50Hz/60Hz
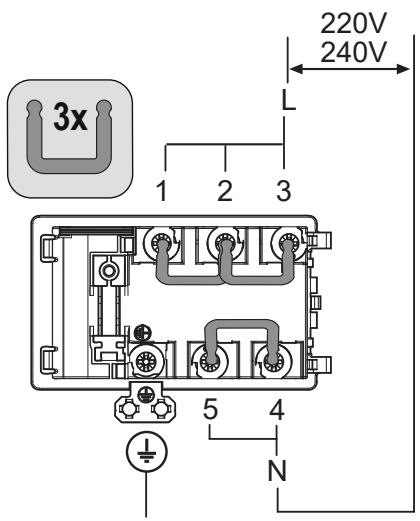
380V-415V~2N~
50Hz/60Hz
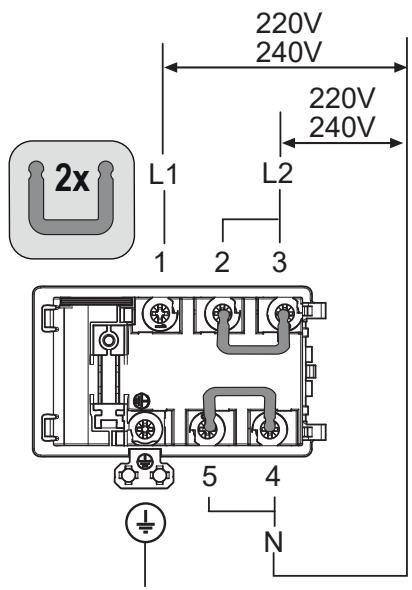
380V-415V~ 3N~
50Hz/60Hz
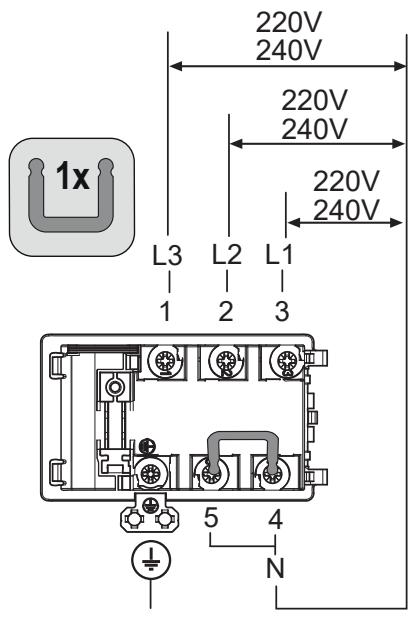
220V-240V ~ 2N 2L
50Hz/60Hz
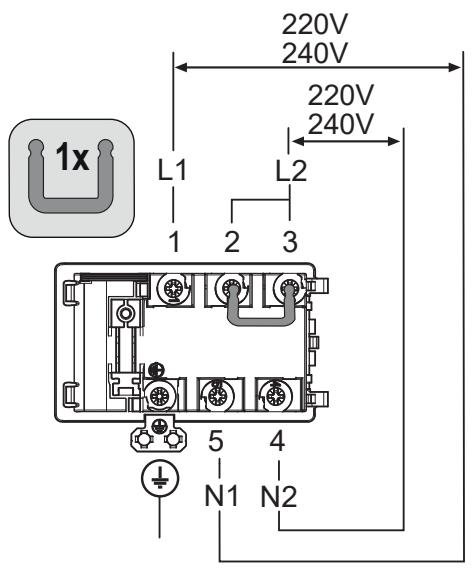
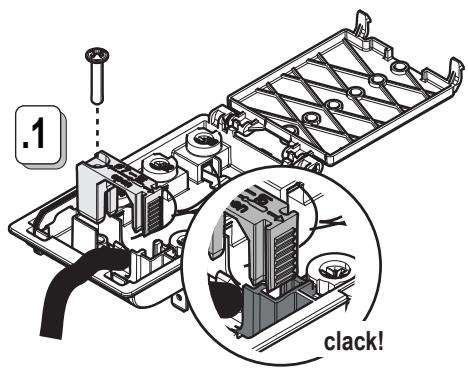


V-Hz
7.1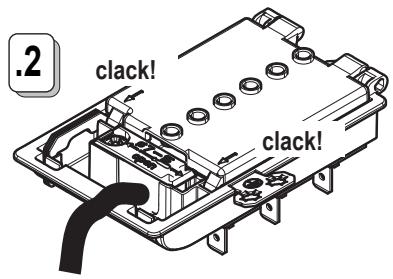
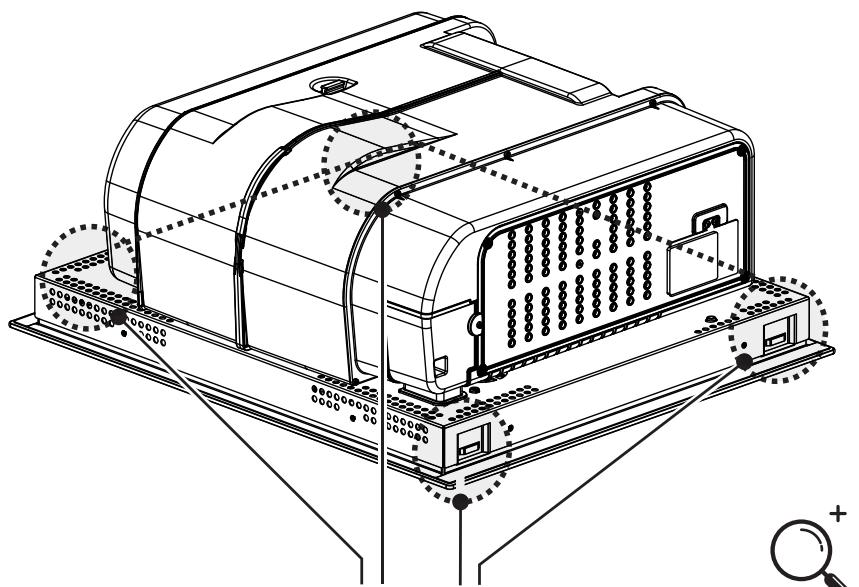
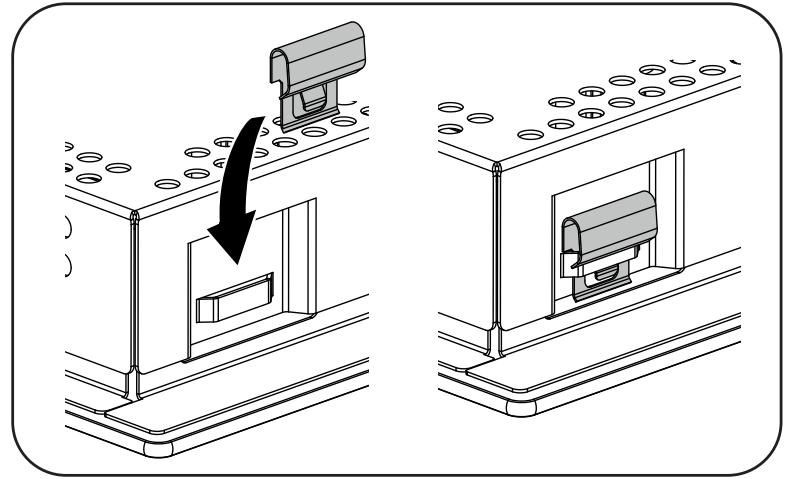
inst.A
inst.B
inst.A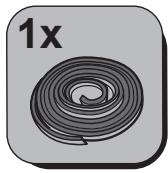
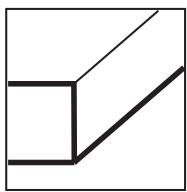
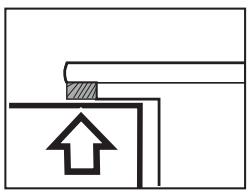
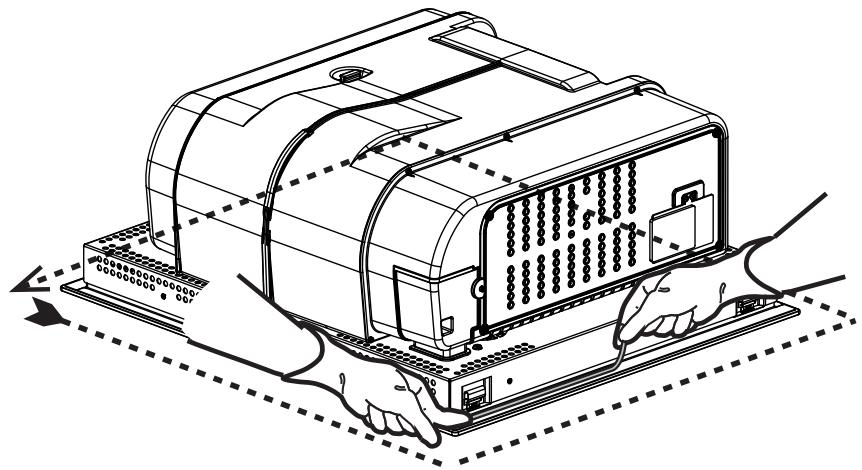
inst.B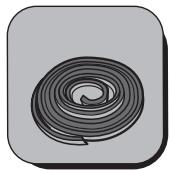
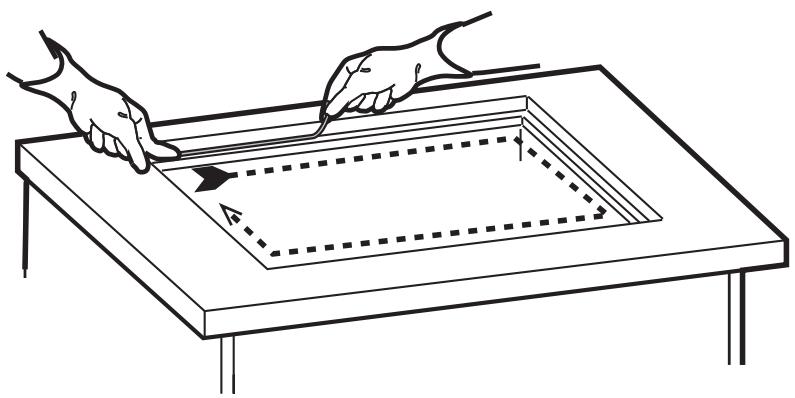
10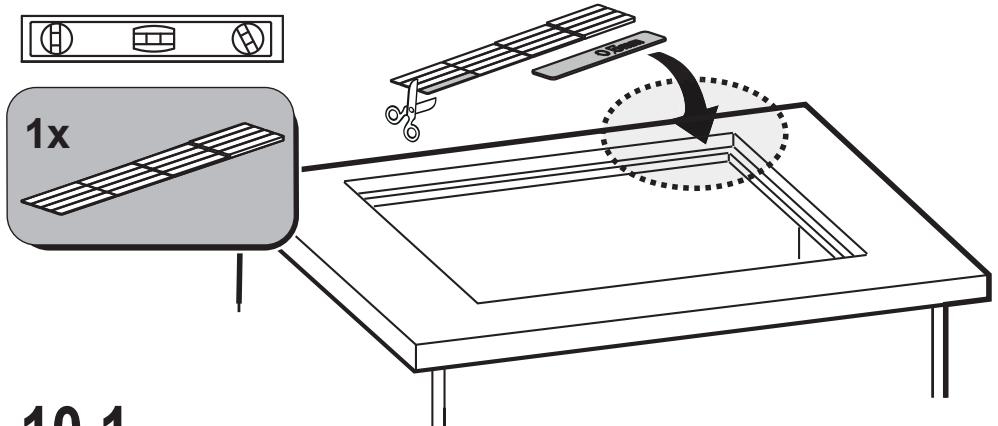
10.1 10.2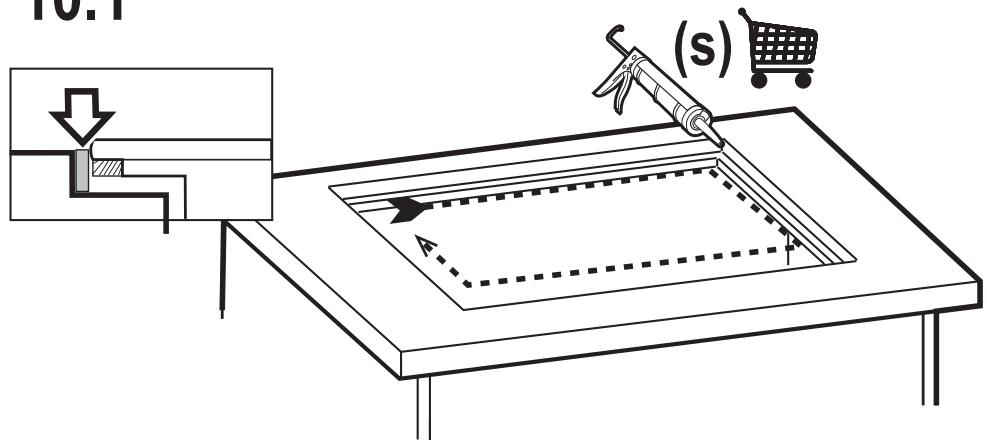
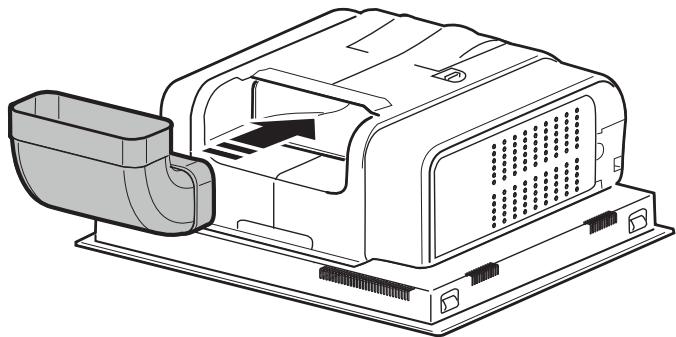
11
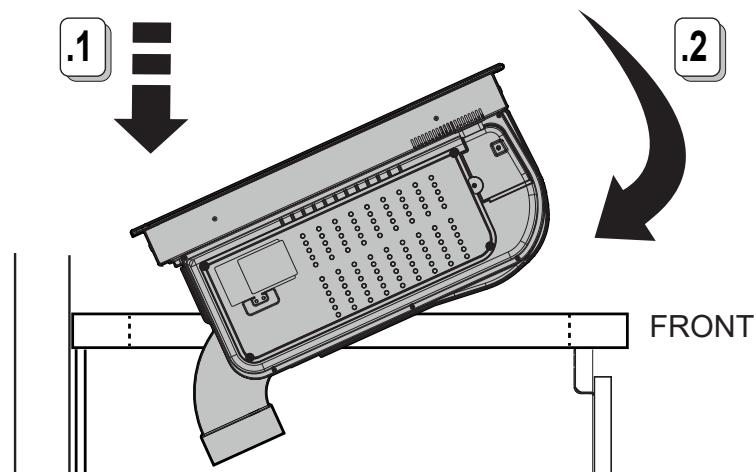
11.1
KIT0167757
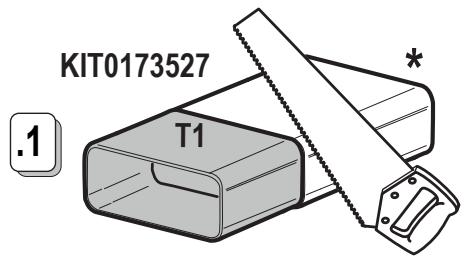
!L>650mm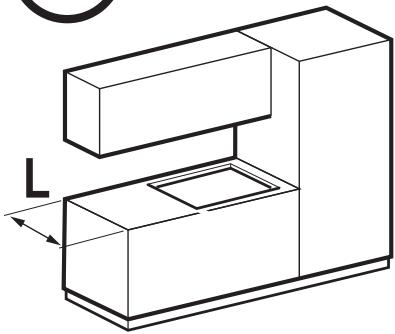
11.2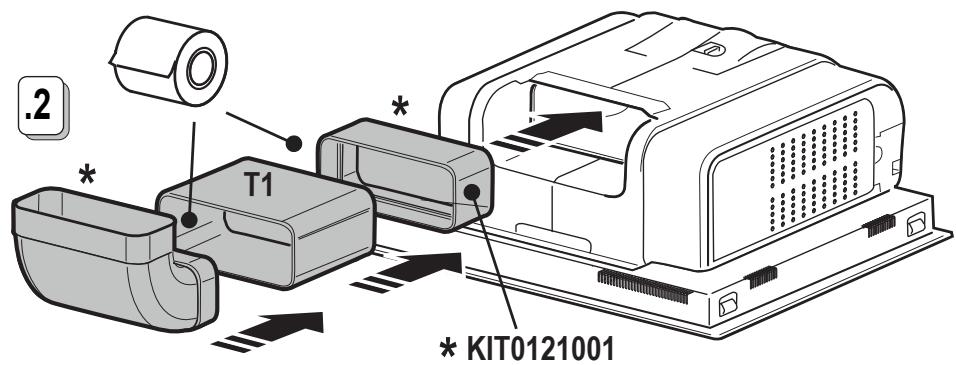
11.3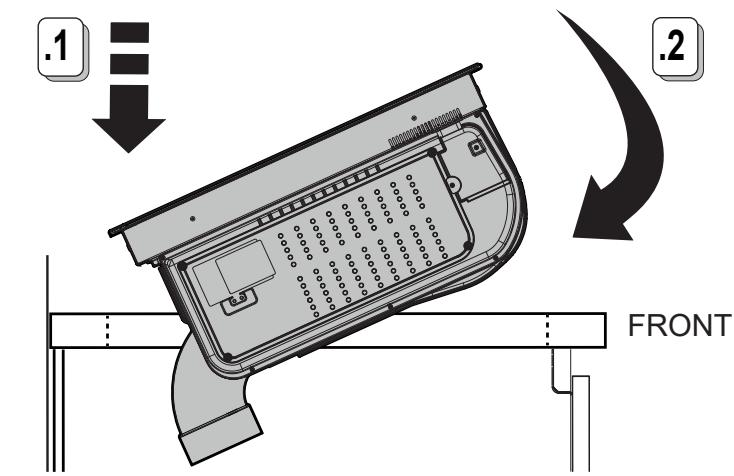
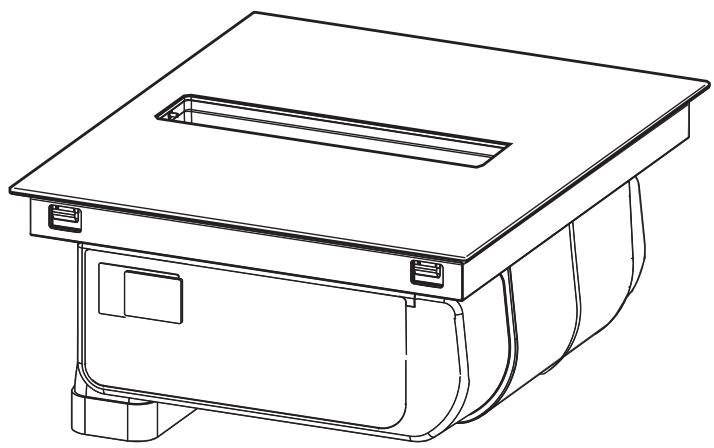
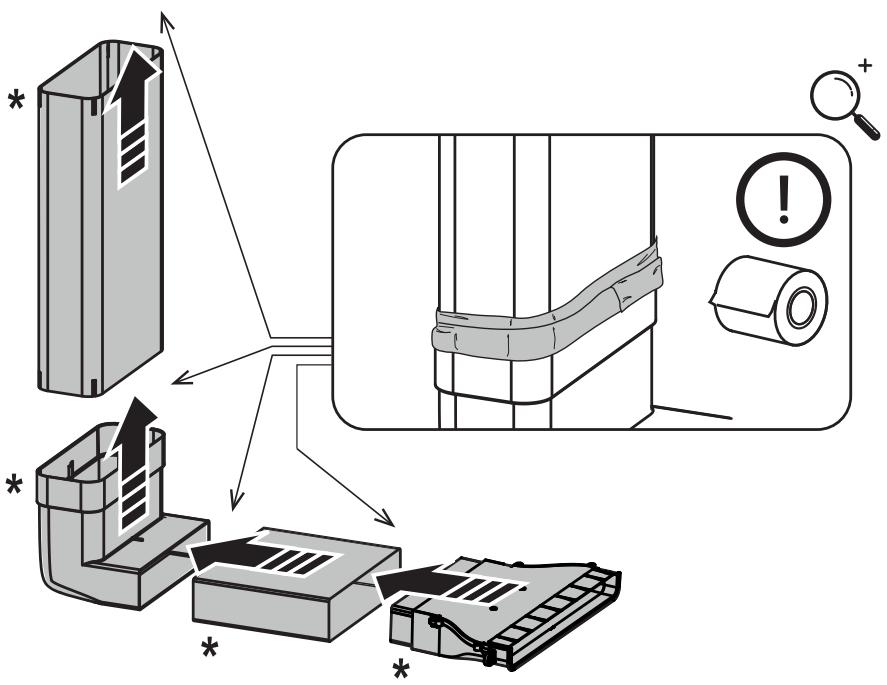
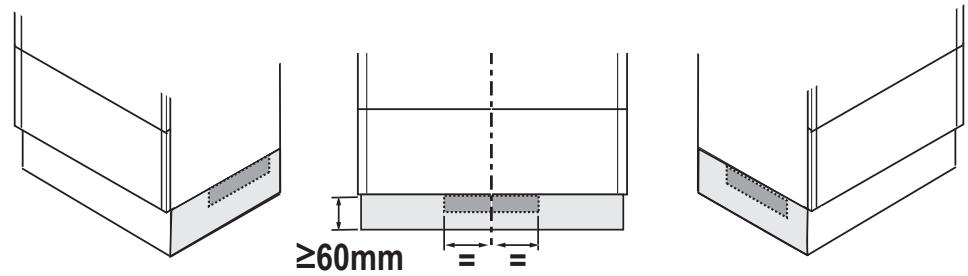
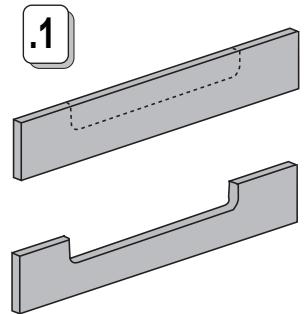
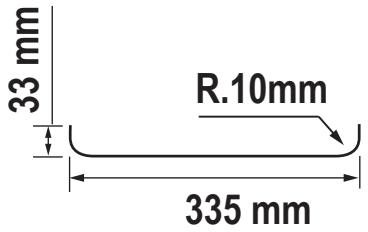
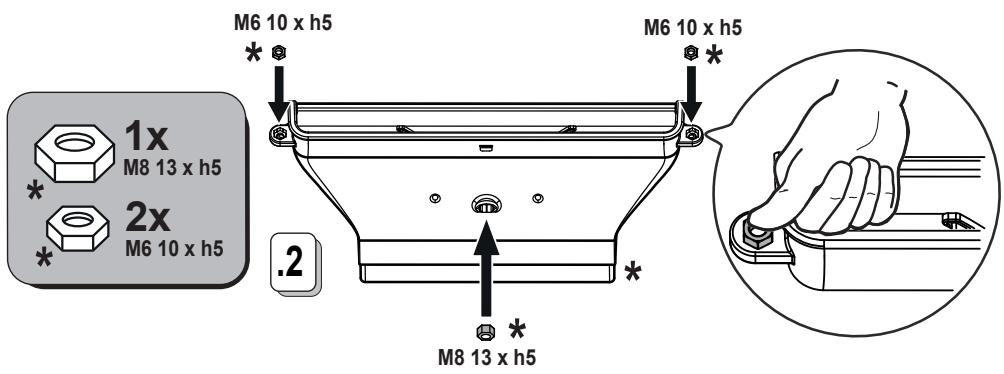
KIT0167757


www.elica.com
www.shop.elica.com

2x
M6x20mm
X ≤ 18.5 mm
X gt; 18.5 mm
X ≤ 22.5 mm
X ≤ 18.5 mm
.1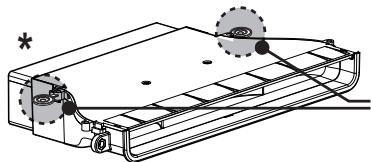
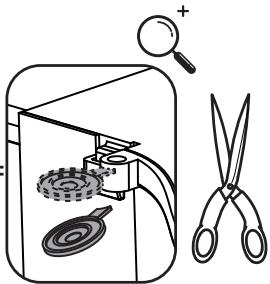
.2

.3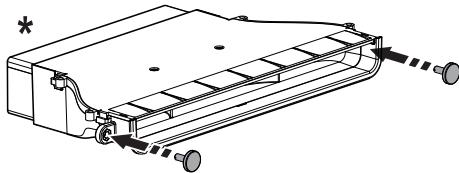
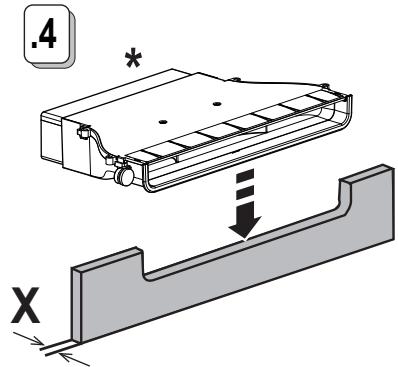
11.6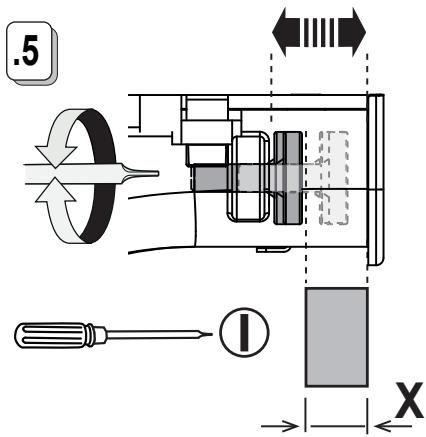
X ≥ 18.5 mm ≤ 22.5 mm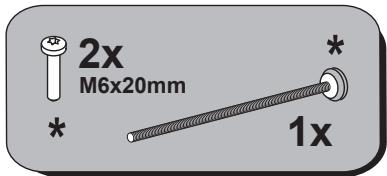
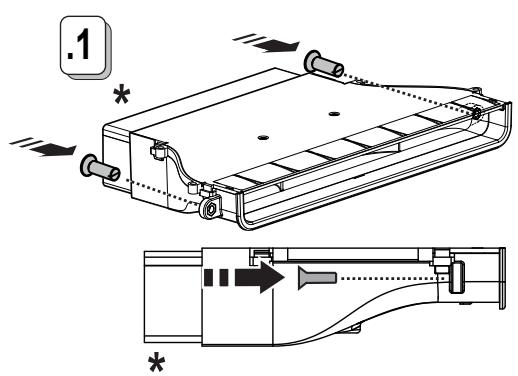
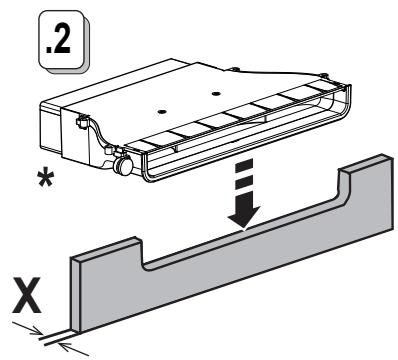
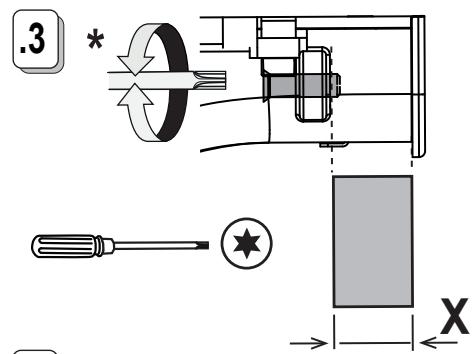
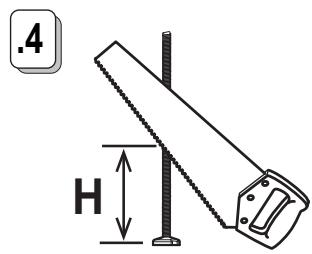
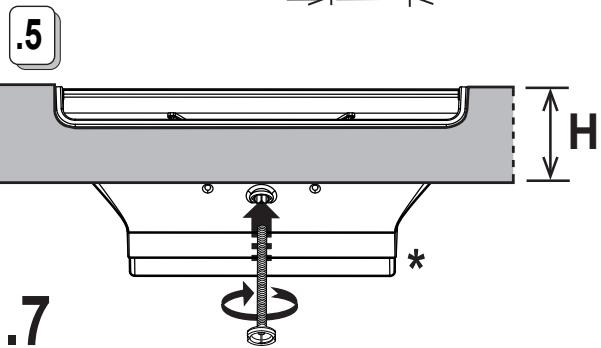
11.7
12
12.1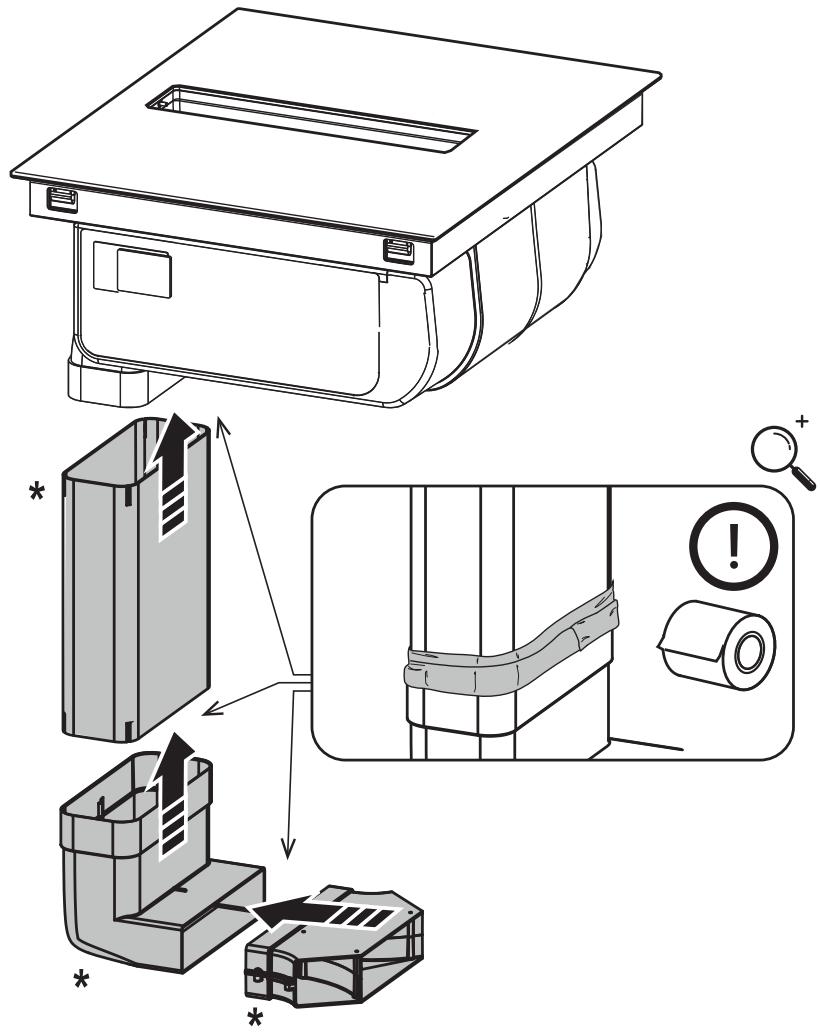
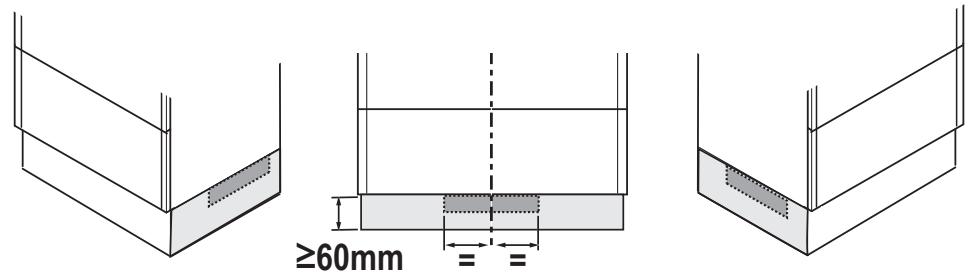
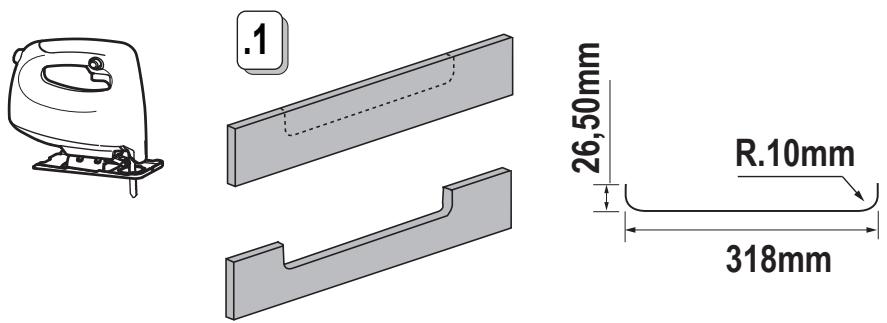
12.2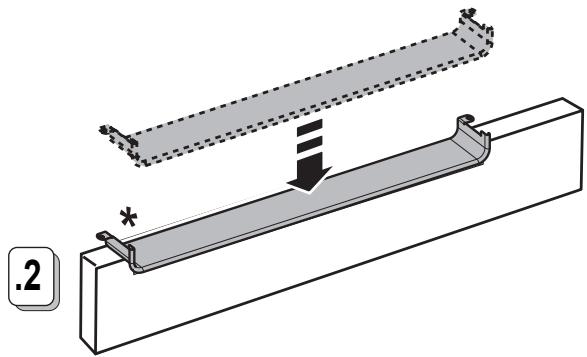
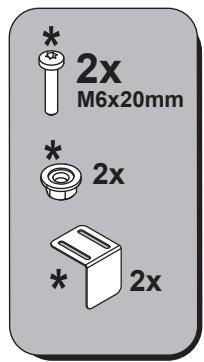
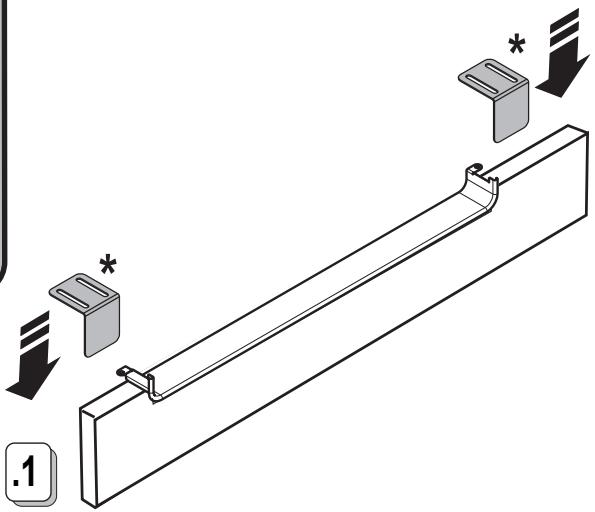
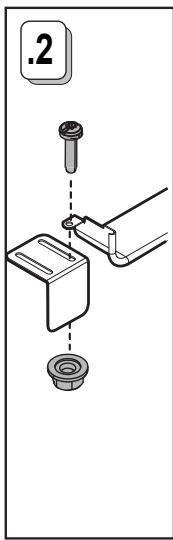
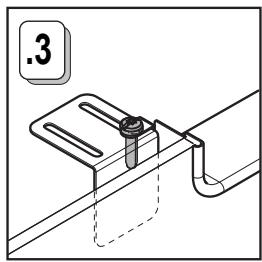
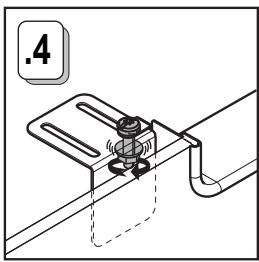
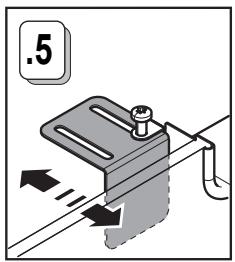
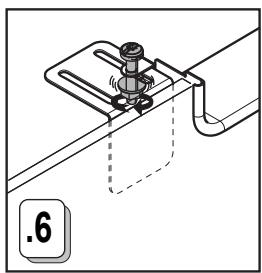
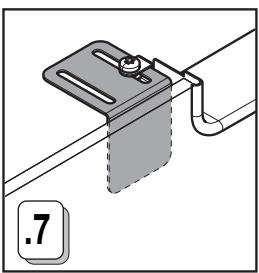
12.3
KIT0180522

www.elica.com
www.shop.elica.com

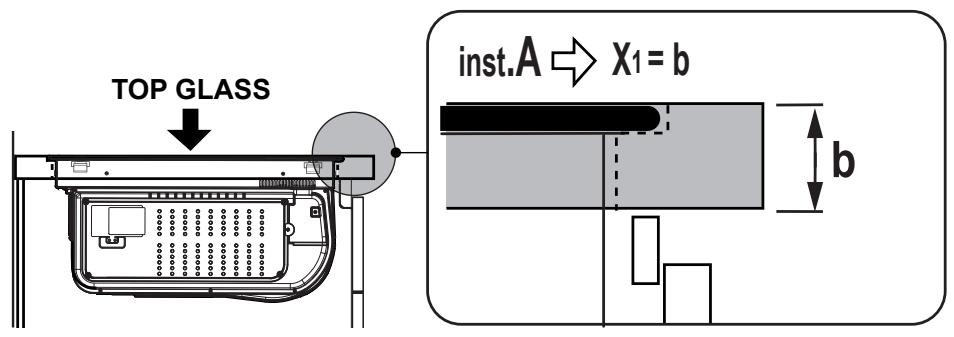
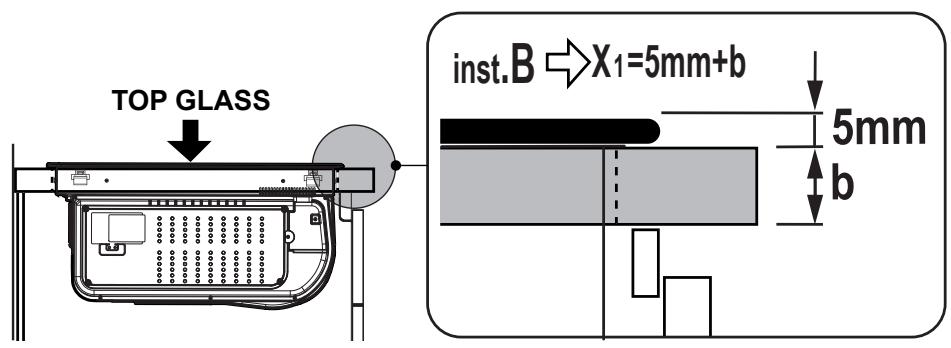
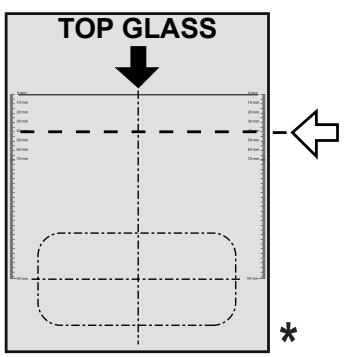
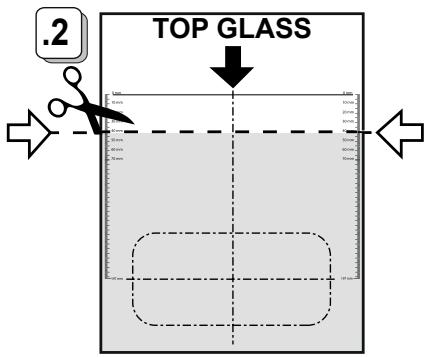
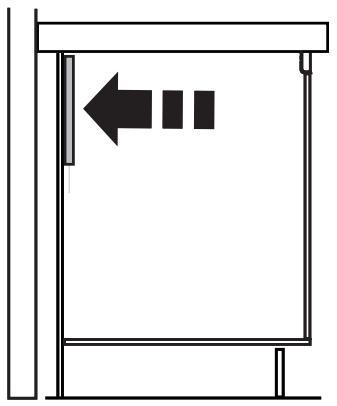
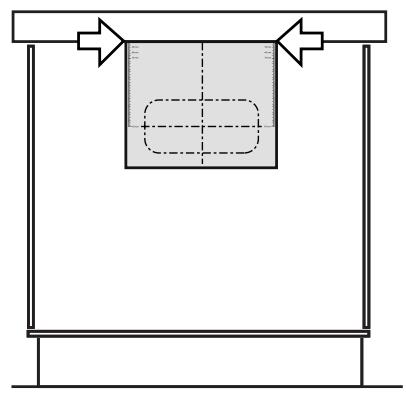
13.1 13.2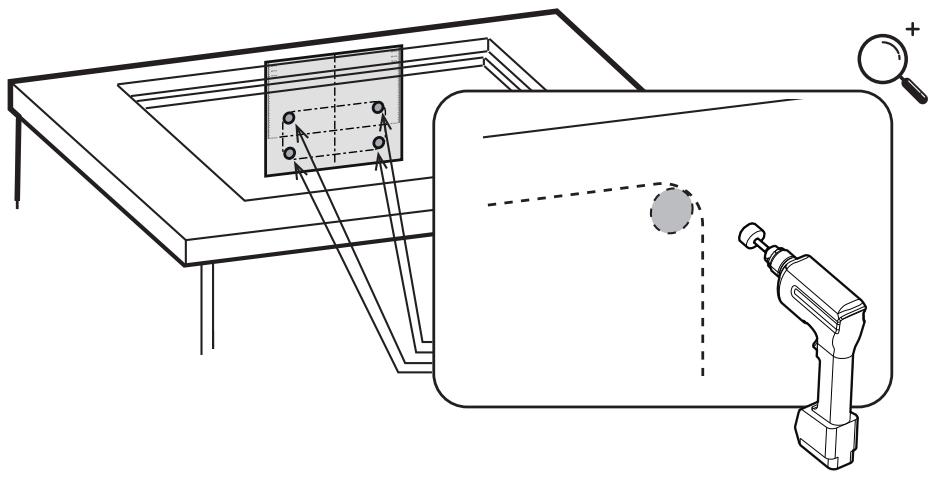
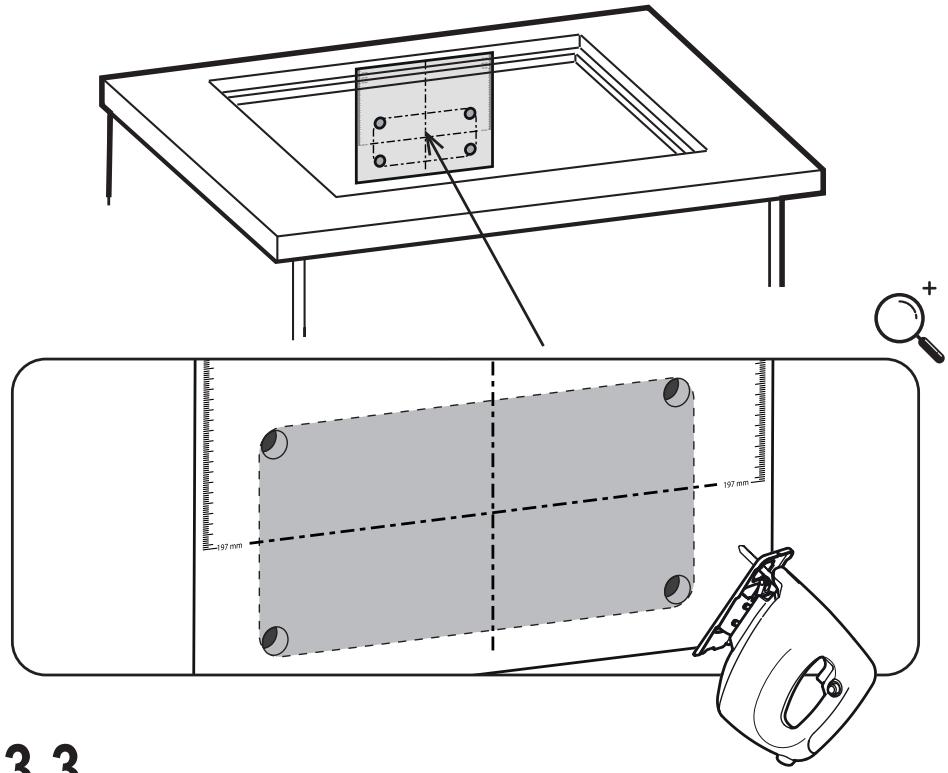
13.3
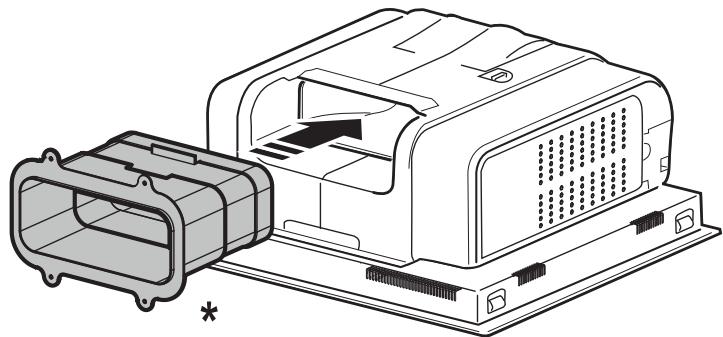
13.4
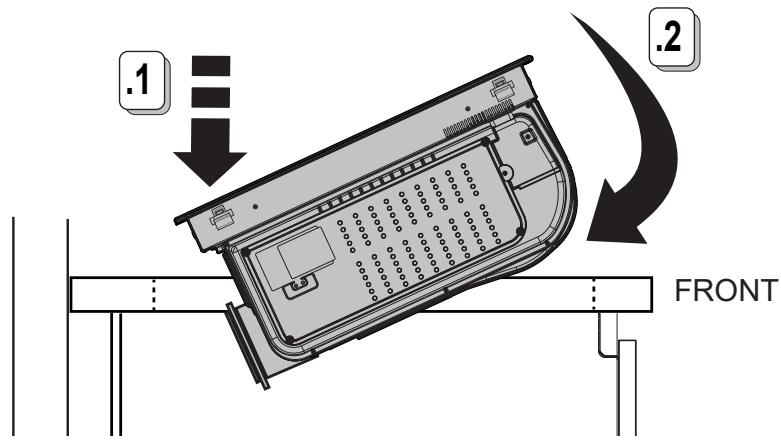
13.5

2x
03,5x13mm
13.6
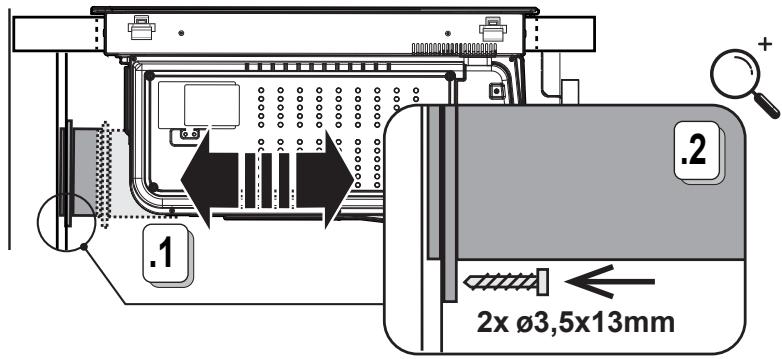
14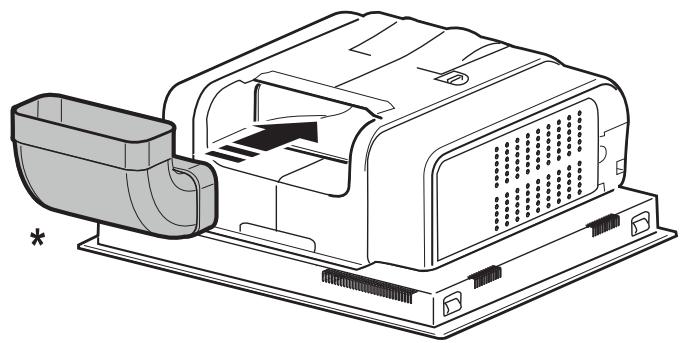
14.1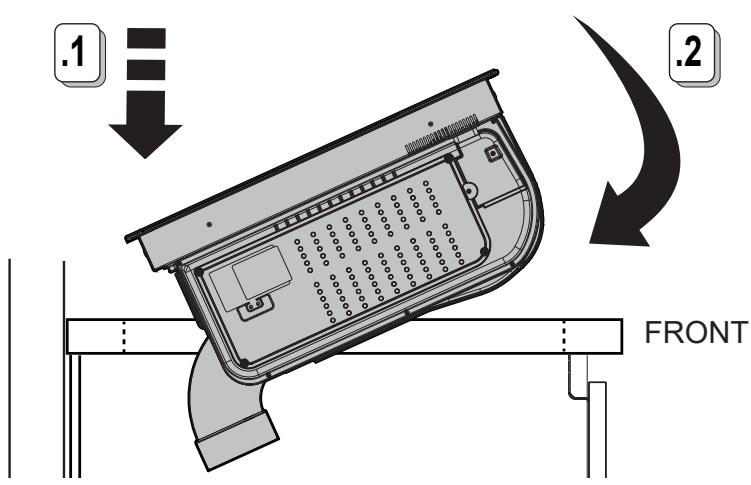
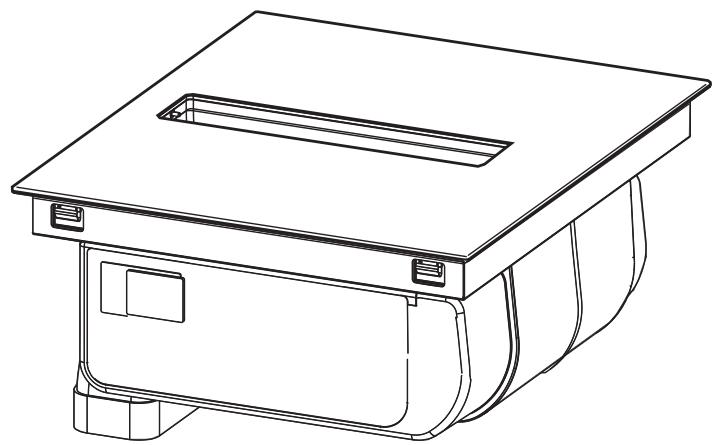
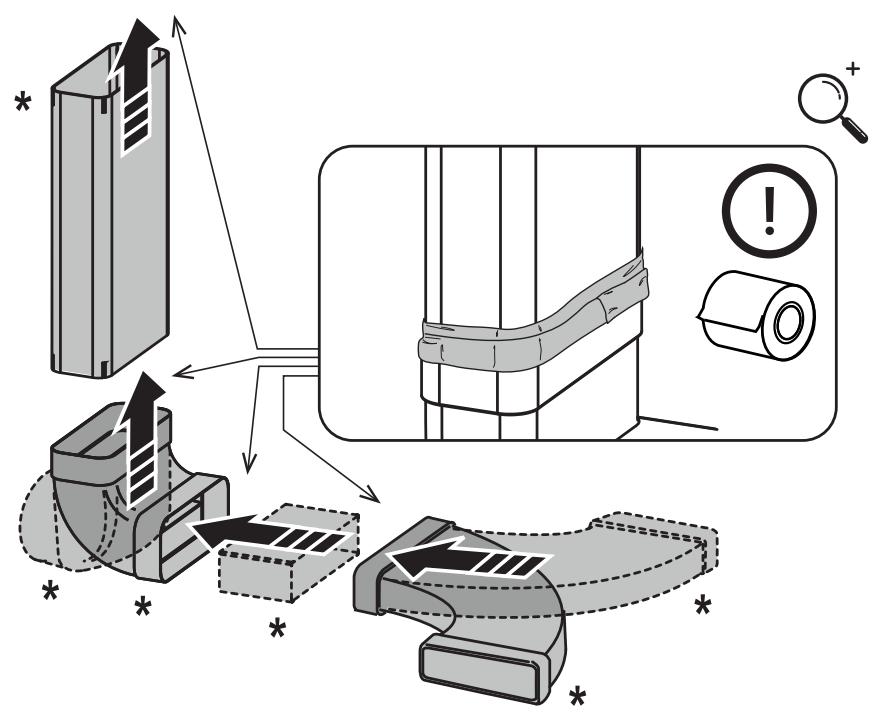

.1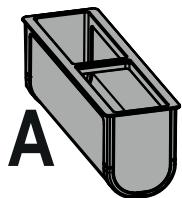
A-B
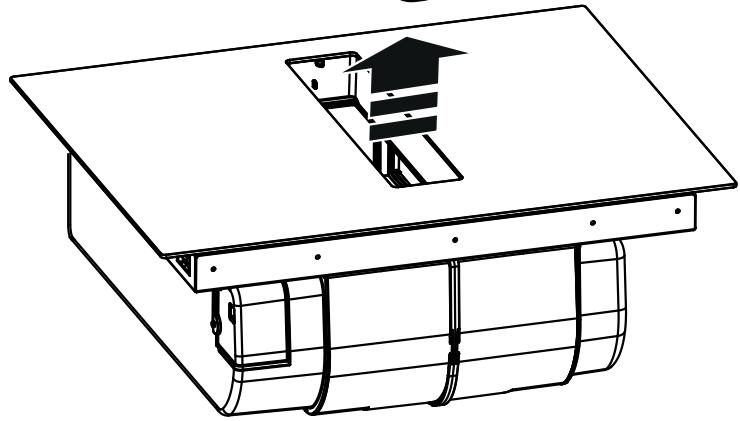
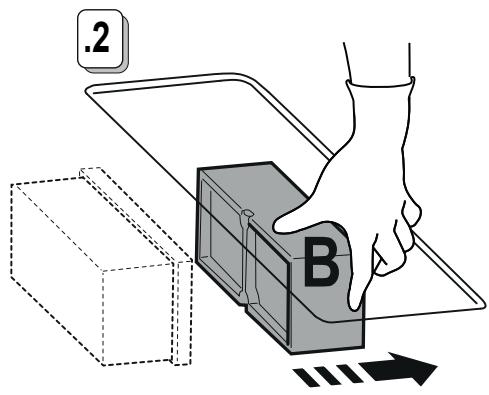
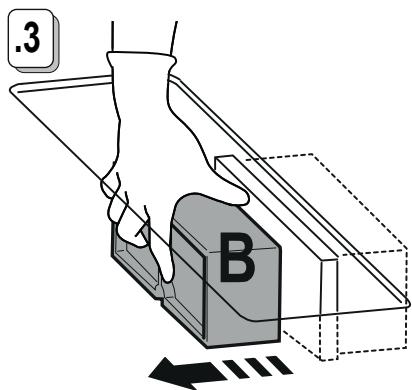
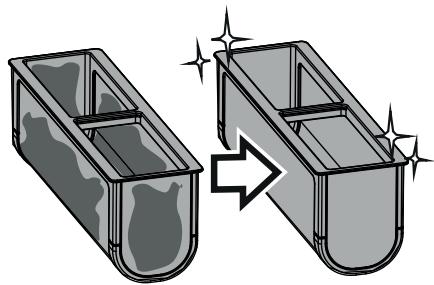
15.0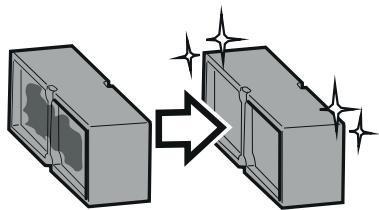

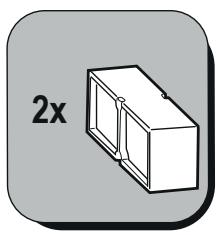
A-B
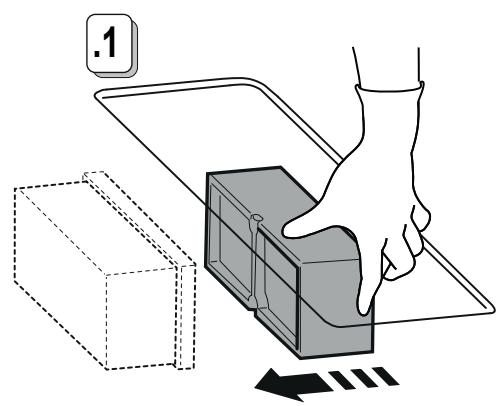
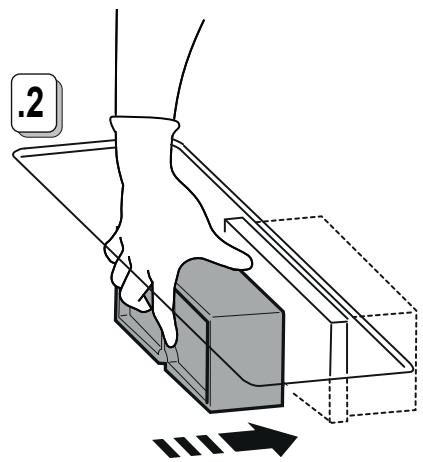
15.1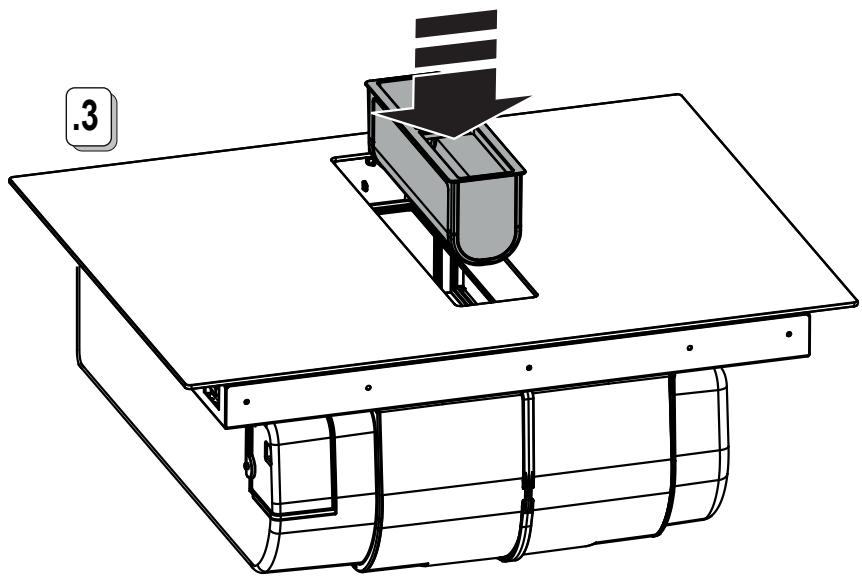
15.2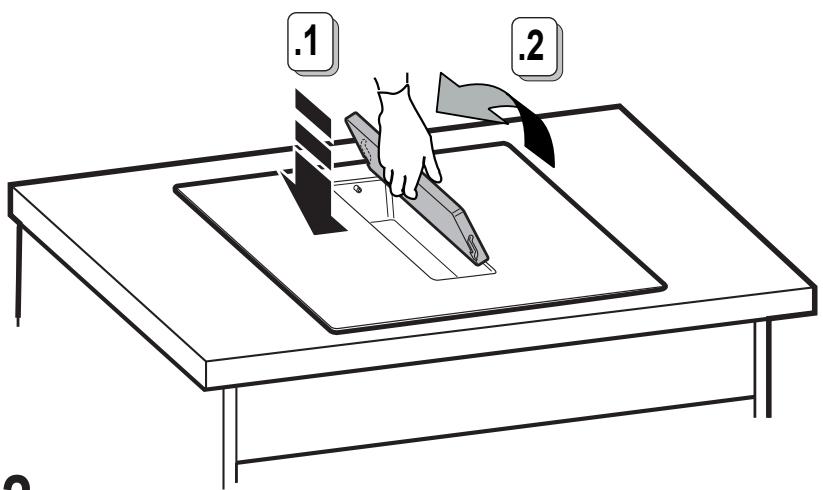
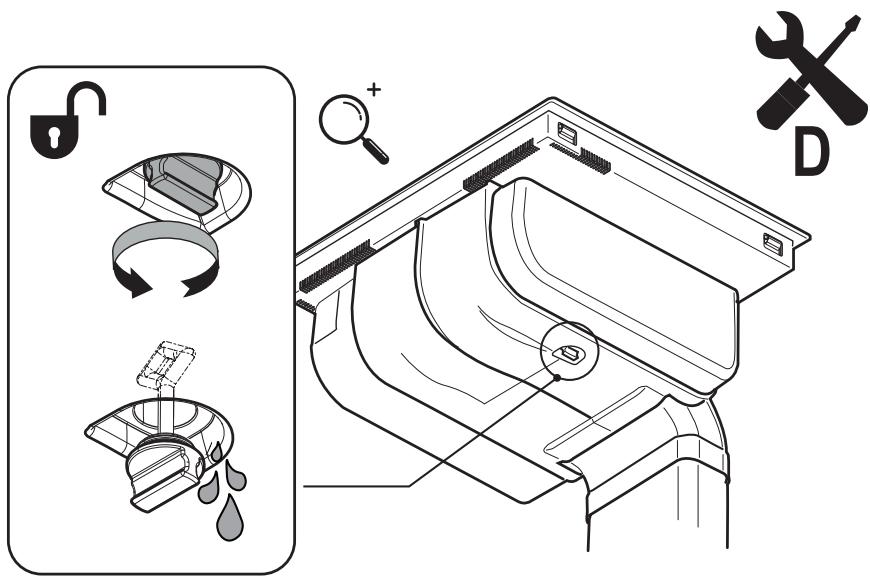
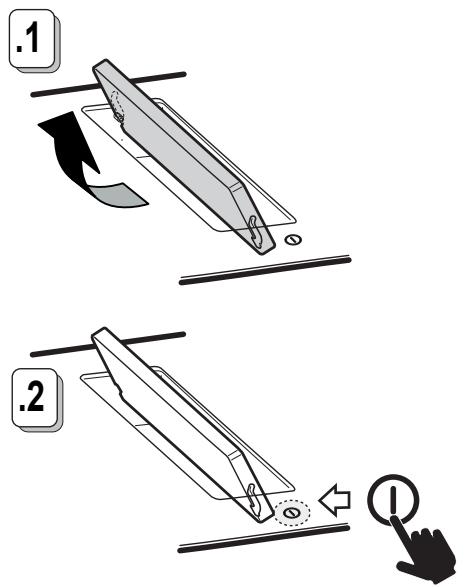
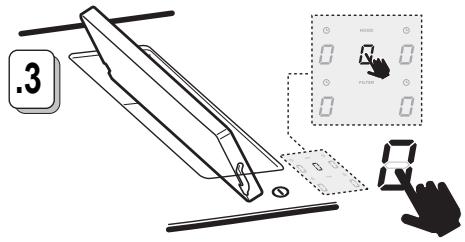
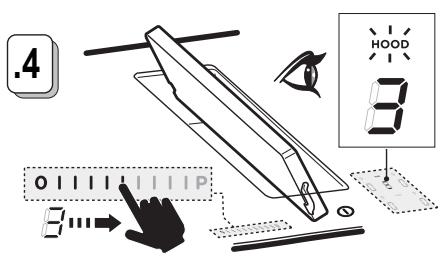
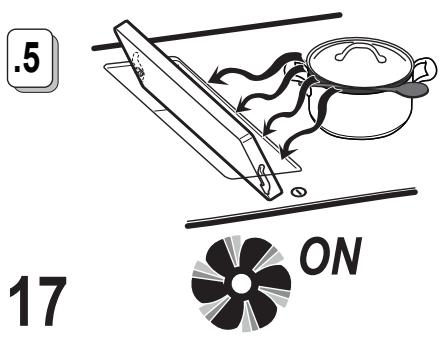
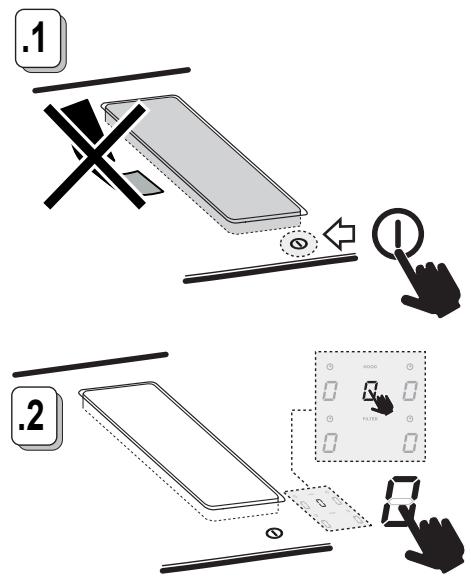
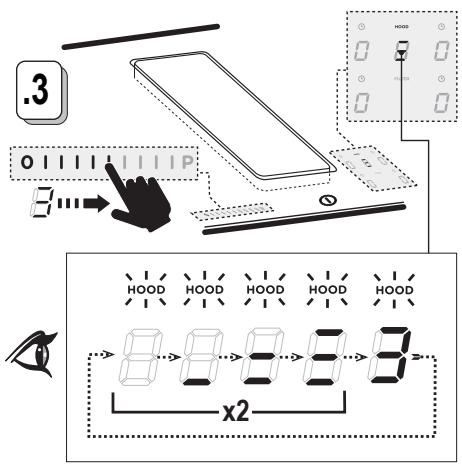
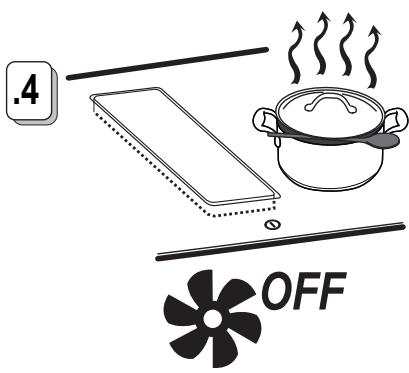

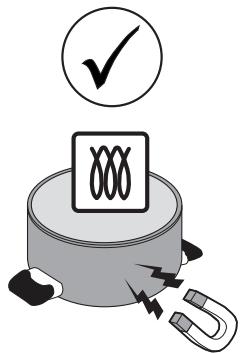
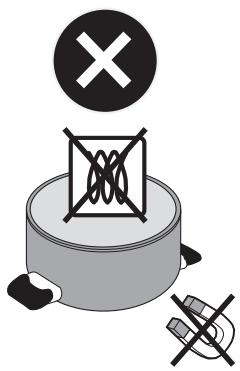
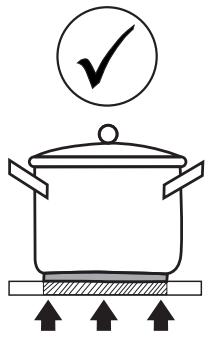
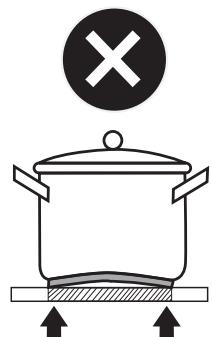
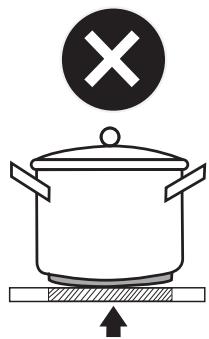



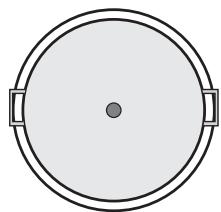
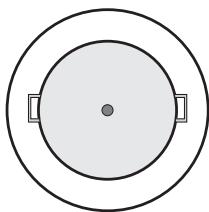
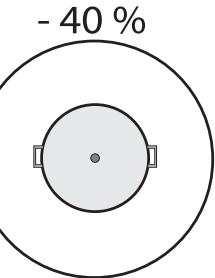
The versatility of features that range from lighting, to suction and cooking, helps create products that were born to amaze.
High-quality materials, careful attention to detail, strong passion for design each in their core essence play a leading role in our products capable of transmitting emotions.
Elica, aria nuova

FRAME AND
DISCOVER
- RESIDUAL HEAT INDICATOR
- TEMPERATURE MANAGER (WARMING FUNCTION)
- SAFETY AND REGULATIONS
- GENERAL SAFETY
- ELECTRICAL CONNECTION SAFETY
- INSTALLATION SAFETY
- END-OF-LIFE DISPOSAL
- REGULATIONS
- RECOMMENDATIONS FOR USE
- USE
- USING THE HOB
- USE OF COOKWARE
- IMPORTANT
- PRE-EXISTING COOKWARE
- RECOMMENDED POT BOTTOM DIAMETERS
- ENERGY SAVING
- USING THE EXTRACTOR FAN
- DUCT-OUT VERSION
- RECIRCULATING VERSION
- OPERATION
- CONTROL PANEL
- THINGS TO KNOW BEFORE STARTING
- COOKING ZONE DISPLAY
- CHARACTERISTICS OF THE HOB
- SAFE ACTIVATION
- POT DETECTOR
- SAFETY SHUT DOWN
- POWER-ON
- SELECTING THE COOKING ZONES
- POWER LEVEL
- POWER BOOSTER
- COOKING ZONE TIMER
- IF DESIRED, REPEAT THE OPERATION FOR SEVERAL COOKING ZONES
- POWER LIMITATION
- BRIDGE ZONES
- KEY LOCK
- AUTOMATIC HEAT UP
- PAUSE
- STAND ALONE" TIMER
- USING THE EXTRACTOR
- SWITCHING THE EXTRACTION SYSTEM ON
- EXTRACTION SPEED (POWER)
- AUTOMATIC MODE
- FILTER SATURATION INDICATOR
- RESET FILTER SATURATION
- ACTIVATION OF FILTER SATURATION INDICATOR
- CARBON/CERAMIC ODOUR FILTERS
- MAINTENANCE
- HOB MAINTENANCE
- CLEANING THE LIQUID COLLECTION CHANNEL
- CLEANING THE METAL GRILLE
- GREASE FILTER MAINTENANCE
- ASSISTANCE
- CUSTOMER SERVICE
- ACTIVATION INDICATOR FILTER SATURATION
- HOOD MAINTENANCE
- PRODUCT DISPOSAL AT END OF LIFE
- INSTRUCTIONS FOR USE
- USE OF THE HOB SURFACE
- BRIDGE ZONES [BRIDGE]
- SYNTHESIS OF THE PRODUCT
- CLEANING THE PRODUCT
- DO NOT USE ABRASIVE OR SHARP OBJECTS FOR CLEANING [THE APPLIANCE]
- IF THE APPLIANCE IS VERY DIRTY
- IMPORTANT: YOU MUST KNOW THIS BEFORE YOU START
- DISPLAY FOR COOKING ZONES
- HOB FEATURES
- SAFE ACTIVATION (SAFE START-UP)
- POT DETECTOR (PAN DETECTOR)
- MAINTENANCE OF THE HOB
- MAINTENANCE OF THE EXTRACTOR HOOD
- MAINTENANCE OF THE COOKING HOB
- PANS YOU ALREADY HAVE
- ENERGY EFFICIENCY
- USE OF THE EXTRACTOR HOOD
- EXTRACTION VERSION
- FILTER VERSION
- WHAT YOU NEED TO KNOW BEFORE USING THE APPLIANCE
- DISPLAY OF THE COOKING ZONE
- FEATURES OF THE HOB
- SAFE ACTIVATION (SAFE ACTIVATION)
- POT DETECTOR (POT DETECTOR)
- SAFETY SHUT DOWN (SAFETY SHUT DOWN)
- RESIDUAL HEAT INDICATOR (RESIDUAL HEAT INDICATOR)
- USE OF THE HOB FOR COOKING
- ACTIVATION
- KEY LOCK (3AKJIIOUBAHE HA BYTOHN)
- AUTOMATIC HEAT UP (ABTOMATUHO HARPABAHE)
- TIMER “STAND ALONE
- POWER BOOSTER (POWER BOOST)
- OPERATION IN AUTOMATIC MODE
- INDUCTOR TOP FOR FILLING THE FILTER
- TECHNICAL SERVICE
- RO
- PANS SUITABLE FOR USE
- PREVIOUSLY MANUFACTURED COOKWARE
- RECOMMENDED PAN DIAMETERS
- EXTRACTOR VERSION
- FILTERING VERSION
- OPERATION OF THE APPLIANCE
- CONTROLS
- USING THE COOKING SURFACE
- SWITCHING ON
- SELECTION OF COOKING ZONES
- POWER LEVEL (POWER LEVEL)
- TIMER FOR THE STEAM FUNCTION
- TIMER "STAND ALONE" (SEPARATE)
- CARE OF THE STEAM SURFACE
- CARE OF THE EXTRACTOR
- TECHNICAL SUPPORT
- SUITABLE COOKWARE
- RECOMMENDED POT DIAMETERS
- RECIRCULATION VERSION
- USE OF THE EXTRACTION
- EXTRACTION POWER (POWER)
- AUTOMATIC OPERATING MODE
- FILTER CLOGGING INDICATOR
- CARE FOR THE EXTRACTOR HOOD
- SAFETY PRECAUTIONS
- ELECTRICAL SAFETY
- PREPARING THE HOUSING FOR INSTALLATION
- STORAGE AND TRANSPORT
- SCHEDULES
- OTHER PROPER USE
- INTENDED USE
- MAHBI3AIBI
- AAIBH AIA DAIBHDIAHAB BIDBC
- BLDIC ACTBIHIN DPYBC NANAMETPI
- KYAT YHEMDEY
- INSTALLATION OF THE EXHAUST PIPE
- RECIRCULATION MODE
- RECIRCULATION KIT
- BEFORE USING THE HOOD, PLEASE READ THE FOLLOWING INSTRUCTIONS
- SWITCHING ON THE COOKING ZONES
- TECHNICAL SPECIFICATIONS
- COOKING ZONES
- RESIDUAL HEAT INDICATORS
- AUTOMATIC SWITCH-OFF
- TOUCH CONTROLS
- TURNING ON
- SETTING THE PARAMETERS
- POWER SUPPLY
- KYAT KYWEIK
- PNICIPY AIMAFBIBH TAMEPI
- ABTOMATBI KBL3BIPY
- BOLEK" TIMER
- TEMPERATURE RETENTION (KEEP WARM FUNCTION)
- PEDAL ADJUSTMENT
- THE PEDAL HAS TWO ADJUSTMENTS
- PEDAL POSITION (POWER)
- POWER ADJUSTMENT
- CY3RIHH TONFAHBH KEPCETEH INDNKATOP
- CY3RIHH TONFAHBIH KEPCETYI KAIA OPHATY
- CY3RINEPEIN TONFAHBIN 6INIPETIH INNKATOPDBIH KOCBLNYBL
- METAL/CERAMIC FILTER ELEMENTS
- PLASTIC FILTER ELEMENTS
- TECHNICAL SERVICE OF THE DIRT TRAP
- MAINTENANCE SERVICE
- MAINTENANCE SERVICE FOR THE DEVICE
- TOMBEVENTILAATORI HOOLDUS
- CLEANING THE DOWNDRAFT VENTILATOR
- TEMPERATURE CONTROLLER (HEATING FUNCTION)
- TIMER FOR THE COOKING ZONE
- AUTOMATIC OPERATION
- (POWER LIMITATION)
- XE
- A
- KIT
Brand : THOMSON
Model : THIH60
Category : Range hood