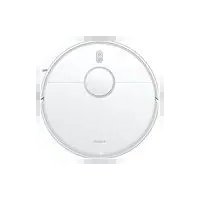
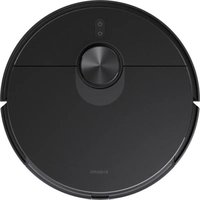
USER MANUAL Robot Vacuum X10 Xiaomi
Read this manual carefully before use, and retain it for future reference.
Usage Restrictions
- This product is for floor cleaning in a home environment only. Do not use it outdoors, on non-floor surfaces, or in a commercial or industrial setting.
- This appliance can be used by children aged from 8 years and above and persons with reduced physical, sensory or mental capabilities or lack of experience and knowledge if they have been given supervision or instruction concerning use of the appliance in a safe way and understand the hazards involved. Children shall not play with the appliance. Cleaning and user maintenance shall not be made by children without supervision.
- The appliance is only to be used with the power supply unit provided with the appliance.
- This appliance contains batteries that are only replaceable by skilled persons.
- Children shall not play with this product. Ensure children and pets are kept at a safe distance from the robot vacuum while it is operating.
- If the power cord is damaged, it must be replaced by a special cord or assembly available from the manufacturer or its service agent.
- Do not use the robot vacuum in an area suspended above ground level without a protective barrier.
- Do not place the robot vacuum upside down. Do not move the robot vacuum by using its LDS laser sensor cover, cover, or bumper as a handle.
- Do not use the robot vacuum at an ambient temperature above 40°C or below 0°C or on a floor with liquids or sticky substances.
- Do not install, charge, or use this robot vacuum outdoors, in bathrooms, or near a pool.
- Pick up any cables from the floor before using the robot vacuum to prevent it from dragging them while cleaning.
- Remove fragile or small items from the floor to prevent the robot vacuum from bumping into and damaging them.
- Keep the cleaning tool out of reach of children.
- Do not place children, pets, or any item on top of the robot vacuum regardless of whether it is stationary or moving.
- Keep hair, fingers, and other body parts away from the suction opening of the robot vacuum.
- Do not use the robot vacuum to clean any burning substances.
- Do not vacuum up hard or sharp objects.
- Make sure the robot vacuum is turned off and the auto-empty station is unplugged before cleaning or performing maintenance.
- Do not wipe the robot vacuum or auto-empty station with a wet cloth or rinse them with any liquid. After cleaning washable parts, fully dry the parts before reinstalling and using them.
- Make sure the robot vacuum is turned off when being transported and kept in its original packaging if possible.
- Please use this product in accordance with the instructions in the user manual. Users are responsible for any loss or damage arising from improper use of this product.
Batteries and Charging
WARNINGS:
- Do not use any third-party battery, power cord, or auto-empty station. The robot vacuum can only be used with model JCZ2201 auto-empty station.
- No action is needed from users to shift the auto-empty station between 50 Hz and 60 Hz; the product can adapt itself to both 50 Hz and 60 Hz.
- Do not dismantle, repair, or modify the battery or the auto-empty station on your own.
- Do not place the auto-empty station near heat sources.
- Do not use a wet cloth or wet hands to wipe or clean the charging contacts of the auto-empty station.
- Do not improperly dispose of old batteries. Unneeded batteries should be discarded at an appropriate recycling facility.
- If the robot vacuum won't be used for an extended period, fully charge it, then turn it off and store it in a cool, dry place. Recharge the robot vacuum at least once every 3 months to avoid over-discharging the battery.
- The lithium-ion battery pack contains substances that are hazardous to the environment. Before disposing of the robot vacuum, please first remove the battery pack, then discard or recycle it in accordance with local laws and regulations of the country or region it is used in.
- When removing the batteries from the product, it is better to use up the batteries and make sure your product is disconnected from power.
1). Uninstall the screw on the bottom, then remove the cover. 2). Unplug the battery connector, then remove the batteries. Do not damage the battery case to avoid any risk of injuries. 3). Return the batteries to a professional recycling organization.
Laser Safety Information
· The laser sensor in this product meets the IEC 60825-1: 2014 and EN 60825-1:2014/A11:2021 Standard for
Class 1 laser products. Please avoid direct eye contact with it during use.
CLASS 1 LASER PRODUCT
CONSUMER LASER PRODUCT
EN 50689:2021

Before use, read the instructions.

For indoor use only.

Hereby, Dreame (Tianjin) Information Technology Co., Ltd. declares that the radio equipment type B102GL is in compliance with Directive 2014/53/EU. The full text of the EU declaration of conformity is available at the following internet address:
http://www.mi.com/global/service/support/declaration.html
For detailed e-manual, please go to www.mi.com/global/service/userguide
The product does not have a standby mode or other equivalent state in terms of energy efficiency requirements or power management function, the power consumption of the product is likely to be higher than other products meeting these functional requirements.
Product Overview
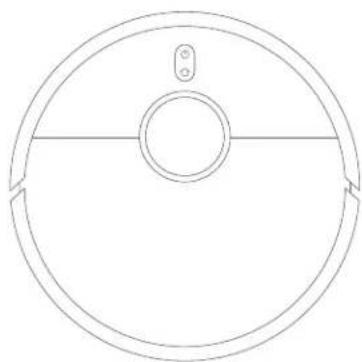
Robot Vacuum
Accessories
Pre-installed Accessories
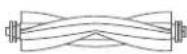
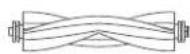
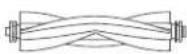
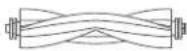
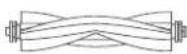
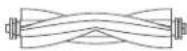
Brush
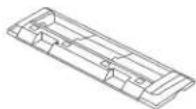
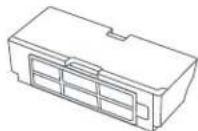
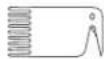
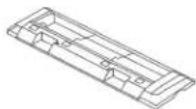
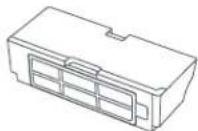
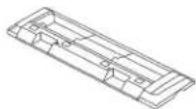
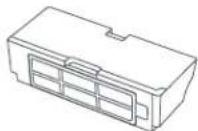
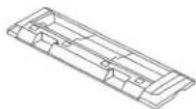
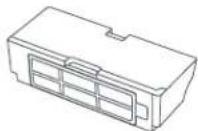
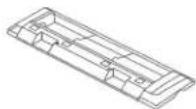
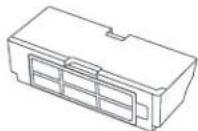
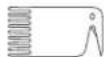
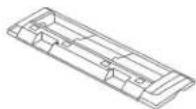
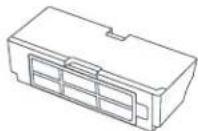
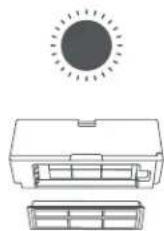
Dust Compartment, Brush Cover, Cleaning Tool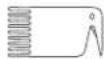
Other Accessories
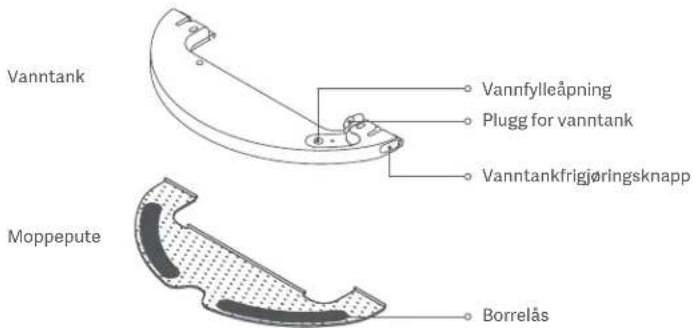
Water Tank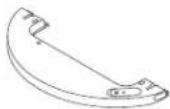
Mop Pad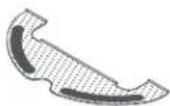
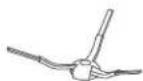
Power Cord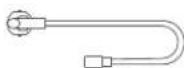
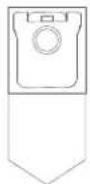
Disposable Bag (Replacement)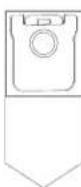
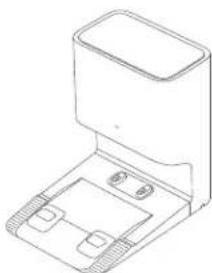
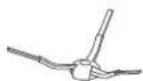
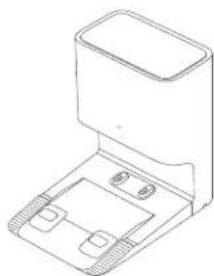
Auto-empty Station, Side Brush (Disposable Bag Pre-installed). Note: Illustrations of product, accessories, and user interface in the user manual are for reference purposes only. Actual product and functions may vary due to product enhancements.
Robot Vacuum Indicator: Press and hold for 3 seconds to turn on or off. Press to start cleaning after the robot vacuum is powered on. Press to send robot vacuum back to auto-empty station. Press and hold for 3 seconds to enable or disable the child lock function. White: Breathing with cleaning/Cleanup completed/Fully charged. Charging. Blinking white: Returning to the station to charge/Repositioning/Updating firmware/Awaiting connection/Connecting to Wi-Fi. Blinking orange: Error. Orange: Wi-Fi disconnected.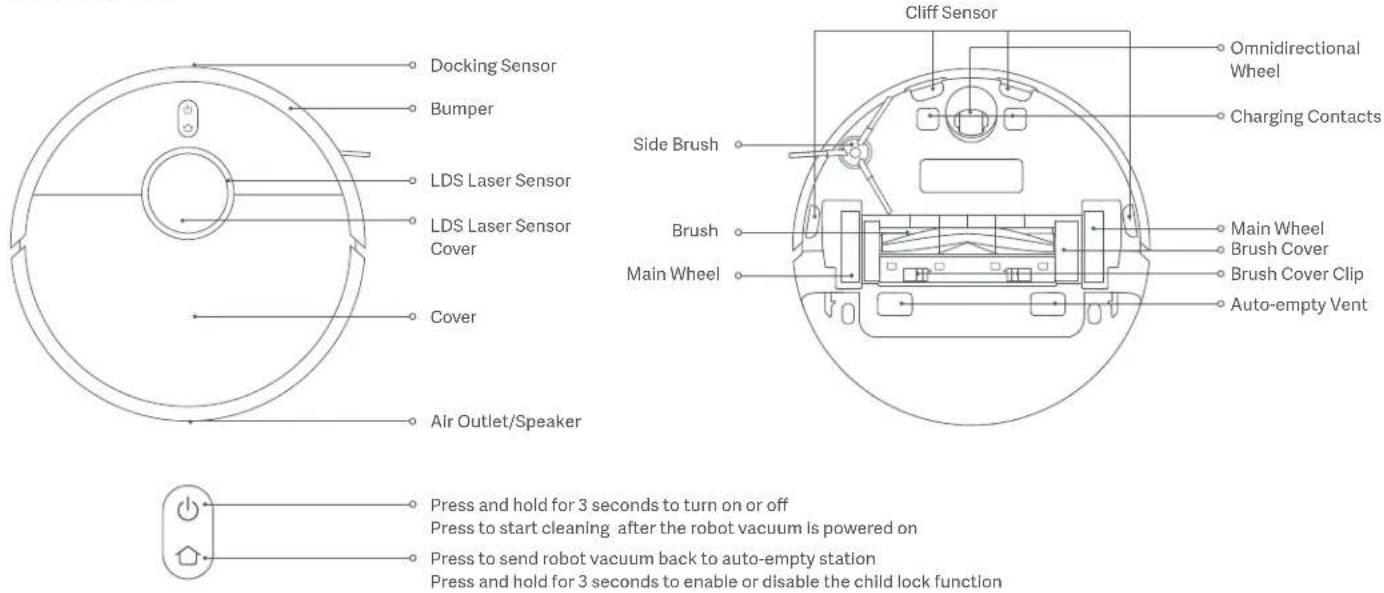
Auto-empty Station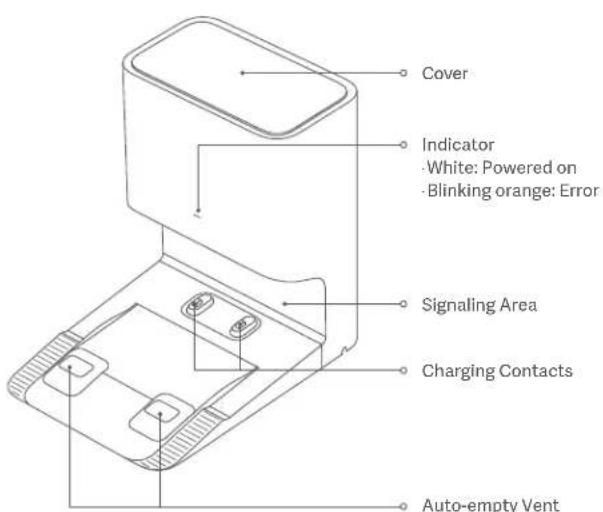
Front View
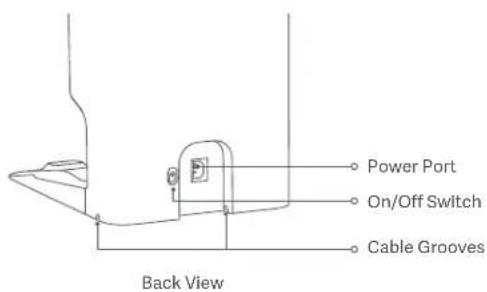
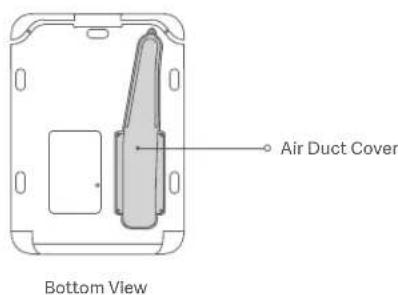
How to Install
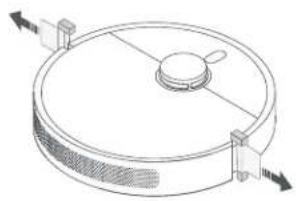
Remove Protective Coverings
Before using the robot vacuum, remove the protective strips from both sides.
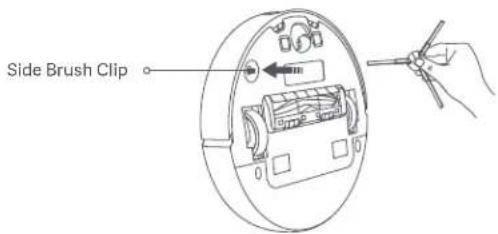
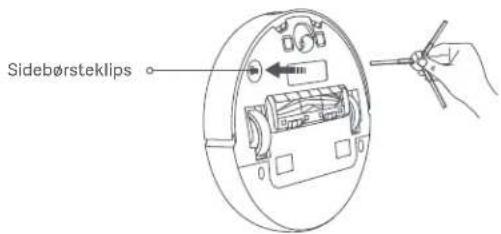
Install the Side Brush
Install the side brush onto the clip on the bottom of the robot vacuum.
Connect to an Electrical Outlet
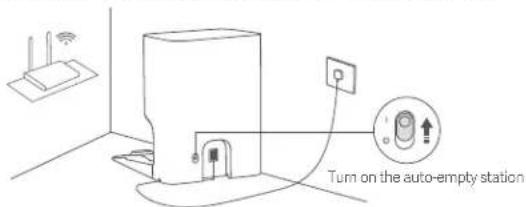
Place the auto-empty station near an electrical outlet in an area with a good Wi-Fi signal. Then connect the auto-empty station to power, and turn it on.
Place the Robot Vacuum
Manually place the robot vacuum onto the auto-empty station, and the robot vacuum will automatically turn on and start charging. When fully charged, the indicators on the robot vacuum and the station will remain white for 10 minutes and then go out. Fully charge the robot vacuum when using it for the first time.
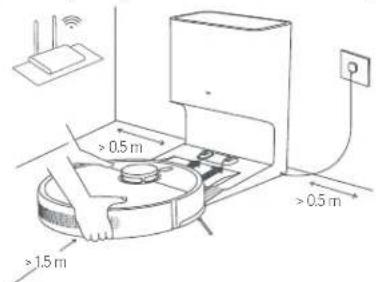
Note: Make sure the charging contacts on the robot vacuum and the station are fully aligned.
How to Use
Connect with the Mi Home/Xiaomi Home App
This product works with the Mi Home/Xiaomi Home app*. Use the Mi Home/Xiaomi Home app to control your device, and to interact with other smart home devices.
Scan the QR code to download and install the app. You will be directed to the connection setup page if the app is installed already. Or search for "Mi Home/Xiaomi Home" in the app store to download and install it.

Open the Mi Home/Xiaomi Home app, tap the plus icon (+) in the upper right, and then follow the instructions to add your device.
* The app is referred to as Xiaomi Home app in Europe (except for Russia). The name of the app displayed on your device should be taken as the default.
Notes:
- This robot vacuum works with the Mi Home/Xiaomi Home app, and it supports Android 4.4 & iOS 10.0 or above.
- Only 2.4 GHz Wi-Fi networks are supported.
The version of the app might have been updated, please follow the instructions based on the current app version.
- When the robot vacuum connects with the Xiaomi Home app successfully, it connects with the network successfully. You can have a reset of Wi-Fi to disconnect it from the network.
Reset Wi-Fi
When there is a connection loss between your phone and the robot vacuum due to the router reconfiguration, wrong password or so, please follow the steps below:
- Open the cover of the robot vacuum so that you can see the Wi-Fi indicator.
- Simultaneously press and hold the buttons and until you hear a voice to indicate that the robot vacuum is waiting for the network configuration.
- When the Wi-Fi indicator blinks, the Wi-Fi connection has been reset successfully.
Start Cleaning
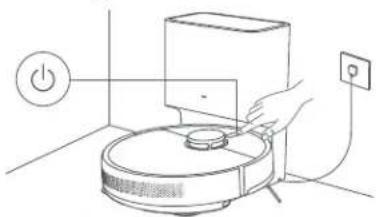
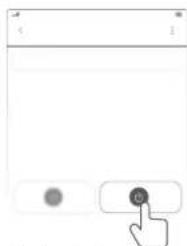
Press the button on the robot vacuum or tap the button in the app, and the robot vacuum will clean all areas by first cleaning along edges and walls and then in an S-shape pattern. Once the cleaning is complete, the robot vacuum will automatically return to the auto-empty station to charge.
Method 1: Press the button on the robot vacuum to start cleaning.
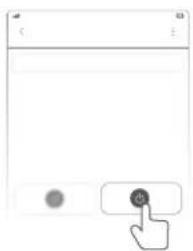
Method 2: Tap the button in the app to start cleaning.
Notes:
- To ensure the robot vacuum can easily return to the auto-empty station after cleaning, allow the robot vacuum to start from the auto-empty station, and avoid moving the auto-empty station during a cleaning task.
- When using the robot vacuum for the first time, it is recommended to follow the robot vacuum and remove any obstacles on the ground. If the robot vacuum may get stuck or scratch the surface of the furniture in some areas, you can set restricted areas in the app to prevent the robot vacuum from entering those areas.
Use the Vacuuming & Mopping Function
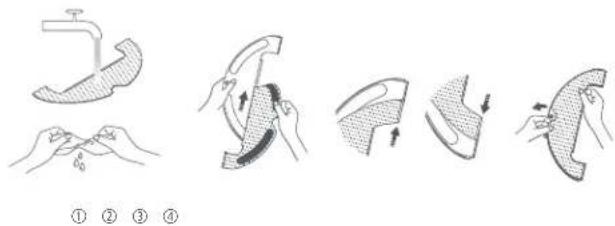
- First dampen the mop pad and wring out excess water. Next, slide the edge of the middle part of the mop pad into the middle slot of the water tank, and then slide the edges on both ends of the mop pad into the slots on both sides of the water tank. Lastly, attach the pad firmly onto the water tank.
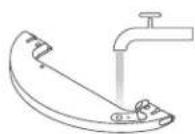
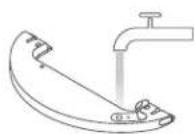
- Open the water tank plug, fill the water tank with tap water and insert the plug.
CAUTIONS:
- Do not add hot water to the water tank, as this may cause the tank to become deformed.
- To avoid clogging, do not add any cleaning agents or disinfectants to the water tank.
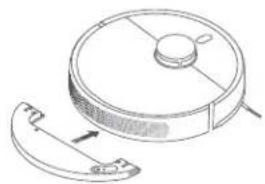
- To install the mopping assembly, slide it into the back of the robot vacuum until it clicks into place. Press the button or use the Mi Home/Xiaomi Home app to start the cleanup. The robot vacuum will automatically recognize the mopping assembly and begin mopping and dispensing water as needed.
CAUTIONS:
- To prevent the robot vacuum from entering a carpeted area, use physical barriers or set up virtual walls or restricted areas in the app before mopping.
- The mop pad should be cleaned after every 30 minutes of use to ensure adequate water flow and cleaning effectiveness.
- After the robot vacuum finishes cleaning and returns to the auto-empty station, press the release buttons on both sides of the water tank, and pull the mopping assembly backward to remove it.
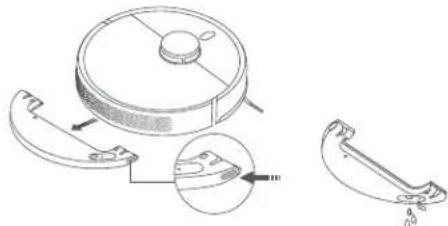
Note: When the robot vacuum is charging or not in use, remove the mopping assembly. Pour out all remaining water in the tank, and clean the mop pad to prevent mildew or lingering odors.
Empty the Dust Compartment
When the robot vacuum has finished a cleaning task, it will return to the auto-empty station to charge. The auto-empty station will then automatically start to empty the dust compartment. You can go to the app to enable or disable the auto-empty function and modify the auto-empty frequency as needed.
Resume Cleanup
If the robot vacuum starts running low on battery during a cleaning task, it will automatically return to the auto-empty station to recharge, then resume cleanup where it left off after being charged sufficiently.
Pause
While the robot vacuum is running, press any button on the robot vacuum to pause it, and then press the button to resume the cleaning. Pressing the button will end the current cleaning task and send the robot vacuum back to the auto-empty station.
Note: Do not pick up or move the robot vacuum while it is paused, to avoid navigation errors that could prevent it from returning to the auto-empty station or cause the loss of the map.
Sleep Mode
The robot vacuum will automatically enter sleep mode after being paused for 10 minutes, and its indicator will go out. To wake it up, press any button on the robot vacuum.
Note: If the sleep time exceeds 12 hours, the robot vacuum will be turned off automatically.
Update the Firmware
You can update the firmware via the app. Before updating, make sure the robot vacuum is on the auto-empty station and has at least 15% battery left.
Restart the Robot Vacuum
If the robot vacuum stops responding or cannot be turned off, press and hold the button for 15 seconds to forcefully turn it off. Then press and hold the button for 3 seconds to turn the robot vacuum on.
If the robot vacuum does not function properly after being restarted, you can use a pin to press the reset button until you hear a voice indicating that the robot vacuum is restoring factory settings. This will reset the robot vacuum to its original factory settings.
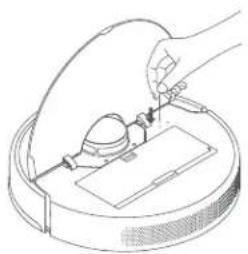
Care & Maintenance
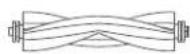
Brush and Side Brush* It is recommended to clean every two weeks.
- Flip the robot vacuum over and pinch the clips to remove the brush cover.
- Lift the brush out of the robot vacuum, then clean the brush bearings.
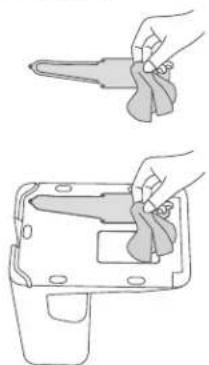
- Use the included cleaning tool to cut any tangled hairs on the brush, and remove the hairs and other debris from the brush.
- Remove the side brush upwards to clean it.
- Reinstall the brush, the side brush, and the brush cover, and ensure they are securely in place.
Notes:
- It is recommended to replace the brush every 6–12 months for optimal cleaning performance.
- It is recommended to replace the side brush every 3–6 months for optimal cleaning performance.
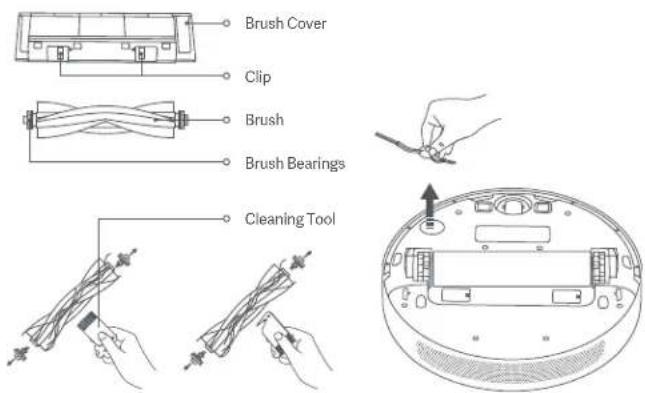
CAUTION: If too much hair is tangled in the brush, or if the hair is tightly tangled, do not forcibly pull on it, as this could damage the brush.
Omnidirectional Wheel: Clean it as needed.
- Flip the robot vacuum over and pull out the omnidirectional wheel.
- Remove hair, dirt, and other debris from the wheel and axle.
- Reinsert the wheel and press it firmly back into place.
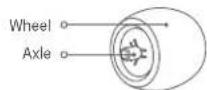
Notes:
- A small screwdriver or other pry tool can be used to gently pop out and remove the wheel.
- The wheel can be cleaned with water and reinstalled after drying.
Disposable Bag: Replace as needed.
- Open the cover of the auto-empty station, pull the handle upwards to remove it, and then discard the bag.
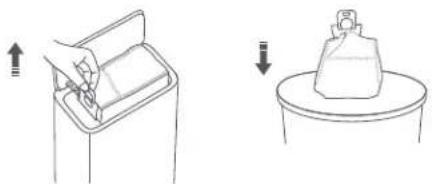
Note: Pulling upwards on the handle will seal the bag to prevent the dust and debris from accidentally falling out.
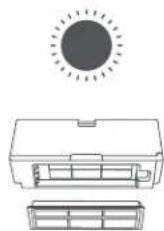
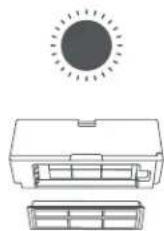
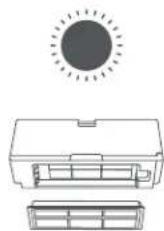
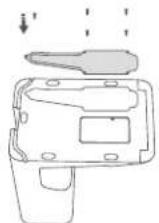
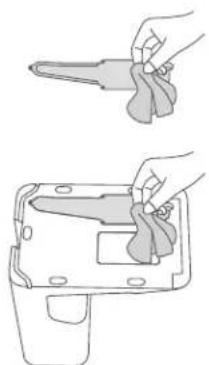
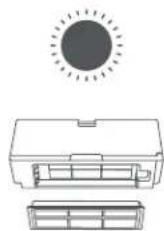
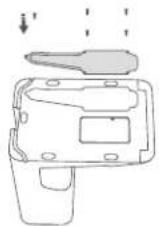
- Remove the dust and debris from the filter with a dry cloth.
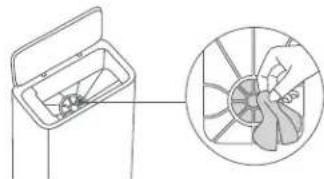
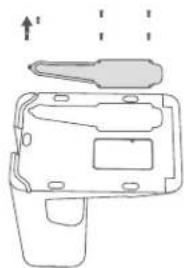
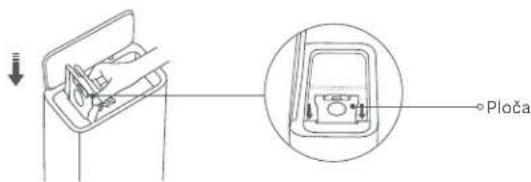
- Insert the board into the slot, and make sure it is installed securely in place.
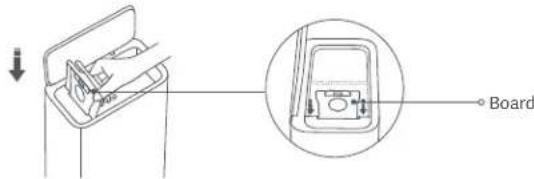
- Press down on the cover of the auto-empty station to make sure it is completely closed.
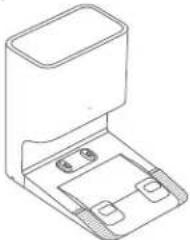
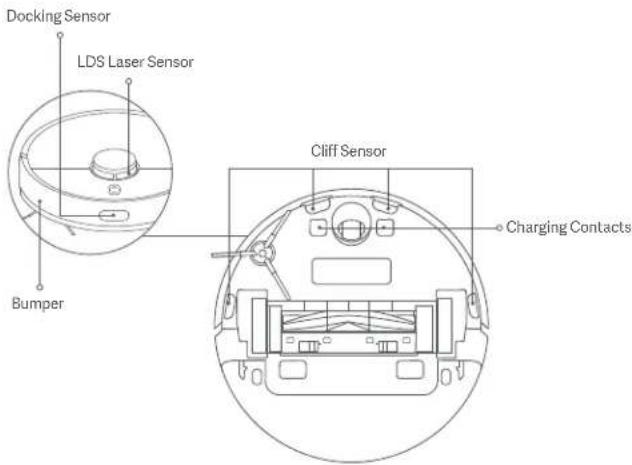
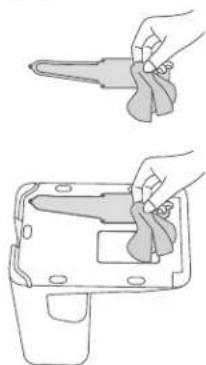
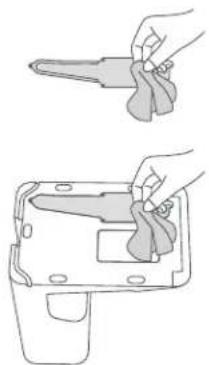
Use a soft cloth to clean all sensors and charging contacts in the robot vacuum:
- The cliff sensors and the charging contacts at the bottom of the robot vacuum.
- The bumper and the docking sensor on the front of the robot vacuum.
- The LDS laser sensor on the top of the robot vacuum.
Air Duct on the Auto-empty Station* Clean it as needed.
If the air duct is blocked, follow the steps below to clean it.
- Unscrew the air duct cover to remove it.
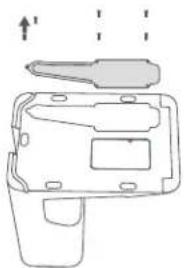
- Check whether the air duct is blocked by foreign objects, and remove the objects if necessary.
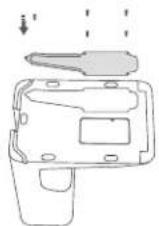
- Install the air duct cover back and screw it.
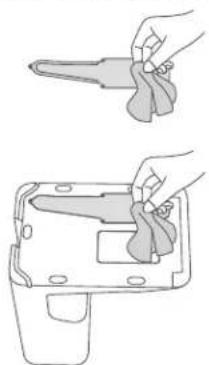
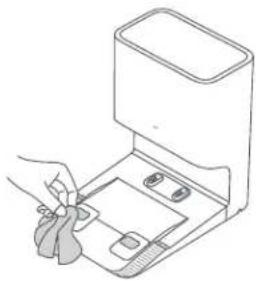
Clean the charging contacts and the auto-empty vents with a soft, dry cloth.
Warning: Make sure the auto-empty station is turned off and unplugged before cleaning.
Battery
The robot vacuum contains a high-performance lithium-ion battery pack. Please ensure that it remains well-charged during daily use to maintain optimal battery performance.
Note: If the robot vacuum is not used for an extended period, turn it off and put it away. To prevent damage from over-discharging, the robot vacuum should be recharged at least once every three months.
Specifications
Robot Vacuum
| Name Robotic Vacuum Cleaner | |
| Model B102GL | |
| Item Dimensions 353 × 350 × 98.8 mm |
| Li-ion Battery 4800 mAh (Rated Capacity) |
| Charging Time Approx. 6 hours | |
| Net Weight (Robot Vacuum) 3.3 kg | |
| Net Weight (with Accessories) 7.4 kg |
| Compatible with Android 4.4 & iOS 10.0 or above |
| Wireless Connectivity | WI-FI IEEE 802.11b/g/n 2.4 GHz,Bluetooth 4.2 |
| Rated Voltage 14.4 V | --- |
| Rated Power 46 W | |
| Operation Frequency 2400–2483.5 MHz |
| Maximum Output Power < 20 dBm |
Auto-empty Station
| Model JCZ2201 | |
| Item Dimensions 397 × 285 × 384 mm |
| Rated Input | 220-240 V~ 50/60 Hz |
| Rated Output | 20.0 V---1 A |
| Rated Power | 1000 W |
| Power Consumption | Off mode: ≤0.3 WStandby mode: ≤0.5 W |
| Time to Enter the Condition | Off mode: ≤20 minStandby mode: ≤20 min |
Under normal use conditions, this equipment should be kept at a separation distance of at least 20 cm between the antenna and the body of the user.

All products bearing this symbol are waste electrical and electronic equipment (WEEE as in directive 2012/19/EU) which should not be mixed with unsorted household waste. Instead, you should protect human health and the environment by handing over your waste equipment to a designated collection point for the recycling of waste electrical and electronic equipment, appointed by the government or local authorities. Correct disposal and recycling will help prevent potential negative consequences to the environment and human health. Please contact the installer or local authorities for more information about the location as well as terms and conditions of such collection points.
Robot vacuum
Accessories
Install the side brush
Notes:
① ② ③ ④
PRECAUTIONS:
Battery
CLASS 1 LASER PRODUCT
CONSUMER LASER PRODUCT
EN 50689:2021

http://www.mi.com/global/service/support/declaration.html
Robot vacuum
Accessories
Notes:
WARNINGS:
Battery
Note:
① ② ③ ④
WARNING:
Care and maintenance
Battery
Notes.
① ② ③ ④
WARNING
Battery
http://www.mi.com/global/service/support/declaration.html
Vacuum cleaner
① ② ③ ④
NOTES:
Battery
CLASS 1 LASER PRODUCT
CONSUMER LASER PRODUCT
EN 50689:2021

Robot vacuum cleaner
① ② ③ ④
CAUTION:
Regular maintenance
Battery
Cleaning Robot
Accessories
Pre-installed Accessories
Installing the Side Brush
Notes:
CAUTION:
Maintenance
Battery
Note:
Warnings:
Battery
Supports iOS 10.0-14.4 (including) Among Men Mi Home (including) Among Women
Supports 2.4GHz Wi-Fi
http://www.mi.com/global/service/support/declaration.html
For the detailed online manual, visit www.mi.com/global/service/userguide
Robot vacuum

Dust compartmentLidCleaning brushBrush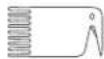
Remove the protective covers
Install the side brush
Notes:
PRECAUTIONS:
Battery
http://www.mi.com/global/service/support/declaration.html
WARNING!
Battery
http://www.mi.com/global/service/support/declaration.html
Robot vacuum
Notes:
① ② ③ ④
WARNING:
Routine maintenance
Battery
Robot vacuum
CAUTION:
Battery
http://www.mi.com/global/service/support/declaration.html
Robot vacuum
Accessories
Continuous white light: Turns on the robot vacuum
Installing the side brush
Notes:
WARNINGS:
Battery
CLASS 1 LASER PRODUCT
CONSUMER LASER PRODUCT
EN 50689:2021

http://www.mi.com/global/service/support/declaration.html
Robot vacuum
Installing the side brush
Notes:
WARNING:
Battery
http://www.mi.com/global/service/support/declaration.html
Robot vacuum
Install side brush
Head:
① ② ③ ④
Caution:
Battery
CLASS 1 LASER PRODUCT
LASER PRODUCT FOR CONSUMERS
EN 50689:2021

http://www.mi.com/global/service/support/declaration.html
Robot vacuum
Accessories
Notes:
WARNINGS:
Battery
Robot vacuum
Accessories
Install the side brush
Notes:
CAUTION:
CAUTION:
Air duct on the automatic emptying station
Battery
http://www.mi.com/global/service/support/declaration.html
Robot vacuum
Accessories
Install the side brush
Notes:
Notes:
Care and Maintenance
Notes:
Battery
Robot Vacuum
Accessories
Disposable Bag Mopping Assembly
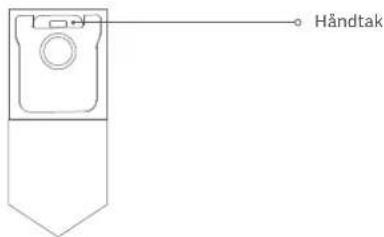
Note: The automatic emptying station is pre-installed with a disposable bag when it leaves the factory.
Dust Container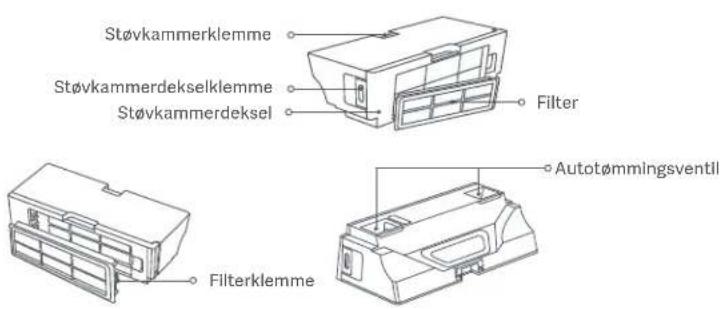
Install the Side Brush
Install the side brush onto the clip on the bottom of the robot vacuum.
Notes:
- Open the water tank plug, fill the water tank with tap water, and insert the plug.
Precautions:
SAFETY PRECAUTIONS:
SAFETY PRECAUTIONS:
Battery
For more information, please refer to the user guide at www.mi.com/global/service/userguide
Notes:
WARNINGS.
Omnidirectional wheel* Clean as needed.
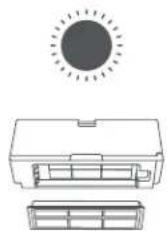
WARNINGS.
Air duct on the auto-empty station
* Clean as needed.
- Replace the air duct cover and tighten it with screws.
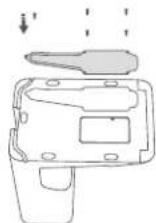
Battery
Robot vacuum
Brush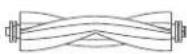
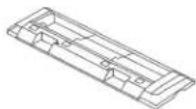
DustbinBrush cover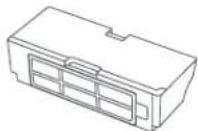
Cleaning tool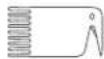
Other accessories
Water tank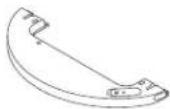
Mop attachment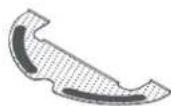
Power cord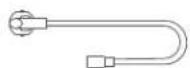
Notes:
① ② ③ ④
WARNING:
WARNING:
Battery
Robot vacuum cleaner
Accessories
Pre-installed accessories
Brush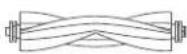
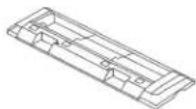
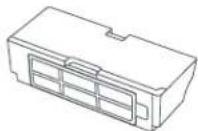
Auto-empty station (side brush and pre-installed disposable bag)

Install the side brush
Mount the side brush onto the clip at the bottom of the robot vacuum.
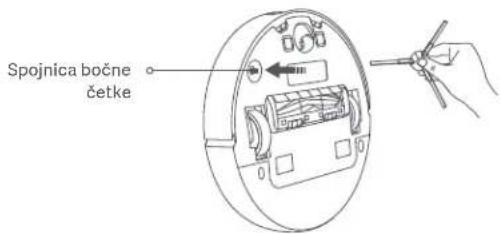
Notes:
① ② ③ ④
- Open the cap of the water tank, fill it with water, and insert the cap.
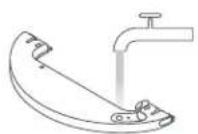
PRECAUTIONS:
- Do not pour hot water into the water tank as this may cause deformation of the tank.
- To avoid clogging, do not add cleaning agents or disinfectants to the water tank.
PRECAUTIONS:
- To prevent the robot vacuum from entering carpeted areas, set up a physical barrier or virtual walls / restricted areas in the app before starting mopping.
- To avoid clogging, do not add cleaning agents or disinfectants to the water tank.
- When the robot vacuum finishes cleaning and returns to the auto-empty station, press the release buttons on both sides of the water tank and pull the mopping assembly backward to remove it.
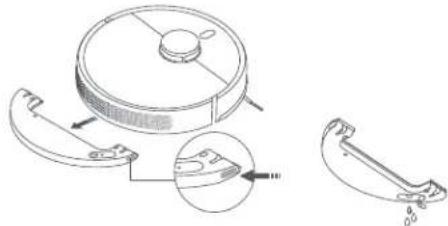
Note: When the robot vacuum is charging or not in use, remove the mopping assembly. Pour out any remaining water in the tank and clean the mop cloth to prevent mold or long-lasting unpleasant odors.
Care and Maintenance
Sensors and charging contacts* It is recommended to clean monthly.
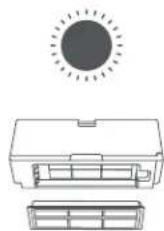
PRECAUTIONS:
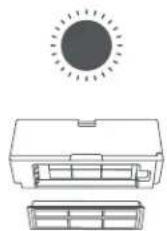
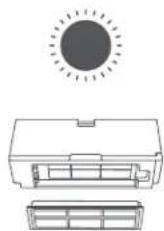
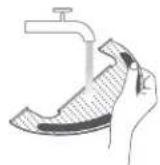
- Only clean water should be used to clean the filter. Do not use detergent.
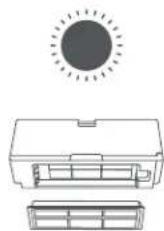
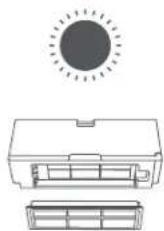
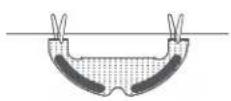
- Thoroughly dry the dust compartment and filter before putting them back.
- Clean and dry the cloth.
PRECAUTIONS:
- Put the air duct cover back and screw it in.
Battery
The robot vacuum and mop contains a high-performance lithium-ion battery. Make sure it stays well charged during daily use to maintain optimal battery performance.
Robot vacuum
Accessories
Notes:
WARNINGS:
Care and maintenance
Omni-directional wheel* Clean as needed.
- Turn the robot vacuum over and pull out the omni-directional wheel.
- Remove hair, dirt, and other debris from the wheel and axle.
- Reinsert the wheel and press it firmly back into place.
Notes:
WARNINGS:
- Clean and dry the floor mopping cloth.
WARNINGS:
Air duct on the auto-empty station
* Clean as needed.
If the air duct is clogged, clean it following the steps below.
Battery
http://www.mi.com/global/service/support/declaration.html
Robot vacuum
Brush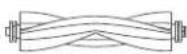
Brush cover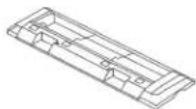
Dust compartment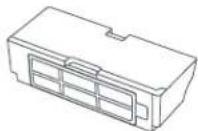
CAUTION:
Care and maintenance
CAUTION:
Battery
http://www.mi.com/global/service/support/declaration.html
For a detailed user manual, please visit www.mi.com/global/service/userguide
This product does not have a standby mode or other equivalent status in terms of energy efficiency requirements or power management functions, so the energy consumption of this product is likely to be higher than that of other products that meet these functional requirements.
Product Overview
Accessories
Pre-installed Accessories
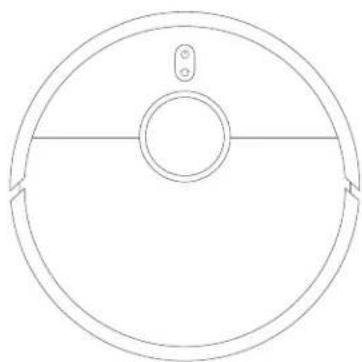
Robot Vacuum
Brush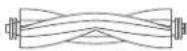
Auto-empty Station and (pre-installed disposable dust bag)
Note: The illustrations of the product, accessories, and user interface in the user manual are for reference only. The actual product and functions may differ due to product enhancements.
Robot Vacuum
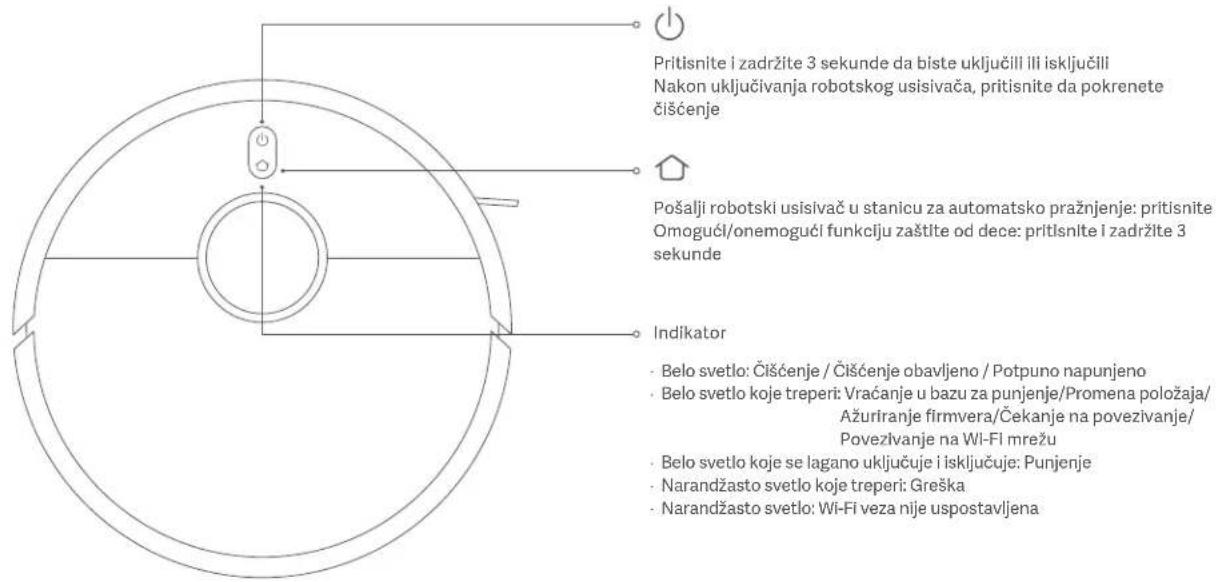
Note: When the robot vacuum is cleaning or returning to the station for charging, press any button to pause it.
Robot Vacuum
Automatic emptying station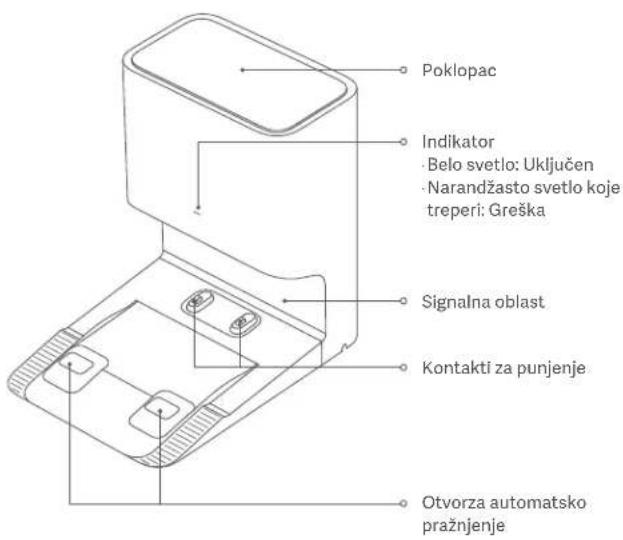
Front view
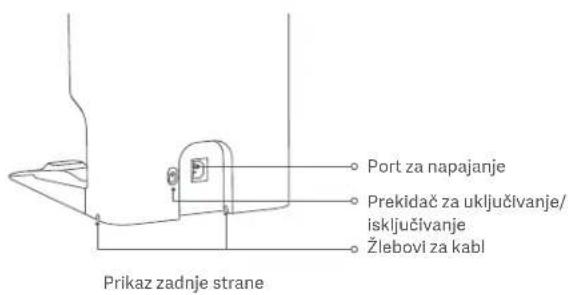
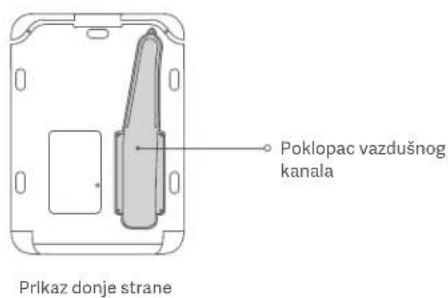
Automatic emptying station (cover open)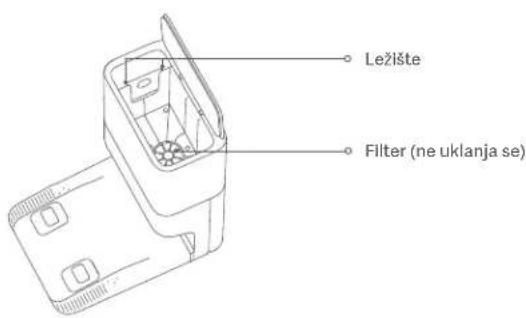
Install the side brush
- Method: Press the button (in the app) to start cleaning.
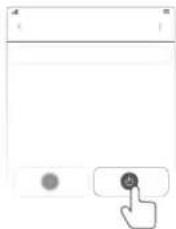
Notes:
- To ensure that the robot vacuum can easily return to the automatic emptying station after cleaning, allow the robot vacuum to start from the automatic emptying station and avoid moving the automatic emptying station during the cleaning task.
- When using the robot vacuum for the first time, it is recommended to follow the robot vacuum and remove any obstacles from the floor. If there is a possibility that the robot vacuum may get stuck or scratch furniture in certain areas, you can set those areas as restricted areas in the app to prevent the robot vacuum from entering those areas.
Using the vacuuming and mopping function
- First, wet the mopping pad and wring out excess water. Then, slide the middle part of the mopping pad into the middle slot on the water tank, and then slide the edges on both ends of the mopping pad into the slots on both sides of the water tank. Finally, attach the pad firmly to the water tank.
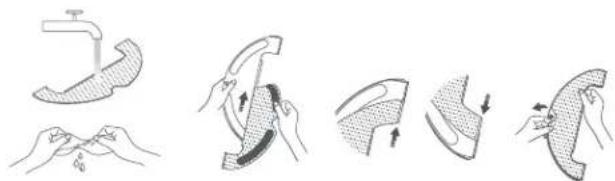
① ② ③ ④
- Open the water tank cap, fill the water tank with tap water, and then insert the cap.
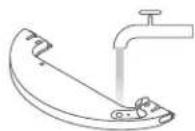
CAUTION:
Do not add hot water to the water tank as it may cause deformation. - To avoid clogging, do not add cleaning or disinfecting agents to the water tank.
- To install the mopping assembly, slide it into the rear of the robot vacuum until it clicks. Press the button or use the Mi Home/Xiaomi Home app to start cleaning. The robot vacuum automatically recognizes the mopping assembly and begins mopping and dispensing water as needed.
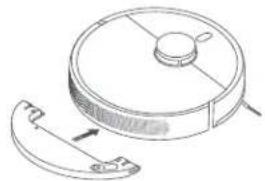
CAUTION:
- To prevent the robot vacuum from reaching a surface covered with carpet, use boundary strips before mapping or set up virtual walls or restricted areas in the app.
- To avoid clogging, do not add cleaning or disinfecting agents to the water tank.
- After the robot vacuum finishes cleaning and returns to the auto-empty station, press the release buttons on both sides of the water tank and pull the mopping assembly to remove it.
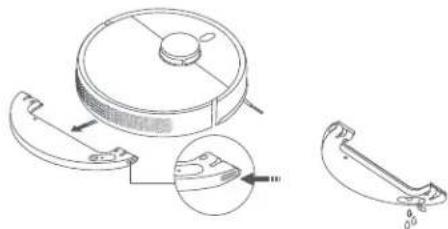
Note: When the robot vacuum is charging or not in use, remove the mopping assembly. Empty any remaining water from the tank and clean the mop pad to prevent mold or unpleasant odors.
Care and Maintenance
Note: Pulling the handle upward seals the disposable dust bag and prevents accidental spillage of dust and debris.
- Remove dust and debris from the filter with a dry cloth.
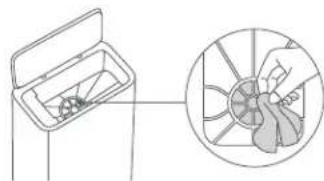
- Insert the plate into the slot and make sure it is firmly in place.
- Press the top cover of the auto-empty station to ensure it is completely closed.
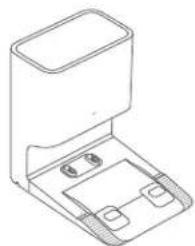
- Open the dust compartment and empty it, then clean the auto-empty vents with a cloth.
CAUTION:
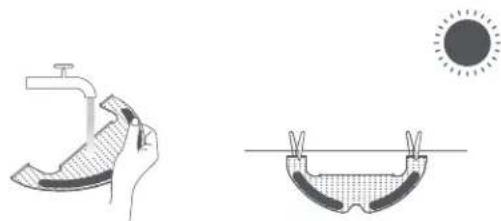
- Clean and dry the mop pad.
CAUTION:
- Remove the mop pad from the water tank before cleaning it, and make sure dirty water does not flow back into the water outlet to prevent clogging.
- Do not press the mop pad too hard as this may affect performance. The mop pad should be cleaned before each use.
- For optimal cleaning results, it is recommended to replace the mop pad every 3–6 months.
Ventilation opening of the auto-empty station
* Clean it as needed.
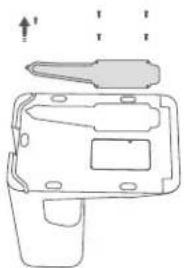
If the air duct is blocked, follow the steps below to clean it.
- Unscrew the air duct cover to remove it.
- Check if the air duct is blocked by foreign objects and remove them as needed.
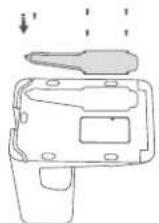
- Put the air duct cover back and screw it in.
Battery
The robot vacuum contains a high-performance lithium-ion battery. Make sure it is well charged during daily use to maintain optimal battery performance.
Note: If the robot vacuum is not used for a long time, turn it off and store it. To prevent damage caused by over-discharging, the robot vacuum should be charged at least once every three months.
Troubleshooting
| Problem Mogući uzrok i rešenje |
| Robot-usisivač se ne uključuje. | Nivo baterije je nizak. Potpuno napunite robotskog usisivača, a zatim pokušajte ponovo.Temperatura okruženja je preniska (niža od 0 °C) ili je previsoka (viša od 40 °C). Vodite računa da robotski usisivač koristite pri temperaturama u rasponu od 0 °C do 40 °C. |
| Robot-usisivač se ne punl. | Stanica za automatsko pražnjenje nije priključena na električni izvor. Postarajte se da oba kraja kabla za napajanje budu uključena u napajanje pravilno I da je stanica za automatsko pražnjenje uključena.Kontakt je slab. Očistite kontakte za punjenje na stanici za automatsko pražnjenje i robotskom usisivaču. |
| Robotski usisivač ne može da se vratí do stanice za automatsko pražnjenje. | Oko stanice za automatsko pražnjenje ima previše prepreka. Postavite stanicu za automatsko pražnjenje u otvoreniju oblast.Očistite signalnu oblast stanice za automatsko pražnjenje.Pomeranje robotskog usisivača može da dovede do toga da samostalno promeni položaj, a u slučaju neuspešne promene položaja, ponovo će se kreirati mapu. Ako je robotski usisivač predaleko od stanice za automatsko pražnjenje, možda neće moći automatski samostalno da se vratí, a u tom slučaju ćete morati ručno da postavite robotski usisivač na stanicu za automatsko pražnjenje. |
| Robotski usisivač ne radi prema očekivanjima. | Isključite robotski usisivač, a zatim ga ponovo uključite. |
| Robotski usisivač proizvodi čudne zvuke. | Možda se strano telo zaglavilo u četku, bočnu četku ili jedan od glavnih točkića. Isključite robotski usisivač i uklonite nečistoću. |
| Robotski usisivač ne čisti efikasno kao ranije ili ostavlja nečistoću iza sebe. | Proverite da li je odeljak za prašinu pun i ako jeste, ispraznite ga. Zatim proverite filter i očistite ga po potrebi i takođe proverite da li se nešto obmotalo oko neke od četki. |
| Konfigurisanje mreže nije uspešno. | Lozinka za Wi-Fi mrežu nije tačna. Pobrinite se da uneste tačnu lozinku.Prebacite se na mrežu od 2,4 GHz usled toga što trenutno nisu podržane mreže od 5 GHz i ruteri za poslovne namene.Pobrinite se da usisivač uvek bude u oblasti sa dobrim Wi-Fi signalom.Robotski usisivač nije u stanju za čekanje na povezivanje. Napustite i ponovo otvorite aplikaciju, a zatim ponovo pratite pravilne korake za konfiguraciju mreže. |
| Problem Mogući uzrok i rešenje | |
| Robotski usisivač ne izvršava zakazano čišćenje. | Proverite da li je nivo baterije dovoljan? Baterija robotskog usisivača mora da bude napunjena najmanje 15% bi se pokrenulo zakazano čišćenje. |
| Malo ili nimalo vode izlazi kada robotski usisivač briše pod. | Proverite da li je odeljak za vodu napunjen i da li je uložak za pranje pravilno postavljen. Redovno čistite uložak za pranje. |
| Previše vode izlazi iz sklopa za pranje. Vodite računa da čep rezervoara za vodu bude čvrsto zatvoren. |
| Robotski usisivač ne nastavlja čišćenje nakon punjenja. | Vodite računa da robotski usisivač nije u režimu rada DND jer će ga taj režim sprečiti da nastavi čišćenje.Robotski usisivač neće da nastavi sa čišćenjem ako se ručno puni ili stavi na stanicu za automatsko pražnjenje. |
| Proces automatskog pražnjenja prašine ne pokreće se nakon što se robotski usisivač vrati u stanicu za automatsko pražnjenje. | Postarajte se da oba kraja kabla za napajanje budu uključena u napajanje pravilno i da je stanica za automatsko pražnjenje uključena.Stanica za automatsko pražnjenje neće automatski da prikuplja prašinu tokom perioda režima DND.Podrazumevani DND period za prikupljanje prašine je 22:00—08:00 časova.Stanica za automatsko pražnjenje možda neće automatski da prazni odeljak za prašinu ako je funkcija automatskog pražnjenja onemogućena ili je učestalost automatskog pražnjenja Izmenjena u aplikacilji. |
| Indikator na stanici za automatsko pražnjenje treperi narandžasto. | Proverite da li je kesa za jednokratnu upotrebu pravilno postavljena. Pogledajte uputstva u korisničkom priručniku za instalaciju. |
| Pražnjenje odeljka za prašinu traje duže nego obično. | Nakon što se stanica za automatsko pražnjenje koristi neko vreme, proces automatskog pražnjenja može da traje nešto duže da bi se osigurao njen neometan rad. To je normalno. |
Robot Vacuum
| Ime Robotski usisivač | |
| Model B102GL | |
| Dlmenzije proizvoda 353 × 350 × | 98,8 mm |
| Baterija 4800 mAh (nominalni kapacitet) |
| Vreme punjenja Pribl. 6 h | |
| Neto težina (Robotski usisivač) 3 | ,3 kg |
| Neto težina (sa dodacima) 7 | ,4 kg |
| Kompatibilno sa Android 4.4 & iOS 10.0 ili novije verzije |
| Bežično povezivanje | WI-FI IEEE 802.11 b/g/n 2,4 GHz,Bluetooth 4.2 |
| Procenjeni napon 14,4 V | --- |
| Procenjena snaga 46 W | |
| Radna frekvencija 2400–2483,5 MHz |
| Maksimalna izlazna snaga < 20 dBm |
Auto-Empty Station
| Model JCZ2201 | |
| Dimenzije proizvoda 397 × 285 × 384 mm |
| Procenjeni ulaz 220–240 V | 50/60 Hz ~ |
| Procenjeni Izlaz | 20,0 V==1 A |
| Procenjena snaga | 1000 W |
| Potrošnja energije | Režim isključenja: ≤ 0,3 WRežim mirovanja: ≤ 0,5 W |
| Vreme ulaska u stanje | Režim isključenja: ≤ 20 minRežim mlrovanja: ≤ 20 min |
Under normal use conditions, this equipment should be kept at a distance of at least 20 cm between the antenna and the user's body.

http://www.mi.com/global/service/support/declaration.html
Robot vacuum cleaner
Accessories

Attach the side brush
Notes:
① ② ③ ④
WARNINGS:
Sensors and charging contacts. It is recommended to clean them every month.
WARNINGS:
- Use only clean water to clean the filter. Do not use any cleaning agent.
- Thoroughly dry the dust collection cartridge and filter, then put them back in place.
- Clean and dry the mopping pad.
WARNINGS:
- Attach and screw on the vent covers.
Battery
Robot vacuum cleaner
Accessories
Installing the side brush
Note:
WARNING:
Care and Maintenance
WARNING:
Battery
Robot vacuum
Warnings:
① ② ③ ④
CAUTION:
CAUTION:
Battery
• For further information, please go to www.mi.com
Manufactured for: Xiaomi Communications Co., Ltd.
Manufactured by: Dreame (Tianjin) Information Technology Co., Ltd. (a Mi Ecosystem company)
Address: Room 2112-1-1, South District, Finance and Trade Center, No.6975 Yazhou Road, Dongjiang Bonded Port Area, Tianjin Pilot Free Trade Zone, 300463 Tianjin, China
Address: Room 2112-1-1, South District, Finance and Trade Center, No.6975 Yazhou Road, Dongjiang Bonded Port Area, Tianjin Pilot Free Trade Zone, 300463 Tianjin, China
Address: Room 2112-1-1, South District, Finance and Trade Center, No.6975 Yazhou Road, Dongjiang Bonded Port Area, Tianjin Pilot Free Trade Zone, 300463 Tianjin, China
Address: Room 2112-1-1, South District, Finance and Trade Center, No.6975 Yazhou Road, Dongjiang Bonded Port Area, Tianjin Pilot Free Trade Zone, 300463 Tianjin, China
Address: Room 2112-1-1, South District, Finance and Trade Center, No.6975 Yazhou Road, Dongjiang Bonded Port Area, Tianjin Pilot Free Trade Zone, 300463 Tianjin, China
Address: Room 2112-1-1, South District, Finance and Trade Center, No.6975 Yazhou Road, Dongjiang Bonded Port Area, Tianjin Pilot Free Trade Zone, 300463 Tianjin, China
Address: Room 2112-1-1, South District, Finance and Trade Center, No.6975 Yazhou Road, Dongjiang Bonded Port Area, Tianjin Pilot Free Trade Zone, 300463 Tianjin, China
Address: Room 2112-1-1, South District, Finance and Trade Center, No.6975 Yazhou Road, Dongjiang Bonded Port Area, Tianjin Pilot Free Trade Zone, 300463 Tianjin, China
Xiaomi Communications Co., Ltd. (the following
Room 2112-1-1, South District, Finance and Trade Center, No.6975 Yazhou Road, Dongjiang Bonded Port Area, Tianjin Pilot Free Trade Zone, 300463 Tianjin, China:
Room 2112-1-1, South District, Finance and Trade Center, No.6975 Yazhou Road, Dongjiang Bonded Port Area, Tianjin Pilot Free Trade Zone, 300463 Tianjin, China:
Address: Room 2112-1-1, South District, Finance and Trade Center, No.6975 Yazhou Road, Dongjiang Bonded Port Area, Tianjin Pilot Free Trade Zone, 300463 Tianjin, China
Address: Room 2112-1-1, South District, Finance and Trade Center, No.6975 Yazhou Road, Dongjiang Bonded Port Area, Tianjin Pilot Free Trade Zone, 300463 Tianjin, China
Address: Room 2112-1-1, South District, Finance and Trade Center, No.6975 Yazhou Road, Dongjiang Bonded Port Area, Tianjin Pilot Free Trade Zone, 300463 Tianjin, China
Address: Room 2112-1-1, South District, Finance and Trade Center, No.6975 Yazhou Road, Dongjiang Bonded Port Area, Tianjin Pilot Free Trade Zone, 300463 Tianjin, China
Address: Room 2112-1-1, South District, Finance and Trade Center, No.6975 Yazhou Road, Dongjiang Bonded Port Area, Tianjin Pilot Free Trade Zone, 300463 Tianjin, China
Address: Room 2112-1-1, South District, Finance and Trade Center, No.6975 Yazhou Road, Dongjiang Bonded Port Area, Tianjin Pilot Free Trade Zone, 300463 Tianjin, China
Xiaomi Communications Co., Ltd
Address: Room 2112-1-1, South District, Finance and Trade Center, No.6975 Yazhou Road, Dongjiang Bonded Port Area, Tianjin Pilot Free Trade Zone, 300463 Tianjin, China
Address: Room 2112-1-1, South District, Finance and Trade Center, No.6975 Yazhou Road, Dongjiang Bonded Port Area, Tianjin Pilot Free Trade Zone, 300463 Tianjin, China
Address: Room 2112-1-1, South District, Finance and Trade Center, No.6975 Yazhou Road, Dongjiang Bonded Port Area, Tianjin Pilot Free Trade Zone, 300463 Tianjin, China
Address: Room 2112-1-1, South District, Finance and Trade Center, No.6975 Yazhou Road, Dongjiang Bonded Port Area, Tianjin Pilot Free Trade Zone, 300463 Tianjin, China
Address: Room 2112-1-1, South District, Finance and Trade Center, No.6975 Yazhou Road, Dongjiang Bonded Port Area, Tianjin Pilot Free Trade Zone, 300463 Tianjin, China
Address: Room 2112-1-1, South District, Finance and Trade Center, No.6975 Yazhou Road, Dongjiang Bonded Port Area, Tianjin Pilot Free Trade Zone, 300463 Tianjin, China
For more information, visit www.mi.com. Responsible manufacturer: Xiaomi Communications Co., Ltd. Manufacturer: Dreame (Tianjin) Information Technology Co., Ltd. (a Mi Ecosystem company) Address: Room 2112-1-1, South District, Finance and Trade Center, No.6975 Yazhou Road, Dongjiang Bonded Port Area, Tianjin Pilot Free Trade Zone, 300463 Tianjin, China. For additional information, visit www.mi.com. Produced for: Xiaomi Communications Co., Ltd. Manufacturer: Dreame (Tianjin) Information Technology Co., Ltd. (a Mi Ecosystem company) Address: Room 2112-1-1, South District, Finance and Trade Center, No.6975 Yazhou Road, Dongjiang Bonded Port Area, Tianjin Pilot Free Trade Zone, 300463 Tianjin, China
Address: Room 2112-1-1, South District, Finance and Trade Center, No.6975 Yazhou Road, Dongjiang Bonded Port Area, Tianjin Pilot Free Trade Zone, 300463 Tianjin, China
Address: Room 2112-1-1, South District, Finance and Trade Center, No.6975 Yazhou Road, Dongjiang Bonded Port Area, Tianjin Pilot Free Trade Zone, 300463 Tianjin, China
Address: Room 2112-1-1, South District, Finance and Trade Center, No.6975 Yazhou Road, Dongjiang Bonded Port Area, Tianjin Pilot Free Trade Zone, 300463 Tianjin, China
Address: Room 2112-1-1, South District, Finance and Trade Center, No.6975 Yazhou Road, Dongjiang Bonded Port Area, Tianjin Pilot Free Trade Zone, 300463 Tianjin, China
Address: Room 2112-1-1, South District, Finance and Trade Center, No.6975 Yazhou Road, Dongjiang Bonded Port Area, Tianjin Pilot Free Trade Zone, 300463 Tianjin, China.
Address: Room 2112-1-1, South District, Finance and Trade Center, No.6975 Yazhou Road, Dongjiang Bonded Port Area, Tianjin Pilot Free Trade Zone, 300463 Tianjin, China.
EU REP.
Xiaomi Technology Netherlands B.V.
Prinses Beatrixlaan 582, 2595BM, The Hague, The Netherlands
contact@support.mi.com
UK REP.
Xiaomi Technology UK Limited
Davidson House, Forbury Square, Reading, Berkshire RG1 3EU
contact@support.mi.com
Made in China