
AF 30 - Air purifier Kärcher - Free user manual and instructions
Find the device manual for free AF 30 Kärcher in PDF.
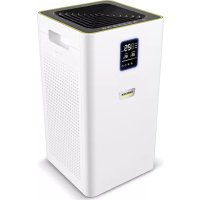



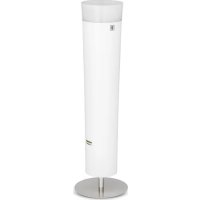
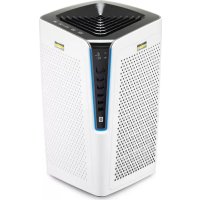
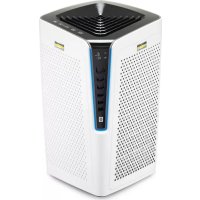
| Product type | Air purifier |
| Brand | Kärcher |
| Model | AF 30 |
| Dimensions (L x W x H) | 260 x 260 x 480 mm |
| Weight | 5.8 kg |
| Power supply | 24 V DC (mains adapter included) |
| Rated power | 36 W |
| Standby consumption | < 0.5 W |
| Maximum usable area | 30 m² |
| Maximum air flow | 320 m³/h |
| Ventilation levels | 5 (manual + automatic) |
| Filter efficiency (0.3 μm) | 99.95% |
| Filter lifespan | Up to 3000 hours (depending on usage) |
| Main functions | Automatic mode, ECO mode, sleep mode, timer (max 12 h), control panel lock, PM2.5 display with color code |
| Air quality sensor | Fine particles PM2.5 |
| Maintenance and cleaning | Wipe with a soft dry cloth; replace filter (unpack before first use) |
| Safety | Control panel lock (child safety), automatic shut-off with timer, disconnect before maintenance |
| Included accessories | AF 30 mains adapter, filters (inside the device) |
| Warranty | According to country conditions, contact distributor |
Frequently Asked Questions - AF 30 Kärcher
User questions about AF 30 Kärcher
0 question about this device. Answer the ones you know or ask your own.
Ask a new question about this device
Download the instructions for your Air purifier in PDF format for free! Find your manual AF 30 - Kärcher and take your electronic device back in hand. On this page are published all the documents necessary for the use of your device. AF 30 by Kärcher.
USER MANUAL AF 30 Kärcher
| general notes | 8 |
| Safety instructions | 8 |
| Intended use | 9 |
| Environmental protection | 9 |
| Accessories and spare parts | 9 |
| Scope of delivery | 9 |
| Warranty | 9 |
| Description of the device | 9 |
| Initial Start-Up | 10 |
| Operation | 10 |
| Transport and storage | 11 |
| Care and service | 11 |
| Troubleshooting guide | 12 |
| Technical data | 12 |
General notes

Read these original instructions and the safety instructions chapter before using the device for the first time. Act in accordance with them.
Keep these original instructions for future reference and for future owners.
Safety instructions
Hazard levels
DANGER
- Indication of an imminent threat of danger that will lead to severe injuries or even death.
WARNING
- Indication of a potentially dangerous situation that may lead to severe injuries or even death.
CAUTION
- Indication of a potentially dangerous situation that may lead to minor injuries.
ATTENTION
- Indication of a potentially dangerous situation that may lead to damage to property.
General safety instructions
DANGER Only connect the device to alternating current. The voltage indicated on the type plate must match the voltage of the power source. Never touch the mains plug and socket with wet hands. Risk of asphyxiation. Keep packaging film out of the reach of children. Operation in explosive atmospheres is prohibited.
WARNING: Persons with reduced physical, sensory or mental capabilities, or those with a lack of experience and knowledge, are only allowed to use the appliance if they are supervised or have been instructed with respect to using the appliance safely, and understand the resultant dangers involved. Children from the age of 8 may use the appliance if they are supervised or have been instructed in its use by a person responsible for their safety, and if they have understood the resultant dangers involved. Children must not play with the appliance. Children must be supervised to prevent them from playing with the appliance. Children may only perform cleaning work and user maintenance under supervision. Check the power supply cable with mains plug for damage before operation each time. Do not put the device into operation with a damaged power supply cable. Have a damaged power supply cable replaced immediately by the authorised customer service / qualified electrician. Switch off the device immediately and remove the mains plug before performing any care and service work.
CAUTION: Do not pull the mains plug out of the socket using the power supply cable. Have repair work, installation of spare parts and work on electrical components carried out by the authorised customer service only. It is prohibited to cover the air inlet and outlet. Switch off the device after each use and remove the mains plug. Do not place the device near a heat source. The device is not a replacement for appropriate ventilation. The device must be placed on an even, firm subsurface. Only use accessories and spare parts which are approved by the manufacturer. Only original accessories and original spare parts ensure that the appliance will run fault-free and safely.
- Do not use the device in damp conditions or in rooms with high ambient temperatures, e.g. bathroom.
Intended use
In accordance with the descriptions and safety instructions listed in these operating instructions, use the device only as an air purifier.
- The device is intended for use as an air purifier.
- The device is suitable for both private and commercial use.
- The device is intended only for indoor use.
Environmental protection

The packing materials can be recycled. Please dispose of packaging in accordance with the environmental regulations.
Electrical and electronic appliances contain valuable, recyclable materials and often components such as batteries, rechargeable batteries or oil, which - if handled or disposed of incorrectly - can pose a potential threat to human health and the environment. However, these components are required for the correct operation of the appliance. Appliances marked by this symbol are not allowed to be disposed of together with the household rubbish.
Notes on the content materials (REACH)
Current information on content materials can be found at: www.kaercher.com/REACH
Accessories and spare parts
Only use original accessories and original spare parts. They ensure that the appliance will run fault-free and safely.
Information on accessories and spare parts can be found at www.kaercher.com.
Scope of delivery
The scope of delivery for the appliance is shown on the packaging. Check the contents for completeness when unpacking. If any accessories are missing or in the event of any shipping damage, please notify your dealer.
Warranty
The warranty conditions issued by our relevant sales company apply in all countries. We shall remedy possible malfunctions on your appliance within the warranty period free of cost, provided that a material or manufacturing defect is the cause. In a warranty case, please contact your dealer (with the purchase receipt) or the next authorised customer service site.
(See overleaf for the address)
Description of the device
For the illustrations, refer to the graphics page. Illustration A
① Operation buttons ② Display field ③ Operation button for Device On / Off ④ Fan level operation button ⑤ Operation button/indicator for Auto mode On / Off ⑥ Operation button ECO mode On/Off ⑦ Operation button/indicator for Sleep mode On / Off ⑧ Operation button/indicator Function lock ⑨ Operation button/indicator Timer ⑩ Operation button for Filter reset ⑪ Indicator for temperature in °C ⑫ Indicator for time-controlled status start-up/shutdown ⑬ Indicator for fan level ⑭ Indicator for PM 2.5 index air quality (numerical / colour display) ⑮ Indicator for relative humidity ⑯ Filter service life display
Air quality sensor ⑱ Connection Power supply unit AF 30 ⑲ Connecting cable AF50 ⑳ Steering rollers AF50 (4x) ㉑ Filter cover ㉒ Filter ㉓ Power adapter AF30
Note
The function settings are only possible via the operation buttons and not via the displays.
Initial Start-Up
Before initial start up, the fine filters already installed in the unit must be unpacked.
- Open the two filter covers on the recessed grip and remove them with both hands.
- Remove the packed filters from the casing using the tabs.
- Unpack the filters.
- Insert the unpacked filters.
- Insert the filter cover firmly with both hands.
- Place the device on a level surface. Ensure that a distance of 0.30 m is maintained to each side.
- Make sure that the air intake and air outlet openings are not blocked.
Note
Do not place the device on hot surfaces or in the immediate vicinity of the room heating.
Do not allow any liquids or foreign bodies (e.g. metallic objects) to enter the device.
- AF 30: Insert the unit plug of the power supply unit into the device.
Plug the mains plug of the power supply unit into a socket.
AF 50: Plug the mains plug of the device into a mains socket.
Illustration I
The device is ready for operation.
Note
The first time you use the device, we recommend allowing it to run overnight to perform an initial basic cleaning of your room.
Note
The table with the hours of the display symbols for the filter service life, see Replacing the filter
Operation
Switching the device on/off
- To switch on the device: Press the on/off button on the device.
Illustration I
The device starts automatically.
Note
After the system is switched on, the displays and buttons on the control panel light up briefly. The integrated
air quality sensor measures the air quality in the room automatically.
- If required, the following functions, for example, can be set via the operation buttons:
Fan level - Auto mode ECO mode - Sleep mode - Lock control panel - Timer - Filter reset
- To switch off the device: Press the On/Off switch of the device.
The displays and buttons on the control panel go out. The device is switched off.
Depending on the air quality, the fan level can be manually set to level 1, 2, 3, 4 or 5. If the air quality is poor, for example to filter out smoke, the blower should run at maximum speed (level 5) for 15 - 20 minutes.
Note
To clean the air effectively, keep windows and doors closed while the air purifier is switched on.
Symbol Operation button for the fan level:

- Press the fan level operation button repeatedly until the desired level is reached.
The selected fan level is displayed on the control panel.
Note
When selecting the fan level manually, the selected speed is shown on the display for 3 seconds before the PM 2.5 index values are shown again on the display.
Setting auto mode
In auto mode, the air purifier sets the appropriate fan level (level 1, 2, 3, 4, 5) depending on the air quality. In the event of poor air quality, for example, the fan level is automatically set high.
Symbol Operation button and indicator for auto mode:

- Press the Auto mode operation button. The automatic mode is switched on or off.
Setting ECO / power saving function
Switch power saving mode on / off
Symbol Operation button and indicator for ECO / power saving mode

The device is in working mode:
- Press the ECO mode operation button.
The device switches to power saving mode and the display is switched off.
The device is in power saving mode:
- Press the ECO mode operation.
The device switches to working mode, the display lights up.
Setting sleep mode
In sleep mode, the fan runs at the lowest speed and is therefore very quiet.
- Press the sleep mode operation button. The sleep p mode is switched on or off.
Symbol, operation button, and indicator for sleep mode:

Note
After the sleep mode operation button has been pressed, all display symbols (except sleep mode) go out.
After 10 seconds, the sleep mode operation button also goes out.
To exit sleep mode, press any operation button (except the on/off button).
Lock/unlock control panel
To prevent accidental change of settings, e.g. by children or pets, the control panel can be locked.
Symbol for the lock operation button and display for control panel:

- Lock: Press the button for 3 seconds.
- Unlock: Press the lock button for 3 seconds.
Setting the timer
The timer can be set to the desired run time (max. 12 h). When the set time has elapsed, the device switches off automatically. The blower speed can be changed at any time.
Symbol, operation button, and indicator for timer:

- Switching on: Press the Timer operation button repeatedly until the desired run time is reached. The set run time is displayed in the display.
- Switching off: Press the timer operation button until the display shows "0".
If set to "0", the timer function is cancelled.
Perform the filter reset after filter change
After the filter lifespan has expired, the filters must be changed. For more information, see chapter Replacing the filter
Symbol Operation button for filter reset:
Display PM 2.5 air quality
The display shows the concentration of fine dust (PM 2.5) numerically in the unit µg / m3 . In addition, a colour index provides information about the air quality:
| PM 2.5 Air quality | Colour | |
| 0 - 60 Good Blue | ||
| 61 - 120 Moderate | Yellow | |
| >120 | Poor Red |
Transport and storage
CAUTION
Failure to observe the weight
Risk of injury and damage
Be aware of the weight of the device during transport and storage.
Store the device only in dry indoor rooms.
Care and service
Cleaning
△DANGER
Danger of death from electric shock
Liquids can conduct electricity and thus cause serious or fatal injuries.
Always disconnect the power supply unit from the socket before cleaning and maintenance work.
Never immerse the device or the power supply unit in water.
Never use wet cloths to clean the device or the power supply unit.
- Switch off the device.
- Unplug the power supply unit from the socket.
- Wipe the device with a soft, dry cloth. Do not use abrasive or corrosive detergents.
Replacing the filter
The filter should be changed after 2500 - 3000 hours of operation at the latest. If the device gets louder, an unpleasant smell emanates from the device (filter) or the filter is visibly dirty, also earlier. If the filter service life is less than 150 hours, the symbol flashes in the display (flashing frequency 2x /second) to remind you to change the filter.
Depending on the service life, the following number of symbols is displayed:
| Display for service life of filter (h) | |
| 2501 - 3000 | |
| 2001 - 2500 | |
| 1501 - 2000 | |
| 1001 - 1500 | |
| 501 - 1000 | |
| 1 - 500 | |
- Switch off the device, and disconnect the power supply unit or mains plug from the socket and device.
Illustration J
- Open the two filter covers on the recessed grip and remove them with both hands.
Illustration B Illustration C
- Remove the filters from the casing using the tabs. Illustration D
- Unpack the new filters. Illustration E
- Insert the unpacked filters. Illustration F
- Insert the filter covers.
Illustration G
- Connect the power supply unit to the device and socket.
- Switch the device on.
To reset the filter (Reset), press the symbol for 3 seconds.
Illustration K
Troubleshooting guide
Malfunctions often have simple causes that you can remedy yourself using the following overview. When in doubt, or in the case of malfunctions not mentioned here, please contact your authorised Customer Service.
| Fault Cause Rectification | ||
| The device cannot be switched on | No electrical voltage present | Check the socket and the power supply fuse.Insert the plug of the power supply unit into another socket. |
| Power supply unit defective | Contact Customer Service to replace the power supply unit. | |
| Device defective Contact Customer Service. | ||
| Display flashes and device does not start | Filter cover not inserted correctly | Insert the filter cover correctly, making sure that the filters are seated correctly. |
| Airflow is reduced | Filter clogged | Changing the filter, see chapter Replacing the filter. |
| Filter not unpacked | Unpacking the filter, see chapter Initial Start-Up. | |
| Fan level too low | Increasing the fan level, see chapter Setting the fan level. | |
| Air outlet is blocked | Remove foreign bodies. | |
| Odour elimination ineffective | Poor ambient air quality | Open windows to improve ventilation. |
| Filter used up or used too long | Replace the filter. | |
| Fan level too low | Increasing the fan level, see chapter Setting the fan level. | |
| Poor air quality | Fan level too low | Increasing the fan level, see chapter Setting the fan level. |
| Draught | Close the windows and doors while the device is working. | |
| AF 30: Room size clearly above 30 m2 | Observe the maximum room size. | |
| AF 50: Room size clearly above 50 m2 | Observe the maximum room size. | |
| Air slots on the device blocked | Keep the required distances from the device.Do not place anything on the device. | |
| Filter not unpacked | Unpacking the filter, see chapter Initial Start-Up. | |
| Filter clogged or contaminated. | Changing the filter, see chapter Replacing the filter. | |
Technical data
| AF 30 | AF 50 | ||
| Electrical connection | |||
| Mains voltage | V | DC24V | 220-240 |
| Phase | ~ | 1 | 1 |
| Power frequency | Hz | 50-60 | 50-60 |
| Nominal power | W | 36 | 50 |
| Standby | W | < 0,5 | < 0,5 |
| Device performance data | |||
| Maximum airflow | m³/h | 320 | 520 |
| Floor space | m² | * 30 | * 50 |
| Filter efficiency at 0.3 μm | 99,95% | 99,95% | |
| Maximum filter working time (depending on environment) | h | 3000 | 3000 |
| AF 30 | AF 50 | ||
| Ventilation levels | 5 | 5 | |
| Dimensions and weights | |||
| Weight | kg | 5.8 | 7.7 |
| Length x width x height | mm | 260x260 | 290x290 |
| x480 | x560 | ||
| Ambient conditions | |||
| Ambient temperature | °C | -10 °C | -10 °C |
| +40 °C | +40 °C | ||
| Determined values in acc. with EN 60335-2-69 | |||
| Sound pressure level | dB(A) | 26-51 | 29-53 |
- At 3 m ceiling height and 3 x air exchange per hour. Subject to technical modifications.
Contents
General notes. 13
www.kaercher.com/REACH
PM 2.5 air quality indicator
The device measures the concentration of fine dust particles (PM2.5) in the air and displays it in μg/m³. In addition, a color indicator provides information about the air quality:
Troubleshooting 68
Technical specifications 69
General notes

Before using the device for the first time, read the original operating instructions and the safety instructions. Follow them. Keep the original operating instructions for future use or for the next owner.
Safety instructions
Safety instructions
Hazard levels
DANGER
- Indicates an immediate danger that leads to severe injury or death.
DANGER
- Indicates a potentially dangerous situation that could lead to severe injury or death.
CAUTION
- Indicates a potentially dangerous situation that could lead to minor injury.
NOTICE
- Indicates a potentially dangerous situation that could lead to property damage.
General safety instructions
DANGER: Connect the device only to an AC power source.
The voltage indicated on the rating plate must match the voltage of the power source. Do not touch the device or plug with wet hands. Risk of electric shock. Keep the packaging film out of reach of children. Operation in explosive atmospheres is prohibited.
WARNING: The device may be used by persons with reduced physical, sensory, or mental capabilities, or lack of experience and knowledge, if they are supervised or have been instructed on the safe use of the device and understand the potential risks. Children aged 8 and above may use the device if they are supervised or have been instructed by a person responsible for their safety, and they understand the potential risks. Do not allow children to play with the device.
Ensure that children do not play with the device. Children are allowed to clean and maintain the device only under supervision. Before starting work with the device, check the power cord and plug for damage. Do not operate the device with a damaged power cord. Immediately replace damaged power cords with original spare parts or by a qualified electrician. Before performing any maintenance or cleaning, unplug the device and remove the plug from the outlet.
CAUTION: Do not pull the plug out of the outlet by the power cord.
Repairs, installation of spare parts, and work with electrical components must only be performed by authorized service personnel. Do not block the air intake and exhaust openings.
• Unplug the device after each use and remove the plug from the outlet. • Do not place the device near heat sources. • The device is not intended for use in confined spaces. • The device must stand on a flat and stable surface. • Use only accessories and spare parts approved by the manufacturer. Use original accessories and spare parts. Only they guarantee safe and trouble-free operation of the device. • Do not use the device in wet conditions or in rooms with high ambient temperature, for example, in a bathroom.
Intended use
Use the device exclusively as an air purifier in accordance with the descriptions and safety instructions provided in this operating manual.
- The device is intended for use as an air purifier. This device is designed for commercial use.
- The device is intended exclusively for use in indoor spaces.
Environmental protection

Packaging materials can be recycled. Please dispose of packaging in an environmentally friendly manner.

Electrical and electronic devices often contain materials that can be recycled, and sometimes components such as batteries,
rechargeable batteries or oil, which, if handled incorrectly or disposed of improperly, can pose a potential hazard to health and the environment. However, these components are necessary for the proper functioning of the device. Devices marked with this symbol are prohibited from being disposed of with household waste.
Information on ingredients (REACH)
For current information on ingredients, see www.kaercher.com/REACH
- Insert the supplied filters.
Figure F
- Insert the covers by hand. Figure G
- Install the device on a flat surface. Ensure a distance of 0.30 m from each side.
Figure H
- Make sure that the air inlet and outlet openings are not blocked.
Note
Do not install the device on an uneven surface or near heat sources.
Do not allow liquids or foreign materials (e.g.,
metal objects) to enter the device.
- AF 30: Insert the power plug into the device.
Insert the power plug into the power outlet.
AF 50: Insert the device plug into the outlet.
Figure I
The device is ready for operation.
Note
It is recommended to run the device for the first time at night to thoroughly clean the air in the room.
Note
Table showing the operating modes of the device symbol for the service functions, see.
Control
Turning the device on/off
1. To turn on the device: press the On/Off button on the device.
Figure 1
The device turns on automatically.
Note
After switching on, the indicators and buttons on the control panel light up briefly. The built-in air quality sensor
automatically measures the air quality in the room.
2. If necessary, the following functions can be set using the control buttons:
- Power level
- Automatic mode, ECO mode, medium fan speed, control panel lock, timer, filter reset
3. To turn off the device: press the On/Off switch on the device. The indicators and buttons on the control panel go out. The device is turned off.
Setting the power level
Depending on the air quality, the power level can be set manually to level 1, 2,
3, 4, or 5. If the air quality is poor, for example, due to smoke or dust, the fan should operate at maximum speed (level 5) for 15-20 minutes.
Note
For effective air purification, keep windows and doors closed while the air purifier is on.
Power level button symbol

Press the power level button several times until the desired level is reached.
The selected power level is shown on the control panel.
Note
When setting the power level manually, the selected level is displayed on the screen for 3 seconds, after which the PM 2.5 index value is displayed again.
Setting the automatic mode
In automatic mode, the air purifier automatically sets the appropriate power level (level 1, 2, 3, 4, 5) depending on the air quality.
For example, if the air quality is poor, the power level is automatically set higher.
Symbol of the automatic mode indicator button:

Press the automatic mode button. The automatic mode is turned on or off.
Setting the ECO/energy saving function
Turning on/off the energy saving mode
Symbol of the control button/indicator “ECO mode/energy saving”

The device is in operating mode:
Press the “ECO mode” button. The device switches to energy saving mode, and the display turns off.
The device is in energy saving mode:
Press the “ECO mode” button. The device switches to operating mode, and the display lights up.
Setting the sleep mode
In sleep mode, the fan operates at the lowest speed and is therefore very quiet.
Press the control button “Sleep mode”. Sleep mode turns on and off. Symbol of the control button/indicator “Sleep mode”.

Note
After pressing the control button “Sleep mode”, all symbols on the display (except the “Sleep mode” symbol) go out.
After 10 seconds, the control button “Sleep mode” also goes out.
To exit sleep mode, press any control button (except the On/Off button).
Unlocking/locking the control panel
To prevent accidental changes to settings, for example, by children or pets, the control panel can be locked.
Air quality index PM 2.5
The display shows the concentration of particulate matter (PM 2.5) in numerical units of µg/m³. In addition, the color index provides information about air quality:
Troubleshooting
Most malfunctions have simple causes, so with the help of the following overview they can be fixed independently. In case of doubt or malfunctions not described here, contact an authorized service center.
- Unpack the new filter.
Figure E
- Install the unpacked filters.
Figure F
- Install the filter covers.
Figure G
- Connect the power supply to the device and the outlet.
- Turn on the device.
a To reset the filter (reset), press the symbol for 3 seconds.
Figure K

Set the operating mode:
Press the button for maintenance ECO mode. The device switches to energy-saving mode, the display turns off.
Set the operating time:
Press the button for maintenance ECO mode. The device switches to operating mode, the display lights up.
Setting the sleep mode
In sleep mode, the fan operates at minimum speed and is very quiet.
- Press the button for maintenance Sleep mode. Sleep mode turns on, respectively turns off.
Symbol button for maintenance and indication on the display for sleep mode:

Note
After pressing the button for maintenance Sleep mode, all symbols on the display (except the one for sleep mode) go out. After 10 seconds, the button for maintenance Sleep mode also goes out.
To stop the sleep mode, any button can be pressed (except the On/Off button).
Control panel buttons
To prevent unintentional changes to the settings, e.g. by children or pets, the control panel can be locked. The service button and the display indication for locking the control panel:

Locking: Press and hold the button for 3 s. - Unlocking: Press and hold the unlock button for 3 s.
Setting the timer
The timer can be set to the desired operating time (max. 12 h). When the set time has elapsed, the appliance switches off automatically. The fan speed can be changed at any time. The service button and the display indication for the timer:
Switching on: Press the service button for the timer repeatedly until the desired operating time is reached. The set operating time is shown on the display. - Switching off: Press the service button for the timer until "0" is shown on the display. With the setting "0" the timer function is deactivated.
Changing the filter after a change of 1
After the operating time of the filter has elapsed, it must be changed. The normal inlet is in the main part of the filter.
Service button for the filter:

Display PM 2.5 air quality
The display shows the digital indication of the concentration of dust (PM 2.5) with the measuring unit µg / m3 . In addition, the color index gives information about the air quality:
| РМ 2,5 | Качесво на Бьздуха | Цват |
| 0-60 Добко Син | ||
| 61-120 Сре:dно | Жыnt | |
| >120 | ПосюЧервен |
Transport and storage
WARNING
Unplug the appliance
Risk of injury and damage when transporting and storing the unplugged appliance.
Store the device only in a dry, ventilated room.
Maintenance
Maintenance
DANGER
Danger of electric shock and moving parts.
The device may be started and operated only by qualified personnel.
Before maintenance and repair, disconnect the device from the power supply.
Never operate the device or the protective block without the cover.
Never install the device or the protective block when it is wet.
1. Disconnect the device. 2. Remove the protective block from the contact. 3. Clean the device with a dry cloth. Do not use aggressive cleaning agents.
Filter replacement
The filter must be replaced at the latest after 2500-3000 hours of operation. If the device emits a signal, the filter is clogged or the filter is dirty, replacement must be performed earlier. If the filter's service life is less than 150 hours, the signal (frequency of beeping 2x/second) will remind you of the necessary filter replacement. Depending on the service life, the following number of signals is shown:
| Показанные за[eç身心健康]хивoting на фальва(h) | |
| 2501 - 3000 | - - - - - - |
| 2001 - 2500 | - - - - - - |
| 1501 - 2000 | - - - - - - |
| 1001 - 1500 | - - - - - - |
| 501 - 1000 | - - - - - - |
| 1 - 500 | - - - - - - |
1. Disconnect the device and remove the protective block, see Fig. 2. 2. Open the filter cover by lifting the latch and removing it with both hands.
Fig. B
Fig. C
3. Remove the filter from the housing, holding it by the tabs.
Figure D
- Separate the new filters.
Figure E
- Insert the separated filters. Figure F
- Insert the filters into the housing. Figure G
- Connect the plug to the power supply and the contact.
- Turn on the device.
To reset the filter (reset), press the button for 3 seconds.
Figure K
Help in case of damage
Many faults are elementary and you can fix them yourself with the help of the following instructions. If you are not sure or the faults are not described here, contact the authorized service.
General safety instructions
The device is intended for household use:
1. To turn on the device: press the ON/OFF button on the device.
The device turns on automatically.
Indicator
The control panel buttons and knobs are used to operate the device. The device design allows for automatic air purification in the room.
- If necessary, using the control buttons, you can adjust, set, the following functions:
Fan speed - automatic mode - ECO mode - Sleep mode - Timer - Filter cleaning
3. Turning on the device: Press the ON/OFF button on the device. The indicators and buttons on the control panel light up. The device is turned on.
Adjusting the fan speed
Depending on the air quality, the fan speed can be manually set to level 1, 2, 3, 4, or 5. If the air quality is poor, for example, after filtering smoke, the ventilator should operate at maximum speed (level 5) for 15-20 minutes.
Indicator
Close windows and doors when operating the device for effective air purification.
Fan speed control button symbol

Press the fan speed control button several times until the desired level is reached.
The selected fan speed is displayed on the control panel.
Indicator
The selected power level is displayed on the display for 3 seconds, after which the PM 2.5 index value is displayed on the display.
Setting the automatic mode
In the automatic mode, the device automatically sets the appropriate power level (levels 1, 2, 3, 4, 5) depending on the air quality.
For example, if the air quality is poor, the power level is set automatically higher.
Symbol of the control button and indicator «Automatic mode»:

Press the control button «Automatic mode». The automatic mode is turned on or off.
Setting the ECO/energy saving function
Enabling the ECO/energy saving mode
Symbol of the control button and indicator «ECO/energy saving mode»

The device is in operating mode:
Press the control button «ECO mode». The device switches to the energy saving mode, the indicator lights up.
The device is in the energy saving mode:
Press the control button «ECO mode». The device switches to the operating mode, the indicator goes out.
Setting the sleep mode
In the sleep mode, the ventilator operates at the lowest speed, so it operates very quietly.
- Control buttons "Sleep mode". Sleep mode turns on or off.
Symbols of control buttons and indicator "Sleep mode":

Indicator
Pressing the control button "Sleep mode" all symbols will turn off (except the symbol of Sleep mode). After 10 seconds the control button "Sleep mode" will also turn off. To exit sleep mode, press any control button (except the On/Off button).
Locking/unlocking the control panel
The control panel can be locked to prevent accidental changes to settings, for example, by children or pets. Symbols of control buttons and indicator "Control panel lock":

- Locking: press the button and hold for 3 seconds. - Unlocking: press the lock button and hold for 3 seconds.
Setting the timer
The timer can be set for the required operating time (max. 12 hours). After the set time has elapsed, the device turns off automatically. The fan speed can be changed at any time. Symbols of control buttons and indicator "Timer":

Activation: press the control button "Timer" several times until the required operating time is reached. The set operating time is displayed on the display. Deactivation: press the control button "Timer" until the display shows "0" or the set value "0", the timer function is canceled.
Cleaning the filter
After the filter's operating time has elapsed, the filter must be cleaned. For detailed information, see the chapter "Cleaning the filter". Symbol of control button "Filter cleaning"

PM 2.5 air quality indicator
The display shows the concentration of fine dust (PM 2.5) in numerical value in units of µg/m³. In addition, the color indicator provides information about the air quality:
| (الإستعمال)Erçud ocretions | |
| 3000-2501 | |
| 2500-2001 | |
| 2000-1501 | |
| 1500-1001 | |
| 1000-501 | |
| 500 | |


Therefore, the area of triangle OBC equals the area of triangle COD plus the area of triangle BOC.

PM 2.5
(PM 2.5)
1
d0j/duw/du
s
.1gJ 12 .1gJ 12 .1gJ 12 .1gJ 12
y 10000000000000000000000000000000000000000000000000000000000000000000000000000000000000000
pwl1l sio
a p > | a 2| 0.9A
4

THANK YOU!
MERCI! DANKE! iGRACIAS!

Register your product and benefit from many advantages.
www.kaercher.com/welcome


Rate your product and tell us your opinion.
www.kaercher.com/dealersearch
Alfred Kärcher SE & Co. KG
Alfred-Karcher-Str.28-40
71364 Winnenden (Germany)
Tel.: +49 7195 14-0
Fax: +49 7195 14-2212

- GENERAL NOTES
- SAFETY INSTRUCTIONS
- HAZARD LEVELS
- DANGER
- WARNING
- CAUTION
- ATTENTION
- GENERAL SAFETY INSTRUCTIONS
- INTENDED USE
- ENVIRONMENTAL PROTECTION
- NOTES ON THE CONTENT MATERIALS (REACH)
- ACCESSORIES AND SPARE PARTS
- SCOPE OF DELIVERY
- WARRANTY
- DESCRIPTION OF THE DEVICE
- NOTE
- INITIAL START-UP
- ILLUSTRATION I
- OPERATION
- SWITCHING THE DEVICE ON/OFF
- SETTING AUTO MODE
- SETTING ECO / POWER SAVING FUNCTION
- SWITCH POWER SAVING MODE ON / OFF
- SETTING SLEEP MODE
- LOCK/UNLOCK CONTROL PANEL
- SETTING THE TIMER
- PERFORM THE FILTER RESET AFTER FILTER CHANGE
- DISPLAY PM 2.5 AIR QUALITY
- TRANSPORT AND STORAGE
- FAILURE TO OBSERVE THE WEIGHT
- CARE AND SERVICE
- CLEANING
- △DANGER
- DANGER OF DEATH FROM ELECTRIC SHOCK
- REPLACING THE FILTER
- ILLUSTRATION J
- ILLUSTRATION B ILLUSTRATION C
- ILLUSTRATION G
- ILLUSTRATION K
- TROUBLESHOOTING GUIDE
- CONTENTS
- PM 2.5 AIR QUALITY INDICATOR
- NOTICE
- INFORMATION ON INGREDIENTS (REACH)
- FIGURE F
- FIGURE H
- FIGURE I
- CONTROL
- TURNING THE DEVICE ON/OFF
- FIGURE
- SETTING THE POWER LEVEL
- SETTING THE AUTOMATIC MODE
- SETTING THE ECO/ENERGY SAVING FUNCTION
- TURNING ON/OFF THE ENERGY SAVING MODE
- SETTING THE SLEEP MODE
- UNLOCKING/LOCKING THE CONTROL PANEL
- AIR QUALITY INDEX PM
- TROUBLESHOOTING
- FIGURE E
- FIGURE G
- FIGURE K
- CONTROL PANEL BUTTONS
- CHANGING THE FILTER AFTER A CHANGE OF
- MAINTENANCE
- FILTER REPLACEMENT
- HELP IN CASE OF DAMAGE
- INDICATOR
- ADJUSTING THE FAN SPEED
- ENABLING THE ECO/ENERGY SAVING MODE
- LOCKING/UNLOCKING THE CONTROL PANEL
- CLEANING THE FILTER
- PWL1L SIO
- THANK YOU
- MERCI! DANKE! IGRACIAS
- WWW.KAERCHER.COM/WELCOME
Brand : Kärcher
Model : AF 30
Category : Air purifier