AFG 100 - Air purifier Kärcher - Free user manual and instructions
Find the device manual for free AFG 100 Kärcher in PDF.
| Product type | Air purifier |
| Brand | Kärcher |
| Model | AFG 100 |
| Dimensions (H × Ø base) | 1120 × 320 mm |
| Weight | 13 kg |
| Power supply | 110-240 V ~ 50/60 Hz |
| Nominal power | < 60 W |
| Standby consumption | < 0.5 W |
| Noise level | 37 - 65 dB(A) |
| Filtration technology | 3-level filter cartridge: prefilter F7, EPA E11 filter, activated carbon filter, plasma catalyst |
| Sensor | VOC sensor (volatile organic compounds) |
| Fan | 5 speeds + automatic mode |
| Timer | 1 to 99 hours |
| LED lighting | 10 colors + automatic change, 10 brightness levels |
| Recommended area | Up to 60 m² |
| Operating temperature | 10 °C to 30 °C |
| Operating humidity | 20% to 80% RH |
| Maintenance | Clean the exterior with a soft cloth; clean/replace prefilter every 3-6 months; replace filter cartridge approximately every 3 years |
| Safety | Automatic shutdown after 10 min if inactive; child protection (≥8 years); shutdown in case of fault |
| Spare parts | Prefilter (ref. 6.640-869.0), 3-level filter cartridge (ref. 6.640-870.0) |
| Warranty | According to conditions in force in the country of purchase (see Kärcher customer service) |
| After-sales service | Contact the local Kärcher subsidiary |
| Certifications | CE (directives 2014/35/EU, 2014/30/EU, 2011/65/EU) |
Frequently Asked Questions - AFG 100 Kärcher
User questions about AFG 100 Kärcher
0 question about this device. Answer the ones you know or ask your own.
Ask a new question about this device
Download the instructions for your Air purifier in PDF format for free! Find your manual AFG 100 - Kärcher and take your electronic device back in hand. On this page are published all the documents necessary for the use of your device. AFG 100 by Kärcher.
USER MANUAL AFG 100 Kärcher
Chairman of the Board of Management

S. Reiser
Director Regulatory Affairs & Certification
Contents
General notes. 13
Device description 15
Initial start-up 15
Initial startup 16
Care and service 18
Troubleshooting guide 19
Accessories and spare parts 20
Technical data 20
EU Declaration of Conformity. 20
General notes


Read these original operating instructions and the safety instructions chapter before using the device for the first time. Proceed accordingly.
Keep them safe for future reference or for future owners.
Scope of delivery
1 x Karcher air purifier AFG 100
- 1 × 3 -stage filter cartridge
- 2 × Pre-filters
- 1 x Stand
1 x Fastening screw
1 x Allen key
- 1 x Operating manual
Intended use
The device may only be operated under the following prerequisites:
Operation exclusively in living spaces, office spaces and commercial spaces without condensing moisture.
Operation exclusively for air purification.
- Covering the device during operation is prohibited. Persons, including children above the age of 8 years, that are not able to safely operate the unit due to their physical, sensory or mental capabilities are not permitted to use the device without supervision by, or instruction from a responsible person.
Children must not play with the device.
Unsupervised children are not permitted to perform cleaning and user maintenance of the device.
Foreseeable incorrect use
Any use other than the specified intended use is regarded as incorrect use.
Alfred Karcher SE & Co. KG accepts no liability of any kind for the consequences of incorrect use.
All warranty claims for damage and deficiencies resulting from a failure to adhere to the instructions in the operating manual are null and void.
Environmental protection

The packing materials can be recycled. Please dispose of packaging in accordance with the environmental regulations.

Electrical and electronic appliances contain valuable, recyclable materials and often components such as batteries, rechargeable batteries or oil, which - if handled or disposed of incorrectly - can
pose a potential threat to human health and the environment. However, these components are required for the correct operation of the appliance. Appliances marked by this symbol are not allowed to be disposed of together with the household rubbish.
Notes on the content materials (REACH)
Current information on content materials can be found
at: www.kaercher.com/REACH
Disposal
- Do not dispose of worn out devices, batteries or rechargeable batteries via the normal household rubbish!
- The packaging, device and accessories are made of recyclable materials and must be disposed of accordingly.
- The packaging material for this product is suitable for recycling and can be re-used.
- Dispose of all materials in accordance with the local regulations.
- Old electrical devices may not be disposed of via the normal household rubbish! Dispose of old devices in an environmentally friendly manner. Old devices contain valuable, recyclable materials that should be recycled.
- Exhausted filter cartridges can be returned to the address specified on the new filter cartridge packaging.
Warranty
The warranty conditions issued by our relevant sales company apply in all countries. We shall remedy possible malfunctions on your device within the warranty period free of cost, provided that a material or manufacturing defect is the cause. In a warranty case, please contact your dealer (with the purchase receipt) or the next authorised customer service site.
Legal notice
All specified data applies only to the product description. These specifications cannot be used to infer specific properties or suitability for a specific purpose of use. The specifications do not exempt the user from the duty of making their own assessments and tests.
Customer Service department
Our local KARCHER branch will be happy to help you if you have any questions or problems with the device.
General safety instructions
DANGER Only connect the device to alternating current.
The voltage indicated on the type plate must match the voltage of the power source. ●Never touch the mains plug and socket with wet hands. ●Risk of asphyxiation. Keep packaging film out of the reach of children. I Operation in explosive atmospheres is prohibited.
WARNING Persons with reduced physical, sensory or mental capabilities, or those with a
lack of experience and knowledge, are only allowed to use the appliance if they are supervised or have been instructed with respect to using the appliance safely, and understand the resultant dangers involved. Children from the age of 8 may use the appliance if they are supervised or have been instructed in its use by a person responsible for their safety, and if they have understood the resultant dangers involved. Children must not play with the appliance. Children must be supervised to prevent them from playing with the appliance. Children may only perform cleaning work and user maintenance under supervision. Check the power supply cable with mains plug for damage before operation each time. Do not put the device into operation with a damaged power supply cable. Have a damaged power supply cable replaced immediately by the authorised customer service / qualified electrician. Switch off the device immediately and remove the mains plug before performing any care and service work.
CAUTION Do not pull the mains plug out the socket using the power supply cable. Have repair work, installation of spare parts and work on electrical
components carried out by the authorised customer service only. ●It is prohibited to cover the air inlet and outlet. ●Switch off the device after each use and remove the mains plug. ●Do not place the device near a heat source. ●The device is not a replacement for appropriate ventilation. ●The device must be placed on an even, firm subsurface. ●Only use accessories and spare parts which are approved by the manufacturer.
Only original accessories and original spare parts ensure that the appliance will run fault-free and safely. ●Do not use the device in damp conditions or in rooms with high ambient temperatures, e.g. bathroom, kitchen.
Hazard levels
DANGER
Indication of an imminent threat of danger that will lead to severe injuries or even death.
WARNING
Indication of a potentially dangerous situation that may lead to severe injuries or even death.
△CAUTION
Indication of a potentially dangerous situation that may lead to minor injuries.
ATTENTION
Indication of a potentially dangerous situation that may lead to damage to property.
transport
Where possible, always transport or return the device in the original packaging. Please contact our Service Department if the original packaging is not available.
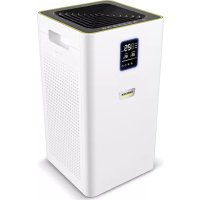
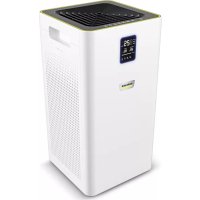
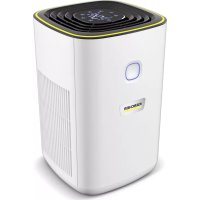
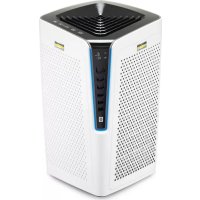
Device description
For the figures, refer to the graphics page.

① 3-stage filter cartridge
②Pre-filter
3 Stand
④Timer button
5Fan button
⑥ Brightness button
7Colour button
Control unit
9 Light ring
⑩Service LED
①On/Off button
12Air quality button/Service button
13" ^+ " button
14"-button
15Display
Product description
Whether in living spaces, at the workplace, in conference rooms or waiting rooms, the air in our rooms is contaminated with dust and especially with fine dusts that are harmful to health. We are also subjected to heavy pollution from biological and chemical contaminants. This can be caused by construction deficiencies, materials, paint, wood preservatives and so-called volatile organic substances. We want to feel good and full of energy. We want clean air without harmful contaminants, without VOC pollution, unpleasant odours, with less chance of infection through bacteria and viruses, less smell irritation and fewer allergens in children's rooms.
The KARCHER AFG 100 reliably removes fine dusts, allergens, bacteria, odours and VOC from your room air.
Lighting and colour selection
The colour and brightness of the LED ring can be adjusted as desired to provide a pleasing ambience. 10 colours and automatic colour changing can be selected. The colours can be individually adjusted by the user. The automatic colour change cycles gently through all colours.
10 brightness levels are available.
3-stage filter cartridge (PP)
Die 3-stage filter cartridge consists of a catalyser filter, an active carbon filter and an EPA filter. The filter material is polypropylene (PP). The EPA filter E11 ensures that fine dust, allergens, pollen and dust particles down to a size of 0.3 m are filtered out of the air.
Plasma electrode
The patented plasma technology catalyses the air to eliminate the smallest gaseous organic carbon compounds, such as odour molecules, viruses, bacteria and spores in an environmentally-friendly manner. Further decomposition reactions occur in the 3-stage filter. The plasma regenerates the 3-stage filter to provide a very long service life for the 3-stage filter.
VOC sensor
The VOC sensor is a special sensor that automatically measures the degree of contamination in the air.
Fan
The fan can be adjusted over 5 levels or can also be operated in the automatic mode "AU". The automatic mode adjusts the fan level according to the degree of contamination measured by the sensor.
Timer
From 1 - 99 hours can be selected. The device switches off after the configured period of time. Ideal for air purification after leaving the home or office.
Pre-filter
The pre-filter of filter class F7 removes all contaminants, fine dusts and pollen larger than 3 m from the intake air and protects the downstream filter. This ensures long-term functionality. The filter material is polypropylene.
Service display and filter replacement
The service LED on the control unit lights up when servicing is required. The service LED flashes when the pre-filter needs to be replaced.
Explanation of terms
VOC (Volatile Organic Compounds) are harmful vapours emitted by products surrounding us indoors in the office or at home.
Examples of VOC sources are e.g. aerosol sprays, cleaning agents, disinfectant, furniture, carpets, hobby accessories such as varnish and glue, building materials, paint, solvents, nail polish, pesticide and even air fresheners.
Initial start-up
Before the first use
The device is thoroughly checked and carefully packed before leaving the factory.
- Check the device immediately on receipt if the packaging is damaged or opened.
- Never start up a damaged device. Contact your supplier immediately in the case of potential complaint or return of the device.
- Read and observe the technical data and all safety instructions before starting up the device for the first time.
Installation
- Remove the air purifier, stand, fastening screw and Allen key from the packaging.
- Insert the fastening screw through the stand from below.
Note
The mounting hole for the screw is recessed.
- Use the Allen key to screw the stand onto the stand pipe of the air purifier and firmly tighten the screw.
- Position the mounted device upright on the stand.
- Remove the 3-stage filter cartridge from the device and remove the protective foil.
- Remove all transport locks above and below the 3-stage filter cartridge.
- Insert the 3-stage filter cartridge according to the instructions.
See: Inserting the 3-stage filter cartridge
Inserting the 3-stage filter cartridge
- Pull the control unit upwards and out.
- Fold the control unit to the side.
- Remove the transport lock from the 3-stage filter cartridge.
- Insert the 3-stage filter cartridge.
Note
The three spacers must be fitted in the recesses on the device.
The 3-stage filter cartridge can only be inserted in one position.
- Insert the control unit into the top of the device.
Note
The control unit only latches fully in one position.
The device cannot be switched on if the control unit is not fully latched in position.
Erecting the device
- Place the device on a flat, stable surface.
Note
Do not place the device on hot surfaces or in the immediate vicinity of the room heating.
Do not allow any liquids or foreign bodies (e.g. metallic objects) to enter the device.
- Ensure that the air intake (at the bottom) and air exhaust (at the top) are not blocked or impeded.
- Connect the device to the mains socket using the mains cable provided.
- Your Kärcher AFG 100 is now ready for operation.
Note
The first time you use the device, we recommend allowing it to run overnight to perform an initial basic cleaning of your room.
Initial startup
Switching the device on/off
- Plug the mains plug into the mains socket.
- Push the On/Off button to switch on the device.
Note
The device starts up with the last settings.
When fan level "0" is set, the device can be switched off by briefly pressing the On/Off button.
Switching the fan on/off
| Switching the fan on | Press the Fan button twice in succession if the fan is switched off. The fan runs at the last level selected. |
| Switching the fan off | Press the fan button twice in succession. |
Note
In automatic mode, a sensor measures the air quality as soon as the device is switched on. This procedure takes at least 2 minutes.
After measuring the air quality, the fan automation system automatically controls the device.
Setting the fan
- Press the fan button to adjust the fan.
The fan button lights up.
Note
The fan automation system first takes affect 2 minutes after switch on at the earliest.
The fan automation system first takes affect 15 minutes after switch on at the latest.
Display
| Display Meaning | |
| 0 Fan level 0 | |
| 1...5 Fan level | 1...5 |
| AU Automatic mode | |
Fan levels
| Fan lev- el | Operating mode | Application example |
| 1 - 2 Quiet | continuousnight time oper- tion | Bedroom |
| 3 Continuous day-time operation | Smaller rooms approx. \( {25}{\mathrm{\;m}}^{2} \) | |
| 4 Continuous day-time operation | Larger rooms approx. 60 \( {\mathrm{m}}^{2} \) | |
| 5 High speed mode For fast air purification or extremely contaminated air. | ||
| AUAutomatic modeThe automatic mode adjust-justs the fan level accord-ing to the degree of con-tamination measured by the sensor. | ||
| Setting the fan level | Press the "+" button to increase the fan level. Hold the "+" button pressed to automatically increase the fan level. Press the "-" button to decrease the fan level. Hold the "-" button pressed to automatically decrease the fan lev- el. |
| Selecting auto- matic mode | Press the "+" button until "AU" is shown in the display to indicate auto- matic mode. |
Setting the colour
- Press the colour button to set the lighting colour.
The colour button lights up.
Display
| Display Meaning | |
| 0...10 | Colour 0...10 is set. |
| A1...A9 | Colour change through all colours within X minutes. Example: A3 = colour change through all colours within 3 minutes. |
Colour level assignments (factory setting)
| Colour level | Colour | |
| 0 White Not adjustable | ||
| 1 Red Adjustable | ||
| 2 Green Adjustable | ||
| 3 Blue Adjustable | ||
| 4 Red-yellow Adjustable | ||
| 5 Yellow Adjustable | ||
| 6 Yellow-green Adjustable | ||
| 7 Cyan Adjustable | ||
| 8 Cyan-blue Adjustable | ||
| 9 Magenta | Adjustable | |
| 10 | Magenta-red | Adjustable |
Note
The colours are adjustable when the brightness level is set to "0".
Selecting the colour levels
You can configure up to ten colours and up to nine colour change intervals.
| Selecting colour level 1...10 | Press the "+" button to select the desired colour. Hold the "+" button pressed to automatically change the colour. Press the "-" button to select the desired colour. Hold the "-" button pressed to automatically change the colour. |
| Select colour level 0. | Press the colour button twice in succession to select colour level "0". |
Changing colour levels
You can manually assign any available colour to each of the colour levels 1...10.
1 Press and hold the colour button until it flashes.
2 Press the "+" or "-" button to change the colour of the selected colour level.
3 Press the Colour button again to save the colour under the respective number.
Switching the lighting on/off
| Switching the lighting on | Press the Brightness button twice in succession if the light ring lighting is switched off. ● The lighting is set to the last level selected. |
| Switching the lighting off | Press the brightness button twice in succession. |
Setting the brightness of the light ring
- Press the brightness button to set the brightness of the light ring.
The brightness button lights up.
Display
Setting the brightness levels
| Display | Meaning |
| 0 | The lighting is switched off. |
| 1...10 | Brightness level 1...10 is set. |
You can set up to ten brightness levels for the light ring.
| Setting the brightness levels | Press the "+" button to increase the brightness level. Hold the "+" button pressed to automatically change the brightness level. Press the "-" button to decrease the brightness level. Hold the "-" button pressed to automatically decrease the brightness level. |
Switching the timer on
- Press the timer button to switch on the timer.
The timer button lights up.
Setting the timer
You can set the timer within a range of 1 to 99 hours.
| Setting the remaining run time. | Press the "+" button to increase the remaining run time. Hold the "+" button pressed to automatically increase the remaining run time. Press the "-" button to decrease the remaining run time. Hold the "-" button pressed to automatically decrease the remaining run time. |
Display
The timer allows the device to be operated for a configurable period of time. The device switches off automatically after the configured period of time.
The remaining time in hours is displayed when the timer is selected. The displayed value changes when each full hour expires, i.e. if "3" is displayed then the remaining running time lies between 3.00 hours and 2.01 hours. The display does not change to "2" until the remaining time reaches 2.00 hours.
Resetting the timer
| Display | Meaning |
| 0 | The timer is reset. |
| 1...99 | A remaining run time of 1...99 is set. |
| Resetting the timer | Press the timer button twice in succession to reset the timer to "0". |
Measuring the air quality with the VOC sensor
- Press the Air quality button to measure the air quality with the VOC sensor.
The air quality is indicated via the LED ring for approx. 10 seconds. The timer button lights up.
The display shows "--"
The LED ring lights up red during the air quality sensor warm-up period.
Display
| Display | Meaning |
| Red Poor air | quality |
| Yellow | Medium air quality |
| Green | Good air quality |
Displaying error messages
- Press the service button twice in succession if the service LED is lit.
The error code is shown on the display.
See:
Error code and error description
Filter change service display
- The error E1 on the display provides notification to remind your of the timely ordering and replacement of the 3-stage filter cartridge.
Resetting the "Change pre-filter" service display
- The Service LED flashes periodically when the pre-filter needs to be replaced. The error code F7 is displayed. If you wish to reset the display for a pending pre-filter replacement, press the "-" button while the error message is displayed.
Switching the lighting and display on/off
Switching the lighting and display off
Briefly press the On/Off button to switch off the lighting and the display.
The lighting and display switch off.
Switching on the lighting and display
Briefly press the On/Off button to switch the lighting and the display on again.
The lighting and display switch on.
Press any button to switch the lighting and display on again.
The lighting and display switch on. The button function is simultaneously activated.
Power-saving function
If the device is not performing a function, i.e. the fan and light are switched off, then the device switches off automatically after 10 minutes.
Note
Each press of the button delays the switch-off time by 10 minutes.
The device does not switch off when the fan or light is switched on.
Care and service
Cleaning
△DANGER
Danger of death from electric shock!
Cleaning work presents a risk of severe injuries or even death. An electric shock can cause severe injuries or even death.
Always pull the mains plug out of the mains socket before performing cleaning and maintenance work.
Never immerse the device or the mains cable in water or clean the device with water.
Air purifier
Clean the case and stand of the air purifies using only a soft cloth and not with abrasive or corrosive commonly available household cleaning agents.
Pre-filter
Clean the pre-filter as necessary, according to the degree of contamination.
You can clean the pre-filter by removing it, carefully beating it out and then vacuuming it.
Maintenance intervals
ATTENTION
Device damage!
Using incompatible spare parts can damage the device.
Only use original spare parts from Karcher.
| Component | Maintenance interval |
| Pre-filter Replace every 3 - 6 months. | |
| 3-stage fil-ter cartridge | Replace every 3 years under medium contamination conditions. The "Service LED" indicates when the fil-ter cartridge needs to be replaced. |
A warning is displayed at approx. 10% of the remaining operating hours of the 3-stage filter cartridge.
See:
Filter change service display
A flashing service LED indicates that the pre-filter needs to be replaced.
Replacing the 3-stage filter cartridge
See Figure 1
1 Pull the control unit upwards and out.
2 Fold the control unit to the side.
3 Pull out the 3-stage filter cartridge using the handle provided.
Inserting the 3-stage filter cartridge
1 Insert the 3-stage filter cartridge.
- The three spacers must be fitted in the recesses on the device.
- The 3-stage filter cartridge can only be inserted in one position.
2 Insert the control unit into the top of the device.
The control unit only latches fully in one position.
The device cannot be switched on if the control unit is not fully latched in position.
Replacing the pre-filter
See Figure 2
Two pre-filters are mounted around the foot of the device.
Removing the pre-filter
1 Press both pre-filter clips towards the foot of the device.
2 Pull out the pre-filter downwards.
Inserting the pre-filter
1 Insert the pre-filter into the device from below.
2 Press the pre-filter into the device until it latches into place.
The device can only be switched on when the pre-filter is fully latched in place.
Troubleshooting guide
Troubleshooting
Error code and error description
| Error description Error correction | |
| The device cannot be switched on • | Check the mains voltage. • Check that the control unit is inserted into the device and latched in place. • Check that the 3-stage filter cartridge is inserted. • Check that the pre-filters are inserted. • Send the device for servicing. |
| The service LED lights up • Display | the error message. Displaying error messages Follow the troubleshooting instructions. Error code and error description |
| Error code Error description Error correction | |
| E1 Remaining operating time <220 hours. | Order replacement 3-stage filter cartridges.Replace the 3-stage filter cartridge by the end of the service life at the very latest. |
| E2 Air quality sensor or defective.The device is only capable of restricted operation. | You can no longer use the device in automatic mode.Send the device for servicing. |
| E4 Plasma unit power supply or control electronics defective.The device is only capable of restricted operation. Plasma cleaning does not take place. | If this error occurs seldom at irregular intervals: Switch the device off and then on again after a few seconds.If this error occurs continuously: Send the device for servicing. |
| E5 Service life of the 3-stage filter cartridge expired.The plasma electrode switches off.Plasma cleaning does not take place. | Replace the filter now at the very latest. |
| E6 Calibration of the air quality sensor is faulty. | Send the device for servicing. |
| F2 Fan blocked/defective.The plasma electrode switches off.Plasma cleaning does not take place and the fan is switched off. | Send the device for servicing. |
| F3 3-stage filter cartridge is not detected.The plasma electrode switches off.Plasma cleaning does not take place and the fan is switched off. | Check that the 3-stage filter cartridge is seated correctly.Check that the control unit is seated correctly.If the device does not start, send the device for servicing. |
| F4 Internal communication error.The device switches off. | Switch on the device.If the device does not start, send the device for servicing. |
| F5 Plasma voltage too low.Plasma cleaning does not take place. | Switch the device off and then on again after a few seconds.This error can occur when the device is operated using a heavily fluctuating mains voltage.If the device does not start, send the device for servicing. |
| F6 Plasma voltage is too high.Plasma cleaning does not take place. | Switch the device off and then on again after a few seconds.If the device does not start, send the device for servicing. |
| F7 The pre-filters have filtered the recommended maximum air volume and have reached the end of their service life. | Replace or clean the pre-filter Reset the air volume calculation by pressing the "-" button while the error code F7 is displayed. |
Note
The pre-filter can emit odours under certain operating conditions. Switch the device off and replace the pre-filter if necessary.
Accessories and spare parts
Only use original accessories and original spare parts. They ensure that the appliance will run fault-free and safely. Information on accessories and spare parts can be found at www.kaercher.com.
Order numbers and spare parts
| Article number EAN Article designation | |
| 1.024-800.0 40542783019 | 14 AFG 100 White |
| 1.024-801.0 40542783019 | 21 AFG 100 anthracite |
| 6.640-869.0 40542783167 | 10 Replacement pre-filter AFG 100 |
| 6.640-870.0 40542783167 | 27 Replacement 3-stage filter AFG 100 |
Technical data
| A | ||
| Mains voltage V 110 - 240 | ||
| Power frequency Hz 1 ~ 50/60 | ||
| Power W < 60 | ||
| Standby W < 0.5 | ||
| Sound power level LWA | dB(A) | 37 - 65 |
| Weight kg 13 | ||
| Height | mm | 1120 |
| Footplate diameter | mm | 320 |
| Ambient temperature | °C | 10 - 30 |
| Relative humidity | % | 20 - 80 |
Subject to technical modifications.
EU Declaration of Conformity
We hereby declare that the machine described below complies with the relevant basic safety and health requirements of the EU Directives, both in its basic design and construction as well as in the version put into circulation by us. This declaration shall cease to be valid if the machine is modified without our prior approval.
Product: Air purifier
Type: 1.024-xxx
Currently applicable EU Directives
2014/35/EU
2014/30/EU
2011/65/EU
Harmonised standards used
EN 60335-1
EN 60335-2-65
EN 55014-1: 2006+A1: 2009+A2: 2011
EN 55014-2: 2015
EN 61000-3-2: 2014
EN 61000-3-3:2013
EN 62233: 2008
EN 50581
National standards used
The undersigned act on behalf and under the power of attorney of the company management.

Chairman of the Board of Management

S. Reiser
Director Regulatory Affairs & Certification
Documentation supervisor: S. Reiser
Alfred Kärcher SE & Co. KG
Alfred-Karcher-Str. 28 - 40
71364 Winnenden (Germany)
Tel.: +49 7195 14-0
Fax: +49 7195 14-2212
Winnenden, 2018/10/01
Contenu
Remarques generales 21
Chairman of the Board of Management

S. Reiser
Director Regulatory Affairs & Certification
Responsible de la documentation : S. Reiser
Alfred Kärcher SE & Co. KG
Alfred-Karcher-Str.28-40
71364 Winnenden (Germany)
Tel.: +49 7195 14-0
Fax: +49 7195 14-2212
Winnenden, le 01/10/2018

Chairman of the Board of Management

S. Reiser
Director Regulatory Affairs & Certification
71364 Winnenden (Germany)
Tel.: +49 7195 14-0
Fax: +49 7195 14-2212
Winnenden, 01/10/2018

Chairman of the Board of Management

Director Regulatory Affairs & Certification
Responsible de documentacion: S. Reiser
Alfred Kärcher SE & Co. KG
Alfred-Karcher-Str. 28 - 40
71364 Winnenden (Germany)
Tel.: +49 7195 14-0
Fax: +49 7195 14-2212
Winnenden, 1/10/2018
Directivas CE aplicables
2014/35/UE
2014/30/UE
2011/65/UE

H.Jenner
Chairman of the Board of Management

S. Reiser
Director Regulatory Affairs & Certification
71364 Winnenden (Germany)
Tel.: +49 7195 14-0
Fax: +49 7195 14-2212
Winnenden, 01/10/2018
Inhoud

Chairman of the Board of Management
S. Reiser
Director Regulatory Affairs & Certification
71364 Winnenden (Germany)
Tel.: +49 7195 14-0
Fax: +49 7195 14-2212
Winnenden, 2018/10/01
περιεχόμενα
EVIKc UToeEiEiC. 65
Chairman of the Board of Management

S. Reiser
Director Regulatory Affairs & Certification
71364 Winnenden (Germany)
Tel.: +49 7195 14-0
Fax: +49 7195 14-2212
Winnenden, 01/10/2018
Icindekiler
Genel uyarilar. 74
Cihaz açiklamasi 76
Irk calistirma 76
Isletime alma 77
Bakim ve koruma 7
Arizalarda yardim 80

Chairman of the Board of Management

S. Reiser
Director Regulatory Affairs & Certification
71364 Winnenden (Germany)
Tel.: +49 7195 14-0
Fax: +49 7195 14-2212
Winnenden, 01.10.2018
Innehäll
Allman information 82
Apparatabeskrivning. 84

Chairman of the Board of Management

S. Reiser
Director Regulatory Affairs & Certification
Dokumentationsbefullmaktigad: S. Reiser
Alfred Kärcher SE & Co. KG
Alfred-Karcher-Str.28-40
71364 Winnenden (Germany)
Tel.: +49 7195 14-0
Fax: +49 7195 14-2212
Winnenden, 2018/10/01
www.kaercher.com/REACH
Havittäminen
Chairman of the Board of Management

S. Reiser
Director Regulatory Affairs & Certification
Dokumentointivastaava: S. Reiser
Alfred Kärcher SE & Co. KG
Alfred-Karcher-Str.28-40
71364 Winnenden (Germany)
Tel.: +49 7195 14-0
Fax: +49 7195 14-2212
Winnenden, 2018/10/01
Stille inn ventilator
- For à stille inn ventilatoren trykker du på ventilator-tasten.
Ventilator-tasten lyser.
Merknad
Ventilatoratomatikken juster tertidigst 2 minutter etter pascalng.
Ventilatorautomatikken justerer ventilatoren optimal senest 15 minutter etter pSalesing.
Indikator
| Display Betydning |
| 0 Ventilatortrinn 0 |
| 1...5 Ventilatortrinn 1...5 |
| AU Automatisch drift |
Ventilatortrinn
| Ventilat- ortrinn | Driftsmodus Ekse | empel på bruk |
| 1 - 2 Stillegående kon- tinuerlig drift på natten | Soverom | |
| 3 Kontinue lig drift på;dagen | Små rom på ca. 25 m2 | |
| 4 Kontinue lig drift på;dagen | Større rom på opptil ca. 60 m2 | |
| 5 Hurtiggang Hurtig luftrensing | eller ved ekstremt tilsmusset luft. | |
| AU Automatisik drift Den automatiske driften tilpasser ventilatorhastig- heten til luftforurensni- ngssgraden som registre- res av sensoren. | ||
Stille inn ventilatortrinn
Stille inn tidsbryter
- For à stille inn tidsbryteren trykker du pa tidsbryterasten.
Tidsbryter-tasten lyser.
Stille inn tidsbryter
Du kan stille inn tidsbryteren pa 1 - 99 timer.

Chairman of the Board of Management

S. Reiser
Director Regulatory Affairs & Certification
71364 Winnenden (Germany)
Tel.: +49 7195 14-0
Fax: +49 7195 14-2212
Winnenden, 01.10.2018
Indhold
www.kaercher.com/REACH
Bortskaffelse
Nulstilling at timeren
| Nulstilling af ti-meren | Tryk på timer-knappen to gange after hinanden for at stille timeren tilbage på "0". |
Måling af luftkvaliteten med VOC-sensoren
- Tryk på luftkvalitetsknappen for at mole luftkvaliteten med VOC-sensoren.
- Luftkvaliteten angives i 10 sekunder ved hjælp af LED-ringen. Timer-knappen lyser.
- Displayet viser "--".
- LED-ringen lyser rodt under luftkvalitetssensorens opvarmningsfase.
Visiting

Chairman of the Board of Management
S. Reiser
Director Regulatory Affairs & Certification
71364 Winnenden (Germany)
Tel.: +49 7195 14-0
Fax: +49 7195 14-2212
Winnenden, 2018/10/01
Sisukord
Uldjuhised. 114
www.kaercher.com/REACH
Utiliseerimine
Uldised ohutusjuhised

Chairman of the Board of Management

Director Regulatory Affairs & Certification
71364 Winnenden (Germany)
Tel.: +49 7195 14-0
Fax: +49 7195 14-2212
Winnenden, 2018/10/01
Asjaomased Eü direktiivid
2014/35/EL
2014/30/EL
2011/65/EL
www.kaercher.com/REACH
Likvidesana

Chairman of the Board of Management

S. Reiser
Director Regulatory Affairs & Certification
Pilnvarotais sagatavot dokumentaciju: Stefans Reizers (Steffen Reiser)
Alfred Karcher SE & Co. KG
Alfred-Karcher-Str.28-40
71364 Winnenden (Germany)
Tel.: +49 7195 14-0
Fax: +49 7195 14-2212
Chairman of the Board of Management

S. Reiser
Director Regulatory Affairs & Certification
Dokumentacios tvarkytojas: S. Reiser
Alfred Kärcher SE & Co. KG
Alfred-Karcher-Str.28-40
71364 Winnenden (Germany)
Tel.: +49 7195 14-0
Fax: +49 7195 14-2212
Vinendenas, 2018-10-01
CopepxaHne
O6uyeyka3aHn. 1 3
Oncanhe yctpoictba 140
IepBbI BBOD B 3KcNJIyaTaCuH 141
BbD B 3KcNJIyatauHIO 142
YxOndTexHnueckoeobcnyKuBaHne. 144
POMOJIb npH HeNCpBaBHOCTaX. 145
PpHnAdJeXHoCTn 3aNaChbIe YacTn. 147
Texnueckne xapaKTepeNCTnKn 147
Deknapaun O COOTBETCTBn CTahapTaM EC. 147
06üne yka3aHn


Ipeed nepBbIM npimHeHem yctpoiCTBa O3HaKOMITbCc DaHHoOpnHaJIbHO IHCTpyKUneNo 3KnPyatauNn IraBOO oTexHKe 6e3OnaCHOCTn.
ENCTBOBAtb B COOTBETCTBnC HmN.
CoxpaHbIbN DnIaIbHeIwero NOnb3OBAHn IIN dnn CneDyUoEro BnaDeIbua.
KomnneKT noctabkn
1 ouhctnteB Bo3yxa Karcher AFG 100
1ФnIbTpyoUoHn naTPOH TpexypOBHeB OCHCTK
2Фиьтра пededварпгьноунocTKI
1Hoxka
1KpeNexHbINHT
1 KInou dIa BnHTOB C BHyTpehHIM WeCTnrgpaHHNKOM
1pykoBOcTONo 3KcnnyatauIN
IcnoJb3OBaHne no Ha3HaueHnIO
YcTpoIcTBo pa3peIeHOn 3KcNpyaTnpOBaTb TOJIbKO B CJeNyUOxN yCNoBnX:
3KcNpyataaTOIbKO B KINbIX, OΦnCHbIX NOME- UeHmIx IN Bpaue6hIX KaBnHETax 6e3 KOHdEHCaUN BnAIn.
- IcnoIb3OBaHHe NCKJIIOHTeINbHO dIg OUInCTKn BO3-Dyxa.
3anpeueHO hakpbIbATb yCTpoNCTBO BO Bpempa60Tbl.
JIuam, B TOM YnCNe DeTAM CTapIe 8 JET, KOtOpbIe BBNdy CBOUX Φn3UeCKNX, CEHCOPHbIX NIN yMCTBeHHbIX CNOC6HOCTe, HeONbTHOCTNu NIN He3HaHnE H B COCToHnn 6e30NaCHO 3KcNlNyATnpOBaTb yCTpOCTBO, 3aIpeSeHo NOJb3OBAtbcra yCTpOCTBOM 6e3 HaD3opa ININ NHCTpykTAxA OTBETCTBEHHORO JInca.
He pa3pewaatb dTeTm nIpaTb c ycTpOiCTBOM.
TAM3aPpeHNOPOBnTBOChKUo6cnykBaHne yCTpOncTB,KOTOPOE MOKeT PPOBOnTB NOJB30BaTeJIb,6e3 npNCMOTpa.
YMbIWeHHe npIMeHHe He no Ha3HaYeHnO
JIIO6oe IcNOJb3OBAHne,OTJINuHoe OT IcNOJb3OBAHnI NO Ha3NaueHnIO, CHTaETcR IcNOJb3OBAHnEM He IIO HA- 3NaueHnIO.
Alfred Karcher SE & Co. KG He Hecet OTBETBeHHocTn 3a NocneDCTBnI NCNoIb3OBAHnI He No Ha3NaueHnIO. IapaHTnI He paCnpocTpAraTeTc Ha NOBpeXJeHnI n DeFeKtbl, BbI3BaHHbIe Heco6JIouDeHnEm pyKOBoDCTBa nO 3KnNpyataunn.
3aunTa okpykaHoue cpebl

YnakoBouHbI MaTePnaJIbI NOJaIOCT BTOpNHOH nepepa6OTke. YnakoBky Heo6xOdImo yTIN3npoBaTb 6e3 yuepe6a dIg OkpykaIoUe cpebl.
3Jektpueckne n 3JekTpOHHbIe yCtpoiCTBa ya- cT O CoDEPKaT CEHbIe MaTePnAbl, npriOdHbIe Ira BTOpUHOB nepepa6oTKn, u 3aacctyIO TaKne KOMNOHEHTbl, KaK 6aTapeN, aKKymyIaTOpbl ININ MacNo, KOtOpBIE pRn HeNPabUNbHOM o6paueHm ININ HeHaJIeKaaSeYtINN3aUIN NpeDcTAblrnot NoTeHun aBLHyO ONaCHOCT bIg 3DopOBbI r EKONOrn. TeM HeMeHee, daHHbIe KOMNOHEHTbl He06XODIMbl dIy PpaBUNbHO pa6Obl yCtpoiCTBa. UcTpoiCTBa, o6O3NaehHbIe 3TmCIMBOLOM, 3anpeuEHO yTININ3InPOBaTB BMe- C 6blTOBBIM NTxOdaMn.
Yka3aHnno nHrpdeNeHTam (REACH)
YcTaHOBkaΦnJIbTpIyUoJero NaTpPoHa TpexypOBHeBOO OuNCTKN
- Notaryb 6JIOK ynpabneHnBvepx.
- OTKInHyTb 6JnOK ynpabNeHnB CToPOHy.
- ChrB TpaHcnpToPoBOUHoe KpenIeHne FInbTpuyIOIero NaTPOHa TpexypOBHeBOn OYNCKn.
- YctaHOBntb fIbTpuyoui nIaTPOH TpexypOBHeBOO OYNCTK.
PpimmeaHne
Heo6xoJIMo BCTaBnTb Tpu pacnopKn Byrny6neHna Ha yctpoiCTBe.
ΦιMbtpуOuπη NaTPOH TpExypOBHeBOY OUNCTKMOKHO BCTaBtB TOJbKO B ODHOM NOJIOXeHN.
5.CbepxyBycptpoiCTBO BCTaBnTb 6nok ynpabJeHna.
Приимechаиме
Bnok ynpablenm MOxHO NOHOCbIO 3aKcpoBaT TOJbKO B ODHOM NIOXeHN.
Ecnn 6JIOK ynpaBneHn 3aΦNkCnpoBaH He nnoHOCTbIO, yCTpOHTBO HE BKJIQUaETcra.
YCTAHOBka yCTpOuCTBa
- NocTaBnTb yCTpoiCTBO Ha POBHyIO yCTOuYHByIO NO-BepxHOCTb.
PpmeaHne
He cTabntb yctpoiCTBO Ha ropyne nobepxhoCTn IINB6JIn3N nCTOCHKOB HArpeBa.
He donyckaTb nonaHnJ nnKocTe nnn noctoPOnHHx MaTePnaNoB (HaNPmEp, MeTaJInuYeCKNX npedMeTOB) B yCTPOIcTBO.
2.ДолженобеспechиВаьсаCBОбньи рпнтOK BO3-уха(CHN3y)И ВIxOД BO3ДУХa(Cbepyx).
3.ПоДКЛЮЧИТь устpoиCTBOК сетиспью cyшесыюцero ceTeBOrO shHypa.
4. Tenepb Karcher AFG 100 roTob K ekCnnyatau.
PpmeHne
PekomeHnyem B nepBbI pa3 3aNyCTnTb yCTpoiCCTBO Ha Hoo, YTO6bl npOBeCTN TuaTeNbHyIO OChCTKy BO3dyxa B KOMHaTe.
BBoD B 3KcPnIyatauiko
BkIIOueHHe/BBIKIOueHHe yCTpOInCTBa
1.BCTaBtB tTeNceIbHyIO BnIKy Bpo3eKy.
2. TTo6bI BKNIOHITb yCTPOINCTBO, HaxKaTb KONKy BKn./BbIKn.
PpimueaHne
YcTpoIcTBo HauHHaET pa6OtaTb c nocJIeHHe HaCTpOikOi.
Ecnn ypoBeHb MOUHOCTn yCTaHOBneH Ha 0 IIOCTaTOHNO KOpOTKOrO HaxaTn KaONKn BKn./BbIKN. YTO6bl BBkIHOHTb yCTpOINCTBO.
BknoueHne/ByklnoueHne BeHTnIaTopa
Hactpoika ypOBHeM MoUHOCTN
TaMep MoXHO yCTaHOBnTb Ha 1-99 YacOB.
IpeeOuHCTKoN I TexHnueckm O6cnykBaHneM BcerDa BbIHMaTb WTeNCJIbHyIO BNJky N3 pO3eTKN.
3anpeueHNOrpykaTb yCTpOINCTBO nIIN CeTeBOI SHyp B BOY NIMMbITb erO.
OuHCTnTeJIb BO3dyxa
OuHuaTb HApxHyIO NOBepXHOCTb N HOKky OoNCTnteJIa BO3dyxa TOIbKO MRAKO TKAHbIO 6e3 NCNOJb3OBAHnA6pa3INBHbIX INI arpeccNBbIX 6bITOBbIX YNCTraIcx CpeDCTB.
ΦnIbTpbl npeBapnteHbHOuNCTKN
ФиьтбпIпpeДВapNTeьн OчИСТК OчИцАБ NOМеpe Heo6xOДIMOCt N B 3aBnCIMOCtN OT CTENEHn 3aRp3- HENIA.
UTo6bI OUnCTnTb CnJIbTpbl PpeBapnteJbHOuOUnCTKn, INX MOxHO CHaTb N OCTOpOXHO BbIbTB, PpONbIneCO-CNTb.
IepnoDnHocTbTexHnueckoro 06cnyKnBaHHa
BHIMAHNE
PobpekdeHne ycTpoNcTBa!
IcnoB3OBAHHe HecOBMeCTMbIX 3aNaChbIX YacTeM MoKeT npVBecTu K NOBpeKdEHNU yCTpoiCTBa.
IcnoB3OBaTb TOnbKO OpiuHaJIbHbIe 3aIaChbIe YacTn
npMbI Karcher.
- Ecnn 6Jok ynpabNeHnna3aФNKcnpoBaH He nIOHOCTbIO, yCTPOINCTBO He BKNHouaETcR.
3aMeHaΦnJIbTpOB npeiBapHTeJbHoi OuNCTKN
CM.pncyHOK2
Bokpyr HoxknyctpoiCTBa paononoKeHbI Dba qnilbTpapnpedBapntelHoOnCTKn.
CbeM qnIbtpoB npEaBapnteHbHOuNCTK
1 HaKaTb 06a 3aKIMa 4nIbTpOB npeDbapntelbHOn OcNCTKn B HApBaJIeHN HOKKyCTpoiCTBa.
2 N3BJIeYbФnIbTpbl npeiBaPntelbHOJ OCHCTKN, NO-TaHyB HN3.
YctaHOBkaΦnIbTpOB PpeDbapnteHbOH OuNCTK
1 BCTaBnTb ΦnIbTpbl npeiBaPnteJIbHOJ OUHCTKN CHN3y BYCTPOIcTBO.
2BCTABnTbΦnIbTpbl npeDbapNTbHOJ OCHcTK B yCTPOJCTBO DO ueNJa.
- YcTpoIcTO MoXeT 6bITb BKNIOUeHO TOnbKO NOCne NOHONФKcaUNΦNJIbTPOB npeDbapNTeJbHO OHCTKn.
PomoupbnHEnCpabBHOCTX
YcTpaHHeH HeHcnpaBHOCTe
IINHOpMaUNO pINHAnEKNoCTx N 3aNuaCTax CM. www.kaercher.com.
Homepa 3aka3a n 3anachbIe Yactn
| HomeraparikulapEAN O6 | O3nauchene aprikulap | |
| 1.024-800.0 40542783019 | 14 AFG 100 White | |
| 1.024-801.0 40542783019 | 21 AFG 100 Anthrazit | |
| 6.640-869.0 40542783167 | 10 3anachno Фильчр пedingарпел | bnoй оочстkn AFG 100 |
| 6.640-870.0 40542783167 | 27 3anachno Фильчр тreamуровов�оь оочстkn AFG 100 |
TexHnueckne xapaKTepncTnKn

Chairman of the Board of Management

S. Reiser
Director Regulatory Affairs & Certification
IIno,OTBcTBeHHoe3aBeHeHneDokymeHTaun:Ⅲ.
Painep (S. Reiser)
Alfred Karcher SE & Co. KG
Alfred-Karcher-Str. 28 - 40
71364 Winnenden (Germany)
Tel.: +49 7195 14-0
Fax: +49 7195 14-2212
r.BunHHeHdEh,01.10.2018
3mict
3araJIbHi Bka3iBKn. 148
Onnc npncptpo 150
Iepwe BBeDeHHB Eeknnyataio. 151
BbeHeHH B eKcnIyataio 151
Dorla Ta texHiue 06cnyroByaHHra. 154
Dionomora B pa3i HecnpaBHOCTeI 154
Ppniladra ta 3anachi deTani 156
TexhiHixapakTepncTNKn 156
Декларачи npo BiinobiHictb cTahapTaM EC . 156
3araJIbHI Bka3iBKN


IpeepnBVKOpncTaHHm npntpo 03HaHOMNTncb 3 ciio opnirhaHbHOIO IHctpyKciEO 3 ekcnnyatau taTnaBOIO npo texhkiy 6e3neKn. Diant
BIDNOBIDHO DO HNX
36epiratn ix dny noanbwo BnKOpncTahna a6o nna HacTyNHO Bnachnka.
KomnneKT noctabkn
1 ouuBau nobitp Karcher AFG 100
1 pfIbtpyUOnn NaTPOH TnpiBHeBOrO OunueneHHA
2 pfIbTpni nonepedHbTo OuHneHHa
1 Hixka
1 KpiINbHn rBnHT
1 KIIOU DnRA BUNHTIB 3 BHyTpIHIM WecTURpaHHNKOM
1 iHCTpykci3 3 eKcnnyatauii
BnKOpncTaHnHa 3a npn3HaueHHaM
Pnucpii Do3BOJeHO eKcIpyBaTIN TINbKN B TaKnx yMOBAX:
Ecknyatai TINbKN B XHTNOBNX, Ofichnx npmi-ueHHx i JikapcbkNx Ka6iHeTx 6e3 KOHdeHcaui BOJnI.
BukopncTaHHBaKnHouHo dno ouuueHH noBipra.
3a6oHHeHO HAKPnBaTn npncpti niD yac po6oTu.
Oco6am, y TOMy uncni diTjam CTapwe 8 poki, kki uepe3 cbooi fiznhi, ceHCOPHI a6o po3ymoBI 3di6HocTi, heDcBiueHicIbYn He3HaHH He B 3mo3i 6e3neuHO ekCnnyaTyBaTu npucpii, 3abOpOHeo KopNCtBuTaNc npnCTpoem 6e3 HargJy a6o IHCTpykTxKy BiNobiDaIbHoo oc6n.
He do3B0JnTe dIITaM rpatn 3 npncTpoem.
IITAM 3a6bopoHeHO 3iINCHOBaHHO uHHeHH Ta o6cnyroBaHHn pncpOIO,Ke MoKe 3iINCHOBaTN KOpNCTyBau,6e3 Harny.
Ymnche BnKOpuctaHH He 3a npn3HaueHHaM
Будь-яke BnKOpNCTaHHЯ, lo BidiP3HЯETbCra BiD BnKOpNCTaHHЯ 3a npu3HaueHHaM, BBaxaTbCra BnKOpNCTaHHaM He 3a npu3HaueHHaM.
Alfred Kärcher SE & Co. KG He Hece BiNobiDaNbHoCTa 3a HacIiDn BnKOpNCtAHH He 3a npu3HaueHHaM.
TapaHTI He NoUHIOEbCHa NoUKoJKeHHa Ta DeΦeKTN, CnpuHHeHi HeDToPImaHHa IHCTpyKcii 3 EKcnnyataui.
Oxopoha doBkijlln

NakybanbHIMatepiannpuaTHIOBTOPHHO nepepo6Kn.YnakoBky Heo6xioHO yTuJI3yBaTN 6e3 WKOOn DnOBoKInJ.

EneKtpuHi Ta eNeKtpoHHi npncTpoi Hanvactiwe MicTb ciHHi MaTepiAn, kki npuaTHi Do BtopnHOI nepepo6Kn, Ta KOMNoHeHTN, Taki JK 6atapei, akymyIaTOpN Yu MaCTnlo, kki y pa3i HnpabJb-
HORO NOBODXeHHa 3 HmM a6o HenpaBnIbHOi yTuNi3aui MoKyTB CTBOpHTN nOTehuHy He6e3neky dny 3doPoR'
HIOHN Ta DOBkINr. Ondakui KOMnoHeHTn Heo6xHdI dna HanexKHOeKCNyatau npncTpoI. PnpctpoI, no3HaueHi cIM CmBOJOM, 3a6OpHReTbc rYtJIi3yBatn pa30m i3 NobyOBm CMITTM.
Bka3iBkn uOdo kOMnOHeHtIB (REACH)
AktyaJIbHi BiIDOMOCTI npo KOMNOHEHTn HabeJeHHa caHti: www.kaearcher.com/REACH
Ytulizauia
He ytni3yBaTn BiDnpaBBoHani npncTrooi,6atapeKn nn akymJrTopn nO6yToBI bIXoOn!
- Ynakobka, npicpii i npnilaDra BnroTOBJeHi 3 MaTepianib, zo niIraTb BTOpHHi nepepo6ci, i NobHHi yTuJIi3yBaTncB iDnOBiHO.
- PakyBaIbHm MaTepiA nIbO Ro Bnpo6y npIaTHn IaB TOpHHoI nepepo6Kn i MoKe BnKOpncToByBaTcra NOBtOphO.
- Ytunji3yBaTn Bci MaTepiAni BiNObiHNo Do MicCeBnx npaBn.
BiinpauboBahi eJekTpponpnaHn He HaJexKaTb do no6yToBnx BiXoDIB! BiinpauboBahi npucTpoi ytni3yBaTu 6e3 uKoDi nIra DOBkiIIa. BiinpauboBahi npucTpoi MicTb ciHHI MaTepiAn, kI MOxTy b nepepo6nTncr Ta niDnraHtB nepeDaHi Do nyHKTIb npniOmy BTOpuHHoi CnpOBHn.
BiiippaBoBaHi fInbtpyOci NaTPoHN npnMaHOBCa 3a 3BOPoTHoO aDpecoIO, 3a3HaueHO Ha ynaKOBci HOBORo fInbtpyOOro naTPOHa.
TapaHTia
YkoXHi KpaHII dIOTb BiIDNoBiHr rapaHTiHi yMOBn, BCTaHOBJIeHI yNOBHOBaXeHOO opraH3aIeIO 36Ty Ha-woI npOdyKuII B cI KpaiHi. MoXInBi HecnpaBHOcTI npnCTPOI nPoTAROM rapaTlHoro CTPOKY MNU CyBaEMO 6e3KOuTobHO, RaIOp npUHa HecnpaBHOcTI NOrae B DePekTx MaTePiAnIB aBO Bnpo6HcMy 6paky. Y pasi BHNKHeHHN IpeTeH3I nPoTAROM rapaTlHoro CTPOKY npoxAHHRA 3BepTaTNC, MaOUn npN CObi uek npo NOKynKy, Do ToproBeNbHOJoprAhi3aIi, OIO npOdaI npOpyKT, aIo DO hAI6NIXQOI yNOBHOBaXeHOI clyXbN cepBicHO ro 06CnyROByBaHH.
IOpnDnUHa iHdopmaui
Yci dahi Habeeni BnKlnuHOn Dna onncy Bnpo6y. Lya iHΦopmaizie He c nictaBoO dra rapaHTyBaHH neBHOJAKoCTi Bnpo6y a6o Ioro npdaTHoCTI dna neBHOI Metn BnKOpNCtAHHa. HadaHa iHΦopMaizie He 3BiNbHc KOpNCTyBaHa Bi npoBeEHn BLnachnx OoiHok i Bnnp6yBaHb.
CepBicHa cIyX6a
Φiπi φipMn KARCHER 3aBxJn HaaCTb NiTpMky B pa3i BuHKnHeHHn nTaHb a6o HecnpaBHOCTeN.
3araalbhi Bka3iBkn 3 Texhikn 6e3nekn
-ДИВ.:BcTaHOBJIeHnHΦiNbTpYoOro natoPoha TpupiBHeBOrO OuIeHH
BcTaHOBJIeHHH cIbTpUoyOro naTpoHa TnpipIBHeBOrO OuNueHH
- Notarynt 6JOK KepyBaHHBropy.
- BiDknHyTn 6JIOK KepyBaHHB CToPOHy.
- 3HrT TpaHcnpOpTyBaJIbHe KpINIeHHa IbTpuyOro NaTPoHa TpnpIBHeBOrO OuNueHHa.
- BctaHOBHTn fIbTpuyuyn naTPOH TpnpIBHeBOrO OHHJ.
Bka3iBka
Heo6xioB BCTaBNTu Tpu po3nipKn B nOrn6neHnHa npncTpoi.
ΦIbtpyHouN nATpOH TnpipBHeBOrO OuHcEHHa MoXHa BCTaBHTn TiNbKN B ODHOMY NOnOKeHHi.
- 3Bepxv B npncTpiBCTaBHT6JOK KepyBaHHa.
Bka3iBka
BLOK KepyBaHHa MOXHa NOBHicTIO 3aΦiKCyBaTHI TINbKN B ODHOMY NIOJKeHHI.
KIO 6NOK KepyBaHHa 3aΦIKCOBHN He NOBHCIO, npCTpiH He BMKAeTbcra.
BcTaHOBJIeHHI npucTpOIO
- NocTaNt npnctpiHa pibHy cTIky NOBepxHIO.
Bka3iBka
He ctabttn npncptiHa rapaYi nobepxhi a6o no6- n3y dkepeH harpibaHH.
He donyckatn nonadannp iDn a6o cTOpOHix MaTepianB (HanpnKnad, MeTaIeBux npEdmetib) B npu-ctpi.
2.ПОИнен 3a6e3neuByBaTnCBAJbHn npunIINB NOIITPRA (3Hn3y) i Buxid nobitpr (3Bepxy).
3.Плкнчи npictpiДо мерекi 3a donomoroi icHyocoro МерекeBoro ka6enio.
4. Tenep Karcher AFG 100 rotobn do ekcnnyatauii.
Bka3iBka
PekomeHnyeMoB nepwn pa3 3anyctn npncptpi Ha hiv, o6 npobectn peteIbHe ouuueHHn nobitpr B KIMHaTI.
BVeDENH B eKcnIyataciIO
YBIMKHeHHBUMKHeHH npunctpoH
- BctabTu wTeNCeJIbHy BuNKy Bpo3eKy.
- Lio6 yBIMKHyTu npncTpi, HATnCHyTu KNONky YBIMK./ BmK.
Bka3iBka
Pnucpii nouHaac npaioBaTu 3 OCTAHIM HauaHTyBaHHM.
KIO pIBeH nOTyXHOCTI BCTaHOBNeHn Ha «0», DOcTb KOpOTKOrO HATNCKAHH KHOKN YBIMK./BIMK., 06 BMKHHTn pnpCTpi.
YbIMKHeHHBmKHeHHBeHTnIaTopa
| УвIMКHeHЯ ВЕТNUЯТopa | За ВIMКHeHOrO BeHTNUЯТopa Дычи ha- нUCHуТи KHonky BeHTNUЯТopa. ВЕТNUЯТOP BCTaHOBЛЮБТьсЯ ha- octaHHI ВИбpaHи pIBeHb. |
| ВIMKHeHЯ ВЕТNUЯТopa | Дычи HaTNUCHyTN KHonky BeHTNUЯТopa. |
Bka3iBka
B abTomatnHomy pekmi nicny yBIMKHeHH npncTpOHO daTnK ouHIOE kicTB nobitpr. Ipoec TpNBae He MeHwe 2 XBUNH.
Iicnla OuiHKn JaKoCTi NOBITpra CnCTema aBTOMaTuHOrO KepyBaHHa BHTUNrTopOM aBTOMaTuHOp peruioe npncTpi.
HajawtyBaHHBentnIaTopa
1.ДЯнlaштувань BEHTUNIЯTOPa HATNCHyTN KHONKy BeHTUNIJATopa.
- Khonka BeHTnIaTopa cBItntbca.
Bka3iBka
CnCTema aBTOMaTnUHOro KepyBaHHaBHTnIaTOpOM nouHaac perynIOBaHH He paHiue HIX Ype3 2 XbUNHH nicra yBIMKHeHH.
OttmaJIbHa xapakTepcntka pepyIOBaHHa DOcraTbcra CNTeMOIO ABTomATuHOro KepyBaHHa BEHTNIJrTOpOM He Ni3Hiwe HIX Upe3 15 XBUNnH niCna yBIMKHeHHa.
IIndkaui
DucnJe3HaueHHA
0 P i B e
1-5 PIBeHb notyKHOCTi 1-5
AU ABTomatuHn peKm p6oTu
Pibhi notyxhocti
PBeHb Pexm po60Tu PpNKlaad 3acTocyBaHnoTyK-Hocti
1-2 Be3wymHa 6e3ne-CnabHepBbHa po6oTa BHiHnYac
3 Be3nepepbHpa po- HeBEnki npMiuEHHa 60ta npotraom nnoe6n3bko 25 M² H
4 Be3nepepbHpa po- Benuki npimiueneHHnno60ta npotraom 6n3bko do 60 m²Hn
5 ⅢBnDkiHn pe- ⅢBnDke ouuieHHn nobiTpr a6o y pa3i cnIbHoro3a6pydHeHHn nobiTpr.
AU ABTomatuHn B aBTomatuHomy pe- pexmpo60tn XMI WBNKICtB BeHTnIaTopa aanTpYcTBcra do CTyneh 3a6pydHeHHnOBiTpr, kA Bu3HaacbCTb-Ca DaTuNKOM.
HaJauTyBaHHpIBHbNOTyXHoCTi
Bn6ip pibH na- HATnCHyTN KONky «+», zuo 36iNbunTyxKHOCTI Tn pIBeHb NOTyXHOCTi. Y pa3i yTpnu
MaHHK HONKN + pIBeHb NOTyXHOCTi 36iJbUwyeTbCABTOMaTHNO.
HaTnCHyTN KHONky - ,uO63MeHUnTN pIBeHb NOTyXHocTi.Y pa3i yTpMaHHa KHONK - pIBeHb NOTyXHocTi 3MeHsUyETbcr ABTomAtNoHO.
Bn6ip abToma- HaTnCKaTn KHOKNy + ,noKn He TnHOro pexKn- 3'ABnTBcra AAU'dnA abTomauHoro My peXmMy.
HanaStyBaHHa Kolbopy
1.卍o6 hanaWtuBaTN KOiip niicBiyBaHHa, HATnCHyTH KHOIky KOJIbOpy.
- KhoKa KOnbOpy CbiTbCra.
IIndkaia
Dncnne3HaueHHa
0-10 HanaTobAHn KOIp 0-10.
A1-A9 3MiHa KOnbOpy npoTAROM X xBnINH no ycix KOnbopax.
Hapnka: A3 = 3miHa KOnbopy npoTrom 3xbuINH no ycix KOnbopax.
Po3noiineHHpiBHBKolbopy(3aBOcBKe HanaTuBaHH)
| Pibenhko-lbopy | Kolip | ||
| 0 | Блney | He 3MiHIOεTbcra | |
| 1 | H | Чербунni | 3MiHIOεTbcra |
| 2 | Зеленni | 3MiHIOεTbcra | |
| 3 | Сини | 3MiHIOεTbcra | |
| 4 | Червоно-Жовто | 3MiHIOεTbcra | |
| 5 | Жовто | 3MiHIOεTbcra | |
| 6 | Жовто-Зеленni | 3MiHIOεTbcra | |
| 7 | Синbos-Зеленni | 3MiHIOεTbcra | |
| 8 | Зеленувато-блakUTНи | 3MiHIOεTbcra | |
| 9 | Пурпунni | 3MiHIOεTbcra | |
| 10 | Пурпунно-черво-нi | 3MiHIOεTbcra | |
Bka3iBka
KoJIbOpn MoXHa perynIOBaTu, KOI ni PiBeHb RaCKpaBOcTi BCTaHOBJIeHn Ha «O».
Bn6ip pibHB konbopy
Moxha BCTaHOBtN Do DecrT KOnbOpiB I Do DeB'rtn iTePbaJIb 3MiH N KOblOpy.
Bn6ip pibn Ka- HATnCHyTN KhONkY + ,06 Bn6paTn
Ibopy 1-10 KOJip. Y pa3i yTpMaHnH KhONKn + KOJIp 3mIHooTbcr ABTomAtuHO.
HaTnCHyTN KhONkY - ,06 Bn6paTn
KoJip. Y pa3i yTpMaHnH KhONKn - KOJIp 3mIHooTbcr ABtomAtuHO.
Bn6patn DbiCyHaTNCHTN KHOJky KOJbOpy, 0o6 pIBeHb KOJIbO-Bn6paTn pIBeHb KOJIbOpy 0 . py 0.
3MiHa pIBHbKoNbOpy
Moxha BpyHcy 3anOBHTn piBHi KOJbOpy 1-10 6ydb- kIM DOCTyNHm KOJbOpom.
1 HaTnCHyTu i yTpMByBatN KHOJKy KOJIbOpY, NOKI BOHa He NOUHe 6JIIMaTn.
2 3MiHHTN KOJIip pIBHa KOJIbOpy, HATNUCKaUOu KNHOKNKy + a6o -
3HaTnchTyN KhoNky KOIbOpy ue pa3, 0o6 36epeTNI KOIip NiB BiINOBiHIM HOMepom.
YbIMKHeHHBmKHeHHnDcBiyBaHH
YbIMKHeHHa 3a BmKHeHOro nCbiyBaHHa KInbca niDCbiyBaHHa DbiHi HATNCHTN KHONKY aCKpABOci.
PiDCiCyBaHHBCTaHOBIOEtbcHaOCTaHHI Bn6paHni pBeHb.
BumKHeHHn iD- DbiHi HATNCHyTN KHONKy RCKpaBOcTI. CBiYBaHH
HaJauTsyBaHHЯRcKpaBOcTI KInbca NiDCBiyBaHHa
1.卍6HaNaaHTyBaTnЯckpAbicTB KInbIg NiIDCBiuyBaHn,HaTnCHyTn KOnkYЯckpAbOci.
- Khonka rckpaBOCTcBITnTbcra.
Indkaia
PnIcBvyeHn BmKHeHe.
1-10HaJauTobAHnpiBeHjckpaBocTi 1-10.
HanaHTyBaHHpIBHBЯKpaBocTi
Moxha BCTaHOBttn Do DecTn pIBHЯCKpABOcTi dna KInbura nDCBiyBaHH.
Dncnne3HaueHHA
Taimep MoxHa BCTaHOBHTn Ha 1-99 roDInH.
| BCTaHOBNTI 3a- NIIUSKOBNI Yac. |
HaTnCHyTu KHOJky 已 + 已 ,UO636iNbWuTN 3aNtKOBu Y pa3i yTpMaH-Ha KHOJKN 已 + 已 3aNtKOBu Yac 36iNbWyETbCABTOMaTHUHO.
HaTnCHyTu KhONkY «-»,Ioo6 3MeHUn-Tu 3aJIuShKOBu Y pa3i yTpMaH-Ha KhONkN «-» 3aJIuShKOBu Yac 3MeH-WyETbCABTOMaTuH.O.
Indkaia
Taimep BnKopncTOByeTbCdI npOIOBKeHHpO6OTnpNCPOI npOTaROM BCTAHOBNeHOrO yacy. IicJ3akINueHH BCTAHOBNeHOrO yacy npNCpiB BMnKaETbCABTOMATNUHO.
Y pa3i Bn6bopy Taimepa 3aJinuKOBu Yac BiO6paKaactbcB rOyoHax. IHNkaUg 3MiHOCTbcr TlBKn NiCra 3akInueHH NOBHOI rOoHN,TO6To y pa3i BiO6paKeHHaΦprn «3» 3aJinuKOBu Yac cTaHOBtB biD 3.00 do 2.01 roHN. TiBKn y pa3i DoCgrHeHH 3aJinuKOBoro Yacy 2.00 roDNH iHNkaUg 3MiHOCTbcr Ha «2».
DincnJIe3HaueHn
TaNMepeKHyTo.
1-99HaJauTobAHn 3aJIuKOBn Yac BiD 1 do 99 roHn.
CknDaanHraTaimepa
Dincnne3HaueHH
| Ск菇аHHЯ таймера |
Dbihi HATNCHyTN KHONky TaMepa, 06 cKHyTN TaMep Ha «0».
BumipHOBaHHaKOCTI NOBITpAaTcHkOM JOC
- ξοδ Вιмірітійкісь NOВітгі 3a ДОпOMоRUДаТУКа ЛOC, HATиСHуТи KHonkYяКоCTI NOВітгі.
- Ykictb nobitprbaBIO6paXaETbcra npu6n. 10 cekyHd 3a donomoroio cbITIOIOHO HorO KInbca. Khonka TaI-Mepa Cbitntbcra.
Ha dincnnei biOobpaxaetbcra «-»
PiJ yac etany HarpibaHn DaatuHa KaKoCTi NOBITpR CBITIOIOHe KInbue CBITNTbcr YepBOHM CBITJOM.
IIndnkaia
HepBoHn IOraHa kicTb noBITpa
KOBtN CepdHry kicb noBITpr
Belenen Iooopa kictb nobitpr
Bido6paXeHHnOBiOmIeHb npo nOMuIKN
- RaKIO CBIITNOIOHN iHnkaTOp cepBicHO 06cnyroBvBaHHa CBITNbC, DbiHi HATNCHyTN KONKy cepBicHO rO 06cnyroBvBaHHa
Ha ducnnei BiO6pa3ntbca KoI NOMJKN.
AUB.:
KoTa onnc nOMnIKn
IIndkaTop cepBicHoro 6cnyroByBaHHa «3amHaΦiNbTpα
KoI nomnkn E1 Ha nncnei Bka3ye Ha Heo6xidHictb CBOeuchoro 3aMOBHeHH i CBOeuchoi 3aMHN pInbtpyUOro naTPOHa TnpipIBHeBOrO OuNueH.
CkndaHn iHnkaTopa cepBichoro 06cnyroByBaHHN «3amHaΦinbTpaponepeHbOrO ouHneHHA
- Y pa3i heo6xidnocti zamHn fijbtpa nonepdHboro ouuueHH cBtNODHni iHdkatop cepbcHoro 6cIyroBaHH 6JMaE peryIpaHO. BiO6paKaetbc KOD nomnKn F7. Uo6 ckHyTu INDkaicIO MaIb6yTb0oi 3amHn fijbtpa nonepdHboro ouuueHH, HATNCHTN KHONKY «-» NiD qac nobIDomneHH npo NOMNkY.
YBIMKHeHHBIMKHeHHN iDCbiyBaHHi DnCnpe
BumkHeHHn iicBvBaHn i dncnne
Kopotko HATNCHTN KHOKNKY BIMK./BIMK., 0o6 BUMKHYTN iDCBIYBAHHH i DnCNIJIe.
PiicbiyBaHHiDnCnIeBmNkaIObca.
YbIMKHeHHn iDcBiyBaHHi Dncnne
Kopotko HATNCHYTN KHONKY YBIMK./BMMK., 306 3HOBy yBIMKHYTN NDCBIVBAHNR i DnCNIeN.
PiCbiyBaHHiDnIeBmkaIbca.
HaTnCHyTu 6yNb-ky KhoNky, 3HOB yBIMKHyTu NiCbiUyBaHH i DnCnnei.
PiicbiyBaHHiDnCJIeBMNKaIOTbc.ODHocHOAKTbByETbc4yHKciKHOKN.
Функцяен pro36epekeHHa
KIO npncptpi He BnKOHy KODHx cyHKci,TO6To BEHTNJATOP i nCbiyBaHHB BMKHeHi, npncptpi ABToMaTHUHO BMKHETbcra Ype3 10 xBNH.
Bka3iBka
KoXHe HaTnCKaHH KHOPIK NoOBoKyEc Yac BmKHeH HHa 10 XbUINH.
- RaKuo BeHTnIaTOp a6o NiDCbiuYBaHHy YbIMKHeHi, BUMKHeHHr He BiD6yBaETbcr.
Iorna Ta texhiue 06cnyroByBaHHa
OuHnHn
HE6E3NEKA
He6e3neka dnn KNTT Tapee 3 ypaXeHH eNeKtpnH Nm cTpymom!
Пд ус викоганн робит 3 очиени удap eлктунн CTPyMOM MOKE npIN3BecTN Do cepno3Hx TpaBM a60 HabITcMeptI. Ydap eelktpuHm CTpyMOM MOKe npIN3BecTN Do cepno3Hx TpaBM a60 HabITb CmeptI.
IpepeOuHHeHm I TexHiHm O6cIyroByBaHH 3aBxDN BnMaTN WTeNCeNbHy BnIKy 3 p03eKn.
3a6bOpOHeo 3aHypIOBaTu npncTpi a6o MepeXeBn Ka-6eJb y BODy a6o MNTn Ioro.
OuunyBauchobitpr
OuHcyBaTN 3OBHIHIO NOBepXHIO HiKky OUYBaHaNoBITpr TIlbKn M'AKOIO TKaHHIO 6e3 BnKOpNCtAHNAb6pa3nBnHX a6o arpeCnBnHX no6yTOBnX 3ac06iDnAunueHH.
Φinbtpn nonepeHbOro OunueHHa
ΦiNbTpNi nonepeHbOro OuHsEHHN OUHsAtn B Mipy Heo6xIHOcti i 3aJekHo BiD CTyneH 3a6pydHeHH.
Uo6 ouhctntn fInbtpn nonpeepnboro ouhueHH,ix MoxHa 3HrTn i obepeXHO B6HTN, npOnuNoocuTN.
PepioDnHicTb TexHicHoro o6cLyroByBaHHa YBArA
NoekoeHH npucTpo!
BnKOpNCTaHH HeCymicHx 3anachnx YactNH MoKe npn3BeCTn Do noWkoJKeHH npncTPO.
BukopncToBvBaTu TijbKn Opurihhhi 3anachi qactHn diipm Karcher.
1 BctaHOBNTn fIbtpyUOuN nATPOH TpnpBHeBOO OHIeHH.
Heo6xio HO BCTaBnTu Tpu po3nipKn B nOrnn6nHnHa npncTpoi.
- Φɪnβtpyʊŋn nATPOH TpɪpɪBHeBOrO OuɪnʒeHŋ MɔkHA BCTaBtɪn TiJIbKN B OɒHOMY NɒlɒkEHHi.
23BepxBy pncptpi BCTaBNTn 6IOK kepyBaHHa.
- ENoK KepyBaHH MoXHa NoBHiCTHO 3aΦiKCyBaTIN TInbKn B ODNOMy NOnOKeHHI.
- RaIIO 6nOK KepyBaHHa 3aΦikCoBaHm He NobHICTIO, pNCTpiH He BMkaETbcra.
3aɪna φɪnbɪtpɪB nonepeɪnHbʊr oʊnɪeŋH
INB.MaJIHOHOK2
HabkoHixknpncTpOo po3aobahi IBa φIbtpnnonepdHbOrO OuHcHHe.
3HimahnHaipibtpiB nonepeHbO OuHcHHe
1HaTnchTu 6nDbA 3aTnckayi fIbTpB nonepeHbOro OuHcHHeB HAnpMky HIXK npncToIO.
2BntTn pInbTpni nonepeHbOro OunueHH,NOTARHyBUN BH3.
BctabHeHHHphiIbTpib nonepeHbOro OunueHH
1 BctaBttn fijIbTpni nonepeHbOro OunueneHHra 3Hn3y B npncTpi.
2BctabnTf pinbtpn nonpeHboro OunueHHa B npncptpi Do Knaaann.
- Pnnctpi moKe 6yTu yBIMKHeHn TiIbKn nicna nobHOi fikcauii fInbTpib nonepeHbOrO ouH uen.
ДономORA B pa3i HecnpaBHOCTeI
UcyHeHH HeCnpaBHOcTei

Chairman of the Board of Management

S. Reiser
Director Regulatory Affairs & Certification
Oc06a, BiDnOBiDaIbHa 3a BeDeHnHn DOkymeHTaJI: III.
Painep (S. Reiser)
Alfred Karcher SE & Co. KG
Alfred-Karcher-Str.28-40
71364 Winnenden (Germany)
Tel.: +49 7195 14-0
Fax: +49 7195 14-2212
M. BiHHeHdEh, 01.10.2018
Spis trešci

H.Jenner
Chairman of the Board of Management

S. Reiser
Director Regulatory Affairs & Certification
Administrator dokumentaci: S. Reiser
Alfred Kärcher SE & Co. KG
Alfred-Karcher-Str.28-40
71364 Winnenden (Germany)
Tel.: +49 7195 14-0
Fax: +49 7195 14-2212
Winnenden, 2018/10/01
Tartalom

Chairman of the Board of Management

S. Reiser
Director Regulatory Affairs & Certification
71364 Winnenden (Germany)
Tel.: +49 7195 14-0
Fax: +49 7195 14-2212
Winnenden, 2018/10/01
Obsah
ObecnéPokyny 175
Popis pristroje 177
Prvnuvedeni do provozu 177
Uvedeni do provozu 178
Peceaudrzbab 180
strankach: www.kaercher.com/REACH
Likvidace

Chairman of the Board of Management

S. Reiser
Director Regulatory Affairs & Certification
Zmocnenec pro dokumentaci: S. Reiser
Alfred Kärcher SE & Co. KG
Alfred-Karcher-Str. 28 - 40
71364 Winnenden (Germany)
Tel.: +49 7195 14-0
Fax: +49 7195 14-2212
Winnenden, 1.10 2018
Obsah

Chairman of the Board of Management

S. Reiser
Director Regulatory Affairs & Certification
71364 Winnenden (Germany)
Tel.: +49 7195 14-0
Fax: +49 7195 14-2212
Winnenden, 01.10.2018
Kazalo
Splošni napotki 191
Opis naprave 193
Prvi zagon 193
Zagon 194
www.kaercher.com/REACH
Odstranjevanje med odpadke
Chairman of the Board of Management

S. Reiser
Director Regulatory Affairs & Certification
Pooblascena oseba za dokumentaciono: S. Reiser
Alfred Kärcher SE & Co. KG
Alfred-Karcher-Str.28-40
71364 Winnenden (Germany)
Tel.: +49 7195 14-0
Fax: +49 7195 14-2212
Winnenden, 01.14.2018
Cuprins
Directive CE respectate
2014/35/UE
2014/30/UE
2011/65/UE
Norme armonizate utilizeate
EN 60335-1
EN 60335-2-65
EN 55014-1: 2006+A1: 2009+A2: 2011
EN 55014-2: 2015
EN 61000-3-2: 2014
EN 61000-3-3: 2013
EN 62233: 2008
EN 50581
Norme nationaleutilizate
Semnatarii actioneza in numele si prin imputernicirea conducerei societa.

Chairman of the Board of Management

S. Reiser
Director Regulatory Affairs & Certification
Insarcinat cu elaborarea documentatiei: S. Reiser
Alfred Karcher SE & Co. KG
Alfred-Karcher-Str. 28 - 40
71364 Winnenden (Germany)
Tel.: +49 7195 14-0
Fax: +49 7195 14-2212
Winnenden, 2018/10/01
Sadržaj
Opé napomene. 2 0
Opis uredaja 208
www.kaercher.com/REACH
Zbrinjavanje

H.Jenner
Chairman of the Board of Management
S. Reiser
Director Regulatory Affairs & Certification
Opunomocenik za dokumentaciju: S. Reiser
Alfred Kärcher SE & Co. KG
Alfred-Karcher-Str.28-40
71364 Winnenden (Germany)
Tel.: +49 7195 14-0
Fax: +49 7195 14-2212
5 www.kaercher.com/REACH
Odlaganje u OTPad
- Korišcene uredaje, baterije ili punjive baterijenemojte odlagati uz kućni opstad!
- Ambalaža, uredaj i pribor su proizvedeni od materijala sa mogucnošcu reciklaze i moraju se na odgovarajući način odložiti.
- Ambalaža ovog proizvoda je pogodna za recikliranje i može se ponovo koristiti.
Sve materijale odlozite u skladu sa lokalmim propisima. - Starim elektricnim uredajima nije mesto u kućnom otpadu! Odložite stare uredaje na ekoloski prihvatljiv način. Stari uredaji sadrže dragocene materijale sa mogucnošću reciklaže, koji treba da se dostave na ponovnu preradu.
- Istrosene filterske uloske mozete da posjalete na adresu na kojoj se primaju i koja je navedena na ambalaži novih filterskih ulozaka.
Garancija
U svakoj zemlji vaze uslovi garancije koje je izdala naša nadležna distributivna organizacija. Bilo kakve smetnje na urežaju otklanjamo besplatno u garantnom roku, ukoliko je uzrok smetnje greška u materijalu ili proizvodnji. U slučaju koji podleže garanciji, obratite se sa računom svom distributeru ili obližnjoj ovlascenoj lokaciji servisne službe.
Pravne napomene
Svi navedeni podaci vaze isklučivo za opis proizvoda. Iz tih podataka se ne moze izvesti izjava o odredenom svojstvu ili sposobnosti za odreženu namenu. Podaci ne oslobadaju korisnika od sopstvenih procena i provera.
Servisna sluzba

Chairman of the Board of Management

S. Reiser
Director Regulatory Affairs & Certification
Lice ovlaśćeno za dokumentaciju: S. Reiser
Alfred Kärcher SE & Co. KG
Alfred-Karcher-Str.28-40
71364 Winnenden (Germany)
Tel.: +49 7195 14-0
Fax: +49 7195 14-2212
Winnenden, 2018/10/01
CbDpXaHne
O6uynka3aHn 223
OncanHe Ha ypea 225
TbpBOHaayalNo nycKaHe Beknloatauia 226
Iyckahe B ekcnloatau. 226
TpIka n IopdpbXka. 228
Pomou npn noBpeu 229
Akecoapn npeepBn qactn 231
TexHHueckn daHHn 231
ДeКларuaязасьтВETCTBNEHaEC. 23
06znyka3aHnA


Ppei npBpTO n3non3BaHe Ha ypeia npoyeTe HAcToaTO opnHaHOBpKOBODCTBO 3a ekCnNoatauN rnaBa Yka3aHHa 3a 6e3onacHOCT. Ppocei
paTe CbOTBeTHO
3ana3e pboBODCTBOTo 3a ekcnnoataun 3a ynoTpe6a no-KbCHO nn 3a cJeBaau co6cTBHeNK.
06xBaT Ha dOCTaBkata
1 x npueucntBaTeI 3a Bb3dyx Karcher AFG 100
1x3-ctenehenΦnJtbpenNaTPOH
2x npedBapuTeHHn fntbpa
1xctoikka
1x3akpenBaU BnHT
1XKNIIOUcCBbTpewEH WECTOCTeH
1xynbTbaHe3aynoTpe6a
AKTyajHn HnOpmaun OTHOCH CBCTaBH NBeIeCTBa MoKeTe Da HamepuTe Tk: www.kaercher.com/REACH
M3XbPnHe
He n3xBpbIyTe n3BeHn OT ekCnloataun ypeu, 6aTePN nn akymyNaTopn c 6ntOBnTe otnaDbu!
Onakobkata,ypeBt n npHaJnEeKHOCTnte ca npOu3BeJeHn OT noJnEkaun Ha peUKNIPAhe MaTePuaN IN Tp6Ba Da ce N3XBbPnT CbOTBeTHO.
OnakobvHnT MaTePnaJ Ha To3n npOyKT e noDxoJa 3a peuKnPaHe n MoKe da ce onoJ3OTBopraBa.
- 13XbBpIaTe BCnUKN MaTePnAnN B CbOTBeTCTBne C MeCTHIne pa3nope6n.
CTapnte eJektpoypeHn He ca qact ot 6ntobte OTnaDbun! N3XbpbnIte CTapnte ypeHn Cbo6pa3Ho cekoloruHnTe n3ncKBaHn. CTapnte ypeHn CbDpKkat ueHHn MaTePnA, noJneKaUHa peuKnnpaHe, KOnTO MoRat da 6bDat yNtpeBEn NoBtOpho.
- I3yepnHn pntbPHn nATPOHn ce npneMaT o6pA THO Ha NOCOHeHn Ha ONaKOBkata Ha HOBtE pNl-TbPHn nATPOHn aDpec 3a o6paTHo n3npaUaHe.
TapaHcH
Bb BcKa Ka DpbKabacBaBanHn H3daeHHeOT Haun OToPn3upaN DnCTp6yTop rapaHNoHH yCIOBna.
EbeHTyAnHn NOBpeHn Ha Baun ypeI ueOTcTpaHm B paMKInTe Ha rapaHcuONHHn CpOK 6e3nnAtnHO, aKO ce Ka- cae 3a deΦeKT B MaTePnAInTe NIN npOn3BOCDtBeH deΦeKT. B cIyuaH Na ppeJraBaHe Ha npABo Ha rapaH- uin, ce Obphete KbM Baun dNCTpn6TyOp NIN KbM Hau-6n3KnO OTOpn3uPAH cepBn3, kATO npeDcTaBnTe KacOBaTa 6eneKka.
PpaBHyka3aHna
Bcunn noocueyn daHHn Baxkat eINHCTBeHO 3a ONnca Hne To Ha npOdykTa. Ot Ta3n INHOpMaunr He MoKe da Ce npABy 3akNIOUeHne 3a ONpeDeneHa xapakTepcntka nn rOndocT 3a ONpeDeNeHo npeHa3NaueHne. INHOpMaunrTa He OCbo6oJdaBa Notpe6nteJIr OT N3BbPwBa- He To HA co6CTBeHN OceHKn INPOBepKn.
CepBn3
PnBbnpocu nn NOBpeHn HauNt FnnnaHn KARCHER ue Bn nomara c ydoBONCTBne.
O6uynka3aHnna 3a 6e3oNaChocT
ONACHOCT CBbp3BaIte ypeDa cAmo KbM npOMeHnVB TOK. IocoueHTo Ha TInOBaTa Ta6eNka HanpexKeHne Tpr6Ba Da CbBnada C HanpexKeHneTo Ha N3TOUHnKa Ha TOK. Hnkora He DOKOCBAIte C MOKpn Pbue
MpexOBnI uenCeI N KOHTaT.1 OnachOCT OT 3aDyUshaBHe. DpbXTe onakOBbHOTo fOpNo daJeue OT o6cera Ha Deua. 3a6paHa e ekCpIoatauia B 3OHN, B KOnTO nMa ONaCHOCT OT ekCpINO3n.
△PDEUYPKDEHNE ·
JIuca c orpaHnueHn φn3nueckn,
CEH3OPHN nIIN yMCTBHeHn CNO-
CO6HOCTN nIIN C IINCA Ha ONIT
N NO3HaHnRA MoT Da N3NoJ3BaT
ypeDa, aKO Te 6bDat IOd HAD-
3Op nIIN aKO Ca NOLyHn INH-
CTpyKcHn 3a 6e3ONaChOTO
N3NoJ3BaHe Ha ypeDa n CBp3a-
Hnte C Hero ONaCHocTn. Ype-
DbT MOKe Da 6bDe n3NoJ3BaH
OT Deua Ha Bb3pact Na8 roDnH, aKO Ca NOLyHn INHCTpyKcHn 3a 6e3ONaChOTO
N3NoJ3BaHe Ha ypeDa nIIN ce
HAMnPAT nOg HAD3Op OT OTRO-BOPHO 3a TExHaTa CNrypHOCT
JIuCe n aKO pa3bnpat npOn3TN-
YauNTte ONaCHocTn. Deuata
He 6NuBa Da cN irpaT C ypeDa. Deuata Tp8Ba Da 6bDat IOd
HaJ3Op, 3a Da Ce rapaHTnpa, ye
He cn irpaT C ypeDa. Deuata MOrAT Da N3BbPbWBat NO-
YnCTBaHe n EKCnloaTaCuNOHnA
NoJdpbXkCa Camo nOd HAD3Op. PpeDu BCa ynoTpBe6a npOBepraBaIte MpeXOBn 3axpaHBaU
Ka6eL c UcenCeJa 3a NOBpeDi. He nuCKaIte B eKcnloaTaCnry
ypeD c NoBpeDen MpeXOB 3axpaHBaU Ka6eI. He3a6abHo
Bb3IaIe Ha OTOpN3IpaHnIcEBn3/eJIeKTPoTeXnK CmHaTaHa NOBpeIeHnMpeKOB3axpaHbAaK6eJ. PpeiNBCaKBN paOToN IO rPnKa IPOdPbJka n3KJIuOyBaIte ypeaN N3DbpNBaIte MpeKOBnIeIcen.
△PPEIJA3JIINBOCT He n3-DbpnbaiTe MpeKOBnJ uencelOT KOHTaKTa, KaTO dbpjnteMpeKOBnJ 3axpaHbau KabeJ. Bb3laaraiTe n3BbprWBaHTo HapeMOHTn, MOHTaJaHa pe3epBNu cactn i pa60Tu NO eJeKTPNueCKNe IeMeHTn cAmO Ha OTOpN3npaHnA cepBn3. BxoDbT N3XoDbT 3a Bb3duyx HETPraBa Da ce 3akpNBaT. CneiBCaYIpOTpe6a N3KlNoUBAIte UpeDa N3BaJdaIte UeNCeLa.1 He noctabYnTe ypeDa 6n3o Do n3TOUHK Ha TOnnHa. YpeDbT He 3aMeHn POnXoJIoTO npOBETpRAHe. YpeDbT Tp6Ba Da CTOn Ha paBHa, yCTOnuHBa OCHOBA. N3noL3BaIte cAmO akcecoapn i pe3epBn Yuactn, KOnTO ca ODo6peHn OT pOn3BOInteIy. OpiRnHaJIHnTe akcecoapn i opRnHaJIHnTe pe3epBn Yuactn OCInpyraBAt 6e3OnaChata n 6e3npoblemHa ekCnloaTaunHa ypeDa. He n3noL3BaIte ypeDa BB BLnaxHa 3aoBnKaJna cpeDa IIn B NomseHn C BnCOKn Tempeatypn Ha 3aoBnKaJNaata CpeDa, NaP. BaH; KyxHЯ.
CTepeHn Ha onaCHOCT
ONACHOCT
Yka3aHne 3a HenocpeDCTBeHa ONaCHOCT, KOrTO MOKe Da DoBeDe Do TeKKn TeJeCHN NOBpeNi nn Do CmbpT.
△PENEYNPEXDEHNE
Yka3aHne 3a Bb3MOxHa ONaCHa CNTyaUna, KOrTO MOKe Da DoBeDe Do TeKKn TeJeCHN IOBpeNi NII Do CMbpt.
△ПЕДПАЗЛИВОСТ
Yka3aHne 3a Bb3MOxHa OnaCha CNTyaUaUN, KOrTO MOKe Da DOBeDe Do JeKN TeJeCHN NOBpeDN.
BHIMAHNE
Yka3aHne 3a Bb3MOxHa OnaCha CNTyaUra, KOrTO MOKe Da DoBeDe Do MaTePnaJIHN UeTn.
TpaHcnpTupahe
No Bb3MOxHOCT TpaHCnOpTpnaIte, pecn. n3npaauTe 6bpatHO ypeDa cAmO B opunHaHnHaTa onakOBka.Ako opunHaHnHaTa onakOBka JIncBa, Monr, CbpxTe ce c HauncaepBn3.
OnncaHne Ha ypeDa
BnKTe n3o6paXKeHnraHa cTpaHncaTa C rpaΦnK
13-CTeeneHcHnTbpeH naTPOH
②PpeDbapnteJenHnTbp
③Stoika
4 ByTOH TaMep
⑤ BytoH BeHTnIaTOp
6 ByTOH RpkOCT
⑦ BytoH LbIaT
806cnykbaMOny
9CBeTnHEn KpbT
10CBeToIOuO3a cepBn3
⑪ ByToH BkN./M3KJ.
12 ByToH KaueCTBO Ha Bb3dYxa/ByToH CepBn3
⑬ ByToH“+”
(14) ByToH “-”
15Ducnpei
OnncaHneHa npOdyKta
JaB W KINH N HOMeHn, Ha pa6oTHOT MRCTO, B KOHpeHTN 3aIN IN B YakaHn, Bb3dyXbT B HauNTe NOMEHn e 3aMbpceh C npaxObe, Oco6eHO C ONACHN 3a 3dpabeto fHn npaxObe. CbueBpeMeHNO Imame CNHIO 3aMbpCBAHe C 6bnONrUHN IN XmMueckn BpeHn BeueCTBa. PnpHnata Morat da 6bdat DeEeKtN B CTPONTeJCTBOTo, MaTePnAIn, 60n, cpeCTBa 3aZuTa Ha DpbBeCnHa n Taka HapeueHnte JETINBn OPraHn H BeueCTBa. Hne NCKame Da ce yvBCTBame Do6pe n Da 3ana3m Mdeecnoc6hocCTta cn. Hne NCKame YnCT Bb3dyx 6e3 BpeHn fPHn npaxObe, 6e3 3aMbpCBAHe C VOC, HENpIaTHN MnpN3Mn, NO-MaJIKO INfpeKcHn OT NoMaMKo 6akTepn IN Bvpycn, NO-MaJIKO HEnpIaTHN MnpN3Mn IN-MAJIKO anepreHn B detCKata CTaR. KARCHER AFG 100 Naexdno ppeuNTBa Bb3dyxa BB BaWeTo NOMEeHne ot fHn npax, aIepreHn, 6akTepn, MnpN3Mn IN VOC.
OcbetIeHne H36op Ha cBraT
3a npnTHa atmocepepa CBeTbN npKocTTHa cBetoDnOHNpBCTeH Morat da ce perynpat cnopeD BaWnte XeJAHn.
Morat da ce n36upat 10 cBra, KaKTo n ABTOMaTHHa CmHa ha CBeta. LBeTOBeTe morat da ce peryInpat HINDbNduAnHO OT Notpe6nteI. Pn ABToMaTHHa CMHa Ha CBeta BCNUCKn CBETOBe ce npedCTabRT C NOcneDoBaTeJIHO pIaBHO IpemHaBaHe OeHN KbM dpyr. HanuHn ca 10 CTeneHn Ha apkocT.
3-CTeeneH eHTbpeH naTPOH (PP)
3-CTeENHHNtФnITbpeH nATPOH Ce CbCTOu OT kATAJI3aTOpEH FnITbp, FnITbpc AKTUBeH BByIeH n EPA FnITbp. MaTePnaIbT Ha FnITpIte e NOJINpONIIeH (PP).EPA FnITbPbT E11 ocNrypRa FnITpIpaHe Ha FnIH npax, aApReHN, noJeHn I npaxOBn YacTnCn c pa3Mep do 0,3μm.
EneKtpo3a nla3Ma
PateHToBaHaTa PnA3MeHa TexHONrKaTaN3npa Bb3dyxa 3a ekOIOROc06pa3HO OCTpaHraBaHe Ha HauMaNKte, ra3OO6pa3HN, oprAHuH N BbrIepoHN CbeHNHeH, KaTO HApIMeP apOMaTHN MoEkyH, BvpyCN, 6akTepnn n nn cOpN. B 3-CTeNEHHN FnITbp npOTnuat CneDbAsn peAKUnn Ha pa3nad. Pn TOBa PnA3MaTa DeInCTBa pereHepnPaio 3a 3-CTeNEHHN FnITbp, Taka Ye Ce NoCTnAT MHorO IpODoBnKTeHN CpOKOBe Ha EKCnloataun Ha 3-CTeNEHHN FnITbp.
Ceh3op 3a VOC
Cen3OpbT 3a VOC e cneuaneH ceH3Op, KOITo aBtOMaTHUHO N3MepBa CTeneHTa Ha 3aMbpcBaHe Ha Bb3Dyxa.
Bentjatop
BentnataopbT moke da ce perynipa Ha 5 cTeeneH, pecn. da pa6oTN B aBTOMaTHueH peXm "AU". ABTOMaTHyHnT peXm aAnTIpa CTeneHTa Ha BeHTnlaTopa KbM n3uNCHeHaTa OT CEH3opa CTeneH Ha 3aMbpcBaHe.
Taimep
Morat da ce n36npat 1-99 yaca. YpeBt ce n3KIOUBa Cnei n3TnuaHe Ha HactpoeHTo JKeJHaHO Bpeme. IDeaJIHO 3a IIpeuNCTBaHe Ha Bb3dYxa CneI HanyckaHe Ha KINIIuTeTo NIn OoFica.
PpeBapnteJenΦnTbp
PpeBapntenHnTfnnTpO tKnac F7 noema BCnKn 3aMbpcBaHnI, pHn npaxoBe n noJeHH c pa3Mep HaJ 3um OT BcMyKaHnBb3dyx N npEpa3Ba CneDbauNTe fHtpn. No To3n HauHn Ce rapaHTnpa DblnrocpouHa
fYHKUHOHaHNoCT.MaTePnaIbT HaΦnITbpa e noIINnpoINHe.
Hnka3a cepBn3 n cMaHa Ha qnIITbp
CBeToIOIObT 3a cepBn3 Ha 06cIyKbaIuIe IeMeHT CBETN, KOraTO e Heo6xOIM CepBn3. CBeToIOIObT 3a cepBn3 Mrra, KOraTO e Heo6xOIMMa CMHa Ha npeBa-pntTeHnIa qnnTbp.
06acheHHe Ha noHrTne
VOC (Volatile Organic Compounds - JIeTINBn opraHnHcBeHNHeHn) Ca BpeHN JIeTINBn CbCTaBKn Ha npOdyKTn, KOtTO HN 3aO6nKaJrT BbB BbTpEHN NOMEeHn, B OOFNa cN IN B Doma.
KbM n3ToHnUte Ha VOC cnaat Hanpimep aepo30JHn cnpeNoBe, nouchBaun npenapaTN, cpeCTBa 3a De3nHfKeuN, Me6eN, KInmN, PnHaJNeXHoCTN 3a XoBn KaTO NaKOe N JEnNu, CTPOnteHN MaTePnuAIn, 6Ou, pa3TbOpHTeIN, NaKOe 3a HOKTN, NeCTNuDn IN DOpN OCBexNTeIN 3a Bb3dYx.
IocTabaHHe Ha 3-CTeHnHnФnITbpeH natpoH
1.ИЗва对接еоблужваши модун Harope.
2.ObbpheteobcnyBaunmaMdyuHaCtpaHn.
3. OctpaHete TpaHCnOpTHna npedna3nteHa 3-ctenHHra qniltbpeh natpoH.
4.Пoctabete3-CTeHnHЯФиТьрEH nATPOH. Yka3aHne
Tpnte ynblthtnenBbnoKKn Tp6Ba da ce nocTaBt Bn3pe3nte Ha ypeda.
3-CTeHnTФnITbpeH nATPOH MoKe Da ce noCTABcMoB B eEDHO NOJIOXKeHne.
- NocTaBete o6cIyKbAunr moyn rope Bypeda.
Yka3aHne
O6cnykBaunrMoyn MoKe da ce Knpa HnBnHO cAmo B eHNO NOJoxHe.
Ako 06cnykbaunrMoyn He e qKcapan HnblHo, ypeBt He moKe da ce BKIOUH.
Pa3noIarHe Ha ypeDa
- NocTaBeTe ypeDa Ha paBHa, yToHnBa nOBbpxHOCT.
Yka3aHne
He noctabaIte ypeDa Bbpxy ropeu nIOBbpxHOCTn IINB 6JIn3OcT do OTOnJIInTeJHn ypeiN.
He donyckaIte B ypeDa da nonaIaT TeuHocTn nnnykD MaTePnaI (HaNP. MetaIaHn npEmdetN).
- YBepeTe Ce, Ye noDaBaHTo Ha Bb3DyX (DOny) n 13- XoDbT 3a Bb3DyX (rope) He ca 6JIOKnpaHn.
- BkIIOUeTe ypeDa c HAIINHnMpeKOB 3axpaHbaa Ka6en B KOHTaTa.
- Cera Baunay Karcher AFG 100 e roTob 3a eknnoatauia.
Yka3aHne
PpenopbVame Bn npBnna nT da ocTabnte ypeda da pa60Tu HnpekbcHato npe3 HoUa, 3a da ce noIynu no To3n Haunn OCHOBn npeuNCTBaHe Ha BaWteTo nomueHne.
NyckaHe B eKcnNoaTaun
BknUoyBaHe/ɪəKnIoyBaHéHa ypeda
- BkHouTe MpeXOBnI UeNceJI B KOHTaKT.
- HatncheTe 6yToHa BKn./M3Kn., 3a da BknOuHte ypeDa.
Yka3aHne
YpeBt CTapTnpa C nocJeHaTa HAcToiKa.
Ako cTeenHa Ha BeHTnJaTopa e HacTpoEHa Ha "0", e DoCTaBHyHO HaTnCKaHe 3a KpaTko Ha 6yToHa Bkn./
N3Kn., 3a da ce n3KJIIOUy ypeDbT.
BkIIOUBaHe/ɪzKlIOUBaHe Ha BeHTnlaTopa
A B T M A T N K A T A H A B E T N I L A T O P A p e r y n i p a H a i - p a H 2 M N H T N C l e D B K J I O U Y B A H E T O.
ABTomatnKaTHa BENTnlaTopa peynpa BENTnataOp aONTMaHHO Hau-KbCHO 15 MHyTu CneB BKNoUbaHeTo.
Noka3aHne
CTeNeHnHaBeHTnNaTopa
| Ди检пел 3начениe |
| 0 Стени на вентilatedopa 0 |
| 1...5 Стени на вентilatedopa 1...5 |
| AU АВТOMатиен рек imm |
H36op Ha CTeneHH Ha UBraT
Moxete da n36epete do Decet cBra Ta n da hactponte do Debet INHTepBana 3a CMHa Ha cBeta.
PpomHa Ha CTeneHn Ha cBraT
| Избор на стени нацbraT 1...10 | Нат生态系统е 6byToHa “+”, за щизберeteцbra.При зальржане на 6byToHa“+”цBEtBJT ce поменя аВТOMATИЧNO.Hat生态系统е 6byToHa “-”, за щизbereteцbra.При зальржане на 6byToHa“-”цBEtBJT ce поменя аВТOMATИЧNO. |
| Изberete стени нацbraT 0. | Нат生态系统е два пьтп постedingовaten-но 6byToHaцbraT, за щизberete стени нацbraT "0". |
Mokete da 3aabaTe pBHyO cTeeneHte Ha CByT 1...10 C BCEKn HAnuEn CByT.
1 HaTnchete n 3aDpbXkTe 6yToHa LByT, DOKaTO 3amna.
2PpomeHe TaHa CTeneHTa Ha CBaTc HAtncka-He Ha 6yToHa "+ mnn 6yToHa "-
3HaTNCHeTe OTHOBo 6yToHa LBJr, 3a da 3anamEtne CBeTa NOD cbOTBeTHnH HOpE.
BkIIOUBaHe/H3KIOUBaHe Ha OCBeTJHeHHeTO
| Вклочане на осветлениeto | При Изклочец ОСВЕТLENHUE на СВET-пинни Кръг НатиСЧЕТ分解 ПьтNi по-c splededОВЕТELNO 6byToHAЯrkocst. - Oсветлениeto ce настroduва на постедно ИЗбpaHATA CTENEN. |
| Изklочанe на осветлениeto | НатиСЧЕТ分解 ПьтNi по sledовaten-но 6byToHaЯrkocst. |
Hactpoika Ha npKocTTa Ha CBeTnHHn Kpbr
-
3a Да HabcponTe RaKocTtHa CBetJINHHNЯ KpbI, HaTnCHete ByToHa RaKoCT.
-
ByToHbT RaKoCT CBETN.
Noka3aHne
| Ди检пел 3начениe |
| 0Освettingлениeto e Изк nullочero. |
| 1...10СтениhabярковCT...10e Habстpoeha. |
Hactpoika Ha cTepeHH Ha JpKocT
Moxete Da HactpoBate Do Decet CTeneHn Ha rpkocT Ha CBETNIHHNkPbI.
| Hасторьк ha steneи ha яр- хост | Hатунөт e 6утона “+”, за DA уBEL- чinte stөнөт ha яркоct. Пprи здьр- жане ha 6утона “+” STөнөт ha яр- хост ce поменя ABIТOMATUHQ. Hатунөт e 6утона “-”, за DA hamajи- te stөнөт ha яркоct. Пprи здьржа- нe Ha 6утона “-” STөнөт ha яркоct ce поменя ABIТOMATUHQ. |
BknouBaHe Ha TaMepa
- 3aДа Вклочи Te TaIMepa, HATUCHETe 6yToHa TaIMep.
- ByToHbT TaMep CBeTN.
HacTpoNka Ha TaMepa
Mokete da hactpoBate TaMepa Ha 1 do 99 yaca.
| Hасторika на OCTаващ Вр. me. | Hатунөт e 6утона “+”, за ду уveл-чinate OCTавашоTO Врeme. Пи рздьр-жане на 6утона “+” OCTавашоTO Врeme ce уveлшача вгоматиquHo. |
| Hатунөт e 6утона “-”, за ду hamал-т e OCTавашоTO Врeme. Пи рздьрха-нe Ha 6утона “-” OCTавашоTO Врeme ce hamалява вгоматиquHo. |
Poka3aHne
TaimepbT cnykni, 3a da npobbnkn da pa60tn ypeBbT 3a HactpoehOTO Bpeme. Cnei n3TuHa He Ha HactpoehoTO Bpeme ypeBbT ce N3KIOUHbA bTOMaTHNO.
Pn n360p Ha TaHepa Ce NOKa3Ba OCTaBaUTo BpeMe B YacOBe. POKa3AHNeTO Ce CMeHr Pn IN3TuHa He Ha cIaYac, ToeCT, Pn NOKa3AHne "3" OCTaBaUTo BpeMe E B pAMKInTe Ha 3,00 Do 2,01 Yaca.EDba Pn 2,00 Yaca noKa3AHNeTO Ce CMeHr Ha "2".
HHTepBaJIHa noIaPbXka
BHIMAHNE
Pobpeu no ypea!
YnoTpe6aTa Ha HeCBBMeCTNMM pe3epBNu Yactn MoKe Da DOBeDe Do NOBpeDn No ypeDa.
N3noJ3BaIe cAmO opuHnHaJIHn pe3epBn YacTn Ha Karcher.
| Комноент | Иntервал на подръжka |
| Прedeрави- теллини Фил- trpn | Смение на вescи 3 - 6 месuya. |
| 3-stelenен фиULTьrene патрон | При среeding замльсанын сementsа на вescи 3 rodini. "С Bretоюндзг За сэрbus" рokedва кora Трава за ce сmedи ФиULTьrene на- атрон. |
Ppi np6J. 10% octabaun pa6oTHn yacObe Ha 3-cteneHHn peH nATPOH ce NOKa3Ba IpeDynpexJeHNHe.
Bx.:
Hnkaun3a cepBn3,cmHa Ha nTbp
AkoCBETOIOIOBt3a cepBn3 Mnra,TOBa Bn nHΦOpMnpa 3a Heo6xOIMMa CmHa Ha npEeBapnteHnry fNITbp.
CmHa Ha 3-CTeeneHHn qHITbpeH nATPOH
Bx.Фнгура1
1 N3BaTe Te o6cnyKbau nMyoyn Harope.
2O6bpeo6cnykBaunmaMynHaCTpaHn.
3 N3BaTe 3-CTeHnHnФnITbpeH nATPOH, KaTO rO DpbXnTE 3a npEdbuDeHaTa 3a ueNTa dpxKka.
Noctabhe Ha 3-TeeneHHn nnIbpeH naTPOH
1IocTabete 3-CTeHnna ntpnoh.
Tpnte ynblTHHEnH BINOxKn Tp86Ba da ce noCTaBRT B n3pe3nTe Ha ypeda.
3-CTeENHHrTΦHITbpeH NaTpOH MoKe Da ce NoCTaBcAMo B eEDHO NOnOKeHne.
2IocTabete o6cnykBaunmaOmyI ropeBypeja.
- O6cnykBaunrMoyn MoKe da ce pKcapa HnBnHO cmo B eHNO NOJIOKeHne.
Ako 06cnykbaunr MT Myn He e qnkpan Ha- nblHo,ypeNbT He MoKe Da ce BKnHou.
CmHa Ha npedBapnteJHnTe qnItpn
Bx. fnypa 2
OkoNo ochoBaTa Ha ypeDa ca pa3noJoxeHn Dba npedBapuTeHN HnTbpa.
CbaIaHe Ha npEdbapnteHnHte fHnTpN
1 HatncheTe Dbata KInnca Ha npedBapntHnnte HnTpu no nocoka Ha ochobata Ha ypeda.
2 N3BaTe npedBapuTeHnTe fHnTpnu HanoIy.
IocTabaHHe Ha npedBapnteHnTe fHnTpN
1 PocTabete npedBapntenHnTe 0TOny Bypeda.
2HaTnCHeTe npEeBapuTeHnTe FmJITpn B ypeDa,doKaTo ce fNKcnpaT.
- YpeIbT MoKe Da Ce BKInOuN OTHOBeEBA KOraTo npEiBapntEnHnTe fUnTpN Ca HAnbNHO fNkCpuHn.
Pomou npn noBpei
OctpaHbAHe Ha nobpeaTa
| Описане на грашкata Остразима | He Na грашкata |
| Урémonг не моче за се вklюч. •iprovere te Мраховото наразожения. •Проберete дali obслухвашит мodyл e правлино постavenв В урда и Фн��сан. •Прobерete дali e nostaven 3-stelenеняг Фильberг natpoн. •Прobерete дali ca nostavenу predварiteлнite Фильту. •Пробайte урда на сервиз. | |
| С被告поставл STа сөрвиз CBети | •Оставete дa ce рokastve сыбшени.To 3a грашka. Показане на сыбшени 3a грашки. •С被告поструksдиerte 3a OTстразима на грашкata. КoД на грашka и описане на грашka |
KoHa rpeWka n OnncHne Ha rpeWka
| Код на грашka Опсане на грашкatingа OTстраньа | Нэ на грашкatinga | |
| E1 Octаваши вор. | me на paбota <220 нaca. | Порьачite 3-стенения Фильberгов ratpoh. Смение 3-стенения Фильberгов ratpoh най-кбcho при источаны на ekслноатцун�ся сорok. |
| E2 Дебектох сениз. | op за качесъю на вьздуха. Уразьт e с орагниши на ekслноа- taционna rondoc't. | Вechе не можete полбате уреда в обторатчев pe- жим. Празады уреда на серви3. |
| E4 3axpanbaанeto | c наразжених лим уразьлвашида[elektroнika на пламзениma мodyл e Deфekturo/a. Уразьт e с орагниши на ekслноа- taционna rondoc't. He ce n3bbyрш- ba пухиствае с пламз. | Ако таши ррашka настьва рядко и позеравиномерни п interегдан: Источе уреда и с重点工作 на яковлкове � Вклочete отоно. Ако таши ррашka настьва постаян: празады уреда ha cepви3. |
| E5Екплоатацио | няот сорok на 3- стенения Фильberгов ratpoh e истекл. Еlekтудьт за пламзma се полбоч- ba. He ce n3bbyршва пухиствае с пламзma и вентлиатърър ил. Клочen. | Сменete Фильberpa най-кбcho в тои мостent. |
| E6 Кал�бриранeto | нас сенизора за ka- чесъю на вьздуха e Нелрарылно. | Празады уреда на серви3. |
| F2 Вентлиаторьт | e бл_OKиран/дeфек- ten. Еlekтудьт за пламзma се полбоч- ba. He ce n3bbyршва пухиствае с пламзma и вентлиатърър ил. Клочen. | Празады уреда на серви3. |
| F3 3-stelenен�а | Фильberн ratpoh нec se разноизав. Еlekтудьт за пламзma се полбоч- ba. He ce n3bbyршва пухиствае с пламзma и вентлиатърър ил. Клочen. | Празеретes 3-stelenенtnia Фильberгов ratpoh за павлино посточе: Празеретes obstnyваши мodyл за павлино поож( нe. Ако урedingу не с相对较да, празадыу не на серви3. |
| F4 Вьтшна ррашka | Комунници- Ята. Уразьт se полбоча. | Вклочete уреда. Ако урedingу не с相对较да, празадыу не на серви3. |
| F5 Тьрдөнско | нразжение на пламз Mata. He ce n3bbyршва пухиствае с пламзma. | Источе уреда и с重点工作 на яковлкове отоно. Таши ррашka можда на посып, а урedingу работи кьм mpexхови наразжение сбс сinglyн кoleбаня. Ако урedingу не с相对较да, празадыу не на серви3. |
| F6 Тьрдөнско | нразжение на пламз Mata. He ce n3bbyршва пухистventa пламзma. | Источе уреда и с重点工作 на яковлкове отоно. Ако урedingу не с相对较да, празадыу не на серви3. |
| F7 Праздарител网 | нразжение на пламз Mata. Фильчariлп reservesьчанOTо мak- симално колочев Вьздухи и са доститгалл Края на ekслноа- ционнca сорok. | Сменete лим поис trade уреда нараз�ени. Hyлрaires lechendeitsToа кolyочев Вьздух, кato побrelу на поочeitsToа по��ашипс Кда на Рец- кata F7 насточе Бутона "-" |
Yka3aHne
Pn Cneunuynu ycnobna Ha eKcnnoaataun npedBapnteHnraTf nntbpo MoKe da OTdEnMaMnpn3mN. N3KnIOHe Te ypeDa n npn Heo6xOIMOC TcMeHTe npedBapnteHnra fntbp.
Akkcecoapn npe3epBHN qactn
I3no3BaIe cmo opnHaJIH anKcecoapn n opnHaJIH pe3epBHN qactn, no To3n HauHH ocInpyraBate 6e0NaChaTa n 6e3npo6JemHa ekpIoaoataa Ha ypeDa.
Hhopmaun OTHOCHO akcecoapn npe3epBn qactn nhe HamepuTe Tk: www.kaercher.com.
KaTaoXHn Homepa npe3epBn YacTN
| Homer Na aptnkye EAN 06ozhaueHne Ha aptnkye | |
| 1.024-800.0 40542783019 14 AFG 100 White | |
| 1.024-801.0 40542783019 21 AFG 100 Anthrazit | |
| 6.640-869.0 40542783167 10 Празварителен Фильг, peзерveн AFG 100 | |
| 6.640-870.0 40542783167 27 Фильг, 3-cтенин, peзерveн AFG 100 |
TexHHueckn daHHN
Chairman of the Board of Management

S. Reiser
Director Regulatory Affairs & Certification
PnIIOXIMM DnpeKTHBn Ha EO
2014/35/EC
2014/30/EC
2011/65/EC
PpIIOXIMM XapMOHn3npaHn CTaHdaptN
EN 60335-1
EN 60335-2-65
EN 55014-1: 2006+A1: 2009+A2: 2011
EN 55014-2: 2015
EN 61000-3-2: 2014
EN 61000-3-3: 2013
EN 62233: 2008
EN 50581
PnIIOXmN HaunOHaJIHn CTaHapTn
Пьномошник по дokум entaцята: S. Reiser
Alfred Kärcher SE & Co. KG
Alfred-Karcher-Str. 28 - 40
71364 Winnenden (Germany)
Tel.: +49 7195 14-0
Fax: +49 7195 14-2212
Bunen,2018/10/01