1929 AA - Rangefinder SKIL - Free user manual and instructions
Find the device manual for free 1929 AA SKIL in PDF.
User questions about 1929 AA SKIL
0 question about this device. Answer the ones you know or ask your own.
Ask a new question about this device
Download the instructions for your Rangefinder in PDF format for free! Find your manual 1929 AA - SKIL and take your electronic device back in hand. On this page are published all the documents necessary for the use of your device. 1929 AA by SKIL.
USER MANUAL 1929 AA SKIL
natural_image
Illustration of a SKIL device with control panel and warning symbol (no text or symbols on body)| GB | ORIGINAL INSTRUCTIONS | 6 |
| F | NOTICE ORIGINALE | 8 |
| D | ORIGINALBETRIEBSANLEITUNG | 12 |
| NL | ORIGINELE GEBRUIKSAANWIJZING | 15 |
| S | BRUKSANVISNING I ORIGINAL | 18 |
| ORIGINAL BRUGSANVISNING | 21 | |
| N | ORIGINAL BRUKSANVISNING | 24 |
| FIN | ALKUPERÄISET OHJEET | 27 |
| E | MANUAL ORIGINAL | 30 |
| P | MANUAL ORIGINAL | 33 |
| I | ISTRUZIONI ORIGINALI | 36 |
| H | EREDETI HASZNÁLATI UTASÍTÁS | 39 |
| CZ | PÜVODNÍM NÁVODEM K POUŽÍVÁNÍ | 43 |
| TR | ORÍJÍNAL İŞLETME TALÍMATI | 46 |
| PL | INSTRUKCJA ORYGINALNA | 48 |
| RU | ПОДЛИННИК РУКОВОДСТВА ПО ЭКСПЛУАТАЦИИ | 52 |
| UA | ОРИГИНАЛЬНА ІНСТРУКЦІЯЗ ЕКСПЛУАТАЦІЇ | 56 |
| GR | ПРОГОТОТУПО ОДНГІΩΝ ХРНЄНЗ | 60 |
| RO | INSTRUCTIUNI DE FOLOSIREORIGINALE | 63 |
| BG | ОРИГИНАЛНО РЬКОВОДСТВОЗА ЕКСПЛОАТАЦИЯ | 66 |
| SK | РОГОVODNÝ NÁVOD NA POUŽITIE | 70 |
| HR | ORIGINALNE UPUTE ZA RAD | 73 |
| SRB | ORIGINALNO UPUTSTVO ZA RAD | 76 |
| SLO | IZVIRNA NAVODILA | 79 |
| EST | ALGUPÄRANE KASUTUSJUHEND | 82 |
| LV | ORIGINÄLÄ LIETOŠANAS PAMÄCĪBA | 85 |
| LT | ORIGINALI INSTRUKCIJA | 88 |
| MK | ИЗВОРНО УПАТСТВО ЗА РАБОТА | 91 |
| AL | UDHËZIMET ORIGJINALE | 94 |
| AR | دليل الاستعمال | 103 |
| FA | راهنماي اصلی | 104 |
1
②

③

4
text_image
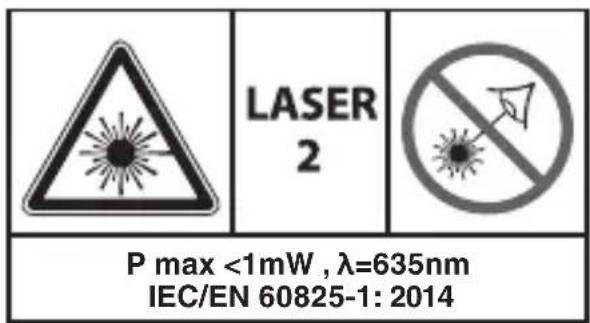
LASER 2 P max <1mW , λ=635nm IEC/EN 60825-1: 2014⑤
text_image
AAA AAA⑥

⑦a
⑦ b
⑧
text_image
SKIL HD , "" - - -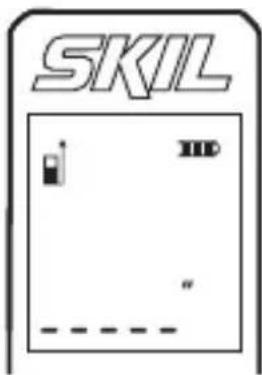
text_image
SKIL HD "..."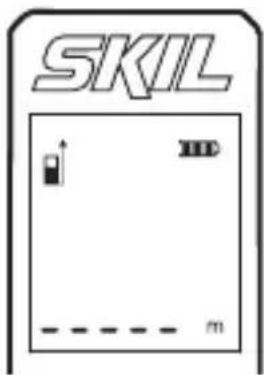
text_image
SKIL m⑨
text_image
SKIL m10

text_image
SKIL 1.676 m1x

text_image
SKIL 1.676 m ---- m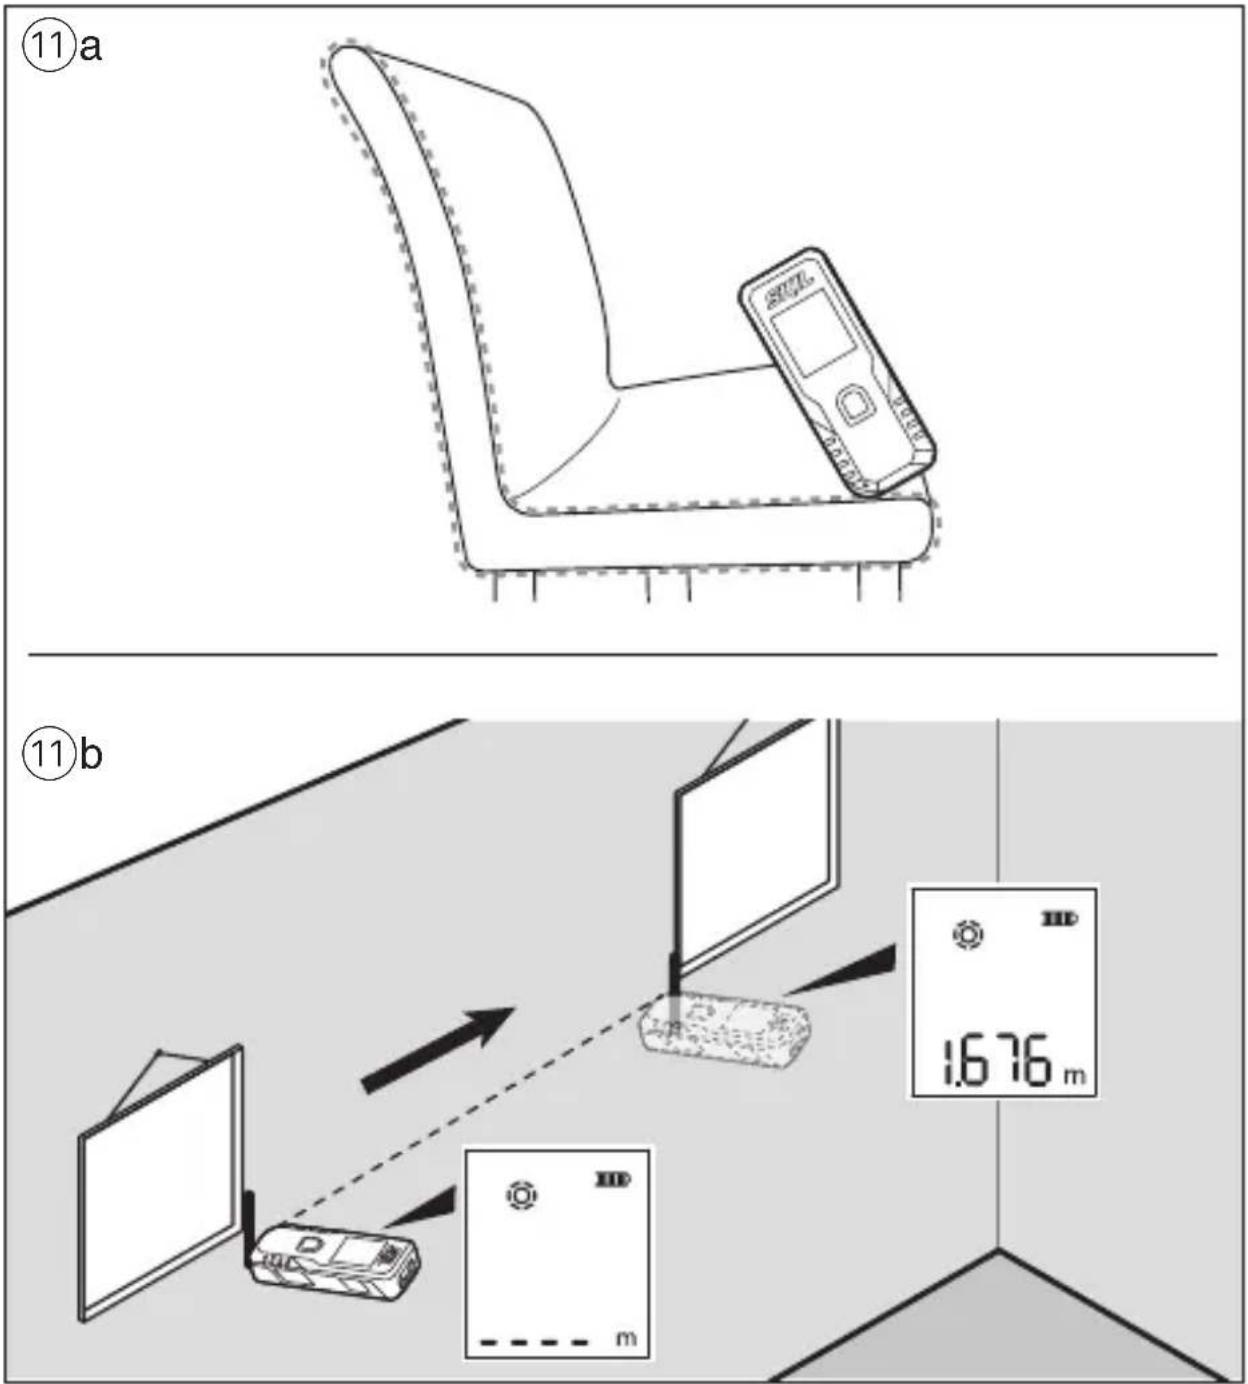
text_image
(11)a ⑪b 1.676 m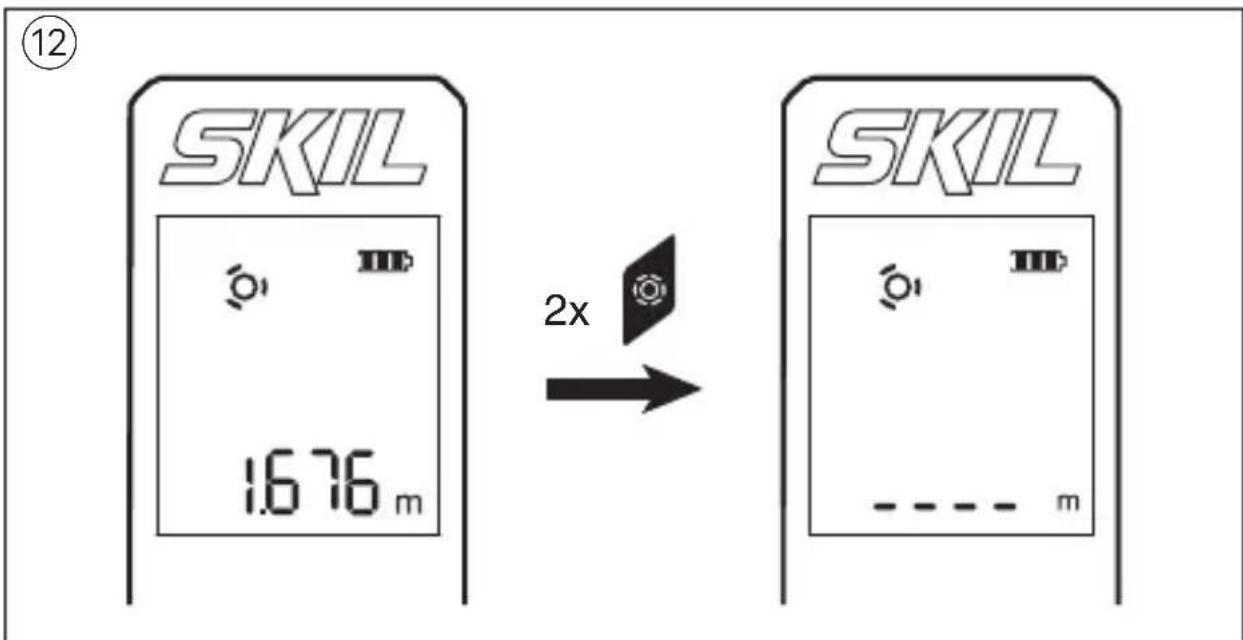
text_image
⑫ SKIL 16.76 m 2x SKIL ----- m13
text_image
SKIL 4.000 m 4.000 m 2x 1x SKIL 16.000 m²Laser measure 1928/1929
INTRODUCTION
- This tool is intended for measuring distances indoors as well as outdoors by means of laser beam projection
- This tool is intended for measuring distances without a projection target or on curved surfaces with the measuring wheel (1929)
- The measuring tool is suitable exclusively for operation in enclosed working sites
• This tool is not intended for professional use - Save these instructions for future reference and include them with the measuring tool when giving it to a third party
TECHNICAL DATA
| Distance measuring range* | 0.2-25m (1928)0.2-30m (1929) |
| Distance measuring accuracy* | ± 3mm |
| Smallest measuring unit 0.001m | |
| Operating temperature 0°C to 40°C | |
| Storage temperature -20°C to +70°C | |
| Relative humidity (max.) 90% | |
| Laser class 2 | |
| Laser type 635nm, <1 mW | |
| Battery 2x 1.5V AAA(LR03) alkaline | |
| Weight 0.075 kg (excl.battery) | |
| Dimensions (length x width x height) | 114 x 43 x 23 mm |
* Important: under unfavourable conditions (e.g. in bright light, or poor reflection) the tool's measuring range and accuracy will be reduced
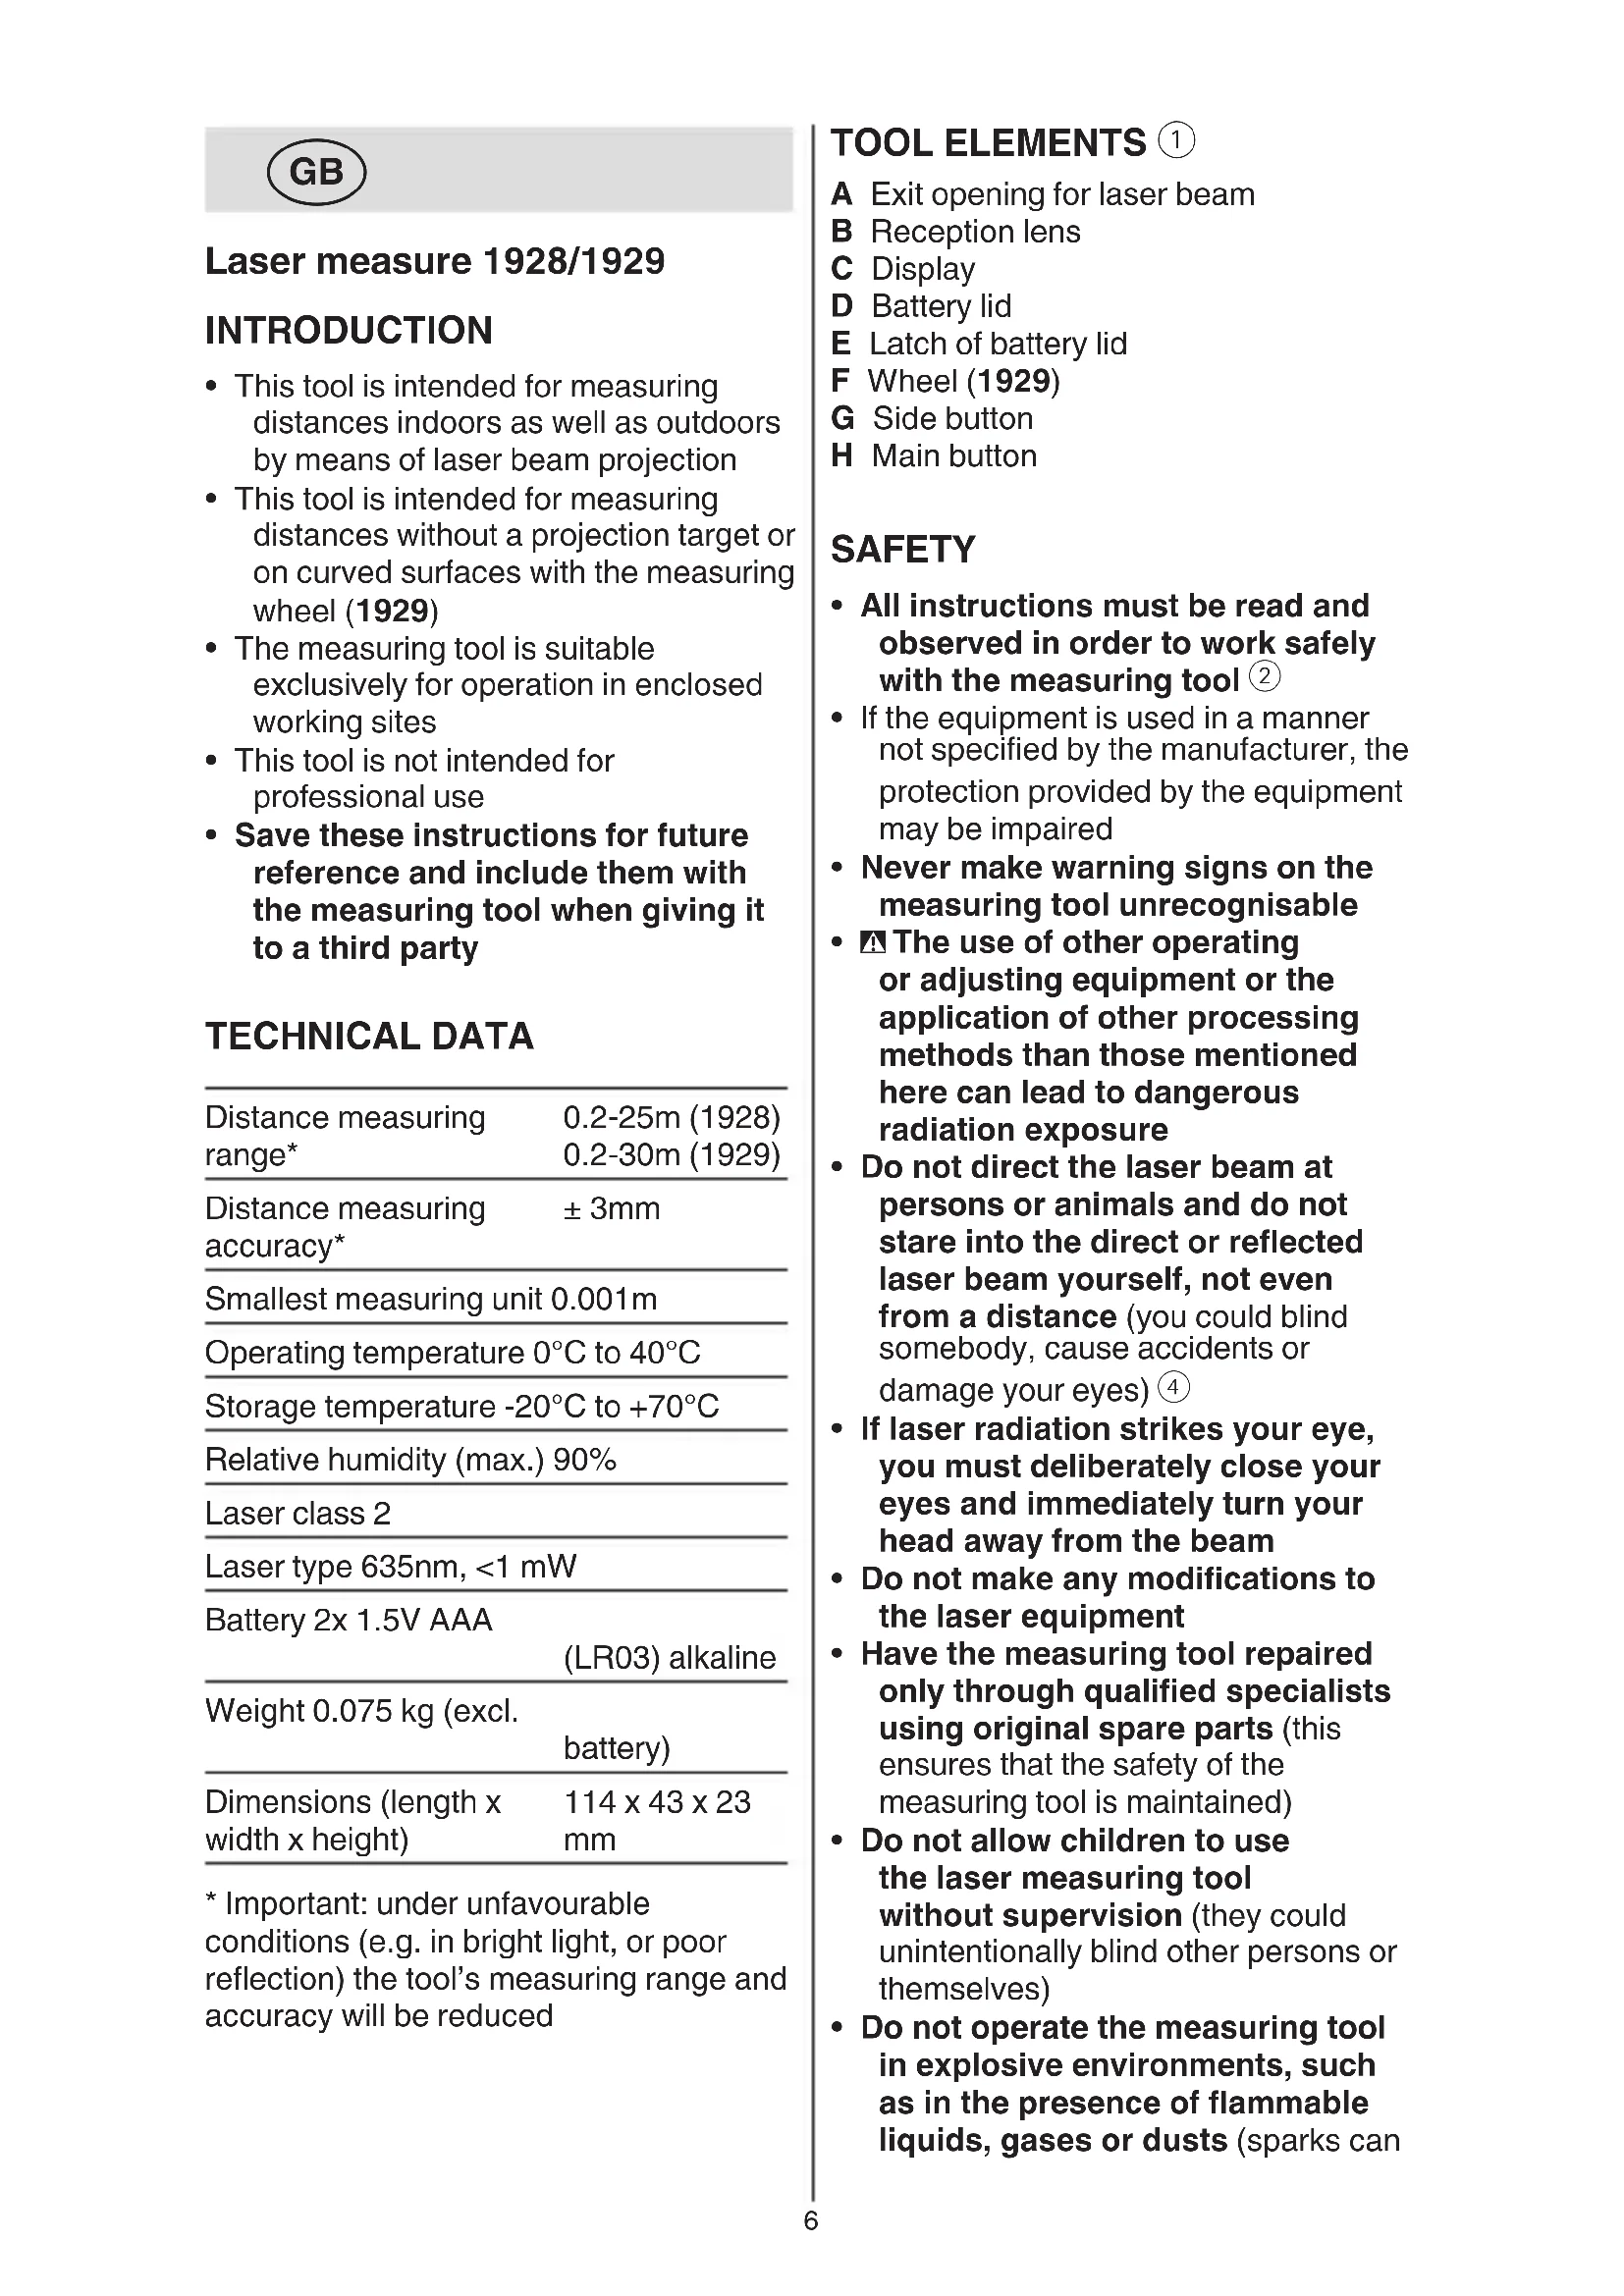
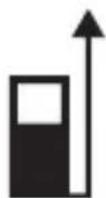
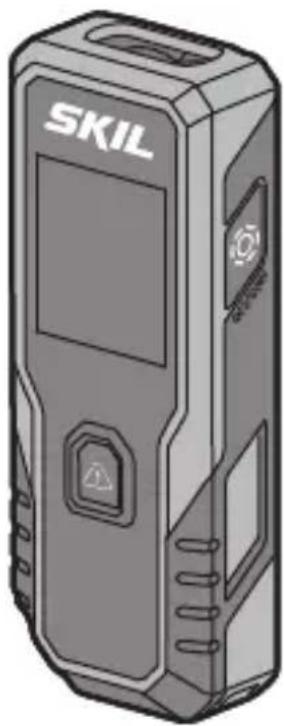
TOOL ELEMENTS ①
A Exit opening for laser beam
B Reception lens
C Display
D Battery lid
E Latch of battery lid
F Wheel (1929)
G Side button
H Main button
SAFETY
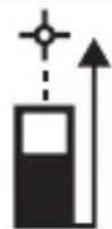
- All instructions must be read and observed in order to work safely with the measuring tool ②
- If the equipment is used in a manner not specified by the manufacturer, the protection provided by the equipment may be impaired
- Never make warning signs on the measuring tool unrecognisable
- The use of other operating or adjusting equipment or the application of other processing methods than those mentioned here can lead to dangerous radiation exposure
- Do not direct the laser beam at persons or animals and do not stare into the direct or reflected laser beam yourself, not even from a distance (you could blind somebody, cause accidents or damage your eyes) ④
- If laser radiation strikes your eye, you must deliberately close your eyes and immediately turn your head away from the beam
- Do not make any modifications to the laser equipment
- Have the measuring tool repaired only through qualified specialists using original spare parts (this ensures that the safety of the measuring tool is maintained)
- Do not allow children to use the laser measuring tool without supervision (they could unintentionally blind other persons or themselves)
- Do not operate the measuring tool in explosive environments, such as in the presence of flammable liquids, gases or dusts (sparks can
be created in the measuring tool which may ignite the dust or fumes)
EXPLANATION OF SYMBOLS ON TOOL
② Read the instruction manual before use
③ Do not dispose of electric tools and batteries together with household waste material
④ Laser radiation / Do not stare into beam / Class 2 laser product
USE
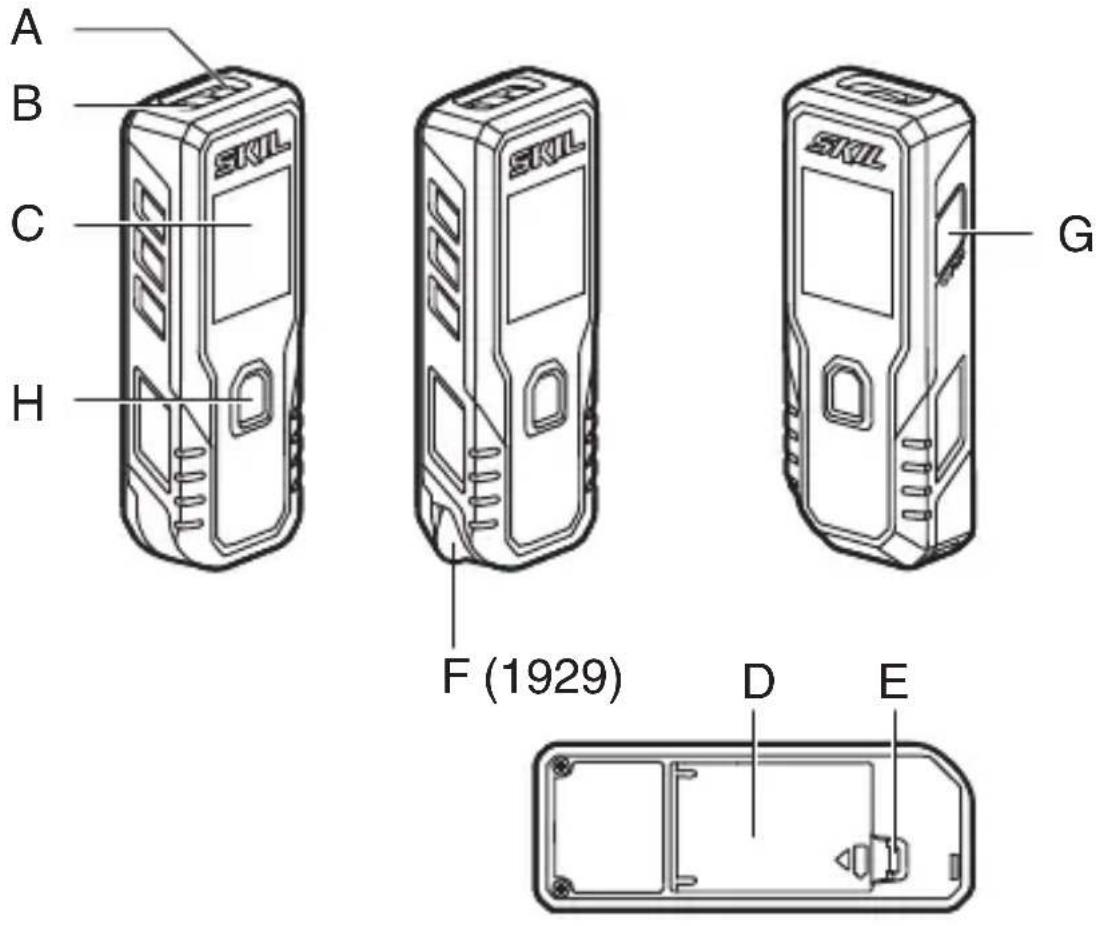
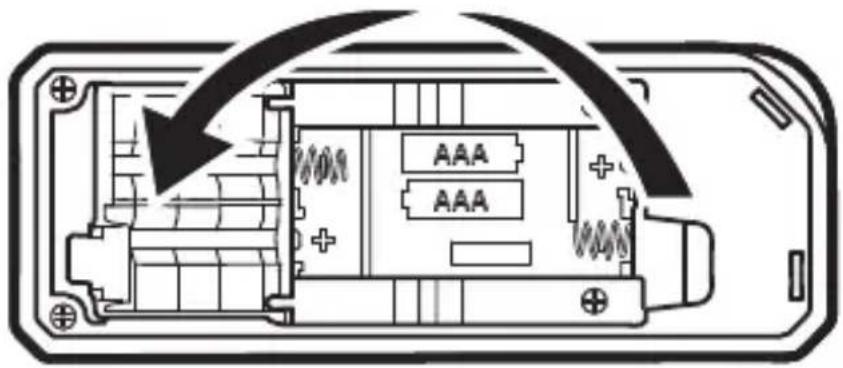
- Inserting/replacing the batteries ⑤
-alkali-manganese batteries are recommended for the measuring tool
-do not use rechargeable batteries
-to open the battery lid D, press on the latch E and fold the battery lid up
-insert 2 x AAA batteries (pay attention to correct polarisation)
-always replace all batteries at the same time
-only use batteries from one brand and with the identical capacity
-close battery lid D
-remove the batteries from the measuring tool when not using it for extended periods (when storing for extended periods, the batteries can corrode and self-discharge)
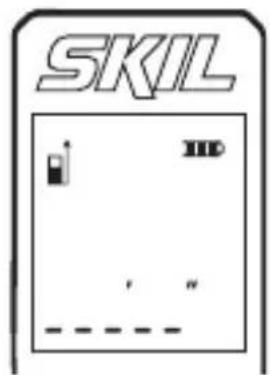
- Battery level indicator ⑥
-during use the battery level indicator on the display indicates the remaining battery capacity
- On/off
-press side button G to turn on the tool
-press and hold side button G for 1 second to turn off the tool
- Change units ⑧
-press and hold main button H for 1 second to change the measurement unit (feet, feet/inch, or meter)
- Laser measuring mode
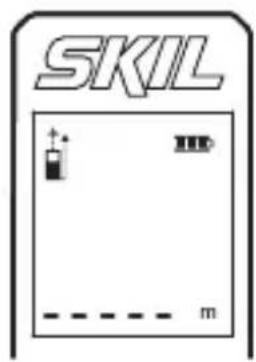
-when you turn on the tool, it will enter laser measuring mode with the laser turned off (see indicator) ⑦a
-press main button H to turn on the laser (see blinking laser indicator)
⑦b
-with the laser beam activated, aim the laser at the target
-this mode can be used to move the tool relative to the target and the continuously updated distance is displayed
-when the display shows only dashes, the measurement cannot be made (see APPLICATION ADVICE for possible causes) ⑨
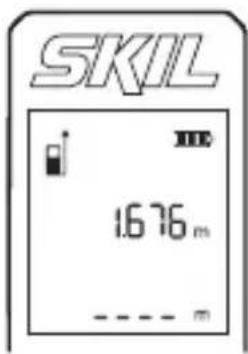
-press the main button H to stop the measurement and save the current value ⑩
! keep in mind that the tool measures from its rear (the tool length is included in the measuring result)
-press main button H to activate laser and start a consecutive measurement; press main button H again to stop and save the measurement (up to 2 measurements can be displayed)
- Wheel measuring mode (1929) ⑪
-press the side button to enter wheel measuring mode (see blinking wheel indicator)
-use wheel to measure (see rotating wheel indicator)
-the wheel can be used forwards and backwards
-when changing direction during measurement, the measured value will be deducted and even be negative if you cross the starting point again
! try to hold the tool in a consistent angle and keep a steady pressure to get to most accurate measurement
-press side button G quickly twice to restart the measurement ⑫
-press main button H to stop the measurement (see wheel indicator) and save the measurement
-press main button H to start a consecutive measurement; press main button H again to stop and save the measurement (up to 2 measurements can be displayed)
-press side button G again to return to laser measurement mode
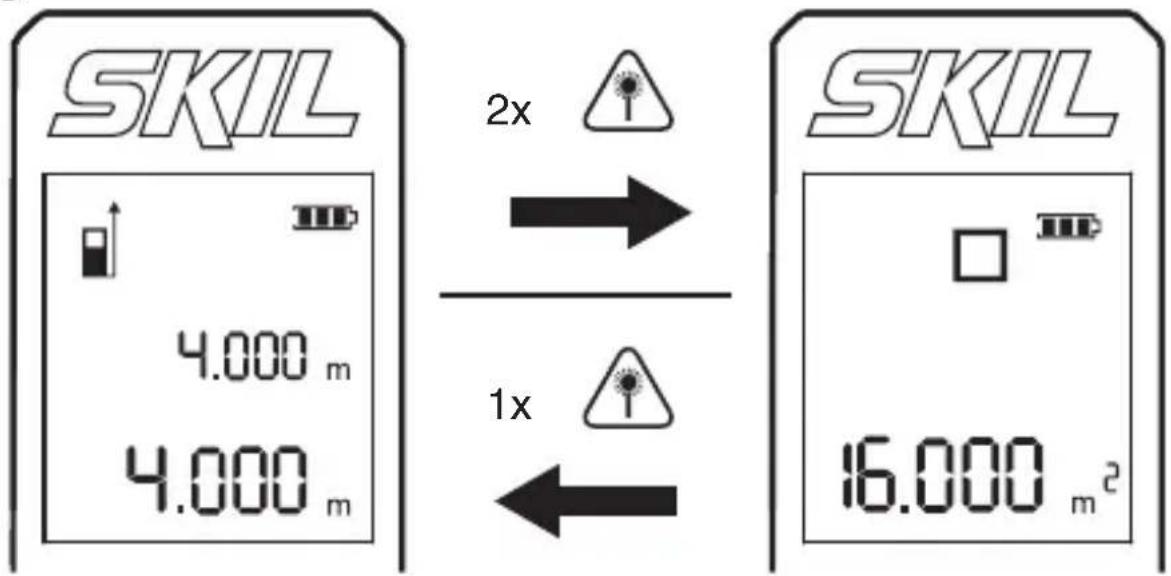
- Area measurement ⑬
-press main button H quickly twice to calculate and show the area from the last 2 measurements
-when there is only 1 measurement, the display will show only dashes -when pressing main button H again you will return to the measuring mode, showing the last 2 measurements in the display
APPLICATION ADVICE
- Faulty measurements cannot be excluded when measuring to different surfaces; the problematic surfaces are: -transparent surfaces (e.g., glass, water) -reflective surfaces (e.g., polished metal, glass) -porous surface (e.g., insulation materials) -structured surfaces (e.g., roughcast, natural stone) If required, use piece of paper or a laser target plate (not included) on these surfaces
- Other possible causes for faulty measurement: - the measurement took place outside the measuring range - the angle between laser beam and target was too small - the reception lens B or the laser beam opening A was misted up (e.g. due to a rapid temperature change)
• Air layers with varying temperatures or indirectly received reflections can affect the measured value
MAINTENANCE / SERVICE
• This tool is not intended for professional use
- Protect the measuring tool against moisture and direct sun light
- Do not subject the measuring tool to extreme temperatures or variations in temperature (the accuracy of the measuring tool can be impaired)
-as an example, do not leave it in vehicles for long time
-allow the measuring tool to adjust to the ambient temperature before putting it into operation
- Avoid heavy impact to or falling down of the measuring tool -damage to the measuring tool can impair its accuracy
- Keep the measuring tool clean at all times
- Do not immerse the measuring tool in water or other fluids
- Wipe off debris using a moist and soft cloth
- Do not use any cleaning agents or solvents
- Regularly clean the surfaces at the exit opening of the laser in particular, and pay attention to any fluff of fibres
- If the tool should fail despite the care taken in manufacturing and testing procedures, repair should be carried out by an after-sales service centre for SKIL power tools
-send the tool undismantled together with proof of purchase to your dealer or the nearest SKIL service station (addresses as well as the service diagram of the tool are listed on www.skil.com) - Be aware that damage due to overload or improper handling of the tool will be excluded from the warranty (for the SKIL warranty conditions see www.skil.com or ask your dealer)
ENVIRONMENT
- Do not dispose of electric tools, batteries, accessories and packaging together with household waste material (only for EU countries)
-in observance of European Directive 2012/19/EC on waste of electric and electronic equipment and its implementation in accordance with national law, electric tools that have reached the end of their life must be collected separately and returned to an environmentally compatible recycling facility
-symbol ④ will remind you of this when the need for disposing occurs

Mesure du laser 1928/1929
INTRODUCTION
VEDLIKEHOLD / SERVICE
APKALPOŠANA / APKOPE
natural_image
Battery icon with four segments and a numbered label (1) above it, no text or symbols on the battery itself.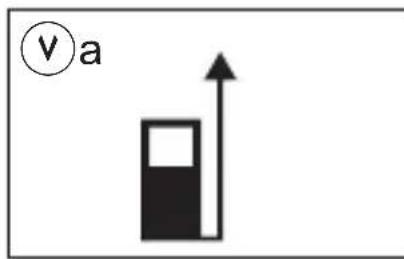
text_image
v a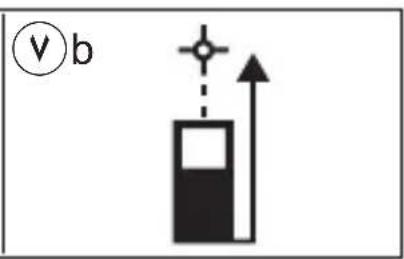
text_image
v b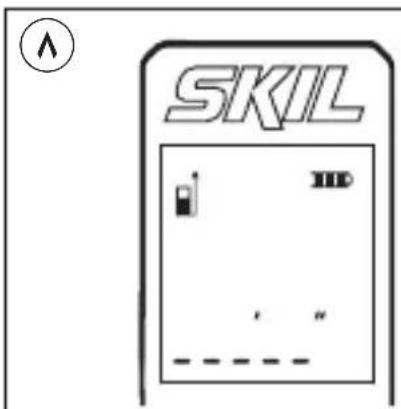
text_image
SKIL HD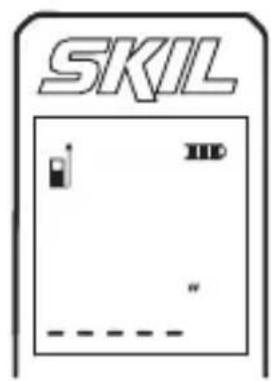
text_image
SKIL HD " - - - - - - - - - - - - - - - - - - - - - - - - - - - - - - - - - - - - - - - - - - - - - - - - - - - - - - -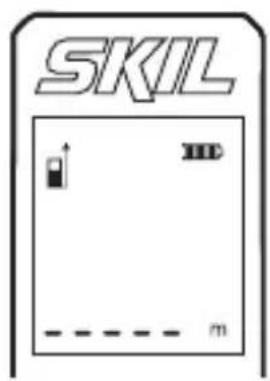
text_image
SKIL m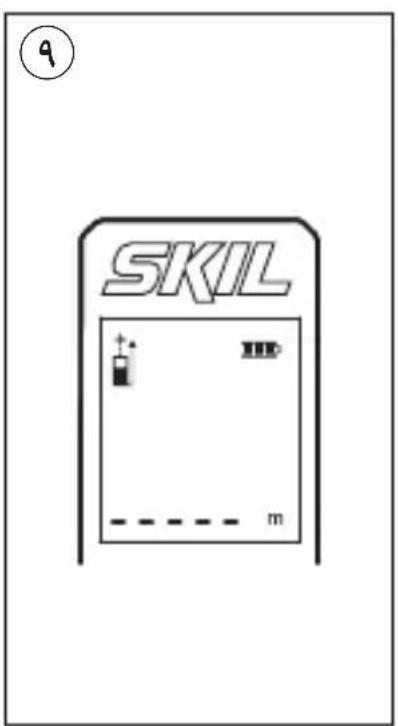
text_image
SKIL 9
text_image
SKIL 1.676 m x1 SKIL 1.676 m ---- m1

1

The image contains a graphical symbol (a stylized number or symbol) inside a circle, which is not standard alphanumeric text. According to the instructions, non-text figures/diagrams are to be ignored. Therefore, no OCR output is generated.
∑

text_image
LASER 2 P max <1mW , λ=635nm IEC/EN 60825-1: 2014قياس الليزر
1928
1929
natural_image
Illustration of a SKIL device with control panel and buttons (no text or symbols on body)
text_image
دليل الاستعمال AR راهنماي اصلی FA