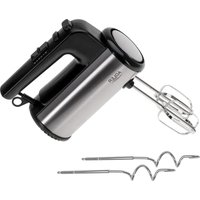
AD 4221 - Food Processor ADLER - Free user manual and instructions
Find the device manual for free AD 4221 ADLER in PDF.
| Product Type | Multifunction planetary kitchen robot |
| Brand | Adler |
| Model | AD 4221 |
| Power Supply | 220-240 V ~ 50/60 Hz |
| Rated Power | 1200 W |
| Maximum Power | 2200 W |
| Bowl Capacity | 7 L (stainless steel) |
| Max. Continuous Operating Time | 15 minutes |
| Min. Rest Time | 10 minutes |
| Functions | Mixing, kneading, whisking, mincing |
| Included Accessories | Whisk, beater, dough hook, mincer with 3 sieves (3, 5, 7 mm), pusher |
| Speeds | 6 speeds + Pulse mode |
| Safety | Overheat protection device, automatic shut-off after 15 min, use under supervision for children |
| Bowl Material | Stainless steel |
| Cleaning | Do not immerse the motor block, hand wash metal accessories, do not use aggressive detergents |
| Recommended Use | Household use only, not for commercial use |
| Repairability | Entrust to an authorized professional service center, do not repair yourself |
Frequently Asked Questions - AD 4221 ADLER
User questions about AD 4221 ADLER
0 question about this device. Answer the ones you know or ask your own.
Ask a new question about this device
Download the instructions for your Food Processor in PDF format for free! Find your manual AD 4221 - ADLER and take your electronic device back in hand. On this page are published all the documents necessary for the use of your device. AD 4221 by ADLER.
USER MANUAL AD 4221 ADLER
natural_image
Line drawing of a modern kitchen grater with a side-mounted handle and control panel (no text or symbols)AD 4221
natural_image
Close-up of mechanical components with arrows indicating motion, no visible text or symbolsA.
natural_image
Close-up of a propeller with a circular arrow indicating rotational motion (no text or symbols)B.
C.
natural_image
Close-up of a metallic mechanical component with internal cavities and a central hole (no text or symbols visible)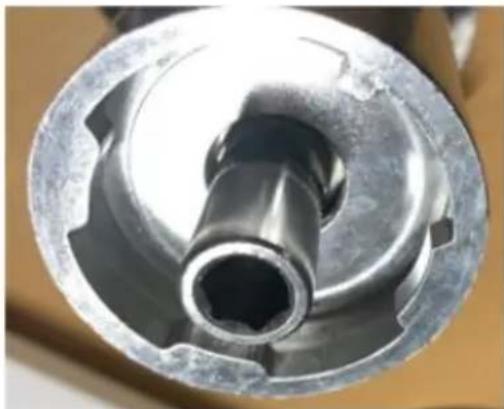
natural_image
Close-up of a metallic mechanical component with a central bore and flange (no visible text or symbols)D1.

natural_image
Close-up of a hand holding a metallic mechanical component with a black gear-like opening (no visible text or symbols)D2.
natural_image
Close-up of a stainless steel kitchen mixer with a metal grater and handle, placed on a wooden surface (no text or symbols visible)D3.
natural_image
Close-up of a stainless steel kitchen mixer with a mounted dish and fan (no visible text or symbols)D4.
ENGLISH
SAFETY CONDITIONS. IMPORTANT INSTRUCTIONS ON SAFETY OF USE PLEASE READ CAREFULLY AND KEEP FOR FUTURE REFERENCE
The warranty conditions are different, if the device is used for commercial purpose.
- Before using the product please read carefully and always comply with the following instructions. The manufacturer is not responsible for any damages due to any misuse.
- The product is only to be used indoors. Do not use the product for any purpose that is not compatible with its application.
- The device voltage is 220-240V, \~50/60Hz. For safety reasons it is not appropriate to connect multiple devices to one power outlet.
- Please be cautious when using around children. Do not let the children to play with the product. Do not let children or people who do not know the device to use it without supervision.
- WARNING: This device may be used by children over 8 years of age and persons with reduced physical, sensory or mental capabilities, or persons without experience or knowledge of the device, only under the supervision of a person responsible for their safety, or if they were instructed on the safe use of the device and are aware of the dangers associated with its operation. Children should not play with the device. Cleaning and maintenance of the device should not be carried out by children, unless they are over 8 years of age and these activities are carried out under supervision.
- After you are finished using the product always remember to gently remove the plug from the power outlet holding the outlet with your hand. Never pull the power cable!!!
- Never leave the product connected to the power source without supervision. Even when use is interrupted for a short time, turn it off from the network, unplug the power.
- Never put the power cable, the plug or the whole device into the water. Never expose the product to the atmospheric conditions such as direct sun light or rain, etc.. Never use the product in humid conditions.
- Periodically check the power cable condition. If the power cable is damaged the product should be turned to a professional service location to be replaced in order to avoid hazardous situations.
- Never use the product with a damaged power cable or if it was dropped or damaged in any other way or if it does not work properly. Do not try to repair the defected product yourself because it can lead to electric shock. Always turn the damaged device to a professional service location in order to repair it. All the repairs can be done only by authorized service professionals. The repair that was done incorrectly can cause hazardous situations for the user.
- Never put the product on or close to the hot or warm surfaces or the kitchen appliances like the electric oven or gas burner.
- Never use the product close to combustibles.
- Do not let cord hang over edge of counter or touch hot surfaces.
- In order to provide additional protection, it is recommended to install residue current device (RCD) in the power circuit, with residual current rating not more than 30 mA. Contact professional electrician in this matter.
- The device is not intended for industrial food processing.
- Do not immerse the motor unit in water. Do not wash in dishwashers. Do not expose the device and its accessories to high temperatures (above 60^ C).
- Before cleaning and removing accessories set the speed control to "0" position and
unplug the power cable.
- Before operating the device check if all parts and accessories are properly mounted:
- planetary food processor: ensure the attachment is fully inserted into the socket, otherwise your mixing result may be affected.
- meat grinder: the grinding assembly needs to be carefully assembled. Inaccurate assembly can cause poor grinding performance and knife and hole plate blunting.
-
Use only original accessories supplied with the meat grinder and planetary food processor.
-
Do not overload the device with excess product or shoving the product in too hard. Use only the pusher for shoving the product in. Using other object can damage the meat grinder.
-
The meat to be ground should be free of bones, gristles, tendons or veins. Cut the bigger parts into pieces.
-
Do not cover the ventilation holes in the housing while the device is on.
-
Do not grind dry poppy seed. The poppy seed needs to be steamed and soaked before grinding.
-
Do not exceed 3/4 bowl high when fill up by food ingredients.
-
Store the device out of the reach of children.
Product description: Multifunction Planetary food processor AD4221
- Housing arm 2. Motor housing
3.Anti-splash cover 4.Mixing bowl 7,0 liters
5.Front cover of mincer 6.Plastic pusher
7.Tilt knob 8.Speed control knob
9.Egg whisk 10.Mixing beater
11.Dough hook 12.Fixing nut
13.Sieves 3,5,7mm 14.Mincing cross blade
15.Worm gear 16. Mincing tray
- Mincing chamber 18. Mixer's attachment nest with spring
BEFORE FIRST USING
-
All parts of the device are to be thoroughly cleaned before being used for the first time. See section: "Cleaning and Maintenance".
-
Stand the device on a horizontal and flat surface.
-
Never operate the device without the supervision.
-
Do not touch moving parts with your fingers. Let the rotating accessories to stop before open the bowl.
WARNING: DO NOT USE MIXING AND MINCING FUNCTIONS AT THE SAME TIME !! ONLY USE ONE OF THEM.
- When using mixing function the front cover (5) should be located at its position.
- When using mincing function the bowl (4) with anti-splash cover (3) should be located at their position to protect end user against rotation of the mixer's attachment nest with spring (18).
- Switch off the device and disconnect from supply before changing accessories.
ASSEMBLY WAY: Mixer function
Before assembling the food processor, be sure the power cord unplugged from the power outlet and the speed control knob is on the "0" position.
-
Place the bowl in the motor unit, then turn it clockwise until you feel it cannot move any further to the left. The bowl is blocked.
-
Choose proper attachment to required operation:
- Egg whisk (9) for whipping :egg whites, cake creams, whipped cream, etc.
- Mixing beater (10) for mixing light mixtures: mayonnaise, pancake batter , sponge cake, etc.
- Dough hook (11) for kneading heavy dough: bread dough, yeast dough, etc.
-
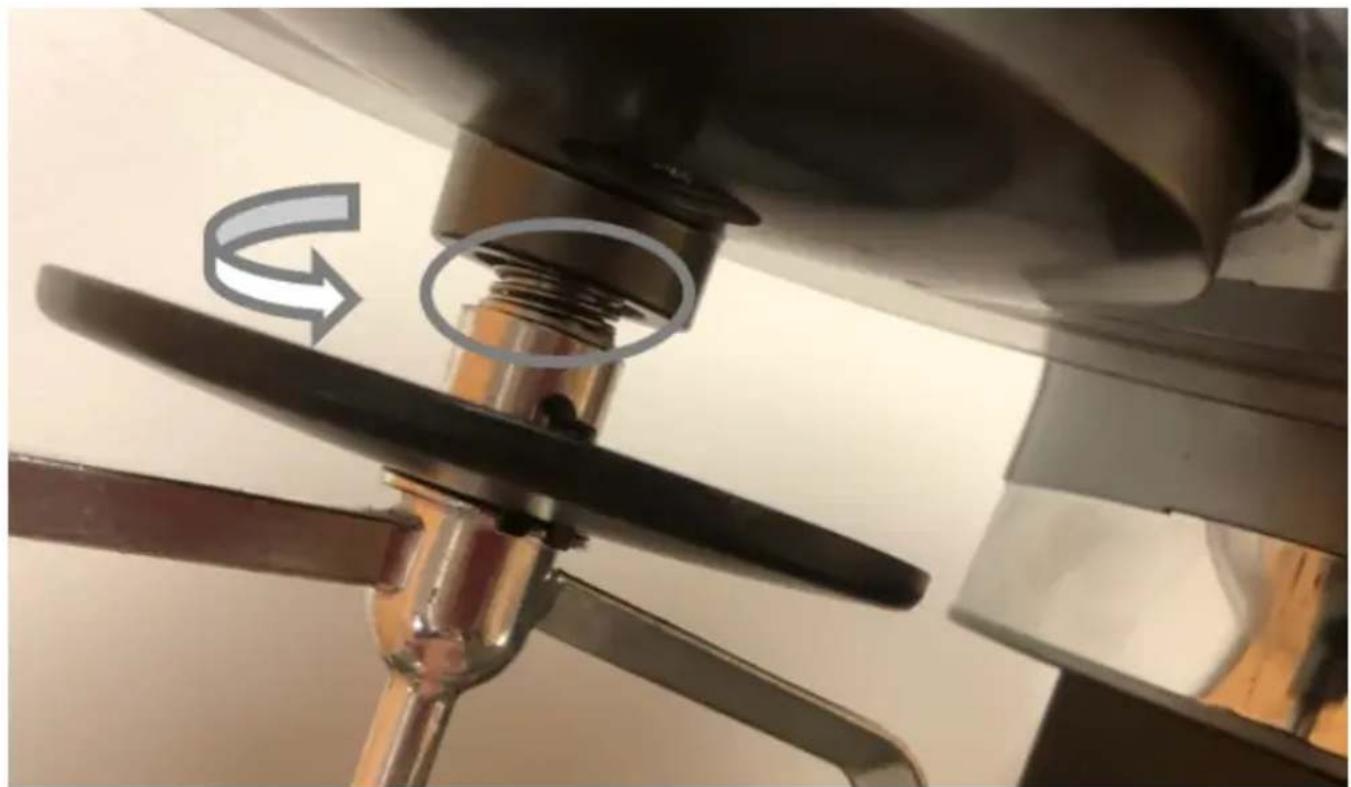
Put the proper attachment (9 or 10 or 11) on the bolt of the mixer's attachment nest with spring (18). Adjust the position of two protrude metal elements to come inside concave places of the mixer's attachment nest with spring (18) – look at picture A. Push the attachment upwards until the spring is fully compressed, turn fully clockwise and release – look at picture B.
-
Put food ingredients into the bowl and press the tilt knob (7) down side to close the housing arm (1).
-
Plug in the device and rotate the speed knob (8) for required speed. The speed 0 means motor stopped, the speed 1 means slowest speed, the speed 6 means maximum rotation. P – means Pulse mode, it means pulse rotating of gears when the knob (8) is kept at Pulse position.
-
After use switch off the device by rotate the speed knob (8) to position 0 and plug of f the device.
-
Press the tilt knob (7) down side to lift the housing arm (1). If mixed mixture is correct, take away the attachment. To take away the attachment, lift it a little to compress the spring completely, then turn left side whole attachment and pull it down.
-
Turn the bowl (4) counterclockwise and remove it from the motor housing (2) by keeping with both hands. Remember the bowl can be heavy.
ASSEMBLY WAY: Grinder function
-
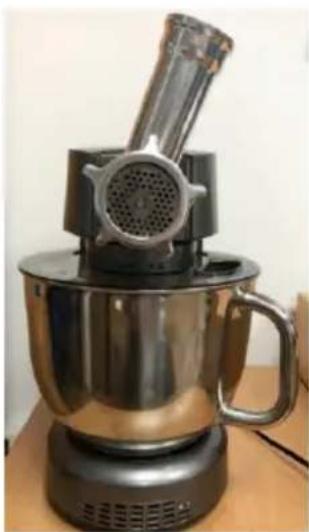
Place the bowl (4) on the motor housing (2) and close the housing arm (1) by pressing the tilt knob (7). Do not assemble any attachments inside the bowl (4). It is need to protect you against rotating of the mixer's attachment nest with spring (18). It is normal the mixer's attachment nest with spring (18) is rotating inside the bowl when using the mincer.
-
Take away the front cover (5) to set up the grinder.
-
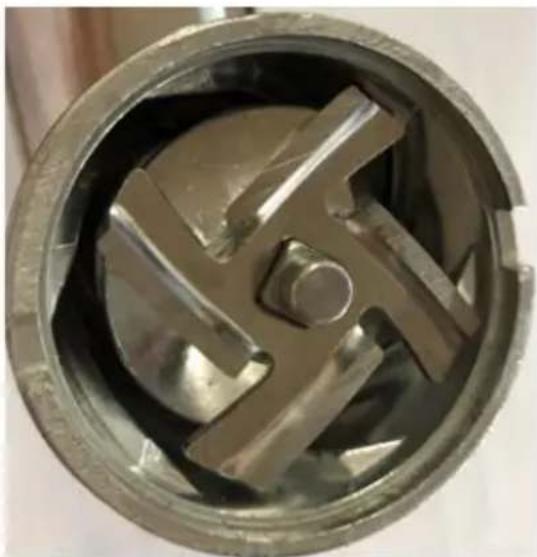
Inside mincing chamber (17) place the worm gear (15), next place the mincing cross blade (14) correct. Take attention to place it correct side, same as shown at picture C. Next, place the proper sieve (13) and LIGHTLY screw the fixing nut (12) in the end.
REMARK: the fixing nut (12) has to be screwed LIGHTLY BEFORE assemble the whole mincing unit to the motor housing (2). It is need to adjust the position of hexagonal hole (picture D1) in mincing unit to the hexagonal shaft in motor housing (2).
-
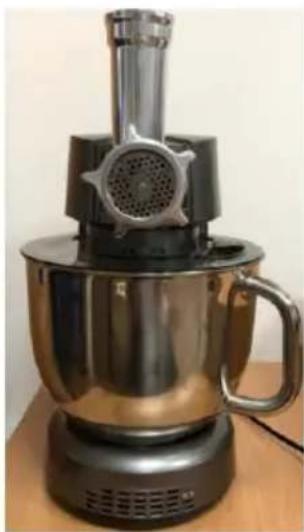
Place the mincer's unit in the position shown at picture D3 (slope position), push it inside the motor housing (2) and turn left to vertical position shown at picture D4. The black round button close to the mincer's unit will come back to protrude position. Screw the fixing nut (12) tightly now.
-
Mount the mincing tray (16) on the top of the mincing chamber (17).
-
To dismantle the mincer's unit, press the black round button act in the reverse order.
USAGE: Mixer function
- Kneading heavy dough (bread dough, yeast dough, etc.)
Assemble the dough hook (11). Put food ingredients inside the bowl. Suggested flour and water ration is: 5:3. Maximum flour quantity: 1500g. It is recommended to start kneading at speed 1 or 2 for not longer than 20 seconds continuously operation. Next, set up the speed 3 and operate not longer than 4 minutes continuously at a time.
- Mixing light mixtures (mayonnaise, pancake batter, sponge cake, etc.)
Assemble the mixing beater (10). Put food ingredients inside the bowl to max 34 high of the bowl. Switch on speed 3-4 and mix as long need to achieve desired density. Use not longer than 4 minutes continuously at a time.
• Whipping (egg whites, cake creams, whipped cream, etc.)
Assemble the egg whisk (9).
For egg whites whipping: Put egg whites inside the bowl to max 24 eggs. Switch on speed 4-6 and mix, about 5 minutes until stif f. Mixing time depends of the size of eggs.
For whipped cream: put at least 250ml of fresh cream (previously chilled in a refrigerator for at least 8 hours).. Mix it at speed 4 to 6 for about 5 minutes. Do not exceed the quantity of 12 high of the bowl of poured fresh cream to keep enough space for whipped cream.
USAGE: Grinder function
-
Cut all foods into pieces (sinewless, boneless and fatless beef or pork is recommended, approximately size: (20 mm x 20 mm x 60 mm,) so that they fit easily into the mincing tube (17).
-
Plug in the device and switch on and then turn the speed control knob (8) to 4-6 speeds.
-
Feed food into the mincing tray (16). Use for it only the plastic pusher (6).
-
After use switch the device off and unplug it from the power supply.
-
Use no longer than 4 minutes continuously at a time.
-
The device is equipped in 3 sieves with holes diameter 3mm, 5mm and 7mm, chose suitable hole plate to your desired dish.
- 3 mm sieve - fine mesh for grinding to a fairly compact, uniform consistency. Perfect for stuffing and pâté.
- 5 mm strainer - medium mesh for grinding meat for minced cutlets, burgers, meatballs and fillings for dumplings, pancakes and tortillas. By using this strainer you can also grind vegetables, hard cheese and even nuts.
- 7 mm strainer - thick mesh for grinding meat with a distinct structure. The strainer is intended for the production of sausages and giblets.
OVERHEAT PROTECTION DEVICE
The device will switch off automatically after 15 minutes of continuous operation to protect the motor against overheating. There is need to plug off the device and let it cool down before next use. The device when cooled down will operate normally.
CLEANING AND MAINTENANCE
- Before cleaning the device, be sure the power cord unplugged from the power outlet and the speed control knob is on the "0" position. Let the device cools down before cleaning.
2.Disassemble all accessories from motor housing (2). Do not clean the accessories while mounted on the machine's drive assembly .
-
Don't use aggressive detergents to clean the motor housing (2), as it may remove the informational graphic symbols such as: scale, signs, safety marks, etc.
-
Do not wash the metal parts in dishwashers. Aggressive cleaning agents used in dishwashers cause the metal parts to turn black. Handwash the metal parts using traditional washing-up liquid. Use soft brush.
5.Wipe the external parts with kitchen towel or soft cloth.
-
Do not use abrasive materials to clean the device.
-
Don't immerse the motor housing () in water or other liquids.
TECHNICAL DATA
Power supply: 220-240V \~50/60Hz
Power: 1200W
Max Power: 2200W
Stainless steel bowl 7 liters
Max operation time in one cycle: 15 minutes.
Minimum rest time between cycles: 10 minutes at least.
To protect your environment: please separate carton boxes and plastic bags and dispose them in corresponding waste bins. Used appliance should be delivered to the dedicated collecting points due to hazarsous components, which may effect the environment. Do not dispose this appliance in the common waste bin.
DEUTSCH
natural_image
White watermelon-shaped kettle with blue liquid inside, no visible text or symbols on the device itself.Electric Kettle AD 02
natural_image
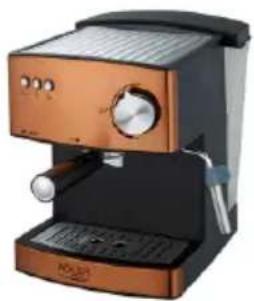
Exterior view of a modern coffee machine with orange and black casing (no visible text or symbols)Espresso Machine AD 4404
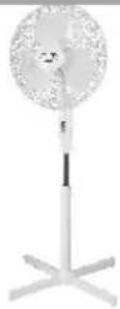
Standing Fan
AD 7305

natural_image
Exterior view of a modern sandwich grater with a black handle and red button (no visible text or symbols)Sandwitch maker AD 3015
natural_image
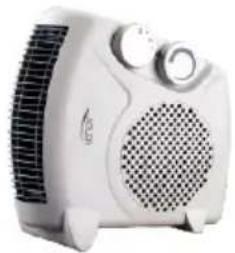
White electric heating fan with cooling grille and control buttons (no visible text or symbols)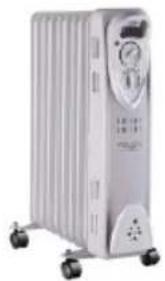
natural_image
White industrial air conditioner unit with cooling fan and wheels (no visible text or symbols)Oil Heater AD 7808
Hair Clipper
AD 2823
Hair Clipper
AD 2825
natural_image
Exterior view of a modern glass coffee maker with a black lid (no visible text or symbols)Dripp Coffee Maker AD 4407

natural_image
Glass water heater with blue liquid, no visible text or symbolsKettle AD 1286
natural_image
White handheld hairdryer with visible brand logo (no text or symbols on body)Hair Dryer AD 2252

natural_image
Black handheld hairbrush with a silver clip and orange handle (no text or symbols visible)Hair Clipper AD 2832
natural_image
Black and red compact device with a strap, no visible text or symbolsHair Shaver AD 2932

natural_image
Close-up of a stainless steel kitchen pan with digital scale and control knob (no visible text or symbols)Kitchen Scale AD 8121
natural_image
Black and white photo of a mobile phone keyboard with a grid of circular buttons (no visible text or symbols)Nut Cookie Maker AD 3039

natural_image
A modern blender with pink liquid and black handle, no visible text or symbols on the device.Blender AD 4076