
GHE 105 - Mechanical chipper STIHL - Free user manual and instructions
Find the device manual for free GHE 105 STIHL in PDF.
| Product type | Mechanical shredder (electric grinder) |
| Brand | STIHL |
| Model | GHE 105 |
| Rated power | 2200 W |
| Rated voltage | 230 V~ |
| Frequency | 50 Hz |
| Rated current | 10 A |
| Speed | 2720 rpm |
| Maximum branch diameter | 35 mm |
| Weight | 20 kg |
| Dimensions (L x W x H) | 77 x 48 x 97 cm |
| Guaranteed sound power level | 102 dB(A) |
| Protection class | I |
| Protection type | IPX4 (splash-proof) |
| Duty cycle | P40 (40 s load, 60 s no-load) |
| Shreddable materials | Green waste: branches, leaves, fruit and vegetable scraps, hedge trimmings |
| Safety devices | Restart protection, funnel lock, braking system, protective covers |
| Maintenance | Clean after each use, lubricate moving parts, regularly sharpen blades |
| Common spare parts | Blade (60087020121), wing knife (60077020300), complete knife disc (60077005190) |
| Warranty | See manufacturer's conditions |
Frequently Asked Questions - GHE 105 STIHL
User questions about GHE 105 STIHL
0 question about this device. Answer the ones you know or ask your own.
Ask a new question about this device
Download the instructions for your Mechanical chipper in PDF format for free! Find your manual GHE 105 - STIHL and take your electronic device back in hand. On this page are published all the documents necessary for the use of your device. GHE 105 by STIHL.
USER MANUAL GHE 105 STIHL
Gemäß 2000/14/EG / S.I. 2001/1701:
Garantier Schall
leistungspegel L_WAd 102 dB(A)
Unsicherheit K_WA
Gemäß EN 50434:
Schalldruckpegel am
Arbeitsplatz L_DA 92 dB(A)
Thank you for choosing STIHL. We develop and manufacture our quality products to meet our customers' requirements. The products are designed for reliability even under extreme conditions.
STIHL also stands for premium service quality. Our specialist dealers guarantee competent advice and instruction as well as comprehensive service support.
We thank you for your confidence in us and hope you will enjoy working with your STIHL product.

Dr. Nikolas Stihl
IMPORTANT: READ BEFORE USE AND KEEP IN A SAFE PLACE.
1. Table of contents
Notes on the instruction manual 26
General 26
Instructions for reading the instruction manual 26
Country-specific versions 26
Machine overview 27
For your safety 27
General 27
Warning - dangers caused by electrical current 28
Clothing and equipment 28
Transporting the machine 29
Before operation 29
Working with your machine 30
Maintenance and repairs 31
Storage for prolonged periods without operation 32
Disposal 32
Description of symbols 32
Standard equipment 33
Preparing the machine for operation 33
Attaching wheel axle and wheels 33
Installing the ejection chute extension and chassis 33
Installing the discharge flap 33
Opening and closing the discharge flap 33
Tool box 34
Notes on working with the machine 34
What material can be processed? 34
What material cannot be processed? 34
Maximum branch diameter 34
Working area for operator 34
Correct machine load 34
Overload protection 34
If the cutting unit of the garden shredder is blocked 34
Feeding the garden shredder 34
Safety devices 34
Motor restart inhibitor 34
Safety interlock 35
Motor run-down brake 35
Protective covers 35
Operating the machine 35
Electrical connection of garden shredders 35
Connecting the power cable 35
Switching on the garden shredder 35
Switching off the garden shredder 35
Shredding 35
Maintenance 36
Cleaning the machine 36
Removing the feed chute 36
Installing the feed chute 36
Locking the blade disc 36
Blade maintenance 36
Electric motor and wheels 37
Storage and winter break 37
Transport 37
Lifting or carrying the garden shredder 37
Pulling or pushing the garden shredder 37
Transporting the garden shredder on a load floor 38
Minimising wear and preventing damage 38
Standard spare parts 38
Environmental protection 38
Declaration of conformity 39
EU declaration of conformity -
STIHL GHE 105.0 garden shredder 39
UKCA-Declaration of Conformity
STIHL GHE 105.0
Garden Shredder 39
Technical specifications 40
REACH 40
Troubleshooting 40
Service schedule 41
Handover confirmation 41
Service confirmation 41
2. Notes on the instruction manual
2.1 General
This instruction manual is a translation of the original manufacturer's
instructions in the sense of EC Directive 2006/42/EC.
STIHL is continually striving to further develop its range of products; we therefore reserve the right to make alterations to the form, technical specifications and equipment level of our standard equipment.
For this reason, the information and illustrations in this manual are subject to alterations.
This instruction manual may describe models that are not available in all countries.
This instruction manual is protected by copyright. All rights reserved, especially the right of reproduction, translation and processing using electronic systems.
2.2 Instructions for reading the instruction manual
Illustrations and texts describe specific operating steps.
All symbols which are affixed to the machine are explained in this instruction manual.
Viewing direction:
Viewing direction when left and right are used in the instruction manual: the user is standing behind the machine (working position).
Section reference:
References to relevant sections and subsections for further descriptions are made using arrows. The following example shows a reference to a section: ( 3.)
Designation of text passages:
The instructions described can be identified as in the following examples.
Operating steps which require intervention on the part of the user:
- Release screw (1) using a screwdriver, operate lever (2)...
General lists:
- Use of the product for sporting or competitive events
Texts with added significance:
Text passages with added significance are identified using the symbols described below in order to especially emphasise them in the instruction manual:

Danger
Risk of accident and severe injury to persons. A certain type of behaviour is necessary or must be avoided.

Warning
Risk of injury to persons. A certain type of behaviour prevents possible or probable injuries.

Caution
Minor injuries or material damage can be prevented by a certain type of behaviour.

Note
Information for better use of the machine and in order to avoid possible operating errors.
Texts relating to illustrations:
Illustrations relating to use of the machine can be found in the front of this instruction manual.
The camera symbol serves to link the figures on the illustration pages with the corresponding text passages in the instruction manual.

2.3 Country-specific versions
STIHL supplies machines with different plugs and switches, depending on the country of sale.
Machines with European plugs are shown in the illustrations. Machines with other types of plug are connected to the mains in a similar way.
3. Machine overview

1 Chute
2 Closure screws
3 Discharge flap
4 Wheel carrier
5 Basic unit
6 Handle
7 On/off switch with mains connection
8 Rating plate with machine number
9 Tool box
4. For your safety
4.1 General

These safety regulations must be observed when working with the machine.

Read the entire instruction manual before using the machine for the first time. Keep the instruction manual in a safe
place for future reference.
These safety precautions are essential for your safety, however the list is not exhaustive. Always use the machine in a reasonable and responsible manner and be aware that the user is responsible for accidents involving third parties or their property.

Risk of injury!
Uninstructed users cannot recognise or evaluate the dangers posed by the garden shredder. This may result in serious or fatal injury to the user or other people.
Make sure that you are familiar with the controls and use of the machine.
The machine must only be used by persons who have read the instruction manual and are familiar with operation of the machine. The user should seek expert and practical instruction prior to initial operation. The user should receive instruction on safe use of the machine from the vendor or another expert.
During this instruction, the user should be made aware that the utmost care and concentration are required for working with the machine.
Residual risks persist even if you operate this machine according to the instructions.

Risk of death from suffocation!
Packaging material is not a toy danger of suffocation! Keep packaging material away from children.
Only give or lend the machine, including any accessories, to persons who are familiar with this model and how to operate it. The instruction manual forms part of the machine and must always be provided to persons borrowing it.
Make sure that the user is physically, sensorily and mentally capable of operating the machine and working with it. If the user is physically, sensorily or mentally impaired, the machine must only be used under supervision or following instruction by a responsible person.
Make sure that the user is of legal age or being trained under supervision in a profession in accordance with national regulations.
The machine must only be operated by persons who are well rested and in good physical and mental condition. If your health is impaired, you should consult your doctor to determine whether working with the machine is possible. The machine should not be operated after the consumption of alcohol, drugs or medications which impair reactions.
The machine is intended for private use.
Caution - risk of accident!

STIHL garden shredders are suitable for shredding branch material and plant trimmings. Their use for other purposes is not permitted and may be dangerous or result in damage to the machine.
The garden shredder must not be used (incomplete list):
- for any other materials (e.g. glass, metal).
- for tasks other than those described in this instruction manual.
for the preparation of foodstuffs (e.g. crushing ice, mashing pulp).
For safety reasons, any modification to the machine, except the proper installation of accessories approved by STIHL, is forbidden and results in voiding of the warranty cover. Information regarding approved accessories can be obtained from your STIHL specialist dealer.
In particular, any tampering with the machine which increases the power output or speed of the engine or motor is forbidden.
It is not permitted to transport objects, animals or persons, particularly children, on the machine.
Particular care is required during use in public green spaces, parks, sports fields, along roads and in agricultural and forestry businesses.
Only release the machine if it is on a level surface and cannot roll away by itself.
4.2 Warning - dangers caused by electrical current

Warning:
Risk of electric shock!
Particularly important for electrical safety are the power cable, mains plug, On/Off switch and

electric cable. Damaged cables, connectors and plugs, or electric cables that do not conform to regulations must not be used, to prevent any risk of electric shocks.
Therefore, check the electric cable regularly for signs of damage or ageing (brittleness).
Only operate machine with fully uncoiled power cable.
Extension reels must always be fully unwound before use.
Never use a damaged extension cable. Replace defective cables with new ones and never repair extension cables.
If the power cable or extension cable is damaged during operation, immediately disconnect the power cable or extension cable from the power supply. Never touch the damaged power cable or extension cable.
Never use the machine if the cables are damaged or worn. Check the power cable in particular for damage and ageing.
Maintenance and repair work on power cables must only be performed by specially qualified technicians.

Risk of electric shock!
Do not connect a damaged cable to the mains and only touch a damaged cable once it has been disconnected from the mains.
Only touch the cutting units (blades) when the machine is disconnected from the mains.
Always ensure that the power cables used are adequately protected by a fuse.

Do not work in the rain or in a wet environment.
Only use extension cables that are insulated against moisture
for outdoor use which are suitable for use with the machine ( 10.1)
Detach electric cables at the plug and socket and not by pulling on the electric cable.
Do not leave the machine unprotected in the rain.
It must be noted that current fluctuations can damage the machine when it is connected to a power generator.
Only connect the machine to a power supply that is protected by means of a residual current-operated protective device with a release current of a maximum of 30mA . Your electrician can provide further information.
4.3 Clothing and equipment

Always wear sturdy footwear with high-grip soles when working. Never work barefoot
or, for example, in sandals.

Always wear protective leather gloves with a closed cuff during work and especially during maintenance operations and
when transporting the machine.

Always wear close-fitting safety glasses when working.

Suitable safety glasses are tested for mechanical strength in accordance with EN 166 or national regulations and
available commercially with the corresponding marking.

Always wear hearing protection when working.

Suitable hearing protection is tested in accordance with EN 352 or national regulations and available commercially with a corresponding marking.
Wear both at all times.

Wear suitable, close-fitting clothing when working with the machine, e.g. overalls, but not work coats. Do not wear
scarves, ties, jewellery, clothing with dangling straps or cords or other protruding articles of clothing when working with the machine.
Long hair must be tied up and secured (headscarf, cap, etc.) at all times when operating or performing work on the machine.
4.4 Transporting the machine
Always wear protective gloves ( 4.3) in order to prevent injuries due to sharp-edged and hot components.
Do not transport the machine with the motor running. Switch off the motor, allow the blades to come to a standstill and disconnect the mains plug prior to transport.
Only transport the machine once the motor has cooled down.
Only transport the machine with the feed chute properly fitted.

Risk of injury!
The user may injure themselves on exposed blades.
Pay particular attention to the weight of the machine, especially when tilting.
Use suitable loading aids (loading ramps, lifters).
Secure the machine on the load floor using adequately dimensioned fastening material (straps, ropes etc.) at the fastening points described in this instruction manual. ( 12.3)
Push or pull the machine at walking pace only. Do not tow!
When transporting the machine, always observe regional legislation, especially regarding load security and the transport of objects on load floors.
4.5 Before operation
Make sure that only persons who are familiar with the instruction manual are permitted to use the machine.
Remove the packaging material and transport locks before using the machine for the first time.
Observe the local regulations regarding permitted operating times for gardening power tools with combustion engines or electric motors.
All faulty, worn or damaged parts must be replaced before using the machine. Replace any illegible or damaged danger signs and warnings on the machine. Your STIHL specialist has a supply of replacement stickers and all the other spare parts.

Risk of injury!
Worn or damaged parts (e.g. blunt blades) can affect the safety of the machine and result in injury to the user.
Before initial operation, check and ensure the following:
- The machine is in good operational condition. This means that the covers and guards must be in place and in good condition.
- A properly installed socket is used for the electrical connection.
- The insulation of the electric cable, extension cable, plug and connector is in good condition.
- The complete machine (motor housing, guards, fastening elements, blades, blade shaft, blade discs, etc.) is neither worn nor damaged.
-
There is no shredding material in the machine and the feed chute is empty.
-
All screws, bolts, nuts and other fastening elements are in place and properly tightened. Tighten any loose screws, bolts and nuts prior to initial operation (observe tightening torque).
Only use the machine out-of-doors and not close to walls or any other solid objects in order to prevent the risk of injuries and property damage (no escape for the user, broken windows, scratched cars etc.).
The machine must be placed in a stable position on firm and level ground.
Do not use the machine on a paved or gravel-covered surfaces, as ejected or thrown-up material could cause injuries.
Before using the machine, always check that it is properly closed. (⇒ 11.3)
Make sure that you are familiar with the On/Off switch so that you can react quickly and correctly in any emergency situation.
The splash guard in the feed chute must cover the feed opening and must be undamaged - replace the splash guard if damaged.
Risk of injury!
Only operate the machine when properly assembled. If parts of the machine (e.g. wheels) are missing, the specified safety distances are no longer maintained and the stability of the machine may also be reduced.
Before using the machine, always carry out a visual check to ensure that it is in good operating condition.
"Good operating condition" means that the machine is fully assembled, in particular:
- Upper chute is installed on lower chute
- Splash guard and chute insert with STIHL cloverleaf opening is correctly installed in upper chute
-Feed chute is installed on basic unit and both closure screws are fastened hand-tight
Wheel carrier assembly is installed - Both wheels are mounted
- All safety devices (ejection chute, splash guard, etc.) must be present and functional
- Cutting unit (blade disc) is installed
- All blades are properly installed.
The switch and safety devices installed in the machine must not be removed or bypassed.
Visually inspect the blade disc for damage and deformation; replace if necessary.
4.6 Working with your machine

Never work when animals or persons, particularly children, are in the danger area.
Do not operate the machine in the rain or during thunder storms, particularly when there is a risk of lightning strike.
The risk of accidents is higher if the ground is damp due to increased danger of slipping.
Particular caution should be exercised during working in order to prevent slipping. If possible, avoid using the machine when the ground is damp.
Only work during the day or with good artificial light.
Keep the working area neat and tidy at all times. Remove tripping hazards such as stones, branches, cables etc.
The operator should not stand any higher than the level of the base of the machine.
Starting:
Place the machine in a stable and upright position prior to starting. The machine must never be operated in a horizontal position.
Exercise care when switching on the machine and observe the instructions in the section "Operating the machine". ( 10.3)
Do not stand in front of the discharge opening when starting the engine or switching on the motor. There must be no shredding material in the garden shredder when it is started or switched on. Shredding material may be ejected and lead to injuries.
The machine must not be tilted during start-up.
Avoid switching the machine on repeatedly within a short period of time; particularly avoid "playing" with the On / Off switch. Risk of motor overheating.
Owing to the voltage fluctuations caused by this machine during the start-up, other devices connected to the same circuit may be subject to interference in the case of unfavourable power supply conditions.
In this case, appropriate steps should be taken (e.g. connection to a different circuit than the one used by the affected device, or operation of the machine using a circuit with a lower impedance).
Working:
Risk of injury!
Never place your hands or feet above, underneath or on rotating parts.
When the machine is running, never put your face or any other part of your body above the feed chute or in front of the ejection opening. Always keep you head and body away from the feed opening.

Never put your hands or any other part of your body or clothing into the feed chute or ejection chute. There is a
considerable risk of injury to eyes, face, fingers, hands etc.
Always maintain your balance and firm footing. Do not stretch forward.
The splash guard must not be tampered with (removed, folded up, jammed into position, damaged etc.) during operation.
The operator must stand in the working area described when feeding the shredder. Stay inside the working area and outside of the ejection zone at all times during operation of the machine. ( 8.4)
Risk of injury!
Shredding material may be ejected back up during operation. This may result in serious injury to the user's face, eyes and hands. Therefore wear safety glasses and protective gloves ( 4.3) and keep your head away from the feed opening.
Never tilt the machine when the engine or motor is running.
If the machine falls over during operation, immediately switch off the motor and disconnect the mains plug.
Make sure that there is no shredding material blocking the ejection chute, as this could result in poor shredding performance or kickbacks.
When feeding the garden shredder, pay particular attention to ensuring that no foreign objects such as bits of metal, stones, plastic, glass, etc. get into the shredding chamber as this could result in damage or kickbacks from the feed chute.

Risk of injury!
Shredding material kickback and foreign objects may result in severe injury to the user. Keep foreign objects away from the machine and remove blockages immediately.

Risk of injury!
- Kickbacks can occur when feeding the garden shredder with branch material. Shredding material kickback may result in serious injury to the user. Wear protective gloves and safety glasses (4.3).

Beware of the cutting tool running on for several seconds before coming to a standstill.
Switch off the motor, disconnect the mains plug and allow all
rotating tools to reach a complete standstill
- before leaving the machine unattended
before repositioning, lifting, carrying, tilting, pushing or pulling the machine - before unscrewing the closure screws and opening the machine
- before transporting the machine
before removing blockages at the cutting unit, in the feed chute or in the discharge chute
before carrying out any work on the blade disc
- before checking or cleaning the machine or before carrying out any other work on it.
If foreign objects get into the cutting tool or if the machine makes unusual noises or vibrates in an unusual way, switch off the motor immediately and allow the machine to come to rest. Detach the mains plug, remove the feed chute and perform the following steps:
- Check the machine, in particular the cutting unit (blades, blade disc, blade mounting, blade fastening screw, clamping ring) for damage or wear and have any necessary repairs and maintenance operations carried out by a technician before starting again and working with the machine.
- Check that all parts of the cutting unit are seated securely, retighten the screws if necessary (observe tightening torques).
- Have damaged or worn parts replaced or repaired by a specialist; the parts must be of similar quality.
4.7 Maintenance and repairs

Before carrying out any maintenance operations (cleaning, repair etc.) and before checking whether the
electric cable is entwined or damaged, park the machine on firm, level ground, switch off the motor and disconnect the mains plug.
Allow the machine to cool down for approx. 5 minutes before performing any maintenance operations.
Before performing maintenance of the cutting tool, ensure that the cutting tool can still be turned despite the locking device, even when the power supply is switched off.
The power cable must only be repaired or replaced by authorised electricians.
Cleaning:
The complete machine must be cleaned thoroughly following use. ( 11.1)
Never use high-pressure cleaners and do not clean the machine under running water (e.g. using a garden hose).
Do not use aggressive cleaning agents. These can damage plastics and metals, impairing the safe operation of your STIHL machine.
Maintenance operations:
Only maintenance operations described in this instruction manual may be carried out. Have all other work performed by a specialist dealer.
If you do not have the necessary expertise or auxiliary equipment, please always contact a specialist dealer.
STIHL recommends that you have maintenance operations and repairs performed exclusively by a STIHL specialist dealer.
STIHL specialist dealers regularly attend training courses and are provided with technical information.
Only use tools, accessories or attachments approved for this machine by STIHL or technically identical parts.
Otherwise, there may be a risk of accidents resulting in personal injury or damage to the machine. If you have any questions, please consult a specialist dealer.
The characteristics of original STIHL tools, accessories and spare parts are optimally adapted to the machine and the user's requirements. Genuine STIHL spare parts can be recognised by the STIHL spare parts number, by the STIHL lettering and, if present, by the STIHL spare parts symbol. On smaller parts, only the symbol may be present.
Always keep warning and information stickers clean and readable. Damaged or missing stickers must be replaced by new, original plates from your STIHL specialist dealer. If a component is replaced with a new component, ensure that the new component is provided with the same stickers.
Only perform work on the cutting unit when wearing protective gloves ( 4.3) and exercising extreme care.
Ensure that all nuts, pins and screws, especially all the cutting unit screws, are securely tightened, so that the machine is in a safe operating condition.
Check the entire machine for wear or damage on a regular basis, particularly before extended periods when the machine is not in use (e.g. over winter). For safety reasons, worn or damaged parts must be replaced immediately to ensure that the machine is always in a safe operating condition.
Components or guards that are removed for maintenance operations must be properly reinstalled immediately.
4.8 Storage for prolonged periods without operation
Allow the machine to cool for approx. 5 minutes before storing it in an enclosed space.
Ensure that the machine is protected from unauthorised use (e.g. by children).
Thoroughly clean the machine before storage (e.g. winter break).
Store the machine in good operational condition.
Store the machine on a level surface so that it cannot unintentionally roll away.

Risk of injury from exposed blades!
Only store garden shredders with the feed chute fitted.
4.9 Disposal
Waste products can be harmful to people, animals and the environment. They must consequently be disposed of properly.
Consult your recycling centre or your specialist dealer for information on the proper disposal of waste products. STIHL recommends STIHL specialist dealers.
Ensure that old machines are properly disposed of. Render the machine unusable prior to disposal. In order to prevent accidents, always remove the power cable and electric cable to the motor.
5.Description of symbols

Caution!
Read the instruction manual before initial use.


Risk of injury!
Keep other persons out of the danger area.
Risk of injury!
Rotating tools.
Keep hands and feet away from apertures when machine is running.

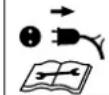
Risk of injury!
Switch off the motor and disconnect the power cable from the machine before working on the cutting tool, before performing maintenance and cleaning work, before checking whether the electric cable is entwined or damaged and before leaving the machine unattended.

Wear hearing protection.
Wear safety glasses.
Wear protective gloves.

Risk of injury:
Do not climb onto the machine.

Risk of injury:
Never put your hands or any other part of your body or clothing into the feed chute or ejection chute.
6. Standard equipment

Item Designation Qty.
A Basic unit with feed chute 1
B Wheel carrier 1
C Ejection chute extension 1
D Discharge flap 1
E Strip 1
F Wheel axle 1
G Wheel 2
H Wheel cap 2
Pin 2
J Hexagon bolt 2 M5x40
K Nut M5 2
L Washer A13 2
M Quick fastener 2
N Self-tapping screw 2 P5 x 40
0 Torx screw 3 P5 x 20
P Torx screw 2 P5 x 10
Q Combination spanner 1
Instruction manual 1
7. Preparing the machine for operation
Risk of injury:
Observe the safety instructions in the "For your safety" section. ( 4.)
7.1 Attaching wheel axle and wheels

- Attach the wheel axle (F) to the wheel carrier (B) with the bolts (J) and nuts (K) using the combination spanner (Q) (4 - 6 Nm).
- Push the washers (L) and wheels (G) onto the mounted wheel axle.
-
Attach the wheels to the wheel axle using quick fasteners (M). Quick fasteners must be pushed onto the wheel axle only to the extent that the wheels can still turn freely once mounted.
-
Press on the wheel caps (H).

Quick fasteners (M) can only be detached by destroying.
7.2 Installing the ejection chute extension and chassis
- Place basic unit (A) with the chute facing downwards onto a level, clean surface.
-
Engage the hooks (1) of the ejection chute extension (C) into the openings (A) on the rear of the basic unit and tilt the extension so that the front part of the basic unit is precisely inserted in the opening of the ejection chute extension.
-
Install the screws (P) in the hooks (1) as shown (1 - 2 Nm).
- Push the chassis with both wheel carriers (2) up to the stop in the guides on the basic unit (A).
- Push the wheel carrier (3) into the recess on the ejection chute extension.
- Fasten the chassis with bolts (N) (1 - 2 Nm).
7.3 Installing the discharge flap
- Insert strip (E) into ejection chute extension. Install screws (O) (1 - 2 Nm).
- Lift garden shredder into upright position.
- Position discharge flap (D) on ejection chute extension. Ensure that the ribs (1) inside the flaps on the left and right are correctly located in the guide groove of the ejection chute extension (2) when attaching.
- Press in pins (I) on left and right.
7.4 Opening and closing the discharge flap
Opening the discharge flap:
- For shredding, fold the discharge flap (D) upwards and allow the tab (1) to engage in the ejection chute extension.
Closing the discharge flap:
- For transport or space-saving storage, lift the tab (1) slightly and fold away the discharge flap (D) downwards.
7.5 Tool box
The combination spanner (Q) can be inserted from below into the tool box (2) in the rear section of the chute (1).
8. Notes on working with the machine
8.1 What material can be processed?
Organic plant trimmings such as fruit and vegetable cuttings, flower cuttings, leaves, tree and hedge cuttings, as well as thick branches with side shoots and twigs.
Tree and hedge cuttings should be processed when fresh, as the shredding performance is better with fresh than with dried-out or wet material.
8.2 What material cannot be processed?
Stones, glass, bits of metal (wire, nails, etc.) or plastic must not be fed into the garden shredder.
As a general rule:
Any materials that do not belong on the compost heap should not be processed using the garden shredder.
8.3 Maximum branch diameter
The data relates to freshly cut branch material:
Maximum branch diameter: 35 mm
8.4 Working area for operator
- For safety reasons, the operator must stay within the working area (grey area X) for the entire operating period (while the motor is switched on or the engine is running), particularly in order to prevent injuries due to shredding material that is ejected backwards.
8.5 Correct machine load
The load on the motor or engine of the garden shredder must never cause the speed to drop significantly. Always feed the garden shredder continuously and steadily. If the speed drops when working with the garden shredder, stop feeding the machine in order to relieve the load on the motor or engine.
8.6 Overload protection
If an overload of the motor occurs during operation, the built-in overload protection device automatically switches off the motor.
The garden shredder can be started up again after a cooling period of approx. 10 minutes. Frequent triggering of the overload protection may be attributable to the following causes:
-Unsuitable electric cable ( 10.1)
- Power overload
Machine overloaded due to excessive quantities of shredding material or blunt blades

8.7 If the cutting unit of the garden shredder is blocked
If the cutting unit of the garden shredder becomes blocked during shredding, immediately switch off the motor and disconnect the power cable. Then remove the feed chute and eliminate the cause of the fault.
8.8 Feeding the garden shredder
Soft material:

Feed organic plant trimmings such as fruit and vegetable waste, flower cuttings, leaves, thin branches, etc. into large rectangular opening (1).
Hard material:

Cut up thick branches and branches with numerous side shoots beforehand using loppers.
- Feed tree and hedge cuttings and branch material slowly into the STIHL cloverleaf opening (2), guiding it along the right chute wall to the blade unit. The hard material is automatically drawn in by the machine.
9. Safety devices
9.1 Motor restart inhibitor
The machine can only be started via the switch and not by plugging the electric cable into the mains socket.

9.2 Safety interlock
The motor/shredding tool may only be operated when the feed chute has been properly closed. If the right closure screw (machine viewed from the front) becomes loose during operation, the motor is switched off automatically and after a few seconds the shredding tool comes to a standstill.
9.3 Motor run-down brake
The motor run-down brake shortens the run-down time from when the machine is switched off until the blades stop to a few seconds.
9.4 Protective covers
The garden shredder is equipped with protective covers in the feeding and ejection areas. These include the complete feed chute with the upper chute and splash guard, the ejection chute extension and the discharge flap.
The protective covers ensure that a safe distance is maintained from the shredding blades.
10. Operating the machine

Risk of injury:
Carefully read the section entitled "For your safety" ( 4.) and follow all the safety instructions before operating the garden shredder.
10.1 Electrical connection of garden shredders
The power cable must be adequately protected by fuse. ( 17.)
Only electric cables which are no lighter than rubber sheathed cables H07 RN-F DIN/VDE 0282 may be used.
The minimum cross-section of the power cable must be 3 × 1.5 mm^2 for a length of up to 25 m or 3 × 2.5 mm^2 for a length of over 25 m .
The connectors of the electric cable must be made of rubber or have a rubber coating and conform to the DIN/VDE 0620 standard.
The plug connections must be splash proof.
Unsuitable extension cables lead to a loss of power and may result in damage to the motor.
This machine is intended for operation with a power supply having a system impedance of Z_max at the transfer point (house connection) of maximum 0.279 ohms at 50Hz .
The user must ensure that the machine is only operated with a power supply which meets this requirement.
If necessary, this information can be obtained from the local electric power company.
10.2 Connecting the power cable
- Lift clip (1).
- Connect power cable connector.
- Release clip.

10.3 Switching on the garden shredder
- Connect the power cable.
(⇒ 10.2) - Press the green button (1) on the switch. Only begin to feed the shredding material once the motor has reach the maximum speed (idling speed).
10.4 Switching off the garden shredder
- Press the red button (1) on the switch. The garden shredder motor is switched off and braked automatically.
10.5 Shredding

It is only permitted for one person to feed the garden shredder.
- Push the garden shredder onto firm and level ground and set down safely.
- Put on thick gloves, safety glasses and hearing protection.
- Open the discharge flap. ( 7.4)
- Connect the power cable to the garden shredder. (⇒ 10.2)
- Start the garden shredder. ( 10.3)
- Wait until the garden shredder has reached its maximum speed (idling speed).
Feed the garden shredder with shredding material in the correct way. ( 8.8) - Switch off the garden shredder.
(⇒ 10.4)
11. Maintenance

Risk of injury:
Carefully read the section "For your safety" ( 4.) , particularly the subsection "Maintenance and repairs" ( 4.7) ,and follow all safety instructions exactly before performing any maintenance or cleaning operations on the machine.
Disconnect the mains plug before performing any maintenance operations.
11.1 Cleaning the machine
Maintenance interval:
After each use

Clean the machine thoroughly each time it has been used. Care of the machine will protect it against damage and extend its service life.
Electric motors are splashproof.
Protect shredding tools, incl. the shredding chamber using a commercially available anti-corrosion agent (e.g. rapeseed oil).
It is only permitted to clean the machine in the position shown.
- Remove the feed chute. ( 11.2)
Remove dirt from the cooling air guide (inlet slots) on the motor housing to ensure that the motor is adequately cooled.

Never spray water onto
motor or engine components, seals, bearing points or electrical parts such as switches. This would result in
expensive repairs.

If you are unable to remove the dirt and accumulated deposits with a brush, a damp cloth or a stick, STIHL recommends the use of a
special cleaner (e.g. STIHL special cleaner).
Do not use aggressive cleaning agents.
Clean the blade discs regularly.
11.2 Removing the feed chute
- Loosen both closure screws (1) until they turn freely. The screws are captive and remain in the feed chute.
- Pivot the feed chute (2) to the rear and remove.
11.3 Installing the feed chute
- Attach feed chute (1) to fastening hooks on basic unit (2) and pivot forwards.
- Tighten both closure screws (3) simultaneously.
11.4 Locking the blade disc


The locking device must always be tilted back and secured with the bolt after installation of the blade disc and before operating the machine again (see illustration).
- Remove the feed chute. ( 11.2)
- Loosen the screw (1).
-
Turn the blade disc until the recess is located in front of the locking device (2).
-
Insert the locking device (2) in the recess.
- Tighten the screw slightly (1).
11.5 Blade maintenance
Maintenance interval:
Before each use

- Remove the feed chute. ( 11.2)
- Lock the blade disc. ( 11.4)
- Check the blades for damage (notches or cracks) and wear; reverse or replace if necessary.
Wear limits of the blades:

The blades must be reversed or replaced before the specified wear limits are reached. STIHL recommends STIHL specialist dealers.
1Reversible blade
On the blades, measure the distance (A) between the bore to the edge of the blade at several points. Minimum distance 6 mm
2Wingblade
Measure the blade width (B) at the upward-pointing curved edge of the wing blade.
Minimum blade width 18 mm
Removing the blade set:
- Lock the blade disc. ( 11.4)
- Loosen the screw (1).
- Remove the screw (1), wing blade (2) and blade disc (3).
Installing the blade set:

The specified tightening torque must always be observed, as the secure attachment of the cutting tool depends upon it.
- Insert the blade disc (3) and fasten. ( 11.4)
- Fit the wing blade (2) and fasten the screw (1) (25 Nm).
- Push back the locking device and fasten with the screw, so that the blade disc can turn freely again. (⇒ 11.4)
Reversing the blades:

Blunt shredding blades result in deteriorating shredder performance. A blunt reversible blades can therefore be reversed once.
- Remove the blade disc, then loosen screws (4) and remove together with nuts (5).
- Lift off blade (6).
Clean the blade disc. - Reverse blade (6) and place onto the blade disc with the sharp edge exposed and align the bores.
- Insert screws (4) through the bores and screw on nuts (5). Tighten the nuts (5) to 10 Nm.
Sharpening the blades:
Blades which are blunt on both sides must be sharpened before resuming work. In order to ensure optimum machine operation, the blades should only be sharpened by a technician. STIHL recommends STIHL specialist dealers.
- Remove the blades for sharpening.
Cool the blades when sharpening, e.g. with water. The blade must not be allowed to display blue colouring, as this would reduce its cutting quality. - Sharpen the blade evenly to prevent vibrations due to imbalance.
- Check blades for damage before installing: the blades must be replaced if notches or cracks are visible or if the blades have reached the wear limits.
- Sharpen blades at a sharpening angle of 30^ .
- Sharpen the blades against the cutting edge.
After sharpening, remove any sharpening burr at the cutting edge using fine sandpaper. - Observe the tightening torques contained in the "Reversing the blades" section when installing the blades.
11.6 Electric motor and wheels
The electric motor is maintenance-free.
The wheel bearings are maintenance-free.
11.7 Storage and winter break
Store the garden shredder in a dry and locked place that is generally free of dust. Make sure that the machine is kept out of the reach of children.
Only store the garden shredder in good operating condition and with the feed chute fitted.
Note the following points when storing the garden shredder for extended periods (over winter):
- Thoroughly clean all external parts of the machine.
- Thoroughly lubricate/grease all moving parts.
12. Transport

Risk of injury!
Before transporting, carefully read and observe the section "For your safety", in particular the "Transporting the machine" section. ( 4.4)
12.1 Lifting or carrying the garden shredder


At least two persons are always required to lift and carry the machine.
Wear suitable protective clothing; the lower arms and upper part of the body must be fully covered.
- First person: Hold the garden shredder at the handle on the upper chute (1).
- Second person: Hold the garden shredder at the bar of the ejection chute extension (2).
- Lift the garden shredder simultaneously.
12.2 Pulling or pushing the garden shredder

-
Hold the garden shredder at the handle (1) and tilt to the rear.
-
The garden shredder can be pulled or pushed slowly (walking pace).
12.3 Transporting the garden shredder on a load floor

- Secure the machine against slipping using suitable fastening materials. Attach ropes or straps to the wheel carrier (1) or the feed chute (2).
13. Minimising wear and preventing damage
Important information on maintenance and care of the product group
Electric garden shredder (STIHGLHE)
STIHL assumes no liability for material or personal damage caused by the non-observance of information contained in the operating instructions, in particular with regard to safety, operation and maintenance, or which arise through the use of unauthorised attachment or spare parts.
Please always observe the following important information for the prevention of damage or excessive wear to your STIHL machine:
1. Wearing parts
Some parts of the STIHL machine are subject to normal wear even when used properly and must be replaced in due time depending on type and duration of use.
These include:
-
B I a d e
-
Blade disc
2. Compliance with the information in this instruction manual
The STIHL machine must be used, maintained and stored with the care described in this instruction manual. Any damage caused by non-compliance with the safety, operating and maintenance instructions is the sole responsibility of the user.
This applies in particular to:
- Inadequately dimensioned power cables (cross section)
- Incorrect electrical connection (voltage)
Product modifications not approved by STIHL - Use of tools or accessories which are not approved or suitable for the machine, or are of inferior quality
- Improper use of the product
- Use of the product for sporting or competitive events
- Resultant damage due to continued use of the product with defective components.
3. Maintenance operations
All operations listed in the section "Maintenance" must be performed regularly.
If these maintenance operations cannot be carried out by the user, a specialist dealer must be commissioned to perform them.
STIHL recommends that you have maintenance operations and repairs performed exclusively by a STIHL specialist dealer.
STIHL specialist dealers regularly attend training courses and are provided with technical information.
If these operations are neglected, faults may arise which are the responsibility of the user.
These include:
- Damage to the motor as a result of inadequate cleaning of the cooling air guide (inlet slots, cooling ribs, fan wheel).
Corrosive and other resultant damage caused by incorrect storage. - Damage to the machine through the use of inferior-quality spare parts.
- Damage due to untimely or inadequate maintenance or damage due to maintenance or repair work not performed in the workshops of specialist dealers.
14. Standard spare parts
Blade:
60087020121
Wing blade:
6007 702 0300
Blade disc assembly:
6007 700 5190
15. Environmental protection
Shredding material should be composted and not disposed of in household waste.
The machine, its packaging and accessories are all produced from recyclable materials and must be disposed of accordingly.
By disposing of materials separately and in an environmentally friendly manner, recyclable waste can be re-used. For this reason, the machine should be disposed of for recycling at the end of its useful life. Improper disposal may be harmful to health and pollute the environment.
16. Declaration of conformity
16.1 EU declaration of conformity - STIHL GHE 105.0 garden shredder
STIHL Tirol GmbH
Hans Peter Stihl-Strasse 5
6336 Langkampfen
Austria
declares under our sole responsibility that
-design:electric garden shredder
- manufacturer's brand: STIHL
-type: GHE 105.0
- Power: 2200 W
- serial number: 6007
complies with the relevant provisions of Directives 2000/14/EC, 2006/42/EC, 2014/30/EU and 2011/65/EU and has been developed and manufactured in accordance with the versions of the following standards valid on the date of manufacture: EN 50434, EN 60335-1, EN 55014-1 and EN 55014-2.
The measured and guaranteed sound power levels were determined in accordance with Directive 2000/14/EC, Appendix V.
- Measured sound power level: 99.4 dB(A)
Guaranteed sound power level: 102 dB(A)
The technical documents are stored at STIHL Tirol GmbH.
The year of manufacture and machine number are indicated on the garden shredder.
Langkampfen, 31.10.2023
STIHL Tirol GmbH
p.p.V.

Matthias Fleischer, Head of Product Development
p.p. p.p.

Sven Zimmermann, Head of Quality Department
16.2 UKCA-Declaration of Conformity STIHL GHE 105.0 Garden Shredder
STIHL Tirol GmbH
Hans Peter Stihl-Strasse 5
6336 Langkampfen
Austria
declares under our sole responsibility that
-design: garden shredder
- manufacturer's brand: STIHL
-type:GHE 105.0
-power input: 2200 W
- serial number: 6007
complies with the relevant provisions of UK Regulations Noise Emission in the Environment by Equipment for use Outdoors Regulations 2001, Supply of Machinery (Safety) Regulations 2008, Electromagnetic Compatibility Regulations 2016 and The Restriction of the Use of Certain Hazardous Substances in Electrical and Electronic Equipment Regulations 2012 and has been developed and manufactured in accordance with the versions of the following standards valid on the date of manufacture: EN 50434, EN 60335-1, EN 55014-1 and EN 55014-2.
The measured and guaranteed sound power levels were determined in accordance with the Noise Emission in the Environment by Equipment for use Outdoors Regulations 2001, Schedule 8.
- Measured sound power level: 99.4 dB(A)
Guaranteed sound power level: 102 dB(A)
The technical documents are stored at STIHL Tirol GmbH.
The year of manufacture and machine number are indicated on the garden shredder.
Langkampfen, 31.10.2023
STIHL Tirol GmbH
p.p.
M. t_stn
Matthias Fleischer, Head of Product Development
p.p.

Sven Zimmermann, Head of Quality Division
17. Technical specifications
GHE 105.0
Power (P_1) 2200 W
Amperage rating (I_p) 10 A
Rated voltage 230V
Frequency 50 Hz
Speed (n): 2720 rpm
Mains fuse 16 A*
Protection class I
Type of protection Splash proof (IPX4)
Operating conditions P40
40 s load time
60 s idle time
GHE 105.0
Tightening torque 25Nm
Blade disc
screw
Tightening torque 10 Nm
Reversible blade
screw
L/W/H 77/48/97 cm
Weight (m) 20kg
20kg (CH)
21 kg (GB)
Sound emissions:
In accordance with 2000/14/EC / S.I. 2001/1701:
Guaranteed sound power level L_WAd 102 dB(A)
Uncertainty KwA 3 dB(A)
In accordance with EN 50434:
Sound pressure level
at workplace LpA 92 dB(A)
Uncertainty KpA 3 dB(A)
- Attention!
Mains fuses of less than 16 A may frequently trip during start-up of the machine or when it is operating under heavy load.
17.1 REACH
REACH is an EC Regulation for the registration, evaluation, authorisation and restriction of chemicals.
Information on compliance with the REACH Regulation (EC) No. 1907/2006 is available from www.stihl.com/reach.
18. Troubleshooting
If necessary, contact a specialist dealer; STIHL recommends STIHL specialist dealers.
Fault:
Motor does not start
Possible cause:
Motor overload protection activated
- No mains voltage
- Electric cable, plug, plug connector or switch defective
-Fuse in UK plug damaged (only applies to machines for UK)
- Feed chute not properly closed - safety cut-off switch actuated (safety interlock)
- Blade disc blocked
- Locking device is not reset
Remedy:
- Allow machine to cool down (⇒ 8.6)
- Check power cable and fuse
(⇒ 10.1) - Check cable, plug, connector and switch and replace if necessary (by electrician) × (10.1)
Replace fuse - Close feed chute properly and tighten screws (11.3)
- Remove feed chute and remove shredder deposits from the housing (Important: disconnect the power cable) ( 11.2)
- Reset locking device (⇒ 11.4)
Fault:
Frequently tripped mains fuse
Possible cause:
- Unsuitable electric cable
- Power overload
Machine overloaded
Remedy:
- Use suitable electric cable (⇒ 10.1)
- Connect the machine to another circuit
- Reduce quantity of shredding material; reverse, re-sharpen or replace the shredding blades × (⇒ 11.5)
Fault:
Reduced shredding performance
Possible cause:
- Blunt blades
Remedy:
- Reverse, re-sharpen or replace shredding blades (⇒ 11.5)
19. Service schedule
19.1 Handover confirmation
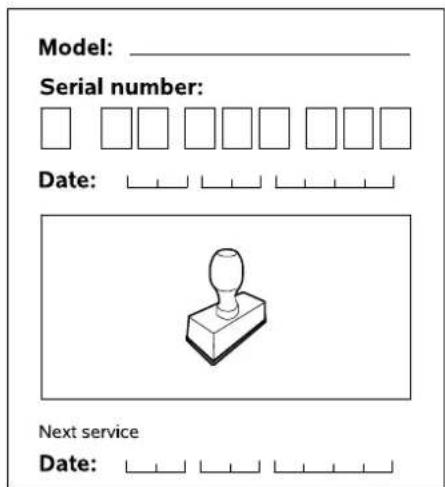
19.2 Service confirmation
Please hand this instruction manual to your STIHL specialist dealer in the case of maintenance operations. He will confirm the service operations performed in the pre-printed boxes.

Service performed on

Next service date

Chere cliente, cher client,
8.5 Charge adapted to l'appareil
De accordo com 2000/14/EC/S.I.
2001/1701:
Nível de potência
acústica garantido
Knivenes slitegrenser:

I henhold til 2000/14/EC / S.I. 2001/1701:
Garantert lydeffekt
nivLwAd 102 dB(A)
Usikkerhet K_WA 3 dB(A)
Varning - risk for olycksfall!

4.4 Transport of maskinen
Zmanjsanje obrabe in
preprecevanje okvar
Obicajni nadomestni deli 236
Varovanje okolja 236
Izjava o skladnosti 237
Po 2000/14/EC / S.I. 2001/1701:
Zagotovljena raven
Negotovost KpA 3 dB(A)
- P Oz o r!
Pokyny pre pracute 248
Co vsetko mozno spracovat? 248
4.4 Transport uredaja
Radite iskljucivo sa zastitnim rukavicama ( 4.3) da biste spreci li povre de na ostrim i vrelim delovima uredaja.
Ne transportujte uredaj dok radi elektromotor. Pre transporte iskljucite elektromotor, sačekajte da se nož zaustavi i izvucite mrežni utikač.
Uredaj transportujte tek kada se elektromotor ohladi.
Uredaj transportujte samo sa propisno montiranim levkom za punjenje.

Opasnost od povreda!
Korisnik moze da se povredi na izlozenim nozevima.
Imajte u vidu tezinho uredaja, narocito akodode do prevrtanja.
Koristite odgovarajuće pomoćne uredaje za utovar (rampe za utovar, sisteme za podizanje tereta).
Urej delove koji se transportuju s njim na teretnoj platformi pravilno osiguraje dovoljno dimenzisionisanim sredstvima za privcrsicivanje (kaievima, sajlama itd.) na tackama za privcrsicivanje koje su opisanu ovom uputstvu zu upotrebu. ( 12.3)
Ure'daj vucite ili gurajte samo brzinom hoda. Nemoje da vučete kosilicu!
4.4 Transport uredaja
Pagal 2000/14/EC / S.I. 2001/1701:
Uztikrintas garso
galios lygis LwAd 102 dB(A)
Neuztikrintumas KwA 3 dB(A).
Pagal EN 50434:
Garso slegio lygis
darbo vietoje L_pA 92 dB(A)
Neuztikrintumas KpA 3 dB(A)
* D émesio!
Stimata clienta, stimate client,
ne bucuram ca ati ales STIHL. Dezvoltam si executam produsele noastre in calitate de varf, conform nevoilor clientilor nostri. In felul acesta iau nasterreich produse de mare fiabilitate chiar si in condiiti de solicitare extrema.
Conform 2000/14/CE / S.I. 2001/1701:
Nivel de putere
acustica garantat
J Exywn 18 M5x40
K Iαξιμαδι M5 2
L Poδελα A13 2
M Aaaleia taexiac ouvdean 2
11.3 ToroTe mon xOavnc nIaipwoanC

TPOOTATEUeVO aTIO Tc OTAYOvEc (IP IPX4)
P40
40 DEUT. XPOVOC KATOTOVONC
60δeut.xpovoc λeitoupyiaicaveu φopfou
25Nm
Pottn ouophiic
Biaoc
siokou aaxapio
Pottn ouophi&nc 3iδac
maqaiouδπλnc oync
M/N/Y
Bapoc (m) 20 kg
10 Nm
77/48/97 cm
20 kg (CH)
21 kg (GB)
EkToUmTeC OOpuBou:
PabochayoJexdaIcpectBa 3aunTbI 407
TpaHcnpToPbKa yctpoiCTBa 408
Ipepa6otoi 408
BoBpempa6oTbI 409
TexHnueckoe o6cnyxuBaHne npemOHThbIe pa6oTbI 411
XpaHHeHne npn dInnteBbIX nepepbBax B pa6ote 412
YTNIN3aun 412
OncaHne CmBOJIOB 412
KOMJIeKT NOCTaBKn 413
IoproToBka yctpoiCTBa k pa6oTe 413
MoHTaX KOneCHOOcN KOJec 413
MoHTaK HaCTaBKn BbIbPoCa n XoIOBOv Yactn 413
MoHTaK OTKnDHO KnbluK 414
OTkpblTne n 3aKpbItne OTKnDHOI KpbIIkN 414
OToIeHHe IINHCTpyMeHa 414
PekomEndaaun no pa6oTe 414
Kakoi MaTePmaI MoXHo nepepaBaTbIbTa? 414
Kakou MaTePuaH Heb3a nepepa6aTbIbTa? 414
MaKcImaJIbHbI dIaMeTp BeTOK 414
Pabochay 30ha onepaTopa 414
PpabnBnaH aHarpy3ka yctpoiCTBa 414
3aunTa oT neperpy3kn 415
EcnpexuymexaH3Ma cadoBoro N3MeJbHTeTn
6IokpoBaH 415
3aonneHncaDoboro 415
3aunthbIe yctpoiCTBa 415 BIOKINPOBka NOBTOpHOrO 3aNyCa 3NeKTPODnIRaTeJIa 415
3aunTHa 6boknpobka 415
Topmo3 octaHOBKn 3JIeKTpOdBVrataTeJRA 415
3aunTHbIe KOMnoHeHTbl 415
BBeHeHne yctpoNCTBa B pa60Ty 416
IopDcoeHHeHne caOBOrO
n3MeNbHTeTnK 3JIeKTpueckoI
ceTI 416
IpoDcoeDInHeHne ceTeBOrO ka6enra 416
BkIIOUeHne caIOBOrO n3MeJIbHuITeTn 416
BbIKIOUeHne caIOBOrO
m3MeIbIyIeTJI 416
I3MeJIbHeHne 416
Texnueckoe 6cbnyuBaHne 417
OuInCTka yCTpoINCTBa 417
Demontax 3aRpy30HOB BOpOHK 417
MoHTax 3arpy3OuHOBoPOnKn 417
ФИКСИРОВАНUE HOЖЕВОДСА 417
TexHnueckoe 6cIyXnBaHne HoxKei 418
3NeKtpoDbBnraTeIb N Koneca 419
XpaenHeI npocToB 3mHnipepnoi 419
TpaHcnpTnpoBka 419
IopdbemnnpepeHoc caDoboro
m3MeIbIyIeIe 419
Pepemeeene caoBoro
m3MeJbUHTeJI 419
TpaHcnpOpBOKca cdoBoro
I3MeBHTeHa NOrpy3OCHoN
natahopme 419
CBeHeHne K MInHMMy N3HOca n npedOTBpaueHne NOBpeXdeHn 419
CTaHapThbIe 3anuactn 420
OxpaHa OkpykaHoue cpebl 420
Deknapaun o COOTBeTCTBn 421
DeknapaunO COOTBETCTBNI
DnpeKTHBAM EC caIoboro
m3meIbIyIeJIa STIHGL GHE 105.0 421
3HaKn COOTBETCTBn421
UcTaHOBHeHHb CpOK Cnyx6bl 421
U7a6-Kbapnpa STIHL 421
DooepHne KOMnHaHn STIH L 421
IpeaTbTeBcTBa STIH
IMnpTepbStIHL 422
TexHnueckne daHHbIe
REACH 423
Ponck HncnpaBHOcte 423
TpaΦnK cepBnCHOrO
06cnyxmbn 424
IoNTBepXdHne npea4n 424
IoiTBePxKeHne cepBnCHoro
06cnyxmbHn 424
2. O noJIb3OBAHmДaHHoIHHCTpyKuNeI NO 3KcJIyatauIi
2.1 06uine cBeedeHHa
DaHHa HNCTpyKUINo 3KcnnyatauIN
YBJIeTcNepeBODOMOpnHnHaNbHO
NHCTpyKUINo 3KcnNyatauIN
n3rTOBNTeINo onpeJeIeHInIO
DnpeKTNBbl EC 2006/42/EC.
KoMaHnStIHNoCToHnPa6oTaet Ha yCOBepueHcTBoBaHneM accOPTmEHTa CBOe npOdykun, NO3tOMyMbIOCTaBnEM 3a co6o npaBO Ha N3MeHeN BHeUHero BVda NOCTaBnEmbIX INDeJIn,TexHOJOrn n OChauEHn.
BCJIeCTBnE 3TOI npTeH3N B OTHOWeHmTexHnueCKNX DaHHbIX NIN pncyHKOB 3TOI 6poWIObI He npHHMaHOcra.
B daHHo HNCTpyKuIN NO 3KcnnyaTaun MOyT 6bITb ONCaHb MoJeIN, KOToPbIe DOctynHb He Ha BCex CtpaHax.
JaHHa HNCTpyKUINo 3KnnyatauIN 3aunueHa 3akHOdaTeNbCTBOM 06 abTOPCKOM npabe. Bce aTbOPckne npaba coxpaHnOTcR, B acTHOCTNu, Ha TnpaxkpOBAHne, nepeBOID n 6pb6Otky C INCNoIb3OBAHmE 3NeKtPOnHbIX CnCTEm.
2.2 Yka3aHHe no npoptyeHHIO HnCTpykunno 3Kcnnyatauun
Ha pncyHKax n B TeKCTax oNcsbIbaeTc0 npedeHnHna nocJeDObaTeJbHocTb onepaun.
B daHHo INHCTpyKUIN NO 3KnJyTaUIN NOCHYOTCA BCE NIKTORpAMMbI, KOTopbIE HaHeceHbHa yCTpoiCTBe.
HanpaBneHe B3rJaDa:
HanpaBneHne B3rJa npu yntpe6JneHn TepMHOB CneBa n Cnpaba B INCTpyKmN IO KcNlyaTaun: noIb3ObaTeNb CTOnT 3a yCTpOINCTBOM (pa6oee noNoxKeHne).
CcbiKaHa rnaBy:
IINCAcBIOKHaCOOTBeTCTByIOUeIraBBI npa3dEblcueIbIO npOpObHbIX 06bcHeHn mCNoB3yeTcR cTepeIka.B CNEyIOUeM npmepe npuBeHa CcBJIka Ha rnaBy: ( 3)
0603aHHeHpea3eNoB TeKCTa:
OncaHbIe yka3aHnM OryT BbIgIaTeB, KaK B cIeNyUOxN npImepax.
Onepaun, Tpe6youune BMeaTeNbctBa nIb30BaTeN:
OcnaBntb BnHT (1) C nOMoUbIO OTBeptKn, HaxaTb pykoTky (2) ...
Obee nepeyncJeHne:
-ПурменгиИдпяДпЯ CNotPnBbIX МерОпрпгТи KOHypcOB
TeKCTbI C DOnOJIHnITeJIbHOJ 3HaUIMOCtBu:
Pa3dJIbI TeKCTa C DonONHITeJbHOI 3HaUIMOCtBIO NOMEueHbIB INHCTpyKcIMN IO 3KcNlyaTaUIN ODNHM I3 npNBedeHHbIX daJe cIMBOJOB IJRA oBaIeHnHa HHX OC6Oro BHNAMHn.

Onachoctb!
Ipeynpexkaetobonacchoctn Heecactbix Cnyaeb INONyueHnra TjKeBbIX TpaBM dna IIOeN. Tpe6yeTc co6IHOatb onpeJeHHbIe npaBnla NOBeHnN BO3depKnBaTbC8OT HapuWeHn.

Ppeynpexkene!
Onachoctb nolyeHn TpaBM dIJIIOJe. OnpeJeHHBIE npabuIa NOBeHeN ICKHouaOT BO3MOKHbE INI BepoTHbIE TpaBMbl.

OctopoxHo!
POnyueHnne IerKnx TpaBMnn HaHeceHnne MaTepnalbHoro yUep6a MoXHo n36eKaTb, co6nIOJdAn onpeJeHbIe npabIna NOBeDeHH.

Yka3aHne
HOpMaunIOnTmAbHoRCIOB3OBaHnYcTPOIcTBnnpoTbPaueHnBO3MOXhIXOuN6okynpabNeHn.
TeKCTbI C Ccblkamn Ha pncyHkn:
PncyHKn, NOcHJUOJIne NOJIb3OBaHne yCTpOINCTBOM,HaxoJrTcB CaMOM HauaJIe INHCTpyKuIN N O KcNIIyatauIN.
CnMBOJ FOToaannapaTcNyKNT DnA CB3n PnCyHKOB Ha CtpaHnIax C pncyHKAMn C COOTBeTCTByIOe YactbTO TEKCTA B HnCTpyKuIN N0 3KcNPyataUIN.
Ha pncyHKax n3o6paXeHb ycTpoiCTBa c eBPOwTEKePAMN, NOKJIouChHe N yCtpoiCTB C dpyTNm TnAmn WTeKePoB K CETn npOn3BOJNTcA hAnOruHbIM IyTEM.
3.Описане устpoиства

1 BopoHka
2 Pe3b60BbIe npo6kn
3 OTKnDna Kpbilka
4 CToiKa KOneca
5 Ba3OBoe yCtpoiCTBO
6 Puyka
7 BbIKHouateJIb c NITaHnEM OT cETN
8 Φирмehная tabичka c
паспоргтбим Дадньим И HomepOM
Maшиньl
9 OTeJIeHHeI dIy INHcTpymeHaTa
4. TexHnka 6e30NaacHoCTn
4.1 06üne cBeeden

Ppnpabote c yctpoictBOM HeoXoImo 083aTeNbHO co6HnOaTb daHHbIe Tpe6OBaHn noTexHKe
6e3oNaCHOCTn.

IpeepnepBbIM BBOOMBpa60Tu Heo6xOIMOBHMaTeJIbHO IpOuHTaTb BCHnCTpyKUIO NO 3KcNlnyataun.
Hnctpykunno 3Kcnnyataun CneNyet 6epexHo coxpanTb dna daNbHeIwero noJb30BaHHa.
Co6JIIOJeHHe 3Tnx Mep
npEIOCTOPOXHOCTn He06XODIMo IJRA
OBeCneueHnBaWe 6e3OnaCHOCTn,
OJHAKo INIpeueHb He ABNReTCR
NOJHBiM. PImMeHrTbYcTPOcNTBO CJIeDyET B COOTBETCTBm C YyBCTBOM 3dpaBORO
CMblcna N OTBEcTCTBeHHOCHTn, He 3a6bIBaAR
PnT 3TOM, qTO NOJb3OBaTeJIb HecET
OTBEcTBeHHOCtB 3a He cHaactHbIe CnyuHn
C DpyHMn JINUaMn NIN 3a INx
Co6CTBeHHOCtB.

Onachoctb TpaBMPOBaHn! IOnlb3oBATEJI, He npOeJUne HNCTpykTax, MOrTy HE OCo3HaBaTb NIn HEnpaBnIbHO OceHNBaTb ONACHOCTu, CB3aHHbIe C CaIOBbIM N3MeIbHTeJIem. 3TO CB3aHO C ONACHOCTbIO NOJyEHnN NOlb3oBATeJIem INJ dpYrIMN JINcAAMCepBe3HbIX TpaBM BnIOtB DO JETaJIbHOro NCXoJa.
OzhakombTecb cJleMeHTamn ynpabHeHnN OOCeHHocTAMn npImeHnYyCTpOJCTBa.
Pa6oTaB c yctpoiCTBOM pa3pe7aetcT OToIbKO IInuam, m3yUHbUIM IHCTpyKUIO NO 3KcNlyaTaUIN U MEmIoUIM HaBBIKU ynpabLeHnY cTPOiCTBOM. Peep NepBbIM BBODOM yCTPOiCTBaB 3KcNlyaTaUIN POJIb3OBATeJB DOJIxKeH npOIIT KBAInΦuCipOBaHHbI INHCTpyKTax,OpneHTnIpOBaHHbI Ha npakTnueckn ONbl. POnlb3ObaTeNb DOJIxKe H pOoiTu INHCTpyKTax NO 6e30NaChOMy o6paUeHnIO cYcTPOiCTBOM y npOdaUca INI dpYrOro CneuaJIncTa.
B yacthoctn, B xOJe 3TOro INHCTpykTaXa noJIb3OBaTeIIO CNeJeYeT pa3bJCHNTb, YTO pa60Ta c yCTpoiCTBOM Tpe6yeT oCoboi OCMOTpntelbHOCTN I KOUeHTpaCIN BHUMAHIA.
2.3 BapnAHTbI IJIpa3JIuNHybIX C7paH
KomnaHn STIHL noctabnreTcytoCTBa B3aBNCMOCNT O TcpaHbHa3NaHeHn C pa3hBMn WTekepamN BbIKNoTaTeJIAMN.
Дахе ecn yctpoNCTBO ekcnnyaTnpyeTcra надлескauIM O6pa3OM, He CTOUT ЗбИВaTB ПО BO3MOXHOCtB ВОЗнКHOBEHЯ OCTaTOUHbIX PNUCKOB.

Onachoctb dnia kni3n BCJeCTBne ydysb!
Onacnocb ydysbJdIeTeB BO BpemI rP C ynaKOBOHbIM MaTePnAOM. YnakOBOHbM MaTePnA CNEyET HnpemEnHO xpaHtB B HeOCTynHom dJIeTeM MeCTe.
YcTpoiCTBO CO BcEM HaBeCHbIM
obOpyIOBaHNem MOxHO nepeJaBaTb ININ
OdaJIKNBaTb TOnbKO Tem NOnb3OBATeJAM,
KOTOpBie,BnPHUIne,3HaKOMbl C DaHHoI
MOJeIbIO u OScIyJKNBaHNem yCtpoiCTBa.
YcTpoiCTBO Heo6XoDmO nepeJaBaTb
BCerDa C IHCTpyKUneNo 3KcNlNyatauIN.
Heo6xoJIMO y6eINTBcra, YTO
NoIb3OBaTeJIb fN3UeCKn, NCNXuueCKn U
ymCTBHeHBO COCTOHNynpAEBTb
yCTpOJCTBOM n pa60TaTb C Hm. EcNI
NoIb3OBaTeJIb 6bnaaetfN3UeCKMn,
NCNXuueCKMn NnY mCTBeHHbIMn
HeIOCTaTKAMn, OH MOKeT pa60TaTb C
ycTPOJCTBOM TOnbKO NOd HaD3OpOM
OTBetCTBEHHORO JInua, INN CNeEpy erO
yKa3AHnM.
Cneyety6eHbTcB,TO nOb30BaTeB IOCTNR COBepueHHoNE TnN Oboye HCOBTBeCTByUoEi npOceCCn CoNaCHO HaOnHOJIbHbIM npaBnAm.
P0JIb3OBAtbc yCTpoiCTBOM
pa3pe7aetcT OJIbKO,HaxoJaCb B
XopoWem 4n3NueCKOM nNCxNueCKOM
coCTOHN. Ecn y Bac NMeOTcR
np6IeMb co 3DopOBBeM,TO cIeNyET
obpaNTbc K Bpauy N BblrCHHTb,MOKHO
Jn Bam pa6oTaTc C yCTpoiCTBOM.
3anpeaaetcPa6oTaTc C yCTpoiCTBOM
nocne ynotpe6JIeHnaAikorOJIbHbIX
HANITKOB, HAPKOITKOB IIN NpneMaIekapCTB, KOtOpbIE MOrYT OKa3aTbHeraTINBHOE BnHHe Ha peakunpa6oTaUoJero.
UcTpoIcTBo pa3pa6OtaHO IJIa IINHOrO nCNoB3OBaHN.
BHMaHne - onachocb hecacthoro cnuya!
CaOBoBn 3MeNbUHTeNB STIHLCKOHCTpynpoBaH DnI N3MeNbUeHnCpe3aHHbIX cyuBeB, a TaKoeocTaTkoB paCTeHNI. HoePnIMHeHne 3aIpeUeHO, TAK KaKMOxET PnIBeCTN K ONaCHbIMNOcJIeDCTBnM INI NOBpeXdEHNIOyCTPOINCTBa.
CaoobbI n3MeIbYHTeJIb 3aIpeuaeTcA IcNoIb3OBAtB (HeNoIbHn nepeYeHb):
- INHbIX MaTePnaIOB (HaNPIMep, CTeKna, MeTaIINa).
- p60T, KOtOpBHe He onncAhl B DaHHo INHCTpyKuIN NO 3Kcnnyataun.
- npn npoN3BOJCTBe NmUeBbIX npOdyKToB (HaNPmEp, n3MeJIbYeHne Jbda, npo6NeHne Me3r).
ИЗ coo6paжehн 6e3onacHocTn
3aŋpeuaeTcJIIO6oe n3MeHeHne Ha
yCTpoiCTBe, 3a NCKHoueHemEM
KbaINΦNcIPoBaHHoY UCTaHOBKn
πpHaJIeXHOCTeY, ΜOpySeHbIX
KOMNaHne STIHL. Kpme TOrO,
n3MeHEny yCTpoiCTBa pInBOdT K
JIuWeHNo npaba Ha rapaHTnHbIn
peMOHT. CBeDeHnO o pa3peUeHHbIX K
ICNoJIb3OBaHnIO pInHaJIeXHoCTaX Bbl
IOnyUte y dInepob STIHL.
3aIpeueHbI N3MeHeHHy yCTpoCTBa C
cJIbIO yBENuHEnr MOUHOCTN IIN
HaCTOTbI BpaueHn IDBIrataTeI
BHyTpeHrero CropaHn IIN
3JeKTPoDIBrArTeIe.
3anpeaaetcnaonb30baHne yctpoiCTBaIpyaHcnopTnPOBKn npedMeTOB,KNBOTbIX ININ JIOeN,BO6oEHHOCTN DeTeN.
Ocobuyo octopoxhocb cneyuET npOBnTb npnpimHeHn yCTpoiCTBa B30haX 3eJIeHbIX HacJxHn,napkax,Ha cnOpTnloaKax,Ha yIuax n npEepnraTnx JecHO n CeIbCKoro XO3yCTB.
OTnyckaTe MaunHy TOnbko Ha poBHom MecTe, YTo6bI CnUaHoe OTKaTbIBaHne C Hero 6bIIO NCKIIOyeHO.
4.2 PpeDynpexKeHne - onaChocTb n3-3a 3NeKtpnueckoro Toka

BHMaHne! OnachOcTb nopaxKeHn 3JeKtpueeCKM TOKOM!
Oc6eHHoBaXhBIMnIJI
06ecneueHn
6e3onacHOCTN
3JIeKTPOo6OpUdOBaHnRABIAOTc CeTeBOINcoEHNHTeBHykAbKnKa6eNn, CTeBaBNJka,BbIKIIOuAteNb.YTO6bIu36eKaTb OnaChOCTn nopAKeHnNAJIeTPOeCKm TOKOM,Hepa3pe7aEcTcNcNOBJ30BaTbKa6eNn,CoEHNHTeNn u BNJKn,CoEHNHTeNBhIE Ka6eNn,IMeIOUne NOBpeXDeHnYnHECOOTBETCTByIOUneIPeDNICAHnM.
IOnTOMy peryIpaRHO npOBepaTe coeHNHTbHbI Ka6bHa OTCyTCTBne Pn3NaKOB IOBpeXDeHn INn n3HoCa (HaNue Tpeunn H3OJaun).
YcTpoIcTBO CJIeDyET BBOINITb B pa6Oty TOJbKO Cpa3MOTaHHbIM CeTeBbIM Ka6eIeM.
PnncnoB3ObaHnn Ka6eJbHoro 6apa6aHa Ka6eJb DOnJxH 6bITb NOHocTbOp pa3MoTaH nepeI HaHaONM 3KcNpyTaUIN.
HnKOrJa He nCNoJIb3yIte NOBpeXeHHbIyDnHInTeNbHbI KabeI. NOBpeXeHHbIkeBEN CneJeT 3aMeHrTb HObIMN,HeJIb3a IpnU3BOJITb peMOHTyDnHInTeNbHbIX Ka6ene.
EcIn B xOe 3KcIyataun yCTpoNCTBa npOnCxOuNT NOBpeJdeHne CeTeBOrO nn yDINHITbHOrO Ka6eJIa, Heo6xOIMo
cpa3y JeOToeDHHnTb TaKoI Ka6eJIb O nCTOuHnKa NHTAHJ. Hn B Koem Cnyuae He npKacatbCk NOBpeXdEHHomCyTeBOMy IIN yDNIHnTEJBHomy Ka6eJIIO.
3anpeaaetcnoIb3oBaTbcra
yctpOInCTBOM,ecINKa6eJIN NOBpeKDeHbI
nNn N3HOWeHb. B Oco6eHHocTn
npOBepaTb cTeBOi COeHNHTeJIbHbI
Ka6eJIb Ha oTCyTCTBne npN3HaKOB
NOBpeKDeHm n CTapeHn.
Pa60TbI NO Texo6cnyKuBaHnIO npemOnTy ceTeBbIX ka6eNe pa3peWaeTc8 BbINOHNrTb TOnbKO CneuaNbHO 06yueHHOMy nepcoHaNy.

Onachoctb nopaxeHna 3Jektpuyeckm TOKOM!
3anpeeHNOpknOaTb NOBpeJeHHb KabeNk Cetn IN npKacaTbC K NOBpeKeHHomy Ka6eIO, NOKa OH He OTCoeHNHe OT cETN.
KacaTbcapekyuixmexaHn3MOB (HOKei) MOXHO JINb B TOM CNYae, KOrda yCTpOJCTBO OTCoeDInHeo OT 3JIeKTPOcETn.
Bcerda cIeHb 3a TeM, UTo6bl IcNoIb3yEmbIe CeTeBbIe Ka6eJIIN IMeJIIN IOCTaTOHyIO 3aUNTy.

HeIb3pa6oTaTbBOBpeMnIOxJnNBoBnAxxHOMOKpyKeHH.
CneNyetNCIOB3OBaTbTOJbKO yDNHHTeNbHbIe Ka6eNN BO BNaO3aUHTHom NCNOJIHeHHN NOxODyue nIpynmeHEnc ycTpoiCTBOM ( 10.1)
Bunky coeHHntbHoro Ka6enHaOo BbIHMaTb N3 p03eTKn, a He TaryTb 3a coeHHntbHbI K6enb.
3aPpeHcHOOCABnTbYCTPOINCTBO NOI DOXDEM.
Ecn yctpoCTBO NOKNUOeHO K
NCTOHNKY NITAHNA, TO Heo6xOIMO
CNEIHTb 3a TEM, YTO6bI HE DOnyCTNTb erO
NOBpeXdHn I3-3a BO3MOXHBIX
KONEbAHN TOKa.
YcTPOIcTBo NIOKNIHOaTB TOnbKO K6NOKy 3JIeKTPoINTaHnRA, KOtOpB3aUuHcEH aBTOMaTIuYeCKm INpeDOxpaHInTeJbHbIM BbIKIHOaTeJeM, Cpa6aTbIBaHOzMM pN iNOABJIeHN yTeKIN TOKa (TOK OTKNOeHnMaKc.30MA).BoJee NpOboHyIO HOpMaUHO MoXHO NOnyHTb y 3JIeKTPoMOHTaXHnKA.
4.3 Pa6oay oJexka n cpeIcTba 3aunTbI

Ppna pa6oTe Bcerda HocuTb npouHy o6yBc HeckoJb3KoI nooBo. Henb3ra pa6oTaB
6ocikom nlin, Hanpimep, BcaHdAniaJnx.
Bo Bpem 3Kcnpnyataun, a taKe ocObeHNO npn pa6oTAX no TexO6cIyKnBaHnIO n TpaHCnOpTnPOBKe yCTpoNCTBa
BcerdaHaedeBaTbKoKaHbIe3aunTHbIe nepuATKnC3akpbItOnMaHKeToI.

Bo Bpempa60tbI Bcerda
HaedeBaTb IIOtHO
npnIeRaIOuNe 3aUINTHbIe OcKn.

IopxOJIe3aUHTbIE OyKINpOBepraTcHaMexAHueckyo IpOuyHOCTB COOTBetCTBn CO CTaHapTOM
EN 166 nHn HauNoHaBbIMnnpEaNcAHmMnIOCTyHbIBpo3HuOHcETNCooTBeCTByUoSeeMapKnipOBKO.

Bo Bpempa60bI BcerdaNCNoB3OBaTb 3aUHTbIe HayuHKn.

Iopxodjusne 3aunTHbIe HaywnknpoBepaTcB COOTBETCTBM CO CTanaptOM EN 352 nn HaonohbHbIM
IpeDnncAHnMn NIOCTyHbBPO3NHyHO CETNC COOTBeTCTByUoJe MapKnupOBKoN.
Oba cpeIcTBA 3aunItb CneJeTy Hocntb BO Bpemr Bcero nepnoJa paobtbl.

Bo Bpempa60tbc yctpoiCTBOM Heo6xOJIMo Hocntb NOxOJaUIO, npJIeraHOUYK TeNy OeKdy,
T.e.BMecTo pa6OuNX xanaTob
NCnOB3OBaBt KOMbHe3oHbl.Pa6OtaC
yCTpoiCTBOM,3anpeuaeTCra HOCNTb
WapФ,raJIcTyK,ykpaWeHnA,IMeTb
CBNaOuNe BHN3JeHTbl NIN UHyPKN I
DpyrIe TopaUne 3JemeHTbl OdEJKbl.
B TeueHne Bcero nepnoa 3Kcnnyatauun n npn Bcex pa60tax Ha yctpoiCTBe 3anpeuaeTcra Hocntb pacnyeHHbIMn dInHHbIe BONoCbl, IN Heo6xoJIMO noKpbBaTb (ICNOJb3yra roNobHOy6Op, WAnKy n T. n.).
4.4 TpaHcnpTnpoBka yctpOCTBa
Pa6oTaTb CnEyEt TOnbKO B 3aUHTbIX ( 4.3) nepuAtkax, UTo6bl N36ekaTb TpaBM OT OCTpbix IN IropaHX qacteY yCTpOInCTBa.
HeIb3ra TpaHcnpTnpoBaTb yCTpoiCTBO npn paOToaUoem 3neKtpoDburatene. Ipeed TpaHcnpTnpoBko BbIKIOuHTb 3neKtpoDburatEJIb,doXJaTbC8 OCTaHOBKn HOKa N BbIHyTb CeTeByO BNJIky.
YcTpoIcTB CNeIyET TpaHCnOpTnpoBaTb TOIbKO Ipi OCTbIBWEM 3JIeKToPOBnIgATEJIe.
TpaHcnpOpIPOBaTb yCTpoIeCTBO TOnbKO C npaBnIbHO yCTaHOBJIeHHo3arpy3OHHo BOPOHKo.

Onachoctb TpaBMPOBaHnI!
IJIb3OBeTJIb MOKeT NOpaHITbcra 06OTKpbITbE HOXn.
CneNyetyuHtBbTaB Bec yctpoiCTBa,BOco6eHHoCTn npn erO npOKMbIBaHN.
Inerpny3nncnoB3ObaTbNOxOJaUe CpeCTBa (npry30HbIe nIaTfOpMbI, NoDbemHbI npicnoc6JeHNA.
YCTPOIcTBOIOJXHO6bITbHaJeXHO 3aKpeIeH0HaNORpy3OuHOIIaTΦopMe C NOMOUsBIOOCTaTOUHO KONUeCTBa TPOCOB,PEMHeN I T.I.,ONNCaHHbIX B DaHHoINHCTpyKuIN NO 3KCNyatauIN. ( 12.3)
YcTPOIcTBO CnEyET TAnHyb nnnepeMeaTaB ToJIbKO B Temne Waara. He 6ykCnpoBaTb!
PtpaHcnpTnpoBke yctpoiCTBa Heo6xoJIMo co6JIOdaTb MeCTHbIe 3aKOHoDAteJIbHbIe npedNCAHn, B Ooc6eHHocTn no 6e3OnaChOCTn nOrpy3Kn I TpaHCnOpTnpoBKe npEdMeTOB Ha norpy30uHbIX nNaTΦopMax.
4.5 Ipepepa60toi
CneNyETyOCTOBepntbCra, YTO C yCTpOINCTBOM pa60aHOT TOJIbKO Te JInuca, KOtOpBle 3HaKoMbIC INHCTpyKUneI NO 3KcNPyataun.
IpeepnepBbIM nCNoJb3ObaHneM yCTpOncTBa CHTb yNaKOBoUHbI MaTePnAII n TpaHCnOpTnpoBOUHbIe fNkCaTopbl.
IyctpoCTB no yxOdy 3a caoOBbIMn
yactkamm C Dnuratema BHytpenHero
cropaHnN nn 3neKtPODURATeJMI
CneDeT cobnoDaTb MyHUNaJIbHbIE
npdncAHnNo npdoONJTeJBHOCTn
pa60Tbl.
IpeepnOJIb3OBaHHeM yCTpoiCTBa CJeDyET 3aMeHrTb NOBpeXeHHbIe N I3HOWeHHbIe DeTaII. Heo6xOJIMo BOBpEmo HOBnTb Ha yCTpoiCTBe HeuHTa6eJIbHbIe IIN NOBpeXeHHbIe HakLeKnC PpeDynpeXeHHaMn U yKa3AHmN O6 IMeOuXxCra OnaCHOCTax. HoBbie HAKNeKn BCE OCTaJIbHbIe 3aNaChbIe Yactn IMeOTcB CneuaJIIn3IpOBaHHom ueHTpe STIHL.

Onachoctb nojyuHn TpaBm!
N3HOWeHHbIe NIN NOBpeXeHbIe
DeTaNn (HaNPmep, Tynbie HOxN)
MOryT NOBnraTb Ha 6e3OnaCHOCTb
yCTpOcTBa H CTaTb pNCHoH
TpAbMbI NOB3OBaTeJI.
Ipeed BBOOMB 3KcnpyaTauHNO Heo6xOIMOpOBepntb y6eINTbcB CneJeUoem:
- YCTPOIcTB HAXOuNTcB TExHnueckn 6e3oNacHom COCTOHHM.3TO O3Haayet 6e3ynpueHoe COCTOHHne KpbIiEe N npdeIOxpaHHTeNbHbIX YCTPOIcTB, KOToPbIe DOJXHbI HAXOuNTcBA Ha CBOEm MeCTe.
-BbInoHHeHne 3NeKtpOnoKnIuOeHnO cyuEcTBnE TcToNbKOyepe3 po3eKy,yCTaHOBnEHyOB COOTBeTCTBnC npEdnncAHnMn.
-Ⅰ30JIaIcCoeINHITbHO UyIINHITeHBO Ka6JIa, BUNKIN COeINHITeHaXoDITcB 6e3ynpEHOMcoTOrHIN.
Ha Bcem yctpoicTbe (kopnyc 3neKtpoDBnIaTeIa, npdoxpaHHTeNbHbIe yctpoiCTBa, 3JIeMeHTbI KPeJIJIeHnI, HOKn, HOKeBOB BaIIK, DnCKOBbIe HOKn I T. d.) OTCyTCTByOT NOBpeXdEHNr Hnnpn3HaKn n3HOca.
BytpoIcBeOTcyTCTByeT 3MeJIbUaEmbMAtepnA, a 3aRpy3OuHaBOpHkA NyctA.
Bce BnHTbI,raKnN npyme KpeKxHbIe 3JIeMeHTbHa MeCTe N HaDeXHO 3aTHyTb.IpeEi BBODOMB 3KcIIpyatauIO CneJeYet 3aTAYtB OCna6JIeHHbIe BnHTbI rAkn (co6HdaTb MOMeHTb 3aTAAKN).
IVcnoIb3yIte yCTPOICTBO TOnbKO BHe NOMEeHn,HaOTKpbITOM BO3dyXe IN BdaJIN OT CTEN IIN Dpynx OObekTOB, YTO6bl NCKJIIOHTb ONaCHOCTb NOUyeHn rTpaBM N BO3MOxHOCTb HaHeceHn MaTePnaJIbHorO yUep6a (HeBO3MOxHOCTb OTKnOHeHn dNl NOJIb3OBaTeJI, ONaCHOCTb pa36ntbIX OKOHbIX CTeKOI, LapaNNbI Ha aBTOMoBUNx NT.)
UcTpoIcTBOdoJNkHO6bITb yCTOuHBO UcTaHOBJIeHOHaPOBHOINTBepDoI NOBepxHOCTn.
He noIb3yntecb yctpoiCTBOM Ha MoSeHoN IIN NOKpbIToI rpaBnEM IOBepxHOCTN,IOCKOJIbKy OT6paCbIBaEmBI INI CNJIbHO pa3BeTBJIeHHb MaTePnaI MOKeT CTAb npuHHO TpaBM.
IpeedKaKdbimNCNoB3OBAHnEM yCTpoiCTBa 063aTeJbHO y6eNtBcB TOM, YTO OHO 3aKpbTIO B COOTBECTBmC npednncAHnM. ( 11.3)
O3hakombTecbpa60ToBbIKUoyateTna, T06blBaapnHOnCnTyauu pearnpoBaTb 6bICTpo n npabNbHO.
БpbI3ROBnВ 3aRpy3OuHOBOPHKe DOnJKeH NOKpbIBaTb 3aRpy3OuHoe OTBepCTne H He IMeTb NOBpeXdHn, npn HaJIynchIOBpeXdHn 6pbI3ROBn CJeNyET 3aMeHHTb.
Onachoctb noyuHnra TpaBm! UcTpoIcTB CneNyET BBOIDITb B pa6Oty TOJbKO B CMOHTnpOBaHHOM COCToHnB COOTBeCTBn CnpEtnncAHnMn. EcnHa yCtpoIcTB OTCyTCTBYKOT DeTaNN (HaNPIMep, Koneca),TO npEtnncAHhble 6e3oNaChbIe pacCToHnA 6oNee He co6JIHOaIOrCA, KpOME TORO,ycTpoIcTB 6oJIbWe H Me MoXeT CoXpaHrTa Tpe6yEmyo yCTOHNBOCTb.
PpeB BBODOM B 3KcnIyatauHNO Heo6xOJIMO Bu3yaJIbHO npOBepNTb COOTBeTCTByIOUee npeDnucAHnM COCTOHNHe!
CoOTBeTCTBnIpeDnncAHnM O3Haayet, YTO yCTpOoiCTBO NOnHOCTbIO CO6paHo,B CaTHoCTN:
BepxHra Yacb BOpOHKn yCtHaOBnHeHa Ha HxHIO Yo Acb Tb BOpOHKn,
B BepxHei YacTn BOpOHKn HAdIeKaUIM O6pa3OM yCTaHOBNeHbI 6pbI3ROBnK IN BCTaBkA BOpOHKn C OTBepCTnEM BΦOpMe YeTbIpexNtCHnKa STIH,
- 3arpy30uHa BOpOHka yCTaHOBnEHa Ha 6a3OBoe yCTpoiCTBO, nObe pe3b6oBBie npo6Kn 3aTAYtBi BpyHyIO do OKa3a,
- CToiKa KOJIeCa B C6Ope CMOnTIpOBaHa,
-06aKoneca yCTaHOBneHbI,
Bce 3aunThbIe ycTpoCTBa (KeJIO6 Bbl6pOca, 6pbI3ROBnK n T. n.) DOJnxHbI 6bITb yCTaHOBNeHb I HaxoINTBcA B NOJHOM NopRAnke,
- pexyM mexaHm3M (DnCKOBbH HOK) yCTaHOBJIeH,
- BCE HOKN yCTaHOBJeHbI COrJaCHO npednncAHm.
3anpeaetcyaanrhynnpembikatb yctahOBLeHHbIe Ha yctpoiCTBe nepeKIOUaIOuIe I npEOxpaHNTeNbHbIe yctpoiCTBa.
Bn3yaIbHo npOBepntb HOKeBOH DaCKHa OTCyTCTBne NOBpeKDeHn I DeOpMaun, B Cnyae Heo6xOImoctn erO cJeDyET 3aMeHHTb.
4.6 Bo Bpempa60tbI

He pa6oTaTb,ecnB onaCHOI 3OHe HaxoJrTcXKBOThbIe IINIIOiN,O06eHHoJeTI.
HelenbaPabotatbCyctpoCTBOM BO BpemdoKnIrp03blOc06eHOB Cnyae onaChOCTN yapa MoHHN.
Pn HauuBn BnaXHO NOBepxHocTN HeCyTOUHBOE NIOXeHne NOB3ObaTeYyBeJNUBaEt ONaCHOCTb HeCuaCTHOro Cnya.
CneNyET pa6oTaTb, co6NIOdaOc6yIO octopoxKHOCTb, YTO6bl He NOCKOJIb3HyTbcra. No BO3MOXHOCTn 136eRaTb npIMHeHnY cTPOIcTBa Ha BnaXHO NOBepxHOCTn.
CneJeT pa6oTaT bToJbKO npn DHeBHom CBTe NIN XopoWem NCKycCTBeHHOM OCBeUeHnn.
Pa6o7a 30Ha BO BpemBa C9ero nepnoda pa6oTbI DOnJXHa OCTaBaTbcra YnCTOIN COepeKAtbCBA NopRJaHeo6xoDmmo y6npaTb PneDMtbl, O KOTOpBIE MoxHo CNOTKHytbcra (KaMHN, cyb, Ka6en n T. d.).
HelenbaryonyskaTb,yTo6bIonepatOp HaxoDunCBAIWe nlouaKn,HaKOTopoYcTaHOBHeOyCTPOICTBO.
3anyck:
Ipeep 3aynycOM yctpoiCTBO CJIeNyET npBecTN B yctOuHBoE BepTKaJIbHOe noJIOKeHHe. Pa6ota B rOpN3oHTaJIbHOM noJIOKeHHn 3anpeUeHa.
BkHoueHne yctpoCTBa cIeNyET npOn3BOIDNTb C OCTOpOxHOCTbIO, co6JIouDAy kA3aHnR, KOtOpBle npBVeHebl B rnaBe «BBeHeHne yctpoCTBa B pa60Ty. ( 10.3)
Pn3ayncke DbngateBHytpenHero
crotapnnaNN BKNIOUyeHN
3JeKTODnBuNTeJI HeJb3ra HaxOINTBc
pepeoTBePCTNeM dNBA6poca. Pn3
3ayncke NNI BKNIOUeHN B CaIOBOM
n3MeJbHTeJI He DoJNXHO 6blt
n3MeJbuaEMOrMaTePnAna.
n3MeJbuaembl MaTePnAImoXeT 6blt
BbIbpoWeH n CTaTb pnuHNO TpaBM.
Pn3ayncke 3anpeaaetc npOKnDbBaTb yCTpOCTBO.
Heo6xoJMo u36eRaTb yactbIX
BkIIOueHn B TeueHne KOpOTKOrO nepNoDa
BpeMeHn, B Oc06eHHocTn He DoNyCKaTb
«Irp» C BblKnIOuHaTeJIeM.
OnachocTb neperpeBa
3JeKTPOdBnraTeJIa!
Bpe3yIbTaTe Kone6aHn HaprrXeHnA, Bbl3BaHHbIX 3TNM yCTpOiCTBOM npn Nycke, npn He6NaIarOpnIrTHbIX ycNObuRx B cETm MOxHO NOBpeDntb Dpyroe O60pyoDobAHne, NOkTIoueHHoe K ToJ Xe 3JIekTpUueckOn Yen.
ДлпnpedotbpaueHЯ noo6Hoi cnTyauu Heo6xOaHMo npinrTb COOTBeTCTByUcne Mepbl (Hanpimep, NOdkluyeHnE daHHoro o6OpydoBaHnK dpyro3NeKtpueeckOn ceni, 3Kcnnyataun yctpoiCTBa B 3NeKtpueeckOn cenC 60nee Hn3KIM nONHbIM COnPOTNBHeHEm).
BoBpempa60TbI:

Onachoctb noJyueHn TpaBM!
HnKoTa He KnaCTb pyKn Hn Hn Ha BpaauOuuecA DetaIn, a TaXke He DepeKaTb Nx HaN Nn POn 3TNMI deTaIaMn.
Ppi pa6oTaOuem yctpoNCTBe NIO OIN Dpyrme Yactn TeNa He DoJXHbI HaxoNTbcra Ha3aRpy3OCHOBOPOHIO nepeoTBePCTnEM nBbipoca. IOnoba HTeNoDoJXHbI BcERda HaxoNTbcra Ha pacCToHHoOT 3arpy3OCHORo OTBepCTnA.

HnKOrda HeJIb3a DoNyCkaTb nonaHaHna pyk,dpyInx chaTei TeIa, a TaKke OeKDbI B 3arpy3OHyIO BOpOHky IIN
JKeNo6 BbIbOpa.BoJIbwaonacHocTb nOlyeHnTpaBm rna3,naCa,naIbueB, pyK nT. n.
Bcerda Heo6xOuMo CneIHTb 3a coXpaHEnm CBOero paBHOBecn I yCTOnuVBOro NIOJKeHn. He HAKIOHrTBcBpeI.
Bo Bpempa60tB 3anpeuaetcnpou3BOoNTb MaHnnylaCmC6pbI3ROBnKOM (HaNPmep,CHMaTb,OTKnDbBaTb HApEx,3aKImaTb,NOBpeXdaTb).
Pn3aONHeHnnNoIb3OBateJIbOJNKeH HaxoHTbcB O ONcAHHO pa6oey 30He onepaTopa.Bo BpemBaCero nepnoda pa6oTbBCerJa CneJeYET HaxoHTbcBpa6oey 30He, INB KoeM cnyae He HaxoHTbcB 30He Bbl6poca. ( 8.4)

Onachoctb TpaBMPOBAnHa! Bo Bpempa0bI n3MeIbHaembl MaTePnAa MoKet 6bITb OTbpoWe HBepx. Opeatop n3MeJIbHInTey MoKet noJyUHTb cepbe3HbIe TpaMbI liuca, rna3 npyk. PoTOMy Heo6xOIMO hAdeBaTa 3aunTHbIe ouKn i nepuaTkn, ( 4.3) n DepktaT roNoBy nOdaJIbWe ot 3arpy3OHO OTBepCTnA.
HeIb38 onpOKuDlbBaTb yCTpoiCTBO BO BpeMpa60Tb DnraTeJI BHyTpneHero CropaHna nn 3NeKToDnraTeJI.
EcIn BO BpeMa pa6oTbI yctpoiCtBO naaet,TO HeoXoIMHO HeMeJnEHNO BbIKIOHTb 3JIeKTPoDBrTaTeN bBbHyTb ceTeByIO BUNKy.
Helen3a donyckaTb, cy06bI B jeNo6e Bbipoca HaxoJICr N3MeJIbcaembl MaTePnA1, TaK KaK 3TO MoXeT npNBecTN K IIOXOMy pe3yNbTaTy N3MeJIbUeHnI INN O6paTHOMy Bbipocy n3 3arpy3OuHn BOpOHKn.
Pn3 3arpy3ke caOBOrO n3MeIbUHTeJI
Heo6xoDIMO C OcOBoO OCTOpOXHOCTbIO
CleNTb 3a TEM, YTO6bl NOCTOPOHHe
nPpeIMTeB, HApnpMep, MeTaLIuYeCKne
DeTaN, KaMHN, NpactMaCCa, CTekNo I
T. N. He NOnaBI N NoIOCTb N3MeIbHTeJIa,
Tak KAK 3TO MOKeT npNBecTI K
NOBpeKJdHnM I O6paTHOMy Bbl6pocy n3
3arpy3OuHOB BOPOHKn.

Onachoctb noJyueHn TpaBM!
IoiB3OBeTJIb MoKet NOJUyHtB cepbe3HbIe TpaBMbl N3-3a BblNeTaHOUero I3MeJIbHaemORo MaTePnAna I NoCTOpOHnIX npEdMeTOB. DePKaTb NoCTOpOHnE npEdMeTb INoAJIbWe OT yCTpOHTBa HHeMeJnEHNO yCTpaHrT 3acOpbl.

Puck noJyueHn TpaMbbl!
Pn 3aONHeHH caOBOro
N3MeIbHTeJI BETKaM N OH MOrYT
OTcKaIBaTb. B pe3yIbTaTe yApOB
OT OTNeTaIOUx N3MeIbHaemBIX
BETOK ONepaTop N3MeIbHTeJI
MOKeT NOyUTb cepBe3HbIe
TpAbMbI. HaJeBaIte 3aUnTHbIe
nepTuK n ( 4.3) ouKn!

CneIb3a INHePcUOnHHbIM DBrXeHMe pexyIero INCTpyMeHTa, KOtOpoe dIITcR HeCKoJIbKO CeKHyD Do NnHOJ OCTaHOBKn.
BbIKNIOHTb 3NEKTPoDnBtAEIb, BbHyTb ceTeByO BnIKy I DoXdA TbC4 NOHON OCTaHOBKn BCEx BpaauoUxxC4 OpraHOB,
- nepei TeM KAK OCTaBnTB yCTpoNCTBO nIin ecIn yCTpoNCTBO HaxOuNTc8e3 HaD3opa,
- nepei TEM KAK NOIDHnTb yCTpoIcTBO, n3MeHNITb ero NIOJKeHne, nepeHeCTN, ONpOKnHyTb, TOJIkATb INI TaUNtB,
- nepei TeK KAK OTBnHTITb pe3b60Bbl npo6kn OTKpbIb yCTpoiCTBO,
- nepei TpaHcnpTnpoBkoYcTpoNCTBa,
- nepei TeM KaK yCTpaHnTb 3a6uBaHnI nn 3acOpEnH B peKyUeMexHaHn3Me, 3arpy3OuHOBoPOnKe nnKaHaJIe Bb6poca,
- nepei BbINONHeHnem pa6oT Ha DNUCKOBOM HOKe,
- nepei TEM KAK npOBepntb yCTpoiCTBO UIN ONUCTnTb erO, a TAKKe nepei npOBeHem Ha HEM INhIx pa60T.
4.7 TexHnueeckoe 06cnyKuBaHne n peMOHTbIe pa6oTbI

Ipeed hauanom pa6oT no texobcnykBaHnIO (OuNCtka, pemOH T. I., nepei npOBePKo CoeINHHTbHO
Ka6eJHa OTCyTCTBne nepenTeHn nn NIOBpeKHeHn NOCTaBnTB yCTpoNCTBO Ha TBepOe,POBHOe OCHOBaHne,BbIKNoHTb 3JIeKtPODnRaTeNb BBHyTb BnKy n3 CETn.
Ipeen BCem np6oTaMn no Texo6cnyXnBaHnO CneJeYeT DaT yCTpOInCTBy OCTbITb B TeueHne np6J.5 MNHT.
IpeedTexo6cnykBaHnEm pexyUero HNCTpyMeHTa Heo6xOIMO yuHTbIBaTb, 1TO pexyUnnHCTpyMeHT HeCMOTpHa 0KcnpuyOuSyIO NaHky MoKeT npOJkaB BpaueHne, daKe N BClyuae OTKnUoyEnraJIeKTPonNTaHna.
Cetebo Ka6eIb pa3peaetcpeMOHTnpOBaTb NIN 3aMeHrTb TOnbKOabTOPnIOpOaHHbIM IpOceCCNOHaJIbHbIM3JeKtpiKaM.
OuInctka:
Iocne pa6oTb BCE yctpoNCTBO Heo6xOJIMO TuaTeNbHO OvHCTNTb. ( 11.1)
3anpeaetcNcnoJb3ObaTb annapat
DnOCHTKN BbICOKO DAbNEHNA,a TaKKe
PpOMbIBaTb yCTPOIcTBo CTPyAMN BObl
(HanpIMep,piN NOMOu CaIOBORO
WnaHra).
3anpeaaetc nCnoB3oBaTb arpeccnBhle uCTaIue cpeCTBa. OHN MOryT NOBpeNTb PnaCTMaCCy N MeTaJI, YTO MOKET BbI3BaTb HApUWeHne 6e3onachO hKcnnyatauN yCTpoiCTBa STIHL.
Pa60tblnoTexHnueckomy 06cJyXnBaHHo:
Pa3pe7aetcBbINONHtB TOJbKO Te pa60TbIO TexNHueCKOMy 06cIyKuBaHnIO, KOtOpbIE ONuCaHbIB daHHo INCTpyKuIN NO 3KcNlNyatauIN. Bce npyrne pa60Tb IOnJxHbI npOn3BOAnTbCdInepom.
IJIyHHeO6XIMbIX CBeHn I NOMOUs ObaaAaTeCb Bcerda K dunepy.
KOMnHaHn STIHpeKomeHyeT BbINOnHrTa pa6ToI NO TexHnueCKomy 06cLyKnBaHnIO pEmOHtBI TOJbKO y dInepoB STIHL.
DInepb STIHPERynpHO npEOCTaBnIOT nporpaMMblObyHnI texHHueckyo HOpmaunio.
Heo6xOIMOn IcNoIb30BaT TOnbKO HnCTpyMeNTbl, PnHaJdNExKHOCTN NnI NaBeChbIe yctpOciTB, DOnyUeHHbIe STIHDLaDnHoro yctpoiCTBa, INI TexHnueckn aHaIOnuHhBle y3JIb. B NHOM cLyuae HeJIb3r NCKIIouHTb HeCyaCThBiE cLyuaI, PnIBOJaIeNk NOnyHeHIO TpaBM nIN NOBpeXKeHIO yctpOciTB. Pn BO3HNKHOBeHm BOpocOB o6paTaBcK dInepy.
OpunHaJIbHbIe INCTpyMeHTbl, npnHaJIeXHocTn 3aIpaCTn STIHLO CBOIM KaueCTBaM ONTImaJIbHO COOTBeTCTByOT yCTpoIcTBY u YOBIETBOPAOT Tpe6oBaHnA m NOJIb3OBAteJIa. OpunHaJIbHbIe 3aIacHbIe qactn STIHLO nO3HaJOTcNo Homepy 3anachoi qactn STIHLO, no HaJnci STIHLO n pni Heo6xOIMOCtN No 3haky 3anaChbIX qactei STIHLO.Ha ManeHbKnx DeTaJIax 3HaK MoXeT CTOrTb TaKKe OTDeJIbHO.
HaKeNc npdUnpexKeHnMn UyKa3AHmCneJeTBCerDaCoepKaTbB YnCTOMXopoOoYnta6eNbHOM COCToHm. NOBpeKDeHhble nn yTepeHHbe HaKeNk Heo6xOIMo 3aMeHnTBHOBBIMOpuHnHaJIbHbIM, KOtOpblcMOxHNOyUHTbYdINepob STIH.Pn3aMeHe y3naNN DeTaN HOBIMy3NOMNNDeTaJIbIO,CNeIITb, YTO6blHOBBieCaTNIOnyUHIn TaKe JEA HKeNk,KaK INpeXHHe y3blnDeTaII.
Pa6oTaIe C pexyUIM 6nOKOM TOJbKO B 3aunTHbIX nepuATkax ( 4.3) nC npedeBHOO octopoxHocTbIO.
ДяТOrOуTO6bIyCTpoICTBOpa60TANO HAdexKHO,CneJyETdoOTka3a3aTЯNtBaTB BCEraKN,6oNTbINBHTb,BOcO6eHNOCTB BCE BnHTbIpeKyuIeroMexaHn3Ma.
CneNyET peryIpyHO npOBepbB BCE
yCTpOINCTBO -OCo6eHNO nepei
yCTaHOBKOHa xpaHHeHne nepei
DInTEJBHbIM NepepbIBOM B KcCnPyatauN
(HanpIMep, B 3mHMn nepo) - Ha
OTcyTCTBNE IN3HOCA INOBpeJdeHNI.13
coobpaKeHNI 6e3OnacHoCTn
Heo6xOIMO cpa3y 3aMeHrTB
n3HOWeHHbIE nIIIOBpeJdeHHbIE
DeTaJI, OBeCeNeHBaTeM CaMbIM
HaedKHyO pa60Tu yCTpoINCTBa.
B clyuae cHraTnKaKnx-Jin6o DeTaJe HIn 3aunThbix npncnocO6neHm BO Bpem npoBeHnpa60nt no TEXHnueckomy o6cLykNbAHnIO Hx Heo6xoJIMo HEmeJleHNO CHOBa YCTaHOBt b Ha MeCTo B COOTBeTCTBn C npedncaHnM.
4.8 XpaHHe H npn dInTeIbHbIX nepepbIbax B pa6oTe
IpeiTeM KAK CTaBnTb yCTpoiCTBO B 3aKpbItoe NOMEUeHne, CNEyET DaTb BO3MOxHOCTb EMy OCTbITB TeHeHne np6JI.5 MNHT.
Heo6xoJIMMO NCKNIOHTB BepoAHTOCTb NOIb3OBaHnY yCTPOJCTBa NOCTOPOHHMN IINaMn (HanpImep,JeTbMn).
IpeJe yctaHOBKo Ha xpaHeHne (HaPmep, B 3MHN nepnoD) yCTpoiCTBO CNeJyEt TuaTeJIbHO OuHsaTb.
XpaHb yCTpoB COCToHnI rTOBHOCTN K EKcNpyaTauN.
CTaBtE MaunHy Ha xpaHeHne Ha poBHOM MecTe, TTo6bl NcknOHTb ee CnyaHoe OTKaTbIbAHne.

Onachoctb TpaBMPOBaHn OTKpbITbIM HOxAMn!
XpaHntb caOobBn3MeNbHTeNb TOnbKO C yCTaHOBNeHHo3 aRpy3OuHO BOpOHoN.
4.9 Ytunnaua
OTXOdbI MOrT PnHnHbBpeJIOdM, JNBOThbIM N3KoJIoTN, PO3Tomy OHN DOJIHXbI 6bITb yTUNHpOBaHbI HApJnxKaUmm o6pa3OM.
YTo6bI NOyHTb INHΦopMaζuO npaBnIbHOYtIN3aζmO TxOIOB, oBaPaaTecb B Bau ceHTp no yTIN3aζmN Iκ BλeMγ έnεpy. KomnaHra STIHLepeKomehdyet oBaPaaTbcR K dInεpy STIHL.
CneNyET o6cneHTb npaBnblHyO ytnn3aunO tCnykWBero yCTpoNCTBa. Ipeydytnn3auneynycTPONCBO cneNyET npBecTN B HepnroDHOe COCTOHN. InpoTbpaueHnreHcuaCTbIX Cnyaeb B nepByO oupeBb yaIInTe CeTEBOINn coeHHntbHbIKKa6en, BeyuNN K 3JNEKtpoDBNRatEnIO.
5. OnncaHne cMBOJIOB


BHHMaHHe!
IpeepnepBbIM
nPIMHeHHem PPOHTaTb
HnCTpyKzniu nO
3Kcnnnyataaun.


Onachoctb noJyuHn TpaBM!
3anpeeHNO npCytCTBne NOCTOPOHNX LIUC B pa6oey 3OHe.
Onachoctb noJyuHn TpaBM!
Bpnaounece daTn!
Pnpa6ote yctpoiCTBa
pykn n HOrn dOnJHKbl
HaxoNTbcra Ha paccToarHNI
OT OTBepCTNI.

Onachoctb noJyehn TpaBM!
Pepa6oTAMn C
peXyIMMHCTpyMeHToM,a
TaKKe nepepa6oTAMn no
TexO6cnyXBaHHIO
OuNCTke,nepe npOBepKO
coEHNHTeNbHOrO Ka6eJRA
Ha OTCYCTBNE 3aNYtBbAHnRA
NJIN NOBpeKDeHnI NepeD
TEM,KaK OCTaBNTb
yCTPOINCTBO,CJIeNyET
BbIKIOUHTb
3JeTPOdBnraTeNb I
OTCoEHNHTb CeTeBOI
Ka6eNBOTyCTPOINCTBa.

HeoXoUmo nCnoJb3ObaTb 3aunTHbIe HayuHKnI
Pa60TaB 3aUHTbIX oukax!
Pa60TaB 3aUHTbIX nepuAtkax!


Onachoctb noJyehnra TpaBM!
He pa3pe7aeeTc 3ane3aTb Ha yCTpOInCTBO.
Onachoctb noJyehnra TpaBM!
HeIb3a IOnyckatb
nonaHaHn pyk,dpYnx
uctei Tena,aTaKke
OeJbI B 3arpy3OHyIO
BopOHkynn JeIo6
BbIbpoca.
6. KomnJIeKT nocTabKu

山
No3. HaimeHOBaHne
A Ba30BOe yCTPOIcTBO c 1 3arpy3OHOBOPOHKO
B CtoiKa KoIeCa 1
C HaCTaBb BbIbPoca 1
D OTKnHaHa KpbIka 1
E PnAnKa 1
F Konechna ocB 1
G Koneco 2
H Kojnak koneca 2
I BoT
J BnHT C uectnrgpaHHoI 20IOBkoM5x40
K Taimka M5 2
L 2
M Φικατορ 2
N CamoHape3aIOuIN BnHT P5x40
O BnHT c roNoBkoTorx 3 P5 x 20
ПОЗ.ΗΝΜΕΝΟΒΑΝΙη
P BnHT C roIOBkoTOrx 2 P5 x 10
Q yHnBepcaIbHbI KJIouy 1
- INHCTpykunno 1 3Kcnpnyatau
7.Под�отовka yctpoиCTBa Ka pa6oTe

Onachocb nonyueHn TpaBm! CneDyet co6nOdaT npednncnno noTexnke 6e30nacHOCTN B InaBe «Texnka 6e30nacHOCTN». ( 4.)
7.1 MoHTaX KOJIeCHOI OCU N KOJIeC
- YcTaHOBnTB KOleChyIO Ocb (F) C BnHTaMn (J) nraKamn (K) c NmOuCbIO yHnBePcaIbHorO KInOua (Q) Ha cTOnKe KOneCa (B) (4 - 6 Hm).
HaTeb wai6bl (L) n Koneca (G) Ha yctaHOBHeHHyIO KOnechyIO Ocb.
3aФИКсИРОВаТь KOLEca Ha KOLECHOI OCSФИКСАТОПМ(M).ФИКСАТОПБI HAneBaTb Ha KOLECHYO OcB TOJIbKO Do TEX NOP, NOKA KOLEca NOCNe MOHTaKa eue JERK BpauaOTcR.
BdaBntb kOJnakn Konec (H).

ΦKcaTopb(M)MOxHO CHrTb, JINMb pa3JOMaB INX.
7.2 MoNTaX HaCTaBKn BbIbPocn XOIOBOY YAcTn
-
NocTaBnTb 6a3OBoe 5 yCTpoiCTBO (A) Ha poBHyo, YNCTyIO NOBepxHOCTb BOpOHKO BHN3.
-
UctaHOBtB HAcTbAky BbIbPocA (C), BCTaBnB KpOuKn (1) B OTBePcTna C3aDn Ha 6a3OBom yCTpoiCTBe (A), n ONpOKHyTb TAKM O6pa3OM, YTO6bl nepeHnY TaCtB 6a3OBOrO yCTpoiCTBa TOUHO BOJNA B OTBepCTne HAcTbAkn BbIbPOca.
BkpyTnTB BnHTb (P) B KpOuKn (1), KaK noka3aHo Ha pncyHke (1-2 Hm).
BCTABNTXOIOBOYU qACTb 06eIMN CTOKAMKOLec(2)B HAnpaBnIouuie Ha 6a3OBOM yCTpoIcTBE(A)doynopa.
Bdabntb n3n6 (3) ctoKoNEca B yry5neHHe Ha HndctAbKe Bb6poca. - PnpBnHTntb XoIOByu Yaactb BnHTaMn (N) (1 - 2HM).
7.3 MoHTaX OTKnIDHO KnBbIkw

- YctaHOBt bnaHky (E) B yIINHeHne BbIbOpa. BkpyTnTB BNHTbl (O) (1 - 2 Hm).
IocTaBnTb CaObBi N3MeJIbUHTeJIb BEPTNkaJIbHO. - UctaHOBt b OKnHyIO KpbIuKy (D) Ha ydINHeHne BbIbPocA. Pnp ycTaHOBKe CNeITb 3a TeM, YTO6b pe6pa (1) CNEBa n Cnpaba H BHyTpHeH NOBepxHOCTN KpbIuKn TOUHO nonaDaN B HAnpABJIOU nn Na3 yDInHeHn BbIbPocA (2).
Bdabntb 60ntbl (I) cneBa n cnpaBa.
7.4 OTKpbIITNe 3aKpbITne OTKnHOn KpbIiKN

OTkpblb OTknHHyu kpblky:
- Ppi n3MeIbYeHn IIOHrTb OTKnDHyo KpbIuKy (D) HabePx n 3aueJIkHytB φnkCpIpyUO yuPiHaKy (1) BHaIcTaBky Bbl6poca.
3aKpbTb OTKnHyu KpbIiKy:
ДяТраHCnOpTIpOBKnIIN KOMNaKTHOxXpaHEHnIpnNOJHrTb CJIerKaФИKcPnyUOyI npAHHK (1) n OTKNHYb OTKNIDHyO KpbIuKy (D) BHN3.
7.5 OTeJeneHne JIINHCTpyMeHa
B3aHHeYacTbBOPOHKn(1) MOKHO BkNaIbIBaTb CHN3y BOtJeHHe IINHCTpyMeHTa(2) yHInBepCaNbHbIKJIOU (Q).

8. PekomeHdaun no pa6oTe
8.1 KaKo MaTePnA MoXHo nepepa6aTbIbTa?
OprAHueckne octaTkn paCTeHn TaKHe, KaK OTXoDbI ppyKTOB n OBOUeH, Cpe3aHHbIe cBeTbI, NICTBY, a TAKKe 6ope3Kn DepeBbeB n KcyCTapHNKOB, n CNJbHO pa3BetBJeHHbIe BcTKN.

Obe3kn DepeBBeB N KcyTapNkoB CneNyET 3aKnlaDbBaTb B CBexMe COCToHn, NOCKoJIbky KayeCTBO n3MeIbHeHn Pn I TOM IyUWe, Yem npn nepepa60Te BbCOxWero nJIN cbIporo MaTePnana.
8.2 KaKo MaTePnAn HeIb3a nepepa6atbBaTb?
3anpeaetc3aknaBbBaTbCaObbn 13MeJbYnteMbKaMH,CTeKNO, MeTaJIInueckne N3deJIINy (npoBOLOky, rBOzNI...) INI INactMaccy.
OchOBHoe npabNIO:
MaTePnAJIbI, KOTOpBie HeJIb3r IcNoJIb3OBAbTdIg PnIroTOBJeHnKOMIOCTa,TakKe 3aIpeUaETcNepepa6aTBiBaTbBCaOBom N3MeJIbYHTeJ.
8.3 MakcmaJIbHbI dNaMeTp BeTOK
AaHbIe OTHocTcK CBexEcpe3aHHbIM Betkam:
MaKcMaJIbHbI dHaMeTp BeTOK: 35 MM
8.4 Pa6o7a 30ha onepaTopa
9 U3 coo6paXeHn 6eONaCHocTn, 4TO6bl He NOnyUHTb TpaBM N3-3a Bb6paCbIBaEMOro MaTePnaJa, onepaTop BO Bpemr BCero nepnoDa pa60TbI (PnB KJIIOueHHom 3NeKToPDnBURAteNe nJn pa6oTaIoem Dnuratene BHyTpneHero CropaHnA) DOJKeH Bcerda OCTabatcbg B pa6oey 3OHe (cepA oBlaCTb X).
8.5 Ppabunbna Harpy3ka yctpoiCTBa
3NeKtpoBnIaTeJIb ININ DnBraTeJIb BHTpeHHeRo croPAHn CaIOBORO N3MeJbUHTeJIpa3peWaaTcHarpyKaTb TOJIbKO TaKIM O6pa3OM, YTO6bl YaCTota BpaUeHnI pN 3OTM CNXkAJaCb He3HaUnTeNbHO.CaObBIu N3MeJbUHTeJIb
CneNyET Bcerda 3aNoHnTb paBHomepHo H HenpepbIBHO. Ecnu Yactota BpaueHnna 3JeKtpoDbnraTeI np npabote C caOobim N3MeJbYnteJIem NaJaet, TO CneNyET OCTaHOBnTB daNbHeiWee 3aONHHeHne N3MeJbYnteJIr, YTO6bl pa3rpy3nTb 3JeKtpoDbnraTeIb nn DBrTaTeIb BHyTpEHHero CropaHn.
8.6 3aunta ot neperpy3kn
Ecn np pa6ote 3nKtpoBnraTeIb nCnbTbIbae Tnepepy3ky,TO BCTpoEHHOe yCTPOINCTBO TeNIOBO 3aunTbI abTomatueckn OTKJIOHaET erO.
Iocne oxnaeHnB TeueHne np610 MmHT MOxHO BHOBb HauaTb pa60Ty caoBOrO n3MeNbYnteR. Pn qactOM cpa6aTBaHm 3aUHTbl OT neperpy3Kn pnpuHaMn 3TOrMOrT 6blt:
- HenpurodHbI coeHHnteHbHbI Ka6eNb (⇒ 10.1)
-Перерузкacetn - Perperpy3ka yctpoicTba n3-3a cnIkwOM 60JIbwoTO KOINueCTBa n3MeJIbuaemoro MaTePnana nn Tynble HOXN
8.7 Ecn npexyun mexaHn3m caoBoro n3MeIbHTeY 6IOkpObaH
Ecni pejxunm MexaHn3m caDoboro
n3MeJbUHTeI npn n3MeJIbYeHIN
MaTePnAna 6JIOKpYeTcR, Heo6XoDMo
HeMeJIeHNO OCTaHOBtB
3JeKTPoDIBuTaTeIb NOTCOEiHNITb
ceTeBOI Ka6eIb. 3aTeM ChrTb
3aRpyOCHyO BOpOHky UycTpaHNTb
npuHNy HApUWeHIny.
8.8 3aOpJHHeHne caOboTe n3MeJIbUHTeJIa
MaTePnaJI:
- Oprahnueckne octatkn pacthen TAKNE, KaK OTXOdbI pkykTOB n OBOeien, Cpe3aHHbIe cBeTbI, JInCTBy, TOHKne BETKN I T. N. CJeNyEt 3aknaDbIBaTb B 6oNbJoe npramoroyroJIbHoe OTBepCTne (1).
TbepybmyMatepnaj!

TOnCTbIe HcINbHO pa3BETBHeHHbIE BEtKN CNeDyE TpeBapHTbHO Nope3aTb CaOobIMN HOHNzAMN.
Cpe3aHbIe cybIepeBBeB nIN KycTOB, a TaKKe BcTKn CneJeT MeJInEHHO 3akJaDbIbAeTB O TBepCTNe BΦOpMe YetbipexNCTHnKa (2) STIHL, HApBaJIy INx BDOJIb npaBOI CTeHN BOPOHKnIO HOKeBOrMOexAHn3Ma. Pn 3Tom TBePbIM MaTePNaI abTOMaTIueCKN BTARNBaETcYCTPOINCTBOM.
9.3aunthbte yctpoctBa
9.1Блokировka nobToPHorO 3anycka 3JIeKtpoDburataTeJRA
YCTPOIcTBMOXHO 3aNyCKaTb TOJIbKO Ipn NOMOUI BbIKJIOUcaTeJIa, a He IOdCOeINHeHnEM COeINHITeJIbHOrO Ka6eJI K 3JIeKTKpOcETn.

9.23aunTha 6JoknpoBka
3NeKtpoDbuRatJIb INM MexaHn3M
N3MeJbUeHnpa3peWaaTcra3anyckaTb
TOJbKO pI npIpaBUNbHO 3akpbITOn
3aRpy3OuHOBOPOHke.IpN
OTBnHnBaHmnpaBoIpe3b6oBoIpO6Kn (PpN B3rJaHe Ha yCTpoiCTBO cnepeDi) BO
BpEmpa60tbl3NeKtpoDbuRatJIb
OTKluOyaeTcABTomaTHueCKn, IN
MexaHn3M N3MeJbUeHn
OCTaHaBnBaETcB TeueHne HeCKoJIbKnx
CEkyHd.
9.3 Topmo3 ocTaHOBkn 3JNeKtpoDbnIraTeJIa
MexaHn3M TopMo3a OCTaHOBKn 3JleKtpoDbrVaTeJIa COKpaUaet Ha HECKOJIbKO CeKYHd BpEmd DmIXeHnIO INHePcUN OT BbIKIQUeHn yCTpoiCTBa DO NOJIHOJ OCTaHOBKn HOKeJ.
9.4 3aunTHbIe KOMIOHeHTbl
CaobbI N3MeIbYIeJIb OcHaIeH 3aUHTbIMN KOMNoHEHTAMN B 3OHe 3arpy3Kn N Bbl6pOca. K HIM OTHOcTcR: BC3arpy3OuHaBOPOHcCBepxHe yactbIO b6pbI3ROBnK, ydInHeHne Bbl6pOca, a TaKke OTKnIHHa KpbIiKa Bbl6pOca.
Pn n3MeIbueHm 3aunTHbIe KOMnoHeHTbI o6ecneuBaHOT 6e3OnaCHOe paCCTOHHe OT HOKeN 3MeJIbUHTeJI.
10. BVeIeHne yCTpoIcTBA Ba pa6Otu

Onacnoctb noyuhenra TpaBm! PpeD BBOOM caoBoro
N3MeNBHTeB 3KcNpyaTauH CnEyET BHIMATEbHO npOHTaTB rABy «TexHnka 6e3oNaCHOCTu» ( 4.) ncoBIOaTB BCE
PnBBeEHbIe TaM yKa3aHmN IO TexHKe 6e30NaCHOCTN.
10.1 PoiocoeHHeHne caoBoro n3MeJIbHTeI K 3JeKtpuYeCKO cTeN
CetBoN Ka6eB DoJKeH NMeTb DoCTaTOHyO 3aunTy. ( 17.)
B KaueCTBe coeHnHTeNbHbIX Ka6eIe npa3peWaeTcN cN0nb30BaT TOJIbKO Ka6eI, KOtOpbIe IMeIOT n3OJIaIIO He xyke, Yem npoBoa B o6pe3nHeHHbIX Tpy6kax H07 RN-F DIN/VDE 0282.
MnHmAbHoe nonepeHoe ceeHne ceTeBOro ka6enI DOxNHO COCTABJrTb 3x1,5MM² npn DnHHe do 25 M nnn 3x2,5MM² npn DnHHe ot 25 M.
CoeHnHnTei coeHnHnTeIbHbIX ka6eNe I0JXHbI 6blb BbINOJIHeHbI n3 pe3INbI INN O6TMytbp e3INHO COOTBeCTBOBaTb cTaHapTy DIN/VDE 0620.
Pa3bembldoJXhblmMeTbBOD03aunTy.
HenoXoJyue nnHntbHbIe Ka6en npBODK NOTEpe MOUHOCTN MOryt Bb3BaT NOBpeJeHn 3JekTpOdBnraTeJI.
JaHHoe yctpoiCTBO npedHa3HauHcNoIa 3KCNyatauINB CETN C NOJIHBIM COPTINBHeHnEM CNCTEmbZMaKc.B TOKe paCnpedeHnra (a6oHeHTCKoe OTBeTBHeHne) CMAKCMaJIbHbIM
3NaueHnem 0,279 Om npu 50 Tc.
IOnb3ObaTeNb DoJKeH yDocTObepntbcra,
yTo yCTpoiCTBO pa6oTaet B
3JIeKTPnuecko CeTu, OTBeuaIoJei
yKa3aHHbIM ycNoBnM.
PiN Heo6xOdmoCTn NOnHoe
conPoTnBHeHne CnCTeMb MoXHo y3HaTb B
MeCTHO nClyXbe 3JIeKTPoCha6KeHnA.
10.2 PioaCoeHHeHne ceTeBOro Ka6eJra
- PnpnoDnAryb KIeMMy (1).
Bctabntb coeHHHTenb ceTeBOrKa6eJIA.
OTnyCTHTb KJIEMMy.
10.3 BkIIOueHne caIOBOrO n3MeJIbCuITeJIa
- PoiocoeHHHTbcTeBOKa6eJIb. (10.2)
HaaTb 3eneHyo KhoNky (1) H BbIKIIOuateJe. IOnaCy u3MeJIbuaemoro MaTePnAJa cNeDuyeT hauHHaTb NIIbB TOM Cnyae, ecIn 3NEKTOBIRaTeJIb IOCTINr MaKcIMaJIbHOJ YACTOTBI BpaUeHn (yactota BpaUeHn Ha XOJOCTOM xOdy).
10.4 BbIKIOueHne caOBOr n3MeIbUHTeJRA
HaxaBkpaChyIO KhoKy (1)Ha BbIKIQUaTeIe. 3JeKtpOaBnraTeIb caIOBOrO N3MeIbYHTeJIa BbIKIQUaETcN aBTOMaTneCKN TOPMO3NTcR.


10.5 N3mEnbYeHne

3arpy3ky caIOBOrO u3MeIbUHTeN aOJIKeH BblONHrTb TOJbKO OINH ueIOBeK.
IocTaBbTe caObBn 3MeJbUHTeBHa pOBHyIO TBepDyIO NOBepXHOCTb, npN 3TOM eO NIOJOxHHe DOJIxHO 6bITb yCTOnHNBbIM.
HaedeHbTe npouHbIe nepaATKn, 3aunTHbIe OcKn I NCnObl3yInTe 3aunTHbIe HayuHNKn.
- OTKpbITb OTKnHHyo KpbIiKy. (7.4)
- PioaCoeHINHTcTeBOKabEJIb KaIOBOMy 3MeJIbUHTeIIO. ( 10.2)
3anyCTnTb caIOBbI IN3MeJIbYHTeJIb. (→ 10.3)
- IIOOxdaTb, noka caOobbl N3MeJIbUHTeNb DOCTINHET MaKcImaIbHOY aCTOTbI BpaueHnB DBrIaTeNla (yactota BpaueHnHa XoIOCTOM XOdy).
- PpaBnIbHO 3aRpy3NtbcAodBbIM N3MeNbHTeJIb N3MeNbYaeMbIM MaTePnaJOM. ( 8.8)
BbIKIOHTb caIOBBI IN3MeJIbYnteIb. ( 10.4)
11. Texnueckoe 06cnyxnbAHne

Onachoctb nonyuhenra TpaBm! Ipeed Bcemn paobamn no
TEXHnueckomy 6cbnykBaHIO UIN ONUCTKe yCTpOncTBa Heo6xOIMBO BHmATEbHO pOuHTaTb TJaBy TexHka 630NaCHocTN ( 4.) BOC6eHHocTN pa3dE TexHnueckoe 6cbnykBaHne IN peMOHT ( 4.7) TOHNO BInONHtB BCE yKa3aAHhble TAM PpeDNiCaHn NO TEXHnke 630NaCHocTN.
Ipeed hauaJiom pa6oT no Texo6cnyKbAHNIO BbHIMaTb BNJKY N3 CETN.
11.1 OuicTka yctpoiCTBa
INHTepBaT TexHueckoro 06cJyXnBaHn: nocJe kKaDOrO npImeHeHn
UcTpoIcTB Heo6xOdmo TuaTeNbHO OuHuaTb NocJe KaJdoRo PnmuHeHn. IpaBnIbHbI yXoD 3a yCTpoIcTBOM 3aunuaeT erO ot nobpeKdEHN n yBeInuINBaet cPok erO cnYk6bl.
3NeKtpoDnBnIaTeN BbINONHeHb BO BJIarO3aUHTOM MCNOJIHeHN.
OprAhbI n3MeJIbYeHnB, BKNIOUa NOIOCTb n3MeJIbYTeJIa, D0JNXHb 6bITcMa3aHbI cTaHApTbIMn aHTNKOPPO3nHbIMn CpeIcTBAMn (HaNPmep, pANCOBbIM MaclOM).
UcTpoIcTbOpa3peWaaETcOuHuaTb TOIbKO BnIOJoxKeHH, I3o6paXeHHOM Ha pncyHke.
-ДемоHTиpoBaTb 3aRpy3OHyIO BOPOHy. ( 11.2)
YTo6bI o6eNeHT bOCTaTOHoe oxJaXdHeNc 3JIeKTPoDBuRAteJIa,Ha KopnyCe 3JIeKTPoDBuRAteJIa CLEyET OUYsTaB OT 3Arpy3HeHn KaHJl BO3dyUHOrO OxJaXdHeNla (UeJeBOI BO3dyX03a6OpHNK).

HEnb3a HanpaBnTb Ctpyn BObl Ha y3bl 3JIeKTPoDnBuRatEnI INI DnuratEn BHTpeHHeRo cropaHn, yNtOtheHn
ONOpHbIe MeCTa,a TaKKe Ha DeTaJIIN 3JeKrTpoo6OpdyObaHnA,KaK,HaPmEep, BbIKJIOuHaTeJI.N.CneDCTBnEM Heco6JIIODeHnN 3Tnx yKa3aHn MoXeT CTaTB DOpORoCTOuaN peMOHT.

Ecni 3arp3HeHnI npnnnne OCTaTKn He ydaetcYdaNTb C NOMOuBIO ueK, BnaXHO TpRKn INI DEpeBHHo NaIOCHN, TO
STIHL pekomehnyet npimehrTb CneuaNbHbOuCTNTeNb (HaNPmep, CneuaNbHbOuCTNTeNb STIH).
3anpeaetcncnolb30BaT arpeccNBhIe uCTaue cpeCTBa.
Perynpho npon3BOIDt b OunchKy INCKOBbIX HOKei.
11.2 DemoHTax 3arpy3OCHOBOPOHK
- Otkpytntb o6e pe3660Bbie npo6kn (1)do nOCTnKeHn IN CBO6OJHO BpaueHn. OHn BblONJIHeHbIC ObecneueHnEM HeBO3MOxHOCHT INX NOTepb N OCTaOTcHa 3arpy3OHOBOPHke.
- OTKInHyTb 3aIpy3OuHyBOPOHky (2) H3aI N CHrTb ee.
11.3 MoNTaX 3aRpy3oUHoi BOpOHKn
IopBecntb 3arpy3OHyBOPOHky (1)Ha KpeNexHbIe KpOuKIN6a3OBoro yCTpoiCtBa (2) INaKIOHnTbe ee Bnepe.
3aTMyb OndHOBpeMeHNO 06pe3b6OBBie npo6kn (3).
11.4ФИКСИРОВАНЕ HOЖЕВORO DKCKA


Iocie MoTaxa HOKeBOrO DnCKa n nepeTeM KAc yCTpoNCTBO CHoBa NaHHT pa6oTaB, cKcnpuyUoJaa IlaHka DoJXHa 6bITb BcerDa B NcxOHDOM NOnOKeHN. Ee Heo6xOdmo 3actOpNTb BNHTOM (CM.pnc.).
-ДемоHTиpoBaTb 3arpy3OHyIO BOPOHy. ( 11.2)
- Oclna6ntb BnHT (1).
-ПоворачиВаь HOжБоД ДИСДОТOROMOмЕпА,КOrДугУБлЕнeЗаIMETnoLOжЕнeпepEDФИКсИрУЮшeENIIaHkoI(2).
BCTaBtBΦnKcnpyUOuIPOIaHky (2) ByrIy6JIeHne.
Cnerka 3aTayHyb BnHT (1).
11.5 Texnueeckoe 06cnykBaHne HOKei
INHepBaI TexHnueckoro 06CJyKuBaHHa: nepeKaXdbIM npImHeHHeM
-ДемоHTирOBaTb 3arpy3OHyTOBOPOHky. ( 11.2)
3aФнксрOBaTb HOKeBOHДСК. (11.4)
PpOBepNTb HOKn Ha HauNue neBpeJdeHn (BbIeMKn IIN TpeUHHbl), npOBepNTb CTeneHb N3HOca n npn Heo6xOuMocTn nepeBepHyTb IN NJI 3aMeHHTb.
PpeJeIbI n3Hoca HOKei:
H3HOWeHHBHe HOJn Heo6XoDnMo nepeBopauHBaTb NnN 3aMeHrTb, He doCTnra yka3aHHbIX npeDeIbHbIX 3NaueHm n3HocA. KomnaHn STIHLeKoMeHdyet o6paatbcKa dnepy STIHL.
1NoBopOtHbI HOx
Heo6xOuMo n3MepaTb paCToHne (A)OT OTBepCTnI DO pexyuei KpOMKn HOKeB H HeCKoJIbKnx MecTaX.
MnHmAbhoe paCToHne 6 MM
2Hox-Nonactb
3aMepntb HOpHy HOka (B) Ha 30rHyToI KpOMKe HOka-JONaCTN. MHHMaJIbHaA HOpHnHOka 18 MM
DemOHtAX KOMnJIeKta HOKei:
3aФнксюВаТь HOKeBOДИСК. (11.4)
- OTKpyTNTb BnHT (1).
- ChaTb BnHT (1), HOX-Nonactb (2) INHOKeBOI DnCK (3).
MOHTAX KOMJIeKta HOXeI:
yKa3aHHbIe 3HaueHnM MomeHTOB 3aTAAKKHeo6xOIMo 063aTeJIbHO co6NIOaTb, NocKOBky OT 3TOrO 3aBNCIT HaexKHoe KpeJIeHne pexKyUero IHCTpyMeHtA.
BCTaBnTb HOKeBOB DnCK (3) n 3aФнксрOBaTB erO. ( 11.4)
- YctaHOBtB HOK-JONACTb (2) IN BBePhyTb BUHT (1)25HM).
ΦHKCnpyUOyU pIaHky BepHyTb B NCXoHoe NIOJoxKeHne I 3aΦHKcnpOBaTB BINTOM, YTO6bl HOKeBOJ DNCK MOR CHOBA CBO6OdHO BpaataBcra. ( 11.4)
IpebebopaunBaHne HOKei:
-ДемоHTиPoBaTbДИСКOBьн HOK,3aTeM OTKpyTNb BnHTbI(4)ИСHЯТБИXBMecTe CraNkam (5).
CHaTbHOK (6).
OuNTb DnCKOBbl HOK.
- PepeBepHyb HOK (6) n octaBnB ero Ha DnCKOBOM HOKe C OTkpBToI OCTpoi KpOMKO. Pn3TOM OTBepCTnA DOJKNHb 6bITb COOChbIMN.
-ДемоHTиPoBaTbДИСКOBьн HOK,3aTeM OTKpyTNb BnHTbI(4)ИСHЯТБИXBMecTe CraNkam (5).
CHaTb HOK (6).
OuNTb DnCKOBbl HOK.
- PnepeBepHyb HOK (6) n octaBnT b ero Ha DnCKOBOM HOKe C OTKpbIToN OCTpoi KpOMKO. Pn3TOM OTBepCTn DOJXHb 6bITb COOCHbIMN.
BCTaBnTb BHTbl (4) B OTBepCTnI IN BKpyTNtB rain (5).3aTHyTb rain (5) C MOMEHTOM 10 Hm.
3aToUka HOKei:
IpeepnpoDOnJxHHeM pa60TbI 3aTyPnEHHbI c 06eHX CTOpOH HOXn Heo6xoIMO 3aTOuHTb.
TTo6bI oBecneuHT ONTnMaJIbHoe
fYHKUHOHINPOBaHNe yCTpoiCTBa,3aTOUY
HOKeJ DoJXeH BbINOHNrTb CneuaNtCT.
KOMNaHnSTIH L peKoMeHnyET
ObaPauTaBcR K DnEpy STIH.L
- ⅡIЯЗATOUKNHOKINCJIeDyETCHYtB.
P p3aToUcke HOxHn HAnO oxJaXdaTb, HAnpUmep,BoOn. Henb3a DonyckaTb NOBJIeHN CInHeBaTOrO UBeTa,Tak KaK INaue CHNkaETc DOJROBeuHOCTb HOKeI.
3atauBaTb HOx npaBHomepHo,TO6bln36exaTb Bn6paun BCJeDCTBne Dnc6aJHaHca. - PepeyctahOBKO npOBepaTb HOxHa OTCyTCTBNE NOBpeXDeHn:HOxN DOJXHb6bTb 3aMeHeHb,ecNJ BnHbI Haceyn IIN TpeuHbI IN,ecNJ pexyue KpOMKn N3HOweHbI Do npedeJa.
- JIe3BnЯ HOKeHIOyHrOM 30°.
3aTOky HOKeI npOn3BOoNTb npOTNB KInHka.
Pocne 3aToQKn O6pa3ObaBunecra HapeKyuEi KpOMKe BO BpeMg 3aToQKn 3ayceHcbl CNeDyET ydaTb npn Heo6xOIMOCr MeKoH HaxDaHHO 6ymarO. - Pn MOHTaKe HOKei Co6JIIOaTb 3HaueHn MOMeHToB 3aTJKKN B COOTBeTCTBn C DaHHbIMn B pa3JeNe «IpeBopauBaHne HOKei

3aTyIeHbIe HOxN 3MeJIbHTeJI npINBOJrK yXyDJaHOuEMyc KaYeCTBy N3MeJIbUHeHry. B CBr3N C 3TUM TynoI NOBOpOThBI HOx MOxHO IpeBOPaUNBaTb TOJIbKO OdINH pa3.
3aTyIeHbIe HOxN I3MeJIbYnteI npBODr K yXyDlaUOeMyca KaYeCTBy I3MeJIbYeHn. B CBr3n C 3TtM Tyno NOBOpOTbHn HOx MOxHO IpeBOpauBaTb ToIbKO OIN pa3.
11.6 ΘneKtpoDbBnraTeIb I Koneca
3NeKtpoDbBnTaTeNb He Tpe6yETexHnueckoro 06CnyxmbaHn.
IoiuHnHnKoJcHe Tpe6yH TeXHueckOrO 0cbnyKaBaHn.
11.7 XpaheHne n npocToB 3umn nepno
CaIobbI N3MeIbYHTeJIb CJIeIyET XpaHNTb B CyXOM 3aKpbIbAemOM HEnblbHOM NOMEJIeHN. YIOCTOBepbTEcb, yTO yCTpOJCTBO XpaHNTcB HBe DOCTyINOM IJIaTeI Mecte.
CaobbI N3MeJIbYnteJIb DOJKeH XpaHHTbcB COCTOHaHIM,ROTOBOM K 3KcNpyaTaUIN, IN C yCTaHOBHeHHo 3arpy3OuHo BOpOHKO.
PnDnTeBHom npocToe caoBoro n3MeIbYnteTg (B nepIOd 3mHero xpaHenna) co6NIOdaTb cNeyUooee:
TtataTeNbHooNCTNTb BCE HapyXHbIe. qactn yctpoiCTBa.
Bce DnKyuuecna Detanxopowo Cma3aTb.
12. TpaHcnpOpTnpoBkA

Onachocb noJyHnra TpaBM!
Ipeep TpaHCnpTupOBko
BHNMaTeJIbHO IPOuHTaTb IJaBy
Oc6eHHoctn pa3deI
Co6NoDaTb yKa3aHHbIe TaM
Tpe6oBaHn. ( 4.4)
12.1 NpOdbemnnnepeHoc caoBOrO n3MeIbUHTeTn

IIN NOINHITN INI NEPHOCA yCTPOICTBa Heo6xOIMbI He MeHee 2JeNoBek.
Cneayet Hocntb noxdoxauyo 3aunthyO odexdy, yTO6bl npndnuebI IN BepxHry aactb TeNa 6blIN nonHOCTbIO NOKpbItbl.
1-и ueNoBek: B3aTbC3a pyky Ha BepxHei qactn BOPOHKn (1) caDoboro n3MeJIbHTeJIa.
2-и ueNoBek: B3rTbcra 3a nHaKy yDInHeHnBbI6poca (2) caIoboro n3MeJIbUHTeJ.
CaobbI n3MeIbYHTeIb cIeNyTe IIOHNMaTb OHOBpeMeHNO.
12.2 PepemeueHne caoBoro n3MeJbUHTeJIa
- Y d e p x n B a T b c a D O B b i n 3 M e J b u H T e N 3 a p y K y (1) n o n p o k n H y T b e r o H a 3 a. d.
Tenepb MoKHO MeIeHHO TaUHTb NITOJKaTb CaIOBbI IN3MeJIbYNTeJIb (BTemne Wa).

12.3 TpaHcnpOpTnpoBka caoBOrO n3MeJIbHnteHa nOrpy3ouHOI nnTaTΦopme
- UcTpoIcTBHOe06xOJIMo 3aKpeJIITb npn NOMOUI NOIXOJAUX CpeIDCTB KpeJIeHnY, YTO6blNCKIIOHTb BO3MOXHOCTb COCKaJIb3bIBaHnry. Tpocbl IIN peMHN dONJHbI 3aKpeJIITbcra Ha cToiKe KOleca (1) INn HA 3aRpy3OuHOB oboHke (2).
13. CBeJeHne K MNHMMy n3HOca N npEDoTbpaSeHne NOBpeXdeHn
BaxhIe yka3aHn no TexHueckomy 06cnyxmbAHnU uyOdy dna cJeDyUoXn rpynn n3denn
Caoobb3JnKtpOn3MeIbYnteNb (STIHGLHE)
KOMnaHn STIH He Hecet Nkakoi OTBeTCTBENHOCTN 3a NOJyehne TpaBM n HaHeceHne MaTePnAIBHO yUepe6a, KOtOpBle npOuOJIIN BCNEcCTBne Heco6IIODeHn IHCTpyKUIN NO 3KCNlyatauIN, B OOCbEHHOCTN B OTHoUeHNi 6e3OnaCHOCTN, ynpABNeHn IN TexHnueCKOrO 06CnyXuBaHn, INN B pe3yNbTaTE NCNOJb3OBAHn He IDOyUeHHbIX HaBeCHbIX y3NOb INN HeOpnInHaJIbHbIX 3aNACTei.
ECIN 3TN pa60tBI NOJB3OBaTeJIb He MOXeT Ipon3BOuNTb CaMOCTOReTEnBHO, TO Heo6xoJMo 6paTntbcra K dInJepy.
KoMaHnStIHLepeKomeHyet BbINOJIHTbpaObTI NO TEXHnueCKOMy 06cJyXnBaHnIO peMOHTbTOJbKO y dInepa STIHL.
Dnepb STIHLPerynnpno npdoctabnHOT nporpammboobyehna TeXnueckyIO HOpopMaunio.
B cnyae yuepe6a n3-3a nobpexdeHn BCJeCTBHe HeBbIOJHHeHHbIX paobT NO TEXHNueCKOMy 06cIyKbBAHH OTBeTCTBeHHOCTb HeCet NOnb3OBaTeNb.
K TAKIM NOBpeXdEHNrM OTHOCATC:
-NOBpeKdHn3JIeKTPoDnBnraTeJBA CNEIcTBnE HeKaueCTBeHHoO uNCTKn KaHaJa OXnaJckHnA (PpOyBOuHOI ⅢeHn,pe6ep oxNaJckHnA,KOneCa BeHTnJIaTopa),
Koppo3HbIe NOBpeXdEHn Ipyrne NocJIeCTBnH HenpaBnIbHorO xpaHeHn,
- NOBpeXdENHy yCTpoNCTBa B pe3yNbTaTe npImMeHENHn HeKaueCTBeHHbIX 3aIpaCTei,
NoBpeKdHn, Bb3BaHHbIe HecBoeBpeMeHHbIM npoBeJeHnEM TexHnueckOrO 06cJyKnBaHNr NIN erO BblIOJIHeHnEM He B NOJHOM O6beMe, a TaKKe pa6oTaMn No TexHnueckOMy 06cJyKnBaHNIO n peMOHTy, BblIOJIHeHbIMN He B CneuJaIN3IpOBaHHbIX MaCTepCKNX COOTBetCTByIOxxC cepBnCHbIX LcHTPOB.
14. CtaHndapTHbIe 3aNuaCTM
Hox: 60087020121
Hox-Jnonactb: 6007 702 0300
ДИСКOBБИй HOЖ B C6Ope: 6007 700 5190
15. OxpaHa okpykaIoUeI cpeIbI
He BbIpaCbIBaTb
n3MeJIbUaEMbIMaTePnaJ
BmecTe C6bITOBbIMNOTXoDAMN,
ero CNeIyETNCNoJIb3OBA Tb.
npriTOBOTBeHnKOMIOCTa.
Ynakobka,yctpoiCTBO n
npHaJIeJXHOCTN I3rOToBJIeHbI N3
MaTePnaIOB, pInroDhIx IIN BTOpUHOrO
NCNoJIb3OBaHnR.
Pa3dJIbHa yTnIn3aunocOtaKOB MaTePnaJIOB,yDObNETBOPraUoAa 3KOJOnuYeCKIM Tpe6oBaHnM, CnOCo6CTByET BO3MOxHOCTN MHOrOKpaTHOro npImeHeHHa MaTePnaJIO.Po 3ToI pniuHne nocNe IcTeueHnIpeDncaHoro cPoKa cnYkbI yCtpoiCTBO CneDuYOTnpabnTBpyHKT yTnIN3aUN.HenpaBnJIbHa yTnIN3aUN
MOKeT HaHeCTN BpeI 3dOpOBbIO IN npBecTe N K 3aqrA3HeHIO OkpykaIoUeI cpebl.
16.ДeКларацяо COOTBETCTBIM
16.1ДeКларuaO COOTBETCTBUN DnpeKtNBaEMC caDoboro n3MeJIbYHTeJI STIHGLHE105.0
STIHTLirolgmb
HansPeterStihl-StraBe5
6336Langkampfen(JaHrKaMnpneH)
ABCtpra
3aBnreT NOcCObCTBeHHyO OTBetCTBeHHoCTb, yTO
KoHCTpykTnBHOe nCNoTHHeHne: 3NeKTPnueckn CaObBn N3MeJIbYHTeJIb
-ПониьодnteJB:STIHLC
-Tun:GHE 105.0
- MoUHocTb: 2200 BT
- CepinHbI Homep: 6007
COOTBeTCTByeT NOLOXKeHnM DnpeKtN B 2000/14/EC,2006/42/EC,2014/30/EU n 2011/65/EU,6bl pa3pa6oTaH n
n3rOToBnE H COOTBeTCTBnC BepCnMn CJeDyUoNxC CTaHdApTOB,JeCtCTByuOuNX Ha DaTy n3rOToBnEHH:EN 50434, EN 60335-1,EN 55014-1 n EN 55014-2.
I3MpeHHbIe IrapaHTnpoBaHHbIe ypoBHN
Uyma 6blIN ONpeJeHbIB COOTBeTCTBm
C DnpeKTHBOI 2000/14/EC,
PpInIOXeHne V.
- IV3mepeHHbI ypoBeHb IyMa: 99,4 d6(A)
-「rapaHTnpoBaHHbIypoBeHbUyma: 102d6(A)
Texnuecka DOKyMeHTaUxpaHITcB KOMNaHn STIH L Tiroh GmbH.
TOr BbIycka HOMep MaunHbI yka3aHbI Ha CaIOBOM N3MeJIbYHTeJ.
JaanKamnpeH,31.10.2023
STIHL Tirol GmbH
N. 0.

Matthias Fleischer, pykoBoUnteNb oTdeNa HayHybIX NCCneIOBaHn n pa3pa60ToK I. o.

Sven Zimmermann, rnaBbI pykoBDnteIb otdeNaueCTBa
16.23HaKc COOTBeTCTBn
EAC CBeHeHnO cepTnΦnKaTAX EAC n DeKnapaunx COOTBeTCTBn, NODTBePckDaOpuNX
BbINOJIHeHHe TexHnuecknx npaBunax n Tpe6oBaHn TaMOxKeHHOro COU3a, npEeCTabIeHbHa caTax www.stihl.ru/eac nnMOnyT 6bITb 3aTpe6oBaHbNo TeJefoHy B COOTBeTCTByIOusem MeCTHOM npEeCTabIeTeNbCTBe STIHL.

Texnueckne npabuna nTreboaHna Iya Kpanhbl BbINOJIHeHbI.
16.3 YcTaHOBJIeHHbI cPoK cIyX6bl
IOnHbI yCTaHOBneHHbI cpoK cnyX6bl - do 30 neT.
IyBbipap60TKn yCTaHOBJeHHORo Cpoka cnjxkbH Heo6XoIMMb CBOEbpemHHoe TexHueckoe o6cnykBaHne n yxoD corlaCHO pykoBoIDCTBy no 3Kcnnyataun.
16.4 L7a6-Kbaptupa STIHL
050005 AnMaTbI, Ka3axCTaH
KUNPTN3NIA
OcOO «My3a»
yI. KneBckar 107
720001 Bnukek, Knpn3n
APMEHIN
OOO «IOHNTyI3»
yn.Γ.Iapneu 22
0002 EpeBaH, ApMeHHa
17. TexHnueckne daHHbIe
GHE 105.0
Mouhoctb 2 2 0
HomHaBna Cnla
TOKa 1 0
HomHaJIbHOe
HanpajkeHne 230 B~
Yactota 50
Ckopoctb
BpaueHn (n) 2720 o6/min
Cetebou
PpeoXpaHHTeIb 16A*
Klacc 3aunTbI
Bn3aunTb C BOIO3aUNTOI
(IPX4)
Pekim P40
3KcPnyatauM
40CBpeM
Harpy3kn
60 CBpemr
xOJIocTOro xOda
Moment 3aT8KK25HM
BNUHTa
DINGKOBOHOXa
MomeHT 3aTAAKKN 10HM
BnHTa
NOBOPOTHORO HOKA
Д/ЛВ 77/48/97 CM
GHE 105.0
Bec (M) 20 K
20K
20 Kr (CH)
21Kr (GB)
Akyctnuecka 3Mmccn:
B COOTBECTBUN C 2000/14/EC / S.I.
2001/1701:
TapaHTnpOBaHHbI
ypoBeHb 3ByK.
MOUHOCTN LwAd 102d6(A)
IorpeuHocb KwA 3dE(A)
B COOTBeTCTBUN C EN 50434:
YpOBeHb 3Byka Ha
pa6oeym meTe LpA 92 E(A)
POrpeuHocTb KpA 3dB(A)
* Bhumahne!
PnCeTeBOM npEdoxpaHnteNe C TOKOM MeHee 16 A B nepNoIycka IIN 6OJIbWoHarpy3Ku yCTpoNCTBa MoKeT qacto npOnCxOAnTb cpa6aTbIBaHne npEdoxpaHnteJ.
17.1 REACH
REACH-3TOTexHnueckn perIaMeHT EC,perynpyoou npOn3BOcTBO n o6opot xmnuuecknx BeuecTB,BKIOUaHnxO63aTeNbHyOppeNCTpauHO.
HOpMauno6nOJIHeHn npdncanREACH(EC)N 1907/2006 cm. Ha caTWe www.stihl.com/reach.
BHHMaHHe - OnaCHOCT OT TOKOB yIap 428
ObeKIO n eknnpobka 429
TpaHcnpToPAnHeHa ypeDa 429
Ppei pa6ota 429
PbBpeMeHa pa60Ta 431
IopdpbcknpeMOHTn 432
CbxaheHne npnpoDbJxnteHNo Hn3non3BaHe Ha ypeDa 433
I3xbpnahe 433
Onncahne Ha CNMBONITE 434
OKOMNNEKTOBka 434
IoirotobKaHa ypea 3a nycaHe BeknloaTaun
MOnTnpaHe Ha KojIeChata Oc N KOJIeNaTa 434
MOnTnpaHe Ha HacTaBkata 3a
N3XBbPnAHe IN XoOBOH
MexAHn3bM 435
MOnTnpaHHeHa deΦneKToPa 435
OTbapHe n 3aTbapHe Ha deΦneKTopa 435
OTdeneHne 3a HcTpymEnTn 435
yka3aHna 3pa6ota 435
KoMaTeepaJIIMoratda6bDaT 06pa6oTBaHn? 435
KoMaTePnAJIHHe MoTaJa 6bDaT o6pa6oTBaHn? 435
MaKcImaJIeH dIaMeTbP Ha KIOHHTe 435
Pa6oTHa 30Ha Ha onepaTopa 436
PpabnHnHaTobapBaHeHaypea 436
3aunTa cpeu npTeOBapBaHe 436
Pn6bnokpanpekese6nokHa rpaHnckata npo6nka 436
3apeKdaneHa rpaDnHcKaTa 1po6nIka c MaTePnaI 436
3aunTHn npncnoco6JeHn 436
Блоран eВТOMaTHHOTO CTAPnpaHe Ha eNekTpoDnBraTeI 436
IpeNa3Ho n3KnIOuBaHe 436
IInepzOnHn cnpaKaHa eJeKtpoBnraTeTn 436
3aunTHn kanaun 436
IyckaHa He ypeDa B ekCnloataa 437
Cbpb3BaHe Ha rpaDnHcKaTa
dpo6uNka KbM eJekTpueckaTa
Mpexa 437
BkIIOUbaHe Ha 3axpaHbauia Ka6eI 437
BkIIOUbaHeHaIpaHnHcKaTa 1pO6nIka 437
B Ta3n HNCTpykUa 3a ekCnIIOaTaUaM0Me Da NMa OINcAHN MoJeJN, KOITo He Ca HAnuHb BB BCa Ka CTpaHa.
Ta3n INHCTpykuzna 3a ekcnnoataun e 3aunTeHa ot ABTOPCKOTO npabo. Bcun npaba ca 3ana3ehn, no-cneunnHO npabOTo Ha pa3MHOKaBaHe, npeBOD n 6pb6Oka C eJekTPOHH cnCTeMn.
2.2 Ka3aHn3a yeTeHe Ha HHCTpyKuYra 3a ekCnloTaauN
ФИгурип TeKCTOBeTe OINCBaT onpeIeHn pa6OTHn CTbNk.
BcnuKn nocTaBeHn BbPxy ypeDa NIKTOrpAmn ca NOrCHeHn BA Ta3N INCTpyKnna 3a EKnNoataa.
NocokaHa norglaa:
IocokaHa norgela npynoTope6a HaHajBO HADCHO B INHCTpyKzraTa 3aeknloatauia:Iotpe6nteT e 3actaHAn 3ad ypea (pa60Ha no3u).
IpenpaTka KbM rnaBa:
Cbc cTpeJka ce ot6eJra3BaT npenpaTkKbM rnaBn u pa3JeN 3a DonbHnTeHnO6cHHeN. CneHnT npimep noka3Ba npenpaTka KbM rnaBa: ( 3.)
06o3hauabaHeHa nacaXn OT Tekcta:
Onncnte Hnctpykun Moar Ta 6bdaT o6o3haeHN KaTO e NOKa3aHO B CneHnTe npimepn.
Pa60THN CTbKNK, KONTO N3NCKBaT DeiCTBne OT CtpaHa Ha Notpe6nteHa:
Pa3BnTe 60TtA (1) COTBePtKa, 3aJeCTBaIte JocTa (2) ...
O6uHn36poBaHnA:
- N3noN3BaHe Ha npOdykTa npn CnpTn nn CbCTe3aTeHm MeponpTn
TeKCTOBe C DonbHnHTeHNo 3HaueHne:
Te3n nacaxn ca 06o3haeHc eEHN OT onucaHNTe NO-DOJy CmBOJN, 3a da 6bDaT No-dObe OTKpoEHN B INHCTpyKUraTa 3a EKCNIOaTaun.

Onachoct!
OnachocOT 3nonoJyka nTexko
Физчecко habaHЯBaHe.
Heo6xoДIMо e nIu Tpr6Ba da ce
n36Ra onpeDeNeHo NOBeHne.

PpeynpexdeHne!
Onacnoct Of n3uuecko HapaHbAhe. OnpeJeHeo NOBeHne npedna3Ba 0T Bb3MoXn nnBepaTHn HapaHbAHn.

BHHMaHHe!
Jekn HapaHbAHnN mI MaTePnAHN NcTeN MoT Da 6bDaT npDeOTBpATEHn Ype3 N3BpWbHe Ha ONpeJeHn DeCTBn.

Yka3aHne
Hhopmaun3a no-do6po n3no3BaHe Ha ypeHa 3a n36raBaHe Ha Bb3MOxHO HnpaBnHNo 06cnyKbaHe.
TeKCTOBe, OTHACaIe cKeBmФHrpyn:
Hnypnte,Ha KOnTo e Nokaah HaunHBt Ha yNOrpe6a Ha yPeJa,ce HAMpuT B HaayanoTo Ha INCHpyKuYra 3a ekCnIooataua.
To3n CmB0N noka3Ba Bpb3kKaTa
Mexkyfhypnte B HauaNoTO IN
CbOTBeTHnA TeKCT B IHCTpyKuYra
3a ekCnNoataLna.

2.3 Pa3nHn BapnaHTn 3a OTdennHte cTpaHn
B 3aBncmocT OT ctpaHaTa, B KoTo ce n3no13Ba ypeIbT, STIH L DocTaB aypeiC pa3nHn uencelnn n pekcbau.
Ha nrgyprte ca noka3aHn ypein c
eBponeckn 1eNceJ; BKNHOVAHeTO B
mpexata Ha ypeiC dpyr CTaNapT
ueNCEJIe Cn3BbPwBa NO CbUHaHn.
3.ОписанneHaурда

1ФyHnIa
2BnHTOBuTaH
3 DeΦηκTOp
4 CToiKa 3a KOneNaTa
5 OchoBEn ypei
6PbkoXBaTka
7 IpeKbCbau c uencen
8 Ta6eIka 3a MoUHocTt a C MaUNHeH HOMep
9 Cekun 3a INHCTpyMeHTn
4.3a Baawata 6e3oNaCHOCT
4.1 06u yka3aHn

Henpemehno cna3BaIte Te3n npabina 3a texhka Ha 6e3oNaCHOCT npaPbota c ypeda.

Ipei nIbPBoTO nYcKaHe Ha yPea B DeIcTBnE TpR6Ba Da npOeTeBHNMaTeJIHO cIJaTa HNCTpyKmra 3a EKcnloaTaun.
CbxaHraBaIte cTapaTeHNO
nHCTpyKuYraTa 3a ekCnNoaTaun, 3a da J
noJI3BaTe nB 6bJeue.
Te3n npedna3Hm MepK (CnncbKbT He e nIbIe) ca 3aIbJIxNtJHn 3a BaWata 6e3oNaChOCT. BnHaRn I3IOn3BaIte ypeDa pa3ymHO n OTROBOPHO n He 3a6paBraYTe, ye NOTpe6ntJrT HOCN OTROBOPHO nPn 3IonoLyka C TpETn Iuca NIM MaTePnaHn UcETn NO T8XHATA Co6CTBeHOCT.

Onachoct ot HapaHraBaHe!
IotppeBnteJIte 6e3 nHcTpkyTak He Moar da pa3nO3HaT nn OceHr onaChocTe Ha rpaHnckata DpObnka. IotppeBnteTn nn dpyu nnca Moke da 6bDat cepno3HO paHen nn y6ntn.
3a03HaTe ce c enemEnrTe 3a ynpabIeHne n C ynoTpe6aTa Ha ypea.
UpeBt Da ce n3nOJ3Ba cAmo OT Jnua, KOINT Ca npOeHIN HNCTpyKuYra 3a ekCnIooataun Ha ca 3aNo3HaTn C haUnHa Ha pa6ota C Hero. PpeDn PbPBoTo nyckaHe Ha ypeDa B ekCnIooataun BCekn IOTpe6ntel Tpr6Ba Da ce noctapae da NOnyUn KOMneTeHTHa n npakTneceka NDoTRObKa 3a pa6ota C Hero. ToT pr6Ba
JaNoyuYka3aHnO TnpdaBaCa uNt O T pyro KbAnuFnuIpaHo Lnue 3a 6e3oNaChata ynoTpe6a Ha ypeHa.
LeTaHa Te3n yka3aHn e npdN BCNUKO da Hakapat Notpe6nteJa Ocb3Hae, Ye ca HeoXoDMn N3KnUHTeTHeBHMaHne I KOHcHTpaun OT HerOba CtpaHa, dokato pa60tn Cypeda.
IopnKoratoO6cnykBaTeTo3n ypeD cnopeyka3aHnra, BnHaRn CbuecTByBa OCTaTbueh Pnck.

Onachoc3aXHBota nopaN 3aDywaBaHe!
CbueCTBya onaHoc3 3a DeuTa, KOnTO CN INrpaT C onakOBKeTe. 3aDbJIknTeJHo DpBKe OnakOBKeTe N3BbN Obcera Ha Deua.
UpeBbT, BKNIOCHTEJIHO BCNUKINPnCnOcO6JIeHn 3a DOnbNHTeJIHOMOHTIpaHe, MOraT Da Ce IpeOCTaBtIINOTDaBaT NOD Haem CaMo Ha JInuA, PnIHUNHO 3aNo3HaTn C To3N MoJeI npabotata c Hero. Hnctpykunra 3aeknloatau n e qact OT ypea n BuHaTrtp8Ba Da 6bNe pedeBaHa 3aeDn C Hero.
YBepete ce, ye NOTpe6nteIyIIMa
fN3Nuecka, CETNBHa I NcXnuecka
CnOC6bOCT Da o6cIyKBA ypeDa I da
pa6oTn C Hero. Ako Notpe6nteIyIIMa
OrpaHnueHa fN3Nuecka, CETNBHa IIN
NCxNuecka Bb3MOxHOCT 3a TOBa, ToI
TPra6Ba Da pa6oTn C Hero IOd HaI3Opa I
CNOpeyKa3aHnIyTa H a OTROBOPHO JInce.
YBepete ce, ye notpe6ntjTe nIbHoneTe HnE 6nO6yueH 3a CbOTBeTHata npocecna CnopeN HaOnoHaHHnte pa3npoe6n N noD CbOTBeTHnHa3Op.
I3noJI3BaIte ypeIa cAmO KOrato CTe OTNoUHaII N B Do6po fN3nuecko INCINuHecKO CbCToHHe. Ako Imate 3dpaBOcNOBHI np6bEMn, Tp8Ba da ce KOHCyTTnPate c Baunna nekap dann MoKeTe Da paBoNTe cypeA.He paBoTe cypeA cnE ynotpe6a Ha aIKOXoI, HApKTou nn 3a6abAun CNOC6HOCTTa 3a peaTnpaeNekapCTBa.
YpeIbTe npEbnEn 3a NnHNo nON3BaHe.
BHHMaHHe - onaCHOcT O T 3JonoJyka!

IpaHcNte IpO6nKStIHLC a nOxOaun 3a pa3npo6BaHe Ha KIOHn npactntenHn octTaBcu. IVno3BaHeTo 3a npuTcEne He e no3BOJeHO, Tb KaTO MOKe Da 6bJe OAnCHO IN da NOBpeDypeDa.
Граинскata Дрбинka He 6иBa da ce n3no3Ba (HenbneH cnncbk):
-3a pa3npo6BaHe Ha npMATEpnaHn (Ha np. CtbKnO, MeTAn);
-3a DeHIOCTN, KOHTO He ca ONICAHN B Ta3n INHCTpyKUra 3a ekCnloaTaunia;
- 3a npOn3BOcTBo Ha xpaHnTeHN npOdyKTn (HaNP.3a pa3dpo6BaHe Ha nei, npriOTBHe Ha Cmec 3a cnnpTHa fepMeHTaun).
OTcbo6paxhen3a cnpyphocTce 3abpaHbBaNbPbHaHe Ha KaKbTaO n da 6nIO npomHa No ypeDa Cn3KnIOueHne Ha KBAINΦuIpaHn DONbIHNTeH eMOHTaX Ha Odo6peHn OT STIH npHaNDexHocTN, OCBeH TOBa TaKaBa NpOMHa 6n DoBela n Do OTMaHa Ha rapaHua. VHOpMaun 3a Odo6peHnTe pInHaADnexHOCTm MoKeTe Da NOyUHTe OT BaUnn CneunaHn3npaH TbproBeu Ha STIH.
I3pHNO ce 3a6paHraBA BcKaKBa MaHnynlaunno ypeDa, KOrTO NOBnUbaMoOuHOCTTnINuYeCTOTATA Ha BbPteHeHa DBnIRatEnC BbTpEeHOropeHe,CbOTB.HaeNEkTPODnIRatEn.
C ypeHa He 6nBa Da ce TpaHcnpTnpaXopa,ocObeHo Deua,JNBOTHn Nnnpedmetn.
Pn n3no3BaHe Ha ypeDa B o6uceTBeHn O6eKn, NapKOBe, Hc cnOpTHN NIOuaAdKn, NO yNIuN B CE9CKOCTOnaHcK N TROPKn PpeIppnTna Ce 3NcKBA NOBUNEO BHIMAHne.
IyckaIte ypeda camo KOraTo ce HAMnpa Ha paBHa NOBbpxHOCT n He MoKe da Ce IJIb3He cam.
4.2 BHHMaHHe - onachOCT OT TOKOB yap

BHHMaHHe! OnachOcT OT TokOB ydap!
MHoro BaXn 3a eJektpueckata 6e0nacnoct Ha ypea ca 3axpaHbauT Ka6en, uenceT, npeKcbauT u CbeHNHTENHnT npOboDnHK. 3a da ce N36erHe ONaCHocTTa OT KTOB ynap, He N3non3BaTe NOpeDeHn Ka6eni, KynnyHn i JeNcEi Nn HeOTRObapuHa H3NCBAHnTa CbeHNHTeHn npOboDnU.
3aToba peIOBHO npOBepraBaIte CbeHNHTINHnI pNOBOHnK 3a NOBpeIN INI npN3HaUN Ha CTapeeHe (yynlNbOCT).
IyckaTe ypeDa cAmo C hAmOtah 3axpaHbau Ka6en.
Pn n3noN3BaHe Ha Ka6eJen 6apaban ToT Tp86Ba npEn yNoTpe6a BnHa n da 6bJe pa3BNT DoKpaI.
Hnkora He n3non3BaIte nobpehen ydbJxnteHen Ka6en. 3aMeHeTe HEn3npaBHTe Ka6en C HOBn HpeMOHTupaTe ydbJxnteJIHtE Ka6en.
Pn nobpeHa 3axpaHbau,pecn. Ha ydbjnxntJHnna Ka6eI NO BpeMe Ha pa6oTa, He3a6abHo ro n3KIOHeTe ot eNeKtpo3axpaHbAHeTo. Hnkora He DOKOCBaIte NobpeDeHnna 3axpaHbau pecn.ydbjnxnteHen Ka6eI.
YpeBt He 6nBa da ce n3noI3Ba, aKo npOboHnUHTe ca nobpeDeHN IIN n3HOceHN. Po-cneuaJIHo 3axpaHbAunr KaBeI Tp8Ba da ce npOBepn 3a nobpeDn n CTapeEHe.
DeHIOCTIte NO NODpBjKka N pEmoHT Ha 3axpaHbAaNTe KaBeJN MoT Da ce 13BbPWBat CaMO OT KBaINΦnUpaHn CneuaJIInCTN.

OnachoctOT TokOB yap!
He BKNIOUBAIte KbM eNektpnueckaTa MPeka HEN3npaBeH npOBoHNK n He rO DOKOCBAIte, ppeDN da CTe rO N3BaDNIOT KOHTaT.
PexeInte 6JIOKOBe (HOXOBeTe) MoRat Da ce DOKOCBaT CNeI N3KNIOUByaHe Ha ypeDa OT eNEKTPuYeCKaTa MPeka.
BnHaHn BnHMaBaIte n3NoJ3BaHnTe 3axpaHbAuz Ka6eI Na ca Do6pe oBe3OpaceHn.

He pa6oTe Te npu DbKn B yCIOBna HbNCOKa BlaXHOCT.
Ppna pa6oTa Ha oTKpnTo n3non3BaTe cAmO n30nnpaHn Cpeu yBnara yDjKnTeHN Ka6eN, noxOJaUN 3a ynOtpe6a cypea ( 10.1)
I3BaKaJaTe CbeENHITeHNHn npoBOdHnK, KaTo XBaHete eenceJa n eenceJHOTOrHe3do,a He ro dbpnaJe.
He n3naraaTe ypeDa nIupeKTHo Ha dIbXJa.
Ako ypeIbTe BKNIOUeH KbM rHehepaTOp, BHIMaBaIte Da He Ce NOBpeDN NopaDN KOJIe6aHn Ha ToKa.
BkIIOUbaIte ypeIa cAmO KbM eJIeKTPo3axpaHbAne, KOeTO e 3aunTeHO nocpeTcBOM npeKcbBaY 3a 3auNTa cpeSy yTeueH ToK C MaKcImaJIeH ToK Ha n3KnIOuBaHe 30 mA. DOnbJInHTenHa INΦOpMaIg MoKeTe Da IOnyUHrTo OT eJIeKTPoTeXnK.
4.3 06Jekno n ekinnupobka

IIO BpeMe Ha pa6oTa BnHaRn HocTe 3aTbOpEHn O6yBKn C rpaHcpHN NOdMeKn. Hnkora
He pa6oTe 6ocn nnn c neKn o6yBkn, HanpImep caHdann.

BnHaH HocTe 3aunTHN KOKeHN pKaBUN CbC 3aTBOpEH MaHWeT NO BpeMe Ha pa60Ta,OCo6eHO No BpeMe Ha
pa6oTa nO noIopBxKkata, KaKTo n npn TpaHcnpTnpaHe Ha ypeJa.

IIO BpeMe Ha pa6oTa BnHaHn Hocete NtBTHO npNlaa npeNa3Hn Ouila.

IopxoaduTe npedna3Hn ouJa ce TcTeBaT 3a MexaHua yctOuNBOCT cbrnaCHO cTaHApT EN 166
NIM CbIaCHO HauNoHaJIHnTe
pa3npoe6n n ce npednaar TcB CbOTBeTHaT a MapKnpOBKa B TbproBCKaTa Mpeka.

IIO BpeMe Ha pa6oTa BnHaRn Hocete CpeDCTBa 3a 3aunTa Ha cnlyxa.

IopxoyaTa3aunHa cnlyxa ce TeCTBa CbflaCHO ctAnapr EN 352 uNc BcflaCHO HaunohnHInTe
pa3npope6n n ce npednaraT cbc CbOTBeTHaTa MapKINPOBka B TbproBCKaTa Mpeka.
Hocete n DBeTe npe3 yAnoto Bpeme, dokato pa6oTne.

Ppi pa6oTa cypea Hocete NOxOJaIoo 3a ceIa I NtBTHOpnIeHnAo oIeKeIIO, t.e. KOMbHe3OH, a He pa6oTHa
npectuKa. INo BpeMe Ha pa6oTa cypeDa He Hocete 7aIIOBE, BpaTOBp3KIn, YkpaSeHn, BnCraU JHeTN NIN BepNkKn IN dpyrN PNOObH eJeMeHTN OT OJNeKlIoTo n Akcecoapn.
Ipe3IaNoTO BpeMe,IOKaTo pa6oTne n npn I3BbPbBaHe Ha BCka DeHocT no ypeDa IbIraTa Koca Tp6Ba e Do6pe np6paHa (Kbpna 3a rnaBa, WAnKa N.T.H.).
4.4 TpaHcnpTupaHe Ha ypeDa
Pa6oTe cAmc nPpeIa3Hn pKaBUNi ( 4.3) ,3a da n36eHHe TepaHbAHN O T qactn Ha ypeia, konTo ca ropeu nn C octpn pb6Obe.
He TpaHcnopTnpaIte ypeJa c pa6oTeu eNeKtpoDburTaTe. Ppei ToBa n3KnHouTe eNeKtpoDburTaTeJn 3yakaIte HOXOBeTe Da CnpaT n 3BaJeTe Uencela OT KOHTaTa.
TpaHcnpToPauTe ypea caMo c n3CTnHaJ eNeKTpoDBrIratEn.
TpaHcnpTnpaTne ypeDa cAmO CMOHTnpaHa cNopeyka3aHnraTaФyHn 3a TbJIHeHe.

OnachOCT OT HapaHbAhe!
IopTeBnTeJrMoKe Da ce HapaHbBy OTKpNTte OCTpeeta.
BzmaTe npEbn TerIto Ha ypea oO6eHo npn HacnaHHeTo My.
3a TOBapeHe N3NON3BaIte NOJXODAJIIN NOMOUI CNbOpBXKeHnIA (TOBAPHn paMNI, NODEMHN MEXaHn3MNI).
3actonopeTe ypeDa Bbpxy ToBapHaTa nIaTOpma C noXoJusn IIO pa3Mep cpeCTBa 3a 3akpenBaHe (KoJaHn, Bbxketa np.). KaTo n3No3BaTe OINCAHnTE B Ta3N INCHpykua 3a ekCnloatau TOnKn 3a 3akpenBaHe. ( 12.3)
TereTe nJn 6yTaIe Te ypeDa cAmo C neXexOHa ckopocr. He ro terIe Ha 6ykCup!
Pn TpaHcnpTnpaHe Ha ypeHa Cna3BaIte MeCTHITe 3aKoHOBn pa3nope6n I NO-CneuNaH0 OTHacuHTe ce do 6e3onacHoCTTa npu TOBapHe n TpaHCnOPT Ha N3dEIny Bbpxy TOBAPn PnAtpOpMn.
4.5 Ppepi pa6oTa
YBepete ce, ye c ypea pa6oTc camo Jnua, KOnTO ca 3aNo3HaTu C INHCTpyKUraTa 3a ekCnloaTaunr.
Ipei npBbTO n3nOJ3BaHe Ha ypea Tp86Ba Da OTcPAnTe onAkOBKnTe n CpeCTBaTa 3a 3aunTa npn TpaHcnpTupahe.
CnazBaIte OnpedeneHnte B MeCTHITepa3nope6n yacObe 3a pa6oTa CrgaINHcN ypeDn,OBOpyDbHn CDBrATeL C BbTpEshO rOpHe NnEnEneKtpoDBrIraTeI.
Ipeynynotpe6aHa ypea BCnukn He3npabHN, N3HOceHN NOBpeDeHN
actn Tpr6Ba da ce 3aMeHrT. CtaHaJInte
HeueTnBNuN NOBpeDeHN
IpeDynpdeNTeHN CTKeepn no ypea
Tpr6Ba da ce nOmeHrT. BaunrT
cneuaJn3npaH TBproBeu Ha STIH L
noDbpbKa HnUHocT OT pe3epBHN
CTKeepn IN BCnukn dpyr n pe3epBHN qAcTn.

Onachoct ot HapaHbahe!
N3HOcEHnTe NIN NOBpeHn Yactn (HaNP. 3aTbNeHn HOKOBe) MOKe Da NOBNIaRr Ha 6eONaCHOCTTa Ha yPeDa N Da npuHr HapaHraBaHe Ha Notpe6nten.
Ipei n yckaHe B eknnoataa Tp6Ba Da npOBepTe n da ce yBepTe B CneHOTO:
- YpeIbTe B 6e3oNaCHO 3a ekCnloatauqy CbCTOHaHne. ToBa O3HaayBa, ye KanaunTe N 3aUHTHe npncnocobJeHHra Ca No MeCTaTa CN U ca B N3npaBHO cbCTOHaHne.
- EneKtpnueckTo Cbbp3BaHe e KbM KOHTaKT, MOHTnpaH CbIaCHO yka3aHaTa.
- Ⅰ30JaunTaHa CbeHNHTeHnna U ydbKnTeHnna Ka6eI, uencena n KynnyHra e B n3npabHo cbctOHaHne.
LcennrTypei (kopnycbT Ha eJektpoDBnrgatEny,3aunTHnTe npncnocobHeH,NpeNexHNte eJeMeHTN,HXOBeTe,HXOBnRT BaJI, NCKOBNTe HOKObE nDp.) He e HHTO n3HOceH, HNTo NOBpeDeH;
BypeHaHMa MaTePnAn 3a HApO6BaHe NФуHnTa 3aПьнHe e npa3Ha.
- BcnuKb 60ntoBe,raKn n npykn KpenexHn enemeHTn ca HauHn, CboTB.3aTeHaTn. Ppei npckane B ekcnloataun 3aterhe paXla6eHnte 60ntoBe n raKn (Cna3BaTe MOMeHTa Ha 3aTaRaHe).
3a da HamaJIne ONaCHocTta OT
fH3nuecko HapaHbAHe UIn MaTePnAHNu
UeTI, IN3NoI3BaIte YpeDa cMo Ha
OTKpIto I DaJeue OT CTeH Nm Dpyr
TBbpN IpEdmTe (B npOTNBcH Cnyua
INNCBaT Bb3MOXHOCTn 3a MaHeBpUpaHe
Ha Notpe6nteJ, CbIeCTByBa PnCK OT
ChyNbAHe Ha CTbKnA, INDpaACKBaHe Ha
ABTomO6nIn n dp.).
UpeBbT TpR6Ba Da ce NoCTaBn CtaBnHOBbpxy paBHa N TBbpda NOBbpxHOCT.
He n3no3BaIte ypeJa Bbpy NaBpuAnu nn NocnAnH C qakbn NobpXHocTn, Tb KaTO n3XBpIeHnT nn 3aBnxpeH MaTePnaJ MoKe Da npuHn HapaHaBaHn.
IpeNi BcKaO nycKaHe Ha ypeJa B
eKcnnoataun Tpr6Ba Da ce yBepnTe, Ye
Toi e 3aTBoPeH B CbOTBeTCTBne C
yKa3aHnTa. ( 11.3)
3a03HaTe ce c DeiCTBnTo Ha npekcbAca, 3a da MoKeTe da pearnpate 6bP3o n npabnHOB aBapnHcNtyaun.
3aunntata cpeu n3xBpuehe Ha MaTePnAa BbB cyHnra Ta 3a NbJIHe He Tp6Ba da e n3npabHa n da noKpna OToBpa 3a NoDaBaHe Ha MaTePnAa. CmeHete 3aunntata, ako e nobpe.deHa.
Onachoct OT HapaHbaHe!
IyckaTe ypeBa EeknloatauncaMoB MOHTupaHO B CbOTBeTCTBNE Cyka3aHnraTa cbctOHHne.AKo Yactn OT ypeDa JInncBat
(Hanp. Konoja), Hma da 6bdaT cna3eHn ppeDncaHnte 6e30aChn pa3ctoHn in OCBEN TOBa CTA6uHOCCTHa Ha ypea MoKe Da ce Hapuyin.
PpeBn BcAko nysKaHe Ha ypeDa B EKcnnoataa npoBepeTe BN3yAnHO daNN CbCTOARHneTo My CbOTBETCTBa Ha yka3aHnraTa!
Ja cBoTBcTcBa Ha yKa3aHnraTa O3Haayaba,yeypebTe HAnbInHO crNo6eH, I NO-KOHKeTHO:
- rophata yact Ha cyhna t e MOHTupaHa Bbpxy DonHaTa;
B rohpata yact Ha cyhna ta ca MOHTnpaHn npabuHNo 3auNTata Cpeuy nXbpyaHe Ha MaTePnaIa I npuctabKaT a 3a cyhnaTa C deTENHO6pa3Hn OTbOp Ha STIH;
-ФyHnIa 3a nIhHe He MOHTnpaHa BbPxy OCHOBHnYpeN dBeTe BNHTOBn TaN Ca 3aTeHnatNo6pe Ha pbKa;
KOMNJIeKbT Tpb6Ha CToIka 3a KOJIeJIaTa e MOHTnpaH; - DBeTe KOJenla ca MOHTnpaHn;
BCNUK3aUHTNnpucnOc6HeHn (JaxTa 3a nXbPnaHe,3aUNTa Cpeu y n3XbPnaHe Ha MaTePnAa N np.) Tp6Ba Da Ca HAnuHn Bn3npabHOCT; - pexeunr6bIOK (DnCKOBnT HOK) e MOHTnpaH;
- BCNUHKOBe ca MOHTnpaHcNopeyka3aHnra.
MoHTnpaHnTe Ha ypeJa npeKbCBAuN 3aunTHn npncnoc6neHn He 6Ba da 6bdaT OCTpaHraHHnn pnpnoKpmbaHn.
He pa6oTeTe CypeJa npn DbXd, 6pyn oOc6eHO KOrato mma onaCHOCT OT yap Ha MbJHNA.
Ako TepehBt e BnaxKeH, onaChocTta OT 3IIOJNYka ce yBeJIuHaBa NopaIi HamaJeHa CTA6NJHoCT Ha OpeaTopa. Pa6oTeMe MHORO BHMAteJIHo, 3a Ja n36BerHeTe NOxJb3BaHe. IIO Bb3MOxHOCT n36RaIte N3No13BaHe Ha ypeDa BbpXy BnaxHn TepeHn.
Pa6oTe cAmo Ha dHeBHa CBetnHa nn npu Do6po N3KycTBeHO OCBetneHne.
Ipe3IJIOTOBPemeHaeknloataunpa6oTHATA30Ha Tp8Ba Da ce NODbpxaHCTaNIOpeDeHa.OTcTpaHeteIpeMEnKoNTO Cb3daBAt ONaCHOCTOTCNbBAHe,HaNP.KAMBn,KNOH,Ka6eINnDp.
Onophata noBbpxHocT ha onepaTopa He 6nBa da 6bJe no-BnCoka ot onophaTa nobbpxHocT ha ypeda.
Ctaptupahe:
Ipei cTaptnpaHe Ha ypeHa ro nocTabe He 3npaBEN B CtaBnHa no3uqra. B HkaKbB CnyaH He ro nyckaIte B DeIcTBne B JerHano noJoxKeHne.
BkHouTe ypea BHIMATEJHO B cbOTBeTCTBNE C HCTpyKUInTE B rnaBa .NyckaHe Ha ypea B EcKnloaatauia" ( 10.3)
Pn CTapTupaHe Ha DBuratena C BbTpseHIO ropeHe, CbOTB. BKJIOvBaHe Ha eJeKtpoDburataTeHa cToIte nped
OTBOPa 3a n3xBpIaHe. Ipi CTapTnpaHe, CbOTB. BKNIOUbaHe B rpaINHcKaTa dpO6nJIka He 6nBa da nMa MaTePnaI 3a pa3dpo6BaHe. ToJ MoKe Da 6bJe n3XBpIe HacTpAHI Da IOBeDe Do HapaHraBaHe.
Pn cTapTnpaHe ypeBbT He 6nBa da e HAKIOHEn.
N36aBaeTe YeCTOe BKNIOUbaHe B
pamKnte Ha KpaTbK nepNoD OT BpeMe N He
cn "IrpaTne" C npeKcba.
OnachocT ot nperpBaHe Ha
eNeKTpoDburatae!
Pn HenoctoHNO HanpexeHne npEn3BnKaHnTe OT To3n ypeN KOle6aHn Ha HAnpexeHneTo IO BpeMe Ha pa60Ta Ha BnCOKn O6OpOTn MORAT Da Hapyuat pa60tataHa dpyrncBbP3aHn KbM CbuaTAt TOKOBA Bepura CbOpBeHn.
BTo3n CnyaH Tp6Ba Da Ce B3MaT NOxOJaMepKn (HaNP. CBp3BaHe KbM Dpyra TOKOBA Bepura, pa3NnHa OTa3N Ha 3acerHaTOTO CbOpXeHne, CBp3BaHe Ha ypeDa KbM TOKOBA Bepura C No-HnCKo TbNHO cbnpTuBHeHne).
No Bpeme Ha pa6ota:

Onachoct ot HapaHbaHe!
Hnkora He noctabraIte pbcTe ne KpaKaTc cHaD, nOd nn Do BbptaIHTe ce yactn.
Korato ypebT pa60tn, HnKora He 3aCTaBaTe C nIue nN C npyra qact Ha TJIOTo nped cyHnraTa 3a nbJnHe He nN OTbopa 3a nXbPJIne. DpBXe TnaBaTa n TAIOTO CN BnHaHn Ha pa3CTOHNe OTbopa 3a NOnaBaHe Ha MaTePnAna.

Hikora He noctabre Te pueTe cn, npyuaCTn Ha TAnOTo nn 06NeKnoto Cn BBb cyHnraTa 3a nJIHeHe nn BwaxTaTa 3a
m3xBpIHa. CbIeCTByBa rOJaMa ONaCHOCT OT HapaHbAHe Ha OHTe, JInuTeO, npbCTnTe, pbcTe nDp.
BnHaBn BnHmBaIte 3a paBHOBeCneTo n CTa6uHnA cn CTOeK. He ce npOraTe Happei.
IIO Bpeme Ha ekcnloataun He npaBeTe Hnio CbC 3aunTata Cpeu NxBbpuaHe Ha MaTePnAJa (Hanp.OTCTpaHraBaHe, NOBnHaHe, 3actOnopRaHe, NOBpeKdaHe).
Ipn3aepkdaheHaMaTePnaja
NOTpe6nteT Tp6Ba Da CTOn B
yKa3aHATA pa60tha 30Ha Ha onepaTopa.
Ipe3 YAnTo BpeMe Ha EKnnoatauHa
yPeDa BNHaCnCTOnTe B pa60Thata 30Ha
B HNKaKbB CnyaB B 30HaTa Ha
n3XBpbJrHe. ( 8.4)

Onachoct ot HapaHraBaHe!
IIO BpeMe Ha ekcnnoatauna
MaTePnAaT 3a pa3dpO6BaHe
MoKe Da 6bJe N3XBbPneH O6paTHo
HaRope. IOTpe6nteJrT MoKe da
NoLyuCepnO3Hn HapaHbAHnN
No
LIuTeO,OnTe n PbUeTe.3aToBa
HOcTe npedNa3Hn OUYNA
npedNa3Hn PbKaBnU ( 4.3) n
DpXkTe TnAbTa Cn DaJeY ot
OTbopa 3a NoDaBaHe Ha
MaTePnAna.
HnKora He NaKaHaNMe ypea,doKaTo DBuRatEnT C BbTpEwHO ropeHe,cbOTB. eJeKTpoDburatEnT paBoTu.
Ako no Bpeme Ha pa6oTa ypeBt naHe, He3a6abHNo n3KnHouTe eNEKtpoDBnraTeN n3BaTe Te enCeNa OT KOHTAKTa.
BHMabaTe da He ce HaTpynBa MaTePnA13a pa3dpo6BaHe B WaxTaTAta 3a IN3XBpIHaHe, Tb KaTO TOBa MoKe Da DOBeDe Do Ioo Pe3yIITAT OT pa3dpo6BaHeTo Nn Do o6paTHN yDapn.
Pn3aepxdahe Ha rpaHnckata
DpObIka C MaTePnA 3a pa3Dpo6BaHe
Tpy6Ba Da Ce BHMABA MHORO KAMepaTa
3a pa3Dpo6BaHe Da He NonaHaT UyKdN
TeJa, HAp. MetaJIH N AcTn, KaMbHn,
PiactMaCa, CTbKIO n T.H., TbJ KaTO Te
MOraT Da IOBeJaT Do NOBpeNi O6paTHN
yDaprO t FyHnTa 3a nbJIHe.

Onachoct ot HapaHbahe!
IotpebnteMTMOKe da 6bde cepno3HO hapaenOT otckaua MaTePnA 3a HApO6BaHe n yknd Tena. Na3eTe yKdN Tena daJeU OT ypeNa IOTcPaHete 3anyBaHnraTa He3a6abHo.

Onachoct ot HapaHbahe!
Ipi nIbHHeHa rpaDnHcKaTa IpO6nKc KNOH MoKe Da Bb3HNKHAT O6paTHN yApn. Iotpe6nteTmOKe da 6bTe cepno3HO HapAhen OTOTCKaU MATEPnA 3a HaIpO6BaHc. HocTe npEtna3n PbKaBnCn IN ppeNa3HOn OuJNa ( 4.3)

BHHMaBaIte3aDnBeKeHneToNo
HHePcNHapeKeU
HHTpyMeHT,KOeTO
STOP
npoIbJIkaBa OSe HnKoIKeCekyHdN, PpeIN INHCTpyMeHTbT
da cnpe HanbIHO.
N3KIOUeTe eNEKToDVBraTeNa, N3BaTeTe
IeCenAOT KOHTaKaTn I3yKaAaTe
CINpaHETo H BA BCuKN BbPTruN Ce
NHCTpyMeHTN:
-
npeDn da octaBnte ypeDa 6eHaI3Op;
-
npeIa npemecTBaTe, NOBnraTe, npenacrTe, haknaHrTe, byTaTe nn DbprNaTe ypeDa;
- npeIa OTBnTe BnHTOBnTe TaII N da OTBOpnte ypeIa;
- npedn da TpaHcnopTnpate ypeda;
- ppei Da oTcpaHnTe 6nokupaHe nn 3aynwbahe B pexeue 6nok, cyhnaTa 3a nIbIHe He nn KaHaJa 3a NxBbpJrHe;
- npei Da n3BbPwnte DeHocTn NO DnCKa 3a HOXOBete;
- ppei npOBepka iINI NOuCTBaHe Ha ypeJa IINI ppei N3BbPbBAHe Ha dpyrN DeHocTn No Hero.
AkoBpekeunnHCTpymEnTnonaHe 4yKdoTJIO NypeDbT3anOHe DaN3daBa HeoBuHnUWMOBe Unnc CeNoBRT HeoBuHn B6paCn,He3a6abHo n3KnIouTe eJeKtpoDbrVaTeTn Iu3aKaHte ypeDa cnp. U3TerneTe MpeXOBnIeNCen,CbAnTeФynrTa 3a TbJIHeNE N3NbJIHeTe CNeDHnTe CTbKN:
- PpOBepe Te ypea n no-CneuaHOp pexuea 6LOK (HOXOBTe, DnCKOBn Hox, IbpxaHa Ha HOx, 6oTtHa HOxa, 3aTgA u npCTeH) 3a NOBpeu INI IN3HOCBaHE N B3IOKeTe INBbPwBaHeTo Ha Heo6xoDmntPeMOHTn IN DeHOCIn IO NoIDpBkKaTa Ha CneuaNlCT, npei OTHOBA BKIOHTe ypea n da paobOTte c Hero.
- PpOBepeTe DaJIu BCNUqKu qactu Ha pexuea 6Iok ca 3aTeHaTu; npn Heo6xoJIMocT Do3aTeHete 60IToBeTe (Cna3BaIte MOMHTnte Ha 3aTaRaHe).
-ObbpeTe ce KbM cneuaJIncT 3a CmHa nn peMOHT Ha NOBpeJeHnte N 3HOceHN YaCTN, KaTO HOBnTE YaCTN Tpa6Ba Da ca C eKBuBaJIeHTHn XapakTePcNTKn.
4.7 PndpBkka npemOnTH

IocTaBete ypea Bbpxy TBbpn paBeH TepeH, n3KnOchete eNkTpoDnBraTeJn N3BaTeTe 1eCena OKTaKaTaNpeDN
da 3anoyhe Te deHocn no noDpBkKaT a (nouchBaHe, peMOHT n dp.) n ppei da npobepnte daJI 3axpaHbauJrK aben e npenIteH nn NobpeJeH.
PpeINBCaKaBn DeHocTn N0NoDpBxKkataOCTaBeTe ypeDa DaN3CTnHE 3a OK.5 MNHyTN.
Ipei Da n3BbpWnte DeHocTn no
NoDpBxKkata Ha pexEuN HcTpyMeHT,
ce yBepeTe, ye ToM MoKe Da Ce BbptN
BbnpKeN 6JOKnpaUTo YcTpoiCTBO DOpN
KOraTO eNEKTPO3axpaHbaHeto e
n3KnIOueHO.
3axpaHbauT Ka6eI Tpr6Ba da ce nonpabry I NOHOBBA cmo OTOpn3npaHn eNeKtPOTeXHn.
NouCTBaHe:
CneI ynoTpe6a ueJrYpeI Tp8Ba cTaPateJIHo Da ce noUcTn. ( 11.1)
Hnkora He non3BaIte npo- nIbBOIOCTpyka I He noUcTBaIte ypeJaIOd Teuaa Boga (HaNP. C rpaunHcknMapky).He n3no3BaIte arpecuBHN noUcTBaUn npenapatN. Te morat da nobpeJrPiactMacOBrte mTaJIHnTe YaCTN, Koeto Da BLOOn 6e3onachata pa6ota HaBaAun ypeHa STIH.L
DeHocTn no noDpBxKkata:
Pa3peSeHo e n3BbPbBaHe cAmo Ha onncaHnte B Ta3n IHCTpyKpua 3a ekPiioatauia DeiHOCTn NO noIpaBpbXkata -BCNcKN OCTaHaII pa6OTn Tpr6Ba Da ce N3TbJIHBaT OT CneuaIIN3npaH TbproBeU.
B cnuyaiyece hkydaete ot
HnOpmaunna nn NMOUHN CpeDCTBA,
BnHaN ce 06pbuaTe KbM
CneuAn3npaH TbproBeu.
STIHn npenopbyBa deHocHTne no
noDpBXka n peMOHT da ce n3BbpWbaT
cAmO O T CneuAn3npaH TbproBeu Ha
STIHL.
Cneuannnupanhte TbprounHa STIHpeoBHO npemnhabat oyuHne nMce npoeocTabraTexnuecka HOpmaun.
U3noJI3BaIte cMo pa3peWeHn ot STIH LNHCTpyMeHTN, pInHaJdJIeXHoCTn uypei 3a DOnbJIHNTeJIHO npKauBaHe IIN TexHNueCK n EKBuBaJIeHTHn YAcTn, B npOTNBEN CnyaM MoKe Da Bb3HNIkHe ONaCHOCT OT 3IIOJONYka, KOrTO Da IOBeJe Do fN3uYeCKo HapaHЯBaHe Ha xopa IIN NOBpeHa Ha ypeHa. Ako IMaTe Bbnpocn, ce o6bphete KbM CneuaIaI3IpaH TbproBeu.
OpunHaJIHnTe INCTpyMeHTn, npinHaJIeXHoCTn n pe3epBnH qactn Ha STIH No cBoNTe KaueCTBa ca ONTmAmNo CbIaCyBaHn CypeDa N3NCKBaHnra Ta Ha notpe6nten. OpunHaJIHnTe pe3epBn H actn Ha STIH L ce no3HaBat no KaTANOHN Homep Ha STIH, no HaJnCa STIH n eBeHTyAInHO no 3naka Ha pe3epBnHa T acT Ha STIH. Bbpxy MaIKnTe qACTn MoKe da Ima CaMo 3HaK.
BnHa nOaBpKaIte npEynpeHnteHNHe uYka3aTeHNHe CTnkePn UcTn uCtJbN. NObpeDeHn INn INrSybeHn CTnkePn Tpr6Ba da ce 3aMeHrT C HOBnOpunHaHn CTnkePn OT
Baun CneuaHn3upaH TbproBec Ha STIH.L.AkO daen DeTaN Ce 3aMeHc HOB, nporxKeTe ce HOBnT DeTaN Da noJyCNbUe CTnKepe.
Ppi pa6oTa no pexeunia 6nok Hocete BnHa n npedna3Hn pbkabuun ( 4.3) n 6bnde n3KnIOHTeINHO npedna3NIBn.
BHHMabaTe BCnKr raiKn, naiu n 6oTObe, oOBeHO 6oTObTe Ha pexuea 6NoK, da ca dope 3aterHaTu, Taka ye ypebT da ce HAMpu B 6e3onacHo pa60THo cbCTOHNHe.
IpoBepaBaiTe peoBHO ueJypeOoc6eNo npEn Da ro npnbepe3 3a cbxpanHeHne (Haep. npe3 3mMaTa) 3a n3HOCBaHe nn NobpeDi.OT Cbo6paKeHn 3a cnpypnoCT noMmeHnTE BeHara n3HOceHnTe nn nobpeDeHn qactn, 3a da sbde ypeBbT BnHarn B 6e3onacHo pa60THc bCTOJHnE.
B cnyaaye 3a n3BbPwBaHe Ha deHocTn no noDpBxKaTa ca 6nnn OTCpaHeH N KOMNoHEHTN nn 3aUnTHn npncnocO6NeHna, Te Tp8Ba da ce NOCTABRT OTHOBo CneT TOBa CbrrNaCHO yka3AHnra.
4.8 CbxaHenne npn npoDbJnxTeHNO HEn3non3BaHe Ha ypea
Octabete ypeda da n3CTnHe 3a ok.5 MNHyTN, PpeDn Da ro OCTaBNTe B 3aTbOpeHO NOMEueHne.
YBepTeCe,Ye ypeTBe 3aunTeH cpeUy Hepa3peWeHa ynoTpE6a (Hanp.OT Deca).
IOnuNCTeTe ypeDa oChOBHo, npEdu da ro npn6epete 3a cbxpanenHe (HaNP. npe3 3mata).
CbxaHbAte ypea B cbctoHne 3a 6e3onacha ekcnnoataun.
CbxpahraBte ypeHa Ha paBaHa NOBbpxHOCT Taka, Ye da He MOKe HeBOHnO da Ce nTb3He.

OnachocOT HapaHraBaHe OT OKpTNOcptneta!
CbxpaaBaeTepaHncknte Dpo6nKcamaOcmOHnpaHa cyHna 3a nHehe.
4.9 N3xBbPnAHe
OtnaBcHnTe npOdyKTmMoraT da HABpeJrTaHaXopaTa, XNBOTHnTe n OKoHNHaTcpeDa n3aTOBa Tp6Ba Da ce n3xBpIaT cNopeD CbOTBeHTnTe npedncaHna.
ObpheTe ce KbMaBaaNnaeHTbp 3a peuknnpaHe nn KbMaBaaNra cneuaaHn3paH TbproBeu, 3a daHayuTe KaKa Da n3xBpbJrTe npabnHo OTnAbyHnTe npOdykTu. STIH LnpopbYBa CBOiTcneuaaHn3paHn TbproU.
YBepTe ce,Ye n3JIe3JnT ot yIOTpe6a ypeJe 6bJe npdaen 3a cbO6pa3eHo C n3NCKBaHnra Tn3XbPnHe. PpeDn da 6bJe n3XBpLnE, ypeDbT Tp8Ba Da ce npBBe B HerodNo 3a yIOTpe6a CbCToHHe. 3a npDeTbPaTaBaHe Ha 3IIOJNYK MxHete npdi BCNUKO 3axpaHbAunKa6eI, CbOTB. CbeDNHTeHNr IpOBODHK 3a eJIeKTPODnRaTeJRA.
5.ОпиcaнеHa cIMBONITE

BHHMaHne!
IpooyTeTe HNCTpyKuYTa 3a ekCnloataa, npEyn da n3No13BaTe ypeia.

Onachoct ot HapaHbaHe! He donyckaIte cTpaHnHyn Iuca B ONaChata 30Ha.
OnachocT OHT HapaHbAhe! BbyrpuCe nHCTpymeHTn! He dpBxTe pTuTe n KpaKaTa CN B OTBOpTe, Korato ypeDbT paBoTn.

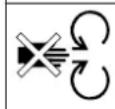
Onachoct OT HapaHbaHe!
I3KIOUeTe eEKeTPODIBNATeJIa I 13BaJeTe 3axpaHbAunia Ka6en OT ypeJa, npEn Da I3BbPwITe KaKBUTOn Ja e DeHOCTN PO pexeunia HnCTpyMeHT, DeHocTN, CBbp3aHN C NOdpbXka N noHCTBaHe Ha ypeJa, npEn Da npOBepNTe DaII I 3axpaHbAunr Ka6en e npennTeH INI IOBpeHn I npEn DA OCTABNTe ypeJa 6e3HaJ3Op.


Hocete cpeicTba 3a 3aunTa Ha cnyuxa!
HocTe npedna3n ouina!
Hocete npedna3n pbkabu!
OnachocOT HapaHbAhe! He ce kaayBaTe Bbypxy ypea.
Onachoct ot HapaHbAhe!
Hnkora He noctabnTe
pBcTe CN,dpynuactnOT
TJIIO NNI OJIeKlTO Cn
BbB DyHnTA 3a PbJIHeHe
NIN B WaxTaTAta 3a
N3XBbpnaHe.
6. OKOMNJIeKTOBka

P03.HaMeHoBaHne 6p.
A OCHOBEN ypei c cyHn3a 1 nbHeHe
B Tpb6Ha cToiKa 3a 1 KOJIeJaTa
C Hactabka 3a n3xBbpnnahe 1
D DeΦJIeKTop 1 E NaIcTHa 1
F Konecha oc 1
G Koneno 2
H Kanak Ha konenoto 2
I Paneu 2
J BoNTc wecToBbHa rnaBa 2 M5x40
Kraika M5 2
Onachoct ot HapaHyahe!
Cna3BaIte yka3aHnIra 3a 6e3oNaChOCT B rnaBa ,3a BaWata 6e3oNaChOCT". ( 4.)
7.1 MoHTnpaHe Ha Konechata oc H KOJenata

- MoHTnpaTe KOJecHata oc (F) c 6oJIToBete (J) n raIKnTe (K) c NOMOuTa Ha KOMbUNHpAHHa KNIOU (Q) KbM TpB6HaTcToIka Ha KOJIeNATA (B) (4 - 6 Nm).
- ΠbXhHeTe ⅢaBnTe (L) n KoIenata (G) KbM MOHTnpaHaT a KOJIeCHA OC.
-ФИКСИРаTe KOLENAc 6b30aTЯAunTe npIcNoC6JIeHn (M) KbM KOLEChATA oc.ПБxHete 6bp3OaTЯAIoTO npIcNoC6JIeHne Bbpxy KOleChATA oc DToJIOKaBa, Ye KOLENaTa Da MoRaT da ce BbPTrCT Cbo6oDnHO CneI MOHTaJa. - NocTabete kanaunte Ha koJeNata (H).

BbP3o3aTgauTe npncocobnna (M) Morat da ce demoHTnpaT cmo kato ce chynr.
7.2 MoHTnpaHe Ha HactaBkata 3a n3XBpJIHe XOIOBnMexAHN3bM
- IocTaBete OCHOBnIypeI(A)c yHnraHaNoJy Bbpxy paBHa n YnCTa nobbpxHOCT.
3aKaayete Hactabkata 3a n3xBbpnahe (C) c nomoTuHa kyKeTe (1) ot 3aHnTa CtpaHa B OTBOpTe Ha OCHOBnA ypei (A) nHa KaIOHHe Taka, ye npedHaT auct Ha OCHOBnA ypeI Da BNe3e ToUHO B OTBopa Ha Hactabkata 3a N3XBpnahe.
3aBnTe 6oJToBete (P) BkyKnte (1) (1-2Nm),KaKTo e noka3aHo Ha cnrgypata. - TbXHeTe DOKpaI DBeTe KpaYeTa Ha Tpb6HaTcSTOka (2) Ha xoOBnMEXaHn3bMbBbBBOdaHTe Ha OCHOBnIypeI (A).
-
HatncheTp6hata cToika 3a kOJIeIATA (3) B npope3nTe Ha HAcTabKaTAta n3XbPpIHe.
3aTeHHeTe XoIOBnMexAHn3bMc 60JItoBe (N) (1-2Nm). -
IocTabete deΦneKtopa (D) KbM Hactabkata 3a n3xBpIne. Pn3aKaUBaHe Ha deΦneKtopa BHIMAbaiTe pe6pata (1) OT BbTpewHATA My CtpaHa da JnerHaT OTJIABO NOTdCHO B CbOTBeTHITE HAnpaBlaBaUN KaHJIu Ha HAcTaBkata 3a n3XBpIne (2).
- ΠbXheTe naiuTe (I) OTnABO nOTdACHO.
7.4 OTBapAne H 3aTbapAne Ha deΦnEKToppa

OtBapnHe Ha dePneKTopa:
3a da 3anoHHe pa3dpo6BaHe, OTBopeTe Harope DeΦJIeKTopa (D) n ΦNKcnpaIte 6JokpuaTa nlaCTnHa (1) B HactaBkata 3a n3xBpIaHe.
3aTbapnHe Ha deΦnEeKTopa:
3a TpaHcnpOpTnpe HIN CbXpaHeHne Ha MaNKo IpoCTpHaCtBO NOBmHHeTe JeKO 6JoknpaUaTa NnactHa (1) n np6epeTe HaOny DePfKeToppa (D).
7.5 OTdJIeHHe 3a HcTpymEHTn
B 3aHaTaaCT Ha yHnra (1) 8 KOMbHnHpaHnT KnHc (Q) MoKe da Ce nocTabn OTkbm DoJHaTa CtpaHa B OTdEnHeHneTo 3a HnCTpyMeHTn (2).
MaKcImaJIeH dIaMeTbp Ha KNoHa: 35 mm
7.3 MoHTIpaHc Ha deΦJIeKTopa

- NocTaBte NaIcTHaTa (E) B HacTabKaT3a 13XbPnAHe. 3aBnTe 60ntoBeTe (O) (1 - 2Nm).
-ИзпраВеТе раДинсkaТа Дрбилka.
8.4 Pa6oTHa 30Ha Ha onepaTopa
- OT cbobpaxkhena 3a cnpyhocn
- npe3 qyto Bpeme Ha
- ekcnnoataunna Ha ypeDa (npu Bk
- eJeekTPOBnRatEn, CbOTB. pa60t
- DnBnAteJ C BbTpewHo ropeHe)
- onepaToPbT He 6nBa Da Hanyck
- pa60Thata 30Ha (CnBaTa NIOU,
- npdeN BCNUKO 3a Da He 6bDe Ha
- OT n3XBbPnHnna 6paTHo MaTeP

8.5 PpaBnJHo HatoBapBaHe Ha ypeDa
HaTOBaBte eEeKTPoDburatJe, CbOTB. DBiRaTeJc BbTpEshO rOpHe Ha rpaHnckata DpObUka cAmO dToJNKoBA, ye YecToTaMy HbPteHe da He cnadHe npactuHO. BnHarz apeXdaIte MaTePnAJa B rpaDnHckata DpObUkapabHomepHo nocToarHNo. Ako no BpeMe Ha paBoTa C rpaDnHckata DpObUkac YeCToTaHa BbPteHe cNaIHe, CnpTe IHO-HaTaTBshOto NODaBaHe Ha MaTePnAJa, 3a Da pa3TOBapuTe eEeKTPoDburatJe, CbOTB. DBiRaTeJc CBbTpEshO rOpHe.
8.6 3aunTa cpeu npetOBapBaHe
Ako no Bpeme Ha pa6oTa ce noIyU npTeOBaBaHe ha eNeKToPDnBnRaTeJRA BrpaDeHaTa 3aUIta CpeUy npTeOBaBaHe rN3KnOuBa aBTOMaTnHIO.
CneI KaTo n3CTnHe 3a OK.10 MNHyTn,
rpaHnCKata DpO6nJIka MoKe OTHOBo Da
6bJe NcHATA B EKcnNoaTaun.
PiuHnTe 3a YecTo 3aJeNCTBaHe Ha
3aUniTata CpeU npETOBapBAHe MOrat Da
6bDat CneHNHe:
- HenoJxOJa3axpaHbau Ka6eI (10.1);
-празоване на мржата; - ypeBt e npetobapen OT npekaleHo rolemnte konuyeCTBa 3a pa3npo6BaHe nI npaI N TbI IN HOXOBe.
8.7Пи6лokипан ржец 6лok ha rpaunHckata dpo6nka
Ako pekeuay6JOK Ha rpaunHcKaTa
dpo6nJa 6JOKupa NO BpeMe Ha pa6oTa,
BeHara n3KnHouTe eEnKtpoDburAteJe N
n3BaJeTe 3axpaHbuaa Ka6en. Cnei
TOBa cBaJeTe yHnaT3a nbIHe He
OTCTpaHeTe npHnHaTa 3a nobpeDaTa.
8.8 3apekdahe Ha rpaHcKaTa dpo6nka c MaTePnaI
Mek matepnaJI:
- OprahuHn paCTtEnHn ocTaTbU, KaTO OTnAdbuO IT NIOObE, 3eJeHuU, UBeTg 3a pa3dpo6BaHe, Wyma, TbHKN KIOHn Ip., ce 3apeKdAT npE3 rolemna npabobIeH otBop (1).
TbprMaTepeHaJ:

PpeBapntenHo Hap3BaIte C rpaHncka HoKuca Je6eIne n cnHPO pa3KnOHeHKnOHi.
- OTPra3aHnO T dBpBeta n KINB PNET MaTePnA 3a pa3dpo6BaHe, KaKTo N KIOHnTE NOdaBaIte 6abHO npe3 DeTeNnHoo6pa3HnO rTObOP (2) Ha STIHLOkpan DaChata CTeHa H a CyHnTA KbM HOKOBn MExaHN3bM. YpeTbT cAm n3TeTnRA TBbpDnMaTePnA.
9.3aunTHn npncnoco6JeHna
9.1БлokupaHe aBtOMaTHUHOTO CTapTupaHa ha eNEKtpoDbnIraTeIa
YpebT MoKe Da ce nycHe B
EeKnloaTaun CaMo C NOMOuTa Ha
npeKcbuHa, a He Upe3 BKNIOUbaHe Ha
3axpaHbua KaBeB KOHTaTa.
9.2 Ppepa3Ho 3KlnOuBaHe
EneKtpoDBuRatJeT, CbOTB. pa3DpO6BaUaNt INHCTpyMeHT MoKe Da ce Nycka B EKcNlloAtaunca Camo Pn npabINHO 3aTBOpEHa FynHra 3a NbInHe. PtN OTBUBaHe Ha JAcHata BNHTOba Tana (nocokata Ha NorNeJa e Ot npedHa cTpaHa Ha ypeDa) NO BpeMe Ha ekCnloataunia ENEKtpoDBuRatJeT Ce n3KnHouBa ABToMaTuH O CNeI HAKOLKOceHyd n pa3DpO6BaUaNt INHCTpyMeHT cnipa.
9.3 INhepuOnHa cnpaKa Ha eJeKtpoDnraTeJr
HHePouHnHaTcnpaKa Ha eJeKToPDBnTaTeNaHamaJbBa BpeMeTo Ha DnKeHne No HnepuNdo HKOJIko CeKyHnO Tn3KnUoBaHeto Do CnpaHeto Ha HOKOBete.
9.4 3aunTHn kana
PraHcKaTa Ipo6nka e o6OpyDbaHa CbC 3aunTHN KanaB BceKunrTa 3a TbJHeNe N3XbPnHe. KbM Tx CnaDat YIaTa Fynr 3a TbJHeNe 3aeDHO C
rohpata Nuchn 3aunTata cpeuy n3xBpcahe Ha MaTePnaHa, HAcTaBkata 3a n3xBpIaHe NdePneKTopbT.
3aunTHnTe kanaun rapaHTnpat cna3BaHeTo Ha 6e3oNaCHO pa3CTOHNr OTO HOKOBete 3a pa3Dpo6BaHe NIO Bpeme Hpa6ota.
Onachoct OT HapaHbaHe!
PpeBn BcKaKbN DeuHOCTn no
noDpBkKaTa- mNIOHCTBaHETO Ha ypeDa BHIMateHNO npOteTe rnaBa ,3a Baawata 6eOnacnocT
(⇒4.), n no-cneuHaHOp pa3dJe, NpOaBxKa u peMoHTn" (⇒ 4.7), n CneBaIe ToH O BcNKn OINCAHn TAM yka3aHn.
V3BaTe UeCenca OT KOHTaKa, npEn Da 3AnOCHete KaKbnto N da 6nlo DeHocTn No NoDpBxkata!
11.3 MoHTnpaHe Ha cyHnTa 3a nblHe He
3aKaHeTe 4yHnTa 3a nJIHeHe (1)B3aKpenBaUHTe KyKn Ha OCHOBnIypei (2)NЯ3aBbPteTe HAppei.
3aTeHHeTe DBeTe BHTOBu TaII (3) eHOBpeMeHHO.
11.4ФИКСИРанHaДИСKa 3a HOKOBeTe


BnHa n CneI MOtax Ha NcKa 3a HoxOBeTe I npEi NIOHOBBAHe Ha pa6oTa7 6IOKnpauOTo UcTpoIcTBo Tp8Ba Da Ce Bpua Bn3XoDHO NOLOKeHNe I da ce 0e3oNaCABc 6oNTa (BxK fpypata).
-ДемоHTирайтeteфуняТа3aПьнHe.11.2)
Pa3xna6eTe 60nTa (1).
3aBbptTe DnCKa 3a HOKOBete, Taka Ye npope3bT da 3aCTaHe nped 6IokupaTO yCTpoiCTBO (2).
- Плзне 6лokupaTOустpoNTBO (2)Вnpope3a.
- 3aterheTe neko 6oJra (1).
11.5 NpOdpbXkKa Ha HOxOBeTe
InTepBaJ 3a noDpBxka: Ppeu BcKa ynotpe6a

-ДемоHTpauiteфунraТа3a nBJHHe. ( 11.2)
ΦHKcnpaTe DnCKa 3a HOXOBete. (11.4)
- PpOBepeTe HOxOBeTe 3a NOBpeDN (pe3Kn NnN pyKHaTnH) n N3HocBaHe n npu HxKa Tn O6bPheTe nn CMeHeTe.
Граици На ИЗнOCBAне НoxOBeTe:

IpeDIOCTnHaHe Ha nocOeHnte IpaHnHa Hn3HOcBaHe
CbOTBeTHnTe HOKOB Tp6Ba Da Ce
O6bpHAT Nm CMeHrT. STIH L npenOpbYBa CBOnTe
Cneuann3upaHn TbproBun.
106pbuaa cehoX
- U3mepete Ha HЯколко меса по HOka pa3ctoHneTo (A) OТ OTbopa do p66a Ha HOka.
MnHmAlHo pa3CToRnHe 6 MM
2JlonatkoB HOX
- ⅠЗмерeteшпунна(T)Haи3ВИТЯ Haropepb6HaJNonaTKOBnHOK.
MnHmMaHa HpiHa Ha HOka 18 MM
DemOHHTnpaHe Ha KOMJIeKTo HOKOBe:
-ФИКсupaаTeДИСka3aHoxOBeTe. ( 11.4)
- P a 3 b u n i te 6oTt a (1).
Cba nete 60nTa (1),nonaTKOBHHOK(2)uDnCKa3aHOXOBTe(3).
MOHTupaHe Ha KOMJIeKTe HOKOBe:

CnAsBaTe ToOHO NOCOeHnMOMeHT Ha 3aTaraHe, TbKaTO OTTOBa 3aBNCn CNrpyPHOTO3aKpeNBaHe Ha peKeuINHCTpymENT.
- IocTaBete DaNcKa 3a HoxoBete (3) n ro cnKcnpaIte. ( 11.4)
- NocTaBete OTrope IOnaTKOBnHOx (2) 3abuTe 6oTta (1) (25 Nm).
-Пьзhte6лokирашоу yctpoicTBO obpaTHOи ro Фнкс苹Te c 60NTa, 3a da MoKe ДИСКБТ 3a HOXOBeTe OTHOBO CBO6OДно DA ce BbpTN. (⇒ 11.4)
06pbuaneHaHOXOBeTe:

TbNTe HOKOBe 3a pa3npo6BaHe BOJr DO HamaJeHa npOn3BOJnteJIHOCT npi pa3npo6BaHe. 3aTOBa IMa Bb3MOxHOCt 3a eNHOkpaTHO o6pbUaHe Ha o6pbUaUaIc Ce HOK KOrATo Ce 3aTbNI.
-ДемоHTnpaTteДИСКа3aHoxOBeTe, cIeI TOBa pa3BnITe 6OITOBeTe (4) n I rCBAIeTe 3aedHO CraNKITE (5).
- I3BaTe Hoxa (6).
- Почисте ДИСКа 3a HOKOBeTe.
- O6bphTe Hoxa (6) n ro noctabete da JnerHe Cbo6oJHo C ocTpaTa CTpaHa Bbpxy DnCKa 3a HoxOBeTe, KaTo NpDpaBHnTe OTBOpnte.
PbXHeTe 6oNTOBeTe (4) npes 0TBOpuTe n 3aBnTe raiKeTe (5). 3aTeHete raKeTe (5) c 10 Nm.
3aTOUbaHe Ha HOXOBete:
Ako Hoxobete ca ce 3aTbnnn n OT dBeTe cTpaHn, Tp8Ba da rna 3aToounTe, npEn da npOdbJnxte pa6ota.
3a da ce rapaHTnpa onTmAmHo
fynKuOHnPaHe Ha ypea, HOxOBete
Tp6Ba Da ce 3aToCbAT cmo OT
cneuaHCT. STIH LpenOpbVb CBOITe
CneuaHn3PAnH TbproBUn.
-ДемоHTираTe HOXOBeTe npeДи 3aTOUbaHe.
-ПиЗаToUbaHe oxnaTeTe HoxOBete, Hanpimep c Boda. He 6nBa da ce noIyaba CInHbO OCbETBaHe, 3aIoTO Taka ce HaMaJIraBa yCToNBOCTTa Ha pIaHa.
- HatoybaTe HOka paBHomepHo, 3a da n36erHete Bn6paun npaun dnc6anac.
- PpeM MoTaxKa npOBePeTe HOxOBeTe 3a NOBpeN: Te Tp6Ba da ce NODMeHrT, aKO CE BIXKaT pe3Kn INyKHaTIHN INA KO ca DOCTnIHATn rpaHnIcTe Ha n3HOCBaHe.
- PexeInte p6oBe Ha HoxOBete ce 3aTOyBaT NOBn 30^
Hoxobete ce 3aToBaT cpeu peKeuspa6.
Cne3aToUbaHe NoBUNITE ce hepabHocTn no pexeunpa6ce otCTpaHbATc mHaWKypka.
- Pn MOHTaxKa Ha HOXOBe Tcna3BaTMe MOMENTe Ha 3aTgAHe, NOCOyEHn B pa3dEn ,Obpbuane Ha HOXOBeTe".
11.6 EneKtpoDbnIaTeJ n KoJIeJa
EneKtpoDbBnraTeIaH He ce HyXJa e O T noDpBxKa.
IanaepnTe Ha koJeJaTa He ce HxKdAaT O T NOIpbkka.
11.7 CbXpaHbAbe n 3mHa nay3a
CbxpaHbAaTe rpaHnckata Dpo6nka B cyxo n 3aTbOpeHo NOMEeHne 6e3 npax. YBepeTe ce, ye ypeBt e ocTaBen Ha MxCTo, HeIOCTbHNO 3a Deca.
CbxpaHbAte rpaHnckata npoBnka camo B 6e30nacHO 3a eKcIIOaTauncaCTOAHNE n C MOHTnpaHaФyHna 3a nbJHeHe.
Pnno-npOdbJnxKeTJHo HEn3noJ3BaHe Ha rpaAnHckata npo6nka (npe3 3mata) Cna3BaIte cneHNTE yKa3aHn:
- NOUHCTeBHHMaTeJHo BCNUKN BbHsHn Yactn Ha ypeDa;
CMAKeTe C MaCNo, CbOTBeTHO rpeC, BCuKn PNOBvKnH YuactN.
12. TpaHcnpTupaHe

OnachoCT OT HapaHbAhe!
Ipeu TpaHcnpTupaHe Ha ypea BHNMaTeHNO npOeTeTe n Cna3BaIte Yka3aHnTa B rIaBa,3a BaWata 6eONacHocT" n noCneUHaNHO B pa3Je1 "TpaHCnpTupaHe Ha ypea". ( 4.4)
12.1 Nobdurahe nIIN npehacnHa Ha rpaunHcKaTa dpo6nka


3a nobDnIraHe nnI npEhaCHe Ha ypeJa ca Heo6xOIMM BnHaHn noHe DBaMa dyuN.
Hocete noDxOJaUo 3aUHTHO obKeNo. DOnHaT aYact Ha pBuTe n roPHaTa YAcT Ha TAnOTo TpA6Ba da ca NOKPTN n3uIIO.
-
yOBek: xBaAa rpaDnHcKaTa ДрбИнka 3a рБkoXbAtKaTа, pa3noJoxKeHa Bbpxy ropHaTa qacT Ha ФунЯТa (1).
-
YOBek: XBaIaI rpaIHHcKaTa Ipo6nIka 3a IaIcTHaTHa HAcTaBkata 3a N3XBpIHe (2).
-ДвамаТа NOВДИгATEнHOBpeI rpaHnCKaTApObUkA.
12.2 TerJene nIe 6yTaHe Ha rpaHnckata dpo6nka

XBaHete3paBOrpaHnKcTaI np6uNka 3a pbKOXBaTKaTa (1) nHaKnHOHe Ha3a.
- Граиннска та добилka можеда се.Terги Ип 6утбabHo (с的新хога ckopoct).
12.3 TpaHcnpTnpaHe Ha rpaHnckata Dpo6mka Bbpxy TOBapHa nlaTΦopMa

- Obéonacete ypea cpeuy xlb3rahe c noxodn KpenexkHn cpeCTBa. 3aterHe Te Bbxketa Tn N konahnte npu Tpbhata ctoka 3a koleta (1) n nn fynnra 3a nbJnhe (2).
13.МинимираHe Ha ИЗнOCBaHTo И празOTВразЯВaHe Ha ПОВразИ
BaxHn yka3aHn 3a npdpbXkHa rpynata npoDyKtn
EneKtpnueckn rpaunncn npo6nkn (STIHL GHE)
3a MaTePnaJIHn 5eTn nΦn3nuecKO HapaHЯBaHe Ha Xopa, KOITo ca npuHHeHn NopaN HeCnA3BaHe Ha yka3aHnraTa BpbKOBoCTBOTO 3a ekCnIooataqur, OcOBeHO NO OTHoWeHne Ha 6e3OnacHocCTta, o6cnyXbaHeTo n
NoIpBkKaTa, INI IopaN yIOnTepeBaHa
Hepa3peWeHn PnCnOc6JIeHn 3a
IOIbJIHNTeJIHO MOHTnpaH e Pe3epBHN
yAcTn, fIpMaTa STIH L He Hocn HnKaKBa
HO OTROBOPHOCT.
HenpeMeHHo cna3BaIte cIeHNITE yka3AHN, 3a da npdeOTbpaTITe NOBpeIN INI pKeJIeHO N3HOCBaHe Ha BaWn IypeHa STIHL:
1.ИЗнOCBaци ceЧастN
Hraon qactn Ha ypeda STIH, dopn npnyoTpe6a no npeHa3NaueHne, ce H3HOCBAT N B 3aBNCIMOCT OT BINA npOdbJxKTeJIHOCTTa Ha n3NoI3BaHe Tp6Ba Da CE NOMeHr T CBOeBpeMeHHO.
KbM TAX CnadaT Hai-Beue:
HOKOBE
-IMCK3aHOXKOBeTe
2.CnBaHe Ha npedncaHnraTa, nocOueHn B Ta3n HNCTpyKuNa 3a eknloataua
N3noJ3BaHTo,NoDpBxKkTa n CbXpaHeHneTo Ha ypeHa HA STIH L Tp6Ba Da Ce N3BbPbWat rpnKlnBO,KaKTo e OINcAHO B Ta3n HNCTpyKu7ra 3a ekCnloataun. Iotpe6nteTt OTROBapn NCHyKn NOBpei, npUHNHeHn nopAn HeCnA3BaHe Ha yKa3aHnra 3a 6e3oNaCHOCT,ObCnyKBaHe n NoDpBxKka.
Toba B haH-roJMa cTeNeH ce OTHac3a:
-HeIOCTaTbUeH KanauTet Ha 3axpaHbaunKa6en (HaNPueHo ceueHne);
-He npabuHcBb3BaHe KbM eektpnueckata Mpeka (HanpexeHne);
- Hepa3peuHn ot STIHL npomHn no npoDyKta;
I3noJI3BaHe Ha INHCTpyMeHTN IIN npHaJnEJXHOCTN, KOITo HE ca NO3BOJEN H He Ca NODxOJaU 3a ypeJa nnCa C No-HNCKO KaueCTBO;
-ynotpe6aHa npodykTa He no npedHa3HaueHne;
- n3noI3BaHe Ha npOdykTa npn CnpTn nn CbCTe3aTeHm MeponpnyTn;
BTopuHIN NOBpeDN BCNEIDCTBHe Ha H3N0N3BaHETo HA pOdykTa C HEN3npaBHN qACTn.
3. DeiHOCTn no NOIDpbXkkaTa
BcHKn n36poeHN Bpa3dJI ,POnDpBxKka" DeHocn Tpr6Ba Da 6bDaT n3BbPwBaH peoBHO.
Ako Te3n DeHocTNo NOIpaBxKkata He MORAT Da 6bDat N3BbpWBAHOTcMNAIOTpe6nten,TOI Tp8Ba da ce o6bphe KbM CneuaJN3npaH TbproBeu.
STIHLPenopbUba DeHocHTe no
noIpbXka n peMOHT da ce I3BbPwBaT
camo np CneuaNIm3npaH TbproBeHa
STIHL.
CneunannnepaHnte TbprobnHa STIHL peoBHO pemHHabat obyuHHeN nM CE npoeocTabr Texnuecka HOpmau.
Ako Te3n DeHocTn No NOIpbXkata He 6bDaT n3BbPweH, MORaT Da Bb3HNKHaT nobpeiN, 3a KOnTO e OTROBOpEH notpe6nteJrT.
KbTAX CnadaT:
NoBpeHnHa eNeKToDnBuTaTeNBA pe3yNTaT Ha HeIOCTaTBuHO NoHCtBaHe Ha npOBoJa 3a OxJaKaDaBb3dyx (CMyKaTeJIHN OTBOpN, OxJaKaIpaNpe6pa, paOTHo KOneNo Ha BeHTnlaTopa);
- NOBpei OTOKOP03N INpyTN KOCBeHINOBpei npaIHNeppaBnHObcxbxpaHeHne;
- noBpeHnHa ypeHa nopAun ynoTpe6a Ha pe3eepBnH uactn C nO-HNCKo KaueCTBO;
- NOBpeN B pe3yIITa H a HeHaBpeMeHHa Nn HEDOCTaTbUHa CepBn3Ha NpDpbXkA, CbOTBeTHo NOBpeN BCNECTBHe Ha DeHOCn NO NpDpbXkAta N pEMOHa, KOtO He Ca N3BbPseHr OT CneuNaIIN3npaHInTe TbpROBn.
14. O6nuaHn pe3epBn uactn
Hox: 60087020121
JonaTKOB HOX: 6007 702 0300
KOMNJIeKT DnCKOBu HOXOBe: 6007 700 5190
15.ОпаЗВанеHa OKОЛНаТаСрEDA

MaTePnAaTb3aHaIpO6BaHe He 6uBa Da ce N3XbBpLn Ha 6oKnyka, a Tp6Ba Da Ce KOMNoCTnpa.
OnakOBKnte,ypeBt n npHaJnEJXHOCHTe ca npOu3BeJeHn OT MaTePnaJI, KONTo NOpJekat Ha peUKnIpaHe, n Tp8BaJaCe u3XBbPnT NO CbOTBeTHnHaunH.
Pa3deJHToI npnpoOocb6pa3Ho
n3XBpIHe Ha OCTaTbYHInTe MaTePnaIi
noIOMarA NOBTOPha YNoTpe6a Ha
BTOPNuHN CypOBHH. 3aTOBa CneI
n3TuHa He HoobuaHMy Cpok Ha
n3no3BaHe ypeBbT Tp6Ba Da ce
npdaHe Ha ueHbP 3a cb6bnpaHe Ha
BtopuHn CypOBHH. HenpaBnHoto
n3xBbpIe MoKe Da HABPeHN Ha
3dpabeto n da 3ambpcn OkONHaTa CpeDa.
16.Декларuaяза cbotBetCTBne
16.1 EC Deeknapaun 3a cbotBetCTBne TpaunHcKa dpo6nIka STIHGL GHE 105.0
STIHL Tirol GmbH
3aunTeHOT npbckaua Boda (IPX4)
PekimHa pa6oTa
40 s Bpeme Ha
HaTObaPbAhe
60 s Bpeme Ha
pa6oTa Ha
npa3eH XoJ
25Nm
Moment Ha 3aTgAHe BoTT
DACKOBHOK
Moment Ha 3aTrahe BoTT
10Nm
Opbuaa Ce Hox
A/LU/B
77/48/97 CM
Tero (m)
20K
20 Kr (CH)
21 Kr (GB)
3BykOBn emncn:
Cbrnacho 2000/14/EC / S.l. 2001/1701:
TapaHTnpaHO HNBO
KoeepnueHt Ha 3 dB(A)
HeonpeJeIeHocT
K_WA
CbrnacHo EN 50434:
HnboHaWymaHa pa60THOTOMrCTO
LpA 92
KoeΦnueHT Ha 3 dB(A)
HeonpeJeIeHocT Ka
* Bhumahne!
PmmpexOB npednataHToN 16 A e Bb3MOxHO ToIa Ce 3aJeCTBa YecTo NO BpeMe Ha NyckaHe NIn Pn rOJMo HATOBapBaHe Ha ypeJa.
17.1 REACH
REACH e kpaTkoto HaHMeHOBaHHe Ha PernAmeHT Ha EO OTHoCHO perncTpaunraTa, OceHKata n pa3peaabaHeTo Ha XIMuHn BeuecTba.
3a INΦOPMaIgO ΘTOHcO HnTbJIHeHHeTo Ha n3NCKBaHnraTa CbINaCHO PernAmEHTa REACH (EO) 1907/2006 Bx. www.stihl.com/reach.
17. TexHHueckn daHHN
GHE 105.0
MoHooT (2200W
HOMnHaJIHa CnHa
Toka 10A
18. OTKpNBaHe Ha NOBpeM
eBENTyaHc o6bPheKbM Cneuana3npaH TbproBe- STIH LnpopbYBa CBOA CneuaN3npaH TbproBe.
HEn3npaBHOCT:
EneKtpoDbBnTaTeTHe cTApTnpa
Bb3MOxHa npuHnHa:
- 3aunntataHa eNeKtpoDnBnraTeIe aKTNBnpaHa
-HmaMpexkoHnpeXeHne - Hen3npaBEN 3axpaHbau Ka6en/uecnEe, cboTB. uencenHo CbeHHHeHne nn npekbcbay
- PpeNa3nTeTnHa MoeJa Uencen 3a BeNko6pntAHn e NOBpeHn (OTHacCe camo 3a ypeN, npeHa3HaueHn 3a BeNko6pntAHn)
-Фунята 3a nbIhHe He e 3aTbOpeHa CbIaCHO yka3aHnra-Ta -3aIuTHnIr npeKbCBAe 3aJeICTBaH (PpeIpa3Ho n3KnIOUcBaHe)
-ДИСКБТаHoxOBeTe e6NoKupaH
-БлнокрацтоустpoиCTBO He e Bbphato B n3XoDnno noNoxKeHne
OTcTaHbAHe:
- OctaBeTe ypeDa n3ctnHe ( 8.6) - PpOBepeTe 3axpaHbAunKa6en n 3auHTHOyUCTPOICTBO × 10.1
- PpOBepeTe nako e Heo6xOaHMo noDmeHeTe KaBena, uencena, KynnyHa CBoTB. npEkbCbaa (eNEKtpoTeXnK) ( 10.1)
-CmeheTe npedna3nteJx
-3aTBOpTe n 3aTeHHeTe yHnraTa 3a nJIHeHe CbIJaCHO yKa3aHnraTa (11.3)
-ДемоHTpapaiTeФуHЯТа3aПБЛHeHeNOTCTpaHeteOCTaTbUInTeOTpa3dpo6BaHeB KOpnyCa(BHIMaHHe:ИЗВадеTe 3axpaHBaunKa6eI) ( 11.2)
-Bbphete6IIOKpaUTo yCTpoIcTBOBn3XoJHO nOJOKeHne ( 11.4)
HEn3npaBHOCT:
YeTo 3aTeiCTBaUc Ce MPeXOB npEJa3nTeI
Bb3MOxHa npuHnHa:
-HeNoDxOJaIcBeIINHTeJIEN IPOBOIDHVK
-Ппетоварвано Мржда
- PpeToBapBaHe Ha ypeDa
OCTpaHBAhe:
-V3non3BaITe noxOJaC cbeHNHTeH npOBoHnK ( 10.1)
Cbpxe Te ypea KbM npyra Tokoba Bepura
- HamaIeTe KOJIueCTBOTo MaTePnA1 3a pa3dpo6BaHe; o6bPheTe HOka 3a pa3dpo6BaHe, 3aTOte Ro IIN rO cMeHete 出 (⇒ 11.5)
HEn3npaBHOCT:
HaMaJIeHa IpnO3BODIteJIHoCT npi pa3dpo6BaHe
Bb3MOxHa npuHnHa:
-TbnnHOKOBe
OTCTpaHbAhe:
-06bphTe HOKOBeTe,3aTOueTe rnnn rncMeHete ( 11.5)
19. CepBn3eH nlaH
19.1 NpTbpxkDeHnE 3a nppeaBaHe
MoeI:
CepnEH Homep:


CneBaa cepBn3
Data:
19.2 NtBbpxkdeHne 3a n3BbPseHa cepBn3Ha noDpBxK

TaaHnHCTpyKun3aeknloataun HaBaunCneuaan3npaHbproBeuHa STIHL npn n3Bpwahe Ha deHoctn no noDpbkkaTa.
ToI ue nOTBbPn N3NbJIHeHneTO Ha cepBUN3HnTe DeHOCnB NOJETaHa foOpMylpa.

CepBn3HaTaNoDpBxKa e n3BbPseHa Ha

IaTaHa CneDbaUca cepBn3Ha nOoDpBxKka
JH6i KniEHTn Ta KniEHTKn,
Mn paDi, 0o Bn o6paJN KOMnaHIO STIH. Mn po3pO6nEMo Ta BnpO6JIeMo Hauy npOdyKuio 3 HauBnUsoI YoKiICTHO Ta y BiIDNoBIDHOCTi i3 Notpe6aMn Haux KJIeHTIB. TAK BnHkaOTb TOBapN, 10 MaOTb BnCOky HadiHicTb TaKoX npn EKCTpeMaJIbHOMy HabaHTaKeHHI.
Komnai STIH tacok rapahtye
HaBnuy kictb cepbicoro
obcnyrobybaHH. Haichi cneuaian3oBaHi
dInepn 3a6e3neuytob KOMnTeHTHy
Kohcyltaaio Ta iHCTpykTak, a TAKOX
IOBHe texHiche obcnyrobyBaHH.
Mn BnyHi Bam 3a Bany Dobipy Ta 6bxaemo Bam 3aNoBOpEnHnB iD npu6bHaoro Bam npOdykTy STIH.

Доктор Nikolas Stihl
BAJKINBO!NEPED
BVKOPUCTAHHЯМ ПОЧИТATN T A 36EPEITN.
1.3Mict
PoncheHHa do yboro nocibnka 446
3araIbHI BiIOMoOCTi 446
IopaAno OIOO uHTaHHn ooc6Hnka
3 eknnyataui. 446
BapiaHTnIJIpaHIXKpaIH 447
Onnc npnilaNy 447
TexHika 6e3neKn 447
3araJIbHi BiIDOMOCTI 447
Ybara! He6e3neka ypaXeHHa
eJeKtpnHm Ctpymom! 448
OjaTa3acobn3axncty
TpaHcnOpTyBaHHn npuIaNy 449
Peped noaTkompo60TN
Piud yacpo6oTn
TexobcnyrobyBaHHi peMOHT
36epirahn npi doBnx nepepbax
y po60ti
Ytunizacij 453
Onnc no3haueHb
KomnneKT noctaHna
PiIroTobKa npnlaNy do ekcnnyatauii
MOnTak KonicHoi oci Ta konic 454
MOHTaX NOIDOBKyBaHa BnKnIHO
KaHaJy Ta XoIOBOI YactuHn 454
MOnTaK KlaNaHa BnKuJaHa
BiDkPnBaHH Ta 3aKpNbHH
KlaanaHa BnKnDaay
Jauik dIJI INCTpyMeHITIB 455
Bka3iBkn 0do p06oTn
KnMaTePiaMoxHa
pepepbn?
Akn MaTepiAn He MoXHa
Ipepeo6n?
MaKcImaJIbHn IJaMeTp rInok 455
PoboHa 30Ha KopncTyBaHa 455
PpunyctmHe HabaHTaxKeHH npnndy 455
3axnCT Bi, npeHaBaHTaKeHH 455
Ikuo pixyui 6loK caDoboro noDiHOBa4 6lokyETbcra 455
HanoBHeHHcaOBOro noDpi6HOBa4 456
3axnchi MexaHi3Mn 456
Mexahi3M 6nokyBaHH noBtOphoro 3anycky eJektpoDnBryHa 456
3axnche 6nokyBaHHa 456
Mexahi3M ralbMyBaHHn eIeKtpoDbvHHa 456
3axnchi nokpnTT 456
PiTBepeKHeHH npoHaDaHH
TexHOrO o6cLyroByBaHH 464
MaHInyIaIi, kI NOBHeN BnKoHyBaTu KOpNCtYbau:
BnKpyTKOIO NOcna6Te rBuHTn (1) Ta npNBeDiTy dy dIO BaxInb (2).
3araJIbHI Bka3iBKn:
BnKOpncTaNHn npnAdiY cnpTbHnx 3axoJax Ta iHux 3maaHHx.
TeKCTN 3doaTkoBm 3HaueHHaM
Mahehki TeKCTN 3doaTkoBnM 3haeHHaBM BuJiNeHO HaBeJeHMM HxKye CmBOJAMn, o6 doaTKOBO BuJiInTuix y noci6nky.

He6e3neka!
PonepeJxKeHH npo He6e3NeKy HeuacHOro BnnaKky a6o BaXkNt PpaM. HabeJeHoro npaBnna Heo6XiHo DotpmyBaTncr.

PonepeKenne
PonepeJxKeHn npo He6e3Neky TpaMbYBaHHa. HabeJeHe npabNIO da€ 3MOry 3anO6irTu MoKInBIM a60 lmOBiPnM HeuacnM Bnnaikam.

3aTepeKehn
3aCTepexeHH npo MOxNIBiCTb
JIeKnx TpaBM i NOsKOxKeHb
MaHa. HabeJe He npaBnO dae
3Mory ix yHNkHyTu.

Yka3iBka
Iopadn3 onTmmaJIbHoro BVKOPNCTaHHN pnpnaTy Ta3aCtepeXeHHB BiM MoKJIbUHX NOMIOK B EKCNyataui.
TeKCTn 3 MaJIHOHKAMN
MaHKn, kI NOCHIOb BnKOpNCTaHH npuaib, MICTbCHa NoaTky nocihka 3 ekcnnyataui.
CmboJ kamepn cnkyntb dny BCTaHOBHeHHra 38'3ky MIX MaIOHKAMn Ta BiIONBIHNMI npaparpaamn Tekcy B nociHNY 3 eknnyataui.

2.3 BapiaHTn dny pi3Hnx kpaIH
KomnaHia STIHHaadae pi3hi uTekepn Ta nepeMnKaui 3aIexKHO BiD KpaIHy y kky noCTaayetbca npnna.
Ha maHkax 3o6paXeHi npnaIaN 3 cBpoWtKePam. IId'EnHaHH npnaIaIB do MepeKi 3a Donomoroio iHmX wTekepi BIdyBaETbCra TAK CAMO.
3. Onnc npnnaNy

1 BopoHka
2ΓBnHTN
3KlaanBnKuJaay
4KoIichnkapkac
5 Ba3OBn npua
6 ČeprkaK
7 BMnKaH/BmMnKaH i3 NiKlnHoueHHaM Do Mepeki
8 3aBOcBka Ta6JIuYka i3 cepiHnM HOMEpOM
9 Raunik dIy IHCTpyMeHTIB
4. Texhika 6e3nekn
4.1 3aaraJIbHI BiIDOMOCTI

Praoun3 npnaDom, 06OB'3KOBO DOTpmyTecn HabeHnx npabTN Texhikn 6e3neKn.

IpeepnepuMM BkOpncTaHHm npnay yBaXno npountaTe yBecnb nocibnk 3ekcnnyatauii. D6aJInBO 36epiraTe nocibnk
3 ekcnnyatauii IJn noaJIbWoRO BVKOPNCaHH.
Li 3axoDnyke BaxkNBI JnB Baooi 6e3neKn. BnkopncTOByte npnlaI d6aJInBO Ta BiINOBiJaNbHO, nAm'raTHe, 10o BiINOBiJaNbHicThb 3a 6e3neKy iHnx ocio Hixhboro MaHa Hece KopncTyBauch.

He6e3neka TpaBMyBaHHa!
Henirotobnehi Kopctybai MoxytHe ycBIOOMIOBATn Ta He ouinHTn He63neHicTb caOboRo nopi6HOBa. Lc MoKe np3BecTN Do TAKKO TpaBMvBaHH Yu 3arN6eJI kopctybaa n Hux oci6.
O3haHOMTeC3 eIeMeHTaMn KepyBaHH Ta npabuIamN ekcnnyataui npnlaNy.
PpnaIaD03BOJAEbCBAKOpNCTOByBaTn
Nnue TmOc06am, Aki npouHtaiu
Noci6Hk 3ekcnlyataui O3Haonomnnc
3 npabnAmn Noro BkOpNCtaHH. Koxen
KopntyBaaypeepnepwnm 3anycOM
npnaNy Mae OTPmuTn pKaTHHi
nopadn paXibciB. KopntyBaay Mae
3BepHyTncd o npodabuq n do IHoro
paXib3a NoaChEHMa odo
6e3neHOro NobODKeHH i npnaIaOM.
Li Bka3iBk n Oc6a MaE Bucnyxatn Dyke yBaXHO Ta po3ymiT, 0o dno pO6OTn 3 cIM npnaDom Notpi6Ha Oc6bNaToHicb i KOHcHTpaia.
Habibyko BN EKcnyaTytei npnlaHaNEXHM YINOM,He BapTO 36yBaTN pO MoXnBicb BuHNKHeHHA 3aJINKOBNP3NKIB.

He6e3neka 3aainxHytnca!
IpaOuNCb i3 naKyBaNbHMM MaTepiAion, DiTn MoKyTb 3aDnxHyTuCra. TpMaJTe naKyBaNbHm MaTepiAn noDani BiD ditei.
PpnaIpa30m i3 6ydb-kaM npnlaIaI M OMe 6ytN HauHNI IJI BIKOPNCaHH TINbK TiOcObi, kA MaE IOCBiD pO6OTn 3 UIEKO MODEIIIO. PpnaIae He MoXHa HauBaTn B KOpNCTyBaHH6e IociBnKa 3 ekCnIyataui.
IpekeKaHTeCA, 0o o3iNHi, ceHCOPHi Ta PO3yMOBI 3di6HOCTi KOpNCyBAca IO3BOJnHOb IOMy KepyBaTn npuJaOM i npaIOBaTn 3 Hm. JaQIO uepe3 o3NHy, ceHCOPHI Ta PO3yMOBI 3di6HOCTI KOpNCyBAc MOKe BIKOHyBaTn 3 II 3 OBmExHHaMn, TO Bin MOKe npaIOBaTn 3 npuJaOM NlWe nI HarnaDom a6o nicra IHCTpyKtaxy BiINOBiJaNbHOI Oc6n.
IpekehauTec, 10 KOpntyBau Docr NOBHONITRAO, AkoTOBOMARAE MICeBe 3aKHOHaBCTB0, 3D6yB npocicinyOCbtyPiHJADOM.
BnKOpncTobyIte npnaIbIINoHbU, KOJIu BN y rapHomy fiznHOMy CTaHI Ta rymopi. JaIO Bu MaTe NopyuWeHHa 3dOpOB'J, npaIbTecb o6O'B3KOBO 3 BaUM nIkapem IooD BnKOpncTaHHa npNJady. 3a6OpOHeNo IpaUOBaTI 3 npNJADom nicra BxNBAHHa aIKORONIO, HApKOTNUHnxpeOBOHIMeDnKaMeHTIB, kI noripuyotb 3daTHiCt b Do pearyBaHHa.
Ppunad po3paXoBaHO ha BnKOpncTaHHB DOMaHbOMy rOcNoapCTBi.
YBara - He6e3neka HeuacHoro BuNaJky!

Caobi nopi6HOBaCI STIHPLn3HaeneH I nnoPi6HeHHrIIOk i 3aNIKIB pocnH. 3acToCyBaHH3 IHoMO MeTOH HePnPyCTmE, aJKe MoKe np3BecTn Do He6e3neHnx HacNiKb a60 noIKoDKeHHn npnaNy.
CaoBn noDpi6HOBaH He MoXHa BkOpNCToByBaTu (HeOBHn nepeNik):
ДинИшnx MaTepiajib (Hanpknad, CKIO, MetaJ);
- pobit, khe onncahi Bcbomy nocihky 3 eknnyataa;
-ДЯ roTyBaHnX xapOuBnx npOdyKTiB (HApnKlaI,ДЯ NOpDi6HeHnJIbOy, nloDIB,яID abO obOvIb).
3mpkyBaHb 6e3neKm 3a6oPoneHo camoctiHNO pO6ntn 6yJb-aki 3MiHN B OCHaueHHI npnaNy, BNMaTn 3anactHH Ta 3HImaTI npnaIaIpy, yCTaHOBJeHe kOMpaHicIO STIH.LJe TAKOK BeE do nepepBaHHra paHtII. IHopMauiio uOdo DoDAkOBoro OCHaueHHM MoXHa OTmuATn y ophiHoro dInepa STIH.L
Oco6nbo 3a6bOpHeNi iii 3 npnaom, kki 3miHOIOy Ioro nOtYxHICTb a6o YNCIO 0eptTIB DnRgamma BnTyPiHbOro 3ropaHHa qn enektpoDnryHa.
3a6bOpOHeo TpaHcNopTyBaTN npnla pa30M 3 iHwIMpeaM, TBapHAmu YIIOdbMn,OcO6NB0 DiTbMn.
PnBnBnKOpncTaHHi y rPoMaJcBkNx MiczX, Napkax, CnpTnBnX MaJaHaNkax, Ha ByIinuX, Ha cIbCboKOrOcNoapcbkNx Ta IicOBnx NiIpnEMcTBax Heo6XiHa oO6blNa oBepeXHicTb.
3aIIwaTe npIuaI JnIe ToI, KOJIi BIn CToITb Ha pIBHIN NOBepxHi Ta He MoKe HEHaBMNCHO BIDKOTNTNcR.
4.2 Ybara! He6e3neka ypaexeHHeJeKtpnHm Ctpymom!

Ybara! He6e3neka ypaxeHHra eJeKtpnHm CTpyMOM!
3BepHITb OcO6nBy yBaIy Ha MepeXeBn Ka6eB, uTeKeP,
BMKau/BMKAu i 3'EnhyBaHbN Ka6eB. Lio6 3aNo6irTu ypaXeHHIO eNeKTPnHMM CTpyOM, He BnKOpNCTOByTe NOWKoJKeHI Ka6eI, MyOtn I Wtenceni, a TAKOK BiNnOBiDiHi 3'EnHyBaHbHi Ka6eI, kAi He BiINOBiJaIOb YHHIM BMMoram.
Perynepno npebipraTe 3'EnhyBaHn Ka6eB Ha HaaBHiCTb NOWkoDxKeH b a6o O3HaK CTapHHa (IamKoCTi).
PnnaIaDIO3BOJeHO BIKOpNCTOByBaTu, NIIeKUo MepexeBn Ka6eNb NOBHCtO p03MToHa.
KopncTyHouncb Ka6eNbHM 6apabaHOM, nIbHynte, 06 MepexeBn Ka6eNb 6yB NOBHCTO p03MOTAHNI.
HikonHe BnKOpncToBnyTe NooKoJxehN Ka6eIb-NoDObKyBa.3aMInTb NoOkoJxehN Ka6eIb Ha HOBn.Hikon He pemOHTuYe Ka6eIb-NoDObKyBa.
Jkio nicacpo6oTn nookjKeHo MepexeBn Ka6eNb a6o noDobKByBaH, HeraHb BID'edHaIte ix Bid eNeKTpOmepeXi. HikOn He TopkaTeCn nookjKeHOro MepexeBoro Ka6eIIO a6o NoDobKByBaA.
He MoXHa BnKOpNCToBvBaTn npnAid i3 NOWKOJKeHMMN YI 3HOWeHMMN Ka6eJIaMn. Oo6JIbNO yBaXHo Heo6xIDHO nepeBiprTa H aNoWKoJKeHH N O3HaKn 3HOcy 3'EDHyBaJIbHN MepExeBn I Ka6eJIb.
TexobcyrobyBaHH npoHT MepexeBXKaBeJIb MOxTyB BnKohyBaTu Iiue npaizBnKn, kI MaOTb CneiaIbHy OCbiTy.

He6e3neka ypaXeHHa eJeKtpnHm CTpymOM!
He niknouaTe nookdoKeHH Ka6eB do Mepeksi Ta He TopkaTecra nokoDkeHOro Ka6eHIO,doKn He BID'EdHaTe Nooro BiMpeksi.
TopkaTnca pixyux 6JokIB (HOXIB) MOxHa, IINe KOJI npUJaB BiD'EnHaHO BiD MepexKi.
3aBxNcIiKyIe 3a TmM,IO6 MepeXeBi Ka6eJI 6yNI IOCTaTHbO 3axuIeHi.

He npaioTe nid dooem iy BOIorMicceBOcTi.
Дяpo60n npnaу 3a MekamnpimiueneHHcNID BnKOpNCTOBByaTNIuwe cneiaJIbHi Ka6eni-nOoBxBuayi 3riipoi3OnaieHO ( 10.1)
BID'ENHyOuN 3'ENHyBaIbHn Ka6eIb BID p03eTKn, He TarrHiTb 3a Ka6eIb.
He 3aIIwaIte npIaI nd doUeM.
Ko npnad niknoeHO do rehepatopactpymy, cnkyte 3a TMM, o60KoINBaHHCTpymy He noWKoDNIcaobn noDiHOBa.
IiknoaTe npnlaJnne do eNeKtpomepexi i3 cnCTeMO 3axNCTy BiabapHoro cTpyM (3i cTpyMOM BmkaHH He 6JIbwe 30 mA).Uo6 oTpMaTH DoKnaDiHiWi BiOmocti, 3BepHtbcra Do eNeKtpomOHTepa.
4.3 OJrTa 3ac06n 3axncty

Ipypo6Otn3aBxDn B3yBaIte TBepDe B3yTTHa Hecn3bKni niDowBi.He npauoTe 6ocOHix NKnAd, y nEkrnx caHdAlyx.

Piuiacpo6oTu,oc6nboiui
yacTexhiHoro
06cIyROByBaHHra Ta
TpaHCnOpTyBaHHn npinaNy,
3aBXKn HadaTae 3axnChi uKipnHi pykabu i3 3akpntm nocrkom.

IiucpoBTo3abKmHocitb 3axnchiOkyJnp,uO uInbHo npuiarAOTb.

Biinobihi 3axnchi oyjnap npoxoTb Bnnpo6yBaHHa MexaHHyMiHcIb BiINOBiHO do cTaHapTy EN 166 a60
HaioHaJIbHnH HOpMaTnBnHx BmOr i HaXoJMyb y npOaJ, MaOuN BiIIOBIDHe MapKyBaHH.

Пид ус роботи завхди Нociтб 3аoc6и зхпctу органов су.

Bidiobni3ac06n3axncty
opraHIB cnyx npoxoTb
BInpO6yBaHH BIDIOBIOHO do
ctaHapTy EN 352 a6o
HaioHaBnHx HopMaTHBnX BmOr i HaXoJy npOaX, MaOn BiIObIiHe MapkyBaHH.
HocitbixB06oxByxaxynpOIOBXBCbOronepiOdypo6oTu.

Piucpo60Tu3 npuiaom Heo6xIDHO B7raTu CneiaIbHn i By3bkN OJr, a camekOM6iHe3OH.
3a6b0pOHTBCB4raTnpo6oHx anaT.
PiJ vac po6oTu 3 npuNaOMkopncTyBaHi He NOBHHMaTu Ha c6i uapΦib,
KpaBAToK, npukpac, 3BvCaUOxN CTPIOK,
WHypkIB nIHux eJeMeHtIB Odary, kI 6 3BVCaNNu BucTypan.
Piucycixpo6it3npnnaomDOBRE BONCCNOTPIHO 3B'8aTNaTa CXOBATN Ioro (PiXcyTKO,waKoIOI.T.D).
4.4 TpaHcnopTyBaHH npuNay
PpaIOBaTn Tpe6a TiIbKn B 3axnCHnx pyKaBnXax ( 4.3) , He TpaBMyBaTncr roCTpIMN Ta rapAChMn DeTaJAMn npICCTPOK.
He TpaHcnpTyIe npnla3 yBIMKHyTm eJekTpOdBnryHom. Ipeed TpaHCnpTyBaHHaM Heo6xioHO BUMKHyTu eJekTpOdBnryH, daTH HOXAM NOBHicTHO 3yNHHTnc Ta BnHrTa MEpeKeBn uTekep.
Ipebeo3nt npuaad cnid nuiue 3 OXIOJQKeHm eJeKToDnHyHOM.
TpaHcnpTyIe npnlaTilbkn 3 BMOHTObaHO 3aBaHTaxyBaJIbHO BOPOHKO.

He6e3neka TpaBmyBaHHn!
KopntyBaM MoKe TpaBMyBaTnCBAIDKPITMN HOKaM.
3BepTaTe yBary Ha Bary npnady npn nepeKndaHHi.
BukopncToByTe BiNObiDi BaHTaxHi npunctpoi (BaHTaxHi nIaTfOpMn, NiIOMHi npunctpoi).
3aΦikcyIte npnnaHbBaHTaxHNI NOBepxHI KpINNbHMN 3aco6aMn DOCTaTHIX pO3MpIB (peMeHAM, KaHaTaMn TOUo) y ToKkX KpInNeHHRAki ONcaHO B Ucbomy Noci6HkNy 3 ekcnnyatauii. ( 12.3)
IITOBxainTe a6o TnHItb npnnay NOBInbHomY Temni. He TnHtB NOrO Ha 6ykCpi!
Iiuc TpaHcnpTyBaHH npnnaD IOtpmyntecb periohahnix npnncib, 3okpema Tnx, 10 cTocyOtbc6e3neKn 3aBaHTaxeHH Ta nepeBe3ehn npedmetIB Ha BaHTaxHi nlaTphiopmi.
4.5 IpepeI noaTkom po60Tu
O6OB'RAKOBO nepekoHaItecra, 0o ocobn, kI npauoBaTMyTb i3 npuIaOM, O3HaHOMUJIncr 3 PociBHKOM i3 ekpnyataui.
IpeepnBnKOpNCTAHm npnlaHy Heo6xIdHO 3HtNaKyBaIbHm MaTepiJ Ta TpaHCnopTHi 3aNo6iXHnK.
IOTpMMyTEcRA BCTaHOBHeHX MicueBMnOpraHmN BnaDN BMOR IOdo yacyekCnnyatauCi daOBnx npunaDIB 3dBNYHOM BHyTpIHbOro 3ropaHH.
IpeaTOMpoBTo3 npnAOnom
06OB'3KOBO 3amHb yci deeKTHi,
3HOWeHi Ta noWKoJKeHi YaCTHNI.
3HOWeHi a6o noWKoJKeHi HaNcN 3
nonepKeHHMaHa KOpNcI npnAdy
Heo6xIDHO MInrN.Yci Heo6xDiHi
HaKnEeKnTa 3anachi YaCTHnMoXHa
npu6aTu y ophiuiHoro dInepa STIHL.

He6e3neka TpaBMyBaHHa!
3noehi a6o nowkoJkehi Detani (Hanpknla, Tyni HOKi) MOkyTb noCTaBNTn iid 3arpo3y 6e3neky npnaNy Ta cnpuHHNTn TpaBMn y KOpNCtYBa4a.
IpeepBBeHnM Beknnyataio Heo6xidno nepebipntu Ta 3a6e3neuHTn NaCTynHe:
- Ppnaad nepe6yBaε B HajeXHOMy TexHiHOMy cTaHi. Lc 03Haayε, ΜO NOKPITT Ta 3axChi MexaHi3Mn BCTaHOBHeHO HaJeKHM YHOM i BOHN He MaOTb O3HaK NOUKOJKeHHa.
- Ppnaad nikKNoyeHo Do po3eTkn, rka BCTaHOBHeHa HaneKHM YHOM.
130nla 3'EnHyBaIbHOro Ka6eIHO, noDObKyBaHa, WTeKepa Ta MyTIn nepe6yBaE B 6e3DoarHomOy cTaHI. - YBeCb npuJa (kopnyc eNeKtpoDbNHyHa, 3axnci MexaHizMn, KpinIbHi eIeMeHTn, HOxI, HOXOBn BaI, DnCKOBI HOxI TOO) He MaE O3HaK 3HOcYu NOnkOJKeHHa.
- Y npinadHemaMatepiJy nIa noPi6HeHHa, a 3aBaHTaKyBaJIbHa BOpOHka nopoxKHa.
- Yci rBnHTn, raKm iHwI KpInnblHi eJemeHTn HABBI Ta 3aTyrHyTI. Yci He3aTARHTi rBnHTn Ta raKm Tpe6a MIuHO 3aTARHTn nepe, 3anyckOM (3BaKaIte Ha MOMENT 3aTAYBaHH).
PpnaDm He MoXHa KopnCTyBaTncy npnmiueHHi, no6n3y ctiHn a6o iHooi nepenOHn, uOb yNkHyTu He63neKn nopAHeHHa Ta noKoDxKeHHa peey (eMoXe No36abuHTn KopnCTyBaCa moXnBOcTi noparTyHKy, npn3BeCTn do p03bntnx 116ok, noDpnnn Ha abTomo6jI Too).
PpnaI Heo6xio Ho HaiHOBCTaHOBTn Ha pibH i TBepi noBepxhi.
He BUKOPINCTOByTe npUJaHa 6pyKOBaHnX Yu NocunahnX rpaBiem NOBepxHx, OCKIbKn BUNDaHHa Ta 3aBHXpeHHa MaTepiany MoKe npN3BeCTn Do TpaBM.
IpeepoKHNBMKaHnM Heo6xio HnepekoHaTncb, 0 npna3i6paHn 3riDHOInCTpykuii. ( 11.3)
O3HaOMTecr 3 p03MiueHHaBMKaua / BMMKaua, uo6 BuacHo i npabNbHO BipearyBaTu Ni d Yac HaDbNvauHoiCtTuayi.
БрИЗКOBИК Ha 3aBaHTaxyBaJIbHiB BOPOHiMa€ 3aKpIbATn 3aBaHTaxyBaJIbHn OTbIP i6ByTN BHaJIexHOMy CtaHI; N0WkoJxKeHn6рИЗКOBИK Heo6xIDHO 3aMInTn.
He6e3neka TpaBmyBaHHr!
D03BOJRAETbCA BIKOPNCOTByBaTN NIIe npnlaad, 3i6paHn HAnexHM YINOM. RaIIO npnlaady 6paKyE neBHX qactNH (hanpknlaad, konic), 3a3haueha B DOKymeHTauii 6e3neuHa BiDCTaHb po6oTn He rapaHTyETcbR, OKPIM TORO, HEmoXnIBO 3a6e3neuTu HAnexHy CTIKCTb npnlaady.
Ipeep 3anyckom npnilaH Heo6xidno ornyu n nepecbiDyntnc, y biH y Hanexhomy cTaHi.
Le 03haa, IO MOHTax BIKOHaHO BiINOBiHIM YIHOM,aCame:
-3aBaHTaKaYBaIbHy ChaTnHy BOpOHKn BCTaHOBNeHO Ha HxKHi YaCTnHi;
y 3aBaHTaKyBaIbHi YacTHNI BOpOHn IpaBnJIbHO BCTaHOBNeHO 6pN3KOBnIK KOMnJIeKT BOpOHKn 3 OTbOPm y cOpMI YoTnpNJInCHnKa STIH;
-3aBaHTaxyBaIbHy BOpOHky BCTaHOBNeHO Ha 6a3ObOMy npnnaDi, a O6uBa TBnHTn MiUHO 3aTyrHyTo;
-yCTaHOBNeHO KOMnneKT KOJIICHOKapkaca;
- yctaHOBNeHOoBuKaKoIeCa;
-yci 3axnchi MexaHiz3Mn (BKNiDnK KaHaI HapiaHOI TpaBn,6pN3KOBuK Too) HaBHi Ta nepe6yBaIOb y HaJIeXHomY CTAHI;
-yctahOBHeHO p3aIbHn6nok (DnCKOBn HIX);
-yci HOxI BCTaHOBJeHO HaJExHHM CHHOM.
3a6b0pHReTbC3HIMaTI Ta 3MiHOBaTI BCTaHOBHeHi Ha npuJaI BUMKaIy I 3axNCi MExaHI3Mn.
Bi3yajbHo nepeBipTe NsCKOBn Hix Ha nooKoJKeHn Ta deOpMauii (BnKpNBHeHH) i 3a notpe6n 3amHItb Ioro.
4.6Пдчасpo6otn

He BnKOpNCTOByIte npnla,
RkUo no6bI3y nepe6yBaIOTp
iHsi IIOu (oc6bIbO dITn) a60 TBapHH.
3a6bOpOHeNo npaIOBaTn 3 npuIaNOM nID DOUeM, y rpo3y Ta oO6NBO npu MoKINBOcTi ypaKeHHa6NICKaBKOIO.
Ha BONori noBepxhi 3pocTae 3arpo3a TpaBMyBaHHaYepe3 3MeHweHHa CtiIKoCTi npnlaNy.
Будte oco6blnBO obepexHni npaIouOHy, 06 He niICKOB3HyTncb.ЯKIO ue MOxNlBO, He BnKOpIcTOByTe npnaD Ha BOJorNi nobepxHi.
PpaHouTe NnWe npn DeHHOMy cBtNi a6o npn HaneXHomy uTyHOMy OCbitJIeHHI.
Ppotarom ycboro yacy po6oTu Bpo6oui 30hi Heo6xioHn NiItpmByaTn nopAdoK i uCTOTy. Pnp6epitb 3aBi npedmetn (kamHHra, rIKn, ka6eJI too).
Onopha nobepxHn KOpncTyBaHa He nOBHHa 6yTN BnUOIO onOpHOI nobepxHi npuJa.
3anyck
Ipeep3aynycOMpo3TaWbByBaTn npuJa y HadiHOMy BepTKaJIbHOMy NOJXeHHi. YKOHOMy pa3i He MoKHa BIKOPNCTOBByBaTn npuaJy Ropn3OHTaJIbHOMy NOJXeHHI.
BmkaTe npnlaD o6epxHo,
DOtpmyuocnb nopad i3 po3iiny
«BBeDeHnHa npnaDy Bekcnnyatauio»,
( 10.3)
PiJ cac 3anycky DBNryha BHyTpiHbOro
3ropaHHa a6o BMKAHH eJIeKTPoDBNYHa
He CTIte Nopyu 3 BKNiDNHM OTBOPOM. PiJ
cac 3anycky a6o BMKAHH B CaIOBOMy
NoPi6HOBaHi He MaE 6ytu MaTepiany dnn
NoPi6HeHHa. MoKInBE BNkUdAHn
MaTepiany, a BiTak - TpaBMvBaHHa
KopNCTyBa4a.
3abopohreTbcpekeiata npina nd niacpo60nDbinyha.
YHnKaIteHaTToyAcTOrOBMnKaHH npJlady npotrOM KOpOTKOro npomixkuyacy;He «rpaTeCra BMnKaeM-/BMnKaueM. LcMoKe pnp3BecTuDo neperpiBaHHeJeKtpoDburhya!
KoJIbBaHnHa npytn, cnpiuHHei npuaDm niD yac po3roHy, 3a yMOBn HeCnpTJNBO rO CTaHy MepeX MoKytb np3BeCTn Do 360iB y pOboti IHux npiaDiB, NiKJIIOUeHnx Do TORO caMOrO eJeKTPuHOro Kona.
Y TAKOMY BUNaIky Ntpi6HO BxHTN BiINOBiHNX 3axoJIB
(Hanpknad, niknHouTn npnaDIO IHoro eNEKtpuHOrO kona a6o do Kona 3 HxKHM 3HaueHHAM NOBHOrO ONOPY).
Ipouec po6oTu

CtepekeTbcra TpaBmyBaHHa!
HikonHeHa6nKaIe pyk i HIR do qactnH, 0o o6epTaOJBcR.
Piudp06oTn npuadny He habnkaTe
obnurTa iHsi uactnH Tla do
3aBaHTaxyBaIbHOI BOPOHN UIN BIKNDHORO
OTbOpy.3aBXNI TPImaNTecra Ha
6e3neuHi BiIcTaHI BiD
3aBaHTaxyBaIbHOrO OTbOpY.

CTe3aTm,io6pyk,iHui
yactnHnTiJa a6oOJr He
NOTpannnI Do
3aBaHTaKyBaJIbHOi BOPOHKn YI
TO kaHaLy. Lc 3arpoxy
MM TpaBMYaBaHHM Oey,
,PaNbUIB,pyKToIO.
NocTInHO6aTe npo CBOOp pIBHOBary Ta CTiKy no3uio. He haxnIyTeCBApeEd.
Пд уас ekcnnyatauji He moxha 3MHIOBATN NOJIOXeHHa 6pN3KOBKA (3HIMATN Ioro, BiKnDaTn Haropy, 3aTNCaTn, NOKOJkyBATN TOIo).
PiJ vac 3anOBHeHH npuIaNy KOpNCyBaU NOBHeH cTOrn B OINcAHIN POBOH 30HI KOpNCyBaHa. IpOTrOM ycBOro NPOeCy PO6OtN 3OCTaBAInTEcR B PO6OH 30Hi I B XODHomY pa3i He 3axOdbTe B 30Hy BNKnIDy. ( 8.4)

He6e3neka TpaBmyBaHH!
IiJ uac po6oTu qactuHa MaTepiany
IaI NOpip6HeHH MoKe
BkUdAaTcR Ha3aJ. KopnCTyBaY
MOKe OTPMaTI cepNo3Hi TpaBM N
ObNacti Obniyy, Oey i pyk. Tomy
HocItb 3axNCHI OkyIaRn Ta
pykabui ( 4.3) n TpMaIte
rONoBy IoJaJI BiD 3aJIbBHorO
OTBOPY.
Hikon He nepekndaTe npuna, kOni DBNrHy BHTpiuHbOrO 3ropaHHa 6o eJeKtpoDnBuHy BBIMKHeHO.
Ja npnaepeKnHyBcNac p6o8tn, cHrHaHo BmKHyTN eKeTpOdBnHyH i BuTARHyTN MepeXeBn WTekep i3 po3eTK.
HnBHyTe,io6y BnKnDHomy KaHaJI Hap3aHOI TpaBN He HAKONuYBaBCr MaTepiAn IJN NOpDiHeHH- 1e MoKe 3HN3NTn eFeKTNBHICTb npJaTy Ta np3BeCTN DO BnKnDaHHMaTepiAny i3 3aBaHTaKyBaJIbHx OTBOpIB.
Iiud 3anOBHeHHcaDoboro
NoDi6HOBaHa NnIbHyIe, 0o6 Do
KaMepn dIy MinKoi CTpyxKn He
NOTpannnCTopoHHI pEmTu,
HaPnKnaI MetaJI, nlaCTNK, KaMHn,
CKIO TOO. Lc MoKe npu3BecTu DO
NOwKOJkeHH npnAyn Ta BnKnDaHH
Taknx pEmTiB i3 3aBaHTaxyBaIbHOI
BOPOHKn.

He6e3neKa TpaBMyBaHHa!
KopncTyBaMuOme OtpMaTu cepno3Hi TpaBMu BiD BnKaDaHHa MaTepiAly DnI NoPi6HeHHa Ta CTopoHHix NpeMetiB. TpMaIte CTopoHHi NpeMetiNoaJI BiD npNlaDu Ta HeraiHo NiKBiDyIte 3acMueHHa.

He6e3neka TpaBMyBaHHa!
Piuc3anOBHeHHcaDoboro
noDi6HOBaCa rIKaMm MoKnBc
BnDaHHMaTepiany.KopncTyBa
MOKeOTpIMaTN cepo3Hi TpaBMn
BiD BnKaDaHH MaTepiany dna
NoDi6HeHH.KopncTyIteC
3axNCHMpykabuYAMnTa
3axNCHMn OKyJpaAMn ( 4.3)

ObepeXHo! Tn Hoxa npoobxye oebpTaTncb npotrorm dekiIbKOx ckyHnicra BmKHeHH npnaNy.
BumKHiTb eJeleKtpoDbunyH, BnTaeHITb wTekep i3 po3eKn n daTe pyxOMM imCTpyMeHTam 3ynHHTncb,
- nepw hix 3aunwntn npnna6e3 Harny;
- nepu HIX nepemiuuybTu, nHIMaTn, nepenocTu, nepekuaTu, nepecyBatu a6o nepetaryBtu npna;
- nepu HIX BiKpyyBaTn TBHNT Ta BIDKpNBaTn npua;
- nepu Hix TpaHcnOpTyBaTn npua;
- nepiHixIikBiyBaTn3acMueHnB pixyomy6loci,3abaHTaKyBaIbHi nii a0o BkndHomoytBopi;
- nepeiMaHinyIaIyMI 3 DnCKOBIM HOXEM;
- nepu hix nepeBiprtn a6o nuCTnT npuaq uN BkOHyBaTn 3 Hm iHsi di.
Jkuo do pixyoro IHctpymeHa
notpannil CTopOHn Ipemtn,
3'ABINCS He3BnuHi 3ByKn HxapaKtepHa Bipauia, HeraiHo
BIMKHITb eNEKtpoDBuHy i 3auekaTe,
DOKn npnaad 3ynHHTbcr. BuTARHtB
MepexeBn uTEkep, 3HIMiTb
3aBaHTaKyBaJIbHy BOPOHky Ta BkOHaITe.
HabeJeHnXkYe II:
IpebeipTe npnlaD,OC6bNBo pkyuH 6nok (HX,INCKOBH HIX,MICue BCTAHOBJIeHHHOXA,TBHNT KpINJIeHHHOXA)Ha HABHICTb NsIKoJXeHb aBO 3HOcy Ta, nepu HIX 3HOBy 3anyCTHTn DBnYH iNoaTn pObTy 3 npuJaOM, 3BepHITcRdo faxiBqIB nI npoeHeHH Heo6xIHHO pEmOH TY Ta TexHiHOrO 06ClyroBvBaHH.
- Ipebeipte, Yu HauiHo BCTaHOBneHo Bci deTani pixyoro 6noka; 3a noTppe6n 3aTHiB rHHTn, DOTpMHyOuNcB BiNobIDHnx MOMeHTIB 3aTaryBaHH.
DopyiTb 3amHy qn peMOHT NOKdoKeHx abo 3HOweHn deTaneN φaxibu. Pnuyomy MoXHa BnKOpCTOByBaTN JnWe deTani 3 TaKIMn CaMMn XapaKTepNCTKaMn.
4.7 Texo6cIyroByBaHHi peMOHT

Npeed noaTkom texhiHoro
o6cnyroByBaHHra (uCTkn,
pemOnTy too) a6o nepeBipKn
Uicinichocti Ta HaneXHoro Ctany
3'εДуВаьного KaБелю npnlaad Heo6xIDNo BCTaHOBuTn Ha TBepiDpiBHi NOBepxHi, npu ZbOMy eNEKtpoDnHyMa6 ByTN BmKHyTo, a MepeXeBn WTekep BNTIHTHyTO.
IpeepBukohannymycixpo6it i3 texhHoro o6cnyrobyBaHHaaiTe npnady oxoNoHytn np6J.5 xBnIH.
Будte yBaxHIMn nД qac BnKoHaHHPO6it i3 texiHoro o6cIyroBaHHOCKiJIbKn pIXyHn IHCTpyMeHT. He3BaxaHOnn Ha CTOpOp,MOKe npOobXHTn O6eptaHH, HabITb KOJIxNBHeHH BmKHeHO.
PemohTyBaTu 3aMihOBaTu 3'EnHyBaIbHm MepexeBn Ka6enb Do3BoJeHO NlWe KBaIipikOBaHm CneuaJIcTAM-EnEeKTPKaM.
UH
YBaXHo YnCTbTe YBeCb npnJa nicna 3aCTOCyBaHH. ( 11.1)
Дячшени npunaу He
BVKOPNCTOByIte CnCTeMn 3 BVCOKIM
TUCKOM BOuTa He MInTe npunaD niD
CTpyMeHem BOu (HaPpKnad, i3 caOboRo
WnaHy).
He BVKOPNCTOByIte AKTNBI Ouchi
3ac06n.BoH MoKyTB NowKOaHTn
IINaCTNK IMetAn, a BiDTaK MoKyTb
3aBaADITn 6e3neuHin po6oTI npunaDy
STIHL.
Texhihe 06cIyroByaHHa
O3BOJRAETBCB NIKOHByaTNIuWe Taki
po6oTu 3TexHrO BOcIyROvBaHHa,
npoAki NdTeBCB B NoCi6Hnky 3
ekCnnyatau. Yci iHpi po6oTu nobHHi
npoBoaHTN TiNbKn npaizBnKn cepBicnX
ueHTpIB.
JaKuo Bam He BnCTaay Heo6xidHoi iHopmaui Ta donomixhX 3acobib,ue BCE 3aBXMN MoXHa OTpMaTu y npaicIBnka cepbicHO ueHTpy. Ira TexHiHoro o6cIyroBvBaHHra Ta peMOHTy npnaiaB kOMnaiR STIHL peKomeHnye 3Beptatncrdo OphiHoro dInepa STIHL.
Cneuiantn ophiunnx dnnepcbkxu eHTPiB STIHL perynapno npoxoJbHabuaHH Ta otpmyIOb TexHiHni IHCTpykTak.
3actocobyte Nlle iHCTpymeHTn, npnaa Hn Habici npucTpoi,Onyuehi kOmnaHicIO STIHLO Do BnKOpncTaHHia 3uM npnaadom. IHaKwe icHy 3arpo3a HeaacnX BNnAdkIB, kI MoKyTB npn3BeCTn do nopaneHb i noUKoJKeHH
npnaNy. KaO y Bac BnHKn 3aHTaHH, oOB'aKOBo 3BepHiTbCra Do ociinHoro dIepa.
OpriHaJIbHi IHCTpyMeHTn, Habiche npaJaTa 3anachi yactHn STIH L 3a CBOIM BlaCTNBOCTaONTMaJIbHO ndxOraTb IpaIaNy Ta BmOR KopncTyBaay. OpriHaJIbHi 3anactHn STIHLOXHa Bn3HaunTn 3a Homepom 3anactHn, Hancom STIH L i MapkyBaHHaM Ha 3anactHnxKOMnaHI STIH (3a Notpe6n). Ha 3anactHnx MaIoro p03mipy MoKe 6byt npucyTHi JInue 3HaK MapKyBaHH.
IiTpmyntonepeJxByaJIbHi Ta BkazIBHI HAKNeKN qNCTUMn, 0o6 ix MOxHa 6yno npOHTaTI. NooKoJKeH i a60 3ary6JenHi HAKNeKN cIi3amIHOBaTN HOBIMOpriHaJIbHMn HAKNeIKAmN, kI MOxHa npUdBaTu y ophiuiHoro dInlepa STIH. JaQo Detanb Notpi6Ho 3AmHITn Ha HOby, 3BepHt bYbary, 0o6 HoBa deTaJIb Mana aHaONrHy HAKNeKy.
Po6Otn3pIXyHIM6JIOKOMMOXHa npoBOaHTnIeUeY3axCHnxpyKaBnCyx ( 4.3) Ta3HaD3BnuayHOO o6epxHicTIO.
Длп niДтрманнг пиладуВ робочу My CTahiMiHNo 3akpyuYte yci raiKn Ta TBInHTN,OCO6NBO TBInHTN KpINJIeHHH HOxa.
IpebeipnIe peryIrpHo BeCb npIaN,
oc6bnBO nepe3 6epiarHnM
(Hanpknad, 3mMoBa nay3a) Ha HaraBnHCTb
ctOuyBaHH HoKIB Ta nooKOJKeHb.3
OrnyHa TexHky 6e3neKn BiDpa3y
miHnTe 3HOWeHi Nn OoKOJKeHi Detani,
IO6 npuNAd 3aBxD 6By y HndiHOMy
po6Oomy cTHi.
3nTi nn npoBeeHn TeXhiHoro
06CnyroByBaHHK OHCTpykTNBHI
eIemEni 3axNCi MexaHi3Mn
Heo6xIdHO HeaHOBHTN
BiIDNoBIDHO DO YHHNX BUMOR.
4.8 36epiraHn npu doBnx nepepbax y po6ori
Iepn HIX nepemictn npuiay 3akpnte npimiuHnn,douekaTeecn Ioro oxoioJKeHH (np6n.5XB.).
IpekeKaHaTeCe 1oOdo 3axnueHocti npnaNy BiD HeKOMPeTeHTHnx Oci6 (HaepKnad, iTe).
ДбайивО OупсьTe npилад NepeД 3бержehнг (Hapnknad, 3moBa nay3a).
36epiraTe npnlay TexHIO 6e3neuHOMy CTaHI.
36epiraTe npnlaHa pIBHni NOBepxHi TAK,IO6 BIn He MIR HeHaBMUCHO BiDKOTNTNCr.

BiikpnTi HOxIMoxyTb 3aBdaTN TpaBMn!
36epiraTe caobn nopiHOBaTINbKn 3i BCTAHOBneHO3aBaHTaKyBaJbHO BOPOHKO.
4.9 Ytuliauia
BiDxOIMoKyTb 3aUKOJNTN JIOJAM, TBAPINHAMI HABKONIWHbOMy cepeoBnuy.Came TOMY ix Heo6xioHO yTuJIi3yBaTN HAJIeKNHM YIHOM.
3BepHITbcra do uehtpy ytni3aui a6o cepBicHO rHTpy, uO6 i3HaTuCRA, k npabunbHO ytni3yBatn BiXoND. KomnaHia STIHLepeKomeHdy 3BepTaTcra do ophiHoro dInepa STIHL.
IpekoHaTeCe y BiNobiHni yTnI3aui npnaNy, 10 BnWOB i3 naNy. PepeyTnI3aueo po36epitb npnaad. Uo6 yNkHyTN HeuacnX BnauKIB, y nepuy cepry cnD BiKnUoyNTn 3'eHyBaNbHn Ka6ebI bID eNeKTpoDbnyHa.
5. Onnc no3haYeHb

Ybara!
Ipeed BMnKaHHm npuAdy npouHTaTe noci6Hnk 3 ekCnnyataui.
Ctepeixtbca TpaBm! He donyckaia Te ctopoHHix ociO y he6e3neuHy 30Hy.
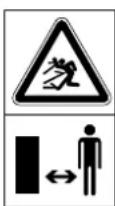
CTepexitbcra
TpaBmyBaHHa!
Pyxomi yacTHNI!
PiJ qac po6OTn
IHcTpymEnTy
3a6opOHReTbCra 3aCOByBaTN
pyK Ta HOrn B NOrO OTBOpN.
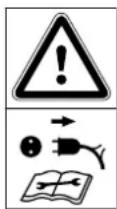
He6e3neKa TpaBMyBaHHa!
Ipeed BnKoHaHnM pObit
Ha pixyomy IHcTpymEnTi,
npoBeJeHHaM
Texo6cnyroByBaHHa 60
uHsEHHa, nepeBipKOIO
3'EDHyBaJbHorO Ka6eHIO
(NoWKoDxKeHHa,
3aNpyTaHCTb), a TaKoX
nepH HIX 3aNNHTn npnlaD
6e3 HargNy, Heo6XiHO
BmKHyTn eNeKTpOdBvryH i
BiD'EDHaTn MepeXeBn
Ka6eJIbBiD npnlaDy.
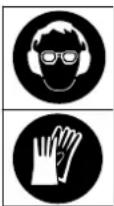
KopunctyTece3aoc6amn 3axncTy opraHIB cnyx! KopunctyTece3axncHmN OKyIpaMn!
KopntyTea3axnCHmnykABnIyM!

CtepekItbcra TpaBm! He ctabaHa npuna.

CTepeKITbC TpaBm! CTeXTE 3a TM, uO6 pyKn, iHsi yactInn Tiia a6o oJAR He NotpanJIyI N Do 3aBaHTaxkyBaNbHOI BOPOHKn YI BKNiDHOI KaHaNy.
6. KomnjeKT noctaHaHHa

T03. Onnc 7ryk
A Ba3obn npna i3 1 3aBaHTaKyBaIbHoIO liKoIO
B Konichn kapkac 1
P03. Onnc 1k
C IOnOBxByBnKnHOrO 1 KaHaJy
D Knaan BnKndaa 1
E Peika 1
F Kojicha Bicb 1
G Koneco 2
H KOBnaqok koneca 2
1 BoNT 2
J 2 M5x40
K Taimka M5 2
L 2
M KpinneHH 2
N CaMoHapi3HnI rBnHT P5x40
0 Tbnt Torx 3 P5 x 20
P TBUHT Torx 2 P5 x 10
Q Kom6iHOBaHm KIOU 1
1
7.ПiДrOToBka npnlaDy do ekCnIyatauii
CTepexitbc TaPbMyBaHna! !DopTpMuyTeec npaBnI TexhIKN 6e3neKn,HaBeJeHux y po3di n «Texhika 6e3neKn. ( 4.)
7.1 MoHTaX KOJIcHoi oci Ta KOnic

3aKpinitb konichy Bicb (F) 1BnHTamn (J) Ta raikamn (K) 3a Donomoroio kombiHObaHoro KIOHA (Q) Ha KonichHomy Kapkaci (B) (4-6HM).
- Ⅲa6n(L)iKoJeca(G)HacaIbHa 3MOHTOBaHy KOnichy Bicb.
KoJecpa zom i3 KpInnEnHnM (M) 3aΦiKcyIte Ha konichi oci. KpInnEnHn Heo6xIDHO HacaINTn Ha Bic TaKm YHOM, Uo6 KoJeca MoIJI NERKO KpyTNTNCra.
Kobnaukn(H)Haarreia
KpinneHHRA(M)3Himaetbcra,NIWE KIO BUNBecTNIOO 3 nay.
7.2 MoNTaX NOOBKyBaVa BKNiDHorO KaHaIy Ta XoIOBOi YACTHNI

- UctahOBt6a3OBn npnaA (A) IINKO BnH3 Ha pIBHn YcTti NobepxHi.
-ПоДОВЖУВач ВИКИДНOrO KaHany(C) Heo6xIDHO NiBicHTn Ha rauKax (1) y 3aHi OTbOpN 6a3OBOrO npuJaAy (A)i BiKHyTn, IO6 nepeJHa YacTnHa 6a3OBOrO npuJaY ToUHO BBIuJNa B OTBip NOIOBxKyBaHa BVKnIHorO KaHany.
3akpyTb rBuHTn (P),rKa0ka3aHo Ha pncyHky,yraKu (1) (1-2HM).
BCTaBTe xoOBOv yactHy 3 o60Ma konichmKapkacm (2) do ynpy B HanpabJIIOUH Ha 6a3OBOMy npuaDi (A).
3aTnCHItb konichm kapkac (3) y 3arIi6JIeHHHa noIOBkyBaui BKNIDHO KAHAly.
3aTЯrHITbXoOByyacTHy rBnHTAMN(N)(1-2HM).
7.3 MoHTaK KJIanaHa BnKaJaHa

- UctahOBiTb peIy (E) Ha NOIOBxkyBaU BKNIMHO KAHaNy. BkpyITb TBnHTn (O) (1 - 2 Hm).
- YctahOBiB caoBn noDpi6HOBa4.
BCTaTe KnaanBnKndaaD (D) Ha nooBxvBaVnKnHoro KaHaNy. Pid Yac HabiWyBaHH CJIkyte 3a Tm, Uo6pe6pa (1) Iibopyu i npabOpuy Ha BHyTpiHbomy 6oCi Knaana ToHOB Biun B HanpMaHn JoLo6ok NoobKyBaVa BnKnHoro KaHaNy (2).
BCTABTe rBuHTn (I) 3niBa Ta cnpaba.
7.4 BiKpNbAHHa Ta 3aKpNbAHHa KJIanaHa BnKaDaHa

BidkpBaHHKlaHa BnKaDaHa
Дя noDi6HnH nDhIMtB kIanaBnKnDaa (D) Bropy Ta 3aΦikCyuTe RaHOK (1) Ha noOBoKyBaHi BnKnDHorKaHaNy.
3aKpNBaHHKnanaHa BnKnJaHa
-ДяТрансоруВаHHУКOMNakTHORO 36epirAHH3nerka NiHIMITb3ryOK(1) iBIDKNHbTe Klnanah BnKnDaua(D) BnH3.
7.5 Raun dna iHctpmertib

- Y 3aHnI qactnHi NiKn (1) MOxHa 3HN3y BKNaCTn KOM6iHOBaHn KInOu (Q) y Jaunk dJa n IHCTpyMeHTiB (2).
8. Bka3iBkn ⅢoDo po6oTn
8.1ЯкmaTepiAn MoXHa nepepo6n?
Oprahihi 3aIIMsKn pocnH (OoYiB-i pykTIB),CKoWeHI KBITN,JIcTgA TAKOX o6p3Kn DepeB- i KyuB,30KpeMa Miue He npo3raLykeHe rllna.
O6pi3kn IepeB i KuyiB cniI nepepo6nTn CBKIMN, OCKJIbKn npu cybomy npoaykTNBHiCtB noPiHIOBaA Bnua, HIX npu nepepo6i BnCyUeHoro a6o MOKporo MaTepiany.
8.2 Akn MaTepiAn He MoXHa nepepo6n?
Do caoBOrO noDi6HObaHa He nobHHnIOTpanTn KAMHH,CKIO,MeTaneBi (HanpKnA,I npOBi, rbi3kn) i nlaCTmacOBI npEdmetn.
OchOBHe npaBnIO
KaIO MaTepiAn He NiIxOaNTb IaN KOMnOcTy, Ioro He MoXHa nepepo6JIaTn CaIOBIM NoPi6HIOBaYem.
8.3 MakcunmaBn diAmeTp rinoK
Dahi CTocyIbCBAIXIO3pi3AHx rINOK.
MakcunmaIbHn IaMeTp rInok:
35 MM
8.4 Po6oHa 30Ha KOpncTyBaHa
3MipkyBaHb6e3neKn npotrrom ycboro yacy ekcnnyataci (iNid qac po60n enektpoBnuRyHa YN DBrHyBaHy BHytpiUHbOro 3ropaHH) KopncTyBaH noBHeH nepe6yBaTN IWe Bpo6oui 30Hi (cipa 30Ha X), 06 He OTPMaTn TpaBMy MaTepiAnom, UO BKNdaeTbcra 3 npnaNy.
8.5 PpunycTme HabaHTaKeHH npnady
3aBaHTaxyIte caobn noDpiHOBaTak, uo6 He BnKnKaTu 3HaunHO3HNKeHH KJIbKocTi o6eptiB eNeKTPODBNHyHa nn DBNHyBAHcyPiUHBO 3ropaHH. 3anOBHOBaTu caobn noDpiHOBaNoTpio6o3nepebpHo Ta pIBHomipHo. KaO kInbKiCTb o6eptiN qic PooBTo caOBOrno npdiHOBaHu 3HxKyTbcra, npinnHtB 3aBaHTaxeHH, uo6 3MeHUnTu HabaHTaxeHH Ha eNeKTPODBNHyA a0 DBNHy BHyTpiHboro 3ropaHH.
8.6 3axnct BiД nepeHaBaHTaKeHHa
YBnpankynepeBaHTaxKeHHaBTOMaTHNOcnpaBoByEbOBoHm3axnHmMexAh3M i eNeKTpOdBnHyBNMkaETbcra.
Iicna oxoIOxkeHHa IBnryHa npotrrom np6n.10XbnnH caOBnIOpiHOBaM oKHa 3HOBy BMnKaTn.3axnHmexaH3M MoKe yacto CnpaOBOyBaTN 3 TaNX npuH:
- HebiOniDnHn 3'EnHyBaIbHn Ka6eIb (10.1);
- nepebaHTaKeHHa Mepeksi;
- npnnaad nepebaHTaxeHo (3aKnlaDeHo 3abaTo MaTepiAny dIra NpDiPioHeHHa 6o 3aTynuBcH iX).
8.7Kaio pixyui 6nok caoBoro noDiHIObau 6nOkyTbcra
Kuo pixyH 6nok caoBoro noDi6HOBa4 6IOkyETbcra nic aoPi6HeHH MaTePiany, HeraHo 3ynHb eJNEKTPOdBnHy I BNTaRHiTb
WTekep i3 po3eTKn. 3HIMITb 3aBaHTaxyBaIbHy NiKy Ta ycHyTe npuHHy HecnpabHocti.
8.8 HAnOBHeHHaDoBOro noDi6HOBaHa

M'ekm MaTepiAn
- OpraHiPi pocnHHi 3aHnUkni (HaPnKnIa, peuTkn OOvI b i cykTIB, KBITN, NCTy, TOHKn XMn3 ToIO) 3aBaHTaKyTe y BeJIuNKn KBaDpaTHNI OTBip (1).
Tbeprn matepian
Tobtni cunbno po3ranykeHH mN3 Heo6xidNo nonepeHbo po3pi3aTu cekatopom.
- Nobinbno npocyaBte 06pi3kn DepeB, KINBOONIOy i IIOK kpi3b OTbip y fOpmi OOTnpnncnka (2) (pO3po6nna KOMnAHI STIHL) y3IOBk npaBoi CTIHKn BOPOHN Do HOXOBOI rapHITpyn. Pnu CbOMy npuna camoCTInHO BTArye TBepnn MaTePian.
9.3axnchi mexaHi3MNI
9.1 Mexahi3M 6nokybaHHnoBtophoro 3anycky eJekTpoDburyHa
PpnaBmkaeTbcraJnue3aDOnOMoHO BMkaua.LcHEMOXJIbBO 3po6ntu, npocTo npneHabWu 3'EDHyBaJbHn Ka6ebI do p03eTK.
9.2 3axnche 6JokyBaHHa
EneKtpoBnHyTa IHcTpymENT nIa NODpi6HeHHMOxHa BMkKaTn,JIiue RaKIO 3aBaHTaxyBaNbHy NiKy npaBnBHO 3akpnto. JkUO Bnpoceci ekCnnyataui BiDkpyTnnpaBn TBnHT (INBnYncb Ha npnaad Cpepey),TO eNeKtpoBnHyABTomAtuHOBmKHeTbcA IHcTpymENT dIe NODpi6HeHH 3ynHnTbcYepe3 KjkbKa cekyHd.
9.3 MexaHIM ralbMyBaHHeJeKtpoDbnryHa
Mexahi3m raIbMyBaHHeJeKtpoBnryHaCKopooye Do DeiklbKOx CekyHd Yac XOdy HOXIB 3a IHePciEIO NiCn BUMKaHH.
9.4 3axnchi nokpTTT
CaoBnIOpiHOBaO6naHaHO 3axnHIM NOKpTTm y 30Hi HAnOBHeHH Ta BKNy.3OkPema,ideTbc npo BCIO 3aBaHTaKyBaIbHy BOPOHy i3 3aBaHTaKyBaIbHO YoacTHNO HO BOPOHN Ta 6pn3KOBiKOM,IOOBxByBaV BKNIDHO KAHaJy,a TAKOX KlaNaH BVKnDaqa.
Iiudacnoip6HeHH3axnchi nokpTTra rapaHTyOtB 6e3neHy BiDCTaHb Do HOXIBdna noip6HeHH.
10. BveeHn npuJaDy B ekCnPyataciio

He6e3neka TpaBmyBaHHa!
Ipea3anyckaHHMa caOBOrO nopi6HOBaHa Heo6xIDHO yBaXHO npouHTn po3dIn «Texhika 6e3neKn>.(4.)DToTpmyTeCe Bcix npabNJ Texhikn 6e3neKn.
10.1ПдкнчeyнcaсоВOro noDi6HOBaCaDo eJekTpOpepexi
Ha 3'EnHyBaIbHOMy MepeXeBOMy Ka6eJI Heo6XiHO BCTaHOBHTn 3anO6iKHNIOCTaTHboI NOTyKHoCTi. ( 17.)
I03BOJIeHO BVKOpNCTOByBaTNIJINJE TAKI 3'ENHyBaJIbHI Ka6JI, Bara JIKNX He MeHwa BarN rymOBnX UJNAHrib H07 RN-F DIN/VDE 0282.
MinimabHa nloua nonepeuHoro nepeTuHy 3'EnyBaIbHoro MepexeBoro Ka6JIIO MaE CTaHOBHTn 3x1,5 MM2 npn DOBXHHI Ka6JIIO do 25Ma6o3x2,5 MM2 npn DOBXHHI Ka6JIIO BiD 25M.
Mycn Ha 3'EnHyBaJbHOMy Ka6eNi MaHOb 6ytN BnroTOBneHi 3 ryma6o MaTu rmoBe nokpTT Ta BiNoBdaTu CTaHdapTy DIN/VDE 0620.
UwTeNcBbHn rHi3Jax Mae 6yTu 3axnCT BiD pO3npNCkyBaHHBOuN.
BnKOpNCTaHHHeBjIDNoBjIDHx
noOBKyBaHIB npn3BODHTb DO BtpATn
nOTyXHOCTI MoKe BnKNKaTn
nOwKOJKeHHeJeKTPoDBrHyHa.
Ley npna npn3haeNo nja
eknnyatauiB mepexi 3 nobHm onopom
cnCTemZMAKC. y nyHKTI po3noiiny
(6yDnHKOBORo BiIraJyKeHH) 3
MaKcMajbHm 3HaueHHaM 0,279 Om npu
50 T.
Kopnctybau nobHHe 3a6e3neHTn
eknnyatau npnaJy nIwe 3a
haBHOCTI eNktpnHoi Mepeki, Ra
BiINOBiAe Bka3AHIM BmORam.
3a Notpe6n NobHn onip cnCTemM MoKHs
3'rcyBatn B MicueBoi Cnyx6n
eNkTponoCTaayHH.
10.2ПiД'ЕнHaHHЯ МержБorO ka6eIIO

-Пднимитьзатиckay(1).
PiEcnHaTe MyfTy MepeXeBoro Ka6eJIO.
- BiDnyctiB 3aTnCKaY.
BiiKpnTe Knaan BuknDaa. ( 7.4)
PiiknHcyb MepeXeBn Ka6eBdo caOBOrO nOpDhOBaHa. ( 10.2)
3anyctitb caobn noopiHOBa. ( 10.3)
3auekaTe,doKn caobn noip6HOBau Haabepe MaKcMaJIbHOi kInbKOCTI oBeptIB (y peKmIXoNocTorO xOdy).
HAnOBhItb caobn noDpi6HOBaB BiNObiHMM MaTePiaIOM dna TepioDnHiCTb TexHiHOro noDi6HeHH. ( 8.8) 06cnyroByBaHH
BumKHiTb caIOBn IOpiHOBa. (10.4)
NepioDnHiCtB TexHicHoro 06cLyroByBaHHa NICNA KoxHoro BkOpNCaHHa.
IepioDnHicTbTexHiHoro 06cnyroByBaHHa
11.1 YnueHH npuHa
Iicna Koxhoro BnKOpNCTaHH npNaI neo6xidno peteJbHO NOUcHNTn. D6aJIINBE NOOxDKeHH DaE 3MOy B6epertn npHaad Bid noUKoDKeHb i NOOBKnTn TepmiH NOrO BnKOpNCTaHH.
PekomeHdyEmo pa3 Ha pik npoBOuNTn texHiche o6cnyroByBaHHra cadoBOrO noDi6HOBaHa. Ie noBHeH 3diCHOBaTn cneiaianct cepbichoi cnxykbu.
10.3 YbIMKHeHHcaDOb noDi6HOBa

PiiknIOHTb MepexeBn Ka6enb. (10.2)
HaTncHtB 3eJeHy KhoNky (1) Ha BnMnKaui. IOnuHaIte 3aBaHTaxKeHH MaTepiAly JnnoPi6HeHH Jnue ToDi, KOJI eJekTpOdBnryH Habepe MaKcMaJIbHOi KInbKocTi oBepti (y peKmIXoNocTorO xOdy).
11. 06cnyroByBaHHa

He6e3neka TpaBmyBaHHa!
IpeTexNiuHIM
06cnyroByBaHHm-iuHHeHHM npnAdu Heo6xIDHO yBaXHo npOHTa n po3iJn 工 Texhika 6e3neKn ( 4) ,oc6nIBo
niPo3iJn 工 TexHHe
06cnyroByBaHHHa peMOHT ( 4.7) ,itouHO DotpmyBaTnCBAcx npaBnTexhik6e3neKn
IpeedTexHiHIM
OcbnyroByBaHHm Heo6xIdHo
BHTaHyTMepeXeBn WTekep.
KomnaHia STIHLekomeHdy3BepTaTnca
do ophiunHoro dInepa STIHL.
(Hanpknad,pancoBOO onieHO).
Ppnaad MoXHa YnCTHTN JINWe B noIOKeHHI, 0o 3O6paKeHo Ha MaHIOHKy.
-ДемоHTуTe 3aBaHTaKyBaIbHy IiKy. (11.2)
BuaJrte 3abpydHeHH 3
BeHTnIauiHoi pewiTkn (OTbopIB nra
BCMOKtyBaHHNoiTp) KopnyCy
eNEKtpoDBrHyHa, uO6 3a6e3neuHTn Ioro
DOCTaTHc OxONoDkeHH.

3a60pOHeTbCMAITN KOMNoHEHTNeEKeTPOdBnryHa a6o DBnHyBa BHyTpIiHbOro 3ropaHH, npoknaKn,
By3nCTpyMeHem BOINiTNUCKOM.Le MoXe npN3BecTu DO NIOWkoJKeHb,INr BInpabHeHHaKx 3HaOobntbcDoporn peMOHT.
10.4 BmknKaHHcaoBOrnoDpi6HOBaay

HaTnCHiHb YepBOHy KhONky (1) Ha BmNkai. EneKtpoBnHy nCaIOBOro noPi6HOBaYa BmNkaeTbcra Ta aBTOMaTHUHO 3yINHReTbcra.
10.5 Nopdi6Hennn

3aONBHOBATn caOBn NOpiHOBaNOBHHa JIWe OHa o6a.
- H a i n h o B c t a h o b i t b c a d o b n n o p i 6 h o b a u h a p i b h i i T b e p i i n o b e p x h i.
- HanaHriTbMiCi pykabuci,3axnchi okyIpaN Ta 3acO6n 3axncty opraHIB cnxy.

YKIO He BdaeTbcBnDaJIHTN 3a6pydHeHH Ta 3aIIuIKn CINPOBHN UITKOHO,BOJOrHO raHcipko aOo DepeB'HOHO naJIuKHO, KOMNaHr STIHL
pekomehdy3actocobByBatn cneiaianbHi 3acobnIyuueHHa (Ha npknad, cneiaJIbHn 3acioI nOuueHHa STIHL).
He BnKOpNCToBnyTe aKTnBHi OunChi 3ac0u.
Perynpho ouuuyte duckobi hoxi.
11.2 Demontax 3aBaHTaxyBaIbHoI NiKu

Ocna6te 0buaBraHTn (1), 06 BOH MOrJN BiNbHO oepTaTnc. ix MOxHa BnKpyTNTn, He 3HimaOnu i3 3aBaHTaxyBaNbHoI NiKn, IIO 3anobirae ix Btpati
BiiKnHbTe 3aBaHTaKyBaIbHy IiKy (2) Ha3aI i 3HiMItb II.
11.3 MoHTaX 3aBaHTaxyBaJIbHOI nIKn

- YctaHObitb 3aBaHTaKyBaJIbHy liIky (1) Ha KpinNblHi rauKn Ha 6a3OBOMy npnlaDi (2) Ta noBepHITb ynepei.
3aTHiB 6nDBA rHNTn (3) BOHOvAc.
11.4ΦikcaizjДnCKOBORHOxka


Iicra MOnTaJy DnCKOBOro HOKa Ta nepei NOBtOpHIM BBeJeHHm B EKcNpyatauio CTonop Heo6xIdHO NOBepHyTu BnXiDiHe NOIOXKeHHa N3akpInNTu TBnHTOM (INB.pnc.).
-ДемоHTуTe 3aBaHTaKyBaIbHy IiNkY. (11.2)
- Ocna6te rBnHT (1).
-ПовернітБ ДИСКOBиH HIX TAKIM YINOM, ьбЗаглбпенгопнHInHIOcBпepd CTOnOpO (2).
BcTaBte cToOp (2) y 3aRnIbJeHna.
3JerKa 3aTgHtB rBnHT (1).
11.5 DOrnA 3a HOxEM
PepioDnHicb TexHOro 06CJyROByBaHHaPepeKoXHM BkOpNCtA
-ДемоHTунTe 3aBaHTaKyBaIbHy JIiKy. (11.2)
3aΦikcyuTe DnCKOBuHix. ( 11.4)
- Ipebeipte Hix Ha HaaBhictb noKoJKeHb (Uep6uH, TpiuH) i 3Hocy; 3a Notpe6n nepecTaBte Noro.
Mexi 3Hocy HOxIB

Hoxi cnid nepectabnTu 3amihOBaTn, nepu HIX BOHN caryHytb Meki 3Hocy. KomnaHs STIHPL pekomehdye 3bepTaTncdo ophiuiHoro dInepa STIHL.
1ДвocToPOHHiHix
Ha Hoxi BmipnTe BiDtaHb (A) BiO TBopIB Do KpaIO HOKa B KInbKOX MicIaX. MinimabHa npnHrTHa BiDCTaHb- 6 MM.
KpnJbUaTn HIX
BumipTe u npHy HOxa (B) Ha BiirHyToMy Bropy KpaI KpunbHaTorO HOxa. MinimabHa u npHnHa HOxa-18 MM
DemOHtax HOxOBoro 6noka
3aΦikcyuTe DnCKOBuHIX. ( 11.4)
BjdkpytItb rInr (1).
3HIMITb TBnHT (1), KpUJIbUaTn HIX (2) Ta DnCKOBn HIX (3).
MOHTaX HOxOBoro 6JIOka
O6OB'3K0BO DoTpMmYntecBbKa3aHnX 3HaueHb MOMeHTy 3aTAYBaHH, OCKINbKn BiD Lboro 3aJeknTB HaJIiHe 3aKpinneHH pIXyUOro IHCTpyMeHTa.
BCTABTe DNCKOBH HIX (3) i 3aΦiKcyIte Ioro. ( 11.4)
- YctahOBiB KpUNbUaTm HIX (2) i BkpyITb TBnHT (1) (25 Hm).
B iD T R H I b H a K C y Tep NOro TBnHTOM, 06 DCCKOBH HIX MIR 3HOBy BInbHO o6eptatnc. ( 11.4)
IpeceTabnHnHOxIB
3atynneHn HIX 3HnXyE npOdykTNBHCtB CaIOBOrO noDpiHOBa. Tomy 3atynneHn DBOCTOPOHHn HIX MOxHa OINH pa3 nepeCTaBNTn.
-ДeMoHTyIteДИСКOBиHIX,NOTIM BiKpyITbTBnHTn(4)i3HIMiTbixpa3OM i3raikamn (5).
-Пидимить дИСКOBин iж (6).
OuNTbTe DnCKOBH HIX.
IIOBepHITb HOxI (6) I noknaIDITb Ha DnCKOBn HIX, 3aINsuaOuN BiIDKpNTMm ix roCTpi kpa!. Bnunkyte OTbOpn B JnHiIO.
BCTABTe rBuHTn (4) BOTBOpTa BKpyTtB raKn (5).3aTARHITb raKn (5) 3 MOMeHTOM 3aTAYBaHHA 10HM.
3aTooyBaHHHOxIB
Ipeep noaIbIoo pOboToIO 3aTyIneHi HOx Heo6xIDHO HatoHTN 3 oOx 60kIB. IAn OITMaIbHOrO fHKUioHyBaHH npIaMy HOx Ma 3aTOyBaTN BKNIOuHO cneiaJnicr. Komnaii STIHLe peKomeHdye 3BepTaTncd oOfiuiHoro dInepa STIHL.
-ДемоHTyTe HOKiДЯЗaTOUyBaHHa.
Piicac3aTouyBaHnOxOIOJkyIte HIX (Ha npKnaD,BooHO).He cnid DonyckatN,0o6 nobepxHn HOxa Ha6yNa CnHOBaTOro KOnbOpy,OcklbKn ce noripwnb nooro pikyia kocti.
- Ⅲo6 3anobirBibpauiyepe3 dnc6baIahc,HarocTphTe HoKipiBHomipHo.
IpeepyctahOBJIeHHn mpecbiuiTbcra, 0o HIX He noikokxhen. Jkso E BNIMi Uep6HnU n TpiuHn a6o DoCryHTo rpaHnHoi MeKl 3Hocy, HIX Heo6XiHOn 3amHtN.
- JIe3O HOxA CJIiD 3aTOuyBaTu NiD KYToM 30^
3aToHyTe HIX npOTn HanpMaKy Ie3a.
3a notpe6n BiDunipyTe pixyu kpaI dp6Ho3epHnCTnM uJidpyBaIbHn mnanepom.
PiД MaTaXy HOxA 3BaXaIte Ha MOMeHTn 3aTaryBaHHa, HabeDeHi B po3diN «PepectabHnHHOxIB
11.6 EneKtpnHm DnBuryh i koneca
BnHyHne notpe6yTeXHiHOro 06cnyrobyBaHH.
PiiuHnHKn KOni He noTppe6yHObTexHnHO 0cbnyroByBaHH.
11.7 36epirAHHa Ta 3MBOH nepioD
CaoBn noDpi6HOBa cnid 36epiratn B cyXOMy 3akpntOM npMiiueHHi 3 MaIMBmCTOM nIy. IpekoHaTeC, 10 do npuIaNy He MaTmYb Doctyn DiTu.
CaoBnIOpiHOBaMoxHa 36epiraTNIue 3i BCTaHOBJeHO3BaHTaxyBaIbHO BOPOHKO.
CTabnayn caobn noepi6HOBaH TaPbAne 36epiraHHy (y 3mOBn nepioD), DOTpmyTeCraTaknx npabnn.
- CṭapaHNO nOuNCTiTb Bci 30BHIiHi DeTaji npnAky.
-ДобpeЗмakTe pyxomi KOMnoHeHTn npuAdy MaCTINOM a6O JnPOM.
12. TpaHcnpTyBaHHa

He6e3neKa TpaBmyBaHHa!
IpepeTpaHcnOpTyBaHHaM peTeNbHO npOHTaTe po3dIn Texhika 6e3neKn), oocbNBo po3dIn TpaHCnOpTyBaHHa npuNaNy), icyBopo dOpymuYtecB BiIDNoBIDHNx Bka3iBOk. ( 4.4)
12.1Пдимангта nepeheceннcaedoBOro noDi6HIObaya


IπiHimHaHn Yu nepeHeceHH npuJaNy notpi6Hi npHaMHi 2oc6n.
Дяpo6OTnNotp6HOHaJ4Tn 3axnCHN OJr,ЯKNI NOBHICTHO 3akPbAe nepednniYra Ta BepxHOn 占tHny tina.
1.Oco6a:Bi3bmitbcra 3a pyky Ha BepxHni yacTnHi BopoHKn caoBoro noDpi6HOBa (1).
2.Oc6a:B3bMItbcra 3apeKny noDObKyBaHa BkUnHOro KaHany caDoboro noDpi6HOBa4 (2).
ПлдимаTe caIOBи NOДpi6HOBaO OнHOаCHO.
12.2IToBxAaHHa6oTARHeHH caOBOrnoDi6HIOBaVa

MiUHO Bi3bMIbCra 3a pyky (1) caIOBOro nOpi6HOBaHa Ta HaxNIITb Ioro Ha3aI.
Caobn nopiHOBaMoxHa nobijbHO (y TemPi Xo) TgTn a60 uTOBxAtN.
12.3 TpaHcnpOpTyBaHHcaOBOrnooPi6HOBaHa BaHTaxHiinnlaTΦopmi

- 3a063anobirn cnoB3aHn npnlaNy, noro cnid 3akpinNBOATn BiNOBiHNMn 3ac06amn KpInneHn. KaHt n peMeHi cnid 3akpinNBOATn Ha KOJichOMy Kapkaci (1) nn 3aBaHTaxyBaIbHi niui (2).
13. 3BedeHnHa 3Hocy do MIHIMMyMa 3aNo6iraHHa NOKoJXeHHaM
BaxnBa inopmaia npo dorna i texihe o6cnyrobyaHna npoodykui Tnuy
eJektpuHn caObni npDi6HOBaC (STIHL GHE)
KomnaHia STIH He Hece BiDnobiIaIbHocTi 3a TpaBMyBaHnIIOJe i noIKoJKeHH MaHa, CnpuHHeHi HeDoTPMaHnHM HabeDeHNy y noci6NHy 3 ekCnPyataui BmOr, y nepuY cepry IHCTpykui 3 ekCnPyataui Ta o6ClyroBvBaHH, a TakoX npaBnI TexHikn 6e3neKn, a60 3actocyBaHH Heo3BOJeHO Habichoro 6bnadHnH i 3anaChnx YacTHN.
O6o'raKoBO DoTpMMyTeCra HabeJeHnx HnXe iNCTpykui, uo6 3ano6iTn nOuKOJKeHHaIHaMipHOMy 3HOCy BaWoOr npnlaady STIHL.
1. Wbndko3HouyBaHi DeTaji
Okpemi deTani npnaii STIH Halib 3a yMOBn HaneXHOEcknyatauii 3HOuyoBCx,3AnexHo Bi TpNBaoCTi Ta CNO6y BkOpncTaHH, NotpiHo CBOeYacHO 3amHOBaTu.
3okpema,ue cTocyETbca:
-HOXiB;
-ДИСКOBиX HOKiB.
2.ДоТрMuHЯВIMOR,HaBeJeHx y zuBomy noci6Hnky 3 ekCnIyTaauii
Iiuceknnyataui, texhihoro
06cnyrobyBaHH Ta 36epiraHn npuaiaB
STIH Heo6xiopeTeNbHO BkoHyBaTu
HaBeHeBcOmy noci6Hky Bka3IBKn.
BiNobiJaIbHiCTb 3a Bci NowkoJxKeHHy,
aki BnHKnB pe3yNbTaTi HeIoTpMaHH
iHCTpyKu i3TexHki 6e3neKn,
eknnyataui Ta texo6cnyrobyBaHH,
Hece KopncTyBaay.
Hacampeed, idetbca npo:
BVKOPNCaHH HeOCTaTHbOro (3a nloeNo nonepeuHoro nepepi3y) Ka6eJIO XnVBneHHa;
- HenpaBnIbHe nIKNIOueHnNo MepeXi (3 HeiINOBIOHO HAnpyroHO;
Heo3BoJIeHI KOMnaiHcIO STIHL 3MiHN B KOHCTpyKuII npuaIaIy;
-BNKOpNCTaHHHeo3BOeHOrO, HeBIOHOaObHeKICHO IHCTpyMeHTy Ta npuaA;
BVKOPNCaHH npIaNy He 3a npN3HaYeHHAM;
- BnKOpNCTaHHI npHnaDy nIaCnOpTNBHX 3axoJIB Ta iHux 3MaRaHb;
NoWKOJKeHn npJaNy B pe3yIbTaTI eKcNpyataui 3 depekTHMn KOMNOHEHTAMN.
3. Texhichhe 06cnyroByBaHHa
Yci po60Tu, npeiuehi B po3diJI «O6cnyroByBaHHRA, notpiioHo BVkoHyBaTu peyIapHO.
KOpNCTyBaH He B 3Mo3i BNKOHaTn Heo6xDiPi pOoTn caMocTiuHO, NOMy CnID 3BepHyTuNCa Do ophiuiHoro DInJepa.
TnTexHOrO6cLyroByBaHH Ta pemOnHT npuaiaB KOMnaHr STIH L peKomeHdyE 3BePtaTncA Do ophiHoro dInepa STIH.
CneuiacnOphiunHx dInepcbkxu
uehtpiB STIHL perynapno npoxoantb
HabuaHH Ta oTpmyIOb TexHiHN iHCTpykTak.
YBnnaKy HeBnKoHaHH po6i i3 TexobcyroByBaHH MoKJIbBi NOkOJKeHH npAaNy, BiIOBlaJbHicTb 3a Jki Hece KopNCTyBa.
3okpema, nTeTbc npo Taki noUKoJKeHHa:
- noшкоженя секточуна чета 3acmчehнь BEHTUNЯсиnpoipiB (OTBOPIBДг BCMOKtyBaHHN NOBITpr, pe6ep oxolodgen,pooborO koneca BEHTUNIATopa);
- Kopo3iN iHNI NowKOJKeHHBHaCJIIOK HEnpaBnIbHoro 36epirAHn;
NOKOKeHH npnnaIy yepe3 BnKOpNCaHH HeKaICHX 3anYacTHN; - NOUKoJKeHnBHaCNIIOK HecBOeacHOrO/HeIOCTaTHbOro TexHiUHOrO 06cNoyROBaHHa 6o BVKOHaHHpeMOHTy H TeXo6cNoyROBaHHa He B MaIcTePHi CneuaJIi3OBaHOrO cepBicHOrO ueHTpy.
14. 3amihIOBaHI 3aIyactINH
Hix:
60087020121
Kpimlbuyatn hiX:
6007 702 0300
KOMIIeKT DnCKOBOro HOxa: 6007 700 5190
15. 3axnct doBknJna

MaTepiAn InI noDpi6HeHHa Tpe6a He BnKuIaTn Ha CMITTA, a nepepo6IaTn Ha KOMNocT.
YnakOBka, npnai d i doaTkoBe
npiJnaI BNIROTOBNeH 3 MaTepiAniB,IO MAIO TBOpHHo Nepepo6nTa HJIeXHO yTNIi3yBaTnCra.
EkoloriHn npabInbHa po3dInbHa yTnIi3aui CnpnE NOBTOPHOMy BkOpNCtAHIO BTOPCuOBuHN. PicnA 3akIneHHN TepmiHy cny6n npnlaNy, 3daTe NOro B NyKt npniOmy BTOPCuOBuHN. HEnpaBInbHa yTnIi3aui MoKe 3awkoDHTN 3dOpOB'Io Ta 3a6pydHNT NaBKOINHNE cepedOBuIe.
TexhiH DnpeKtNB Ta BmOrn YkpaHH BnKOHyOtbcR.
16.3 BcTaHOBnEHa TpNbAniCtB BkOpNCtAHN
Nobha BCTaHOBnHea TpUbaNtcb BkOpNCtAHHcTaNOBHTdo30pokib.
BctaHOBHeTaPbIaicTb BnKOpNCaHH nepe6bae peryIepheTexHne 0cbNyroByBaHH Ta DOrnB BiINOBiDHO BmOR IHCTpykui3 BnKOpNCaHH.
16.4 L7a6-KbapTnpa STIHL
IotyXHCTb (P) 2200BT
HomHaBha cuna
CTpyMy 10A
HomHaHbHa HAnpyra 230B\~
Yactota 50
KnbkiCtB
06epTIB (n): 2720 /xB
MepexeBn
3anobixhuk 16A*
Knaac 3axncty
Tin 3axncty 3axnCT BiD p03npnckyBaHHB Boi (IPX4)
Pekimpo60tn P40
40c yac HabaHTaXeHHA 60cxoOCTn xi
Momet 25 H·M
3aTaryBaHHa
ΓΒΜΗΤ
ДиСКOBиHIX
MOMEHT 10 H:M
3aTAYBaHH
BnHT
DbocToPOHHH HIX
Д/ЛВ 77/48/97 CM
Bara (m): 20 k
20Kr (UBe) 21K
(Beileko6pntaHia)
Emicia wymy:
BidiobioHIO do ctaHapry 2000/14/EC / S.I. 2001/1701:
rapaHTOBaHn
piBeHb 3BykoBoi
noTyxHocTi, LwAd 102 dB(A)
PtoxnbKa KwA 3d5(A)
BidiobiDIO do cTaNdApTy EN 50434:
PibHeIryHocTiHa
po6oohmy micui LpA 92 d5(A)
PtoN6ka KpA 3d5(A)
* yBara!
MepexeBn 3anobixkHKn Do 16 A nid cac 3anyck npunaNy y BunaKy 3NaHoro HabaHTaKeHH 6yde qacto cnpaCbOByBaTu.
17.1 REACH
REACH-ue noctanoba EC npo peectpaio, ouihobHH Ta donyckaHH xiMiyHx peohBN.
ДяОТРИМАнг ИФОРMAцIпОВИКОHAнHЯ NOCTAHOBИ REACH (EG)Ne 1907/2006 nepeiTb Ha Be6-CTOpIHkywww.stihl.com/reach
18. UcyHeHH HeCnpaBHOCTe
KuO BAM Notp6Ha KbaIicIKOBaHa DONOMora, peKoMeHnyEMO 3BepHyTnCra Do ophiuiHoro DInepa STIHL.
HecnpaBnictb:
He 3anyckaetbc8 eNeKtpoDvHyN.
MoxjlnBa npnHa:
Cnpaouab 3anobixn Bmukay eKeKtpoDBnryHa
- Hemac Hanpyu B Mepeksi
-Пошкodжевуз'EDHyBaIbHn Ka6eIb/штЕКEP,штЕнселыMyФТу a60 BmNKaU - POnKoJKeHo 3anO6iKnHnK dnn 6pntaHcbkoT OTekepa (CTocyeTbCn npnlaIb DnB BeNko6pntaHi).
-3aBaHTaKyBaIbHy IiMy He 3aKpnto HaJIeXHIM YINHom -CnpaIOBab MExaHIm ABTomATuHOrO BUMKHeHHra (3axnche6JOKyBaHH)
-3a6JIOKOBaHO DnCKOBH HIX - Ctonop He nepebeDeHo y BuxiHne noJIOXeHH
UcyeHHa:
- 3auekaIte,doKn npuJaOxOIOHe ( 8.6).
-ПepeBipTe 3anobixHnK Ha 3'EDHyBaIbHOMy MepexeBOMy Ka6eni 念 10.1). - Ipebeipte 3a notpe6n 3amHItb Ka6eIb, WTeKeP, MyfTy a6o BmKau (BnKOHye eJekTpNk) 喜 10.1).
-3amHitb 3an06iXnK
-3aKpNInTe MlCuHO 3aBnHTiTb 3aBaHTaxyBaIbHy NiKy ( 11.3)
-ДемоHTyIe 3aBaHTaxyBaIbHy IiKy Ta BnDaJIrIb i3 KopnyCy noDi6HeHm MaTePiaI (YBara! BiI'cHaIte MepexeBn Ka6enb) ( 11.2) - Ipebeiitb ctonop y BuxiHne noIoxKeHHa ( 11.4)
HecnpaBnictb:
Yacto cnpaobBye MepexeBn 3an06iXHnK
MoxnBa npuHa:
-He npabnIbHo niiipbaHn 3'EnHyBaIbHn Ka6eIb;
-NepeBaHTaXeHHaMepeXi;
-ПиладпepeнавантхеHo
YcyHeHHa:
Bn6epitbBiINOBiHN3'EDHyBaJIbHNI Ka6eIb ( 10.1)
-Ⅰπκηιουγίν πριαδ ἀο έλυτόσεηκτρολημύσα
- 3aBaHTaxyIte MeHHe MaTepiany InnoPi6HeHHr; NepeCTaTe, HarocTpItb a6o 3amHITb HIX (⇒ 11.5)
HecnpaBnictb
PpOdykTNBHCbCaOBOroNoDpi6HObaHa 3HxkeHa.
MoxJInBa npuHa
- 3atynnnncnHOxKi.
YcyHennr
- Phepectabe, Haroctpitb a6o 3amHItb HIX (⇒ 11.5)
Hoidke seadet tookorras.
Hoiustage seadet tasasel pinnal, nii et see ei saaks veerema hakata.

BaKaHa YcaKaTafblbH Kyat Ke3iHe KaIay 493
Xeni HINHcBn KocbHb3 493
BaKaCaTaBbIITapBbIKocbIHb3 493
BaKycaKaTaBbIbH cHdpy 493
YcaKay 493
TexHnKaIbIK KbI3MeT KepceTy 493
KypblfblHbTa3aay 494
Cyapma WyHbIMacbH 6eWekTey 494
CyapMaUyHfbImaHbI opHaty 494
Диickin nbIaKtbI opHaTy 494
PbIwaKTapFa Kbi3Met KepeTy 494
3JneKtp K03FaTkblIbI XeHe DOHfanaK 495
CaTay wapTTapbl 495
TacbImaJday 496
BaKycatkbIbIH KeTepy Hemece Tacy 496
BaKaHa YCaKaTaBbIbH ayBicTbIpy 496
BaKaHa yCaKaTaBbIbHbIH TIK KInHeOpHbIH aybIcTbipy 496
To3y dapekexcin 6apbIHwa a3aHTy
XHe 3aKbIMapdAn Kopray 496
Baca da kocankbl 6nwektep 497
Kopwaroh opTaHbI Kopray 497
Caikeci6oibHma mImdme 497
STIHGLHE105.06aKaHa ycaKaTaBbIbHbIeO TaanTapbHa ceKeCTiri TypaIbIeKnapaun 497
Ceykectik 6enrici 498
BelnirineHren kondaHbc Keeshi 498
STIHL 7a6-ntepi 498
STIHLEHwinec KecinopbIhapbl 498
STIHLeKjIqIkTepi 498
STIHLMnpTaybnapb4 498
TexnkaJIbIK DepeKTeP 499
REACH 499
AkayIbIKTapbliz 3dey 499 TexHnKaJIbIK KbI3MeT KepceTy kocnapbl 500
Bepinicti pactay 500
Kb3MeT KepcTeYdi pactay 500
2. AtaMbIu naJaIaHy XeHInDeI HycayIbIK XaBbHa
2.1 KaannblaknapaT
BynnnaHany XehiHderi HcyaybIK 2006/42/EC EK dnpeKTHBaCbHa cKeec eHdpuyinH TynHcKa naDanaHy XehiHderi HcckaylbIb aydapMaCbI 6oJbIn Ta6bIaNbl.
STIHL KOMnHaHrcbE3EHmDepiHH cypbntaIbIMbH epi kapa Xetindpy 6oBihwa TypaKbI JxMBC Jxprizin KeJeDi; coHbIKTaH 63 XeKtkiINIM
KbIbTbIbHbIH NlWiHHe, TexHOJrAcb
MeH Ka6DbIKaTybHa e3repicTepe Hri3y
KkBbIH 3iIM3re KaNbIpambl3.
AtanFaH c6eBnke 6aJNaHbICTbl OcbI
KitanWadaFbMI aImimetTep MeH cypetTep
Herizihde eWkaHdaa WafbIMdap
Ka6bIaHa6aNbbl.
Ocbi naDanaHy KeHHneri HcckaybIkTa Keibip endepde KOnKeTImDi 60Imaybl MyMkiH ynrine cunatlanraH.
Ocb nainananyKeHHneri HcyayIbIK abTOPbnIK KybkIneKoprFaH. Bapblk KykbITapbi, COBHIN iWInDe KeWipMe Kacay, aydapy XaHe 3neKTPOHdbIK KyinepePiKemerimEn eHdey KykbIfbl KoprFaH.
2.2 NaiDanaHy XeHInDi eri ocbl HcyayIbIKTb KaJau KOnDaHy KepeK
CypTTepeMeH mtiHep, KymbIcTBH 6enrini6ip catbnapbi CnataaTaNbl.
KeranankbiuTa6apbHK HbiuHaNap, naDanaHy KeHHDiI OcbHcyKayBkTa Tycinipinei.
Ke3 tiry 6aftbl:
PaiIaIaHyKeHHderiHcyckaybikTa
KoIaNHaRan Ke3De:
naiIaIahyblacannenH typ (Kymbic Kyni).
Bemimdeepin HycKaynapbI:
ToIbIbIpaK aknapaTbI Ta6yfa 60JAtbH
6eimdep MeH 6eJIkTeP KepcTeKiUneH
6enrileHre. BeIm HycKaynapbIHbH
MbIcaJIbI: ( 3.)
Matih y3iHdinepiHH6nrrinehyi:
BeneK Hcykaynap KeNeciJeBenrIneHyi MymkiH.
PaiDanaHuybHbHOpbHdaTbH onepaunapbHbH 6ipi3diiniri:
- 5ypaybIbTbH KemerimHeKHeTyTkblTbI (2) KOJdaHa OtbIpbn,6ypaHdaHbI (1) 6ypan aJIbHb3 ...
XaJIbI tIaIMeIpi:
CnpTbik ic-wwapanap meh caibictapdbI eTKi3reH ke3de eHimdi KOndaHy
Aca MaHbI3dbI MAtiHHi6eNikTepi:
OkbipMaHHbIH Ha3apbH aydapy ywiH, naDanaHy KeHHderi HcayNbIKTaFbl MeHHH eH MaBb3dby 3iHdinepi KeNeci TaHbapmeh 6nrrineheJI.

Kayin-katep!
Aybp kapaKaT neh 3akbIM any kayni 6ap. Benrini 6ip apeKeTepi benrineHreH hemecpe pyKcat etinmereh.

Eckey!
Kapakat any kayni 6ap.
KapakatTah amah caTan kaJatbIH
Tcin KepctiReH.

A6aB60JIbIbIbI
Benrini 6ip apekeTepin
canapbHAn Jekin JapaKaTAP
KeTIPiJIn, Ka6DbIK CbHybl MyMKH.

HycKay
OnepaTopdbihbIKTmam
kateiikTeipin6oJdbIpMay
MaKCaTbImeXa6DbIbTkblKOJaHy
XehHderiYcbHbICTap.
CypTeKc cInTeMeJep:
KpybIyBnI naIaIaNHybI KepcTeTIn CypETe PnIaIaNHy KeHJERI HcayNbIKbIH 6acbIHJa KeNTipinreH.
Φotokamepa 6enrici Pnndanhy KehHderi HcyckaynbkTa KeTipinreH MeTHRE CcNEKC CypETTI HcyckaNbl.

2.3 Typni endepre aphanf an Hyckana
STIHL KOMnHaHrcbl KOJaHaBbJaTaBH eniHe 6aJNaHbICTbl KpybInfbHbI aWanap MeH axkpaTkbUHTapdbH KeNTereh TypnepeMeH Ka6DbIKTaNbI.
CypertepE Eypona yuih kacalraHapbkepcetirreH,kypbilfnbHb6acaawamekocy dJc0bnaiyny3ere acbpnaabbl.
3. KypbInfbInapdbIn cnaTbI

1WyHfbima
2Буразндалытбгьндap
3JaKtBipMaHbIH KaKnarbl
4 DeneReneK tiperi
5 Heri3ri Kypbnfbl
6 TipeyiTuTka
7 Keniik KocbIbIMbIbap Kockbl /aXbipaTkbIb
8 Maunha Hemipi Xa3bIFAH TeKyXaT
9 AcnaniKa apHaIraH 6eJIM
4. Kayinci3dk wapaanapbl
4.1 Kannbepexepe

AcnanneH Kymbic icterehne Kayinci3ik TexHnKaCbIH KaTaH yCTaHbIb13.

Anaw pet kondaHap andbiHa naandaHny KeHHderi ocbI HcaybIKbTObnIFbIMeH
OKybHb3 Kepek. PnJaHaHy XeHiHderi HcayNbKbT TaBla Da KOnJaHy MaKaTaHda CaTan KoBbHb3.
Kayinc3dk MaKCaTbIHdaMbHa Kayinc3dk
wapanapbH yCTaHraH XeH XeHe de
HyckaynbkTa eCKepimereH 6acka da
epexenepiyctahny Kepe. Kpyblrhlb
YHEMI akblmeH XeHe kayankepwnikneH
naidanabHbH3 XeHe de naDanaHybI
6acaTyfpanpa 3akbIM Turi3reHi ywiH
XeHe MyNIki 6yndipreHi yiw H kayanTbI
EkehYMbITNaHbI3.

KapaKaT any kayni 6ap!
Biikci naiandaHuybIap 6akwa ycaTarlhH TyeKeJIepin aHbIKa anMaybI Hemece 6aFaan aImaybIMyMkiN. PndaHaYu bI Hemece 6aca aamdap aybp Hemece ka3aJIbI kapaKaT aNybl MyMKiH.
Bacapy 3IeMeHTepiMeH XaHe KypblfblHbI NaJaHaHy epeXeIepiMe TaHbICbl NblfblHb3.
KpybIINHbTEK naDanaHy XeHiHderi
HcKayblkTbOKbIFaH XHe KpyblfHb
naJaAnaHa anaTBnTHyraJFaHa
naJaAnaHyra6oJaB. AIfaw pet
KoJaNbICKa eHri3ep aNDbHa
naJaAnaHysbTExkpNBeJI MaMaHa
XyriHyKepeK.CatUbHemec6BaKa
MamAH naJaAnaHybifa KpyblfHb
Kayinc3XonMeH naDanaHy epexenepi
TyciHdipy KepeK.
Hyckay 6epren Ke3ne naaandaanybifa KpybnfBIme Hymbcic ictereh Ke3de 6apbHsa a6aan60bn, 3eiH KOra OTbipin Xymbic tey kepeekehn TycihipreH XeH.
OcbkypbInfbHbMyKnT naDanaHaFKe3de DeepaBIM KaNdbIK TeyeKeIepeNanda6oJyblMmKiH.

TyHbIFyDAn eIm Kayni 6ap! OpaybiMATEpnaIMeH ouHaHaHHa 6anapra TyHbIFy kayni TeHy MyMKiH. OpaybiMATEpnaIbI 6anapdaan aIwaK YCTaHbI3.
KypblfnHb6apnbKypanapbImeH TeK Ocb yIrrimHe TaHbIC XaHe OHbIMeH Kymbic icTe anatbH TynrApaFra fHa 6epyre pykcat etinei. NaDanahy XeHHderi HcKaynbKypblfnHbH axbipamac 6eniri 6oJbTabnAbx He XaHa naJaIaNHyBbFA KypblfBImeH 6ipre 6epinyre Tnic.
KpybIINFBImeHxmbicicteyxhe naDanaHy wih naDanaHyBHBiH
fN3NKaJIbIK,ce3iny xHe oJnay KaBineTin
kAMTaMaCbI3 ety.Erep naDanaHyBb
fN3NKaJIbIK,ce3iny Hemece OJnay
kaFbIHAn WeKteyn6oNca, on
KpybIINFBImeH TeK KaDaFaNAyda Hemece
XayanTbTYnFaHbIH HyCKaynapbl
6ObIHwa fHa Xymbcic icte anadbl.
NaiandaHybHIn KMeNeTke TOnfahbHa HEmeCe YTTbIK epExeepre CaiKec Kcci6 BoBuHwa Kaadarayda OKbTIJIFaHbHa Ke3 XeKti3iH3.
KpbIJIbIMeH TeK 433nKaIbIK XaHe
NCNXONORINbIK KArDaBbIX KaKcbI
6oJFaHa Da Rana Kymbcic Ictey Kepek.
DeHCayIbIbH3 Haap 6oJfAH
XaJaDa YcAKTaFbIuNeH Kymbc icTeyre
pyKcat any yuH dApirepre KOblfBbH3.
KmblNbH3DbHaWapNaTbIH
dApineepin Hemece anKorOnb
iIMdkTepiHcEpei Bapda KpbIbIMeH
Kymbc icTeyre TbBIM CaHbHaBbI.
KypbJIfbl TypMbICTbIK MaKcTtapFa apHanfaH.
Ha3ap aydpbHb3 - Ja3aTaibIM OKnFaHbIn Kayni 6ap!

STIH6akwa ycaKaTbfuBk cciinre 6yTaKwlanap MeH ecimdkTeepin KanDbkTapbH ycaKayra apHaanra. OHb 6aca MaKcatnne KOndaHyra 60MaJdbi, ce6e6i 6yn aanam ywiH kayinti Hemece Kypblfba 3aKbIM KeNTipy MymkiH.
BaKaHa yCaKaTaBbIbH KeNeci MaKcTAPFa naJaIaHyFa TbIbIM CaIbIHFaH (TOJIbK eMec Ti3IM):
-6acaMaTeepnaJap (Mbicanbl,WBHbI, MetaJI) ywiH;
- naaandaany XeHHderi HcKaynbkTa KepceTIImereH KMbICTapdbOpbIHday ywiH;
a3bIK-Tyik DaaihhyiH (MbICanbl, M3dbly ycaKay, Me3raiaipikTey).
Kayincizik MaKcaTbIHda STIHL KOMnHaHrcbI pyKcat etKeH kepeK- kapaKTapdbIH dyPbc opHaTbIMbIHaH 6acka, Kpyblfbl KpyblmbHa Ke3 KeJiree3repcep eHri3yre TbIM caMbHa, cohImeH katap, MydAn apeKeTTep KeniDikTih KOblNybiHa eKeenei. PyKcat etinreH kepeK-kaPaKTap Typanbl MmimetTepdi STIH LdenDaBHaH 6in anlyfa 6oJa.
CoHbIMeKatap, iUTeH KaHaTbIH K03faNTKbIi NeH 3NeKTP Ko3faNTKbIiTbIH aHany KInirHe HEmeCe KyaTTbIbIFbHa ecep etetih KpybIbIbHbI KOIme K03faNTyFa TbIMcAblHafH.
KypblfblHb3aT,kaHyapnap MeHaamdapbl,acipece 6anapanpblTacbmaJlay ywiH naDanaHyra TbiBIMCaIbHaDbI.
Koramdbk opbHap,napKtep,cnopt aanaHuaapbHa,konda,aybnKehe opMaH wapyaWbHbHbHa naDaanHa H Ke3e eTe cak bony kaxet.
KpybIyfbHbI Teric Xepre KoIbIHaHaJda
XaHe on e3diirHe ayHan KeTneiTH
6oIraH KaIdAra rAha XiepePi3.
4.2 Eckepty! 3neKtp TorbHa corbiny kayni!

Ha3ap aydapbHb3! 3Jektp torbHa corbiny kaynil
Kayinci3ik MaKcaTbHda
KeJI cbMbIHbIH, KeJIINIK
WTekepre
aXbIpaTkbIHTap MeH

KocatbH cbIMfa epeKwe Ha3ap aydabibIbI. Tok cory KayniH anDbH any yuH, 3aKbIMdaHraH WoFBipCBIMapdbI, yanapdbI, aBipnap MeH HcKaIraH KOCy cbMdpbH naJaHaYfa TblbIM caIbHaIbI.
Con c6bnti 3akbim 6enrinepihe (cbHfblTbIK) KOCy cbIMdapBH TypaKbI TeKcepin Typy KaKeT.
Xenilik cblmbi Ka3bIbnFaH KypblnBhlb IfHa KondaHbicka eHri3iH3.
Ka6eBb 6apa6aHbH naIdaIaNfA H Ke3e, OHbI naIdaIaNHy aIbIHDa TOIbIKTaN K3y Kepek.
3aKbIMdAJaHaFy y3apTkbl W Ka6eBdi
naiDaJlAnHyra TbiHbIM CaJIbHaDbl.
3aKbIMdAJaHaFy y3apTkbl W Ka6eBdi
kaHaacbHa aybcIbpy KepeK, y3apTkbl W Ka6eBdi XeHDeyre TbiBIM CaJIbHaDbl.
ErepKenilikcbHemecey3apTKbIi Ka6eJIbKymblc6apbcihda3aKbIMdAnca, KEniIK cbIMbl Hemece y3apTKbIi Ka6eJIbdi 6iphen TOK Ke3iHeH
aKbIpaTbHbI3.EWkaaHa3aKbIMdaJIFaH KENiIK cbIMra He y3apTKbIu Ka6enbre TImeHi3.
KpybIbHbCIMapb3aKbIMdHaFah
Hemece To3fAn 6oJcna naiDnAhyra
6oImaDb. KocatbH CbIMda 3aKbIM Keny
MeH To3y BeJIrIepiH 6oMaybHa
epeKeJe Haap aydpBIn TeKcepiH3.
3NeKtp cbIMdapbH KHeHdey MeH aibip6actaydbI TK apHaon OKbITbINraH Kbi3MeTKePnep raHa Xy3ere acbipy KepeK.

Tok cory kayni 6ap!
3aKbIMdaIraH cbIMbI Kyat KeiHe Kocyra TbIbIM caIbHaDbI JeHe OHbTEK 3neKtp JenicineH axbIpTaBnFaH Kynde yCTayra 60JaBl.
Keckiu6IIOKTapra (nbiwakTapra) Tek acnan cehin typrHda faH KOJ Turi3yre 6oJaBl.
3NeKtpKeJici Caikec caKaThaBipfbiTapMeH KopFaIybiH YHemi KaDaFaNt OTbPbIHbI3.

KaHbip Kaybin TyprHaHa
Hemece bInraIdbI optada
Kymbcic tcyre TbIMIM
CaIbIHadbl.
Ausbk acnah actbHda kymbc ictereh Ke3e TeK KpybInfbfKeJeTih ( 10.1) cy eTKi36eHtIH y3apTKblI WOfbIpcbIMdbI KOJHaHbHbI3.
3NeKtp KyaTbHbH CbIMbH aHaHbI pO3eTKaHaH anbIn TacTay apKbInbI cHdiPiH. 3NeKtp CbIMbH TapTyfA TbHbIM CaMbHaBl.
KypblfblHbXaHbipdbHactbHda KaandbIpMaHb3.
Erep KpybInfRehepatOp arperatbHa KocbInca, ToKtBHy aybTKybiHa opaOHbH 3aKbIMdaH6aybH Kapan OTbIPbHbI3.
KypblfblHbMaKcMmAbIaXbIpaTyTorb30MA6aNkbImanbCaKaTaHbIpBfUwneH KopraHan 3NeKtp KyaTbHbIH Ke3iHe KaRan Kocyfa 6oNaIb. KocbIMwa MJImeTTepDi 3NeKTPMOHTaXdaybIdaH anyFa 6oNaIb.
4.3 Knim XeHe 63en

KypbIFBImeHxMbIC icteyyuih Ta6aHbCbIPraHaMaTbIH Ka6bIK aAR KIMM KINiH3. KaJAH
aK HEmeCe CaHdAnJaDapMeH XyMbIC icTeyRe TbIbIM CaJIbIHFaH.

Kymbic Ke3iHde XeHe ecipece TexHNkaIbIK KbI3MET KepCetY XHe KpybIINHbI TaCbIMaIday Ke3iHde epKaWahXa6bIK
6eB6eyi 6ap Koprahbi 6blrnapbKoJrnn KniH3.

Kymbc Ke3iHne epkaaWah TbFbI3 KopraHbI W Ke3iJdpirH KIn KypiH3.

Kapamdbi KopfaHbI W KeinipiriHmexaHKnabIK 6epiktiri EN 166 cTaNapTbI Hemece yTTbIK HcKaMaJnapFa
cayda TaHbanaMa6bap.

Kymbicteereh Ke3eepaibim KopraHbI WynakKanTapbH KIn Kypin3.

Kapamdbi KoprfaHbI
KJaakKaanTapbEN352
CTaHaapTbI HeMece YNTtBk
HyckamanaPra cKeC
TeKcepiTReH XeHe OHbIH Tnicti Cayda TaHbanaMaCbi 6ap.
Ekeyih de kymbic aarTaNfHaHwa Knin kypihi3.

KypbIJIbIMeH Kymblc icTeerH Ke3ne Dehere Xa6bIcbIn TypaTbH cainkec KNIM KNIiH3, MbicaJIb, Kymblc XanaTbIHbIH
OpHbHa KOMbHe3OH. YCaKaTbIuNeH
Kymbc icTeReHne IeI TaTpY, ranCTyK,
aWeKeJnep Tatyra, 6oc Xi6epinreH
JeHTaIap MeH 6aca Da cbiptKa WblfBIn
TypaTbIH KNIM 3JemeHTTepiH KIORE TbIBIM CaJIbHaDbI.
Acnannen Kymbcic tterehne,Kehe de OAFH KbI3MET KepceTkeHe De 3bIH WaItapdb6aIIan,6acKIM (XayIbIK, Kenka XeHe T.6.) actbHa Xacbipy KaXeT.
4.4 KypbIINfbIH TaCbIMaIIay
KypbIbnHbHiykip XHe bICTbIK 6eNikTePiHexapakat anMay ywiH TeK KopraHbiW KOJFaTAPMeH rHa ( 4.3) Kymblc icTeHi3.
3NeKtp K03FaNTKbIbI KocYbI TyPfAH KpyBnFbHbTacbMaIaMaHaB13.
TacbImanap andbHda 3neKtp K03fJNTkbWtBcHdiPiH3, nbIwakTbIH TOkTaBH KyTIi3 XHe TYaHbipy 6iTechiH TyicneJI WtBfbH Cybpbln aJIbHbI3.
KypblfblHbI TEK OHbIH 3JIeKTp KO3faJTKblBcYbifaHH KeiHa fHa Tacyfa 60anaBl.
KpybIyfbHbI Tek TnicHwe opHaTbIJFaH Tney WHyfBIMacbImeH TaBImaJaHb3.

Kapakatanykayni6ap!
PaiDalaHyuBb6ocKaTkaH nbIwaKapdaHkapaKaTanybl MymkiH.
Ocipece eHKeiTy Ke3iHde KypblfblHbH caImafbH eckepiH3.
Cai KeTeIH KxKTey MexaHn3MdepIH (KxKTeY TyfbipHaMaIapbIH, KxKKeTpriU KOHdbIpfbIcapDbI) naJaIahBiHbI3.
PaiDanaHy XeHInderi HcKaybikTa KepcetinreH opBnapdbI naDanaHa OTbipIN, YCaKaTbIbTIb CaiKec KeNetIH KypaandapMeH (baynapMeH, KaibCTapMeH XaHe T.6.) 6ekity Kepek. ( 12.3)
KypblfblHbI TK Kypic KbIaAMdbIFbIMeHTapTyra Hemece Tacya 6oJaBl.CyipetneH3!
KypblfblhTacbImaJdayKe3Hde,atan aITcak,KyKTeY TyfbipHaMaIapbIHda KyKTiH XHe TaCbIMaJaHaTBH 3aTTbH KayinciDiRHe KaTbICTj KepriikTi 3aHapdbIH TanaTapbIHOpbHdayKaXeT.
4.5 Kmbictb6actamac 6ypbiH
Kypblfbln bna danahny xehinderi HcyaynbkTbOKbn WbIKKaH aadmap fana naandaHaTaBbHaKe3 KeTeK3iH3.
KpybIfblHb6ipihpi pet kondaHap aIbIHda opay MaTePnAbI MeH TaCbIMaJIay caKaTHDbIpfbIHTapbIHah 6ocatblh3.
DKMEN3eKTPKo3fantKbIuHnEH Ka6dbkTaTaNrHa 6aKaacnTapbH naDanahyepexenePi CaKaTaHbI3.
KypblfHbI naDanaHap anDbHda
akaybI,coHdA-naTosraHxHe 6yInHRe
6eJWeKTePi anMaCTbipy KaKeT.
KypblfDaFbI aHbIk EMEc Hemece
3aKbIMdaIraH Kayin XHe eCkepy
6eJrinepiH xHaHpTBHb3.03
KaIaNbI3daFbI STIHL denDaIbHda
KocankbI xAncbipManap Meh baplbK
6acka KocankbI beJWeKTe konKeTimdi.

Kapakatanykayni6ap!
To3raH Hemece 3aKbIMdaIraH
6JIWeKTeP (MbICaJIb, eTnei KaIraH nbIwaKaTap) KypblfBiHBiKayinci3diRHe Kepi ecep etyi XaHe naJaTaHaHyBbIHbIH
JapaKaATTaHybHa anbIn Kenyi MymkiH.
KoJdaHbIcKa eHri3ep anDbIHa TEmeHdErIepei TeKcepy XHe KaMTaMaCbI3 ety KaXeT:
KypbIbHbH Kayinc3 Kymbc Kypri3yE KapamdbIbfbH. Byan KanTamaJap MeH caKaTHdbIpBbI W KypblfIbIaPdbIe 3 opbHaapbHaOpHaIacByH KeHe MInCi3 Kynde eKeHdiIN biJipei.
- Tok Kezihe XaIray yuIH tananTapra caikec opHaTbInFaH po3eTKa KOJaHaHbJaDbI.
XaIraftbI WKeHe y3apTbIbIcBIMApDbIH OKwayNaftbIbHbIH,WTekepDIn XeHe KaIFaCTbIPrBtBtMHIC KyIe EekHirH.
Kanbl KpbIbIa (3neKtp KOfantkbihBHH Kopnycbl, KopraHbi WabkTap,6eKtkiw 3nemeHTep, nbwaik, nbwaik biiri, nckini nbwaikTap Xhe T.5.) eWkaHdai 3aKbIMdaHy XHe To3y BnirinepiHJ KOK EKeHdiRiH.
KypbIJIbI iWIIHe yCaKaTaNATbIH MaTePnAaNbIH 6oJMaBbIH XeHe Tney 1yHbIMacbIHbIH 6oc 6onybIH.
-6apnbik 6ypananapdbih, combHnapdbih xhe 6acka 6ekitkiu 3IeMeHTepinOpbIHda 6onybIHxHe 6ypan taptbInFaHbH. KOnHaH apAnbHda 6ocarH 6ypanJaHap MeH combHnapdbi 6ypanTaptbHb3 (6ypan KaTbipy cTIN KaadraHanb3).
KpybIJIbHbI TEK aIbIK acnHa nactbHda, Ka6bIpFa MeH 6acka Da Ko3raMaHtBIn OH6beKTIpeDe HAnak Kepde NaIdIaHaHbHbI3, XapaKaT any KayinH XHe MyNIkTi 3aKbIMay KayinIH TeMeHNeTy YwIH (naIdaNaHyWbYwIH XeTKiNlKiC3 XyMbIC aMafbl, WbHbl CbIHdbpy, ABTOKeNlKi TcB3bn any XeHe T.6.).
KypblfI teric api ktaik Ka6aattbl opHbIKTl Tpybl Kepek.
KpybIfblHbTacTap MeH KnbipBbTactapfaOpHaTbIN naDanaHyra TbIBIM caIbIHFa, YUKBbIHdaTbIH MaTePnAnDaH JkapaKaT aNybl MymKiH.
品 p e T e 6actaHaKe3eKypbInfBtiNicti TypdeKaabinraHdbibHaKe3XeTKi3iHj3. (11.3)
Kayinti kafdaia Te3 epeket etyre aphanrah axbipakbiHTapdbIH ophanackan Xepih ccte caKaTahbI3.
Cyapma WHyfBImaHbIH, WAsbipaHdbdaH
KopraTbIH naHeNbdepi 6ytih 60nybl Tnic
KHe cyapMa TecikTI ToIbIKaT JkaybIn
Typybl Tnic, 3aKbIMDaHaH
WAsbipaTkbiUbI aibp6acTay KepeK.
KapaKaT any kayni 6ap!
KpybIrfHbI TEK dypbic KnaHaTrAH Kynde naJaIaIHyra 6oanaIb. KpyblfdaFbIXOK 6eIweKTeP (MbicaIb, DeHreKeTep) 3aKbIM any KaynIH apTTbIpaDbI XaHe KpyblfHbIH OPhbIKbIbIFbIH TeMeHdTeJI.
KoandaHap aandbHda KypblfBihBn Dypbc XnHaHraHdbfBih Ke36eH kapan TeKcepy KaKeT!
《Дурьс КнHay》DEERHce3dIH MaBbHaHacbHaTeK KybpInbda6apNbIK 6eIWeKTEpDiOpHaTbNyblDen KaHa TyciHyre BoMaMnblc,coHbImeK Katap KeNeciapeKeTepdiXacay:
- WfHbImaHbH Xorapfb6eniri TeMeHricHe OphTaBnFaH,
WHyHbIMaHbIiXKOFapfbl6enirHde WaaMbipaHdbIdanKHopFaNTbIH naHeJIbep MeH STIHL yw xanbipak TypinDiTeCiri 6ap cantama opHaTbIJFaH,
TneyHfimcbI Hnri Kypblfbifa opHaTbIraH XHe eK6ypaHdaBt bIbIH Da TapTbIraH, - DeHreNeK Tiperi opHaTbInraH,
- eki DeHreIeri De opHaTbIuFaH,
-6apIbIK KoprayuBkypaInap (naKtbIpMaHbIH actayuacbl, 1aWbipAHaDbIaH KopraTbIH naHeNbdep XeHe T.6.) opHaTbINFaH XeHe XyMbICKa XapaMdbI, - WankbIbI 6eJIk (DnckiI nbIwaK) opHaTbIraH,
-6apIbIK nbIwaKTap dypbic opHaTbnFaH.
KypaIJaIbI opHaTbIJFaH aJIMaCTbIpBIn-KOCKbIWTap MeH CaKaTHdbIpBII KypbIJIbInapDbI anyFa Hemece KaITa Kocyra 60nMaIbI.
3aKbIMap MeH MaBicKaH XepnepiHi
6ap-KoFBiTH TeKcepy apKbIb IuCKini
nbIaKaTbI TeKcepiH3 XeHe KaXeT
6OJIraHa aYbICTbIPbIH3.
4.6 Kymbic yaKbItbIHda
Kahyapnap Hemece Kyctap, acipece 6ananap Kayinti ayMaKaTa 6oNraHda, eW6ip KaFdaJa KaMbic ICTeMeH3.
KypbifbimEnKaH6bp, KYN KypkiperHeJKe He ecipece Hn3aFain KapblndarHaJda JyMbIC icTeye 6oImaiDbI.
Cy xepnepde ophblkbl TpymaTbIHbIKTaH Xa3ataBIM OKfA kayni aptabl.
Xymbic 6apbcibHda cbipraHan Ketney yuih epeke aab 6oIraH xen. MymkiHirHwe KypblfbHb IdbIMkbJN xepnepde kondaHydbH andbH any kepeK.
XymbictbkyHiz3HeMeceKetkinikT iepexeJei XacahDbjXkapbi60JFaH XaIaNda fAHaOpbHdaFAnxH.
Kymbic 6apbcihda Kymbic aimarfbihda
e3re 3attap MeH 6atnak 60nMay Kepek.
Cypin H ketyre 6onatbH 6apnbIK
3aTAPdbI aBIn TactaHbI3: Tactap,
6yTaKTap,cbIMdap XHe T.5.
PnDanaHyBbHbOpHbYCaKaTbIITbI opHaJAcTbIpraH opbHHaXorapbl 6oImaybTnic.
Icke Koccy:
ICKe Kocap aIbHda KpybIfbHb CEHIMBePtnKaIbI Kynde OphaNactbIPbIHb3. TOpn3oHTaIbI Kynde naJaIaNHyTaBIM CaJIbIHFaH.
《KypblfblbKOJdaHbIcKa eHri3y》6eJIIMIHHyCKaynapbHcKaTaN OTbIPbIN, KypblfblbAbaanlan KocblbI3. ( 10.3)
BENHnHl Hemece 3neKtp MOpTbI icKe KOKaH Ke3e MaTePuaNapDbI TactayFa apHaJrFaH CaHbInayDbH aANbIH DaTypyFa 6oMaHdbI.CeHdipren Ke3e 6aKaW aCaKaTaFbUHbH iWiHne eHdEin JxATKaH MaTePuaNap KaBn KOImaybI Tnic. ByJ XaJaDaMaTePuaN cbIPTkA TactanbI, aAdMaDapra 3akbIM KeNTipyMmKiH.
Bactay Ke3iHne KypblfblbI aydapyfa 60JMaIbI.
Kbica yaBt apanbfihda, Kni Kocybl, atan aTcak Kocy / cHdipy OuBnDapBH6oNdbipMaFAH XeH. 3NeKTp Ko3FaNTkbIbHbIH KbIbIN KeTy kayni!
YcaKaTbIbTbI Kocy caIapbIHan 6oJIFaH KyaTbIH TypaKcbI3dbfBi YIiH XeJIiH6enrini bipnapametpnpiehe oCb 3NeKtpXeNiciHe KocBIFAH 6acka Kypblfnap icTeH WbIfByIMMkiH. Byn KaJaDaKeNeci epeketTepDi opbHdayKaKcET (MbICaN, acnNTbI bacKa 3NeKtp XeJIcIHe Hemece KeJepri ci eH TemeH XeNiRE Kocyra 6oJaBI).
XymbictbHbactanybl:

Kapakatanykayni6ap!
AHaJaMaJIbI 6eJIeKTepe KOnJaPaHbI3DbI HeMeCe aKaTApbHbI3DbI TnI3yRe 6oImaJbI.
KypbJfbl KymbcICTen Typfah Ke3de, 6etih3iHemece DeHeH3iH 6acka da 6eNikTePi cyapMa WHyfbIMacBHBnKHe KaIbIKTapbl Tycipin Tacayfa apHaHanr h 6yprbl KydbfbHbH YcTInHe eWkaaH yCTamaHb3. 5acBbH3 6eH DeHeH3di KYkTey 6yprbl KydbfbHAn Hopek YctAhb3.

KolbHb3, DeHeHi3iH 6acka
6eJIkTepi Hemece KImiH3di
cyapMa WHyfBIMara Hemece
KaIbIKTapDbI Tycipin Tactayfa
apHaHraH 6yPbI KydbIbHbIH iUHe cyKaNaHbI3.Ke3,6eT,caYcA,anakAHKHe T.6.Myuenepre XapaKaT KeNtipiny Kayni 6ap.
Tipeyui yctihri beke yhemi cyehin3
XHE Tnicti Tene-TeHdikti caKaTaHb3.
KoIJaapbHb3nb KypblfBhlh YcTIHe
WbIrapMaHb3.
PnDnHaHnKe3eWaaBbIpaYdaH KopFaTbIH naneHbepimEn naDanaHyf TaBIM caJIbIHFaH. (MbICaBI, WbIFapy, NaKTbIPy, 6ekITy, cbIHdbipy).
MaTePnAnDbI canFaH Ke3e naJaHaHybI HyCKaNFAH KymBlc aMarmbIHda 6ony KepeK. YCaKaTafbiW
KyMbIC ICTEN TyphaHda naIaIaNahyubi KMybic aMarmbIHda 60nybI Tnic, NaKbpy aMarmbIHda 60nyra TbInbIM caJIbIHfA. ( 8.4)

Kapakat any kayni 6ap! KpbIbHbH JyMbIcBi KeiHcJ yCaTaNFaH MaTePnaJ Kepi NaTbIbNybl MyMKIH. PaIaIaNHyBb 6etIH,Ke3i MeH KOnbH aybn japaKaTTan anybMyMKIH.CoDbIKTaH KopraHbII W Ke3inDipik nen KopraHbIW KonF ( 4.3) KnH3 XeHe 6acbHb3d Tney TecirHeH anWak YCTaHb3
BENH HEMece 3JKeTp K03FaNTKbIuBblXyMbIC icTe TpyFaH KypblNfblHbIeHNKeTyrte 6oMaunbl.
Kymbic yaKbIbHa KaPbIbI KyaNarH KaFaDa, 3NeKTp Ko3rAnTkbIUtBl Depey cHdpin,KeiNik wTekepi cybpin aJIbHbI3.
JaKbIpa actayacbiHa ycaKaTaIaTbH MaTepeanabH KeNTenin KaMMaybH KaDaFanaHb3,ce6e6i 6yIycaKaTay HtNKeCiHn HaapnaybHa Hemece Kepi COKkblnapra anbln Kenyi MyMKIn.
BaKaTaBbIbHa CaKaTaNbIH Maepnai CanFaH Ke3e YCaKTay KaMepacbiHa MetaJIb 6aIWeKTeP, TaCTap, PAnactNK 3aTTap, bHbIXaHe T.C.C. 6eTeH 3aTTapDbH cAlbIHbYbIH KdaFaNaHaB3, Ce6eBi KybIbHbIH 3aKbIMDaHybHa XHe Tney WHyfImcBHaH Kepi COkKnapDbH 6epinyiH aBIn Kenyi MymKiH.

Kapakatanykayni6ap!
PaiJaIaHuybI Kei yuKaH
yCaTaNtBIn MaTePiAn MeH 6eTeH
3aTTapHaaybipKapaKaT aybI
MymKiH. KpyblfRa 6eTeH 3aTTap
caJMaHbI3 XHe MaTePiAnDbIH
KeTIenYiH 6ipDen XeHdEn
OTbIPbIHbI3.

Kapakatanykayni6ap!
BaKaHa yCaKaTaBbUHa KeciIreH 6yTaKaHaapDbI cAnFaH Ke3Je Kepi NaKtBpyb MyMKIn. PaJaTaNHybI Kepi NaKtBpblfAH yCaKaTaIaTbIH MaTePnAanDaH aybp JapaKaT aNybl MyMKIn. KopraHbI W KonFAN neh Ke3inDipik ( 4.3) KniH3!

Keckiuypan
axbipatbinaHn H Kein TObnk
TOKtaHa dein6ipwama
yaKbIT eTeTIH eCTeH
UbIFapMaHbI3.
3NeKtp Ko3raTTkbIbTb CcHdiPiH3,KeJIiIK WTekepi cybpHbI3 XaHe 6apNbIK KblXbIMaJIb KypaJdapDbIH TOKTafahbIH KYTIH3.
-Ci3 KpyblfblHbI KaIbIipMac 6byphIn Hemece OJI KapaycbI3 KaIap anDbHda
KypblfblhblOphaJaackaHxepih aybictbpydbHaJIbHda,KypblfblHbI aJbIn 6apBn,TeHkepin,XbljkbTbn Hemece TaTpbyHb3Kepek,
- 6ypaHdaIb 6iteyiIi 6ocaTbHKbpap KHe KpybIfblHb aawap aIbHda,
- KypaIbI TaCbImaIaIbIHda,
- 6iTeyiIePepiHemece Keckiw 6eNikTeri, cyapMa uYHbIMaIaBfHemece KOkbc Tycipin Tacayfa apHaIFaH apHaIapdaftoKoKbICTapdbKeTipep aIbHda,
- nckjnl nbwaekneH kymblc ictep andbihda,
KpybIrfI TeKcepiin Hemece Ta3anaHbIn KaTkaHHbH anDbIHda, 6aca da KymbICTapdbEeKi3epdiH anDbIHda.
Erep Keckiw Kypanra 6eIe 3aTtap kipin KeTce, KpybIyfbIaH 6TeH Dbl6bIcTap WbIKca Hemece OJ ADeTTerIeH TBIC dipIndece, 3NeKTP Ko3FaNTkbIwTbI ceHdpin, KpybIyfbIbIH CcHReH IH KyTIH3. Xeniniik wTeKeppi cybpIn aIbIHbI3, Tney WHyfIMacBHaIbIN TaTaHbI3 da, KeJIci KaamdApblOpblHaHbI3:
Kypblfda, ecipece keckiw 6oNtih (nbiwak, nickini nbwak, nbwakTbH KbiickbiWb, nbwak 6paHdAmacbl, KbiickbiW wblfbipWBk) 6eTIHe 3aKbIMapdbH Hemece TO3FaH Xepneepin6ap-KoFBIH TeKcepiH3 De, KypblfblHb Kocap XeHe OHbIme HxMbcic TcEp aIdbHna KecinKoM MaMaHdpra XeHDey XeHe TexHnKaIbIK KbI3MeT KepCety XMybIcTapBIn EtKi3yre pyKcat 6epiH3.
Kecki6nikTb6apBbIK6eJIWeKTepeI dypbic opHaTbIFaHbIH TeKcepiH3 de, KaKeT 6oJca, 6paHdaIapbIH KaTbipak TaPbIH3 (co3bIny Me3etIH eckepiH3).
3aKbIMdAnFaH XHe To3FaH 6eIWeKTePdi KcI6n MaMaHaF aYbICbpyFa HemeCe KeHDeyre 6epiH3, 6eIWeKTePdi CnNaTtAmanapbl 6ip- 6ipiHe caikec keyiKepek.
4.7 TexHnKaJIbIK KbI3MeT KepCey XeHe XeHDey

TexHnKaIbIK Kbi3MeT KepeTyDiHaIbIHDa (Ta3apTy, XeHNey XHe T.6.) XKeHe
KocatbH CbIMhbH KyHH TeKcepep
aIbIHda YcaKaTbIbITb Teric opbIHra
OpHaTy KaKeT, 3JIeKTp Ko3FaNTkbIbTIb
cHdipin, KeiNik WTekepi CybpIn
aIbHbI3.
TexHnKaIbIK Kbi3MeT KepeTeY anDbIHda Kpyblfba cyy yuH 5 MNHy T yaKbIT 6epiH3.
Keckiw KypanFa Kb3Met KepeCy TaIbHa, Tinti Kyat Ke3i axbipatynbI 6oJFaHda da Keckiw Kypan 6yfarTay KpbIbIcBiHbIH OPhaTbINFaHbHa KapamactaH aHaNydbJaNfactbipa AnaTbIHbIFbIH TeKcepHj3.
KeHney KHe Kenire KocbIyra apHaIra hcbIMdbaibp6actaytek6iniKT3neKtpuineprefahpykcatetinei.
TasaJay:
KoJaHbIn 60nFaHHaKeiH, KpybInfbl KaCblan Ta3apTbInybl KepeK. ( 11.1)
Ewkaaah Kofapbl Kbcimdb Ta3anaftbIbI naDanaH6aHbI3 XeHe KpyblfbiHbI afbHbI CyMeH JyMaHbI3 (MbicaJIb, 6akwabIK WnaHriHi KemerimeH).
ArpeccnBti Kyblu 3aTapdbi naDanaH6aHbI. Bynap nlaactnKTHHeMece MetanDbIH 3akbImdanyibaHa eKein, STIHLC KybpInfbcibHkayinci3 KymbcHbHa Tepic acep etyi MymkiH.
TexHnKaJIbIK Kbi3MeT KepeCy XeHiDiErI KymBicTap:
Ocbi naIdaIaHy XeHiHderI HcyckayIbIkTa KepceTinreH TexHnKaIbIK KbI3MeT KepceTy XeHiDeri XyMbICTapDbI OpbIHdaHbI3, 6apIbIK 6acaXyMbICTapDbI deJaI aEtki3yi Tnic.
Kaketti Kypaapanap Men 6inim Keticneren Hkaan dapey deJana ra xa6apnacbl3.
STIHKL KOMnHaHrcbI TEXHkAJIbIK KbI3MET
Kepcety KehiHderi XyMbICTapdbXeHe
XeHdeyni opbHday ywiH TeK STIHL
DendaanapbHa HxYriHydi YcbHaDb.
STIHLDennanapbTypaKaTbI TypDe
OKbITyDbYcbHaDbXeHE TexHkAaBik
aknapaTbI KaMTaMaCb3 eTei.
AtaMbI KwpybIbnfbywH IN TEK KaHa STIH L KOMnAHnrcbI pyKcAT eTKeH Hemece TexNkAblk TyfbdaH 6ipdei KypanapdbI, KepeK-kaPakTap MeH acnJIbXabIKTapdbI naJaTaHbHb13, aHTnece aamdapfa 3aKbIM KeNTipy Hemece KpybIbnHbH 6y3bIpy Kayni TybHdaBb. CypaKT ap 6oFaH KaFdaJa da DeJdaFxa6apnaCbHbI3.
STIHKLOMnHaHcBbHInTynHycka KpaanDapbl,KepeK-JapaKTapbl MeH Kocankbl6enweKTepi e3 kacneTTepi 6oibHwa KpybInfbYwH IN OHtaNblXHe naIdaIahyUbHbIN TaIantapbHa ca KeJeDi.STIH TLynHcyKa Kocankbl 6eIweKtepih STIH Kocankbl 6eIweK Hemipi,STIHLaaybiXeHe KaKet 6oIraHa STIH LKocankbl 6eIweK KoDb I 6oibHwa anbIKayfa 6oJaBl.YcaK 6eIweKtepe Tk 6eIweK Hemipi fHa 6oJyblMmKiH.
EckepTy KHe Hcykay XancbipManapbl apkaaH Ta3a XeHE OKbIaTbH Kynde 6onykepe.3akBIMdaHan HeMece XofalfH XancbpManapbl STIHL DeanadpBlbH JKaHa TYNHcKa XancbipMaPbHa aybICTbPiHb3. BenweKti KaHaCbHa aybcITbIPraH Ke3de, KaHa 6enweKeTe deJ coHdai XancbipMaHbH 6ap 6onFaHbHa Ke3 KeTki3iH3.
Kecki6eiknE JKacanaTbH
KyMbICTapDbI TEK KopfahBli
KoJrFaTAPMeH ( 4.3) XHe epeKwe CaKTbIKNeHOpbIHdHaB13.
KypbIbnKayinci naindaIanaHaTbIH Kynde 6onybl yuih, bapnbik combiHnap, 6ypanlaIap MeH bypaHdamaIap, cipece keckii 6enikTH bapnbIK bypaHdamaIapblMbIKTanTapbIINFaH.
KypbIbHbTo3y6enrinepi MeH 3aKbIMdapdbHbOnybHaTpyakTbTeKcepin OTbIPbHb3, ecipece y3ak yaKbIT naJaIaHa6a KOrTbH Ke3e (MbicaJIb, KbIC Me3riniHIn anDbIHda). Kayinci3dk TyciniriHe opai, To3raH XeHe 3aKbIMdaHFaH 6nIweKeTpDi Depey aybiCTbipy Kepek, CoHbH apKaacBHa da Kypan Kayinci3 api KaIbITbI KOJaHaBic KaJdaBnDa 60nAbI.
ErepTexHnKaIbIKKbI3MeT KepCteY Ke3iHc KaHdAnBip6nikTepe Hemece KopFaHbI W KpyblfJbIaPbI aNbIHbIn TaCTaIca, HcayblkTbH TaHa CneKec OApblOpHbHa opHAty KaXeT.
4.8 ¥3ak MEP3im 6oynbicaTay
Ka6bIopbIHFa opHaTap anDbIHda acnantbH cybI yuH 5 MHyTTaY aKbIT 6epiH3.
OkimaraH aamra (Mbicanb, 6anapra) yCaKaTarlneH xMbcic icTeyTe TblIM caIbIHFAH.
¥3ak yakbl cakay andbihda (Mbicnbl, Kblic aHapbHda) KpybInfbHbl MyKnrt Ta3apTy KaKeT.
KypbIJIbIhIb TEK XyMbIcKaJapAmDbI KyniHde rHa naiDanaHaHxH.
KypbIbHbI a6aIcbl3da ayHan KETneIH Teric Jepde caKaTahB13.

Boc katakah nbiwaktah kapaKat any kayni 6ap!
BaKaUa ycaKaTbIbIbIH TeK opHaTbIbIaH Tney IyHfblMaCbImeH caKaTaHbI3.
4.9 PaiDara acbipy
KaIbIKTap aamdapra, KaHyapnapra
KHe KOp7aHaH opTaFa 3nH KeTipyi
MmKiH, CoHbIKTaH Kc6B Tpye KaDere
KapaTbIybl KaKeT.
KaIbIKTapbl KaIaIwa KcIc6n Tpyde naIdaRa acbipyra 60NaTbIHdbfBbH 6inyuH kaTa eHDey optaibfbih3ra Hemece dendanapra kYrhiH3. STIHKOMnaHnrcbStIHL denanapbH cybHaDbI.
Abyicbipinrah arperat Hyckayibkka
caikec naindara acbipinaTbHbHa Ke3
XeTKsH3.IaNda raCbipap anDbHda,
arperaTTb KOndaHbICKa KapaMcbI3 etIH3.
TeHeWe XaRanapdAn CaKTahy yuH
XeniiKcIMdb HeMece 3NeKtp
KO3rANTkblTbIH KyaT cbIMbH aXbipaTy
KaKeT.
5. TaH6aJapdbIH cnNaTTMaCbI

Ha3ap aydapbHb3!
KoIdaHap anIbIHnaIaIaNHy XeHiNderi
HYCKayIbIKTbI OKbIN
UblfbiHb3.

Kapakat any kayni 6ap! Kayinti aMakta aamdapbH 6onyha Tbibm CanbIHah.
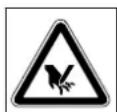


Kapakat any kayni 6ap!
Ainhalbn typhaH
6eIweKtepmen!
Acnan Kymbc icten
TpyHaHa KaIdap MeH
aKaTApdbI TecikTepre calyfa
TbIbIM caIbIHfAH.
Kapakat any kayni 6ap! Kecki KypaIMeH KymbIc
Kacap aIdbIHda, COhBMeH
KaTAP TexHkAJIbIK Kb3MET
KepeTy,KeHDey, KocatBn
CbIMHbIK KyIH TekcepReHde
XHe YCaKTarblTbI
Ha3apcbI3 KaIbIpaP
aIdbIHda 3JNeKtp
KO3FaNTkbIUtB1 cHdpin,
Xeni cbIMbIH acnantah
axbipaty KepeK.
Kopray KnyakkanTapbHn naJdaNaHbHb3!
KopfahbIi Ke3inDipirH TaftbHb3!
Kai.F.Benriney CaHbI,
A CyapMa WHyHfbIMacbl 6ap 1 Heri3ri KypbInfbl
B DoHaJaA k Tiperi 1
C Tycipin tacayfa apHaIra 1 y3apTaTbIH WbIfbIKbi Xep
D KaIbIKTapBt Tycipin TaCTayra apHaIraH XaNkbI
EПланкa 1
FdoHaJnAaKtbIbKocb 1
G DohFanaK 2
H DohfanaKaTbH KaNaFbI 2
1 Bekityuji tripeyii 2
J ANTbI KbIpNbI 6acbl 6ap 2 6ypaHda M5x40
K Taimka M5 2
L TblfbpbkA13 2
M Kblndam 6ekityre 2 apHaHFaH KbICkBll
N Θ3dirHnKeceTIn6ypaHa 2 P5x40
O KyndbI3wa-6ypaHda P5x20
P KynIbI3wa-6ypaHda 2 P5x10
Q Kom6nHaunJbIK KInT 1
1 HcayIbIbI
7. KondaHbICka daHybIHday
Kapakat any kayni 6ap!
«Kayinci3ik wapaanapbI» 6eimderi Kayinci3ik TexHnKaCbIHbIH
HyckaynapbH yCTaHbHbI3. ( 4.)
7.1 DoHaJaN 6iJirin XaHe DOHaJaNtbl opHaTy
- DoHfanaK ociH (F) 6paHdAnapMeH (J) KHe raKaIaPmeH (K) KnbICTbIpBjIfaH kTTiH KemerimE (Q) DoHfanaK tipeyiuihe (B) (4 - 6 Hm) 6ekiriH3.
OpHaTbIJaH DoHraJak OcHe Wai6anap (L) MeHDoHraJaKTapdbI (G) Kuri3iHi3. - DoHaJaKTapDbI, DoHaJaK 6inirihderi e3diirimeh 6ekitinen
3JIeMeHTepeMeh (M) 6ekithi3. Θ3diirimeh 6ekitinen 3JIeMeHTepdi opHaTkaHHaH KeiH DoHaJaKTap epKi aHaHaTaBHaJ daen erin opHaHaactbipy KaKeT. - Dohfranak KannakTapbiH opHaTbHb3 (H).
Bekitiren e3irimeh 6eikitein HneMeHTepi (M) 6eJweKtey onapdbH 3akbIMdaHybHa eKejin cofaBl.
7.2 Tycipin Tactayra aphanfaH y3apTaBih WbIFbHKbI Kep XaHe KO3fAnfbWi 6eniKtIH MOHTakBi

Heri3ri KpybIrfbHbI (A) WHyHfbIma KaFbIMeH Teric, Ta3a Ka6aTka KOybHbI3.
Tycipin tacayra aphanfah y3apTaBH 11111111111111111111111111111111111111111111111111111111111111
- BypaHdAmanapdbI (P) cypetTe KepcetinreHnei etin (1) (1 - 2 Hm) imMeKtePihe bypan KoibHbI3.
Ko3raflb16eikrieki doHranaKeH (2) KblnKb1TbHb13,ON Heri3r KypblfB1HbH (A) 6aftayblbHa Tycyi Tnic.
- DohfanaKtbi (3) Tycipin Tactayra apHaHaH y3apTaTbIH WbIFbIH Kbl KepeH KybcIbHa KbIcBiHbI3.
Ko3raJfbl6eNikTi (N) KaTbipak 6paHbI3 (1-2HM).
7.3 KandbkTapbl NaKtbipbIn Tactay ywiH XankblWtbl opHaTy

KaIbIKapblJaKTbpBn Tactayra apHanfah y3apTbilfaH 1bIfbHKbi Kepdi opHaTbIHb3 (E). BypaybiHTapbl TapTbIN TaCTaHb3 (O) (1-2HM).
BaKycatKbIUtBtIKOpHaty.
KaIbIKTapbl NaKbIPbn Tactayfa apHaIraH y3apTbIinah WbIFbIHkBi Kepde KaIbIKTapbl Tactayfa apHaIraH xankbIHTB(D) opHaty. OPhaTKaH Ke3e KaIbIKTapbl TaTaIbIH y3apTbIinaH TyTKbIP bIfbIKbi KepdiH (2) 6aftTaybl na3bHa XaKbIITbIH iWKi XaFbIHah OH Xhe con Ka6bpIanaPbI1 (1) dN Kipyih KaIaRaan OTbIpBHB3.
OHKHe con XaftbHaH 6paHdaapdb (I) KOblb13.
7.4 KaIbIKTapDbI Tycipin TaCTayFa apHaJIraH XaNkbIUtB1 aMy XeHe Xa6y

Tycipin Tactayra aphanraH xankbiWtbl awy:
YcaTay aIbIHda KaIbIKTapdbly Tycipin Tacayfa apHaIraH kaKbIUtbl awy kaxet (D) XeHe KaIbIKTapdbly Tycipin Tacayfa apHaIraH y3apTkbiU WbIbIKbI KepiHde ocbI Kynde 6ekiTkiuTH KEMerimeh 6ekTIy Kepek (1).
KaIbIKTapbl TYcipin Tactayfa apHaJIFaH XANKblWtbl Xa6y:
OpbHbI aybIcTbIPfAH Ke3de Hemece KINHaKbI KyIe caKTay yuIH 6ekITetIH UInΦepdi WAMaJIbI KeTepiH3 (1) XKeHe KaIbIKapDbI NaTbIPbIN TAcTayFa apHaJIFAH KAnKbIUtBTi TeMeH TyciPiH3 (D).
7.5 Kypanap
甲HbImaHbIn apTbHa (1) Kypan caMaHdapra apHaJFaH 6eimHiH TeMeHri KaftBa (Q) KNbICTbIpBnFaH KINTTI KOIora 6oNaDb (2).

8. XyMbIc HycKaynapbl
8.1 KaHdai MaTePnAnDbI eHdeyre 6oJa?
OcIMdkTeepihOpraHnKaIbIKKaIbIkTapbl, Mbicbl: TaBipnb ecIMdkTeepiH ca6aKTapbl, rJInep, KeKeHicTepeM MeH XemICTepin KaIbIKTapbl, XanbpakTap, aFaWtbih ByTaKTapbl MeH ByTanapbl.
AraTap MeH 6yTaIapDbIH 6yTaKTapbH JAc KyiHne yCaKaTaFaH XeH, c6e6i yCaKaTbIUtBn HcIMdIniri Kypfak HeMece DbIMKbl MATEpHaNdb KeckehHeH KapaHaHaJxOfarb6oJaB.
8.2 KaHdai MaTePnaIaIbI eHdeyre 6oJMaIdbI?
BaK yCaTkBbIbHa TAcTap, bHbI, MeTann (cbIMap, Werenepe KHe T.6.) KHe nJaactMacca 6eKeTepi Tycneyi Tnic.
Herizirepeke:
KOMnoCTTaNJaIaNbIaNtBIMATEpnaIap6aKaYcaKaTbIITApbHaKeJIMei.
8.3 BytakwahbH en Xorapfb DnameTpi
ByndepekTejkaHaKecijiren 6yTaKaWanapFa KaTbICTbl:
MaKcImaJIbI 6yTaKaTapDbIH DnAmEtpi: 35 MM
8.4 NauDanaHuysbihbH Xymblc aMafbl

Kayinciik MaKcaTbHa, eH aIbIMeH cbiptKa TactaJIbIN JkATKaH MaTePnAJaH 3aKbIMDaHydAn CaKTaHy yuH naiDanaHyBxJyMbIC yaKbTbIHda (3neKtp K03FaNTkbUbl Hemece OKK Kocybl6oNfAHda) YHeMI xMyBc aiMaFbIHda 06nactn (Cyp aMak «X») 6onybl Tnic.
8.5 KypbInfbHbI dypbc KyKTeMeMeH icTeTy
BaKaHa yCaKaTaBbIbHbI H3NeKtp Hemece iUTh KaHaTbIH K03FaNTbIbHa aHaJIbIMap cAh bAIaTApNbIKTaiaaMaHTbIaH aIN JyKTeMe Tycipyre 6OJaIb. BaKaHa yCaKaTaBbIbHa MaTePnAJIbYHemI bOpKeJIki XeHe Y3dIKcI3 JyKTeN ObIpy KaKeT. Erep 6aKaHa yCaKaTaBbIMeH XyMbIC icTey Ke3InDe K03FaNTbIbTIbIH aHaJIbIMap cAh bAaCa, 3NeKTP Hemece iUTh XaHaTbIH K03FaNTbIbTIbIXyKTeMeDe H6ocaty UwIH MaTePnAJI caLyDbI TOKTaTBHbI3.
8.6 Ⅲamaaah apTbIK TneydeH kopray
ErepKymbic6apbcbHna3neKtp K03fantkbWlwaMaHaApTBIK KyuTyCKeH 6oJCa,ABTOMaTTbTypde WAMAdn apTBIK TneyDen Kopray yuiOpHaTbInFaH acna6bl ickeKocbIaNbI JHe OHcEHdpin TaTaNbl.
CanbHdaTkaHHaKeIH (WamameH 10 MNHyTTaH KeiH) 6ak YCaKaTaBbUb KaTa XyMbICKa DaNbIH 6oJaDb. Wamadah apTbIK TneyDeh KopraydbH xni icke KocblNybl, Keene Ce6eNTepdeH 6onybl MyMKH:
KocatbIHcbIMbcNKeCKeJIMei, (10.1)
-Kei wamadah TBIC KyKTeJreH,
MaTePnAJIbIH KeJIeMI TbIM KeI HEmece NblwakTapbl MyKaIFaH
8.7 Erep Keckiw 6enik 6ak ycaKaTbIiWTapBn 6yFaTTaca
Erep Kecki6eik, ycaKaTaHaN Ke3e 6aK ycaKaTbIITapbIH 6yFaTTaca, 3neKtp Ko3raJITkbIITbI DepeK cEHdipin, KeniIik Ka6eNbDi cybpBn anbHbI3. Coda coH cyapMa wYhBIMcBn anbIn, KeedeprHi Ketipih3.
8.8 BaKwa ycaKaTbIWBn TOnTbIpy
Kymcak MaTepnaI:
- OcimdkTeepdH opraHnKaIbIK KaIdbkTapbH, KEmicTeepdH, KeKHeICTeepdH KaIdbkTapbH, TaMbipNbI eCimdkTeepdH ca6aBbH, KaIbpaKaTapDbI, XKiHsKe ca6aKTapdbI XeHe T.6. YInKe H TK6ybpblTbI Tecik (1) apkbIbI bETKI3reh XeH.
KaTbI MaTepnaJI:
KhiHike epi KaTbI TapMaKaTaHaF 6yTaKaWanapdbI aNDbIH ana 6aKaWa KaHbICbImeH Kecin any KaKeT.
Kecinre haraTapdb,6yTanap meh 6yTaTapdb nbIwaMexaHn3mHe deHHyHbImaHbIH OH kak Ka6bpFacbHbH 6oBIMeN STIH L yu KaIbpaK TypiHderi Teciri (2) apkblb6aaylan6afttaHb3.5yKe3de KaTTbI MaepnaI e3diirHeN KypblfdaH TaTbIaBl.
9. CaKaTaHdIbIpfblIW KypblInfbInap
9.1 3NeKtp MOTOpbIHbH KaItaHaH icKe KocblnybIHbH 6ipniri
KypbIbIeKisriWt Wtencelb axbipatyibHa cany apkblb Emec, an ceHdipriWtiH KEMERIme H aHa icKe Kocbina anaabi.
9.2 CaKaTHaDbipfbIw 6yfatTay acna6bl
3NeKtp K03rAnTbIu NeH nbIwaKTapDbI
Kocy TeK cyapMa WHyfBImAhbI dypbc
KockaH Ke3e faHa MyMkiH 6oJaBbI. Acnan
Kymblc icTeN Typran Ke3e OH JAK
6eKitiW 6ypaHdaHb 6ypan anFaH Ke3e
(erep KpybIrfa aIdbHrbI XaRbIHah
kapacAb3) 3NeKtp K03rAnTbIu
ABTomaTTbI Type aXbIpaTbIJaBbI,
nbIwakTap 6ipHeWe cekyHdTaH Kein
TOkTaJbI.
9.3 3neKtp Ko3rTbIuTbH TeXeriiwi
3NeKtp K03fantKbIuBHBH TeXeriiWi nbIaKaTap TOnbIK TOKtaFaHaFra DeiHi rCeHy yaKbITbIH 6ipHeIe cekyHdka DeiH KbICkapTaBl.
9.4 KopraTbIH Ka6bIH
MaTePnAaBcanyKeHeTacay
aHaMaFbHdaacnAn,KopFayu
ka6DbkTapMeH Ka6DbkTanFaH. OJapFa
MbHAnapKaTaDa:KoFapFb6eNirMeH
WuBpaTkblNaHenbdepiBap cyapMa
WuHbima, KOKbIcTapbl Tycipin Tacayfa
aphaHaHaY3apTbINFaH bIfbHKbXep
KeHeTacayra apHaIraH kAnkbli.
Kopraybki Kypblfblnap XyMbIC 6apbcbiHa yCaKaTafbltbiH nbIwaKTapbiHa deiHi kayinc3 KaWbIKbIKblkAmTaMaCb3 etdi.
10. KondaHbicka eHri3y
KapakatanyKayni6ap!
BakycatkbWtBbactayandbHda
"Kayinc3ikwapaanapbi 已 4 .
TapaybIMeH MyKnT TaHbICblHbI3
XHe Kayinc3ik TaanTapBH
caKaTaHbI3.
10.1 BaKaWa yCaKaTarBbIWBH KyaT Ke3iHe KaJray
Xenire Kocbinyra apHaHraH cbIM Tnicti caKaTHdbIpblwneh Ka6DbIKTanybi TnIC. ( 17.)
Xanfactbipywbl WOFbIPcIMap petiHTeK H07 RN-F DIN/VDE 0282 pe3eHKeIaHr cbIMdApbiHaH JeHIn EmeC cbIMdap naJaIaNbIybl Tnic.
Keire Kocinyra apHaIraH cbIMhBiE h a3 KeJeHeH KIMacB KeNecHi Kpyaybi Tnic: 3x1,5 MM² -y3bIHdbIfbeH Ke6i 25 M 6oJFaHda HeMece 3x2,5 MM² - y3bIHdbIfbeH Kemi 25 M 6oJFaHda.
BaiNaHbIc Ka6eJIiHiYyJapbIpe3eHKeDeH KacaybI Tnic KeHe DIN/VDE 0620 cTaNapTbHa caN Kenyi Tnic.
UTeNceJIbIK KocblIbIMdap
waBpaHdblaHaKopranFaH 6onybKepeK.
Kapamcb3 y3apTkblkabelb KyaTbIbIKTbH KOFaNbyHa eKeNei XeHe 3JeKTP KO3raTTkbIwka 3akBIM KeNTipyi MYMKIH.
Bny KpybIbI XeJIRE KOCY HkyTeciHc (yN
Xenici) ZMAKx KyneHi TOnblk KApcbIbIbI
EH Ke6I 0,279 OM (50 Fu 6oynihwa)
KpaTbH 3NeKTpNIK Keiide
naiDanaHbIyFa apHaIHa.
PiDanaHyu bI naDanaHbIbIN otblprAH
3NeKTpIK KeJIiHn npaMeTpnepi
KorapbIda ataIraH TaIantapra cai
KeIeTIHHe Ke3 KeTki3yI Tnic.
KaKet 6oRan HkarDaia 3NeKTpIK
KeiHIn TOblk KApcbIbIFbIH 3NeKTpmH
Xa6dbIKay YbIMbIHAn 6in anyfa
6oNaDbI.
10.2 Keni NHHcBbKocBbI3
KbikbiWbI (1) KeTepiH3.
Kenilik KaebnbHJXanFactbipfbIbH KocblbI3.
KbickbiWtby TycipiH3.
10.3 BaK ycaKaTarblIHTapblH KocbiHbI3
- XeJI nnHnAcbIH KOCbIHbI3. (⇒ 10.2)
AbybTbpybn-KockblttarfbjKacbln nephehi (1)6acbHb3. 3neKtp K03faJTTkbll aHaJIbIMHbIH KOfapbl caHbHa (6oc naIadcbi3 KypictiHaHaHbIM Kniiri)KeTeKeH Ke3de ycaKaTaNfAH MaTePnaIbI caNa 6epiH3.
10.4 BaK ycaKaTbIbIbIn cHdpy
AkbipataTbH(1)Kb3blnepHehi 6acbHb3.YcaKTaftbUThbH 3NEKtp K03fANTkblb CeHei XKeHe aBTOMaTTbI TypDe TOKTaNbI.


10.5 ¥caKtay
MaTePnAnDbI 6aK ycaKaTbIbHa 6ip aam caBIn Tpy Kepek.
- 5aK ycaKaTafblbH Teric epi opHbIKtBj Kepre opHaJnactapan, cehin TypFaHbHa Ke3 keTKi3iH3.
MbIKbI KONKan, Kopfaywbl Ke3iNdiipik neH KyJaKaKanTapbl KmiH3.
Tycipin Tactayra aphaIraH xanKbIuTbI awy. ( 7.4) - BaKaJa yCaKaTarlBbIbH KyaT Ke3i KenicHe Kocy. ( 10.2)
BaKaCaTaBbH Kocy. ( 10.3)
卡 KtaB1Ko3raTkbuHbH aHaany kiniiri MaKcImaIbI KbIaMdbkKa KeTkeHH KyTIi3 (aHaIbIMdapDbH ydepycaHI).
BaKaJua yCaKaTafblIbIH MaTePnAnfA TOITbIpbHbI3. ( 8.8)
BaK ycaKaTafbIbHcEHdipy. ( 10.4)
11. TexHnKaJIbIK Kbl3MeT KepeTy
KapakatanyKayni6ap! KypbIITbIgKaI3MeTKepcTeTeH Hemece Ta3apTaBtBn 6apbIK XyMbICTapDbI eTkI3ep anDbIHda, «Kayinci3ik waapanapbi》 ( 4.) , ecipece «TexHnKaIbIK Kb3MeT KepeTy XeHe XeHneY》 ( 4.7) 6enimH OKbl, 6apbIK Kayinci3ik TaanTAPbIH caKTay KepeK.
Kb3MeT KepCety KymBICTapBH eTki3ep anDbHda XeNiIK WTeKepei cybpIn anHbI3.
11.1 KypbInfbHbTa3anay
TexHnKaIbIK KbI3MeT KepeCy MeP3iminiri:
Kmbic 60JFaHHKeinH
OpaBIM naDanaHFaHHa KeiH KpybIybl MyKnT Ta3apbIybl Tnic.
KakcbkyTIM KpbIINfbIHb 3aKbIMdaHydAH KopraIbIXeHe KOJaHy Mep3iMH y3apTaIbI.
3NeKtp K03raTkbIw WaubIpaaydAn KopraTbIH KopnycneH Xa6dbkTaTfA.
Kecki npbwaKaTapDbI, coHbImeH Koca YcaKaTbIH KamepaHbI KdImr Koppo3nFA KypaNdbI (MbCaJbI, pANC MaibMeH) KaftbHbI3.
KypbIfblHb cypeTte KepceTIJre H KynderiJe faha Ta3apTyfa 60Jabl.
Cyapma uHfblmacbIH 6eIweKTey. (11.2)
3NeKtp K03faNTkbiUbHbH JxekTkiNkTI Tpyde cyblbyH KaMTaMaCbI 3 ety yuH, 3NeKtp K03faNTkbiUbHbH KOpNycbHdaB1 aya cyblkiW KeTeKT (caHbIay Kblny aJImackbiUb) KipDe H Ta3apTbHbI3.

KbcimMeHaKaH cydbI
3JIeKTP K03FaNTKbIUtTBiH HEmece iUJTeH XaHaTbIH K03FaNTKbIUtTBiH 6JIuWeKTePiHe, COHbIme
KaTAp TbIfb3daybIITapra, MoBbHTipeKTepeOpHaTbIFaH KepNepre XeHe 3NeKTp6JIWeKTEpiHe, MbICaNb, axbipaTKbIka6aftTayf Ta bIM caJIbHaDb. ByKbIMbAt KeHDey KaXeTTinirn TybipaDbI.

KHaHbIn KaIraH 6aTnak neh
opraHnKaJIbIK KaIbIKTap
KbIJaKNeH,blrFaNDbI
MaTaMeH Hemece aara
TaKaNeH Ta3aJAn6aca,STIH

KOMnHaHcbl apHaBt Ta3aIarbl W Kypanbl naIdaNahybl YcbHaDb (MbCaBb, apHaBStIH L Ta3apTkbl W Kypanbl).
ArpeccnbIxybl3aTapdbi naDanaH6aHb3.
Iickini nbwaakTapdbI TypaKtbI ta3an Tpy KaKeT.
11.2 CyapMa WYHFBIMacbiH 6enwekTre
EpkiH aHHany yuiH (1) eKi 6eKITiH 6ypaHdaHbI 6ypa anlbHb3. 6ypaHaanapdbToJbIFbIMeH cybpBn anydbH KaKetI KO, onap cyapMa 6yHbImaHbIH iHHe kanybl Tnic
Cyapma WYHfBImaHbApTka Kapay (2) eHKeTIi3 XHe OHb aFbTbn aIbIHbI3.
11.3 CyapMa WYHfBImaHbI opHaty
Bekitiren6enweke(1)cyapma uHfmbaHb(2)Kobin,anFa kapa eHKeiTiH3.
Eki6ekitkiw 6ypaHaHbIa 6ip Me3rInDe (3) TapTbIn TacTaHbI3.
11.4 DnckiPi nbIwaKaTbI opHaTy
I NsckiNl nbwakTb mohtaxdaarHnH Kein JxHe XaHa KpyblfblHb KOnlaHap andbHda,eppeTte OHbl anbIn Tactan,6paHdAmahbH Kemerimh6eKityKepek(cypett Kaapanb3).
CyapMaIyHbIMacbIH6JIWeKTeY. (11.2)


- BypaHdaHbI (1) 6ocaTbIHkbipaHbI3.
Ombfbl 6yFaTfBli KpybIjfbHbH (2) andbihda opHaIacatbIHdai etin, nckini nbwaKbI aNbcipak aHaIbIpy.
ByrataTarlKypblrlHbI(2) caHbIayfKaapan KblKbItbHbI3.
-Бураздамаи(1) can TapTbIHKbIpaHb3.
11.5ПьшakTapfa Kbl3Met Kepeety
TexHnkaJIbIK Kbl3MeT KepeCy Mep3iminiri:
@peTKeKoIaHaP aIbIHda
CyapMa WyHbIMacbIH 6eIWeKTeY. ( 11.2)
- Dnckini nbIwaakTbOpHaTy. ( 11.4)
-ПышakтардзakimTIO(kapbiktap MeH cibhltap)MeHTo3y6enrinepiHH 60maybIH TeKcepii3 KHe KaKET 6oIraH KaIaIa aYdAp y Hemece aybICTbpy KaKTe.
TbIwaK To3yBihBIn Weri:

To3ydbH WERiHe Jxetnec 6ypbH
Tnicti NbIaKapDbI 6py Hemece
aybCTbpy KaKeT. STIHL
KOMnaHnrcs STIHL dAndapbH
ycbHaDbI.
1bypbnmanbnbwaik
-ПышakтбнбipншежерпгнТecikTeH nblwaKtBnH weTHe DeHHri KaWbIKtBkTbI (A) eNweH3.
MnH. KaWbIKTbIK: 6 MM
2KaJnak-NbIwak
KaIak-NbIwaKtBn iinreH weTInDe nbIwaK eHH (B) eJWeH3.
TbIwakTbH MNH. eHI: 18 MM
IbIwaKapdb6eJIweKTeY:
Dnckini nbwaaktb opnaty. ( 11.4)
- Буразданы Бураз any (1).
- BypaHdaHbI aRbITbn any (1), kanaKnbIwaK (2) dNckini nbIwaK (3).
Пьшakтары opHaTy:
Co3binydbH aHany Me3eI HcaynabH KaTah KaDafanaHb3, ce6e6i Kecywi KypanDbH cHimdi 6ekitiny ocbyraH Teyendi.
- Dnckini nbiwaakTbOpHaTbIn, 6ekitihi3 (3). ( 11.4)
KaIakwa-NbIwakTbOpHaTbHb3(2) 6paHdaHb6ekitih3(1)(25HM). - 5yfaTay KypbIInfbicih COnHdiPiH3 xHe DnCKiJI nbiwak epKin aHaHany yWIn 6ypaHdAmen 6ekitih. ( 11.4)
NbiwakTbaydapbHb3:
YcaTayra apHaIraH Dorar
nblwaTap, YcaTaydbH TImdInirH
Tycipy MyMKIN. Con cebenti MyKaIraH 6ypMaTbH KeckiU
PiactNaHaHb aydpy KaKeT.
- Dnckjnl nbIwaKtbl aftbTbn, 6paHdaIapbl 6ypan anbln (4) xhe raKaIaIapbIme 6ipre aftbTbn aIbHb3 (5).
-ПылwaКтб(6)aanbIn WbIfbHb3.
- Dnckjni nbiwaKtbi Ta3apTbHbI3.
- PbIwaKbI ayapbIHbI3 (6), DnckiNilbIaKa OHJI Kepi 6eTImeH opHaTbIHbI3XHe TecIKTePdIH opHaIacByH peTHeI3.
- BypaHdaIapdbOpHbHa(4)KoBbHb3
XHe raKaIapdb6paHb3(5).
TaNkApaDb6pyay Kyu(5)KeNeciDeH
10HMacnaybTnic.
Пьшakтары кайрay:
Eki KaTb MyKaIFaH nbIwaKapDb KeNeci XyMbICTapDbOpbIHday anDbIHda KaIpay KaKeT.
KpybIJIbIJaPdbIH OHTaIbI KymbICbIH KaMTaMaCbI3 eTy yWiH nbIwaKTbI TEK KaHa MaMaH KaIpaByI KepeK. STIHL
KOMnHaNcBStIHL DeIaIapbH YCbHaDbI.
KaayayanDbihdaNbIwakTapdbu WbifapyKaKeT.
- PbIwaKtbl KaIpay aIbHda, MbICaJIb, CmEH cankbIHDaTyKaXeT. KeK TycKe 6oanyBn 6oNDbIpMay Kepek, ce6e6i 6yN Kecku KypaJbIH Te3iminirIH TEmHeDTeY MyMKH.
TeHrepimci3ik Tydbipfah Dipindepi60ndbipmay yuih nbwaKtb6ipkenki KaipaHb3.
KypbIbIbI opHaJAcTbIpraHra DeiH nbIwaKTapDbIH 3aKbIMdaJIMaFAHdbfIH TeKcepy KaKeT: A3dAn JapblrFaHdbfI, XapblkTap baiKaIcA HemeCe To3yDbH WerIHe KeTeKeHde nbIwaKTapDbI aImactbipy KaKeT.
PiBlaKaTApDbIH Xy3H 306ypbIbI aCTbIHda KocbIMwa KaPaNbl.
-Пышakтарди kecy 6apbicbHda etkipneH3.
KaiparaHann Kein KeckiXnneriHeriyrHdinepeH ycaK dyipni bickblka36e Ta3apTaBl.
-Пьшakтары могтухдафан Ke3de «ПьшakТы 6ур»белimиндeri co3biny Me3eTTepiH KapaHb3.
11.6 3neKtp Ko3rAnTKbIbI XeHe DOHraNak
3NeKtp K03raTbIbI KbI3MeT KepeTydi Tanan etneNi.
DohfanaKTapbH nIHtripeKepei Kbi3MeT Kepcetyi Tanan eTneNi.
11.7 CaTay wapTTapbl
BaK yCaKaTArbIbH Kpyrak, Ka6bIKxHe Ta3a Kepde YcTay Kepe. Kypblfbl 6aJalapdbH KOJIb XeTeiH Kepde TypMaHaBbHa K3XeTKi3iH3.
BaK yCaTKBIbIH KMyMbICKa KApamDbI Kynde XHe cyapMa WYHbIMacbl opHaTbINFaH Kynde caTay KepeK.
Bak ycaTkblbH naaIanaHaar Ke3e (Kb3 Me3riniHde) keNci WapTAPdbi caKTay KepeK:
KypblfblHbH6apnbkcbiptkb1 6enweKtepiDypbictan Ta3anan WblfblHbI3.
Bapnbko3rmaIb6nweKTepej KaKcbIaMaJNaHb3.
12. TacroImaJday

Kapakat any kayni 6ap! TaBImaIap aIbIHda Kayinci3ik wapaIapbl» XaHe KpyIbIbHbTaBImaNay? 6eimdePiHde KeItipinre Hcaynapbl OKbIHb3 XaHe YCTaHbHb3. ( 4.4)
12.1 BaK ycaTkbIbIH KeTepy Hemece Tacy


KpybIbfHbKeTepy Hemece TacbImaIay yuHKe3 KeIreH KaJdaJa 2 aam Kepek.
KoIapApblXaHe DeHeHH yciHi
6eJIirIH XayBn TOJbIFbIMeTH TypaTbH
XapaMbI KOpFaHbIC KNIMIH KNIH3.
- Bet: BaK yCaKaTafBliTapbIH WYHfBImaHbIH XOFapBbl 6enirihderi (1) TYTKaHaH YCTaHbI3.
- Bet: Bak ycaKaTafBilTapbIH Tycipin Taayfa apHaJIFaH y3apTaBih WblfBiHKbl XepdiH (2) XneriHeh YCTaHbI3.
CoHbIMeH kaTap 6aK ycaKaTafblBbIH da KeTepiH3.
12.2 BaKaWa yCaKaTafBbIbH aybIcTbipy

- YaKaTafblIbI TyTkacBHaH (1) YCTan, apTKa aydpblb3.
OcbykyiHde6aKa7a yCaKaTbIbHJXaY KypriHuiH XbIaNdMbIfbIme andbifa canbin nTepyre Heme apTkacanbin Taptyfa 6oJabl.
12.3 BaKaWa yCaKaTaBbIbHbH TIK KyiHHe opHbH aybictbipy

KypblfblHbXkapamdb6ekity KpaanapbImeH aydpblnydah caKaTHy yuH 6ekiriH3. DohfanaK TipekyiWTePiH (1) Hemece cyapMa uHyFbImaHb (2) XInTepMeH Hemece KaibicnH 6ekiriH3.
13.To3y dəpejxcin 6apbIHwa a3aHTy XaHe 3aKbIMdApdaH KOpFay
TexHnKaIbIK Kbl3MeT KepCeTy TypaJIbMaHbl3dbl aKnapaT
3neKtpnik 6aKawa ycaKaTbIwbl (STIHGLHE)
NananaHy XeHiHderi HcyckayIbIKtbIH TaanTapbiH CaKtamay HeTNkeciHde, cipece KondaHy MeH Kb3MeT KepcTeY Kayinci3irire Hemepe pyckat eTINmereH Kypamdac 6nikTepeHemece KocalkbI 6nweKtepi KOnaHy HtnXkeCInDe naDa 6onfah Ke3 KenreH MaTePnaIbIK 3aJH Hemece JapaKaTTAH yuH STIH L KomnHaHcbi XayanKeppuiNik TaptnaDbI.
STIHL KpybIfblcHbIH 3aKbIMapblH
Hemece WAMadaH TbIC To3yBH
6oJIbIpMAY yuH MInDeTTi Type MeHa
MaHbI3bl HcKaynapblOpbIHdHaBl3:
1. To3aTbH 6eJIweKTeP
STIHL KpybIYfbcHbIH Ke6ip 6aIweKtepi MaKcaTbHa cai naIdaIaNbIJaFah Ke3de De KaIbINTb To3yFa Tan 60IaDbI XHe OnapdbI naIdaIaNHy Typi MeH y3aKtBfBiHa Kapaayakbl ETe KeJe aybICTbpy Kepek.
OnapraMbIHanapXataaIbI:
-WankbnblwaK
-ДиckijIпьшak
2.OcbI naDanaHy KeHHderi HcayIbIKtbH TaanTapbIH opbHday
STIHKpybIfbcih naDanahy, caTay
XaHE OFAH TEXHkAblk KbImET KepcTeY
XMbICTapbiH OcbI naDanaHy XeHiHderi
HYCKayNtBTH TaanTapbiHa cai MyKnT
etki3y kepk. Kayincidik, naDanahy
XaHE TexHkAblk KbImET KepcTeY
HYCKaynapbH cakTamaydah naDa 6oJFaH
6yKin WbIfhAp yuHn naDanaHyBHBH
e3i faha Xayantbl 6oJaBl.
Atan aitkaHda,6ynMbHaHapra KaTbIcTbI:
XeTki3yui cibMHbH eIWeMepiH dypbic aHbIKtamay (KeIneHeH KIMa),
-3neKtpKeNiciHeDpybIC Kocblmay (Kepey),
- eHimre STIHL kOMmaHnrcbI pyKcAT etneren e3repicTepe Hri3y,
acnan yuhi pykcat etinmehen, Kapamcb3 Hemece canacbTeMeH Kpyblfblnapbl Hemece KepeK- kapaKTapdbi KOlaHy,
- EHIMDi MaKCaTbIHAn TbIc naiJaNaHy,
-EmHIMi cnpTbIK HeMece 6aKa da KaPbc WapanapBHa naDanaHy,
-6eKeTepi akaybI eHIMdi naJaHaHydAn 6oNaTbIH 3aKbIMdAp.
3. TexHnKaIbIK Kbl3MeT KepcTeY XeHiIerI xMyBicTap
《TexHnKaIbIK Kbl3MeT KepCetTy》 6eJIIMInHe KePcTeINReh 6apNbIKKymbICTap TpyaKTBtTypDe Ky3ere acbIpBnybTnic.
TexHnKaIbIK KbI3MeT KepCety KeHiNderi OcbI XyMbICTapbl naHaNAHyBbE3 6eTimEn eTKi3e anMaHan KaJaJa da deJaIra xaIbApnacyKepeK.
STIHKL KOMnAHHcbl TexHnKaJIbIK KbI3MeT Kepcty XeHiHderi XyMbIcTapbl XHe XeHneuyi opbHday ywiH TeK KaHa STIHL DeNdaanapbHa XyriHydi YcbHaBl.
STIHL deJdaIapbl TypaKbI Typde OKbITydbI YCbHaDbI XeHe TexHnKaIbIK aknapaTbI KaMTaMaCbI3 etedi.
OcbjKmbictap etkiizmereH kafda naaandaHybHb kayankepiikke TaTbH 3akbImdap naJa 6onybl Mykhi.
OnapraMbHaHajapXataDbI:
AyaMeH caKbIHaTy KyyneCiHiX (XeIeTeKiU caHbIaaynap, caKbIHDaTkblk Ka6bIpraIap, XeIeTeKIuTIK KyydIbIpykWacbl) KObICKa TOnybl HETNKeCiHNe 3NeKtp KO3FaNTKbiUThbH 3aKbIMdaHybl.
TOTTaHyra XeHe DpybIC CaKtamayra 6aJNaHbICTb6acKa Da3aKbIMdapbl.
- canacb3 kocankb6eJneKTepei KOndaHya 6aJnaHbICTb cbiHa H KepJIepi,
yaKbITbIHda eTKiImereH Hemece KETKIINIC3 Tpyde eTKiIITReh TexHKaBik KbIMTeTHe TYbIHdArH He 60JMacac6NIkC3 TyfHanapTapanbHaH eTKiINeTIcepBnCTIK XHe XeHDey XMyBICTapbIHIn KeiHne naJaDa 6OJIFaH 3aKbIMnap.
TamboBCKaK-ci,12yu,BJNT.,52-KeHcE
192007, CaHKT-TeTep6ypr K-cbl, Pecei
Uyfbn xeni: +7 800 4444 180
3n. nowta: info@stihl.ru
YKPAHAA
«Aндpeac UItinb»ЖшK
ANTHOB K-ci, 10 yu, Yau kny aybbl
08135,KneB o6n.,YkpanHa
Tepeoh:+38044393-35-30
ΦaKc: +380 044 393-35-70
3n. nowa: info@stihl.ua
www.stihl.ua
Ljyfnxeni: +38 0800 501 930
220004, MHHCK K-cbl, Bnapycb
Wyfnjxeni: +375 17 200 23 76
KA3AKCTAH
Okinik
050026, AnMaTbI K-Cbl, Ka3aKCTaH
Wyfnxeni: +7 727 225 55 17
16.7 STIHL mnmopTayubinapbi
PECENΦEDEPAUINCBi
OOO《HTINb3IOBECT》
350000, Pocciucka Fedepaunr,
r. Kpacnoap, yI. 3anaHbI o6xOa, I. 36/1
OOO《ΦJIAMH》
194292, Pocciucka Phedepaunia,
r.CaHKT-PeTeP6bprg,3-nBepxHn
nepeyloK, d. 16 nIteP A, nomeueHne 38
OOO《PPOPECC》
KyaTTbIbIfbl (2200BT
KecimDi TOK Kyuui (In) 10 A
Kecimdi kephey 230 B~
Kniik 50
AaHaJy Xniiirri (n): 2720 aH/MnH
CaKaTaHDbipFbIu 16A*
Kopfahblic Knaeb
KopraHbc dpeXekci waIbipaHdbiHa
Kopfajfah
(IPX4)
Kymbcpekmi P40
40C KxKTeMe
yakblbl
60c6ocxypic
yakblbl
25HM
TapTy MOMeHTi
6ypanna
nbiwak dncckici
TapTy MOMeHTi 10HM
6ypaHda
6ypbblmabnlbllak
¥/E/B 77/48/97 CM
Canmaft (m) 20K
20 K (CH)
21 KΓ (GB)
Uybbl 3mccnrcb1:
2000/14/EC/S.I.2001/17016bouhna:
Kenindi b16b1c7bik
KyaT DeHreNi LwAd 102 dB(A)
blktnan dnci3ik 3 dB(A)
KwA
EN 50434 BoiBihua:
KymbcOpHbIHdAftbl
dbibcbtbk bcbim
denei LpA 92 dB(A)
blkTmAn dnci3ik 3 dB(A)
KpA
*Ha3ap ayadpaHbI3!
3NeKtp Xenici 16 A-DeH TeMeH caKaTHdbIpfbIwnen Kaa6DbIKTaIHaF 6oJcA, KypblfBiHbI IcKe KockaH Hemece OaH KaTbI KykTeMe TycipReH Ke3De, caKaTHdbIpfbI Wn i cKe KocblNybl MymkiH.
17.1 REACH
REACH xmmnabk 3aTapbl Tipkey,
6aranay khe eKindeHdipy Typanb EC peTeyiH biDipei.
1907/2006 Hemipni REACH PernameHTIH (EC) opbHday Typajb aknapaT www.stihl.com/reach caTbHa 6epinreH.
18. AkaynbikTapdbi i3dey
Kaket 6onraH Ke3de DeJaIra KyrinH3, STIH L KomnaHrcb1 STIH DeJaIapbHa KyriHyre KeHec 6epedi.
AkaynbikTap:
3NeKtp K03FaTbIw icKe KocblmaNdi
blkTMan ce6e6i:
-3neKtp KO3raJTKbIUtBtH CaKaTaHdbIpFbIbI Kocblnbl
-KeinidekepheykoK
KocatbH Ka6enb, aHbip, YrcbI Hemece axbipaTkblw 6y3blfah
-AybpDbH caKaTHdbipFbIb6y3bJFaH (TeK Ynb6pTaHaRa apHaHa ynrinep)
CyapmaWHyfblMaCbI dypbic KocblmHaH -caKtaHdbIpfblw axblpaTkbll icke Kocblnbl (anaTbIK 6yfaTtfl)
- Dnckini nbiwaik Toktan KaIraH
- Byfattay KpybJfbcIc cHdpjImereH
AkayIbIKTapIbI KOIO TecINI:
-KypbIJfblHbI cyblTbHb3 ( 8.6)
-KeinireKocbinyibHxHe caKaTaHdbIpFbIUtB TekepiH3 ( 10.1)
- Tekcepin, kaxet Bonfah XaFdaJa WOfbIPcBIMdbi, aHbIPdbi, YHaHbI HemeCe axbipatKbIUtbI aybICTbIPbIH3 (TeK 3neKTpnk) ( 10.1)
- CaKaTaHDbIbPflblTbI aybiCtblpblHbI3
CyapMaHfBIMAhBbIpypbICKocbln, 6ypay ( 11.3)
CyapmauHbImaHbafbITbn anbIn, Kopnyctan eCIMdkTePdiK KaIdbIK MaTePnAbH aBnTacTaHb3 (Ha3ap aydapbHb3: Jeili cbIMbIH axblpaTBHb3! ( 11.2)
- Byfattay Kpbblrbcih cehdihi3 (11.4)
AkaynbikTap:
3neKtpKeNici caKaTaHdbIpBbUbHbIH Kmi axbpataJybl
blktnman ce6e6i:
KocatbIH cbIMbi caikec Keimei
- XeJI WAMadaH TbIC KYKTEnReH,
KypbIINfbira WAMadaH apTbIK KYK TYCKEH
Akaynbikapdbj koiTo tecini:
CaikeKeKeTInKocatbHcIMdbi naDanaHbIbI3 ( 10.1)
KypbIINfbIb6acka3JIeKtpXeJIiCiHe KOcbIbI3
-CanbHaTbH MaTePnAn KeIeMIn a3aNtBhlb3; yCaKTarblTbIH X nbIaKaTapBn aydApBn, erey Hemece anbp6actayKepeK ( 11.5)
AkaynbikTap:
YcaKtaBliU KyaTbIbIbIbH TeMeHdei
blktmman ce6e6i:
-DofannbIwaKaTap
AkaayIbIKTapdbI XOIO Tacini:
-ПышakТыaydapbHb3,Ka npaHbI3 HeMece aybICTbPbHbI3x( 11.5)
19. TexHnkaIbIK Kbl3MeT Kepcety Xocnapbl
19.1 Bepinici tropay
Ynri:
CepnHemipi:

KyHi:

Keneci Kbl3MeT
KyHi:

19.2 KbI3MeT Kepcetyi pacTay
Kb3MeT KepcTey KymbIcTapbH
etki3reH Ke3de, naDanaHy
XaHIderi ocbl HcykayIbIKtB STIHL
deJaJIbIbI3ra 6epiH3.
On andbih ana 6acbifraH epictepde Kbl3MeT kepcty JxMblCTapblHbIH etki3jNHyiH pactaHbl.

Kb3MeT KepcTeTy eTKi3InreH KyHi

KeIeci KbI3MeT KepeTeY KyHi
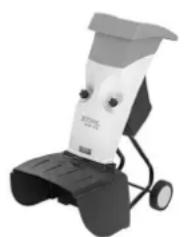
D
INT1

04782019915D
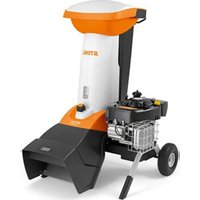

- Table of contents
- Notes on the instruction manual 26
- Machine overview 27
- For your safety 27
- Description of symbols 32
- Standard equipment 33
- Preparing the machine for operation 33
- Notes on working with the machine 34
- Safety devices 34
- Operating the machine 35
- Maintenance 36
- Transport 37
- Minimising wear and preventing damage 38
- Declaration of conformity 39
- Technical specifications 40
- Troubleshooting 40
- Service schedule 41
- Notes on the instruction manual
- General
- Instructions for reading the instruction manual
- Viewing direction:
- Section reference:
- Designation of text passages:
- Texts with added significance:
- Danger
- Warning
- Caution
- Note
- Texts relating to illustrations:
- Country-specific versions
- Machine overview
- For your safety
- General
- Risk of injury!
- Risk of death from suffocation!
- Caution - risk of accident!
- Warning - dangers caused by electrical current
- Warning:
- Risk of electric shock!
- Clothing and equipment
- Transporting the machine
- Before operation
- Working with your machine
- Starting:
- Working:
- Maintenance and repairs
- Cleaning:
- Maintenance operations:
- Storage for prolonged periods without operation
- Risk of injury from exposed blades!
- Disposal
- 5.Description of symbols
- Risk of injury:
- Standard equipment
- Item Designation Qty.
- Preparing the machine for operation
- Attaching wheel axle and wheels
- Installing the ejection chute extension and chassis
- Installing the discharge flap
- Opening and closing the discharge flap
- Opening the discharge flap:
- Closing the discharge flap:
- Tool box
- Notes on working with the machine
- What material can be processed?
- What material cannot be processed?
- As a general rule:
- Maximum branch diameter
- Working area for operator
- Correct machine load
- Overload protection
- If the cutting unit of the garden shredder is blocked
- Feeding the garden shredder
- Soft material:
- Hard material:
- Safety devices
- Motor restart inhibitor
- Safety interlock
- Motor run-down brake
- Protective covers
- Operating the machine
- Electrical connection of garden shredders
- Connecting the power cable
- Switching on the garden shredder
- Switching off the garden shredder
- Shredding
- Maintenance
- Cleaning the machine
- Maintenance interval:
- After each use
- Never spray water onto
- Removing the feed chute
- Installing the feed chute
- Locking the blade disc
- Blade maintenance
- Before each use
- Wear limits of the blades:
- 1Reversible blade
- 2Wingblade
- Removing the blade set:
- Installing the blade set:
- Reversing the blades:
- Sharpening the blades:
- Electric motor and wheels
- Storage and winter break
- Transport
- Lifting or carrying the garden shredder
- Pulling or pushing the garden shredder
- Transporting the garden shredder on a load floor
- Minimising wear and preventing damage
- Important information on maintenance and care of the product group
- Electric garden shredder (STIHGLHE)
- Wearing parts
- Compliance with the information in this instruction manual
- Maintenance operations
- Standard spare parts
- Environmental protection
- Declaration of conformity
- EU declaration of conformity - STIHL GHE 105.0 garden shredder
- UKCA-Declaration of Conformity STIHL GHE 105.0 Garden Shredder
- Technical specifications
- Sound emissions:
- REACH
- Troubleshooting
- Remedy:
- Fault:
- Possible cause:
- Service schedule
- Handover confirmation
- Service confirmation
- Chere cliente, cher client,
- Charge adapted to l'appareil
- Knivenes slitegrenser:
- Varning - risk for olycksfall!
- Transport of maskinen
- Zmanjsanje obrabe in
- Pokyny pre pracute 248
- Transport uredaja
- Opasnost od povreda!
- * D émesio!
- Stimata clienta, stimate client,
- ToroTe mon xOavnc nIaipwoanC
- EkToUmTeC OOpuBou:
- OncaHne CmBOJIOB 412
- KOMJIeKT NOCTaBKn 413
- IoproToBka yctpoiCTBa k pa6oTe 413
- PekomEndaaun no pa6oTe 414
- 3aunthbIe yctpoiCTBa 415 BIOKINPOBka NOBTOpHOrO 3aNyCa 3NeKTPODnIRaTeJIa 415
- BBeHeHne yctpoNCTBa B pa60Ty 416
- Texnueckoe 6cbnyuBaHne 417
- TpaHcnpTnpoBka 419
- O noJIb3OBAHmДaHHoIHHCTpyKuNeI NO 3KcJIyatauIi
- 06uine cBeedeHHa
- Yka3aHHe no npoptyeHHIO HnCTpykunno 3Kcnnyatauun
- HanpaBneHe B3rJaDa:
- CcbiKaHa rnaBy:
- 0603aHHeHpea3eNoB TeKCTa:
- TeKCTbI C DOnOJIHnITeJIbHOJ 3HaUIMOCtBu:
- Onachoctb!
- Ppeynpexkene!
- OctopoxHo!
- Yka3aHne
- TeKCTbI C Ccblkamn Ha pncyHkn:
- 3.Описане устpoиства
- TexHnka 6e30NaacHoCTn
- 06üne cBeeden
- BapnAHTbI IJIpa3JIuNHybIX C7paH
- Onachoctb dnia kni3n BCJeCTBne ydysb!
- BHMaHne - onachocb hecacthoro cnuya!
- PpeDynpexKeHne - onaChocTb n3-3a 3NeKtpnueckoro Toka
- BHMaHne! OnachOcTb nopaxKeHn 3JeKtpueeCKM TOKOM!
- Onachoctb nopaxeHna 3Jektpuyeckm TOKOM!
- Pa6oay oJexka n cpeIcTba 3aunTbI
- TpaHcnpTnpoBka yctpOCTBa
- Onachoctb TpaBMPOBaHnI!
- Ipepepa60toi
- Onachoctb nojyuHn TpaBm!
- Bo Bpempa60tbI
- 3anyck:
- BoBpempa60TbI:
- Onachoctb noJyueHn TpaBM!
- Puck noJyueHn TpaMbbl!
- TexHnueeckoe 06cnyKuBaHne n peMOHTbIe pa6oTbI
- OuInctka:
- Pa60tblnoTexHnueckomy 06cJyXnBaHHo:
- XpaHHe H npn dInTeIbHbIX nepepbIbax B pa6oTe
- Onachoctb TpaBMPOBaHn OTKpbITbIM HOxAMn!
- Ytunnaua
- OnncaHne cMBOJIOB
- BHHMaHHe!
- Onachoctb noJyehn TpaBM!
- Onachoctb noJyehnra TpaBM!
- KomnJIeKT nocTabKu
- 山
- No3. HaimeHOBaHne
- ПОЗ.ΗΝΜΕΝΟΒΑΝΙη
- 7.Под�отовka yctpoиCTBa Ka pa6oTe
- MoHTaX KOJIeCHOI OCU N KOJIeC
- MoNTaX HaCTaBKn BbIbPocn XOIOBOY YAcTn
- MoHTaX OTKnIDHO KnBbIkw
- OTKpbIITNe 3aKpbITne OTKnHOn KpbIiKN
- OTkpblb OTknHHyu kpblky:
- 3aKpbTb OTKnHyu KpbIiKy:
- OTeJeneHne JIINHCTpyMeHa
- PekomeHdaun no pa6oTe
- KaKo MaTePnA MoXHo nepepa6aTbIbTa?
- KaKo MaTePnAn HeIb3a nepepa6atbBaTb?
- OchOBHoe npabNIO:
- MakcmaJIbHbI dNaMeTp BeTOK
- Pa6o7a 30ha onepaTopa
- Ppabunbna Harpy3ka yctpoiCTBa
- 3aunta ot neperpy3kn
- Ecn npexyun mexaHn3m caoBoro n3MeIbHTeY 6IOkpObaH
- 3aOpJHHeHne caOboTe n3MeJIbUHTeJIa
- MaTePnaJI:
- TbepybmyMatepnaj!
- 9.3aunthbte yctpoctBa
- 9.1Блokировka nobToPHorO 3anycka 3JIeKtpoDburataTeJRA
- 9.23aunTha 6JoknpoBka
- Topmo3 ocTaHOBkn 3JNeKtpoDbnIraTeJIa
- 3aunTHbIe KOMIOHeHTbl
- BVeIeHne yCTpoIcTBA Ba pa6Otu
- Onacnoctb noyuhenra TpaBm! PpeD BBOOM caoBoro
- PoiocoeHHeHne caoBoro n3MeJIbHTeI K 3JeKtpuYeCKO cTeN
- PioaCoeHHeHne ceTeBOro Ka6eJra
- BkIIOueHne caIOBOrO n3MeJIbCuITeJIa
- BbIKIOueHne caOBOr n3MeIbUHTeJRA
- N3mEnbYeHne
- Texnueckoe 06cnyxnbAHne
- OuicTka yctpoiCTBa
- DemoHTax 3arpy3OCHOBOPOHK
- MoNTaX 3aRpy3oUHoi BOpOHKn
- 11.4ФИКСИРОВАНЕ HOЖЕВORO DKCKA
- Texnueeckoe 06cnykBaHne HOKei
- INHepBaI TexHnueckoro 06CJyKuBaHHa: nepeKaXdbIM npImHeHHeM
- PpeJeIbI n3Hoca HOKei:
- 1NoBopOtHbI HOx
- MnHmAbhoe paCToHne 6 MM
- 2Hox-Nonactb
- DemOHtAX KOMnJIeKta HOKei:
- MOHTAX KOMJIeKta HOXeI:
- IpebebopaunBaHne HOKei:
- 3aToUka HOKei:
- ΘneKtpoDbBnraTeIb I Koneca
- XpaheHne n npocToB 3umn nepno
- TpaHcnpOpTnpoBkA
- NpOdbemnnnepeHoc caoBOrO n3MeIbUHTeTn
- PepemeueHne caoBoro n3MeJbUHTeJIa
- TpaHcnpOpTnpoBka caoBOrO n3MeJIbHnteHa nOrpy3ouHOI nnTaTΦopme
- CBeJeHne K MNHMMy n3HOca N npEDoTbpaSeHne NOBpeXdeHn
- CtaHndapTHbIe 3aNuaCTM
- OxpaHa okpykaIoUeI cpeIbI
- 16.ДeКларацяо COOTBETCTBIM
- 16.1ДeКларuaO COOTBETCTBUN DnpeKtNBaEMC caDoboro n3MeJIbYHTeJI STIHGLHE105.0
- 16.23HaKc COOTBeTCTBn
- YcTaHOBJIeHHbI cPoK cIyX6bl
- L7a6-Kbaptupa STIHL
- KUNPTN3NIA
- APMEHIN
- TexHnueckne daHHbIe
- GHE 105.0
- Akyctnuecka 3Mmccn:
- * Bhumahne!
- Onncahne Ha CNMBONITE 434
- OKOMNNEKTOBka 434
- IoirotobKaHa ypea 3a nycaHe BeknloaTaun
- yka3aHna 3pa6ota 435
- 3aunTHn npncnoco6JeHn 436
- IyckaHa He ypeDa B ekCnloataa 437
- Ka3aHn3a yeTeHe Ha HHCTpyKuYra 3a ekCnloTaauN
- NocokaHa norglaa:
- IpenpaTka KbM rnaBa:
- 06o3hauabaHeHa nacaXn OT Tekcta:
- TeKCTOBe C DonbHnHTeHNo 3HaueHne:
- Onachoct!
- PpeynpexdeHne!
- TeKCTOBe, OTHACaIe cKeBmФHrpyn:
- Pa3nHn BapnaHTn 3a OTdennHte cTpaHn
- 3.ОписанneHaурда
- 4.3a Baawata 6e3oNaCHOCT
- 06u yka3aHn
- Onachoct ot HapaHraBaHe!
- Onachoc3aXHBota nopaN 3aDywaBaHe!
- BHHMaHHe - onaCHOcT O T 3JonoJyka!
- BHHMaHHe - onachOCT OT TOKOB yap
- BHHMaHHe! OnachOcT OT TokOB ydap!
- OnachoctOT TokOB yap!
- 06Jekno n ekinnupobka
- TpaHcnpTupaHe Ha ypeDa
- Ppepi pa6oTa
- Onachoct ot HapaHbahe!
- Ctaptupahe:
- No Bpeme Ha pa6ota:
- STOP
- PndpBkka npemOnTH
- NouCTBaHe:
- DeHocTn no noDpBxKkata:
- CbxaHenne npn npoDbJnxTeHNO HEn3non3BaHe Ha ypea
- OnachocOT HapaHraBaHe OT OKpTNOcptneta!
- N3xBbPnAHe
- 5.ОпиcaнеHa cIMBONITE
- BHHMaHne!
- OKOMNJIeKTOBka
- P03.HaMeHoBaHne 6p.
- Onachoct ot HapaHyahe!
- MoHTnpaHe Ha Konechata oc H KOJenata
- MoHTnpaHe Ha HactaBkata 3a n3XBpJIHe XOIOBnMexAHN3bM
- OTBapAne H 3aTbapAne Ha deΦnEKToppa
- OtBapnHe Ha dePneKTopa:
- 3aTbapnHe Ha deΦnEeKTopa:
- OTdJIeHHe 3a HcTpymEHTn
- MoHTIpaHc Ha deΦJIeKTopa
- Pa6oTHa 30Ha Ha onepaTopa
- PpaBnJHo HatoBapBaHe Ha ypeDa
- 3aunTa cpeu npetOBapBaHe
- 8.7Пи6лokипан ржец 6лok ha rpaunHckata dpo6nka
- 3apekdahe Ha rpaHcKaTa dpo6nka c MaTePnaI
- Mek matepnaJI:
- TbprMaTepeHaJ:
- 9.3aunTHn npncnoco6JeHna
- 9.1БлokupaHe aBtOMaTHUHOTO CTapTupaHa ha eNEKtpoDbnIraTeIa
- Ppepa3Ho 3KlnOuBaHe
- INhepuOnHa cnpaKa Ha eJeKtpoDnraTeJr
- 3aunTHn kana
- MoHTnpaHe Ha cyHnTa 3a nblHe He
- 11.4ФИКСИРанHaДИСKa 3a HOKOBeTe
- NpOdpbXkKa Ha HOxOBeTe
- InTepBaJ 3a noDpBxka: Ppeu BcKa ynotpe6a
- Граици На ИЗнOCBAне НoxOBeTe:
- 106pbuaa cehoX
- 2JlonatkoB HOX
- DemOHHTnpaHe Ha KOMJIeKTo HOKOBe:
- MOHTupaHe Ha KOMJIeKTe HOKOBe:
- 06pbuaneHaHOXOBeTe:
- 3aTOUbaHe Ha HOXOBete:
- EneKtpoDbnIaTeJ n KoJIeJa
- CbXpaHbAbe n 3mHa nay3a
- TpaHcnpTupaHe
- Nobdurahe nIIN npehacnHa Ha rpaunHcKaTa dpo6nka
- TerJene nIe 6yTaHe Ha rpaHnckata dpo6nka
- TpaHcnpTnpaHe Ha rpaHnckata Dpo6mka Bbpxy TOBapHa nlaTΦopMa
- 13.МинимираHe Ha ИЗнOCBaHTo И празOTВразЯВaHe Ha ПОВразИ
- EneKtpnueckn rpaunncn npo6nkn (STIHL GHE)
- 1.ИЗнOCBaци ceЧастN
- 2.CnBaHe Ha npedncaHnraTa, nocOueHn B Ta3n HNCTpyKuNa 3a eknloataua
- DeiHOCTn no NOIDpbXkkaTa
- O6nuaHn pe3epBn uactn
- 15.ОпаЗВанеHa OKОЛНаТаСрEDA
- 16.Декларuaяза cbotBetCTBne
- EC Deeknapaun 3a cbotBetCTBne TpaunHcKa dpo6nIka STIHGL GHE 105.0
- 3BykOBn emncn:
- TexHHueckn daHHN
- OTKpNBaHe Ha NOBpeM
- HEn3npaBHOCT:
- Bb3MOxHa npuHnHa:
- OTcTaHbAHe:
- OCTpaHBAhe:
- OTCTpaHbAhe:
- CepBn3eH nlaH
- NpTbpxkDeHnE 3a nppeaBaHe
- CepnEH Homep:
- NtBbpxkdeHne 3a n3BbPseHa cepBn3Ha noDpBxK
- JH6i KniEHTn Ta KniEHTKn,
- BAJKINBO!NEPED
- 1.3Mict
- PoncheHHa do yboro nocibnka 446
- Onnc npnilaNy 447
- TexHika 6e3neKn 447
- Onnc no3haueHb
- KomnneKT noctaHna
- PiIroTobKa npnlaNy do ekcnnyatauii
- Bka3iBkn 0do p06oTn
- 3axnchi MexaHi3Mn 456
- TeKCTN 3doaTkoBm 3HaueHHaM
- He6e3neka!
- PonepeKenne
- 3aTepeKehn
- Yka3iBka
- TeKCTn 3 MaJIHOHKAMN
- BapiaHTn dny pi3Hnx kpaIH
- Onnc npnnaNy
- Texhika 6e3nekn
- 3aaraJIbHI BiIDOMOCTI
- He6e3neka TpaBMyBaHHa!
- He6e3neka 3aainxHytnca!
- YBara - He6e3neka HeuacHoro BuNaJky!
- Ybara! He6e3neka ypaexeHHeJeKtpnHm Ctpymom!
- Ybara! He6e3neka ypaxeHHra eJeKtpnHm CTpyMOM!
- He6e3neka ypaXeHHa eJeKtpnHm CTpymOM!
- OJrTa 3ac06n 3axncty
- TpaHcnopTyBaHH npuNay
- He6e3neka TpaBmyBaHHn!
- IpepeI noaTkom po60Tu
- He6e3neka TpaBmyBaHHr!
- Ipeep 3anyckom npnilaH Heo6xidno ornyu n nepecbiDyntnc, y biH y Hanexhomy cTaHi.
- 4.6Пдчасpo6otn
- 3anyck
- Ipouec po6oTu
- CtepekeTbcra TpaBmyBaHHa!
- Texo6cIyroByBaHHi peMOHT
- UH
- Texhihe 06cIyroByaHHa
- 36epiraHn npu doBnx nepepbax y po6ori
- BiikpnTi HOxIMoxyTb 3aBdaTN TpaBMn!
- Ytuliauia
- Onnc no3haYeHb
- KomnjeKT noctaHaHHa
- T03. Onnc 7ryk
- P03. Onnc 1k
- 7.ПiДrOToBka npnlaDy do ekCnIyatauii
- MoHTaX KOJIcHoi oci Ta KOnic
- MoNTaX NOOBKyBaVa BKNiDHorO KaHaIy Ta XoIOBOi YACTHNI
- MoHTaK KJIanaHa BnKaJaHa
- BiKpNbAHHa Ta 3aKpNbAHHa KJIanaHa BnKaDaHa
- BidkpBaHHKlaHa BnKaDaHa
- 3aKpNBaHHKnanaHa BnKnJaHa
- Raun dna iHctpmertib
- Bka3iBkn ⅢoDo po6oTn
- 8.1ЯкmaTepiAn MoXHa nepepo6n?
- Akn MaTepiAn He MoXHa nepepo6n?
- OchOBHe npaBnIO
- MakcunmaBn diAmeTp rinoK
- Po6oHa 30Ha KOpncTyBaHa
- PpunycTme HabaHTaKeHH npnady
- 3axnct BiД nepeHaBaHTaKeHHa
- 8.7Kaio pixyui 6nok caoBoro noDiHIObau 6nOkyTbcra
- HAnOBHeHHaDoBOro noDi6HOBaHa
- M'ekm MaTepiAn
- Tbeprn matepian
- 9.3axnchi mexaHi3MNI
- Mexahi3M 6nokybaHHnoBtophoro 3anycky eJekTpoDburyHa
- 3axnche 6JokyBaHHa
- MexaHIM ralbMyBaHHeJeKtpoDbnryHa
- 3axnchi nokpTTT
- BveeHn npuJaDy B ekCnPyataciio
- 10.1ПдкнчeyнcaсоВOro noDi6HOBaCaDo eJekTpOpepexi
- 10.2ПiД'ЕнHaHHЯ МержБorO ka6eIIO
- YnueHH npuHa
- YbIMKHeHHcaDOb noDi6HOBa
- 06cnyroByBaHHa
- BmknKaHHcaoBOrnoDpi6HOBaay
- Nopdi6Hennn
- Demontax 3aBaHTaxyBaIbHoI NiKu
- MoHTaX 3aBaHTaxyBaJIbHOI nIKn
- 11.4ΦikcaizjДnCKOBORHOxka
- DOrnA 3a HOxEM
- Mexi 3Hocy HOxIB
- 1ДвocToPOHHiHix
- KpnJbUaTn HIX
- DemOHtax HOxOBoro 6noka
- MOHTaX HOxOBoro 6JIOka
- IpeceTabnHnHOxIB
- 3aTooyBaHHHOxIB
- EneKtpnHm DnBuryh i koneca
- 36epirAHHa Ta 3MBOH nepioD
- TpaHcnpTyBaHHa
- 12.1Пдимангта nepeheceннcaedoBOro noDi6HIObaya
- 12.2IToBxAaHHa6oTARHeHH caOBOrnoDi6HIOBaVa
- TpaHcnpOpTyBaHHcaOBOrnooPi6HOBaHa BaHTaxHiinnlaTΦopmi
- 3BedeHnHa 3Hocy do MIHIMMyMa 3aNo6iraHHa NOKoJXeHHaM
- eJektpuHn caObni npDi6HOBaC (STIHL GHE)
- Wbndko3HouyBaHi DeTaji
- 2.ДоТрMuHЯВIMOR,HaBeJeHx y zuBomy noci6Hnky 3 ekCnIyTaauii
- Texhichhe 06cnyroByBaHHa
- 3amihIOBaHI 3aIyactINH
- 3axnct doBknJna
- BcTaHOBnEHa TpNbAniCtB BkOpNCtAHN
- Emicia wymy:
- * yBara!
- UcyHeHH HeCnpaBHOCTe
- HecnpaBnictb:
- MoxjlnBa npnHa:
- UcyeHHa:
- MoxnBa npuHa:
- YcyHeHHa:
- HecnpaBnictb
- MoxJInBa npuHa
- YcyHennr
- TexHnKaIbIK KbI3MeT KepceTy 493
- TacbImaJday 496
- AtaMbIu naJaIaHy XeHInDeI HycayIbIK XaBbHa
- KaannblaknapaT
- NaiDanaHy XeHInDi eri ocbl HcyayIbIKTb KaJau KOnDaHy KepeK
- Ke3 tiry 6aftbl:
- Bemimdeepin HycKaynapbI:
- Matih y3iHdinepiHH6nrrinehyi:
- XaJIbI tIaIMeIpi:
- Aca MaHbI3dbI MAtiHHi6eNikTepi:
- Kayin-katep!
- Eckey!
- A6aB60JIbIbIbI
- HycKay
- CypTeKc cInTeMeJep:
- Typni endepre aphanf an Hyckana
- KypbInfbInapdbIn cnaTbI
- Kayinci3dk wapaanapbl
- Kannbepexepe
- KapaKaT any kayni 6ap!
- Ha3ap aydpbHb3 - Ja3aTaibIM OKnFaHbIn Kayni 6ap!
- Eckepty! 3neKtp TorbHa corbiny kayni!
- Ha3ap aydapbHb3! 3Jektp torbHa corbiny kaynil
- Tok cory kayni 6ap!
- Knim XeHe 63en
- KypbIINfbIH TaCbIMaIIay
- Kapakatanykayni6ap!
- Kmbictb6actamac 6ypbiH
- KoandaHap aandbHda KypblfBihBn Dypbc XnHaHraHdbfBih Ke36eH kapan TeKcepy KaKeT!
- Kymbic yaKbItbIHda
- Icke Koccy:
- XymbictbHbactanybl:
- TexHnKaJIbIK KbI3MeT KepCey XeHe XeHDey
- TasaJay:
- TexHnKaJIbIK Kbi3MeT KepeCy XeHiDiErI KymBicTap:
- ¥3ak MEP3im 6oynbicaTay
- PaiDara acbipy
- TaH6aJapdbIH cnNaTTMaCbI
- Kai.F.Benriney CaHbI,
- KondaHbICka daHybIHday
- DoHaJaN 6iJirin XaHe DOHaJaNtbl opHaTy
- Tycipin Tactayra aphanfaH y3apTaBih WbIFbHKbI Kep XaHe KO3fAnfbWi 6eniKtIH MOHTakBi
- KandbkTapbl NaKtbipbIn Tactay ywiH XankblWtbl opHaTy
- KaIbIKTapDbI Tycipin TaCTayFa apHaJIraH XaNkbIUtB1 aMy XeHe Xa6y
- Tycipin Tactayra aphanraH xankbiWtbl awy:
- KaIbIKTapbl TYcipin Tactayfa apHaJIFaH XANKblWtbl Xa6y:
- Kypanap
- XyMbIc HycKaynapbl
- KaHdai MaTePnAnDbI eHdeyre 6oJa?
- KaHdai MaTePnaIaIbI eHdeyre 6oJMaIdbI?
- Herizirepeke:
- BytakwahbH en Xorapfb DnameTpi
- NauDanaHuysbihbH Xymblc aMafbl
- KypbInfbHbI dypbc KyKTeMeMeH icTeTy
- Ⅲamaaah apTbIK TneydeH kopray
- Erep Keckiw 6enik 6ak ycaKaTbIiWTapBn 6yFaTTaca
- BaKwa ycaKaTbIWBn TOnTbIpy
- Kymcak MaTepnaI:
- KaTbI MaTepnaJI:
- KhiHike epi KaTbI TapMaKaTaHaF 6yTaKaWanapdbI aNDbIH ana 6aKaWa KaHbICbImeH Kecin any KaKeT.
- CaKaTaHdIbIpfblIW KypblInfbInap
- 3NeKtp MOTOpbIHbH KaItaHaH icKe KocblnybIHbH 6ipniri
- CaKaTHaDbipfbIw 6yfatTay acna6bl
- 3neKtp Ko3rTbIuTbH TeXeriiwi
- KopraTbIH Ka6bIH
- KondaHbicka eHri3y
- BaKaWa yCaKaTarBbIWBH KyaT Ke3iHe KaJray
- Keni NHHcBbKocBbI3
- BaK ycaKaTarblIHTapblH KocbiHbI3
- BaK ycaKaTbIbIbIn cHdpy
- ¥caKtay
- MaTePnAnDbI 6aK ycaKaTbIbHa 6ip aam caBIn Tpy Kepek.
- TexHnKaJIbIK Kbl3MeT KepeTy
- KypbInfbHbTa3anay
- TexHnKaIbIK KbI3MeT KepeCy MeP3iminiri:
- Kmbic 60JFaHHKeinH
- KbcimMeHaKaH cydbI
- CyapMa WYHFBIMacbiH 6enwekTre
- CyapMa WYHfBImaHbI opHaty
- DnckiPi nbIwaKaTbI opHaTy
- 11.5ПьшakTapfa Kbl3Met Kepeety
- TexHnkaJIbIK Kbl3MeT KepeCy Mep3iminiri:
- @peTKeKoIaHaP aIbIHda
- TbIwaK To3yBihBIn Weri:
- 1bypbnmanbnbwaik
- 2KaJnak-NbIwak
- IbIwaKapdb6eJIweKTeY:
- Пьшakтары opHaTy:
- NbiwakTbaydapbHb3:
- Пьшakтары кайрay:
- 3neKtp Ko3rAnTKbIbI XeHe DOHraNak
- CaTay wapTTapbl
- TacroImaJday
- BaK ycaTkbIbIH KeTepy Hemece Tacy
- BaKaWa yCaKaTafBbIbH aybIcTbipy
- BaKaWa yCaKaTaBbIbHbH TIK KyiHHe opHbH aybictbipy
- 13.To3y dəpejxcin 6apbIHwa a3aHTy XaHe 3aKbIMdApdaH KOpFay
- 3neKtpnik 6aKawa ycaKaTbIwbl (STIHGLHE)
- To3aTbH 6eJIweKTeP
- 2.OcbI naDanaHy KeHHderi HcayIbIKtbH TaanTapbIH opbHday
- TexHnKaIbIK Kbl3MeT KepcTeY XeHiIerI xMyBicTap
- YKPAHAA
- KA3AKCTAH
- STIHL mnmopTayubinapbi
- PECENΦEDEPAUINCBi
- Uybbl 3mccnrcb1:
- *Ha3ap ayadpaHbI3!
- AkaynbikTapdbi i3dey
- AkaynbikTap:
- blkTMan ce6e6i:
- AkayIbIKTapIbI KOIO TecINI:
- blktnman ce6e6i:
- Akaynbikapdbj koiTo tecini:
- blktmman ce6e6i:
- AkaayIbIKTapdbI XOIO Tacini:
- TexHnkaIbIK Kbl3MeT Kepcety Xocnapbl
- Bepinici tropay
- KbI3MeT Kepcetyi pacTay
Brand : STIHL
Model : GHE 105
Category : Mechanical chipper