Steam Genie 2in1 2760056 - Iron RUSSELL HOBBS - Free user manual and instructions
Find the device manual for free Steam Genie 2in1 2760056 RUSSELL HOBBS in PDF.
User questions about Steam Genie 2in1 2760056 RUSSELL HOBBS
0 question about this device. Answer the ones you know or ask your own.
Ask a new question about this device
Download the instructions for your Iron in PDF format for free! Find your manual Steam Genie 2in1 2760056 - RUSSELL HOBBS and take your electronic device back in hand. On this page are published all the documents necessary for the use of your device. Steam Genie 2in1 2760056 by RUSSELL HOBBS.
USER MANUAL Steam Genie 2in1 2760056 RUSSELL HOBBS
Read the instructions, keep them safe, pass them on if you pass the appliance on. Remove all packaging before use.
IMPORTANT SAFEGUARDS
Follow basic safety precautions, including:
This appliance can be used by children aged from 8 years and above and persons with reduced physical, sensory or mental capabilities or lack of experience and knowledge if they have been supervised/instructed and understand the hazards involved. Children shall not play with the appliance. Cleaning and user maintenance shall not be done by children unless they are older than 8 and supervised. Use and store the appliance out of reach of children under 8 years.
Between uses, the steamer must be rested on a stable, level, heat-resistant surface.
Don't leave the appliance unattended while plugged in, or while it's resting between uses.
Unplug the appliance before filling, before cleaning, and after use.
Don't operate the appliance if it's dropped or damaged, or if it malfunctions or leaks.
The plug must be removed from the socket-outlet before the water reservoir is filled with water.
When placing the iron on its stand, ensure that the surface on which the stand is placed is stable.
Keep the iron and its cord out of reach of children less than 8 years of age when it is energized or cooling down.
Care should be taken when using the appliance due to the emission of steam.
If the cable is damaged, return the appliance in order to avoid a hazard. The surfaces of the appliance will get hot during use.
Do not use this appliance near bathtubs, showers, basins or other vessels containing water.
- Never use anything except water to fill or clean the appliance.
- Never steam clothing that is being worn.
- Never aim steam directly at people, animals or plants. Steam is hot and can cause serious burns and scalds if used without care.
- Never hold the steam head downwards while at rest, or tilt it backwards as this may cause hot water to be discharged and possible injury.
- Ensure the appliance is switched off and cooled down before fitting or removing attachments.
- Don't use the appliance for any purpose other than those described in these instructions.
HOUSEHOLD USE ONLY
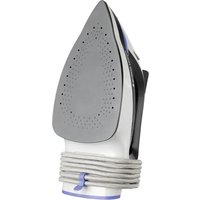
PARTS
- Steam trigger lock
- Steam trigger
- Water inlet cover
- Water tank
- Auto shut off light
-
Accessory storage
-
Power button
- Self clean button
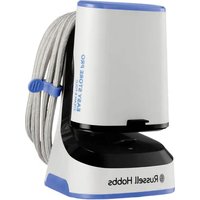
- Steam tube storage
- Power cable storage
- Delicate fabric attachment
- Upholstery attachment
GB
BEFORE USING FOR THE FIRST TIME
- Remove labels, stickers and packaging from the appliance.
- Note: Any water droplets or condensation inside the water tank are a result of quality testing prior to shipping.
IMPORTANT INFORMATION
- For best performance, we recommend using distilled, purified or filtered water in your steamer. Tap water contains minerals that can build up inside your steamer over time and reduce its efficiency or even cause damage.
- Never use perfumes, oils or other additives.
- Always check the garment's care label before steaming, and always test fabrics for colourfastness in an inconspicuous area. Steamers are not recommended for use on leather, suede, vinyl, plastic, or other materials that are sensitive to steam.
- During use the steamer and accessories will become HOT. Never try to fit or remove attachments while still hot.
- After preheating, prime the water pump by holding the steam trigger until steam forms.
- It is normal to feel or hear the water pump inside the device. It may become louder when the water level in the tank is low. Check and refill the tank when required.
- Small amounts of dripping might occur during use. If excessive, your steamer needs time to get back up to full temperature. Just allow the steamer a minute to reheat.
- Wearing clothes immediately after ironing or steaming can actually create wrinkles. Always allow the clothing to cool for about 5 minutes before wearing.
ATTACHMENTS
Your steamer has two attachments.
| Delicate fabric attachment | Reduces the possibility of damage to fabrics such as silk and lace. Tip: For items with printing/embellishment, turn the garment inside out to avoid damage to sensitive areas. |
| Upholstery attachment | Deodorise, refresh and clean larger materials such as bedding, mattresses, curtains, soft toys, sofas and much more. Always test for colourfastness and heat sensitivity on an inconspicuous area. |
Fitting/Removing (Fig. D)
- Make sure that the steamer and attachment are cool.
- Hook the top of the attachment over the top edge of the steamer.
- Click the bottom edge into place.
- Remove attachments by lifting them away from your steamer starting at the heel. When removing the attachment, watch out for condensation that may have built up during use.
FILLING
- The water tank has a built in handle. Lift up the handle and pull the tank upwards and out of the body of your steamer (Fig. A).
- Open the water inlet cover (Fig. B).
- Fill the water tank to the max marking (Fig. C).
- Close the cover and refit the water tank into the body of your steamer. Fold the water tank handle down.
- To refill at any time during use, turn the steamer off by pressing the power button until the blue indicator light goes out, unplug from outlet, and follow the above procedure.
- After refilling, allow to reheat for 60 seconds and then prime the pump by holding the steam trigger until steam forms.
USING
If the label says "do not iron" or shows this icon , fit the delicate attachment and make sure to test on an inconspicuous area prior to steaming the entire garment.
If the label says "do not steam" or shows this icon, do not steam the garment.
- Hang the garment in an area that will not be affected or damaged by the heat and steam, such as on a shower curtain rail, or in an open doorway. Alternatively, place the garment on a bed or towel. You can use the heat resistant bag between the bed/towel and garment if required.
- Fit any attachment you wish to use.
- Plug the steamer in then press the power button. The blue power button light will slowly flash, indicating that the steamer is heating.
- After about 45 seconds the power light will stay on, indicating your steamer is ready to use.
- Prime the water pump by holding or locking the steam trigger until steam forms. If this is your first use this will take about a minute for steam to form.
- To generate steam, press the steam trigger. As long as the trigger is held, steam will emit from the steamer. When the trigger is released, the steam will stop.
- To generate a constant flow of steam without holding the trigger, press the steam trigger and then slide the steam trigger lock upwards. You can then release pressure on the steam trigger. To turn the steam off, press the trigger, slide the steam trigger lock downwards, then release the trigger.
- With your free hand keep the fabric taut. Steam the garment with slow, downward strokes, keeping the head of the steamer in contact with the fabric.
- When you have finished, press and hold the power button until the blue light goes out (about 3 seconds) and unplug.
- After ironing or between garments, place the head of your steamer into the holder. Make sure the steam trigger is not locked in the on position otherwise condensation will form inside the holder.
Ceramic heated plate
Your steamer features a ceramic heated plate that helps smooth out wrinkles and creases on the areas of garments that are more difficult to reach with steam alone. The temperature of the plate is safe for all ironable fabrics.
To use, hold the plate of the steamer directly against the fabric. Don't fit any of the attachments. Steam the garment with slow, downward strokes, keeping the head of the steamer in contact with the fabric.
Important: Always make sure that the surface you use to iron on will not be affected or damaged by heat or steam!
Auto shut off
If you haven't used the steam trigger for approximately 8 minutes, your steamer will enter auto shut off mode. In auto shut off mode, the blue light in the head of your steamer will flash. To restart your steamer, press and hold the steam trigger for a few seconds until your steamer begins to steam again and the blue light stops flashing. Depending on how long your steamer has been in auto shut off mode, it may take up to 45 seconds to re-heat before steam will be generated.
Safety Note: After 15 minutes of using your steamer with the steam trigger in the locked position, the steamer will enter auto shut off mode. The light on your steamer will flash. To re-activate, unlock then lock the trigger and wait for the light to stop flashing and stay on. If you haven't used the steam trigger for approximately 30 minutes, your steamer will shut off entirely.
GB
CARE AND MAINTENANCE
- Store the steam tube and power cable in the compartments on the back of your steamer.
- Make sure steamer is off, unplugged and completely cool.
- Wipe all surfaces with a clean damp cloth.
- After the steamer has been thoroughly dried, turn it back on and lightly steam over an old cloth. This will help remove any residue left in the steam holes.
- To avoid mineral buildup, empty the tank after each use.
Cleaning attachments
- Delicate fabric attachment: Wash with cold water and small amounts of a gentle cleanser if needed. The fabric cannot be removed.
- Upholstery attachment: The fabric can be removed and hand washed with cold water and a gentle cleanser.
Self clean
After approximately 150 minutes of use the self clean button will light up. Self cleaning will help to reduce scale build-up that can occur during use. You can carry on using your steamer when this happens but we recommend following the self cleaning procedure as soon as possible. The self clean light will remain on until you do this.
You'll need a basin or a large bowl to catch the water coming out of the soleplate.
- Fill the reservoir to the max mark.
- Plug the steamer in then press the power button. Wait until the blue power stops flashing.
- Now hold the head over the basin or bowl, with the soleplate down.
- Press the self clean button for approximately 3 seconds. The self clean button light will slowly flash.
- Steam and dirty water will start to be emitted from the soleplate for approximately 1 minute.
- Next, your steamer will go through a drying process which will last approximately 45 seconds. The process is finished when the self clean button turns off and the blue power light stays on. The steamer is then ready to use as normal.
TROUBLESHOOTING
| Problem Possible Cause Solution | ||
| The steamer is plugged in but not heating. | The auto shut-off has activated. Press the steam trigger until the light on the steamer stays on. Press the power button if it is turned off and let the steamer heat up. | |
| Not enough steam or no steam is coming out of the steamer. | The steamer is not heated to full temperature. | Always allow steamer to preheat at least 60 seconds, or until the power button light stops flashing. |
| There is not enough water in the water tank. | Fill the water tank. | |
| The water pump hasn’t been primed. | After preheating, always prime the water pump by holding the steam trigger until steam forms. | |
| Discoloured water is coming through the holes and staining the fabric. | Residue has built up in the water tank. | Empty the water tank after each use. Only use distilled, filtered, or purified water. |
| Perfumed or scented additives were used. | Never use perfumed or scented additives. | |
| Steamer is leaking or spitting. | Steamer is not hot enough. | Allow the steamer to heat for about 60 seconds. |
| Water tank is running low. Fill the water tank. | ||
RECYCLING
To avoid environmental and health problems due to hazardous substances, appliances and rechargeable and non-rechargeable batteries marked with one of these symbols must not be disposed of with unsorted municipal waste. Always dispose of electrical and electronic products and, where applicable, rechargeable and non-rechargeable batteries, at an appropriate official recycling/collection point.
Fixation/Retrait (Figure D)
APENAS PARA USO DOMÉSTICO
PEÇAS
BEHANDLING OG VEDLIKEHOLD
IPIN AIO THN IPOTH XPHSH
MOnTnpaHaHe/OTCTpaHЯBaHé (ΦmR.D)
- YBepTe ce, ye ypeIbT 3a rIaIeHe c npapa n pnpCTaBkTa ca CTyIeHn.
- 3akaute rohpata uact Ha npictabkata Bbpxu ha-tropnna KpaH na ypea 3a rnahe c napa.
- Φικυραῖντε ὅληνηκραῦ ἀντός Μακτο.
- OTCpaHHe TnpuctabKnte KaTo rncBalaTe OT ypeDa 3a rnaDeHe C npap, 3anOuBaKn OTkbM DoJHaTa qact. IOKaTO n3BaXdaTe npuctabKaTa, BnIMaBaIte 3a KOHdEHaZn, KOrTo MoKe Da ce e HaTpynana no Bpeme Ha ynotpe6a.
ПьлHEнE
- Pe3epBoaApbT 3a BOda nma BrpaDeHa npBXka. IOBnirHeTe npBXkata n n3dbpnaTe pe3epBoapa Harope n HABbH OT Kopnyca Ha ypeDa 3a rJaDeHe c npapa (fnr.A).
- OToBopeTe KaNaueTo 3a BoJaTa (fIr. B).
- HanbJIHeTe pe3epBoapa 3a BODa IO o6o3NaueHneTo 3a max (MaKcImaJIeH) KanaqtTeT (ΦnR.C).
- 3aTbOpTe KaNaKa I NoctaBeTe OTHOBO pe3epBoapa 3a BOda B KOpnyca Ha ypeJa 3a rJaIeHe C npapa. CrBHeTe DpBXKkata Ha pe3epBoapa 3a BOda HAnOJy.
3a da HapbHnTe NOBTOPOyepa No BpeMe Ha ynoTpe6a, n3KJIoueTe ypeDa 3a rnaDeHe c npa, KaTo HATNCKaTe 3axpaHbaun 6byoN, DOKaTO CInrTa INHnKaTOPHa IamnUka N3rAcHe, n3KJIoueTe OT KOHTaTaNcEaBaiTe OINcaHata No-rope npOceDypa. - Cnéi KaTo rO HanbIhInTe NOBtOpH0, OCTaBeTe Ja 3aIpee 3a 60 cekyHn i 3apeJeTe NOMnata, KaTo 3aIbPxHInTe cnyCbKa 3a npa, dOKaTo ce o6pa3yBa TaKaBa.
YIOTPE6A
AkoHa eTnkeTa NnSe "Da He Ce rna" nnn Noka3Ba Nkohata, noCTaBeTe npuctbKaTa 3a fHH TbkAnu I TeCTBaIe BbpxU He3a6eJekima oBnact, npedn da npuctbNte KbM rnahe C npapa Ha ZraIaTa dpexa.
AkoHa eTnKeTa nIe "Da He Ce rJaDi C npapa" nn NOKa3Ba NkOHaTa, He rJaTe DpexaTa c npa.
1. 3aKaueTe dpexaTa Ha MЯCTO, KoETo Hama Da 6bDe 3aceHaTO OT TOnnHata N npaTa, HanpImep Bbpxy penca Ha 3aBeCaTa 3a Duy uNn Bbpyx OTBopeHa BpaTa.Дpyra Bb3MoJHoCT e Da NoctaBnte dpexa Ta Bbpyx IegIIO uNkBpna. MoKeTe Da n3NoI3BaTe TOnnoyCtOuNBata Top6a MeJy IeRlOTO/ KbpNaTa N dpexaTa, aKo e Heo6xOdmo.
2. NocTaBeTe npicTaBkaTa, KOrTo JKeJaEte da non3BaTe.
3. BkIIOUeTe ypeDa 3a rnaJeHe c npa n HaTnCSHe 3axpaHbAunia 6yToH. CInrTa lamnueKa Ha 3axpaHbAunia 6yToH 3aNouBa Da mra 6abHo, Koeto Yka3Ba, ye ypeDbT 3a rnaJeHe c npa 3arpBa.
4. CnéД okоло 60 sekyнди пamnчka_ta на 3axpaHbauя 6byToH 3aNoUba Да CBetN NOCTOHHO, KoETO yKa3Ba, Ye ypeIbT 3a rIaIeHe c napa e roTOB 3a ynoTe6a.
5. 3aDééçTbaIte BOdHaTa NOMNa, KaTo 3aIbpxNte IIN 3aCTOnOpNte CnycbKa 3a Inpa, OOKaTO ce o6pa3yBa npa. Ako n3NoJ3BaTe ypeDa 3a npBb NbT, npapa Ta ige Ce o6pa3yBa 3a OKOJOMHyTa.
- 3a reheepnapeHa npapa Hata nchte cncybka 3a npapa. IokaTo Ibpxnte cnycbka ot ype da 3a rnaede He C npapa ige npodbnjnx da n3nn3a Takaba. Korato nychete cnycbka, npapa Ta ige cnpe.
3a da rehepupe tnoctoHHe nToK ot npa,6e3 da 3aIbpxKe cnycbKa,HaTncHeTe cncycbKa 3a npa n Cnei TOBa Pb3HeTe 6loKnPOBkaTa Ha cnycbKa 3a npa HaroPe. Cnei TOBa MoKeTe da ocbo6Ondte HATNcKa BbpxY cnycbKa 3a npa.3a Da n3KJIIOUHTe npaTa,HaTncHeTe cnycbKa, Pbl3HeTe 6loKnPOBkata Ha cnycbKa 3a npa HaIoNy i Cnei TOBa OTnycHeTe cnycbKa. - CbC cB6oHaTa cn pKa IpbXTe PnIaTc onbHaT. O6pa6OTe Te npexaTa c npap, KaTO n3PON3BaTe 6aBn DnJxHn HaOny, 3aIbpxkN rJaBaTa Ha ypeDa 3a rnaHe c npap B KOHTaK T c PnIa (fInr. C).
- Korato npnKnIouHte, HATINCHete n 3aIpBxTe 3axpaHbAuny 6yToH, OkaTo CInHra Ta IaMnUka N3rache (okono 3 cekyni) n IN3kIIOUeTe OT 3axpaHbaHeTo.
Cne KaTO npKIOUHTe C rJaDeHTo IIN MmJy rJaDeHc Ha dpexn, NocTaBeTe rJaBaTaHa ypeDa 3a rJaDeHc napa B dIbPkaa. YBepTe ce, ye cIpycbkbl 3a napa He e nocTaBeH Bbb BKIOUeHO pIoJKeHHe, B npOTiBc HcuyaB DlbPkaa ige Ce o6pa3yBa KOHN3.
3aerbaa kepaunha nloa
UpeT3a rIaeHe c npa Ima HarpBaAa KepamuHa IIOua, KOTo nomara 3a N3rJaXdaHe Ha rBHKTe np6oBeTe no dpexnte, KOTo ce rIaJrno-tpuDnO camo c npa. TeMpepaTpaTa Ha IIOuata e 6e3OnacHa 3a BCNUKn TbKaHn, KOTo ca npEHa3NaueHn 3a rIaeHe.
3aДаизползВATEурEDA,дрьжTe почateHa урEDA 3a ГадеHe cnapa ДиpeКТнСрeшу ТьканТ. He nocstавиTe HNKОг OTnpicTAbKInTe.ДвижTe 6abHOb ypeDA NaDony no dpexaT,aKTo npiNbBpKaTe TlaBaTaHa ypeDA DonpЯHa Do TbKaHtA.MoKeTe DAизпоL3ВATEToNlOyctOnuVBaTAp06a 3a BbpxHЯ (ФИr.D).
Baxho:BnHaHn npOBepaBaiTe daJIi NOBbpxHOCTTa, Bbpxy KOAYIaIITe, HMa Ia 6bJe 3aceHaTa IIINIOBpeHa oT OToIIHa n npap!
ABTomaTnUHO n3KIOUcBaHe
Baunrtype3a rnaheHe c npapa aBtOMaTHUHO npemHaBa B n3KIOUeH pejM CneI OKOJI 8 MNHTn IINcHa Ha AKTNBHOCT. B To3n ABToMaTHUHO n3KIOUeH pejM CnHra Ta lamNpUka ige 3aOnueH da MInra. 3a da pectapTnpate ypeDa 3a rnaDeHe c npapa, HATNCHeTe N 3aDpbXte CnYcbKa 3a npapa 3a HRAOKo CekyHdN, DOKATO NOdaBAHeTo Ha npapa CE BV306HObN i CNHra Ta lamNpUka CnPpe Da MInra. B 3abucmocT OT TOBa KOLKO bJIo napHaTa BN IOTuE 6uNa B pejM HA aBtOMaTHUHO n3KIOUChBaHe, Moxe Da OTHeMe Do 45 ceKyHdN, 3a Da ce 3arpee OTHOBO, PpeDi Da ce reHepnpa npapa.
Белека 3a 6e3oNacHocT: Cnej 15 MInHyTu N3IOn3BaHe Ha ypeDa cBc 3aCToNOpEn cnYcbK 3a npa, ypeDbT 7e BnE3e B pexmHa aBTOMaTnUHO n3KnIOuBaHe. CBeTNIHHnT INdNKaTOp Ha napHaTa IOTnIe 3aNoUHe d npemIrBa. 3a da JAKTNbUpaTe OTHOBO, OCBO6OJeTe n Cnej TOBa 3aCToNOpTe cnYcbKa n 3uKaJIte CBETNIHHnT INdNKaTOp Da CNpe Da MInIa N da OCTaHe BKIOUeH. Ako He cTe IN3IOn3BaJIIn cnYcbKa 3a npa B npoDbJIxJHne Ha npi6bn3ntelHo 30 MInHyTu, BaAata npHa IOTnIe ce IN3KlUOu IN3UJIIO.
jll jll jll jll jll jll jll
1
.
Lgawalj - jglz
.
.1
·laolj
g 1
a
y
aiaaa aai! aag g clll g rgrg
.
…Llaill
baai jiaai Jaaaiu
z_B( -2.1)
8
j 1
a1111111111111111
aaiiaai 11
12
L
- = all .
- 5
6
gJyll Jaauiu
. 015 a123456789011234567890
a.s.s.s.
1 5
1 5
1 5
1 5
1 5
1 5
1 5
1 5
1 5
1 5
1 5
1 5
1 5
1 5
1 5
1 5
1 5
1 5
1 5
1 5
1 5
1 5
1 5
1 5
1 5
1 5
. 1
.
.
.
.
.
.
C. = +
jll jio jiao la
| .الإستعمال齐全 الإستعمال齐全 الإستعمال齐全 الإستعمال齐全 الإستعمال齐全 الإستعمال齐全 الإستعمال齐全 الإستعمال齐全 الإستعمال齐全 الإستعمال齐全 الإستعمال齐全 الإستعمال齐全 الإستUTION齐全 الإستUTION齐全 الإستUTION齐全 الإستUTION齐全 الإستUTION齐全 الإستUTION齐全 الإستUTION齐全 الإستUTION齐全 الإستUTION齐全 ال,enrollment ال,enrollment ال,enrollment ال,enrollment ال,enrollment ال,enrollment ال,enrollment ال,enrollment ال,enrollment ال,enrollment ال,enrollment ال,enrollment ال,enrollment ال,enrollment ال,enrollment ال,enrollment ال,enrollment ال,enrollment ال,enrollment ال,enrollment ال,enrollment ال,enrollment ال,enrollment ال,enrollment ال,enrollment ال,enotation ال,enotation ال,enotation ال,enotation ال,enotation ال,enotation ال,enotation ال,enotation ال,enotation ال,enotation ال,enotation ال,enotation ال,enotation ال,enotation ال,enotation ال,enotation ال,enotation ال,enotation ال,enotation ال,enotation ال,enotation ال,enotation ال,enotation ال,enotation ال,enotation ال,enestation ال,enestation ال,enestation ال,enestation ال,enestation ال,enestation ال,enestation ال,enestation ال,enestation ال,enestation ال,enestation ال,enestation ال,enestation ال,enestation ال,enestation ال,enestation ال,enestation ال,enestation ال,enestation ال,enestation ال,enestation ال,enestation ال,enestation ال,enestation ال,enestation ال,enotation ال,enotation ال,enotation ال,enotation ال,enotation ال,enotation ال,enotation ال,enotation ال,enotation ال,enotation ال,enotation ال,enotation ال,enotation ال,enotation ال,enotation ال,enotation ال,enotation ال,enotation ال,enotation ال,enotation ال,enotation ال,enotation ال,enotation ال,enotation ال,enomination ال,enomination ال,enomination ال,enomination ال,enomination ال,enomination ال,enomination ال,enomination ال,enomination ال,enomination ال,enomination ال,enomination ال,enomination ال,enomination ال,enomination ال,enomination ال,enomination ال,enomination ال,enomination ال,enomination ال,enomination ال,enomination ال,enomination ال,enomination ال,enomination ال,enotation ال,enotation ال,enotation ال,enotation ال,enotation ال,enotation ال,enotation ال,enotation ال,enotation ال,enotation ال,enotation ال,enotation ال,enotation ال,enotation ال,enotation ال,enotation ال,enotation ال,enotation ال,enotation ال,enotation ال,enotation ال,enotation ال,enotation ال,enotation ال,enATION ال,enATION ال,enATION ال,enATION ال,enATION ال,enATION ال,enATION ال,enATION ال,enATION ال,enATION ال,enATION ال,enATION ال,enATION ال,enATION ال,enATION ال,enATION ال,enATION ال,enATION ال,enATION ال,enATION ال,enATION ال,enATION ال,enATION ال,enATION ال,enATION ال,enotation ال,enotation ال,enotation ال,enotation ال,enotation ال,enotation ال,enotation ال,enotation ال,enotation ال,enotation ال,enotation ال,enotation ال,enotation ال,enotation ال,enotation ال,enotation ال,enotation ال,enotation ال,enotation ال,enotation ال,enotation ال,enotation ال,enotation ال,enotation ال,enAT ال,enAT ال,enAT ال,enAT ال,enAT ال,enAT ال,enAT ال,enAT ال,enAT ال,enAT ال,enAT ال,enAT ال,enAT ال,enAT ال,enAT ال,enAT ال,enAT ال,enAT ال,enAT ال,enAT ال,enAT ال,enAT ال,enAT ال,enAT ال,enAT ال,en AT ال,enAT ال,enAT ال,enAT ال,enAT ال,enAT ال,enAT ال,enAT ال,enAT ال,enAT ال,enAT ال,enAT ال,enAT ال,enAT ال,enAT ال,enAT ال,enAT ال,enAT ال,enAT ال,enAT ال,enAT ال,enAT ال,enAT ال,enAT ال,enAT ال,enat ال,enAT ال,enAT ال,enAT ال,enAT ال,enAT ال,enAT ال,enAT ال,enAT ال,enAT ال,enAT ال,enAT ال,enAT ال,enAT ال,enAT ال,enAT ال,enAT ال,enAT ال,enAT ال,enAT ال,enAT ال,enAT ال,enAT ال,enAT ال,enAT ال,enATE ال,enAT ال,enAT ال,enAT ال,enAT ال,enAT ال,enAT ال,enAT ال,enAT ال,enAT ال,enAT ال,enAT ال,enAT ال,enAT ال,enAT ال,enAT ال,enAT ال,enAT ال,enAT ال,enAT ال,enAT ال,enAT ال,enAT ال,enAT ال,enAT ال,enCAT ال,enAT ال,enAT ال,enAT ال,enAT ال,enAT ال,enAT ال,enAT ال,enAT ال,enAT ال,enAT ال,enAT ال,enAT ال,enAT ال,enAT ال,enAT ال,enAT ال,enAT ال,enAT ال,enAT ال,enAT ال,enAT ال,enAT ال,enAT ال,enAT ال,enAP ال,enAT ال,enAT ال,enAT ال,enAT ال,enAT ال,enAT ال,enAT ال,enAT ال,enAT ال,enAT ال,enAT ال,enAT ال,enAT ال,enAT ال,enAT ال,enAT ال,enAT ال,enAT ال,enAT ال,enAT ال,enAT ال,enAT ال,enAT ال,enAT ال,enATA ENAT ENAT ENAT ENAT ENAT ENAT ENAT ENAT ENAT ENAT ENAT ENAT ENAT ENAT ENAT ENAT ENAT ENAT ENAT ENAT ENAT ENAT ENAT ENAT ENAT ENAT ENAT ENAT ENAT ENAT ENAT ENAT ENAT ENAT |
(D)
.1
.2
.3
.4
Jai
.1
.2
.3
.4
. 6
. 7
.8
AE
1
J 1 J 1 J 1 J 1 J 1 J 1 J 1 J 1 J 1 J 1 J 1 J 1 J 1 J 1 J 1 J 1 J 1 J 1 J 1 J 1 J 1 J 1 J 1 J 1 J 1 J 1 J 1 J 1 J 1 J 1 J 1 J 1 J 1 J 1
J 1 J 1 J 1 J 1 J 1 J 1 J 1 J 1 J 1 J 1 J 1 J 1 J 1 J 1 J 1 J 1 J 1 J 1 J 1 J 1 J 1 J 1 J 1 J 1 J 1 J 1 J 1 J 1 J 1 J 1 J 1 J 1 J 1 J 1 J
n 1
J
J
J
J
J
J
J
J
J
J
J
J
J
J
J
J
J
J
J
J
J
J
J
J
J
J
J
J
J
J
J
J
J
J
J
J
J
J
J
J
J
J
J
J
J
J
J
J
J
J
J
J
J
J
J
J
J
J
J
J
J
J
J
J
J
J
J
J
J
J
J
J
J
J
J
J
J
J
J
J
J
J
J
iill
Jlalil 15 15 Jlalil 15 Jlalil 15 Jlalil 15 Jlalil 15 Jlalil 15 Jlalil 15 Jlalil 15 Jlalil 15 Jlalil 15 Jlalil 15 Jlalil 15 Jlalil 15 Jlalil 15
aIyallg yLia
aaii iia aiee eae eae eae eae eae eae eae eae eae eae eae eae eae eae eae eae eae eae eae eae eae eae eae eae eae eae eae eae eae eae eae eae eae eae eae eae eae eae eae eae eae eae eae eae eae eae eae eae eae eae eee
. jililol
1 2
Caaal
a aal 1 1 1 1 1 1 1 1 1 1 1 1 1 1 1 1 1 1 1 1 1 1 1 1 1 1 1 1 1 1 1
.
1
150
y i lii j 1 1 1 1 1 1 1 1 1 1 1 1 1 1 1 1 1 1 1 1 1
a 1
aall aedn jy dll lal bll y 100
max 1
.2
Jaaol 4 2000 1 1 1 1 1 1 1 1 1 1 1 1 1 1 1 1 1 1 1
3 4
5
45 45 45 45
a a a a a a a a a a a a a a a a a a a a a a
b1 = 2ab - a1b_2 =
1
始末可追溯
JSLi