
HSG 190D - Welding machine Herkules - Free user manual and instructions
Find the device manual for free HSG 190D Herkules in PDF.
| Product type | MIG/MAG welding machine (inert/active gas) |
| Brand | Herkules |
| Model | HSG 190D |
| Weight | 36.3 kg |
| Power supply | 230 V / 400 V ~ 50 Hz (230 V adapter included) |
| Welding current | 25 - 160 A (max. 190 A) |
| Rated no-load voltage (U0) | 41 V |
| Solid wire diameter | 0.6 / 0.8 / 1.0 mm |
| Wire spool capacity | Max. 5 kg |
| Recommended fuse | 16 A |
| Duty cycle (X%) at 400 V | 160 A: 10%; 130 A: 25%; 100 A: 35%; 85 A: 60% |
| Duty cycle (X%) at 230 V | 115 A: 10%; 90 A: 25%; 70 A: 35%; 60 A: 60%; 40 A: 100% |
| Thermal protection | Yes (overheat indicator light) |
| Insulation class | H |
| Protection rating | IP21 |
| Standard | EN 60974-1 |
| Usable gas type | CO₂, Argon/CO₂ (for unalloyed steel) |
| Included accessories | Torch, cable harness, welding shield, pressure reducer, pressure gauges, 230 V adapter cable |
| Maintenance | Regular cleaning with damp cloth; no internal parts require maintenance |
| Safety | Thermal protection, fuse, detailed safety instructions in the manual |
| Wear parts | Feed roller, nozzles, contact tips, welding wire |
| Warranty | 60 months (5 years) for non-professional use; 12 months for commercial use |
Frequently Asked Questions - HSG 190D Herkules
User questions about HSG 190D Herkules
0 question about this device. Answer the ones you know or ask your own.
Ask a new question about this device
Download the instructions for your Welding machine in PDF format for free! Find your manual HSG 190D - Herkules and take your electronic device back in hand. On this page are published all the documents necessary for the use of your device. HSG 190D by Herkules.
USER MANUAL HSG 190D Herkules
GB Original operating instructions Shielding gas welder
RS Originalna uputstva za upotrebu Uredaj za zavarivanje sa zašitnim gasom
When using the equipment, a few safety precautions must be observed to avoid injuries and damage. Please read the complete operating instructions and safety regulations with due care. Keep this manual in a safe place, so that the information is available at all times. If you give the equipment to any other person, hand over these operating instructions and safety regulations as well. We cannot accept any liability for damage or accidents which arise due to a failure to follow these instructions and the safety instructions.
1. Safety regulations
The corresponding safety information can be found in the enclosed booklet.
Danger!
Read all safety regulations and instructions. Any errors made in following the safety regulations and instructions may result in an electric shock, fire and/or serious injury.
Keep all safety regulations and instructions in a safe place for future use.
2. Layout and items supplied
2.1 Layout (Fig. 1-8)
- Handle
- Operating status indicator
- Thermostat control lamp
- Housing cover
- Gas bottle support surface
- Castors
- Welding current switch
- ON/OFF/Voltage selector switch
- CeCon plug
- Earth terminal
- Hose package
- Gas nozzle
- Burner
- Guide rollers
- Chain hook
- Gas supply connector
- Welding screen
- Shielding gas hose
- Pressure reducer
- Pressure gage (gas flow rate)
- Screw connector
- Safety valve
- Shielding gas hose connector
-
Rotary knob
-
Burner switch
- 3 x contact pipe
- Handle for housing cover
- Safety chain
- Welding wire speed controller
- Adapter cable
- Pressure gage (bottle pressure)
a. 16 × Screw for castors
b. 16 × Spring ring for castors
c. 16 × Washer for castors
d. 2 x Hose clip
k. 1 x Safety glass frame
1. 1 x Welding glass
m. 1 x Transparent safety glass
n. 2 × Safety glass retaining bushes
o. 3× Nut for handle
p. 3 x Screws for handle
q. 2 × Safety glass retaining pin
r. 1 x Handle
s. 1 x Welding screen frame
2.2 Items supplied
Please check that the article is complete as specified in the scope of delivery. If parts are missing, please contact our service center or the sales outlet where you made your purchase at the latest within 5 working days after purchasing the product and upon presentation of a valid bill of purchase. Also, refer to the warranty table in the service information at the end of the operating instructions.
- Open the packaging and take out the equipment with care.
- Remove the packaging material and any packaging and/or transportation braces (if available).
- Check to see if all items are supplied.
- Inspect the equipment and accessories for transport damage.
If possible, please keep the packaging until the end of the guarantee period.
Danger!
The equipment and packaging material are not toys. Do not let children play with plastic bags, foils or small parts. There is a danger of swallowing or suffocating!
Weldingset
Original operating instructions
- Safetyinstructions
GB
3. Proper use
The shielding gas welding set is exclusively designed for welding steel with the MAG (Metal Active Gas) method using the appropriate welding wires and gases.
The machine is to be used only for its prescribed purpose. Any other use is deemed to be a case of misuse. The user / operator and not the manufacturer will be liable for any damage or injuries of any kind caused as a result of this.
Important information about the power connection
This equipment falls under Class A of the standard EN 60974-10, i.e. it is not designed for use in residential areas in which the power supply is based on a public low-voltage supply system because given unfavorable conditions in the power supply the equipment may cause interference. If you want to use the equipment in residential areas in the which the power supply is based on a public low-voltage supply system, you must use an electromagnetic fiiter which reduces the electromagnetic interference to the point where the user no longer notices any disturbance.
In industrial parks or other areas in which the power supply is not based on a public low-voltage supply system the equipment can be used without such a fi tter.
General safety information
It is the user's responsibility to install and use the equipment properly in accordance with the instructions issued by the manufacturer. If electromagnetic interference is noticed, it is the user's responsibility to eliminate said interference with the technical devices mentioned in the section "Important information about the power connection".
Reduction of emissions
Main current supply
The welder must be connected to the main current supply in accordance with the instructions issued by the manufacturer. If interference occurs, it may be necessary to introduce additional measures, e.g. fitting a filter to the main current supply (see above in the section "Important information about the power connection"). The welding cables should be kept as short as possible.
Pacemakers
Persons using an electronic life support device (e.g. a pacemaker) should consult their doctor before they go near electric sparking, cutting, burning or spot-welding equipment in order to be sure that the combination of magnetic fields and high electric currents does not affect their devices.
For commercial users the guarantee period is 12 months and for normal users 24 months, beginning from the date of purchase.
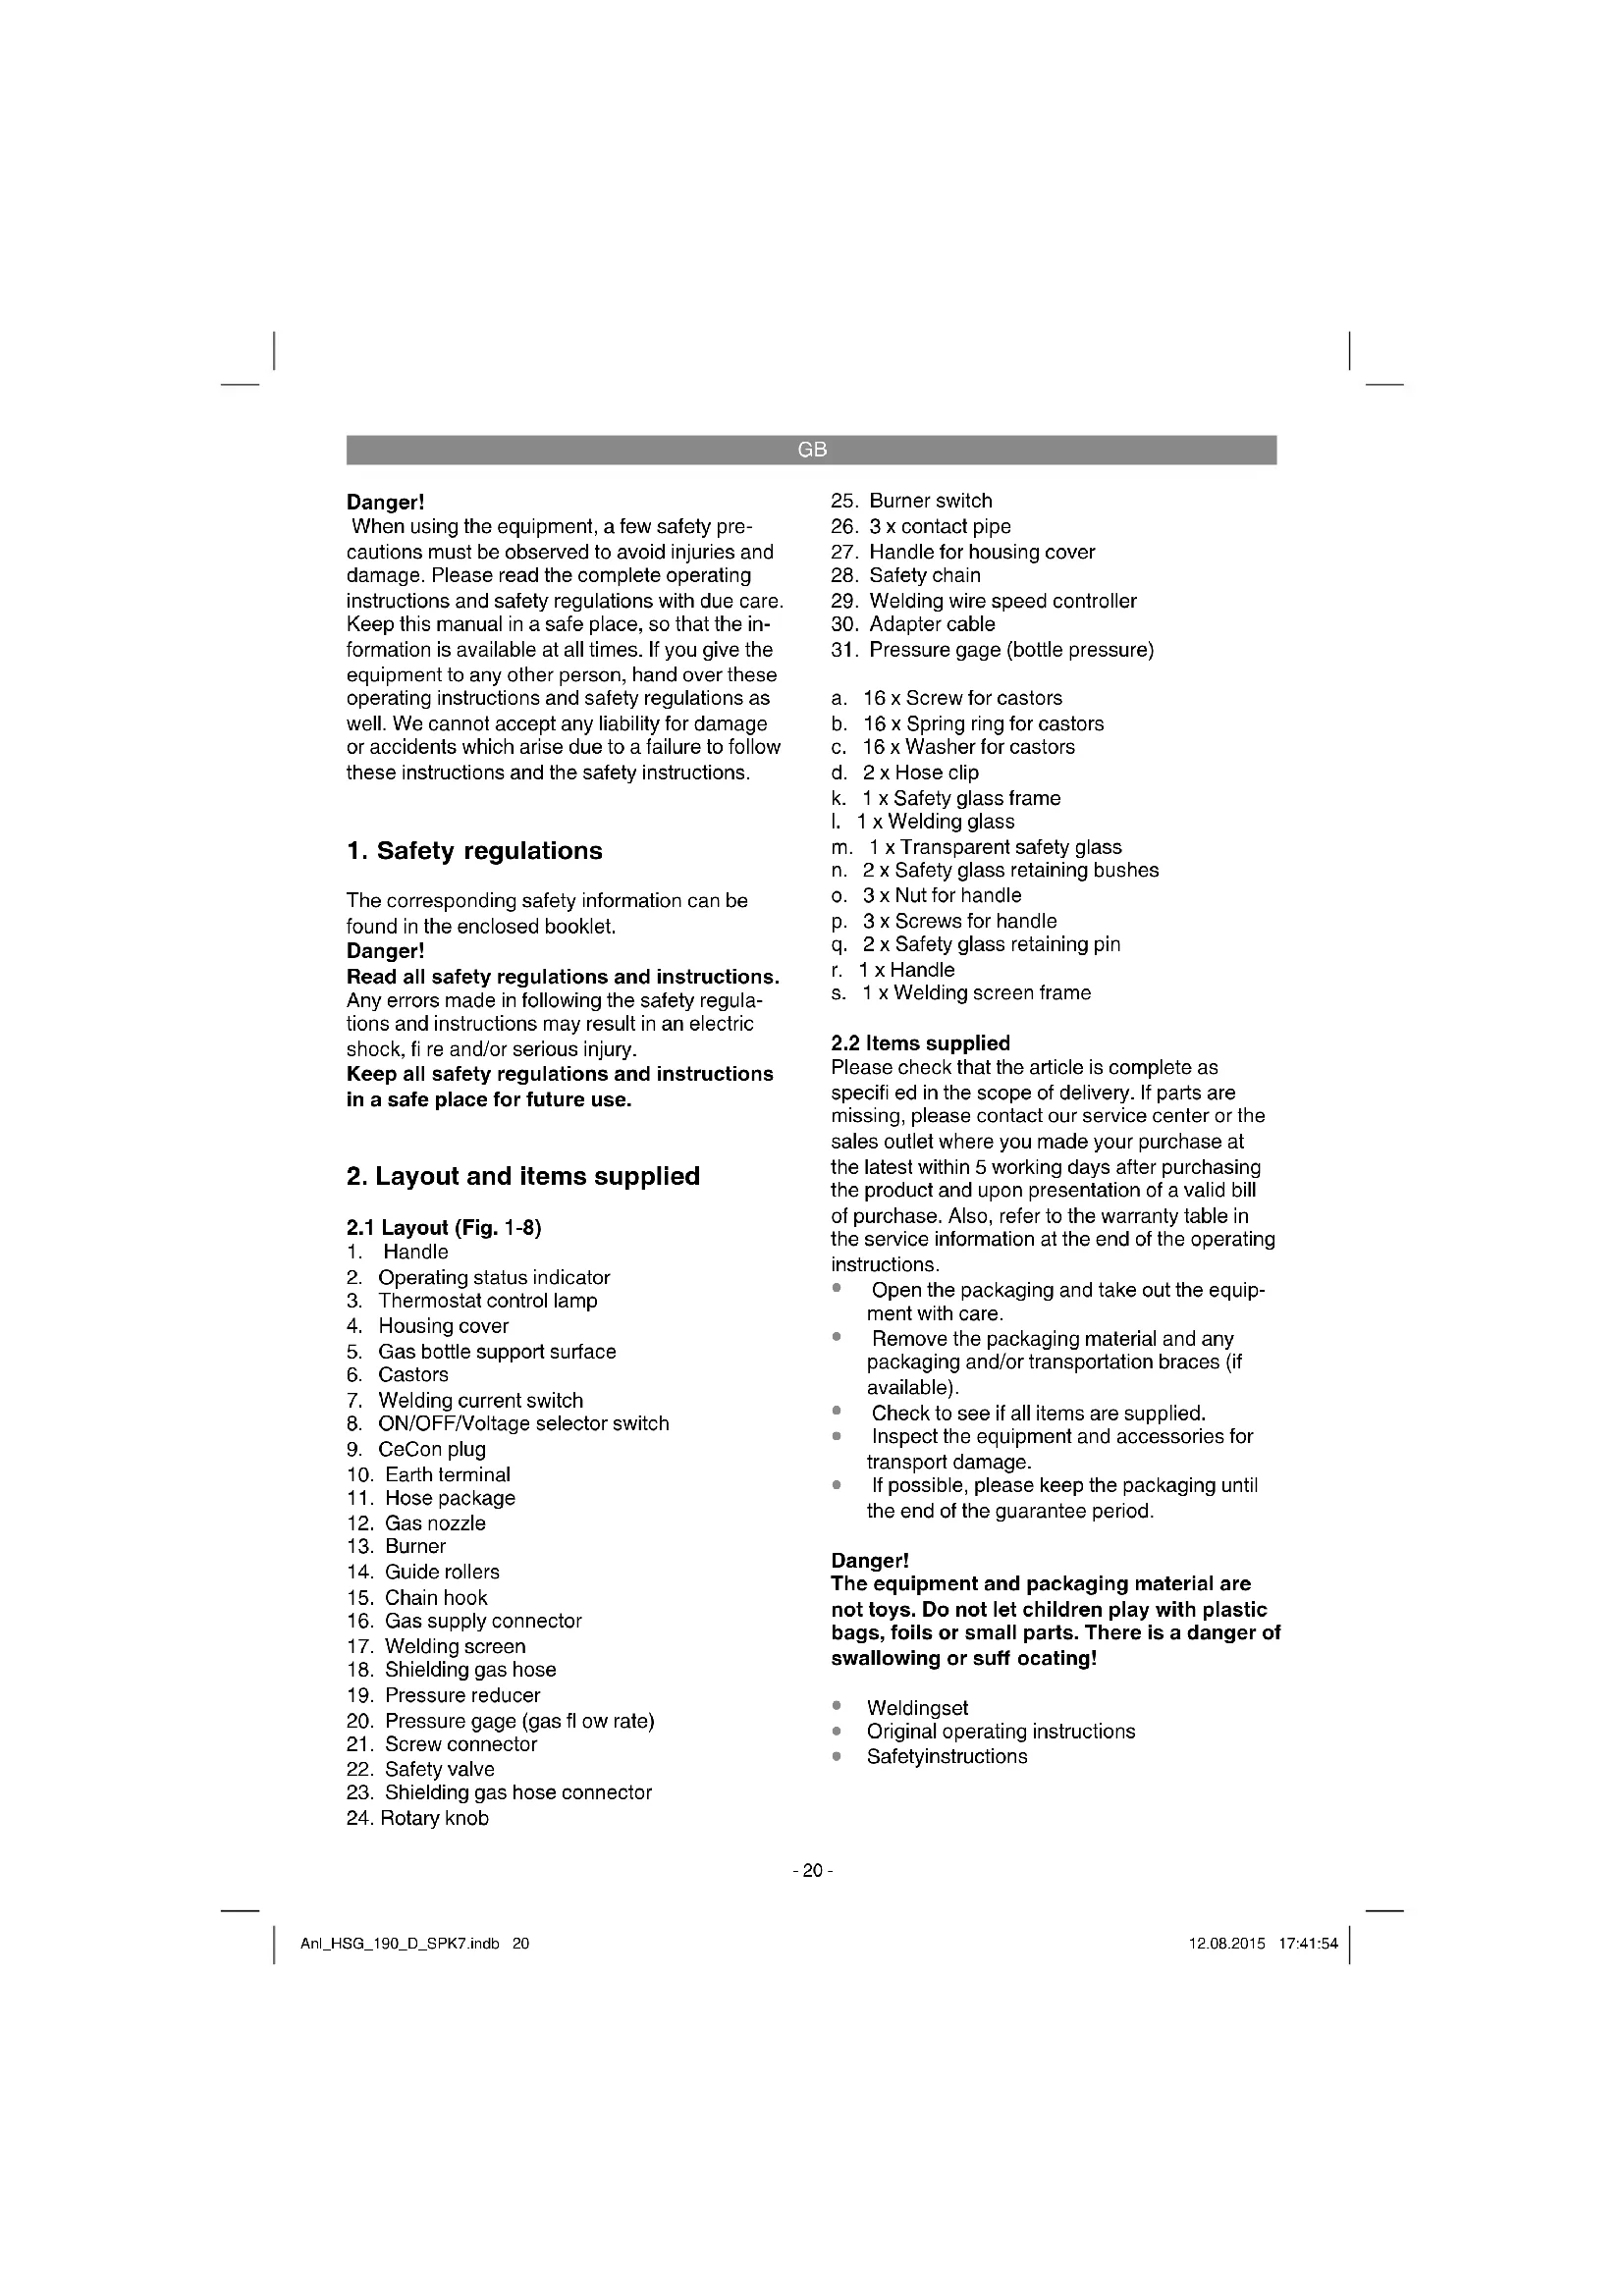
4. Symbols and technical data
EN 60974-1
European standard for arc welding sets and welding power supplies with limited on time
U。
Rated idling voltage
U
Mains voltage
0 mm
Welding wire diameter
1max
Rated maximum mains current
1
Welding current
\~50Hz
Mains frequency
IP 21
Protection type
H
Insulation class
X
On-load factor

Mains connection

Metal inert and active gas welding including the use of filer wire
GB

Symbol for falling characteristic curve
Transformer
Fuse with rated value in A in the mains connection

Do not store or use the equipment in wet or damp conditions or in the rain

Read the operating instructions carefully before using the welding set and follow them
Mains connection: 230 V/400 V ~ 50 Hz
Welding current: 25-160 A (max. 190 A)
| Duty cycle r X%: 10 15 25 35 60 100 | |||||||
| Welding currentl _2(A): | |||||||
| 400 V: 160 130 100 85 | 35 / | ||||||
| 230 V: / 115 90 70 60 4 | 0 25 | ||||||
Rated idling voltage U: 41 V
Max.welding wire drum: 5 kg
Welding wire diameter 0.6/0.8/1.0 mm
Fuse: 16 A
Weight: 36,3 kg
The welding times apply for an ambient temperature of 40^ .
5. Before starting the equipment
5.1 Assembly (Fig. 5-21)
5.1.1 Installing the castors and guide rollers (6/14)
Install the castors (6) and guide rollers (14) as shown in Figures 7, 9, 10 and 11.
5.1.2 Fitting the welding screen (17)
- Place the welding glass (l) and the transparent safety glass (m) over it in the frame for the safety glass (k) (Fig. 12).
- Press the safety glass retaining pins (q) into the holes in welding screen frame (s) from the outside. (Fig. 13)
- Place the frame for the safety glass (k) with the welding glass (l) and transparent safety glass (m) from the inside into the recess in the welding frame (s), press the safety glass retaining bushes (n) on to the safety glass retaining pins (q) until they engage to secure the frame for the safety glass (k). The transparent safety glass (m) must be on the outside. (Fig. 14)
- Bend the top of the welding screen frame (s) inwards (Fig. 15/1) and fold down the top corners (Fig. 15/2). Now bend the outer sides of the welding screen frame (s) inwards (Fig. 15/3) and connect them by pressing the top corners and outer sides together. As the retaining pins engage, you should be able to hear to clear clicks on each side (Fig. 15/4).
- When the top corners of the welding screen are connected as shown in Figure 16, place the screws for the handle (p) from the outside through the three holes in the welding screen. (Fig. 17)
- Turn over the welding screen and place the handle (r) over the threads on the three screws for the handle (p). Secure the handle (r) to the welding screen the three nuts for the handle (o) (Fig. 18).
5.2 Gas connection (Fig. 4-6, 19-25)
5.2.1 Gas types
Gas shielding is required for welding with continuous wire, the composition of the shielding gas depends on the welding method you wish to use.
| Shieldinggas | CO2 | Argon/CO2 |
| Metal to be welded: | X | X |
| Non-alloyed steel |
5.2.2 Fitting the gas bottle on the unit (Fig. 19-25)
The gas bottle is not supplied.
Fit the gas bottle cables as shown in Figures 19.
-
- Ensure that the safety chain (28) is secure and that the welding set cannot tip over.
GB
Danger! Only gas bottles with a maximum capacity of 20 liters may be fitted on the gas bottle support area (Fig. 19/5). If you wish to use larger gas bottles, there is a risk that they will tip over and therefore they may only be placed next to the unit. In this case the gas bottle must be secured to prevent it tipping over.
5.2.3 Connecting the gas bottle
After removing the protective cap (Fig. 22/A), open the bottle valve (Fig. 22/B) briefly y, ensuring it is pointing away from your body. Clean any dirt off the connecting thread (Fig. 22/C) if necessary using a dry cloth without adding any cleaning products. Check whether there is a seal on the pressure reducer (19) and that it is in perfect condition. Turn the pressure reducer (19) clockwise on to the connection thread (Fig. 23/C) on the gas bottle (Fig. 23). Place the two hose clips (d) over the shielding gas hose (18). Connect the shielding gas hose (18) to the shielding gas hose connection (23) on the pressure reducer (19) and gas supply connector (16) on the welding set and secure it to both connectors using the hose clips (d). (Fig. 24-25)
Danger! Check all gas and other connection for leaks. Check the connections using leak spray or soap pads.
5.2.4 Information about the pressure reducer (Fig. 4/19)
The pressure gage (31) shows the bottle pressure in bar. The gas delivery rate can be adjusted using the rotary knob (24). The set gas delivery rate can be read off the pressure gage (20) in liters per minute (l/min). The gas is discharged at the shielding gas hose connector (23) and is then forwarded to the welding set through the shielding gas hose (Fig. 3/18). (see 5.2.3)
Important. Always proceed as described in point 6.1.3 for setting the gas delivery rate. The pressure reducer is fitted on the gas bottle using the screw connector (21) (see 5.2.3).
Danger! The pressure reducer may only be adjusted and repaired by trained personnel. Send defective pressure reducers to the service address if necessary.
5.3 Mains connection
Before you connect the equipment to the mains supply make sure that the data on the rating plate are identical to the mains data.
The equipment may only be operated from properly earthed and fused sockets.
Please read the following to prevent the risk of fire, an electric shock and personal injury:
- Never use the welding set with a rated voltage of 400V if it is set to 230 V. Caution: Fire risk.
- Disconnect the welding set from the power supply before you adjust the mains voltage.
- Do not change the rated voltage whilst the welding set is operating.
Before using the welding set, ensure that the rated voltage setting is identical to that from the power source.
Please note:
The welding unit is equipped with a 400V 16 A CeCon plug. Use the supplied adapter cable No. 30 to operate the welding unit with 230V
5.4 Fitting the wire spool (Fig. 1, 5, 6, 26-34)
The wire spool is not supplied.
5.4.1 Wire types
Various welding wires are required for different applications. The welding set can be used with welding wires with a diameter of 0.6/0.8 and 1.0 mm. The appropriate feed rollers and contact tubes are supplied with the set. The feed roller, contact tube and wire cross-section must always match each other.
5.4.2 Wire spool capacity
Wire spools with a maximum weight of 5kg can be fitted in the welding set.
5.4.3 Inserting the wire spool
- Open the housing cover (Fig. 2/4) by pushing the handle for the housing cover (Fig. 2/27) backwards and opening the housing cover (Fig. 2/4).
- Check that the windings on the spool do not overlap so as to ensure that the wire can be unwound evenly.
Description of the wire guide unit (Fig. 26-27)
A Spool lock
B Spool holder
C Cam pin
D Adjusting screw for roller brake
GB
E Screws for feed roller holder
F Fee roller holder
G Feed roller
H Hose package mounting
Pressure roller
J Pressure roller holder
K Pressure roller spring
L Adjusting screw for counter-pressure
M Guide tube
N Wire spool
O Cam opening in wire spool
Inserting the wire spool (Fig. 26, 27)
Place the wire spool (N) on the spool holder (B). Ensure that the end of the welding wire is unwound on the side of the wire guide, see arrow. Ensure that the spool lock (A) is pushed in and the cam pin (C) is engaged in the cam opening in the wire spool (O). The spool lock (A) must engage again over the wire spool (N). (Fig. 27)
Inserting the welding wire and adjusting the wire guide (Fig. 28-34)
- Push the pressure roller spring (K) upwards and swing it forwards (Fig. 28).
Pull the pressure roller holder (J) with the pressure roller (I) and pressure roller spring (K) downwards (Fig. 29). - Undo the screws for the feed roller holder (E) and pull off the feed roller holder (F) upwards (Fig. 30).
- Check the feed roller (G). The appropriate wire thickness must be specified on the top of the feed roller (G). The feed roller (G) is fitted with two guide grooves. Turn the feed roller (G) over if necessary or replace it. (Fig. 31)
- Position the feed roller holder (F) again and secure it.
- Remove the gas nozzle (Fig. 5/12) from the burner (Fig. 5/13) by turning it clockwise, unscrew the contact tube (Fig. 6/26). (Fig. 5-6). Place the hose package (Fig. 1/11) on the floor as straight as possible pointing away from the welding set.
Cut off the first 10cm of the welding wire to produce a straight cut with no shoulders, warping or dirt. Deburr the end of the welding wire. -
Push the welding wire through the guide tube (M) between the pressure and feed rollers (G/l) into the hose package mounting (H). (Fig. 32) Carefully push the welding wire by hand into the hose package until it projects out of the hose package by approx. 1cm at the burner (Fig. 5/13).
-
Undo the adjusting screw for counter-pressure (L) a few turns. (Fig. 34)
- Push the pressure roller holder (J) with pressure roller (I) and pressure roller spring (K) upwards again and attach the pressure roller spring (K) to the adjusting screw for counter-pressure (L) again (Fig. 33).
Now set the adjusting screw for counter-pressure (L) so that the welding wire is positioned firmly between the pressure roller (I) and feed roller (G) without being crushed. (Fig. 34) - Screw the appropriate contact tube (Fig. 6/26) for the welding wire diameter on to the burner (Fig. 5/13) and fit the gas nozzle, turning it clockwise (Fig. 5/12).
- Set the adjusting screw for the roller brake (D) so that the wire can still be moved and the roller stops automatically after the wire guide has been braked.
6. Operation
6.1 Setting
Since the welding set must be set to suit the specific application, we recommend that the settings be made on the basis of a test weld.
6.1.1 Setting the welding current
The welding current can be set to 6 different levels using the welding current switch (Fig. 1/7). The required welding current depends on the material thickness, the required penetration depth and the welding wire diameter.
6.1.2 Setting the wire feed speed
The wire feed speed is automatically adjusted to the current setting. The final wire feed speed setting can be made on the welding wire speed controller (Fig. 1/29). We recommend that you start the setting work at level 5 which is the middle value, and then adjust it from there. The required quantity of wire depends on the material thickness, the penetration depth, the welding wire diameter and also of the size of the gap to be bridged between the workpieces you wish to weld.
6.1.3 Setting the gas delivery rate
The gas delivery rate can be infinitely adjusted on the pressure reducer (Fig. 4/19). It is shown on the pressure gage (Fig. 4/20) in liters per minute (l/min). Recommended gas delivery rate in rooms with no drafts: 5 - 15 l/min.
GB
To set the gas flow rate, first release the clamp lever (Fig. 26/K) on the wire feed unit to prevent unnecessary wire wear (Fig. 5.4.3). Connecting to the mains (see point 5.3), set the ON/OFF/Welding current switch (Fig. 1/7;8) to setting 1; 230 V/400 V and press the burner switch (Fig. 5/25) to start the gas flow. Now set the required gas delivery rate on the pressure reducer (Fig. 4/19).
Turn the rotary knob (Fig. 4/24) counter-clockwise:
Lower gas delivery rate
Turn the rotary knob (Fig. 4/24) clockwise:
Higher gas delivery rate
Secure the pressure roller spring (Fig. 26/K) to the wire feed unit again.
6.2 Electrical connection
6.2.1 Mains connection
See point 5.3
6.2.2 Connecting the earth terminal (Fig. 1/10)
Connect the welding set's earth terminal (10) in the immediate vicinity of the welding position if possible.
Ensure that the contact point is bare metal.
6.3 Welding
When all the electrical connections for the power supply and welding current circuit have been made and the shielding gas has also been connected, you can proceed as follows:
The workpieces for welding must be clear of paint, metallic coatings, dirt, rust, grease and moisture in the area where they are to be welded.
Set the welding current, wire feed and gas flow rate (see 6.1.1-6.1.3) as required. Hold the welding screen (Fig. 3/17) in front of your face and move the gas nozzle to the point on the workpiece where you wish to complete the weld. Now press the burner switch (Fig. 5/25).
When the arc is burning, the welding set will feed wire into the weld pool. When the weld nugget is large enough, move the burner slowly along the required edge. Move it to and fro if necessary to enlarge the weld pool a little.
Find the ideal setting of the welding current, wire feed speed and gas delivery rate by carrying out
a test weld. Ideally an even welding noise will be audible. The penetration depth should be as deep as possible, but the weld pool must not be allowed to fall through the workpiece.
6.4 Safety equipment
6.4.1 Thermostat
The welding set is fitted with an overheating guard that protects the welding transformer from overheating. If the overheating guard trips, the control lamp (3) on your set will be lit. Allow the welding set to cool for a time.
7. Replacing the power cable
Danger!
If the power cable for this equipment is damaged, it must be replaced by the manufacturer or its after-sales service or similarly trained personnel to avoid danger.
8. Cleaning, maintenance and ordering of spare parts
Danger!
Always pull out the mains power plug before starting any cleaning work.
8.1 Cleaning
- Keep all safety devices, air vents and the motor housing free of dirt and dust as far as possible. Wipe the equipment with a clean cloth or blow it with compressed air at low pressure.
We recommend that you clean the device immediately each time you have finished using it.
Clean the equipment regularly with a moist cloth and some soft soap. Do not use cleaning agents or solvents; these could attack the plastic parts of the equipment. Ensure that no water can seep into the device. The ingress of water into an electric tool increases the risk of an electric shock.
8.2 Maintenance
There are no parts inside the equipment which require additional maintenance.
GB
8.3 Ordering replacement parts:
Please quote the following data when ordering replacement parts:
Type of machine
Article number of the machine
- Identification number of the machine
- Replacement part number of the part required
For our latest prices and information please go to www.isc-gmbh.info
9. Disposal and recycling
The equipment is supplied in packaging to prevent it from being damaged in transit. The raw materials in this packaging can be reused or recycled. The equipment and its accessories are made of various types of material, such as metal and plastic. Never place defective equipment in your household refuse. The equipment should be taken to a suitable collection center for proper disposal. If you do not know the whereabouts of such a collection point, you should ask in your local council offices.
10. Storage
Store the equipment and accessories in a dark and dry place at above freezing temperature. The ideal storage temperature is between 5 and 30
^ C Store the electric tool in its original packaging.
11. Troubleshooting
Fault Cause Remedy
| Feedrollerdoes not turn | - Power supply not connected | - Check connection |
| - Wire feed controller set to 0 | - Check setting | |
| Feed roller turns, but does not feed any wire | - Incorrect roller pressure (see 5.4.3) | -Checksetting |
| - Roller brake set too fi rmly (see 5.4.3) | - Check setting | |
| - Dirty / damaged feed roller (see 5.4.3) | - Clean or replace | |
| - Damaged hose package | - Check the wire guide jacket | |
| - Contact tube wrong size / dirty / worn (see 5.4.3) | - Clean or replace | |
| - Welding wire welded to the gas nozzle / contact tube | - Release | |
| After a lengthy period of use the welding set does not work any longer, the thermostat (3) control light is lit | - The welding set has overheated due to being used for too long and a failure to observe the reset time | - Leave the set to cool down for at least 20 - 30 minutes |
| Very poor weld - Incorrect current / feed setting (see 6.1.1/6.1.2)No / too little gas (see 6.1.3) | - Checksetting- Check setting and fi lling pressure of the gas bottle |
GB

For EU countries only
Never place any electric power tools in your household refuse.
To comply with European Directive 2012/19/EC concerning old electric and electronic equipment and its implementation in national laws, old electric power tools have to be separated from other waste and disposed of in an environment-friendly fashion, e.g. by taking to a recycling depot.
Recycling alternative to the return request:
As an alternative to returning the equipment to the manufacturer, the owner of the electrical equipment must make sure that the equipment is properly disposed of if he no longer wants to keep the equipment. The old equipment can be returned to a suitable collection point that will dispose of the equipment in accordance with the national recycling and waste disposal regulations. This does not apply to any accessories or aids without electrical components supplied with the old equipment.
The reprinting or reproduction by any other means, in whole or in part, of documentation and papers accompanying products is permitted only with the express consent of the iSC GmbH.
Subject to technical changes
GB
Service information
We have competent service partners in all countries named on the guarantee certificate whose contact details can also be found on the guarantee certificate. These partners will help you with all service requests such as repairs, spare and wearing part orders or the purchase of consumables.
Please note that the following parts of this product are subject to normal or natural wear and that the following parts are therefore also required for use as consumables.
| Category Example | |
| Wear parts* Feed roller, wire core, mass tongs | |
| Consumables* Welding wire, nozzles, contact tube | |
| Missing parts |
- Not necessarily included in the scope of delivery!
In the effect of defects or faults, please register the problem on the internet at www.isc-gmbh.info. Please ensure that you provide a precise description of the problem and answer the following questions in all cases:
Did the equipment work at all or was it defective from the beginning?
- Did you notice anything (symptom or defect) prior to the failure?
What malfunction does the equipment have in your opinion (main symptom)?
Describe this malfunction.
GB
Warranty certificate
Dear Customer,
All of our products undergo strict quality checks to ensure that they reach you in perfect condition. In the unlikely event that your device develops a fault, please contact our service department at the address shown on this guarantee card or the sales outlet from where you bought the device. Please note the following terms under which guarantee claims can be made:
- These warranty terms regulate additional warranty services, which the manufacturer mentioned below promises to buyers of its new products in addition to their statutory rights of guarantee. Your statutory guarantee claims are not affected by this guarantee. Our guarantee is free of charge to you.
- The warranty services cover only defects due to material or manufacturing faults on a product which you have bought from the manufacturer mentioned below and are limited to either the rectification of said defects on the product or the replacement of the product, whichever we prefer. Please note that our devices are not designed for use in commercial, trade or professional applications. A guarantee contract will not be created if the device has been used by commercial, trade or industrial business or has been exposed to similar stresses during the guarantee period.
-
The following are not covered by our guarantee:
-
Damage to the device caused by a failure to follow the assembly instructions or due to incorrect installation, a failure to follow the operating instructions (for example connecting it to an incorrect mains voltage or current type) or a failure to follow the maintenance and safety instructions or by exposing the device to abnormal environmental conditions or by lack of care and maintenance.
- Damage to the device caused by abuse or incorrect use (for example overloading the device or the use or unapproved tools or accessories), ingress of foreign bodies into the device (such as sand, stones or dust, transport damage), the use of force or damage caused by external forces (for example by dropping it).
- Damage to the device or parts of the device caused by normal or natural wear or tear or by normal use of the device.
- The guarantee is valid for a period of 60 months starting from the purchase date of the device. Guarantee claims should be submitted before the end of the guarantee period within two weeks of the defect being noticed. No guarantee claims will be accepted after the end of the guarantee period. The original guarantee period remains applicable to the device even if repairs are carried out or parts are replaced. In such cases, the work performed or parts fitted will not result in an extension of the guarantee period, and no new guarantee will become active for the work performed or parts fitted. This also applies if an on-site service is used.
- Please report the defective device on the following internet address to register your guarantee claim: www.isc-gmbh.info. If the defect is covered by our guarantee, then the item in question will either be repaired immediately and returned to you or we will send you a new replacement device.
Also refer to the restrictions of this warranty concerning wear parts, consumables and missing parts as set out in the service information in these operating instructions.
FR
Danger!
Chere cliente, cher client,
1. INHctpyKuIN 3a 6e3onacHOCT
CbOTBeTHnTe HNCTpyKuun 3a 6e3oNaHocT ue Hamepnte B npJIOKeHaTa 6poWypa.
Onachoct!
Ipooyetete BcHKn yHa3aHHa 3a 6e3oNaCHOCT HNCHTPKHN. IpnOyckntepn Cna3BaHeTo Ha yHa3aHHaTAt 3a 6e3oNaCHOCT IN HNCTpyKUHTe MOrAT Da HmTa KaTO nocLeNuCA eJeKTPnueCKN Udp, NOpHAPuNN TeKKN HapAraBAnH.CbXpAHete 3a B 6bDeeCE BcHKn YHa3aHHa 3a 6e3oNaCHOCT IN HHCTpyKUHN.
2. OncaHne Ha ypeHa n o6em Ha doCTaBHa
2.1 OnncanHe Ha ypeDa (fHr. 1-8)
1.Дрьжka
2. Pa60Tha INHdkauua
3. KoHTpOHa IaMaIa TepMonpeKbCBaY
4. Kanak Ha Kopnyca
5. Macto 3a noctabrHe Ha ra30b6ytnk
6. Xoobn poKn
7. NpeBknIOyBaTeI 3a 3aBapbueH TOK
8. MHorono3nOHOHeH npeBkIOyBaTeI 3a BkI-/ N3KIOUHa He Ha HApEKeHHeTO
9. CeCon-ueence
10. HneMa 3a Cbbp3BaHe KbM Kopnyc
11. LJnayx
12. Ra3OBA IIO3a
13. Topelka
14. HanpaBraBaun poJHK
15. BepnKHa KyKa
16. Bpb3ka 3a nodaBaHe Ha ra3
17.3aBapbueHwnpM
- JIayx 3a 3auNTen ra3
- PduyuPBeHTnI
20.MaHOMeTbp (KoJIyEcTeBO ra3)
21.BoNTOBOCbeDnHeHne
22.претаителенклanaH
23.Bpb3ka wlnayx 3a 3aunTeH ra3 - Honche 3a nactpoika
- IpeBnIOyBaTeIa ropeIkaTa
- 3 x KOHTaKTHa Tpb6a
- PbUka 3a 3auNTHnKoKx
28.претанверURA
29.3abapbHaTe-ckopocTeH perynaTOp - AaanTepeH Ka6eI
- MaHOMeTbp (HaIraHaHe Ha 6yTNkata)
a. 16 x BoNT 3a xoObo n poKn
b. 16 x OcnrypnteHa npyKHHHa wa6a 3a XOIOBn poIKN
c. 16xPonIOKHa 7aH6a3aXoOBn poHN
d. 2xHema3a wJayx
k. 1x Pamka 3aunnten ra3
1. 1x3abapbHNO CTbHIO
m. 1x PpO3paHNO 3aunTHo CTbKIO
n. 2x3aDbpKaHs6yHcN3aHTHOCTbKNO
0.3xTaNk3aDpBnKa
p. 3xBontobe3a npbHKHa
q. 2xΦHKnpaaUuHHTaunTHOCTbHIO
r.1xApbXHa
s. 1x Pamka 3abapbueh wipm
2.2 06em Ha doctabka
Moln, npOBepTe OKOMJIeKToBaHocTtHa apTNKyUa c NOMOuTa Ha ONcAHNr O6em Ha DoCTABHa. Pn IINCBAuN hACTH, MoI, o6bPHTe Ce Hau-KbCHO B pAMKeTHe Ha 5 pa6OTHi dNcIeNOKyUNHa apTNHyla KbM HauN rCeHTbp 3a 06cLyKBaHE NlN KbM nyHKTa Ha npoJaXbKa, KaTO npEcdTaBHe BAIndHa pa3nncKa 3a NOKyHpaPeCn. NlAteKeH DokmHT. MoI, o6bPHTe BNHMAnHe 3a ueLTA Ha rapaHIOHHa Ta6bNiua B INHΦOpMaunrta OTHO ChoNc LyKBaHETo B KpaHa yTBAHeto.
OTBopete onaKOBkata N BHIMateJIHO 3Baande ypeda OT onaKOBkata.
- OTeTpaHete onaKOBbYHnMaTepeHn KaKTo n OnaKOBbYHnTe/H TpaHCnOpTHN OCHypOBKn (aKO NMa TaKNBa).
- PpOBepTe DaJIH OeMbT Ha DOCTaBka e nIbJeH.
- Поберете далуypedи npнадлжнотпгямат nobpeи OT TpaHcnpTupaHe.
IIOBb3MOxHOCCTaana3eTeOnakOBKaTaDo n3TnUaHeHa rapaHcNHOHHnCpOK.
BG
Onachoct!
YpebT noAnOBbUHNr MaTePnA1 He ca detChn NrpAaH! Dea He 6NaBa nIrpAaT C nIacTMACOBn Top6uHn, FOJIno MaKn DetAaN! CbseCTByBa onAcNoct Da rN rBtHaT n da Ce3adUar!
- Elenktpo3aBapb4eH anapaT
OpunnaHno ymbTbahe 3a ynTope6a - Yka3aHnI 3a TexHnKa Ha 6e3onachOCT
3. Ynotpe6a no npedHa3NaeHne
UpeBt 3a 3abapBaHe B cpea O T 3aunTeH ra3 e npiroDhen N3KIOuHTeNo 3a 3abapBaHe hctomAn No MeToDa MAF (MeTaN-AkTNBeH Ra3) KaTO ce H3IOJ3BAT CbOTBeTHnTe 3abapyHnTeLOBE nra3OBe.
MaunhaTpr6ba da ce n3no3Ba camo no npedna3NaeHneTo h.Bcra Ka no-hataBuaHa n3bH ToBA yNtpe6a He e no npedna3NaeHne. 3a npedn3BvKaHn OT ToBA uTeH Hn HapaRaBnAOT BCaKaBb BnD oTROBOPHOCT Hocn Notpe6ntT/O6cnyBaTO Taue, a He npo3BOuNTeJrT.
BaanH yHa3AHn 3a Cbbp3BaHTo KbM TOHO H3TOHHK
UpebT nonada noi Kaac A Ha cTaHdapt EN 60974-10, T. e. cBnIaT He e npEpaHauehen 3a HnO3BaHe B KInLIuHH 3OHN, B KOITo eEeKTPoCHaBaeBAHeTo Ce n3BbPwBa 4pe3 oobcctBeHata eEeKPO3axpHaBaua CNTema 3a HnCHO HaPpeKeHne, 3aIoTO npi He6bnaropnIaTHn ycIOBnHa MpeKaTa MoKe da pniunHn CmUeHn. Ako JenaTe Da n3NO3BaTe yPeDa B KInLIuHH paOHN, B KOITo eEeKTPoCHaBaeBAHeTo Ce n3BbPwBa 4pe3 oobcctBeHata eEeKPO3axpHaBaua CNTema 3a HnCHO HnpeJHne, To e Heo6XoIMa YnOTpe6bata Ha eEeKTPomarHHTen Ffntbp, KOITo DO Takaba CTeneH hAmajBa eEeKTPOMaHRHTHNE CmUeHn, Ye CbIuTe NOBEe He Obe3nOKOBat Notpe6ntela.
B INHdyctpnHaINH 30HN HNN DpyrpaHOH, KbTeO EJIeKTPoCHA6DBAHeTO He ce N3BpWA ype3 6ObIeCTBeHa CNCTema 3a HNCHO HanpeHKeHne, ypeBT MoJE da CE nIOnL3Ba 6e3 yonTpe6bA h TaKb8 fHNTbp.
06uMepHn,cbp3aHn cTexHHata Ha 6e3oNaCHOCT
NotpebntotOTROBap3aTexHnuechnpabINHOTOnHCTaInpaeHn30J3BaHeHa ypeDaBCBOTBETCTBnCnHCTpyKunTe Ha npOn3BOHTeJaOKoHNOTcneBa da ce yctahOBtEJIeKTPomarHnCMyueHn,TO OTROBOPHOCTHaNPTeBnTEnEdaOTcPAnCbIeTc NOMOuTaHaTexHnueChneT NOMOuCHnPcEDCTBa,NOCOeHnNO-TopeBTOUka,BaKnHnyKa3AHn3aCBbp3BaHEToKbM TOKOBn3TOHnK".
HaMaJaBaHe Ha emncn
OchOBHO eJeKTPo3axpaHbAe 3aBapTuHrT ypeD TpR6Ba Da Ce CbPKe KbM OCHOBHTO eJeKTPo3axpaHbAe B CbOTBeCTBnE cYka3aHnraHa npon3BODntEe. Ako HAcTbNt CMyueHn, MoMe Da Ce HaIoKn Da ce B3eMaT DOnbJIHnTeHn NpeDna3Hm MepKn, HApN. MoTHnPaeHa HfNITbP B OCHOBTO eJeKTPo3axpaHbAe (BVKe No-Tope B ToKa h, BaxKn Yka3aHn 3a CbP3BaHeTo KbM TOKOB N3TOUHN).3aBapTuHrTe Ka6eN TpR6Ba Da ce DbPHT OToKOBa KbcN, KOJIHO e Bb3MOHHO.
Teic-Meikbp
JIuza, KOHTO HOCrT eJKeHTPOHeH
KHHBOTONODbPbHaa anapat (KaTO HaNP.
Neic-MeIKbP n.T.H.), Tp8Ba Da ce
KOHcyNTnpat CbC CBOB Jekap, Ppei Da
ce HacOyAT KbM eJKeTPOdbROBN, pe3aHN
NHCTaIaUIN, INCTaIaUIN 3a N3rapAne HNI
TOCHKO 3aBapRaBe, 3a Da Ce rapaHTnpa,
Ye MArHNTHTe NOIeta, CBbP3aHn C
BVCOKOcECTOTTH eJEKeTPrMeHn TOKOBe HMa Da
NoBIIraRt Ha TeXHITe UpeiN.
IapauHIOOHnIe npnoI npTbproBcKa ynoTpe6a e 12 Meceua, 3a noTpe6nteN 24 Meceua n 3aouBa da Teue OT MOMHTa Ha 3aKynBaHe Ha ypea.
BG
4.CmBOLnI TexHnueChn DaHHN
EN 60974-1
EbponeiKa HopMa 3a yctpoiCTBa 3a eIeKTPoDbroBO 3abapBbAbeH N3TOHnHa 3aBaPbYeh ToC oPraHHeA PpOdbJHKTeJIHOCT H BA KIIIOUHeA
U。
HomHaHnHa npexeHne Ha npa3eH xoJ
U,
MpeKoBO HanpeKeHne
0MM
HnameTbpHa3aBapbHaTeI
1MAK
MaKcHMaJIeH MpeHOB TOK CTOHOCHT Ha 13MepBaHe
12
3aBapbTuK
50Hz
MpekoBa YecToTa
IP 21
Klaac 3aunra
H
H3oJauHnHaKlnac
X
IpoDJIINHITeIHIOCT Ha BIIIOUOVAHe

Cbbp3BaHe BmpekaTa

3aBapBaHe Ha MeTaJIe HnHepTeH nAKTINBeH ra3 BkIOHTeIHO 3nOITBaHe Ha TeI C fIOcOBa CbpuEBAHA

CIMBOL 3a nadaa xapaTepeHcTmHa KpBa

TpaHcΦopMatop

Obe3oNaBaHe C HOMHaHnHa CTOnHoCT B ampeRnB TOUkTa 3a BKIOuBaHe B MpeKaTa

He cbxpaHraBaIte Hn He n3no3BaIte ypeDa BbB BnaKaHa Nm MOKpa Cpe Da nn npn DbKa

Ipeynynotpe6aHa3abapyHnYypeD BHIMATEHNO npOHTeTe NcB6IOaBaTeyTBaHETo 3a ynotpe6a
3axpaHbAe O T MpeHa: 230 V/400 V ~ 50 Hz
3aBapbYeH TOK: 25 - 160 A (MaKc. 190 A)
| Побдьн即时ост На влочьache X%: | 10 | 5 25 | 35 6 | 0 10 | 0 | ||
| Зварbayен ток I₂(A): | |||||||
| 400 V: 160 130 100 85 | 55 / | ||||||
| 230 V: / 115 90 70 60 40 | 25 | ||||||
HominaHnHa nppeKeHne Ha npa3e Hoxd Uo:41V
Bapaban 3a 3aBapbueH TeI MaKc: 5Kr
DnaMeTbp Ha 3aBapbueH TeI: .0,6/0,8/1,0 MM
3aunTa: 16 A
Terno: .36,3 Krr
BpeMeTo Ha 3aBapBaHe BaKn npn OkoHa TemnepaTypa oT 40^
5.ПпсдпснанeВЕкплоациЯ
5.1 MoHTaH (ΦmR. 5 - 21)
5.1.1 MoNTaH Ha XoOBeTe N BOeU npJHn (6/14)
MOnTnpaIteXoIOBnPoJHKn(6)HnPaRbIbBaun poJHKn(14)KaKToeNOKa3aHoHaΦnFpyn7,9, 10,11.
5.1.2 MoHTaH Ha 3aBapb4HHa WnP M (17)
IocTabete 3aBapbHOTo CTbKIO (I) nHaI HERO npOzpaHOTo 3aUHTHO CTbKIO (m) B paMkata 3a 3aUHTHO TcBIO (k) (fmr.12).
PnTCHHe PHKnpaunte uNTOBe Ha 3aHTOCTbKIO(q) BbHNOBOTBOpTe Ha pAMKaTaHa 3abapHHn HnPM(s)(ΦnR. 13).
BG
IocTaBeTe pAmKaT3a 3aunTHOTO CTbKIO (k) CbC 3aBapbHOTo CTbKIO (l) INpO3paHOTo 3aunTHO CTbKIO (m) OTbTpE B KaHaJa Ha pAmKaTHa 3aBapbHnHa WnPM (s), HATNCKaHTe 3aJbPbKaUnTE 6yKnHa 3aunTHOTc CTbKIO (n) BbPx yHKcnpaunTE uΦTO Be Ha 3aunTHOTc CTbKIO (q), DOkaTO Bn3at B rHe3dTo, 3a Da ΦKcnpate pAMKaT3a 3aunTHOTo CTbKIO (k). IpO3paHOTo 3aunTHO CTbKIO (m) Tpr6Ba da 6bde OT BbHnHa t cPaHa (fnr.14).
- N3kpBBeHe NaBbTpE rOpHn p6 Ha paMkata Ha 3abapbHnHa nMp (s) (ΦIr. 15/1) n PdRbHeTe bHnTe Ha rOpHn p6 (ΦIr. 15/2). Cera n3kpBBeTe HABbTpE BbHuHnTe cTpaHn Ha paMkata Ha 3abapbHnHa nMp (s) (ΦIr. 15/3) n rN CbPbHeTe qe3 cnIHO npNTckAHe Ha bHnTe Ha rOpHn p6BoE N bBbHnHeCTpAHn. Pp BNz3aHTo B rHe3D0To Ha fKnCnpaHn UfΦTObe Ha BCBAcTaPa Hr6BaJa ce yyrt ACHO 2 npeuPAKbAHn (ΦIr. 15/4).
Cnei KaTo DbTa Tropn bTbJa Ha 3aBapbHnHa UINPM Ca CbPb3aHn, KaKTo e NOKa3aHo Ha fNpyra 16, nXhTe BoTobete 3a dPbHKata (p) OTBnB 3 OTBOPa B 3aBapbHnHa UINPM (fHr.17).
- O6bpHHeTe 3aBapbUHHnIuHPM NnoCTaBeTe dpbHKATA (r) HAppe36aTa Ha 3 60JTa 3a dpbHKATA (p). 3aTeHHeTe dpbHKATA (r) c 3 raHn 3a dpbHKATA (o) KbM 3abapbHHnIuHPM (Φm.18).
5.2 Cbpb3BaHe Ha rasa (fur. 4-6, 19-25)
5.2.1 BnOBe ra3
Pn3abapBaHe C HEnpeKbChat TeI e HeoXOdima 3aunTa OT ra3, CbCTaBbT Ha 3aunTHna Ra3 aBcNOT N36paHn MeToD Ha 3abapBaHe:
| Зашитей ragа | CO2 | Argon/CO2 |
| Метал за заварвае Нелегирана CTOMана | X | X |
5.2.2 MoHTnpaHe Ha ra3oBaTa 6yTnIka Ha anapata (ФИr.19-25)
Ta3OBaTa 6yTnHa He e B O6ema Ha oOCTaBkA!
MoHTnpaIte Ra3oBAta 6yTHHa KaKTo e nok3aHn Ho hynpn 19-21.BHmabaiTe npEpaHata Bepira (28) da cTIObHea 3dpabo H 3aBapuHnH anapar da e NocTaBeH cTbHo 6e3 OnaCHO Ta ce O6bPhe.
Onachoct! Ha MRCOTO 3a noCTabAHe Ha ra3oBN 6yTNIHN (PHR.19/5) MoRat da ce MOHTnpat cAmO rA3oBn 6yTNIHN DO MAKCHMym 20 nHTpa. IpiN H3NOJ3BaHne Ha no-ROlemn Ra3oBN 6yTNIKN cbIeCTbYBa ONACOCT O o6pTaune, cbIuTe MoRat da ce NoCTABrT Do anapata. Ako Clyaart e TaKb, rA3OBATA 6yTNIKA TpRbDa DocTaTbHo NO6pe Da ce 3aunTN ot O6pTuane!
5.2.3 Cbbp3BaHe Ha ra3OBaTa 6yTnIka
Cnei chemaHe Ha 3aunTHaTa KaanHka (frr.22/A) 3a KpaTHO OTBOPe TE BENTnla Ha 6ytNkata (frr.22/B) B NOcKa ObpaTHo Ha TAnTO.IPi HeNo6XoNDMOCT NocIcTete OT 3ambpcaBaHe CbP3BaUaTep36a (frr.22/C) Cbc cyx napau, Be3 NOMOuHa HRAKBO NOuchBaUO cpeCTBO.PnoBepTe daHn Ha peDyUnpBEHTnla (19) Hma yNtTheHne n daHn ToE B6zypueHo CBCTOHNHE 3aBnITE peDyUnpBEHTnla (19) No nocKa H aacOBHNKObaTcTrePaHa CbP3BaUaTAp pe36a (frr.23/C) Ha ra3oBAToA 6ytNkla (frr. 23).CloKeTe DBeTe Cbo6n 3a Wlayx (d) Ha Wlayxa 3a 3aunTHen ras (18).CLOhe Te Wlayxa 3a 3aunTHen ras (18) Ha Bp3KaTa 3a WlayxA 3a 3aunTHen ras (23) Ha peDyUnpBEHTnla (19) IN BP3KaTa 3a noDaBaHe Ha ras (16) Ha 3abapbHna anapat N hKcnpaIte Ha DBete MeCTa Ha CbP3BaHe C DBete Cbo6n Ha WlayxA (d). (frr.24-25)
Onachoct! O6bPHeTe BHMaHHe 3a yIbTHeHOCT Ha BCNUHn BPb3Kn Ha ra3a n BCNUHc CbeDInHeHnI! PpOBepTe Bp3KnTe n MeCTATA Ha CbeDInHBaHe Cbc CnpE 3a Teu nn CaNYHe HoDA.
5.2.4 06cHHeHne Ha peyuPbENTnla (fHr. 4/19)
MaHOMeTbpT31 noka3Ba HaIraHaTeHO Ha 6yTHnHaTaB 6apObE. Ha KOnHeTo 3a HAcTpoHa Ka (24) MoKe Da ce perynpa pa3xoJa Ha Ra3. PerynpahOTO KOInueCTBO Ra3 MoKe Da Ce OHTe Ha MaHOMeTbPa (20) BInTpN Ha MNHyTa (l/min). Ra3bT n3n3a Ha Bp3kata Wlayx 3a 3aunTeH (23) Npe3 Wlayxa 3a aunTeH ra3 (fir.3/18) ce noDaba KbM 3abApTuHnAn apat (BnK 5.2.3).
PpeynpeinteHa 6eKHa! 3a perynpahe pa3XoJa Ha ra3 BnHaH npOeepaIte KaKTo e onicaHo nO TOka 6.1.3.
PeynpBeHTnBt Ce MOHTnpHa Ra3oBaTa 6ytnkac nmocta Ha 60IbTOBOTo CbeHHeHne (21) (BnK 5.2.3).
BG
Onachoc! DeCTBnI npeMOHTn NO peDyUpBEHTnla MoT a Ce nepeInpHemaTcmoOT CneuHaN3npaHepcoHaJI. DeEeKTHPeDyUpBEHTnI H3paauTe Ha aDpeca Ha cepBn3a.
5.3 3axpaHbaHe oT MpeHaTa
PpeHn Cbpb3BaHTo ce y6eTe, Ye daHHNHe Ha TINOBaTa TaBekA CbBnaDc DaHHNte Ha MpeXkata.
- YpeTbTpr6Ba Da ce BkHIOUBa cMo 3a CbO6pa3HO N3NCKBaHHaTa 3a3eMeHN I Obe3ONaceHN KOHTaTKI.
Molra, cboIIOdaBaTe CneHnTe yka3aHnra, 3a da H36eHHeTe onaCHOCTTA OT noXap, eNeKTPnueckn ydap nHapAraBaHnHa Iuca:
HnKora He n3noJ3BaIte ypeJa c 400 V HOMHaJIHO HanpeJeHne, aKO ypeIbT e NaCTpoEH Ha 230 V. BHMaHHe: ONaCHOCT ot noXap!
Mol, otdeJeTe ypea ot eNekTpo3axpaHbAHeTo npden da HacTpOnTe HOMnHaJIHOTo HappeKeHne.
PerynnpaHTo Ha MPeKOBTo HAnpeKeHne IIO Bpeme Ha eKcPiOaTaunHa 3aBapbHnna anapat e 3abpaHeno.
- Праздн ekcnloatauaЯ На 3abapbHnna anapat, MONI, rapaHTnpaTe, Ye HAcTPOeHOTO HOMHaJIHO HanpeJKeHne Ha yPeDa CBbNaC a N3TOHnKa Ha eJeKTPnueckn TOK.
3a6eJekka:
3aBapyHnT anapat e o6OpDbaH c 400 V~ 16 A-CeCon-uenCeI.AKo 3abapyHnT anapat Tp8Ba da ce 3aDbNHN C 230 V~, to Tp8Ba da ce n3noL3Ba npInIOHeHH aanTepeH KaBe Ng 30.
5.4 MoHTaK Ha MaKaPaTa 3a TeT (Hr.1,5,6,26-34)
MaKaPaTa 3a TeI He E B O6ema Ha DoCTaBHa!
IpeenuaTbaHTo NnI npR BnI pa3mHOxHaBaHe Ha DOKymeHTaun I cBnpoBOuNTeHN DOKymeHTn Ha npOyKTInE, CbIO Taka H a Yactn E dOnyCTHMo Camo C n3pnuHOTc bflacne Ha iSC Gmb/HCH Tm6X/.
3anaeHO e npaBTo 3a H3BpWbAHe Ha TexHneckn npomeHH
BG
HΦopMaun OTHOCHO 6cnyHbHeTo
BbB BCnHKn DbpKaBn, KOHTO Ca yIOnMeHaTn B rapaHNoHHaTn KaTAp, Hne pa3noIarame C KOMNEETHN B O6cLyKbAHeTo napThbOpN, YHNTO KOHTaKTn Ie HamePte B rapaHNoHHaTn KaTAp. CbIe Tc Ha BaWe pa3noJIOKeHHe 3a BCKaKbB Bd cepBn3Hn pa6oTn KaTO peMOHT, HabABHe Ha pe3epBnH n N3HocBaUe Ce qAcTn nn Cha6dJaBaHe C KOHCymaTHBn.
HeoXoHMo e da ce B3eMe noD BHMaHne, Ye cJeHHTe qaTH npTo npoDyKT noJNeKHaT Ha eCTeCTBeHO 3NcOBA He IIN TaKOBa BCJeCDTBHe Na yIOTpe6aTa Hm peCn. CJeHHTe qaTn Ca HeoXoHm KaTO KOHCymaTbN.
| Катерия Пимер | |
| Изнocваши се частn* | ПобавATEлна ролka, лени, клыза за заземяваце |
| ЮнсуматIVES матерпалу/юнсumsатIVES* | Заварычна тел, дуOSTN, koHTакт end NaKрайнik |
| Линсваши части |
*He Ce BkIIOyBaT 3aIbIIXeJIHO B ODCtABeHnKOMPJIeKT!
PnHedocTaBunNnDeEeKtn BmMOJIM Da yBeDMITE 3a CnyaHa DeEeKt B INHTepHeT Ha WwW. isc-gmbh.info.MoJI,ObbpHete BnHMaHHe Ha ToHOTO ONCAHHe Ha DeEeKTA N BbB BCEHN CnyaI OTROBOpTe 3a CEJIHa CNeDHNTE BbnpCOn:
- YpeBt pa60tnn Ie Bce nIe deΦeKbT ce e npoRbN B caMTo Haqano?
Heio HanpaBnlo Nn Bn e BneuatIeHne npedn da ce npoBn defeKtBT (HnNkaua 3a deFeKta)?
CnopeBac B KaBO ce c bCTOn DeefKTbT Ha ypea (OCHOBHa HnKaua)? OnuweTe defeKta.
BG
TapaHcNoHHa KapTa
YBaKaemKIneHTn,
HaunTe npdyHTn noJeHnat Ha cTpor KaeeCTBEN KOHTpO.Bcnya,Ye BbnpKeIN TOBa To3n ypeH KAnrA He FyHKUHOHPa 6e3ynpeH0,TO MHOrO CbXaJIbAme 3a TOBA H Bu MoIMM da Ce o6bPHeTe KbM Haata CepBn3Ha cLyKbHa aApdeca, NocOey H Ta3n rapaHNoHHa KapTa NkM pNKTa Ha npo4Na6b, KbTeTo cte 3aKynInu ypeDa. OTHOCHO npdABBaHETo Ha rapaHNoHH npTeHUn e B cnla cIeHTo:
- Te3n rapaunHn yCIOBna perIamentnpaT doNbHInTeHN rapaunHOHN yCnyr, KOHTo no-dOly nocouehnT npOH3BOIDNEI dONbHnTEHNO oBeUaBA KbM 3aKOHOBata rapaunHa HkyBaHTe Ha HerOBnTE HOH ypeDn.BauWte 3aKOBHNrpaHUNOHn npaba He ce 3acraT O Ta3n rapaunHa.Hawata rapaHUnOHn YcLyra e 6e3nnTa 3a Bac.
2.「PapaHIOOHHa yClyra o6xBa7a caMo HeIOCTaTbIi no 3aKynHe OT Bac HOB ypeHa DOLyNOCOeHn IPOIN3BODInTe, KOITo DOKa3yeMo Ce dIbIKHa NTPOIN3BODCTBeH NII OTHACsCe Do MaTePnAHa DeΦEKT, IN NO HAH N36Op ce ORpaHnUba DO OTCTpAnRBAHETo HA TAKINBA HeIOCTaTbIi No yPeDa HIN Do NOmHnATA Ha ypeHa. MoJIr, IMaHTe ppeBnID, Ye HauNTe ypeHc Cnped IpeNa3HaueHHeTo Cn He Ca KOHCTpyuPAHN 3a IpomnUHe, 3aHaHTyNCa II INDyCTPnAHLHa YnOTpe6a.FapaHIOHOEN DOROB NOP npADn TOBa HE ce peALIN3npaTORaba, KOrato YpeDb t E bIN N30JON3BaH B pAMKHe Na HapAIOOHHNNE PEPNOB D pOMnLIeHn, 3aHaTynCKn IINDyCTPnAHLN ppeDnPrnTnI INe E bIN N3INOKeH Ha NIOOBeH Bn HATOBAPBaHE. - OT haata rapaunca ne 3KIOUHbAT:
- B3 0C H O B A H E X H N U E K H E K O M N E T E H A H C T A L A Z I, H A H C E N P A S B A H E T O H A P B K O B O D T B O T O 3a
- yIOTpe6a (KATO HApN. IIOCEPCTBOM CBp3BAHc KbM HENPABINHO MPeKOBO JInHEH NO HAnpeKHeHne
- INI BID ELEKTPNCTBO) INI BCNECTBn HA HECbSIIQDABaHTo Ha pA3npoEBoTe 3a NoDpBHKa
- INTexHHa Ha Be3Oanachost INI NOCPEDCTBOM 3HlaRaHTo Ho yPeDa Ha AHOPMAJHN YcNoBn,
- XapaKTEPHN 3A OKOIHaTcpeDa INI NopaDN IINNCBaUa NODpBHKa N O6ClyKBaHe.
- UeTN no ypea, Bb3HnKHaJI NcIeCTBne Ha HeNo3BOleHa IIN npOecHOHaIHO HEOMnTeHTHa. ynoTpeBa (KATO HApN. npeTobapBaHe Ha ypea IIN 3IOJ3BaHe Ha Hepa3peSeHN INCTpyMeHTN 3a YnOTpeBa IIN O6OpyDbaHe), npOHKBaHe Ha yKdI Tena B ypea (KATO HApN. pCbK, KaMbHn IIN npax, TpAHCnpTH NcETn), npInlahe Ha cIIa IIN YUkDn B3dEeCTBna (KATO HApN. 5eTn BCJeCTBne Ha naJaHe).
-
UeTn no ypeDa nn no YacTn Ha ypeDa, bJIkaun ce Ha n3HocBaHe BCJeDCTBHe Ha noJ3BaHe, Ha 0bUaHNO nn dpyro eCTeBHeo n3HocBaHe.
-
萨拉普斯诺夫 单位:千克 10000000000000000000000000000000000000000000000000000000000000000000000000000000000000000000000000000
- 3a da npedabte Baunte rapaHOnHH npaba, cbo6eTe, moJIa, 3a defeHTnHa ypeJ Ha: www.isc-gmbh.info. Ako hauata rapaHUnHHa ycLyra oxbaua defeKta Ha ypeJa, To He3a6abHoJe noIyUHe neonpaBeH nn HOB ypeJ.
IIO OTHOJEHHe Ha N3HOCBaUc CE, yN0Tpe6BaHn HIN DeΦeKTHN UaCTN OObpJMaE BHNMaHHe Ha orpaHneHrTa Ha Ta3N rapaHcN CbO6pa3HO INΦOpMaunrTa OTHO Cho 06ClyKbaHTo B TOBa yNbTBaHe 3a yN0Tpe6a.
BA
Opasnost!
Prilikom uporabe uredaja morate se pridrzavati sigurnosnih propisa kako bisteprijecili natanak ozljeda i steta.Zato paizljivo procitajte ove upute za uporabu/sigurnosne napomene.Dobro ih saucuvaje tako da vam informacije u svako doba budu na raspolaganju.Ako biste ovaj uredaj trebali predati drugim osobama, molimo da im proslijedte i ove upate za uporabu. Ne preuzimamo jamstvo za stete nastale zbog nepridrzavanja ovih uputa za uporabu i sigurnosnih napomena.
1. Sigurnosne napomene
5. Pre puštanja u pigeon
5.1 Montaza (sl. 5 - 21)
HOMHaJIbHoe 3NaYeHHe HAnpJKeHnXoIoCTOrO xOda
U,
HapnpeHne cetn
0MM
3anpeeHoxpaHnTBnINcNoB3oBaTb yCTpOCTBO BO BnAHHoNnCbIpO OKpyKaIOe CpeDe NnNOg DOKdEM

IpeepncnoJIb3OBAHnEM cbapOHoro annapaTa Heo6XoIMBOBHIMATEJIbHO npOHTaTb pyHOBOCTBO no 3HCnIpyaTuuN nCleDoBaTbero Yka3AHnM
NapaMeTpbl 3eKtpocTeH: 230 B/400B\~50Tc CBaOpHb TOK:....25A-160A (MaHCm.190A)
| Пюдолжнельноctы ВКЛЮЧЕНИ; X%: | 10 | 5 25 | 35 6 | 0 10 | 0 | ||
| Сварочьй ТOK I₂(A): | |||||||
| 400 V: 160 130 100 85 | 35 / | ||||||
| 230 V: / 115 90 70 60 40 | 25 | ||||||
HOMHaJIbHOe 3NaueHHe
HanpReHnXoLoCToro XoJa Uo: 41B
Bapaban CBaOpHOrO 3JeKToPaMAkCMm.: .5Kr
DnAmEtP CBaOpHOrO 3JeKToPa:0,6/0,8/1,0MM
PpeOxApaHntelb: 16A
Bec: 36,3Kr
IpoJOnKHTeJIbHocTcCBaRKn npN TeMnepaType OKpyKaIOUeI cpebl 40°C.
RU
5. Npeed BBODOM B3Hcnpnyatauio
5.1 C6opka (pnc. 5-21)
5.1.1 MoHTaH XoOObbIX N NOBOpOTbIX poINKOB (6/14)
YCTaHOBNTb XOJOBbIe poliNk (6) N NOBOPoTHbIe poliNk (14) TAK KAK NOKa3aHo Ha pncyHKax 7, 9, 10, 11.
5.1.2 YctaHObKa 3auNTHOrO 3KpaHa (17)
BLOKHTbCTeKIOIINHcBAPKn(I)NHaHero npo3paHHe 3aunTHoe CTeKIO(M) Bpamky Ira 3aunTHoro CTeKna (k)(pnc.12).
KpeenHbIe uHTnOtb3aunTHoroCTekla(q) BdaBnTb BOTBePcTne Bpame 3auTHoro ekpaHa(s).(pnc.13)
BLOKHTb pamyI3aunTHoro cTeKHla (k) C cTeHlOM dIy CBapKn (I) nIpo3paHbIM 3aunTHbIM cTeKHOM (m) I3HYTpN B BbEMKy B pAmE 3aunTHORO 3kpHa (s), BdaBHb KpeeKhble rHe3da 3aunTHoro cTeKHla (n) B KpeeKhble wTnTb 3aunTHoro cTeKHla (q) Do tex nop, noka OHNe BOUYT B 3aueJIeHne dIy TORO, YTO6bl 3aHcnpoBaTb pamyI3aunTHoro cTeKHla (k). Ipo3paHoe 3aunTHoe cTeKHlo (m)doJHKHO HaxoDnTcb ChapyKn. (pnc.14)
3aHybBepxHnKaHTpaMb3aHTHO 3KpaHa(s)(pnc.15/1.),a TaHHe yIbI BepxHrO KaHTa (pnc.15/2.) BOBHyTpB. 3aTeM 3aHyTb BHeHHIO CTOpOHy paMb3aHTHO 3KpaHa(s)BOBHyTpB(pnc. 15/3.) H 3aTeM NytEm CnJIbHO CkHMAnH CoeHNHTb yIbI BepxHrO KaHTa N BHeHHe 60KOBnHi. Ha KaJDoI CTOpOE npi FHKCaun KpeEnKhblX UTNΦTOB DOJIHXo 6bITcBluHNo 2-a OTYeTTNBbX UeJIYka (pnc. 15/4.)
EcII 06a BepxHnx yIra 3aunTHoro 3KpaHa CoeJInHeBt KaK NOKa3aHO Ha PnCyHke 16, To HJHo BCTaBbTb BNHTbl dIy pyoTHn (p) CnapyKn CKBo3b 3OTBePcTnB 3aunTHOM 3KpaHe. (pNc.17)
Pa3BepHyb 3aunTHbH 3KpaH N BCTABHTb pyKoTHy (r)pee3 pe3b6y 3 BNHTOB nla pyKoTKn (p).PpoH npBnHTbPyKoTHy (r) npn NOMOu 3raEan dpyKoTKn (o) K 3aunTHomy 3kpaHy (pnc.18).
5.2 PoiKJIouHeHne ra3a (pnc. 4-6, 19-25)
5.2.1 Tnblra3OB
PnCBapKe C NMOuBIO NoCTyauoero HnpepbIBHO 3JeKTPoDa Heo6xOIMMa 3aunTa ra3OM,CocTaNHeHne 3aunTHOrO r3a 3aBNCHT OT Bb6paHHoro MeToDa CBapKn:
5.2.2 YctaHObKa r3oBOrO 6aJIIOHa Ha yctpoiCTBe (pnc.19-25)
Ta3OBbI 6aIIIOH He BXOINB O6bEM NOCTABK!
UctahOBHTe ra3OBb 6aHIOH, TaK KaK noKa3aHO H naCpHykax 19-21. BHNMaTeIbHo CJeDHe 3a npOuHocTbKpeJIeHnCTpaxOBOuHOn ceHn (28) n3aTeM, YTObbl CBapOHyb Annapat CToRJ yCTOuHBO.
Onachoctb!Ha noctabke nla yctahobkn ra30bix 6aIIOHOB (pnc.19/5) pa3pewaetcra yctahabnBaTb TolbKO r3oBble 6aIIOHbI eMKocTbO DO MaKCHMaJIbHO 20 IITPOB.
PnHcNoJb3oBAHNr Ra3oBbX 6aIIOHOB
6oJIbWero p3mepa B03HnKaeT onacChtB
onpOKdIBaHHN, NO3OMy TaHne 6aIIOHbI
pa3ewaETcRA yCTAHABnBA TbOLko prdOM C cYCTPOICTBM.B TAKHx CNYaHx HEo6xoIMBO D oCTaTOHON CTENEHN 3aUHTNb r3oBbI
6aIIHOOT ONpOKdIBaHHN!
5.2.3 NpOcEHHHe RaOBO 6aIIOHa
PocLe ydaJIeHn 3aunTHoKpbUHN (pnc.22/A)
OTKPOIte Ha KOpOTKoe BpeMBAHTNb 6aIIOHa (pnc.22/B) B HApabJHEnn B CTOPHOY OT c6B.
Ppi Heo6XoDmOCTn OChTne OT rpa3n
pe3b6y nooCoEHHHe (pnc.22/C) cyxoi
TPaIKoB 6e3 NCNoB3ObaHnAR KaHX NN60
OCHNTeIbHbIX CpeCDt. PnpOBepTE HAIINue
yIIOHTHeJI HA peDyKTope (19) uY6eINTeCB b
6e3ykOpIN3EHNOCTn ERO COCTOHN. HABINTe
peDyKTop (19) B HApabJIeHN BpaUeHNs
YacOBOn CTpeKN Ha pe3b6y nooCoEHHHe (pnc.23/C) ra3oBOrO 6aJIIOHa (pnc.23).HaDeTB
obaXOMyTa pykAb (d) Ha pykAB 3aunTHoro r3a3 (18). BCTaBnTB pykAB 3auNTHO r3a (18) Ha nooCoeHHHe pykAb 3auNTHO r3a (23) Ha peDyKTop (19) nnoCoEHHHe nOdBora r3a (16) Ha CBAPOHm Annapate n 3aФINKCMPOBaTb
B 06ONX MecTx NoCooEHn pni NMOOuN
XOMyTOB pykAba (d) (pnc.24-25).
RU
Onachoctb! BHMaTeIbHo CJIeDInTe 3a repMeTNUHOCtBIO BCEx NpKJIooHeHr Ra3OBO cnCTeMbI n CoeHNHeHr! PpOBepBte MeCt aNkIooHeHn I CoeHNHeHn PpN pOMoUa a3o30Jn dA n6hApHyKeHn yTeKn nII MblbHO BDObl.
5.2.4 Iorchenne pa60tbppeyKtopa (pnc. 4/19)
MaHometp (31) noka3bIbaeT daJIbeHne B 6aIIIOHe B 6apax. C NOMOuIbIO KHOJKN HAcTpOHH (24) MOHHO OTepyIInPOBaTb KOINHECTBO npOnyCKaEMORo ra3a. YcTaHOBJIeHHOE KOINHECTBO npOnyCKaEMORo ra3a MOHIO CHITaB Ha MaHometpe (20) B IHTPAX B MNHY (l/min). Ra3 bIXOHTn3 NOCoEOINHeHn pyKaba 3auNTHorO ra3a (23) n NODaOTcR DaJIbSe No pKaBY 3auNTHorO ra3a (PNC.3/18) K CBAPouHOMy annapaTy (CMOTpnt E5.2.3).
Yha3aHne! PerynnpOBky KOnIueCTBa nponycKaemoro rataOcuyeeCTBnIte Bcerda TaK, KaK 3TO ONIcaHO B pa3dene 6.1.3.
PeDyHTOp KpeHITcR npn NOMOu BNHTOBORo coeHNHeHr (21)Kra3OBomy 6aJIHOHy (CMOTPte 5.2.3).
Onachoctb! BmeWateIbCTBa BycTpoIcTBO peykTopa n peMOHTbIe pa60bI Ha HEM pa3pewaeTcOcUeCTBIArTb TOLko cneuaJIncTAm. BbiJInTe HeNCpabHbI peykTop npn Heo6xOIMocTn no aDpecy clyKbI cepBICA.
5.3 Napametpbj 3JleKtpocetn
IpeTeM KAK BKLIOHTyCTPOINCTBO y6eNTecb, YTO DaHnBHe Ha TUNOBO TabNnue COOTBeTCTBYOT npaMeTpam 3NEKTPnueckOn CeTH.
UcTpoCTBO pa3peaetcnoKIOuTaTOIbKO HAnJIeHaaUMO6pa3OM3a3EmJIeHHbIM 3aUHcEHbIM npEOxpaHHTeMeIeHTeCeJIbHbIM p03eTHaM.
HeoOIOMO CLEIOBAtb CLEyIOUIM yKa3aHnM dIgToro, TTObI N36ExATb ONaCHOCTN NOXapa, yDapa TokOM IN TpaBMIpOBAHn IIOe:
3anpeeHNO nokKIOvATb K yCTPOIcTBy HOMHaJIbHOe HAnpRKeHHe 400 B,ecn yCTPOIcTBO nepeKIOUeHO Ha 230 B. OctopoJHo:OnaChOcTb noKaapa!
Heo6xOJHMOOTCOeHNHTyCTPOINCTBOOTIHTAHN3JIeKTHPNUeCTBOMnpexKe,yeM
pepeKIOUaTb HOMHaJIbHoe HapJKeHHe.
3anpeeNo nepeKIOueHne HOMHaJIbHOrO HanpJxHn BO Bpempa60b CBapOHoro annapata.
IpeedKcnnyataune CBapOHHo annapata HeobxmoHy6eHbTcB, YTO yCTaHOBJHeHOO HOMHaJIbHOe HnprKeHne ycTPOcTBa COOTBeTCTBye HAnpReHIO cTeu 3JleKTPOnHTaHH.
Hhopmaa:
CbapoHb annapaT cha6KeH CeCon
tkeKepom, paccHTaHHbIM Ha 400 B,
16 A. EcJn CbapOHy b annpaT doJIHeN
3KnCyATnpOBaTBc C hApRJaHEHM 230 B,
TO Heo6XoIMHO HcNoB3OBAb PtIIOHeHHb
aadTepHb KabEJI N30.
5.4 MoNTaH HAtyUHN 3JIeHTpOIOB (pnc.1,5,6,26-34)
Katyusha 3JneKtpoOB He BXoHIT B O6bem noCTabKn!
5.4.1 Tnbl 3JeHTpOIOB
B 3aBnCmOCTN O BnDa pa60t HcNoIb3yIOTc
pa3IINHbIE CBAPoHbIE 3eNEKTPoDb. CBapoHbI anpapat MOHO HcNOJb3OBaTb C CBAPoHbIMn
3eKTPoDAMn DnAmetPOM 0,6; 0,8 mm MM
n 1,0 MM. COOTBeTCTByUOHe nOdaUOHe
poLNHN KOHTAOKThbE Tpy6bE npINOJOHeHbIK
yCTPOCTBy. IOnaIOuH pONiK, KOHTAOKTHbE
tpy6bI NceHne 3eNEKTPoDA DOJIKNbI BCERda
COOTBeTCTBOBaT bDpy dpyry.
5.4.2 EmKocb KaTywKn 3JeKtpoDb
BycpoIcTBO MOHNO yCTaHaBnBaTb KaTyuWN 3JIeKTOPOOB BeINuHm MaCmMaJIbHo Do 5 K.
CbapnBaemble DeTaJI NdoJIHbI B ObnactN CBAPK6blcB6OoHbIMOT KpaCHN, MeTALHueCKNX NOKpbITNI, rpr3N, pXaBHNbI, Hnpa N BlaRn.
OtperyIpyte CBapouhny ToK, noauy 3JIeKToPoJa n KOnuYeCTBO npOnyckaemoro r3a (CMOTpTe 6.1.1-6.1.3) COOTBeTCTByIOUIM 06pa3oM.
Дерхитс CBAPОнь 3нран (pnc.3/17) nepeid ЛицOM, И понecит eязOBоe conлк Мecу, Ге нжнO OCUseCTBNTb CBapky. 3aTeM 3aIeNcTByIte nepeKJIIOuAteIb ropelHn (pnc.5/25).
Ecnnrnpnt 3nEeKtpnuechka dyra, to yctpoiCTBO nodaet 3nEeKToPD B CbapOHyo BaHny. Ecnn pa3Mep rda CBAPHOI TOCHk6ydt DocTaTOhen, TO HyHXo MeDIIENHBO BcTe ITOpeNkY BdoJIb KaHTa B HeoBXOnIMOM MceTe. PnH HeoBXOnIMOCTH ocUyIeTbnIteJeIeKHe NOKaUNBaHNdIg TOrO, qTO6bl HEMHORO YBeJIuNtB CbApOHyo BaHny.
BbIaBnTE IeAaBhIe yCTaHOBKn CBAPoCHOrTOKa, CHOPoCTN POnaH NJIeHTPoda N KOJIueCTBO IpOpyCKaEMOR FOa3a IyTEm npOBeHnna Ipo6HoCBAPKn. Ppi IeAaBHom OcUyIeCTBJeHn CbIbIe Hn paBHOMepHbIyM CBAPKn. Iy6bHa nPoKrHaHn DOJHKHa 6bITb KaK MoXHO 60bJaE, HO CBAPoHaN BaHNA BCE Je He DoJiHa nPoBaJIHTCBaCKO3b 06pa6aTbIBaEmyIO DeTalb.
RU
6.4 3aunTHbIe npncnoco6JeHHA
6.4.1 DaTCHK TemnepaTypbI
CbaOpHbI annapat cHa6KeH npncoc6beHem 3aunTbI OT neperpeBa, KOtOpoe 3aunuaeT CbaOpHbI TpaHcFopMaTOp OT neperpeBa. B Tom cIyuee, ecn cpa6oTaet 3aunTa OT neperpeBa, TO cBeHTcN HOHTpOlbHaa lamnoKa (3) Ha BaWem yCTPOCTBE.
CbapoHbI annapaTdoJKeH B TeueHn HekOToporo BpeMeHN OxJaKaDaTbcra.
7. 3aMeHa Ka6eI NaTaHnA 3JIeHTpocEtN
Onachoctb!
Ecni 6ydt nobpeHkabIb nHTAHnO TJIeKTPocETn 3TOr yCTPOiCTBa, TO ero DOnJKeH 3aMeHNTb N3ROTOBnTEb yCTPOiCTBa, ERO cLyh6a cepBnca HnDpyroe IInc o NIObHOH KBAHnHKnAaueN dIra TOR, YTObI N3BeKaTb onaHcTei.
8.OuHCTHa,Texo6cnyKHBaHne 3aKa3 3anaChbIX deTalei
Onachoctb!
Ipeep BCempa6oTaMnNo OChTKe Heo6xoJIMOBbHyTb uTeKep n3 po3eTKaJIeKTpoCeTN.
8.1 OuInCTHa
CopeKHTe 3aunTHbIe npncnOc6JIeHnI, BEHTINIAIOHNbIe IeJIIN KOPNc DIBrAteJI CBO6oHbIMn HACoJIbHO 3TO BO3MOHHO OT Nblnn IN rpr3H. IpOTpIte yCTpoiCTBO qHCTOIN BETOJbIO IN pOdyTe cKaTbIM Bo3DyXOM NOH3KIM DaJIeHnEM.
Mby peKomeHMyem OUnuTaYyCTPOHCTBO cpa3y nocJe KaJDoRo NcNoJb3OBAHN.
PeyIaRHO OuHuaTe yCTpoiCtBO BlaHHOBETObO C HeoJbUIM KOnIYeCTBOMXnKOrO MblA. He NcNoJIb3yIte CpeDCTBaДЯ OUnCTHn HIn pactBOpbi; OHI MOrYTNOBpeNTb PIACTMaccOBble YactNycTPOiCTBa.CJeIeHTe 3a Tem, YTObi BOda HeNoIa BOHyTpby cTpoiCTBa.IOnaJaHHe BOByB ALeKTpuYeCKoe YcTpoiCTBO NOBbIaAe TOnaCHOctb NoLyueHnYdapaTOKOM.
8.2 Texo6cIyKuBaHne
BHTpyu yctpoiCTBa HET HNKaHx DeTaNe, HxKdaIoXxC BTEXHueChom yxoJe.
8.3 3aKa3 3anachbIX DeTanei:
Pn3a3e 3anachbix DeTaneHne Heo6xOIMO yka3aTb CNeDyUOpHe daHHbe;
TnyctpojCTBa
HomepapTuKynaycTroPcTBA
- ΜεντημκαμηοHHbH HOMep yCTpOHTBa
- HOMep HEO6xOДMо 3aNaCHOДeTajN
AHTaIbHbIe Hebl HnHΦopMaun HaXoJrTcHa cTpaHnue www.isc-gmbh.info
9. Ytln3aunn n BtopnHoe HcnoJb3ObaHne
UcTpoCTBO NOCTaBIAHETC B ynaKOBHe
dI npedOTbpaueHn NOBpeKeHn npi
TpaHCnpTPOBHe. 3Ta ynaHOBKa ABJIeTCs
cbIpbem I N03TOMy MOkET 6bITb HcNoIb3OBAHa
BHOB bNn HapabLeHa H NoBTOpHyIO
nepebaOHTy CbIpBa.YcTPOJCTBO I erO
PnHaJNeHHoCTn H3rOToBJeHbI H3 pa3JIuHbIX
MaTePnAIOB, HApnPmep, MetaIIa N IlaCTMacc.
He bIbpaCbIaBe TdeEhThBE YcTPOCTBA
BmEcTe C bIbTOBbIMM OTXoDAmI. JIa NpabUNbHOJ
YtINImauny UcTPOCTBO Heo6xOdmIO cDaTb B
noDxOJaum nyHKT npHema.EcIn Bbl He 3Haete,
rIe HaxOHTcN pyHKT npHema,yTOCHNE 3TO B
OpraHAX KOMMyHaJIbHOr OYPabLeHnR.
10. Xpachenne
XpaHnTe yCTPOCTBO I erO npHaJNeHHoCTN B TEMHOM, CYXOM HEnOpDBepKeHNOM BO3eIcTBHO MOp03a, a TaKHe HeIOCTynHOM dIa DeTeM MeTe. OtnMaJIbHaT TempePaTypa XpaHnHa HaxoDITcMeJdy 5 C n 30 C. XpaHnTe JAEKTPOnIHCTpyMeHT B opRnHaJIbHoYyNAHOBke.
RU
11. Понск Немсправност (Московский).
- He 683aTeJIbHO BxOJrT B 68bem NoCTaBKn!
PnObHApUHeHmJeFekTobHmHeNCpabHocTeMbI pOcHm Bac 3aBnTb O TaKOM cLyae B CetN INHTepHET Ha caTe www.isc-gmbh.info. Obpatnte BHMaHne Ha ToCHoe ONCAHne HeHCnpabHOCTN B IIO6OB cmLyae OTBeTbeHa cIeDyUoHne BONpOcbi:
- YcTpoIcTBO yHe pa6oTaIO nH OHO 6bIO HeCNpPaBHBIM c Camoro HauJa?
Bam 6pocnlocb yTo-ln6o B rna3a nepeD BO3HKnHOBeHHeM HeuCnpabHocTn (npn3HaK nepeD HncnpabHocTbO)?
KaHyIO HeNCpabHocTb HMeET ycTPOcTBO, NO BaWemy MHeHHIO (OCHOBHO npn3HaK)? Ommite 3Ty HeNCpabHocTb.
RU
TapaHTnHoe CBnTeJbCTBO
YbKaemnokynatelbHnua, yBaKaemnokynatelb
Haun npOdykTb npoxoJrTa TuaTeBHeuKoHTpoJI KaecCTBa.EcIn 3to yctpoIcTB Oce He 6ydt FyHKUHOHPOBaT 6e3ynpueH, Mbl npocm Bac obaTbcra Hnaw cepBncbH otdeI no aDpcy, yka3aHHOMy B 3OTom rapaHTnHOM TaIOHe, nIN B mara3HN, B KOTOpom Bbl npno6peN yctpoIcTB. PnnppeBraHnrrpaHTnHbIX TpeOBaHn DeiCTBYOT cJeDuOuNe ycIOBna.
- HactoIe npaBnla rapaHTn peryIpyOT donoHnTeIbIhIe ycIOBnOka3AHra rapaHTnHbIX ycIyr, KOtOpbe HnHeynOMnHTbI npo3BOJITeIb 06cneYBaAET NOKyNaTeJIAM CBOHX HObIX yCTPOICTB BdoONHeHKe YCLOBnM rapaHTn B COOTBcTBN C 3aKOHOM. 3TN rapaHTnHbIE 06a3aTeIbCTBa He 3aTpaNBAiot BaAn 3akOHbIe rapaHTnHbIe Tpe6oBaHn. HaanrapaHTnHbIe ycLytn dJa Bac 6ecnIaNthIb.
- RapaHTnHbIe yCyIyI paCnPoCTpaHIOCTcToIbKO Ha deEeKbHO HOBO yCTPOINCTBa HKeynOMaHyTO pOn3BODITJIa, KOTOpoe Bbl npNo6peJIi, CBa3AHbIE C HeIOCTaKOM MaTePnAHa IIN pOn3BODCTBEHHbIM 6paKOM, N OrpAnuHbAIOTcN IO HaewMy BbIOpy YcTpaHEHMe TaIKx DeEeKbTO yCTPOJCTBA HIN ZAMeHOY yCTPOINCTBA. YUHTe, TFO HAHN YcTPOINCTBA He npDeHa3HaNeHbI DJIH NCNOB3OBAHnB IN POMbIIeHHbIX cIeJX, B peMecJIeHHOM pOn3BODCTBE H Na npOeCECHoHAhOB OH OChObE. NoTOMy rapaHTnHbI DOROBOP ChTaETcH HeJeCTBtIELbHM, ECNIy CTPOINCTBO HCNOB3OBAIOCb B TeUHeNc RaPaHTnHOrO cPoka Ha KyCTapHbIX, pOnMbIIeHHbIX npDEPiPrnTIAHX NBI BpeMecJIeHHOM pOn3BODCTBe, a TaKHe NODbepraIOcb conocTabmOH Harpy3ke.
-
Haa rapaHTnHe pacnpoctpaHReTc Ha:
-
NOBpeKdEHHy yCtpoiCTBa, BO3HKnIhne B pe3yIbTaTe HecobIoJeHn pyKOBOcTBA nO MOHTaKy IIN HeNpaBnIbHO rMOHTaKa, HecobIoJeHn pyKOBOcTBA nO 3HCnIpyatauyn (HaNPIMep, npn noKnIOHeHHn K CETn C HepBaBnIbHbIM HApPaeHeHem NIn pOdom ToKa), HecobIoJeHHn Tpe6oBaHn KacatelbHO texHceckoRo o6cLyHnbAHn u Tpe6oBaHn TeXnKn 6e3OnaCHocTH, BO3eMCTBnHa YcTPO CTBO aHOMaIbHx ycIobn OkpykaIoJe cpeDbI IN HeOCTaTOHOrO yXoJa nTexHnueckoro O6cLyHnbAHnia;
-
NOBpeKdHeNy yCTPOIcTBa, BO3HKnUWe B pe3yIbTaTe He npabuHbHO r Hn HeHaJIeKaIeRc
MCNoIb3OBAHnA (HanPmHeM, nepepy3Ka YcTPOIcTBa IIN nPImHeMeHnE He dOnyUeHbIX K
HCNoJIb3OBAHnIO HacAOk IN NpInpIeJnxHcOte), IONaDAHN B yCTPOIcTBo NOcTOpOHnX
PpeMDtOB (HanPmHeM, necka, KamHeN IIN pblN, NOBpeJdeHnI pN TPAHCNOPTPiBOBe),
PpIMHeHnICbl bI IN BHEUnx BO3DeIcTBn (HanPmHeM, nobpeJdeHnI pN NaDEHH); -
NOBpeKdEHHy yCTpoiCTBa HJIN YacteY yCTpoiCTBa, CB3aHHbIe C N3HOCOM B CBA3N C 3KcNyaTauneH, O6bYHbIM HJIN DpyrIM ECTECTBEHHbIM N3HOCOM.
-
RapaHTnHbI cpoK coCTabJIeT 60 Mecra, OTCyET HaHnHaETcC oD Hn NOKynu yCTpoCTBa. RapaHTnHbI npaba Heo6xOdmo PpeBbIaTb Do nCTeueHHa CPOka rapaHTnB TceHHn DByX HeJeNb NocLe TORO KAc6yEt OBapUKeHa HeNCpAbaHOCb. 3aBHeHHa Ra paHTnHOe 6CbJYnBuHae NocLe nCTeueHHa CPOka rapaHTnHe pNHMaTOc. PeMOHT IIN 3aMeHa yCTpoCTBa He BeTeK NpOJIeHHo RapaHTnHOrO cPOka, TaHKe Prn OKa3AHn TakoYcLytn OTCyET HOBOrO rapaHTnHOrO cPOka Ha YCTpoCTBO IIN BO3MOHXo YCTaHOBLeHHbIe DeTaJIHn He HaHnHaETc 3aHBO. 3To yCIOBne DeIcTBeyet TaHKe Prn ObaaehHN B MeCThBi CEpbCHbI OTDeI.
5.Длпрдьгелнога rapаннногутpeбоганязapernctppyntdeфekthoe yctpoctBO ha caHTe:www.isc-gmbh.info.Ecnna hawa rapahtnpaacnpoctpanraetcaHa deΦeKt yctpoctBa,BbI He3aMeDInTeBHO nOlyHTE OTpeMOHTNPOBAHHO HIN HOBOE yCTPOCTBO.
TcKaacaeTcBbCTpon3HaunBaOuXxCpaXoHbIX DetaleN HeoctaoXHX KOMHOHTOB, Mbl Obaaem BHMaHHe Ha OrpauHne 3ToI rapaHTn COIaCHO HOpMaUIN O cepBCHOM 06cnyHbAHn HactoJero pyKOBODCTBaNO EKnlyatauN.
DK
Fare!
2.1 Taeislysing (myndir 1-8)
- Haldfang
- Astandsljos
- Prufljos hitaskynjara
- Tækishlif
- Undirlag fyrir gasfl osku
- Hiol
- Suǒustraumsrofi
- Hófuǎrofi / val spennu
- CeCon-Tenging
- Jarotenging
- Barki
- Suohaus
- Suohalfang
- Beygjuhjol
- Keojukrokar
- Gastenging
- Suohjalmur
- Gasslanga
- Prystiminnkari
- Flaeismaelir (gasfa eoi)
- Tengingar
- Oryggisventill
-
Tenging gass
-
Flaedisstilling
- Suurofi
- 3 x snertiror
- Haldfang fyrir taekishus
- Oryggiskedja
- Hradastilling suovirs
- Millistykki
- Prystingsmaelir (prystingur gass)
a. 16 x skrufur fyir hjol
b. 16 x spenniskifur fyrir beygjuhjol
c. 16 × skifur fyrir hjol
d. 2 × slonguklemmur
k. 1 x Rammi fyir suougler
I. 1x suouqler
m. 1 x taert hiffoargler
n. 2× festingar fyir gler
o. 3× rae fyir haldfang
p. 3 x skrufur fyrir haldfang
q. 2 x pinnar fyrir gler
r. 1 x haldfang
s. 1 x suohjalmur
2.2 Innihald
Vinsamlegast yfi rfi hultinn og athugio hvort allir hlutir fylgi me sem taldir eru upp i notandalei beingunum. Ef ahluti varntar, hafi o ba tafaraust, eoa innan 5 vinnudaga aftir kaup a teki, sambadi pv jonustubod okkar eoa pa verslun sem teko var keypt i og hafi me innkuapanotuna. Vinsamlegast athugio tof u aftast i lei beiningunum varandi hluti sem eru ayrgoir.
Opni ombuairn og taki taki varlega ut ur umbuunum.
Fjarlegi oumbóirnag lésingar umbóda / taekis (ef slikt er til staðar).
- Athugio hvort aə allir hlutir fylgi meə tækinu.
Yfirfari takiog aukahluti pess og athugihvort aofrutningaskemmdir séu afinna.
Geymi ombuöirnar ef hægt er par til að ábyrgöartimabil hefur runnó ut.
Haettal!
Raftenging: 230 V/400 V ~ 50 Hz
Suoustraumur: 25-160 A (max. 190 A)
| EinschaltdauerX%:101 | 5253 | 560 | 00 | ||||
| SchweiBstroml 2 (A): | |||||||
| 400 V: 160 130 | 100 | 85 | 65 | / | |||
| 230 V: / 115 90 70 60 40 | 25 | ||||||
Spenna an alags: 41 V
Suovirrulla hamark: 5 kg
Pvermal suovirs: 0,6/0,8/1,0 mm
Öryggi: 16 A
Pyngd: 36,3kg
Suutimar gilda vi 40^ umhverfi shita.
IS
5. Fyir notkun
5.1 Samsetting (mynd 5-21)
5.1.1 Samsetining hjola (6/14)
Hjol (6) og beygjuhjol (14) eru samsett eins og synt er a myndum 7, 9, 10, 11.
5.1.2 Samsetning suohjalms (mynd 17)
Leggio suogler (I) og glera hlifargleri (m) i rammann (k) (mynd 12).
- Prysti festipinnunum (q) fyir hllfargleri at utanverou i gotin a hjalminum (s) (mynd 13)
- Setjio rammn (k) meo suoglerinu (l) og glera gleriu (m) ao innanveru inn i hjalmin (s) i par til gert op, prstio festingunum (n) a festipinnana (q) par til smellur til pess ao trygga hlfoargleri (k). Glera hlfoargleri (m) verour ao liggja ao utanveru. (mynd 14)
Beygiö efri kann't suohjámsins (s) innavið (mynd 15/1) og brjótið inn hornin á efri kanti-num (mynd 15/2). Beygiö nu ytri hlió suohjámsins (s) innavið (mynd 15/3) et tengio saman efri hornin mey trihíina medpvi abrysta peim saman. A hverri hlió verour adsmella i pinnunum báum (mynd 15/4.)
- Ef aō bæöi efri hornin á hjáminum eru eins og synt er á mynd 16, stingio pá skrufunum fyrir haldfangio (p) a òutanveróur i gengum gotin 3 á hjáminum. (mynd 17)
Snuiu suuhjalminum viog renhi haldfanginu (r) yfir vindur skufanna (p) brigga fyir haldio. Skufi haldio (r) fast me premur rom (o) a suuhjalminn. (mynd 18)
5.2 Gastenging (mynd 4-6, 19-25)
5.2.1 Gastegundir
Til suδu meo helium suδuvir er gas naosinlegt. Samsetting gastegunda er mismunandi eftir efni sem soöö er i:
| GastegundCO2Argon/CO2 | ||
| Til suǒu à mǎlmi: Ölbandaostál | X | X |
5.2.2 Gasfl aska fest a taki (mynd 19-25)
Gasfl aska fylgir ekki meo taekinu!
6.2.1 Tenging rafrasar
Sjali 5.3
6.2.2 Jarotenging tengd (mynd 1/10)
GB explains the following conformity according to EU directives and norms for the following product
□90/396/EC_2009/142/EC
89/686/EC_96/58/EC
2011/65/EC
□2006/42/EC
Annex IV
Notified Body.
Notified Body No.:
Pan-Ne:
2000/14/EC_2005/88/EC
Annex V
Annex VI
Noise: measured LPA = dB (A); guaranteed LPA = dB (A)
P = KW; L/0 = cm
Notified Body:
2004/26/EC
Emission No.:
Standard references: EN 60974-1; EN 60974-10
Subject to change without notice
Archive-File/Record: NAPR003413
Documents registrar: Martin Guggenberger
Wiesenweg 22, D-94405 Landau/Isar


EH 08/2015 (02)


- Safety regulations
- Danger!
- Layout and items supplied
- Layout (Fig. 1-8)
- Items supplied
- GB
- Proper use
- Important information about the power connection
- General safety information
- Reduction of emissions
- Main current supply
- Pacemakers
- Symbols and technical data
- EN 60974-1
- mm
- \~50Hz
- IP 21
- Before starting the equipment
- Assembly (Fig. 5-21)
- Installing the castors and guide rollers (6/14)
- Fitting the welding screen (17)
- Gas connection (Fig. 4-6, 19-25)
- Gas types
- Fitting the gas bottle on the unit (Fig. 19-25)
- Connecting the gas bottle
- Information about the pressure reducer (Fig. 4/19)
- Mains connection
- Please note:
- Fitting the wire spool (Fig. 1, 5, 6, 26-34)
- Wire types
- Wire spool capacity
- Inserting the wire spool
- Description of the wire guide unit (Fig. 26-27)
- Inserting the wire spool (Fig. 26, 27)
- Inserting the welding wire and adjusting the wire guide (Fig. 28-34)
- Operation
- Setting
- Setting the welding current
- Setting the wire feed speed
- Setting the gas delivery rate
- Electrical connection
- Mains connection
- Connecting the earth terminal (Fig. 1/10)
- Welding
- Safety equipment
- Thermostat
- Replacing the power cable
- Cleaning, maintenance and ordering of spare parts
- Cleaning
- Maintenance
- Ordering replacement parts:
- Disposal and recycling
- Storage
- Troubleshooting
- Fault Cause Remedy
- Service information
- Warranty certificate
- FR
- INHctpyKuIN 3a 6e3onacHOCT
- Onachoct!
- OncaHne Ha ypeHa n o6em Ha doCTaBHa
- OnncanHe Ha ypeDa (fHr. 1-8)
- 06em Ha doctabka
- BG
- Ynotpe6a no npedHa3NaeHne
- BaanH yHa3AHn 3a Cbbp3BaHTo KbM TOHO H3TOHHK
- 06uMepHn,cbp3aHn cTexHHata Ha 6e3oNaCHOCT
- HaMaJaBaHe Ha emncn
- Teic-Meikbp
- 4.CmBOLnI TexHnueChn DaHHN
- U。
- U,
- 0MM
- 1MAK
- 12
- 50Hz
- H
- X
- 5.ПпсдпснанeВЕкплоациЯ
- MoHTaH (ΦmR. 5 - 21)
- MoNTaH Ha XoOBeTe N BOeU npJHn (6/14)
- MoHTaH Ha 3aBapb4HHa WnP M (17)
- Cbpb3BaHe Ha rasa (fur. 4-6, 19-25)
- BnOBe ra3
- MoHTnpaHe Ha ra3oBaTa 6yTnIka Ha anapata (ФИr.19-25)
- Cbbp3BaHe Ha ra3OBaTa 6yTnIka
- 06cHHeHne Ha peyuPbENTnla (fHr. 4/19)
- 3axpaHbaHe oT MpeHaTa
- 3a6eJekka:
- MoHTaK Ha MaKaPaTa 3a TeT (Hr.1,5,6,26-34)
- HΦopMaun OTHOCHO 6cnyHbHeTo
- TapaHcNoHHa KapTa
- BA
- Opasnost!
- Sigurnosne napomene
- Pre puštanja u pigeon
- Montaza (sl. 5 - 21)
- RU
- Npeed BBODOM B3Hcnpnyatauio
- C6opka (pnc. 5-21)
- MoHTaH XoOObbIX N NOBOpOTbIX poINKOB (6/14)
- YctaHObKa 3auNTHOrO 3KpaHa (17)
- PoiKJIouHeHne ra3a (pnc. 4-6, 19-25)
- Tnblra3OB
- YctaHObKa r3oBOrO 6aJIIOHa Ha yctpoiCTBe (pnc.19-25)
- Iorchenne pa60tbppeyKtopa (pnc. 4/19)
- Napametpbj 3JleKtpocetn
- Hhopmaa:
- MoNTaH HAtyUHN 3JIeHTpOIOB (pnc.1,5,6,26-34)
- Tnbl 3JeHTpOIOB
- EmKocb KaTywKn 3JeKtpoDb
- 3aunTHbIe npncnoco6JeHHA
- DaTCHK TemnepaTypbI
- 3aMeHa Ka6eI NaTaHnA 3JIeHTpocEtN
- Onachoctb!
- 8.OuHCTHa,Texo6cnyKHBaHne 3aKa3 3anaChbIX deTalei
- OuInCTHa
- Texo6cIyKuBaHne
- 3aKa3 3anachbIX DeTanei:
- Ytln3aunn n BtopnHoe HcnoJb3ObaHne
- Xpachenne
- Понск Немсправност (Московский).
- TapaHTnHoe CBnTeJbCTBO
- DK
- Fare!
- Taeislysing (myndir 1-8)
- Innihald
- Haettal!
- IS
- Fyir notkun
- Samsetting (mynd 5-21)
- Samsetining hjola (6/14)
- Samsetning suohjalms (mynd 17)
- Gastenging (mynd 4-6, 19-25)
- Gastegundir
- Gasfl aska fest a taki (mynd 19-25)
- Tenging rafrasar
- Jarotenging tengd (mynd 1/10)
Brand : Herkules
Model : HSG 190D
Category : Welding machine