Multiquick 7 MQ 777 - Blender BRAUN - Free user manual and instructions
Find the device manual for free Multiquick 7 MQ 777 BRAUN in PDF.
| Brand | Braun |
| Model | Multiquick 7 MQ 777 |
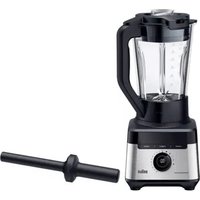
| Product type | Multifunctional immersion blender with accessories |
| Dimensions (L x W x H) | Approx. 7 x 7 x 40 cm (motor unit and blending foot) |
| Weight | Approx. 1.2 kg (motor unit and main accessories) |
| Power supply | 220-240 V, 50-60 Hz |
| Power | Not specified (estimated 600-800 W) |
| Main functions | Blending, whisking, puréeing, chopping, slicing, grating, kneading |
| Speed technology | Smartspeed trigger with continuous speed variation |
| Safety | Safety button, automatic stop if trigger not pressed within 5 seconds, indicator light |
| Included accessories | Blending foot, whisk with gearbox, purée accessory (gearbox, shaft, blade), 350 ml chopper bowl "hc", 1500 ml food processor bowl "fp", chopping knife, slicing/grating/julienne knives, french fry tool, kneading accessory |
| Maximum capacity | Chopper 350 ml, processor 1500 ml, up to 250 g flour for kneading |
| Maintenance and cleaning | Motor unit and gearboxes: damp cloth; processor lid: hand wash, not immersed or dishwasher; other parts: dishwasher safe |
| Spare parts and repairability | Additional accessories available (MQ 30, MQ 40), cord replacement by professional |
| General information | Household use only, do not use in microwave, very sharp blades, recycle at end of life |
Frequently Asked Questions - Multiquick 7 MQ 777 BRAUN
User questions about Multiquick 7 MQ 777 BRAUN
0 question about this device. Answer the ones you know or ask your own.
Ask a new question about this device
Download the instructions for your Blender in PDF format for free! Find your manual Multiquick 7 MQ 777 - BRAUN and take your electronic device back in hand. On this page are published all the documents necessary for the use of your device. Multiquick 7 MQ 777 by BRAUN.
USER MANUAL Multiquick 7 MQ 777 BRAUN
Our products are engineered to meet the highest standards of quality, functionality and design.
We hope you thoroughly enjoy your new Braun appliance.
Before use
Please read the use instructions carefully and completely before using the appliance.
Caution

The blades are very sharp! To avoid injuries, please handle blades with st care.
- This appliance can be used by persons with reduced physical, sensory or mental capabilities or lack of experience and knowledge if they have been given supervision or instruction concerning use of the appliance in a safe way and if they understand the hazards involved.
Children shall not play with the appliance. - This appliance shall not be used by children.
Children shall be kept away from the appliance and its mains cord. - Cleaning and user maintenance shall not be made by children without supervision.
- Always unplug or switch off the appliance when it is left unattended and before assembling, disassembling, cleaning and storing.
- If the supply cord is damaged, it must be replaced by the manufacturer, its service agent or similarly qualified persons in order to avoid a hazard.
- Before plugging into a socket, check whether your voltage corresponds with the voltage printed on the bottom of the appliance.
- Be careful if hot liquid is poured into the food processor or blender as it can be ejected out of the appliance due to a sudden steaming.
- This appliance is designed for household use only and for processing normal household quantities.
- Do not reach into the filling shaft when the appliance is plugged in, especially while the motor is running. Always use the pusher to guide food through the shaft.
- Do not use any part in the microwave.
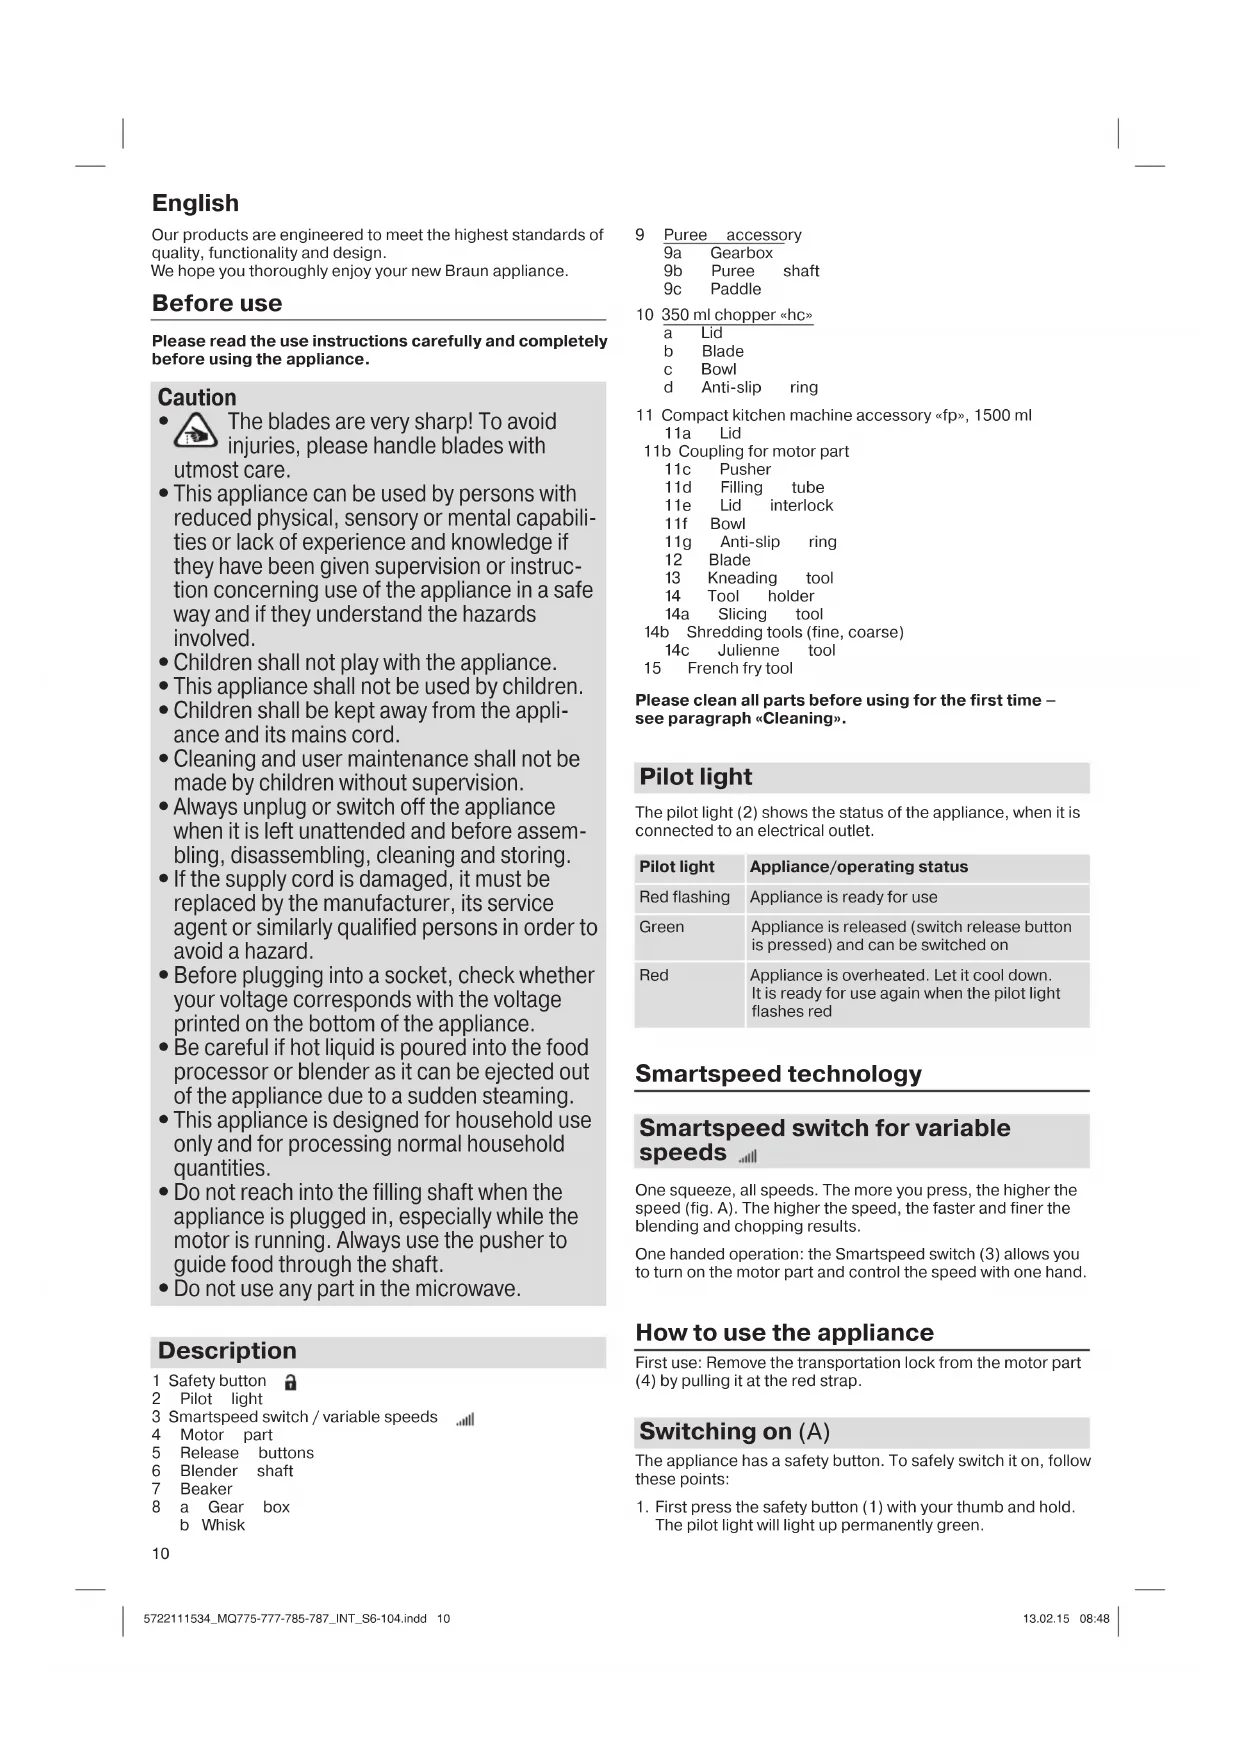
Description
1 Safety button
2 Pilot light
3 Smartspeed switch / variable speeds
4 Motor part
5 Release buttons
6 Blender shaft
7 Beaker
8 a Gear box
b Whisk
9 Puree accessory
9a Gear
9b Puree shaft
9c Paddle
10 350 ml chopper «hc»
a Lid
b Blade
c Bowl
d Anti-slip ring
11 Compact kitchen machine accessory «fp», 1500 ml
11a Lid
11b Coupling for motor part
11c Pusher
11d Filling tube
11e Lid interlock
11f Bowl
11g Anti-slip ring
12 Blade
13 Kneading tool
14 Tool holder
14a Slicing tool
14b Shredding tools (fine, coarse)
14c Julienne tool
15 French fry tool
Please clean all parts before using for the first time - see paragraph «Cleaning».
Pilot light
The pilot light (2) shows the status of the appliance, when it is connected to an electrical outlet.
| Pilot light | Appliance/operating status |
| Red flashing | Appliance is ready for use |
| Green | Appliance is released (switch release button is pressed) and can be switched on |
| Red | Appliance is overheated. Let it cool down. It is ready for use again when the pilot light flashes red |
Smartspeed technology
Smartspeed switch for variable speeds
One squeeze, all speeds. The more you press, the higher the speed (fig. A). The higher the speed, the faster and finer the blending and chopping results.
One handed operation: the Smartspeed switch (3) allows you to turn on the motor part and control the speed with one hand.
How to use the appliance
First use: Remove the transportation lock from the motor part (4) by pulling it at the red strap.
Switching on (A)
The appliance has a safety button. To safely switch it on, follow these points:
-
First press the safety button (1) with your thumb and hold. The pilot light will light up permanently green.
-
Then directly press the Smartspeed switch (3) according to the desired speed. If the Smartspeed switch (3) is not pressed within 5 seconds, the appliance cannot be switched on for safety reasons. The pilot light flashes red. In order to switch the appliance on, start again with step 1.
- During operation you do not have to keep the safety button pressed.
Hand blender (B)
The hand blender is perfectly suited for preparing dips, sauces, soups, mayonnaise and baby food as well as for mixing drinks and milk shakes. For best blending results use highest speed.
- Click the motor part (4) into the blender shaft (6).
- Position the hand blender deep in a beaker or bowl. Then switch the appliance on as described above.
After use unplug and press the release buttons (5) to detach the motor part.
When blending directly in the saucepan while cooking, remove the pan from the stove first to avoid splashing of the boiling liquid (risk of scalding!).
Recipe example: Mayonnaise
250 g oil (e.g. sunflower oil),
1 egg and 1 extra egg yolk,
1-2 tbsp. vinegar (approx. 15 g), salt and pepper to taste
Place all ingredients (at room temperature) into the beaker in the a.m. order. Place the hand blender on the bottom of the beaker. Operate the hand blender at maximum speed, keep it in this position until the oil starts emulsifying. Then without switching off slowly raise the shaft to the top of the mixture and back down to incorporate the rest of the oil. Processing time: from 1 minute (for salad) up to 2 minutes for more stiffness (e.g. for dip).
Whisk (B)
Use the whisk only for whipping cream, beating egg whites and mixing sponges and ready-mix desserts.
- Insert the whisk (8b) into the whisk gear box (8a) then click the motor part (4) into the gear box.
- Place the whisk in a bowl and only then switch the appliance on.
After use, unplug and press the release buttons (5) to detach the motor part. Then pull the whisk out of the gear box.
Tips for best results
- Use a medium-sized bowl.
- Move the whisk clockwise, holding it slightly inclined.
- Whipped cream (max. 400 ml chilled cream, min. 30% fat content, 4-8 °C): Start with low speed (light pressure on the switch) and increase the speed (more pressure on switch) while whipping.
- Beaten egg whites (max. 4 eggs): Start with a medium speed (half way pressure on switch) and increase the speed (more pressure on switch) while whipping.
Puree accessory (C)
The masher can be used to mash cooked vegetables and fruits such as potatoes, sweet potatoes, tomatoes, plums and apples.
Before use
Don't mash hard or uncooked food; you may damage the unit. Remove hard parts such as peel, stones and stems, then cook and drain.
Important
- Never use the puree accessory in a saucepan over direct heat.
Always remove the saucepan from the heat and allow to cool slightly. - Do not tap the puree accessory on the side of the cooking vessel during or after using. Use a spatula to scrape excess food away.
- For best results when mashing never fill a saucepan etc., more than half full with food.
- Do not process more than 1 batch without interruption.
- Let the appliance cool down for 4 minutes before you continue processing.
How to use the puree accessory
- Fit the gear box (9a) to the shaft (9b) by turning in a clockwise direction.
- Turn the puree accessory upside down and fit the paddle (9c) over the central hub and turn anti-clockwise to locate. (If the gear box isn't fitted then the paddle doesn't secure in place).
- Fit the motor part to the puree accessory and push to lock. Plug in.
- Place the puree accessory in the saucepan or bowl etc., and switch on the appliance. Move the puree accessory in an up and down movement throughout the mix until the desired result is achieved.
After use unplug the appliance. Remove the paddle (9c) by turning clockwise. - Press the release buttons to remove the puree accessory. Detach the gear box (9a) from the puree shaft (9b) by turning counter-clockwise.
Recipe example: Mashed potatoes
- Put 1 kg cooked potatoes in a bowl
- Mash 30 s (3/4 way pressure on the switch)
Add 200 ml warm milk - Resume mashing for about 30s
Chopper (D)
The chopper (10) is perfectly suited for chopping meat, hard cheese, onions, herbs, garlic, carrots, nuts, almonds etc.
Always chop hard foods at full speed (e.g. parmesan, chocolate).
For best results see processing tables D. Maximum operation time for the «hc» chopper: 2 minutes.
Recipe example: Vanilla-Honey-Prunes (as a pancake stuffing or spread):
- Fill the «hc» chopper bowl with 50 g prunes and 70 g creamy honey.
- Chop 4 seconds at maximum speed (fully press the Smartspeed button).
- Add 10 ml water (vanilla-flavoured).
- Resume chopping for another 1.5 seconds.
Compact kitchen machine accessory
The compact kitchen machine accessory (11) is perfectly suited for
- chopping and blending
- kneading dough (based on max. 250 g flour)
- slicing and shredding
Chopping (E)
Using the blade (12) you can chop meat, cheese, onions, herbs, garlic, carrots, walnuts, hazelnuts, almonds etc.
For best results, please refer to the maximum quantities and speed settings indicated in the processing table of section E.
Do not chop extremely hard food, such as ice cubes, nutmeg, coffee beans or grains.
Before chopping ...
- pre-cut meat, cheese, onions, garlic, carrots, chillies
- remove stems from herbs, shell nuts
- remove bones, tendons and gristle from meat
- always make sure that the anti-slip ring (11g) is attached to the chopper bowl
Caution: The blade is very sharp! Always hold it by the upper plastic part and handle it carefully.
Carefully remove the plastic cover from the blade.
- Place the blade (12) on the centre pin of the bowl (11f) and give it a turn so that it locks.
- Fill the bowl with food. Attach the lid (11a) onto the bowl with the interlock (11e) positioned next to the bowl handle.
- To lock the lid, turn it clockwise so that the interlock engages with a "click" above the handle.
- Insert the motor part (4) into the coupling (11b) until it locks.
- Plug in the appliance and make sure the pusher is in place.
- Switch the appliance on and hold the bowl with the other hand.
After use unplug and press the release buttons (5) to remove the motor part. Remove the pusher. - Press the lid interlock (11e) and hold it. Turn the lid (11a) counter-clockwise to unlatch it.
- Lift the lid up.
- Carefully take out the blade before removing the processed food. To remove the blade, slightly turn it then pull it off.
Mixing light dough
Using the blade (12), you may also mix light dough like a pancake batter or a cake mixture based on up to 250g flour.
Recipe example: Pancake batter
First pour 375 ml milk into the bowl, then add 250 g flour and finally 2 eggs. Using full speed, mix the batter until smooth.
Kneading dough
Picture section E also applies for the use of the kneading tool. The kneading tool (13) is ideal for kneading different dough types like yeast dough or pastry (based on max. 250 g flour).
- Place the kneading tool into the bowl (11f).
- Fill the bowl with max. 250g flour, then add the other ingredients except liquids.
- Turn the appliance on at full speed.
- Add liquids through the filling tube while the motor is running.
Maximum kneading time: 1 minute - then allow the motor part to cool down for 10 minutes.
Recipe example: Pizza dough
250 g flour, 1/2 tsp salt, 1/2 tsp dried yeast, 5 tbsp olive oil, 150 ml water (lukewarm).
Recipe example: Pastry
250 g flour, 170 g butter (cold/hard, small pieces), 80 g sugar, 1 vanilla sugar, 1 small egg, 1 pinch salt
For good results, do not use warm, soft butter.
Stop kneading shortly after dough has formed a ball. Dough will become too soft from excessive kneading.
Slicing/shredding/french fries(F)
Using the slicing tool (14a) you can slice e.g. cucumbers, onions, mushrooms, apples, carrots, radishes, raw potatoes, courgettes, cabbage.
Using the shredding tools (14b), you can shred e.g. apples, carrots, raw potatoes, beetroot, cabbage, cheese (soft to medium).
Use the french fry tool (15) to prepare french fries.
- For slicing / shredding place a tool (14 a,b,c) into the tool holder (14) and snap into position. Place the tool holder (14) or french fry tool (15) on the centre pin of the bowl (11f) and make sure it locks into place.
- Attach the lid (11a) onto the bowl with the interlock (11e) positioned next to the bowl handle.
- To lock the lid turn it clockwise so that the interlock engages with a «click» above the handle.
- Insert the motor part into the coupling (11b) until it locks.
- Plug in the appliance and insert the food to be processed into the filling tube.
- Switch the appliance on to operate. Never reach into the filling tube when the appliance is switched on. Always use the pusher (11c) to feed in food.
After use unplug and press the release buttons (5) to detach the motor part. - Press the lid interlock (11e) and hold it. Turn the lid (11a) counter-clockwise to unlatch it.
- Lift the lid up.
- Take out the tool holder or french fry tool before removing the processed food. To remove the tool (14a,b,c), push it up at the one end that protrudes at the bottom side of the tool holder.
Cleaning (G)
Clean the motor part, the gear boxes (8a,9a) with a damp cloth only. The lid (11a) can be cleaned under running water, but do not immerse it in water, nor clean it in a dishwasher. All other parts can be cleaned in a dishwasher.
You may remove the anti-slip rings from the chopper bowls for extra thorough cleaning.
When processing foods with a high pigment content (e.g. carrots), the plastic parts of the appliance may become discoloured. Wipe these parts with vegetable oil before cleaning them.
Accessories
can be bought individually, not available in every country
MQ 30: 500 ml chopper to chop carrots, meat, onions, etc.
MQ 40: 1000 ml chopper to chop, mix, blend and crush ice
Subject to change without notice.
Please do not dispose of the product in the household waste at the end of its useful life. Disposal can take place at a Braun Service Centre or at appropriate collection points provided in your country.

For UK Only
Guarantee Information
All Braun Household products carry a minimum guarantee period of two years. The rights and benefits under this guarantee are additional to your statutory rights which are not affected.
Please keep your receipt as this will form the basis of your guarantee.
In the unlikely event of a breakdown you have access to professional help from our team simply by calling: 02392 392333
For service in the Republic of Ireland please call: 012475471
Braun Household undertakes within the specified period to repair or replace any part of the appliance, free of charge (with the exception of any glass or porcelain-ware incorporated in the product) found to be defective provided that;
We are promptly informed of the defect.
- The product is used and maintained in accordance with the User Instructions.
- The appliance has not been altered in any way or subjected to misuse or repair by a person other than an authorised service agent for Braun Household.
- No rights are given under this guarantee to a person acquiring the appliance second hand or for commercial or communal use.
- Any repaired or replaced appliance will be guaranteed on these terms for the unexpired portion of the guarantee.
- The need for repair has not been caused by insufficient aftercare or cleaning: or damage caused by the chemical or electrochemical effects of water.
Under no circumstances shall the application of this guarantee give rise to the complete replacement of the appliance or entitle the consumer to damages.
Braun Household, New Lane, Havant, Hampshire PO9 2NH www.braunhousehold.co.uk
Français
b Varilla monta-claras
Varilla monta-claras (B)
Smartspeed technology
Compact kitchen machine accessory
11b Kobling for motordel
11c Stapper
11d Pafyllingsr
11e Lasesperre
11f Bolle
11g Sklisikker ring
12 Knivblad
13 Elteinnsats
14 Innsatholder
14a Snitteinnats
14b Riveinnsatser (fin, grov)
14c Julienne-tilbehør
15 Pommes frityrkoker verktoy
Vennligst rengjor alle deler for forstegangs bruk - se avsnitt «rengjoring’.
Indikatorlampe
a Kapak
b Biçak
c Kase
d Kaymayi onleyen halka
11 Kompakt mutfak makinesi aksesuarlan «fp», 1500 ml
11a Kapak
11b Motor icin baglanti parcasi
11c ltici
11d Doldurma tupu
11e Kapak kilidi
70
11f Islem kabi
11g Kaymayi onleyen ataçman
a Capac
b Lama
c Recipient
d Inel antialunicare
TexvoLoyia Smartspeed
Aiaokonnc Smartspeed yia n c taXUTnTEc
Me eva namua, oec o taxutntc. Ooo nepioootepo niieCETe, too eyaute np n taxutnA (Eik.A). Ooo eyaute np evai n taxutnTa, too nio ynpyopa kai nio ae ta anotel aouata avaeiengs kai konns.
Aeroupyiae To eva xepi: o biakontnS martspeed (3) aoc eipenie va evpyonoiite To potep kai va eayxete nV taun ta eva xepi.
Nc va xnpoiponoieite n oukeun
PpOxHApAepTe mV aopaleia metapopac ano to oTep (4) rpaovrtac mV ano tvkokivn raivia.
Avapma tnc ouokevnC (A)
H ouakeun biheTei eva nIkpO aapalaeiac. Tia va thege tue apaleia tn ouakeun oe aeitoupyia, aokoutheote ta npakatow hmuata:
- Ppota niote to nAikto aocpaaleiac (1) 1e Tov avixepa cac kai koatne to natmEvO. H evEukn luxvia 0a avaepa otgepa npaoivo.
- 2n ouvexia nioe anu thec tov biakontn Smartspeed (3) avaloya me nvi eunu mnt taxutna.Eav o biakontnc Smartspeed (3) 6ev neotei meo a 5 6eutepeaenn, n oukeun dev npoei va tetheta ae leitoupyia ia loyouc aoqaaieac.H evdeikni luxvia avaboaiye kokkivo. Tia va 0eotm oukeun oe aleitoupyia, ekivnote naI ME TO Bma 1.
- Kata n diapkeia nC LEIOTUPOYIAc 6ev xpeiaCTai va kpatn- oTE TO nKTKPO aopaaEIAc NIEgevo.
MnAevTeP xEipoc (B)
To mLevtp exipoc evai anoluta kataaannlo yia nvy npapaokunvti, oaltoac, oounac, maivoezca kai naibikc troepnc kaohc enionc kai yia tv avaeiEit noTov kai uK oEK.
TooTheTto Toptep (4) o np aB6o unAevep (6).
TOnoBETnTo uIaEvTepeic oE eva baTuOa n doxieio. Tm ouvexia theeT nooukeun ae Ieroupyia otwC npipapqetai npanadw.
- Meta Tn xpon, ByaTe To pic ano Tny npia Kai nntote Ta nktpa ane aeuvepownc (5) yia va anouovdeoe to potep.
Otaav avayvye aneueoiaoc mny katoapola kata to
yapeipma, apixka, anopakpuve Tnv katoapola ano Tnv
etia,yia nV anOpuyn nTnaiicmuot Tou Bpaotou uypou (kvduvoC ykauuatoC!).
Suvay: Mayovc
MOnla, npOHTeTe HnCTpyKunTe BnMaTeHNO n DOkpaN, npEdu n3non3BaTe ypeDa.
PpeynpeKdHne
Hoxobete ca MHoro octpn! 3a da n36eHrTe HapaHraHe, OTHacnTe ce KbM HOXOBeTE C N3KJIQUHTeJIHO BHIMaHne.
To3n ypei moKe Ja ce n3noJ3Ba OT Jnca C ORpaHnueHn fN3nueCKn, CETNBn JnIy MCTBeHn HeJb3n JnIb6e3 ONNT I NO3HaHnA, aKO rO npaBRT NOD Ha6JIoJeHne JnCbflacHO c HNCTpyKcUNTE 3a n3noJ3BaHe HaypeDa No 6e30NaCeH NaHH, n aKO Ocb3HaBaT EBEHTyaJHnTe pNCKOB.
He no3BOLIyBaIte Ha deca da cn irpaT cypeia.
To3n ypei He Tp8Ba Da ce n3noJ3Ba OT deca.
-ДeцаТгябВдСToTДалЧeOTурдаиOT3axpaHbUIMyKa6eI.
-ПочИстваHEToи NOДпьЖКаТОТ NOTрБИТЕЯ He Tpr6Ba Na ce ИЗВьршВа OT Deua 6e3HaДз0P.
BnHaHn n3KnIOuBaIte ypeDa kOraTo He e noi Ha6JIoDeHne HnpEn CrNo6BaHe,pa3rIo- 6BaHe,NOUcTBAHe UIN CbXpaHeHne.
- Ak0 3axpaHbAaT Ka6e n oBpeDen, Toi Tp8Ba Da 6bJe CMeHe OT npOn3BOAnTeJr, cepBn3HnayTexHnK nn Dpyn KBaJIuNpuHa NlaC uCeI n36yraBe Ha OnaCHOCTn.
-Ппебдд Кьнчiteурда KMКоТаТа,поверетдд ИнржсенetoHaBaшатaleKtpo3axpaHbwa Мржа OTROварЯHaHanpжсенeto,OЗнчehОВьрху HeRo.
BHHMaaTe, B clyaaye B ypea 3a oba-60TKa Ha xpaHnTeJHn npOdyKTn nn 6IeH-epa ce Iobabn ropeu npOdyKT, 3auTo ToJ MOKe da Ce n3xBpnn OT ypea BCJeCTBne Ha BHe3aHNo n3napenHe
To3n ype n e c6b3daen 3a IOMaIHa ynoTpe6a, 3a KOJInuEcTBa, HxKHi 3a eJHO IOMaKINHCTBO.
- HnKora He nocTabraIte pUcTe cn B yIe 3a NbIHeHe, KOraTo ypeIbT e BKIOueH I NO-CneuJaHIO, KOraTo MOTOpBt pa6OTn. Korato Ce HaIOxN da HaTNCHEte npOdyKTITE B yIe N3NoJ3BaIte 6yTaIOTO.
He nocTabaIte HnKaBn YaCTn B MmKpObblHOBaTa ypha.
Onncanne
1 Bytoh 3a 3auNTa
2 INdkaTOpHa lamnA
3 PpeBknOyBaTeN 3a yMHa cKOpocT /npomeHnBn
CKOPOCTn
4 DnurataeHa hact
5 BytoHn 3a ocbo6oxdaBaHe
6 HakpaHnK 3a nacnpaHe
7 MeH3ypa
8 a CbeHnHTeI 3a pa36uBaHe
bTeI3a pa36nBaHe
9 Ppeca
9a 3aBnKBaU MoDyI
9b BaI 3a nOpupaHe
9c Bloxxka 3a npecata
10 350 mI pezauka «hc»
a KaNAK
b Hox
c Kyna
dPbCTeH npOTnB nJb3raHe
11 KomnakTHO npncnocobneHne 3a kyxHeHcN po60T «fp», 1500 ml
11a Kanak
11b CbeHNHTe3a DBnraTeHaTa Yact
11c N36yTbay
11d Tpb6a 3a nblHeHe
11e MexaHn3bM 3a 6IokpapeHa KaNaka
11f Kyna
11g PpbTeH npOTNB nB3raHe
12 Hox
13 HCTpyMeHT 3a MeceHe
14 Dbpxka Ha HnHCTpyMeHTN
14a INCHtpyment 3a p3ahe
14b INCTpymEnTH3aCTbpxKeHe (fHNO,eDPO)
14c Hox 3a p3aHe Ha JyJnneHn
15 Pnctabka 3a npjxehn kapTofH
MOnI NOUcTbAte BCnKu qaCTn npEdu da Tn 3NIOJI3BaTe 3a NpBn NbT-BNXnaparpaΦ "NoCTBaHe"
HdNkaTopHa lamna
HnDnKaTOpHaTa lamna (2) noka3Ba cbctoHneTo Ha ypea, KOrATo e Cbbp3Ah cEneKtpueeCKN KOHTAKT.
| Индан- каторна ламма | Урени/разб轨道交通 CBCTОДНЕ |
| Миганы В червао | Урени т сrotob за уnotpeba |
| Зелени | Урени т освобODEн (ытоньт за осв- бождаване в chatишит) и моче за sbide ВКлиODEн |
| Червао | Урени т пэррял. Оставete гда се хлади. Тοй e отоно рotob за уnotpeba, korato Инданахета ламма мirma в червао |
TexHOrn yMHa ckOpocT
PpeBkIIOUbATEJ yMHa cKOpOCT 3a npOMEHJIIBN cKOpOCTn
EduhoHaTnCKaHe,BCWKnCKOpoctN.KoIKOTONoBueeHaTNCKaTe,ToNKOBANo-BNCOKe cCKOpocTa(ΦnHyraA.)。KoIKOTO No-BNCOKe cCKOpocTa,ToNKOBANo-6bP3nHΦnHnCape3yIITATNEOTNaCnpaHEToKbJIuaHETo
Onepupahe c eHa pKa: IpeBknIOuBaTeIaYmHa CKOpOCT (3) BN NO3BOJRA Ba BKNIOUBAte DnRaTeHata Yact N da KOHTPOIpnPate CKOpOCTTa C eHa pKa.
Kakce n3noJ3Ba ypeDbT
Ppei npbpa ynoptpe6a: Maxhete TpaHcnpTHna 0e3oNaCnTeIOT DnBraTeHaT aYact KaTo dpbnHeTe YepBeHaT a BpB.
BkIIOUbaHe (A)
YpeBt NMa 6yToH 3a 3aunTa. 3a da ro BKIOHHTe 6e3OnaCHO, CJIeBaIte CJIeHNTe CTbIKN:
1.ПьрвНаTNCHETe 6byToHa 3a 3auNTa(1)c noka3aneua cn 3aIpbxTe.NHnkaTOpHaTa IanMa Iue CBeTHe B 3eNeHo 6e3 Da Mfra.
2.CnTTOBAIINPEKTHO HATNCHE TpeBKNIOUbaTeN yMHaCKoPocT(3)CnpopeJXeJAHATAcKOpocT.AKO INPEKTHIOUBATeNRT YMHa CKOPOCT(3)He6bJe HAITNCHaBpAMKnTe Ha5cekyHm,ypeBtHe MoKeJa 6bDe BKNIOH NopadnnpuHnna 3a 6e3onacHOCT.NDkAToPnHaTaIaNMa 3aNohydaMaNraBuePbeHo.3a Da BKIOUHTyePe,3anOHTeOTHOBO cbc CTbnka1.
3. No Bpeme Ha pa6oTa He e Hc6xOIMo Da IbpxnTe 6yToHa 3a 6e30nachocT HATnCHaT.
Pbueh nacaTop (B)
PbHnT nacatop e ndeaen 3a npiroTBHe Ha nactn, COcOBE, Cynn, MaIOHe3n N6e6wKn XpaHn, KaKTo n 3a CmecBaHe Ha HAnrTkN nn MneuHn WeKeBOe. 3a Han-dOpn pe3yntan npn nacnpaHe, n3non3BaTe MaKcImaHa CKoOCT.
3aKpeTe Upe3 upaKaBaHe DnIraTeHHaTa Yact (4) B HakpaHnka Ha nacaTopa (6).
- NocTabeTe pBHyHnI nacatop Dbl60Ko B MeH3ypa HnI Kya. CneTToBA BKJIOUyTe ypeJa, KaKTo e OmncAHO no-rope.
CJedn3N0NJ3BaHe N3KJIQUHETe OT KOHTAKTa HATNCHETe 6yToHNTe 3a OCB6OxKaBaHe (5), 3a Da OTDeJIInTe DBNrA-TeHNHaT aYact.
Korato nacipate dupeKTHO B TeHxepaTn O BpeMe Ha rotbeHe, Hau-Hanpeo OTTeTe TEnxepaTa OT KOJIOnHa, 3a da n36erHete pa3npbckBaHe Ha BpuaTa TEHOCCT (OnachOCT ot n3raphe!).
Ppmepeeenta:MaHOe3a
BykypblfblKaalnKoJaHy KaKeT
Aifaikk kollhaic: TacbImanay 6ekitncih MOTop 6niriHeH (4) OHbIK b3bn 6aybH TapTy apKbln aInT nactAhbl.
Kocy (A)
KypbIyBHH, Kayinci3ik Tymeci 6ap. Kayinci3 Typne Kocy yuiH KeNeci apeKeTTepDi opbHaBIs:
- Biipinien Kayincizik Tymecin (1) 6ac6apmakneh 6acbln, yctan typbHb3. BaKbIay uambl ydaBxacbln 60bn JkaHaNbI.
- CoaH KeiH akblIbXblIaMblk aybCTbIPbIbH (3) KaIaFaH XblIaMblbIFbHIb3Fa caI TiKeIe Tpyde 6acblbl3. ErepakblblXblIaMblk aybCTbIPbIbU (3)5cekyHd
iwiHde 6acblmaca, KpybIrfbHI Kayinci3ik MaKcaTTaPbHna KOCY MymkH EMEC 60anbl.
BaKbInaywaMbI Kbl3bl60bnJxapKbldaNbl.
KypbfnBihhkyuH1-kiKaamDkaTaNtTa6aTaHb3.
- Kymbic 6apblicihda Kayinci3ik Tymecin 6acbin TypybHb3 KaKeTTI emc.
KoI 6JIeHJIepi (B)
KoI 6eHepi coyctapbl, kxepepi, Maohes3di, c6bi TaFamdpbIH e3ipnyre xeHe cybIHap MEH CYT KOKTeJIbde-piH apanaactbipyra ete xakcbi beimdienreH.
EHJAKcbI apalactbipy HtNKeJIepiHe KOJIeKl3y yuiH eKOFapFbI XblJaMdbIKTbI KOJaHbIHbI3.
- Motop 6eJIirH (4) 6JIeHdep TipeyIe (6) 6aCbIb3.
KoJI6JIeHnDEpiCtakAHbIHHEMeCETOCTaFAHHbIH iIiHe opHaTbHb3.CoJaH KeiH KpybIFbHbXOFapbda CnNaT TaHaHdai KcBbHb3.
KoIaHbCTAH KeiH TOkTaH axbipatbIn, MOTOp 6eNirH axbipatyuH6OcAtyTuMeciH(5)6acbHb3.
Coyctb Ta6ada TikeJeapanactbipFaHaKaHaraCynbIKTBH 1aMbipamayb yin Tabahb neTeh anbIn KoiBbI3 (Kyinn kany Kayni 6ap!).
Peuertyirici:Maohoe3
250MaM(MbCaJFa,KHy6aFbICMaBbI),
1xymbiptkaxhe xymbiptkahbiH KocbIMwa 1 capbyb3bl,
MockBaKaIacbCyueBckKaKweci,
27/3-yn(27-yn,3-KypbblbIM)
Te n.+7 (495) 781-26-76
AkaynbikTbI Ty3ety
| Акayльк Себебii | Шewim | |
| Кол SFLEндері ЖуMbIC ICTeMei Тур. | Куат кOK | Курьлфынг.TOKKa КосылfaHbI.Tekcepiñ3. Уйderi сakТанДырБышТы/ КыСka ТУьытБышТы Tekcepiñ3. Еream оларын ewkaисысы akayльб бOLмасa, Braun серВиС opТалБынha хабарпасьи. |
Pycckn
PykoBODTBO no 3KcnnyatauN
Haama npdykun OTBeayet CaMbIM BbICOKM CTaHdapTaMa KaeeCTBa, yHKUHOHaJIbHOCTN IN dI3aHa. Mbl Haedeemc, TTo Bbl OCTaHETec bIOBbHb CBOIM HObbIM 6JeHepeom Braun.
IpeepncnoJb3ObaHnem
IoxaanyiCTa, BHMaTeNbHO npOuHTaTe DaHHoe pykoBODCTBO NO 3KcNpyataun neped nCpOJIb3OBaHnem np60pa.
BHHMaHHe

HOxM OeHb OCTpbl! Bo 136EkaHne TpaBM, noKaIyIcTa, oBaPauTecb C HOxAMn COCOBOCTOPOXHXOCTbIO.
- YCTPOINCTBO MOXET NCIOJIb3OBAtBcA JIiUAMN C OpraHnHEHbIMN ΦIN3UeCKIMN, CEHCOPHBIMN IINI YMCTBEHHbIMN CNOC6HOCTM NII JIiUaMn, He OJNAJIOUIMN IOCTaTOHbIM ONbITOM N3AHINM, INPY UCLOBNI, ECINNCIOJIb3OBAHNE OCUyIeCTBIAReTcN NOJ Ha3Opor M NII OHNPoIJN HINTCPYKTAQ NO63OnaCHOM NOJIb3OBAHUNYCTPOINCTBOM INOC03HaOT NOTEHuaJIbHbIE ONACHOCTN.
- Deta 3a npeueho nrgpTaC npn60pOm.
- UcTpoIcTBo He npEHa3HaueHO IInr NcNoIb3OBAHnA DeTbMn.
XpaHnTb npnbop n ero rnaBbI coeHHntbHbI Ka6JIb BdaII NT deTei.
3aIpeueHa nCTka H yXoD 3a npnbopom DeTbMn 6e3 npncmOTpa.
BcERda OTKJIIOaHTe pIbObOT cTeH IIN BIKJIIOaHTe erO,ecn OH octaETc8e3 nPcMCOTpa,a TaKke nepeD c60pkO,p36bOpKo,NCTCKOnIIN XPAHeHMe.
- Ecln coeHInTeIbHbI KaIb NOBpeJdeH, To eO DOnJIxH 3aMeHnTb PON3BOrDInTeB, cepBnCHa CJyKb HnCneuaNtCTb TAKOH JKe KBaIIHnΦkaUNc CueJIbIO ppeDTBpaAeHN OAnACOHTn IIN POJIb3OBeAtEn.
- Ipepe nokkUeHnEM, npOBepbTe COOTBeTCTBHe HApJxEHNBA CETn HApJxKeHnO, yKa3aHHOMy Ha np6ope
- BydTe octOpOxHbI npn 3aJIbVe rOpRux XuIKoCTe B KyXOHHy MoUInHy nnMnKcep, TAK KaK BO3MOKeH BixOJ napa.
JaHHb npH6Op npEHa3HaueH NCKIIOHTeBHO JIA 6bToboro nCnOJb3ObaHn I paCCHTaH Ha nepepaOTky 0bEmOB npOyKmN B MacUTabax DomAunHeo Xo3raCTBa.
Korda np60b BkIOUeH B cTeB, B OcObeHHoCTNo BpEMa poTobl npBOda, dIJI 3aIpy3kn npOdyKTOB noJIb3yITecbTOJbKO TOJkaTeAEN.
-Деталл пибopa Heпрдна3нayehы Дя ИспьзOBань B MИКРОВЛH0-BbIX Neayx.
Onncahne N KOMJIeKTHOCTb
1 Khonka 6e30nacHOCTN
2 CnHnBnaJamnoKa
3 Khonka Smartspeed / nepeknqueneckopocTei
4 MotopnHa yactb
5 KhoNKn 1KCaun
6 Paobayacb6lenepa
7 MepHbI cTaKaH
8 a PeDyKTop
b BeHnK
9 Hacadka dny niope
9a Kopobka ckopocTei
9b CTepxKeHb HacaKn IJnIpoe
9c Jnonatka
90
10 n3meBHTeB 6bemOM 350 M
a Kpbioka
b Hox
c Yawa
d PtoTnBOckOJIb3aJaua noDCTaBka
11 Ha6op «KomnaKTThbI KyxOHHbI KOM6aH» «fp», 1500 ml
11a Kpbwka
11b CuenneHne MOTOPHOaTn
11c TonkaTeIb
11d HanoHnTeNb
11e 0KCaTOp KpbIuKN
11f Yawa
11g PpOtnBocKoNb3aUaA noDCTaBka
12 Hox
13 Hacda Ka Tecta
14 DepkaTeJIe3BnI
14a Je3Bne DnHape3Kn
14b Je3Bne JnIaunHKOBKn (MeJIKoN, KpyHoi)
14c 1e3BnE dIa IINHKOBKn COIOMKOJ
15 Hacaikda nka kaptofoafo
OuHCTHTE BCE detaI INpeepnx npBbIM
HcnoIb30BaHHem.Cm.pa3dEe“OuNCTka"
CnHaJIbHaJaMNoUka
CnHnBHaJaAMNoKa(2)NOKa3bBaETcTAtycpa60TbI npi-6opa,KoTdA OH NODKIOUeH K 3JeTKePCeTn.
Texholognia Smartspeed
KhoNka SmartspeedДлЯпения ckopocTei
Ondo hakatne, liobai ckopoctb. Yem ciNbhee Bblhaxmaete, TEM bIiwe ckopoctb (pnc.A).Yem bIIie cKopoctb,TEM npdykTb obictpee CmEunBaioTc mMeIbe n3MeJIbHaioTcra.
Unpablenhe OndHou pyKo: KhONKa Smartspeed (3) no3BOnJraT BkIIOaTb 6JIeHep n peYunIpOBaTb ckOpocTb OndHou pyKo.
Kak noJIb3OBAtbcra np6Opom
IpeepnepBbIM nCOnb3oBaHHeM: YdaJIne TpaHCnOpTnpoBOuHb3aMOK C MOTOPHOJyTn (4),notraHyB 3a KpaChyIOJeHTy.
BkIIOUeHne (A)
Pnp6op mMeet KhoNky 6e3oNaChOCTn. IaI 6e3oNaCHOBkUOeHnA CJeDyIte CJeDyIOuM WaRAM:
- Chauana haxmte KhoNky 630nacHocTn (1) 60nbWM nIbIeM uYepKuBaIe ee.CrHaJIbHaJ lamNoyka 3aROpITcR 3eJIeHbIM CBETOM.
2.3aTeMaKeKhONky Smartspeed (3),Bb6npaJXeMaemyIOCKopocTb.EcnHe HaxaTB KhoKy Smartspeed (3) B TeueHn5 cekyHnNocLe HaxaHTN KhoKn 6e3oNaCHOCTn,To np6bp He BKIOuHTcR.CrHaJIbHaJ lamNoOka 3Amraet KpaCbHMCBETOM.DIg BKIOUeHnnp6Oba,HaunHte Cwara 1.
3.BoBpempa6oTbKHOkny6e30nacHocTu ydepXuBaTb He Hxko.
Puyho6JeHep(B)
PyH0n 6IeHep IeAebHo NDOxOuNT nI npiroTOBHeHncoYCOOB, NOJIINB.CyIOB, MAJIHO3a NDETCKORIO NTAHnA, aTAKKe IJN CMEUHNBaHnHTKO INMOLOHTbIX KOKTeJIe.ДлnoIOLyEHHaHlyuWnxpe3yblTaTOB CMeuHBnHcNcONb3ynte Camyo BbICOKYIO CKOPoCTb.
BCTabTe MOTOpHyO yactb (4) B pa6oyu yactb 6neHepa (6)doФИКСАПИ.
- PONHOCTBIO ONCYCTINE pyHNO 6NEHnDEP B MEPHBn CTaKaH nnu Yauy. 3aTe BKNIOHTe npNoOp, KaK OINCAHO BbIwe.
- Nocne nCnOJIb3OBaHnR OTKJIIOUHTe npIbOp OT cETn Hax-MITE KHOJKNФKCaun (5), YTO6bl OTcoEduHHTb MOTOP-HYIO YaCTb.
EcnBb nepemeeuBaTe npmo B kactpioe B npoucece npnroTOBHeHRA, TO CHaHa ChMMTE KACTPOJIO C nIINbI, TObbln36ExaTb pa36bp3rMaHnKnJauee KnDkOCTn (PCK OXORA).
PpimepeIenTa:MaHOHe3
250 r macna (Hanpimep, noDCONHeuHO).
1 RnUO 1 RnHbI JXeJTOK DOnOJIHNHeJIbHO
1-2. JIOKKn yKCyca (npn6JIn3ntelbHO 15r),
Cobnpepu no Bkyc
POMECTTE BCE INHpeJeNHTb (IpiKOMHaTHoI TEMnepaType) B EMKOCTb, B BIIweyONMAHyTOM NOPRJaKe. POMECTTE pyHOH 6JIeHep Ha dHO EMKOCTn. NcNoB3yJte pyHOH 6JIeHep Ha MAKCIMAbHOH CKOPOCTn, pNIDepKJBauNTec 3TOtckOPOCTn DoTex NOPKA MacNo He NoBceJeT. 3aTEM, He BBKIOHaa, NODHmITE pyKHY Na NOBepXHOCTb CMEcN, 3aTEM ONrTB HA3aD, BHIN, 7TO6b3a6paTb OCTaTOK MaCna.
Bpemn3rOToBneHn:OT1MnHyTbI(Dnra canata)Do2-xMNHyT Dnla6oJIbWeIyCTObl(HanPmep,nlacoYca).
Benchk(B)
NcnoB3yIe BENHK TOJIbKO IINB6nBaHnCJINBOK,HNHBIX 6eIKOB,INCKBNTHO TECTa INTOBbIX DECEPTOB.
BCTaBtBeBHeuK(8b)BpeykTOp(8a),3aTeMnoCoeHnHTe MOTOPHyO qACTb (4) K peykTopy.
- PONHOCTbO ONyCTnTE BeHnK B HAuY n TOJIbKO Nocne 3TOrO BKIOUaHTe npu6Op.
- Nocne nCnOJIb3OBaHnIgOTKJIOHTe npNoOp OT cTn HaxMNTe KHOKN KcAun (5),YTO6bl OTcoEduHInTB MOTOPHyO uactb. 3aTeM BbTAuTIte BEHKn n3 peDyKTopa.
CobetbI drrnnoyueHnHaunnyuuxpe3yntaTOB
- IcnoIb3yIte yauy cpeIHero pa3mepa.
- NepemaaIte BENHk NO HacobOc TpeKe, epka erO CJIeKa POJ HAKHOHOM.
B36NTbIe CnBKn (MaKc.400 Mm OxJaDeHbIX CnBOK, MNH. 30% XnPHoCTN, 4-8°C): HauHIne C MaOni CKOpOCTN (JeRKeOE HaxaTne Ha HA KhoNkY) uYbeMnHaBaTe CKOpOCTb (Bce 60bnuee HaxaTne Ha KhoNkY) npu B36buaHN.
B36NBAHHe RnCHbIX 6eIKOB (MaKc.4 RaUa):HaHHTe CO CpeHNe CKOPoCTn (CpeHHe HaXaTne Ha KHOKy) uYBeJIu NBAite CKOPOCTb (Bce 60JIbIe HaxaTne Ha KHOKy) npn B36NBAHIn
HacaikdaIpaope(C)
PpeccMOxHO NcIb3OBAtB DnPa3MmHaHn CbapeHHbIX Do MfKocTN OBOeNΦpyKTOB, HAnpImep KapToFeJn, 6aTata, NOMIDOPOB, CINB INI R6IOK.
Ipeed nCnoJb3ObaHMeM
He nCnoIb3yIe dIra npiroToBnEHH NIOpe JxecTkne nn CbIbIe npOyKtIb, TAK KAn 3TO MoXeT pNBeCTN K NOBpexDeHIO yCTponCTBa. YdaIaTe TBepblte Yaact, TaKne KaK OKYpa, KOCTOKH N UpeHKn, a 3aTeM CbApIte N CJIeTe BOy.
Baxho!
He nomeuTe HacaKy dIy IIOpe B KAcTpIOH, HaxoDraUOcR HeNOCPeICTBeHNO Ha NCTOHNKE TENla.
Bcerda cchaJia CHImaTe KactpHIO CnnITbI DaHTe HEMHOOCTbITb.
He CtyuHte HacaKoI IyIIOpe BO BpEmn IIN nocJe ee IcNoJIb3OBAHn NO CTeHKe KAcTPOJn. IyIaIeHHN OCTaTKOB NmU INcNoJIb3yTe JOnaTKy.
YTO6bI DOCTNb HAnyUHINx Pe3yNbTaTOB npnnpriROToBHeHn Niope, He NaONJIte KAcTpIOIO (nnIpyrOgEMOKc) npOdyKtAmu 60JIwe, Ym HAnoJOBHNY.
He 6pa6aTaBbAaTe 6oJee 1 npuun 6e3 nepepbBa.
JaTe yctpoiCTBy 0ctbIb Ha npotjKeHn 4 MNHyT, a 3aTe mnpoJkaTe o6pa6Oky.
HcnoB3OBAHne Hacaekn IIOpe
- YctahOBHTe Kopo6ky ckopocTei (9a) Ha cTepxHeb (9b), Bpaua no yacoboi CTpeKe.
- NpeBepHnTe HacaKny IJnIIOpe nYcTaHObNTe IOnaTky (9c) Ha cHTpaBHyO bTykU, a 3aTeM NOBopaHbAaTe npOTNB YacOBoC TpeJKN Do HAJIeKaUero NoIOXeHn. (EcIn KOp6BaCKopOCTe H e YcTaHObNeA, To HeBO3-MoKHO HAdEKeH O3aФHKCINPOBaTb IOnaTky.)
CoedHInTe HackyIpynope C6JIOKOMMOTopaHnHaabnte,tyo5b3aФHKcnpoBaT.POdkJIOHTpePn6OpK CetH.
IOMeCTnTe HacAdKy IJN IIOpe B KAcTPOJIO, MCKy IIN IpyrTyEO EMKOCtB IN BKLHOHTe YcTPOIcTBO. NpeMeuaIte HacAdKy IJN IIOpe B Cmecn npOdyKTOB BBepx-BHN3 Do Tex NOp, NOka He 6ydet nOlyeh XeJaembl pe3yIbTat.
PocJeNCIOJIb3OBAHnBaBITAHyTbIITeKepN3PO3ETKNIOBopauHBaNoYacOBOnCTpeJKe,CHrTBHaCaADKyMANK(9C).
HaxaTb pa3MbikaIOUe KHOKNI JIN CHAITN MRAIK. CHAITb npBDOHOy y3en (9a) cXBOCTOBKka (9b), NOBepHyB erO npOTNB YACOBON CTpeKN.
Pnpmepeenta: KaptoeJIbHoe nope
IomeTeBauy1KrBaepHoroKaptofien
Pa3MnHaTe B TeueHne 30c (DaBHeHne Ha 34 xOda nepeKJIOUaTeJIa
-Добавыт200MЛТENJOROMONOKA
-Пюдолжайтpe pa3MнHaTbВ TeчEHne npIMepH0 30 c
N3MeJIbUHTeJI (D)
N3MeIbHnTeJI(10)NEaJIbHO NOxOJrT JIN3MeJIbYeHnMraCa, TBepIOro Cbipa, Lyka, 3eJeHn, Yechoka, MOPKOBn,OpexOB, MNHaJIr N.T.D.
Bcerda n3melenbayte TbepeIyKtbn Ha noHnCKOpocTn (Ha npimep,napme3an,wokoJad).
IINJNOJUHHeH HANUYHxpe3yNbTaTOB, NOXaNHyCTa, 03HakombTebc C TabnueD. MAcmajbHOe Bpem pa60tbl 13MeJIbHTeTEn «hc» -2 MNHTbl.
PnMeppecnta:BaHnIbHo-MeObBMyePHocnB (BAKeCTBe HauHKnI JIg6JIIOHB NII NaCTbIJNHaMa3bIBaHnI):
- PonoXnTe 70 r rycToR MoMa n 50 r cepHocnBa B aWy n3MeIbYnteTg «hc»
n3MeIbHauTe B TeueHeNe 4 ckyHa MaKcMmaJIbHoN CKOpOCTn (NoHocTbIO HaxMnte Ha KHOkKy SImntspeed)
-ДобавытEs 10 mN BODby (BaHnIb NO BKcCy)
BkIIOUHTe npnbop eue Ha 1,5 cekyHdbI.
Ha6op «KOMnakTHbI KxOHbI KOM6aH»
Ha6opKOMnakTHbIkyxOHbIKOM6aH(11)ndaJIbHO noXODNTJIA:
- N3MeJIbHeHn I CMeUHbHn
- 3aMeuBaHnTecTa (He 60Jee 250 r MyKn)
Hape3KUNHHKOBKN
N3MeJIbYeHne (E)
C NOMOJIbHO HOXA (12) BbMOKeTe N3MeJIbHITb MRCO, CbIP, JyK, 3eJIeHb, YecHOK, MOpKOb, rpeKne opexn, FyHJyK, MNHdJIb NT.
IJIIOJUyEHnHaHnlyuHnxpe3yJbTaTOB,NOxAynCTa, O3HAKOMbTeCbCMAKCmAmhBbIMKONHcTBMCKOPoCTbIO, yka3aHHbIMB Ta6nuei pa3denaE.
He n3meIbHaIte CnIuKOM TBePbIe npOyKbI, TaKe KaK Ky6Kn Ibda, MycKaTHbI opEx, KoFeHbIe 3epHa INI Kpybl
Ipeepn3MeIbueHHeM...
- PnpBapntelbHn HapeKbTe MRCO, CbIP, LyK, YecHOK, MOPKOb, Ynn
- ydaJInte cTe6n 3eJIeH, ckOpJny opexOB
- ydaJInte KOCTN, JxJbI xPraU n3 Mca
ybeiTEcB,BAHINHNIPOTNBOCKOJIb3aueIIOCTaBKn(11g)Ha aape NImelbHTeJIa.
BHHMaHHe: OYeHb OcTpbi Hox! BcerIa DepeXnTe erO 3a BePxHIOI IaCTNkoByIO qAcTb N O6paauNTecb C HIM OCTOpOxHO.
OCTOPOXHO CHNMTTE 3aunTHbY cHoxJ C Hoxa.
- YCTAHOBHTE HOX Ha CEHTpaJIbHbI CTepXeHb YaHn (11f), NOBepHnTe erO do Φɪkcaɪn.
PomeCTIe npOdykTB B aUy. PnpcoEaHnHTe KpbIbKy (11a) k aape npn moOnuФKcTaOpa KpbIbKn (11e), KOTobpI paCNoJoxKe pADOM C pyKoN qAun.
-ДяЗakpyTЯКрblшкNoOBepHnTe eeNo yacobOCTpeKe,уTOБыФИССТOP3aUeKHyNcHaIpyKoI.
BCTaBtMeMOTOPHYU qACTb(4)BCuENJIeHHe MToPHOJ qACTn (11b)doΦUKcaUN.
BkIOuHTe npI6Op B cetb n y6eNTecb, YTO TOnKaTeNb Ha MeCTe.
BknHouTe npn6op n npndepxNBAIte yauy pyroynkoJ. - Iocne NcnoIb3OBAHnO TkIOUHTe npIOBOp OT cTeN HaxMITE KHOKN KCAUN (5),YTO6bl OTCOEduHHtB MOTOPHyO uactb. Y6epNTe ToKATEnb.
Haxmnte 3amok Kpbuikn (11e) nepknte. Nobepehnte Kpbuiky (11a) npotnb yacoboi ctpenki dny OTkpbltnr. - POnHIMnTe KpbIuKy.
- Octopoxho BbTaunTe HOx nepei TEM, KaK BbHIMaTb n3MeIbueHHIe npOdykTB.ДЯ CHrTu HoxKa CJIerKa NOBepHnTE u pnpoDHNMITE erO.
3ameunbaHne JERKOROTECTa
C NOMOIOHOXa(12) BbMOKTe 3aMeCnTbJeRKeOE TcTo, IJRA6HIOHOI INIINPOra,C INCNOJB3OBAHnEM He 60Jee 250 mMyKn.
Pnimepeenta:TcToDn6nnHOB HaneTe 375 mI moNoka B yauy,doabbTe 250 r Mykn n 2 na. Ha nonHOckopocT CMeaHTe Do noLyueHnro OndoHORO HexHoro TectA.
3ameumbaHne Tecta
Ha pncyHke pa3deJa E noka3aHo KaK noJIb3ObaTbcra HacaIko IJRA Tecta. Hacadka IJRA Tecta (13) uJealbHO NOxOJNT IJRA 3ameuBaanpa3hIx BnIOB Tecta, HanpIMep, DPOXKeBOr OIN BNCBHTHO (MAKcMym 250 r Mykn).
Onyctnte hacaiky dny tecta bawy (11f).
HacbInBeBauSyHe6Oone250rmyKn,3aTeMdoabBeOCTaIbHbIe INHPrEneHtbl,KPOMEJxNkX.
BkIOHnTe np6Op Ha NOhHyo ckopoCTb.
- DóbaBbTe KxNkne INHpeDnEHTbI Yepe3 HAnOJIHNTeJIb He BbIKIOUa npIbOp.
MaKcImaJIbHoeBpeM3aMeuBaHnI:1MNHyTa-3aTeM DaIte np60pyocTbBTBeueHne 10 MNHT.
Pnmepeenta:TecToIy nucbI
250rmyk,1/2aHHOJIOKKnCOJI,1/2aHHOJIOKKnCyHXN dpojkei,5aHbIXIOKEOINKBOKOBOrMaCna,150MBOBbl (KOMHaTHOHTeMnepatypbl).
PnMeppeenta:6nCKBNTHOe TECTO
250rmykn,170rmacna(xoJOnHO/TBepDoro,MJIeHbKMM KycOyKaMn),80rcaxapaHoroNecka,1nakeTBAHNbHoro caxapa,1He6oJbwoeRnQ,1JeNOTKaCOnL.DnI NOyehnXopoWerope3yIbTaHaHEcNOJb3yIteTeNIOoe,MKRoeMaNo. BbIKIOuTe np6Op,KAKToJbKO TECTo CΦopMpyETCB Wmap.TECTO CTAHOBNTcCmIKOM MMRKMOT Ype3MePHORO 3aME-
Hape3ka /uHHKOBka/HacaKaIa KapToΦeIa F
IcnoIb3yI ne3Bne InHape3Kn (14a) Bbl moKeTe pe3aTb orypcbI,nyk, rPi6bi, 6bLOKNI, MOpKOBB, peDNC, cbIpOi KApToΦeB, Ka6aHKn, KanCyT. IcnoIb3yI ne3Bne IIn HIKOBKn (14b) Bi MoKeTe IuHHKOBAbT b6IOKN, MOpKOBB, cbIpOi KapToΦeB, CBeKJY, KaNyCTy, cbIp (MraKIN nn cpeDHe TBePDocT).
HacaKaIJI KAPToΦeIa (15) npEHa3HaueHa IJI npiroTOBHeHn KaTcΦeIa pI.
- NomeCTNeIe3BHe(14a,b,c)BdePkaTeNb(14)/nacKaДЯKAPTOFeJPhn(15)и3aФHKCpUyTeBHyKHOMNIOXKeHn. YcTaHObITEpeKApTeHaueHTpaJIbHCTePXEHbAaHnI3aФHKCpUyIeero.
- PnncoeiHnTe KpbIuKy (11a) KaWae npn nOmoU nnKcaTopa KpbIuKn (11e), pacnoJoxeHHoro pAnom C pyKoN yAun.
-ДЯФИКСАПИКРБИKKN,NOBEPHNTe ee NO YACOBONCTpeJIke,HTO6blФИKcAToP3aUeJIKNyIcnHnADpyKoN.
BCTaBtE MOTOPHYO YACTb (4) B CcENJIeHHe MOTOPHOYACTn (11b)doΦHKcaun.
BkIIOHTe npI6Op B cETb N do6aBBte npOyKtB HAnoJIHnTeB.
BKNIOHTe np6Op. HNcOHa He cyuTe pyky B HAnoHnTeIb, noka np6Op BKnOHeh.BceJa NcNoJIb3yIte TOnKATEIb (11c) dnoobneHnpdykTob.
PocneNCJb3OBAHnRAOTKJIOpHTnp6OpOTcEN HAKMNTKeKONKnФHKCaunn(5),TTObIOTcoeHNHTb MOTOPHYIOHaCTb.
HaxMHTeHaΦKcTOp KpbIuKn (11e) uyepeXnBaIte. NObepHHTe KpbIuKy (11a) npOTNB acOBou CTpeJkn, TTO6bl OTKDbItb ee. - IOnHIMnTe KpbIuKy.
BbTaunTe depKataEnb /nacJa nA KaptoFeIaPn nepeTem, KaB bHIMatb N3MeJIbHeHbIe npOdyKTb. Ia CHrTnaJe3Bn (14a,b,c) octopoXHO NOToLKnTe ero CHN3y BBePx.
yxoD(G)
OuHuaTe 6nok MOTopa n Kopo6ky ckopocTe (8a,9a) NCKIOHTeNbHO yBnaJxHeHHo TKaHbIO. KpbIuKy (11a) MoXHO MbITb NOd npOTUHO BDOiHO He norgpykaJe ee B OBOy H Me MOte B NOCyDOMOeHOr MaUNHe. BCE dpyrue qactn MOxHO MBtB NOCyDOMOeHOr MaUNHe. C qAunN3MeJIbTuNE MoXHO CHrTB pOnTbNOcckOJIb3raUYo NOCTABK Ky Ia6Boe TuaTeNbHO OuHueHn.
Pn paBoTe C npOdyKtAm, HmEIOUmm HacBbIeHHbI UBeT (HAnPMHeM, MOpKOb), PnAcTMaccOBBe DeTALN MOrYr OKpaCnTBcR. PepeOChTKo npoTpnte Takne Detanu pactntelHBm MacNoM.
Akeccyapbl
(MOxHNO npno6peCTn OTdEINbHO,IOCTyNHBI He BO BCEx CTpaHax)
Texholoria Smartspeed
PyHn6IeHep npeKpaCHO IuHTb IJI npriroTybaHHaCOYiB, NiINB, CyINB, MaHOHe3y i DmTARo XAPyBaHHa, a TAKOx DN 3MIwYBaHH HANOIB TA MOnOHyX KOKTeJIB. DnA 3D0ByTT HaNkPaUxH Pe3yJbTaTIB 3MIwYBaHH BKNOpNCBOyTE HaNBNU WBNKICTb.
BCTABTe npuBic4 Bpyky6JIeHepa(6).
- Po3a7yIte pyHn 6bnHeep rIn60Ko B aaii a6o Mncui. Notim yBIMKnHtbpnnaJk onncaHo Bnue.
- NicnBnKOpNCTaHnBnMkhHtB 3 MepeXi iHaTnCHHtB KHOkny BiKpnTTA (5) DnB BID'EDHaHHn npNbOy.
Pn3miuyybaHHi 6e3nocepeHbO B KAcTpyI B XoDi roTyBaHHcNoaTky 3HIMtB KAcTpyIIO 3 PInTI uO6 yHnKHyTN po36pN3KyBaHHKINJIyOoi pIDHH (pN3NK 06wnapIOBAHH!).
PnPKlaepeTMyMaHOe3
250r poCINHHOJ OJI(HAnpKnlaD,coHsHKnKOBoI), 1Uine Rnue+1ReuHnnXOBToK, 1-2u. loxKn ouTy (npN6n3HO 15r), CInbTa nepeCu 3a cMakOM
PoknaidtbycihrpeiEHTN (npnKimHaTHH TeMnepatypi) BEMHCTb, yBnue3a3HaHcHOMy npRky. 3aHpyTe pyHn Hsienep Ha dHO EMHOCTI. BnKOpNCBOYte pyHn bHsienep HA MAKCnAmblHn WbUNKOCTI, DToPMUYTECB LcIE WbUNKOCTI do Tnx nip, pOKoONe HnoBNIIE. NotIM, He BmNKaOuN, NIDHIMITb pykny No hOBepxHIO cymiwi, NotIM 3HOBY ha3ad, BHN3, So5b 3a6paTn peWtu Macna. Yac BnroTOBNEHRA: BiD 1 XBNINH (dJIraCaIATy) Do-2-XXBNINH dJIg 6JbwoI rctOTn (HanpNKlad, dJIr rcyto cocy).
Bihvnk (B)
BnKOpNCToBMyTe BInHk IINe DnE 36BaHHBepKIB, RcHnx 6iKnib 3MiUyBaHHBicKBbTHOro ticTa i RotOBx DecepTIB.
BCTABTE BInHnK (8b) B MExaH3M (8a), 3akpiinTbpnbid B KOpnyci.
- Nomicitb BiHOOK B MCKy i IIMe nICr UbOro yBIMKHITb npna.
- NICIA BUKOPUCTAHHBAUMKHTb 3 Mepeki i HATNCHTB KHONKY BiDKPITTR (5)IaBI'EDHaHHN pINBOy. IOTIM BiE'EDHaHTe BIHNK BID pINBOy.
IopadnIaDIOcRHeHHHaIKpauuxpe3yIbTaTIB
BnKOpncToByTe MnCKy cepeHbOTo po3Mipy.
PyxaTe BInHnKOM 3a roINHHNKOBIO CTPIIKOIO, TpMaIOH NoIoro 3JERKa NiD KYTom.
36ntiBepkni (mKc.400 mI oxoJckEHn Bepkib, MIH. 30 % xnpHOCTI,4-8°C) nOHTb 3 manoi WBnKOCTI (nerke hatncheHHHa nepeMnKaH npn 36nbAHHi.
36nBaHHraeHnX 6iKnB (MaKc.4a)noHHTb 3 cepedHb0I uBnKoCTI (noIOBnHHe HaTNCHeHH Ha nepeMnKa) 3iBbUyTe WnDkCTb (Bce 6IbIwe HaTNCHeHH Ha nepeMnKa) npn 36nBaHHi.
HacaKaIraIIOpe (C)
Pnpctpi dI npirotoybaHHNIOpe MOXHa BnKOpNCTOByBaTINI pnpirotoYbHHIOpe 3 BapeHnx OBOuH Ta pkyTIB, kHapnPKlaD, 3BnuAaHoiTa coNoDKoI KapTONi, nomIdopIB, CInB Ta RaLyk.
IpeedBnKOpNCaHHaM
He nopi6HIOIe TBepdy a6o cny iky -ce moKe nooKoIuNTn npuaad. BuaaIitb TbepiactHH, HapnKnad, uKipKy, KicTocku Ta Cte6na, notim npirotoyTe i npouidTb.
Baxlnbo
HikonHe BnKOpncToByTe HacaKy IJy NIOpe y KAcTpynI, 10C CTOITb HA BORHI.
3aBXn 3HIMaTe KaCTpyIIO 3 BOrHIO Ta DaBaIte I TPOXn OXOJHOHTN.
He cykaTe HacaKOIO dIg nIope No cTIHKax EMHOCTI, 00 BIKOPNCTOBcYbTcBdIy IIOrO npriOTyBaHHN, IId Yac a6o NICJI BIKOPNCtAHH.3icKpiBaTe IkY, 00 HaJIINnla, 3a DONOMOFOKI ONaTKn.
Длготриманнанайкрашип релультблпд пд сац prniroToBAHн ПIOpe He 3aIOBHIOTe KAcTpyIIO ChI HIIy EMHITbIXKeO 6JIbIe, HIX Ha NIOBOHNY.
He o6p06nIte 6iNbue 1 npTIT npOdyKtB 6e3 nepebpN.
-ДаиTe npictpoO oxolohytn npotraHm 4xbnH, nepH HIX npodobkByatn o6p6ky.
BukopncTaHHH Hacakn DnIIOpe
- PnueHaIte Kopo6ky WbNIOKoTei (9a) do pyKn (9b), NOBepHyBwii 3a rOuHHNKOBIO CTPIKOIO.
- IpeBepHitb hacAnky dIra NIOpe,HaDiNbTe IOnaTky (9c) Ha LeHTpaIbHy BicTa NOBepHITb II dIry 3akPinHeHH. (RkUo Kopo6Ky IwNkoCTe He 6yIo npEeDHaHO, IOnaTky He 3akPinITbcrHaMiCi.)
- PnEHaIe MoTOpHn 6Jok Do HacaKn dJa IIOpe Ta HATNCHTb, 063aΦikCyBaTu. YBIMKHTb B EJeKTpOmepeKy.
- POMICTb HacaIky dIy IIOpe y kactpyIIO, MnCKy HINHcy EMHITb Ta yBIMKHITb npHaI. PyxAaTe HacaIky dIy IIOpe y cyMIUI BROPy Ta BHN3 DO DOcARHeHHaBaxaHO r pezylbTaty.
PcIe BIKOPCTAHHBAID'EDHAIETe PpINaD BID MEpeXi 3HIMtB HacaKy (9c), NOBepHyBUN II 3a RoDHHNKOBIO CTPIKOIO.
HaHcHtB KhoNk De6lokyBaHHa, 0o6 3nTu HacaKy dIy IIOpe. 3HIMtB peDyKTop (9a) 3i cTpNxHr ToKyuK (9b), NOBepHyBm NOrO npOTn rOdNHKnKOBoCTpIKN.
PnKnaPeuNTa: Kaptonnne IIOpe
- Pokna日益 1 kr BapehoI KaptoniB uawy
- P03MnHaTe npTgrom 30 cek. (HATncHiB peryIaTOp Ha 34
-Ддайт200mTENlOroMOnoka - PpOoBxMyTe po3MnHaTn 1e npOTaRm 30 cek.
NoDpi6HObaui (D)
IoppiHOBaHi (10) yuOBo IuHaTb IyI npoi6HeHH M'raCa, TBeporo Cpy, Lyka, TpaB, YachNY, MOpKBN, ropixIB, MRdaiIO i Tak dani.
3aBxNn noDi6HIOIe TBepi npOyKTn Ha nobHi WbNIOKCTI (HaPnKJIa, NapMe3aH, WOKoJa).
Дяdoягнгайногаikpauxpe3yltatib,6yblnacka, 03haionmteca3 tabuueD.MakcmaJIbHnYacpo6OTNДЯ noDi6HOBaHa“hc-2xbnnHH.
PnKnapeuenty:BaHInbHO-MeDObi CnBn
PnKlaepenty:MInHueBeTicTo
CnoaTky nomictb 375 mI MONoka B MNCKy,doaIte 250 r 60poWHa i notim 2 auiy. Ha nobHni wBnKocti 3miuaTe do 3dooyTTQ ODHopiHOrO HIXHOROTCTA.
3amic ticra
KaptnHka 3 po3dijy E taKoX 3aCTOCOBHa dJa BnKOpNCtAHn npntpoIO DnA 3amCy Ticta.
Pnpctpi dIy ticTa (13) iIealbHn IJr 3amCy pi3Hx BnIB Ticta, HapnPKnaI, dpixdkoBoro a6o 6ickBiTHoro (MaKcIMMy 250 rp 6opouHa).
- Tomictitb npctpiJnTicTa B Mncky (11f).
HANOBHITMNCyHe6IbweHIX250rp60puHa,NOTIMdoaTeOCTAHHIHRpeJeHTN,OKpimpiKnx. - YbIMKHiTb npnnaHa noBHy WbNdkiCtB.
- IOnaIte pIDHn Hpe3 OTBip nHaOBHeHH npnnpauOIOHOMy npuBOi.
- MakcmaIbHn yac 3mIyBaHHa: 1xBuHa - notim oxoNoiBtpnbID npTgrom 10 xBuHn.
PnKlapecenty: ticTo nni
250mykn 12 qainhoi noxkcoj 12 qainhoi noxkynx npixdxiv, 5qainhix noxok onnKBOBOrO macna, 150 mI BOn (KIMHATHOI TEMNepaTyPI).
PnPKaIpaenTy:6ickBtHe TictO
250r6bopuHa,170rMaCna(xoIOnHoro/TBepDoro, MaJIeHbKIMM uMaTochAm),80rUkypy,1nakeTnK BaHInbHoro Ukypy,1HeBeNlke Rnue,1uinka coJi. Jn3O6yTTNo6pOro pe3yIbTaTy He BnKOpNCtobyTe Tnen, M'KeMacNo. PnpiHITb 3MIuYBaTN Be3nocepehNbO nicra TorO, kTicTo cΦOPMyBaNoC B KynIO.TICTo CTAHe DnyKe M'KIM BiHnAdmip-Horo 3amCy.
Hapi3ka ckn60kamn / ky6nKamn / hacaKa nIa Kaptonli φpi (F)
BukopncToBouyUOn npuJaI dny Hapi3K (14a)
Bn moxete Hapi3ybaTu cKbOcKaMn OriPK, u6yIIO, rpn6n, 6nyka, MopkBy, peNc, Cpy KapToTnIO, Ka6aKn, Kanycty. 3 BnKOpNCtAHm NOpi6HIOHO npnAyn (14b) Bn moxete Hapi3ybaTu 6nyka, MopkBy, Cpy KapToTnIO, 6pyk, Kanycty, Cnp (M'kyn a6o cepeHb0i TBepdoCTi). HacaKn dJa kapToTnI pI (15) dJa hapi3aHHa KapToTnI coJOMKOHO.
- POMICTb npnla(14a,b) B TpIMaH (14)/ HacaKa dJa
KAPTONIi φpi (15) i3aΦikCyuTE B NtPf6Homy NoJoxHeHHi.
POMICTb TpIMaH B CEHTP MmCKn i 3aΦikCyuTE Ha MiCiJ. - PnneHaHte KpnuKy (11a) Do MNCKN 3a DoNOMOIO 3AMky (11e), po3aWoBaHO ropn43 pyKIO MNCN.
-Дяфikcaii KpnuKn, npokpyTb II 3a roDHHNKOBIOO CTPIKIO, a6n 3AMOK 3AMKHYBCR HaD pyKIO.
BCTABTe npuBID MyfTy (11b)do fikcauii.
BknIOHTb npnlaB Mepexy i doaTe npOyKTN BOTBip HANOBHEHRA.
YBMKNHb npnnd.HikOni He TopkaTeCyaKAMOTBOpy DnHaNOBHeHHN, NOKn npnnd yBMKeHHN. ABxKn BUNOPcTOByTe TOBKaY (11C) dIdoBaAHH npOdykTtB.
-Пись ВИКОРИСТАнHA BID'EDHAHTe BID МЕTEXI HATNUCKYTe KHOKNBIDKPNTTT(5)ДЯ BID'EDHANH NpNBOy.
HaTnCHiB 3amok KpUk (11e) iYtpmUyIe.ObepHITb KpUkky (11a) npOTn rOdHHNKOB0I cTPIK DN BIDKPITTTA.
PiHIMITbKPNkY.
BUTTHTb TpIMa/ HacaIky dIy kapToNJI φpi npnCTpoI nepeT MIK, AITBTHYrTOBI pOdykTN. DInra BUnaJeHnI npCTPOIO NotARHbIHO rO 3 OJHO BOKy, kKn BcTynae 3 HxHHbOro 6Oky TpIMa/.
OuHueHHa (G)
Ouuyyte MOTOPHNI 6Iok Ta Kopo6Kn WBNKocTe (8a, 9a)
Jnue 3a DOnOMORIO BOIoro raHicpKn. KpnUky (11a) MoXHa
MNTn NiD pTOOHO BOIOO; aJe He 3aHypioTe II y BOy i He
MMTE B NOCyDOMHiMaHI.
Bci Hui JuaCTHHN MOxHa MNTn B NOCyDOMHi MaHI.
BIMoKTe 3HnKJIbIpy npOTN KOB3aHH3 MUCKNIOpDiHO-BaayapetelbHIOWO OUYueHH.
Pnpo6oTI npOdyKTAMN 3 BeJINKMM BmICTOM φap6HnKIB (HaNPKJa, MOPKa) nlaCTNKOBi DeTani MOxyTB BpTaNTu KOIp. PpOTpiTb ix pocnnHHIO OIeIO nepeD ouHneHHM.
Akcocyapn
(OTPMyIOBcA OKpEMO,DOCTYNI He y BCIX KpaIHAX)
MQ 30:500 mI nopi6HIOBau dIa IooPi6HeHHa MOpKBN, M'aca, u6yni, i Tak dani
MQ40:1000Mn noDpi6HOBaJnI noDpi6HeHHa3MiUyBaHHI KpNiHHNbOdy
3MiHMOXYTB BHOCHTNc8e3 NOBIDOMHeHH
BylbIacKa, He yTnIi3yIte npOdyKT B noboyToBI bIXoHn nCJIa3akIHHeHH TepMHIn CnyK6N. Ioro MOxHa yTnIi3yBaTN B CepBichNX ueHtpx Braun a6o y BiINOBHINx ToKaxnpHMy y BaWiI kpaIIH.

O6naHann H BiINOBiAc BmOram TexHnHoro perAmenty
6mEkeHHn BnKOpNCTAHn DeAKNx He6e3neuHX peoBnH
B eektpnHOMy Ta eektpoHOMy 6naHaHHi.

001
TapaHaJIHrO 800503-507 (I3BihKn 3i CtaioHapNx TenefoHIB 6eKoWTOBHi).
| الجعaultالله� | :MQ 30 |
| الجعaultالله�,ال500م辩证ique | :MQ 40 |
LwJl

Country of origin: Poland
Year of manufacture
To determine the year of manufacture, refer to the 5-digit production code located near the type plate. The first digit of the production code refers to the last digit of the year of manufacture. The next 2 digits refer to the calendar week in the year of manufacture. And the last 2 digits show the print date automatically calculated since 1992. Example:30421 - The product was manufactured in week 4 of 2013.
山
:iallai
1
1
1
1
1
1
1
1
1
1
1
1
1
1
1
1
1
1
1
1
1
1
1
1
1
1
1
1
1
1
1
1
1
1
1
1
1
1
1
1
1
1
1
1
1
1
1
1
1
1
30421 .9. 1992 . 2013
Jai Jia Jiauui E aill jk
e 13)
250 250 250 250
(1) ADE FEG
.(11f)legla jaoaai
250 250
Jgall 111wly LgS11 a
aagaaal aegall aegy jaii Jia
J 1
.
eog no gssall plabll 1jla jia jia jia jia jia jia
. 1111111111111111
ai I ai II a_i II
aillll 12) aaiil
11 11
250
aal aab81 paii gaaai jai
()
aaiiD jglj jil jil jil jil
liang:《hC》zaijiali
Julll, llll lal jol: liq
( a^2 + 1) ( b^2 + 1) = - 1^2 + 1^2
3gj50 70
. a4 = a1 + 2d a_4 = 2
gall Jll 10d jai
(20 Smartspeed j b)
(L)1030
3aJai J
a0d11 1abla a2slo gdo
Iolai wio Iolai wio (11) aodl iolal ailo
juiy jiy jiy jiy jiy jiy jiy jiy jiy jiy jiy jiy jiy jiy jiy jiy jiy jiy jiy jiy jiy jiy jiy jiy jiy jiy jiy jiy jiy jiy jiy jiy jiy jiy jiy jiy jiy jiy jiy jiy jiy jiy jiy jiy jiy jiy jiy jiy jiy jiy jiy juy
1.a5b211j0g21
JLaauiucljloj jbaa JraaiuU cii 3
.14
(B)
aabjai jai jai Jai Jai Jai Jai
I 1
eJlaxuJz. 1111g 1gai
blal lai Jai jie Jgall
.6) bxi11 ygi (4) gi 1j k
paa 1g jie gj 1s 1aue gdo bdo
Lulwosill aably jzll
yjll jall jll jll
jgl (5) jail
gall 10000000000000000000000000000000000000000000000000000
Jlll jll lgl g jll jll eagll
.(iLjglg)
juiu1:
(x)250
aaioljuiy jio 0o lksdo
(15)15)
aJll Jalilg clll no
()cglglaLgll
eagll jgsbokai (aajl a
yai yale gaoall aegull ale blyali gai.
ySra. cIgSsLoLai cuill juaa
aalg aai jll jlaikjlaai jaiy g
(1000)
(B)
aal 11
ylll lalw uylall lblg yiey1 1sll
(8a) 1 (8b)
(4)2gglj
y1g1
(Smartspeed) (3) C. all
.1JlJaaWbAeJgllgKsillg,gggl
1JgJLaaaiia
(4) 15111111111111111111111111111
C. a + b = 1
(A)
E 1
:
1
y jll y 1
.
alalgljajglalolall cikI jqllpaa
.5albclaaai Logio gLi jggl lall glll
.
j4d = 11 d = 20g
10 × 12
2
3
254
Jai 5
6
32917
a 8
b
9
aeyull aie 9a
w#llgac 9b
19c
b2 a
a. ,
c < 0
jU Juaa d
fp 1500 a11 b11 a11 11
11a
11b
11c
11d
11e
l_eg 11f
11g
12
13
14
14a
(cuiy gci) 14b
14c
aaii Iuui iui 15
-0yJgJ1jLjI JgJgJg
《..

158 100
jgl jll lla JlaxuLygaiuji gaji paoill
. 1
gj jai jll plabll ciaag no agaegaoe 1yblu
www.braun.com 8
JLoaiuJ
lg = 1
4
y
.

jolil 1abwlg jgllllip
JibbIabwIyIaIallIaBllIeae
aiklgljll jgssll Jull Jauu
gSjill Jd dlsJd Jdall Jd Lioie
111
g1,4g11110201111111111111111
Jb12 1
joo gao jilu jilu jilu jilu
11
16 = 11 16 = 11 16 = 11
j4a jai Jilw Jilw aie jiall jll
eaiie 1
gao jie jie jie jie jie jie jie
joljg bai gdlil plusuJlai liia pi
auiuill auii iuiuill iuiu