2506007 - Lawn mower GREENWORKS - Free user manual and instructions
Find the device manual for free 2506007 GREENWORKS in PDF.
| Features | Details |
|---|---|
| Product type | Lawn mower |
| Power | Not specified |
| Cutting width | Not specified |
| Cutting height | Adjustable |
| Engine type | Electric |
| Grass collection box capacity | Not specified |
| Weight | Not specified |
| Usage | Gardening, lawn maintenance |
| Maintenance | Regularly check blades, clean the collection box |
| Safety | Wear gloves, do not touch moving blades |
| General information | Ideal for small and medium surfaces |
Frequently Asked Questions - 2506007 GREENWORKS
User questions about 2506007 GREENWORKS
0 question about this device. Answer the ones you know or ask your own.
Ask a new question about this device
Download the instructions for your Lawn mower in PDF format for free! Find your manual 2506007 - GREENWORKS and take your electronic device back in hand. On this page are published all the documents necessary for the use of your device. 2506007 by GREENWORKS.
USER MANUAL 2506007 GREENWORKS
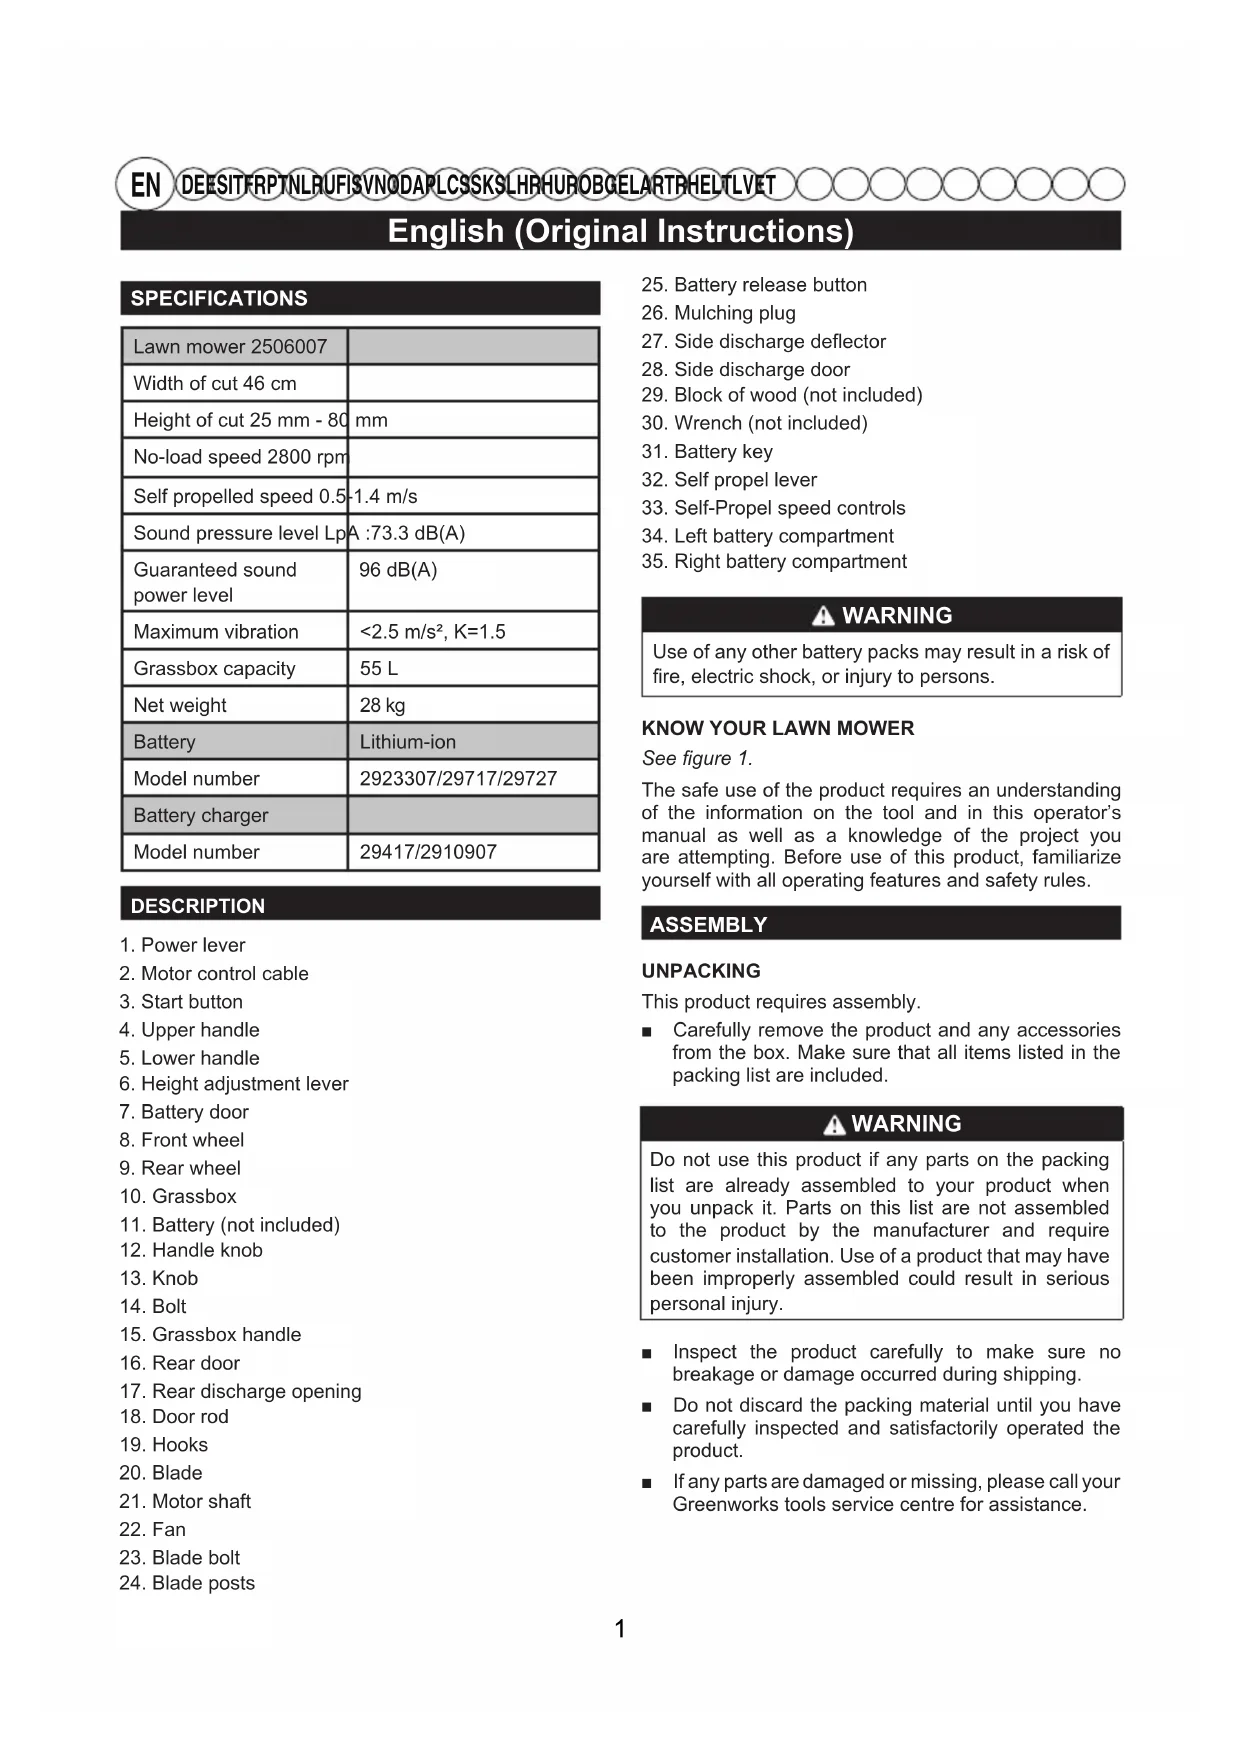
| SPECIFICATIONS | |
| Lawn mower 2506007 | |
| Width of cut 46 cm | |
| Height of cut 25 mm - 80 | mm |
| No-load speed 2800 rpm | |
| Self propelled speed 0.5 | 1.4 m/s |
| Sound pressure level Lp | A :73.3 dB(A) |
| Guaranteed sound power level | 96 dB(A) |
| Maximum vibration | <2.5 m/s², K=1.5 |
| Grassbox capacity | 55 L |
| Net weight | 28 kg |
| Battery | Lithium-ion |
| Model number | 2923307/29717/29727 |
| Battery charger | |
| Model number | 29417/2910907 |
DESCRIPTION
- Power lever
- Motor control cable
3.Start button - Upper handle
- Lower handle
- Height adjustment lever
- Battery door
- Front wheel
- Rear wheel
- Grassbox
- Battery (not included)
- Handle knob
- Knob
- Bolt
- Grassbox handle
- Rear door
- Rear discharge opening
- Door rod
- Hooks
- Blade
- Motor shaft
- Fan
- Blade bolt
-
Blade posts
-
Battery release button
- Mulching plug
- Side discharge deflector
- Side discharge door
- Block of wood (not included)
- Wrench (not included)
- Battery key
- Self propel lever
- Self-Propel speed controls
- Left battery compartment
- Right battery compartment
WARNING
Use of any other battery packs may result in a risk of fire, electric shock, or injury to persons.
KNOW YOUR LAWN MOWER
See figure 1.
The safe use of the product requires an understanding of the information on the tool and in this operator's manual as well as a knowledge of the project you are attempting. Before use of this product, familiarize yourself with all operating features and safety rules.
ASSEMBLY
UNPACKING
This product requires assembly.
- Carefully remove the product and any accessories from the box. Make sure that all items listed in the packing list are included.
WARNING
Do not use this product if any parts on the packing list are already assembled to your product when you unpack it. Parts on this list are not assembled to the product by the manufacturer and require customer installation. Use of a product that may have been improperly assembled could result in serious personal injury.
Inspect the product carefully to make sure no breakage or damage occurred during shipping.
- Do not discard the packing material until you have carefully inspected and satisfactorily operated the product.
If any parts are damaged or missing, please call your Greenworks tools service centre for assistance.
PACKING LIST
Lawn mower
Battery key
Grassbox
■ Mulching plug
Side discharge deflector
Operator's manual
Knobs
Bolts
WARNING
If any parts are damaged or missing do not operate this product until the parts are replaced. Using a product with damaged or missing parts could result in serious personal injury.
WARNING
Do not attempt to modify this product or create accessories not recommended for use with this product. Any such alteration or modification is misuse and could result in a hazardous condition leading to possible serious personal injury.
WARNING
Do not insert battery key until assembly is complete and you are ready to mow. Failure to comply could result in accidental starting and possible serious personal injury.
WARNING
To prevent accidental starting that could cause serious personal injury, always remove the battery pack from the product when assembling parts.
WARNING
Never operate the mower without the proper safety devices in place and working. Never operate the mower with damaged safety devices. Operation of this product with damaged or missing parts could result in serious personal injury.
UNFOLDING AND ADJUSTING LOWER HANDLE
See figure 2.
Pull and rotate the handle knobs 90^ on both sides to loosen the lower handles on both sides.
- Move the lower handles to the operating position. You may raise or lower the handle to a position
comfortable for you. There are 3 positions for you to choose. Release the handle knobs to lock the lower handle into position.
NOTE: Ensure both sides are set at the same position for proper assembly.
INSTALLING THE UPPER HANDLE
See figure 3.
Align the mounting holes on the upper handle and the lower handle. Insert the carriage bolts and use the knobs to tighten them. Repeat the operation on the other side.
INSTALLING THE GRASSBOX
See figure 4.
- Lift the rear discharge door.
- Lift the grass catcher by its handle and place under the rear discharge door so that the hooks on the grass catcher are seated on the door rod.
- Release the rear discharge door. When installed correctly, the hooks on the grass catcher will extend through the openings on the rear discharge door.
INSTALLING THE MULCHING PLUG
See figure 5.
- Lift and hold up the rear discharge door.
- Grasp the mulching plug by its handle and insert it at a slight angle, as shown.
Push the mulching plug securely into place.
Lower the rear discharge door.
INSTALLING SIDE DISCHARGE DEFLECTOR
See figure 6.
NOTE: When using the side discharge deflector, do not install the grassbox. The mulching plug should remain installed.
- Lift the side discharge door.
Align the hooks on the deflector with the hinge rod on the underside of the door.
Lower the deflector until the hooks are secured on the mulch door hinge rod. - Release the defl actor and side discharge door.
SETTING BLADE HEIGHT
See figure 7.
When shipped, the wheels on the mower are set to a low-cutting position. Before using the mower for the first time, adjust the cutting position to the height best suited for your lawn. The average lawn should be between 38 mm and 51 mm during cool months and between 51 mm and 70 mm during hot months.
To adjust the blade height
To raise the blade height, grasp the height adjustment lever and move it toward the back of the mower.
To lower the blade height, grasp the height adjustment lever and move it toward the front of the mower.
OPERATION
WARNING
Do not allow familiarity with products to make you careless. Remember that a careless fraction of a second is sufficient to inflict serious injury.
WARNING
Always wear eye protection. Failure to do so could result in objects being thrown into your eyes resulting in possible serious injury.
WARNING
Do not use any attachments or accessories not recommended by the manufacturer of this product. The use of attachments or accessories not recommended can result in serious personal injury.
WARNING
Always inspect mower for missing or damaged parts and blade for damage, uneven, or excessive wear prior to use. Using a product with damaged or missing parts could result in serious personal injury.
- Do not tilt the lawn mower when starting the engine or switching on the motor, unless the lawn mower has to be tilted for starting. In this case, do not tilt it more than absolutely necessary and lift only the part which is away from the operator.
- Do not start the engine when standing in front of the discharge chute.
- Do not put hands or feet near or under rotating parts. Always keep clear of the discharge opening.
For complete charging instructions, refer to the operator's manual for the battery packs and chargers listed in the specifications section.
TO INSTALL BATTERY PACK
See figure 8.
-
Lift and hold up the battery door.
Align the battery with the mower's battery port. -
Insert the battery into the left battery compartment to start the mower. This mower is equipped with a battery storage compartment which offers a convenient place for storing your battery when not in use, or to store an extra battery pack to extend your run-time.
Make sure the battery release button snaps in place and that battery is fully seated and secure in the mower before beginning operation.
Insert the battery key.
If the machine is not going to be used immediately, do not insert the battery key - Close the door.
TO REMOVE BATTERY PACK
See figure 8.
Release the power lever to stop the product.
- Open the battery door to access the battery compartment.
Remove the battery key.
Press the battery release button on the battery. This will cause the battery to raise out of the tool slightly.
Remove battery pack from the product.
STARTING/STOPPING THE MOWER
See figure 9.
Press and hold the safety lock-out button.
Pull the power lever upward to the handle to start the mower and release the safety lock-out button.
To stop the mower, release the power lever.
NOTE: A high-pitched noise and sparking may occur as the electric motor decelerates. This is normal.
SELF-PROPELLED MOWING
See Figure 9.
To engage the self-propelled feature:
- Open the battery door.
Insert the battery.
Insert the battery key.
Pull the self propel lever upward to meet the handle.
To disengage the self-propelled feature:
Release the self propel lever.
To adjust the speed of self-propelled feature:
Pull the variable speed control lever towards the Rabbit Symbol to increase speed.
- Push the variable speed control lever towards the Turtle Symbol to decrease speed.
MOWING TIPS
Make sure the lawn is clear of stones, sticks, wires, and other objects that could damage the lawn mower blades or motor. Do not mow over property stakes or other metal posts. Such objects could be accidentally thrown by the mower in any direction and cause serious personal injury to the operator and others.
For a healthy lawn, always cut off one-third or less of the total length of the grass.
- Do not cut wet grass, it will stick to the underside of the deck and prevent proper bagging or mulching of grass clippings.
New or thick grass may require a narrower cut or a higher cutting height.
Clean the underside of the mower deck after each use to remove grass clippings, leaves, dirt, and any other accumulated debris.
- When cutting long grass, reduce walking speed to allow for more effective cutting and a proper discharge of the clippings.
NOTE: Always stop mower, allow blades to completely stop, and remove the battery key before cleaning underneath the mower.
SLOPE OPERATION
WARNING
Slopes are a major factor related to slip and fall accidents that can result in severe injury. Operation on slopes requires extra caution. If you feel uneasy on a slope, do not mow it. For your safety, do not attempt to mow slopes greater than 15 degrees.
WARNING
Please keep self-propelled at low speed when mowing up to a slope
Mow across the face of slopes, never up and down. Exercise extreme caution when changing direction on slopes.
- Watch for holes, ruts, rocks, hidden objects, or bumps which can cause you to slip or trip. Tall grass can hide obstacles. Remove all objects such as rocks, tree limbs, etc., which could be tripped over or thrown by the blade.
Always be sure of your footing. A slip and fall can cause serious personal injury. If you feel you are losing your balance, release the power lever immediately.
- Do not mow near drop-offs, ditches, or embankments; you could lose your footing or balance.
- Stop mower, allow blade to completely stop, and remove battery key.
- Lift the rear door.
- Lift the grassbox by its handle to remove from mower.
Empty grass clippings. - Lift the rear door and reinstall the grassbox as described earlier in this manual.
MAINTENANCE
WARNING
Before performing any maintenance, make sure the mower battery and battery key are removed to avoid accidental starting and possible serious personal injury.
WARNING
To prevent accidental start-up or unauthorized use, the cordless lawn mower is equipped with a removable safety key. To completely disable the mower, the safety key should be removed and kept in a place away from the mower and out of the reach of children.
WARNING
When servicing, use only authorised replacement parts. Use of any other parts may create a hazard or cause product damage.
WARNING
Keep the motor and battery compartments free from grass, leaves or excessive grease. This will help reduce the risk of fire.
GENERAL MAINTENANCE
Before each use, inspect the entire product for damaged, missing, or loose parts such as screws, nuts, bolts, caps, etc.
Tighten securely all fasteners and caps and do not operate this product until all missing or damaged parts are replaced. Please call Greenworks tools customer service for assistance. Avoid using solvents when cleaning plastic parts. Most plastics are susceptible to damage from various types of commercial solvents and may be damaged by their use. Use clean cloths to remove dirt, dust, oil, grease, etc.

WARNING
To reduce the risk of damage and danger, never clean the tool with pressure washer or under running water.

WARNING
Store indoors only. Always remove the battery from mower and charger when cleaning or storing the tool.

WARNING
Do not at any time let brake fluids, gasoline, petroleum-based products, penetrating oils, etc., come in contact with plastic parts. Chemicals can damage, weaken, or destroy plastic which may result in serious personal injury.
Periodically check all nuts and bolts for proper tightness to ensure safe operation of the mower.
Wipe the mower clean with a dry cloth occasionally. Do not use water.
LUBRICATION
All of the bearings in this product are lubricated with a sufficient amount of high grade lubricant for the life of the unit under normal operating conditions. Therefore, no further bearing lubrication is required.

WARNING
Always protect hands by wearing heavy gloves and/or wrapping the cutting edges of the blade with rags and other material when performing blade maintenance. Contact with the blade could result in serious personal injury.

WARNING
Do not lubricate any of the wheel components. Lubrication may cause the wheel components to fail during use, which could result in serious personal injury to the operator and/or mower or property damage.
REPLACING THE CUTTING BLADE
See figure 11-12.
NOTE: Only use authorised replacement blades. Replace worn or damaged blades and bolts in sets to preserve balance.
- Stop the motor and remove the battery key. Allow blade to come to a complete stop.
Remove the battery pack.
Turn the mower on its side.
- Wedge a block of wood between the blade and mower deck to prevent the blade from turning.
- Loosen the blade bolt by turning it counterclockwise (as viewed from bottom of mower) using a 27mm wrench or socket (not provided).
Remove the blade bolt and blade.
- Place the new blade on the shaft. Ensure blade is properly seated with shaft going through center blade hole and the two blade posts on the fan inserted into their respective holes on the blade. Make sure it is installed with the curved ends pointing up toward the mower deck and not down toward the ground. When seated properly, the blade should be flat against the fan.
Thread the blade bolt on the shaft and finger tighten.
Torque the blade bolt down clockwise using a torque wrench (not provided) to ensure the bolt is properly tightened. The recommended torque for the blade bolt is 62.5~71.5 kgfcm (350-400 in.-lb.).
TROUBLESHOOTING
| Problem Possible cause Solution | ||
| Handle is not in position. | Carriage bolts are not seated properly. | Adjust the height of the handle and make sure the carriage bolts are seated properly. |
| Mower is not starting. | Battery is low in charge. Charge the battery. | |
| Battery is either inoperable or will not take a charge. | Replace the battery. | |
| The battery key is not inserted. Insert the battery key. | ||
| Mower is cutting grass unevenly. | Lawn is rough or uneven or cutting height not set properly. | Move the wheels to a higher position. All wheels must be placed in the same cutting height for the mower to cut evenly. |
| Mower is not mulching properly. | Wet grass clippings are sticking to the underside of the deck. | Wait until the grass dries before mowing. |
| Mower is hard to push. | High grass, rear of mower housing and blade are dragging in heavy grass, or cutting height too low. | Raise the cutting height. |
| Mower is not bagging properly. Cutting height is set too low. Raise the cutting height. | ||
| Mower is vibrating at higher speed. | Blade is unbalanced, excessively or unevenly worn. | Replace the blade. |
| Motor shaft is bent. | Stop the motor, remove isolator key and battery, disconnect the power source, and inspect for damage. Have it repaired by an authorised service center before restarting. | |
| Motor stops while cutting. | Cutting height is set too low. | Raise the cutting height. |
| Battery has no power. | Charge the battery. | |
If these solutions do not solve the problem contact your authorised service dealer.
DIE INSTALLATION DES OBEREN GRIFS
Siehe Abbildung 3.
Use of any other battery packs may result in a risk of fire, electric shock, or injury to persons.
FAMILIARIZE-SE COM O CORTADOR DE RELVA
Ver figura 1.
TEXHMHUECKOE OBCJNYXINBAHNE
A OCTOPOXHO
Ipepe npoBeHnem TexHnueeCKOrO 6cnyKuBaHHy y6eHntecb, YTO 6aTape raoHokocnKn n npedoxpahntelhBHy KJIIOU N3BneYeHb BO n36exaHne cnyauHoro 3anycka n cepbe3hIX TpaBM.
OCTOPOXHO
IpypeDToBpaueHnCnyaHOrO npckn HecAHKIOHOHPoBAHHORO nCNOb3OBAHn 6ecnpoBOHa ra3OHOKocnka OchaueHa CbeMHbIM npedoxpahnteHbHbIM KNoHcOM. TObbl NoHocTbO BblKnOChTBra3OHOKocnky, Heo6xOdmo N3BneHb npedeXpaHTeHbHbIKNoH xpaHtB erO BdAnOT ra3OHOKocnKnB HeoCTynHom dJeTe MeCe.
OCTOPOXHO
Pn npoBeHn TexHueckoro 6cnyKuBaHnnaCnoJb3yIe TOnbKO peKOMeHDoBaHHbIe 3aNactn.1CnoJb3OBaHne IIO6bIX dpynx qacteM MoKeTco3daBaTb OnaCHOCTb INn pnpHHrTb NOBpeXdHneH3dEHN.
OCTOPOXHO
OuIaTe DBratEn b OTCek AkkMyJrTOpHoi 6aTapeu OT TpaBbl, NCTbeB IN NnUHeN Cm3Kn. 3TO NOMOXET CHN3NTb ONaCHOCTb BO3ROPaHn.
OBUEE OBCJYKUBAHNE
Ipeq KaKdbIM nCnoJb3ObaHnEm npOBepbTe HNCTpyMeHT Ha OTCyTCTBnE NOBpeXKeHn, HeoctaoUx nnocna6uX DeTaNe (BnHTbl, raKn, 6oNTbl, KpbuKn n T.I.
Haedxho 3aTAHnTE BCE KpenJIeHnI N KpbIuKn I He NOb3yntecb HNCTpyMeHTOM Do 3aMeHb BCex yTepeHHbIX INN NOBpeXKeHHbIX DeTaJeN. 3a KOHCyJbTaUnei ObaaItecb B C Jny6by pa 60tbl KIne HTacMN KOMpaHnN Greenworks tools. Pnp OunchTE pNactMaccobbIX DeTaJeH He DOnyckaetcN cNoJb3OBAbT pactBOpNTeIN. BoJbUnHCTBO pNactMacc BOCpHmUHBO, YTO6bl NOBpeDITbcr OT pa3NJHbIX TINOB KOMMepueckNX pactBOpNTeJe N MoKET 6bITb NOBpeXKeHO IX NcNoJb3OBAHnEM. IIn OChCTKn OT rpr3N, PbIIN, Macna, Cma3Kn I.T.I. NcNoJb3yIte npOTnPOCHyU TprNKy.
Pycckn (IpeBOD n3 nepBOHaayalbHbIX IHCTpyKcN)

OCTOPOXHO
YTO6bI CHN3NTb PNCK NOBpeKDeHnI BO3HnKHOBeHnO nacHOn CNTyaCnn, HNKoRda He OUYaIte yCTpOJCTBO BDOJ NOd DaBHeHem IIN NOD npOTouHO BDOJ.

OCTOPOXHO
XpaHnTb TOnIbKO B NOMEeHN. BcerDa n3BNeKaIte aKKyMnyTAToP n3 rA3OHOKOCNkn n 3apJHOro yCTpOHTBa nepeD OChcTKoN XpaHeHEm INHCTpyMeHtA.

OCTOPOXHO
He donyckaTe B3aHMOeIcTBnT TopMo3HbIX XndKoCTe, 6eH3nHa, HeqTe npOyKTOB, npOnIOUhIx MaceJI N T.I. C pNactMaCCOBbIM DeTaJMyN. XmNKaTb MOrY NOBpeDntb, OcNa6tB INI pa3pyuHT bPiactMaCCy, YTO MoKeT PpNBecTn K TAAKKIM TeJeCHbIM IOBpeKDeHnM.
PepnoDnueckn npOBepaTb BCE 6oJIbI n 3aDbNkKn dna HndnEkae nnOTHOCTn, YTO6bl rapaHTnpoBaTb 6eOtnacHoe DeiCTBne KocNIkn.
BbItpaTb KocunKy, uCToN u cyxOu TkaHbIO uHorda. He nCNoIb3OBaTb BODy.
CMA3bIBAHNE
Bce OTHoWeHnB 3TOM N3dEInN - Cma3aHbI CdoCTaTOUHbIM KOJINUeCTBOM CMA3KN BbICJeROKaueCTBa JnJ Xn3HN eINHcBi NOD HopMaJIbHbIMN EKCIpyatauONHHbIMn Pekmamn. NOrTomy, HnKaKaJaDaJIbHeiWaa CMA3Ka OTHOWeHnA, He Tpe6yETcR.

OCTOPOXHO
Bcerda 3aunntb pykn, Hadeba TjxeJIbe IepaTkn
Hnn OeptbIbA Je3Bn TpIKNAM n DpymM MaTePnaIOM npN BbIOJHHeHn OBcIyXnBaHn
Je3Bn. B pe3ynbTaTe KOHTaC pexkyuIm
Je3BnEM MoKHO NOnyUHb CepBe3HyTO TaBMy.

OCTOPOXHO
He Cma3bBaTb HnKaKo N3 KOMnoHETOB KOJeca. Cma3ka MoXeT npVBecTu K c6oU B pa6oTe KOMnoHETOB KOJeca BO BPem CTpNJKN, YTO MoXeT npVBecTu K cepBe3Hoi TpaBme OepaTopa N/IN NOBpeJdeHIO ra3OHOKOcNIKN INI dpyrOIO NMyuectBa.
3AMEHA COKPAUJAIOUEIJE3BNA
CM.puc.11-12.
INPIMEYAHNE: NcnoJb3yIe TOnbKO pa3peWeHHbIe 3aNaChbIe pexyIe Je3Bn. 3aMeHInTe n3HOWeHHbIe IIN NOBpeKdEHHbIe pexyIe Je3Bn I 6oNTbIB KOMNKeTe, YTO6bl ObecneuHTb 6aHaHCnPOBky.
OCTaHOBNTe BnIaTeNb N 3BNEKInTe npEdoXpaHnteNbHbN KJIIOU. DoxDInTEcb NOHoro octaHOBa peKyUeroJe3BnI.
CHIMITE aKkymyTOpHyIO 6aTapeIO.
IIOBepHyTb KocnKy Ha ee CTopoHy.
Btnchytb 6nok dpebecnhb MeKdy ne3Bnem n naIyboi KocJIKN, YTO6bl PpeDToBpaTntb Ne3Bne OT npEbpaaehna.
Icnoj3yKIOHHa 27 MM (He BXOINT B KOMNJIeKT nocTaBKn), ocna6bte 6oNT nnhBOHO DNCKa NOBOPOTOM npOTNB YacOBON CTpeKN, ecn CMOTpeTB C HxKHe Yactn Ra3OHOKOJIKN.
CHIMITE6OJT NINbHOro DNCKa n Cam DNCK.
YCTAHOBNTE HOBBI NINbHbI DnCK Ha BaJI. Y6eINTecb, YTO NINbHbI DnCK npaBnBHO CnDHT Ha BAly, nPOXODJEM Yepe3 ueHTpaNBHO OTBepCTne NINbHORO DnCKa, IV DBa WtBIPRA HA BEHTNJrTOpe BCTaBNeHb I B COOTBeTCTBYIOUne OTBepCTNa H NINbHOM DnCKe. Y6eINTecb, YTO OH YCTAHOBNEH C 3arHyTBIM KOHcAmN BBepx B CTOPOHY OCHOBAHNA r3oHOKOCUNK, a He BHN3 K 3emne. Ppi npaBnBHom pa3MeueHHn HAnpOTNB BEHTNJrTOpa DOJXHa HaxoDnTbcr Pnocka Yaactb DnCKa.
HaxNBte 6oNT nIbHorO nCKa Ha BaN n 3aTnHTe naIbIaMn.
3aTnHte raKy peKyIero ne3Bna raeHbIM KIOyOM (He npunaeraTc), BpaAa no yacoboi CTpeJIke, YTO6bl oBeCneHTb HAdIeKaIyIO 3aTAAKky 6oNTa. PekomeHdyembl kpyTuIN MOMENT npu 3aTARBaHHraIKn peKyIero ne3Bna COCTABNReT 62,5~71,5 Krc-CM (350-400 IIOHMOB/phiHT).
Pycckn (IpeBOD n3 nepBOHaayalbHbIX INHCTpyKcN)
Use of any other battery packs may result in a risk of fire, electric shock, or injury to persons.
TUNNE RUOHONLEIKKURISI
Katso kuva 1.
TOMMING AV GRESSBOKSEN
Se figure 10.
GENERELT VEDLIKEHOLD
ISAEING AF GRAESBOKSEN
Sefigur4.
TOMNING AF GRAESBOKSEN
Sefigur10.
INSTALACJA KOSZA NA TRAWE
Zobacz rysunek 4.
OPRÖZNIANIE KOSZA NA TRAWE
Zobacz rysunek 10.
3A6EENKKA:Прдп NOHCTBaHe HaДONHaT auct Ha Kocaykata BnHaIЯ CnpaIte,ИЗЧАВaITe OCTpIeTATA DA CnPаT HANbJIHO I CBaJIrTe KIIIOuHa aKymyNaTOPHaT a6aTePnI.
3a da HamaJIte pUCKa OT HapaHЯBaHe n ONaCHOCTTa, HNKORA He NOuNCTBaIe TE INHCTpyMeHTa CbC CTpy NOd HaNraHe NnHa TeYaAa BOJa.
A PEPENPPEXDEHNE
CbxpaHbAte cAmo Ha 3akpnto. BnHarn BaTe6BaTepya ot Kocaykata n 3apdHOTo, KOrato NOuchTBate NIn npBupate HNCTpyMeHTa 3a cbxpaHeHne.
PENEYNPEXKDEHNE
B HnkaBcnyaH He No3BOJBaIte PIACTMACOBNTe
Yactn Da Bn3aT B KOHTaKT CbC CNpaHNI TeHOCn,
HePTeHN IpOyKTN, PPOHnKBaUm Macna N T.H.
XIMnKaJIte MoRat Da NOBpeJr, OTCJa6r NIn
YHnIOxKAT PIACTMacata, KoETo MOKe Da DOBeDe Do
cepno3Hn PhNueckn HapaHBAHn.
PepnoDnHNO npOBepaBae BCNUK 6oNTOBe n raKn, daN ca 3aTeHaTn, 3a Da ce rapaHTnpa 6e3OnacHOCTTa BN NO BpeMe Ha pa60Ta C KocaykaTa.
3a6bpcBaIte KocaykaTa OT BpeMe Ha BpeMe c napYe cyx nlat. He n3non3BaIte BOda.
CMA3BAHE
Bcun Kaepn B To3n npOdykT 3a Cma3aHn CdoCTaTbUHO KOINueCTBO BNCOKOKaueCTBeHO MacNo, KOETO Tp6Ba Da CTURHe 3a CEINN EKCNIOaTaCNOHe HKNBOT Ha INCTpyMeHTa PnHOPMaJIHN pa60THN ycNOBna. 3aTOBA He e Heo6xOIMO DonbJIHNTeHNO CMA3BaHe Ha NaepuTe.
A PENEYNPEXKDEHNE
BnHaHn HocTe 3aunTHn pbKaBnU nnn yBnBaIte pexeuntpe pb6OBe Ha octpneTo B napcaNN nnn dpyr Maepuaan, 3a da npedna3nte pbcTe cn, DOkato N3BbPwBaTe DeNCTBn NO NOdpbXkata. KOHTaKbT C OCTpneTO MOKe Da DOBeDe Do cepNo3Hn Fn3nueckn HapaHbaHn.
PENEYNPEXXDEHNE
He cma3BaIte yactnte Ha KOJIeIeTata.Cma3BaHepTo MOKe Da IOBeTe Do n3nadaHe Ha HRAKOr OT YACTnte NO BpeMe Ha pa6Ota N da npuHn HapaHraBe Ha ONepaTopa IIN Da IOBeTe DO NOBpeDa Ha KocauKaTa IIN IMyIeCTBeHn IeTn.
CMRAHA HA OCTPNETO
Bux Duaypa 11-12.
3AEBEKKA: N3noJ3BaIte cAmO OToPn3npaHn pe3epBHN ocTpneTa. 3ameHeTe n3HOceHIne TIN NOBpeDeHIne ocTpneTa n 6oNTObe 3aeDHO, 3a da 3ana3HTe 6aJahca.
Cnpete MoTopa n 3BaTe KeIoua Ha akymyataopHaTa 6aTepe. N3aKaaiTe ocTpneTo da cnpe HanbJHo.
OTcTpaHete 6aTepeNraTa.
IocTaBeTe KocauKaTaJeHana Ha eHa cTpaHa.
BknHe npue DbPBO MExy OcTpneTo nNoa, 3a Da npEoTbpataTe 3aBbPaTaH e OcTpneTo.
OTBnTE 6oTHa OCTpneTo, KATO rO 3aBbptnte o6paTHo Ha YacOBHnKOBaTa CTePknA (NOrneHnato OT DOJHATA CtpaHa HA Kocaykata) C NOMOHTa Ha 27 MM Rauehen Knou Hn BbTpweH WeCTOCTeH (He ca BKNHOEN BDOCTaKaTa).
ДемонтураитeteбоглесаюoctpneToиcamotooctpne.
IocTaBete HOBOTo OCTpne Bbpxy OCTa. YBepete ce,Ye OCTpneTo e NOCTaBeHO npabUNHO, KATO 3a ueTtA OCTa Tpr6Ba Da e Bn3Na Npe3 CEHTpaHnra OTBOp 3a OCTpneTo, a DBeTe NOIopn Ha OCTpNeTO npn BEHTnAtopa Tpr6Ba Da ca BKapAHN B CbOTBETHnTE NM OTBOpN. OCTpneTo Tpr6Ba Da e MOHTnpaHO CbC 3AkPnBEHnTe KpanuHa HArope KbM Kopnyca Ha KocaKaTata, a He KbM 3emrTa. Pn npabUNHO NOCTaBnHe OCTpneTo Tpr6Ba Da e XOpunOHTaJHo CNpMa BOHTnAtopa.
IocTaBete 6oPaTHo 6oJTA 3a OCTpneTO Bbpxy octa n rO 3aTeHETe pbHIO.
3aterhe raikata Ha octpneTo no nocoka Ha yacobnkoBata CTpeNka C dHAmOMeTpueH KIOU (He e BkIIOueH B IOCTabKaTAt), 3a Da ce yBepnte, ye e npabnHO Haterhata. PpenOpbHTeHNrT MOMENT Ha 3aTaRaHe 3a raikata Ha octpneTo e 62.5~71.5 kgf cm (350-400 in. lb).
j jaaal aaiyraaayaaalee aai yaaia
1
aalalalalalalalalalalalalal
10
(aiaiaia y) ayibll.11
all 12
13
Jolal.14
J 15
gaii 16
aalld aalld 17
18.
CaiJai.19
20
253gd2.21
22
aai jil al gala.23

()
4 1234567890
1234567890
1234567890
aaii
.5
A
A
y j
.6
y 1
A
i 1
y haoai yaoai yie cai bai ciui yu jia jia jia jia jia jia
1
a
7.7
e jll ojil g45rgei jai jia jia jia jia jia jia jia jia jia jia jia jia jia jia jia jia jia jia jia jia jia jia jia jia jia
aai 45jg eai jn biae i jy dai aai gai jai jai
#
K 1
#
aai j 1 1 1 1 1 1 1 1 1 1 1 1 1 1 1 1
A
A
J
y j 1j 1 j 1 j 1 j 1 j 1 j 1 j 1 j 1 j 1 j 1 j 1 j 1 j 1 j 1 j 1 j 1 j 1 j 1 j 1 j 1 j 1 j 1 j 1 j 1 j 1 j 1 j 1 j 1 j 1 j 1 j 1 j 1 j 1 j 1 j
A
y 1 y
A
Jiai, jialiau 5o Si Laiie gao yill plai Jjall tian Jia 2
G, jiall d guan yue Jus G yuyy d cayll oip al jil 1
Aaiia aai
A
aal 10 aaylall gai yai jaiyaiyaiyaiyaiyaiyaiyaiyaiyaiyaiyaiyaiyaiyaiyaiyaiyaiyaiyaiyaiyaiyaiyaiyaiyaiyaiyaiyaiyaiyaiyaiyaiyaiyaiyaiyaiyaiyaiyaiyaiyai
A
Clll l 12 12 12 12 12 12 12 12 12 12 12 12 12 12 12 12 12 12 12 12 12 12 12 12 12 12 12 12 12 12 12 12 12
1 1 1 1 1 1 1 1 1 1 1 1 1 1 1 1 1 1 1 1 1 1 1 1 1 1 1 1 1
y j 150 150 150 150 150 150 150 150 150 150 150 150 150
A
a 1/2 a 1/2 a 1/2 a 1/2 a 1/2 a 1/2 a 1/2 a 1/2 a 1/2 a 1/2 a 1/2 a 1/2 a 1/2 a 1/2 a 1/2 a 1/2 a 1/2 a 1/2 a 1/2 a 1/2 a 1/2
#
alall lsso aee y alall cllso ay 2
0yaae aayl! aee y aee laa eel 1
A
e 1
j 1 j 1
1
1
J 1 J 1 J 1 J 1 J 1 J 1 J 1 J 1 J 1 J 1 J 1 J 1 J 1 J 1 J 1 J 1 J 1 J 1 J 1 J 1 J 1 J 1 J 1 J 1 J 1 J 1 J 1 J 1 J 1 J 1 J 1 J 1 J 1 J 1 J
12g2015
10
aai 1
E
jglal jaiil jali jaii jaii jaii jaii
aagaa aaa aaa aaa aaa aa aaa aaa
y 1
y gssgall yllje kSalb jay Jannal (jgyj) yolpe cia pldiyd aell l jao jai jaa Jaa Jaa Jaa Jaa
350-400 71.5~62
4yolgolbisslwlcc
nni nnnn nn nnnn nnnn nnnn nnnn nnnn nnnn nnnn nnnn nnnn nnnn nnnn nnnn nnnn nnnn nnnn nnnn nnnn nnnn nnnn nnnn nnnn nnnn nnnn nnnn nnnn nnnn nnnn nnnn nnnn nnnn nnnn nnnn nnnn nnnn nnne
ynnn nn nnnn nnnn noon nn nn nn nn nn nn
Nn
10 11X 11
nnnnn nnnn nn nnnn nn nnnn
ninnnnnnnnnn
nnon nnnnnnnnnnnnnnnnnnn
innnnn nn n
n nn nnnnnnnnnnnnnnnnnnnnnnnnnnnnnnnnnnnnnnnnnnnnnnnnnnnnnnnnnnnnnnnnnnnnnnnnnnnnnnnnnnnnnnnnnnnnnnnnnnnnnnnnnnnnn
ninn
A
nnn nn n nn n nn n nn n nn n nn n nn n nn n nn n nn n nn n nn n nn n nn n nn n nn n nn n nn n nn n nn n nn n nn n nn n nn n nn n nn n nn n nn n nn n nn n nn n nn n nn n nn n nn n nn n nn n nn n nn n nn n nn n nn n nn n nn n nn n nn
A
nnn nn nnnnnnnnnnnnnnnnnnnnnnnnnnnnnnnnnnnnnnnnnnnnnnnnnnnnnnnnnnnnnnnnnnnnnnnnnnnnnnnnnnnnnnnnnnnnnnnnnnnnnnnnnnnnnnnnnnnnnnnnnnn
A
Wu.17n 77n 77n 77n 77n
y (n xin npin)
nnn nn
12-11
JINN NNNN NNNN NNNNNNNNNNNNNNN
107
nion
.
1.
27 nn nnnn nn nn nn (nnnnnnnnnnnnnnn) nn nn nn nn nn nn nn nn nn nn nn nn nn nn nn nn nn nn nn nn nn nn nn nn nn nn nn nn nn nn nn nn nn nn nn nn nn nn nn nn nn nn nn nn nn nn nn nn nn nn nn nn nn nn nn nn nn nn nn nn nn nn nn nn nn nn nn nn nn nn nn nn nn nn nn nn nn nn nn nn nn nn nn nn nn nn nn nn nn nn nn nn
n nn nn nn nn nn nn nn nn nn nn nn nn nn nn nn nn nn nn nn nn nn nn nn nn nn nn nn nn nn nn nn nn nn nn nn nn nn nn nn nn nn nn nn nn nn nn nn nn nn nn nn nn nn nn nn nn nn nn nn nn nn nn nn nn nn nn nn nn nn nn nn nn nn nn nn nn nn nn nn nn nn nn nn nn nn nn nn nn nn nn nn nn nn nn nn nn nn nn nn nn
n nn nnnnnnnnnnnnnnnnnnnnnnnnnnnnnnnnnnnnnnnnnnnnnnnnnnnnnnnnnnnnnnnnnnnnnnnnnnnnnnnnnnnnnnnnnnnnnnnnnnnnnnnnnnnnnnnnnnnnnnnnnnnnnnnnnnn
y
yinnnnn nn nnnn nn nnnn nn nnnn nn nnnn nn nnnn nn
.(400-350)n"o/n17 71.5-62.5
All new Greenworks Tools machinery is supplied with a 2 year parts and labour warranty from original date of purchase. A 30 day warranty is available for machines used professionally as Greenworks Tools are designed primarily to be used by DIY consumers.
This warranty is non-transferrable.
LIMITATIONS
This warranty applies only to defective parts/components and does not cover repairs due to:
- Normal wear and tear.
- Routine tune up or adjustment.
- Damage caused by improper handling/abuse/misuse or neglect.
- Overheating due to lack of maintenance.
- Damage due to fittings/fasteners becoming loose/detached through lack of maintenance.
- Damage caused by cleaning with water
- Machines serviced or repaired by non-authorised Greenworks Tools service centres.
- Machines incorrectly assembled or adjusted.
- Damage caused by improper use of the machine.
- Damage caused by improper winterisation (pressure washers)
-
Items considered as consumable parts are not normally covered by the warranty, including but not limited to:
-
Batteries
Electric cables - Blade and blade assemblies
- Belts
-
Filters
-
Certain products may contain components such as engines, transmissions from an alternative manufacturer, these items will be subject to the appropriate manufacturer's warranty policy except where Greenworks Tools Europe GmbH agrees to underwrite any claims outside the said manufacturer's warranty period.
- Second hand goods are not covered under this warranty policy.
- The fitting of spares, replacements or extra components which are not supplied or approved by Greenworks Tools Europe GmbH.
Warranty
To claim a warranty on any product under this policy a proof of original purchase is required. Credit card statement do not qualify as sufficient proof of purchase. In the first instance of a warranty event occurring the consumer should return the product to the original place of purchase with their proof of purchase. The machine will be sent to our central service facility and an inspection made. If the machine be found to be at fault it will be repaired and sent back to the address of the consumer free of charge. Machines that retail for less than €100 euros including sales taxes will generally be replaced.
If the central service facility finds that machine is not found to be at fault then the consumer will be advised they will need to pay for the cost the repair.
This warranty policy is subject to change from time to time to accommodate the needs of new products. A copy of the latest warranty policy will be available at www.greenworkstools.eu.

Greenworks Tools garanti for hobbymaskerGreenworks Tools in
GARANTIPERIOD
TapaHOnHH npaBnHa Ha Greenworks Tools 3a camOeHN MaHH
NEPNOHATAPAHUYRA
Bcunn Maunn Ha Greenworks Tools ce npedoctabr c 2-rounha rapaunna 3a cepbnHa deHooCT n pe3epBN qactn, cHTaHO OT daTata Ha 3akynBaHe Ha npdykTa. PnpocTabra Ce camo 30-dneBna rapaunna 3a npocecnoHaHn H3non3BaHnte Maunn, 3auTo npodykTte Ha Greenworks Tools ca npedha3hauehn npedeIMHO 3a KIneHTn, pa6oTeu Csc camoJeHH MaunnH. Hactoata rapaunna He Moke da ce npexbprn.
OTPAHnueHHN
Hactoata rapaun e bainda cmo 3a dekeTHn qactn/ kOMnoHEHTN H NOKPBA peMOHTN, NOPOENOT:
- HopmaJIHO n3HOCBaHe n amOpTn3aUJ.
- PyTHHHH HAcTPOKn INI DeHOCrNo peRyInpAhe.
- NOBpeNi, npWnHeHOn OT HePpABUNHO 6opabeHe/3noynoTpe6a/ rpeuho n3non3BaHe nn npOBA Ha He6peXHoCT.
4.перрванорадилоча подрьжka - NopBepn nopApa pa3xa6eHn/pa3kaeHn cHaKn nNcKpeNTnHn eIemEnB CnEcdTBe Ha Noa npDpBxKa.
- NOBpeHn, npuHHeH B CJIeCTBHe Ha NOUcTbHe C B0da.
- MaunHH, 06cnyKbAHn nnn pemOHtpaHn OT cepBn3n ceHTpOBe, KOTo He ca otOpN3npaHn OT Greenworks Tools.
8.Maunn, konTo ca crno6eHn nn peylnpaHn HnpabnHO. -
NOBpeH, nopOeHH oT HnpaBnHOb6opBaBeHe C MaunHaTa.
-
NopBpei, nopoJeHn OT HnPaBnHIO 3aImBaHe (BOOcTpyKn)
-
EneMeHTN, KOINTO CE CHTaT 3a KOHCymATNB, HO O6NKHOBHe He cE NOKPnBaT OT rapaHnIra, BKNIOUHTeJIHO (HO HE CAMO):
Batepni
- EneKtpueeckn Ka6en
- OctpneTa n KOMnneKTH ocTpneTa
Pembln
Φnntpn
-
NpatoHHnN nDbpxkaa3a nHCTpyMeHTn
-
HЯков поюкту мора на сдьркат KMПОЕНТ (HANPIMep DBIraTeHn, TpAHCMNcH) OTДугп пОИЗБОДТЕЛ -3a Te3N eJIeMeHTn CA B cnila rapaHIOHnHTe YCIOBnHa CbOTBeTHn npOImBODIgNT OCBEN b CnyaHte, KOrato Greenworks Tools Europe GmbH ce cbflacn da noKpme IeHTe, KOtTO He ce noKpnbAT OT rapaHIOHHHNE pIPOID Ha To3H nPOnI3BODInTeJ.
-
CToKn BTopa yNoTpe6a He ce nokpmbat ot HacToaTa rapaHua.
- MoThIpaHTo Ha pe3epBn YacTn, 3aMeCTBaun nIN DoNbHInTeHN KOMNoHEHTn, KOTo He ca IpeOcTabeHN nIN ODo6peHN oT Greenworks Tools Europe GmbH.
Tapaun
3a npedraBaHe h a rapauHnoHnck 3a daen H npdykT pr6Ba da ce npedeocTabn Doka3aTeNCTBO 3a nbpBOHaanHTo My 3akynyBaHe.
13BneHnHTAOT KpeDTHnKAPTN He npdeCTabnBaT BAnHIO
Doka3aTeNCTBO 3a3kyuBaHe. PnPi NpBoTO B3HNBAHe HA cyNObHe,
No3BOBnAto npdeRBAHe Ha rapauHnOHeHck, KIneHTb Tpr6Ba Da
3aHece npDyKT Ha MRCTO H AHEROBO TnpBOHaanHO 3akynyBaHe,
KbTeTo Tpr6Ba Da npdeocTabn Doka3aTeNCTBO 3a 3akynyBaHo.
MaunHata ue 6bDe n3npateHa do hainr rnaBeH cepBnEh cethtp,
KbTeTo ue 6bDe n3BbPseHa HcneKeUria Ako ce yctahOBn PhapuH
deΦeKt NO MaunHata, Ta ue 6bDe 6e3nIaTHo pemOHtnpaHa n
n3npaTeHa o6pTaHO ha aIpeca Ha kIneHTa. MaunHnte Ha na3apHa
ctOHOCT no 100 Ebo (BKn. dAnbK npdoax6a) o6knHObeHO ue 6bDaT
NOmEHnC HOBn.
Ako haunr rnaBeH cepBn3eH ceHTbpeYcTaHO bpaPnuHn DepeKTo N0 MaunHaT,KnHeNTb Tse 6bde yBEdOMeH,Ye Toi ue TpBa da 3annat pa3xOdnte No pemOHa Ha npOdyKTa.
HaCToIuHTe rapaHUNOHn npaBnla MoRat da 6bDat npomeHnnpnoDnHO,3a Da 6bDat AKTyANHO aanTnpaHN KBM HOBtne npOkyTN. Konne Ha na-AkTuAnHrTe rapaHNoHH npaBnna e HauNHO ha aqdec www.greenworkstools.eu.

Ioiitik yyyuno ng ouke uuv maotopepaoc Greenworks Tools
NEPIOAOEETHYHHE
Ola ta vεa μnxavnata tnc Greenworks Tools ouvodéuovtai ato
eyyun2 2 etw yia ta εgaptnata kai ta epyatikα touc, atio nγ
apxiknηepounvia ayopac. Eyyun3 30 npewv napexetai yia
μnxavnata tou xpnoiotoiouvta iTayeeλmuikα, kaωc ta
tpoiovta ts Grewworks Tools aTeuθuvovtai kupiwσ Εepaɪtexvec
katavaawtεs tpoiovtwu maatopεμatoc.
H eyynon evai μn eβαδauiŋ.
NEPIOPIEMOI
H TAPouOa Eyyunon IOxueI moVIO iaEaattWpatiké EApntmuata/EvotnteKai Eev KaUttTEI ETIOKEUECTOU OpeiaovTAl OE:1. DuioioyIK pOpa.
n nn nnnn nn nnnn nn nnnn nn nnnn nn nnnn nnnn nnnn nnnn nnnn nnnn nnnn nnnn nnnn nnnn nnnn nnnn nnnn nnnn nnnn nnnn nnnn nnnn nnnn nnnn nnnn nnnn nnnn nnnn nnnn nnnn nnnn nnnn nnnn nnnn nnnn nnnn nnnn nnnn
Greenworks an yn nnnn nn nnnn nnnn nnnn nnnn nnnn nnnn nnnn nnnn nnnn nnnn nnnn nnnn nnnn nnnn nnnn nnnn nnnn nnnn nnnn nnnn nnnn nnnn nnnn nnnn nnnn nnnn nnnn nnnn nnnn nnnn nnnn nnnn nnnn nnnn
111111111111111111111111111111
xiv nniin 14
Greenworks Tools Europe GmbH
#
y 100
197n"yn 70
yuyin yun,ynn nn nnnn nn nn nn nn nn nn nn nn nn nn nn nn nn nn nn nn nn nn nn nn nn nn nn nn nn nn nn nn nn nn nn nn nn nn nn nn nn nn nn nn nn nn nn nn nn nn nn nn nn nn nn nn nn nn nn nn nn nn nn nn nn nn nn nn nn nn nn nn nn nn nn nn nn nn nn nn nn nn nn nn nn nn nn nn nn nn nn
wnn nn nnnn nn nnnn nn nnnn nn nnnn nn nnnn nn nnnn nn nnnn nn nnnn nn nnnn nn nnnn nn nnnn nn nnnn nn nnnn nn nnnn nn nnnn nn nnnn nn nnnn nn nnnn nn nnnn nn nnnn nn nnnn nn nnnn nn nnnn nn nnnn nn nnnn nn nannn nn nnnn nn nnnn nn nnnn nn nnnn nn nnnn nn nnnn nn nnnn nn nnnn nn nnnn nn nnnn nn nnnn nn nnnn nn nnnn nn nnnn nn nnnn nn nnnn nn nnnn nn nnnn nn

"Greenworks Tools" buitines paskirties irenginiu garantijos taisykles
GARANTIJOS LAIKOTARPIS
EN EC DECLARATION OF CONFORMITY
Manufacturer: Changzhou Globe Co., Ltd.
Address: No. 65 Xinggang Rd., Zhonglou Zone, Changzhou, Jiangsu, China
Name and address of the person authorised to compile the technical file:
Name: Peter Söderström
Adress: Hjortronvagen 3, 555 93 Jönköping, Sweden
Herewith we declare that the product
Category CORDLESS MOWER
Model 2506007
Serial Number See product rating label
Year of Construction See product rating label
■ is in conformity with the relevant provisions of the Machinery Directive (2006/42/EC)
■ is in conformity with the provisions of the following other EC-Directives EMC Directive (2014/30/EU),
Noise Emission Directive (2000/14/EC amended by 2005/88/EC)
And furthermore, we declare that
The following (parts/clauses of) European harmonised standards have been used EN 60335-1; EN60335-2-77; EN 62233, EN ISO 3744; EN 55014-1; EN 55014-2; ISO 11094
Measured sound power level 93.3 dB(A)
Guaranteed sound power level 96 dB(A)
Conformity assessment method to Annex VI / Directive 2000/14/EC
EC type approval to 2000/14/EC : Intertek Testing & Certification Co., Ltd. (NB0359)
Place, date: Changzhou, 08/09/2017
Signature: Ted Qu Haichao
Quality Director
Ted qu
Adresse: No. 65 Xinggang Rd., Zhonglou Zone, Changzhou, Jiangsu, China
Indirizzo: No. 65 Xinggang Rd., Zhonglou Zone, Changzhou, Jiangsu, China
Adresse: No. 65 Xinggang Rd., Zhonglou Zone, Changzhou, Jiangsu, China
Endereço: No. 65 Xinggang Rd., Zhonglou Zone, Changzhou, Jiangsu, China
Adres: No. 65 Xinggang Rd., Zhonglou Zone, Changzhou, Jiangsu, China
Ampes: No. 65 Xinggang Rd., Zhonglou Zone, Changzhou, Jiangsu, China
IIMn aadpc Jnua,OTBETCTBEHHORO 3a NOdrotOBky TEXHnueckoJ DOKyMeHTaun:
Osoite: No. 65 Xinggang Rd., Zhonglou Zone, Changzhou, Jiangsu, China
Adress: No. 65 Xinggang Rd., Zhonglou Zone, Changzhou, Jiangsu, China
Adresse: No. 65 Xinggang Rd., Zhonglou Zone, Changzhou, Jiangsu, China
EC type approval to 2000/14/EC : Intertek Testing & Certification Co., Ltd. (NB0359)
Sted, dato: Changzhou, 22/07/2016 Signatur: Ted Qu Haichao
Kvalitetsdirektor

EC OVERENSSTEMMELSESERKLAERING
Fabrikant: Changzhou Globe Co., Ltd.
Adresse: No. 65 Xinggang Rd., Zhonglou Zone, Changzhou, Jiangsu, China
Adres: No. 65 Xinggang Rd., Zhonglou Zone, Changzhou, Jiangsu, China
Adresa: No. 65 Xinggang Rd., Zhonglou Zone, Changzhou, Jiangsu, China
Adresa: No. 65 Xinggang Rd., Zhonglou Zone, Changzhou, Jiangsu, China
Naslov: No. 65 Xinggang Rd., Zhonglou Zone, Changzhou, Jiangsu, China
Ime in naslov osebe, ki je pooblascena za sestavljanje tehnicne dokumentacije:
Ime: Peter Soderström
Naslov: Hjortronvagen 3, 555 93 Jönköping, Sweden
Adresa: No. 65 Xinggang Rd., Zhonglou Zone, Changzhou, Jiangsu, China
Ime i prezime, i adresa osobe ovlaštene da sastavi tehničku datoteku:
Ime i prezime: Peter Soderstrom
Adresa: Hjortronvagen 3, 555 93 Jönköping, Sweden
Cim: No. 65 Xinggang Rd., Zhonglou Zone, Changzhou, Jiangsu, China
Adresa: No. 65 Xinggang Rd., Zhonglou Zone, Changzhou, Jiangsu, China
Ampes: No. 65 Xinggang Rd., Zhonglou Zone, Changzhou, Jiangsu, China
Ime n aadpec Ha IInceTo, ynbHHomOuSeHO da cbCTaBn TexHnueckn qaai:
UMe: Peter Soderstrom
Ampec: Hjortronvagen 3, 555 93 Jonkoping, Sweden
C HacToaTeTo DeKnapnpaMe, Ye npOdyKTbT
Kateropn . KOCAUKA 3A TPEBA
Moei 2506007
CepneH Homep . Bux eTuKeTa c HOMHaJIHnTe cToHocTn
ToiHa Ha npOn3BOIDCTBO .BxK etNkeTa c HOMHaJIHnTe cToHOCn
OTROBAPRA Ha CbOTBeTCTBaUHTe pa3nopeDn Ha NipeKTHBaTA OTHOCHO MaUNHNTe (2006/42/EC)
OTROBAPa pa3nope6nte Ha cneHnTe pyrN dIpeKtNBHa EO
2014/30/EU (Директва за EMC),
Директва зашу mobite emncn (2000/14/EC, n3meheHa ot 2005/88/EC)
OcBeH ToBa IekJnapnPame,Ye
ca npinnojehn cneHnTe (uaCTn/Knay3n OT) eBponeiCKnTe xapMOHn3npaHn CTaHdapTu
EN 60335-1; EN60335-2-77; EN 62233, EN ISO 3744;
EN 55014-1; EN 55014-2; ISO 11094
H3MepeHo HnBO Ha yM 93.3 dB(A)
TapaHTnpaHo HnBO Ha 96 dB(A)
MeToI Ha OueHbAHe Ha CbOTBeTCTBnETo CbO6pa3Ho npInIOxKeHne V ot DnpeKtNbA 2000/14/EC
TinobO Odo6peHne Ha EO B cboTBeTcTBnE c 2000/14/EO: Intertek Testing & Certification Co., Ltd. (NB0359)
MЯсто, Дata: Changzhou, 22/07/2016
Iopnnc: Ted Qu Haichao
Диpeктор KaueCTBO
Ovouα: Changzhou Globe Co., Ltd.
: No. 65 Xinggang Rd., Zhonglou Zone, Changzhou, Jiangsu, China
Ovoua kai dieuthetaon atou eouoiobotnevou va ouvtacei Tov texviko pakeo:
Ovoα: Peter Soderström
u uvon : Hjortronvagen 3, 555 93 Jonkoping, Sweden
i tou npovtoc oTI to poiov
EC/2000/14 5 /5 5/5 Intertek Testing & Certification Co.,: EC/2000/14 5/5 Ltd (NB0359)
Ss S 23 gill (s)
Changzhou, 22/07/2016:
Ted qu
Uretici: Changzhou Globe Co., Ltd.
Adres: No. 65 Xinggang Rd., Zhonglou Zone, Changzhou, Jiangsu, China
No. 65 Xinggang Rd., Zhonglou Zone, Changzhou, Jiangsu, China
yipn nnn noinn nn nni
Peter Soderstrom:
Hjortronvagen 3, 555 93 Jönköping, Sweden
N
ninn nnnoon
2506007
1
y
(EC/
④ に
,EMC (2014/30/EU) n"nn
(EC/2005/88-nn EC/2000/14) wyn nnn
:O'nnn nn, no
Dn nn Dn nn Dn nn (7u D'yo, D'ny) 7nu D'ny uynu 4
EC: Intertek Testing & Certification Co., Ltd./2000/14-7 nnnn nn no
(NB0359)
Ted Qu Haichao:nnnn
Changzhou, 22/07/2016: yin,
n
LT EC ATITIKTIES DEKLARACIJA
Gamintojas: Changzhou Globe Co., Ltd.
Adresas: No. 65 Xinggang Rd., Zhonglou Zone, Changzhou, Jiangsu, China
Adrese: No. 65 Xinggang Rd., Zhonglou Zone, Changzhou, Jiangsu, China
Personas, kas atbildigs par tehniska faila apkopošanu, vards un adrese:
Vards: Peter Soderstrom
Adrese: Hjortronvagen 3, 555 93 Jönköping, Sweden
Aadress: No. 65 Xinggang Rd., Zhonglou Zone, Changzhou, Jiangsu, China
English (Original Instructions)
Your product has been engineered and manufactured to Greenworks tools' high standard for dependability, ease of operation, and operator safety. When properly cared for, it will give you years of rugged, trouble-free performance.
Thank you for buying a Greenworks tools product.
Save this manual for future reference
INTENDED USE
This product is intended for domestic lawn mowing. The cutting blade should rotate approximately parallel to the ground over which it is being wheeled. All four wheels should touch the ground while mowing. It is a pedestrian controlled walk behind mower.
NOTE: The mower should never be operated with the wheels off the ground, it should not be pulled or ridden on. It should not be used to cut anything other than domestic grass lawns.
GENERAL SAFETY RULES
WARNING
To reduce the risk of injury, the user must read and understand the operator's manual.
WARNING
Do not attempt to operate this mower until you have read thoroughly and understood completely all instructions, safety rules, etc. contained in this manual. Failure to comply may result in accidents involving electric shock, fire, and/or serious personal injury.
WARNING
The machine should be operated with the battery pack. When using battery operated machine basic safety precaution should always be followed to reduce the risk of fire, leaking batteries and personal injury.
PERSONAL SAFETY
The lawn mower is capable of amputating hands and feet, and throwing objects. Failure to observe all safety instructions could result in serious injury or death.
English (Original Instructions)
- Never allow children people unfamiliar with the instructions to use the machine. Local regulations may restrict the age of the operator.
-
Stay alert, watch what you are doing, and use common sense when operating the lawn mower. Do not operate the mower while tired or under the influence of drugs, alcohol, or medication. A lapse in concentration while operating the machine may result in serious personal injury.
Wear heavy, long trousers, long sleeves, boots, and gloves. Do not wear loose fitting clothing, short trousers, sandals, or go barefoot.
Always wear safety glasses with side shields. Use face mask if operation is dusty.
Always be sure of your footing. Keep firm footing and balance. Do not overreach. Overreaching can result in loss of balance.
Walk, never run.
Mow across the face of slopes, never up and down. Exercise extreme caution when changing direction on slopes. -
Do not mow near drop-offs, ditches, excessively steep slopes, or embankments. Poor footing could cause a slip and fall accident.
Plan your mowing pattern to avoid discharge of material toward roads, public pavements, bystanders and the like. Also, avoid discharging material against a wall or obstruction, which may cause the material to ricochet back toward the operator.
WORK AREA SAFETY
- Never mow while people, especially children, or pets are nearby.
Always mow in the daylight or in good artificial light. - Do not operate the machine in explosive atmospheres, such as in the presence of flammable liquids, gases or dust. The tool may create sparks which may ignite the dust or fumes.
- Objects struck by the lawn mower blade can cause severe injuries to persons. Thoroughly inspect the area where the machine is to be used and remove all rocks, sticks, metal, wire, bones, toys, or other foreign objects.
English (Original Instructions)
- Do not operate the machine in wet grass or in the rain.
- Keep in mind that the operator or user is responsible for accidents or hazards occurring to other people or their property.
GARDEN TOOLS USE AND CARE
Before using, always visually inspect to ensure blades, blade bolts, and cutter assembly are not worn or damaged.
- Replace worn or damaged blades and bolts in sets to preserve balance.
- Check all nuts, bolts, and screws at frequent intervals for proper tightness to be sure the equipment is in safe working condition.
Check the grass catcher frequently for wear or deterioration.
- Replace worn or damaged parts.
- Do not leave the battery in the mower in direct sunlight.
- Do not force the machine. It will do the job better and safer at the speed for which it was designed.
■ Do not overload your mower. Mowing long thick grass
may cause the motor speed to drop, or the power to cut out. When mowing in long thick grass a first cut with the cutting height set higher will help reduce the load.
- Stop the blade when crossing gravel surfaces.
- Do not pull the mower backward unless absolutely necessary. If you must back the machine away from a wall or obstruction, first look down and behind to avoid tripping or pulling the machine over your feet.
- Stop the blade(s) if the machine has to be tilted for transportation when crossing surfaces other than grass, and when transporting the machine to and from the area to be mowed.
- Never operate the machine with defective guards or shields, or without safety devices, for example, deflectors and/or grassboxes, in place.
- Switch on the motor according to instructions and keep hands and feet away from cutting area.
- Never pick up or carry a lawnmower while the engine is running.
English (Original Instructions)
Remove isolator key for the steps: below cases:
whenever you leave the machine
- before cleaning a blockage
- before checking, cleaning or working on the machine
- after striking a foreign object; inspect the appliance for damage and make repairs as necessary
- before clearing the grassbox
- if the machine starts to vibrate abnormally (check immediately)
- when not in use and storing the machine
- when recharging and removing/inserting battery pack
-
Avoid holes, ruts, bumps, rocks, property stakes, or other hidden objects. Uneventrain could cause a slip and fall accident.
If the machine should start to vibrate abnormally, stop the motor and check immediately for the cause. Replace the blade if it is unevenly worn or damaged in any way. Vibration is generally a warning of trouble.
If the machine strikes a foreign object, follow these -
Stop the machine by releasing the power lever, wait until the blade comes to a complete stop, and then remove isolator key.
- Thoroughly inspect the machine for any damage.
- Replace the blade if it is damaged in any way. Repair any damage before restarting and continuing to operate the mower.
-
Use the right appliance. Do not use the machine for any job except that for which it is intended.
-
When not in use, mowers should be stored in a wellventilated, dry, locked up place-out of the reach of children. The isolator key should also be removed.
- Do not expose machine to rain or wet conditions. Water entering a garden tool will increase the risk of electric shock.
■ Follow manufacturer's instructions for proper operation and installation of accessories. Only use accessories approved by the manufacturer.
■ Be careful during adjustment of the machine to prevent
English (Original Instructions)
entrapment of the fingers between moving blades and fixed parts of the machine.
Always allow the machine to cool down before storing.
- When servicing the blades be aware that, even though the power source is switched off, the blades can still be moved.
BATTERY TOOL USE AND CARE
- Recharge only with the charger specified by the manufacturer. Using a charger with an incompatible battery pack may create a risk of fire.
Use power tools only with specifically designated battery packs. Use of any other battery packs may create a risk of injury and fire. - When battery pack is not use, keep it away from other metal objects like, paper clips, coins, keys, nails, screws, or other small metal objects, that can make a connection from one terminal to another. Shorting the battery terminals together may cause burns or a fire.
Under abusive conditions, liquid may be ejected from
the battery; avoid contact. If contact accidentally occurs, flush with water. If liquid contacts eyes, additionally seek medical help. Liquid ejected from the battery may cause irritation or burns.
SERVICE
Service on the product must be performed by qualified repair personnel only. Service or maintenance performed by unqualified personnel could result in a risk of injury to the user, or damage to the machine.
Use only identical replacement parts when servicing the product. Use of unauthorised parts may create a risk of serious injury to the user, or damage to the product.
inMAINTENANCE
After use and before storage, disconnect the machine from the battery and check for damage.
- When not in use store the machine out of the reach of children.
The machine should only be repaired by an authorised repairer.
Use only manufacturers
English (Original Instructions)
recommended replacement parts and accessories.
CAUTION
The cutter head will continue to rotate for a few seconds after switching off.
The vibration level during actual use of the power tool can differ from the declared total value depending on the ways in which the tool is used.
It has been reported that vibrations from the tools may contribute to a condition called Raynaud's Syndrome in certain individuals. Symptoms may include tingling, numbness and blanching of the fingers, usually apparent upon exposure to cold. Hereditary factors, exposure to cold and dampness, diet, smoking and work practices are all thought to contribute to the development of these symptoms. It is presently unknown what, if any, vibrations or extent of exposure may contribute to the condition. There are measures that can be taken by the operator to possibly reduce the effects of vibration:
-
Keep your body warm in cold weather. When operating the unit wear gloves to keep the hands and wrists warm. It is reported that cold weather is a major factor contributing to Raynaud's Syndrome.
-
After each period of operation, exercise to increase blood circulation.
-
Take frequent work breaks. Limit the amount of exposure per day.
If you experience any of the symptoms of this condition, immediately discontinue use and see your physician about these symptoms.
Save these instructions. Refer to them frequently and use them to instruct others who may use this product. If you lend someone this unit, lend them these instructions also.
SYMBOL
Some of the following symbols may be used on this product. Please study them and learn their meaning. Proper interpretation of these symbols will allow you to operate the product better and safer.
V Volts
English (Original Instructions)
| A Amperes |
| Hz Hertz |
| W Watts |
| Hrs Hours |
| Precautions that involve your safety. |
| To reduce the risk of injury, user must read and understand user's manual before using this product. |
| Do not expose machine to rain or wet conditions. |
| Pay attention that bystanders are not injured through foreign objects thrown from the mower. |
| Keep all bystanders (especially children and pets) at least 15 m away from the work area. |
| Keep hands and feet away from blade and cutting area. |
| Switch off and remove isolator key before adjusting, cleaning and before leaving the product unattended for any period. | |
| Do not operate on inclines greater than 15°. Mow across the face of slopes, never up and down. | |
| Beware of electric shock hazard. | |
| STOP | Wait for all components of machine to have completely stopped before touching them. |
| The charger is intended for indoor use only. |
English (Original Instructions)
The following signal words and meanings are intended to explain the levels of risk associated with this product.
| SYM-BOL | SIG-NAL | MEA-NING |
| DAN-GER | Indicates an imminently hazardous situation, which, if not avoided, will result in death or serious injury. | |
| WAR-NING | Indicates a potentially hazardous situation, which, if not avoided, could result in death or serious injury. |
| CAUT-ION | Indicates a potentially hazardous situation, which, if not avoided, may result in minor or moderate injury. |
| CAUT-ION | (Without Safety Alert Symbol) Indicates a situation that may result in property damage. |
SERVICE
Servicing requires extreme care and knowledge and should be performed only by a qualified service technician. For service we suggest you return the product to your nearest authorised service centre for repair. When servicing, use only identical replacement parts.
English (Original Instructions)
This product has many features for making its use more pleasant and enjoyable. Safety, performance, and dependability have been given top priority in the design of this product making it easy to maintain and operate.
CAUTION
The operation of any power tool can result in foreign objects being thrown into your eyes, which can result in severe eye damage. Before beginning power tool operation, always wear safety goggles or safety glasses with side shields and, when needed, a full face shield. We recommend Wide Vision Safety Mask for use over eyeglasses or standard safety glasses with side shields. Always use eye protection which is marked to comply with EN 166.
ENVIRONMENTAL PROTECTION
Waste electrical products should not be disposed of with household waste. Please recycle where facilities exist. Check with your local authority or retailer for recycling advice.
Separate collection of used products and packaging allows materials to be recycled and used again.
Re-use of recycled materials helps prevent environmental pollution and reduces the demand for raw materials.
Batteries At the end of their useful life, discard batteries with due care for our environment.
The battery contains material which is hazardous to you and the environment. It must be removed and disposed of separately at a facility that accepts lithium-ion batteries.
CoxpaHnTe DaHHOe pyKOBoODCTBO IJIЯ nOcIeDyUoIeTo IcNoJIb3OBaHnIA
HA3HAUEHNE
Данhoe устpoистBO
IpeDHa3HaueHO IJRA 3pNxKn Ra30HOB B 6bITOBbIX YCIOBnX. Pexyuee Je3Bne DOJXHO Bpaatbcra PrIMepHO npaJIeNbHO IOBepXHOCTN, NO KOTOPoI nepemeaaetcra3OHOKOcNka.Bo BpeMa CTpNxxN BCE yETbIpe KOleca DoJXhbl KacaTbCra 3emNI. CJeIOBaHne 3a pa6oTaIOseJ ra3OHOKOcNko Tpe6bye Oco6oro BHIMAHNA OT onepaTopa.
ПРИМЕЧАНЕ: He ДОпунскайта OTPыВа KOлес ГАЗОнOKОСИКИ OT 3eMLN
BO BpeMpa60TbI, ee TaKxe He cJeDyET DepraTb I NcNoJb3OBaTb 7n KaTaHn. YcTpoiCTBO MoXHO NcNoJb3OBaTb NCKJIuOHTeNbHO dJa CTPNkN r3OHOB B 6bITOBbIX yCIOBnX.
OBUHE INPABUNA TEXHNI B3ONACHOCTN
OCTOPOXHO
yTo6bI yMeHbShaTb pNcK yUepe6a, nOJIb30BaTeJIb dOJIxKeH cHTaTb I NOHMaTb pyKOBoDCTBO ONEpaTopa.
OCTOPOXHO
He nbitaTecb nCnoB3OBaTb 3Ty Kocnilky, Poka Bbl He uHTaII NOLHOCTbIO I NOHJI N OJHOCTbIO BCE INHCTpyKcN, npabnla 6e3ONaChOCTN, N T.D. COdepkaUncE8 B 3TOM pyKOBoDcTBe. HecobIouDeHne DaHHbIX INHCTpyKcN MoKeT npINBeCTN K HeCuaCThblM CJIyuaM, BKJIouyA npopaxeHne 3JIeKTPnueckm TOKOM, BO3rOpAHNe I TjXkne TeJeCHbIe NOBpeJdEHnI.
Pycckn (Ipeboi n3 nepBOHaayalbHbIX INHCTpyKcui)
OCTOPOXHO
UcTpoIcTBo cJeDyET
NcNoJIb3OBaTb C
aKKymJyTOpHOn
6batapee. Bo n36eXaHne
ONaCHoCTn BO3rOpaHnA,
Teu aKKymJyTOpHO
6batape N NOlyYeHnA
TpAbM npNcNoJIb3OBaHnN
3JIeKTPoINHCTpymeHTOB C
NTaHHeMOTaKKymJyTOpHBIX
6batape cJeDyET CO6JIIOdaTb
OCHOBhIe npabnla TexHnKn
6e3ONaChOCTn.
JIINHAR B3OJACHOCTb
HehaIJIeJkaIe e IcNoIb3OBAHne Ra3OHOKOcNlKu MoXeT npIBecTI K amnyTaUIN pyK HOr, Ra3OHOKOcNlKa TaKKe MoXeT pa36paCsbIBaTb pa3nUHbIe PpeDMeTbI, nonadaIOUne IOd Hee.OTka3 CO6JIoDaTb BCE INHCTpyKcIn 6e3OpacHOCTn, MoXeT KOHuaTbcra Cepbe3HbIM yIep6om nIIcMepTbIO.
He donyckaTe K pa6ote C daHHbIM yCTPOIcTBOM DeTeN I Ns, He3HaKOMbIX C nHCTpyKzmaMn PO nCNoJIb3OBAHnIO yCTPOIcTBA. MeCTHbIe nHCTpyKznn MOryt OrpaHnUHTb BO3pact onepaTopa.
Будыт e BнIMaTeIbHbI, CMOTpIte, yTO Bbl DeIaeTe, n NcNoJIb3YeTe 3dpaBbI CMbICn Iprn DeIcTBn KocNilKn JyKaiKn. He NcNoJIb3yIte KocNilKy, B TO BpeM aK yTomJeHbI nII nOd BJIraHnEM HapKOTIKOB, aIKNOrOJn, nII neueHn. HeIOCTaToUHaB BHNMaTeJIbHOCTb BO BpeM pa60tby c YcTPOiCTBOM MOxET pINBecTN K NOJyuHeHIO cepBe3HOJ TpaBMbl.
HaideBaIte ДлIHbIe ПLOTHbIe 6pIOKn, OdEJdy CДЛINHbIMN pyKaBaMn, 6OTINKn I nepuATKn. He HaideBaIte CBObOdHyo OdEjdy, KOpOTKne 6pIOKn, caHdaJIIn N He pa6OtaIte 6OcNKOM.
Bcerda HaedeBaTb He6bIooJIeC8 OUYC C UHTAMN CTOpOHbl. IcNoJIb3OBA Tb Macky JInca,ecnI DeICTBne NblbHO.
CoxpaHnTe yCTOuNBOCTb BO BpeMpaBOTbl. DepeKATb yCTOuNByo ONOpY n 6aHaHC.He nepeHapraTb. IpeHapJxKeHne MoKet KOHcTaBCnOTepeB6aHaHca.
■Передвига'tecьшaram, He 6eraite.
Pycckn (IpeBOD n3 nepBOHaayalbHbIX nHcTpyKcn)
He KOCINb nonepek HaKIOHOB, HNKoIa BBepx n BHN3. OcyueCTBnTb Ppe3BblaHoe npedoctepexehne npn 3MeHenn HanpaBJIeHna HaKNoHaX.
He npOn3BOJNTe cTpNkky B6IIN3n O6pbIBOB, pBOB, Heo6bIyauHo KpyTbIX OTKOCOB n HacbIne. BeDnaonopa MoKeT npuHnABy HeCuaCThBi CnyaH npomaxa n paDeHnA.
CocTaBbTe cxemy cTpJxKn, UTO6bl n36eXaTB BbIbOpa MaTePnAna Ha DOpOrn, TPOTyApbl,Ha NOCTOPoHnHX IINu T.I. TaKHe, n36eRnTe OCBO6OxJaTb MaTePnaJI PNOTIB CTeHbI INI INpeRpaIbI, KOTopA MoXeT 3aCTaBJIaTb MaTePnAIn 6NTb pNkoWeTOM Ha3aD K ONePaTOpY.
БЕЗПАСHОCTБ PABOЧМECTE
He pa6oTaIe cyCTpoiCTBOM,ecnPraDOM HaxoJrTcnoCTOpOHnE Iuca,Oco6eHNO Detn,a TaKKe DomaUHnE XNBOTHbIe.
Ipn3BOJNTe CTpNkky TOJIbKO dHem ININ pni XopoWeM NCKyCCTBeHHOM OCBeUeHN.
He nCnoJb3yIte n3dJIeNc
aKKymyIaTOPbIM nITaHnEM BO B3pbIBOOpaCHOcpeDe, Hanpimep, pni HaJIuHi NERKOBocPJaMaMeHЯUxxCa XnDKoCTeN, Ra3OB nIIN nbIi. BycTpoiCTBe MoryT 06pa3OBbIBaTbcra NCKpbI, UTO MOKeT npINBecTN K BOCPJaMaHeHIO nbIi nJIn ra3a.
O6bekTbI, nopaxeHHbIe Ie3BnEM KOCNkN JykaaKN, MOryT npuHnYb Cepbe3HbIe NOBpeJdeHna JIOdAm. TuaTeNbHO OCMOTpnte yactOK,rdenpeDnOlaRaETcA N cnoJb30BaTb ra3OHokCnKy, u y6epnte BCE KaMHN, NaKN, MetaJIInueckne qactN, npoBOJOkY, KOCTN, INrpyuKn N dpyrHe NOCTOPoHHne npedMeTbI.
HepaobotaeCycptpoiCTBOM BO BnaJHOI TpaBe IIN IOd DOxKDEM.
I MeB B BnDy, YTO OepaTop IIN NOIb3OBaTeJIb OTBETCTBEHHbl 3a HeCuaCTHbIe CnyuAn IIN ONaCHOCTN, BCTpeuOuIneCЯ dpyrIM JIOdAm IIN IX CO6CTBeHHOCtN.
Pycckn (IpeBOD n3 nepBOHaayalbHbIX INHCTpyKcN)
Ecnn aKKymyIaTOPna
6aTapeH He nCnoJIb3YeTcY,
XpaHnTe ee OTdJeIbHO OT
Dpynx MeTaJIInueckNX
PpeDMeTOB, HApPIMep
KaHZeJIrpCKNX CKPeNOK,
MOHeT, KJIIOUeY, TBO3DeY,
BNHTOB N Dpynx MeJIKNX
MeTaJIInueckNX PpeDMeTOB,
KOTOpblc MOrYT pINBeCTN
K 3aMbIkaHnIO KOHTaKTOB
6aTapen. 3aMbIkaHne
KoHTaKTob 6aTapeu MoXeT Bbl3BaTb OXOgN IJI N pINBecTn K BO3rOpaHIO.
■Пи HeHOpMaJIbHbIX yCNoBnIx n3 6aTapei MOxET BbITEuyb XnIDKOCTb, n36eaiTe KOHTaKTa C Hei. EcIn 3ToRo n36eXaTb He ydaIocb, CMoIte XnIDKOCTb BODoi. EcIn XnIDKOCTb IOnaJa B rIa3a, NocJe IX npOMbIBaHnI O6paTntEcB 3a MeDiuINHcOJ NOMOUsBO. XnIDKOCTb, BbITEKShaY n3 6aTapei, MoXet Bbl3BaTb pa3dpaXeHne nII OxKOr.
OECJIYXINBAHNE
O6cnykBaHne 3dJIy
I0JxHO 6bITb BbINOJIHeHO
KBAJI N OuNpOBaHHbIM
PepcoHaIOM peMOHTa
ToIbKO.ObcnykBaHne IIN
HaJaKa, BbIOJNeHHa
INCKBaJI N OuNpOBaHHbIM
PepcoHaIOM MOrYT
KOnHaTbcr yUePbOM
IOnb3OBaTeJIIO IINI
IOBpeJdaTb 3dJIeNe.
IcnoJb3OBaTb TOJbKO
ndeHTnUHbIE CMeHHbIe
uactn npn 06cnyxHBaHn
n3deJIy. IcnoJb3OBaHne
He npaBOMOuHbIX qAcTei
MOXET CO3daBaTb PNCK
cepbe3Horo yuepe6a
NoJb3OBaTeJIIO, IJIi
Pycckn (Ipeboi n3 nepBOHaayalbHbIX INHCTpyKcui)
IOBpeXdaTb n3dJIne.
TEXHNUECKOEOBCJNUKBAHNE
Iocne nCnoJb3OBAHnna nnpeed XpaHeHneM OTKJIouHTe aKKyMylTOpHyIO 6aTaapeIO n npOBepbTe HaHaJIuYne NOBpeXdEHN.
EcnHcTpyMeHT He nCNoJIb3YeTCa, XpaHnTe erO B MeCTe, HeIoCTyINHom JIЯ DeTei.
PemOH T yCTPOIcTBA
DJIKeH IPOIN3BOIDITbC8
TOJIbKO yNOJHOMOyeHHbIM
pa60THNKOM cJyX6bl
peMOHTa.
IcnoJb3yIte 3aIacHbIe
Uactn I npHaJpeJXHOCTN
TOJIbKO peKOMeHDoBaHHbIe
N3rOToBHTeJIaMn.
UWAGA
Iocne BbIKNoyeHnpeXyuaI
rOIOBka npoJxHaET
BpaaTbcB TeueHne
HeCKoJIbKnx CeKHyd.
YpOBeHb Bn6paCnn BO BpeM TeKUePa60TbI 3JIeKTPnueCKoro yCTpoiCTBa MOxET OTnUaTbcra OT 3aBHeHHo 6uEe BeNnHbI Bn6paCnn, YTO\ 3aBNCtOT Cnoc6a erO
NcNoJIb3OBaHnI.
CunTaETc, yTo Bn6paZnHNCpymeTOB MoKet npNBecTN K npoBJIeHNOy OTdJIbHbIX IINu TaK Ha3bIbAeMoJ BoJe3Hn PeiHO (Raynaud's Syndrome). K CmPTOMaM MOryT OTHOCNTbcr POKaJIbVBaHne, OHemHe N IOBeJIeHne PaJIbUeB (kak npNpeOxJaXdEHN).CUnTAIOr, YTO HacJIeDCTBeHHbIe 0aKTOpbl, OxJaXdEHN E BnaxHOCTb, DIneta, Kpyehne IN ppaKTNUeCKn ONbIT CnOCO6CTBYOT pa3BVNTINO 3TINX CmPTOMOB. B HactoJuee Bpemr Hen3BeCTHO, KaK Bn6paZnI INI pOdoJXnteJIbHOCTb BO3DeIcTBnBnIAHOT (ecNI BOo6UeBnIAHOT)HaPa3BVNTne DaHHbIX CmPTOMOB. HnKe npNbBOJATc MEpbI, KOtOpblc MoKet npinraTb OepaTop IINr CHNXeHn BO3DeIcTBn Bn6paZnI:
OdEBaIteCb TeNJIeexoJOnHyIO nOrOy. Pnpa6Ote C yCTpOINCTBOMNoJIb3yIITecb nepUaTKaMn,HTo6bl pyKn I 3aPAnCTb86bln B TcJIpe.CuNTaETcA,yTO xOJOnHaNOrOda ABJIaETcOCHOBhIM
Pycckn (IpebeoN3 nepBOHaayaJIbHbIX nHcTpyKcn)
CnOco6CTByUoIIM BO3HnKHOBeHnIO 60Je3Hn PeiHo (Raynaud's Syndrome).
- После кждого этana pa6otbl BbINOJHnte ynpaxHeHЯ дя усileHЯ kpoBOO6pauneHЯ.
- Yaune DeJaTe nepepbIbbl B pa6Ote. Cokpatnte IJIITeJIbHOCTb exKeIHeBHO rpe6bIBaHnHa OTKpbITOM BO3dUxE.
■Пи NOЯВЛeHи KaKnx-JIb6O n3 yKa3aHHbIX CnMNTOMOB cpa3y JxpeKpatnte pa60Tu N obpaTntecb Ix IO NOBOdy K BpaCy.
Coхраинь 3TN INHCTpyKcIn.
O6paaatbcsr K Hm, Yacto
N INCNoIb3OBaTb Nx, YTO6bl
INHCTpyKtnpOBaTb DpynX,
KTO MOxET INCNoIb3OBaTb 3TO
N3dJIe. Ecnn Bbl BpeMeHHO
NepeJaTe KOMy-JIb60 DaHHOe
YCTPOIcTBQ, NepeJaTe
BMECTe C Hm I daHHbIe
INHCTpyKcIn.
CHMBOJ
Ha DaHHOM INHCTpymhte MOrYT PnCytCTBOBaTb HEKOTOpbIe N3 CJeDyUOxNx Obo3NaYeH.N3yUHTe NX N 3aONMHTe, YTO OHN O3NaUaOT. PpaBnIbHoe IOHMaHHe
DAHHbIX 06O3HaueHn I03BOJNT Bam JyUwe N 6e3OpacHee NOIb3OBaTbcra DAHHbIM yCTPOIcTBOM.
MaTePnaIOB N03BOJЯeT Ix
Inepepa6aTbIBaTb I NOBTOpHO
NcNoJIb3OBaTb. IcNoJIb3OBaHHe
Inepepa6OtaHHbIX MaTePnaIOB
POMORAET PpeIoTbPaTNTb
3aRpy3HeHHe OKpyKaIOUSei
CpeIbI IN CHnJaET Cnpoc Ha
cbIpbe.
Batteries B KOHcE cPoka CnyKbI 6batapey TnIn3npyTe Hx C NaJIeJkaUe 3a60ToO o6 OkpyKaIOUe CpeDe. BaTapeY coDEpXHT BeIeCTBa, KOTOpbl EYBLJIoTcR ONaCHbIMN DJIa Bac N OKpyKaIOUe CpeDbI. Ee CneDyET ChrTb N OTnpaBVtB dJIa YTNIN3aCmN B NYHK T npHeMa OTPa6oTaHHbIX IINTN-NOHHbIX 6batapei.
OPEA SIGURNOSNA PRAVILA
UPOZORENJE
Da se smanji rizik od povreda,
rukovatelj mora proeitati i shvatiti ove upute.
UPOZORENJE
He paBOTeTe c MaUHaTAtBbpxy BnaJxHa TpeBa IJIINpN DbXd.
Tp6Ba Da 3Haete, ye OepaTopbT NnN noTppe6nteIe otroBopeh 3a npuHnBaHeto Ha 3NoOpnyKn NnN uetn Ha dpyrN NiUa Nn NmUseCTBO.
I3IOJ3BAHE OBCJIYJXBAH E HA TPAdINHCKN IHCTPYMEHTN
OrlexdaTe HnctpyMeHaBceKn nT npedn ynoTppe6a,3a Da ce yBepnte,YeoctpneTaTa,6oTobete mnpexeun MexaHn3bM He caH3HOCEHN IIN NOBpeHn.
3aMeHete N3HOceHnte IINIOBpeJeHnte OCTpneTaI 60JTOBe 3aeDHo, 3a Da 3ana3nte 6aJahca.
■Перноюно повераят endaJIи BCnUKN raIKN,
He octabraye 6atepyra
B KocaykaTa NOD npKa CJIbHueBa CBETInHa.
He hacnlaBte MaunHaTa.
ToI 1e CBbpHn
pa6oTaTa no-Do6pe n no
6e30napcnoB 3aadaene NO
HactpoNka Ha BncoUHaT.
Cnpete octpneTo, kOrato
премнаватудчakьпессT
NOBbpxHOCTN.
He Dbprnate Ha3aD
Kocaykata, OCBeh aKO He e abcoJIOTHO Hen36eXHO.
Ako Tp8Ba Da BbPHeTe
MaunHaTa B o6paTHa
nocoka, 3a da n36erheTe
CTeHa nn npenrTCTBne,
PbPoCeOrpeaTeHaOJy
iHa3a, 3a da n36erHete
cπbBaHe nIu IdpbPbAHe Ha
MaunHaTa Haid KpaKaTa cn.
Cnpete octpneTo
(OCtpneta), ako ce haIara
Hnkora He noJ3BaIte ypeDa
C NOBpeHn 3aunti nIIN
CTpaHnUHN eKpaHn IJIIN
6e3 3aunTHn yctpoNCTBa,
Hanpimep 6e3 MOHTIpaHn
OTKIOHNTeIN NIN KYTN 3a
TpeBa.
Hnkora He BdngaTe n He
HOCTe Kocaykata, DOKaTO
ДВИГАТЕЛТ ИЕ В XOD.
OtctpaHete KJIoua Ha
n3oIatopa npi cIeHnTe
CnyuAn:
BUNHn, KOrato OCTaBrTe
Maushnata
CIMPTOMN. KbM MOMeHTa He e N3BecTHO KaKBN Bn6paun, aKO nMa TaKNBa,
I P E D U N P E X J D E H N E
Iprnpabota c MexaHn3nap HNCTpymeNT B OuHTe MoTaT Da IOnaAdHaT ChxDn YactnCn, KOeTO MoKe Da DoBeDe Do CepNo3HbYBpeJdaHnB 3peHneTo. Ppei Da 3aOnuHete pa60ta C MExaHn3nap HNCTpymeHT, BInHaCn Cn CnaRaTe PpeJa3Ha MaCKa, PpeJa3Hn OUnla CbC CTpaHnUHn ekpaHn IIn MaCKa 3a ZJIATO JInCe, KOrato e Heo6XoDnMo. PpenOpbVbame WI de Vision Safety Mask (PpeJa3Ha MaCKa C ShnOk n3rJe) 3a N3NoJ3BaHe Bbpxy OUnla INI CTaNdApTHN 3aUHTnOUnla CbC CTpaHnUHn ekpaHn.BinHarn n3NoJ3BaJte 3aUnTHN OUnla, KOINTO cNa3Bat cTaHdapTa EN 166.
ОПАЗВАЕ HA OKОЛHATA CРEDA
E lektpnuecknte ypeHn He Tp6Ba da ce n3XBbPJIaT 3aedHO C bHTOBNTe OTnabu. PeuknpaIte, KbdeTo mAb Bb3MOxHocT. O6bpHeTe ce 3a cBbET NO peuknpaHeto KbM MeCTHnte BlaCTN Ipa3npocTpaHnteJIte.

Pa3dJIHOTO cIbIpaHe HauN3PON3BaHnIpOdyKTNI ONAKOBKN P03BOJRABa MaTePnaJIte Da 6bDaT IInpaHn N3POn3BaHn OHO. IOBTOphoT OBAHe Ha peuKJIpaHn HaJI NaI ppeDToBpaTaBa CcraBaHETO Ha aTa CpeDa N HamaJIba BHOCTTA OT CypOBHH.

Batteries
B KpaHa ekCnloaTauNoHHna XNBOT Ha 6aTepeHnTe TpAbaTn3XbPJIHTe
no ekolorocb06pa3eH naHH. BatepnaTa cbDbpxka MaTePnAIn, KOnto ca onaChn 3a Bac n OkonHaTcpeDa. TЯ Tp8Ba Da ce n3BaAn OT ypea N da Ce npedae OTdelenHO B OBeKT, KOHTO npneMa JNTHeBO- HoHNbatepnn.
JU J U J U U U U U U U U U U U U U U U U U U U U U U U U U U U U U U U U U U U U U U U U U U U U U U UUUUUUUUUUUUUUUUUUUUUUUUUUUUUUUUUUUUUUUUUUUUUUUUUUUUUUUUUUUUUUUUUUUUUUUUUUUUUUUUUUUUUUUUUUUUUUUUUUUUUUUUUUUUUUUUUUUUUUUUUUUUUUUUUUUUUUUUUUUUUUUUUUUUUUUUUUUUUUUUUUUUUUuuuuuuuuuuuuuuuuuuuuuuuuuuuuuuuuuuuuuuuuuuuuuuuuuuuuuuuuuuuuuuuuuuuuuuuuuuuuuuuuuuuuuuuuuuuuuuuuuuuuuuuuuuuuuuuuuuuuuuuuuuuuuuuuuuuuuuuuuuuuuuuuuuuuuuuuuuuuuuuuuuuuuuuuuuuuuuuuuuuuuuuuuuuuuuuuuuuuuuuu uu
A
sJgE gJgBp 1JgBgBgBgBgBgBgBgBgBgBgBgBgBgBgBgBgBgBgBgBgBgBgBgBgBgBgBgBgBgBgBgBgBgBgBgBgBgBgBgBgBgBgBgBgBgBgBgBgBgBg
1JUJU 1JU
J 1 J 1 J 1 J 1 J 1 J 1 J 1 J 1 J 1 J 1 J 1 J 1 J 1 J 1 J 1 J 1 J 1 J 1 J 1 J 1 J 1 J 1 J 1 J 1 J 1 J 1 J 1 J 1 J 1 J 1 J 1 J 1 J 1 J 1 J
JU 1 JU U JU 1 JU U JU U JU U JU U JU U JU U JU U JU U JU U JU U JU U JU U JU U JU U JU U JU U JU U JU U JU U JU U JU U JU U JU U JU U JU U JU U JU U JU U JU U JU U
1JU 1JU 1JU 1JU 1JU
()
Jg j Jc s g Jg b g 1
g 1 g 1 g 1 g 1 g 1 g 1 g 1 g 1 g 1 g 1 g 1 g 1 g 1 g 1 g 1 g 1 g 1 g 1 g 1 g 1 g 1 g 1 g 1 g 1 g 1 g 1 g 1 g 1 g 1 g 1 g 1 g 1 g 1 g 1 g
1rds s w gJ 2g Jg Jg Jg Jg Jg Jg Jg Jg Jg Jg Jg Jg Jg Jg Jg Jg Jg Jg Jg Jg Jg Jg Jg Jg Jg Jg Jg Jg Jg Jg Jg Jg Jg Jg Jg Jg Jg Jg Jg Jg Jg Jg Jg Jg
1 1
1 1s1s1s1s1s1s1s1s1s1s1s1s1s1s1s1s1s1s1s1s1s1s1s1s1s1s1s1s1s1s1s1s1s1s1s1s1s1s1s1s1s1s1s
1p
1 1
JU 1JU JU JU JU JU JU JU JU JU JU JU JU JU JU JU JU JU JU JU JU JU JU JU JU JU JU JU JU JU JU JU JU JU JU JU JU JU JU JU JU JU JU JU JU JU JU JU JU JU
1 1 1 1 1 1 1 1 1 1 1 1 1 1 1 1 1 1 1 1 1 1 1 1 1 1 1 1 1 1 1 1 1
J 1 J
JU
JU 1JU JU JU JU JU JU JU UUU
1 1
JU JU JU JU JU JU JU JU JU JU JU JU JU JU JU JU JU JU JU JU JU JU JU JU JU JU JU JU JU JU JU JU JU JU JU JU JU JU JU JU JU JU JU JU JU JU JU JU JU JU JU
1 1 Js 1
Jb 1
Jg 1
Jg 1
Jg 1
Jg 1
Jg 1
Jg 1
Jg 1
Jg 1
JU 1JUgUs UeU 1UuJgU
1 1 1 1 1 1 1 1 1 1 1 1 1 1 1 1 1 1 1 1 1 1 1 1 1 1 1 1 1
1s 12g 1Jc
JU 1JU
()
1J 1J 1J 1J 1J 1J 1J 1J 1J 1J 1J 1J 1J 1J 1J 1J 1J 1J 1J 1J 1J 1J 1J 1J 1J 1J 1J 1J 1J 1J 1J 1J 1J 1
JU JU JU JU JU JU JU JU JU
J 1 J 1 J 1 J 1 J 1 J 1 J 1 J 1 J 1 J 1 J 1 J 1 J 1 J 1 J 1 J 1 J 1 J 1 J 1 J 1 J 1 J 1 J 1 J 1 J 1 J 1 J 1 J 1 J 1 J 1 J 1 J 1 J 1 J 1
J 1 J
J 1Jzj 1JUg
1 J 1Jb1rSg S Jc J G gJg C
J 1 J 1 J 1 J 1 J 1 J 1 J 1 J 1 J 1 J 1 J 1 J 1 J 1 J 1 J 1 J 1 J 1 J 1 J 1 J 1 J 1 J 1 J 1 J 1 J 1 J 1 J 1 J 1 J 1 J 1 J 1 J 1 J 1 J 1 J
JU JU UUUU UUUUUUUUUUUUUUUUUUUUUUUUUUUUUUUUUUUUUUUUUUUUUUUUUUUUUUUUUUUUUUUUUUUUUUUUUUUUUUUUUUUUUUUUUUUUUUUUUUUUUUUUUUUUUUUUUUUUUUUUUUUUUUUUUUUUUUUUUUUUUUUUUUUUUUUUUUUUUUUUUUUUUUUUUUUUUuuuuuuuuuuuuuuuuuuuuuuuuuuuuuuuuuuuuuuuuuuuuuuuuuuuuuuuuuuuuuuuuuuuuuuuuuuuuuuuuuuuuuuuuuuuuuuuuuuuuuuuuuuuuuuuuuuuuuuuuuuuuuuuuuuuuuuuuuuuuuuuuuuuuuuuuuuuuuuuuuuuuuuuuuuuuuuuuuuuuuuuuuuuuuuuuuuuuuuuu uu
1 1
J 1 J 1 J 1 J 1 J 1 J 1 J 1 J 1 J 1 J 1 J 1 J 1 J 1 J 1 J 1 J 1 J 1 J 1 J 1 J 1 J 1 J 1 J 1 J 1 J 1 J 1 J 1 J 1 J 1 J 1 J 1 J 1 J 1 J 1
Jc Jc Jc Jc Jc Jc Jc
JgJgJgJgJgJgJgJgJgJgJgJgJgJgJgJgJgJgJgJgJgJgJgJgJgJgJgJgJgJgJgJgJgJgJgJgJgJgJgJgJgJgJgJgJgJgJgJgJgJgJ
JU 1 JU 1 JU 1 JU 1 JU 1 JU 1 JU 1 JU 1 JU 1 JU 1 JU 1 JU 1 JU 1 JU 1 JU 1 JU 1 JU 1 JU 1 JU 1 JU 1 JU 1 JU 1 JU 1 JU 1 JU 1
1Jg 1Jg 1Jg 1Jg 1Jg 1Jg
Jg Jg Cg Cg G g
1Jz 1JzJ JzJU
1
J
JU 1JU Jg U
JU 1JU JU UJU JU JU
J
J 1 J 1 J 1 J 1 J 1 J 1 J 1 J 1 J 1 J 1 J 1 J 1 J 1 J 1 J 1 J 1 J 1 J 1 J 1 J 1 J 1 J 1 J 1 J 1 J 1 J 1 J 1 J 1
1
E 120 120 120 120 120 120
1 1 1
()
J 1 J 1 J 1 J 1 J 1 J 1 J 1 J 1 J 1 J 1 J 1 J 1 J 1 J 1 J 1
1 1 J 1 J 1 J 1 J 1 J 1 J 1 J 1 J 1 J 1 J 1 J 1 J 1 J 1 J 1 J 1 J 1 J 1 J 1 J 1 J 1 J 1 J 1 J 1 J 1 J 1 J 1 J 1 J 1 J 1 J 1 J 1 J 1 J 1 J
1 1
1J 1J Jg jj 1J 1J 1J 1J 1J
1 1JU J U
1J 1J Js Js Js Js Js Js Js Js Js Js Js
1J201 JU 1JU201. 1JU201. 1JU201. 1JU201.
1 1 J 1J 1J 1J 1J 1J 1J 1J 1J 1J 1J 1J 1J 1J 1J 1J 1J 1J 1J 1J 1J 1J 1J 1J
JU 1JU JU UJU 1JU 1JU. 1JU JU JU UJU 1JU 1JU 1JU 1JU 1JU 1JU 1JU 1JU 1JU 1JU 1JU 1JU 1JU 1JU 1JU 1JU 1JU 1JU 1JU 1JU 1JU 1JU 1JU 1JU 1JU 0
1
JU 1JU UJU JU UJU UJU UJU UJU UJU UJU UJU UJU UJU UJU UJU UJU UJU UJU UJU UJU UJU UJU UJU UJU UJU UJU UJU UJU UJU UJU UJU UJU UJU UJU UJU UJU UJU UJ
J 1 J 1 J 1 J 1 J 1
J 1 J J J J J J J J J J J J J J
1J 1J 1J 1J 1J 1J 1J 1J 1J 1J 1J 1J 1J 1J 1J 1J 1J 1J 1J 1J 1J 1J 1J 1J 1J 1J 1J 1J
1
12 1JbI JU 1JbI UJbI UJbI UJbI UJbI UJbI UJbI UJbI UJbI UJbI UJbI UJbI UJbI UJbI UJbI UJbI UJbI UJbI UJbI UJbI UJbI UJbI UJbI UJbI UJbI UJbI
E 1s E Jg 1Jg 1Jg 1Jg 1Jg 1Jg 1Jg 1Jg 1Jg 1Jg 1Jg 1Jg 1Jg 1Jg 1Jg 1Jg 1Jg 1Jg 1Jg 1Jg 1Jg 1Jg 1Jg 1Jg 1Jg 1Jg 1
()
2
J 1 J 1 J 1 J 1 J 1 J 1 J 1 J 1 J 1 J 1 J 1 J 1 J 1 J 1 J 1 J 1 J 1 J 1 J 1 J 1 J 1 J 1 J 1 J 1 J 1 J 1 J 1 J 1 J 1 J 1 J 1 J 1 J 1 J 1 J
1JU
1s 1s 1s 1s 1s 1s 1s 1s 1s 1s 1s 1s 1s 1s 1s 1s 1s 1s 1s
山
1 J 1J 1J 1J 1J 1J 1J 1J 1J 1J 1J 1J 1J 1J 1J 1J 1J 1J 1J 1J 1J 1J 1J 1J 1J 1J 1J 1J 1J 1J 1J 1J 1J 1J
Edu 1uue 1Jus 120
J 1
1 1
J 1 J
A
Jg 1JgS JgJgJgJgJgJgJg
1s j 1s j s Jj J J J J J J J J J J J J J J J J J J J J
J 1 J 1 J 1 J 1 J 1 J 1 J 1 J 1 J 1 J 1 J 1 J 1 J 1 J 1 J 1 J 1 J 1 J 1 J 1 J 1 J 1 J 1 J 1 J 1 J 1 J 1 J 1 J 1 J 1 J 1 J 1 J 1 J 1 J 1 J
J 1 J 1 J 1 J 1 J 1 J 1 J 1 J 1 J 1 J 1 J 1 J 1 J 1 J 1 J 1 J 1 J 1 J 1 J 1 J 1 J 1 J 1 J 1 J 1 J 1 J 1 J 1 J 1 J 1 J 1 J 1 J 1 J 1 J 1 J
()
J 1 Jg.
1 1 1 1 1 1 1 1 1 1 1 1 1 1
1 1 1 1 1 1 1 1 1 1 1 1 1 1 1 1 1 1 1 1 1 1 1 1 1 1 1 1 1
J 1 Jg E Jg E Jg E Jg E Jg E Jg E Jg E Jg E Jg E Jg E Jg E Jg E Jg E Jg E Jg E Jg E Jg E Jg E Jg E Jg E Jg E Jg E Jg E Jg E Jg E Jg E Jg E Jg E Jg E
U
d d 1 Jg j Jg s
EJs oJpJc. gJcJrJ
gJpJcJqSOL. CgJnJUeJ
UJQCS Jdo UJgJgJgJ
Jd UJpJgJgJ
gJrJl.
J 1 J 1 J 1 J 1 J 1 J 1 J 1 J 1 J 1 J 1 J 1 J 1 J 1 J 1 J 1 J 1 J 1 J 1 J 1 J 1 J 1 J 1 J 1 J 1 J 1 J 1 J 1 J 1 J 1 J 1 J 1 J 1 J 1 J 1 J
Ucplso Uusso
J 1 J 1 J 1 J 1 J 1 J 1 J 1 J 1 J 1 J 1 J 1 J 1 J 1 J 1 J 1 J 1 J 1 J 1 J 1 J 1 J 1 J 1 J 1 J 1 J 1 J 1 J 1 J 1 J 1 J 1 J 1 J 1 J 1 J 1 J
s s c 1 Jp n J
J p J
Jggl Jgol J
Jgol Jgol J
Jgol Jgol J
Jgol Jgol J
Jgol Jgol J
Jgol Jgol J
Batteries 10000000000000000000000000000000000000000000000000000000000000000000000000000000000
nwn no'ni 7xyn, y7 nwnnu nn nnnnny
A
x' non nnnnn nnonn
yT xnn nn nn nn nn nn nn nn, 777 nn nnn nn nn nn nn nn nn nn nn nn nn nn nn nn nn nn nn nn nn nn nn nn nn nn nn nn nn nn nn nn nn nn nn nn nn nn nn nn nn nn nn nn nn nn nn nn nn nn nn nn nn nn nn nn nn nn nn nn nn nn nn nn nn nn nn nn nn nn nn nn nn nn nn nn nn nn nn nn nn nn nn nn nn nn nn nn nn nn nn nn nn nn nn nn nn nn nn nn nn nn nn.
A
ywnny y no17n.
yn niuy nniy nnxyin
oyn y ny nniy nniin
noynin npnn noiyyn,
tnno17n 19yn.
2019 X'UIN
nONnn nTNNOIN 7nIN T'0N7O INyIN yNIO. Nynynn nnNn nnNn nnNn nn.
X7 Nxuyy10 77T0
XI XUo UxO Oo'0 Xn
NnNXn Ynuu nn.
NnIN nInn yUu n
XnXnNvY.
nynny, nnnn nnyn ny nyn nnyn nonn nnyn. nynnnn nnnonn nnyn nnyn nn nnnn nnyn onn, nnnn nn. nynnn nn nn nn nn nn nn nn nn nn nn nn nn nn nn nn nn nn nn nn nn nn nn nn nn nn nn nn nn nn nn nn nn nn nn nn nn nn nn nn nn nn nn nn nn nn nn nn nn nn nn nn nn nn nn nn nn nn nn nn nn nn nn nn nn nn nn nn nn nn nn nn nn nn nn nn nn nn nn nn nn nn nn nn nn nn nn nn nn nn nn nn nn nn nn nnnn nnnn nnnn nnnn nnnn nnnn nnnn nnnn nnnn nnnn nnnn nnnn nnnn nnnn nnnn nnnn nnnn nnnn nnnn nnnn nnnn nnnn nnnn nnnn nnnn nnnn nnnn nnnn nnnn nnnn nnnn nnnn nnnn nnnn
yun (nxxin npinn)
ywnnD 2T D, ynn D NID,D, n9D ID99IN.7 nyu T D NID, OITN XI nnu nn
T. NOON XN NNTX
nT nT y7 nT nT. uT y7 nT y7 uT uT. xT nyio y7 nT y7 nnT. oT Tnnnnn nT y7 nnT y7 nnT y7 nnT.
77, x7 nviY.
on 7nna yiyD, yiyD x nyyn nn. nnn nxit yy U'lluivD.
n7 nON 7T Nx17D, ny7n, yNIO 77D NT XI YIN 77D. TNI 7X IYI 77D 77D 77D
n nn nnn nooin 7nny
ywn ninn yni
nyn, yinn ninn n.
n09, nny nyn ninn
yinn x nyviD, uyivD
yinn nnnyi ng anyn y
nyy
2019 2019
X7 nON yIyD 77n XwO,
INT TIO XINNNNT.
ON JNT XIN 10 XI JNIXIN NIN INOIO
X7 Jnnn nnonnn nTnD 7 X117 19y, kI I Tn70 nn7nD, xD xN.
XIXIN YH7D 7N XN XNXTD.
TIN WNSY'X NNNN XN'JNIOIOOIOO NOI.
wniu 1
nuiu, nTnT nn nn nn nn nn nn nn nn nn nn nn nn nn nn nn nn nn nn nn nn nn nn nn nn nn nn nn nn nn nn nn nn nn nn nn nn nn nn nn nn nn nn nn nn nn nn nn nn nn nn nn nn nn nn nn nn nn nn nn nn nn nn nn nn nn nn nn nn nn nn nn nn nn nn nn nn nn nn nn nn nn nn nn nn nn nn nn nn nn nn nn nn nn nn nn nn nn nn nn nn.
n nn n nn nn nn nn nn nn nn nn nn nn nn nn nn nn nn nn nn nn nn nn nn nn nn nn nn nn nn nn nn nn nn nn nn nn nn nn nn nn nn nn nn nn nn nn nn nn nn nn nn nn nn nn nn nn nn nn nn nn nn nn nn nn nn nn nn nn nn nn nn nn nn nn nn nn nn nn nn nn nn nn nn nn nn nn nn nn nn nn nn nn nn nn nn nn nn nn nn nn nn nn
TITIINN'TI7 7 NIND INIININIOYIOI TITXUNYITOIN.
TIN 7OT NUX XN19I INSU O'UN'.
n nn n7D unipD XI 9inD.
X7 NUXN NO17N JONN XIN WU
N7 NNIIN IN.
ONNN NYN INYITN
UINIIN IIXININ IN
ININ INN INN
yynio ynnonn nnynn. 0in yux nn
yun (nxxin npinn)
yH yH yH yH yH yH yH yH yH yH yH yH yH yH yH yH yH yH yH yH yH yH yH yH yH yH yH yH yH yH yH yH yH yH yH yH yH yH yH yH yH yH yH yH yH yH yH yH yH yH yH
wnnnn nn nnnn nn nnnn

NIOIN 197T W NIXD NINW D INTN NNN
nwnnnn nn nniu nnntu nn ninn noynnny ninn noonn nn nnnn nn
Batteries

2019 no' nuiin 7
noi7n,nu7n xin|xin
TIN' 70n. no7n