
GB 370 S - Mechanical chipper VIKING - Free user manual and instructions
Find the device manual for free GB 370 S VIKING in PDF.
| Product type | Mechanical shredder (chipper/shredder) |
| Brand | VIKING |
| Model | GB 370 S |
| Dimensions (L/W/H) | 128 / 77 / 140 cm |
| Weight | 45 kg |
| Engine | Briggs & Stratton Series 850, 4-stroke, 190 cm³ |
| Rated power | 3.3 kW at 3000 rpm |
| Starting system | Recoil start |
| Fuel tank capacity | 1.1 L |
| Maximum branch diameter | 45 mm |
| Sound pressure level (LpA) | 90 dB(A) (uncertainty 4 dB(A)) |
| Guaranteed sound power level (LwAd) | 102 dB(A) |
| Tightening torque of the blade disc | 52 - 60 Nm |
| Tightening torque of reversible blades | 22 - 28 Nm |
| Number of blades | 2 (reversible) |
| Drive system | V-belt, permanent drive |
| Safety devices | Engine stop if hopper not closed properly, protective covers |
| Engine oil type | See engine manual (4-stroke oil) |
| Routine maintenance | Cleaning after each use, checking oil level, sharpening blades |
| Common spare parts | Blade disc (69037005101), blade (69037020101), belt (60017042100) |
Frequently Asked Questions - GB 370 S VIKING
User questions about GB 370 S VIKING
0 question about this device. Answer the ones you know or ask your own.
Ask a new question about this device
Download the instructions for your Mechanical chipper in PDF format for free! Find your manual GB 370 S - VIKING and take your electronic device back in hand. On this page are published all the documents necessary for the use of your device. GB 370 S by VIKING.
USER MANUAL GB 370 S VIKING
97/68/EC, 2000/14/EC, 2004/108/EC
2006/42/EC
Motor, Bauart: 4-Takt
Verbrennungsmotor
Typ: Briggs&Stratton
Series 850
Nennleistung bei
3,3-3000
Nenndrehzahl:
kW-U/min
Hubraum: 190 ccm
Startvorrichtung:Seilstart
Thank you for choosing a VKING quality product.
This product has been produced using state-of-the-art production methods and extensive quality assurance procedures, because our goal is only achieved if you, the customer, are satisfied with your machine.
If you have any questions concerning your machine, please contact your dealer or our sales agency directly.
I hope that your VIKING machine will give you great enjoyment.

Dr. Peter Pretzsch
Management
1. Table of contents
Notes on the instruction manual 30
General 30
Instructions for reading the instruction manual 30
Machine overview 31
For your safety 31
General 31
Refilling the tank - handling petrol 32
Clothing and equipment 32
Transporting the machine 32
Before operation 33
Working with your machine 33
Maintenance and repairs 34
Storage for prolonged periods without operation 35
Disposal 36
Description of symbols 36
Standard equipment 37
Preparing the machine for operation 37
Installing ejection chute extension 37
Installing wheels and chassis 37
Installing the discharge flap 37
Opening and closing the discharge flap 38
Installing the blade disc 38
Removing the blade disc 38
Installing the feed chute 38
Removing the feed chute 38
Fuel and engine oil 38
Notes on working with the machine 39
Working area for operator 39
What material can be processed? 39
What material cannot be
processed? 39
Maximum branch diameter 39
Feeding the garden shredder 39
Correct machine load 39
Safety devices 39
Motorstop 39
Protective covers 39
Initial operation of the machine 40
Starting the engine 40
Stopping the engine 40
Shredding 40
Maintenance 40
Combustion engine 40
Cleaning the machine 41
Blade maintenance 41
V-belt maintenance 42
Changing the engine oil 42
Storage and winter break 42
Minimising wear and preventing damage 43
Transport 44
Pulling or pushing the garden shredder 44
Lifting or carrying the garden shredder 44
Transporting the garden shredder on a load floor 44
Standard spare parts 44
Circuit diagram 44
Environmental protection 44
CE-Manufacturer's declaration of conformity 45
Technical specifications 45
Troubleshooting 46
Service schedule 47
2. Notes on the instruction manual
2.1 General
This instruction manual constitutes original manufacturer's instructions in the sense of EC Directive 2006/42/EC.
VIKING is continually striving to further develop its range of products; we therefore reserve the right to make alterations to the form, technical specifications and equipment level of our standard equipment.
For this reason, the information and illustrations in this manual are subject to alterations.
2.2 Instructions for reading the instruction manual
Illustrations and texts describe specific operating steps.
All symbols which are affixed to the machine are explained in this instruction manual.
Viewing direction:
Viewing direction when left and right are used in the instruction manual: the user is standing behind the machine (working position).
Section reference:
References to relevant sections and subsections for further descriptions are made using arrows. The following example shows a reference to a section: ( 7.1)
Designation of text passages:
The instructions described can be identified as in the following examples.
Operating steps which require intervention on the part of the user:
- Release screw (1) using a screwdriver, operate lever (2)...
General lists:
- Use of the product for sporting or competitive events
Texts with added significance:
Text passages with added significance are identified using the symbols described below in order to especially emphasise them in the instruction manual:

Danger
Risk of accident and severe injury to persons. A certain type of behaviour is necessary or must be avoided.

Warning:
Risk of injury to persons. A certain type of behaviour prevents possible or probable injuries.

Caution
Minor injuries or material damage can be prevented by a certain type of behaviour.

Note
Information for better use of the machine and in order to avoid possible operating errors.
Texts relating to illustrations:
Illustrations relating to use of the machine can be found in the front of this instruction manual.
The camera symbol serves to link the figures on the illustration pages with the corresponding text passages in the instruction manual.

3. Machine overview

1 Feed chute
2 Engine
3 Spark plug socket
4 Wheel
5 Wheel carrier
6 Ejection chute
7 Closure screws
8 Throttle lever
9 Identification plate with serial number
4. For your safety
4.1 General

These safety regulations must be observed when working with the machine.

Read the entire instruction manual before using the machine for the first time. Keep the instruction manual in a safe
place for future reference.
Observe the operating and maintenance instructions contained in the separate engine instruction manual.
These safety precautions are essential for your safety, however, the list is not exhaustive. Always use the machine in a reasonable and responsible manner and be aware that the user is responsible for accidents involving third parties or their property.
Make sure that you are familiar with the controls and use of the machine.
The machine must only be used by persons who have read the instruction manual and are familiar with operation of the machine. The user should seek expert and practical instruction prior to initial operation. The user must receive instruction on safe use of the machine from the vendor or another expert.
During this instruction, the user should be made aware that the utmost care and concentration are required for working with the machine.
Only give or lend the machine, including any accessories, to persons who are familiar with this model and how to operate
it. The instruction manual forms part of the machine and must always be provided to persons borrowing it.
The machine must only be operated by persons who are well rested and in good physical and mental condition. If your health is impaired, you should consult your doctor to determine whether working with the machine is possible. The machine should not be operated after the consumption of alcohol, drugs or medications which impair reactions.
Never allow children under the age of 16 to use the machine. Local regulations may specify a minimum age for users.
This machine is not suitable for use by persons (in particular children) with impaired physical, sensory or mental faculties or those lacking the appropriate experience and/or knowledge, unless supervised by a person responsible for their safety or having received instructions on use of the machine from such person. Children must be supervised, in order to ensure that they do not play with the machine.
Caution - risk of accident:
VIKING garden shredders are suitable for shredding branch material and plant trimmings. Its use for other purposes is not permitted and may be dangerous or result in damage to the machine.
The garden shredder must not be used:
- for any other materials (e.g. glass, metal).
- for tasks other than those described in this instruction manual.
for the preparation of foodstuffs (e.g. crushing ice, mashing pulp).
For safety reasons, any modification to the machine, except the proper installation of accessories approved by VKING is forbidden and results in voiding of the warranty cover. Information regarding approved accessories can be obtained from your VKING specialist dealer.
In particular, any tampering with the machine which increases the power output or speed of the engine or motor is forbidden.
It is not permitted to transport objects, animals or persons, particularly children, on the machine.
Particular care is required during use in public green spaces, parks, sports fields, along roads and in agricultural and forestry businesses.
4.2 Refilling the tank - handling petrol

Danger to life:
Petrol is poisonous and extremely inflammable.
Petrol must only be stored in appropriate, tested containers (canisters). Always screw on the fuel tank and canister caps properly and tightly. Defective caps must be replaced for safety reasons.
Never use beverage bottles or similar for disposal or storage of fuels and lubricants. Persons, particularly children, could be tempted to drink out of them.
Keep petrol away from sparks, naked flames, pilot lights, heat sources, and other ignition sources. Do not smoke!
Re-fill the tank out-of-doors and do not smoke during re-filling.
Before refilling the tank, stop the engine and allow it to cool.
Re-filling with petrol must be performed before the engine is started. When the engine is running or is hot, the tank cap must not be removed and the tank must not be re-filled with petrol.
Do not fill fuel tank completely, but fill to approx. 4cm below the edge of the filler neck so that the fuel has room to expand.
If petrol is spilled, the engine must only be started after the petrol-contaminated area has been cleaned. All attempts at starting must be avoided until the petrol fumes have dispersed (wipe dry).
Any spilt fuel must be wiped up immediately.
Clothing must be changed if it comes into contact with petrol.
Never store the machine with petrol in the tank inside a building. The resulting petrol fumes could come into contact with naked flames or sparks and could be ignited.
If it is necessary to drain the tank, this must be done out of doors.
4.3 Clothing and equipment

Always wear sturdy footwear with high-grip soles when working. Never work barefoot sample, in sandals.
or, for example, in sandals.

Also always wear sturdy gloves when working and in particular also when performing maintenance operations or
transporting the machine.

Always wear safety glasses and hearing protection when working. Wear them at all times.

Wear suitable, close-fitting clothing when working with the machine, e.g. overalls, but not work coats. Do not wear
scarves, ties, jewellery, clothing with dangling straps or cords or other protruding articles of clothing when working with the machine.
Long hair must be tied up and secured (headscarf, cap, etc.) at all times when operating or performing work on the machine.
4.4 Transporting the machine
Always wear gloves in order to prevent injuries due to sharp-edged and hot components.
Do not transport the machine with the engine running. Switch off the engine, let the blades come to a standstill and remove the spark plug socket prior to transport.
Only transport the machine once the engine has cooled down and with an empty fuel tank.
Only transport the machine with the feed chute properly fitted
Risk of injury due to exposed blades.
Pay particular attention to the weight of the machine, especially when tilting.
Use suitable loading aids (loading ramps, lifters).
Secure the machine on the load floor using adequately dimensioned fastening material (straps, ropes etc.) at the fastening points described in this instruction manual. ( 13.3)
Push or pull the machine at walking pace only. Do not tow!
When transporting the machine, always observe regional legislation, especially regarding load security and the transport of objects on load floors.
4.5 Before operation
Make sure that only persons who are familiar with the instruction manual are permitted to use the machine.
Observe the local regulations regarding permitted operating times for gardening power tools with combustion engines or electric motors.
Defective mufflers and all other worn or damaged parts must be removed before use of the machine. Replace any illegible or damaged danger signs and warnings on the machine. Your VIKING specialist has a supply of replacement stickers and all the other spare parts.
Before initial operation, it must be ensured
that the covers and guards are in place and in good condition
that all fuel-carrying components are fitted to the engine and are in good condition (leak-tight)
- that the tank is in good condition (leak-tight)
that the housing and cutting tools (blades, blade shaft, blade discs, etc.) are not worn or damaged
- that there is no shredding material in the machine and that the feed chute is empty
that all screws, bolts, nuts and other fastening elements are in place and properly tightened. Tighten any loose screws, bolts and nuts prior to initial operation (observe tightening torques).
Only use the machine out-of-doors and not close to walls or any other solid objects in order to prevent the risk of injuries and property damage (no escape for the user, broken windows, scratched cars etc.).
The machine must be placed in a stable position on firm and level ground.
Do not use the machine on a paved or gravel-covered surfaces, as ejected or thrown-up material could cause injuries.
Before using the machine, always check that it is properly closed. ( 7.7)
The switch and safety devices installed in the machine must not be removed or bypassed.
4.6 Working with your machine

Never work when animals or persons, particularly children, are in the danger area.
Do not operate the machine in the rain or during thunder storms, particularly when there is a risk of lightning strike.
The risk of accidents is higher if the ground is damp due to increased danger of slipping.
Particular caution should be exercised during working in order to prevent slipping. If possible, avoid using the machine when the ground is damp.
Only work during the day or with good artificial light.
Keep the working area neat and tidy at all times. Remove tripping hazards such as stones, branches, cables etc.
The operator should not stand any higher than the level of the base of the machine.
Exhaust gases:

Danger to life through poisoning! In the case of nausea, headache, impaired vision (e.g. decreasing field of view) hearing disorder, dizziness, decreasing power of concentration, stop working immediately. These symptoms may be caused by excessively-high exhaust gas concentrations.

The machine generates poisonous exhaust gases when the engine is running. The gases contain poisonous
carbon monoxide, a colourless and odourless gas, as well as other pollutants. The engine must never be operated in closed or poorly ventilated spaces.
The machine must be positioned so that it is not necessary to work facing the direction of the exhaust gases.
Starting:
Place the machine in a stable and upright position prior to starting. The machine must never be operated in a horizontal position.
Do not pull the recoil starter rope if the machine is not properly closed and the blades are exposed.
Risk of injury due to rotating blades!
Exercise care when starting and observe the instructions contained in the section entitled "Initial operation of machine". ( 10.)
Do not stand in front of the discharge opening when starting the engine or switching on the motor. There must be no shredding material in the garden shredder when it is started or switched on. Shredding material may be ejected and lead to injuries.
The machine must not be tilted during start-up.
Working:

Risk of injury:
Never place your hands or feet above, underneath or on rotating parts.
When the machine is running, never put your face or any other part of your body above the feed chute or in front of the ejection opening. Always keep you head and body away from the feed opening.

Never put your hands or any other part of your body or clothing into the feed chute or ejection chute. There is a
considerable risk of injury to eyes, face, fingers, hands etc.
Always maintain your balance and firm footing. Do not stretch forward.
The operator must stand in the working area described when feeding the shredder. Stay inside the working area and outside of the ejection zone at all times during operation of the machine. (8.1)
Risk of injury:
Shredding material may be ejected back up during operation. Always wear safety glasses and keep your face away from the feed opening.
Never tilt the machine when the engine or motor is running.
If the machine falls over during operation, immediately switch off the engine and detach the spark plug socket.
Make sure that there is no shredding material blocking the ejection chute, as this could result in a poor shredding performance or kickbacks.
When feeding the garden shredder, pay particular attention to ensuring that no foreign objects such as bits of metal, stones, plastic, glass, etc. get into the shredding chamber as this could result in damage or kickbacks from the feed chute. Remove blockages for the same reason.
Kickbacks can occur when feeding the garden shredder with branch material. Wear gloves.
Switch off the engine
- before tilting, pushing or pulling the machine
- before unscrewing the closure screws and opening the machine,
before re-filling the tank. Allow the engine to cool down before filling the tank.
Fire hazard!

Beware of the cutting tool running on for several seconds before coming to a standstill.
STOP Switch off the engine, detach the spark plug socket and allow all rotating tools to come to a complete standstill
before leaving the machine unattended
before lifting or carrying the machine
- before transporting the machine
before removing blockages at the cutting unit, in the feed chute or in the discharge chute
- before working on the cutting unit
before checking or cleaning the machine or before carrying out any other work on it.
If foreign objects get into the cutting tool or if the machine makes strange noises or vibrates in an unusual way, switch off the engine immediately and allow the machine to come to rest. Detach the spark plug socket, remove the feed chute and perform the following steps:
- check the machine, in particular the cutting unit (blade, blade disc, blade fastening screw) for damage and have any necessary repairs carried out by a technician before restarting and working with the machine.
- check that all parts of the cutting unit are seated securely, retighten the screws if necessary (observe tightening torques).
- Have damaged parts replaced or repaired by a technician; the parts must be of similar quality.
4.7 Maintenance and repairs

Before beginning cleaning, adjustment, repair and maintenance operations, park the machine on firm, level
ground, stop the engine, allow it to cool down and detach the spark plug socket.
Allow the machine to cool down before working on or around the engine, exhaust manifold or muffler in particular. Temperatures of 80^ and above can be reached. Danger of burns:
Direct contact with engine oil can be dangerous. Engine oil must not be spilled. VIKING recommends leaving the task of topping up engine oil or performing engine oil changes to a VIKING specialist dealer.
Cleaning:
The complete machine must be cleaned thoroughly following use. ( 11.2)
Never use high-pressure cleaners and do not clean the machine under running water (e.g. using a garden hose).
Do not use aggressive cleaning agents. These can damage plastics and metals, impairing the safe operation of your VIKING machine.
In order to prevent fire hazards, keep the area around the air vents, cooling ribs and the area of the exhaust free from e.g. grass, straw, moss, leaves or escaping grease.
Maintenance operations:
Only maintenance operations described in this instruction manual may be carried out. Have all other work performed by a specialist dealer.
If you do not have the necessary expertise or auxiliary equipment, please always contact a specialist dealer.
VIKING recommends that you have maintenance operations and repairs performed exclusively by a VKING specialist dealer.
VIKING specialist dealers regularly attend training courses and are provided with technical information.
Only use tools, accessories or attachments approved for this machine by VKING or technically identical parts. Otherwise, there may be a risk of accidents resulting in personal injury or damage to the machine. If you have any questions, please consult a specialist dealer.
The characteristics of original VKING tools, accessories and spare parts are optimally adapted to the machine and the user's requirements. Genuine VKING spare parts can be recognised by the VKING spare parts number, by the VKING lettering and, if present, by the VKING spare parts symbol. On smaller parts, only the symbol may be present.
For safety reasons, fuel-carrying components (fuel line, fuel cock, fuel tank, tank cap, connections etc.) must be checked regularly for damage and leaks and replaced by a technician if necessary (VIKING recommends VKING specialist dealers).
Always keep warning and information stickers clean and readable. Damaged or missing stickers must be replaced by new, original plates from your VIKING specialist dealer. If a component is replaced with a new component, ensure that the new component is provided with the same stickers.
Only perform work on the cutting unit when wearing thick work gloves and exercising extreme care.
Ensure that all nuts, pins and screws, especially all the cutting unit screws, are securely tightened, so that the machine is in a safe operating condition.
Check the entire machine for wear or damage on a regular basis, particularly before extended periods when the
machine is not in use (e.g. over winter). For safety reasons, worn or damaged parts must be replaced immediately to ensure that the machine is always in a safe operating condition.
Never alter the basic setting of the engine or run at excessive engine speeds.
Components or guards that are removed for maintenance operations must be properly reinstalled immediately.
4.8 Storage for prolonged periods without operation
Allow the engine to cool before storing the machine in an enclosed space.
Store the machine with empty fuel tank and the fuel reserve in a lockable and well-ventilated room.
Ensure that the machine is protected from unauthorised use (e.g. by children).
Never store the machine with petrol in the tank inside a building. The resulting petrol fumes could come into contact with naked flames or sparks and could be ignited.
If the tank has to be emptied (e.g. immobilisation before the winter break), the fuel tank must be emptied out of doors only (empty the tank by running the engine out of doors, for example).
Thoroughly clean the machine before storage (e.g. winter break).
Only store the machine with the spark plug socket disconnected.
Store the machine in good operational condition.
Only transport the garden shredder with the feed chute fitted.
Risk of injury due to exposed blades.
4.9 Disposal
Waste products such as used engine oil or fuel, used lubricants, filters, batteries and similar wearing parts can be harmful to people, animals and the environment, and must consequently be disposed of properly.
Consult your recycling centre or your specialist dealer for information on the proper disposal of waste products. VIKING recommends VIKING specialist dealers.
Ensure that old machines are properly disposed of. Render the machine unusable prior to disposal. In order to prevent accidents, remove the ignition lead, empty the fuel tank and drain the engine oil in particular.
Risk of injury from the blades.
Always store an old garden shredder in a safe place prior to scrapping. Ensure that the machine and particularly all the blades are kept out of the reach of children.
5.Description of symbols

Caution!
Read the instruction manual before initial use.


Caution:
Rotating tool.
Risk of injury!
Rotating tools.
Keep hands and feet away from apertures when machine is running.
Risk of injury!
Keep other persons out of the danger area.
Disconnect spark plug socket before performing repairs.

Caution:
The machine/cutting tool continues to run after being switched off.


Risk of injury:
Do not climb onto the machine.
Risk of injury:
Never put your hands or any other part of your body or clothing into the feed chute or ejection chute.


Wear hearing protection.
Wear safety glasses.
Wear work gloves.

Throttle:
STOP
Stop engine
MIN
Low speed
MAX
High speed
START
Working position
6. Standard equipment
Item Designation
0 Hexagon bolt M10x55
P Retaining washer
Q Closure screw
R Wheel pin
S Pin
T Deflector
U Upper spacing ring
V Lower spacing ring
W Protective cap
X Installation tool
Y Torx wrench
Z Combination spanner
Instruction manual
Engine instruction manual
Qty.
7.Preparing the machine for operation

Risk of injury:
Observe the safety instructions in
the section "For your safety" ( 4
- Place the machine on level and firm
ground when performing all the operations described.
7.1 Installing ejection chute extension

- Fit ejection chute extension (E) onto basic unit and install screws (J) (1 - 2 N m).
7.2 Installing wheels and chassis
- Attach left and right wheels (G) with wheel pin (R), washer (L1), washer (L2) and nut (K1) to wheel carrier (C).

- Press wheel caps (H) onto wheels.
- Place wheel carrier as shown on firm and level ground and fit basic unit (B) into position.
- Insert flat head bolts (N) on the left side and screw on lock nuts (K2), but do not tighten them yet. Install Torx screw (M) on the right side (1 - 2 N m).
- Tighten nuts (K2) (10 - 12 Nm).
7.3 Installing the discharge flap

- Set garden shredder on its back.
- Insert strip (F) into ejection chute extension. Install screws (J) (1 - 2 Nm).
Item Designation
A Feed chute 1
B Basic unit 1
C Wheel carrier 1
D Discharge flap 1
E Ejection chute extension 1
F Strip 1
G Wheel 2
H Wheel cap 2
Blade disc 1
J Torx screw 5 P5x20
K1 Nut M8 2
K2 Safety nut M8 2
L1 Washer A8 2
L2 Washer A10 2
M Torx screw 1 P5x50
N Flat head bolt 2 M8x45
- Lift garden shredder into upright position.
- Position discharge flap (D) on ejection chute extension. Ensure that the ribs (1) inside the flaps on the left and right are correctly located in the guide groove of the ejection chute extension (2) when attaching.
- Press in pins (S) on left and right.
7.4 Opening and closing the discharge flap

Opening the discharge flap:
- For shredding, fold the discharge flap (D) upwards and allow the tab (1) to engage in the ejection chute extension.
Closing the discharge flap:
- For transport or space-saving storage, lift the tab (1) slightly and fold away the discharge flap (D) downwards.
7.5 Installing the blade disc


Observe the installation sequence and tightening torque of 52 - 60 Nm
Ensure correct position of upper spacing ring (U) to both blades when installing.
- Fit protective cap (W), lower spacing ring (V), blade disc (I), upper spacing ring (U), deflector (T) and retaining washer (P) onto blade mounting and insert screw (O).
- Use installation tool (X) to counterclock the blade disc. Screw in screw (O) using combination spanner (Z) and tighten to a torque of 52 - 60 Nm.
7.6 Removing the blade disc
- Use installation tool (X) to counterclock the blade disc.
- Loosen screw (O) with combination spanner (Z).
- Remove screw (O), retaining washer (P), deflector (T), upper spacing ring (U) and blade disc (I).
7.7 Installing the feed chute


The closure screws (Q) must be securely fastened to the feed chute following initial assembly.
- Insert closure screws (Q) in the slot of the feed chute and screw in fully, applying pressure.
- Attach feed chute (A) to hinge (1) in basic unit and pivot forwards.
- Tighten both closure screws (Q) simultaneously.
7.8 Removing the feed chute
- Loosen both closure screws (Q) until they turn freely. They remain on the feed chute
- Pivot feed chute (A) to the rear and remove.

7.9 Fuel and engine oil
Top up engine oil before initial start ( engine instruction manual)!
Engine oil
Please consult the engine instruction manual for the type of engine oil to be used and the oil capacity. Check engine oil level at regular intervals ( see engine instruction manual). Avoid exceeding or falling below the correct oil level.
Fuel
Recommendation:
Fresh good quality fuel, normal unleaded petrol ( engine instruction manual)! Use a funnel when filling the tank with fuel (not included in standard equipment). Note the warnings in the section "For your safety". ( 4.)
8. Notes on working with the machine

Risk of injury:
Observe the safety instructions in the "For your safety" section. ( 4.)
It is only permitted for one person to feed the garden shredder.
8.1 Working area for operator
- For safety reasons, the operator
must stay within the working area (grey area X) for the entire operating period (while the motor is switched on or the engine is running), particularly in order to prevent injuries due to shredding material that is ejected backwards.

8.2 What material can be processed?

Tree or hedge cuttings, as well as branch material with many or few side shoots and twigs can be processed with the garden shredder.
Tree and hedge cuttings should be processed when fresh, as the shredding performance is better with fresh than with dried-out or wet material.
8.3 What material cannot be processed?

Stones, glass, bits of metal (wire, nails, etc.) or plastic must not be fed into the garden shredder.
As a general rule:
Any materials that do not belong on the compost heap should not be processed using the garden shredder.
8.4 Maximum branch diameter
The data relates to freshly cut branch material:
Maximum branch diameter
GB370S:45mm
8.5 Feeding the garden shredder
Before feeding the garden shredder, note the working area. ( 8.1)
- Observe the maximum branch diameter. ( 8.4)
- Insert the branch material at a slight angle and guide it along the right-hand chute wall to the blade unit. The hard material is automatically drawn in by the machine. You should support and guide longer branches with your hand when shredding.

8.6 Correct machine load
The load on the motor or engine of the garden shredder must never cause the speed to drop significantly. Always feed the garden shredder continuously and steadily. If the speed drops when working with the garden shredder, stop feeding the machine in order to relieve the load on the motor or engine.
9. Safety devices
9.1 Motorstop
The engine/shredding tool can only be operated when the feed chute has been properly closed.
When loosening the engine-side closure screw during operation, the ignition contact is interrupted and the engine/shredding tool come to a standstill after a few seconds.
9.2 Protective covers
The garden shredder is equipped with protective covers in the feeding and ejection areas. These include the complete feed chute with the upper chute and splash guard, the ejection chute extension and the discharge flap.
The protective covers ensure that a safe distance is maintained from the shredding blades.
10. Initial operation of the machine

Risk of injury:
Carefully read and observe the "For your safety" section before operating the machine. ( 4.)
10.1 Starting the engine
- Check the oil and fuel levels.
(⇒ 7.9) - Move the throttle lever (1) to the START position.
- Pull the recoil starter rope (2) slowly to the point of compression resistance and then pull vigorously to arm's length. Slowly release the cable so that it can gradually be rolled up by the starter. Repeat the starting procedure until the engine starts.
10.2 Stopping the engine
- Set the throttle lever (1) to the STOP position. The engine/shredding tool com standstill following a brief run-time.

16
10.3 Shredding
- Push the garden shredder onto firm and level ground and set down safely.
- Put on thick gloves, safety glasses and hearing protection.
-
Open the discharge flap. ( 7.4)
-
Start the garden shredder. (⇒ 10.1)
- Wait until the engine has reached its maximum speed (idling speed).
Feed the garden shredder with shredding material in the correct way. ( 8.5)
After work is completed, stop the garden shredder ( 10.2) and clean. ( 11.2)
11. Maintenance

Risk of injury:
Carefully read the section "For your safety" ( 4.) , particularly the subsection "Maintenance and repairs" ( 4.7) ,and follow all safety instructions exactly before performing any maintenance or cleaning operations on the machine.

Detach the spark plug socket before performing any maintenance or cleaning operations.
11.1 Combustion engine
Maintenance interval:
Before each use
To achieve a long service life, it is always particularly important to maintain a sufficient level of oil and to change the oil and air filter regularly. Observe the operating and maintenance instructions contained in the attached engine instruction manual.
The cooling ribs must always be kept clean to ensure that the engine is adequately cooled.
11.2 Cleaning the machine

Maintenance interval: After each use
Clean the machine thoroughly each time it has been used. Care of the machine will protect it against damage and extend its service life.
Cleaning position of the garden shredder:
It is only permitted to clean the machine in the position shown.
- Remove the feed chute. ( 7.8)
The machine (engine) may be damaged if the garden shredder is not positioned as described.

Never spray water onto motor or engine components, seals, bearing points or electrical parts such as switches. This would result in expensive repairs.
If you are unable to remove the dirt and accumulated deposits with a brush, a damp cloth or a stick, VKING recommends the use of a special cleaner (e.g. STIHL special cleaner).
Do not use aggressive cleaning agents.
Clean the blade discs regularly.
Remove dirt from the cooling ribs, fan wheel, area around the air filter, exhaust, etc. to ensure that the engine is adequately cooled.
11.3 Blade maintenance

Risk of injury! Always wear thick gloves.


Maintenance interval: Before each use
- Remove the feed chute. ( 7.8)
- Check the blades for damage (notches or cracks) and wear; reverse or replace if necessary.
Wear limits of the blades:

The blades must be reversed or replaced before the specified wear limits are reached. VKING recommends VKING specialist dealers.
- On the blades, measure the distance between the bore to the edge of the blade at several points. Minimum distance 6m
Reversing the blades:

The cutting blades are designed as reversible blades. This means that blunt blades can be reversed and the machine is ready for use again. Always reverse both blades.
- Remove the blade disc. ( 7.6)
- Unscrew screws (1) and remove together with nuts (2).
- Remove blade (3) upwards.
- Clean the blade disc.
-
Reverse blade (3) and place onto the blade disc with the sharp edge exposed and align the bores.
-
Insert screws (1) through the bores and screw on nuts (2). Tighten nuts (2) to 22 - -28 Nm.
Install the blade disc. ( 7.5)
Sharpening the blades:
Blades which are blunt on both sides must be sharpened before resuming work. In order to ensure optimum machine operation, the blades should only be sharpened by a technician. VIKING recommends VIKING specialist dealers.
- Remove the blades for sharpening.
Cool the blades when sharpening, e.g. with water. The blade must not be allowed to display blue colouring, as this would reduce its cutting quality. - Sharpen the blade evenly to prevent vibrations due to imbalance.
- Check blades for damage before installing: The blades must be replaced if notches or cracks are visible or if the blades have reached the wear limits.
- Sharpen blades at a sharpening angle of 30^ .
- Sharpen the blades against the cutting edge.
After sharpening, remove any sharpening burr at the cutting edge using fine sandpaper. - Observe the tightening torques contained in the "Reversing the blades" section when installing the blades.
11.4 V-belt maintenance

Maintenance interval: Every 10 operating hours
Check the V-belt for wear and damage by means of a visual inspection and replace if necessary.
Check V-belt tension and adjust as required.
Insufficient tensioning increases V-belt wear, excessive tensioning may lead to bearing damage. If you do not have the necessary knowledge to adjust the V-belt, you should have a technician perform this work.
Checking V-belt tension:
- Detach the spark plug socket.
- Loosen screws (1), but do not unscrew fully (remain on belt guard) and remove belt guard (2).
Using your thumb, press on the V-belt between the two V-belt pulleys. It must be possible to depress the V-belt by approx. 10mm
Adjusting V-belt tension:
- Loosen the engine mounting (not illustrated): Loosen 3 bolts of engine mounting, but do not remove; counterhold nuts on upper side.
Tension the V-belt by turning the adjustment nut (3).
After adjustment, re-tighten the engine fastening bolts and install the belt guard.
11.5 Changing the engine oil
Maintenance interval:
The recommended oil change intervals, the engine oil to be used and the oil capacity can be found in the engine instruction manual.
Oil drain plug:
- Loosen screws (1), but do not unscrew fully (remain on belt guard) and remove belt guard (2).
- Remove oil drain plug (3) and drain engine oil.
- Reinsert oil drain plug (3) and fill with fresh engine oil. Install belt guard (2).
11.6 Storage and winter break
Store the garden shredder in a dry and locked place that is generally free of dust. Make sure that the machine is kept out of the reach of children.
Only store the garden shredder in good operating condition and with the feed chute fitted.
Note the following points when storing the garden shredder for extended periods (over winter):
-
Thoroughly clean all external parts of the machine.
Thoroughly lubricate/grease all moving parts. -
Empty fuel tank and carburettor (e.g. by running the engine).
- Unscrew spark plug and pour approx. 3cm^3 of engine oil into the engine via the spark plug hole. Turn the engine several times with the spark plug removed.

Fire hazard!
Keep the spark plug socket away from the spark plug hole (danger of ignition).
- Re-install the spark plug.
- Perform oil change ( engine instruction manual).
- Cover the engine well and store the machine in a dry, dust-free room in the upright position.
12. Minimising wear and preventing damage
Important information on maintenance and care of the product group
Petrol garden shredders
VIKING assumes no liability for material or personal damage caused by the non-observance of information contained in the operating instructions, in particular with regard to safety, operation and maintenance, or which arise through the use of unauthorised attachment or spare parts.
Please always observe the following important information for the prevention of damage or excessive wear to your VIKING machine:
1. Wearing parts
Some parts of the VIKING machine are subject to normal wear even when used properly and must be replaced in due time depending on type and duration of use.
These include:
-
B I a d e
-
Blade disc
-V-belt
2. Compliance with the information in this instruction manual
The VIKING machine must be used, maintained and stored with the care described in this instruction manual. Any damage caused by non-compliance with the safety, operating and maintenance instructions is the sole responsibility of the user.
This applies in particular to:
- Improper use of the product.
- Use of fuel and lubricants not approved by VIKING (lubricants, petrol and engine oil, see engine instruction manual).
- Product modifications not approved by VKING.
- The use of attaching parts, attachments or cutting tools not approved by VIKING.
- Use of the product for sporting or competitive events.
- Resultant damage due to continued use of the product with defective components.
3. Maintenance operations
All operations listed in the section "Maintenance" must be performed regularly.
If these maintenance operations cannot be carried out by the user, a specialist dealer must be commissioned to perform them.
VIKING recommends that you have maintenance operations and repairs performed exclusively by a VKING specialist dealer.
VIKING specialist dealers regularly attend training courses and are provided with technical information.
If these operations are neglected, faults may arise which are the responsibility of the user.
These include:
Corrosive and other resultant damage caused by incorrect storage.
- Damage and resultant damage due to the use of spare parts which are not original VKING parts.
damage due to maintenance and repair operations not performed in the workshops of authorised specialist dealers.
13. Transport

Risk of injury:
Before transporting, carefully read and observe the section "For your safety", in particular the
"Transporting the machine" section. ( 4.4)
13.1 Pulling or pushing the garden shredder

Hold the garden shredder at the upper chute (1) and tilt to the rear.
The garden shredder can be pulled or pushed slowly (walking pace).
13.2 Lifting or carrying the garden shredder


Due to its heavy weight, at least two persons are required to lift the garden shredder. Always wear suitable protective clothing; the lower arms and upper part of the body must be fully covered.
- When lifting the garden shredder, hold it at the housing on the right and under the engine on the left.
13.3 Transporting the garden shredder on a load floor

- Place the garden shredder in one of the two cleaning positions when transporting it on a load floor. (⇒ 11.2)
- Secure the machine against slipping using suitable fastening materials. Attach ropes or straps to the wheel carrier (1) or the feed chute (2).
14. Standard spare parts
Blade disc assembly
69037005101
Reversible blade (2x)
69037020101
V-belt
60017042100
15. Circuit diagram

1 Engine
2 Safety switch
3 Lustre terminal
BK black
BR brown
BL blue
16. Environmental protection

Shredding material should be composted and not disposed of in household waste.
The machine, its packaging and accessories are all produced
from recyclable materials and must be disposed of accordingly.
By disposing of materials separately, and in an environmentally friendly manner, valuable resources can be re-used. For this reason, the machine should be disposed of for recycling at the end of its useful life.
17. CE - Manufacturer's declaration of conformity
We,
VIKING GmbH
Hans Peter Stihl-Strasse 5
declare that the machine,
Shredding machine for plant trimmings with petrol engine (GB)
Manufacturer's
VIKING
brand:
Type: GB 370.2 S
Serial number 6001
conforms to the following EU guidelines: 97/68/EC,2000/14/EC,2004/108/EC, 2006/42/EC
The product has been developed in conformance with the following standards: EN 13683
Applicable conformity assessment procedure: Appendix VIII (2000/14/EC)
Name and address of relevant, named location:
Compilation and storage of technical documentation: Johann Weiglhofer
VIKING GmbH
The year of manufacture and serial number appear on the identification plate of the machine.
Measured sound power level: 97,4 dB(A)
Guaranteed sound power level:
102 dB(A)
Langkampfen,
2012-01-02 (YYYY-MM-DD)
VIKING GmbH

Weighlofer
Research and Product Development Manager

18. Technical specifications
Manufacturer's
VIKING
brand:
Model: GB 370.2 S
Serial number:
6001
Engine, design:
4-stroke combustion engine
Type: Briggs&Stratton
Series 850
Nominal output at
3,3-3000
nominal speed:
kW-rpm
Displacement:
190 ccm
Starter:
Rope start
Fuel tank:
1.1
Cutting unit drive:
permanent
In accordance with
Directive
2000/14/EC:
Guaranteed sound
102 dB(A)
power level LwAd
In accordance with
Directive
2006/42/EC:
Sound pressure level
90 dB(A)
at workplace L_pA
4 dB(A)
Uncertainty K_pA
52-60Nm
Tightening torque
Bladeset:
22-28Nm
Tightening torque
Reversible blade:
128/77/140 cm
LW/H:
45 kg
Weight:
19. Troubleshooting
See engine instruction manual.
If necessary, contact a specialist dealer; VKING recommends VKING specialist dealers.
Fault:
Engine will not start
Possible cause:
- Feed chute not properly closed
- Blade disc blocked
- No fuel in tank; fuel line blocked
- Inferior, dirty or old fuel in tank
- Spark plug socket detached from spark plug; ignition lead not properly fastened to socket
- Dirty air filter
- Spark plug dirty or damaged; incorrect electrode gap
- Engine is flooded due to several starting attempts
Remedy:
- Close feed chute properly and tighten screws ( 7.7)
- Remove shredder deposits from the housing (Important: first detach spark plug socket)
-Top up fuel; clean fuel line ( 7.9) - Always use fresh, good quality fuel, normal unleaded petrol; clean carburettor (⇒ 7.9)
- Connect spark plug socket; check connection between ignition lead and socket
-
Clean air filter
-
Clean or replace spark plug; adjust electrode gap
- Remove spark plug and dry; pull recoil starter rope repeatedly with the spark plug removed (throttle lever in STOP position)
Fault:
Engine overheating
Possible cause:
- Dirty cooling ribs
Oil level in engine too low
Surface of engine covered in shredding material
Remedy:
- Clean cooling ribs ( 11.2)
-Top up engine oil ( 7.9) - Remove shredding material from the engine
Fault:
Shredding material is not drawn in
Possible cause:
- Blunt or incorrectly ground blades
Remedy:
- Reverse or re-sharpen blade; ensure sharpening angle of 30^ ( 11.3)
Fault:
Reduced shredding performance
Possible cause:
- Blunt blades
- Incorrectly ground blades
Bent blade disc
Remedy:
- Re-sharpen or replace blades ( 11.3)
- Sharpen blades correctly (⇒ 11.3)
- Visually inspect blade disc and replace if necessary ( 7.6)
Fault:
Excessive vibration during operation, abnormal noises, rattling
Possible cause:
-Faultyblade disc or blades
- Loose engine mounting
- Boltsloose
Remedy:
- Check blade discs, blades, blade shaft, screws, nuts, washers and bearings of cutting unit, repair if necessary
- Tighten engine mounting bolts
- Ensure secure seating of bolts
20. Service schedule
Provide your VIKING specialist dealer with this instruction manual when you have maintenance operations performed on your VIKING product.
Your VKING specialist dealer will confirm the correct performance of the required service operations in the "Service schedule" section.
Date:
VIKING dealer stamp
Next service
Date:
Date:

Next service
Date:
Model:

Serial number:

Handed over
Date:

Next service
Date:
Date:

Next service
Date:
Date:

Next service
Date:
Date:

Next service
Date:
Date:

Next service
Date:
Chere cliente, cher client,
97/68/EC, 2000/14/EC, 2004/108/EC, 2006/42/EC
97/68/CE, 2000/14/CE, 2004/108/CE, 2006/42/CE
regimen nominal: kW-rpm
Montar as rodas e o chassis 146
Montar a tampa de expulsion 147
Abrir e fechar a tampa de expulsion 147
Montar o disco das laminas 147
Desmontar o disco das laminas 147
Montar o funil de enchimento 147
Desmontar o funil de enchimento 147
Combustivel oleo do motor 147
7.2 Montar as rodas e o chassis

97/68/CE, 2000/14/CE, 2004/108/CE, 2006/42/CE
Fyll不断提高 his speed, but he was still able to run.
ca. 4 cm under kanten til
pafyllingsstussen, slick at drivstoffet fär nok
plass til ä utvide seg.
Maks. kvist diameter
GB 370 S:45 mm
8.5 Pafylling av kompostkvernen

Pass pa arbeidsomradet nar du fyller pa kompostkvernen. ( 8.1)
- Ta hensyn til maksimal kvistdiameter.
(⇒ 8.4)
- Hold kvistmaterialiet litt paskra og for det langs hoyre traktvegg frem til knivmekanismen sik som symbolet angir. Det harde materialiet trekkes inn automatisk. Lengre kvister bo r stottes og fores med handen ved kverning.
Knivenes slitegrenser:

Snu ellr skift ut knivene for slitegrensene er nadd. VIKING anbefaler at du kontakter en VIKING forhandler.
- Mäl avstanden fra hullene (sylinder diameter) til knivkant flere steder på knivene. Minimumsavstanden er 6 m m
Snu knivene:

97/68/EF, 2000/14/EF, 2004/108/EF, 2006/42/EF
2012-01-02 (AAAA-MM-DD)
VIKING GmbH

Weighlofer
Varning - risk for olycksfall!
97/68/EC, 2000/14/EC, 2004/108/EC, 2006/42/EC
2012-01-02 (AAAA-MM-DD)
VIKING GmbH

97/68/EC, 2000/14/EC, 2004/108/EC, 2006/42/EC
erklaerer, at maskinen
97/68/EC, 2000/14/EC, 2004/108/EC, 2006/42/EC
Motor, type: 4-takts
forbraendingsmotor
Type: Briggs&Stratton
Series 850
Nom. effekt ved
3,3-3000
mærkehastighed:
kW-O/min
Slagvolumen: 190 ccm
L/B/H: 128/77/140 cm
Vægt: 45 kg
19. Fejlsøgning
97/68/EC, 2000/14/EC, 2004/108/EC, 2006/42/EC
2012-01-02 (RRRR-MM-DD)
VIKING GmbH

Weighlofer
97/68/ES, 2000/14/ES, 2004/108/ES, 2006/42/ES
2012-01-02 (LLLLL-MM-DD)
VIKING GmbH
w_2 = L_0l_u
Weighlofer
97/68/EC, 2000/14/EC, 2004/108/EC
2006/42/EC
2012-01-02 (RRRR-MM-DD)
VIKING GmbH

Weighlofer
4.4 Transport uredaja
97/68/EB, 2000/14/EB, 2004/108/EB
2006/42/EB
2012-01-02 (MtMtMtMt-MnMn-DD)
VIKING GmbH

Tyrimumir gaminiupletros srities vadovas

18. Techninai duomenys
| Gamintojo发明专利: VIKING Modelis: GB 370.2 S Serijos numeris: 6001 Variklis, tipas: 4 taktu vidaus degimo variklis | |
| Tipas: „Briggs&Strat-ton“ 850 serija | |
| Vardine galia esant vardiniam sūkiú skaičiui: | 3,3 - 3000 kW - sūk./min. |
| Cilindro darbinis tūris: | 190 ccm |
| Paleidimo jrenginys: starterio trosas | |
| Degalu bakes: 1,1 l | |
| Pjovimo bloko pavara: | nuolatiné |
| Pagal direktyvá 2000/14/EB: | |
| garantuotas garso galios lygis LwAd | 102 dB(A) |
| Pagal direktyvá 2006/42/EB: | |
| garso galios lygis darbo vietoje LpA | 90 dB(A) |
| Neapibrežtis KpA | 4 dB(A) |
| Priveržimo momen- tas | 5 2 - 6 0 Nm |
| Peiliu komplektas: | |
| Priveržimo momen- tas | 2 2 - 2 8 Nm |
| Apverčiamas peilis: | |
| Ilgis / plotis / aukstis: | 128/77/140 cm |
| Svoris: | 45 kg |
19. Gedimu paieška
Zr. vidaus degimo variklio naudojimo instrukcija.
Stimata clienta, stimate client,
Conducerea executiva
1. Cuprins
Despre aceste instruanti deutilizare 382
Generalitäti 3
Indicatiqii privind citrea
instructiunilor deutilizare 382
Reglaj acceleration:
STOP
Opirea motorului
MIN
Turatie redusa
MAX
Turatie mare
START
Positie delucru
97/68/CE, 2000/14/CE, 2004/108/CE, 2006/42/CE
Produsul este projetat si fabricat cu respectarea urmatoarelor standarde: EN 13683
Conform directivei 2000/14/CE:
nivel maxim de
putere acustica Lwad
Conform directivei 2006/42/CE:
Piv aTo Tnv EvapnTwv Epyaiov K0aipouo, puOuNC, EtiokueNC KA ouvtnpnc, fepe to
mXavnua oEv aOaTepeKa EITIEdo
Ebaoc, Obnote Tov KIVnIpa EaWTEpIKNC
Kauonc Ka aHote To VKaPuwoei,
aphiote TO KaAuaMa Tou mTouzi.
Afnote to mnxavnua va kpuwoei, kupic
TPIV EKIVnoTe TIC epyaoiec otov KIVntnpa
eowtepiNC KAoNC, TIV nOAAanl
EgaywnC KAI TO OIAOTPA EaTmuNC.
Evsextai va npouoiotouv
Thepokpaies 80°C n meyAUTEpc.
Kivuvoc ykawatw!
H aTeUtheiac eTn aeTo aiavtko KIVNTnpa mTOpei va evai ETIKivduvN, Eaaou SEV EEITpETeai va xutheta to AIAATKIO KIVNTpA. H VIKING TPOTEVEIva vaoheoeTe my
Eival evapuovievo tic npakotw Eupwnaikec Ondyic: 97/68/EK,2000/14/EK,2004/108/EK, 2006/42/EK
To pioov exei oxediatoei kai kataokeuaotei ouwva e ta akoloutheta npotu:
EN 13683
Eeapmo26eyndiakaiαxioymonc
ouβatotntac:
PapptmaVIII (2000/14/EK)
Ovoa kai dieuthetavon nC KOVOTIOINmuEvnc apxnc:
Ybaxaemble nokynateIn!
Bolbwoe cnacn6o 3a To, yTo Bbl Bbl6pann BbICOKOKaueCTBeHHoe N3JeNne KOMNaHm VIKING.
3To n3dene 6bIIO I3rTOBNeHO nO cambIM COBpeMeHHbIM TEXHOJOnueckm MToDAM N B COOTBeTCTBn C MepaMn NO obecneeyHNO kaueCTBa npOdyKun, BeNb Haa Zelbc CHTaETcra DOCTNHyTo TOnbKO B Cnyae NOnHOro yDoBJIeTBOpEHHn NOKyNaTeJI.
Ecn y Bac mIeIOTCB BonpocbI no Baewmy yctpoictBy,To obaaauTecb, noxaynta, K Baewmy dInepy nn HenocepndBeHHo B hauy kOMnHaHIO.
Mbl Hadeemcra, cyto pa60ta c yctpoiCTBOM KOMnHmVIKING doCTaBt Bam ydoBOJIbCTBne

Dr. Peter Pretzsch
DinpekTop
1. CodepkaHne
O noIb3oBaHm daHHo HnCTpyKuieNo 3KcNpyatau 426
ObuaHnOpMaun 426
Yka3aHHe no npouTeHHIO
HnCTpyknnno 3KcNnyataa 426
Oncanhe yctpoctBa 427 Texnka 6e3onachoctn 427
O6uue cBeDeHn4 427
3anpaBka -o6paueHne c
6eH3nHOM 428
Pabouay oJekda n cpeCTBa
3aunTbI 429
TpaHcnpTnpoBka yctponCTBa
Pepedpaobotoi 430
BoBpempa60tbI
TexHueeckoe o6cnyxmbaHne n
peMOHTbl
XpaenHe npi DInTeBbHbIX
nepepbBax B pa60Te
YTNIN3aun 434
OncaHne CmBOJIOB 434
KomnneKT noctabkn 435
IpoTobka yctpOcTBa k pa6oTe 435
MoHTaX HaCTaBKn BbIbPoCa 435
MOnTakKoNEcN XoJIOBOu qactn 435
MoHTaK OTKnHOn KpbIuKN 436
OTkpblte n 3akpbblte otknHOn
KpbIuKu 436
MOnTaK HOKeBOrO DnCKa 436
ДемоHTax HOKeBOrOДИСКА 436
MOnTaX 3arpy3oHn BOpOHKn 436
DemOHtax 3aIpy3OuHOBPOHKn 436
TOnnBO MToPHOe MacNo 436
PekomeHdaaun no pa6ote 437
Paboyaa 3oHa onepaTopa 437
Kakon MaTePnAn MoXHo nepepa6aTbIbTa? 437
Kakom MaTePnAn HeIb3a nepepa6aTbBaTb? 437
MaKcImaJIbHbI nnAmEtp BeToK 437
3aONHeHne caOBOrO 13MeJIbUHTeJIa 437
Ppabunbna Harpy3ka yctpoictBa 438
3aunTHbIe yCTpoiCTBa 438
YCTPOIcTBO OCTaHOBKn DBnraTeJIa 438
3aunTHbIe KOMPOHeHTbl 438
BVeDenHe yCToPiCTBa B pa6OTu 438 3aNyck DnIraTeTn 438
OTKJIUcHHeIbVrTaTeJIa 438
I3meJIbueHne 439
Texnueckoe 6cbnyxbanne 439 Bunatb BHTpeHHero cropaHn 439
OuHCTKa yCTpoHCTBa 439
TexHmueckoe o6cIyKuBaHne HoxKei 440
Texnueckoe o6cnykBaHne KInHOBOpe pEmHa 440
3aMeHa MToPHO ToMaCna 441
XpaheHne n npocToB 3mHn nepnoD 441
CbeHeHne K MmHmMy m3Hoca npeoTbpaueHne noBpeXdeHn 442
TpaHcnpOpBka 443 IepemeueHne caoBoro N3MeJIbUHTeJI 443
IopdbemnnnepeHoc caoBoro 13MeIbUHTeJIa 443
TpaHcnpOpBbKa caOboRo
N3MeIbHInTeJI Ha Iorpy30uHO
IIaTΦopMe 443
CTaHapThbIe 3anactn 443
3JIeKtpocxema coeHHeHn 444
OxpaHa OkpyKaHoueI cpebl 444
Deknapaunu n3rotobntela o COOTBeTCTBUN DnpeKtNBam EC TexHueckne daHHbIe 445 NOnCK HeNCnpaBHOCTeN 445 TpaPcK cepBcHoro 06cnyKBaHHra 446
444
2. O noJb3OBAHn DaHHoH nHcTpkyuKei no 3Kcnpnyatau
2.1O6uaHnΦopMaun
DHaHn HNCTpyKuNo 3KnnyatauIN ABJETcnepeBOoDM opurnaHbHO INHCTpyKuN NO 3KnNyatauIN npou3BoNTeNa cornacho dnpekTBe EG 2006/42/EC.
ФирмаVIKING noCToHnHo pa6oTaet Ha,ycOBepWeHCTBOBaHNem accOpTmMeHTa CBOeI npOdykCmN, nO3TOMy MblOCTaBnEEM 3a co6oI npaBO HaI3MeHeHry BHeUHero BVdaIOCTaBnEeMbIX N3DeJIiN, TexHOJOrINu OCHaUeHry.
BcIeCTBnE 3TOrO npTeH3nB OTHoUeHHnTexHnueCKNX DaHHbIX INN pncyHKOB 3ToI bpoHOpbl He npHHMaHOCTa.
2.2 Ka3aHne no npoptyehnIO nHCTpykunno 3KcnJyatau
Ha pucyHKax u B TeKCTax oONcBIBaETCO npedeJIeHHa nocJeIOBaTeIbHOCTb onepaun.
B daHno nHCTpykunn no 3Kcnnyataunn NOACHyOTcBCE NIKTORpaMMbl, KOtOpbl Hahecehbl Ha yCTpoNCTBE.
HanpaBHeHne B3rJa:
HanpaBneHne B3rJna npu ynoTpe6nHn TepmHOB CneBa n cnpaBA B HNCTpyKcMn NO 3KcNpyaTuMN: POnb30BaTeNb CTouT 3a yCTpOiCTBOM (pa6ooye noIooKeHne).
CcbiKaHa rnaBy:
Ia CbIOK Ha COOTBETCTByOuIe rnaBbl
n pa3JeNbIC ueIbIO NOIpO6HbIX
06bAcHeHm IcNoIb3yETCCTpeIka.B
CneYIOUeM npIMePe npIBeHa CcbIka
Ha rNaBy: ( 7.1)
06o3haeHne pa3deJIOB TeKCTa:
OncaHbIe yka3aHnM OryT BblIaTeB, KaK B CNeDyUOxN PpIMepax.
Onepaun, Tpe6yUeBMeuTaTeNbCTBa nOJIb30BaTeTn:
- OcnaBntb BnHT (1) C NOMOuHOTBePtk, HkaTb pyKoTky (2) ...
Obeenepeuicenne:
- PpMHeHne n3dJIeNnI dIa cnOpTnBbIX MeOpnpnTNI KOHkypcoB
TeKCTbI C DOnOpHInTeNbHO 3HaUHMoCTbIO:
Pa3eJIbTeKCTa C DonONHnTeJbHOI 3HaUHMOCtBIO NOMEueHbIB NHCTpyKcIM NO 3KCNyatauIN ODNHM INPnBeJeHHbIX daee CmBONoB JnO6paueHna Hnx OC6oR0 BHNMaHn.

Onachoctb!
IpeDynpexkdaetobOnacHocTn HeecactThbIX CnyaeB INONyueHnra TjKeblx TpaBM DNJIOJe. Tpe6yeTc co6JIoDaTb onpeDeHHeIe npaBnla NOBeHnN I BO3dEpxNBaTbcr OT HapuWeHn.

PpeynpeXeHne!
Onachoctb nonyuhenr TpaBM dny IIOe. OnpeJeHHbe npabnla nOBeHnN NCKHouaHT BO3MOKHBie INN BepoTHbIE TpaBMbl.

OctopoxHo!
IOnyehne IerKnx TpaBM nnHaHeceHnme MaTePnaNbHorO yuepe6a MoXHO n36ekaTb,co6nIOaonpeDeeneHHbIe npabuHa NOBeDeHn.

Yka3aHne
HhOpMaunIgONTmAmlbHoRO nCnObl3OBaHnYcTpOcnTBA n npTeDtBpaueHnBO3MOXHbIX oUIN60k ynpabLeHn.
Tektbic CcbIJKAMn Ha pncyHKn:
PcynKn, NOIcHJUOJIne NOIb3OBaHNe yCTpoIcTBOM,HaxoJrTCB CaMOM Hauane IHCTpyKuIN NkCnIyatauIN.
CmboJ foToaannapaT cnyknt
IJIcBraHnPcUyHKOB Ha CTpaHnuaX
C PcUcyHKaMn C COOTBeTCTByIOuei
YactbTO TEKCTA B INHCTpyKuIMN IO
3KcNPyatauIN.
3. OnncaHne yctpoiCTBa

1 3arpyzouhyaBovonka
2 DBuratEnb
3 3Teke npoBoda CBeu 3aKunraHn
4Koneco
5 CToiKa koneca
6KeNo6 Bbipoca
7 Pe3b6ObIe npo6Ku
8 PernyaTOp nodau tonlina
9 3aBODcKa Ta6nUka C cepHbIM HOMEpOM
4. TexHnka 6e30NaCHOCTN
4.1 06üne cBedeHn

Ppna pa6oTe C yctpoIcTBOM HeoXoUmo 063aTeJIbHo co6JIOdaTb DaHHbIe Tpe6ObaHnNoTexHnke
6e3oNaChocTn.

IpeenepBbIM BBOOMB paobTy Heo6xoIMMO BHMaTeNbHO IpOuHTaTb BCHO HCTpyKUIO NO 3KcNpyataUN.
Hnctpykuu no 3Kcnnyataun CneNyet 6epeXHo coxpaHrTb dna daJbHeIwero nOJIb3OBaHnI.
CneNyET co6JIOdaTb yka3aHnno no
ynpaBneHHIO nTexHueCKOMy
obcJyKnBaHHIO, KOtOpBie BbHaNdeTe B
OTJeIbHOH INCTpyKmN NO 3KcnJyatauNN
DburTaTEn BHYTpEHHero CropaHnA.
Co6JIIODeHne 3TnxMep
npEIOCTOPOXHOCTn Heo6XODIMO IIN
obecneueHnBaIe 6e3OnaCHOCTN,
OHaKo IN nepeyeHb He RAJIeTCRA
NoHNbIM. PpImeHArbYcTpOcTBo CneNyET B COOTBETCBN C YyBCTBOM 3dpaBOrO
CMblCA N OTBETCTBEHHOCHTN, He 3a6blBaar
Pn3TOM, qTO NOJb3OBaTeNB HeCet
OTBETCTBEHHOCtB 3a HecuACTHbIE CnyHAn
C DpyHM NlUaAM NIN 3a INx
Co6CTBeHHOCtB.
O3HaKOMbTeCb cJIeMeHTaMn ynpabHeHn uOCo6eHHocTAMn npImeHHeN yCTpOcTBA.
IVcnoB3oBaTb yctpoiCTBO pa3peWaaTcra TOIbKO JINaAM, IN3yUHWBIM INHCTpyKUNIO NO 3KcNJIyatauM IN IMeHOUIM HaBBIKYnpaBHeHry cTPOiCTBOM. PepeNepBBIM BBODOM Bpa0Ty NOnb3oBaTeNb
J0nHex no3a6oTb8c0 nOlyueHnn KbaInuNpuOBaHOrO npaKTHUHO HnCTpykTaXa. Nolb3oBaTeB dOnJKe HOnyHT bNCTpykTaX y npoDaUca nn DpyrOcreuaNCTa NO BONPOcy 6eOnacHOrO o6paueHn C yCTpOCTBOM.
Bo Bpem 3TOro INHCTpykTaKa
NoIb3OBeTJI DoJIKeH, IpEKeBCErO,
NoIeTb, YTO npn paBoTe C yCTpoNCTBOM
Heo6xOIMbl OcO6a TuaTeJIbHOCTb N
KOHcEHTpaUra.
UcTPOINCTBO CO BCEM HabeCbIM
obOpyIOBaHnEM MOxHO nepeJaBaTB INN
OdaJKNBaTb TOnbKO Tem NOnb3OBaTeJIaM,
KOTOpBIE, B npHcIe, 3HaKOMbIC DaHHo
MoJeIbIO N ObcJyKnBaHnEM UcTPOINCTBA.
UcTPOINCTBO Heo6XoDMo nepeJaBaTaB
BCerDa C INHCTpyKUne IIO KcNPyatauIN.
Ponb3oBaTcR yCTPOINCTBOM
pa3pe7aetc TOnbKO,HaxOJaCb B
XopoWemΦn3UeCKOM NcNxUeCKOM
coCTOHN. Eclny BAc IMHeOTc
np6JIeMbI c 3DOpOBBeM,TO CNEyET
O6paNTbc K BpaCy H BByCHHTb,MOKHO
NJ Bam pa6oTaTc C yCTPOINCTBOM.
3anpe7aetc pa6oTaTc C yCTPOINCTBOM
nocJe ynotpe6JenH aIKOrONbHbIX
HaNtKOB,HAPKOTIKOB INn npEma
NekapCTB,KOTopblc MOrY OKa3aTb
HeratNBHOe BInraHHe Ha peakun
pa6oTaHouero.
3anpeaaetcnoJIb3OBaTbC KocnKoI
TeTAMnnnoDpoCTkamdo16net.
MeCThBiE npednncAHmOryT
onpeJeTb MNHmAbHbBIO3pACT
NOJIb3OBaTeJr.
3To yctpoicTBo He npedHa3HaeHo dnn NOIb3ObaHnna JIuCaAMn (B Oc06eHHocHTn DeTbMn) C nI3NueCKnMn, NCUXueCKnMn Nm yMCTBeHHbIMn HeIOCTaTKamn, a TAKKe C HeIOCTaTOHybIM ONbITOM m/nnn HeIOCTaTOHybIM 3HaHnYMaMn, 3a
NCKIIOUeHHeM,ecn OHn HaxoJrTcN pO
Ha6JIIODeHHeM Nua,OTBeTCTBHeHOrO 3a
NX 6e30NaCHocTB,NIN NOyUaIOT OT Hero
Yka3AHN No npImeHEnIO yCTPOINCTBa.
TTO TOrO YTO6bI NCKIIOuHTb BepoTHOCTb
HRP C yCTPOINCTBOM,DETN NOCTOHNHO
DOJXKHi 6bITNo INPCMOrPOM.
BHHMaHHe - onaCHOCTb HeCuaCThblx cnlyaeb!
CaobBn N3MeIbYHTeJIb VIKINGCKOHCTpyuPBOaH DnN 3MeIbYeHnBeTOK, a TaKKe oCTaTKOB paCTeHm. HHOepnIMHeHne 3anpeUeHo. OHO MoXeTPINBEcTN K ONaCHbIM NocJeDCTBnM INIOBpeXeHnO yCTpoiCTBa.
CaobbI n3MeBvTeIb 3anpeaetc IcNoB30BaTb:
-ДЯИньx MaTePnAIOB(HAnpIMep,CTeKna,MeTaJIa).
- p60T, KOToPbIe He oNcHbI B DaHHo INHCTpyKuIN NO 3KcnnyatauIN.
- npn npo3BODCTBe NIIeBbIX npo4yKToB (HaNPIMep, n3MeJIbYeHne Ibda, npo6IeHne Me3r).
ИЗ coo6paKeHи 6e3OanacHcTn
3aIpeuaeTcJIIO6oe n3MeHeHne Ha
yCTpoiCTBe, 3a NCKIIuOeHnEM
KbAInΦnUPOBaHHoY cTaHOBKn
npHaJdEHXoCTeN HaBeCHoro
obOpyDobAHn, dOnyUeHHbIX KOMNaHnei
VIKING.KpOme TOrO, n3MeHeHn
ycTpoiCTBa npINBODaT K JInSeHHIO
rapaHTnHbIX npab.CBeDeHHaO
pa3peUeHHbIX K nCNoJIb3OBAHHIO
npHaJdEHXocTEx Bbl NOyUHTe B
cNeuJaIN3uPObAHHom cepBUCHOM
ZeHTpe VIKING.
3aIpeuHbI N3MeHeHn yCTpoCTBa C
ueJIbIO yBeIuHcHn MOUHOCTN IIN
yAcTObI BpaUeHn DBuRaTeJI
BHyTpeHHero CROPAn HIN
3JIeKToPODBuRAteJI.
3anpeaetcnaCnoB3ObaHne yctpoiCTBaIraTpaHCnOpTnpOBKn npedMeTOB,KNBOTbIX NIN IIOJe,B Ooc6eHHoCTn DeTei.
Oc6yIO octopokHOCTb CneIyET npoBnTb npnpimeHn yCTPOICTBa B30Hax 3eJIeHbIX HacXJdeHn,napKax,Ha cnOpTnloaIckax,Ha yNlucx n npedpnaTnx IecHO r N cIbCKORO XO3RCTB.
4.2 3anpaBka - o6paueHne c 6eH3nHOM

Onachoctb dnn JxN3Hn! BeHN TOKCNUeH cINbHO rOpIOU.
XpaHnTb 6eH3nH TOJbKO B
npEHa3HaueHHbIX DJI 3TOr EMKOCTAX (KaHnCTpax), KOTOpBle npoUIMn COOTBeTCTByOuSyI npOBepKy. KpbIuKIN 3aPapBOuHbIX EMKOCTe HEO6xOdIMo BCERda npaBnBHO NaKpyTntb N 3aTAYb Do OTKa3a. IV coo6paxeHn
6e3OnaCHOCTN NOBpeXJeHHbIe KpbIuK IN DOJXHbI 6bITb 3aMeHeHbI.
IyTIN3aunn XpaHEnn
Ipon3BOJCTBHeHHbIX MaTePnaNoB,
HaNPmep, TOnnBa 3anpeuaeTc
NCNtB3OBaTb 6TyblKn IJa HAnNTKOB Nn
IOO6HbIE EMKoCTn. HeJb3r NCKIOuHTb,
TOXIKoCTb B 6Tyblkax MOKeT KTO-TO
BbInTb, 3TO OCO6eHNO onaCHO dJeTei.

BENHIN XpaHnTB BdaIOn O T NCTOCHNKOB NCKP,OTKpbITORO PJIaMeHNI,NOCTOARHHORO
ropeHnA, a TaKke NCTOCHNKOB TeTnA n Dpyrnx NCTOCHNKOB BO3rOpaHnA. He Kypntb!
3anpaBky npoIN3BOIDnTb TOJIbKO Ha BO3dyxe HHe Kypntb BO Bpemr 3anpaBKn.
Ipeep3anpaBkoHnOoBbIKIOHTb DnuratBnBHyTpeHeroCropaHnN IOdoKdaTb, KOrDa OH OCTbIHET.
3aJINBaTb 6eH3nH Heo6xOuMo nepei
3aNyckOM DnRatEn BHyTpHeHrero
cropaHna.Bo BpempaBtI BnraTeHa
BHyTpHeHrero CropaHna nnPi
HeoCTbIBwe MaunHe 3anPeuaETc
OTKpbBaTb KpbUky 6eH3o6aka nn
doJIINBaTb 6eH3nH.
TOnnBb6ak He 3aONHtB
NoHOCbO, a HANBaTb TOnnBO np6J.
do yPoBHa 4 cm Hxke KpOMKn HaNBIHO
NaTp6ka, YTo6bl NMeIOCb MeTO dJa
pacupeHHa TOnnBa.
EcIn Bbl nepeHnN 6eHN H uee3 kpa, To 3anyckaTb DnurateJIb BHyTpehHero cropaHnMoKHO TOnbKO NocJe OChCTKn NobepxHocTN, 3aIITOn 6eHNHom. He BKIOuATb 3axrHaHne Do TOrO MOMeHTa, noka napbl 6eHNHa He yIeTyuHnCb (npoTepeTb hacyxo).
PpOJIuToe TOnnIbO Heo6xOJIMo Bcerda BbITnpaTb.
Ecnn 6eH3nH nonan Ha oJekny,To ee Heo6xoNMO CMeHNTb.
HeIb3a octabTb yctpoCTBO C 6eH3nHOM B 6eH3o6ake B NOMEueHEN. TaM IMeETcB O3MOXHOCTb BCTyINeHENB KOHTAK T 6eH3nHOBBIX napOB C OTKpbITbIM ORHEM INN NCKpAMN, YTO MOKeT PIPNBECTN K BOCNJameHeHIO napOB.
EcHn Heo6xOIMo OnpoKHTb TOnnHBn 6ak,3TO CneIyET BbINOJIHrTB BHe NOMEueHn.
4.3 Pa6o7a oexka n cpeiCTBa 3aunTbI

Ppi pa6oTe Bcerda Hocntb npouhyo 0obyc Heckonb3kOi nooBBo. HeIb3ra pa6oTaB mnn, Hanpimep, B caHaJnax.
6ocikomIJIHnPImepBcHdaJInx.

Bo Bpem3Kcnnyataaun, a taKkeBOCo6eHHocTn np npapobotax noTexHnueckomy 06CnykBaHnIO
TpaHcnpTnpoBKe yCtpoNCTBa cNeDyET HaDeBaTb npOuHbIe nepaATKn.

BoBpempa6oTb Bcerda CneNyET NcNoIb3OBaTb 3aunTHbIe OKn I cpeCTBa 3aunTbI ywei. IVx CneNyET
HOCHTB BO BpeMBA Cero nepno da pa6oTbI.

BoBpempaobTbC yCTPOINCTBOM Heo6xOdmo Hocntb NOxOaIyU, npJIeraouYIO TeJy OeKdy,
T. e. BMEcTo pa6OuNX xAlaTOB
NCNoIb3OBoTa b KOM6nHe3OHb. Pa6oTa c
yCTpOJCTBOM, 3aPpeUaEeTCra HocNTb
WapΦ, raNCTyK, yKpaUeHnA, IMetB
CBuCAIOUne BHN3 JeHTb IIN UHypKn I
dpyrNe TOPaUe NEmeHTb ODeXDbI.
B TeueHne Bcero nepnoa 3Knnyatauunn npn Bcx pa60ax Ha yctpoiCTBe 3anpeuaeTcra Hocntb paCnyueHHbIMn DnHHbIe BONoCbl, INx Heo6xoDIMO nOKpbBaTb (ICNOnb3yra roIOBHOy6Op, WAnKy n T. n.).
4.4 TpaHcnpTnpoBka yctpOCTBa
ДлпnpedOTBpaueHЯ TpaBM OCTpbIMN IROPaMn YactMaN yCTpOInCTBa CneDyEt pa6oTaB B nepuATkax.
HeIb3a TpaHCnOpTnpoBaTb yctpoiCTBc npiaPabotaoUeM DBrarTeJe BHyTppeHero CropaHna. Ipeed TpaHCnOpTnpoBkoB bIKIOuHTb DBrAteIb BHyTppeHero CropaHna, DOxJaTbcraOCTaHOBKn HOKa N BbHyTb WTeKe pnoBOda CBeu 3axirHaHna.
YcTpoNCTBO CneNyET TpaHcnpOpTIpObaTb TOIbKO C OCTbIBUIM DBNrAteJeM BHyTpHeHrO CropaHnI N 6e3 HAnuHr ToNNBa.
UcTpoNCBO CneNyET TpaHCnOpTnPOBaTb TOIbKO C 3aRpy3OCHOBOPOHKOB, UCTaHOBJEHNO INHCTpyKUN. OnachocTB NOnyuEHHN TpaBM n3-3a OTKpbITbIX HOKe!
CneJeT yuHTbIaTb Bec ycTpOJIcTBA, B OOCeHHoCTn npn erO onpOKnIbIBaHIN.
IgnoRpy3KnNCNoB3ObaTbNOxOJaUne CpeCTBa (norpy3OHyIe NlaTΦOpMb1, NOdbemHbI npncnoc6JeHna).
YcTPOIcTB DoJXHO 6bITb HaJeXHO
3aKpeJIeHO Ha NOrpy3OHy INaTΦOpMe
C NOMOuB IOCTaTOHOro KOnUYeCTBa
TpOCOB, peMHeN t. n., ONuCaHHbIX B
DaHHo IHCTpyKuIM No 3KcNpyaTuIM.
( 13.3)
YcTpoIcTB CnEyET TAnHytB nnnepeMeaTaTOJbKO TeMnE WaRa. He 6yKcnpoBaTb!
PtpaHcnpTnpoBke yctpoiCTBa HeoXoIMo CoJIbAteb MeCThBiE 3aKHOdaTeNbHbIe npeDncaHn, B Ooc6eHHocTn no 6e3OnacHoCTn Norpy3Kn I TpaHCnpTnpOBe npeMeTOB Ha Norpy3OuHbIX PnAtopMax.
4.5 Ipepe pa6oToi
CneNyET yIOCTOBepntbcyTcYCTpOietBOM pa60TaHOT TOnbKO Te NuaKOTOpblE 3HaKOMbl C INHCTpyKUneN NO3KcnnyatauIN.
IyctpoCTB no yxOdy 3a caoOBbIMn
yactkamN C DBIrTaTeJMaB BHTpeHHeRo
cropaHna NNI 3NeKtPoDBIrTaTeJMaN
CneNyET CO6KnDaTb MYHUnNaJBHbIe
npdncAHnNo npoDOnKInTeJbHoCTn
pa60tbl.
IpeepncnoB3OBAHmE yCTpOINCTBa
CneJeT 3aMeHrTB HeNCnPabHBie
TnyuHTeIN, a TAKKe BCE dpYrNe
n3HOWeHHbIe nNI NOBpeKdEHbIe y3bl N
TeTaN. NOBpeKdEHbIe nNI
Hepa36OpHbIe HakNeIKN Ha yCTpoINCTBe
c PpeDynpKdEHnMn Uyka3aHnMn O6
IMeOuxxCn ONACHOCTax Heo6xOAnMo
3aMeHrTB.HOBbIe HAcNkN IN Bce dpYrNe
3aNaChbIe YactN IMeKOTcB
CneuaJIIn3nPOBaHHOM CepBnCHOM
ZeHTpe VIKING.
Ipeed BBODOM B kCnnyatauIO CneNyET npoBepntb:
-6e3ynpeHoe coCToHHe KOxyXOB INpeDOxpaHHTeNbHbIX yCTpoIcTB, KOTOpBle DOJIKHbI HaxOuNTbcra Ha CBOEm MeCTe,
- HAIuue BCex y3IOB Dnuratela BHTpeHrero CropaHna, CBraaHHbIX C noDAeY TOONBa, KOtOpBe DOJXHbI 6bITb BnopAke (repMeTnHbI),
- HauJekaaee COCTOHNTE TOnnBHO6baka (repMeTnUHOCt b),
OTCYTCTBNE H3HOCa INI NIOBpeKdEHN KOpNyCa INpeKyUeRO MexAHN3Ma (HOKN, HOKeBOB BaJIUK, DnCKOBbIE HOKN I T. I.).
OTCYTCTBNE B yCTPOIcTBe NMeJIbYeHOrO MaTePnAna I NyCTOTy 3aRpy30HOBOPOHK,
HaJIyHe n 3aTJkKy Do OTka3a BCex BnHTOB, rAek N dpyrNkpeNExHbIX 3IeMeHToB. IpeE BBOOM B 3KcNlyaTaUIO CneJeYeT 3aTAYb OCna6JIeHbIE BnHTbI raiKn (co6IIOdaTb MOMeHTb 3aTJkKn).
NcnoB3yIte yctpoCTBO TOnbKO BHe NOMEueHn,HaOTKpbITOM BO3DyXe IN BdaJIN OT CTEN IIN dpyrNX O6bEKTOB, YTO6bl NCKJIIOHTb ONaCHOCTb NOJUyeHn TpaBM IN BO3MOXHOCTb HaHeceHn MaTePnaJIbHorO yIepe6a (HeBO3MOxHOCTb OTKnloHEnn dIIN POJIb30BaTeJI, ONaCHOCTb pa3bTbIX OKOHbIX CTeKoI, UapAnHHb Ha ABTomO6nIax nT. n.).
YCTpOINCTBO DOJNkHO 6bITb YCTOuHBO YCTaHOBJIeHO Ha POBHO IN TBepDoI NOBepXHOCTn.
He noIb3yIteCb yCTpoiCTBOM Ha MOUeHOH NIN NOKpbITOn IpaBnEM NOBepxHOCTN, NOCOJIbKy OT6paCblBaembl ININ CNJbHO pa3BeTBnEHbM MaTePnaI MoKeT CtA b npuHHo TpaBM.
IpeenKaKdbimNcNoB3oBaHnEM yCTpOINCTBa 063aTeJbHO y6eInTbC B TOM,HTO OHO 3aKpbITOB COOTBEcTBm C npEINNCAHnM. ( 7.7)
3anpeaaetcyaJdAraTbnnnnepeMbikatb yctaHOBNEHHbHe Ha yCTpoiCTBe nepeKIOUaOuIe N ppeoXpAHTeNbHbIe yCTPOINCTBa.
4.6 Bo Bpempa6oTbI

He pa6oTaTb,ecnB onaChon 3OHe HaxoJrTcXINBOThbIe NII JIOuO,OCo6eHNo DeTu.
HeIb3pa6oTaTbCyCTpoNCTBOM BO BpeMdoJnIrpO3bl,OCo6eHNO Clyuae onaChOCTyndapa MoHnn.
Pn HauuBn BnaXHOB NOBepxHOCTn HeycToHbOE NIOXKeHne NOb3ObATEJIyBeJNUBaET OaCHOCTb HeCuaCTHOro Cnya.
Cneyeetpa6oTaB,co6JIOaIaOc6yO octopoxhocTB,yTO6bI He nOACKoJIb3HyTbcI. N0 BO3MOXHOCTn 136eRaTbpNpIMHeHIn yCTPOINCTBa Ha BIAxHoi NOBepxHOCTn.
CneNyet pa6oTaTb TOnbKO npn DHeBHom CBTe Nnn XopoWem NCKYCCTBeHHOM OCBeueHIN.
Pa6o7a 30Ha BO Bpemr BCero nepnoa pa6OtbI DOJIXHb OCTBaTbCra YICTOIN COePxaTbCRA B NOPAke. Heo6xOIMo y6npaTb PpeMTeB1, O KOTOpBIE MOXHO CNOTKHyTbCRA (kAMHn, cyyB, ka6eN n T. d).
HEnb3a Donyckatb, YTo6bI onepaTOp HaxoDnCBAIe NIOUaKn, Ha KOTopoY yCTaHOBNeHO yCTPOIcTB0.
Otpa60taBwne ra3bl:

Onachoctb dnia kni3Hn BCJeCDTBne OTPaBneHn!
PnnoBneHn ToHOTbl,
roNoBHO 60nn, HapyWeHnA
3peHn (HaNPmep, yMeHbSeHne
noIa 3peHn), HapyWeHn Cnyxa,
roNoBOKpyKeHn, yXyDuaOuCeCn
cnoc6HoCTn KOHeHTpaunn
Heo6xOIMo CpOHy NpeKpaTntb
pa6Ot. 3TN CmNTombl MOrY,
KpOME npOero, 6bITb BbI3BaHbl
CNIuKOM BbICOKO KOncHTpaune
OTpa6Otabux ra3OB.

YcTpoIcTBo BblJeIeRr RaOBNTbIe OTPa6OTabWne ra3bI BO Bpempa6ObTI dBuratEnBHyTppeHrero cropann. B Hx
coepkntraIOBNTaOKcByrIepoJa -ra3,He IMeoun CBeTa n 3anaxa,a TaKke INpyTne BpeHbIe BeueCTBa. 3anpeaaetc paBoTa Dbratela BHTpeHHeRo CropaHnB 3akpbItbIX INN NINO pOBeTpnaEBmIx NOMeueHnx.
YcTpoIcTBo Heo6xOJIMo yCTaHaBJIbNAbTa TaKIM O6pa3OM, YTO6bl BbIXIOHbIE Ra3bl He MeWAsn npn pa6Ote.
3anyck:
Ipeep 3anyckom yctpoiCTBO cneyuET npBecTN B yctOuNBoE BEpTuKaJIbHoe noIOKeHHe. Pa6oTa B rOpN3OHTaJIbHOM noIOKeHHn 3anpeueHa.
HeIb3ra TaryTb 3a nyckOBoTpoc,ecnYcTpOioCTBO 3akpbITo He HaJIeKaUIMM06pa3OM N HOKINOTkpbITbl.
Onachoctb nonyuhenra TpaBM n3-3a Bpaauounxsc Hoxe!
3anyck npoun3BODnTb c OCTopoXHOCTbIO, co6IIOda yka3aHnraIaBBi «IoIroTOBka yctpoiCTBa K pa6Ote>. ( 10.)
Pn3ayncke DburaTeJI BHyTpHHeRr CrotapHHN INB KKnOueHNN 3JeKtpoDburraTeJI HeIb3a HaxOuNTbcra nepei OTBepCTnEM nBb6poca. Pn3 ayncke INB BKnIOueHNN B caIOBOM n3MeJbUHTeJI He DoJXHO 6bITb N3MeJbuaemoro MaTePnaJa. N3MeJbuaembl MaTePnaJI MoXeT 6bITb BB6poWeH n CTaB npuHNO TpaBM.
Pn3ayncke 3anpeaaetcnaonpOKnDbIbTaYcTpoiCTBO.
BoBpempa60tbl:

Onachoctb noJyueHn TpaBM!
Hikorda He KnaCTb pykUn HOrn Ha BpaauoUneCraTeaNN, a TaKKe He DePkaTb Nx HAd Un NpOd 3TUMN deTaIaMn.
Ppi pa6oTaOuIe ycTpoIcTBe IuO uIN dpYrne Yactn TeNa He DoJXHbI HaxoDInTBcR HaD 3arpy3OuHOBOPOH N nepeD OTBepCTnEM DJIa BblOpoca. TOnoba n TeNo DoJXHbI BcerDa HaxoDInTBcR Ha pacCToHHNOT 3arpy3OuHOrO OTBepCTnR.

Hikorda HeIb3a DonyckaTb nonaHa nya pyk,dpyrnx chaTei Teia, a TaKe OdekBIB 3arpy3OHyBOPOHKyJIN
JKeNo6 Bb6pOca.BoIbwaonacHocTb nolUyeHn TpaBm rna3,naua,naIbueB, pyK nT. n.
Bcerda Heo6xOdmo CneIITb 3a coXpaHeHem CBOero paBHOBecn y cytOnuBoro noJoxKeHn. He HAKNoHrTaBcBpeI.
Pn3aONHeHn nOb3OBaTeJbDOnKeHaxoHTbcB O ONcaHHo paOoey 30He onepaTopa.Bo BpemBcero nepnoJa paOToBtBCerda CneJeT HaxoHTbcB PaOoey 30He, HnB KoeM cnyae He HaxoHTbcB 30He Bbl6poca. ( 8.1)
Onachoctb noJyueHn TpaBm!
Bo Bpempa60TbI N3MeJIbYeHHbIMaTePnAImoKeT bIKNDbIbTaBc8O6paTHHOHabePx.1oTOMy CneJeYET HOCNTb3aUHTbIe OOKN He npu6JInxKaTb IINIOK3arpy3OCHOMY OTBepCTNO.
HeIb38 onpOKuDlbBaTb yCTpoiCTBO BO BpeMpa60Tb DBVaTeNBAHyTpEHHero CropaHn nn 3NeKtpoDVBaTeN.
EcIn BO BpeMa pa6oTbI yCtpoiCTBO naaet,To Heo6xOIMo cpa3y BbIKIOuHTb DnBraTeN bBHyTb ITeKepe npOBoJa CBeU 3axnFaHn.
HeIb3a DOnyckatb, 4TO6bl B JKeIIO6e BbIbOpa HaxoJINcra N3MeJIbYaeMbI MaTePnAJI, TAK KaK 3TO MoKeT npNBecrN K IIOXOMy pe3yJbTaTy N3MeJIbYeHnRA INI OTdAue B 3arpy3OCHHO BOPOHke.
Pn3aRpy3ke caoBOrO n3MeIbHnteJIe HEO6xOIMo COCOB OCTOPOXHOCTbIO CLeNTb 3a TEM, YTO6bl NOCTOPOHHe NpeMTeBI, HApPIMep, MeTaNNUeCKne DeTaJIIN, KAMHN, PIACTMaCCa, CTKNO T. I. He NOnaIN B NOIOCTb N3MeIbHTeJIa, TAK KAK 3TO MOXET INPBecTNI K NOBpeJdeHnM I O6paTHOMy Bbl6pocuN3 3aRpy3OCHOBOPONK. IV3 3TxN Xe COo6paJHexn CneDyET yCTpaHrTB 3abIBAHnB yCTpoICTBe.
Pn3 3arpy3ke caoOBoro n3MeIbUHTeIe BETkAm MoKET npOn3OHTn O6paTHbI Bb6poc. Heo6xoJIMo pa60TaTb B nep4atkax!
HeoMO BIKIOHTB DnTaTeB,
-pepeTEm,kaOpoknHyTb yCTpOINCTBO,nepeMeaTaBnn TaunTbeo,
- npei TeM KaK OTBnHTNTb pe3b60Bble npo6Kn OTKpbTb yCTpoIcTBO,
- nepei 3anpaBko. 3anpaBky npOn3BOAnTb TOJIbKO npN OCTbIBWeM DnuratJe.
Onachoctb noxapa!

STOP
Cneintb3aHepuohhbIM DnBxKeHempeKyUeRo INCTpyMeHTa, KOtOpoe dNITcR HECKoNBKO CeKHyD DO NOHON OCTaHOBKN.
CneNyET BbIKHouTb DnBraTeIb BHyTpHeHrO CROPaHIN, BByHtB UTeKeP npOBoDA CBeuN 3aJnrAHH N DoXJaTBcR nIOHO OCTaHOBKn BCex BpaUauOuNXcR opraHOB.
- npexJe Yem OCTaBnTb yCTPOINCTBO,
- nepei noIbeMOM nnepeHocom yctpoNCTBa,
- nepei TpaHcnpTnpoBko yctpoNCTBa,
- nepeI TeM KaK yCTpaHITb 3a6uBaHnI IINI 3acOpEnH B pexyIeM MexAHnI3Me, 3aRpy3OCHoB OPOHKe IINI KaHaJIe Bbl6poca,
- nepei BblonHeHnem pa60T ha pexkyem mexaHn3me,
- npei TeM KaK npOBepntb yCTpOiCTBO nn ONUCTnB ero nn nepei npOBeHneHem Ha HEM INhbx pa60T.
Pn nonaHn B pexyui MexaHn3M
HNObIX TeI, npn NOBHeHn
HeobHybIX WymOB UIN HeoBlyHoH
Bbpaun HeoXoIMo HEmdJeHHO
BbIKIOHTb DBrAteIb N DoXdaTcR
POHHO OCTaHOBNK yCTpoiCTBa. BblHyTB
WTeKe pnoBoJa CBeu 3axirHaHn, CHrTB
3aRpyOHTyo BOPOHK u BblONHHTb
CNeDyUOJIe DeICTBn:
- PpOBepuTb yCTpoIcTBO, B OOCoBENHOCTn pexyUm MEXaHIN3M (HOxN, HOKeBOI DNCK, BINT HOKa) Ha OTCyTCTBne NOBpeXJeHIn. Ipn Heo6XoDMocTN CNEuaJIInCT DOJKeH BblIOHNb TpeByemI peMOHT, npExe Yem ChOba HauaTb paBoTy c yCTPOIcTBOM.
- PpOBepuTb pKcnpObaHne BCex y3IOB peKyUeO mExaHN3Ma, npn Heo6xOIMOCtN Do3aTHyTb BNHTbl (co6JIIOJaTb 3HaueHn MOpHTOB 3aTJkN).
B Cnyae NOBpeKdEHHaIeTaNEn Ix CNeDyeT 3aMeHnITb IIN OTpEMoHTnpOBaTB CneuaJIaNCTy, PnueM DeTaII DOnXKnbl 6bITb paBHOUeHHbIM.
4.7 TexHnueckoe 06cIyXnBaHne n peMOHTbl

Ipeen Hauanom pa60nt no ounCTke, yCTaHOBKe, pemOnTy IN texHNueCKOMy 6cNjxuBaHIO yCTpOInCTBO Heo6xOdmo
NOCaBnTb Ha TBepdoe,poBHOE OCHOBaHHe,BbIKIOuHTb DBNrTaTeJIb BHyTppeHrero CropaHn I DoXJaTbcra OCTbIBaHnI,3aTEM BbIHyTb 7TeKepe NPOBOda CBeyn 3axKraHna.
IpeenBbInonHeHempa6oT, npexde Bcero,Bobactn DBiratena BHyTpehner cropaHna,BbInycKHOKOJIKeKTopa I rnyuHTeNcIeYETdoXdaTbcra OCTbHaHHaYcTPOiCTBa.Temnepatypb MoTy DoCTnRaTb 80°C N Bblie.
Onachoctb oxorob!
HenocpeCTBeHHbIKoHTaKTC MOTOpHbIM MacnOM MoKet 6bITb ONaChbIM.KpOme TOrO,He DOnyckaETc npOJIuBaHne MOTOpHOrO MaCJa.
KoMaHnVIKINGpeKomeHnyeT npOn3BODntb 3aJIINBky NIn CMeHy MOTOPHO macna B cneuaIIN3npOBaHHom ceHTpe VIKING.
OuInctka:
Iocne pa6oTb BCE yCTpoNCTBO Heo6xOJIMO TuaTeNbHO OuHCTNTb. ( 11.2)
3anpeaetcncnoJIb3OBaT annapaT
DnOuCTKN BbICOKO DaBHeHna, a TaKKe
PpOMbIBaTb yCTPOINCTBO CTPyAMN BObl
(Hapmep, npn NMOU CaIbOro
wnaHra).
HeIb3nCnOJIb3OBaTb arpeccNBbIe
HcCTraUne CpeDCTBa.3TN CpeDCTBa MOryT
IOBpeNTb NtAcTMacCy N MeTaN, YTO
MOKeT Bbl3BaTb HApUWeHne 6e30NaCHO
3KcnNyatauyn yctpoNCTBa VIKING.
CzIbIO NCKJIQUeHn BO3rOpaHn
OTBepCTnOxJaXDeHn,pe6pa
OxJaXDeHn IObLnAcTb BbIXIoNa DOJXHbI
6bITb UcTBIMn,HanpImep,OT TpaBbl,
COJOMbl,MxA,JNCTbeB NIN BbITEKWei
CMA3Kn.
Pa60tblnoTexHnueckomy 06cJyKmBAHHo:
Pa3pe7aeTc BbINONHbT ToIbKO Te
pa60TbIO TexHnueckomy
obClyKuBaHNIO, KOtOpBIE ONuCaHbIB
daHHoN IHCTpyKUIN IO 3KcNlNyatauIN.
Bce dpyrne pa60TbIO dnXKnbl
npOn3BOIDnTBcB CnEuaIn3nPOBaHOM
cHTpe.
IIra IOnyHeHnaHEOxOIMbIX CBeDeHNI OKa3aHnI NOMouI O6paAaITecb
BCerDa B CnEuaIn3nPOBaHbI N cHTp.
KomnaHnY VIKING peKOMeHdyET
BblONHbTa60TbIO TexHnueckomy
obClyKuBaHNIO pEmOHrToIbKO B
cNeuaIn3nPOBaHOM cepBnCHOM
cHTpe VIKING.
CneuHaIN3npoBaHhbie cepBcHbIeHTpbVIKINGperyIpaHno ppeInaHOT KpcblnpedocTabIaT TEXHueckyo HOpMaunIO.
CneIyET NcNoB3ObaTb TOnbKO HNCTpyMeHTbl, npHaJdLeXHOCTn ININ HabecHoe 6obOpYdoBaHHe, DOnyuSeHHBe VIKING nJa daHnOro yctpoCTBa ININ TexHnueckn aHaJIoRnHbte y3bl. B INOM Cnyae Bo3MOxHbI HeCuaCThBiE CnyaIn, pInBODaJIuNE K NoJUyeHNIO TpaBM ININ NOBpeJeHNIO yCTpoCTBa. PIn BO3HNKHOBeHN BONpOCOB CneIyET O6paTaBCaB CneuNaHm3IpOBAHHbI ueHTp.
OpunHaJIbHbIe INHCTpyMeHTbl,
PnHaJdEJXHOCTn 3aIyAcTn VIKING no CBOUM CBOIcTBAM ONITMaJIbHO COOTBcTcBYOT yCTPOIcTBY uYOBJTeBOPaIOT Tpe6oBaHNaM NOJIb3OBeTEn. OpunHaJIbHbIe 3aIacHbIe Yactn VIKING ono3HaIOTCn no HOMepy 3aIacHO JAcTn VIKING, no HaJdNcN VIKING n B cIyae Heo6xOIMOCtN n 3NaKy 3aIacHbIX qAcTei VIKING. Ha MaJIeHbKnX DeTaJIax 3HaK MoKET CTOrTb TaKe OTJeJIbHO.
I3coo6paKeHn 6e3onacNoCTn
Heo6xoDnmo peryIraPHO npOBepaTb y3Nbl,
CBraHHbIe C noDaueY ToONJIbBa (ToNNBONPOBOi,ToNNBHiKpaH,
ToNNBHiB 6ak, KpbIuKy ToNNBHOrO
6aka, nOcEOHNHeHn I T. n.) Ha
OTcyTCTBne IOBpeXDeHn i
HerepMeTnHocTn, pRn Heo6xoDMOCtN COOTBeTCTByIOUne y3Nbl DOJHXhbl
3aMeHrTaCnEuaNlCTOM (KOMNaHn
VIKING peKomeHnyET
CneuaIN3npoBaHbI cepBnCHbI ceHTp VIKING).
Haknei c npdeynpejdxenmnyka3aHnMn CneJyET Bcerda coepKaTbB qntom XopoOo YtAbelHom
coCTOHN. NoBpeKDeHbIe nnnyTepaHHbIe HAKNeIKN Heo6XoIMMO3aMeHHTb HOBbIMOpuHaJIbHBIMKOTOpbIE MOxHO NOLyHTB CnueNtIN3npOBaHOM cHTpe VIKING.Pn3aMeHe y3Na nn DeTaIIN HOBbIMy3IOm nn DeTaIbO, CneINr, YTObIHOBBie qACTn NOyUInn TaKe JeknAkpexHne y3NbI n DeTaIIN.
Ppi pa6oTe cpejxMm MexaHn3MOM Heo6xoJMo Bcerda Hocntb npOuHbIe pa6ouHe nepaTkn co6JIOaTb npdeJIbHyO octopoxHoCTb.
ДяТOROTOyTO6bIyCTPOIcTBo pa60taNo HaJExHNO, CNeJyET Do OTKa3a 3aTЯNtBaTb BCEraKIN,6OJIbIuBnHTbl,BOco6eHHocTN BCE BnHTblpeKUeeroMexaHn3Ma.
Perynpho npOBepyte BCE yCTpoiCTBO-OCO6eHNO nepey uCTaHOBKOHa
XpAHHeHne nepeD IINTEbHbIM
nepepbOM B 3KcIpyatauN
(HanpMep, B 3mHn nepno) - Ha
OTcyTCTBue n3Hoc a NOBpexdeHn.13
coo6paKeHH 6eONacHocTn
Heo6xOIMo cpa3y 3aMeHrTB
n3HOWeHHbE iNIOBpeXDeHHbIE
TeTaN, oBeCneUBA Te M CaMbIM
HaJeKHyIO paBoTy yCTpoiCTBa.
HeIb3a MeHrTb OCHOBHOe NOLOXeHne DBrIraTeJI BHyTpEHHero CropaHn I nepeBopaUBaTb erO.
B cnyuae cHnTna kaknx-Jin6o deTaJe nJIN 3aunTHbIX npncnocObeHn BO BpeM npOBeHn pa60 nTO texHnueckomy o6cnykBaHHIO nx Heo6xoIMo HemeIeHHo CHoba yCTaHOBt b Ha MeCTo B COOTBeTCTBm C npedncaHnM.
4.8 XpaHeHne npn dInTeJIbHbIX nepepbIbax B pa60Te
Ipeud Tem KAK CTaBnTb yCTPOIcTB O B 3aKpbIToe NOMEuEHNe, CNeJeYET DaTb BO3MOXHOCTb DnIRaTeJIIO BHyTpENHrO CROPAHN OCTbITb.
YcTpoIcTBo CneDyET XpaHnTb C ONyCTOWeHHbIM TOPnINBHBIM 6aKOM 3aNaCOM TOJINBa B 3aKpbIBaEMOM XOPOIJO BEHTNINpyeMOM NOMEueHN.
HeoXoUMO NCKIOHTB BepoTHOCTb NOIb30BaHnY yCTpoNCTBa IOCTOpOHHMNIuamn (HaPnPmep, DeTbMn).
3anpeaetcocrabTb yctpoCTBO C 6eH3nHOM B 6eH3o6ake B NOMEueHEN. IMeETcB03MOXHOCTb BCTyIIeHENB KOHTAKT 6eH3INHOBbIX napOB C OTkpblIM ORHEM INN NCKpAMN, YTO MOKET PnPBecTN K BOCNJAMHeHENIO napOB.
Ecni Tpe6yeTcOnyctoWntb ToNNBHy
6ak (Hanpimep, npn ppekpaeeHH
pa60tby B 3mHmN nepnoD), onopoxHeHne
6aka DoJXHO npou3BOOHTbcra ToNbKO BHe
nomeueHn (OnycTooAaB 6ak Ha
OTkpblOM Bo3dyxe, Hanpimep,
BbIPA6oTb TOJIINBO npn pa6oTaUoem
Dburatene).
Ipepe yctahOBKOHa xpaHeHne (Hanpimep,B 3mHn nepnoD) yCTpoiCTBO CNeJeT TuaTeJbHo OuNtB.
YCTpOINCTBO CNEyET XpaHnTb TOnbKO C BbIHytBM WTeKePOM NPOBOa CBeuN 3axnraHn.
XpaHbYcTpoIcTBOBcoCTOHN IROTOBHOCTN KKcnnyatauIN.
CaObBn3MeBbHTeB CneDyET TaHcNOpTIpOBaTb TOJbKO C yCTaHOBNeHHo BPOHko. OnachOCTb noJyueHn TpaBM n3-3a OTKpbITbIX HOKe!
4.9 Ytulna
Takne OTOObl, KAK OTPa60TaHHe MaCNO HIN TOINBO, CMA3OCHbIe CpeCTBa, fNtBtpbl, AkkMyJrTOpHbIe 6bataepn IN NOIOOBHbIe N3HaUNBaemblc y3JIbIMoYr TpUHNrTB BpeI JIOdAM,XKIBOTbIM IN 3KOJOrnn, NO3ToMOny OHN DOJXHbIb 6bItb yTNIN3NPOBaHbI HaNDexKaUIM o6pa3OM.
06paaItecbB Baw ceHtp no ytnn3aunnnn BnHO nHOJ cneuaan3npoBaHHbI ueHp, YTO6bl noJyntb HOpMaunO npaBnHoh ytnn3aun OTxODB. KomnaHnVIKING peKomeHdyET cneuaan3npoBaHHbI ueHtp VIKING.
CneNyET o6ecneuTb npaBnblHyO ytnn3aunO tcljxmbero yctpoiCTBa. Ipeed ytnn3aune npBBeNTe yctpoiCTBO H nepnroDHOe coCToHne. Bo n36exahne Hecacthbx CnyaeB Hado cneuaNBHO ydaJIb TnpOB D BbICOKOr HaprrkHeH, ONyCToWHTb TOnNHBbl 6ak n CInTB MOTOPHOe MacNo.
Onachoctb noIyueHn TpaBM n3-3a HOKei!
3anpeuaeTcraKkeocTbTb OTCnykBmCaOBoHmMeIbHTeJIb 6e3Ha30pa. YIOCTOBepbTecb,TO yCTpOJCTBO IN BOCoBeHHoCTn BCE HOxN, XpaHrTcB HHeOCTyHOM DnA DeTeMecTe.
5. Onicahne cIMBOJOB

BHHMaHHe!
IpeepnepBbIM npmeneHnem npoHTaTb HNCTpyKuIO NO 3Kcnnyataun.

BhimaHne!
Bpaauoouaerae Taeb.

Onachoctb noJyehn TpaBM!
Bpaauouece daTann!
Pp npabote yctpoiCTBa
pykn HnHn DoJXhbl
HaxoNTbca Ha pacCTOHHN
OT OTBepCTn.
Onachoctb noJyuHnra TpaBM!
3anpeeHNO npucytcbne NOCTOPOHNX JIUC B pa6oey 3OHe.

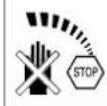
IpeepemOHTamn BbIHMaTb 1tKepe npoBoda CBeu 3aXrAHH.
BHUMAHne!
UcTpoIcTBO HINpeKyuH INHCTpymeHT NocNe BbIKIOUeHnIPOoONKaHbBpaAaTbcnO INHePcHn.


Onachoctb noyuheHn TpaBM!
He pa3pe7aetcraane3atb Ha yctpOCTBO.
Onachoctb nonyuhen TpaBM!
HeIb3a Donyckatb nonaHaHn pyk,dpyrnx TaCTe Tena,aTaKke OJExDbB 3arpy3OHyIO BOpONkynnKeIo6 BbIbPOca.


NcnoB3oBaTb 3aunTHbIe HayuHnKn!
Pa60TaB 3aunTHbIX oukax!
BoBpempa6oTbHaedeBaTb pa6oue nepaTkn!

PerynipoBka noaun TOnJIbBa:
STOP
OTKJIIOHHe NDBINrataTeIa
MIN
Hn3Ka yactota BpaueHn
MAX
BbICOKa Yactota BpaueHn
START
Pa60uee noJoxKeHne
6. KomnjeKT noctabku

No3. HAMMeHOBaHne
A 3arpy3oHaBPOHka 1
B Ba3oBoe ycTpoiCTBO 1
C CToiKa Koneca 1
D OTKnHaKa KpbIuKa 1
E HaCTaBb BbIbPoca 1
F Pnana 1
G Koneco 2
H Kolnak Koneca 2
HokBoN Dnck 1
J BnHT C rOIOBkoI Torx 5 P5x20
K1 Taimka M8 2
K2 Ctonopnra raika M8 2
L1 5aia6aA8 2
L2 1aiaA10 2
M BnHT C roJOBKOI Torx P5x50
No3. HAMMeHOBaHne
N BnHT C KpyrIoi nIOCKoI roIOBkoI M8x45
O BnHT C WeCTurpaHHOI 1 roIOBkoI M10x55
P Ctonopnhaaia 1
Q Pe3b6oBa npo6ka 2
R Bont koneca 2
S Bont 2
T OtpaKaTeIb 1
U Bepxhee pacnophoe 1 KOJIb4O
V HxHHee pacnOpHoe konb1o 1
W PpeoXpaHnteHbH 1 KOJINaQOK
X MoHTaXHbI INHCTpyMeHT 1
Y Knuc hacaikoi Torx 1
Z yHnBepcaIbHbI KJIouy 1
HCTpyKnna 1 eknyataun
1
1
Wt.
7. Побтовka устpoиства Кра6оTe
Onachoctb nonyuene TpaBm!
CneJeT cO6nIodA Tb npEaHcHn noTexnke 6e3oNaChoctn, yka3aHHbIe B rnaBe «Texnka 6e3oNaChoctn» ( 4.).
-ДяБынОнHeHЯ BCex yNOMaHyTbIX pa60YcTpOJCTBOdoJnxHO 6bIb rOp3OHTaIbHo yCTaHOBJIeHO Ha pOBHOM N TBepdOM OCHOBaHN.
7.1 MoTtak HaIcTaBkn BbI6poca
- YCTaHOBtHaCtABky BbIbPOca (E) Ha 6a3OBoe yCTpoiCTBO IN BKpyTHTB BNHTb (J) (1 - 2 Hm).
7.2 MoHTaK KOJIeC N XOJOBOI
quACTn
Ha cToiKe kOleca (C) 3aKpeNt b KaJdoe n3 Konec (G) cneBa n Cnpaba 6oTOM (R), 7aHb0n (L1) 7aHb0n (L2) nraKoK (K1).
Bdabntb konnKaKonec (H) B Koneca.
- NocTabnBCTOky KOlec Ha poBbI IN TBepdbI rpyHT, KaK Noka3aHO Ha pncyHke, n yctahOBnTB 6a30Boe yctpoiCTBO (B).
CJeBOI CTOPHOI yCTaHOBnTB BNHTbIC nlocko Kpyrno I roNBoKo (N) HABINHTnTB CTOnOpHbIe raIKu (K2),Ho He 3aTARBaTb IX. C npabO CTOPHOI BkpyNTb BNHT c roNOBKOIRx(M)(1-2HM).
3aKpyTb do oTKa3a raKn (K2) (10 - 12 Hm).

7.3 MoHTaX OTKnIHOH KpbIiKn

CaO BbI N3MeIbYHTeB6 OnpOKHyTb Ha3a.
- YctaHOBtB PnAHHKy (F) B HAcCTaBky BbIbPOCa. BkpyTHTb BnHTbl (J) (1 - 2HM).
IocTaNtBaCaObBn 13MeJbUHTeNb BepTNKaJIbHO.
- YctaHOBtB OTKnHyIO KpbIbKy (D) Ha HndCTaBky Bb6pOca. Pnp yCTaHOBKe CneIITb 3a TEM, YTO6b pe6pa (1) CNEBa N Cnpaba HA BHyTpHHeN NOBepxHOCTN KpbIbKN TOUHO nonaIaN B HAnpaBJIIOUIN Na3 HAdCTaBKn Bb6pOca (2).
BdABnTb 60JITbS) CneBa n cnpaBa.
7.4 OTKpbITNe n 3aKpbTne OTKnDHO Kn

OTKpbItb OTKnDHyu KpbIiKy:
- PnN3MeIbYeHm NOpHrTb OTKnHHyo KpbIuKy (D) HabePx N 3aUeJIKNHyTb CnKcIpyUOyIO pHaKy (1) BHaIcTaBky Bbl6poca.
3aKpbTb OTKnHyIO KpbIiKy:
- TpaHcnpTnOBKn nn KOMNaKTHOro XpaHeHn npnNoHnTb Cnerka qncuPyOuyu nHaKy (1) n OTKNHyb OTKnDHyk KpbIiKy (D) Bn3.
7.5 MoTax HOKeBOrO nCKa

Heo6xoDIMO co6nHOdaTb
IOCJIeIOBaTeJIbHOCTb MOHTaKa I
3HaueHIN MOMeHTa 3aTJXKN
52-60HM.
PnMOHTaxe CJIeINb 3a npaBnIbHbIM NIOJKeHNEM BepxHero pacnopHoro KoJIbua (U) NO OTHOseHIO K o6oM HOXAM.
- YctaHOBtB Ha KpennHeHoe HOKeBOro MExAHn3Ma 3aunTHbI KOJIpaOc (W), HIXKHee paCnpOpHoe KOJIbO (V), HOKeBOJ DNCK (I), BepXHee paCnpOpHoe KOJIbO (U), OTPaKaTeJB (T), CTOnOpHyIO Wai6y (P) INBHT (O).
Дяуджьани HoKeBOrO nCKa nCNoIb30BaTb MoHTaXHbI INCTpyMeHT (X).BkpyTtB BnHT (O) npN NOMOUs yHnBePcAblbHorO KInOua (Z) n 3aTAYtB BnHT MOneHTOM 3aTAAK52-60HM.
7.6 DEMOHTaX HOKeBOrO DnCKa
-ДяудерхиBaHЯ HOKeBOrO
ДИСКА ИСПОЛБ3OBaTБ
MOHTAXHbI INHCTpyMeHT (X).
- OTBHTb BnHT (O) yHnBepCaNbHbIM KJIQUOH (Z).
- ChTb BnHT (O), cToonOpHyu
waN6y (P), oTpaxaTeJb (T), BepxHee
pacnOpHoe KOnbUo (U) u HoXeBoi
dNCK (I).

7.7 MoTax 3arpy3oHn BOPOHKn


IpypeoTbpawueHnnoTepn noCne npBoro MOnTaKa pe3b6OBe Inpo6Kn (Q) CoeINHebl C 3aRpy3OuHOBOPHKoN.
- UCTAHOBITb pe360BbIe npo6Kn (Q) BnpoDOJIbHOe OTBepCTne 3aRpy3OuHoi BOPOHKN IN BKpyTNTb IN C yCNIeM DO OTKa3a.
- YctaHOBtB 3arpy3OHyo BOpOHky (A) Ha shapHnp (1) B6a3OBoe yCTpoiCTBO n HAKIOHTb ee Bnepe.
3aTMyTb oBe pe3b60BbI npo6Kn (Q) OdHOBpeMeHHO Do OTKa3a.
7.8 DEMOHTax 3arpy3oHOB BOPOHKn

OTKpyTb o6e pe360BbIe npo6Kn (Q)doOCTnKeHnN cx CBO6DHorO BpaueHn. OHn OCTaHTCB B 3arpy3OCHOH BOPoHKe.
- OTKHyTb 3aIpy3OHyHO BOpOHky (A) Ha3aI n CHrTb.
7.9 TOnJIINBO mOTOpHoe MaCnO


Ipeep nepBbIM nyckom 3aJntb MOTOPHOe macNo INHCTpyKUIN no 3KcNlyatauMn DInarateTIA)!
Motophoe macno
CBeHeHnO npMmEHaEMOM MOTOPHOM Macne n Tpe6yEmOM KOJInuYeCTBe MaCna BbI HauTeB VInHCTpyKuIN No 3KcNpyatauIN DBIratateN». PerjIpaHO KOHTpOINPOBaTb yPoBeHb 3aJIbKIN MacNa
(=>HCTpykunno3Kcnnyataunn DBruratela).Heh3a donyckatb HeJIOUBAHNA Macna INIINpeBbIeHNA Tpe6yemoro ypOBH MaCna.
TOnnbo
PekomeHaJn: Cbekee TOnJIbBO MapoHbIX copTOB, HOpMaJIbHbI He3TmNInPOBaHHbI 6eH3HN () IVHcTpkyu nO 3KcNpyaTuMn DBurateJr)! JnA 3anpaBKn npImeHrTb BOpOHky (He BXoNT B KOMJIneKT noCTaKn).CneJeYt co6NIOdaTb npEynpejXeHnB rnae «Texnka 6e3onacHOCTn》. ( 4.)
8. PekomeHdaun no pa6oTe

Onachoctb noJyueHnraTpaBm! CneJeYer co6nIouaTb npEiNcHnno TexHnke 6e3oNaChOCTn B rnaBe «TexHnka 6e3oNaChOCTn». ( 4.)
3arpy3ky caIIOBOrO n3MeIbHHTeIa I0JIKeH BbIIOJHrTb TOJIbKO OINH yeIOBeK.
8.1 Pa6o7a 30Ha opepaTopa
13 U3 coo6paKeHn 6e3onacHOCTn, 4TO6bI He NOLyUHTb TpaBM N3-3a Bbl6paCbIBaEMORo MaTePnaJa, onepaTOp BO Bpemr BCero nepnoDa pa60TbI (PnB BKJIOueHHOM 3JIeKToPOdBnraTeNe nIN pa6OtaUcEM DnIRatene BHyTpEHReHO CropaHnA) DOJKeH BcerdaOctBaTbCBA6Oey 3OHe (cepA o6NaCTb X).
8.2 KaKo MaTePnI MoXHo nepepa6aTbIbTa?

IcnoJIb3yra caObbln
H3MeJIbUHTeJIb,MOxHO
nepepa6aTbIBaTb 06pe3Kn
depeBbeB INN KCTOB,a
TaKKe He CInuKOM
pa3BtBHeHHbIe HcNbHo pa3BtBHeHHbIE BcTKn.
Obe3Kn IepeBBe N KycTapNkoB
CneJeT 3aKnlaDbIbA Tb B CBExKem
COCTOHN, NockoNkY
PpOn3BOJNTeJIbHOCTb N3MeJIbUHTeJI npn
3ToM JyUWe, Yem npn nepepa6OTke
BbICOXJero Nnn CbIporo MaTePnaJa.
8.3 KaKo MaTePnAn HeJIb3a nepepa6aTbIbTaB?
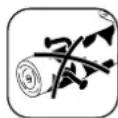
3anpeaetc3aknaDbIBaTb B caOBBn N3MeIbYnteNb KaMHn,CTEKNO, MeTaJIInueckne H3dEINr (npoBOLOKy,TBO3Dn...) INI
Пл actmaccy.
OchOBHoe npaBnIO:
MATEPNAJIb, KOTOpBIE HeIb3r
HcNIOb3OBAbT dIJI npIroTOBJeHnR
KOMIOCTa, TAKKe 3aIpeUaETcR
nepepaTaIBaTb B CaIobOM
m3MeJIbYHTeJIe.
8.4 MaKcMaJbHbI dNaMeTp BeTOK
AaHbIe OTHocTcK CBExEcpe3aHHbIM Betkam;
MaKcImaJIbHbI dHaMeTp BeTOK GB 370 S:45 MM
8.5 3anolneHne caoBoro n3MeIbYHTeTn

- Pn 3aONHeHm caOBOrO n3MeIbYHTeJI CNEyET HxOHTbcra B pa6oey 30He. ( 8.1)
He npebBwaTb MaKcMaNbHbI dNaMeTp BeTOK. ( 8.4) - Betkni CneIyET noIaBaTb CJIeRka HAKIOHNO I 3aKIIaIbIaTb INX B COOTBETCTBNI CCIMBOJOM Ha npabOri CTehke BOPOHKI, ONyCKaI Do HOKeBOrO MEXaHN3Ma.
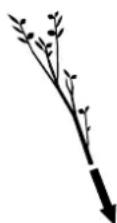
Pn3TOM TBePbI MaTepeMaI
aBTOMaTNeCKN BTAfNBAeTCN
n3MeJbUHTeIeM. Pn n3MeJIbUeHIn
dINHHbIe BetKn Heo6xOIMO
noepKbBaTb pyKo I HanpaBnTb.
8.6 IpaBnIbHna Harpy3ka yctpoIcTba
3NeKtpoDBuRatEnbNIM DBuRatEnb BHTpeHrero CropaHnra CaIOBoro
13MeIbUHTeIpa3peWaeTcHarpyKaTb
TOIbKO TaKIM O6pa3OM, YTO6bl YaCTOTa
BpaUeHnI npn 3TOM CNHXaJIacb
He3HaHTeIbHO.CaOBoB IN3MeIbUHTeIb
CleNyET BCERda 3arpyKaTb paBHOMepHO HENpepBIBHO.Ecnn Yactota BpaUeHnI
3NeKtpoDBuRatEna npn pa6oTe c
CaIOBbIM IN3MeIbUHTeIeM NaJaet, TO
CleNyET OCTaHOBt DaNbHeJWee
3aONHeHne IN3MeIbUHTeIy, YTO6bl
pa3rpy3ntb 3NeKtpoDBuRatEnb NII
DburatEnb BHTpeHrero CropaHnra.
9. 3auntthbIe yctpoNCTBa
9.1 UCTPOCTBO OCTAHOBKN DBURAteJIA
ДиraTeIb nI np pa6OuI opraH 13MeJIbChITeI MoXHO 3aNyCKaTb TOJIbKO npn ppaBnIbHO 3akpbIToI 3arpy3OuHo BOpOHke.
PnO tBNHnBaHN pe3b6oB0 np6kM co
CTOPHOI DBIRATENo BO Bpempa6oTbI
IPpePBIAeTc KOHTAKC NCTEmbl
3axIRaHH, INYeep3 HeCKOJIbKO CeKHyD
PONCXODNT ONHNA OCTaHOBKa
DBIRATeN INN OpraHa N3MeJbUeHH.
9.2 3aunthbIe KOMnOHeHTbI
CaObI N3MeIbYIeJIb OcHaIeH 3aUINTHbIMN KOMIOHeHTaMn B 30He 3aRpy3Kn N bIb6PocA. K Hm OTHOcTcR: BC3aRpy3OuHaBOPoHa C BepxHe YaCTbIO N 6pbI3ROvK, yDInHeHne Bbl6PocA, a TaXke OTKnHaHa KpbIiKa Bbl6PocA.
Pn n3MeIbYeHnn 3aunTHbIe KOMnoHeHTbI obecneuBaHOT 6e3OnaCHOe paCCToHHe OT HOKeN n3MeJIbUHTeJIra.
10.Вて徳てYeCTpoIcTBAВ pa6oTy

Onachoctb noyuHn TpaBM! NpeiHaJAMo paOtBi CneNyET BHNMaTeBHo IpoCHTaB INaBy «Texnka 6e3oNaChocTn» n co6NIOaTbe eTpe6oBaHn. ( 4.)
10.1 3anyck dBirataTeia
-Пюверпь урOBи Macna nTOnnBa. ( 7.9)

- UCTAHOBITb peryIaTOp nOaHnToJIbBa (1) B noJoxKeHne START.
TpocctapTepa(2)MeIeHNONotHyb
IO NOBHeHc CONPOTNBHeHn
HaTKeHHo,3aTeM DePhyTB,BbITAHyB
ero Ha DnHy pyKn.
MeIeHHO B03BpATNb Tpoc Ha MeCTO,
YTO6bl CTApTEp MOR npabNtHo
HAMOTaTB erO.
PiobTopr3anyck DoTexnop,Noka
DnuratJIb He 3apa6oTaet.
10.2 OTKIouHe nE dBnraTeTn
- UctaHOBtB peryIaTOp nOdauTOnnBa (1) B noLoXeHneSTOP. IocJIe KpaTKOBpeMeHHoro DBNX no INhePun DnIRaTeNb nIN pa6OpraH N3MeJIbYeHnA NOHOCbK OCTaHaBnBaIOCTcA.

10.3 N3MeJbYeHne
IocTaBbTe caObBmN3MeJbUHTeNbHa pOBHyIO TBepyIO NOBepxHOCTb, npn 3TOM ero IonoXKeHne DoJXHo 6blb yCTOnHHBIM.
HaedeThe npouhbe nepuataKn, 3aunthbte Ockn nncnoB3ynte 3aunthbte HayuHKn.
- OTKpbITb OTKnHyo KpbIuKy. ( 7.4)
3aynctntb caoobbl n3MeIbHTeIb. (10.1)
IIOJXDaTb, noka DBVaTeNb IOCTURHT MAKCIMMaHbHOuCACTOTbI BpaueHnna (aactota BpaueHnna Ha XOIOCTOM XoNy).
- PpaBnIbHo 3aRpy3ntb B caOobbl n3MeJIbYHTeNb MaTePnaJ dIy n3MeJIbYeHn. (→ 8.5)
Iocne pa6oTb caobbIn 3MeJIbYnteNb CNeyET BbIKNIOHTb ( 10.2) nOChNTb. ( 11.2)
11. Texnueckoe o6cJyXnBaHne

Onachoctb noJyueHn TpaBm!
IpeB BCEM pa6oTAM no texHmecKOMy 06CnyxHBaHIO nINO ouNCTke yCTpOcTBa Heo6xOJMO BHNMaTeNbHO npOHTaTb rABy Texnka 6e3oNaCHOCTu ( 4.) ,B oOC6eHHocTN pa3dJI TexHmecKoe 06CnyxHBaHne I peMOHT ( 4.7) ,TOHOb BBINOJHrTB BCE yKa3aAHhble TAM ppeDNCAHn NO Texnke 6e3oNaCHOCTn.

Ipeed BCempa6oTaMn noTexHneCKOMy 06CnyKbAHIO- n Ounchke CJeDeyET
BbHIMMaTb WTeKeP npoBoa cBeu3axnraHn!
11.1ДигателвHyтpenHero cropaHn
InTepBaI texHmYeckoro
06cJyKbAHn: nepeKaXdbIM npMHeHnem
Длпnpodолжнтельногорсрkaсnyкбл OCO6eHBOBaxHBIMBCERdaЯВьяETC DOCTaTOUHbIyPOBEHbMaCnla,aTakKe peRyIaPnHa3aMeHaMaCLYHbIXn BO3dyuHbIXФИNbTpOB.CobNIOdaTb yKa3AHNoуnpaBJIeHnO TEXHnueCKOMyObcnyKINBaHnIO,KOTOpbIe BbIhaIeTeBpInnaRaemOnIHCTpyKcNl no 3KcnnyatauINDbVatetIa.
Yto6bI o6ceNeHT bOCTaTOHoe oxJaXdHeHne DnurTaTeN,pe6pa oxJaXdHeHn DOJnxHbI CoepKxTaBCr BCerDa B YnCTOM COCToHn.
11.2 OuicTka yctpoiCTBa
PepnoDnHocTbTexHueckoro 06cJyKBAHN: nocne kKaDDOr npMmHeHHa
UcTpoIcTB Heo6xOaIMo TuaTeNbHO OuNtB NocJe KaKDoR OpImeHEnr. IpaBnIbHbI yXoD 3a ycTpoIcTBOM 3aunIT erO ot nobpeKeHn n yBeInuHT cPOK cnYk6bl.
PonoxeHne caoBoro n3MeIbYnteTnA DnO uNCTKn:
UcTpoIcTbOpa3peWaaETcOuIaTb TONbKO BnIOJoxKeHH, n3o6paXeHHOM Ha pncyHke.
-ДемоHTиpoBaTb 3arpy3OHyTO BOPOHky. ( 7.8)
Ecni caIobbN3MeIbYIeTb NoCTaBtB nHaYe,TO MOXHO NOBpeINTB erO (DBrIaTeB BHyTpEHHero cropaHna).
Helenb3n HapabTb Ctpy B0dHa y3bl 3NeKtpoDbBraTeI INI DBuRaTeI BHTpeHHeRo CropaHna,ynIOThEnHn OOpHbIe MeCTa,a TaKxHe Ha DeTaII 3NeKtpoo6OpdyobAHn,Kak, HanpImep,BbIKNoUaTeI.NCneCTBnEM Heco6NIODeHn 3Txu yka3aHm MoKeT CTaB DOpOroCTOuaPpeMOHT.
Ecn 3aqr3HeHn n npunuune ocTaKN He ydaetcyaJNTb c NMOUbU uETKn, BnaXHoT prAnu INn DepeBAAHOI NaOouKn, To KOMNaHn VIKING
pekomehnyet npmeharycneuaNbHbmy OuNCTNTeJIb (HaNPmep, CneuaNbHbmy OuNCTNTeJIb STIHL).
3anpeaaetcncnoB30BaTb arpeccnBhIe YNCTaHne CpeDCTBa.
PeryIaRHO npOn3BODnTb OuNCTky DnCKOBbIX HOKei.
YTo6bI o6ceuHb DoCTaTOHoe oxJaXdHeNHe DnRAteTn, CneJeTy OOnuTaB OT 3arpyr3HeHn pe6pa OxJaXdHeHn, KONEo BeHTnAITopa, O6NaCTb BOKpyr Bo3dyUHoro fInhTpA, BbIXIOI N T. I.
11.3 Texnueckoe obcnykubahne HOKei


Onachoctb noJyehn TpaBM!
Pa6oTaTb TOnbKO B npOuHbIX nepaTkax!

INTEPBAI TexHnueckoro 06cnykBaHHa: nepeKaXdbIM npImeHeHnem
-ДемоHTиpoBaTb 3aRpy3OHyIO BOPOHy. ( 7.8)
- PpOBepNTb HOKn Ha HauNue
- NOBpeKdEHN (BbIeMKn NIn TpeuHbI),
- PpOBepNTb CTeNEHb N3HOca N pN
- Heo6xOaUMocTn nepeBepHyTb IN NIn
- 3aMeHNTb.
PpeJeIbI n3Hoca HOKei:

N3HoueHHbIe HOKn Heo6xOJIMOpnepeBopauHBaTb NIN 3aMeHrTb,HeDcTtRaYka3aHHbIX npedeJIbHbIX3NaeHm IN3HOca.KOMnHaVIKING peKomeHnyet obaaTaBCB CpeuaNInpOBAHHbI cepBnchbI ceHTp VIKING.
HeoXoIMo N3MepaPacCTOHNeOTOTBepTnI Do pexyUeKpOMKn HaHOxax B HeckOJIbKnx MeCTax.MHmAlbHoE pacCToHNe 6 MM
IpebeBopauBaHne HOxKe:

Pexyue HOXN BbINOHNHeB BnDE NOBOPOTbIX HOXe.3TO O3Haayet, 4TO TYbIE HOXMOKHO OINH pa3 nepebopaunBaT, TOrda yCTpoiCTBO CHOBA rTOBO Kpa6ote. Bcerda cneNyET nepebopaunBaT o6a HOXA!
-ДемоHTnpoBaTb HOKeBOHДИСК. ( 7.6)
- OTKpyTnTB BnHTbl (1) n CHrTb nx BmecTe C raKamn (2).
BbHyTb HOxN (3) BBepx.
Ou nctntb HOKeBOI DNCK.
- Ipebebpyb HOxN (3) n octabntb nx Ha HOXeBOM DnCKE C OTKpbTOn OCTpO KnPOMKO. Pn 3Tom OTBepCTna DOJXHbI 6bTb COOChbIMN.
BCTaBnTB BnHTbI (1) B OTBepCTnI IN BkpyTnTBraIKN (2).3aTMyTbraIKN (2) MOMeHTOM 3aTAAKKN 22-28HM.
- CMOHTIpOBAbTb HOKeBOH DNCK. ( 7.5)
3aToUka HOKei:
Ipeen npoOnKeHnem pa60tbi 3aTynnHeHHbIe C o6Enx CTOpOH HOXn Heo6xoJIMO 3aToUHTb. YTO6bl o6ecneuHTb ONTmAmJIbHoe cyHKUHOHnpOBaHne yCTpoiCTBa,3aTOUYKHOKe JdoJKeHN BbINOJIHrTb CneuaNICT. KomnaHnVIKING peKOMeHnyET 6paAsaTBcB C cneuaIN3npOBaHHbI cepBnCHbI ueHTp VIKING.
-Дязаточи HOKи CneJyET ChYtB.
- Ppi 3aToUcke HOxN HAdO oxJaXdaTb, HAnpImep, BDoI. Henb3a DonyckaTb NOBJIeHnCINHeBaTOro UBeTa, TAK KAK HAue CHIXKaETc DOJROBeYHOCTb HOKeI.
3aTaunBaTb HOx npabHomepHo, UTo6bln36ExaTb Bn6paCn BCJeCTBne pa36aHaHCupOBKn.
- PepeJyctaHOBKo npoBeprTb HOxN HaOTcyTCTBne NOBpeXDeHn: HOxNdoJIxHbI 6bITb 3aMeHeHbI, eCIn BnDhbl HaceuN nIN TpeUHHbI nIN, eCnnpexyue KpOMKn n3HOWeHbI do npedeJa.
- JIe3BnH HOKeJ TOnuTb NOD yrnom 30^
3aTOky HOKeI npOn3BOoNTb npOTNB KInHka.
Iocne 3aTockn O6pa3oBaBwneCn HapeKyuEe KpOMKe BO BpeM 3aTockn 3ayceHcbl CteNyET ydaTb npN Heo6xOIMOCtN MeKoN HaJdauHOH 6yMaroi.
- Pn MOHTaKe HOKei Co6JIIOdaTb 3HaueHnM OMeHTOB 3aTJKKN B COOTBeTCTBm C daHHbIMn B pa3deJe «PepeBopaunBaHne HOKei.
11.4 Texnueckoe o6cnykBaHne KInHOBOpeMH

INHTepBaT texHnueeCKoro 06cnykuaHnna: KaKdble 10 dacob EKnnyatauinn
Bn3yaJIbHO npOBepaTb KINHOBo peMeHb Ha OTCyTCTBne N3HOca N NOBpeKdEHH, npHeo6xoDmOcTn 3aMeHrTb.
PpOBepaTb HATXKeHHe KNIHOBOrO pEmHn, B Cnyuae Heo6xoDmOcTn OtperynpoBaTb.
CnIuKOM MaIoe HaTKeHne yBeNnUHBeT N3HOC KInHOBOrO pemHry, INIINHee HaTKeHne pemHry MOKeT BbI3BaTb IOBpeXdEHHNoDUnnHKNOB. Pn HeIOCTaTKe Heo6xOIMbIX 3HaHn IJIpyIOBepKn I peryIIpOBkN KInHOBOrO pemHry 3TN pa60Tb DOJIKeH BblIOJNHrTb cNeuaJIInCT.
PpOBepKa HATXeHnKnnHOBOrOpemHr:
BbIHyTb WTeKeP npoBoa cBeu 3aXnraHna.
OTkpyTntb BnHTbI (1), HO He BbIKpyuBaTb NIOHOCTbO (OHN OCTaHOTcHa 3aUHTHOI JNaCTHe pemHra), 3aTeM CHrTb 3aUHTHyo INaCTHy pemHra (2).
Haadabntb Ha KlnHOBoB peMeHb MExdy 60bIMKINHOpeMeHHbIMu WKINBaMn 60JIbUIM NaJIbUcEM pyKn. KlnHOBoI peMeHb DOJKeH npOaBnBaTbc npN6n. Ha 10 MM.
PerynpoBka HataXeHna KlnHOberopeMHr:
- Ocna6ntb kpenneHne dBnraTeTn (6e3 pncyHa):
OTkpyTb 3 BnHTa KpeNJIeHnA DnIraTeJI, Ho He BbIKpyINBaTb INX; ydepKINBaTb raIKn Ha BepxHei NOBepxHOCTn.
HaTAYHyKINHOBpypeMeHb, noBopauHBa peryIupoBOHyO raKy (3).
- Pocne perynupOBK n ChOba 3aTHyTB BnHTb KpeIeHn I BnraTeJn U yCTaHOBnT 3aunTHyIO nlaCTnHy peMH.
11.5 3ameHa MOTOPHOro MacJa

KONUeCTBe 3aINBkMaCnA DnA CMeHbIMacna IMeOTcB INHCTpyKcuN NO3KcnnyatauIN DBuratJIa.
Pe3b6oBa np06ka macnocnBHOOTBepCTna:
OTKpyTntb BnHTbl (1), HO He BBIKpyuINBaTb NONHOCTbO (OHN OCTaHOTcHa 3aUNTHOI NpACTnHe peMH) n CHaTb 3aUNTHyIO NpACTHypeMH (2).
BbikpyTntb pe360byu npo6ky MacIOcINHBHO OTBepCTnR (3) nCInTb MOTOPHOE MaNo.
- Choba yctaHOBtbp36bOByo np06ky MacNoCnIBHOro OTBepCTna (3) n 3aINTb CBExee MOTOPHoe MaCNo. MoTHnpOBaTb 3aunTHyIO pAACTHy pemHry (2).
INHTepBaJI TexHueckoro 06cIyKuBaHHa:
PekomEnyemble INHTepBaJIb 3aMeHbI MacJa, a TaKxHe INHΦopMaζη O npIMeHReMOM MOTOPHOM MacJe I
11.6 XpaHHe n npocToB 3mHn nepno
CaObBn 3MeNbHTeJIb CneJeYET XpaHNTb B CyXOM 3aKpbBaEMOM HHeNbJIbHOM NOMEUeHN. YDOCTOBepbTEcb, YTO yCTpOJCTBO XpaHNTcBHE DOCTyNHOM DnA DeTeMecte.
CaobbI N3MeJIbUHTeJIb DOJKeH XpaHITbcB COCTOHHN,ROTOBOM K 3KcIIpyaTaUN,IN C yCTaHOBHeHHOH 3arpy3OuHO BOPOHKO.
PnDnTeBHom npocToe caOBOrO n3MeJbUHTeY (B nepNo 3mHero xpaHenry) co6KnOdaTb cNeyUouee:
TtataeIbHO OuHCTnTB BCE HapyXhBte. qactynycToPcTBA.
Bce DnKyuuecnaTeaHxopoOo Cma3aTb.
OnyctoHTb TOnJIINBHyI 6aK I Kap6Opatop (HaNPIMep, BbIPA6oTAb TOnJIINBO npu pa6OtaUcEm DBrIaTeNe BHyTpENHrero cropaHna).
BbIBNHTNb CBeBy 3aJnraHn N 3aJIbTB DnIaTeNb BHyTppeHrero CropaHn np6n.3cm3MOTOpHoro Macna Upe3 OTBepCTne DnIa CBeyn 3axnraHn. PpokpyTntb DnIraTeNb BHyTppeHrero CropaHn HeckoIbKO pa3 6e3 CBeyn 3aJnraHn.

Onachoctb noxapa!
UTeke npoBoda cBeyn 3axirahnepKaTb BdaHn OTOBpctnn noCbeuy 3axirahn (OaCHOCTbBOcPiameHenry).
BHOBB BBHNTNb CBeU 3aXnraHna.
-ПюиЗВeCTи 3aMeHy MaCnA (ИнстPyкциЯ NO ekCплуаTuaци n DBuRatЯ BHyTpEnerHo croPaHnI).
Xopoio nokpbIb,DBnraTeIb BHyTppeHrero CropaHnI XpaHHTb yCTpoiCTBOB ePTNkaJIbHOM NOJIOKeHHB CyXOM HEnblHOM NOMEuEHN.
12. CBeDeHne K MNHMMyu3Hoca N npEDoTbpaUeHneNoBpeXdeHn
Baxhhe yka3aHn no TexHueckomy 06cnykmbAHn u xOy dna cIeMyuux rpynn n3deNn
CadoBbie 6eH3nHOBBie n3MeIbYntTei
KomnaHnVIKING He Hecet HnkaKoI OTBeTCTBHeHcOHT3a NOnUyehne TpaBM n HaeneHne MaTePnAlbHO rUepe6a, KOtOpBle IPOu3OuIN BCJeDCTBue HecO6JIouDeHn IHCTpykCmIO 3KcNPyatauM, B OCo6eHHocTn B OTHoWeHn Be3ONaChOCTn, ynpabLeHn IN TexHnueCKOrO o6CnyKBaHn, mN B pe3yNbTaTe NCNoJb3OBaHn HeOnyUeHHbIX HabeCHbX y3N0B mN HeOpunHaJIbHbIX 3aAnacte.
ДлпnpedotbpaueHn BO3HKnHOBHeHn NOBpeJHn nIIN ype3MepHOro n3HocA DeTaleBawero ycToPoNCTBaVIKING 6OBaTeNbHo cO6JIOnaIte CJeDyHouNe BaxHbIe yKa3AHn:
1.БыICTpon3HaunBaIouneceKOMNOHEHTbl
HeKoTOpBie DeTaIyycTroPcTBaVIKING
dAxe npn IcNoIb3OBAHm INx nO
Ha3NaueHnIO NODBepraOTcR
HOPMaJIbHOMy I3HOCy INx HeO6XoIMo
CBOEbpemHNO 3aMeHЯTb B 3aBNCMOCTN
OT BnDa INpOdoJIkHTeJIbHOCTN
3KcNlnyatauIN.
KHMMOTHOCTCA:
-Hox
-HoKeB0IuCK
-KnHOBoPemHb
2.Co6HDoHeHne ppeHncaHn daHHo HNCTpyKuIN NO 3KcNlyaTaun
IcnoJb3oBaHne,TexHnueeckoe
obcJyKnBaHne n xpaHeHne yctpoCTBa
VIKINGdoJXhblOcUyEeCTBnTBCTOHNO
Tak,KaK OINCAHO BdaHHo INHCTpyKuNIO
3KcnNyatau. IOnJb3oBaTeJIb cam Hecet
OTBeTCTBeHHocTb 3a BCE NOBpeKeHnna
yuep6,Bbl3BaHHbIE Heco6JIIODeHnEM
npedncaHn no Texnke 6e3onacHoCTn
yka3AHnNo npaBnEHnIO yctpoCTBOM n
TexHnueckomy obcJyKnBaHnIO.
3To, B nepByIO oupeBb, pacnpoCTpaHReTcHa:
IcnoJb3ObaHne n3dennn He B COOTBETCTBnC Ha3HaueHHeM.
- IcnoJIb3OBAHnE HeIOnyUeHHbIX KOMnAHeNVIKING Cma3OuHbIX MaTePnaIaOB,6eH3nHa N MOTOpHOro MacNa (CM. INHCTpyKUnHO NO 3KnPyataun DBrTaTeJI BHyTpEnHero cropaHn).
- N3meHeHHB KOHCTpyKUNN3dEJIIN, He corJIacOBaHHbIe C KOMNaHneVIKING.
- PpimHeHne HaBeCHoro o6OpyOBoHnHa, HAcBcHbIX opyDn nnpeKyuNX INCTpyMeHTOB, He odobpeHHbIX KOMNaHneVIKING.
- PpIMHeHHe N3dEJIIN BO BpeM CnOpTnBbIX MePOnpIaTNI KOHkypCoB.
KocbeHHbIe y6bITKN Bpe3yNbTaTe nocJeDyUoEero NcONb3OBAHnN3dJIINC HeuCnpaBbIMn DeTaNAMN.
3. Pa6oTbI no TexHnueckomy 06cJyKnBaHHIO
Bce pa60tblnpueDeHHbIe Bpa3dene «TexHnueeckoe 06cnyxnbAHne»,doJXhbl BblONHrTbcpeyIaPHO.
Ecnn 3Tu pa6OtbI NOlb3ObaTeJIb He MoXeT Ipon3BOUntb CaMOCToTeJIbHO,TO Heo6xoDIMO o6paTtbcB CnueuNn3nPoBaHHbI cHTp.
KOMnHaHnVIKING peKoMeHnyeT BbIIOJIHrTa pa6Otbl IO TexO6cIyXINBaHnIO pEmOHrToIbkoB CneuAn3nPobAHHom ueHTpe VIKING.
CneuHaun3npoBaHhbie cepBnchbIeHTpbVIKINGperyIaPno npednaarot Kypcbi npedeOCTabNIO TExHueckyo HOpmaio.
B cnyae yuepe6a n3-3a nobpekdeHn BCJIeCTBHe HeBbIOJHHeHHbIX pa60T NO TEXHNueCKOMy 06ClyKJBaHIO OTBETCTBeHHOCTb Hecet NOnb3OBaTeNb.
K TaKIM NOBpeXeHnM OTHoCraTcA:
Koppo3nHbIe NOBpeKdEHNu Ipytne nocneDCTBn HEnpaBnIbHorO xpaHeHna.
-Повржденяи послдвь в pe3yIbTaTe npIMeHEnia HeopnHaJIbHbIX 3aIpaCTeVIKING.
IIOBpeKdHnB BCNEcTBne pa60T no TexHNueCKOMy 06CnyJXBaHNIO npMOHTy, KOToPbIe Ipon3BOUINLNCb He yONHNOHouEHbIMN CneluaJIInCTaMNI.
13. TpaHcnpOpTnpoBka

Onachoctb noJyehnra TpaBm!
Ipeep TpaHcnpTupOBkoBHNMaTeNbHO npOHTaTB INaBy 工 Texnka 630naCHoCTN》,BOco6eHHocTN pa3deJ TaHcnpTupOBka yCTpoiCTBaCO6IOaTb yka3aHHble TaTM Tpe6oBAHNA. ( 4.4)
13.1 NepemeeHne caoBOTo n3MeIbYnteJIa

CaO BbI N3MeBHTeYdepXnBaTb 3a BepxHIOU Yactb BOPoHN (1) nOpOKHyTb Ha3a.
- Tenepb MoKHO MeIeHHO TaIuNTb NIT TOJKAb CaIOBbN 3MeJIbYHTeNb (B TEMne Wa).
13.2 PoiBem nIepeHoc caoBOrO u3MeJIbUHTeJIa


Caobb n3MeIbYHTeB Heo6xOIMO NOHIMaTb KaK MNHmym BdBOEM BCNECTBne er0 60nbWorO Beca. B Oc06eHHocTn CNeEyET HOCNTb NOXODyU 3aunTHyIO Odekny, npednpeBy n BepxHra Yactb TeJa DOJXhbl 6bitb NnHOCTbIO NOKpbl.
- Ppi noDbem He yedpknBaTb caobb H3MeBbYnteB 3a Kopnyc cnpaBa N 3a DnraTeB cH3y CneBa.
13.3 TpaHcnpOpTnpOBkCaDoboro n3MeIbHnteHaNorpy3oYHO nnatΦopme

CaOobBn3MeNbUHTeNb CneNyET TpaHCnOpTnpOBaTb Ha NOrpy3OuHbIX NlaTΦopMax TOJbKO B OdHOM N3 NOIOXeHn, PpeDyCMOTpeHHbIX dIra OuNCtKn. ( 11.2)
- YCTPOINCTBO Heo6xOAnMo 3aKpeNJIbTb npn NOMOu NODXoAunxCpeDCTB KpeNIIeHn, YTO6bl NCKIIOHTb BO3MOXHOCTb COCKaJIb3bIBaHn. Tpocbl INJ peMHN DOJIKNbI 3aKpeNJIbTbc Ha cToiKe KOneCa (1) INI Ha 3arpy3oHoh BOPOHke (2).
14. CtaHndapTHbIe 3aunactn
HoxeBoN dncB c6ope
6903 700 5101
NobopothbHn HOx (2 wT.)
69037020101
KlnHOBoIpeMeHb
60017042100
15. Θлектрocхema coeHHeHn

1 ABnraTeIb
2БLOKINPOBOUHyBbYIKHouaTeNb
3 KneMa Ka6eJra
BK cepHbI
BR KOpuHHeBbI
BL CUNH
16. Oxpana okpykaioe cnpebl
IV3MeIbueHHbMaTePmaH He OTHOCITcKOTXoDAM,ero CJIeNyETNCIOJIb3OBAtBДЯ npiroTOBJIeHnKOMNCTa.
YnakOBka,yCTPOIcTBOn
PnHaJNExKHOCTN N3ROTOBNeHbI N3 MaTePnaIOB, PnFOJNbIX DnB BTOpUHOrO NCNoJIb3OBaHnA.
Pa3dIbHa yTuIN3aunO octaKOB MaTePnAnOB,yDObNeTbOpraIOUaer 3KOJOrnueckm Tpe6oBaHnM, CNOcO6CTByET BO3MOxHOCTN MHorokpArHO rIpmeHeHn MaTePnAnOB. IOn 3ToI npuHne nocne NCTeueHnO bHyHO cPoKa cnKy6by UcTpoiCTBO cJeNyEt OTnpaBnTb Ha nyHKyTuIN3aun.
17.Дeклараць ИЗROTOВИТЕЛС COOTBETCTBиДиpeKТИВaM EC
Mbl.
VIKING GmbH
COOTBeTCTByeT CNeIyUOuM DnIpeKtNbAm
EbponeNcKoro Coo6uEcTba (EC): 97/68/EC, 2000/14/EC, 2004/108/EC, 2006/42/EC
I3JeIe 6bIIO pa3pa6oTaHO B COOTBeTCTBmN CO CJIeNyUOuMMH HopMaMn: EN 13683
PpIMeHHbMyMeToD OceHKn COOTBeTCTBnA DnpeKtUBaM: PpIIOxKeHne VIII (2000/14/EC)
Ha3BaHne n aDpec npHmAbwei yuactne HCTaHcN:
BnurateIb CunIbHO nepepeBaetc
Bo3MOxHaa npuHa:
- Pe6pa oxnaqdeHn 3aqr3HeHbI
CnHJKOM HN3Km ypOBeHb MaCna B DnIgatene
V3MeIbIaEmbl MaTePnAn He B7rIbBaETC
Bo3moxnha npuynHa:
TynbIe HnHn HnnpaBnBHO 3aTOueHHbIe HOXN
YcTpaHeHne:
- Ipebepehyb nnn 3aToCHy HOxN; TOHcO6nHOa npn 3TOM yrO1 3aToCHn 30^ ( 11.3)
HemcnpaBHOCTb:
CHINKHeHHa npOn3BDoNTeNbHOCTb N3MeJIbYeHn
Bo3MOxHn npuHa:
-HoKn 3aTynnncb
- HenpaBnIbHo 3aToeHHbIe HOXN
-NothytbH HOXeBOH DNCK
YcTpaHeHne:
-Hoxn3aToHTbnn3aMeHHTb(11.3)
-3aToCHbHOxIN npaBnJbHo ( 11.3)
HoxeBoN Dnck npOBepntb Bn3yAJIbHO, npn Heo6xOuIMOCtN 3aMeHNTb ( 7.6)
HencnpaBHOCTb:
IbIeHHa Bn6paun Bo Bpem pa60tbl, HeOpMaHbHbe 3BykN, CTyK
Bo3MOxHa npuHna:
HOKeBOIINHIOHOHNHeCNpABHbI
- KpenneHne DnurateJe OcnaBneHo
- Ocna6JIeHbI BNHTbl
YcTpaHHeHne:
IpoBepntb n B cnyae Heo6xOIMOCn OTpeMOHTnpOBaTb HOKeBbIe DNCKN,HOXN,HOXeBOI BAJ, BNHTbI,raIKN,7aIB6bl NODUINHKN peKyuero MEXAHN3Ma
3aTMybBnHTbIKpeHnEHNABnAteN
- PpOBePntb 0KcnpoBaHHoe NOIOXKeHMe BNHTOB

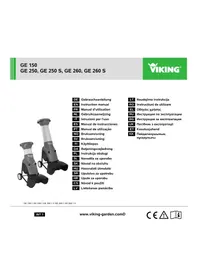
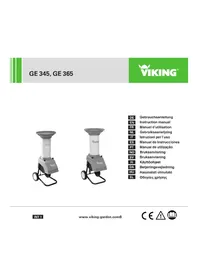
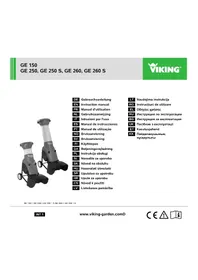
- Dr. Peter Pretzsch
- Management
- Table of contents
- Notes on the instruction manual 30
- Machine overview 31
- For your safety 31
- Description of symbols 36
- Standard equipment 37
- Preparing the machine for operation 37
- Notes on working with the machine 39
- Safety devices 39
- Initial operation of the machine 40
- Maintenance 40
- Minimising wear and preventing damage 43
- Transport 44
- Standard spare parts 44
- Circuit diagram 44
- Environmental protection 44
- CE-Manufacturer's declaration of conformity 45
- Technical specifications 45
- Troubleshooting 46
- Service schedule 47
- Notes on the instruction manual
- General
- Instructions for reading the instruction manual
- Viewing direction:
- Section reference:
- Designation of text passages:
- Texts with added significance:
- Danger
- Warning:
- Caution
- Note
- Texts relating to illustrations:
- Machine overview
- For your safety
- General
- Caution - risk of accident:
- Refilling the tank - handling petrol
- Danger to life:
- Clothing and equipment
- Transporting the machine
- Before operation
- Working with your machine
- Exhaust gases:
- Starting:
- Working:
- Risk of injury:
- Fire hazard!
- Maintenance and repairs
- Cleaning:
- Maintenance operations:
- Storage for prolonged periods without operation
- Disposal
- Risk of injury from the blades.
- 5.Description of symbols
- Caution!
- Caution:
- Risk of injury!
- Standard equipment
- Item Designation
- Qty.
- 7.Preparing the machine for operation
- Installing ejection chute extension
- Installing wheels and chassis
- Installing the discharge flap
- Opening and closing the discharge flap
- Opening the discharge flap:
- Closing the discharge flap:
- Installing the blade disc
- Removing the blade disc
- Installing the feed chute
- Removing the feed chute
- Fuel and engine oil
- Engine oil
- Fuel
- Notes on working with the machine
- Working area for operator
- What material can be processed?
- What material cannot be processed?
- As a general rule:
- Maximum branch diameter
- Feeding the garden shredder
- Correct machine load
- Safety devices
- Motorstop
- Protective covers
- Initial operation of the machine
- Starting the engine
- Stopping the engine
- Shredding
- Maintenance
- Combustion engine
- Maintenance interval:
- Before each use
- Cleaning the machine
- Maintenance interval: After each use
- Cleaning position of the garden shredder:
- Blade maintenance
- Maintenance interval: Before each use
- Wear limits of the blades:
- Reversing the blades:
- Sharpening the blades:
- V-belt maintenance
- Maintenance interval: Every 10 operating hours
- Checking V-belt tension:
- Adjusting V-belt tension:
- Changing the engine oil
- Oil drain plug:
- Storage and winter break
- Minimising wear and preventing damage
- Important information on maintenance and care of the product group
- Petrol garden shredders
- Wearing parts
- Compliance with the information in this instruction manual
- Maintenance operations
- Transport
- Pulling or pushing the garden shredder
- Lifting or carrying the garden shredder
- Transporting the garden shredder on a load floor
- Standard spare parts
- Blade disc assembly
- Reversible blade (2x)
- Circuit diagram
- Environmental protection
- CE - Manufacturer's declaration of conformity
- Technical specifications
- Troubleshooting
- Fault:
- Possible cause:
- Remedy:
- Service schedule
- Next service
- Handed over
- Montar as rodas e o chassis
- Pafylling av kompostkvernen
- Knivenes slitegrenser:
- Snu knivene:
- Varning - risk for olycksfall!
- Fejlsøgning
- w_2 = L_0l_u
- Transport uredaja
- Techninai duomenys
- Gedimu paieška
- Cuprins
- Reglaj acceleration:
- STOP
- MIN
- MAX
- START
- Ybaxaemble nokynateIn!
- CodepkaHne
- O noIb3oBaHm daHHo HnCTpyKuieNo 3KcNpyatau 426
- Oncanhe yctpoctBa 427 Texnka 6e3onachoctn 427
- OncaHne CmBOJIOB 434
- KomnneKT noctabkn 435
- IpoTobka yctpOcTBa k pa6oTe 435
- PekomeHdaaun no pa6ote 437
- BVeDenHe yCToPiCTBa B pa6OTu 438 3aNyck DnIraTeTn 438
- Texnueckoe 6cbnyxbanne 439 Bunatb BHTpeHHero cropaHn 439
- CbeHeHne K MmHmMy m3Hoca npeoTbpaueHne noBpeXdeHn 442
- TpaHcnpOpBka 443 IepemeueHne caoBoro N3MeJIbUHTeJI 443
- CTaHapThbIe 3anactn 443
- O noJb3OBAHn DaHHoH nHcTpkyuKei no 3Kcnpnyatau
- 2.1O6uaHnΦopMaun
- Ka3aHne no npoptyehnIO nHCTpykunno 3KcnJyatau
- HanpaBHeHne B3rJa:
- CcbiKaHa rnaBy:
- 06o3haeHne pa3deJIOB TeKCTa:
- TeKCTbI C DOnOpHInTeNbHO 3HaUHMoCTbIO:
- Onachoctb!
- PpeynpeXeHne!
- OctopoxHo!
- Yka3aHne
- Tektbic CcbIJKAMn Ha pncyHKn:
- OnncaHne yctpoiCTBa
- TexHnka 6e30NaCHOCTN
- 06üne cBedeHn
- BHHMaHHe - onaCHOCTb HeCuaCThblx cnlyaeb!
- 3anpaBka - o6paueHne c 6eH3nHOM
- Pa6o7a oexka n cpeiCTBa 3aunTbI
- TpaHcnpTnpoBka yctpOCTBa
- Ipepe pa6oToi
- Bo Bpempa6oTbI
- Otpa60taBwne ra3bl:
- Onachoctb dnia kni3Hn BCJeCDTBne OTPaBneHn!
- 3anyck:
- BoBpempa60tbl:
- Onachoctb noJyueHn TpaBM!
- Onachoctb noxapa!
- TexHnueckoe 06cIyXnBaHne n peMOHTbl
- Onachoctb oxorob!
- OuInctka:
- Pa60tblnoTexHnueckomy 06cJyKmBAHHo:
- XpaHeHne npn dInTeJIbHbIX nepepbIbax B pa60Te
- Ytulna
- Onachoctb noIyueHn TpaBM n3-3a HOKei!
- Onicahne cIMBOJOB
- BHHMaHHe!
- BhimaHne!
- Onachoctb noJyehn TpaBM!
- Onachoctb noJyuHnra TpaBM!
- BHUMAHne!
- Onachoctb noyuheHn TpaBM!
- Onachoctb nonyuhen TpaBM!
- NcnoB3oBaTb 3aunTHbIe HayuHnKn!
- PerynipoBka noaun TOnJIbBa:
- KomnjeKT noctabku
- No3. HAMMeHOBaHne
- Wt.
- Побтовka устpoиства Кра6оTe
- Onachoctb nonyuene TpaBm!
- MoTtak HaIcTaBkn BbI6poca
- MoHTaK KOJIeC N XOJOBOI
- quACTn
- MoHTaX OTKnIHOH KpbIiKn
- OTKpbITNe n 3aKpbTne OTKnDHO Kn
- OTKpbItb OTKnDHyu KpbIiKy:
- 3aKpbTb OTKnHyIO KpbIiKy:
- MoTax HOKeBOrO nCKa
- DEMOHTaX HOKeBOrO DnCKa
- MoTax 3arpy3oHn BOPOHKn
- DEMOHTax 3arpy3oHOB BOPOHKn
- TOnJIINBO mOTOpHoe MaCnO
- Motophoe macno
- TOnnbo
- PekomeHdaun no pa6oTe
- Pa6o7a 30Ha opepaTopa
- KaKo MaTePnI MoXHo nepepa6aTbIbTa?
- KaKo MaTePnAn HeJIb3a nepepa6aTbIbTaB?
- OchOBHoe npaBnIO:
- MaKcMaJbHbI dNaMeTp BeTOK
- 3anolneHne caoBoro n3MeIbYHTeTn
- IpaBnIbHna Harpy3ka yctpoIcTba
- 3auntthbIe yctpoNCTBa
- UCTPOCTBO OCTAHOBKN DBURAteJIA
- 3aunthbIe KOMnOHeHTbI
- 10.Вて徳てYeCTpoIcTBAВ pa6oTy
- 3anyck dBirataTeia
- OTKIouHe nE dBnraTeTn
- N3MeJbYeHne
- Texnueckoe o6cJyXnBaHne
- 11.1ДигателвHyтpenHero cropaHn
- InTepBaI texHmYeckoro
- 06cJyKbAHn: nepeKaXdbIM npMHeHnem
- OuicTka yctpoiCTBa
- PepnoDnHocTbTexHueckoro 06cJyKBAHN: nocne kKaDDOr npMmHeHHa
- PonoxeHne caoBoro n3MeIbYnteTnA DnO uNCTKn:
- Texnueckoe obcnykubahne HOKei
- INTEPBAI TexHnueckoro 06cnykBaHHa: nepeKaXdbIM npImeHeHnem
- PpeJeIbI n3Hoca HOKei:
- IpebeBopauBaHne HOxKe:
- 3aToUka HOKei:
- Texnueckoe o6cnykBaHne KInHOBOpeMH
- INHTepBaT texHnueeCKoro 06cnykuaHnna: KaKdble 10 dacob EKnnyatauinn
- PpOBepKa HATXeHnKnnHOBOrOpemHr:
- PerynpoBka HataXeHna KlnHOberopeMHr:
- 3ameHa MOTOPHOro MacJa
- Pe3b6oBa np06ka macnocnBHOOTBepCTna:
- INHTepBaJI TexHueckoro 06cIyKuBaHHa:
- XpaHHe n npocToB 3mHn nepno
- CBeDeHne K MNHMMyu3Hoca N npEDoTbpaUeHneNoBpeXdeHn
- Baxhhe yka3aHn no TexHueckomy 06cnykmbAHn u xOy dna cIeMyuux rpynn n3deNn
- CadoBbie 6eH3nHOBBie n3MeIbYntTei
- 1.БыICTpon3HaunBaIouneceKOMNOHEHTbl
- 2.Co6HDoHeHne ppeHncaHn daHHo HNCTpyKuIN NO 3KcNlyaTaun
- Pa6oTbI no TexHnueckomy 06cJyKnBaHHIO
- TpaHcnpOpTnpoBka
- Onachoctb noJyehnra TpaBm!
- NepemeeHne caoBOTo n3MeIbYnteJIa
- PoiBem nIepeHoc caoBOrO u3MeJIbUHTeJIa
- TpaHcnpOpTnpOBkCaDoboro n3MeIbHnteHaNorpy3oYHO nnatΦopme
- CtaHndapTHbIe 3aunactn
- Θлектрocхema coeHHeHn
- Oxpana okpykaioe cnpebl
- 17.Дeклараць ИЗROTOВИТЕЛС COOTBETCTBиДиpeKТИВaM EC
- Bo3MOxHaa npuHa:
- Bo3moxnha npuynHa:
- YcTpaHeHne:
- HemcnpaBHOCTb:
- Bo3MOxHn npuHa:
- HencnpaBHOCTb:
- Bo3MOxHa npuHna:
- YcTpaHHeHne:
Brand : VIKING
Model : GB 370 S
Category : Mechanical chipper