
SCW 70 - Saw HILTI - Free user manual and instructions
Find the device manual for free SCW 70 HILTI in PDF.
| Product type | Hand-guided circular saw |
| Brand | Hilti |
| Model | SCW 70 |
| Power supply | 230-240 V, 50-60 Hz, 1,700 W |
| Weight | 5.3 kg |
| Dimensions (L × l × h) | 317 × 236 × 269 mm |
| Max. blade diameter | 190 mm |
| Maximum cutting depth | 67 mm (0°), 49 mm (45°), 38 mm (56°) |
| No-load speed | 5,800 rpm |
| Bevel angle | 0° to 56° |
| Protection class | II (double insulation) |
| Cable length | 2.5 m |
| Sound pressure level (LpA) | 89 dB(A) |
| Sound power level | 100 dB(A) |
| Base plate | 290 × 170 mm |
| Main functions | Rip cuts, bevel cuts, plunge cuts (with oscillating guard) |
| Maintenance and cleaning | Regularly clean the chip ejection channel, use a dry brush |
| Safety | Oscillating lower guard, spindle lock, double insulation |
| Spare parts and repairability | Spare parts available from Hilti after-sales service, repair by qualified personnel |
| Warranty | Manufacturer's warranty according to Hilti conditions |
Frequently Asked Questions - SCW 70 HILTI
User questions about SCW 70 HILTI
0 question about this device. Answer the ones you know or ask your own.
Ask a new question about this device
Download the instructions for your Saw in PDF format for free! Find your manual SCW 70 - HILTI and take your electronic device back in hand. On this page are published all the documents necessary for the use of your device. SCW 70 by HILTI.
USER MANUAL SCW 70 HILTI
Head of BA Quality and Process Management
Business Area Electric Tools & Acces
series
01/2012
Jan Doongaji
Executive Vice President
Business Unit Power
Tools & Accessories
01/2012
It is essential that the operating instruct are read before the power tool is open the first time.
Always keep these operating instructions gather with the power tool.
Ensure that the operating instructions with the power tool when it is given persons.
Contents Page
1 General information 14
2 Description 15
3 Insert tools, accessories 17
4 Technical data 17
5 Safety instructions 18
6 Operation 21
7 Care and maintenance 24
8 Troubleshooting 24
9 Disposal
0 Manufacturer's warranty - tools 25
11 EC declaration of conformity (original) 25
These numbers refer to the corresponding illustrations. The illustrations can be found on the fold-out pages. Keep these pages open while studying the operating instructions.
In these operating instructions, the designation "the power tool" always refers to the SCW 70 / WSC 7.25 circulare saw.
Components, operating controls and indicators 10
(1) On / off switch
② Auxiliary grip
3Briepindle lockbutton
(4) Hexagon socket wrench
(5) Cutting angle scale
(6) Clamping lever for cutting angle adjustment
(7) Clamping screw for rip fence
Clamping lever for cutting depth adjustment
(9) 45^ cutting line indicator
⑩ 0°cutting line indicator
(1) Parallel guide (rip fence)
⑫ Pivoting guard
13 Base plate
(14) Guard
15 Drive spindle
16 Mounting flange
⑦ Clamping flange
18 Clamping screw
19 Cutting depth scale
② Pivoting guard operating lever
21 Hose connector (vacuum cleaner)
22 Cutting angle setting
23 LED
Guide rail adapter 2
Rear retaining lug
② Front retaining lug
1 General information
1.1 Safety notices and their meaning
DANGER
Draws attention to imminent danger that will lead to serious bodily injury or fatality.
WARNING
- Draws attention to a potentially dangerous situation that could lead to serious personal injury or fatality.
CAUTION
Draws attention to a potentially dangerous situation that could lead to slight personal injury or damage to the equipment or other property.
NOTE
Draws attention to an instruction or other useful information.
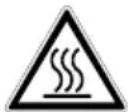
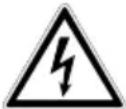
1.2 Explanation of the pictograms and other information
Warning signs

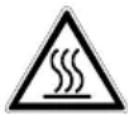
General warning

Warning: electricity
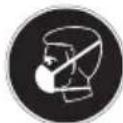
Obligation signs

Wear eye protection

Wear a hard hat

Wear ear protection

Wear protective gloves
Wear breathing protection
Symbols

Read the operating instructions before use

Return waste material for recycling.

Volts Alternating current

Rated speed under no load

Revolutions per minute


Diameter Saw blade
2 Description
2.1 Use of the product as directed
The power tool is a hand-guided circular saw.
The power tool is designed for cutting wood or wood-like materials, plastics, gypsum plasterboard, gypsum fiberboard and composites up to a cutting depth of approx. 70mm and for making bevel cuts at angles between 0^ and 56^ .
Working on materials hazardous to the health (e.g. asbestos) is not permissible.
The power tool is designed for professional use and may be operated, serviced and maintained only by trained, authorized personnel. This personnel must be informed of any special hazards that may be encountered. The power tool and its ancillary equipment may present hazards when used incorrectly by untrained personnel or when used not as directed.
The working environment may be as follows: construction site, workshop, renovation, conversion or new construction. The power tool may be operated only when connected to a power supply providing a voltage and frequency in compliance with the information given on its type identification plate.
The use of saw blades not in compliance with the given specification (e.g. diameter, speed of rotation, thickness) the use of cutting and grinding discs or blades made from high-alloy steel (HSS steel) is not permissible.
Sawing metals is not permissible.
Do not use the power tool to cut tree branches or logs.
To avoid the risk of injury, use only genuine Hilti accessories and insert tools.
Observe the information printed in the operating instructions concerning operation, care and maintenance.
Modification of the power tool or tampering with its parts is not permissible.
Location of identification data on the power tool The type designation and serial number can be found on the type identification plate on the machine or tool. Make anoteofthisdatainyouroperatin g and always refer to it when making an enquiry to your Hilti representative or service department.
Type:
Generation: 01/02
Serial no.:

2.2 Switches
On / off switch
2.3 Grips
Grip and auxiliary grip
2.4 Protective devices
Blade guard and pendulum-type blade guard
2.5 Lubrication
Grease lubrication
2.6 Items supplied as standard
1 Power tool
1 Sawa w b l a d e
1 Operating instructions
1 Hexagon socket wrench
1 Parallel guide (rip fence)
1 Hilti cardboard box or toolbox
2.7 Using extension cords
Use only extension cords of a type approved for the application and with conductors of adequate cross section. The power tool may otherwise lose performance and the extension cord may overheat. Check the extension cord for damage at regular intervals. Replace damaged extension cords.
Recommended minimum conductor cross section and max. cable lengths
| Conductor cross section | 1.5 mm2 2.0 m | mm2 2.5 mm2 3.5 | mm2 | |
| Mains voltage 110-120 V 15 m 25 m | ||||
| Mains voltage 220-230 V 60 m 100 m | ||||
Do not use extension cords with 1.25mm^2 conductor cross section.
2.8 Using extension cords outdoors
When working outdoors, use only extension cords that are approved and correspondingly marked for this application.
2.9 Using a generator or transformer
This power tool may be powered by a generator or transformer when the following conditions are fulfilled: The unit must provide a power output in watts of at least twice the value printed on the type identification plate on the power tool. The operating voltage must remain within +5% and -15% of the rated voltage at all times, frequency must be in the 50 - 60 Hz range and never above 65 Hz, and the unit must be equipped with automatic voltage regulation and starting boost.
Never operate other power tools or appliances from the generator or transformer at the same time. Switching other power tools or appliances on and off may cause undervoltage and / or overvoltage peaks, resulting in damage to the power tool.
| 3 Insert tools, accessories | |
| Accessories for the SCW 70 | |
| Designation Description | |
| Parallel guide (rip fence) | |
| Guide rail WGS 1400-2B | |
| Guide rail adapter | |
| Recommended saw blade for the SCW 70 | |
| Designation | Short designation |
| Saw blade W-CSC 190x30 z24 A | |
| Recommended saw blade for the WSC 7.25-S | |
| Designation | Short designation |
| Saw blade W-CSC 7 1/4x5/8 t24 GP | |
4 Technical data
Right of technical changes reserved.
| Rated voltage 100 V 110 V 220 V 230-240 V | |||
| Rated power input 1,430 W 1,550 W 1,700 W 1,700 W | |||
| Rated current input 15 A 15 A 8.1 A 7.5 A | |||
| Mains frequency 50...60 Hz | 50...60 Hz | 50...60 Hz | 50...60 Hz |
NOTE
This equipment complies with the applicable standard provided that the maximum permissible mains supply impedance (Zmax) at the point where the user's installation is connected to the public supply network is less than or equal to 0.370 + j0.25 . It is the responsibility of the installer or user of the equipment to ensure, by consultation with the supply network operator if necessary, that the equipment is connected only at a point in the supply with an impedance of less than or equal to Zmax.
| Power tool | SCW 70 | WSC 7.25-S |
| Weight in accordance with EPTA procedure 01/2003 | 5.3 kg | 5.3 kg |
| Supply cord length | 2.5 m | 2.5 m |
| Dimensions (L x W x H) | 317 mm x 236 mm x 269 mm | 317 mm x 236 mm x 269 mm |
| Base plate | 290 mm x 170 mm | 290 mm x 170 mm |
| Maximum saw blade diameter | 190 mm | 190 mm |
| Minimum saw blade diameter | 184 mm | 184 mm |
| Saw blade disc thickness | 1.1...1.5 mm | 1.1...1.5 mm |
| Kerf width | 1.7...2.3 mm | 1.7...2.3 mm |
| Saw blade arbour size | 30 mm | 15.88 mm (%ill) |
| Cutting depth | Cutting angle 0°: 67 mm Cutting angle 45°: 49 mm Cutting angle 56°: 38 mm | Cutting angle 0°: 64 mm Cutting angle 45°: 47 mm Cutting angle 56°: 37 mm |
| Speed under no load | 5,800/min | 5,800/min |
NOTE
The vibration emission level given in this information sheet has been measured in accordance with a standardized test given in EN 60745 and may be used to compare one tool with another. It may be used for a preliminary assessment
of exposure. The declared vibration emission level represents the main applications of the tool. However if the tool is used for different applications, with different accessories or poorly maintained, the vibration emission may differ. This may significantly increase the exposure level over the total working period. An estimation of the level of exposure vibration should also take into account the times when the tool is switched off or when it is running but not actually doing the job. This may significantly reduce the exposure level over the total working period. Identify additional safety measures to protect the operator from the effects of vibration such as: maintain the tool and the accessories, keep the hands warm, organization of work patterns.
en
Noise and vibration information for the SCW 70 / WSC 7.25-S (measured in accordance with EN 60745-2-5):
| Typical A-weighted sound power level 100 dB (A) |
| Typical A-weighted emission sound pressure level 89 dB (A) |
| Uncertainty for the given sound level 3 dB (A) |
Triaxial vibration values (vibration vector sum)
| Sawing in wood,ha | 2.5 m/s2 |
| Uncertainty (K) 1.5 m/s2 |
Other information about the power tool
Protection class Protection class II (double insulated), see rating plate
5 Safety instructions
5.1 General Power Tool SafetyWarnings
a) !WARNING
Read all safety warnings and all instructions.
ure to follow the warnings and instructions may result in electric shock, fire and/or serious injury. Save all warnings and instructions for future reference.
The term "power tool" in the warnings refers to your mains-operated (cored) power tool or battery-operated (cordless) power tool.
5.1.1 Work area safety
a) Keep work area clean and well lit. Cluttered or dark areas invite accidents.
b) Do not operate power tools in explosive spheres, such as in the presence of flame liquids, gases or dust. Power tools create sp which may ignite the dust or fumes.
c) Keep children and bystanders away while ing a power tool. Distractions can cause you control.
5.1.2 Electrical safety
a) Power tool plugs must match the outlet. Modify the plug in any way. Do not use apter plugs with earthed (grounded) power Unmodified plugs and matching outlets will reduce risk of electric shock.
b) Avoid body contact with earthed or grounded surfaces, such as pipes, radiators, ranges a refrigerators. There is an increased risk of electric shock if your body is earthed or grounded.
c) Do not expose power tools to rain or wet tions. Water entering a power tool will increase the risk of electric shock.
(d) Do not abuse the cord. Never use the cord for carrying, pulling or unplugging the power tool. Keep cord away from heat, oil, sharp edges or pins. Praying parts. Damaged or entangled cords increase the risk of electric shock.
(1) When operating a power tool outdoors, use an extension cord suitable for outdoor use. Use of a cord suitable for outdoor use reduces the risk of electric shock.
f) If operating a power tool in a damp location unavoidable, use a residual current device (RCD) protected supply. Use of an RCD reduces the risk of electric shock.
5.1.3 Personal safety atmo
a) Stay alert, watch what you are doing and use a common sense when operating a power tool. Do not use a power tool while you are tired or the influence of drugs, alcohol or medication. As a moment of inattention while operating power tools may result in serious personal injury.
b) Use personal protective equipment. Always wear eye protection. Protective equipment such as dust mask, non-skid safety shoes, hard hat, or hearing protection used for appropriate conditions will reduce any adpersonal injuries.
C) Prevent unintentional starting. Ensure the switch is in the off-position before connecting to power source and/or battery pack, picking up or carrying the tool. Carrying power tools with your finger on the switch or energising power tools that have the switch on invites accidents.
(d) Remove any adjusting key or wrench before tuning the condi-the power tool on. A wrench or a key left at
tached to a rotating part of the power tool may in personal injury.
e) Do not overreach. Keep proper footing and ance at all times. This enables better control power tool in unexpected situations.
f) Dress properly. Do not wear loose clothing, jewellery. Keep your hair, clothing and glove away from moving parts. Loose clothes, jewe or long hair can be caught in moving parts.
g) If devices are provided for the connection, extraction and collection facilities, ensure that are connected and properly used. Use of a collection can reduce dust-related hazards.
5.1.4 Power tool use and care
a) Do not force the power tool. Use the core power tool for your application. The correct tool will do the job better and safer at the rate it which it was designed.
b) Do not use the power tool if the switch turn it on and off. Any power tool that can controlled with the switch is dangerous and must repaired.
c) Disconnect the plug from the power source and/or the battery pack from the power before making any adjustments, changing accessories, or storing power tools. Such preventive safety measures reduce the risk of starting the power tool accidentally.
d) Store idle power tools out of the reach dren and do not allow persons unfamiliar power tool or these instructions to operat power tool. Power tools are dangerous in the of untrained users.
e) Maintain power tools. Check for misalignment binding of moving parts, breakage of parts any other condition that may affect the power tool's operation. If damaged, have the pov repaired before use. Many accidents are caused poorly maintained power tools.
f) Keep cutting tools sharp and clean. Properly maintained cutting tools with sharp cutting edges are likely to bind and are easier to control.
g) Use the power tool, accessories and tool in accordance with these instructions, taking account the working conditions and the work be performed. Use of the power tool for operations different from those intended could result in hazardous situation.
5.1.5 Service
a) Have your power tool serviced by a qualified repair person using only identical replacement parts. This will ensure that the safety of the power tool is maintained.
reg.2 Safety instructions for all saws
5.2.1 Cutting procedures
the DANGER
Keep hands away from cutting area and the blade.
or Keep your second hand on auxiliary handle, or motor housing. If both hands are holding the saw, they cannot be cut by the blade.
b) Do not reach underneath the workpiece. The guard
of dunhot protect you from the blade below the work- these piece.
Adjust the cutting depth to the thickness of the workpiece. Less than a full tooth of the blade teeth should be visible below the workpiece.
d) Never hold piece being cut in your hands or across
Correct your leg. Secure the workpiece to a stable place with powerform. It is important to support the work properly to avoid minimize body exposure, blade binding, or loss of control.
Does the power tool by insulated gripping surnot be, only, when performing an operation where be the cutting tool may contact hidden wiring or own cord. Contact with a "live" wire will also make exposed metal parts of the power tool "live" and tool could give the operator an electric shock.
f) When ripping always use a rip fence or straight edge guide. This improves the accuracy of cut and reduces the chance of blade binding.
g) Always use blades with correct size and shape (of chidiamond versus round) of arbour holes. Blades with the do not match the mounting hardware of the saw. Use the will run eccentrically, causing loss of control.
hand Never use damaged or incorrect blade washers or bolt. The blade washers and bolt were specially int odesigned for your saw, for optimum performance and andsafety of operation.
Over 2.201 Further safety instructions for all saws and trackback causes and related warnings
kickback is a sudden reaction to a pinched, bound or misaligned saw blade, causing an uncontrolled saw to lift up and out of the workpiece toward the operator;
when the blade is pinched or bound tightly by the kerf.
Closing down, the blade stalls and the motor reaction
drives into the unit rapidly back toward the operator;
Work the blade becomes twisted or misaligned in the cut, then teeth at the back edge of the blade can dig into the top surface of the wood causing the blade to climb out of the kerf and jump back toward the operator.
Kickback is the result of saw misuse and/or incorrect operating procedures or conditions and can be avoided by taking proper precautions as given below.
Maintain a firm grip with both hands on the s and position your arms to resist kickback force Position your body to either side of the blade,
notinlinewiththeblade.Kickback could cause path. Be aware of the time it takes for the blade to saw to jump backwards, but kickback forces can be stop after switch is released. controlled by the operator, if proper precautions are taken. 53 Additional safety instructions
b) When blade is binding, or when interrupting cut for any reason, release the trigger and the saw motionless in the material until it comes to a complete stop. Never attempt move the saw from the work or pull the ward while the blade is in motion or kid may occur. Investigate and take corrective action to eliminate the cause of blade binding.
c) When restarting a saw in the workpiece, the saw blade in the kerf and check that teeth are not engaged into the material. blade is binding, it may walk up or kickback from workpiece as the saw is restarted.
d) Support large panels to minimise the risk pinching and kickback. Large panels tend to under their own weight. Supports must be placed under the panel on both sides, near the line of and near the edge of the panel.
e) Do not use dull or damaged blades. Unsh or improperly set blades produce narrow kerf caue excessive friction, blade binding and kickback.
f) Blade depth and bevel adjusting locking lev must be tight and secure before making blade adjustment shifts while cutting, it may cause binding and kickback.
g) Use extra caution when sawing into existing or other blind areas. The protruding blade m objects that can cause kickback.
5.2.3 Safety instructions for circular saws with outer pendulum guard
Lower guard function
a) Check lower guard for proper closing before use. Do not operate the saw if lower gun not move freely and close instantly. Never or tie the lower guard into the open pot is accidentally dropped, lower guard may be bent. Raise the lower guard with the retracting handle make sure it moves freely and does not touch the blade or any other part, in all angles and depths cut.
b) Check the operation of the lower guard s If the guard and the spring are not ope properly, they must be serviced before us guard may operate sluggishly due to damaged pa gummy deposits, or a build-up of debris.
c) Lower guard may be retracted manually or special cuts such as "plunge cuts" and "pound cuts." Raise lower guard by retract handle and as soon as blade enters the ial, the lower guard must be released. Fo sawing, the lower guard should operate automat i ally.
d) Always observe that the lower guard is c the blade before placing saw down on b floor. An unprotected, coasting blade will cause saw to walk backwards, cutting whatever is in its
5.3 Additional safety instructions
5thPersonal safety
the) Made ear protectors. Exposure to noise can cause to hearing loss.
bawackhold the power tool securely with both kbackbands on the grips provided. Keep the grips clean and free from oil and grease.
c) Breathing protection must be worn if the power centre tool is used without a dust removal system for sawwork that creates dust.
If da do not operate the power tool without the program on the tective devices that belong to it.
e) Operate the power tool only as intended and w of bitadis in faultless condition.
$ a# Improve the blood circulation in your fingers by relaxing your hands and exercising your fingers cut during breaks between working.
g) Switch the power tool on only after bringing it to carpen position at the workpiece.
Using Always guide the power tool away from your bus when working with it.
We'll Do not work with the power tool overhead.
cut.Dof not attempt to brake the speed of the saw blade by pressing it to the side.
k) Do not touch the clamping flange or the clamping wallsw while the power tool is running.
ay) The kerf must be free of obstructions. Do not into screws and nails etc.
m) Never press the drive spindle lockbutton while saw blade is rotating.
n) Never direct the power tool toward persons.
o) Children must be instructed not to play with the power tool.
(rep) each power tool is not intended for use by children. Hard to do debilitated persons or those who have received a clamp instruction or training.
sion Adjust saw the pressure applied to the saw blade a
and the material being cut so that the blade does
stall, possibly causing the power tool to kick I
er) Avoid overheating the tips of the saw blade to
os) When cutting plastics, melting of the plastic
should be avoided.
Before beginning the work, check the hazard clas-. ratingsification of the dust that will be produced. Use e. Lower an industrial vacuum cleaner with an officially approved protection classification in compliance with locally applicable dust protection regula- ally for tions.
com Dust from material such as paint containing lead,
ing some wood species, minerals and metal may be
mater harmful. Contact with or inhalation of the dust may
or all cause allergic reactions and/or respiratory diseases
to the operator or bystanders. Certain kinds of dust
are classified as carcinogenic such as oak and beech
Covering just especially in conjunction with additives for wood bench conditioning (chromate, wood preservative). Material the
containing asbestos must only be treated by special- is damaged accidentally. This presents a serious risk ists. Where the use of a dust extraction device of electric shock.
high Alvea's lead the supply cord and extension cord cleay from the power tool to the rear while v od diug. This helps to avoid tripping over the cord while Enwrking.
5.3.2 Power tool use and care
a) Hold power tool by insulated gripping surface when performing an operation where the may contact hidden wiring or its own covers contacting a "live" wire may make exposed parts of the power tool "live" and could give the operator an electric shock.
b) Secure the workpiece. Use clamps or a secure the workpiece. The workpiece is thus more securely than by hand and both hands remain free to operate the power tool.
c) Check that the insert tools used are com with the chuck system and that they are in the chuck correctly.
5.3.3 Electrical safety
a) Before beginning work, check the working (e.g. using a metal detector) to ensure the concealed electric cables or gas and water are present. External metal parts of the power may become live, for example, when an electric
ace53.4 Work area
taste sure that the workplace is well lit.
d) Ensure that the workplace is well ventilated. Ex- metal posure to dust at a poorly ventilated workplace may result in damage to the health.
ice5.36 Personal protective equipment
I held

secured


The user and any other persons in the vicinity m wear suitable eye protection, a hard hat, ear prot tion, protective gloves and breathing protection while tool is in use.
at no
r 5potes Protective devices
toole not switch the power tool on if the saw blac cable the blade guard or the pivoting guard are not fit correctly.
6Operation

CAUTION
Wear protective gloves. The cutting edges of the saw blade teeth are sharp. The cutting edges may present a risk of injury.
CAUTION
Wear protective glasses and a dust mask. The sawing operation swirls up dust and wood chips into the air. The dust and wood chips may be harmful to the eyes and respiratory system.
CAUTION
Wear ear protectors. The power tool and the sawing operation generate noise. Exposure to noise can cause loss of hearing.
6.1 Changing the saw blade

CAUTION
Wear protective gloves when changing blades.
blade, the clamping flange and the clamping screw hot.
CAUTION
Check that the bladetobefitted c technical requirements and that it is well sh sharp saw blade is an essential requirement for a pe cut.
6.1.1 Removing the saw blade 3
- Disconnect the supply cord plug from the power outlet.
- Press the drive spindle lockbutton.
- Turn the saw blade clamping screw with the hex.
socket wrench until the locking pin engages fully. - Use the hex. socket wrench to release the clamp by screw by turning it counterclockwise.
- Removethe clamping screw from the outer clamp of flange.
- Open the pivoting guard by swinging it to the side and then remove the saw blade.
6.1.2 Fitting the saw blade
- Disconnect the supply cord plug from the power outlet.
- Clean the mounting flange and the clamping flange
- Fit the mounting flange.
- Open the pivoting guard.
- CAUTION Observe the direction-of-rotation a row on the saw blade.
Fit the new saw blade.
- Fit the outer clamping flange.
- Secure the clamping flange by tightening the clamping screw in a clockwise direction. When doing the press the spindle button moving the blade).
- Before using the power tool, check that the saw blade is securely attached.
6.2 Adjusting the cutting depth 4
NOTE
The cutting depth should always be set to a depth at 5 to 10mm greater than the thickness of the material to be cut.
The cutting depth can be adjusted stepplessly between 0 and approx. 70~mm
- Disconnect the supply cord plug from the power outlet.
-
Place the power tool on a supporting surface.
-
Release the cutting depth adjustment clamping lever The set cutting depth is indicated by the arrow on the scale on the gear housing.
- Lift the power tool in a scissor movement and set the desired cutting depth by closing the clamping lever.
Tθ3 Adjusting the cutting angle 5
The saw can be set to any angle between 0 and 56^ for bevel cuts.
6.3.1 Presetting the bevel cutting angle
- Presetswits are possible: 22.5^ 45^ and 56^ . Perpened. A
Effect Disconnect the supply cord plug from the power outlet.
2. Release the cutting angle adjustment clamping lever.
3. Pivot the base plate to the 0^ position.
4. Set the preset angle indicator to the desired angle.
5. Pivot the base plate as far as it will go.
6. Tighten the cutting angle adjustment clamping lever.
ng6.3.2 Setting the bevel cutting angle without presetting
g1. Disconnect the supply cord plug from the power outlet.
e2. Release the cutting angle adjustment clamping lever.
- Pivot the base plate to the desired angle setting.
- Tighten the cutting angle adjustment clamping lever.
6.4 Sawing along a line
There is a cutting line indicator for straight cuts or bevel cuts (0^ and 45^) at the front section of the base plate of the power tool. This permits precise cuts to be made at the selected cutting angle. The edge of the line indicator corresponds to the inside of the saw blade. There is a cutting line indicator at the opening for the saw blade at the front end of the base plate.
1 Secure the workpiece so that it cannot move.
02 Position the workpiece so that the saw blade is free.
As a s b e f move under the workpiece.
3. Check to ensure that the switch on the power tool is in the off-position.
4. Plug the supply cord into the power outlet.
5. Place the power tool with the base plate on the workpiece in such a way that the blade still has no contact with the workpiece.
Approach the on/off switch.
jaiF.toGuide the power tool along the cutting line on the workpiece at a suitable speed.
6.5 Sawing with the parallel guide (rip fence)
The parallel guide (rip fence) can be used to make accurate cuts along the edge of a workpiece or to cut strips of equal width.
The parallel guide can be fitted on either side of the plate.
6.6 Fitting / adjusting the parallel guide 6
- Disconnect the supply cord plug from the power outlet.
- Slidetheripfenceguideunderthecla
- Set the desired cutting width.
- Tighten the clamping screw.
6.7 Using the saw on the guide rail 7
NOTE
Using the saw on the guide rail can reduce the risk kickback.
6.7.1 Inserting / removing the tool from the rail adapter
- Remove the rip fence, if one is fitted.
- Fit the front edge of the base plate into the front retaining lugs on the guide rail adapter.
- Swing the rear edge of the base plate down fully into the guide rail adapter.
The base plate must engage fully with the rear retaining lug.
- To remove the tool, pull the rear retaining lug back slightly and lift the tool up out of the guide rail adapter.
6.7.2 Longitudinal cuts at 0°
- Place the saw on the guide rail so that the rib fits in the groove in the adapter.
6.7.3 Longitudinal cuts at up to 56°
Guide the saw so that the outer edge of the guide adapter runs along the rib on the guide rail. The sa blade will otherwise come into contact with the guide
6.7.4 Cuts at an angle across the surface workpiece
NOTE
The cutting angle indicated is the angle of deviation a straight, right-angled cut.
-
Position the guide rail with the zero mark at the of the workpiece and then pivot the rail until the desired angle shown on the angle scale is oppo the zero mark.
-
Use the two screw clamps to secure the guide ra
6.8 Trimming to size
- Secure the guide rail from below with two screw clamps.
NOTE The saw must be placed on the guide behind the workpiece.
- CAUTION Take care to ensure that the saw blade is not in contact with the workpiece.
Position the saw on the guide rail a short distance from the starting point of the cut.
- Switch the power tool on.
push the saw steadily across the workpiece.
The pendulum guard opens as it contacts the actuating edge at the side of the guide rail and subsequently closes at the end of the rail as the cut is completed.
6.9 Cleaning the chip ejector channel 8
CAUTION
Ensure that the power tool is disconnected electric supply.
en
- Remove the screw at the rear underside of the guard and then remove the vacuum cleaner hose of connector.
- Clean the chip deflector and hose connector.
- Refit the hose connector to the chip deflector and guidesecure it with the screw.
- Check for misalignment or binding of moving parts, breakage of parts and any other condition that may affect the power tool's operation.
6.10 Using the saw with a dust and chip system
remov
NOTE
The circular saw is equipped with a hose connector suitable for use with conventional vacuum cleaner hoses with a diameter of 27mm . In order to connect the vacuum cleaner hose to the saw, use of a suitable adapter may be necessary.
CAUTION
Dusts are hazardous to the health and can cause respiratory or skin diseases and allergic reactions.
WARNING
Certain dusts are considered to be carcinogenic (cause cancer). These include mineral dust as well as oak and/or beech wood dust, particularly in conjunction with additives substances used for the treatment of wood (chromate, wood preservatives).
CAUTION
Wherever possible, use a suitable mobile vacuum dust removal system such as the WVC 40-M (wood or VCU 40-M (wood and mineral materials) for the application concerned. Use a respiratory protector of the P2 filter class with half-mask facepiece if no removal system is available or its use is impossible. In addition, to keep the concentration of dust low always ensure good ventilation.
CAUTION
Commercial and industrial users must consult the responsible trade association to clarify the situation regarding special requirements applicable to working on other materials.
6.11 Using the saw without a dust and chi removal system
NOTE
A rotatable chip ejector is available as an accessory.
To turn the nozzle to the desired direction of ejection so that the chips and dust are deflected away from your
en
7 Care and maintenance
CAUTION
Ensure that the power tool is disconnected electric supply.
7.1 Care of saw blades
Clean off dirt and dust deposits adhering to the black and protect them from corrosion by wiping from time time with an oil-soaked rag.
7.2 Care of the power tool
CAUTION
Keep the power tool, especially its grip surface clean and free from oil and grease. Do not using agents which contain silicone.
The outer casing of the power tool is made from im resistant plastic. Sections of the grip are made from synthetic rubber material.
Never operate the power tool when the ventilation slot are blocked. Clean the ventilation slots carefully using a dry brush. Do not permit foreign objects to enter interior of the power tool. Clean the outside of the p tool at regular intervals with a slightly damp cloth. Do not use a spray, steam pressure cleaning equipment running water for cleaning. This may negatively affect electrical safety of the power tool.
7.3 Cleaning the safety devices
from the Remove the saw blade before cleaning the safety devices.
- Clean the safety devices carefully with a dry brush.
- Use as suitable tool to remove epoxy chips from the inside surfaces of the safety devices.
- Fit the saw blade.
7.4 Maintenance
WARNING
Repairs to the electrical section of the power tool may be carried out only by trained electrical specialists. Use clean
CAUTION
If the power tool's supply cord is damaged it must be replaced with a specially-prepared supply cord available from Hilti Customer Service.
Check all external parts of the power tool for damage at regular intervals and check that all controls operate faultlessly. Do not operate the power tool if parts are damaged or when the controls do not function faultlessly. Have the power tool repaired by Hilti Service.
the 7.5 Checking the power tool after care and maintenance
After carrying out care and maintenance work on the power tool, check that all protective and safety devices are fitted and that they function faultlessly.
To check the pivoting guard, open the guard fully by moving the guard operating lever.
The pivoting guard must close quickly and completely when the guard operating lever is released.
8 Troubleshooting
| Fault | Possible cause | Remedy |
| The power tool doesn't achieve full power. | The extension cord is too long or itsUse an extension cord of an approved length and / or of adequate gauge. | |
| The voltage provided by the electric supply is too low. | Connect the power tool to a different power source. | |
| The power tool doesn't start. | Interruption in the electric supply. | Plug in another electric appliance and check whether it works. |
| The supply cord or plug is defective. | Have it checked by a trained electrical specialist and replaced if necessary. | |
| The on / off switch is defective. | Have it checked by a trained electrical specialist and replaced if necessary. | |
Fault Possible cause Remedy
The power tool doesn't start. The carbon brushes are worn. Have it checked by a trained electrical specialist and replaced if necessary.
No / reduced suction power. Chip ejector channel blocked. Clean out the chip ejector channel.
9 Disposal

Most of the materials from which Hilti power tools or appliances are manufactured can be recycled. The materials must be correctly separated before they can be recycled. In many countries, Hilti has already made arrangements for taking back your old power tools or appliances for recycling. Please ask your Hilti customer service department or Hilti representative for further information.
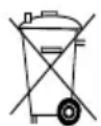
For EC countries only
Disposal of electric tools together with household waste is not permissible.
In observance of the European Directive on waste electrical and electronic equipment and its implementation in accordance with national law, electrical appliances that have reached the end of their life must be collected separately and returned to an environmentally compatible recycling facility.
10 Manufacturer's warranty - tools
Please contact your local Hilti representative if you have questions about the warranty conditions.
11 EC declaration of conformity (original)
Designation: Circular saw
Type: SCW 70/ WSC 7.25-S
Generation: 01/02
Year of design: 2011
We declare, on our sole responsibility, that this process complies with the following directives and standards: 2004/108/EC, 2006/42/EC, 2011/65/EU, EN 60745-1, EN 60745-2-5, EN ISO 12100.
Hilti Corporation, Feldkircherstrasse 100, FL-9494 Schaan


Paolo Luccini
Head of BA Quality and Process Management
Business Area Electric Tools & Ac
cessories
01/2012
Jan Doongaji
Executive Vice President
Business Unit Power
Tools & Accessories
01/2012
Technical documentation filed at:
Head of BA Quality and Process Mana
segment
Business Area Electric Tools & Acces
series
01/2012
Executive Vice President
Business Unit Power
Tools & Accessories
01/2012
Paolo Luccini Jan Doongaji Head of BA Quality and Process Management Business Area Electric Tools & Acces
sories 01/2012
Executive Vice President
Business Unit Power
Tools & Accessories
01/2012
b) Procure que haya una buena ventilación del lugar de trabajo. Los lugares de trabajo mal ventiladosSEOSEOSEOSEOSEOSEOSEOSEOSEOSEOSEOSEOSEOSEOSEOSEOSEOSEOSEOSEOSEOSEOSEOSEOSEOSEOSEOSEOSEOSEOSEOSEOSEOSEOSEOSEOSEOSEOSEOSEOSEOSEOSEOSEOSEOSEOSEOSEOSEOSEOSEOSEOSEOSEOSEOSEOSEOSEOSEOSEOSEOSEOSEOSEOSEOSEOSEOSEOSEOSEOSEOSEOSEOSEOSEOSEOSEOSEOSEOSEOSEOSEOSEOSEOSEOSEOSEOSEOSEOSEOSEOSEOSEOSEOSEOSEOSEOSEOSEOSEO SEOEO SEOEO SEOEO SEOEO SEOEO SEOEO SEOEO SEOEO SEOEO SEOEO SEOEO SEOEO SEOEO SEOEO SEOEO SEOEO SEOEO SEOEO SEOEO SEOEO SEOEO SEOEO SEOEO SEOEO SEOEO SEOEO SEOEO SEOEO SEOEO SEOEO SEOEO SEOEO SEOEO SEOEO SEOEO SEOEO SEOEO SEOEO SEOEO SEOEO SEOEO SEOEO SEOEO SEOEO SEOEO SEOEO SEOEO SEOEO SEOEO SEOEO SEOEQ
Head of BA Quality and Process Mana
gement
Business Area Electric Tools & Acces
sories
01/2012
Jan Doongaji
Executive Vice President
Business Unit Power
Tools & Accessories
01/2012
Serra circular manual SCW 70/ WSC 7.25-S
Executive Vice President
Paolo Luccini Jan Doongaji Head of BA Quality and Process Management
Business Area Electric Tools & Acces
series
01/2012 01/2012
Paolo Luccini Jan Doongaji Head of BA Quality and Process Management
Business Area Electric Tools & Accessories 01/2012 01/2012
Executive Vice President
Business Unit Power Tools & Accessories
7.2 Rengoring at maskinen
FORSIGTIG
Paolo Luccini Jan Doongaji
Head of BA Quality and Process Management
Business Area Electric Tools & Accessories
01/2012 01/2012
Executive Vice President
Executive Vice President
Business Unit Power
Tools & Accessories
Paolo Luccini Jan Doongaji
Head of BA Quality and Process Mana
gement
Business Area Electric Tools & Acces
sories
01/2012 01/2012
Teknisk dokumentation vid:
"Ledeskinneadapter 21
24 Holdespor bak
② Holdesporbak
6.3 Stille inn skrakutt 5
Maskinen kan stilles inn paskrakutt i enhver vinkel m 0^ og 56^ .
6.3.1 Stille inn skrakutt med forhandsinnstilling
3 forhandsinnstlinger kan utfores: 22,5^ 45^ og 56^
- Trekk stopselet ut av kontakten.
- Løsne klemarmen på snittvinkelinnstillingen.
- Svinggrunnplatentilvinkel 0^
- Still viseren for forhandsinnstilling av vinkel pa onsket vinkel.
- Sving grunnplaten til anslag.
- Trekk til klemarmen på snittvinkelinnstillingen.
6.3.2 Stille inn skrakutt uten forhandsinnstilling
- Trekk stopselet ut av kontakten.
- Løsne klemarmen på snittvinkelinnstillingen.
- Sving grunnplaten til onsket stilling.
- Trekk til klemarmen på snittvinkelinnstillingen.
Head of BA Quality and Process
Management
Business Area Electric Tools & Access
ries
01/2012 01/2012
Executive Vice President
Business Unit Power
Tools & Accessories
Head of BA Quality and Process Mana
Executive Vice President
gement
Business Area Electric Tools & Acces
series
01/2012 01/2012
Business Unit Power
Tools & Accessories
Aaies pnpopoe yia To epyaeio
Katnyopia npootaoia; Katnyopia npootaaia; II (diAns movwong), Bkova 1oxuoc
el
5 Ynoδεiεic yia Tny ασφαλεια
5.1 Evikc uno6iEic yia Tnv axopaia yia nEktpia epyaia
a) IPOEIAOIOIHs
AiaBae Tc unoEieic yia tvn ao Kai Tc oyniec. H npaBaeynTwv unoEieaw aOaaleiac kai twv oyniow mopei va npokalee nEktponlxi, npkayia kai/n oobapouc TpauaTiaouc. OauTe oE c Tc unoEieic yia T aOpoc "nEeKpiKO epyaleio" nou xpoaiuoiotai otic unoEieic yia thv axoAaleia avapeetai oKTPiKa epyaleia nou aeitoupyov auoeovtac Ta nEeKpiKO diktuo (ue kaawdo Tpofo0oiac) kai o nEeKpiKa epyaleia nou aeitoupyov me enavaop TcOuec mntapiec (xwpic kaawdo Tpofo0oiac).
5.1.1 Aopaxiax χpou εpyαia
a) Aatnpesit To xwp Epyaoiaoc aoc Kcoaipo Kafo Wtioo. H ataxia oTo xwp Epyaoiaoc oi u np wtioue c nepioxc mnopei va odnynouv atuxmuTa.
b) Mny epyaZeOTe mTo nAektpiko epyaaleo Enikivuvo yia ekpnEic, oTo onioxouv eupkctau npa, aepia n kovn. AnotKTPiKa epyaLia dnioupyouvtai otivnopec, oI OTOIopei va avapexouv tn kovn n TIC ovaxuui
Head of BA Quality and Process
Management
Business Area Electric Tools &
Accessories
01/2012
Jan Doongaji
Executive Vice President
Business Unit Power
Tools & Accessories
01/2012
Texvki Teknpiwn otyn:
Executive Vice President
Business Unit Power
Tools & Accessories
Paolo Luccini Jan Doongaji
Head of BA Quality and Process Management
Business Area Electric Tools & Accessories
01/2012 01/2012
Muszaki dokumentácio:
Head of BA Quality and Process Mana
gement
Business Area Electric Tools & Acces
series
01/2012 01/2012
Executive Vice President
Business Unit Power
Tools & Accessories
Ipeed hauanom pa6oTbI 06aTeIbHo H3y UHTe pyKOBOdCTBO NO 3KcNpyaTuH.
Bcerda xpaHnte daHHoe pyKOBoCTBO no nnyataunn pAdom c HHcTpymeHTOM.
Pn CmeHe BnaTeIbua 06aTeIbHo nepe DaIte pyKOBoDCTBO NO 3KcNlyaTaunn BMe C HCTpyMeHToM.
Copejkanne c.
1 O6uye yka3aHn 178
2OnncaHne 179
3Hctpymentb,akceccyapb1
4 Texnueeckne xapaKTepeNCTnKn 181
5 Yka3aHnno TeXnke 6e3oNaChocTn 182
63Kcnpnyataa 186
7yoxointexhnececkoe06cnynBa
8 POnsck uYcTpaHHe HEnCnPaBHoCTe 190
9ytinnaaun
10Fapantn npon3BODnte 190
11ДeКларачи COOTBETCTBnHOpMaM EC (opuHaJ) 191
LunpaMn 603HaueHb COOTBeTCTBHyOuIe HnnocTaPauN. HnIOCTpaun K TeKCTy paCNOJoxHeHa pa3BoP tax. NcNoB3yIte nx npn H3yuEHH pyKOBOdCTBa.
B TeKCTe DaHHoro pyKOBODCTBa no 3KcNpyaTauIN ( 3I KeKtpo)HnCTpyMeHT> Bcerda o6o3Haayet pyHyO u npKyJnpHyIO nny SCW 70/WSC 7.25-S.
KOMnoHeHTbI HHCTpymeHTa, opraHbI ynpabJeHHaJIeMeHTbI HndnKaun
1BbIKIOuAtEnb
②Дононтьнагукогтka
③ Khonka 6JOKOpOBKn UHHdJIa
④ LJIecTnIpaHbI KJIIOU
(5)LkaIaI nI3MepeHryrIa npOnnla
63axmmHOnpbIarIpeynipOBKnyrna nponna
⑦ 3aJHMHOBINHTIpaannenbHorOynopa
3aKHMHO pBiar dIpeRynpOBKn rny6HbI npo-
⑨ Metka yrna npoinnla 45^
(10) Metka yrna nponna 0^
(1) NapapannelbHbI ynop
(12) Bn6po3aunTHbI KOxuyX
(13) OnopnHa nIInTa
⑭3aunTHbIKoKuyx
15 pInBOHOJgUHNHeB
16 KpeeKnbl ΦnaHeu
173 BaxmmHoi 0nHeu
(18)3aJHMHOH BnHT
19 Lka nI I3MepeHn rny6Hb npOnna
20 Pbyar Bn6po3aunTHoro KoKyuxa
② CoeHHInTeHbHb natpy6ok (nIy nbinecoca)
(2)празустановka улma npoшILA
23 CBeToaNoA
AanTep IJn HnpaBnaHouei HHHb 2
24Pacnopka 3aHnra
25 PaCnOpka npeeHnH
1 O6uhe yka3aHnA
1.1 CnHaJIbHbIe coo6ueHHn Hx 3HaueHHa
ONACHO
Obuee 063haueHHe HENOCpeDCTBeHHo ONaCHOn CHTyaunn, KOtopa MoKeT NOBneYb 3a CO6O TReKjIbe TpaBMbl Nn npeDctBaJIrTb yrpo3y dnn Kn3HN.
BHHMAHNE
Ooiee o6o3haueHne noteHuaJIbHO onaCHO nCtyaI KOTOPa MOKeT NOBLeYb 3a COoB THXJbIe TpaBMbl IpeDCTaBJIr b yrpo3y dIn JxN3HN.
OCTOPOXHO
Ooiee o6o3aueHne noTeHuaJIbHO onaCHO cnTuayuNn KOTopA MoKcET NOBLey 3a c6oJ NoEKe TpaBMbl NIOBpeKdHne O6OpUdoBaHn.
YKA3AHNE
Yka3aHnno 3KcnnyatauHn npyra nne3Ha HOpMaun.
1.2 06o3HaueHHe nHKTORpaMM n DpyrHe 06o3HaueHH
PpeynpeKdaHoune 3HaKu

Onachoctb
Onachnoctb npaKeHHN 3eKtprue-
CKHM
TOKOM
PpeDnCbBaIOUne 3HaKn

HcnoIb3yIte 3aUHTbIe O4KN

HcnoIb3yIte 3aunTHyKACKy

NcnoIb3yIte 3aIHTbIe HayuHnKu

HcnoIb3yIte 3aunTHbIe nepuATKn
HcnoIb3yIte pecnnpatop
CHMBOJIbI

Iepei
HauaIOM pa60tbi
npoHTe pyKOBOCTBO NO 3KcNpyaTaun

Hapabte Otpa6oTaH Hble
MaTePnAbl Ha nepepaOToKy

Bolb T Nepemeh

HbI TOK

HomnHaB-Ha YacToTa BpaueHnHa XoIOCTOM XOy

O6opOTOB MmHyTy

DnAmEtP NInbHoe NOIOTHO

2OncaHne
2.1 HcnoJb3ObaHne HHCTpyMeHTa no Ha3HaueHHIO
HCTpyMeHT npedctabIeT cooB pyHyIO cNpKyIpaHyIO nnly.
Oh npedHa3haueH dIy nIeHn IpeBeChbIX/NoIIMepHbIX/KOMno3HTbIX MaTePnaIOB, rncOkapToHa u rncBOJOKHNCTbIX nIIT c rIy6Hoi npoHn a Do 70 MM, a TaKHe dIy BblONHeHn KocbIX npOnHOB NOd yrIOM B dHaana3OHe OTdo 56^
HcnoB3oBaTb onachbIe 3dopoBbMaTePnaJIb (HaPnMep, ac6ec) 3aIpeaaetca.
HhctpymEn npedha3haen dI npoepccnoHaBHO NOToMy MOKeT o6cnyKbBaTcN peMOHTPOBaTcN TObKO yIOHOMOeHHbIM nepcoHApOM. NepcoHaNdoJKeH npoiTH CneuaJIbHbIN HCTpykTaK NO TexHnke630aNCHOTn. nOJIb3OBAHNE IHCTpyMeHTa He No Ha3HaueHIO IIN ERO 3KcIIyatauH HeOByeHHbIM nepcoHApOMnpedCTabJIHOT onaCHOCTb.
Bo3MOKHbIe 6nactn H BapnaHTb HcnoJIb3OBaHn HhCTpyMeHt: CToNTeBHa NIOuaKa, MaTePCKa, BInONHeHpeMOHTbIX pa60 Pa3HbIX TINOB.
3Kcnpyaataa HnCTpyMeHa BO3MOxHa TOnbKO npHn HnprKeHN uactote 3JeKTpocETn, COOTBeTCTByIOxuX yKa3aHbIM Ha 3aBODcKo Ta6nue.
3anpeaetca hnoB3OBaHHe nIbHbIX dNCKOB, HE COOTBeTCTByOuX yka3aHHbIM npaMeTpam (HaNPmep DnAmEtpy, cactote BpaueHn, TOnuHne), OTpe3bIX u NllofoBaJIbHbIX KpyROB, a TaKKe nIbHbIX dNCKOB n3 BbICOKoJeNpOBaHHo 6bICTpopeKyuSe ctaH (cTaJIb HSS).
Pe3ka MeTaNIOB 3TOI NIOI 3aPpeJSeHa.
He nCnoB3yIe HnCTpyMeHT dJI r CnHINBaHNr BeTOK n CTBOJOB DepeBbeB.
PacnoIooJeHne HdeHTnKauNoHHbIX daHHbIX Ha nHcTpymeTe
Tn n cepHbHn HOpem IHCTpyMeHTa yKa3aHbHa 3aBODCKo Ta6nUKe. 3aHeCnTe 3TN DaHHbE B HAcToRuee pyKOBOcTB NO 3KcnnyatauHN. OHn Heo6XoDMbl npn CepBnCHOM 06CnJyKnBaHn IHCTpyMeHTa N KOHCyIbTa- qnx no erO 3KcnNyatauHN.
Tn:
Поколегни: 01/02
CepniHbI Homep:
Bo n36eKaHne TpaBm nepcoHaIa I NOBpeKdEHHN IHCTpyMeHTa NcNoJb3yTe TOJIbKO opnIHNaIbHbIe npHaIaNeXHOCTn I INHCTpyMeHTbl npOn3BOcTBA Hilti.
Co6nIaTe yka3aHnno 3Kcnnyatauyn, yXoNy nTexHnueckomy o6cnyknaHHIO nHCTpyMeHTa, npNBedeHHbE B HactoIeM pyKOBOdCTBe no 3Kcnnyatauyn.
BHeceHne H3MeHEn B KOHcTppyKuHIO HnCTpyMeHTa I erO MoHnΦKaua 3anpeaaOTca.
2.2 NepeKJIIOUaTeHbIKIOUaTeH
OCHOBHO BbIKIOUaTeIb
2.3 PyKoRTKn
OCHOHn DOnONHHTeJIbHa pyKoRTKn
2.4 3aunTHbIe ycTpoNCtBa
Пьile-и Вибpo3aunTHbIe KOKyXn
2.5 Cma3ka
KoHcNCTeHTHa Cma3Ka
2.6 B cTaNdapThbI KOMnNEKT NOCTABKN BXOJrT:
1 H c T py m e H T
1 n b H b N c K
1 PykoBoCTBO no 3Kcnpnyatau
1 5eTnIgpaHHbI KIOU
1 NapannenbHb ynp
1 KapToHHa Kopo6ka nH yEmoHaH Hilti
2.7 NcnoJb3OBAHne ydHHHTeJIbHoro Ka6eIa
IcnoB3yIe ToIbKO nOxOJnue IaHHO oBnactn npimeHeHHa yIINHTeBhIE Ka6JIcN CIOCTaTOHbIM CeHHeM. HNaue Bo3MOKHa Notepa MOUHOCTH INHCTpyMeHTa N nepepeB Ka6JIa. PeryIaPHO npOBepRte, He NOBpeKDeHnn Ka6JIb. TObpeXKeHHBe yIINHTeBhIE Ka6JIu HemeDNeHHO 3aMeHraTe.
PekomeHdyemblie MHH. ceeyHn MaKc. JInHa Ka6eJr
| Сechени повoda | \( 1,5 \space \mathrm {MM}^2 \space 2,0 \space \mathrm {MM}^2 \space 2,5 \space \mathrm {MM}^2 \space 3,5 \space \mathrm {MM}^2 \) | ||
| Наръжени сети 110-120 B | \( 15 \space M \space 25 \space M \) | ||
| Наръжени сети 220-230 B | \( 60 \space M \space 100 \space M \) |
IcnoB3oBaTb yJINHHTeBhIe Ka6eHn CeueHnem 1,25 MM² 3anpeaetca.
2.8 PpimHeHne yDInHHTeBHorO Ka6eI BHe nOMEueHH
Pp np a60ax BHe nOmeHn HcnoJIb3yIe ToIbKO dOnyUeHHbIe K 3KcnNpyaTuau N ydInHHTeNbHbIe Ka6eN C COOTBeTCTByIOSe MapKnpoBko.
2.9 HcnoJb3OBAHne reHepaTopo nIh TpaHcΦopMaTopa
HnctpymeHT moKET nntaTbCt OR THehepatopA nn TpaHcFOpMaTopa np Co6nOeHN CneJeUox Tpe6oBaHN: BbIXoHaH MoUHocTb (Bt) MmHmym B DBA pa3a 60nbwe MoUHocTN, yKa3aHHo H a 3aBOcko Ta6nueKe IHCTpyMeHTa; pa6ooye HapRaeHne HaxoHTcB B npeDenax OT +5 % Do -15 % OT HomHaIbHoro HapRaeHn; qactota 50-60 T, HN B Koem cnyae He 6oJee 65 T, a TaKke NMeetc AToMaTuueckn Cta6nIn3atOp HapRaeHn C nycOBblM ycINlTelem.
NcnoB3OBaTb rHepatop/tpaHcΦOpMaTOp dIra OAnHOBpeMeHHoro NtAHn 3pyrnx 3JKeKTPoPnp6OpOB KaterOpueckn 3anpeaaetc. Pn BkIOUeHN/HbIKIOUeHn Dpyrnx 3JKeKTPoPnp6OpOB MOyT BO3HNKHyTb CkaKN HAnpAKeHn NtAHn, KOtOpbIe MOyT NOBpeNTb IHCTpyMeHT.
3 NHcTppyMeHTbl, akceccyapbl
PpHaJaJIeXHocTH JIA SCW 70
HaHMeHOBaHHe Ha3NaueHne
PapalneIbHbIynp
HanpaBnIouaWGS1400-2B
AadantepnHaHnpablaIOuoe HINbI
Pekom. nHbHbI dNCK dNRA SCW 70
HaMeHOBaHne YcNoBbIe 06O3HaueHn
ПиьндИСК W-CSC 190x30 z24 A
Pekom. nHbHbI dNcK Ia WSC 7.25-S
HaMeHOBaHHe YcNoBbIe 06o3HaueHn
ПиьндИСК W-CSC 7 1/4x5/8 t24 GP
4 TexHHueckne xapaKTepeHCTNKN
Pon3BOnTeIb OCTaBnEeT 3a co6oN npaBO Ha BHeceHne TexHuecknx H3MeHeHH!
| Hominahlbhoe Ha- prajxene | 100 B 110 B 220 B 230-240 B | ||
| Hominahlbna no- trpeblyemam Moi- HOCTb | 1430 Bt 1550 Bt 1700 Bt 1700 Bt | ||
| Hominahbny Tok 15 A 15 A 8,1 A 7,5 A | |||
| Chactota Chilepto- cetn | 50...60 Γι 50...60 Γι 50...60 Γι 50...60 Γι |
YKA3AHNE
3TOT INHCTpymEnOTBeueaET Tpe6oBaHnM COOTBETCTByUeero CTAHdapTa npu ycNoBn, YTO MAKcMaJIbHO DOnyCTHMoe NOIHOE cOpOTNBHeHne CETn (3NaueHne Zmax) B TOUKe NODKnIOUeHn K O6OpyOBOAHnO 3aKa3UHKa C NITaHnEM OT O6uei 3NeKtpocetn 6ydt MeHbSe nnn paBHO 0,370+j0,25 Om. CneuaJNCt, BblONHrJOUeN NODKnIOUeHne, nnn NOIb3OBaTeJIb INHCTpyMeHTa DOJIkeH y6eINbC B TOM (Pn HeO6xOAnMOCTn ObpaTbUncb K OepaTOpY 3JeKTPOcTe), 4TO INHCTpyMeHT NOkJIIOUeH HMeHHO B ToI TOUKe, B KOTopoN NOIHOE cOpOTNBHeHne CETn MeHbSe nnn paBHO 3NaueHnO Zmax.
Otnaay ABnAETC nEeCTBnEM HnPaBnBHorO nn Own60Horo hCnObl3OBaHHn Pn Co6IHOeHHn HnKe npNBedeHHbIX Mep npEOctOPOXHOCTN 3TOrO MOXHO 3-6eKaTb.
a) Haedxho Depxknte Nnny 06enmny pykamn, npn-HRB TaKoe NIOJKeHne, npn KOTOpom Bbl CMOXeTbAMOPTHNPOBaTB OTdauy HNCTpyMeHTa. Depn-TEcb B CTopoHe OT NIIbHOrO DNCKa, H36eraTe pacnojaraTbcra c HNM Ha OndoH JINHH. PnO Tdaue cnpKyIpaHnMoKeT OTCKOHTB CTopoHy HeOTepaTopa. Tem He MeHee, npnHB Heo6xoDnMbte Kky Mepbl PpeoTOPOXHOCTN, Bbl CMOXeTe CKOMnEH-CNPoBaTB OTdauy HNCTpyMeHTa.
b) Bcnyae 3aueemnHn NnIbHorO dNCKa Hn nepepeBbA B pa6ote OTKIOUHTe NnHy H He BblHMaee H3 3arOTOBKn, NOKa NnIbHbI INck He OCTaHOBTcH. HnkOrda He nbITaHTecb BblHYb NnHy H3 3arOTOBKn Hn BBtAHyTb eHa3ad, NOKa BpaauaETcH NnIbHbI DnCK - ONACHOCTb NOABJIeHn OTAuH! YctAHOBIne n yCTpaHInTe pnuHHy 3aklnHBaHHN NnIbHOrO dNCKa.
c)Пи NOBTOPHOM 3anycke nHJIbI, KOTOPaHaxO- DHTcB 3aROTOBKe, OTcEHTpHpyTe nHJIbHbI INCK B npONHe n npOBepbTe, Het nN 3aCenJIeHnR 3y. 6beB nHbI B DetAnH. B cNyae 3aUeMJIeHnR nHb-HORO DNCKa PnP NOBTOPHOM 3anycke nHJIbI INCK MOJxET BbICKOHTb N3 npONJa B 3aROTOBKe nIN CTaTb PPnHHoB 03HNKHOBEHnO TdaHn.
d) POndepKnBaIte nIHTb 6oIbUoro pa3Mepa, 7TO6b CHN3HTb PNCK OTDaH B Clyuae 3aueemHeHH NIIbHorO dNcKa. PoJ DeIeCTBnEM
CO6CTBENHORO BECA TAKHE PINTbI MORYT npOrn6aTbPINTbI Heo6xOdmo NOIDepKINBaTb C O6eX CTOpOKaK B6n3M Mecta npOnna, TAK I C KpaEB.
e) He nCnoB3yIte TynbIe HnN NOBpeXdeHHbIe HbIe DNCKN. NINbHbIe DnCKN C TynbIMN HnN HEn BnIBHO pa3BeDeHHbIMN 3y6bAMN CNOCO6CTBYOT NOBJIeHNIO CNIBHO TpeHnR, 3aUeMJIeHNIO NINbHO DnCKa I OTDAYe N3-3a HeNOCTaTOOH NUnPbHbI npnHa.
f) Npei nnleHnem 3aTAHHe yCTpoHCTBa peryn poBKn rIy6HbI n yrna pe3aHn. B cIyuae HnHaCTpOeK BO BPeMnIIneHnBO3MOxHO 3aue JeHnE nnIbHOrO DnCKa n BO3HNKHOBeHne OTdaHn.
g) Bynde Oco6eHNO octopoxhbl npn nHHeHH CTehax HnB pyrHx HeNpocMatphBaembix Hax. Iorpykaembl nnIbHbI DnCK MoKeT 3aKInH npn cOpNKoCHOBeHN CO CKpbITbIMN IppeTCTBn- RMM, BCJeCDTBne Yero BO3HNKHET OTdaua.
5.2.3 Yka3aHnno TeHHKe 6e3oNaChocTH npna paoTe C uRKyIaRPhbIM nHaAMn CB6pO3aUHTbIM KOxYXOM
Ha3haeHHe HxKHeRo 3aunTHoro Koxyxa
a) Npeed KaJdbim HcNoIb3OBAHnem npOBepnTe, 3aKpbIbAeTcra Hn HnXHHa 3aunTHaer KpbIbKa. He nCnoIb3yIte nnly, ecn HnXHHa 3aunT KpbIbKa nloxo noDbHXHa n 3aKpbIbAeTcra He cpa3y. HnkOrda He fHKcnpyTe HnXHHIO 3aunTHyO KpbIbKy B OTKpbITOM NOLOXKeHHN. CInyae naDeHnna Bo3MOxHO deΦOpMnPOBaHn KpbIbKn. OTKpOte 3aunTHyO KpbIbKy C NOMoUbB03BpaTHoro pbUqara n yBeDntecb, YTO OHa CBO6oNDHO DnBraeTcra Hne KacaETcra Hn NnIbHORO dNCKa, Hn dpynx qactey INHCTpyMeHTa npu BCEx BO3MOxHbIX yrNaX n rnyBnHex nIIeHnA.
b) IpoBepbTe 0yHKUHOHPOBaHne npyHH HnXHe 3aunTHoN KpbIuKn. IpOBeHte TexHueeCKoe 06cJyKHBaHne HHCTpyMeHTa nepeEero HcnoJIb3OBaHHem, ecnn 3aunTHbIi KOxHy n npyKHBpa6OtaOT HenpaBnIbHO. IobpeXdEHbIe DeTALn, INIKNe OTNOKeHnI Nn CKoPJIeHnI OONIOK MeWAIOT FyHKUHOHPOBaHIO HNXHERO 3aunTHoro KOxYxa.
c) OTkpbBaIte KpbIshky BpyHyIO ToIbKO npi nONHeHH CneuHaJIbHbIX pa6OT, HAnpHMeP np NorpyKHom N yrNoBOM nnHeHH. OTkpoTe HHO 3aunTHyO KpbIshky C NOMoUBO BO3BHO HorO pbUra H OTNyCTHTe erO, KaK ToJIbKO HbIN DnCK Norpy3NTcB O6pa6aTbIbAemyo TaJIb. Pn BblONHeHH BCEx dpyrNx pa6OT KpbI s DOJIKHa cpa6aTbIBaTb aBTOMaTnueckn.
d) He KlaIHTe NnHy Ha BepCTak Hnn non, eCNI HbIN DnCK He 3aKpbIT HNHNHMM 3aunTHbIM XOM. He3aunueneHHb, Bpaauoounca no nHePUN NIIbHbIN DnCK DnKETcnpOTNB HAnpaBNeHn IJIeHnI pexkET BCE, qTO HaxOHTcHa erO npTu. YHTbBaIte npn 3TOM Bpem PaBOTbl Nlbl No nHep- cinn.
5.3 DOnoHnTeNbHbIe yKa3aHHNo TExHKe H, 6e3onachOCTn
5.3.1 Bezonaacnoctb nepcohana
a) HaedeBaHre 3auHTHbIe HayuHHKn. B pe3yIbTaTe BO3DeiCTBn Wyma BO3MOXHa nOtepr cnlyxa.
b) Bcerda DepeKHTe HNCTpyMeH 3a pyKOaTKn 06e- HMM pykam. CneHTe 3a TeM, 4TO6bl pyKOaTKn 6bln cyxHMn n 6e3 cneIOB Macna n Cma3KN.
c) EcIn HNCTpyMeHT NcNoIb3yeTc8 6e3 yctpoiCTB 3MeHn ydaJIeHNn nbIIIN, npn pa6oTaX c 06pa3OBA-M- HnEM nbIIH NcNoJIb3yIte 3aUHTHbIe CpeIcTBA.
d) Ipn pa6ote c HnctpymehTom HcNoIb3yHTe TOnbko B 3aunTHbIe npncnocO6JeHHN H3 KOMnJIeKTA.
OE) Bcerda HcnoIb3yIte HNCTpyMeHT TOnbKO NO HA- 3HaueHHIO H B HcnpaBHOM COCTOHHH.
f) 4To6bI BO Bpempa60tby pyKN He 3aTeKaJIH, DeJaIte nepepbIBbl dIpaCCla6JeHHn pa3MHKn IaIbueB.
g) BkIIOUaHTe HNCTpyMeHT TOJIbKO NOcNe TORO, KaK noDBeDeTe erO K pa6oueh 30He.
h) Pn nHHeHHn BeHTe HNCTpyMeHT TOnbKO OT Ce6
i) He pa6oTaIte c HnHCTpyMeHTOM HAD roNoBOH.
j) He octaHaBnBaIte HNCTpyMeHT, npHXMaHnnJbHbI dNCK c60ky.
k) Pn BKNIOeHHOM HNCTpyMeHTe He KacaItecb 3a- HJHMHOro FNaHua N BuHTa.
1) No Bcei DnHHe npoHJa He DoJXHo 6bIb npen CTBn. He dOnyckaIte nHJIeHHa DNCKOM wypynOB, B rBO3dei np.
m) HnkOrda He HauHMaTe KhONky 6JoknpoBKn 7nnHdJI npn BpaaHoueMcN HJbHOM DnCte
n) He HanpaBnaTe HnCTpyMeHT Ha IIOde.
0) DeTN DoJNKhbl 3HaTb O TOM, YTO HM 3aIpeueHo HrpataB C HHCTpyMeHTOM.
p) Hhctpymehn He npedHa3HaueH dIa HCnoIb3ObaHHa DeTbMn HIN hH3NueCKN Ocna6JeHHbIMN Iu- cAMn 6e3 COOTBETCTByIOUeRo HhctpykTaJa.
q) KOHTPOINHPyIe HaxHM Ha NnIbHbI INCK n 6pa 6aTbIBaEMbIMatepHaI, YTO6bl DNCK He 3a6IOKN- poBaJcH He Bbl3BaN OTdauy.
r) He donyckaite neperpeBa BepuH 3y6beB HnIb-Horo DnCKa.
s) Pnppe3Ke noJIHmepHBix MaTePnAnOB H36eraTepBbl- pacnJaBneHHn nlaCTnka.
Ht) Npeed Hauanom pa60TbI BBHcHnte NO MaTePnaHy
HNK- 3arOTOBKN KJIacc ONaCHOCTN BO3HNKaHOuee NblIN.
PaT- IJra pa60TbIC HHCTpyMeHTOM HCNOJB3yHe CTPO
HIIrTeNbHbI INbIeOCoc, CTEneHb 3aUNTBI KOToporo
Ke- COOTBETCTByeT DeHCTBYIOHM HopMaM NblJE3a-
ka UHTbl.
u) PbIb, Bo3HnKaIOUaŋ npn o6pa6OTke MaTePnaIOB, CnN CoepKaauxxC BnHeu, HeKOTOpbIX BnOBo Toxy- DpeBeCInbI, MnHEpaJIOB H MeTaIIIOB, MOKeT npeDCTaBnTb CO60 ONaCHOCTb DnA 3DOPOBb. BdxHaHne qactnq TAKo Nbln NlN KOHTaKT C Hei MoKet CTaTb pnuHOn IOBJIeHHaep- anleprHuecknx peakni N/nn 3abObeBAHN dblxatelbHbIX nyTe. HeKOTOpbIe Bndbl PbIIN (HaNPmEp nbIb, Bo3HnKaIOUaŋ npn o6pa6OTke
Iy6a nII 6yka) cHTaOTc KaHcpeOReHHbIMN, OCO6eHHo B KOM6HaCm C DOONHtEJIbHbIMMaTePnAImn, NcIOJIb3yeMbIMn DnIgOBaTKnDpeBecHbI (CoIb XpOMoBOK KNCIoTbI, CpECDBa3aUHTbl DpeBecHbI). O6pa6OTKa MaTePnaIOB C CoDEpXaHem ac6eCTa DOJXHa BblNOHHTCBTOJIbKO CNEuHaJIncTAm. No BO3MOxHOCTNHCNoB3yIte NOxD0Jaun NblneOTCaCbIBaOUnannapat. IInr ONTHMaJIbHOro ydaJeHnR NblINHCNoB3yIte 3TOT 3JIeKTPOnHCTpyMeHT BKOM6HaChn C NOIXOJaUM NepeHOCHbIMNbIEcOCOM, peKOMeHDoBAHhbIM Hilti dnn y6OdpeBecHbIX ONlOK H/INM MHePaJIbHOblO6ecNeYbTe XopoWyo BEHTNJauHQ pa6Oey3OHbl. PeKOMeHdyETc HocHTb pecnnapOp c PhnlbTpOM Knacca P2. Co6JIouaIteDeIcTByUoune HaCuHOHaJIbHbIe npedncaHnno6pa6OTKe MaTePnaIOB.
5.3.2 BepeKHoe o6paueHne c 3JIeKTPoMHCTpyMeHTaMn I INx npaBnIbHaJ 3KcNJIyatauHa
a) Pn OnachocTH NOBpeKJeHn HNCTpyMeHTOM CKpbIToH 3NeKTPponPOBoDKn Nn CTeBOrO Ka6eJIa DepXHte HNCTpyMeHT 3a H3OJNPoBaHHbIe NOBepxHOCTn. Pn KOHTaKTc T TOKONpOBOJaUHM INPeDMtAMn He3aUuEHHbIe MetaJIInueckne qactn HNCTpyMeHTa HaxoJITcN PoI HaPraKeHNEm, YTO MOKeT pINBeCTn K NopaxKeHNIO 3NeKTPnuEcKNM TOKOM.
b) Haedekho 3aΦHKcHpyTe 3arOTOBky.ДнЯ
ФнкcaqHH 3arOTOBKn HcNoJb3yIe Ctpy6uHbI
Hn TnCKn. 3TO HaedekHee, yem ydepKHBaTb ee
pyKoH, n npn 3tOM MOxHo DePKaTb INHCTpyMeHT
DByMn pykamn.
c) y6eHNTecb, qTO HnCTpyMeHTbl HmEOT NOxOJa- Une K NaTPOHy XBOCTOBKN HnHaJeKHO ΦHKChpyIOTcB NaTPOHe.
5.3.3 ΘleKtpnuecka 6e3onacHocTb

a) Npeed Hauanom pa6oTb npOBepnTe pa6ooye MecTo Ha HauHnue CKpbIToh 3NeKtponpOBOkN,
ra30bix H BOJOpBOOHNbIX Tpy6, HApHmep, npn NOMOuN metaONCKaTeI. OTKpbItbIe metaJINuCeCKne qactn INHCTpymEtA MOrY CTaTb IPOBOHNKAMN 3NEKTpUeCKORo TOKa, eCIn CnyaHHO 3aDeTb 3NeKTPoNPBoOky. Ppi 3OM Bo3HKnAet ONaCHOCTb NopaxKeHHN 3NEKTpUeCKIM TOKOM.
b) Ipn pa6ote cneHnte 3a Tem, UTo6bI cTeeBoH ydHHHTenbHbIK Ka6eHN HaxoHnncb No3aHn HCTpymEnTa. 3TO CHN3HT PnCK CNOTKHyTbcra O HNX BO Bpema pa6Otbl.
c) Co6nHOaHTe MeCTHbIe npabHna TeXnKN pKn 6e3oNaChOcTH npn noKnIOueHnn yCTpoNCTBa. n. POnKnIOUaHTe yCTpOcTBO TOJbKO K po3eTke c 3auHToN OT ToKa yTeuKN (RCD).
5.3.4 Pa6ooye MeTo
a) 06ecneue xopooe ocbee Hne pa6oery Me- cta.
b) 06ecneyte xopooyo BeHTnraquno pa6oey 30hbl. IIOxo npOBetpnaeMa npOaay 30Ha MOKET CtaTb npuHNO yxUdEHH CaMOuyBCTBn H3-3a BbICOKO KOHcHTpaunn IIJIN.
5.3.5 CpeICTBa HnHbNdyanbHO 3aHTbI


Pn pa6ote c HNCTpyMeHToM pa6oTuuH N HaxOJa- uceB HeNoCpeDCTBeHHo 6JIn3OCTn INuca DOnJHbI HaDeBaT b COOTBeTCTByUoune 3aunTHbIe OUYK, 3aunTHbIe UHM, 3aunTHbIe HayuHKn, 3aunTHbIe nepuATKN IerKn peCnnpatOp.
5.3.6 3aunthbyeyctpoicTba
He BKNHouaIte HNCTpymeHT npn HENpaBnBHOY yCTaHOBKe NIIbHORO DNCKa, Nblne- HNN Bn6po3aunTHOROKoJxOB.
6 3Kcnnnyatauia

OCTOPOXHO
Pa6oTaIe B 3aunTHbIX nepuatkax. Pexyune KpMkn
HINbHOrO DnCKa OcTpBie. O HNX MOxHNope3aTbCra.
OCTOPOXHO
HcnoB3yIe Ierkn pecnnpaTop n 3aunTHbIe ouKn.
Pn paOte c nIIO ono3yOTc nbIb n OOnIKN. OH MOrTy NOBpeNTb dIbXaTeJIbHbIe nyTn rna3a.
OCTOPOXHO
HaedeBaIte 3aunTHbIe HayuHKn. Ppi paOte HMeHT pON3BOoNT Wym. B pe3yIbTaTe BO3JeCTBnR LBy BO3MOxHa nOtepr Cnyxa.
6.1 3aMeHa nIbHorO dNcKa

OCTOPOXHO
Ipn 3aMehe pa6oery HnCtpymeHa HcNoJb3yntuHtBHe IepaTKn. HnCtpymeHT, 3aXHMHO JhaHeu3aXHMHO BnHT HarpeBaHOTcra.
OCTOPOXHO
Y6eHNTecb, qTO yCTaHOBJEHhB NINbHbI DnCK OTBetCTByET TexHHueckHM Tpe6OBAHNM H Xopo3aToey. XopoOaA 3aToUka INlbHOrO DnCKa RBAIRETC Heo6XoDmMbIM YcIOBHeM dJa KaueCTBeHHOrO BblONHe HNA IpONHa.
6.1.1 DEmoHTaN NJIbHOrO DNCKa 3
- BbHbTe BnKy Ka6eNa n3 cTeBOB po3eTKN.
- HaKMnte KhoNky 6JIOKINPOBKN UINHDeJIa.
- BbopaunBaTe KpeeKnBn BnHT nHbHorO dNcKa c NOMOuBo WecTHrpaHHoro KIOUa Do Tex NOP, noka CTOnOpHbI uTnFT He 6yDet 3aΦHKcnpoBaH noHOCtBu.
- BbIePHnte (npOTnB yacOBN cTpeKN) KpeENHbI BnHT C NOMOJIbIO KJIIOUa.
- BbHbTe KpepeKhbl BnHT n HapyKhbl 3aKHMHOI PhaHeU.
- OTKpoTe Bn6pO3aUHTHbI KOxHyN ydaJIte NJIbHbI DnCK.
6.1.2 YctaHObKa NJIbHoro DnCKa
- BbHbTe BnIKy Ka6eIa I3 cTeBOI PO3eTKN.
- Ouchntte KpeenKHHbN 3aXMMHOI PhaHcbl.
3.YctahOBNTe KpenKnHbI ΦnaHeu Ha MecTo. - OtkpoTe Bn6pO3aUHTbI KOxUx.
- OCTOPOXHO Co6IIOdaIte HappaJIeHne BpaIeHHa, yKa3aHHoe Ha NIIbHOM DnCK. YcTaHOBInTe HOBbI INJbHbI dNCK.
- YctaHOBHTe HApyKHB3aXMMHOn FJNaHeU.
- 3aKpEnIte 3aXHMHOJ PhaHeU, 3aBepHyB HaTJXHOJ BnHT NO YacBOB CTpeJIke. PnN 3Tom, KaN n npN OTBopauBaHH, DOJXHa 6bITb HxKaTa KHOJa 6n KInPOBKn UINHDeJIa.
- IpepeBBODOM B 3KcnpnyatauHIO npOBepbTe nHbI DnCK Ha npOCHCTb NOCAkN.
6.2 Perynnpovka rny6Hb nponna 4
YKA3AHNE
YcTaHOBJIeHHa Iy6HbHa npOnnla DOnJXHa 6bITb BcERHa 5-10 MM 6OJBSe TOIuINHb 3aRTOBKn.
Tny6nHa npoHnA nnabHo perynpyetcB dnaana3OHe 0do70mm.
- BbHbTe BnIky Ka6eJn3 cTeBOB po3eTKN.
By-IOCTaBbTe INHCTpyMeHT Ha OCHOBaHHe. - Pa36IokpyuTe 3aKIMHoi pbUar IJIpeRyIpOBKn rny6HHb npOnnna.
C T P e J K a H a p a c n o peDyKTopa uKaIe yKa3bIbAeT yCTaHOBJIeHHyU rJy6HHy npOnnla.
4.ПипоДнИМITE ИСТPyМЕNTИ yCTaHOBITe HxKHyO rny6bHy npOnnla c NOMOuBIO 3aKHMHoro pbHara.
6.3 Kocbie nponnbl 5
HctpymeHT MoKHO OTpErpyIInpoBaTb Ha BbINOnHeHne Ko- cBcR- npONIOB NOJ IIO6bIM yrnom B dHaNa3OHe ot 0^ Do 156°.
6.3.1 Kocbie nponnblc npedyctaHOBko
Bo3MOKHbI 3 BapnaHTa: 22,5^ 45^ n 56^ . co-
J. BbHbTe Bnky Ka6eNn3 ceTeBOu po3eTKn.
- Pa36nokpyne 3aKHMHOBpbUar dIpeynpOBKn yrla npoIIna.
- YctaHOBnTe onOpHy nIHTy Ha yroI 0^
- YctaHOBnTe yKa3aTeJI npedyCTaHOBKn yrna npo-nnna Ha HyKhbI yroI.
- OTeIte onOpHyIO nHTy do ynopa.
- 3aTaNHTe 3aXHMHOI pbUar IINpeRyInpOBKn yrna npOnnla.
6.3.2 Kocbie npoHJIbI 6e3 npedycTaHOBKn
- BbInBe BnIky Ka6eIa n3 cTeBoB pO3eTKH.
- Pa36nokpyte 3aKHMHoi pbuarg npeynpOBkn yrna nponna.
- YctaHOBnTe onOpHyIO nnITy B HyxHoe nOIOKeHne.
- 3aTnHte 3axmHoi pbuarg npeynpOByn yrna nponna.
6.4Пильенno pa3metke
Ha nepeHHe qactn onOpHoi nIHTb HNCTpyMeHTa pa-nOIOxhen yka3aTeJIb pa3MeTKn (0^ n 45^ ), KOTOpBn HC-NOJb3yETcA DnT OTOHOro BblONJIeHn NpRmBX N KOCbIX npONIOB B 3aBNCIMoCTn OT Bbl6paHHoro yrna npONIIa. KpOMKa pa3MeTKn COOTBeTcByeT BHyTpEHHen CToPOHe nnIbHO rNcKa. Yka3aTeJIb pa3MeTKn HaxOHTcR Ha nepeHem Bblpe3e dnn nnIbHO rNcKa.
1.He donyckaTe cmeueHHraTOrTOBKn.
2. PacnojaraaTe 3arotOBky TaKIM o6pa3OM, YTO6bI NnIbHbI DnCK MOR CBO6OJHO Bpauatbcr NOd Hei.
3. Y6eIHTecb, yTO BblKIOHcTeIb Ha IHCTpyMeHTE BblKIOHcH.
4. BctaBbTe Bnky Ka6eJr B ceTeByIO po3eKy.
5. YctaHOBHTe onOPHyIO pINTy HNCTpyMeHTa Ha 3a- roTOBky TaKIM O6pa3OM, yTO6bl NINbHbI DnCK He 3aDeBaJI 3aTOrOBKy.
6. BkHouHTe OCHOBHO BbIKHOaTeJIb.
7. Beinte nHCTpymEnT c noDxOJaUeN CKOpocTbIO BdoJI pa3MeTKn NO 3aROTOBKe.
6.5Пи�нhoe cnapaJIeIbHbIM ynpom
BlaoradapnncnoB3OBAHnnpapaJIenbHoroynopa CTaHOBNTcBO3MOXHBIM BblNOJHEHNE TOHyIX npONIOB BDJIb KpOMKn 3aTOrOBKn IIN Hape3aHHe PIIaHOK OINHaKOBORo pa3Mepa.
NapannenbHn ynop MOKeT MOHTnpoBaTbcHa 06nx CTOpOHax ONOPHOIITbl.
6.6 YcTaHOBKa/perylnipOBKa napannenbHorOynopa 6
- BbHbTe BnKy Ka6eNa n3 cTeBOi po3eTKN.
2.CdBnHbTe HnnpaBnHOu npapnnelbHoro ynopa NO3aXHMHO BHT. - OtperynnpyTe HxKHyU ShnpHny npOnna.
- 3aTaNHTe 3aXHMHOB BnHT.
6.7 HnJenHe c HanpaBraHoue 1HHo
YKA3AHNE
HcnoB3OBAHne HnpaBJIIOUeI IINHbI IO3BOJREt yMeHbIHTb OTdau NYHCTpyMeHTa.
6.7.1 YcTaHOBKa/H3BJeueHHe HnCtpyMeHTa n3 aadanTepa dHa HanpaBnaIOuSei uHHbI
1.ДemonHTpyTe npaJIeJIbHbI ynp (ecJn yCTaHOB- neH).
2. 3aBcHte onOpHyo nnTy B nepeDHe pacnOpKn aadTepa dHa npBaJIOuei HnHbI.
3. Nolnoctbvo BCTaBbTe onopHyo nHHTy c3aHn B aadan Tep dIra HappaBnaHOse IINHb. OonpHaar nHtta DOnJXHa 6bITb NOHOCbHO 3aΦHKcPOBaHa Ha 3aDHei pacnopke.
4.ДЯиИЗВLEЧЕНЯ NOTAHINTE 3aHIOI PACNOPKy CJIeRka Ha3aI N I3BLeKInTe INHCTpyMeHT I3 aIaNTeO DЯнHaIpaBIAHIOUe IINHbI.
6.7.2 PpOJIbHbIe npOnnJIb noJ yrnom 0°
YcTaHOBnTe Nnny na30m aanTepa nIra HappaBIOUe IHHbHa HappaBIAIOOee pe6po WnHbI.
6.7.3 PpOOnbHbI npOnnbl noJ yrnom 56
BedeHTe HnCTpyMeH HApyKHO KnpOMKO aAnTepa dHa npabJIOUeI uHHb BDOJI HaNPABJIOUeI pe6pa uHHb. B npOTNBOM Cnyae NIIbHbI DnCK MoKet 3aDeBaTb HnpabJIOU cyHy.
6.7.4 YrnoBbIe nponHJI B nIOCKoCTn
YKA3AHNE
Yka3aHHb yron npoHna OTnuaetc r ot npoHna no npaMbIM yrnom.
- YCTaHOBHTe HAnpaBnHOUyIO UINHy HynEBOH OTMeT-KoN NO KpOMKe 3aROTOBKn N NobOpauBaHTe UINH Do Tex nop, NOKa HyKbIy yRoi Ha UIKaIe I3Mep YrJa npONHa He YCTaHOBHTcH AnpOTNB HynEOH TOHKN.
2.3aФИКСИРУTe HAnpaBIAHIOU OIINHy C NOMOUIO DByx CTpy6uH.
6.8Пиелене 3arotOBKN
1.3aKpEnIte 申Hy CnH3y C NOMOuBIO DByx CTpy6uH.N YKA3AHNE HNCTpyMeHT DOJXeH 6bITb yCTaHOBHeHa HAnpaBnaIOse IINHe No3aDn 3arOTOBKn.
2. OCTOPOXHO O6paHTe BHHMaHHe Ha To, YTO NnIbHbI DnCK He DOJKeH KacaTbcra 3aROtOBKn. OctaHOBInTe nny B 30He yCTaHOBKn HAnpaBnaHOucei ShINHbl.
-
BkHIOUHTe INHCTpyMeHT.
-
PabHomepHo nepemeaTe HcTpymeHr no 3arotOBke.
Bn6po3aunTHa KpbIuKa OTKpbIbAetc npn KacaHn 6OKOBoKpOMKn Bblpe3a n CHOBa 3aKpbIbAeTc npn BblDnKeHn Ha KpaIO HnPaBnIOuei nnHbI.
6.9 OuHcTka KaHaJa IINr OTBODa ONHIOK 8
OCTOPOXHO
HctpymeHTdoJxeh 6bITbOTcoeHHHeH OT cETN 3JeI TpONHTAHHa.
- BbIePNHT BnHT Ha 3aHHe HxHHe CTOpOHe 3aHHTHO Koxyxa I CHIMTe CoeHNHTeBHyI NaTpy6OK DnI PbIeCocca.
- OuHCTHe KaHaI dIa OTBOda ONIOK H COeHNHTeJIb-HbI nATpy6ok.
- ChOba yctaHOBnte coeHNHTeHbI naTpy6ok Ha KaHaI dIa OTbOa ONNIOK n 3aKpeNITe erO BnHTOM.
- Поберяпе бezур Neuофуноваи noDBINKHBIXЧаTei,ЯгкocTb nx XODa,цelnoctHOCtB BCEx ChTei n OTCyTcTBne NOBpeJdeHn, KOTOpbIe MOrIIb 6bl OTpuatelbHo NOBnIaTb Ha pa6Oty NH-CTpyMeHTa.
6.10Пиелнe c ydaJIeHHe m onHIOK
YKA3AHNE
PyHnA CnKpynHnna OChaueHa CoeHNHTbHbIM NaTpy6kOM DnI NODKNIOUeHnra CTaHapTHbIX BCacbIBaOuXnX nlaHROB dHaMeTpom 27 MM. IINr NOcEINHeHH BCAcbIBaHOoero WnHaRa (nbIeCOca) K INne MOKeT NoTpe6OBaTcR NOxOJaun aadantep.
OCTOPOXHO
YactnIbI nbIIN npedctabJrOT onachOCTb IJIa 3dOpOBBA mOryt cTaB npuHHO 3a6oJIeBaHNI dIbxaTeHBix nyTei, KOxN nn NOrBHeHH aJIneprHuecknx peakun.
BHIMAHNE
HeKoTOpbIe BnIbI nbIin CnHTaOTc KaHcEporeHHbIMN. K Hm OTHocATc MNHepaJIbHaI NbIb, Nblb, Bo3HnKaIOUcaI npn 6pbOtKe Dy6a H/nn 6yKa, B YactHOCTN B KOM6Ha- cI IONOLHITeJIbHbIMMaTePnaJAMn, IcNoJIb3yEmbIMn dIra 6pbOtKn dpeBecInbI (COIIxPOMOBONKNCLOTbl, cpeCTBa IIN 3aunTb IpeBecInbI).
HIN
OCTOPOXHO
HcnoIb3yIe no BO3MOJHOCTn NOxOJaun nepeHocHOn nbIeOTcacBaIOUun annapat WVC 40-M (npn o6pa6Otke IpeBeCnHbl) nH VCU 40-M (npn
06pa6oTke dpeBecnHbI H MNHepaJIOB). B cnyae HeBO3MOXHOCTN HIN 3anpeueHHaJaEHn YdaJeHHa NblcneNyET HocHTb peCnHpAToP C HnltpOM Klaac
P2. Kpome TORO,ДнЯ CHINJHIN KOHcEHTpaCIN nblnn cIeMyET NOCToRHHO O6ecneuHBaTb XopoUy BeHTnJIaNIO pa6oye 3OHbl.
OCTOPOKHO
B OTHOWeHn Dpyrnx MaTepeHAnOB pyKOBoDHTenb npOn3BOcCTBa DoJXKeH BbIChNtB COOTBeTCTByIOUeM np
ΦeCCHOHaJIbHOM OBeIINHeHH, CyIeCTByIOT JN KaKHe-1n6o CneuaJIbHbIe Tpe6OBaHH Nx 06pa6OtKe.
6.11Пиленп 6e3 ydaenHn onHnok
YKA3AHNE
B BnDE OOnuIN BO3MOxHOBbITaIKBaHHe ONNIOK uepe3 NOBOPoTHbI NaTpy60K.
BbIbpaHTeHJXHoEHaPpABLeHne NOMOIOIOPOCTORIO NOBOPota TaKIM O6pa3OM, YTO6bl BbIbpc ONNIOK BbINOLHRICB HAnpaBHeHNOT Bac.
7 yxoid n texhnueeckoe 06cnyxnbahne
OCTOPOXHO
HCTpymEnI DOJKeH 6bITb OTcoeINHeH OT cTe TponntAHn.
7.1 yxod 3a pa6oHMM HhCTpyMeHTamn
YdaHnTe cKoINBwUcO rpa3b C pa6OuNX nHCTpyMeNTn 3aunuae Ix OT Kopp03nn, IpOTnpaR Cma3aHHoM MacnO npToHpOCHN TkaHbIO.
7.2 yxoid 3a HhctpyMeHTOM
OCTOPOXHO
CopeKHTe HhctpyMeH, B Oco6eHHoCTn NOBepx CTN pyKOaTKN, B YHcTOM N cyXOM COCTOaHHN, 6e3 CNEIOB Macna H cMa3Kn. 3anpeuaetc HcNoIb UHCTaUne CpeIcTBa, CoepKaaUne CNHkoH.
BHeuHn KOpNc HnCTpyMeHa n3rOToBnE H3 yDapopnpouHn PnactMaccb. HaKlaJaHa KOpnyce n3rOToBLeHa n3 3naCTomepa.
Pn pa6ote He 3aKpbIbAitte BeHTnIaOnHbIe npope3nB KpbIiKe Kopnyca! OuIaIte BeHTnIaOnHHyIO npope3 cyXoI ueTko. CneInte 3a TeM, YTO6bl BHyTpB Kopny INCTpyMeHTa He IonoadaJIN NOCTOPOHHe npEIMTeB. P rJyRnPHO OOnIaIte BHeUHIO IOBepxHOCTb INCTpyMeH BlaXH0r TkaHBIO. 3anpeaaetcN cNOJIb3OBaTb BOdHO paCnblNTeB, NaporehepatOp Nn CTpyU BoD! PoCNE qNtKn TaKIMN CpeCTBaMn 3JeKtpObe3OnaCHOCTb INCTpyMeHTa He ObecneuBaETc.
7.3 Ouchka 3aHTHOO OchaueHH
-
OuchcKn 3aunTHoro OchaueHn CHIMITE NIIbHbI DnCK.
-
OctopokHO Ounchte 3aunTHoro Ocha-3neHHra CyXoIeTKoI.
- YdaIte OTIOKHeHn OOnIKN BByTpN 3JeMeHTOB 3aUHTHO OCHaueHn C NOMOuBu NOxOJaEro HHCTpyMeHTa.
- YCTaHOBNTe NINbHbI DnCK.
7.4 TexHHueeCKoe 06cnyKHBaHne
BHIMAHNE
Pemont 3neKtpnuecko qactn HnctpymEnTa npuyaTe TOnbko CneuaJIncTy-3neKtpnky.
OCTOPOXHO
B cnyuae noBpeKdeHn HNTaHooero Ka6eI ero cne OyET 3ameHHTb Ha npyro, CneuHaNbHO npedHa3Ha- Yehhbl dna 3ameHbI Ka6eIb, KOtOpbl MoXHO 3aTb uepe3 OTdENo 06cnyKhbHIO KInHeTOB rU
Perynphno npOBepHte y3JIb IHCTpyMeHTa Ha OTCyTCTBne NOBpeJdeHn, a TaKKe IcnpaBHocTb BCEX 3JeMeHTOB ynpaBHeHn INOMNoHETOB. Nolb3OBaTbCnH-CTpyMeHTOM C NOBpeJdeHHbIMn y3IaMn IN HeNCpABaHbIMN 3JeMeHTAMn ynpaBHeHn IN KOMNoHETaMn 3anpeaetc. ObpaHTecb B cepBnCHyO cnYk6y Hilti.
7.5 KoHTpoJIb nocne pa6oT no yxOy uTexHHueckOMy 06cnyKnBaHHo
Iocne yxoda 3a HnctpyMeHToM n ero TexHnueckoro o6-cnyKnBaHHy y6eHNTEcb, yTO Bce 3aunTHbIe npncnocO6JIeHHy ycTaHOBJIeHbI nHCnPabH0 FyHKUOHpyHT.
I npOBepKn Bn6pO3aunTHoro KoxkxnaonHOCTbIO OTKpoTe eroc nOMoUbOp bivara.
Iocne otnyckaHn npyara Bn6po3aunTHbIKoKyx DonJx Hen 6bICTPO n nonHOCTbIO 3aKpbITbcra.
8 POnck N yCtpaHHeHne HEnCnpaBHOcTei
HTPaolo Luccini Jan Doongaji Head of BA Quality and Process
Management Business Area Electric Tools &
Accessories 01/2012 01/2012
Executive Vice President
Business Unit Power Tools & Accessories
TexHuecka DOKymeHTaun:
Executive Vice President
Business Unit Power
Tools & Accessories
Paolo Luccini Jan Doongaji
Head of BA Quality and Process Management
Business Area Electric Tools & Acces
series
01/2012 01/2012
Paolo Luccini Jan Doongaji Head of BA Quality and Process Management
Business Area Electric Tools & Accessories
01/2012 01/2012
Executive Vice President
Business Unit Power Tools & Accessories
Head of BA Quality and Process Ma
nagement
Business Area Electric Tools &
Accessories
01/2012
Executive Vice President
Business Unit Power
Tools & Accessories
01/2012
ALGUPÄRANE KASUTUSJUHEND
Käsketassaag SCW 70/ WSC 7.25-S
5.1.1 Ohutus tookohl
Head of BA Quality and Process Mana
gement
Business Area Electric Tools & Acces
series
01/2012 01/2012
Executive Vice President
Business Unit Power
Tools & Accessories
Tehnilised dokumendid saadaval:
BukopncToByIe 3axnChi HabyuHnKu

BukopncTo ByTe 3axnChi pyKaBnCi

BukopncTo ByIte pecnipatop
CHMBOJIH

Ipeed 3actocyBaH-HRM npouHTaTe IHCTpyKuio 3 eknnyatauui

Bidnpaob Bani MaTepiAn BiDnpaBnIte Ha nepepo6y

Bolb 3MiHHN

CTpym

Homihalha
yactota
OeepTaHH B
peKmI
XoNocTO
xOdy

06eptiv 3a XBNHHy

Diametp HnBn

Micra po3TaawyBaHHI iDeHTnphiiauiHnx no3HaQK Ha IhCTpyMeHTi
Tin i cepiHn Homep IHcTpymeHTa Bka3aHi Ha Ioro 3aBODcbKni Tabnui. 3aHecitb ci daHi Do IHcTpkyu3 ekCnlyataui i 3abKn nnocnnaItecb Ha Hx, 3BeptaOuHcBdo HaIoro npedctabHnUcTa Ta do BiDiny cepBichoro 06cIyroByBaHHra.
Tn:
Bepcira: 01/02
3aBOdcbkN N:
2OnnC
2.1 3actocyBaHHa npn3HaueHHAM
IhctpymEnrBnEco6oO pyHy npKyIaRhy nnKy.
IhctpymEn npn3HaueHn dnn nnaHHa DepeBnH Ta noi6Hnx Do Hei MaTePianib, nactNky, rincOkapToHy, rincOBonoKOHnX PNT Ta KOMNo3HTHX MaTePianib Ha rIn6Hny do 70 MM Ta dnn BnKoHaHH noxUloro pi3aHH niD kyTOM BiD 0^ 10 56^
3a6bOpHaeTcBc 3acTOCBaTH iHCTpymENT dIy o6po6K uKdINBHX dIy 3DopOB'peOBOH, HapnKlaI, a36ecTy. IHCTpymENT npu3HaueHO dIy npopeciHoro KOpNCTyBaay, a TOMY Ioro EKCnpyataia, TexHicHe o6CnyROByBaHHa Ta peMOHT dOpUaTe Nlwe ABTopu3OBAHOM npcohany 3i cneuaIbHOIO nIdroTOBko. Ley npcoHAn nobHEn 6ytn CneuaJIbHO npoiHCTpykTOBaHm npo MOxJIbI He63neKn. IHCTpymENT Ta Ioro DonomixHi 3aco6M MoKyb CTATN DKepeLOM He63neKn B pa3i ix HnppaBnIbHOrO 3actocyBaHHaHEKBaIIfIKOBaHm npcoHAnom a60 npn BHKOPnCTAHHI He 3a npu3HaueHHM.
MoxkniBIO6laCTi 3actocybaHHa: 6ydiBeIbHm MaHaHnK, MaICTepH, peMOHTHi pO6OTn, peKOHCTpyKciT a HOBO6ydoBa.
EknpnyataiinHCTpymeHTaMOKlnBaIINue3aYMOBn,IO Hanpyra Nactota MepeXIKINBHeHHB iIDNObIdAOTb Bka3AHMa 3abOcckn Ta6nui.
3a60pOHaTcBc 3actocOByBaTH NnNtBHi DnCKn, Rki He BiIDNOBIAOTb BkA3AHM npaMeTpam (3OKpeMa, 0do diametpy, aactotn o6eptanra Ta TOBunH), BiDpi3Hi Ta WnIphiBaNBHi DnCKn, a TAKoX NnNtBHi DnCKn 3 BnCOKonerobahoi WBnKopixyoyi CTani (HSS).
3a6oPohReTbcBnKOHyBaTHnnHnMeTaJIb.
He 3actocobyTe iHctpymENT Ia CnNIOBaaHH rINOK Ta cTOB6ypib DepeB.
LIO6 yHnKHyTN p3Nky TpaBMyBaHHa, BnKOpNCTOByTe JInue opriHaJIbHe npIaNJaT a IHcTpymEnT Bnpo6HnTBA KOMnahii Hilti.
Iotpmytecb npinnicB 3 eknnyaataui, dorgny TeXHnoro o6cnyroBaHHra IHCTpyMeHTa, HabeJeHX B IHCTpyKii 3eknnyataui.
BhocHTn 6yIb-riKi 3miHn B KOHCTpyKuio IHCTpyMeHTa 3a6opoHeHo.
2.2 BmKau
Bmkaay/Bmkkau iHctpyMeHa
2.3 PyKoA rTKn
PykoTka Ta IoDaTKOba pykoTka
2.4 3axnchni npncTpii
3axnchakpnkaiBio po3axncnka
2.5 3mauyyBaHHa
3MaUyBaHHKOHCHCTeHTHM MaCTHNOm
2.6 Do cTahdaptTHoro KOMnIeKTy NOCTaHaHH BxOaRTb:
1 I H C T py M e H T
1Пил bHиДиCк
1 IHCtpyKci3 ekcnnyataaui
1 TopceBNI WeCTnrrpaHHN KJIIOU
1 PapanelbHHy npop
1 KaptonHe nakyBaHHa 6o Bani3a
2.7 BnKOpHcTaHHa NOoBMyBaIbHnx Ka6eJIb
BnKOpNCTOByIe TINbKN Do3BOJeH IINI ciE O6NaCTi 3AcTocyBaHN H NOOBKyBaJIbHI Ka6JI 3 DoCTaTHIM nonepeuHm nepepiOM. B iHwOMy pa3I He BnKIIouHeI 3HKeHH NOTyHXOCTI iHCTpyMeHTa I npeepiBaHN Ka6JIIO. Upe3 peryIapHi npomixkN uacy nepeBipAte NoobKyBaJIbHI Ka6JIb Ha HARBHICTb N0UKoJKeHb. N0UKOJKeH I NOOBKyBaJIbHI Ka6JI niDnraIb 3amHI.
PekomeHdoBaHi mHimalbHi nonepeuHi nepepi3n Ta maKcHMaJIbHa DOBXHn Ka6eIIO
| П一步一步 по за вдόюу | \( 1,5 \) \( {\mathrm{{MM}}}^{2} \) | \( 2,0 \) \( {\mathrm{{MM}}}^{2} \) | \( 2,5 \) \( {\mathrm{{MM}}}^{2} \) | \( 3,5 \) \( {\mathrm{{MM}}}^{2} \) | |
| Hашига в мереки 110-120 B | \( {15}\mathrm{\;M}\;{25}\mathrm{\;M} \) | ||||
| Hашига в мереки 220-230 B | \( {60}\mathrm{\;M}\;{100}\mathrm{\;M} \) |
He BnKOpHCTOByIte noDobKyBaIbHnx Ka6eJIb, nonepueHn nepepi3 dpotIB y kKnx cKnlaa 1,25 MM².
2.8 POnobxBybIhI Ka6JI IJr 3OBHiHix po6IT
IIN 3OBHIHIX poit 3actocobyte IInse Do3BoneHi dner ekcnnyatau i noobkybblhi Ka6e, IO MaOTb BiINOBIiHe MapKyBaHHa.
2.9 XnBJIeHH BID reHepaTopa a6o TpaHcΦopMaTopa
KINBHeHHa 0bOIOHCTpyMeHTA MoKe 3diIChHOBaTHc BId TReHepaTOpa 6o K BiD TpaHCFOpmATOp KaHCTyBa4a 3a yMOBNOTPIMAHnRAkHX BmOR: BnXIDHa NOTyHKHicTb y BaTAX OHOaMeHwe BDBiI nepeBNUeNOTyHKHicTb, BKA3aHy Ha 3aBOcBiKII Ta6NIuCi IHCTpyMeHTA, po6Oa HAnpyra NoCTiHO nepe6yBaE MExk Ax Bd +5 % Do -15 % BiD HomHaJIbHoI, a Yactota CklaJaae 50-60 F, B KOdHOMy pa3i He nepeBNUUOuN 65 F, a TAKoK E B HAABHOCTi ABTomAtuHn CTa6IJI3atop HAnpyrN 3 NyCKOBIM NiDCNHOBaYem.
Kateropnno 3a6oheho 3actocobvatn rehepatop/tpaHcphiomatop Ira Ondohoyachoro KINBneHHI HxHCTpyMeHtIB. Pia C BmkaHHBmkaHHI HxN x npctpoB BmkaHOb CTpNk HAnpyr, BiD RkN X IHCTpyMeHT MoKe BInTn 3 naNy.
Ha TpaekTopiPiHJIAHHe NOBHHo 6yTH XOJHHCTOPOHHX npedMeTIB,3OKpeMa, RBnHTIB, cBaxIB TOIO. UK
m) 3a6bopohcTa HATNCKyBaTH KONky fikcybaHHIHHdEJ Do NOBHOI 3ynHKn NnHbHOrO dNcKa.
n) He HanpaBnaIte IHcTpymeHT ha iHux IIOdeN.
0) O6OB'3KOBo po3'RCHTb DiTAM, 10 rpaTHc3 eJe.
KNH KTPoIHCTpyMeHtOM cyBopo 3a6OpOHeHO.
(HE) IHCTpyMeHr He npn3HaueHn DnI 3actocyBaHH
KHRA dITbMn a6o HeDocHTb φi3NuHo CnIbHNM OCO-
He- 6amn, 10 He OTpHMann IHCTpyKTaK.
[4- q) Bn6npaIte 3ucHnn noDaBaHH 3anExKHO BiD nHbHorO dNcKa Ta o6po6NHOBaHoro MaTepiany - Ldo3BOJNTb yHNKHHTn 6JOKyBaHHaNcKa Ta 3BO-poTHOI BiJaayi.
r) YHKaIe neperpiBHaH KINiB 3y6uB nJKN.
s) Pia qac po3nHIOBaHHa nlaactmacn cni yHKaTH II nnabHeHHa.
HNC
t) Nepu HIX po3noHnHaTH po60Ty, 3'acyte Knae Hne6e3neKnnny, OonpnuBom y BATHc. BHKOPNCTOByTe 6yDIBeBbHn nnIOoc 3aTBepdxHeHO Knacy 3axNcty, 0o BiINOBiJaM MicueBnM BnMOram 0o0 3axNcty BiD nHny.
u)ПиI,IO MICTb B co6i Taki MatepiAnH,Rk fap6nBMICTOM CBHHQIO,TnPCy DeAKNX Nopid DepeBHNH,HepaII Ta Metan,MOKe 6ytN ukiDNHBIM Dnra 3doB'。PnKoNTAKTI 3 TAKIN NnONM a6O Noro BnHexaY KOpNCtBuBaHa eEeKTPoIHCTpyMeHTa Ta B NIOde, LniD Yac pO6OTn 3 Hm 3HaXoJrbcn IO6n3y,MOHNKHyTN anepriHi peakii Ta/a60 3axbOpOBaHHaNXaJIbHNx IJnxIB. DeKpi pi3HOBNi Nnly,HanpNKlaI,DepeBHNu Dy6a Yn 6yka,BBAkaIObCn KaHcpePOEHHM,OC6bNBO B NOcDAHHi 3 npicaKaAMnDn8 O6pO6Kn DepeBHNH (XpOMaT,3aco6n Dnra 3axcyTe DEpeBHNH。Do O6pO6Kn MaTePIaJIb,TOcMIcTn a36ecT,DOnyCKaIObCn NnIe PhaxIBci 3i CneCiAlbHO NiIroTOBkoH。HamaraIteCn PauObATn NnHe 3CnpabHNM NnIOBIDBoDM. 3 MeTOO eFekTHNB BiBeDeEHN Hny 3AcTOCObYte BiNDOBHN 6IbHN Nnlooc,peKOMeHDOBAHN KOmnaHien Hilti DnRA BnJaENHn DepeB'HarO Ta/a6o MiPaIbHorO nHy,CneCiAIBHO po3paXOBaHN Ha cnNyataciHOcame 3 cHM KOHKpeTHM eEeKTcTpymETom. Notyp6yIteCb npo HaneKHy BeNaio POboOOro Micu.PekomeHdyETCB Bpecnipatop 3 φInbTpOM Klacy P2.DotprmyCHHHx y CBOI Knai HiOp TM npHHnciB o6pO6NobAHnx MaTePiAnIB.
5.3.2 HanexKHe 3aCTocyBaHH eIeKtpoHcTpymentTb Ta D6aHnBn DOJrA 3a HmN
a) RaKuo niacuacpo6oTH eJektpoiHcTpymeHTOM Kytb 6ytn nooKoJKeHi npHXOBaHI eJektpoBODn a6o Ka6eni MepeKi XNBHeHH, yTPHM IHcTpymeHT 3a pyKoHTKn 3 iOJaIiHNm Ha KaMn. B pa3i KOHTaTy 3 eJekTpOpBoaam RkNx npoxoHTb cTpyM, He3axuheHi Metanet Tani IHcTpymeHTa MoKtYb BnBHTncra NiD HroTO, 0o O3HaauE dNn KopHCTyBaay pN3NK JeHHA eJekTpHMM cTpyMOM.
b) HadiiHo 3aikcyte 06po6nIOBAHy 3arOTOBky. Dna HadiHoro yTPMaHH 3arOTOBKn BHKOpHCTOByTe 3aTHCKHN npHcTpi a6o J neata.Tak BOHa 6yde 3aikcoBaHa HadiHiwe, HIX KOJI II npocTo ytpmYBaTH B pyu, KpIM TOrO y Bac 06nDi pyKN 6ydyTB BInbHI dnn po6OTn 3 IHCTpyMeHTOM.
c) Doctemehno yneBHITbcB TOMy, 0o dIaR K 3actocobyBaHOro po6oyoro IHcTpymeHa B BiHN 3aTHCKHn npCTpi Ta 0o cei 3M po6ouH IHcTpMeHT Opa3y HaleKHM qHH 3aikcoBaHO y 3aTHCKHOMy naTPOHI.
5.3.3 EneKtpnHa 6e3neKa y6yJeYTBOpH
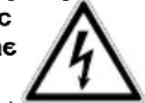
13
m
pu
1
[AH]
10
4^
yTb
.
( x - 2x) t - xy^2 = ( x - 2x) f^ t
(b)
. 0)
b
40
10
i
1
iorg
MO
c)
0
1,2,3 4,5,6
He-
DOIH
HTN
[ra]
5
Poboe Micce NOBHHHe 6yTH DOCTaTHbO OCBITneHe.
b)
5) HocBaHHe Ipo HanEeHy BENTHnAeIO p000-010
iB Micu. HeIOCTaTHbO npoBITpOBAHe po6oe Micue MOKe CTaTN PnUHHO NOrIPsaHHa CTAHy 3dOpOB'
Hcpe3 BnCOke NINObe HabaHTaXeHHa.
MO-
no-
5
WNTE

1
ypa-

PiJ qac po60TH 3 IHCTpyMeHTOM CAM KOpHcTByBaU, a TaKoX Oco6n, 10 nepe6yBaHOb 6e3nocepEnhbo B Micui npOBeJeHHa Po6i, NOBHHI BHKOpHcTOBvBaTH oBiiDiHi 3axHChi OKyIaH, 10JOM, HabyuHNKn, po- 6quiypkabuqi Ta JERKn pecnipatop.
SMC
He BMHKaIte IHcTpymeHT, kUo Ioro NHJbHn DNCK, 3axncha KpnuKa a6o Bi6po3axncha KpnuKa He 3MOH TOBahi HaleXHHM YHHOM.
6Eckcnnyatauia

OSEPEKHO
Hocitb 3axnchi pykabuCi. Pkiyui KpOMKn nIINbHor cka roctpi.BoHH MoKyTb ctaTN npUHHOIO TpaBMn.
OBEPEXHO
Kophtyteb pecnipatopom Ta 3axhchmm Okypamn.Пд уac nIIaHnB Bi6yBaetbc 3aBnxpeHHn TnTa TnpcN. 3aBnxpeHm Matepian MoKe 6yTn UkiDInBnДnOprAHIB DnxaHH Ta oueN.
OBEPEXHO
BHKOPHCTOByTe 3axnchi HabyuHnKn. IiD qac nI INCTpyMeHT e DkepeNoM uMy. IiD iieIO uMy opra CnyxMoKyTb NoctpaKaDaTH.
6.1 3aHa HnHbHorO nCKa

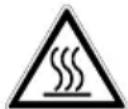
OBEPEKHO
Pn 3amhi po6o0r o IHcTpymeHa BnraHte 3ax pykabuci. Pid yac po6oTn cam IHcTpymeHT, Ioro 3aKnn Knn fnaHeCb Ta 3aTnCKn rBnHT HarpiaBoTBca.
OBEPEKHO
Nepu HIX BCTAHOBHOBaTH HOBNI NJIbHHINBCIbC, 00 BIH BIINOBiJaE TexHiYHM BHMOrAMJEXHHM CHHOM 3aTOeHH. FocTn NJIbHH INCHpepeyMOBOIO 6e3doraHHORO BIKOHAnHPO3nny.
6.1.1 3HATTANMBHORO DnCKA 3
- BnMItb 7TeNceBHy BnKy Ka6eHIO XnBHeHHa 3 po3eTKn.
- Hatnchitb Khonky fikcaui nnHneJra.
- BrBnHcyIte KpINnblHn TBINT nNbHorO DNCKa 3 DOnOMoroTO TopeBOrO WeCTnRpaHHORo KNIOUa, ax NOKC CTONOPHNI WTHOT NOBHcTHe 3aΦIKcyETbcra
- Nocla6Te KpInnIbHn rBnHT, o6eptaOu noro Klu- yem npOTn roDHHNKOBOI cTpiKN.
- BnMItb KpiNJIbHn I TBnHT i 3OBHiUHII 3aTnCKHn PhaHeuB.
- BiDyHnItb Bi6po3axnchCy KpnIky i 3HiMItb NInIbHn nnCK.
6.1.2 YcTaHOBHeHHH NnIbHOrO DnCKa
- BnMItb 7tencelbHy BnKy Ka6eHIO XnBHeHHr 3 po3eTKN.
- Ounchitb Kpinnnblnn Ta 3aTnckHn FnaHci.
3.YctaHObitbHaMicue KpinnblHn PhaHeu. -
BiikpnIte Bi6po3axnchHy KpnIky.
-
OBEPEKHO BpaxOByIte cTpiKy, AKOIO No3Ha-ueHO HAnpR M OeptaHH NINbHOrO DnCKa. YCTaHOBITb Ha MICe HOBNI INJbHNI DnCK.
- YctaHObitb Ha Micue 3OBHIHIN 3aTnCKHNI PhaHeCb.
- 3aKpinitb 3aTnCKHn ΦnaHeCb, 06eTpauOn 3aTnCKHn TBNHT 3a rOuHHNKOBIO CTpiIKoIO. Ppi cboMyIi-TakoK CnID HaTNCHyN KHONKy 6NoKyBaHHa WnHH-DeJIa.
- Ipeed yBeeHnM B ekCnnyatauio nepeBipTe nIbHn DnCK Ha HadiHicTb nocaKn.
6.2 YcTaHOBJIeHHr rHn6HH npOnnly 4
BKA3IBKA
YcTaHOBHeHa rHbHa npOHHy 3aBxKn IOBHHa 6yTH nPn6n3HOHa5-10MM6iNbBa3aTOBunHy o6p HJ3aTOrTOBKn.
IIN6Hny npONnMy MOxHa BCTaHOBIOBaTH INaBHO B MeKaxBID0do70MM.
- BnMItb 7TeNceIbHy BnIky Ka6eIIO XnBLeHHr 3 po3eTK.
- NocTaBte iHcTpymeHT Ha niDcTabKy.
- Po36nokyTe 3aTHCKHn BaXiNb dIra perynIOBaHHr IIN6HN npOnNHy.
Ctpinka Ha uki, o po3aObaHa Ha Kopnyci peyKtopa, nokaYc BCTaHOBHeHy rIn6HnHy npOnnly.
4.Пдимить IncTpyment, npokpyuOHy Ioro, i 3doMCHI nOMORIO 3aTHCKHOrO BaKeJI BCTaHOBITb NOTpIbHyIC-rn6Hy npOnnIy.
6.3 PerylloBaHHnoxHOro npOnnly 5
NoxnooPi3aHHIHCpMeH MoKe 6yTH BnCTabJe Hna 6yDb-Kn KyT BiD O do 56^
E
6.3.1 PeryIHOBaHH noxHnoro nponny i3 BHKOPNCaHHAM nonepeHbOi HacTpoKN
Ipepe6aueHo 3 BapiaHTn nonpepeHbOi HacTpoKn: 22,5°, 45^ Ta 56^ .
- BnMItb wTeNceIbHy BnIky Ka6eIIO XnBJIeHHra 3 pO3eTKn.
- Po36NoKyIte 3aTnCKHn BaKInb IJI BCTaHOBHeHH KyTa pisaHH.
- NobepeHItb OCHOby y nonoKeHHn iN KyTom 0^
- YctaHObitb nokakqNK nonepeDhboi HacptpoKu KyTa y noJoxeHHra, 0o BiIDNOBidae notpi6Homy KyTu.
- NobepHITb OCHOBy Do ynopa.
- Miuho 3aTNCHTb 3aTNCHH BaxKiJb DnB BCTaHOJIeHHKyTa pi3aHH.
6.3.2 PerylnoBaHH noxHoro nponny 6es BHKOpNCtAHn nonepedHboi HactpOKn
- BnMItb wTeNceIbHy BnIky Ka6eIIO XnBLeHn3 pO3eTKn.
-
Po36nokynte 3aTNCHN BaKInb DnB BCTaHOBHeHH KyTa piaHH.
-
NobephiO ochoby y notpi6he nooKeHHa.
- MiuHO 3aTNCHTb 3aTNCKN BaKJIb DJIa BCTaHOBJIeHHKaYTa pisaHHa.
6.4 NJIaHHa 3a po3MiTKOIO
Ha nepehni yactnhi OCHOBn IHCTpymeHTa po3taooba nokaKuHK po3mitkn (0^ i 45^ ), KnBnKOpNCTOBYcBc DnTochoro BnKoHaHH npAmnx Ta noxHnX npOnnIB 3aIeKHOBI Bn6paHOrOkyTapi3aHH.K BiNobidae BHyTpuiHi CTopoHI NnBHorO DnCKa. Noka KUHK po3mitkn 3haxoHntbcr y nepeHbOMy BnpisiDn NnBHorO DnCKa.
- HadiiHo 3aΦikCyIe 06pO6nHOBaHy 3arOTOBky, 06 BOHa He MOrla 3MiCTHtncr.
- 3arotobky po3mictb TaKHM uHOM, uo6 nIbHn DnCK mR BinbHO niD Heo oBeptatncr.
- IpekeKaHTeC, 10 BIMKau iHCTpyMeHa 3haxoDHTbCBy BIMKHeHOMY NIOXKeHHI.
- YcTaBTe WTeNceJIbHy BnIKy B pO3eTKy.
- YctaHObitb OCHOby IHCTpymeHTa Ha 06po6NIOBaHy 3aROTOBky TAKIM YHOM, 06 PnIbHm DnCK He KABCR 3aROTOBKn.
- HatnchItb BmHKaU.
- Beitb ihctpmEn3 BiINOBiHNOU WBNKICTHO B3IOBx po3MIKN NO 6o6nIOBaHI 3arOTobci.
6.7 HnlaHHH 3 HAnpamHOO uHHo
BKA3IBKA
HINHA 3a DOnOMOIO HAnpMHOI UHH MoKe 3HN3HTN pN3IK BUNHKHeHH BiDaui.
6.7.1 YctaHOBJIeHHr/3HimaHHH iHCTpyMeHTa 3 aanTepa HnprmHoi WHHN
1.ДeMoHTyIte napaJIbHn ynop,ЯKIoYo Ioro BKe BCTaHOBJIeHO.
2. YBeiB OCHOBy B nepeHi pe6pa aanTepa HanpA MHOI uHHN.
3. Повсгю BCTaBTe OCHOBy i3 3aДньоi CTOPOHnВ aanTep HapPamHoI ShHH. OCHOBa NOBHHa 6yTN HaDiIHO 3aФIKCOBaHa Ha 3a- dHbOmy pe6pi.
- Lio6 3nHt n ii, 3nerka notarHitb 3aHne pe6po Ha-3aT a dictaHbTe iHcTpymeHT 3 aanTepa HanpAmHOI uHHn.
6.7.2 Io3doBxHi nponnn niK KyTom 0°
CTaHOBIb Nnky na3OM aanTepa HAnpMHOI uHHn Ha pe6po HAnpMHOI uHHN.
67.3 NoaonbHn nponnnn niKyTom 56° OMRAPOSSMTRK
Bedi b ihtpymeh 30bhiuHboK pomko o daantepa hnpamHOI uHH B3doBx HnprAmHoro pe6pa uHH, 6o BVHOMy pa3i nIbHn DnCK 3ainaTme HnprMHy uHHy.
6.7.4 Kytobi nponnn y nloounHi
BKA3IBKA
Ioka3aHn KyT piaHHBk3yE BEnuHy KyTa,Ha Kny nponn BiDxHaeTbcra BiD nHAAHn NiID npAmm Kytom.
1.Пикладын HanpmaHy HnHy Hny BoIO BIdmitkoIdo KpOMKn O6po6NHOBaHOI 3aROTOBKn i NOBepHITbShHy HactiBKn, 6o6 BaKaHN KyT 6yNo BnHOHaKyTOBI shKani HanpoTH HyNbOBoB I DMITKN.
2.3aikcyte HanpymHy HINHy DbOMa Ctpy6uHaMn.
6.8 NIIJIHHI BiDpi3KIB
- 3aKpinitb nHaHky 3Hn3y 3a DOnOMoROD BDOX Ctpy6-
UHN.
BKA3IBKA IHCTpyMeHT NOBHeH 6yTH PO3TaJIOBA
Hn Ha HaprMHi 5HHi 3a O6po6JIIOBaHO 3arTO
KOIO. - OSEPEXHO CnIkyTe 3a THM, uO6 nHbHN HNCK He TopKABcO 6oPo6IOBaHOI 3aROTOBKN. KIB YCTAHOBITb IHCTpymEt y npn3HaueHIN dNRA zuBOrO oNacti HanpRmHOI uHHN.
- YbIMKHiTb IHCTpyMeHT.
PIBHOMipHO nepecyBaIte iHCTpyMeHT HaI 06po6JIIOBAHOIO 3aROTOBKOHO.
3axnchnnuTOK BiDkPnBaetbCn npn KOHTaKti i3 60KOBOO KpOMKHO 3aRTOBKn Ta 3aKPNBaetbCn 3HOBy, KOIN INCTpyMeHNT BnJDKKae y KIni HAnpMHOI uHHN.
6.9 YnueHHa KaHany DnBuaJeHHa CtpyKKn 8
OBEPEKHO
IhctpymEn 3a6opohAeTbca npHcDHyBaTH Do MepeXi.
- BnKpyTb rBnHT, po3TaIIOBaHm nO3aNy 3 HNKHbOi CTOPOH 3axNCHO KpnuKN, Ta 3HIMtB cDHaJIbHm NATpy6OK dIra nnococa.
- Ouchitb KaHAN dNn BuaaeneHHA CtpyKKn Ta eHaB-Hn natpy6ok.
- Notim 3HOBy BCTaHOBtB eHaJIbHn nATpy6OK Ha KaHAn DnBnAaIeHHr CTpyKKn Ta 3aKpIniB eHaJIbHn nATpy6OK 3a DonOMOrOIO TBnHTa.
- Petelbno KOHTPOJIHOte, YI 6e3dOraHNO npauHOToTa YI He 3aKINHIOToB IORO pyxomi yacTnHN, YI He 3naMaJIncA aOHe 3a3HaJN iHUnx NOWKoDKeHb DeTAli, BiI JIKX 3aJIeKHTb cnpaBHpa o6Ota IHCTpy-MENTa.
6.10 NIIJIaHHH 3 BnJaJIeHHAM TnpCH
BKA3IBKA
PyHa nIpynHa nIIka oIaHaHa eHaJIbHm NaIpy6kOM, kIi po3paxOBaHn Ha HAIbIbN noIpuHei T IlaHrib IIIOOCocIB diametpom 27 MM. IJr NiID'EDHaH BiICMOKtYBaIbHOI IlaHrN IIIOOCoca, MOJINBO, 6yJe Notpi6eB BIDNOBIDHn aIanTep.
OBEPEKHO
Tnpca 6yBaE WkDnBIOO DnI 3dOpOB' I MoKe BnKIn 3axBOPOBaHH DnXaJIbHIX WJrXiB Ta WkipN, a TaKoX anepriHi peakii.
NONEPEDKEHHA
Дяк BiNn TnpC MoKyb BnKnKaTn 3axBopOBaHHpaK.MaOTbcHa yBa3i MiHepaIbHnПnI,dy6oBa Ta/6ykoBa Tnpca,3OKpema,BnoEdHaHHI 3 npocuKaMnДЯ O6po6k NdepeBHH (XpOMaTH,3acO6n DnI 3axHCTDepeBHH).
OBEPEKHO
PekomeHdyctb3aBKnBnKOpHCTOByBaTH 3 iHctpymeHTOM BiNObiHN NopTaTHBHN NIOBNOBIOBAuWVC 40-M (dna depeBHH) a6o VCU 40-M (dna dpeBHH Ta MInepaIbHnx peOBNH). Kkuo NIOBIDBeHeHH HeMa e HBOHO HEMOXJIHBE, KOpHCTyTEcbpecnipatopom Knacy fInbTpauii P2. DodaTKOBO no-Typ6yIteCb TaKoX npo HaneKHe npoBiTPOBAHH, ceDOnOMOKe 3MeHUnTH KOHcHTpaUIO NNy.
aTN
Ku npaHyeTbca 06opo6ka iHnx MaTepiAIB, npOMnCIOBn ekCnnyatauiHnK NOBHeH y3roDHT CneuaIbHi BmOrn 3 BiNOBiDnM npOpeciHm COIO3OM.
66.11ПИЯHHH 6e3 BnJaJIeHHI TnpCn
BKA3IBKA
Bn TakoK MoKeTe CkOpNCTaTHcR NOBOPOTHM nATpy6-KOM DnB BiDBeDeHHr CTpyKKn.
O6epitb noTpi6Hn HAnpMOK BiIDBOy CtpyKKn, npocTo o6epTaouH nATpy6ok TaKIM YHOM, Uo6 cTpyKKa 6yna cnPMAOBaHa BID Bac.
7 Dorigi texhiue o6cnyrobyaHHA
OBEPEKHO
IhctpymEn 3a6oPoHaETbCn PnHcHyBaTH Do MeP
7.1 DOrn3a 3miHHM po6oHm iHcTpymeHTOn
TTOO BIDANATN HAKONHcHn 6pyu Ta 3axn NOBepxHIO 3MINHO POBOHOro IHCTpymeHaTa BiD Kopo3IO DCNTb YAC BiD YAcy npOTnpaTH IX raHupkoH, IpocR TOIO MACTNIOM.
7.2 DOrn3a iHCTpyMeHTOM
OBEPEKHO
Utpmyte iHCTpyMeHT, 3OKpema, Horo pyKOHTKN XHM i YnCTHM BID 6pydy i MaCTHn. IJRA YnKOpHCTyITeCb 3acO6amH, Uo MicTATb B Co6i C
30BhiHn KOpNc IHCTpyMeHTa BnroTOBneHn i3 ydapToPnBkoI nactMaCh. HknaJaHa KaOp Nyci BnroToB enactOmePHoro MaTepiany.
He npaioTe 3 IHcTpymENTOM, RaIO B HbOMy no3abBaanbc BeHTnauiHi npop3n! ObepeKHO npouuataBeHTnauiHi npop3n cyxOo uTkoIO. CniDkyte 3a TmUo6 BCEpeDHy Kopnycy IHcTpymEntHa He notpannnCTOPOHNI npedmetn. PerynpHO ouHuyte 3OBHIuHi nBepxhi IHcTpymenta BOIoroHO npotpaJIbHO rAchipKO. DnBvdaeneHH 6pyd 3a6OpOHeHO 3actOCOByBatn BoHn po3NIOBaay, naporehepatop a6o K cTpyMInbBOU
AДже ц Me MoJKe Iprn3BecTи Do NopyuWeHHЯ eIeKTpObe. neKn iHCTpyMeHTa.
7.3 YHueHHa 3axnchoro npncptpo
- Npeed uHnEHHa 3axnCHnx npncTpoIB 3HiMitb nIJIbHn DnCK.
2.ObepeKHO YnCTbTe 3axNCHi npncTpoi cyxOIO zuT- KJI.KOHO.
3. 3a DonomoroIO BiINOBiDHorIO IHCTpymeHTa BnDaIITb BiKlaDeHHI cTpyKky, IIO HAKONHUNNCB BCEpeHi 3axnCHnx pNCTpoIB.
4.YctahOBiB nIJIbHn DnCK.
7.4 TexHiUHe 6cnyroByaHH
NONEPEDXEHNA
DopemOHy eJekTpHoi yactHHn IHcTpymeHTa 3any- chaTe nHwe faxibra-eJekTpHka.
CV- OPEPEKHO HHE
Kabenb KnBneHH eneKtpoiHcTpmyHa 3a3HAB NOKOHeh, Horo Heo6xidHO 3amHHT CneuaJI HanaOJKeHM Ka6eem XNBHeHH, KIN MOXHa UK MOBATN B cny6i cepbcHOrO o6cnyroByBaHH.
Perynepno nepeBipraTe Bci 30BhiHi Detani iHCTpyMeHa Ha BiDCyTHiCt b NOIKoDKeHb Ta Bci Noro opraHn KepyBaHHa H cnpabHy po6Otu. HikoN He npauOte 3 iH'CTpyMeHTOM, Ako O HbOro E BnIMI NOIKoDKeHHa 6oHeCnpaBHO FYNKIOHYOTb OpraHn KepyBaHH. Y BnPaKy Heo6XiHDocTi peMOHTy 3BeptaTecb Do aBTOpN3OBaHOI cepBicHO CIyXkOn KomnaiH Hilti.
7.5 KoHTpOJIb nicIe BnKoHaHHaDOrIaY TeXHiUHorO 06cIyROByBaHHa
Iicn npoBeeHn I Dorny nTexHiyHoro 06cIyROByBaHH nepeBipTe, u 6yNo BCTaHOBNeHo Bci 3axnci npCtpoiTauN yHKciOHy tboHnHaJeKnMnH
Ioo6 nepeBipnTH BiKndHm 3axnCT, BiKpnTe Ioro np-1icJIy BiDnyckaHH pyKn ynpablinHH BiKnHm 3axnCT BhictIO 3a DonomoroIO pyKn ynpablinHH. NOBHN H WbNko i NOBHcTIO 3akptncr.
8 POnyK HecnpaBHOCTeI
| Hecnpabnictb Moxlnba npuynha Ucyhenna | ||
| Ihctpyment npaioe He Ha no-BHy notykhictb. | Повькалын Kaobel 3aHaTdo DOBm Ta / a60 Ma€ 3aHaTdo MaII NoppeuHn Nepei3. | Викорисову te ПОДБЖУВALNH Kaobel HALEKHOД IOBXHn Ta / a60 DoCTaTHIM NOpeuHm Nepeipizom. |
| ЗанадTo Hn3bKa Happya Джepela eNeKTPOJKNBLeHn. | Пд'EDнTe ICHTpymeNT do iHsOro DjKepeLa eNeKTPOJKNBLeHn. | |
| Ihctpyment He BmKac7bc8 | 3бiB Mepexi eNeKTPOJKNBLeHn. | ДлЯ nepeBipkn HaBHOCTI JXWBleHn YBiMKnITb iHsN IHCTpyMeNT. |
| ПошКoДжeHn Kaobel JXWBleHn a60 Ito O StencelbHa BnIka. | ДлЯ nepeBipkn 3BepHITbCdo phaxiBzA-NeEeKTPnKa i - B pa3i Heo6xIDNoCTi - BVKOHaTe 3aMIny. | |
| HecnpabHn BmKacu. ДлЯ nepeBipkn | 3BepHITbCdo phaxiBzA-NeEeKTPnKa i - B pa3i Heo6xIDNoCTi - BVKOHaTe 3aMIny. | |
| Знocинся ByrilbHi Zitkn. ДлЯ nepeBipkn 3BepHITbCdo phaxiBzA-NeEeKTPnKa i - B pa3i Heo6xIDNoCTi - BVKOHaTe 3aMIny. | ||
| BidCyTN/3nIXeHa Notykhictb BCMOKtBuHn. | Зався Канл Дг BIDBeDEHn Tn-рсn. | Пючисы Канл Дг BIDBeDEHn Tnрсn. |
9yTnIi3aui

BilbuiB MATEPIAIB, 3 kNx BnroTOBHeIO IHCTpymeHT N KOMnaHII HIti, npuaTHI dN BTOPINHOI nepeo6Kn. PepeyMOBOIO IIN BTOINHOI nepeo6Kn e HaleXHe POzDIneHHa 3a MATEPIAAMN. Y 6araTbox KpaIHAX KOMNAHII HIti BKe yKlana yroN pno nobepHeHH CTapnx IHCTpyMeHTIB, 10 BiDcLyKnn CBOE, dN Ax yTNIsaui. l3 cboR npNbOdy 3BeptaTeCb Do BIDiny cepBicHOrO oClyroBvBaHH a6o Do CBORO TOpribelHOrO KOHCynbTaHTa.
uk
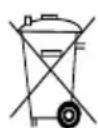
Tinbkn nIg KpaH-ueHeHIB EC
He BnKndaaTe eNeKTpoiHcTpymeHT y 6aKn dna noobyTOBOro cmiT
3riH0 3 DnpEeKTHBOO EbponecBkoro CoIOy 0do yTnI3aqii CTaporo eNKeTpHORo ta eNKeTPOHORo yCTaTKBaHHaTa 3 HaioHaJIbHM 3aKOHOaBCTBOM eNKeTPOIHCTpyMeHTn, TepMIn CnyK6n AKNX 3akHnBCn, Heo6xIDHO 3bnpatn Okpem o I yTnI3yBaTN eKoJOriHNO 6e3neuHm C nO cO bOM.
10 TapaHTiHi 3o6OB'raaHnBnpo6Hnka iHcTpymeHTa
I3 nHTaHb rapaHTi 3BepTaHTecr do BaWOrO MiceBoro napTHepa KOMnAHII HILTI.
11 CeptnphiKaT BiIDNOBIDHOCTI EC (opurihan)
Ha3Ba: PuyhaunpkyIpaHannka
Позачени ТИNY: SCW 70/ WSC 7.25-S
Bepcia: 01/02
Pik Bnyncy: 2011
3i BciEIO HaleKHO BIDNOBdaIbHicTHO 3aRbIReMo,
IO ueBnpi6 BiINOBidae HAcTyNHm DnpeKTHBaM i
ctAnapTAM: 2004/108/EG, 2006/42/EG, 2011/65/EC, EN 60745-1, EN 60745-2-5, EN ISO 12100.
AksiohepHe ToBapnCTBo Hilti, Feldkircherstrasse 100, FL-9494 Schaan


Paolo Luccini Jan Doongaji
Head of BA Quality and Process
Management
Business Area Electric Tools &
Accessories
01/2012
Executive Vice President
Business Unit Power
Tools & Accessories
01/2012
TexhiuHa DOKyMeHTaui:
Head of BA Quality and Process
Management
Business Area Electric Tools &
Accessories
01/2012
Executive Vice President
Business Unit Power
Tools & Accessories
01/2012
Hilti = registered trademark of Hilti Corp., Schaan
W 4025 | 0214 | 00-Pos. 1 | 1
Printed in China © 2014
Right of technical and programme changes reserved S. E. & O.