
KST2 UPRIGHT EASYFIX - Steam cleaner KARCHER - Free user manual and instructions
Find the device manual for free KST2 UPRIGHT EASYFIX KARCHER in PDF.
User questions about KST2 UPRIGHT EASYFIX KARCHER
0 question about this device. Answer the ones you know or ask your own.
Ask a new question about this device
Download the instructions for your Steam cleaner in PDF format for free! Find your manual KST2 UPRIGHT EASYFIX - KARCHER and take your electronic device back in hand. On this page are published all the documents necessary for the use of your device. KST2 UPRIGHT EASYFIX by KARCHER.
USER MANUAL KST2 UPRIGHT EASYFIX KARCHER
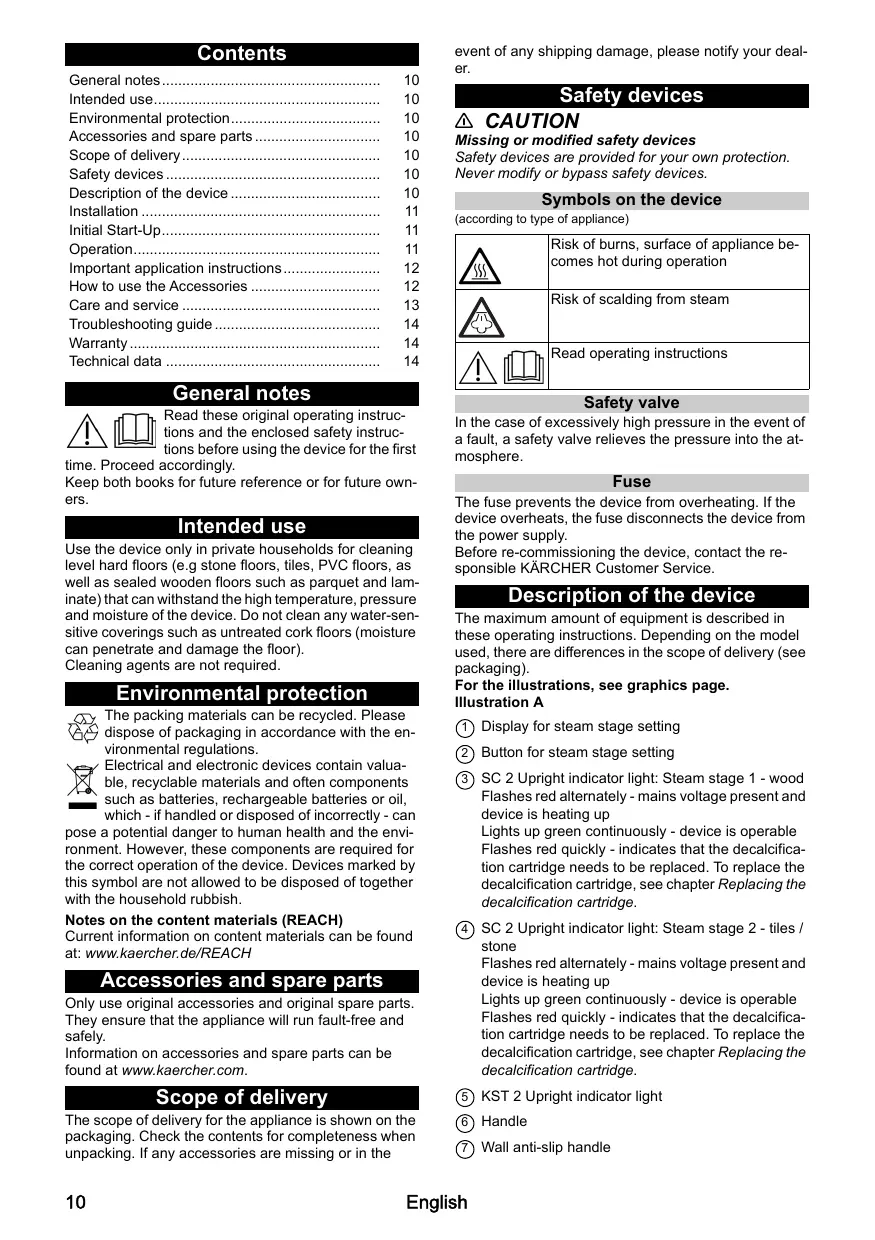
Environmental protection. 10
Accessories and spare parts 10
Scope of delivery. 10
Safety devices 10
Description of the device 10
Installation 11
Initial Start-Up 11
Operation 11
Important application instructions 12
How to use the Accessories 12
Care and service 13
Troubleshooting guide 14
Warranty 14
Technical data 14
General notes

Read these original operating instructions and the enclosed safety instructions before using the device for the first
time. Proceed accordingly.
Keep both books for future reference or for future owners.
Intended use
Use the device only in private households for cleaning level hard floors (e.g. stone floors, tiles, PVC floors, as well as sealed wooden floors such as parquet and laminate) that can withstand the high temperature, pressure and moisture of the device. Do not clean any water-sensitive coverings such as untreated cork floors (moisture can penetrate and damage the floor).
Cleaning agents are not required.
Environmental protection

The packing materials can be recycled. Please dispose of packaging in accordance with the environmental regulations.

Electrical and electronic devices contain valuable, recyclable materials and often components such as batteries, rechargeable batteries or oil,
which - if handled or disposed of incorrectly - can pose a potential danger to human health and the environment. However, these components are required for the correct operation of the device. Devices marked by this symbol are not allowed to be disposed of together with the household rubbish.
Notes on the content materials (REACH)
Current information on content materials can be found at: www.kaercher.de/REACH
Accessories and spare parts
Only use original accessories and original spare parts. They ensure that the appliance will run fault-free and safely.
Information on accessories and spare parts can be found at www.kaercher.com.
Scope of delivery
The scope of delivery for the appliance is shown on the packaging. Check the contents for completeness when unpacking. If any accessories are missing or in the
event of any shipping damage, please notify your dealer.
Safety devices
CAUTION
Missing or modified safety devices
Safety devices are provided for your own protection.
Never modify or bypass safety devices.
Symbols on the device
(according to type of appliance)
| Risk of burns, surface of appliance becomes hot during operation | |
| Risk of scalding from steam | |
| Read operating instructions |
Safety valve
In the case of excessively high pressure in the event of a fault, a safety valve relieves the pressure into the atmosphere.
Fuse
The fuse prevents the device from overheating. If the device overheats, the fuse disconnects the device from the power supply.
Before re-commissioning the device, contact the responsible KÄRCHER Customer Service.
Description of the device
The maximum amount of equipment is described in these operating instructions. Depending on the model used, there are differences in the scope of delivery (see packaging).
For the illustrations, see graphics page. Illustration A
① Display for steam stage setting
② Button for steam stage setting
③ SC 2 Upright indicator light: Steam stage 1 - wood Flashes red alternately - mains voltage present and device is heating up Lights up green continuously - device is operable Flashes red quickly - indicates that the decalcification cartridge needs to be replaced. To replace the decalcification cartridge, see chapter Replacing the decalcification cartridge.
④ SC 2 Upright indicator light: Steam stage 2 - tiles / stone
Flashes red alternately - mains voltage present and device is heating up
Lights up green continuously - device is operable Flashes red quickly - indicates that the decalcification cartridge needs to be replaced. To replace the decalcification cartridge, see chapter Replacing the decalcification cartridge.
(5) KST 2 Upright indicator light
⑥ Handle
⑦ Wall anti-slip handle
(8) Steam lever
⑨ Cable hook with cable fastener
10 Decalcification cartridge
11 Filling hole for water
(12) Water reservoir with reservoir cover and carrying handle
(13) Mains connection with mains plug
14 Unlocking button for floor nozzle
(15) Floor nozzle
16 Hook and loop fastener
(17) Microfibre floor cloth (1 x)
18 * Abrasive floor cloth (1 x)
- optional
Installation
Installing the floor nozzle
- Hold the device by the handle.
- Connect the lower section of the basic unit to the floor nozzle until it audibly latches into place. Illustration B
Installing the floor cleaning cloth
- Attach the floor cleaning cloth to the floor nozzle.
a Place the floor cleaning cloth with the hook and loop strips pointing upwards on the floor.
b Place the floor nozzle onto the floor cleaning cloth, applying slight pressure. Illustration C
The floor cleaning cloth will stick to the floor nozzle of its own accord due to the hook and loop fastener.
Initial Start-Up
ATTENTION
Device damage due to calcification
Always work with a decalcification cartridge.
- Insert the decalcification cartridge into the water reservoir and press it firmly into place. Illustration D
Installation information
When steaming for the first time after removing and reinserting the decalcification cartridge, the steam jet may be weak or irregular, and individual drops of water may be expelled. The device requires a short running-in period in which the decalcification cartridge fills with water. The steam volume that is expelled increases constantly until the maximum steam volume has been reached after approx. 50 seconds.
Note
Please note that here it is set to steam stage 2 (tiles/ stone), since the running-in period will otherwise be extended.
Operation
Unwinding the power cable
WARNING
Risk of electric shock
If the power cable is not completely unwound, the danger exists of you straining and damaging the power cable by overestimating the range of the cable.
Always completely unwind the power cable.
Note
The lower cable holder can be rotated by 360^ for removing the cable. The upper cable hook cannot be rotated.
- Turn the lower cable holder upwards.
- Remove the power cable completely from the cable hook.
- Fasten the cable in the fastener of the upper or lower cable hook to prevent it from being run over during cleaning work.
Illustration E
Filling water
The water reservoir can be filled at any time.
ATTENTION
Material damage through open reservoir cover or incorrectly seated or loose water reservoir
Liquid can escape and damage the floor covering if the reservoir cover is not correctly closed or the water reservoir is not correctly inserted into the device.
Take care to ensure that the reservoir cover is securely closed and the water reservoir is seated tightly in the device when the water reservoir is full.
ATTENTION
Damage to the device
Unsuitable water can block the nozzles.
Do not use condensation from the clothes dryer for filling.
Do not use collected rain water for filling.
Do not use cleaning agents or other additives (e.g. scents) for filling.
Note
The decalcification cartridge must be installed in the water reservoir when filling the water reservoir.
Filling the water reservoir directly on the device
- Hold the device firmly.
- Open the reservoir cover, and fill the water reservoir with max. 0.4 l tap water, directly at the device. Illustration F
- Close the reservoir cover.
Removing the water reservoir for filling
- Hold the device firmly.
- Pull the water reservoir vertically upwards by the handle.
- Open the reservoir cover, and fill with max. 0.4 l tap water. Illustration G
- Close the reservoir cover.
- Insert the water reservoir and press downwards until it locks into place.
Switching on the device
ATTENTION
Device and material damage due to tipping over
The device can fall over and be damaged if inadequately secured during work breaks or storage. Liquid can also leak out and damage the floor covering in the process.
Position the device with the floor nozzle on a solid base, or the handle with the wall anti-slip protection in a vertical position on a solid wall.
Installation information
When steaming for the first time after removing and reinserting the decalcification cartridge, the steam jet may be weak or irregular, and individual drops of water may
be expelled. The device requires a short running-in period in which the decalcification cartridge fills with water. The steam volume that is expelled increases constantly until the maximum steam volume has been reached after approx. 50 seconds.
Note
Please note that here it is set to steam stage 2 (tiles/ stone), since the running-in period will otherwise be extended.
- Place the device on a firm surface.
Illustration H
- Plug the mains plug into a mains socket. Illustration I
- The indicator light flashes red alternately. Illustration J
- The indicator light lights up constantly green after approx. 30 seconds.
Illustration K
The device is ready for use.
Regulating the steam volume
The steam volume setting depends on the surface to be cleaned.
Note
Controlling the volume of steam only works for the SC 2 Upright EasyFix. Only one steam stage is available for the KST 2 Upright.
- Press the button with the direction arrows on the handle repeatedly until the desired steam stage is selected.
Illustration L
2 different steam stages are available:
| Tiles/stone - maximum steam stage | |
| Wood - minimum steam stage |
Note
The maximum steam stage (Tiles/stone) is always selected when the device is switched on.
- Press the steam lever after setting the steam volume.
Illustration M
Refilling water
Note
The water level can be seen through the partially transparent fresh water reservoir.
When the water is refilled, the decalcification cartridge remains fixed in the device.
- Open the reservoir cover, and fill the water reservoir with max. 0.4 l tap water, directly at the device.
Illustration F
or
- Remove the water reservoir, open the reservoir cover, and fill with max. 0.4 l tap water, see chapter Filling water.
Illustration G
Interrupting operation
ATTENTION
The floor covering can be damaged by moisture remaining on the floor cleaning cloth or floor nozzle/device after cleaning.
Remove the floor cleaning cloth and dry the floor nozzle/ the device after finishing the cleaning work.
Do not place or store the device on heat-sensitive surfaces.
In order to save energy, we recommend that you switch off the device for breaks in operation of longer than 20 minutes.
- Pull the mains plug out of the socket.
Illustration N
Switching off the device
- Pull the mains plug out of the socket.
Illustration N
ATTENTION
Device damage due to water putrefaction
The water in the reservoir may putrefy if the device is not put into operation for more than 2 months.
Drain the water reservoir before longer breaks in operation.
- To drain the water reservoir, see chapter Draining the water reservoir.
Illustration O
Storing the device
- To remove the floor cleaning cloth, see chapter Floor nozzle. Illustration C
- Remove the moisture from the floor nozzle/device.
- Wind the power cable around the lower and upper cable hooks.
Illustration P
- Store the device in vertical position on a solid base or on a wall.
Illustration H
- Store the device in a dry location that is protected from frost.
Important application instructions
Cleaning the floor areas
We recommend sweeping the floor or vacuum cleaning it before using the appliance. In this way the floor will be cleared of dirt and loose particles before the wet cleaning.
Cleaning coated or painted surfaces
ATTENTION
Damaged surfaces
Steam can loosen wax, furniture polish, plastic coatings or paint and edge band from edges.
Do not direct the steam at glued laminated edges as the edge band may loosen.
Do not use the device for cleaning unsealed wood or parquet floors.
Do not use the device for cleaning painted or plastic coated surfaces such as kitchen or living room furniture, doors or parquet.
How to use the Accessories
Floor nozzle
The floor nozzle is suitable for cleaning washable floor coverings, e.g. stone floors, tiles and PVC floors, as well as sealed wooden floors such as parquet and laminate.
ATTENTION
Damage due to steam effect
Heat and the effects of steam can lead to damage.
Check the heat resistance and steam effect on an inconspicuous area using a minimal volume of steam prior to use.
Steam clean sealed wooden floors using the correct, preset steam level, and do not remain in the same position on the floor for too long.
Note
Detergent residues or care emulsions on the surface to be cleaned can cause streaks during steam cleaning, but these disappear after repeated use.
CAUTION
Beware of burns to your feet
The floor nozzle/floor cleaning cloth heats up during steaming.
Hot water may drip out when pulling off the floor cloth. Only operate or remove the floor nozzle/floor cleaning cloth with suitable footwear.
For fastening the floor cleaning cloth to the floor nozzle, please refer to chapter Installing the floor cleaning cloth
Microfibre floor cloth
The microfibre floor cloth is suitable for cleaning stone floors, tiles and PVC floors, and also sealed wooden floors such as parquet and laminate.
Abrasive floor cloth
The abrasive floor cloth is suitable for cleaning insensitive surfaces such as tiles or stone.
ATTENTION
Damage to floor coverings
The abrasive floor cloth can damage sensitive floor coverings and surfaces.
Do not use the abrasive floor cloth for cleaning wooden surfaces.
Do not use the abrasive cloth with the carpet glider.
Removing the floor cleaning cloth
- Place one foot on the bottom corner of the floor cleaning cloth and lift the floor nozzle up. Illustration C
Note
Initially, the floor cleaning cloth's hook and loop fastener strip is very strong and cannot be removed from the floor nozzle easily. After the floor cleaning cloth has been used several times and washed, it is easier to remove from the floor nozzle and it has reached the optimum adhesion.
Removing the floor nozzle from the basic unit
ATTENTION
Material damage due to an unstable device
Removing the floor nozzle makes the device unstable and it can tip over and damage the device and floor covering.
Do not remove the floor nozzle from the basic unit after installation.
Remove the floor nozzle only when sending the device for servicing.
- Pull the mains plug out of the socket. Illustration N
- Drain the water reservoir. Illustration O
- Hold the device tightly by the handle.
- Actuate the unlocking button for the floor nozzle.
- The floor nozzle releases from the device and can be removed. Illustration Q
- Store the device safely in a horizontal position.
Care and service
Draining the water reservoir
ATTENTION
Device damage due to water putrefaction
If the device is not put into operation for more than 2 months, the water in the reservoir may putrefy.
Drain the water reservoir before breaks in operation.
- Pull the mains plug out of the socket. Illustration N
- Remove the reservoir cover.
- Remove the decalcification cartridge.
- Drain the water reservoir. Illustration O
Replacing the decalcification cartridge
ATTENTION
Device damage and shortened service life
If the replacement intervals (indicator light) for the decalcification cartridge are not observed, there is a risk of device damage and the service life of the device may be shortened.
Observe the replacement intervals (indicator light).
Note
The anti-calcification effect of the decalcification cartridge is activated as soon as the reservoir is filled with water, and the device is put into operation. Lime in the water is absorbed by the granulate in the decalcification cartridge. Additional descaling is not required.
Note
The granulate in the decalcification cartridge may change colour after it comes into contact with water. This depends on the mineral content in the water. This discolouration is harmless and does not have a negative effect on the device, the cleaning work or the functionality of the decalcification cartridge.
Indicator light at end of the run time
The indicator light shows you when the decalcification cartridge needs to be replaced.
The indicator light flashes red 1 hour before the run time expires. Illustration R
- When the run time of the decalcification cartridge is exhausted, the indicator light flashes quickly. The pump switches off automatically (no water steam) to prevent damage to the device.
Inserting the decalcification cartridge
ATTENTION
Device damage
There is a risk of damage to the device if the used decalcification cartridge is re-used.
Work carefully in order to prevent mixing up the cartridges.
Installation information
When steaming for the first time after removing and reinserting the decalcification cartridge, the steam jet may be weak or irregular, and individual drops of water may be expelled. The device requires a short running-in period in which the decalcification cartridge fills with water. The steam volume that is expelled increases constantly until the maximum steam volume has been reached after approx. 50 seconds.
Note
Removing the water reservoir makes it easier to remove and install the decalcification cartridge.
- Pull the mains plug out of the socket. Illustration N
- Remove the reservoir cover.
- Remove the decalcification cartridge.
- Insert the new decalcification cartridge and press it firmly into place. Illustration S
- Press the steam lever and insert the mains plug into a socket.
- Keep the steam lever pressed for 7 seconds. Illustration T
- After a successful reset, the device flashes green twice and then switches to heating mode.
- Press and hold the steam lever for approximately 50 seconds to vent the decalcification cartridge.
Care of accessories
(Accessories - depending on scope of delivery) Note
The micro fibre cloths are not suitable for dryer. Note
Observe the instructions on the washing tag when washing the cloths. Do not use any liquid softeners as this will affect the ability of the cloths to pick up dirt.
- Wash the floor cleaning cloths in a washing machine at a max. temperature of 60^ .
Troubleshooting guide
Malfunctions often have simple causes that you can remedy yourself using the following overview. When in doubt, or in the case of malfunctions not mentioned here, please contact your authorised Customer Service.
WARNING
Risk of electric shock and burns
Trying to eliminate faults while the appliance is connected to the mains or has not yet cooled down is always dangerous.
Remove the mains plug.
Allow the appliance to cool down.
No steam / little steam although there is sufficient water in the reservoir
The decalcification cartridge has not been inserted or has been inserted incorrectly.
- Fit the decalcification cartridge and/or check that the decalcification cartridge sits tightly in the reservoir and press in again if necessary.
The decalcification cartridge has been removed when filling with water and/or a new decalcification cartridge has been fitted
Always leave the decalcification cartridge in the water reservoir during filling.
- Press and hold the steam lever constantly. The full steam output is reached after approximately 50 seconds.
The indicator light flashes red at regular intervals
Run time of the decalcification cartridge ends soon.
- Fit a new decalcification cartridge, see chapter Inserting the decalcification cartridge.
No steam although there is sufficient water in the reservoir. The indicator light flashes red quickly.
Run time for the decalcification cartridge has expired
- Fit a new decalcification cartridge, see chapter Inserting the decalcification cartridge.
- If a new decalcification cartridge has already been installed and this error still occurs, the reset process has probably not been carried out correctly. Please follow the steps below to reset it:
1 Pull the mains plug out of the socket.
2 Press and hold the steam lever constantly.
3 Plug in the mains plug and hold the steam lever for 7 seconds until the indicator lights flash green twice.
See chapter Replacing the decalcification cartridge.
Warranty
The warranty conditions issued by our sales company responsible apply in all countries. We shall remedy possible malfunctions on your device within the warranty period free of cost, provided that a material or manufacturing defect is the cause. In a warranty case, please contact your dealer (with the purchase receipt) or the next authorised customer service site. (See overleaf for the address)
Technical data
| SC 2 Up-right | KST 2 Upright | ||
| Electrical connection | |||
| Voltage | V | 220-240 | 220-240 |
| Phase | ~ | 1 | 1 |
| Frequency | Hz | 50-60 | 50-60 |
| Degree of protection | IPX4 | IPX4 | |
| Protection class | I | I | |
| Device performance data | |||
| Heating capacity | W | 1600 | 1600 |
| Heating-up time | Sec- onds | 30 | 30 |
| Continuous steaming | g/min | 38 | 38 |
| Filling quantity | |||
| Water reservoir | I | 0.4 | 0.4 |
| Dimensions and weights | |||
| Weight (without accesso- ries) | kg | 2.7 | 2.7 |
| Length | mm | 314 | 314 |
| Width | mm | 199 | 199 |
| Height | mm | 1185 | 1185 |
Subject to technical modifications.
Contenu
(Enfunciendeltopodequipment)
Limpar as superficies pavementadas
(alt after maskintype)
Porandalapi monteerimine
- Kinnitage porandalapporandadusisi kulge.
a Asetage porandalapp porandale takjaribad ulevalpool.
b Seadke porandadüus kerge surveya porandalapile.
Joonis C
Abraziva drana gridai
Abrziva drana gridai ir piemerota noturigu gridas segumu, piemeram, flizu un akmens tiriisanai.
IEVERIBAI
YctaHOBKa HacaKdIg nona
1.ДеркаТь устpoCTBO3a pyKoTky.
2. CoeINHtB HIXHIOU qACTb yCTPOIcTBa C hAcAkoI DnI Na Do fHKCaUNC XapaKTePbIM SeJyKOM.
PncyHok B
YctaHOBka caJIΦeTKn JIy IOnla
1.ПикpenTb canfeKу ДЯ NOA K Hacakke ДЯ NOA.
a PonoKntb caIeTky Ha non IeHTamnIINnyKamN BBePX.
b C He3NaHTeBbHm ycINnEM pInxKaTb HacAnky dIa nOla K cAnPeTe dIa nOla.
PncyHOK C
Blaorapar KpeIeHnM-NIpyKam caIepetKa Ipnnona cama 3akpenTcna HacaKe.
PepBbI BBOD B 3KcNpyaTaunIO
BHIMAHHE
IoepekeDeHue ycmpoUcmea u3-3a o6pa3oBaHua hakunu
Bceea paobamb c kapmuqem dny 3aumby om hakunu.
1. YCTAHOBITb KAPTRINDJI3AaINTbIOT HAKINB BEMKOCTB IJN BOYI IN PnIXaTbIJIФИNKcaUNI. PucyHOK D
Hhcmpykuu no Mohmaxy
Ipu 1-ü o6pa6bomke napom nocne u3eneuhenu u noomopHou ycmaHOBku karmpuOxa dno 3auumbl om hakunu ehepauea npa moKem bblcnaobu unu hepaeHomepHou, a maKe O8oMxHO nOraenHeu omOenbHbIX KanenB oObl. YcmoUcmey nompeSyemr HEmHo2o epemenu dno 3anonHnue karmpuOxa dno 3auumbl om hakunu eoOu. Konuecmeo nodaaemoTo npa nocmHNO yeenuueaemc, u npu6buImenbNo cepes 50 cekHyod noada docmuaem Makcumyma.
PpumueHue
yumbibambycmaohneHHbE daHOM cnyae ypoeeHB MOUHCmu napa 2 (nnumka/Kameh), nockkky e npouemoh cnyae nompebyemc8 bonlsue epemeHu dna 3anycksaymcpocmea.
3Kcnnyatauia
Pa3MaTbIbAHne cTeBOrO ka6eJra
PENEYNPEXKDEHNE
Onachocmb npaxehmokom
Ecnu cemeeou Kaebnb pazmoman He noHocmbio, mo npu HnpeabunbHou ouenke ducmaHnUcyeceMeyem onachocmb Hamjeknua u noepkdeHncaemoeo kaebna.
Bceea cneyem pa3mambIaamb cemeoou kabeIb nonHocmbIO.
PpumeyaHue
Ду убсма Chмua kabena Huxhui δржамь noeopaueaemca ha 360°. Bepxhu kabebhbu kpiK he noeopaueaemcra.
- NObepHyb HnKnn DepeKaTeB Ka6eJr BBePx.
2.ПОЛHOCtBIO CHrTb CeTeBOI Ka6eJIb C KpHOKa. - 3aKpEeNtB Ka6eB bФHcAtope BepXHero NnH NkHrero KpIoka, YTo6bI OH He MeuAn BO BpeM yObpKn.
PncyHok E
3aINBka BObl
EMKOCbI DnI B0DbI MOXHO HAnOJIHHTB JIO6OIMOMEHT.
BHIMAHNE
MamepuanbHyuep6 u3-3a He3akpbimou KpbuKu unu HazaKepeHHo eMKocMu dny bOdu Ecnu KpbUka 3akpMa HennomHo unu eMKocMb dny 60du ycmHOBnHa e YcmpoucMeo HnpabunHo, Xkuokmb Moem bImeu u nopeDum hAnonbHoe nokpbImue.
Cledumbaem,ymoibkpiukaHanoHHou emKocmu bila3akpmaI npmoH u emKocmbIrae oobblbna HadeXho 3akpenlha.
BHIMAHNE
PoepeKeHnue ycmpoucmea
Ipu ucnolb3oeaHuu eodbl Heccoomemcmeyoue0 Kaecmea MoKem npou3oUmzacopeHue conen. He 3aneumb KoHDeHcauOHHy oody u3 cyuunbhou MaUHb.
He 3aaneamb cobpaHnyo doxdeuyo eody. He 3aaneamb mooue credcema u np dyuee do6abku (Hanpumep, apomamuzamopby).
PpumeyaHue
Ipu HanoHeneHu emKocMu dno 8oBb e Heu doJKeH haxoDbcKaMpduok dno 3aumbl om hakunu.
HaonHeHne EMKoCTn Ia BObI HenocpeDCTBeHHo Ha yCTpoiCTBe
- YdepxnBaTb ycTpoIcTBO.
- OtkpbItb KpbIbUky I HaJIbTb B EMKocTb, He CHIMaee c yCTpoIcTa, MaKc. 0,4 I BOJOpPoBOHoi BOBly.
PucyHOK F
- 3aKpbItb KpbIuKy.
ChTne emKoCTn dIe BoDbI c ZelbIO 3aONHeHna
- YdepxnBaTb ycTpoIcTBO.
- Notaryt b emKocTb dIa BOIb BepTKaJIbHO BBepx 3a pyKoRtKy.
- OtkpbItb KpbIky EMKoCTn 3aJIHTb MaCk.0,4 n BOJOpOBOHOH BOBJ.
PmcyHOKG
- 3aKpbItb KpbItJky.
5.BCTaBnTb eMKocTb IJI B0bI B yCtpoiCTBO nHaadabTb Ha Hee Do qnkcaun.
BkIIOUeHne ycTPOINCTBa
BHIMAHNE
IoepekdeHue ycmpoucmea u umyucmea u3-3a onpokudbaHua
Hedocmamouha fukcaun ycmpoucme 80 epem nepepbiae a p6ome unx xpanehu moem npueecmu K eo nadehu u nopekxdenu. Takaek npu 3mom o03moKHa yumeka kudokcmu, ymo npueedem K nopejdehu HanoIbHOO nOKpBImu.
Cmaeb npubop c hacaekou dnona cnedyem ha npouhoe ochoeaHue unu npucnohmbykyc 3auomum o npockan3bivahue eepmuaklbHom nonoxeu K npouho CmeH.
Hhcmpykuua no Mohmaxy
Ppu 1-ü 6bpaomke npom nocne u3anehenu u noemopno ycmanohku kapmpduka ona zauumby om hakunu aenepauna napa mojem 6bmb cnaobu unu nepaehomepno, a maKxe 0e3mOHO NOAENHe omdbnxkanen 0oBu. Ycnpoucmey nompeyemc HmHoo epemenu oyraanonHHa Kapmpduka ona 3auumby om hakunu eoOo.
KoJIuueCMeO noaAeMoEO npa NoctmHO yEnuueaeamc, u npBnuzumenbHo uepe3 50 ckyH noDa oocmaeaem Makuyma.
PpumueaHue
Yyumbiaamb ycmaHOeHHbE o daHOM cnyae yypoeeHB Mouocmu napa 2 (nnumka/Kameh), nockkky e npomueHm cnyae nompebyemc8 bonlwe epemeHu dna zanycka ycmpoCmea.
- YctaHOBnTb yCTpOJCTBO Ha npoHoe oChOBaHne. PucyHok H
- BCTaBntb 7tTeNceJIbHyIO BnIky B po3eTky. PucyHok I
- KOHTPONbHaJaMnOCha NonepeMeHNO MHaTeKpaCbIM.
PucyHOK J
Tpe6yemoe KOINueCTBO npa 3aBNCIT OT CBOIcTB OHIuaeMOI NOBepxHOCTN.
PpumeyaHue
Peayupeoka konuuecmea npapa b6maem monko
oN 2 Upright EasyFix. Iyne KST 2 Upright
Oocmyen monko oyun ypuoeH mbouocmu npaa
Hakimatb KhoNcy c hO6paXeHNem Ctpenok HapyKoTKe do Tc Nop, noka He bSydet BbybpaHxenaMaB yOpBeNb MoUHcTo npa.
PncyHok L
DocTynHb2 pa3Hbix ypOBH moUHOCTn npa:
PpnoctaHOBka pa60TbI
BHIMAHNE
MamepuaIbIyuepe6 u3-3a KOHDeHcama u 8nau Tocne yObKpX xUoKoCmB, haoDuaaerca e canpeMe k de nona, Hacade de nona u ycmpoucmee, moem nopeDbH anonbHoe npkpbimue.
I OKoHuaH u60ku Heo6xOdu m Chm b canfemky
dnon n a bcyuumb hacaody nona /
ycmpoucmeo.
Hcmaumbu Hue xpaHmby cympoUcmeho deunakmbhix Hanofnbhbs NOKpbumix.
C zelb0 3Kohomn 3Heprnn peKomeHdyem OTKIOHaTb yctpoCTBO npi nepepbIbax B pa6ote 6oJee 20 MNHT.
- ⅢBJIeMbIITeNCeJIbHyIO BNIky I3 po3ETKIN. PnCyHOK N
Bbikluoyenne yctpoctBa
- ⅢBnueb ⅦTeNCeIbHyIO BnIKy I3 pO3eTKN. PncyHOK N
BHIMAHNE
IoepekehdeHue ycmpoucmea u3-3a 3acmoe0obbl
Ecnu ycmpooucmeo He ucnnonbyemc60one 2-x
mecuue, oda e emkocmu moxem ucnopmumbsc.
Ipeod dnumenbHbIM nepepbboeom bInueambb oy3
emkocmu.
- Onopoxhenhe emkoctn, cm. pa3den Onopoxhenhe emkocm tna eodbl
PncyHok O
XpaHHeNe yCTpoNcTbA
- Chytne canfeTkn dny nona, cm. pa3den HacaKa dny nona.
PncyHOK C
-
YdaIbT bIaIy n3 HacaIKn dIra IOnla / yCTpoIcTaBa.
-
Hamotatb ceTeBoi Ka6eIb BOKpyr HIXKHeO IN BepXHero KpOKOB.
PucyHok P
- XpaHnTb yCTPOB CTBO B BEPTNkAJIbHOM NIOJIOKeHN Ha IPOUHOM OCHOBAHN INJY CTeHbl.
PucyHok H
- XpaHnTb yctpoIcTB B cyXOM n 3aUuIeHHOM OT Mopo03OB MecTe.
Baxhble yka3aHnno npImeHeHHIO
OuNTKa NOJIOB
Ipeed npimmeHHeHem ycTpoiCTBa Mbl peKoMeHdyem nOMeCTn InpbnJbcocntb noI. BnaorDapr 3ToMy nOy Je Do BnaxHoH OuNCTKn bEydet OcBO6oxDeH OT 3aqr3HeHn MyCopa.
OuNCTka NMeoJnx NOKpbIte NeI IN OkpaWeHHbIX NOBepXHocTei
BHIMAHNE
PoepeXeHHbIe noepxHocmu
Iap cnocoben omcauabmb ock, Me6benHyio npmypy, nonumepbhe nokpbimura unkpaacky u OKneuky h KaPOMkax.
He npaaenm bp na Ckneehnbe Kpomku, m.K. 3mo Moxem npueecmu K omcoeduhenu Okneku.
HeucnoIb3o8ambycmpoucmoeDnOuycmku HenakupoBaHbIxdepeBAAhBuxnapkemhBx noNoe.
HeucnoIb3o6aMb ycmpoUcmeO dna OUCMcKu OkpaueHHbIX unu UmeIOux nnaCmukoe oNokpbImue noBepxHocmeu, Happumep KycXHO u XJUNo Me6enu, deepu u napkema.
IcnoIb3OBAHnE npHaIeJnxHoTei
HacaKaJnI nona
Hacadka dIJa nOla npedHa3NaueHa dIy OunCTKn
PnroDhbIX dIyMbIb TaHApOBhBIX NOKpbITM,
HanpIMep KaMeHHbIX IIOOB, KepaMneCeokn PIIITK,
HaONbIX NOKpbITN 13 PBX, a TAKKe JAnIpObaHHbx
depeBHHbx HApOBhBX NOKpbTm, Happimep
napketa n lamHnata.
BHIMAHME
Poepekenu u3-3a 803deumnna npa
Bbocka mmepeamypa u np mozym bbe3amb nopexduha.
Ipeod npumeneHuem Heo6xodUmo npoeepumb mePmocmouKcmb u e03euiCmeue npa e Mano3amemHom Mecme, UcnoB308ae MUHumaNbHoe KOnuecmeo npa.
IJaOChmKu napOMaKUpoAHHbXdepeBHHbIX nOKpbimU uCNbOaMb mONbKO cneuaanbHO npedycmOpHnBu yOoBHe MOuHocMu npa U He 3a0ePxueambCnUuKKomdoNo Ha odHm Mece.
PpumueaHue
Ocmmu cpcme uu 3mybcu npy
xoda ha ouaemaou noepxhcmu npu opa6omke
napm moaym cmaib npuho noehenura pa3e0doe,
koppbue ohdako uce3hm nocne heckonbkux
ceahco8y6pku.
OCTOPOXHO
Oxozu cmonbl
Bo epem oboabomku npom hacaKa u canpemka oJn oJna HaepeaIomc.
Ipu omcoedehu canda nora moem ebimekab oopya ooda.
IcnoJIb3OaMb u Chumamb hacaKy/canfemky dna nona moIbko 8 noxdxodaeu obyu.
3AkpenneHcantcFmI nnonaHa Hacakke dnn nona Cm. B rnae YcmaHoeka cantcFmKu dn nnon
CanpeTka JnnoJn3 MnkpoΦnbpl
CaIpfTeKa InIy IOna I3 MkPocN6pbI NODxOuNT I nI ONUCTKII HAnOpIbHbIX NOKpBTM I3 KAMH, KepAMUeCKo IINrKu, IBX, a TAKKe JAKInpoBaHHbIX IdepeBAAHHbIX NOKpBTM IJn IOna, HApnPmEp NapKeTa I nnAMHaTAtA.
A6pa3nBna caIqetka dny nola
A6p3aBnHbA canfepTeKa dIy nOJa npEpaHaChauHa dIy ONUCTKN TBPdbHX HApONbHbIX NOKpbTIN I3 PNTK IN KAMH.
BHMHAHNE
PobpekeHue HanoIbHO2o NOKpbimua
A6pazuehna canfeimka dny nona moxem noepedumb neko noepexdaembie hanoibhle nokpbimu u noepexhcmu.
HeucnoIb3o6aambabpa3u8Hyo canfemkydny oucMcku depeeHHbIX noepxHocmei.
He uonb3oamb abpauehyu canfemky Emece mo ckob3aue Hacaokou dny Koepoe.
Chrtne canfetkn nnona
- NocTabt bOHy Hory Ha Ra3bUOK caIpeTkn Dnna nona nNoDnTaH hAcadky dNnnona.
PucyHOK C
PpumueaHue
Chahana lehma-nunya candeemu dnon a eue ouehkpenka u canemky mjkeno chamb c hacaKu. Iocne mhoaokpamnooucnlobn3oaeua u cmupku
canfemku oha neko chumaemc c hacaKu u docmuaeom orimumabhozo ycunur ckpennenhu.
OTcoeDInHeHne HacaIKn IpaI NOJa OT 6a3OBoro yCTpoiCTBa
BHIMAHNE
MamepuaIbHbIyuep6 u3-3a Heycmoueocmuymcpoeaea
Ppu cHrmou hacaek dnona ycmpoucmeo cmaohoeumc Hyecmouhueim, moxem ynaactb u noepedumbc unu noepedumb HanonbHoe nokpbimue. Pocne ycmaohoukbojwe ne Chumamb hacaekdy nona cba30800 ycmpoucmea.
CHumMbIh hAcDky dny mona pazepuAemcra monbko npu omnpaBe ycmpoUcmeHa ne cepueChoe obcIyKueaHue.
1.ИЗВЕЧБШТЕСЕЛБНУВИЛКУиз розетк.N Pусунok N
2. OnopoxHnTb 6aK dJa BOdbI.
PucyHok O
3.Держать устpoистBOзуку.
4. HaxaTb KhoNky pa36JokpOBKn HacaKn JIy noJa.
5. HacadkaДЯпюнOTcoeMHITcOуCTpoiCTBa moket 6bIb ydaneHa.
PncyHok Q
- XpaHnTb yCTpoIcTB B HaNExHOM MecTe B TROP3OHTaJIbHOM NIOJKeHN.
YXOD IN TEXHNUeCKOe 06cIyXnBaHne
OnopoxHeHne emKoCTn DnBovbl
BHIMAHNE
Pobpekehue ycmpoucmea u3-3a 3acmo bodbl
Ecnu ycmpoucm8o He ucnnoB3yemc6 60onee 2
meueee, e0da e bake moxem umnopumbs.
Ipeed nepepbIbAmu e paobme onopoknmb 6ak dnn
ooobi.
1.ИЗВЕЧ bHTENCeIbHbYIO bINKу n3 po3eTKN.PucyHOK N
2. ChrTb KpbIuKy EMKoCTN.
3.ИЗВЛЕЧКAPТРДЖДЛЯЗПТБIOTHAKINN.
4. OnopoxkHtB 6ak dIy BObl. PncyHOK O
3aMeHa KapTpIgka IJn 3aIHTbI OT HAKINN
BHIMAHNE
Ioepekehue ycmpoucmaa u cokpaueHue cpoka cnjx6bl
HecobnOeHue UHmepeAnoe 3aMeHbU (UHduKauau KOHMponlHOJ nAMNoHu) KApmpudka dnr 3auumbl om Hakuu moKem npueecmu KnoepekdeHuo ycpoucmea u cokpaueHIO cpoKa cnxkbU ycpooucmea.
Cobnloamb unmepeanbl 3amehbl (uhdukaucya KOHnpoBHOJ lamnoKU).
PpumeyaHue
Kapmpudx dna 3aumby om hakunu haunaem fynkuohuoaaamb nocne hanoHneu emkocmu odo u eKnUeHue ycmpoucme. 13ecmb, codepkaaacrae 8 ode, 3aeambleaemca apahyramom, haxoayumc6 a kampudxe.
DOnonHumeNbHbIX Mep no ydaJIeHuO hakUnu He mpeSyemc.
PpumeyaHue
Гаруняг m Kapmpudxe doЯцumby om hakunu moxem u3meHumb ueem nocne KOHMakma c eodou.
3mo c8ra3aHc codepaHaue m e 6ode MuhepaIbHbIX
eueecme. Taekoe u3mehnue ueema be3epedno u He 0a3b1aem HeaamueHoo enuHna Ha ycpoucmeo, Kaeecmbo yobpku unpa6omy Kapmpudka dna 3auumbl o n Hakunu.
KoHTpOJIbHЯ NaMNoUka 3aBepSeHna cPoka cnJx6bl
KoHTpONbHaJaMaMNoUcKa CInrHAnu3npyeTe O NaCTyPJIeHIN cPoKa 3aMeHb KaTprNiJka DJIa 3aUNTbl OT HaKnIi.
3a 1 yac do nCteeHncrepokcnyk6bkoHTpObnha JAMNOUka HauHnaet Mrgatb KpaChbIM.
PncyHOK R
Korda cpoK cnkykbI kapTpndka Inra 3aunbl O T haknn nctek, KOHTPOBbHaJa MAnOChka bItcPo miraet. Hacoc aBTOMaTnueckn BbIKIIuOaTeCn (nap oTCyTCTByeT) IJn PpeoTbPaUeHn NOBpeXdHn yCTPOICTBa.
YctaHObKa KapTpndka dIy 3aunTbI OT HAKINN
BHIMAHHE
PoepekeHue ycmpoCmea
Ipu noaemopno ycmahoe ompabomannhoo
kapmuoxja forna 3auumbl om hakunu moxem
o03nukhmnb noepexedhe ycmpoueema.
He donyckcamb nepenymbbaanu kapmuoxe.
(PiHnAaIeXhOCTN-B 3ABcIMcOCTN TO KOMIIeKTA NOCTBKN) IpumuevHae
Canemku u3 Mukpofo6pbI He noxdxOam dna cyuKu 6 cyuunbHOu MaUHe.
PpumueaHue
Длсмрк canфemok cobliodamby kazahnaHa npblke no yxoy 3a u3denmu. YmboI canfemku
xopoio enumbiau np3b, he ucnonbsaomb onankueamnb.
- CanfeKn Dny Iono CtnpaTb CtnpaIbHoI MaIINHe PnI TempePaTyPe He BvIe 60^
POMOUI npHn HcnpaBHOCTX
3aayctyo HeNCnpabHocTn IMeOT npocTbe npuHbI, nO3tomy C NOMOUsBcIeDyUoTeo 630paHX MOxHOCTpaHNTb camocToTeBNo. B clyueae comHeHnIb BO3NHKOBHeH e ONiCaHHbIX 3deCb HeNCpabHOCTe CneDeYET o6paTaBcB y UyONHOMOeHNyUcLyK6By cepINCHOrO 06CnyKBaHnA.
PPEyPExEHHe
Onachocmb ydapa mokom u noluyehnou oxo208 Ucmpaamb Heucnpaehcmu Ha nooknloHemK 3nekmpueeckou cemu unu paaoepemom ycmpoicmee onaCHO.
BbIymb cemeo umekep.
damb ycmpoucmey ocmbim.
Het/Mano napa HecMOTpy Ha DOCTaTOUHoe KONHcCTBO BObl B EMKOCTn
OTCYTCTBYETIHNHenpABINbHOyCTAHOBNEK KAPrTnIXJ DnA3uHtBtOHTaKNII.
- YctaHOBNb KapTpniDJIЯ 3aUHTbI OTHaKINN N/ INI pOBePntB, HADeXHO JN OH yCTaHOBNHe B EMKoTn, PnH HeOBxOIMOCtN eEe pa3 HaJaABNTb HA Hero.
KaptrpndJn daaHTbIOT hakinnbIIN3BNEeH npn HanoJIHeHH EMKOCTN BOOJ, n/InIb 6ytaHOBIIH HOBB KAPTRDJN dJa 3aUHTbIOT hAKINI
Bka3iBa Ka odo ecmahoeJehn
Iid cnc nepuooi obo6ku npao nicna 3Himannn ma noBmopnoeo ecmaHOeHNn KApmuDka dla 3axumy eio hakuny euxid npu moeby mcu ncbkum qu HepieHomipHum ma moxymb eumymanu okpemki kpanli eodu. Pucmpi niompebye deeku yac dnna 3anoenHHaKpMa DooIO. Kinbkimnb napu, uo
nodaemcb, nocmiHOn 36nbuyemcb, i npubu3Ho uepe3 50 cekyhd noada doceaae MaKcummy.
Bka3ieka
Veaaa! Ipu bOmy ecmahoeaneho pieehb nomyxHocmi napu 2 (kaxni/kamih), ockinbu e iHOMy eunaoKy cac cnpaubooyeHH 36bnvyebmcb.
Ekconnnyatauaia
Po3MOTyBaHHa MepexeBOro Ka6JIIO
△NONEPEJXEHH
He6e3neka ypaXeHHcmpymOM
JaKuo Mepekeeui Ka6bI po3MOMaHO He NoEHCmIO, IcHye He6e3NeKa HnpeAunBHeHOo PO3paxHykPyadiYca oii, 0io npu3BeDe o HadMpHoo HaeahmaKeHHa Hapekeeui Ka6bI i OoO nouKoOdKeHHa.
Cnio 3aekdu noEhicmIO po3Momyamu Mepexeeu Ka6enb.
Bka3ieka
He 3aIueamu 3ibpaHy douooy oOy.
He doaamau y body Muhi zacobu yi hui doabaku (hnpuknad, apomamuzamopu).
Bka3ieka
Iid ac 3aueaHnE oDu E bak y Hbomy Maé 3haxodumuckarmpuOx dny 3axucmy iD hakuNy.
HaonBHeHHa Ka DnBa BoN 6e3nocepHbO Ha npicTpoi
- YtpmMyBaTu npucTpii.
- BiiKpIITN KPIuKU 6bKa Ta 3aIITN B 6aK I NaB OBDI 6beIOepeHbO Ha npICrpoI He 6Inbue 0,4 n BODOpOBiDHOIbO.
MaJIHOHOKF
- 3aKpntu KpnuKy 6aka.
3HimaHHa 6aka dIy BODn 3 MeTOIO HANOBHeHHA
-
YtpmMyBaTu npctpi.
2.ПOTЯнТибakДпяВODиЗPyKoTkyBepTKaJIbHO Bropy. -
BiKpnTn KpnSky 6aka i 3aIInTn MaKc. 0,4 n BOOpnpoBIDHOI BOH.
MaJIHOHOK G
- 3aKpntKpnuKy6aka.
- BCTaBHTn 6ak DnRA BODn Ta HATNCHYTN Ha HbORO BHN3 Do φikcaii.
YbIMKHeHHnI npCTpoH
YBATA
IpoKoJdKeHH npucmpoU MaHa Ype3 nepekuDaHn
Iid qac nepepu e pobomi afo ndac 36epiaaHnna hedocmatNbO cmiKe nonoKHeHn npucmpo Moke npu3eecmu do0ao naHnma nookodkHe. Taok moKJIuee umikaHnpiDuH iBnacndok uO2o ooukoDxHnNiIOAoOooNOKpumm.
Ipucmpi i3 hacado kno dny ndnioau nompiho ecmaoeboamu ha meepdi noepexhi, a ykoarny i3 3axucomd i0 k0aehnna nompi6h o y epmukbnHOM nyonoxenhi onupamu ha cmihy.
Bka3iKa zoDo ecmahOBJIeHHa
Iid vac nepuo obo6ku npao nicna 3Himannha ma noemopnoe oecmaoenehne karpmuokda ona 3axumcy eid hakuny euxid napu meo bemy cna6kum qu hepienomipHM ma mojymts ucmynamu okpemi kpanni eodu. Pucmpiu nompebye dekuu dacnra 3anoenehna karpmuokda eo0o KInkicmb napu, zo nodaembc, nocmiuoh 36iibuyemcb, i npubn3ho uepe35 cekyno ndocaae maksumy.
Bka3ieka
Yeaaa! Ppu ubomy ecmahoeneo smynih napu 2 (Pnumka/kamHb), ockinbku e inuomy eunadky ctraupaoyeahna 3bnuyemcb.
- IocTaNtBn pInCTpI h Na Tbepy nu NoBepxHIO. ManIOHOK H
- BCTaBtIn uTencelbHy BnIky B po3eKy. ManHOHok I
- KoHTpOJIbHa IaMna IonopeMeiHNo 6IIMMae
ЧерБОнМ.
MANNOK J
4.ПибИЗнО УрЕЗ 30 сеКУн KOнТрьHAЯмпа NOЧЕ NOCTIИН CBITITNCSA ZENEHIM.
MaJIHOHOK K
PpncpiroTOBmDo BVKOpncTaHHa.
PeryIIOBaHHKJIbKOcTi napi
KJIbKicTb nap np perynkoTe bIIOBIDNo do xapakTepeNtK OuIyBaHoI nobepxHi.
Bka3ieka
PeaynnoaHn KInbKocmi napu moxIneu nue de 2C UprightEasyFix.Дг NKT 2 Uprigt docmynu nuwe odun pireHb nomyXhocmi napu.
- Hattickatni Khonpi 3i CTPIKAMHa pykoRTci,doKi He 6yde Bn6paHO nOtpi6HmPiBeHnOToyKhocti napi.
MaJIHOHOK L
Ha Bn6ip Doctynho 2 pi3Hnx pIBHnnotyXhOcTi nap:
| kaxnii/kamihb — naHbUzni pibeHb notyXhocTi napi |
| depeBO — naHnKchp iBeHb notyXhocTi napi |
Bka3ieKa
Пспя симьнгеляху mamuho 武maHbca naeuau piehn nomyknocmi napu (kaxni/kamiHb).
He donyckamu nepennymyeann KaMPuDxie.
Bka3iKa uodo ecmahOBJIeHHa
Iid cac nepwoi obo6ku npao nicna 3Himannn ma noamopnoe oecmaoenehna Kapmpuoka dn3 zaxumcy iD hakuny euxid npu npo mec bymc nca6kum yu hepienomipHM ma mojmyb uocmynamu okpemk parrnni eodu. Ipcumpii nompebye deeku cac dna 3anoeneHHa Kapmpuoka eo0io. Klnbkimb napu, zo naodembc, nocmiuho 36inbuoyemcb, i npubn3ho uepe35 cekyhd noadaocdaae makscumy.
Bka3ieka
3nmmbaKa dny eodu noneuye 3nmmma ecmaHOeHnHa KapmuOxa dny 3axucmy iD hakuny.
- BnTyrHyTuIeNceIbHy BnIky 3 po3eTKI. MaJIOHOK N
-
3нгкршкубaka.
-
3HЯтNi KapTpIaJxДЯЗaxNCTy BiD HakIny.
- BctabTn HOBN KAPTpNDJ DnA 3aXnCTy B1d HAKnny Ta HtncHTy Na HbO Ro MiUHOi φikcauij. ManHOK S
- HataHcyTn BaxiNb npaI npi IBCTaBNTn UTeNcehNy BUNKy Bpo3ETky.
- HATMCHNY uYTPMHyBAtn Baxijb noaapi npn npotrarom 7 cekyHd. ManHOHOK T
7.ПicIy ycniiHoro cKnHaHH npncIpii Dbii 6mHHe 3eHIM,a Notim nepeIeBpeKHM harpibAHnH.
8.Ди Вдаленн� NOBITR 3 KaptrpduKa HATINCHNYBaxibN noaH npa T yTPmUyBaTn INoR B HATINCHYOMI NOLOXeHHI 6bNbKo 50 cekyHd.
Dorla3a npnaadm
(Pinapada 3aIeXHO BID KOMnEKeY nOCTaBkN) Bkaika
Tanipku 3 mikpoqibpu He nixoaymb dny cywinnc cyuapui.
Bka3ieka
Длп пання зачирок дompumyeamucя ekazieok ha emukemui. He ukopucmoeyamauto konduiohepдг mkaunu, uob saчирku 6ynu 3damni do6pe 3bupamu 6byo.
- RaHijpkn Dny NiDnOri npatu y npaJIbHi MaIHHN 3a TempeaTpyn He Bnue 60^
Donomora B pa3i HecnpaBHOcte
HecnpabHocti Yacto MaTb npocTy npuHny, kky MoKHa YCyHTn camOcTIHO 3a donOMorOIO hCTpykui, HabeDeHnx HnKYe. 3a HaBnOct cyMHBiB a60 B p3i HeHa3BaHnx HecnpabHocte cnId 3BePtaTnc DO abTOPINOBAHOc cepBICHO CNyXb.
NONEPEIXEHH
He6e3neka ypaKeHH enekmpuHUM cmpymom i ompumahn onikie
Joku npucmpi niδoHaHou do enekmpuHoiMepexi abo ye He oxonohye, npucmynamu do ycunenHnea ncepnaehocme Hne63neuHo.
BuHm umencelbny uIky.
Damu npucmpoio oxonohymu.
HemaC/3amIo npa Hne3BaXaOuH Na OoctaTHIO KInbKlcBt BOni B a6ui DBOI
Bicytni a6o HnpeBaunbHO BCTaHOBNeHn KApTpNJx Dnra 3axncty BiD haknny.
BCTabNTn kaptprndk JIa 3axncty BiIh Hauyny Ta/ab0 nepebipnTn, nHaHIO n3afoicobann KAPTPNk y 6aKy, i3a Heo6dIoHcOti ue paa 3afoicbyatn Ioro.
KaptrpndJnIa3xNCTy BID nakny 6bno 3nTTO nic 3aJImbHnBBoD, i (a60) 6bNo BCTaBNeHO HOBNI KAPTrpndJnIa3xNCTy BID nakny.
Пд ac3anOBHeHn3aBXn 3aINuATn KapTpndx y 6aky dny BOn.
- Hatncchytn i dobro ytpmByaTn BaxiNb noa hi napi.
Pn6n3Ho uee3 50 cekyHb 6yde doocrhyta makcmaIbHa nToxkhicTb napi.
KohtpoJIbHa lamna 6JIIMaC YepBOHm Yepe3 pIBHi npomixkN yacy
Ctpok cnyk6n kaptnpjka dna 3axncty BiD hakiny HeBdo3i 3aikHnTbcra.
BctaHOBNeHnHOBOrKpTnDJaIINa3axNCTy BID HAKUY, DnB. pozDIn YcmaHOeHnKapmuDka DnA 3axucmy EID HAKUY.
Hemac napn HezbaXaOuHa Na DoCTaTHo KIlbKICTb BOIN B6aky. KOthpoIbHa lamna SwBnKO 6bnMaC YepBOHNM.
Ctpok cnjxbn Kaptrnka dna 3axncty BiD nakiny cnlnBae
BctaHOBNEHnHOBOrKapTNDJaIINa3axNCTy BID HAKNY, DnB. pozdi YcmaHOBNeHn KaPmuDka DnA 3axucmy EID HAKNY.
- 阿KIO HOBNI KAPTpNIXJnI3aXInCTy BiI HAKINNy BKe 6By yctAHOBNeHNI, aIJI NOMUNKA BCE Ie BHNKAc, IMoBIpHO, IpOcE cKNDaHHN 6By BNKOHaHI HENpaBnIBHO. JnI NOBTOPHOro cKNDaHHN BIKOHAnTe Taki II:
1 BntaHnyTn uTeNceJIbHy BuJIky 3 po3eTKI.
2 HaTnchTyN I DOBro yTPmByaTn BaxKiNb npaI napi.
3 YctabNTn WTeNceBHy BnKy B po3eTky N ytpmByBat BaxInb Npaui npotrrom 7 ceKyHd,doKoHTpoJIhIaMn DbiHi He bImHytbe ZhenHM. dIb. po3iin 3aMiHa KapmuOxda nna 3axucmy eid hakuny.
Fapantria
YKOKH KpaIHINIOBbIIDOBiHrapaHTHIyMOBN, BCTAHOBHeI yNOBHOBaKeHOO orpAHIzaiEo 36Ty Hauoi npOduKyii Bui kpaII. MoKJIbIe HecnPabHocTi pNcSTPO npOTFOrm rapaHTIHorO cTPOky MNUcBAeMO 6Be3oUToBHO, KaIO npMnHa HeNCpABHocTi nPjrae BCdeFeKTax MATEpiAIB abo Bnpo6HcuOmy bpaKy. Y pa3i BVHNKHeHH npTeH3I npOTfOM rapaHTIHorO cTPOky npoxAHHn 3BepTaMc, MaOu npC6bi Yek npo NOKynkny, DO toroPBbHoO ropAHIaCI, IIO npOdaI npOdyKT, abo Do NaHbNkXoI yNOBHobaKeHOI cNy6bl cepBicHoro 06cNpyRbYBaHn. (Adpecn DInB. Ha 3BopOt)
TexHiChi XapakTepncTNKN
| SC 2 Upright | KST 2 Upright | ||
| Еlektrichihe piДкlioчени | |||
| Hанpyra | V | 220-240 | 220-240 |
| Фаза | ~ | 1 | 1 |
| Частota | Hz | 50-60 | 50-60 |
| СтунIHь зхисту | IPX4 | IPX4 | |
| Клас зхисту | I | I | |
Akaaynap Ke3iHderi KEmek 140
Keninik 141
TexHnKaIbIK MaFMyMaTTap 141
XaHnbl HycKaynap

Kpyblfnbhyn aflaans pet KOnlaH6ac 6byhIn, Ocbi naIanlanaHy keHnIeIer TynHcyka HyckayIbN nen Sebpinre
Kayinciik XeHInDeri HycaynapdbI Okbl nbfbHb3.
Onapra caa apeket etiH3.
Eki kitaanha bda epi kapa naaanahy Hemece Keleci neci ywiH cakTan Koibih3.
MaKcaTbIHa cEiKeC KOnDaHy
KypblfblbIyuiHJXOFapfbl TempepaTpaCbHa,
KbICbIMbHa XeHe bJFaJdbJIbIbIbHa Te3IMdi
6onatbHdai KaTbI eHeHepdi (Tac eHeHep,
JIINTKaIbI JKeHe IBX eJeHepi, coHdaI-ak na
KHe JAMnHaT CnAKTb TbIfb3aJFaH afau eDeHep)
Ta3apTy yuiH yinde fana naiahahnbi3. HndemereH TaBbIHbl eedeHep ciAIKbl cyfa ce3IMtan xa6bHnapdbI Ta3anamaHb3 (bInran eHH, eHeHre 3aKbIM KeTIPy i MymKiH).
TazapTkblu Kypannap KaKet emec.
KopshaFAn opTaHbI Kopfay

OpaybIiMatepnaIapabHIn yTnIinaaunraNayfa 6oIaIbI. OpaBiyIaTpIbI KOpIaRan optara Kayinc3 Tpyde yTnIN3aIyanaHaIbI.

3neKtpnik Xane 3neKtpOnHbIK 6yBIMapDbH KpypMbHda KaTe KOndaHy HeMece
yTnIIm3aIqIay HtIXKeciHne aIam
DeHcayIbIbHa XHe KOpWaFaH OpTaFa Kayin
TeHdiPyi bIKTImaJI, KHyIbI KaITa eHdIeMEnI
MaTePnAnDap KHe 6aTapeJnap, AkKymyTOpnap Hemece MaN CnAHTb6eJIeKTeP JxNi Ke3DeceJI.
AanaDa, aTaanMbIu 6eNweKTepeBbIMdbTniciHne naaDAnaHy uuih KaKet 6oNaDb. Ocb TaH6aMeH
6eIineHReh 6yBIMapdbI yKOKbICTapbImeH 6ipre Tactayfa 6oMaJdbI.
Kypamdaftb 3aTap 6oBbHwa Hcckaynap (REACH)
BmybIMhbH KpaMbIHdafb3aTtap TpyanbCOHfbl
mamimetTep TemeHderi MeKeHka 6oBbHsa
KoJIkeTeIMDi: www.kaercher.com/REACH
KepeK-kaPak KHe KocaJIkbl 6eJWeKTeP
Tek TynHyckalbKepek-Kapak Hemece KocanKbI
6eIueKTepei naIaIaNbIbI3,ce6eoi KypaIbIH
Kayinci3 XHe anaTcbI3 XyMbIc icTeYiHe KeniINdiK 6oanaJI.
Kepek-kaapakTap MeH KocalKbI 6JIWeKTeP TpaJIbI
aknapaT www.kaercher.com Be6-caIbIHJa KOnJKeITMJI.
Xetki3jIm XnHaFbl
BmybMhIh JKeTki3iIm JxHnHaftbOpaybItbH YcTInHe KepcetinreH. BmyMbIbOpaybItanbIfapFaHda
KHaTbH TOblkTbIfbH TEkcepin WbIfbHb3.KepeK
JkapakTap KeticnerenH Hemece TacbImay Ke3iHde
3aKbIMdap TnreH XkaFdaJa, DnnepiHj3re
xa6apnacbHb3.
KopraHbIC kypaJI-ka6DbIbIKTapbl
△ABAHJIAHbI3
KoHemece 3eepminzeh KopraHbic KypaJIka6bikmapbl
KopraHbIc KypbnfbcI ci3iH Kayinc3dizhi3e
apHaJraH.
KopraHbIc Kypblfbcih ewkaWah e3eepmneHi3
Hemece axbipamnHa3.
Kypbblfbldafl6enrinep
(KypbIINfBi TpyiHe 6aJIaHbICTbl)
2 typi by dehre i 6ap:

Takai/Tac- xofapbi 6y deHreii

Hycay
KypblfblbI KockaHHAn KeiH, apdaubim eHxorapfb6y deHeeui (nnumanap / mac) maHdanaabI.
- By měnlípeipin peTTereHHeH KeiH, 6y TeTiriH 6acblb3.
Cypet M
CydbI ToTbipbHbI3
Hycay
Cy deHaeuiin Kapmbiau auBik MmDip cy 6aBihn Kepye 6oIabbl.
Cy Kyuhan Ke3e KaKmam mazapmy Kapmpudki KBybIurba Iobnably.
Bak KaKaNaFbH aAaBbHb3 XaHe cy BaTaHbTa TikeNe KpybIJaMaKc.0,4NITp CyTOnTbIpbHb3.
Cyper F
Hemece
Cy 6aBbH aIbH, 6ak KaNaFbIH aUbIbH3 XaHE MaKc. 0,4 nTp Cy ToTbIpbHbI3, 6eimih KapaHbI3 Cy KyuHbI3.
Cyper G
XymbictbI TOKTaTy
HA3AP AYdAPbIHbI
KoHdencammbb/blnfaandbH ece6iHeMyjikmi3aKbIMdaHybl
Tanaan bongrahan KeiH, eeh uy6peeiHeea Hemece eeh canmamacbIaRa/bKypbIaRdaBbIbnrEe HxabHbH 3akbIMayb MyMkh.
Tanaay JyMtbMapbiH KeiH, eDeH uSyBepeih anbIn macmaHb3 KHe eDeH canmamacbH/KpbblfHbI KpyrambHbI3.
KypblfnbHbI ceiImma eDeHepae KoImaHb3 Hemece cakmAmAb3.
3HeprnHbI yhemdey uih, 20 MNHyTah aCatbH y3nic KeiHKe KpbJfblHbI eUipin KOIOblcHbAmbl3.
- Xeji icikwecih ToKtah axbipaTbHb3.
Cyper N
KypbInfbHbI eWipy
- Kypblfblhl katkhan kynihde kayinc3 kepe caKaTaHbI3.
Kytim XaHe TexHnKaIbIK Kbl3Met KepceTy
Cy 6aBbH 6ocaty
HA3AP AYdAPbIHbI
KypbInrBihh cybH mypbIn kanyibHaH 3aKbIMdanybl
Kypbnf2 aodah acmam yakimka kondahmiu mbin
bonca,6kmafb cybih 6y3bln bacmayb MyMKH.
Kypbnf1nbi naoanahydarbyzakynicmepehen 6yphin,
6bakni 6ocambn kuo kepk.
- Xeni icikwecih ToKtah axbpaTbHb3.
Cyper N
- BaK KaKnafbH aJbIn TaCTaHbI3.
- KaKaTaH Ta3apTy KapTpNdxH aIbIbI3.
- Cy 6a b H 6oCa t b H bI3.
Cypet O
KaTaN Ta3apTy KapTpndxin aybICTbipy
HA3AP AYdAPbIHbI
KypbIrfBbI 3aKbIMday XeHe KbI3Mem Kepcemy Mep3imHIN KbICapmbinybl
KaKmbi KxuHaKmay nampoHbI aybIcMbipy
apabIbKmapbI cakmamay (BaKapy waMbI
UnDukauuCbI) KpybIFbIBI 3aKbIMOaB1 XeHe KbIMem
KePcemy Mep3imn KbICkapmy MymKiH.
AybIcMbipy apabIKmapbI (BaKapy waMbI
UnDukauuCbI) cakmaHbI3.
Hycay
Bakmbi cyra monmbipbIn, KpybIrrbHbI icke KOckaHHah KeiH, KaMnA masapmy KapmuxdinH KaKa KapcBi epekemi icke Kocblaobc. CydarKaKakmammasapmy KapmuxdinHei meuipukmepem cihipinedo. KocbIMua KaKmammasapmy manan emimmeoi.
Hycay
KaMman m3apmy KapmuDxihDeei myuipuiKmep cyMeH konhacahan Keiuh m3eepy MyMKIn, 6yn cyBbH KpyPmbHa MUhepandApbH bonyBuHa 6aunhaicmb. Mydua myc eepy 3uhrbc13 bOnbl mablnadby XeHe Kpybntfba, ma3anay xymCbHa Hemece KaMman m3apmy KapmuDxihH xMybcbHa kepi eepi mua3beoi
Kymbic yaKbItb aKaTaNFaH Ke3deri 6aBjIay wAmbl
BaKbIyay WAmby KaKaTah Ta3apTy KapTpNdxiH KaWah aybIcBpy KaKet EKeHdirH KepCteTei.
BakJbIay IaMbIy KxMlbc YAcBtBtHbN aRyTaNbHa 1 cfar KaIraFaHa Zb3bN 60bn JXbIbJIbIKaIbIy. Cyper T
KaKtaH Ta3apTy KapTpNdiKiHi XyMbIc YaKbITbl TayCbIrlAHa 6aKbIaIIay 7aMbIe Te3 XbIInbIbIbTaNbIy KypblrBbHn 3aKbIMdaNybl B0ngdbMp ayliH copBbYABOMATbTI Type eUeDi (cy 6byXoK)
KaKaTaH Ta3apTy KapTpndxih OPhaTy
HA3AP AYdAPbIHbI
KypbInrfbHb3aKbImdayKayni
BpybH naUdanaHbIraH kAkmbl XuHaKmay nampoHbIH opHamy KpybIbrHbI 3aKbIMOaByMymKiH.
PampoHapabby aYbcMbipbn anmay yuiH, a6aunan xMybic icmeH/3.
1-nde. KaKMah mazapmy Kapmpudxih wBirapbIn, Kauma opHamaKHAN Keiui bynay Kezihde by cypei anci Hemece mypaKmbI emec bonybl MymKIN Jxhe Jxke cy mamuBnApbl aBfn kemyl MymKIN. KpybIbnFa KaMKAH mazapmy Kapmpudxine cy monmbipambH kBcA icKe Kocy yakmbI kepek. Makcumanbi By menepiH 50 cekyhd iuihde konemkiimme, WbIRambH dyBHmenepi mypakmbI mpye kebee bepeoi.
Hycay
Cy 6aebin anbim macmay apkblbl, Ka'man m3apmy Kapmpudxih onai wibrapbin, Ka'ma ophamyra 60ana.
- Xeni ictikwecih TokTah axbipatbHbI3. Cypet N
- BaK KaKnafBIn aJbIn TaCTaHbI3.
- KaKaTah Ta3apTy KapTpuiXiH aIbIbI3.
- XaHa KaKTaN TaaapTy KapTpIaJxIH caJIbHbI3 KHe ON opHbHa TYcKeHlE 6acblHbI3. Cyper S
- By tetirih 6acbIn, jeni ictkwecin po3ekara KocbHbI3.
-
By teririH 7 cekyHd 6acbIn yctan typbHbI3. CypT
-
Kanblya hentipy catti OnbIaIaNdaIHaHAn KeiH KpyblJrB 2 pet Xacbl JolbIbn KjblnblkTaNbl, coJaH KeiH Kbl3dbipy pexmHne aybCaNb.
- KaTaN TaaaprY kaTpndXiHEn ayahbI uBbHApy yuH, 6y teirir shaMaMeH 50 cekyHd 6acbIn yctan TypbHb3.
TOnbIMdayMbInapra Kytim Kepcety
Akaynap Ke3iHderi KEmek
Akaynapdbin ce6bentepi ken jkaaandaKelenci wonydbi naanadanyapkblbEzdiHEn Xoora 6onatbHdai kapanabim 6oIbA. Kydkert 6bone Mece oBj KepcetcreImer h akaynap 6bnfak 3e, pyKcat etInre HcpBnCTik opTalkbKa xa6apnacbHb3.
ECKEPTY
Kyuikmep Kayni XeHe 3neKmp moBaHn KaPaKaam any
Kpyblnbr kyam ke3iHe KcBly Ke3eHemeC sybmaHaK 3Ke,ayaknapdy kjoIOKayinmi.
Keninik umekepoi po3emkadaH ubirapbn anbHbI3.
KypbInfbHbCybImbHb3.
Bakteri cydbin xekntikti meIwepine Kapamactan 6ydbin xoktbfb/ekntikic3 meIwepi
KaTaN Ta3aIpy KaptrnDxKi opHaBtJMaHaH Hemece DyBbO pHaBtJMaHaF.
KaKaTaH Ta3apTy KaTpndxih OpHaTbIb3 xHe/ HeMece KaKaTH Ta3apTy KaTpndxi 6aKaTa 6epiK 6eKiTIInHIn TeKecepH3,KaKet 6oTrAh XaFaJaDa oHb KaTtadH 6acBb3.
KaKaTah TasaPTY KaTprDxKIn CyDbI ToTNbIpy Ke3iHne BbIfapblfJaan HeHe/Hemece KaKaTah TasaPTY KaTprDxKi CaTbnHraF
ToTbpy Ke3iHne KaKtah Ta3apTy KapTpNdxin YHemicy 6aBbHda KaJbIpbHbI3.
By tetirih y3diKia 6abIn yctan TypbHb3.
Uamamen 50 cekytdan Keiin 6byh TOnbIK
eHimdiIirHne kon Xetki3iJeD.
BaKbInay wAmbl TypaKtbl Type De Kbl3bl 60bnbl XblnbIbIKtaDbI
Kybpda KaKaTaN Ta3apTy KapTpNiXiHiH Mep3iMaayTaIaIbI.
Kaha KaKaTah T3aapTy KapTpNdxHIN opHaTbHbI3, 6eimin KapaHbI3 KaKMaH m3apMy KapmuDxHIN opAhmy.
Bakteri cydbin xetklinikti Menuopeiphe Kapamactah 6ydbin koktibfbl. Baibinay wambbl b3bl60bn Te3 xblnbltkTtAdbI.
KaTaN Ta3aprty KapTpndXiHm Mep3iMi aRanTanyfTa TaHn KaIbIa
Kaha KaKaTaN Ta3apTy KapTpNdxH opHaTbHbI3, 6eImiH KapaNbI3 KaKmAH m3apMy KapmuDxHnOphmy.
ErepKaHa KaTAn Ta3Apry KarpTpNkOphatbInca XaHe 6ynKate KaTaNtA-KaTaNbIe Bepce, KaNbHn KaTIPy npoeuci Dpybc JxprjImJemer hOnby
MymkiH. Ohbl KaIIbHa KeTIpy yIiH TeMeHderi apeKeTepDi opIHDaHb3:
1 Jeji icikwecih ToKtah axbipaTbHbI3.
2 By teririn y3diikci 6acbin yctan typbihb3.
3 Xeni ictkueecih po3etkafka kocbHb3 xhe6 by teTirH 7 cekynd 60bn 6akblay uamdapbi eki pet xacbln 60bn jxahfana yctan TypbHb3. Benin HkapabH3 KaKman mazapmy KapmuDjxh aybcmbipy.
Keninik
Op enDe xepriinikti dinctpnbIotnpap bepren Keninidik
IupTnabI KOnlaHnaJaIb.IyBIMda MaTePnAnIbIK
Hemece eHndipictk akaynap anbIKtanFaH XaFdAda,
bKTHMnA kaynapDaIb KeninIDMKep3Mi IiUHde AkbIcbI
XeHndeM3.KeninIDMKep3IMHe Hapa3blkbTApbHbI
Bonca,6bYIMdbCatKaHc CayaDA MekeMeCine Hemece
kaBHdaftE kIneTTK b3Met KepeCyOpBHa
Ty6ipTeKI KepeCtin XabapNaCbHb3.
(MeekHxaibMbI3 apTkBi 6eTTE)
Theipinre H Kyhi KepceiTInre Tpy KecTeciHde 1nppnaHaH.
Keke caHapdbH MafbHacb KeleceiDee 60naDbI:
MbicaJIbI:30190
3 ΘHπipiIπeR KbIJIbI
0 ΘHdpinre facbipbl
1 ΘHdiipinreH OHxbIbIK
9 ΘHdpijiren aibHbEeKiHs caHbI
0 ΘHdiipirreH aibHbH 6ipihi caHbI
CoHbIMe6yI MbicaJa 30190 KoDbI
09/(2)013 eHdpinren KynH 6iDipezi.
TexHukaJIbIK MaFJyMaTTap
| SC 2Upright | KST 2Upright | ||
| ЗлектожелICHe Кosity | |||
| Керhey | V | 220-240 | 220-240 |
| Фаза | ~ | 1 | 1 |
| Жилік | Hz | 50-60 | 50-60 |
| Корphaльс кlasы | IPX4 | IPX4 | |
| Корray кlasы | I | I | |
| Курьнгын Techнікалык сипаTTamalapы | |||
| Жыліу куаты | W | 1600 | 1600 |
| Кызу укыты | Секун | 30 | 30 |
| Д | |||
| Удійсіз 6-byлі п жібіту | g/min | 38 | 38 |
| Сынім'dыныk | |||
| Су 6ari | I | 0,4 | 0,4 |
| Θлшем徴і мен салмары | |||
| Салмагы(Tолы'mдаушыларсыз) | kg | 2,7 | 2,7 |
| 丫ын'dыы | mm | 314 | 314 |
| Енi | mm | 199 | 199 |
| Биiktiri | mm | 1185 | 1185 |
TexHnKaIbIK e3repictepyKcat etinreH.
CbDpbXaHne
O6u yka3aHn 141
YnTope6a no npedHa3NaueHne 141
3aunTa Ha okonHaTa cpeDa 141
Akecoapn pe3epBn qactn 141
O6xBaT Ha doCTaBka 142
PpeDn3H yCtpoCTBa 142
Oncanhe Ha ypea 142
MoHTax 142
TbpBOHaJHbBBeJdaHe Beknloataa.. 142
Eknpnoatauia 143
Baxhnyuka3aHna 3a ynoTe6a 144
I3noJI3BaHe Ha npHaJnEJXHOCHTNe 144
Pnka n npdpbXka 145
Pomou npn Henn3npaBHOCTN 146
Tapaunia 146
TexHHueckn DaHHN 147
06uzuka3aHna

PnepinbPBOTo n3nOPIBaHe Ha ypeDa npOyTeTo ToBpOrInHaNo pbKOBoCTBO 3a ekCnIPOaTauZn I
npIIOXKeHTe yKa3aHnA 3a 6e3oNaCHOCT.
Ppoueepaate CbOTBeTHO.
3aana3e Te DBeTe KHNKKn 3a NocpeDbaUO nIPOJ3BaHe IIN 3a CNEBaUHc SoCCTBeHInK.
- CbXpaHЯBaIte ypeIa Ha cyxo I 3aIHTeHOOT 3aMPb3BaHE MRCTO.
Baxhny yka3aHn 3a ynoTpe6a
NouctBaHe Ha noOBoN NOBbpxHOCTN
PnpopbUbame npde n3noI3BaHe h ypea noIbT da ce IMTE mN da Ce noIcNt C npaxocMykaHa. Taka Oue npde bXnXHOToNCTBaHe noIbT ce OCbo6OxJdA0 t MPbCOTm I CBO6Odn Yactnu.
Почистван Н IOВьхноTN C NOКРNTHE JINJЯкпани NOBьхноCTN
BHIMAHNE
PoepeheHu noebpxhocmu
Tapa m oKe 8a pa3meOpu 6ocbK, Me6eHn Pak, u3Kcymehu nokpumhu unu bou, kaMoo u nenlomo, c Koemo ca 3aenene HmecnHume KaHmoe.
He haoyuame napama KbM nelenHu Me6enHu KaHMOe, MuKamnenoLomo, C Koemc a3aIenHu, Moxe da ce pazmeoju.
He u3non36aume ypeda 3a noocmeane Ha nakupaHbpeenu npoede unu napkem.
He u3no138aume ype6a 3a noocmeae Ha naKupanu unu chabdehu c u3kycmeHo nokpumue noebpxnocmu, kamo nap. KxyHcHKU cmaHu meBenu, epaMu unu napkem.
3nON3BaHe Ha npHaJnxHocHTe
IopOBAI03a
Ipoobata IIO3a e IOxOJa7a 3a NOChCTBaHe Ha Mmeiue Ce IOOBn HAcTnKn, HApr. KaMeHNIOObe, PIOUKNIOObe oPTVC, NaKpAnHbPBeHNIOObE, KATO napKeT n lamHaNT.
BHIMAHNE
Ioepeu ecIeCmue Ha napHo 33eucmeue Haepraehemo u npahomo 33eucmeue Moam da odoedam do nopeu.
Ipedu ynompebama npoeepbaume ycmouueocmmha Ha aepbae u naphomo b3deucmbue ha
He3abeneKUMO McMo c Manko Konuuecmo npa. IpoodyxaIme c npa nakupaHou dbpeehu noooe c npedapumEnHo hacmpoeho Hueo 3a dbpeecuna u Hukozae He 3aDbpkaIme mBpde dbnao ebpxy eHDo u cbsoMcmo.
Yka3aHue
Ocmaa om noucmeauomo cpecmoe unu nooepaa emyncu, hauuHn ebpxnyoepxHocmma, koro me ce noucmea, npu napho
noucmebe Meozam da doeedam do nemha, koumo u3e3am npu Mhooeokpamno npunoxehue.
PPEIa3JNBOCT
N3zapnHa KaPakama
Ipu mpemupahe c npapa noobama dio3a/kbpna 3a nod ce haoopeeaea.
Ipu cBaIaHemo Ha KbpnaMa 3a nOd moKe da KaNe opeu a oda.
Pabomeme cbcu cbaIme noobama biO3a/kbpnama 3a nop camo c nopXo8u oOyku.
3aKpenete KbPnata 3a nod KbM nOOBaTa IIO3a, BIXKTe rnaBa MoHmupaHe Ha KbPnama 3a nod
Mnkpno6bphKaBpna 3a noD
MnKpOoBbPbHaTc KbPna 3a nod e npdoXoJa7a 3a NaOHCTBaHe Ha KaMeHHN pODoBe, pNoCHN i NpOBe OT PVC, KaKTo I Ha NaIkpApaHn DbPBeHn pODoBe, KaTo napKeT n lamHMHaT.
A6pa3nBHa KbPna 3a noD
A6p3aINbHaTATbPnA 3a nOe I nOxOJaUa 3a NOnCTBaHe Na HeYbCTBNTENH NIOBOE KaTO TAKINBa OT NIOK KI IN KAMtK.
BHIMAHHE
POMOUI npH HEN3npaBHOCTN
Mhoro cheTo npuHnHnte 3a nobpeda ca enMeHTapHn n C moOHTa Ha cneDnHte Yka3aHnma Moze camd da rN oTcTaPAnHe.AKo He cte cnrgHyn nIi NOBPeDnTe He ca onCaHnTuK, OobpHete Ce kBm OTOpnsnapHnCePBn3.
PENEYNPEXDEHNE
Onachocm om mokoe ydap u u3zapnne
Jokamo ypebdm e cebpaan cenekmpuueckama MPeka unu oou he ce o oxnadun, omcmpaehaemoh Na Heu3npaehocmu e onaocho.
U3bpaume uencena.
Ocmae me ypea da ce oxnau.
JIINCBa/MHORO MaIko Napa, BbIpeKu Ye BoDaTa B pe3epBoapa e DoCTaTbUHa
IaPOnbT 3a OTCpaHbAHe Ha KOTJIeH KAMbK He e NOCTAbE n IcOCTAbE rpeSHo.
- Noczbete natpoha 3a OTcpaHraBaHe Ha KOTJIeH KaMbK n/nnn npoBepete daJIi ToE eΦMKcIpaH dObe B pe3epBoapa, pNIeOBxOIMMoCT ro HATICHTe OUIE BeDHTbX.
Ntpohbt 3a OTcpanhaBe Ha KOtIe KaMbK e 6n IN 3BaIeH NO BpeMe HA HAIINBaHeTo HA BOa I/INu e 6n IN NOCTaBeHOB NaTPOH 3a OTcpanhaBe Ha KOtIe KaMbK
BunhaN octabYnTe NaTPOHa 3a OCTpaHnBaHe Ha KOJIeH KaMbK B pe3epBoapAp npI PbJIHeHc BOJa.
3aDpBkTe IocTa 3a npapa HATINCHAT npOdbIjXnTEHNO. CNeI OKoI 50 cekyHnHaCtBnBa nblNaTApna MoUHOCT.
KoHTpOJIHATA JAMnA MnRA B ChePBeHO Ha peIOBHN HHTepBaII
BpeMeTo 3a paBoTa Ha NaItpoHa 3a OTePaHraBaHe Ha KOTJIeH KaMbK e KbM KpaCn.
- Поставе Нов патон 3а остраве на котпен KaMbК, Виктега Поставе на порна за omсграима вд Котпен KMbK.
JInncBa npapa, BbIpeKn Ye BoData B pe3epBoaapa e OoctaTbUHa. KOHTpOHLATA JAMNA Mra 6bp30 B YeBpBOH.
BpeMeTo 3a pa6Ota Ha nIaTpoHa 3a OTeCpaHbAne Ha KOTJIeN KaMbKe I3TEKJIO
- TóctabeTé HOB NATPOH 3a OCTpAHBaHe HA KOTnEH KaMbK, BvKTe rINaBa IocMaBHe Na pAmoHa 3a OmcmpaHBeHa HOMtneh KaMbK.
Ako Buee e noctaBeH HOB naTPOH 3a OTCTpaHraBaHe HA KOTJIeH KAMbK N Ta3N rpeJka BCE OUE CE NOBRABa, IpoUcEcbT Ha HynipaHe BepoRTHO He e N3BbPwIe npabuInHO. CneDbaTe CTbKnTe No- dony, 3a Da To HynIPAte:
1 N3BaTeMpexKOBnI UencenOT KOHTaTa.
2 3aŋpβxTe nocTa 3a npapa HataHCHAT npoDbIxxNtEnHO.
3ПьхHeTe МржOBицencenИЗадьЖte loCTa 3a napaВ npOДьнжЕнe Ha 7ceKHyДи,ДOKATO KOHTPOnHATAЯMaNA CBETHe DBA NBtN B3eNEHo. BvKte rnaBa CMraHa Na mampoHa 3a omCmpaHReaHe Ha komTne KaMbK.
Tapaanua
BbB BcKaBa DpKAba Ca BaIiDn H3daDeHIne OT HaSiy OToPi3rpan DAChTb5TpRapAHuONHH ycNOBn. EBeHTyaHn NobPeYn Ha BaSiy ype ZteOTcPAnm B paMKnHe Na rapaHuaONHH cspk 6e3JIaTHo, Ako CE kacae 3a DeFeKT B MaTePnaINTE Nn PpOn3BOdCTBeH DeFeKT. B cnUyAHa npeJraBaHa He npabo Ha rapanu, ce oBpHete KbM BaSiNx DAChTb5TpRop Nn KbM Hau-bIbn3Kny OToPi3nPaH cepBn3, KaTO npEcdTabnte Kacobata 6benjcka.
(Adpec, Bxk. 3aHaTa cTpaHa)
Texhnueckn daHHN
| SC 2Upright | KST 2Upright | ||
| Еléktрическо с[b]рзванe | |||
| Hа[npeşенье | V | 220-240 | 220-240 |
| Ф[a]зa | ~ | 1 | 1 |
| Ч[ectота] | Hz | 50-60 | 50-60 |
| Ти[n З[a]цида | IPX4 | IPX4 | |
| Клас З[a]цида | I | I | |
| Д[a]нн[a]ошнocтта на урада | |||
| Hа[npeвateелна мошноct] | W | 1600 | 1600 |
| В[peme э[a] по[d]ряванe | Секун[di] | 30 | 30 |
| П[pod[b]лжигелно ручсанe | g/min | 38 | 38 |
| Н[a]пара | |||
| Колическо на п[b]ленье | |||
| Рezерbooар за вoda | I | 0,4 | 0,4 |
| Ра:[mepуи n terга | |||
| Тe[sno (бeэпriи[a]д'eжhoe'tи) | kg | 2,7 | 2,7 |
| Д[b]лжинa | mm | 314 | 314 |
| Ш:[uɔpчинa | mm | 199 | 199 |
| Ви:[oɔvнa | mm | 1185 | 1185 |
3ana3BaMe cn npaBoTo Ha TexHnueckn IpomEni.
g g uu uu uuu uuu uuu uuu uuu uuu uuu uuu uuu uuu uuu uuu uuu uuu uuu uuu uuu uuu uuu uuu uuu uuu uuu uuu uuu uuu uuu uuu uuu uuu uuu uuu uuu uuu uuu uuu uuu uuu uuu uuu uuu uuu uuu uuu uuu uuu uuu uuu uuu uuu uUU
jog .u jzll 105 2g g 90 no p jll Jg U aJgJgU u gU
aJll aJl aJbJz Jll aJl aJbJz Jll aJl aJbJz Jll aJl aJbJz
j06b jwlg od sll al aagbgsaas lalld 1 1
1
2
3
4
5
laai
gssll asw gea jll lalall bog w al g J s Ws
Jc |jz jll clll lgl o jy 11 aill aasaiial
o00000000000000000000000000000000000000000000000000000000000000000000000000000000000000000000
a
KST 2 SC 2 Upright Upright
| a' | a' | a' |
| 220-240 | 220-240 | V |
| 1 | 1 | ~ |
| 50-60 | 50-60 | Hz |
| IPX4 | IPX4 | |
| I | I | |
| d' | d' | |
| 1600 | 1600 | W |
| 30 | 30 | g/min |
| 38 | 38 | |
| e' | e' | |
| 0.4 | 0.4 | I |
| f' | f' | |
| 2.7 | 2.7 | kg |
| 314 | 314 | mm |
| 199 | 199 | mm |
| 1185 | 1185 | mm |
Jusill aiaol aiaiIaiaol
a
j42//ab
aIgua//muu//a//awb
bbl/1 jbn bbl/1 jbi jbi jbi jbi
·s + ( 1 + u) 1 = ( 1 + u) 1 + 1 = ( 1 + u) ( 1 + u) >
a//j aagbgs 0c/19 g b2 jll plzaiw /g/16
sagpabu u/2 g/1 w/2 u/2 u/2 u/2 u/2 u/2 u/2 u/2 u/2 u/2 u/2 u/2 u/2 u/2 u/2 u/2 u/2 u/2 u/2 u/2 u/2 u/2 u/2 u/2 u/2 u/2 u/2 u/2 u/2 u/2 u/2 u/2 u/2 u/2 u
Jauu uill /a/ jaiagbgs 1s sall jg Jl.
.1
N a|la| 0g
.1j111111111111111
.3
glaolg oys allj aogb j 4 .4
S a|a| o
aasll Jlsjy jz 5
.
.6
T aIaI O
Pn jnn n nn n nn n nn n nn n nn n nn n nn n nn n nn n nn n nn n nn n nn n nn n nn n nn n nn n nn n nn n nn n nn n nn n nn n nn n nn n nn n nn n nn n nn n nn n nn n nn n nn n nn n nn n nn n nn n nn n nn n nn n nn n nn n nn n nn n nn n nn n nn n nn n nn n nn n
J 1 g0g Jaa
50 jj j j j j j j j j j j j j j j j j j j j j j j j j j j j j j j j j j j j j j j j j j j j j j j j j
Jlll jwglj 0e gll
yJyJyJyJyJy
()
aalwio wJU/1Ua 2
J
cuii / / 15/15/15/15/15/15/15/15/
jwla/ jaa >, wlll, psoi oio u. Jw
.0g 0111111
60g 60 a
. a_Su loggUl aJlu
JLJGdJbJcJlwall
Lg 100000000000000000000000000000000000000000000000000000000000000000000000
g211g a45 a0a/
00000000000000000000000000000000000000
UlllUl lcld
.5w/
1g/2jgl≥1
f 100g2g>g2g>g2g/2gU
jE JsB LgSj p0gl aSll allj Aaogb jp
20
151 lo a>gl/g 151ll alljlaaogb j
p9jll xcg ijzjj 10k>bl aaaas kll alljlaaogbds
Sjol oJolalc ldoi
gglall cJol lwljll aljlaawgbgs glp
oJd jkj Jg
cJall eIJI IaIeI JzJgJssll alljlaaagbJzJ
Jr Jbgs20j 1
J 50>
aabii jlrjgl UgUlll JgJzUla jao
L
0g12g9g4u2u/1a2uaaa ySg4b u w gKg4/u
Jaaawll 1y. yao aoo Jaaao o ao j jaoa2al
aU Uio no aillj jSoy aUuauu Juc 10g SiaI
ailll/llj/ aawgbj 0g0g0g0g0g0g0g0g0g0g0g0g0g0g0g0g0g0g0g0g0g0g0g0g0g0g0g0g0g0g0g0g0g0g0g0g0
li. slal/ j, sall gjzally lao liq slal lguollo 12
aawlll/ogssllgl/llgai gao gaa/ aia kai /ll 129 U/g, aoull absw, o2gai / gzjll jzli agi U gai / bui / Jauu u/ gai / u/ u/ u/ u/ u/ u/ u/ u/ u/ u/ u/ u/ u/ u/ u/ u/ u/ u/ u/ u/ u/ u/ u/ u/ u/ u/ u/ u/ u/ u/ u/ u/ u/ u/ u/ u/ u/ u/ u/ u/ u/ u/ u/ u/ u/ u/ u/ u/ u/ u/ u
Jdlaal 1
aJUd
Ll Jlll llll jlll aabla abaiaa aaiia aaii aai i aag 111111111111111111111111111111111111111
a
Jll
Jgog 1uus uKs Jlll g odUd Uoagla oJrJol no gao JI LpLzuiu/ Jg oRcl lJc Jull no aas JI pLzuiu/ Jb do JIyLWitig agswll bgo zo giogo
jJ11 jssu lalao pai Ug laa bgaanll jla// gaiwa. gaa// maia lc aie alab
L
gablll a giall aliauall alla lgl glalbiallw/1g 1golgo ggl /jIbllcuiill ic ggl /Sa aaiiul /glll 1siall psswll go jgl lgl b
#
P
JUULIaW/1sic Jauu aUJI/auauo/aUJI/aaqg aUJI/aaua 129 uUJI/clal UJI blaui UJI sUJ 10UJI aUJI/auauo/aUJI/auqg g39 JaU aU
Jll jil aJU UaJgl Jauu JU Uauu uauu
a a a a a
auiuui uuiuui uuiuui uuiuui uuiuui uuiuui uuiuui uuiuui uuiuui uuiuui uuiuui uuiuui uuiuui uuiuui uuiuui uuiuui uuiuui uuiuui uuiuui uuiuui uuiuui uuiuui uuiuui uuiuui uuiuui uuiuui
auiu uoui a
awwJgCnJzjRjUuBgoWwJzJUaJzJUaJzJU JgUgUllJz
a
1111111
g/2wU/1a/b/c/1/2w/1/2w/1/2w/1/2w/1/2w/1/2w/1/2w/1/2w/1/2w/1/2w/1/2w/1/2w/1/2w/1/2w/1/2w/1/2w/1/2w/1/2w/1/2w/1/2w/1/2
auiu auaa
aio gJg aJU 12000000000000000000000000000000000
JJI JIJI
C a|la|0.90
aJbJSSgss-0JJbU
J 1JU JIJI JIJI


L
/1bU// 1/211111111111111111111
Jlglj JbI JbIaJbIa 10
clll JJoJlssi
glallllalllJlls Jllss
.
a aulukslll j aagb j sla l o JlaSui
j( q) ≥ j( l)
aai jjlll aal lal jlll al
J. 0.4
F a>120
91
0.4 aolol oJzlll alc gclal 1
cIaI cJ JJIJIJIJIJIJIJIJIJIJIJIJIJIJIJIJIJIJIJIJIJIJIJIJIJIJIJIJIJIJIJIJIJIJIJIJIJIJIJIJIJIJIJIJIJIJIJIJIJIJIJIJIJIJIJIJIJIJIJIJIJIJIJIJIJIJIJIJIJIJIJIJIJIJIJIJIJIJIJIJIJIJIJIJIJIJIJIJIJIJIJIJIJIJIJIJIJIJIJIJIJ
G a|la| o
Jusill alac gbo
a
a//c//cl//c//j
aaiuio 10gaii / aqbi// aaiu / jaiy aaiii// aaiy aaiii// aaiy / aaiy / aaiy / aaiy / aaiy / aaiy / aaiy / aaiy / aaiy / aaiy / aaiy / aaiy / aaiy / aaiy / aaiy / aaiy / aaiy / aaiy / aaiy / aaiy / aaiy / aaiy / aaiy / aaiy / aaiy / aaiy
20jglz aJrJl jIgJl JIgJI IyI yIyI yIyI yIyI yIyI yIyI yIyI yIyI yIyI yIyI yIyI yIyI yIyI yIyI yIyI yIyI yIyI yIyI yIyI yIyI yIyI yIyI yIyI yIyI yIyI yIyI y
aalln aalw 1
N a|la| 0g
jglal
a a 1
N a>la| 0.90
4
eallgai jjll
/1222/1222/1222/1222/1222/1222/1222/1222/1222/1222/1222/12
O a|la| o
jkl all bid
aJ//a0gJdalljbl.aJUaasaaJl.1
C a|la|0
jgl/ a0jUa0g jc a0br alljLp .2
..gJgJgJgJgJgJgJgJgJgJgJgJgJgJgJgJgJgJgJgJgJgJgJgJgJgJgJgJgJgJgJgJgJgJgJgJgJgJgJgJgJgJgJgJgJgJgJgJgJgJg
P a|la| 0g
1cgl aaiia jlc aagac aegjgllb> .4
12 > 0
Ha|la|0
.5
slll lss sllc lol llllllll 100 51
jlll sall lss sss pks/00 L2y/1stg leglao
4
16 × 2 = 36
sla/1pUzw/sj>0oJg/1sUw/2uJ Ssa
ylll l 111 111 111 111 111 111 111 111 111 111 111 1
..(llio gboal) s/4 a91/10g/12a/b/10g/11u
J 1 J 1 J 1 J 1 J 1 J 1 J 1 J 1
jgljy o jolcll jj
jIgJlJdmoI .1
Jg jj J 2
J. 0.4
F a|la| 0g
.1jzllelbc glsl .3
Jd
jIJI Jwol .1
JUgac JkWjJoo all o all jwJ 2
.04 0llg jlll b
G a|a| o
.1jzll elbc glél .4
Jawl JwIJI aIc Iaol gclll 5
J
4
lll//10joo slo jgjgl
bgaull a 1 jy jg jg jg jg jg jg jg jg jg jg jg jg jg jg jg jg jg jg jg jg jg jg jg jg jg jg jg jg
eas/111111111111111111111
gaiuaijLc0jSooaiuuiiaqg jgljglgj
JUJI UUUUuUauuuuuuuuuuuuuuuuuuuuuuuuuuuuuuuuuuuuuuuuuuuuuuuuuuuuuuuuuuuuuuuuuuuuuuuuuuuuuuuuuuuuuuuuuuuuuuuuuuuuuuuuuuuuuuuuuuuuuuuuuuuuuuuuuuuuuuuuuuuuuuuuuuuuuuuuuuuuuuuuuuuuuuuuuuuUU
yJU>Jc sogac gog
a//j /aagbgs 100g g> 12, jla/lll aiai /jg iic
gaae aie /jla /iia /jla /iia /jla /iia /jla /iia /jla /iia /jla /iia /jla /iia /jla /iia
.50
J
1JSSa.()/bU)2Jb//aRjxicaiolc0
JbI sla>U1 Jzooj G
J. SC 2 Upright EasyFix J U J L J I aS J aI U
. KST 2 Upright 日 _ 日 SII aal bdd >lg jg s
olull pwrjgale galsall jjll lclal
Jn JnJnJnJnJnJnJnJnJnJnJnJnJnJnJnJnJnJnJnJnJnJnJnJnJnJnJnJnJnJnJnJnJnJnJnJnJnJnJnJnJnJnJnJnJnJnJnJnJnJnJn
jgiuii j0j
jJg jIg jIg jIg jIg jIg jIg jIg jIg jIg jIg jIg jIg jIg jIg jIg jIg jIg jIg jIg jIg jIg jIg jIg jIg jIg jIg jIg jIg jIg jIg jIg jIg jIg jIq Jq Jq Jq Jq Jq Jq Jq Jq Jq Jq Jq Jq Jq Jq Jq Jq Jq Jq Jq Jq Jq Jq Jq Jq Jq Jq Jq Jq Jq Jq Jq Jq Jq Jq Jq Jq Jq Jq Jq Jq Jq Jq Jq Jq Jq Jq Jq Jq Jq Jq
jgljla
Jyogall aolal aljg jzgl h w l ad jzglll Jd y 10
(ogssll jbi) jyj g jzgl lal jzgl lal jzgl
jgall jzgl JLkaii A
1
jlllglusu ②
1-1JgJSSG:SC2UprightJgJSSJAAJ ③ JgJg a>laaAsSsAaBbI -JagUl UglUuWglUu
Jj jj jj - jj jjj U u uu U e 2 JJJU OJU JUOJU UUJU UUUU UUU UUUU UUUUU UUUUU UUUUU UUUUU UUUUU UUUUU UUUUU UUUUU UUUUU UUUUU UUUUU UUUUU UUUUU UUUUU UUUUU UUUUU UUUUU UUUUU UUUUU UUUUU UUUUU UUUUU UUUUU UUUUU UUUUU UUUUU UUUUU UUUUU UUUUU UUUUU UUUUU UUUUU UUUUU UUUuuuuuuuuuuuuuuuuuuuuuuuuuuuuuuuuuuuuuuuuuuuuuuuuuuuuuuuuuuuuuuuuuuuuuuuuuuuuuuuuuuuuuuuuuuuuuuuuuuuuuuuuuuuuuuuuuuuuuuuuuuuuuuuuuuuuuuuuuuuuuuuuuuuuuuuuuuuuuuuuuuuuuuuuuuuuuuuuuuuuuuuuuuuuuuuuuuuuuuuu uu
/1bU-2Jg:SC2UprightJgssJg 4
jgljg a>laaaklll aab - jgUl nguU gUu
jgl jgl -jglw -jglw -u 10gll 10 gll lgl w 10gll 10gll 10gll 10gll 10gll
JUILl/llj/awgbs JUwJ
KST2UprightJgJSSJIaJ ⑤
6
s ⑦
JSLIggoJSLIglls ⑨
juljjjajwglj ⑩
clallo Joo a
Jaa aagaaa aagaae aagaae ⑫
aAslls g aAsllalg ⑬
aJUul a9g jj 14
aJUJI a9 15
all
152.
152.
152
152.
152.
152.
152.
151
151
151
150.
150.
149.
149.
148.
148.
aolc
plaswgljgldaessllolocj 200000000000000000000000000000000000000000000000000000000000

aai g>U1 piaiW UJg uuiu U 1u
aalaaallllallll
auiuuiiuiiuiiui i jieaiiui iue auii PVC uusig builg auiuui uui (ua) uusiuui uauu uui uuuu uui uuuu uuuu uuuu uuuu uuuu uuuu uuuu uuuu uuuu uuuu uuuu uuuu uuuu uuuu uuuu uuuu uuuu uuuu uuuu uuuu uuuu uuuu uuuu uuuu uuuu uuuu uuuu uuuu uuuu uuuu uuuu uuuu uuuu uuuu uu
aill aIa
y j 100000000000000000000000000000000000000000000000000000000000000000000000000000000000
(REACH) all joljall joljall joljall joljall joljall joljall joljall joljall joljall joljall joljall joljall joljall joljall joljall joljall joljall joljall joljall joljall joljall joljall joljall joljall joljall joljell joljell joljell joljell joljell joljell joljell joljell joljell joljell joljell joljell joljell joljell joljell joljell joljell joljell joljell joljell joljell joljell joljell joljell joljell joljll
JalglbfoaJalLall JAL
.1a aulll jll gla9 gaaull alalssll aalssll .Ulll l mllg jll jll jll jll jll jll jll gla9 gaaull alalssll aalssll aloglaall .www.kaercher.com gao
pulill sio
g2g>9 051.ogall le gao jaeill palw sio gai aoc lao ai aai aggagg aie gao ci gai gilj lalz r jaaiaaacn e gai sl
a|w|j
4g
0a//g/ai//aiollw//j
dolal oolwll

Register your product and benefit from many advantages.
www.kaercher.com/welcome


Rate your product and tell us your opinion.

- General notes
- Intended use
- Environmental protection
- Notes on the content materials (REACH)
- Accessories and spare parts
- Scope of delivery
- Safety devices
- CAUTION
- Symbols on the device
- Safety valve
- Fuse
- Description of the device
- Installation
- Installing the floor nozzle
- Installing the floor cleaning cloth
- Initial Start-Up
- ATTENTION
- Device damage due to calcification
- Installation information
- Note
- Operation
- Unwinding the power cable
- WARNING
- Risk of electric shock
- Illustration E
- Filling water
- Material damage through open reservoir cover or incorrectly seated or loose water reservoir
- Damage to the device
- Filling the water reservoir directly on the device
- Removing the water reservoir for filling
- Switching on the device
- Device and material damage due to tipping over
- Illustration H
- Illustration K
- Regulating the steam volume
- Illustration L
- Illustration M
- Refilling water
- Illustration F
- Illustration G
- Interrupting operation
- Illustration N
- Switching off the device
- Illustration O
- Storing the device
- Illustration P
- Important application instructions
- Cleaning the floor areas
- Cleaning coated or painted surfaces
- Damaged surfaces
- How to use the Accessories
- Floor nozzle
- Beware of burns to your feet
- Microfibre floor cloth
- Abrasive floor cloth
- Damage to floor coverings
- Removing the floor cleaning cloth
- Removing the floor nozzle from the basic unit
- Material damage due to an unstable device
- Care and service
- Draining the water reservoir
- Device damage due to water putrefaction
- Replacing the decalcification cartridge
- Device damage and shortened service life
- Indicator light at end of the run time
- Inserting the decalcification cartridge
- Device damage
- Care of accessories
- Troubleshooting guide
- Risk of electric shock and burns
- No steam / little steam although there is sufficient water in the reservoir
- The indicator light flashes red at regular intervals
- No steam although there is sufficient water in the reservoir. The indicator light flashes red quickly.
- Warranty
- Technical data
- Contenu
- Limpar as superficies pavementadas
- Porandalapi monteerimine
- Abraziva drana gridai
- IEVERIBAI
- YctaHOBKa HacaKdIg nona
- PncyHok B
- YctaHOBka caJIΦeTKn JIy IOnla
- PncyHOK C
- PepBbI BBOD B 3KcNpyaTaunIO
- BHIMAHHE
- Hhcmpykuu no Mohmaxy
- PpumueHue
- 3Kcnnyatauia
- Pa3MaTbIbAHne cTeBOrO ka6eJra
- PENEYNPEXKDEHNE
- Onachocmb npaxehmokom
- PpumeyaHue
- PncyHok E
- 3aINBka BObl
- BHIMAHNE
- PoepeKeHnue ycmpoucmea
- HaonHeHne EMKoCTn Ia BObI HenocpeDCTBeHHo Ha yCTpoiCTBe
- PucyHOK F
- ChTne emKoCTn dIe BoDbI c ZelbIO 3aONHeHna
- PmcyHOKG
- BkIIOUeHne ycTPOINCTBa
- Hhcmpykuua no Mohmaxy
- PpumueaHue
- PpnoctaHOBka pa60TbI
- Bbikluoyenne yctpoctBa
- XpaHHeNe yCTpoNcTbA
- Baxhble yka3aHnno npImeHeHHIO
- OuNTKa NOJIOB
- OuNCTka NMeoJnx NOKpbIte NeI IN OkpaWeHHbIX NOBepXHocTei
- IcnoIb3OBAHnE npHaIeJnxHoTei
- HacaKaJnI nona
- BHIMAHME
- Poepekenu u3-3a 803deumnna npa
- OCTOPOXHO
- Oxozu cmonbl
- CanpeTka JnnoJn3 MnkpoΦnbpl
- A6pa3nBna caIqetka dny nola
- BHMHAHNE
- PobpekeHue HanoIbHO2o NOKpbimua
- Chrtne canfetkn nnona
- PucyHOK C
- OTcoeDInHeHne HacaIKn IpaI NOJa OT 6a3OBoro yCTpoiCTBa
- MamepuaIbHbIyuep6 u3-3a Heycmoueocmuymcpoeaea
- PucyHok O
- PncyHok Q
- YXOD IN TEXHNUeCKOe 06cIyXnBaHne
- OnopoxHeHne emKoCTn DnBovbl
- 3aMeHa KapTpIgka IJn 3aIHTbI OT HAKINN
- KoHTpOJIbHЯ NaMNoUka 3aBepSeHna cPoka cnJx6bl
- PncyHOK R
- YctaHObKa KapTpndka dIy 3aunTbI OT HAKINN
- PoepekeHue ycmpoCmea
- POMOUI npHn HcnpaBHOCTX
- PPEyPExEHHe
- Het/Mano napa HecMOTpy Ha DOCTaTOUHoe KONHcCTBO BObl B EMKOCTn
- Bka3iBa Ka odo ecmahoeJehn
- Bka3ieka
- Ekconnnyatauaia
- Po3MOTyBaHHa MepexeBOro Ka6JIIO
- △NONEPEJXEHH
- He6e3neka ypaXeHHcmpymOM
- HaonBHeHHa Ka DnBa BoN 6e3nocepHbO Ha npicTpoi
- MaJIHOHOKF
- 3HimaHHa 6aka dIy BODn 3 MeTOIO HANOBHeHHA
- MaJIHOHOK G
- YbIMKHeHHnI npCTpoH
- YBATA
- IpoKoJdKeHH npucmpoU MaHa Ype3 nepekuDaHn
- Bka3iKa zoDo ecmahOBJIeHHa
- MaJIHOHOK K
- PeryIIOBaHHKJIbKOcTi napi
- MaJIHOHOK L
- Bka3iKa uodo ecmahOBJIeHHa
- Dorla3a npnaadm
- Donomora B pa3i HecnpaBHOcte
- NONEPEIXEHH
- He6e3neka ypaKeHH enekmpuHUM cmpymom i ompumahn onikie
- HemaC/3amIo npa Hne3BaXaOuH Na OoctaTHIO KInbKlcBt BOni B a6ui DBOI
- KohtpoJIbHa lamna 6JIIMaC YepBOHm Yepe3 pIBHi npomixkN yacy
- Fapantria
- TexHiChi XapakTepncTNKN
- XaHnbl HycKaynap
- MaKcaTbIHa cEiKeC KOnDaHy
- KopshaFAn opTaHbI Kopfay
- KepeK-kaPak KHe KocaJIkbl 6eJWeKTeP
- Xetki3jIm XnHaFbl
- KopraHbIC kypaJI-ka6DbIbIKTapbl
- △ABAHJIAHbI3
- Kypbblfbldafl6enrinep
- Hycay
- Cypet M
- CydbI ToTbipbHbI3
- Cyper F
- XymbictbI TOKTaTy
- HA3AP AYdAPbIHbI
- Cyper N
- KypbInfbHbI eWipy
- Kytim XaHe TexHnKaIbIK Kbl3Met KepceTy
- Cy 6aBbH 6ocaty
- KaTaN Ta3apTy KapTpndxin aybICTbipy
- Kymbic yaKbItb aKaTaNFaH Ke3deri 6aBjIay wAmbl
- KaKaTaH Ta3apTy KapTpndxih OPhaTy
- TOnbIMdayMbInapra Kytim Kepcety
- Akaynap Ke3iHderi KEmek
- ECKEPTY
- BaKbInay wAmbl TypaKtbl Type De Kbl3bl 60bnbl XblnbIbIKtaDbI
- Keninik
- CbDpbXaHne
- 06uzuka3aHna
- Baxhny yka3aHn 3a ynoTpe6a
- NouctBaHe Ha noOBoN NOBbpxHOCTN
- Почистван Н IOВьхноTN C NOКРNTHE JINJЯкпани NOBьхноCTN
- 3nON3BaHe Ha npHaJnxHocHTe
- IopOBAI03a
- PPEIa3JNBOCT
- N3zapnHa KaPakama
- Mnkpno6bphKaBpna 3a noD
- A6pa3nBHa KbPna 3a noD
- POMOUI npH HEN3npaBHOCTN
- PENEYNPEXDEHNE
- JIINCBa/MHORO MaIko Napa, BbIpeKu Ye BoDaTa B pe3epBoapa e DoCTaTbUHa
- KoHTpOJIHATA JAMnA MnRA B ChePBeHO Ha peIOBHN HHTepBaII
- JInncBa npapa, BbIpeKn Ye BoData B pe3epBoaapa e OoctaTbUHa. KOHTpOHLATA JAMNA Mra 6bp30 B YeBpBOH.
- Tapaanua
- laai
- a
- yJyJyJyJyJy
- JLJGdJbJcJlwall
- Jdlaal 1
- aJUd
- Jll
- L
- #
- P
- a a a a a
- auiu uoui a
- 1111111
- auiu auaa
- clll JJoJlssi
- Jusill alac gbo
- a//c//cl//c//j
- jglal
- 4
- eallgai jjll
- jkl all bid
- jgljy o jolcll jj
- Jd
- J
- jgiuii j0j
- jgljla
- all
- aolc
- aalaaallllallll
- aill aIa
- JalglbfoaJalLall JAL
- pulill sio
- a|w|j
Brand : KARCHER
Model : KST2 UPRIGHT EASYFIX
Category : Steam cleaner