
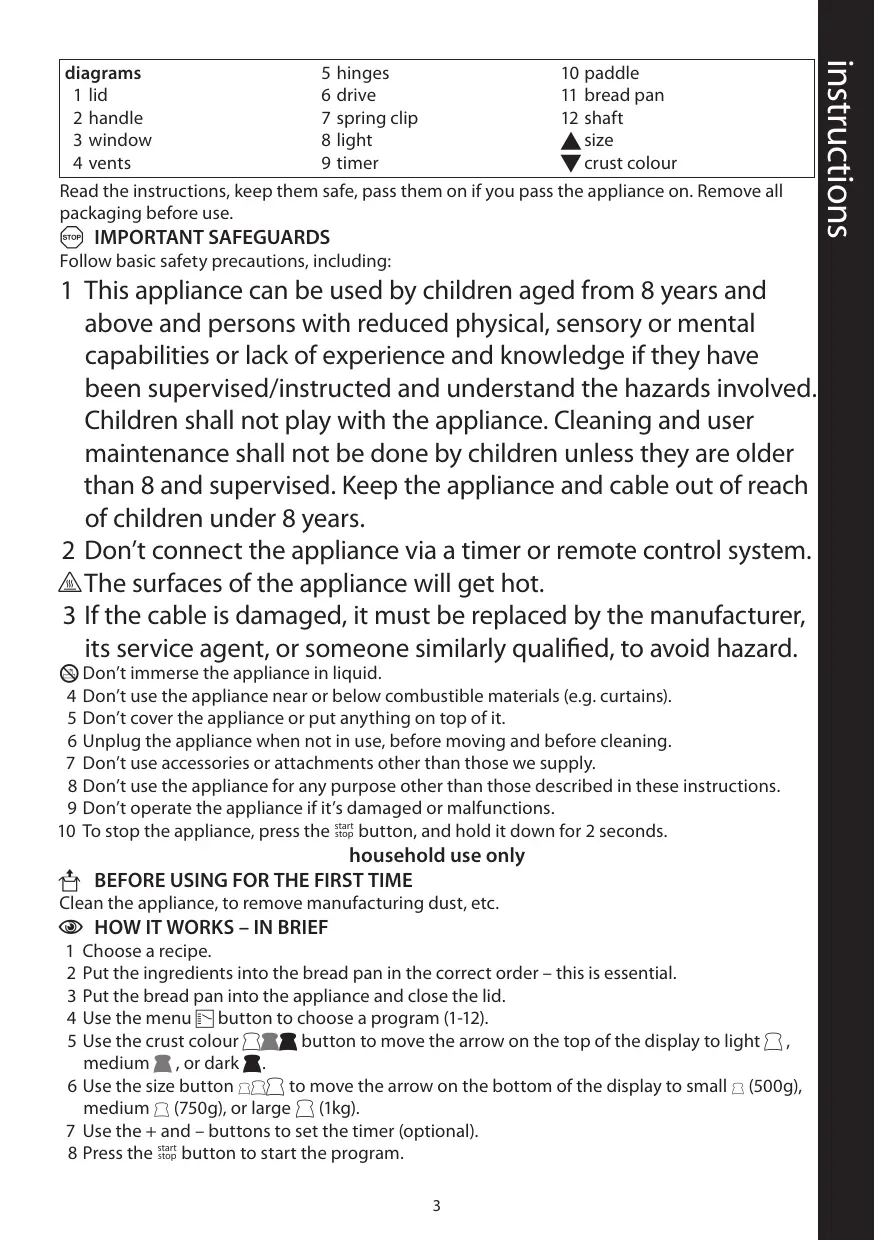
18036-56 - CLASSICS - Kitchen appliance RUSSELL HOBBS - Free user manual and instructions
Find the device manual for free 18036-56 - CLASSICS RUSSELL HOBBS in PDF.
User questions about 18036-56 - CLASSICS RUSSELL HOBBS
0 question about this device. Answer the ones you know or ask your own.
Ask a new question about this device
Download the instructions for your Kitchen appliance in PDF format for free! Find your manual 18036-56 - CLASSICS - RUSSELL HOBBS and take your electronic device back in hand. On this page are published all the documents necessary for the use of your device. 18036-56 - CLASSICS by RUSSELL HOBBS.
USER MANUAL 18036-56 - CLASSICS RUSSELL HOBBS
Read the instructions, keep them safe, pass them on if you pass the appliance on. Remove all packaging before use.
IMPORTANT SAFEGUARDS
Follow basic safety precautions, including:
1 This appliance can be used by children aged from 8 years and above and persons with reduced physical, sensory or mental capabilities or lack of experience and knowledge if they have been supervised/instructed and understand the hazards involved. Children shall not play with the appliance. Cleaning and user maintenance shall not be done by children unless they are older than 8 and supervised. Keep the appliance and cable out of reach of children under 8 years.
2 Don't connect the appliance via a timer or remote control system.
The surfaces of the appliance will get hot.
3 If the cable is damaged, it must be replaced by the manufacturer, its service agent, or someone similarly qualified, to avoid hazard.
Don't immerse the appliance in liquid.
4 Don't use the appliance near or below combustible materials (e.g. curtains).
5 Don't cover the appliance or put anything on top of it.
6 Unplug the appliance when not in use, before moving and before cleaning.
7 Don't use accessories or attachments other than those we supply.
8 Don't use the appliance for any purpose other than those described in these instructions.
9 Don't operate the appliance if it's damaged or malfunctions.
10 To stop the appliance, press the start button, and hold it down for 2 seconds.
household use only
BEFORE USING FOR THE FIRST TIME
Clean the appliance, to remove manufacturing dust, etc.
HOW IT WORKS - IN BRIEF
1 Choose a recipe.
2 Put the ingredients into the bread pan in the correct order – this is essential.
3 Put the bread pan into the appliance and close the lid.
4 Use the menu button to choose a program (1-12).
5 Use the crust colour button to move the arrow on the top of the display to light medium, or dark.
6 Use the size button to move the arrow on the bottom of the display to small (500g), medium (750g), or large (1kg).
7 Use the + and - buttons to set the timer (optional).
8 Press the start button to start the program.
9 The display will count down, then beep when it's finished.
After the beep, the appliance will keep warm for an hour, on programs 1, 2, 3, 5, 8, 9, 10, and 11.
PREPARATION
10 Sit the appliance on a stable, level, heat-resistant surface.
11 Leave a space of at least 50mm all round the appliance.
12 Open the lid.
13 Use the handle to pull the bread pan up and out of the appliance.
14 Fit the paddle to the shaft in the bottom of the bread pan.
15 The shaft and the hole in the paddle are D-shaped.
16 Set out a wire tray (for the bread), a heatproof mat (for the bread pan), and oven gloves.
18 It's important that ingredients are measured accurately.
19 Use the same measuring spoons for all the ingredients.
20 Level the spoons with the back of a knife.
21 Don't use a measuring jug - electronic scales are much more accurate, so weigh the water.
22 1 millilitre of water weighs 1 gram, so we've shown the water in the recipes as grams (g), rather than millilitres (ml).
23 If you still want to use a measuring jug, 1 millilitre of water weighs 1 gram, you may replace grams "g" with millilitres "ml", but the results may not be consistent.
24 If you're using a recipe from elsewhere, replace millilitres (ml) of water with grams (g) for accuracy.
25 It's important that you add the ingredients in the correct order.
26 We've numbered them, to make it easy.
27 First, add the liquid.
28 It's usually water, but it might include milk and/or eggs.
29 Water/milk must be warm (20^ - 25^ / 68^ - 77^)
30 Both hot and cold water will inhibit the yeast.
31 Add sugar and salt, if required.
32 Add wet ingredients - honey, syrup, molasses ...
33 Add dry ingredients - flour, dried milk, herbs, spices ...
34 Finally – add the dried yeast (or baking powder/baking soda).
35 Lay it on top, and don't get it wet, or it'll start working too soon.
If you're using the timer, it's even more important that the yeast and water are well separated.
36 Nuts, raisins, etc. are normally added during the second kneading.
LOAD UP
36 Clean any spillage off the bread pan.
37 Lower the bread pan into the appliance.
38 You may have to turn the drive slightly to allow it to fit.
39 Close the lid.
SWITCHING ON
40 Put the plug into the power socket.
41 The appliance will beep.
42 The display shows (program 1, with medium crust), then : (the program duration).
43 Use the menu button to choose a program (1-12).
CRUST COLOUR
44 Use the crust colour button to move the arrow on the top of the display to light medium, or dark.
light (display = L) , medium (display = P) , dark (display = H)
45 This function only works with programs 1, 2, 3, and 5.
SIZE
46 Use the size button to move the arrow on the bottom of the display to small (500g), medium (750g), or large (1kg).
47 These sizes are approximate – think of them as small, medium, and large.
48 This function only works with programs 1, 2, 3, 5, and 8.
THE TIMER
49 If you're not using the timer, jump to point 63.
50 Use the timer to set the finishing time up to 13 hours ahead (including recipe time).
51 This function only works with programs 1, 2, 3, and 5.
52 Don't use the timer with a recipe containing fresh milk, yoghurt, cheese, eggs, fruit, onions, or anything that might go off if left for a few hours in a warm moist environment.
53 Leaving the ingredients together for an extended period will inevitably cause some interaction, especially on a hot or humid day
54 Don't use moist ingredients like fruit.
55 Add any nuts or raisins after the flour
56 Decide when you want your bread to be ready, e.g. 1800.
57 Check the time now, e.g. 0700.
58 Calculate the difference between the two times, e.g. 11 hours.
59 Use the + and - buttons to change the time shown on the display from the program time to the time you've just calculated (e.g. 11 hours).
60 Each press will decrease - or increase + the time displayed by 10 minutes
61 You can't reduce the time to less than the program time.
62 The maximum time which can be shown on the display is 13 hours.
START THE APPLIANCE
63 Press the start button to start the program.
64 The appliance will beep.
65 The display will count down, then beep when it's finished.
66 If you're using program 3, kneading won't start for 30 minutes, while the ingredients are warmed.
67 Have a look at the dough (through the window) after 30 minutes of kneading.
68 If you see any unincorporated ingredients round the walls of the bread pan, open the lid, scrape them into the dough with a spatula, then close the lid.
69 Scrape only the walls, to avoid the paddle.
FINISHED?
70 To stop the appliance, press the stop button, and hold it down for 2 seconds.
71 For best results, remove the bread as soon as it is finished.
72 If you don't stop it, the appliance will keep the bread warm for an hour.
73 It will then beep 10 times, and switch off.
74 Unplug the appliance.
Steam and hot air will escape when you lift the lid.
75 Wear oven gloves.
76 Open the lid.
77 Use the handle to pull the bread pan up and out of the appliance.
78 Turn the bread pan upside down and shake it to release the bread.
79 You may have to run a heatproof plastic or wooden spatula round the inside of the bread pan.
80 Put the bread on the wire tray to cool for 20-30 minutes before cutting.
81 Put the bread pan on the heatproof mat.
82 Check that the paddle is still in the bread pan.
83 If the paddle is in the bread, dig it out of the bread with a plastic or wooden spatula.
nuts, raisins, etc
84 Before reusing the appliance, let it cool, and clean it.
85 If the appliance is too hot, the display will show an error message.
86 Nuts, raisins, etc. are normally added during the second kneading.
87 The appliance will beep 15 times when it wants them.
88 The beeps come about 22 minutes after the start of programs 1 and 5, but 47 minutes after the start of program 3.
89 This function only works with programs 1, 3, and 5.
90 If you're using fresh fruit or vegetables, dry them with kitchen paper.
91 The appliance will beep 15 times when it wants them:
92 Open the lid.
93 Sprinkle the new ingredients over the dough.
94 Close the lid.
THE PROGRAMS
1 basic
For basic white bread, or recipes based on white bread dough.
2 French
For French-type bread, with a lighter texture and crispier crust. Recipes suitable for this program don't normally use butter (or margarine) or milk. It will only stay fresh for a few hours.
3 wholewheat/wholemeal
The heavier flour needs preheating for about 30 minutes before kneading. Loaves tends to be smaller and denser. They don't work very well with the timer.
4 cake
For cake and batter recipes, rather than dough, usually using baking powder or baking soda as the raising agent, rather than yeast.
5 sweet
For sweeter bread recipes, often containing fruit or dried fruit.
6 dough
This uses the appliance as a mixing/kneading machine.
Remove the dough as soon as the program has finished.
Punch it back, cover, and let it rest for ten minutes or so before cutting/shaping.
7 jam
This preheats the ingredients, then boils them. Allow plenty of room for the jam to expand when boiling. If jam gets into the appliance, it will be difficult to clean.
Take care - hot jam can give you a nasty burn.
8 sandwich
This makes a loaf with a loose texture and a thin crust, ideal for making sandwiches.
9 gluten-free
Gluten-free bread uses other substances to give the dough elasticity and bounce. The bread is denser and coarser than bread made with strong flour.
10 fastbake I
11 fastbake II
These are variations on the basic program, with reduced kneading, rising, and baking times.
They cut the program times to 55 and 80 minutes respectively
The loaves will be smaller, denser, and coarser than normal, and any additional ingredients (raisins, nuts, etc.) may be mashed, or unevenly distributed
12 speciality
This program is specially designed for the malt loaf recipe.
INGREDIENTS
flour
The type of flour used is important. You can't use "ordinary" plain flour for making bread. Buy flour with "strong" or "bread" in its title. The commonest is normally marketed as strong white flour. These "strong" or "bread" flours contain more gluten than ordinary baking flour. Gluten is the protein that gives the bread its structure and texture. It retains the carbon dioxide produced by the yeast, putting the elasticity, the bounce, into the dough.
other bread flours
These include strong brown flour, strong wholemeal, and whole wheat bread making flours.
These have lower levels of gluten than strong white flour. Brown loaves tend to be smaller and denser than white loaves. Generally, if you substitute strong white flour for half of the brown flour in a recipe, you can make bread with a "brown bread" flavour and a "white bread" texture.
yeast
1 Yeast is a living organism. Given moisture, food, and warmth, the yeast releases carbon dioxide, which make the dough rise.
2 We recommend using "dried active yeast", also known as "dry active yeast", and "instant yeast" or "easy blend dried yeast". These are usually sold in 7 gram sachets and don't have to be dissolved in water first.
3 If you don't use all the yeast in a sachet, throw the remainder away.
4 Don't use fresh or tinned yeast - they won't work with your appliance.
5 Check the "best before" date on the sachet of yeast.
6 You may also see "fast action' or "bread machine" yeast - really potent yeasts that can make dough rise up to 50% faster. If you use these, you'll need to experiment to get the best results. You could start by trying them with programs 10 and 11.
liquid
1 The liquid ingredient is normally water or milk, or a mixture of these.
2 Water makes a crisp crust. Milk makes a softer crust.
3 Water/milk must be warm (20^ - 25^ / 68^ - 77^)
4 Some recipes call for hand-hot water (that's 35^ - 50^ / 95^ - 122^ ), to speed up the process. Only the fast yeasts can handle this temperature.
5 Don't use milk with the timer.
butter/fat
These make the dough tender, enhance the flavour, and retain moisture, making the bread keep fresh longer. Margarine or olive oil can be used instead of butter, but they are less effective.
Do not use low fat spread.
sugar
Sugar feeds the yeast, adds flavour, texture, and helps with browning the crust. Some sachets of yeast do not need sugar to activate.
You may use honey, syrup, or molasses instead of sugar, provided you adjust the liquid ingredient compensate.
Don't use artificial sweeteners.
salt
Salt adds flavour, and helps control the yeast, to prevent the bread rising too much, then collapsing.
eggs
Eggs make bread richer and more nutritious, add colour, and help with structure and texture. If you add eggs, adjust the other liquid ingredients.
herbs and spices
These can be added at the beginning, along with the main ingredients.
Dried cinnamon, ginger, oregano, parsley, and basil add flavour and interest. Use in small quantities (a teaspoon).
Fresh herbs, like garlic and chives may contain enough liquid to upset the balance of the recipe, so adjust the liquid content.
nuts, raisins, etc
Dried fruit and nuts should be chopped finely; cheese should be grated; chocolate chips must be chips, not lumps. Don't add too much, or the bread may not rise.
When using fresh fruit and nuts, you may need to adjust the liquid ingredient to compensate.
STORING BREAD
Store bread for a couple of days at room temperature, in a polythene bag with the air squeezed out.
To freeze bread, let it cool, put it in a polythene bag, suck all the air from the bag, then seal it.
Don't put bread in the fridge. The chemical reactions involved in bread going stale work best at fridge temperatures.
KITCHEN TEMPERATURE
The appliance works best in a kitchen with a temperature of 15 - 34^ (59-93°F).
POWER CUTS
If a power cut lasts less than 7 minutes, the appliance will compensate.
If the power cut is more than 7 minutes, the program will fail.
Unplug, empty, and clean the appliance.
ERROR MESSAGES
If the appliance is too hot, the display will show an error message.
This will be an odd set of letters and/or numbers.
To stop the appliance, press the stop button, and hold it down for 2 seconds.
Let the appliance cool, and try again.
If this doesn't work, then the appliance isn't overheating, it's broken.
CARE AND MAINTENANCE
1 Unplug the appliance and let it cool.
2 If the paddle has stuck to its shaft, fill the bread pan with warm water, to soften dough residues and allow the paddle to be removed. Don't leave it to soak.
3 If the inside of the paddle gets clogged with flour, soak it in warm water, then clean with a wooden toothpick.
4 Wipe all surfaces with a clean damp cloth.
5 Hand wash the bread pan and paddle, rinse, and dry.
You may wash these parts in a dishwasher.
6 Put the paddle, on its own, in a compartment of the cutlery basket.
7 If you use a dishwasher, the harsh environment inside the dishwasher will affect the surface finishes.
8 The damage should be cosmetic only, and should not affect the operation of the appliance.
RECIPES
1 Many external factors affect the taste and texture of your bread (e.g. yeast type, flour type, sugar type, kitchen temperature, even air pressure and height above sea level).
2 The recipes supplied have been designed specially for this appliance.
3 If you want to experiment, use the recipes as a guide, taste the results, and keep notes.
4 It's best to change only one thing at a time so you know what is responsible for the result you get.
5 If you already have bread recipes, or find recipes in other publications, compare them with the recipes given here, to find out which program to try first, then experiment till the results match your desires.
6 Be careful with quantities when using other recipes. For the first trial, don't fill the bread pan above about a quarter full, certainly not as much as a third full. If you overfill the bread pan, ingredients may burn on to the element and clog the drive.
7 It's important that you add the ingredients in the correct order.
8 We've numbered them, to make it easy.
PROBLEMS
the bread collapsed
The dough may be too moist. Reduce the recipe liquid slightly. If fruit was used, it may not have been properly dried.
Leaving the bread in the bread pan while it cools can cause moisture released during baking to soak back into the bread.
The flour may have been too coarsely ground. Try using finer flour.
the bread didn't rise
Ingredients quantities were wrong - accuracy is essential.
The yeast is stale - check the "best before" date.
the core of the bread is too moist
The dough may have been too moist.
The flour may have been too heavy. This problem can occur with rye, bran and wholemeal flours.
Replace some of the heavy flour with white flour.
the bread has swollen too much
You may have used too much yeast, try reducing it slightly.
Too much sugar can cause the yeast to work too fast, and the bread to rise too much. Try reducing the amount of sugar. If you add sweet/sugary ingredients such as dried fruit, honey or molasses, reduce the amount of sugar to compensate.
The dough may be too moist. Reduce the recipe liquid slightly. If fruit was used, it may not have been properly dried.
Use a coarser flour. Less yeast is needed with fine flour than with the same type of flour ground coarsely.
the bread tastes bland
Try increasing the amount of salt by up to 14 of a teaspoon.
ENVIRONMENTAL PROTECTION To avoid environmental and health p
electronic goods, appliances marked with this symbol mustn't be disposed of with unsorted municipal waste, but recovered, reused, or recycled.
| 5 | sweet | |||
| 1 | milk | 200g | 300g | 400g |
| 2 | olive oil | 1 | 1½ | 2 |
| 3 | salt | 1 | 1½ | 2 |
| 4 | sugar | 2 | 3 | 4 |
| 5 | vanilla extract | ½ | ¾ | 1 |
| 6 | strong wholewheat flour | 300g | 450g | 600g |
| 7 | cocoa powder | 25g | 40g | 50g |
| 8 | dried yeast | ½ | 2 | 1½ |
| 9 | chopped hazelnuts | 7 | 5 | 3 |
| 6 | dough | |
| 1 | lukewarm water | 250g |
| 2 | olive oil | 1 |
| 3 | salt | 1 |
| 4 | sugar | 2 |
| 5 | strong white bread flour | 400g |
| 6 | dried yeast | 1 |
| 7 | dried mixed herbs | 1 |
| Work the dough into a ball on a floured surface. Rest for 15 minutes. Roll the dough into circles on a floured surface. Put the circles on a non-stick baking tray. Spread the circles with a tomato based sauce and add toppings. Bake in a pre-heated oven at 190°C for 15-20 minutes. The surface should be golden brown. |
| 1 | basic | |||
| 1 | lukewarm water | 190g | 260g | 360g |
| 2 | olive oil | 1 | 1 + 1 | 2 |
| 3 | salt | 1 | 1½ | 2 |
| 4 | sugar | 1 | 1 + 1 | 2 |
| 5 | dried milk powder | 1 | 1½ | 2 |
| 6 | strong white bread flour | 350g | 500g | 650g |
| 7 | dried yeast | 1½ | 1¼ | 2 |
| 2 | French | |||
| 1 | lukewarm water | 200g | 300g | 400g |
| 2 | salt | 1 | 1½ | 2 |
| 3 | strong white bread flour | 360g | 545g | 725g |
| 4 | dried yeast | 1 | 1½ | 1 |
| 3 | wholewheat/wholemeal | |||
| 1 | lukewarm water | 200g | 300g | 400g |
| 2 | olive oil | 1 | 1 | 2 |
| 3 | salt | 3/4 | 1 1/4 | 2 |
| 4 | sugar | 2 | 1 | 1 1/2 T |
| 5 | dried milk powder | 1 | 1 1/2 | 2 |
| 6 | strong wholewheat flour | 150g | 220g | 300g |
| 7 | strong white bread flour | 150g | 220g | 300g |
| 8 | dried yeast | 1/2 | 3/4 | 1 t |
| 4 | cake | |
| 1 | lemon juice | 1 |
| 2 | egg, small (up to 53g) | 2 |
| 3 | vanilla extract | 1/4 |
| 4 | butter, melted | 50g |
| 5 | mixed dried fruit (soaked) | 175g |
| 6 | plain flour | 250g |
| 7 | sugar | 150g |
| 8 | ground cinnamon | 1/4 |
| 9 | ground nutmeg | 1/4 |
| 10 | baking powder | 2 |
| 11 | brandy (optional) | 3 |
| If the butter isn't melted, the recipe won't work. |
| 6 | dried milk powder | 1 + 1 |
| 7 | dried yeast | 2 |
| 11 | fastbake II | |
| 1 | lukewarm water | 400g |
| 2 | olive oil | 2 |
| 3 | salt | 2 |
| 4 | sugar | 2 |
| 5 | strong white bread flour | 630g |
| 6 | dried milk powder | 2 |
| 7 | dried yeast | 1 Ⅶ |
| 12 | speciality | |
| 1 | lukewarm water | 270g |
| 2 | olive oil | 1 |
| 3 | salt | 1 |
| 4 | dried milk powder | 1 |
| 5 | plain flour | 450g |
| 6 | dried yeast | 1 ½ |
| 7 | sultanas | 200g |
| 8 | honey | 1 |
| 9 | malt extract | 2 |
| 10 | black treacle | 1 ½ |
| 7 | jam | |
| 1 | strawberries | 500g |
| 2 | lemon juice | 2 |
| 3 | sugar | 100g |
| 4 | vanilla extract | 1¼ |
| 5 | ground cinnamon | 1¼ |
| 6 | liqueur (optional) | 3 △ |
| 8 | sandwich | |||
| 1 | milk | 250g | 300g | 400g |
| 2 | olive oil | 1 | 1½ | 2 |
| 3 | salt | 1 | 1½ | 2 |
| 4 | sugar | 1½ | 2 | 3 |
| 5 | strong white bread flour | 370g | 450g | 600g |
| 6 | dried yeast | 1½ | 2 | 1 |
| Mash all the ingredients together, then add to the bread pan. | ||
| 9 | gluten-free | |
| 1 | lukewarm water | 350g |
| 2 | olive oil | 1½ |
| 3 | salt | 1/2 |
| 4 | sugar | 1 |
| 5 | gluten free bread mix | 400g |
| 6 | dried yeast | 1 |
| 10 | fastbake I | |
| 1 | lukewarm water | 300g |
| 2 | olive oil | 1 + 1 |
| 3 | salt | 1½ |
| 4 | sugar | 1 + 1 |
| 5 | strong white bread flour | 470g |
9 Glutenfrei (gluten-free)
1 pain basique (basic)
9 sans gluten (gluten-free)
10 snelbakken I (fastbake I)
11 snelbakken II (fastbake II)
9 sin gluten (gluten-free)
2 franskbrd (French)
10 hurtig bagning I (fastbake I)
11 hurtig bagning II (fastbake II)
12 specialbrd (speciality)
9 glutenfritt (gluten-free)
10 hurtigbaking I (fastbake I)
11 hurtigbaking II (fastbake II)
Dette er variasjoner i standardprogrammet, med reduserte elte-, heve- og steketider.
De kutter programmet med henholdsvis 55 og 80 minutter.
9 glutenfritt brod (gluten-free)
12 specialbrod (speciality)
9 gluteeniton (gluten-free)
12 Erikois (speciality)
12 specialita (speciality)
9 bezlepkovy (gluten-free)
12 špecialita (speciality)
9 brez glutena (gluten-free)
10 hitra peka I (fastbake I)
11 hitra peka II (fastbake II)
BAXKbIE MEPbl PPEIOCTOPOXHOCTN
CneyuTe OCHOBHbIM INHCTpyKcIaM No 6e3OpacHOCTN, BkJIouyAa CneJeUOuIe:
1 IcnoIb3OBAHne daHHoro yctpoiCTBa DeTbMn CTapwe 8 let, IInIaMn C OrpaHnueHbIMN fIIN3NuYeCKIMN, CEHCOPHbIMN INIy UmCTBeHHbIMN cNoC06HOCTaMn, HeIOCTaTKOM ONbITa INIy 3HaHni DOpyCKaETcR npu ycNOBnKoHTPOJN INIy INHCTpyKTaJa INOC03HaHnC B7aHHbIX pNcKOB. JeTAM 3aPpeJeHO INrPaTB C yCTPOiCTBOM. Ounchky n O6cLnyJBaHne yCTpoiCTBa MOryt BblIOJIYb TdTe N CTAPwe 8 let npu ycNOBn Ha6JIIODeHn B3PoCSbIMN. XpaHnTe yCTpoiCTBO IN Ka6eJIb B HeIOCTUHNOM dJIy dTee Do 8 let MeCTe.
2 He noDcoeHnYte np6op uepe3 taMep nIi cNCTemy dNCTaHcIOHHO ynpabLeHn.
Поверхноctи пибoga награвотся.
3 Ecni Ka6eIb NOBpeJdeH, OH DoJIKeH 6bITb 3aMeHeH npOn3BOdInTeJIeM, cepBnCHbIM aReHTOM IJIu DpyrIM KBaJINΦUncIPOBaHHbIM IINcOM IJPNpeDOrTbPaUeHnO NaCHOCTN.
He norgykaaTe np6op B xndkoCTb.
4 He nCpOJIb3yIte npI6Op pIaOM c rOpUChmMaTePnAanAmn (HaIprImep, 3aHaBeCKamn) IJIIN PoiD HIMN.
5 He naKpbBaIte npi6Op n He pa3MeaTe HnYeTo Ha ero NIOBepxHocTn.
6 OtklouaTe npi6op oT cetn, KOrDa He nCnoJb3yeTe ee, nepeI nepeHockoi nnu chKo.
7 IcnoIb3yIte TOnIbKO npInaIeJXHOCTn HacaIckn OT npOIN3BOIDTeJIa.
8 IcnoJb3yIte np6op TOnbko nHa3HaueHnIO.
9 He ncpoIb3yIte np6op, ecn OH noBpeKdEe nn pa6OtaeT c nepe6Oamn.
10 TTo6bI octaHOBuTb pa6Otu np6Opa, HaxMnte KhoNkY start stop u ydepxnBaIte ee B TeueHne 2 cekyHd.
TOnbKO DnI 6blTOBOrIO nCNoJIb3OBAHn
IPEDEIIEPBbIM IcIOJIb3OBAHHEM IPIBOPA
OuHCTnTe npi6Op, UTO6bI ydaJIbT 3aBOIDCKyU nbIb N T. n.
ПИNHцINДЕICTBЯ -КРATКИОБ3OP
1 BbIbepuTe peueeTT.
2ПоложиTe INHредиЕнтыВформУдЯхLEбаВнужHomпорядкe—эТОВаЖнO.
3 PocTaBbTe oOpMy dIy xJIe6a B npIb6op nHaKpOte KpbIshKoI.
4ДЯВьбopa nporpaMmbI (1—12) nCnoJIb3yIte KHOHkY MeHIO
5 IVcnoIb3yIte KhoIKNuCBeTaKOpOuKn DJIpepeMeUeHnA CTePknB BepXHeu qactN DInCpIeY, yKa3bIbAIOUeH Na «CBetna», «CpeHna» NJIU «TemHa».
6 IVcnoIb3yIte KhoIKN pa3Mepa ⅡДЯперemeшнястpenB b HnKHeч acTи ДИСПЕЯ, yka3bIbAOJIeH Na «He6OJbsoH» (500 r), «CpeHnH» (750 r) nIIn «6OJbsoH» (1 k).
7ДлЯ установки таймера Incpoьзутей Кногк «+» «-» (при Heобхдимости).
8ДлЯ зауcke nporpaMMbI NaKMNTe KHOKNy stop.
HAYAJO PABOTbl IPNIBOPA
87 Pn6op n3daCT 15 3ByKObblc HnaIOB, KOrda nx HnyxHO 6yTeTdo6aBNTb.
88 CnHnAbI npO3ByuAT npi6bn3nteBHO uepe3 22 MnHyTbI nocne hauana npoRpaMM 1 n5 nuepe3 47 MnHyT nocne hauana npoRpaMMbl 3.
89Данная Функця pa6oTaet TOnьКВ nporpaMMax 1,3и5.
90 EcIn BbI nCnOJIb3YeTe CBExHe ΦpyKtbl IJIN OBOU, BbITpuTe INx HAcYxo 6yMaXHbIM noJIoTeHcEe.
91 Pn6op n3daCT 15 3BykoBbIX cunHaJIOB, KOrJa ux Hux HxuHxo 6ydet Do6aBntb:
92 OtkpoTe KpbiUKy.
93 BbCbIbTe HOBbie INHrpeDneHTbHa TeCTO.
94 3aKpOmeKpbIshKy.
PPOPTPAMMbI
1 06bIyHbI (basic)
96e3rIIOTeHOBbI (gluten-free)
ДябзглЮTeHOBOrO xIe6a nCNoIb3yIOTc dpyrne nHrpeJnEHTbl, npndaIoUJIne TecTy элactuHOCt b uypuroctb. 3TOT xIe6 6oJee pIoTHbI N rpy6bI, Yem xIe6, n3rotobHeHHbI n3 «СиьHoH» MYKN.
10 6bICTpaBbIneukaI(fastbakeI)
11 6bICTpaBbINEyka II (fastbake II)
3ToBapnAHTbI npOrpaMMbl BblneuKN O6bIyHoro XLe6a C yMeHbWeHHbIM BpeMeHem 3aMeCa, NObbeMa N BblneuKn.
Bpemy BbIOpJIHEnHn IporpaMmbi cokpaueHo Do 55 n 80 mHyT, COOTBeTCTBeHHO.
Byxahkn 6ydyT Mehble, IIOHThee n rpybee, yem 0blyHO, a IIObIe DoONHnTeIbHbIe INHrpEiNeHTbl (N3IOM, opexn T. d.) MOryT 6bITb pa3MraTb IINn HepaBHomepHo pacnpedeJeHbI.
12 oco6bni (speciality)
XJIe6 He noDnHmMaETcA
KoiuueCTBO INHrpEINHeTOB HeBepHoe - KpaIHe BaJxHa TOUHOCTb.
Дрожжн HeCbExNe - npOBepbTe cpoK rOJHOCTn.
XJIe6BcepeDInHe CnIuKOM BnaJxHbI
Bo3MOxHTo,TeTO CInuKOM BJaXHoe.
Bo3MOxHNO, Myka cIINsKOM «TЯжеля». 3Ta npO6JIeMa MOKeT Bo3HNKHyTb C pJxHoN I ceJIbHO3epHOBOy MysKo rpy6Oro NOMOna n Otpy6aMn. 3aMeHInTe YacTe b «TЯжело» MysKu MysKo BbICwero copTa.
XJe6 nOdHnCnIuKOM CnJIbHO
Bo3MOxHNO, Bbl NcIPOJIb3OBAJI N CIIuKOM MHOrO IpOJKei, Ioppo6yIte HEmHO rYMeHbIHTb INX KOJIuYeCTBO.
CnIshKOM 60nbIooe KOnIueCTBO caxapa MoKeT 3aCtABuNTb DpOxxN pa6oTaTB CnIshKOM 6bICTPO, nXne6 NOpHmEtcra CInIshKOM cnIbHo. NoppoByTe yMeHbUnTb KOnIueCTBO caxapa. Ppi do6abLeHHn CnaKnx/CaxapncbIX INrpeJeNEHTOB, TAKNX KAc cyXoΦpyKTbl, Mei nn NaTOKa, dJIa KOMneHcauny MeHbUnTE KOJIueCTBO caxapa.
TecTo CnIshKOM BnaJxHoe. HemHoro yMeHbUnTe KOJIueCTBO JxNdkOCTB BpeCenTe. EcIn Bbl NCIOJIb3OBaJI N ppyKtbl, BO3MOxH0, Bbl He BblCyUINu IX KaK CNeJyEeT.
IcnoJIb3yIte MyKy 6oJe rpy6Oro nOMoJa. Ipn IcnoJIb3OBaHnMyKu TOnKOro nOMoJa Tpe6yeTcMeHbIe npoxKeJ, yem npu IcnoJIb3OBaHn ToJ Ke MyKn 6oJe rpy6Oro nOMoJa.
XJIe6 IMeetIpeChbI Bkyc
Ponpo6yIte yBelenuHTb KOJnueCTBO cOn Ha 14 chHOn loKKN.
3AUNTA OKPYKAIOUcE CPEbl
ДлЯТОУTO6bIи36eKaTbуrpo3ДЯЗДОРOBЯИOKpykaIOSeСрдыИЗ-3aВpeHbIX BeueCTB B 3JIeKTPnueCcknxИ 3JIeKTPoHHbIX TOBaPax,Ipi6Opby,OTMeueHHbIe DaHHbIM CmBOJOM, IDJIxHbI yTNIIIN3UPOBaTbCRe He KaK He OTCOPTuPOBaHHbIe 6blTOBbIe OTXOdbI,a KaK BOCCTaHOBJIeHHbIe INI IOBTOPHO ICNoJIb3OBAHHbIe.
PIN ANO THN INPOTXPHEN
KaθaipioTe Tn ooukeun, yia va aφaipéoεte Tn okovn ano tn paon kataoKeunc, kλπ.

Mny xnpoiopoite TE xvntc yukavtic oouic.
aλατι
To aIpi npooTei yEun kai Boon oTov EeYxo Tnc mayiac, eToi wote va un pouokwoei Uepolikto _i ,kai tva Eeovokwoei.
auya
to Eeovoukwoe
9 bez glutena (gluten-free)
Za kruh bez glutena koriste se druge tvari za dobijanje elastičnosti tijesta. Kruh je gušći i grublje teksture u odnosu na kruh od oštrg brašna.
10 brzi program I (fastbake I)
11 brzi program II (fastbake II)
9 glutensiz (gluten-free)
9 fārā gluten (gluten-free)
10 coacere rapida I (fastbake I)
11 coacere rapida II (fastbake II)
He notapiyte ypeda B teuhoct.
4 He non3BaIte ypea 6IInzO do nnnn pOd 3aPAnIMMaTePnaI (Hanp. nepDeTa).
5 He nokpmbaite ypeia n He noctabraTe hnso otrope my.
6 N3KJIIOUeTe ypeDa OT KOHTaKaTa, KOraTo He ro I3NoI3BaTe, IppeDu Ro IpemecTHe, KaKTo IN npedn NouCTBaHe.
7 He n3non3BaIte akcecoapn nn npncTabKn, pa3nUHN OT Te3n, npedocTaBeHn OT Hac.
8 He n3non3BaIte ypea 3a dpyrI nuIeJIN,OCBEN Te3N,ONICAH N HACTOJIte HnCTpyKUIN.
9 He n3noI3BaIte ypeDa, aKo e noBpeDeH nn He pa6Otn n3paIHO.
10 3a cnipahe Ha ypeHa, HATncHeTe 6yToHa 山 nT ro 3aapbXte 2 cekynn.
cAmo 3a DomaunHa yNtpe6a

IPEDNbPBOHAUHNO N3N0JI3BAHE
Iounctete ypeda,3a da npemaxhe Te npo3bOdCTBeH npax np.

BbP3O PbKOBOДCTBO
1 N36epepeuenta.
2 ПoctabeTe CBCTaBKNiteВ TaBnUkata 3a XnIb6 B npaBnHa nocJeIOBaTeHNOCT - TOBa e OT CbIeCTBeHO 3NaueHne.
3ПoctabeTe tabuKata 3a xla6ВуpeДиЗТВОпЕТe Kanaka.
4 I3noI3BaIte 6yToHa MEHIO 3a n36npaHe Ha nporpama (1-12).
5 N3noJ3BaIte 6yToHa 3a cTepeH Ha n3nUpaHe ,3a da npemeCTnTe cTpeKkTa Bbpxy DnCpIe 3a JeKO ,cpeHNO ,nnn CnIHO n3nepeHa KOpuKa.
6 IVIIN3BaInTe 6yToHa 3a rpaMaJx 3a Ia npMeCtInTe CTrpeJIkaTa B DOJIHaTa YAcT Ha DnCIIeR 3a MaIbK (500g), cpeH (750g), IINrOJaM (1kg) rpaMaJx.
7 I3noI3BaIte 6byToHInTe + n - 3a HacTpoIka Ha TaIMepa (no JeIaHne).
8 HaTnchTe 6yToHa start 3a cIapTnpaHe Ha nporpaMaTa. stop
1 06nKHOBeH xIa6 (basic)
3a 6nKHOBEN 6yI xIy 6u nppeTn C TeTo 3a 6yI xIy6.
2 pfenckn xla6 (french)
10 6bpr3 xna6 I (fastbake I)
11 6bp3 xna6 II (fastbake II)
ToBa ca pa3IuHn Bapuaun Ha OCHOBHaTa npOprpMa, C HamaJIeHO BpeMe 3a OMEcBaHe, 6yXBaHe n neueHe.
Te cbkpaaaBbT BpemHa Ta Hnporpamata CbotBeTHo do 55 n 80 mHyTu.
Xne6eTata cTaBAt NO-MaIKN, PJIbTHN I TBbpDn OT HOpMaJIHInTe N BCNUKn DOnbJIHInTeHN CbCTaBKN (cTaΦuNi, JaKN i np.) MoRaT da 6bDat HanpaBeHn Ha nIpe nJin pa3npedeJeHn HepaBHomepHo.
12 Cneunannet (speciality)
Ta3n nporpama e cneuaJnHO cb3daJeHa 3a peeentata 3a maIIOB XJI6.
CbCTABKN
6pausho
Baxhen e tnnb6paahno. He moKe da n3nOJI3BaTe, "obukHOBeHo" 6paHNO 3a npriGTOBHe Ha xIa6. KyuBaIte 6paahNo, uHeTo hauMeHOBaHne BkIIOUba dymnte, cInHO" nn, XJle6HO". Hau-YeCTo CpeuaHNTe obukHOBeHo ce peKlAmnP aT kaTo ,cInHO 6yIo 6paHNO". ToBa ,cInHO" nn ,XJle6HO" 6paHNO cbDbprka nobuee rnyTeN ot obukHOBeHOTo 6paHNO 3a neueHe. IpyTeN e npoteHbT, KoITo npndaBaHa xJa6a HerOBaTa cTpkytpa n TeKctypa. TOn 3ana3Ba BvIepoDnna DnOKCnI, KoITo ce npon3BexJa OMaTa, npndaBaKa n EJAcTNUHOCn I neKOTA Ha TectOTO.
dpyrBnOBeXne6Ho 6paHNO
Te BkJIIOUbaT „CUNHO" KaΦaBO 6paIHO, „CUNHO" HenPecrATo 6paIHO u 6paIHO 3a npriOTBraHe Ha TbJHnO3bPheCT XIA6. Te CbIbPxKat NO-HNCKn HNBa Ha rIyTeH oT „CUNHOTO" 6aIHO 6paIHO.
KaΦaBnT xIa6 e c no-MaIbK pa3Mep u nO-PlbTHa KOHcNCTeHcIa O T 6eJIa. IIO npHcIu, aKO B eHa peueNTa 3aMeHnte "CJInHOTo" 6JIaO 6paAHo C nONOBHaTa Ha HerOBOTo KOnUYeCTBO KaΦaBO 6paAHo, ige nOlyuHTe xIa6 c Bkyc Ha ,KaΦaB XJIa6" u TeKcTypa Ha ,6aN xJIa6".
Ma
1 MaTa e xHb OpraHn3bM. Pn BlaJxHn ycIobN, npn HauNue Ha xpaHa n TOnPiHa, MaTaOTeJI BvIpeODeH dIOKcND, KOeTO pPeDn3BnKBa 6yXbaHe Ha TcTeTOTO.
2Прелорьчамеи3нлзВаHEToHa,IИЗсуЕнаakTINBHaMaJ",no3HaТоОSe KaTO,cYxaakTINBHaMaJ",pa3TBOPIMaMaJ",nIIn,cYxaMaj3aJeCNocMecBaHe".O6nKHOBeHo ce npoJaBA BMaJIKN paketYeTa no 7 rpaMa nHЯMa HjXda Da ce pa3TbaprnpedBaPurTeJIHO BvB BODa.
3 Ako He ynoTpe6nte cnaIaTa MaJ OT nakeTuTe, IN3XBpJIeTe Hn3NoJI3BaHaTa YacT.
4 He n3no3BaIte npaHa nI KOncepBnpaHa MaJ - He e noXoJa7a 3a Ba7nja ypeI.
5 PpOeTeTe cPoka Ha rOJHOCT Bbpxy naKeTcTo MaJ.
6 Cbio taka MoKeTe da n3npo6BaTe,6bp3OeJeCTBaUaTa" Ma ynn MaTAt 3a ,xne6onekapnMaunH".TOBa ca hAnctHa eΦnkacn BVIOBe MaJ, KOINTo H6yXbAT TectOTo Do 50%No-6bp3o.AkopeiTe da rN n3noI3BaTe,TPra6Ba da ekCnepmuMeHTnpaTe,3a da noJyUHTeMaKcImaJIHO do6pn pe3yntaTn. MoKeTe da zanOuHete KaTo onNTate c nporpaMn 10 n 11.
TeuHOCT
1 TeuHaTa CbCTaBka O6NKHOBeHc BOda NIN MIAKO, INI CMec OT DBeTe.
2BodaTaooba3yBaXpynKabA KopnKa.MJIAKOto -no-MeKa KopnKa.
3 Bónda/TmIaKoTo Tp86Ba da 6bDat c TOnJa TempepaTpya (20^ - 25^ / 68^ - 77^)
4 HЯkon peçentn i3nckBaT BODa c ymepeHa TempepaTya (KoJTo e 35^ - 50^ / 95^ - 122^ , 3a yckopraBaHe Ha npocea. EynHCTBeHo 6bP3OeIcTBaUaTa MaJ MoKe Ja n3IbpxN Ha Ta3n TempepaTya.
5 He n3noJ3BaIe TaIMepa, aKO 1e BkIIouYBaTe MnaKO.
MaCNo/Ma3HnHa
Te npabT TeCTOTO NO-KpexKO, nOIO6PBAt Bkyca N 3aIbPkaT BnaJHOCCTTa, KOeTO yDbJIkaBa TpaHocTtHa xJa6a. MoKeTe Da I3NON3BaTe Maprapn Hnn 3eXTnH, BmecTo MaCNo, HO Te Ca PO-MaJIco eΦeKTHBn.
He n3no3BaIte pokpntc HnCKO cbDbpxKaHne Ha Ma3HnHn.
3axap
3axapTa nOxpanBa MaTt, IObabB BKyc, TeKCTypa N NOMara C n3npuHTo Ha KOpuKaTa. HrkOn naKeTceta Marn HmAt HyJda OT 3axap, 3a da Ce aKTbNpaT.
Mожete Да ИЗПОЛЗВATE МEd, Сирп ONИЛ MELaNa CBmecTo 3axap, AkO perулmpaTe TeuHaTa CBCTaBka, Cцел KMнeHcnpaHe.
He n3non3BaIte n3KycTBeHn noDcnaITeJI.
con
COnTa Do6aBv Bkuc n CnOMaRa 3a KOHTpOJIpaHe DeIcTBVeTo Ha MaTAt, C cIe IpeDOTBpaTBAHe Na ppeKaJIeNo 6bXBaHe n CneI TOBa pa3PnaHa He XJI6a.
YIca
Яица правгхлба по-богати xpaаннтelen, добавг тцгпсmonмагтзастуктураза.NAko doobavteяиca, cbo6ba3eTe TOBa C occtaHaJIte TeuHn sbctabkn.
6nkn n noapabKn
Mokete da rI do6aBnTe B hauaIOTO, 3aeHNO C OCHOBHnTe CbCTaBKn.
Ako ToBa He noDeiCTBa,To TORaBa ypeBt He nperepaBa,a e cuyneH.
TPNJN IN IODAPbXKA
1 I3kIIOUe Te ypeDa OT KOHTaTaN FO OCTaBeTe da N3CTnHe.
2 Ako IonoTkata 3aceJe BvB Bana, HnBnHe Te TaBnKata 3a Xna6 C ToPnBaOda, 3a Da OMEKOITNe OCTaTbUnte OT TECTO n HAnpaBeTe MRCTo 3a N3BaJdaHe Ha IonoTkaTa. He a OCTabraIe Da ce HAKNCBA.
3 Ako BbtpeunHata qact Ha Ionoatkata ce 3aIpbctn c 6pausho, hakicheT a B ToPna BOda, cIeKoETo Nocntete C dbpBeHa KLeuKa 3a 3b6n.
4Поупстete BCИЧКи NOВьрхHOCtС сИСТа ВlaЖн Кьрna.
5 N3mIte Ha pbka TabuKaTa 3a XJI6 n IJonaTkata, n3JIaKHeTe n OCTabEt Da n3cbXHaT.
Mokete da n3MneTe Te3n Yactn BcbdOmraJIHn MaJInHa.
6 Noctabete Ionoata OTeJelno B nperpaTaHa KoosnUka 3a np6opn.
7 Ako n3noJ3BaTe cIbOmnaJIHa, ekCTpeMHaTa cpeJa B MInJHaTa MaunHa MoKe da NOBpeNIOBbpxHOCTHnTE POKPITnHa NOBbpxHOCTnTe.
8 MoRaT Da ce nOlyuata camo Ko3MeTuHn HapaHbAHn, KOInTo HMa da NOBJIraR T Bbpy pa6oTaTa Ha ypeda.
PEUENTN
1 IMa MHOrO BbHsHn ΦaKToPn, KOnTO BnIyRrHa BkUcA N TeKCTypaTa Ha BaIiYxIa6 (HaNP. TINbT Ha MaIraTa, 6paShOTo, 3axApTa, TempePaTypaTa B KyXHraTa, DOpN Bb3dUshOTo HAnIraHe n HaDMOPCKaTa BvCOuHnA).
2IpeoctabeHnte peentn ca cneuaJIo N3rOToBHeN 3a To3n ypei.
3 Ako JxelaTe da ekCnepeMEnTpate, n3PON3BaIte rN KaTO npIMep, TcCTBaIte pe3yIaTITe cn BODTe 6enexKn.
4Прелорьчтелно eда поменятешараз endо endho,3a da 3HaTe Koe ToHObdoBoNo do nolyeHTe pezltatn.
5 Ako Beue pa3nolaraTe c peuentn 3a xna6, nnn otKpnne Te peuentn B npyn ny6nkaun, cpabheTe rncnpedocTabeHnte peuentn, 3a da pa36pepeTe kOy nporpaMa da n3npo6BaTe nbpBO, cIeN KoETo ekCnepmEnTnpaIte, DOKaTO He NOnyUHTe JekaHNTe pe3yIITaTI.
6 BhimabaiTe c koliuecbata, koraTo n3non3BaTe dpyrpeuenT. Pnp nbpBnO nnt He 3aIbIbaTe TaBnUkata 3a XJI6 NaJ edHa eYTBbpT; Tpr6Ba Ja J 3aIbIhnte MaKcImaJIHO do eJHa TpeTa. Ako J 3aIbJIHnte ppeKaJeHO MHOro, Bb3MOxHo e CbCTaBKnte Da N3rOpRt N da 3aIpbCTT NODBnXHNsCbD.
7 Baxho e da do6abnte cbctabknte B npaBnHa nocneObaTeHOCT.
8HomepupaIcmeI,3aDaBvyechIM.
PPOBJIEMN
xIJI6bT ce pa3nadHa
Bb3MOxH O e TcTOTO Da e npeKaJIeHO BnAIXHO. JeKO hAmAJeTe KOJIueCTBOTo Ha TeUHOCTTa BpeIeNTa. Ako cTe I3NoI3BaII NIOJObE, Bb3MOxH O e Da He Ca 6NIu IN3CyUeHn PpaBILHO. Ako OCTabInTE xIA6a B TabNvKATA 3a XIA6, DOKaTO IN3CTInHe, Bb3MOxH O e BnArata, OTJeLEHa nO Bpeme Ha NeueHETo OTHOBO Da Ce HAKINe B XIA6a.
Bb3MOxHNo e 6paunHO da e npekaneHo eo pcmlaHo. IpO6BaIte c nO-cnTHo 6paHNO.
XJIa6bT He 6yXHa
KoIInueCTBaTa Ha CbCTaBKnTe Ca crpeSeHn - OT rOJaMa BaxHoCT e ToUHOCTTa.
MaTa e cTapa - npOBepTe cPoka Ha roDHOCT.
Kopnukata Ha xla6a e npekaneHO BnaXHa
Bb3MOxHo e TectOTo da e 6nIo pKeaIeHo BlaJxHO.
Bb3MOxH O e 6paunHO t a e 6nlo npekaneno TeKko. To3n npo6m MoKe da ce no8n C pbxeHo 6paunHO, TpuyeHO 6paunHO u Hnpecato 6paunHO. CmeHeTe yact OT teKkoto 6paunHO c 6yano.
XJ6bT ce e noyn npekaneno MHoro
Bb3MOxH O e da cTe n3PON3BaJI INpeKaIeHO MHOrO Ma; ONITaJIte KaTO HaMaJIInTe JIeKO KOJIuYeCTBOTO.
IpekaneHOTOKoJIueCTBO3axapMOKeJa npuHnTbBpIe6bp3OJeICTBHeHaMaTaI npkeaneHOh6yXbaHeHaXla6a.HamaleTe KOJIueCTBOTo 3axap.Ako Do6aBnte CnaKn/ 3axapHNcBCTaBKn,KaTO HApnPmep cySeHn PLOIOBe,MeI INM MeLaCa,HamaleTe KOJIueCTBOTO 3axap,3a Da KOMPHeHCnPate.
Bb3MOxH O e TcTOTO da e npeKaIeHO BnAaJHo. JeKO HamaJIeTe KOINueCTBOTo Ha TeUHOCTTA B peIeNTATA. Ako cTe I3noI3BaII INIOJObE, Bb3MOxH O da He ca 6nIn I3CyUeHN npABUNHO. I3noI3BaIte No-eDPO cmIAHO 6paSHO. Cbc cTHOTo 6paSHO e HuxHa NO-MaIKo MaJ, OTKOLKOTO CbC cbIuY TIN eDPO cmIAHO 6paSHO.
XJIABbT HMa Bkyc
YBENuHTe KOINuCTBOTO CON IO 1/4 yaeHa JbXnua.

ОПАЗBAHE HA OKOLHATA CPEДA
3a da ce n36erHaT ekoloruHn 3dpabHn npo6JIeMn nopadHn HauHnue Ha onaCHn cy6ctaHnB eNEKtpnuCeKnTe n eNEKtpoHHN CTOKn, ypeiNe, o6O3HaueHn C To3n CmBOJ, He Tp8Ba Da ca ne3XbPnT 3aeHNO C HecOpTnpaHn O6UHNCKn OTpaIbU, a CneDbA da Ce BbPHaT 06paTHO, da ce n3NoJ3BaT OTHOB nI I peuNKnPaT.