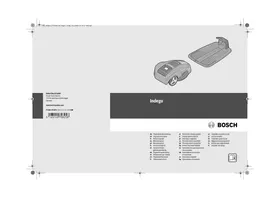
USER MANUAL INDEGO BOSCH
Power Tools Division
70745 Leinfelden-Echterdingen
Germany
www.bosch-garden.com
F016L70825(2012.11)O/310UNI
Indego
de Originalbetriebsanleitung en Original instructions fr Notice originale es Manual original pt Manual original it Istruzioni originali nl Oorspronkelijke gebruiksaanwijzing da Original brugsanvisning sv Bruksanvisning i original no Original driftsinstruks fi Alkuperäiset ohjeet
el Πρωτότυπο οδηγιών χρήσης tr Orijinal işletme talimatı pl Instrukcja oryginalna cs Původní návod k používání sk Pôvodný návod na použitie hu Eredeti használati utasítás ru Оригинальное руководство по эксплуатации uk Оригінальна інструкція з експлуатації ro Instrucțiuni originale bg Оригинална инструкция за употреба

BOSCH
sr Originalno uputstvo za rad sl Izvirna navodila hr Originalne upute za rad et Algupärane kasutusjuhend lv Instrukcijas oriģinālvalodā lt Original instrukcija

Deutsch . 12
English 23
Français. 33
Espanol .Pagina 44
Portugues.. 56
Italian . 68
Dutch .80
Danish. 91
Swedish Page 101
Norwegian. Page 111
Finnish. 121
Greek 131
Turkish Page 143
Polish .Page 154
Czech Page 166
Slovak. Page 176
Hungarian Page 187
Russian Page 198
Ukrainian. Page 211
Romanian . 222
Bulgarian. Page 233
Serbian. Page 245
Slovenian. Page 256
Bosch Lawn and Garden Ltd., PT-LG/ENS,
Stowmarket, Suffolk IP14 1EY, England
Dr. Egbert Schneider
Senior Vice President
Engineering
Helmut Heinzelmann
Head of Product Certification
PT/ETM9
PA · PB = PA · PD = PB · PD
Robert Bosch GmbH, Power Tools Division
D-70745 Leinfelden-Echterdingen
12.10.2012
www.bosch-garden.com
Warning! Read these instructions carefully, be familiar with the controls and the proper use of the machine. Please keep the instructions safe for later use!
Explanation of symbols on the machine

General hazard safety alert.
Ensure no exits are blocked or obstructed by the machine.

Warning: Read user instructions before operating the machine.

Warning: Operate the disabling device before working on or lifting the machine.

Caution: Do not touch rotating blades. Sharp blade(s). Beware of severing toes or fingers.

Wait until all machine components have completely stopped before touching them. The blades continue to rotate after the machine is switched off, a rotating blade can cause injury.
Pay attention that bystanders are not injured through foreign objects thrown from the machine.

Warning: Keep a safe distance from the machine when operating.

Do not ride on the machine.

Battery charger contains a safety transformer.
Operation
Before working on the machine itself (e.g. maintenance, tool change, etc.) as well as during transport and storage, remove the isolator key from the machine. - Never allow children or people unfamiliar with these instructions to use the machine. Local regulations may restrict the age of the operator. This machine is not intended for use by persons (including children) with reduced physical, sensory or mental capabilities, or lack of experience and knowledge, unless they have been given supervision or instruction concerning use of the machine by a person responsible for their safety. Children should be supervised to ensure that they do not play with the machine. The operator or user is responsible for accidents or hazards occurring to other people or their property. If any hazard occurs whilst the machine is operating immediately press the red stop button. Ensure correct installation of the perimeter wire as instructed. - Check the perimeter wire is fully pegged to the ground avoiding any slack lengths of wire. Periodically inspect the area where the machine is used and remove all stones, sticks, wires and other foreign objects. - Do not run over any live mains cable running in the working area. Periodically inspect to see that the blades, blade bolts and cutter assembly are not worn or damaged. Replace worn or damaged blades and bolts in sets to preserve balance. - Never operate the machine with defective guards or without safety devices.
24|English
Do not put hands or feet near or under rotating parts. - Never pick up or carry the machine while the motor is running. Do not leave the machine to operate unattended if you know that there are pets, children or people in the immediate vicinity. Start the machine according to the instructions standing well away from rotating parts. Do not use the product at the same time as a sprinkler or use the schedule to ensure that the two systems never run simultaneously. Do not modify this product. Unauthorized modifications may impair the safety of your product and may result in increased noise and vibration.
Remove the isolator key:
before clearing a blockage, - before checking, cleaning or working on the machine, - if the machine vibrates abnormally (stop and check immediately), - after striking a foreign object. Inspect the machine for damage and get advice on necessary repairs from your Bosch Service Centre.
Maintenance and Storage
Always wear gardening gloves when handling or working near the sharp blades.
Before working on the machine itself, remove the isolator key. Before working on the docking station or power supply, remove plug from mains.
Clean the exterior of the machine thoroughly using a soft brush and cloth. Do not use water, solvents or polishes. Remove all grass and debris, especially from the ventilation slots.
Turn the machine on its back and clean the blade area regularly. Use a stiff brush or scraper to remove compacted grass clippings. (see figure A)
Blades are reversible. (see figure B)
- Keep all nuts, bolts and screws tight to be sure that the machine is in safe working condition. Periodically visually inspect the machine and replace worn or damaged parts for safety. Ensure that only official Bosch replacement parts are used. Replace all blades and bolts as a set as required.
Storage
Remove isolator key when storing.
During winter season store the machine and the docking station in a secure, dry place, out of the reach of children.
Do not place other objects on the machine or docking station.
SD-Card
The machine has an SD-Card interface to allow software diagnosis by a Bosch Service Centre.
Battery Hazards
Recharge only in the Bosch approved docking station. In the unlikely event of liquid being ejected from the battery, avoid all contact with the machine. If contact with the liquid occurs, seek medical advice. If the battery becomes defective, liquid can escape and come into contact with adjacent components. Check any parts concerned and contact the Bosch Service Centre. Do not open the machine and battery inside. Danger of short-circuiting and electric shock. Protect the machine against fire. Danger of battery explosion. In case of damage and improper use of the machine, vapours may be emitted from the battery. Provide for fresh air and seek medical help in case of complaints.
The vapours can irritate the respiratory system.
Store the machine only within a temperature range between 5°C and 45°C. As an example, do not leave the machine in the car in summer.
Safety Warnings for Docking Station and Power Supply
Only charge via the official Bosch docking station. Otherwise there is danger of fire and explosion. - Check the docking station, power supply, cables and plugs periodically. If damage is detected, do not use the docking station or power supply. Never open the docking station or power supply. Have repairs performed only by a qualified Bosch technician and only using original spare parts. A damaged docking station, power supply, cable or plug increases the risk of an electric shock. Do not operate the docking station and power supply on easily flammable surfaces (e.g., paper, textiles, etc.) or surroundings. The heating of the docking station and power supply during the charging process can pose a fire hazard. Supervise children at all times. This will ensure that children do not play with the docking station, power supply or the machine. Children or persons that owing to their physical, sensory or mental limitations or to their lack of experience or knowledge, are not capable of safely operating the docking station or power supply, may only use this docking station and power supply under supervision or after having been instructed by a responsible person. Otherwise, there is danger of operating errors and injuries. The voltage indicated on the power supply must correspond to the voltage of the power source.
The power supply should ideally be connected into a socket that is protected by a circuit-breaker that is actuated by a 30mA residual current. Check your Residual Current Device (RCD) at regular intervals.
The supply cord must be inspected for signs of damage at regular intervals and may only be used if in perfect condition.

If the supply cord is damaged, it must be replaced by the manufacturer, its service agent or similarly qualified persons in order to avoid a hazard.
Only use or replace cables for the docking station and power supply with Bosch approved parts.
- Never touch the mains plug with wet hands.
Do not run over, crush or pull the cables. Protect the cables from heat, oil and sharp edges.
The power supply/docking station is double insulated for safety and requires no earth connection. The operating voltage is 230 VAC 50 Hz (for non-EU countries 220 V - 240 V as applicable). Contact your Bosch Service Centre for details. If in doubt, contact a qualified electrician or the nearest Bosch Service Centre.
The connection lead must be inspected for signs of visible damage and ageing at regular intervals and may only be used if in perfect condition.
Products sold in GB only: Your product is fitted with a BS 1363/A approved electric plug with internal fuse (ASTA approved to BS 1362).
If the plug is not suitable for your socket outlets, it should be cut off and an appropriate plug fitted in its place by an authorized customer service agent. The replacement plug should have the same fuse rating as the original plug.
The severed plug must be disposed of to avoid a possible shock hazard and should never be inserted into a mains socket elsewhere.
Symbols
The following symbols are important for reading and understanding the operating instructions. Please take note of the symbols and their meaning. The correct interpretation of the symbols will help you to use the garden product in a better and safer manner.
Symbol
Meaning

Wear protective gloves

Permitted action

Prohibited action

Accessories/Spare Parts
Intended Use
The garden product is intended for domestic lawn mowing.
Technical Data
| Robotic Mower | Indego |
| Article number | | 3600 HA2 ... |
| Cutting width | cm | 26 |
| Height of cut | mm | 20 – 60 |
| Slope angle (max.) | ° | 20 |
| Working area size | | |
| - maximum | m² | 1000 |
| - per charge up to* | m² | 200 |
| Weight | kg | 11.1 |
| Degree of protection | | IPX1 |
| Serial number | see type plate on the garden product |
| Battery | | Li-lon |
| Rated voltage | V= | 32.4 |
| Capacity | Ah | 3.0 |
| Number of battery cells | | 18 |
| Operating time, average up to* | min | 50 |
| Charging period (max.) | min | 50 |
| Perimeter Wire | | |
| Perimeter wire | | |
| - minimum working length | m | 20 |
| - maximum working length | m | 450 |
| Docking Station | | |
| Input voltage | V | 42 |
| Power consumption | W | 150 |
| Charging current | A | 2.0 |
| Allowable charging temperature range | °C | 5 – 45 |
| Weight | kg | 2.0 |
| Degree of protection | | IPX1 |
| Power Supply | | |
| Input AC | V | 220 – 240 |
| Protection class | | ☐/II |
| *depends on cutting height, grass conditions and moisture **protected against splashing water from all directions The values given are valid for a nominal voltage [U] of 230 V. For differ-ent voltages and models for specific countries, these values can vary. Please observe the article number on the type plate of your garden product. The trade names of the individual garden products may vary. |
| Robotic Mower | Indego |
| Frequency | Hz | 50/60 |
| Output DC | V | 42 |
| Degree of protection | | IP44** |
| Weight | kg | 2.0 |
| *depends on cutting height, grass conditions and moisture
**protected against splashing water from all directions
The values given are valid for a nominal voltage [U] of 230 V. For differ-ent voltages and models for specific countries, these values can vary.
Please observe the article number on the type plate of your garden product. The trade names of the individual garden products may vary. |
Measured sound values determined according to EN 60335. Typically the A-weighted noise levels of the product are: Sound pressure level 64 dB(A); sound power level 72 dB(A). Uncertainty K = 2.74 dB.
We declare under our sole responsibility that the product described under "Technical Data" is in conformity with the following standards or standardization documents: EN 60335 (battery powered product) and EN 60335 (battery charger) according to the provisions of the directives 2011/65/EU, 2006/95/EC, 2004/108/EC, 2006/42/EC, 2000/14/EC. 2000/14/EC: Guaranteed sound power level 75 dB(A). Conformity assessment procedure according to Annex VI.
Equipment category: 32
Notified body:
SRL, Sudbury, England, Nr. 1088
Technical file (2006/42/EC, 2000/14/EC) at:
Bosch Lawn and Garden Ltd., PT-LG/ENS,
Stowmarket, Suffolk IP14 1EY, England
Dr. Egbert Schneider
Senior Vice President
Engineering
Helmut Heinzelmann
Head of Product Certification
PT/ETM9
PA · PB i.v.kw.
Robert Bosch GmbH, Power Tools Division
D-70745 Leinfelden-Echterdingen
12.10.2012
Explanation of Installation Guide (see pages 3-11)
| Action | Figure |
| Delivery scope/unpacking product | 1 |
| Position the docking station | 2 – 3 |
| Thread wire through base plate | 4 |
| Action | Figure |
| Connect first end of perimeter wire | 5 |
| Fix docking station to the ground | 6 |
| Lay out perimeter wire | 7 |
| Connect second end of perimeter wire | 8 |
| Clip on protective cover of docking station | 9 |
| Install power supply | 10 |
| Docking station indicates power on | 11 |
| Plug in isolator key | 12 |
| Charge battery by putting the machine into dock-ing station | 13 |
| Welcome screen = Refer to manual | 14 |
| Lift up and carry the machine | 15 |
| Set height of cut | 16 |
| Cleaning | A |
| Maintenance | B |
Lawn Preparation
Remove stones, loose pieces of wood, wire, live mains cables and other foreign objects from the cutting area.
Make sure that the cutting area is even and has no ditches, grooves and steep slopes above 20° that are clear obstructions for the machine.
Cut the main area of the lawn with a conventional mower to a max. height of 40mm and the perimeter wire area to a max. height of 20mm .
Installation
For a video guide on how to install the Indego, please visit www.bosch-indego.com or use the following QR code.

Select a position for the docking station that is horizontally level and out of direct sunlight.
Make sure that the docking station is placed by the side of the cutting area with a straight 2 m track in front and behind. While standing in the grass area to be cut, it is important that the docking station charging pins point to the left. (see figure 2) Note: If the docking station is positioned with the charging pins pointing either into the grass area or to the right, the Indego will not leave the dock.
Pull the wire end through the front hole of the base plate and straight through the wire duct and the rear hole. Fix the wire with a peg in line with the hole. Cut off insulation carefully and

connect the wire to the right-hand (red) terminal. (see figures 4-5)
Fix the docking station to the ground with the 4 supplied fixing pins. (see figure 6)
Lay out the perimeter wire counterclockwise and flush to the ground. Observe the minimum distances from lawn edges, steps, walls, ponds, etc. Use the spacing guide. (see figure 7)
Trees, ponds, flower beds, etc. on the lawn must be delimited in a clockwise direction. The lines to and from these zones may not cross, but the wire should be touching. (see figure 7)
Fix the wire with the first peg next to the docking station, tension it, and fix with pegs at a distance of approximately 50 cm (see figure 7)
Continue the loop and bring the wire to the back of the docking station, in line with the other end of the wire. Fix the second end of the wire also with the peg. The perimeter wire and peg should be installed in line. Shorten the wire, cut off insulation carefully, and connect the wire to the left-hand (black) terminal. (see figure 8)
Clip on the protective cover of the docking station. (see figure 9)
Note: The wire can be extended up to the maximum allowed length of 450 m.
Note: If verticutting or raking is intended, avoid the perimeter wire.
Install the power supply in a cool, dry environment. Connect it to the docking station and an indoor mains socket (see figure 10).
Check the indicator on the docking station (see figure 11):
- Indicator lights up continuously green if the output voltage of the power supply is available and the perimeter wire is not interrupted.
- Indicator flashes green if the perimeter wire is broken, long, or short.
- Indicator does not light up when the output voltage of the power supply is not available.
Initial Programming
Plug the isolator key into the machine and put it into the docking station for charging (see figures 12-14).
The welcome screen appears and shows the following symbols:
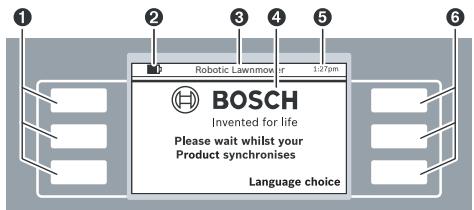
Symbol Meaning
Multifunctional buttons, left
Battery capacity
3 Title of Menu/Submenu
Symbol Meaning
4 Display with dialog screens Time Multifunctional buttons, right
The buttons are multifunctional. Their meaning depends on the current menu function and is explained on the screen.
The buttons next to the arrow symbols or allow you to navigate up or down through the menu options. The buttons next to the arrow symbols or allow you to go right or left through the menu options.
The display will change to the next screen as soon as any option is selected and confirmed.
Installation
First press the button next to "Language choice". The "Set Language" screen appears and shows the following.
| Set Language |
| English | ▲ |
| Deutsch | |
| Dansk | |
| Svenska | |
| Norsk | ▼ |
| Suomi | |
| Save |
Select one of the "Language" options and confirm with "Save".
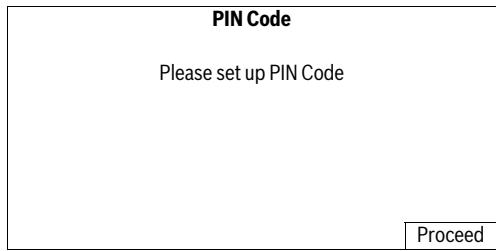
Select "Proceed" to enter your personal PIN Code.
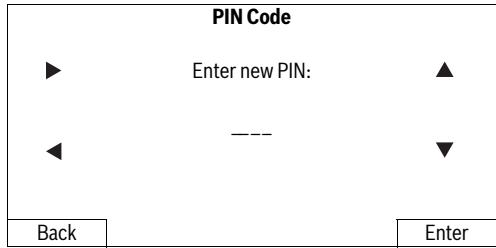
Select the input position with the left/right cursors, adjust the digits with the up/down cursors and confirm with "Enter" or select "Back" to return to the first "PIN Code" screen.

28|English
Note: Keep the PIN code secret from third parties. If you have lost your personal PIN code, you will have to return the Indego and its docking station to a Bosch Service Center to be unlocked. Please contact your dealer or Bosch (see "After-sales Service and Application Service").
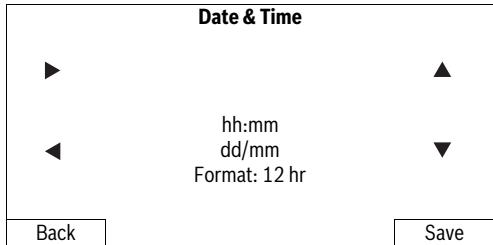
Select the "hh:mm", "dd/mm" and "Format: 12 hr" input positions with the left/right cursors, adjust the values with the up/down cursors and confirm with "Save" or select "Back" to return to the first "PIN code" screen.
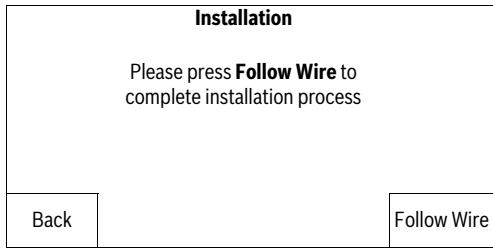
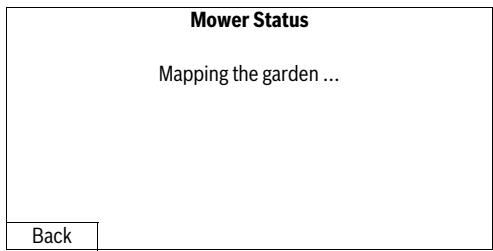
Press "Follow Wire" to complete mapping the garden (Select "Back" to return to the "Date & Time" screen.)
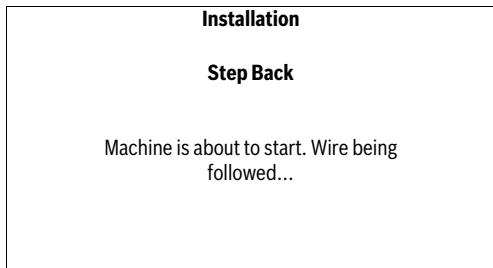
The following screen indicates the initial follow of perimeter wire:
The blades do not rotate when the machine follows the wire for the first time.
Mapping Completed
Is this the back of the docking station or an obstacle? If this is an obstacle, remove it and the machine will continue mapping.
Obstacle
Docking Station
Mapping is complete when the machine reaches the back of the docking station.
If the machine hasn't reached the back of the docking station, press "Obstacle" and observe the information indicated on the screen to complete installation.
If the machine has reached the back of the docking station, press "Docking Station".
Mapping Completed
Mapping Completed. Mower is returning to the docking station. Please wait.
Back
Robotic Lawnmower

BOSCH
Invented for life
Mow now
Menu
After a successful installation you can either immediately begin to mow by pressing "Mow now" or set up a mowing schedule in the "Menu > Select Daily Timer".
For more information about the behaviour of the machine while mowing see section "Mowing".
Custom Settings
Configure the mowing schedules and the settings of the machine according to your needs. All menu items are listed in section "Menu Navigation".
The set up of a "Select Daily Timer" is explained in detail. The other menus are self explaining.
Schedule
In "Menu > Select Daily Timer" 5 schedules are available.
"MANUAL" should be used if you only want to instruct the machine to operate at the current time.
Each of the "CUSTOM" mode can be scheduled according to your needs.
Example:
| Select Daily Timer |
| Info | MANUAL | ▲ |
| CUSTOM 1 | |
| CUSTOM 2 | |
| Edit | CUSTOM 3 | ▼ |
| CUSTOM 4 | |
| CUSTOM 5 | |
| Back | | Select |
Select a "CUSTOM" schedule with the up/down cursors, e.g. "CUSTOM 1" and press "Edit".
| CUSTOM 1 |
| View | Monday | ▲ |
| Tuesday | |
| Wednesday | |
| Edit | Thursday | ▼ |
| Friday | |
| Saturday | |
| Sunday | |
| Back | | OK |
Select the mowing day with the up/down cursors, e.g. "Monday" and press "Edit".
| CUSTOM 1 - Monday |
| ► Slot 1: Start 12:00 Slot 2: Start : | On End 14:00 Off End : | | ▲ |
| Cancel | | | Save |
Set up a time slot for "Start" and "End" of automatic mowing. If a dormant period is required, e.g. at noon, two slots must be established. For each day a single slot or both slots can be turned ON or OFF.
The machine will work within a slot unless the battery needs charging. If the lawn area has been completed before the end of a time slot the machine will return to the docking station. Select slot 1 with the right/left cursors and select "On" or "Off" with the up/down cursors. Select "Start" with the right/left cursors and adjust a start time with the up/down cursors. Select "End" and adjust an end time in the same way. If required set also a start and end time for slot 2. Press "Save" to confirm your entry.
If the machine should not operate, e.g., on Monday, select "Off" with the up/down cursors for both slots.
The programmed slot is shown on a schedule.
| CUSTOM 1 |
| View | Monday | ▲ |
| Tuesday | |
| Wednesday | |
| Edit | Thursday | ▼ |
| Friday | |
| Saturday | |
| Sunday | |
| Back | | OK |
Set up all additionally required mowing days and confirm your personal "CUSTOM 1" mowing schedule with "OK".
| Select Daily Timer |
| Info | MANUAL | ▲ |
| CUSTOM 1 | |
| CUSTOM 2 | |
| Edit | CUSTOM 3 | ▼ |
| CUSTOM 4 | |
| CUSTOM 5 | |
| Back | | Select |
A tick will appear next to the saved mode.
The machine will start mowing as soon as day and start time of slot 1 is reached.
Note: Set up different schedules for seasonal growing conditions in spring, summer and autumn. Observe the growth of the grass and adjust your schedule if required.
Note: The Indego's cutting system is designed to cut small lengths of grass (3-5 mm) so that the clippings can mulch down and fertilise the lawn.
Mowing
Do not let children ride the machine. Press manual stop button before lifting. Always lift the machine at its handle.
For best mowing results, set up a frequent mowing schedule for longer lasting battery and for preventing debris on the lawn.
Once mowing has started:
- In "MANUAL" mode, the machine operates until the lawn area has been cut or until the manual stop button is pressed or until the battery needs charging.
- In the programmable "Custom" mode, the machine operates continuously within a slot. It only pauses mowing for charging. To stop mowing before the machine has finished a slot, press the manual stop button. If the lawn area has been completed before the end of a time slot, the machine will return to the docking station.
The machine has the following sensors:
- Lift sensor: will be activated if the machine is lifted and cause the machine and cutting blades to stop.
- roll over sensor, will detect when the machine is inverted and cause the machine and cutting blades to stop


30|English
- obstruction sensor, tactile detection for obstacle anywhere in the full width of the path of the machine and cause the machine to change its direction
- tilt sensor, will be activated if the machine reaches an angle of 45°
If one of the sensors is activated, such as lift sensor, the screen will show a message, e. g. "Machine has been lifted. Please enter PIN code to continue". The display switches into sleep mode, if no input is made for 3 minutes. Press any button to reactivate the screen.
If the machine is in sleep mode, press any button to change to the PIN entry screen and enter the PIN code.
Battery Charging
The battery is equipped with temperature monitoring that allows charging only in the temperature range between 5°C and 45°C .
The Lithium-lon battery is supplied partially charged. To ensure full capacity of the battery, completely charge the machine in the docking station before first use.
The Lithium-lon battery can be charged at any time without reducing its service life. Interrupting the charging procedure does not damage the battery.
When the battery is run down or discharged, the machine is shut off by means of a protective circuit: the blade no longer moves.
Following tables show the various menu items.
| Settings | Explanation |
| Mow Settings | Border Cut | Never | Machine never cuts lawn border. |
| Every 4th time | Machine cuts lawn border every 4th mowing. |
| Every 2nd time | Machine cuts lawn border every 2nd mowing. |
| Cutting lane prox- imity | Set the proximity of the cutting lane |
| Signal ID | Choice of different signals, if there is any signal interfer- ence. |
| Delete Maps | Machine will map garden again. Note: Machine should be in the docking station |
| Security Options | Change PIN | PIN code is required for reactivation after auto-lock and safety shut-down. Changing of a PIN code needs entering of existing PIN code first. |
| Auto Lock | On | If buttons are not pressed for 3 min. they will be auto- matically locked. Recommended for safety reasons and protection against theft. |
| Off | Buttons are always ready for input. |
| Set Language | Change of displayed language. |
| System Options | Set Keypad Volume | Set the volume of the keypad. |
| Set Display | Display Brightness | Set the display brighter or darker. |
| Info | Information about software version, serial number and last service. |
| Factory Reset | Reset of the machine to factory setting will delete all per- sonal settings. A factory reset will require to repeat installation. |
| Set Time & Date | Edit date and time. |
English|31
| Select Daily Timer | Explanation |
| MANUAL | View | | Help information when to use MANUAL. |
| Select | | Select this programme if no schedule should be used. |
| CUSTOM 1 - 5 | Edit | Edit Monday | Program up to 5 automatic mowing schedules by setting individual mowing days and time slots. |
| Edit Tuesday |
| Edit Wednesday |
| Edit Thursday |
| Edit Friday |
| Edit Saturday |
| Edit Sunday |
| Select | | Activate one of 5 custom settings. |
| Schedule Info | Explanation |
| Schedule Info | |
| Back | Return to Menu. |
| Change Schedule | Enter submenu “Select Daily Timer”. |
| Lock Controls | Explanation |
| Lock Controls | To lock buttons immediately, independent from Auto-Lock. |
| Unlock Controls | To unlock buttons the entry of the PIN code is required. |
Troubleshooting


| Problem | Possible Cause | Corrective Action |
| Machine fails to operate | Possible clogging | Check underneath the garden product and clear out as necessary (always wear gardening gloves) |
| Battery not fully charged | Replace garden product in the docking station |
| Grass too long | Increase height of cut |
| Battery too hot/cold | Allow to cool/warm |
| Isolator key not inserted correctly/fully | Fit correctly |
| Motor starts and stops immediately | Battery not fully charged | Replace garden product in the docking station |
| Isolator key not inserted correctly/fully | Fit correctly |
| Battery too hot/cold | Allow to cool/warm
Increase height of cut |
| Machine functions intermittently | Possible internal fault | Contact your Bosch Service Centre |
32 | English
| Problem | Possible Cause | Corrective Action |
| Garden product leaves ragged finish | Height of cut too low | Increase height of cut |
| Cutting blade blunt | Replace the blade |
| Possible clogging | Check underneath the garden product and clear out as necessary (always wear gardening gloves) |
| Areas left uncut | Time slot not long enough for garden size | Increase mowing time slot |
| Battery duration | Contact your Bosch Service Centre |
| Distance between obstacles surrounded by perimeter wire is less than 1 m | Increase distance between perimeter wire
Note: Obstacles with a height of more than 6 cm do not require to be wired |
| Rough lawn conditions | Increase/decrease cutting lane proximity from "mow settings" |
| Excessive vibrations/noise | Blade nut/bolt loose | Tighten blade nut/bolt |
| Cutting blade damaged | Replace the blade |
| No charging procedure possible | Charging pins corroded | Clean the charging pins |
| Possible internal fault | Contact your Bosch Service Centre |
| Garden product unable to dock | Perimeter wire not correct aligned | Check perimeter wire and align it |
| The LED on the docking station does not light up | Mains plug of power supply not plugged in (properly) | Insert mains plug (fully) into the socket outlet |
| Possible faults with the socket outlet or mains cable | Have the mains voltage supply checked by an authorized electrician |
| Power supply or docking station fault | Have the power supply or docking station checked by your Bosch Service Centre |
After-sales Service and Application Service
In all correspondence and spare parts orders, please always include the 10-digit article number given on the type plate of the garden product.
Additionally be aware of your product's software version (see "Menu > Settings > System Options > Info").
Great Britain
Robert Bosch Ltd. (B.S.C.)
P.O.Box 98
Broadwater Park
North Orbital Road
Denham
Uxbridge
UB95HJ
Tel. Service: (0844) 7360109
Fax: (0844) 7360146
E-Mail: boschservicecentre@bosch.com
Ireland
Origo Ltd.
Unit 23 Magna Drive
Magna Business Park
City West
Dublin 24
Tel. Service: (01) 4666700
Fax: (01) 4666888
Australia, New Zealand and Pacific Islands
Robert Bosch Australia Pty. Ltd.
Power Tools
Locked Bag 66
Clayton South VIC 3169
Customer Contact Center
Inside Australia:
Phone: (01300) 307044
Fax: (01300) 307045
Inside New Zealand:
Phone: (0800) 543353
Fax: (0800) 428570
Outside AU and NZ:
Phone: +61 395415555
www.bosch.com.au
Francais | 33
Republic of South Africa
Customer service
Hotline: (011) 6519600
Gauteng - BSC Service Centre
35 Roper Street, New Centre
Johannesburg
Tel.: (011) 4939375
Fax: (011) 4930126
E-Mail: bsctools@icon.co.za
KZN - BSC Service Centre
Unit E, Almar Centre
143 Crompton Street
Pinetown
Tel.: (031) 7012120
Fax: (031) 7012446
E-Mail: bsc.dur@za.bosch.com
Western Cape - BSC Service Centre
Democracy Way, Prosperity Park
Milnerton
Tel.: (021) 5512577
Fax: (021) 5513223
E-Mail: bsc@zsd.co.za
Bosch Headquarters
Midrand, Gauteng
Tel.: (011) 6519600
Fax: (011) 6519880
E-Mail: rbsa-hq.pts@za.bosch.com
Transport
The contained lithium-ion batteries are subject to the Dangerous Goods Legislation requirements. The user can transport the batteries by road without further requirements.
When being transported by third parties (e.g.: air transport or forwarding agency), special requirements on packaging and labelling must be observed. For preparation of the item being shipped, consulting an expert for hazardous material is required.
Disposal
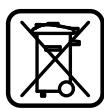
Do not dispose of garden products, battery chargers and batteries/rechargeable batteries into household waste!
Only for EC countries:
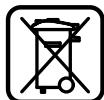
According to the European law 2002/96/EC, electrical and electronic equipments that are no longer usable, and according to the European law 2006/66/EC, defective or used battery packs/batteries, must be collected separately
and disposed of in an environmentally correct manner. Batteries no longer suitable for use can be directly returned at:
Great Britain
Robert Bosch Ltd. (B.S.C.)
P.O.Box 98
Broadwater Park
North Orbital Road
Denham
Uxbridge
UB 95HJ
Tel. Service: (0844) 7360109
Fax: (0844) 7360146
E-Mail: boschservicecentre@bosch.com
Integrated batteries may only be removed for disposal. Opening the housing shell can damage or destroy the garden product. - Integrated batteries may only be removed for disposal by service agents.
Battery packs/batteries:
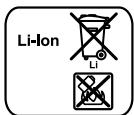
Li-Ion:
Please observe the instructions in section
"Transport".
Subject to change without notice.
French
Bosch Lawn and Garden Ltd., PT-LG/ENS,
Stowmarket, Suffolk IP14 1EY, England
Dr. Egbert Schneider
Senior Vice President
Engineering
Helmut Heinzelmann
Head of Product Certification
PT/ETM9
PA · PB i.v.k.m
Robert Bosch GmbH, Power Tools Division
D-70745 Leinfelden-Echterdingen
12.10.2012
Robert Bosch (France) S.A.S.
Bosch Lawn and Garden Ltd., PT-LG/ENS,
Stowmarket, Suffolk IP14 1EY, England
Dr. Egbert Schneider
Senior Vice President
Engineering
Helmut Heinzelmann
Head of Product Certification
PT/ETM9
Robert Bosch GmbH, Power Tools Division
D-70745 Leinfelden-Echterdingen
12.10.2012
Bosch Lawn and Garden Ltd., PT-LG/ENS,
Stowmarket, Suffolk IP14 1EY, England
Dr. Egbert Schneider
Senior Vice President
Engineering
Helmut Heinzelmann
Head of Product Certification
PT/ETM9

Robert Bosch GmbH, Power Tools Division
D-70745 Leinfelden-Echterdingen
12.10.2012
Bosch Lawn and Garden Ltd., PT-LG/ENS,
Stowmarket, Suffolk IP14 1EY, England
Dr. Egbert Schneider
Senior Vice President
Engineering
Helmut Heinzelmann
Head of Product Certification
PT/ETM9


Robert Bosch GmbH, Power Tools Division
D-70745 Leinfelden-Echterdingen
12.10.2012
Bosch Lawn and Garden Ltd., PT-LG/ENS,
Stowmarket, Suffolk IP14 1EY, England
Dr. Egbert Schneider
Senior Vice President
Engineering
Helmut Heinzelmann
Head of Product Certification
PT/ETM9
PA · PB i.v.k.m
Robert Bosch GmbH, Power Tools Division
D-70745 Leinfelden-Echterdingen
12.10.2012
Technical file (2006/42/EC, 2000/14/EC) at:
Bosch Lawn and Garden Ltd., PT-LG/ENS,
Stowmarket, Suffolk IP14 1EY, England
Dr. Egbert Schneider Senior Vice President Engineering
Helmut Heinzelmann
Head of Product Certification
PT/ETM9
PA · PB
Robert Bosch GmbH, Power Tools Division
D-70745 Leinfelden-Echterdingen
12.10.2012
Bosch Service Center
Telegrafvej 3
2750 Ballerup
Tlf. Service Center: 44898855
Fax: 44898755
E-Mail: vaerktoej@dk.bosch.com
Transport
Bosch Lawn and Garden Ltd., PT-LG/ENS, Stowmarket, Suffolk IP14 1EY, England
Dr. Egbert Schneider
Senior Vice President
Engineering
Helmut Heinzelmann
Head of Product Certification
PT/ETM9

Robert Bosch GmbH, Power Tools Division
D-70745 Leinfelden-Echterdingen
12.10.2012
Bosch Service Center
Telegrafvej 3
2750 Ballerup
Danmark
Tel.: (020) 414455 (inom Sverige)
Fax: (011) 187691
Transport
The lithium-ion battery included is subject to the requirements for dangerous goods. The user can transport the batteries by road without further obligations.
Only for EU countries:

2004/108/EC, 2006/42/EC, 2000/14/EC.
2000/14/EC: Guaranteed sound power level 75 dB(A). Conformity assessment method per Annex VI.
Product category: 32
Declared sound power level:
SRL, Sudbury, England, No. 1088
Technical data (2006/42/EC, 2000/14/EC) at:
Bosch Lawn and Garden Ltd., PT-LG/ENS,
Stowmarket, Suffolk IP14 1EY, England
Dr. Egbert Schneider
Senior Vice President
Engineering
Helmut Heinzelmann
Head of Product Certification
PT/ETM9

Robert Bosch GmbH, Power Tools Division
D-70745 Leinfelden-Echterdingen
12.10.2012
Enter new PIN code:


Back
Enter
Bosch Lawn and Garden Ltd., PT-LG/ENS,
Stowmarket, Suffolk IP14 1EY, England
Dr. Egbert Schneider Senior Vice President Engineering
Helmut Heinzelmann
Head of Product Certification PT/ETM9
Robert Bosch GmbH, Power Tools Division D-70745 Leinfelden-Echterdingen
12.10.2012
This product complies with the requirements of the following standards: EN 60335.
Characteristics of the product
The product has been tested in accordance with the standard and is approved for:
Bosch Lawn and Garden Ltd., PT-LG/ENS,
Stowmarket, Suffolk IP14 1EY, England
Dr. Egbert Schneider
Senior Vice President
Engineering
Helmut Heinzelmann
Head of Product Certification
PT/ETM9

Robert Bosch GmbH, Power Tools Division
D-70745 Leinfelden-Echterdingen
12.10.2012
Explanation of the symbols for installation (see page 3-11)
EayniKa 135
Papakaoume aokoloutheta to
Oupa nathote yia va tepuatae
TynEykataoTaon
Piω
AkoIouθηα
TO aUpua
Pnthe «AkoioBto oupa» yia va terpatiote tny kataetponTnC enipaveic tou ypaioiu.
(EniEeTe «Tioo» yia va eimotpεeTe otnv oθovn «Hμερομηvia & 'Opa').)
Eykarataaon
OniofoxwpoTe
To Indego Eekivá Œliyo kai akolouθei
To oupa.
O enoec diaiyooc deixvei otyn oboyn tn npwn diabpoun kata nkoTou oupatoC, opoTeTnOnc:
KataoTaonXlookOnn
The device must not be operated when the memory is running through a protective cover.
www.bosch-garden.com
When ordering spare parts, always specify the 10-digit order number printed on the type plate of the machine.
You need the software version of your machine (see "Menu > Settings > System settings > Information").
Greece
Robert Bosch A.E.
37 Erchias Street
19400 Koropi-Athens
Tel.: 210 5701270
Fax: 2105701283
www.bosch.com
www.bosch-pt.gr
ABZ Service A.E.
Tel.: 210 5701380
Fax: 2105701607
OpiepiOevee mntapie covtwv laotou unokivtai otic anatnnoei ctwv enikivduuvayaoov. Omuatapiec npoov va metapepeoov obikwoc ao to xpohnt xwpic allouc opouc. Otav, oowc, o npatapie c anootelaovtai ano ptiou (n.x. aeponopikwne tiaipia metafopow) npenei va npoovtai diapopec 1diaitepec anatnioeic yia tn ouakeuaia kai tn anavon. Eed npenei, kato tvnpoetouaia tou uno anoottol teauiou, va zntnthe onwohnot e kai n oumbouh evoc eiikouy eikivduva aytheta.
Anòoupon
Mny piEeTe ta mnxavnmuata knou, touc oportiotc, kai tic npatapie cTsigma anoppimuata tou omiou oac!
Moyo yia xwopec tnc EE:
Tnpoue to 6ikaiomegaaalayov.
Türkce
Güvenlik Talimatu
Bosch Lawn and Garden Ltd., PT-LG/ENS,
Stowmarket, Suffolk IP14 1EY, England
Dr. Egbert Schneider
Senior Vice President
Engineering
Helmut Heinzelmann
Head of Product Certification
PT/ETM9
Robert Bosch GmbH, Power Tools Division
D-70745 Leinfelden-Echterdingen
12.10.2012
www.bosch-garden.com
Bosch San. ve Tic. A.S.
Ahi Evran Cad. No:1 Kat:22
Polaris Plaza
80670 Maslak/Istanbul
Bosch Expert Team +90 (0212) 367 18 88
Isiklar LTD.STI.
Kizilay Cad. No: 16/C Seyhan
Adana
Tel.: 0322 3599710
Tel.: 0322 3591379
Bosch Lawn and Garden Ltd., PT-LG/ENS,
Stowmarket, Suffolk IP14 1EY, England
158 | Polish
Dr. Egbert Schneider Senior Vice President Engineering
Helmut Heinzelmann Head of Product Certification PT/ETM9

Robert Bosch GmbH, Power Tools Division D-70745 Leinfelden-Echterdingen 12.10.2012
Robert Bosch Sp. z o.o.
Bosch Lawn and Garden Ltd., PT-LG/ENS,
Stowmarket, Suffolk IP14 1EY, England
Dr. Egbert Schneider
Senior Vice President
Engineering
Helmut Heinzelmann
Head of Product Certification
PT/ETM9
i. V. h = {ml} _____
Robert Bosch GmbH, Power Tools Division
D-70745 Leinfelden-Echterdingen
12.10.2012
Bosch Service Center PT
K Vapence 1621/16
692 01 Mikulov
Tel.: 519305700
Fax: 519305705
E-Mail: servis.naradi@cz.bosch.com
www.bosch.cz
Transport
Bosch Lawn and Garden Ltd., PT-LG/ENS,
Stowmarket, Suffolk IP14 1EY, England
Dr. Egbert Schneider
Senior Vice President
Engineering
Helmut Heinzelmann
Head of Product Certification
PT/ETM9
Robert Bosch GmbH, Power Tools Division
D-70745 Leinfelden-Echterdingen
12.10.2012
180 | Slovak
Batteries:
2011/65/EU, 2006/95/EC, 2004/108/EC, 2006/42/EC,
Bosch Lawn and Garden Ltd., PT-LG/ENS,
Stowmarket, Suffolk IP14 1EY, England
Dr. Egbert Schneider
Senior Vice President
Engineering
Helmut Heinzelmann
Head of Product Certification
PT/ETM9

Robert Bosch GmbH, Power Tools Division
D-70745 Leinfelden-Echterdingen
12.10.2012
www.bosch-garden.com
Keep away from garden tools.

The device is protected by a safety transformer.
Disconnect the plug from the power source before any work on the garden tool (e.g., maintenance, changing working tools, etc.), as well as during transport and storage.
Never modify the garden tool yourself. Unauthorized modifications can affect the safety of your garden tool and lead to increased noise and vibration.
Disconnect the plug from the power source:
- before clearing jams, before checking, cleaning, or performing any work on the garden tool,
- in case of unusual vibration of the garden tool (stop the garden tool and check it immediately),
- after striking a foreign object. Check the garden tool for damage and have it repaired at a Bosch service center if necessary.
Maintenance and Storage
Always wear garden gloves when working with sharp blades. Disconnect the plug from the power source before any work on the garden tool. Before performing any work on the charging station or battery, pull the plug out of the socket.
Carefully clean the outside of the garden tool with a soft brush and cloth. Do not use water, solvents, or abrasive agents. Remove grass and dirt, especially in the area of the ventilation slots.
Regularly clean the blade area, turning the garden tool upside down for this purpose.
Remove the firmly stuck grass with a wooden stick or brush. (See Fig. A) The blade can be resharpened. (See Fig. B)
Check all screws and bolts for tightness to ensure safe operation of the garden tool. Regularly inspect the garden tool and replace worn or damaged parts. Ensure that only original Bosch spare parts are used. If necessary, replace the blade and screws as a complete set.
Storage
Before storing the garden tool, disconnect the plug from the power source.
Store the power tool in a dry, frost-free place that is inaccessible to children.
Do not place the power tool on a charging station during storage.
200 | Russian
SD memory card
The power tool is equipped with an interface for an SD memory card, thanks to which the Bosch service workshop can perform diagnostics of the software.
Danger from the battery
Charging must only be carried out using the Bosch charging station provided. Avoid contact with the power tool if liquid leaks from the battery in an emergency. In case of contact with the liquid, consult a doctor. When the battery is damaged, liquid may leak and come into contact with adjacent parts. Check the parts that have come into contact with the liquid and contact the Bosch service workshop.
Do not open the power tool or the battery inside it. There is a risk of short circuit and electric shock. Protect the power tool from heat. There is a risk of explosion. If the power tool is used improperly, vapors may be emitted from the battery. Ensure a supply of fresh air and consult a doctor if you have any health complaints. The emission of vapors can irritate the respiratory tract. Store the power tool only within a temperature range of 5 °C to 45 °C. For example, do not leave the power tool in a car in summer.
Safety instructions for the charging device and power supply unit
Charging must only be carried out using the original Bosch charging station. Otherwise, there is a risk of explosion and fire. Regularly check the charging station, power supply unit, and cable. Do not use the charging station or power supply unit if you have detected damage. Do not open the charging station or power supply unit yourself; their repair is only permitted to be carried out by qualified personnel and only using original Bosch spare parts. Damaged charging stations, power supply units, cables, or plugs increase the risk of electric shock. Do not use the charging station or power supply unit on easily flammable surfaces (e.g., paper, textiles, etc.) or in the vicinity of flammable materials. Due to the heating of the charging station or power supply unit during charging, there is a risk of fire.
Children and young people must not play with the charging station, power supply unit, or the power tool. Children and young people who, due to their physical, sensory, or mental abilities, or lack of experience or knowledge, are not capable of safely working with the charging station or power supply unit, are prohibited from using the charging station or power supply unit without supervision or instruction by a responsible person. Otherwise, there is a risk of incorrect use and injury. The power supply unit must match the data on the nameplate. In the case of a permanent connection, the power supply unit must be connected to a socket that is equipped with a residual current device (RCD) with a tripping current of 30 mA or less. Regularly check the functionality of the residual current device (RCD). If it is necessary to check for signs of damage, it may only be used in perfect condition. If the power supply unit's cable needs to be replaced, contact the manufacturer, an authorized service center, or a qualified specialist to avoid danger. When laying the cables of the charging station and the power supply unit, make sure that they are not pinched or damaged. Never touch the plug with wet hands. Do not drive over the power supply unit's cable, do not place anything on it, and do not pull on it, as you could damage it. Protect the cable from high temperatures, oil, and sharp edges.
For safety reasons, the power supply unit/charging station has protective insulation and is not grounded. The rated voltage is 230 V ~, 50 Hz (for countries not in the EU: 220 V, 240 V depending on the version). Information can be obtained from the authorized Bosch service center.
In case of doubt, contact a professional electrician or the nearest Bosch service center.
Regularly check the power supply unit's cable for visible damage or signs of aging; use the cable only in perfect condition.
Symbols
The following symbols will help you with the use and understanding of the operating instructions. Remember the symbols and their meaning. The correct interpretation of the symbols will help you to work more correctly and safely with the power tool.
Russian | 201
Technical documentation (2006/42/EC, 2000/14/EC): Bosch Lawn and Garden Ltd., PT-LG/ENS, Stowmarket, Suffolk IP14 1EY, England
Dr. Egbert Schneider Senior Vice President Engineering
Helmut Heinzelmann Head of Product Certification PT/ETM9

Robert Bosch GmbH, Power Tools Division D-70745 Leinfelden-Echterdingen 12.10.2012
Name Change/Model Change
4
Disposal
5
6
Multifunction keys
The keys perform different functions.
The corresponding function of the key depends on the menu called up and is explained on the display.
Using the keys next to the arrows (cursor), you can move up or down in the menu. Using the keys next to the arrows (cursor), you can move left or right in the menu.
After selection and confirmation, the following display appears.
Setup
Soon the device will switch on and the limit wire will be detected.
The following display shows the first detection of the limit wire:
Station keys
Searching for wire...
Back
When the device detects the limit wire for the first time, the keys do not rotate.
Wire detection completed
If the tool does not reach the rear side of the charging station, remove the obstacle. Continue mapping.
Obstacle
Charging station
Measure the distance if the tool reaches the rear side of the charging station.
Press "Obstacle" if the tool does not reach the rear side of the charging station. Follow the information on the display to complete the setup.
Press "Charging station" if the tool reaches the rear side of the charging station.
Mapping complete
Mapping complete. The robot vacuum returns to the charging station. Continue.
Back
Russian | 205
Work area. Robot vacuum

BOSCH
Invented for life
Mow
Menu
You can adjust the settings yourself to immediately start mowing the lawn or create a temporary schedule in the "Menu > Schedule selection". Further information on the behavior of the garden tool when mowing the lawn can be found in the "Mowing" section.
Own settings
Create temporary schedules and adjust the garden tool according to your needs. All menu items are listed in the "Program table" section.
The "Temporary schedule" is explained in detail. The other menu items are self-explanatory.
Temporary schedule
In the "Menu > Schedule selection" you can call up 5 temporary schedules.
The "Manual mode" should be used if the garden tool is only to work for the actual time.
Each schedule can be set according to your requirements.
Example:
www.bosch-garden.com
For any further questions and ordering spare parts, please always specify the 10-digit product number shown on the type plate of the garden tool.
Additionally, it is necessary to specify the software version of your garden tool (see "Menu > Settings > System settings > Information").
Do not dispose of garden tools, chargers, and batteries/rechargeable batteries in household waste!
Only for EU countries:
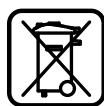
According to European Directive 2002/96/EC, used electrical and electronic equipment, and according to European Directive 2006/66/EC, defective or used batteries must be collected separately and recycled in an environmentally friendly manner.
Batteries must be collected separately and handed in for environmentally friendly recycling.
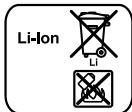
Integrated batteries may only be removed by qualified personnel. Opening the housing can destroy the power tool. Integrated batteries may only be removed by qualified service personnel.
Batteries:
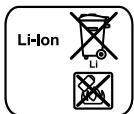
Lithium-ion:
Please observe the instructions in the "Transport" section.
Subject to change.

ME77

F016L70825|(23.11.12)
Bosch Power Tools

Ukrainian|211
Ukrainian
Safety instructions
Warning! Read the safety instructions carefully. Familiarize yourself with the controls and proper use of the power tool. Keep the instruction manual for future reference.
Symbols on the power tool

General safety warning.
Before use, 10 cm of the cable must not be blocked or obstruct the outlet.

Warning: Read the operating instructions before switching on the power tool.

Warning: Switch on the power tool before starting work on it or cleaning it.

Caution: Do not touch the blades while they are rotating. The blades are sharp. Keep your fingers away.

Before touching the parts of the garden tool, make sure all parts have stopped. After switching off the garden tool, the blades continue to rotate for a while and can cause injury.
Watch out for objects that may be thrown out. Do not stand in the working area.

Warning: Keep a safe distance from the garden tool while it is in operation.

Do not lean on the garden tool.

Disconnect the transformer from the power supply before cleaning.

Operation
Before performing any work on the garden tool (e.g., before maintenance, replacing working tools, etc.), as well as before transport and storage, switch off the device and disconnect it from the power supply. Never allow children or persons who are not familiar with these instructions to use the garden tool. Local regulations may specify the minimum age of the operator.
This garden tool is not intended for use by persons (including children) with reduced physical, sensory or mental capabilities, or lack of experience and knowledge, unless they have been given supervision or instruction concerning use of the appliance by a person responsible for their safety. Children should be supervised to ensure that they do not play with the garden tool. In case of an accident, injuries to other persons or damage to other property may occur. If any unsafe conditions arise during operation of the garden tool, immediately press the stop button. Ensure proper routing of the power cord according to the operating instructions. Check the power supply. It must be fully charged, secured with the key switch, and not hanging by the cables. Regularly check the device on which the garden tool is used and remove stones, sticks, wires and other foreign objects. Do not walk on uneven ground; be careful. Regularly check the garden tool to ensure that the blades and the cutting device are not damaged. To avoid imbalance, replace all worn blades and blade screws at the same time. Never use the garden tool with damaged safety devices or without safety devices.
Do not use the tool near flammable liquids or gases, and do not place it near such materials. Never hold or carry the tool by the cord. The tool must not be used without the guard, if you are working, or if there are domestic animals or other people nearby. Switch off the tool according to the instructions for use and keep a safe distance from rotating parts. Do not use the tool together with a vacuum cleaner. Set up a work area for one person only. Do not use the tool in the rain. Unauthorized modifications may affect the safety of the tool and lead to serious injury or death.
Disconnect the tool:
- before you adjust, check, or clean the tool, or perform any work on it,
212 | Ukrainian
- in case of unexpected vibration of the tool (switch off the tool and immediately check it),
- after use, away from the workpiece. Check the tool for damage and take it to a Bosch service center for necessary repairs.
Maintenance and storage
Wear protective gloves when handling or working near sharp blades. Before carrying out any work on the tool, remove the battery pack. Before carrying out any work on the charging station or the power supply, unplug the charger from the socket.
Carefully clean the outside of the tool with a soft brush and a cloth. Do not use water, solvents, or abrasive agents. Remove all grass and dirt, especially from the ventilation slots.
Regularly clean the blade. To do this, turn the tool upside down. Use a hard brush or scraper to remove grass and dirt. (See Fig. A)
The blade can be turned. (See Fig. B)
Check all nuts, bolts, and screws for tightness and ensure the tool is in a safe working condition. Regularly inspect the tool and replace worn or damaged parts with original Bosch spare parts. If necessary, replace the blade with a genuine Bosch blade.
Storage
Before storing the garden tool, remove the battery pack.
Store the tool in a dry, locked place out of reach of children. Do not place objects on the tool or the battery pack.
Kapta nam'atri SD
The tool is intended for reading SD cards, with which the Bosch service workshop can perform diagnostics of the software.
Danger due to battery
Charging must be carried out only in the original Bosch charging station. Avoid contact with the tool if the battery is damaged in any way.
If contact occurs, immediately consult a doctor.
If the battery is damaged, liquid may leak and come into contact with skin. Avoid contact with the liquid; if contact occurs, consult the Bosch service workshop.
Do not open the tool or the battery; they contain no user-serviceable parts. There is a risk of short circuit and electric shock. Protect the tool from moisture. There is a risk of electric shock. If the tool is used improperly, there is a risk of battery leakage. Ensure proper use; if the battery is damaged, consult a doctor. Improper use may lead to injury. Store the tool only at temperatures between 5°C and 45°C. For example, do not leave the tool in a car.
Safety instructions for the charging device and power supply unit
Charging must be carried out only in the original Bosch charging station. There is a risk of electric shock and injury. Regularly check the charging station, power supply unit, cable, and plug. Do not use the charging station or power supply unit if they are damaged. Do not open the charging station or power supply unit yourself; repairs may only be carried out by qualified personnel using original Bosch spare parts. Damaged charging stations, power supply units, cables, or plugs pose a risk of electric shock. Do not use the charging station or power supply unit on flammable surfaces (e.g., paper, textiles) or near flammable materials. Due to heating of the charging station and power supply unit during charging, there is a risk of burns. Keep children away from the charging station, power supply unit, and tool. Children or persons who, due to physical, sensory, or mental limitations or lack of experience or knowledge, are not able to safely operate the charging station or power supply unit must not use them without supervision or instruction by a responsible person. Otherwise, there is a risk of incorrect use and injury. The plug must fit into the socket.
The appliance must be connected to a socket with a protective earth conductor, which must have a residual current device (RCD) with a tripping current not exceeding 30 mA. Regularly check the functionality of the protective earth conductor (RCD). The power cord must be regularly checked for signs of damage; do not use the appliance if it is in an unsafe condition. To avoid danger when replacing the power cord, contact the manufacturer, an authorized service center, or a qualified specialist. Damaged power cords must be replaced by the manufacturer, its service center, or a qualified person. Do not touch the plug with wet hands. Do not pull, twist, or crush the power cord, as this may damage it. Keep the cord away from high temperatures, oil, and sharp edges.
The safety of the appliance is ensured by the protective earth conductor and does not require replacement. The operating voltage is 230 V~, 50 Hz (for countries not belonging to the EU, depending on the version: 220 V, 240 V). Information can be obtained from the authorized service center of Bosch.
If you need to replace the power cord, contact a qualified electrician or the nearest Bosch service center to carry out the service.
Regularly check the power cord for visible damage and signs of wear; use the cord only in a safe condition.
SYMBOLS
The following symbols will help you when reading and understanding the operating instructions. Remember these symbols and their meanings. Correct understanding of the symbols will help you use this tool correctly and safely.
Symbol
Meaning

Wear protective gloves

Allowed for

Prohibited for

Accessories/spare parts
Intended use of the device
This tool is intended for cutting grass in private households.
Technical data
Technical documentation (2006/42/EC, 2000/14/EC):
Bosch Lawn and Garden Ltd., PT-LG/ENS,
Stowmarket, Suffolk IP14 1EY, England
Dr. Egbert Schneider
Senior Vice President
Engineering
Helmut Heinzelmann
Head of Product Certification
PT/ETM9
PA · PB
Robert Bosch GmbH, Power Tools Division
D-70745 Leinfelden-Echterdingen
12.10.2012
The rechargeable battery can be charged only after it has been fully discharged. Recharging the battery before it is fully discharged will shorten its service life.
If the battery pack is discharged or the power tool stops due to overload, the protection circuit is activated: Do not continue to press the switch.
Table of contents
The tables in the chapters contain various menu items.
For all questions and spare parts orders, please quote the 10-digit order number on the type plate of the garden tool.
Additionally, you must specify the software version of the tool (via "Menu")
> Settings > System settings > Information').
Warranty service and repair of the power tool are carried out in accordance with the requirements and standards of the manufacturer in all countries, either at authorized or service centers of Robert Bosch.
WARNING! Use of counterfeit products is unsafe and improper operation may have negative consequences. Manufacturing and distribution of counterfeit products is prosecuted by law in administrative and criminal proceedings.
Ukraine
LLC "Robert Bosch"
Service center for power tools
St. Krainy, 02660, Kyiv-60
Ukraine
Tel.: (044) 490 24 07 (multi-channel)
E-Mail: pt-service.ua@bosch.com
Website: www.bosch-powertools.com.ua
The list of authorized warranty and service workshops is indicated in the national warranty card.
222 | Roman
Transport
The contained lithium-ion batteries are subject to the requirements of the Dangerous Goods Legislation. The batteries can be transported by the user by road without further requirements. When shipping by third parties (e.g.: air transport or forwarding agency), special requirements on packaging and labelling must be observed. For the preparation of the item being sent, consulting an expert for hazardous material is required.
Disposal
Do not dispose of power tools, rechargeable batteries/battery packs, and accessories in household waste!
For EU countries only:
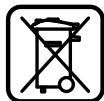
According to the European Directive 2002/96/EC and the European Directive 2006/66/EC, power tools that are defective or have been used up, and rechargeable batteries/battery packs that are defective or have been used up, must be collected separately and disposed of in an environmentally correct manner.
Battery packs/batteries must be disposed of separately and in an environmentally friendly manner.
Integrated rechargeable batteries may be removed only for disposal. When opening the housing, the power tool can be destroyed. Integrated rechargeable batteries can be removed for disposal and are not intended for service workshop use.
Rechargeable batteries/battery packs:
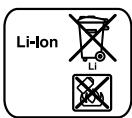
Li-ion: Please observe the section “Transport”.
Possible.
Romanian
Bosch Lawn and Garden Ltd., PT-LG/ENS,
Stowmarket, Suffolk IP14 1EY, England
Dr. Egbert Schneider
Senior Vice President
Engineering
Helmut Heinzelmann
Head of Product Certification
PT/ETM9
PA · PB
Robert Bosch GmbH, Power Tools Division
D-70745 Leinfelden-Echterdingen
12.10.2012
226 | Roman
Tel. service scule electrice: (021) 4057540
Fax: (021) 4057566
E-Mail: infoBSC@ro.bosch.com
Tel. consultanta clienti: (021) 4057500
Fax: (021) 2331313
E-Mail: infoBSC@ro.bosch.com
www.bosch-romania.ro
Transport
Danger when using the battery
Charging must only be carried out in the charging stations specified by Bosch. If the battery leaks electrolyte, avoid contact with the electrolyte. In case of contact with electrolyte, seek medical help. If the battery is damaged, it may leak electrolyte on the dry parts of the power tool. Check the dry parts and contact the Bosch service. Do not open the power tool and do not remove the battery from it. There is a risk of short circuit as well as electric shock. Keep the power tool away from fire. There is a risk of explosion. Improper use of the power tool with the battery
May cause injury. Ensure good ventilation and in case of complaints consult a doctor. The vapors may irritate the respiratory tract.
Store the power tool at temperatures between 5°C and 45°C. Do not leave the power tool in a car.
Safety instructions for working with the charger and the battery
Charging must only be carried out with the original Bosch charging stations. Otherwise there is a risk of explosion and fire.
Always check the charging station, charging module, charging cable and plug for damage. If you detect defects, do not use the charging station or charging module. Do not attempt to open the charging station or charging module yourself and have repairs carried out only by qualified technicians using only original spare parts. Damage to the charging station, charging module, charging cable or plug increases the risk of electric shock. Do not use the charging station or charging module on flammable materials (e.g., cardboard, fabric) or in a flammable environment. The time required for a full charge of the battery and the charging module may vary. Monitor the device. This prevents the risk of fire from the charging station, charging module, or electric tool. ▸ Persons who, due to physical, sensory or mental limitations or lack of experience or knowledge, are not able to use the charging station or charging module safely must not operate it without supervision or without instruction by a responsible person. In such cases, there is a risk of incorrect use and injury. The electrical connection for charging must comply with the data specified on the charging module nameplate. In case of use in a building, the charging module must be connected to a socket protected by a residual current device (RCD) with a tripping current of at most 30 mA. Periodically check the proper functioning of the residual current device (RCD). The charging cable must be periodically checked for damage; it may only be used if it is in perfect condition.

If replacement of the charging cable is necessary, this must be carried out by the manufacturer, an authorized service center, or a qualified electrician to prevent hazards to safety. When handling the cable of the charging station and charging module, use only approved cable types. Never touch the plug with wet hands. Do not drive over the charging cable with vehicles, do not pull it or damage it, as you could damage it. Protect the cable from hot objects, oil, and sharp edges.
For safety reasons, the charging module/charging station with protective insulation does not require grounding. The nominal charging voltage is 20 V AC, 50 Hz (for countries outside the EU: 220 V, 240 V depending on the version). You can obtain further information from your specialist dealer or from the manufacturer's service department.
If necessary, consult a qualified electrician or the nearest representative of the manufacturer.
The charging cable must be regularly checked for visible defects and used only if it is in perfect condition.
Symbols
The symbols below are important for reading and understanding the operating instructions.
The symbols and their elements are explained. The correct interpretation of the symbols will help you use the power tool better and more safely.
Symbol
Meaning

Work with both hands

Permitted action

Prohibited action

Accessories
Spare parts
Intended use of the power tool
The power tool is intended for cutting wood in domestic conditions.
Technical data
* Depending on the height of the cut, the type of wood and the humidity
** Protection against splashing water from all sides
The data refer to nominal voltage [U] 230 V. At different voltages, such as those used in some countries, the data may differ.
Attention, pay attention to the type plate on your power tool. The type designation of the power tool may be changed.
Information for use and selection
References for selection are defined according to EN 60335.
The noise levels for the electric tool are typically: sound pressure level 64 dB(A); sound power level 72 dB(A). Uncertainty K = 2.74 dB.
Declaration of Conformity
We declare under our sole responsibility that the product, described in the section 'Technical Data', complies with the requirements of the standards and normative documents: EN 60335 (battery-powered electric tool) and EN 60335 (charging device) according to the requirements of Directives 2011/65/EC, 2006/95/EG, 2004/108/EG, 2006/42/EG, 2000/14/EG.
2000/14/EG: guaranteed sound power level 75 dB(A). Conformity assessment method according to Annex VI.
Product category: 32
Authorized certification organization: SRL, Sudbury, England, Nr. 1088
Technical documentation (2006/42/EO, 2000/14/EO) at:
Bosch Lawn and Garden Ltd., PT-LG/ENS, Stowmarket, Suffolk IP14 1EY, England
Dr. Egbert Schneider Senior Vice President Engineering
Helmut Heinzelmann Head of Product Certification PT/ETM9
Robert Bosch GmbH, Power Tools Division D-70745 Leinfelden-Echterdingen 12.10.2012
Assembly and operation instructions (see pages 3-11)
When using the electric tool, keep it away from the limited area, do not turn it on.
240|Bulgarian
Cartography. Appendix
This is the reverse side of the base. Is there any obstacle? If there is, remove it. The cartography should not be damaged.
Obstacle
Base
Station
The measurement is completed when the measuring instrument reaches the rear side of the charging station.
If the graphic electronic instrument does not reach the set target thickness, press "INTERRUPT". Follow the instructions on the display to stop charging.
When the graphic electronic instrument reaches the set target thickness, press "BASE STATION".
Charging. Connecting
Charging complete
The charging cable is in the base station. You can remove it.
Back
Charging cable

BOSCH
Invented for life
Koche
MeHIO
You can successfully install the device by pressing "Koche" to start the cooking process, or "MeHIO > Selection of graphics" to enter the graphics for cooking.
Safety. The device is not suitable for children.
When the battery is low, the garden tool switches off automatically. The blades must be sharpened.
Programming table
The tables below explain the different elements of the menu.
| Параметер | Оьшениe |
| Насто只得do рбаКосе He | Косе до рббa | Никога | Градинскйт eilektroюнструмент He кosci до рббa. |
| Всеки чевырtn ПБТ | Градинскйт eilektroюнструмents KoscДdo рбба Всеки чевырtn ПБТ. |
| Всеки вторплТ | Градинскйт eilektroюнструмents KoscДdo рбба Всеки вторплТ. |
| Пробок. на trаект. | | Насто只得 Na pa3ctomoneto м exdty trаektopinite Na kosе He |
| Ид сигнал | | Сmarha Na дуг чecтоен канал priп Bьзніквае Na smуценья. |
| Изто只得 Na karptinte | | Градинскйт eilektroюнструмents ono3нава Trpeвнatable пloц呐 ho BO. |
| Уьъванe: Машинату He trябba Da CTOn B 3aprdnata STAHUCY. |
| Опции за сигуност | Пробая Na ПИN | | За Nobtoproн oakTbivapane се'd abTOMatuHNo 6лokиразе и n3kLIOUVAbe поради сьobpaжения за сигунrost e neobxodimo BьvejdaHetO Na ПИN Кoda. |
| АвTomатчно 3aklIOUVAbe | ВкlioquBaHe | БутонITE abTOMATUHNo ce 3akIIOUvBat, akO b\
поблжение Na 3MinHytNi He 6bde habtschat 6byToH. |
| Тази Насто只得 Na ИЗИСКВа пьв БьvejdaHetO Na Stapry ПИN Kod. |
| Изто只得 Na винаги rotOBи 3a BvyBexdahe. | |
| Избор на eзиг | | | Пробая Na e3iKA Na Ддалоговite п探测ци. |
| Системпюци | Насто只得 Na 3bYk 6byToH | | Пробая Na силata Na 3bYKOBnA сигнал Na 6byToHte. |
| Насто只得 Na диспел | Ярков� Na dinCpIe | Насто只得 Na dinCpIe - no-ярьк ilni lo-ТьMeH. |
| Инфорmaци | | Инфорmaци 3a Версида Na coФтуера, серийни homer и поочдно.T copВИЗнɔ obcnilgBXbae. |
| ЗавODSCN
насто只得 | | Врьше Н ra徵нскй eilektroюнструмент КьM 3abODSCNte Habstpoikи n3trPINA BA BCSUKN Haprabeni INdINBIDuaJIH NacStpoIKN. |
| ВрьшаMuTo KaM 3abODSCN Na cactpoikи ИЗССКВа NOBTOPO NHCTaIIIPAhe. |
| Насто只得 Na datasи уас | | | Вьveжданe Na уаси I datata. |
Bulgarian | 243
| Избор на график | | Обсянения |
| Рыно | Информаця | Помошина Информаця за позанeto на РычЕН PEXКМ. |
| Избор | Изберета зи Фунckци, akо не трава за се изпоглесу в график на косе. |
| График 1 - 5 | Пром. | Понеделник рedingатуpe
Вторник рedingатуpe
Сраза рedingатуpe
Чеб耗费 рedingатуpe
Пек専 рedingатуpe
Сбота рedingатуpe
Нededу рedingатуpe |
|
|
|
|
|
|
|
|
|
|
|
|
|
|
|
|
|
|
|
|
|
| Информаць
графник | ОBSTСЕНИЗЕ |
| Информаць
графник | ОБзор на погамирално за косе.
Назад
Овразно Кым Главно Meно. |
| Избор на графник
Извикваце на поимень «Избор на графник». |
When contacting the representatives of Bosch, always quote the 10-digit product number of the garden tool.
In addition, the version of the software of your garden tool is required (see "Menu > Settings > System settings > Information").
Robert Bosch EOOD - Bulgaria
Bosch Service Center
Warranty and out-of-warranty repairs. Terms and conditions.
Tel.: (02) 9601061
Tel.: (02) 9601079
Fax: (02) 9625302
www.bosch.bg
Transport
The rechargeable batteries included in the scope of delivery are covered by the requirements and the relevant documents for products with increased safety. The batteries can be transported by the user on the road without further restrictions.
When transporting by third parties (e.g. by air freight or forwarding agency), special requirements for packaging and labeling must be observed. For this, consult an expert in the relevant field when preparing the shipment.
Disposal
Do not dispose of power tools, chargers and batteries/rechargeable batteries in household waste!
Only for EU countries:

According to the European Directive 2002/96/EC on waste electrical and electronic equipment and according to the European Directive 2006/66/EC on batteries and accumulators,
batteries and accumulators that can no longer be used must be collected separately and disposed of in an environmentally compatible manner for recycling.
Built-in rechargeable batteries may only be removed for disposal. When opening the housing of the power tool, it may be damaged. The disposal of built-in rechargeable batteries may only be carried out by an authorized service center for power tools.
AkymynaTopHN nHn 6HKHOBeHH 6aTePHN:
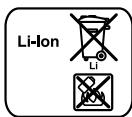
JIHTHEBO-NOHHN:
Mon, cna3BaIte yka3aHnIaTb pa3dela «TpaHcnpToHpAe».
IpaBata 3a n3meHeHH 3ana3eHN.
Serbian
Safety instructions
Attention! Read the following instructions carefully. Familiarize yourself with the working elements and proper use of the garden tool. Please keep the operating instructions safe for later use.
Explanation of symbols on the garden tool

General danger instruction. Make sure that no outlets are blocked or closed through the garden tool.

Warning: Read the operating instructions before starting the garden tool.

Warning: Activate the shut-off device before starting work on the garden tool or lifting the garden tool.

Caution: Do not touch rotating blades. The blades are sharp. Be careful not to lose fingers on your feet and hands.

Wait until all parts of the garden tool have stopped before touching them. The blades continue to rotate for some time after the garden tool is switched off and can also cause injuries.

Take care that people standing nearby are not injured by thrown foreign objects.

Warning: Maintain a safe distance from the garden tool when it is running.

Do not ride on the garden tool.

Technical documentation (2006/42/EG, 2000/14/EG) at: Bosch Lawn and Garden Ltd., PT-LG/ENS, Stowmarket, Suffolk IP14 1EY, England
Dr. Egbert Schneider Senior Vice President Engineering
Helmut Heinzelmann Head of Product Certification PT/ETM9
Robert Bosch GmbH, Power Tools Division D-70745 Leinfelden-Echterdingen 12.10.2012
Explanation of figures for installation (see pages 3-11)
| Cilj rukovanja | Slika |
| Obim isporuke / raspakivanje bašenskog uredjaja | 1 |
| Poziccioniranje uredjaja za punjenje | 2 – 3 |
| Graničnu Žiću sprovesti kroz podnu ploću | 4 |
| Priključiti prvi kraj granovične Žice | 5 |
| Pričvrstiti uredjaj za punjenje na PODU | 6 |
| Postavite granovičnu Žiću | 7 |
| Priključiti drugi kraj granovične Žice | 8 |
| Stavite zašitnu haubu na uredjaj za punjenje | 9 |
| Priključiti uredjaj za snabdevanje strujom | 10 |
| Uredjaj za punjenje signalizira mrežni napon
UKLJUCENO | 11 |
| Umetnuti prekidač strujnog kruga | 12 |
| Staviti bašenski uredjaj za punjenje u uredjaj za
punjenje | 13 |
Serbian|249
| Cilj rukovanja | Slika |
| „Dobro došli“-Ekran, pogledaje tekst u uputstvu za rad | 14 |
| Podić i nositi bašenski uredjav | 15 |
| Podesiti visinu sećenja | 16 |
| Čišćenje | A |
| Održavanje | B |
Preparing the lawn
Remove stones, loose wooden pieces, wires, live power supply cables, and other foreign objects from the area to be mowed.
Make sure that the mowing area is flat and does not present any obvious obstacles for the garden tool, such as depressions, channels, and slopes over 20 degrees.
Please always quote the 10-digit item number from the type plate of the garden tool for all inquiries and when ordering spare parts.
Bosch Lawn and Garden Ltd., PT-LG/ENS,
Stowmarket, Suffolk IP14 1EY, England
Dr. Egbert Schneider
Senior Vice President
Engineering
Helmut Heinzelmann
Head of Product Certification
PT/ETM9

Robert Bosch GmbH, Power Tools Division
D-70745 Leinfelden-Echterdingen
12.10.2012
Bosch Lawn and Garden Ltd., PT-LG/ENS,
Stowmarket, Suffolk IP14 1EY, England
Dr. Egbert Schneider
Senior Vice President
Engineering
Helmut Heinzelmann
Head of Product Certification PT/ETM9

Robert Bosch GmbH, Power Tools Division
D-70745 Leinfelden-Echterdingen
12.10.2012
270 | Croatian
For all inquiries and orders for spare parts, please always provide the 10-digit catalog number from the type plate of the garden tool.
Additionally, the software version of your garden tool is required (see "Menu > Settings > System options > Information").
Croatian
Robert Bosch d.o.o
Kneza Branimira 22
10040 Zagreb
Tel.: (01) 2958051
Fax: (01) 2958050
Transport
The lithium-ion batteries installed in the power tool are subject to the regulations for the transport of dangerous goods. The user can transport the batteries by road without any further requirements. If transport is carried out by a third party (e.g., by air freight or forwarding agent), special requirements regarding packaging and labeling must be observed. When preparing such shipments for transport, prior consultation with a specialist for the transport of dangerous goods is required.
Disposal
Do not dispose of garden tools, chargers, and batteries in household waste!
Do not dispose of garden appliances, chargers, and the battery/batteries in household waste!
Only for EU countries:
Bosch Lawn and Garden Ltd., PT-LG/ENS,

Stowmarket, Suffolk IP14 1EY, England
Dr. Egbert Schneider Senior Vice President Engineering
Dr. Egbert Schneider Senior Vice President Engineering
Head of Product Certification PT/ETM9
i. V. h = ml _____
Robert Bosch GmbH, Power Tools Division
D-70745 Leinfelden-Echterdingen
D-70745 Leinfelden-Echterdingen
12.10.2012
The following sensors are installed:
www.bosch-garden.com
2006/95/EK, 2004/108/EK, 2006/42/EK and 2000/14/EK.
Directive 2000/14/EK: guaranteed sound power level is 75 dB(A). Conformity is assessed in accordance with Annex VI.
Product category: 32
Test location:
SRL, Sudbury, England, No. 1088
Technical file (2006/42/EK, 2000/14/EK) from:
Bosch Lawn and Garden Ltd., PT-LG/ENS,
Stowmarket, Suffolk IP14 1EY, England
Dr. Egbert Schneider
Senior Vice President
Engineering
Helmut Heinzelmann
Head of Product Certification
PT/ETM9
PA · PB = PA · PD = PB · PD
Robert Bosch GmbH, Power Tools Division
D-70745 Leinfelden-Echterdingen
12.10.2012
Latviešu | 291
When requesting consultation and ordering spare parts, please be sure to state the ten-digit order number indicated on the nameplate of the garden tool.
In addition, it is necessary to specify the garden tool software version (see path "Menu > Settings
System settings > Information"
Republic of Latvia
Robert Bosch SIA
Bosch power tool service center
Dzelzaviai120S
LV-1021 Riga
Tel.: 67146262
Fax: 67146263
E-mail: service-pt@lv.bosch.com
Transport
Bosch Lawn and Garden Ltd., PT-LG/ENS,
Stowmarket, Suffolk IP14 1EY, England
Dr. Egbert Schneider Senior Vice President Engineering
Helmut Heinzelmann
Head of Product Certification
PT/ETM9
PA · PB
Robert Bosch GmbH, Power Tools Division
D-70745 Leinfelden-Echterdingen
12.10.2012