CombiTurbo 281277 - Oven Hendi - Free user manual and instructions
Find the device manual for free CombiTurbo 281277 Hendi in PDF.

| Product type | High-speed CombiTurbo oven |
| Brand | Hendi |
| Model | 281277 |
| Intended use | Commercial (restaurant kitchens, canteens, hospitals) |
| Cooking modes | Microwave, convection, combination |
| Temperature range | 93 °C to 275 °C |
| Temperature accuracy | Custom preheating, step adjustment |
| Number of cooking steps | Up to 3 steps per recipe |
| Special functions | ECO mode, automatic recipes, Chef customization |
| Included accessories | Pizza stone, Teflon coatings, paddle, clip, perforated basket, grill, full bottom tray |
| Interior lighting | Yes, bulb replaceable by a technician |
| Display | TFT touch screen |
| Connectivity | USB port for updates and recipes |
| Safety | Thermal cut-off (RESET button), grounding, microwave safety |
| Maintenance | Regular cleaning; no steam cleaner or dishwasher |
| Repairability | Repairs by qualified personnel only |
| Warranty | 1 year (operational defects) |
Frequently Asked Questions - CombiTurbo 281277 Hendi
User questions about CombiTurbo 281277 Hendi
0 question about this device. Answer the ones you know or ask your own.
Ask a new question about this device
Download the instructions for your Oven in PDF format for free! Find your manual CombiTurbo 281277 - Hendi and take your electronic device back in hand. On this page are published all the documents necessary for the use of your device. CombiTurbo 281277 by Hendi.
USER MANUAL CombiTurbo 281277 Hendi
GB: Read user manual and keep this with the appliance.
GB: For indoor use only.
natural_image
Simple line drawing of a wine glass with a fork (no text or symbols)

GB: NOTE: This manual is translated from original English manual using AI and machine translations.
2
natural_image
Plain gray textured surface with no visible text, symbols, or distinct features
9 10 11 12
13 14 15
3
4
5
6
7
8
9
10

11 12

natural_image
Interior view of a laboratory incubator with circular cavities and a rectangular chamber (no visible text or symbols)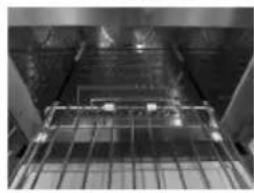
natural_image
Interior view of a stainless steel oven with metal grating and ventilation grilles (no visible text or symbols)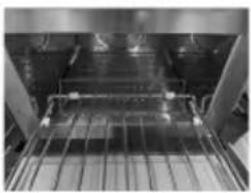
natural_image
Interior view of a stainless steel industrial machine with cooling fins and internal structure (no visible text or symbols)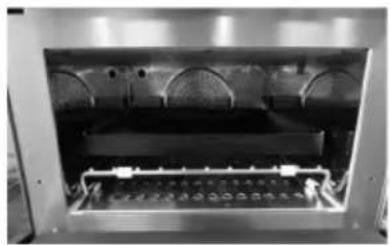
natural_image
Interior view of a stainless steel industrial machine with circular components and a rectangular tray (no visible text or symbols)13 1
natural_image
Interior view of a stainless steel industrial machine with internal structural components (no visible text or symbols)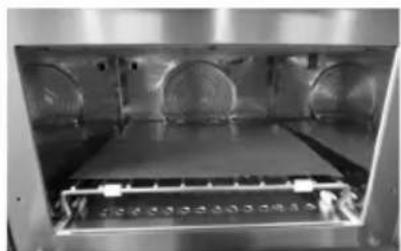
natural_image
Interior view of a stainless steel industrial furnace or reactor chamber with circular cavities and a rectangular chamber (no visible text or symbols)15 1
natural_image
Interior view of a laboratory incubator with cooling unit and perforated chamber (no visible text or symbols)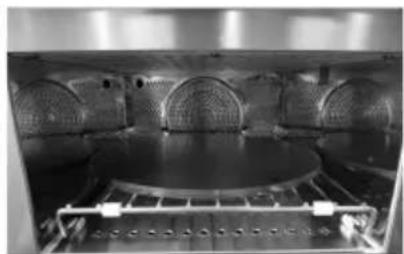
natural_image
Interior view of a large industrial furnace or reactor with circular chambers and a central platform (no visible text or symbols)17
natural_image
Close-up of metallic perforated metal surfaces with rivets and holes (no text or symbols visible)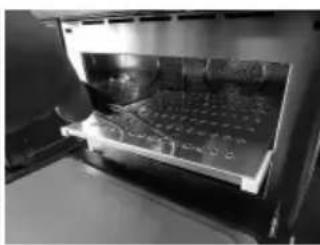
natural_image
Interior view of a laboratory or industrial chamber with a perforated tray and transparent casing (no visible text or symbols)
natural_image
Close-up of a hand using a tool to cut or mark a metallic component with visible internal markings (no text or symbols)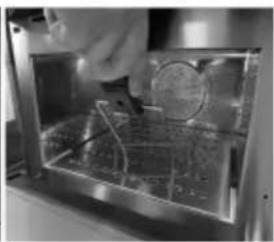
natural_image
Interior view of a stainless steel laboratory apparatus with internal components (no visible text or symbols)18
natural_image
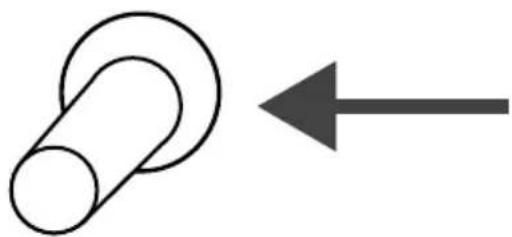
Simple line drawing of a cylindrical object with a curved ring and an arrow pointing left (no text or symbols)GB: Location guideline / DE: Standorthinweise / NL: Locatierichtlijn / PL: Wytyczne dotyczące lokalizacji / FR: Consignes de positionnement / IT: Linee guida per la posizione / RO: Ghid amplasare / GR: Однүйес топовётпонс / HR: Smjernice za lokaciju / CZ: Pokyny pro umístění / HU: Hely nyomvonala / UA: Рекомендації щодо місця розташування / EE: Asukoha juhis / LV: Atrašanās vietas vadlīnijas / LT: Vietos gairès / PT: Diretriz de localização / ES: Directrices de ubicación / SK: Smernica o polohe / DK: Retningslinjer for placering / FI: Sijainnin ohjeet / NO: Retningslinjer for plassering / SI: Navodila za lokacijo / SE: Riktlinjer för placering / BG: Насоки за местоположение / RU: Рекомендации по размещению

GB: Technical specifications / DE: Technische Angaben / NL: Technische gegevens / PL: Dane techniczne / FR: Données techniques / IT: Parametri di base / RO: Parametrii de bază / GR: Baoukéç paráµetrot / HR: Tehnički podaci / CZ: Technická specifikace / HU: Műszaki adatok / UA: Texníční характеристики / EE: Tehnilised andmed / LV: Tehniskás specifikacijas / LT: Techninés specifikacijos / PT: Especificações técnicas / ES: Especificaciones técnicas / SK: Technické špecifikácie / DK: Tekniske specifikationer / FI: Tekniset tiedot / NO: Tekniske spesifikasjoner / SI: Tehnične specifikacije / SE: Tekniska specifikationer / BG: Texнически спецификации / RU: Texнические данные
| A 281277 | |
| B 230V ~ 50Hz / 230B ~ 50Гц | |
| C 1600W / Вт | |
| D 1000W / Вт | |
| E 2700W / Вт | |
| F 3000W | |
| G IPX3 | |
| H 18.7 L | |
| I 2450 MHz | |
| J 10 minutes per stage, Total 6 stages | |
| K | 93°C - 275°C |
| L | I |
| M 402x735x(H)608 mm / мм | |
| N 60.5 kg / кг | |
A: GB: Item no. / DE: Art.-Nr. / NL: Artikelnr. / PL: Nr pozycji / FR: N° d'article / IT: N. articolo / RO: Nr. articolului/ GR: Ap. εiðouç / HR: Broj stavke / CZ: Položka č. / HU: Cikkszám / UA: Номер елемента / EE: Artikli nr / LV: Vienums Nr. / LT: Prekès Nr. / PT: Item n.o / ES: N.o de artículo / SK: Č. položky / DK: Varenr. / FI: Kohteen nro / NO: Varenr. / SI: Št. izdelka / SE: Art.nr / BG: Номер на елемент / RU: Номер позиции
B: GB: Rated voltage and frequency / DE: Nennspannung und Frequenz / NL: Nominale spanning en frequentie / PL: Znamionowe napięcie i częstotliwość / FR: Tension et fréquence nominales / IT: Tensione e frequenza nominali / RO: Tensiune nominală și frecvență / GR: Ovojaotikn táon kai ouxvótnta / HR: Nazivni napon i frekvencija / CZ: Jmenovité napětí a frekvence / HU: Névleges feszültség és frekvencia / UA: Номінальна напруга та частота / EE: Nimipinge ja -sagedus / LV: Nominālais spriegums un frekvence / LT: Vardinė jtampa ir dažnis / PT: Tensão e frequência nominais / ES: Tensión y frecuencia nominales / SK: Menovité napätie a frekvencia / DK: Nominel spænding og frekvens / Fl: Nimellisjännite ja -taajuus / NO: Nominell spenning og frekvens / SI: Nazivna napetost in frekvenca / SE: Märkspänning och frekvens / BG: Номинално напрежение и честота / RU: Номинальное напряжение и частота
C: GB: Rated input power (Microwave) / DE: Nenneingangsleistung (Mikrowelle) / NL: Nominaal ingangsvermogen (Microgolf) / PL: Znamionowa moc wejściowa (Mikrofalówka) / FR: Puissance d'entrée nominale (Micro-ondes) / IT: Potenza nominale in ingresso (Microonde) / RO: Putere nominală de intrare (Microunde) / GR: Ovojoaotikn iɔxúç εισόδου (Микрокúpata) / HR: Nazivna ulazna snaga (mikroval) / CZ: Jmenovitý vstupní výkon (Mikrovlna) / HU: Névleges bemeneti teljesítmény (Mikrohullám) / UA: Номінальна вхідна потужність (Microwave) / EE: Nimisisendvõimsus (Microwave) / LV: Nominālā ieejas jauda (Mikroviņi) / LT: Vardinė jėji-mo galia (mikrobanga) / PT: Potência de entrada nominal (Micro-ondas) / ES: Potencia de entrada nominal (Microondas) / SK: Menovitý vstupný výkon (Mikronáv) / DK: Nominel indgangseffekt (Mikrobølge) / FI: Nimellistuloteho (Mikroaalto) / NO: Nominell inngangseffekt (Mikrobølge) / SI: Nazivna vhodna moč (mikrovalov) / SE: Märkineffekt (Mikrowave) / BG: Номинална входяща мощност (Микровълнова) / RU: Номинальная входная мощность (Микроволновая волна)
D: GB: Rated output power (Microwave) / DE: Nennausgangsleistung (Mikrowelle) / NL: Nominaal uitgangsvermogen (microgolf) / PL: Znamionowa moc wyjściowa (mikrofalówka) / FR: Puissance de sortie nominale (micro-ondes) / IT: Potenza nominale in uscita (Microonde)/ RO: Putere nominală de ieşire (Microunde) / GR: Ovojaotikn ioxuç εξόδου (μικροκύματα) / HR: Nazivna izlazna snaga (mikroval) / CZ: Jmenovitý výstupní výkon (mikrovlna) / HU: Névleges kimeneti teljesítmény (mikrohullámú) / UA: Номінальна вихідна потужність (Microwave) / EE: Nimivõimsus (Microwave) / LV: Nominālā izejas jauda (mikroviļni) / LT: Vardinė išėjimo galia (mikrobanga) / PT: Potência nominal de saída (Microondas) / ES: Potencia de salida nominal (microondas) / SK: Menovitý výstupný výkon (mikrovlny) / DK: Nominel udgangseffekt (mikrobølge) / FI: Nimellinen lähtöteho (mikroaalto) / NO: Nominell utgangseffekt (mikrobølge) / SI: Nazivna izhodna moč (mikrovalov) / SE: Nominell uteffekt (mikrovågsugn) / BG: Номинална изходна мощност (Microwave) / RU: Номинальная выходная мощность (Microwave)
E: GB: Rated input power (Convection) / DE: Nenneingangsleistung (Umleitung) / NL: Nominaal ingangsvermogen (convectie) / PL: Znamionowa moc wejściowa (konwekcja) / FR: Puissance d'entrée nominale (convection) / IT: Potenza nominale in ingresso (convezione) / RO: Putere de intrare nominală (Convectie) / GR: Ovoportikn ioxúc εισόδου (Συναγωγή) / HR: Nazivna ulazna sna-ga (konvekcija) / CZ: Jmenovitý vstupní výkon (konvekce) / HU: Névleges bemeneti teljesítmény (konvekciós) / UA: Номінальна вхідна потужність (конвекция) / EE: Hinnatud sisendvõimsus (konvektsioon) / LV: Nominālā ieejas jauda (konvekcija) / LT: Vardinė įvesties galia (konvekcijos) / PT: Potência de entrada nominal (Convecção) / ES: Potencia de entrada nominal (convección) / SK: Menovitý príkon (konvekcia) / DK: Nominel indgangseffekt (konvektion) / FI: Nimellistuloteho (kiertoilma) / NO: Nominell inngangseffekt (konveksjon) / SI: Nazivna vhodna moč (konvekcija) / SE: Nominell ingångseffekt (konvektion) / BG: Номинална входна мощност (конвекция) / RU: Номинальная входная мощность (конвекция)
F: GB: Rated input power (Max.) / DE: Nenneingangsleistung (max.) / NL: Nominaal ingangsvermogen (max.) / PL: Znamionowa moc wejściowa (maks.) / FR: Puissance d'entrée nominale (max.) / IT: Potenza nominale in ingresso (max.) / RO: Putere de intrare nominală (Max.) / GR: Ovojaotikn ioxuç eisobou (Méy.) / HR: Nazivna ulazna snaga (maks.) / CZ: Jmenovitý vstupní výkon (max.) / HU: Névleges bemeneti teljesítmény (max.) / UA: Номінальна вхідна потужність (макс.) / EE: Hinnatud sisendvõimsus (max) / LV: Nominālā ieejas jauda (maks.) / LT: Vardinė jvesties galia (maks.) / PT: Potência nominal de entrada (máx.) / ES: Potencia de entrada nominal (máx.) / SK: Menovitý príkon (max.) / DK: Nominel indgangseffekt (maks.) / FI: Nimellinen tuloteho (maks.) / NO: Nominell inngangseffekt (maks.) / SI: Nazivna vhodna moč (največ) / SE: Märkeffekt (max.) / BG: Номинална входна мощност (макс.) / RU: Номинальная входная мощность (макс.)
G: GB:Waterproof protection rating / DE:Wasserdichtigkeitsschutzklasse / NL:Beschermingsgraad tegen water / PL:Klasa wodoodporności / FR:Indice de protection étanche / IT:Grado di protezione impermeabile / RO:Clasificare protectie impermeabilä / GR:Baθμός αδιάβροχης προστασίας / HR:Vodootporna zaštita / CZ:Odolnost proti vodě / HU:Vízálló védelmi besorolás / UA:Рейтинг водонепроникности / EE:Veekindluse kaitseaste / LV:Üdensnecaurlaidības klase / LT:Apsaugos nuo vandens klasé / PT:Classificação de proteção à prova de água / ES:Grado de impermeabilidad / SK:Stupeň ochrany proti vode / DK:Vandtæt beskyttelsesklassificering / FI:Vedenpitävä suojausluokitus / NO:Vanntett beskyttelsesklassifisering / SI:Stopnja zaščite pred vodorom vode / SE:Vattentät skyddsklassning / BG:Kлас на водоустойчивост / RU:Рейтинг водонепроницаемости
H: GB: Oven cavity capacity / DE: Volumen der Kammer der Mikrowelle / NL: Capaciteit ovenruimte / PL: Pojemność komory kuchenki / FR: Capacité du compartiment du four / IT: Capacità del compartimento del forno / RO: Capacitatea cuvei cuptorului / GR: Хпрптикóтпа коілótпає фоїрвов / HR: Kapacitet unutrašnjosti pećnice / CZ: Kapacita vnitřku trouby / HU: Sütőtér kapacitása / UA: Емність камери духової шафи / EE: Ahjuðõne maht / LV: Cepeškrāsns tilpnes ietilpība / LT: Orkaitės ertmės talpa / PT: Capacidade da cavidade do forno / ES: Capacidad de la cavidad del horno / SK: Objem dutiny rúry / DK: Ovnrumskapacitet / FI: Uunin sisätilan tilavuus / NO: Kapasitet ovnsrom / SI: Zmogljivost pečice / SE: Ugnens kapacitet / BG: Капацитет на кухината на фурната / RU: Ёмкость камеры печи
I: GB: Microwave operation frequency / DE: Mikrowellen-Betriebsfrequenz / NL: Werkingsfrequentie magnetron / PL: Częstotliwość pracy kuchenki mikrofalowej / FR: Fréquence de fonctionnement du micro-ondes / IT: Frequenza di funzionamento microonde / RO: Frecvență de functionare microunde / GR: Συχνότητα λειτουργίας μικροκυμάτων / HR: Učestalost rada mikrovalne pećnice / CZ: Frekvence provozu mikrovlnné trouby / HU: Mikrohullámú működés frekvenciája / UA: Частота роботи мікрохвильової печі / EE: Mikrolaineahju kasutamise sagedus / LV: Mikrovilņu darbības frekvence / LT: Mikrobangų veikimo dažnis / PT: Frequência de funcionamento do microondas / ES: Frecuencia de funcionamiento del microondas / SK: Frekvencia prevádzky mikrovlnnej rúry / DK: Mikrobølgedriftsfrekvens / FI: Mikroaaltotoiminnon taajuus / NO: Mikrobølgedriftsfrekvens / SI: Pogostost delovanja mikrovalov / SE: Mikrovågsugnens driftsfrekvens / BG: Честота на работа на микровълновата фурна / RU: Частота работы микроволновой печи
J: GB:Time settings (10 minutes per stage, Total 6 stages) / DE: Zeiteinstellungen (10 Minuten pro Phase, insgesamt 6 Phasen) / NL: Tijdinstellingen (10 minuten per fase, totaal 6 fasen) / PL: Ustawienia czasu (10 minut na etap, łącznie 6 etapów) / FR: Réglages du temps (10 minutes par étape, total de 6 étapes) / IT: Impostazioni di tempo (10 minuti per fase, Totale 6 fasi) / RO: Setări timp (10 minute per etapă, total 6 etape) / GR: Puθμίσεις χρόνου (10 λεπτὰ ανὰ στάδιο, συνολικά 6 στάδιο) / HR: Postavke vremena (10 minuta po fazi, ukupno 6 faza) / CZ: Nastavení času (10 minut na fázi, celkem 6 fází) / HU: Időbeállítások (10 perc szakaszonként, összesen 6 szakasz) / UA: Налаштування часу (10 хвилин на етап, всього 6 etanів) / EE: Aja sätted (10 minutit etapi kohta, kokku 6 etappi) / LV: Laika iestatījumi (10 minūtes katrā posmā, kopā 6 posmi) / LT: Laiko nuostatos (10 minučių viename etape, iš viso 6 etapai) / PT: Definições de tempo (10 minutos por fase, Total de 6 fases) / ES: Ajustes de tiempo (10 minutos por etapa, 6 etapas en total) / SK: Nastavenia času (10 minút na fázu, spolu 6 fáz) / DK: Tidsindstillinger (10 minutter pr. trin, i alt 6 trin) / FI: Aika-asetukset (10 minuuttia per vaihe, yhteensä 6 vaihetta) / NO: Tidsinnstillinger (10 minutter per trinn, totalt 6 trinn) / SI: Nastavitve časa (10 minut na stopnjo, skupno 6 stopenj) / SE: Tidsinställningar (10 minuter per steg, totalt 6 steg) / BG: Настройки на времето (10 минути на етап, общо 6 етапа) / RU: Настройки времени (10 минут на этап, всего 6 этапов)
K: GB: Temperature settings / DE: Temperatur-Einstellungen / NL: Temperatuur instellingen / PL: Ustawienia temperatury / FR: Réglages de température / IT: Impostazioni della temperatura / RO: Setări de temperatură / GR: Puthuõeis θερμοκρασίας / HR: Postavke temperature / CZ: Nastavení teploty / HU: Hõmérséklet-beállítások / UA: Налаштування температури / EE: Temperatuurisätted / LV: Temperatūras iestatijumi / LT: Temperatūros nuostatos / PT: Definições de temperatura / ES: Ajustes de temperatura / SK: Nastavenie teploty / DK: Temperaturindstillinger / FI: Lämpötila-asetukset / NO: Temperaturinnstillinger / SI: Nastavitve temperature / SE: Temperaturinställningar / BG: Настройки на температурата / RU: Настройки температуры
L: GB: Protection class (Class) / DE: Schutzklasse (Klasse) / NL: Beschermingsklasse (klasse) / PL: Klasa ochrony (klasa) / FR: Classe de protection (classe) / IT: Classe di protezione (classe) / RO: Clasă de protectie (clasă) / GR: Kláon proostasiaç (katnyopia) / HR: Klasa zaštite (klasa) / CZ: Třída ochrany (třída) / HU: Védelmi osztály (osztály) / UA: Клас захисту (клас) / EE: Kaitseklass (klass) / LV: Aizsardzības klase (klase) / LT: Apsaugos klasè (klasè) / PT: Classe de proteção (classe) / ES: Clase de protección (clase) / SK: Trieda ochrany (trieda) / DK: Beskyttelsesklasse (klasse) / FI: Suojausluokka (luokka) / NO: Beskyttelsesklasse (klasse) / SI: Razred zaščite (razred) / SE: Skyddsklass (klass) / BG: Клас на защита (Клас) / RU: Класс защиты (класс)
M: GB: Dimensions / DE: Abmessungen / NL: Afmetingen / PL: Wymiary / FR: Dimensions / IT: Dimensioni / RO: Dimensiuni / GR: Διαστάσεις / HR: Dimenzije / CZ: Rozměry / HU: Méretek / UA: Розміри / EE: Möötmed / LV: Izmēri / LT: Matmenys / PT: Dimensões / ES: Dimensiones / SK: Rozmery / DK: Mål / FI: Mitat / NO: Mål / SI: Mere / SE: Mått / BG: Размери / RU: Размеры
N: GB: Net weight / DE: Nettogewicht / NL: Nettogewicht / PL: Waga netto / FR: Poids net / IT: Peso netto / RO: Greutate netă / GR: Kaθαρὸ Bάρος / HR: Neto težina / CZ: Čistá hmotnost / HU: Nettó tömeg / UA: Bara нетто / EE: Netokaal / LV: Neto svars / LT: Grynasis svoris / PT: Peso líquido / ES: Peso neto / SK: Čistá hmotnosť / DK: Nettovægt / FI: Nettopaino / NO: Nettovekt / SI: Neto teža / SE: Nettovikt / BG: Нетно тегло / RU: Вес нетто
GB: Remark: Technical specification is subjected to change without prior notification.
Thank you for purchasing this HENDI appliance. Read this user manual carefully, paying particular attention to the safety regulations outlined below, before installing and using this appliance for the first time.
Safety instructions
- Only use the appliance for the intended purpose it was designed for, as described in this manual.
- The manufacturer is not liable for any damage caused by incorrect operation and improper use.
- DANGER! RISK OF ELECTRIC SHOCK! Do not attempt to repair the appliance by yourself. Do not immerse the electrical parts of the appliance in water or other liquids. Never hold the appliance under running water.
- NEVER USE A DAMAGED APPLIANCE! Check the electrical connections and cord regularly for any damage. When damaged, disconnect the appliance from the power supply. Any repairs should only be carried out by a supplier or qualified person to avoid danger or injury.
- WARNING! When positioning the appliance, route the power cable safely if necessary to avoid unintentional pulling, being damaged, coming into contact with the heating surface, or causing a tripping hazard.
- WARNING! As long as the plug is in the socket the appliance is connected to the power supply.
- WARNING! ALWAYS switch off the appliance before disconnecting from the power supply, cleaning, maintenance or storage.
- Only connect the appliance to an electrical outlet with the voltage and frequency mentioned on the appliance label.
- Do not touch the plug/electrical connections with wet or damp hands.
- Keep the appliance and electrical plug/connections away from water and other liquids. If the appliance falls into water, remove the power supply connections immediately. Do not use the appliance until it has been checked by a certified technician. Failure to follow these instructions will cause life threatening risks.
- Connect the power supply into an easily accessible electrical outlet so you can disconnect the appliance immediately in case of emergency.
- Make sure the cord does not come in contact with sharp or hot objects and keep it away from open fire. Never pull the power cord to unplug it from the socket, always pull the plug instead.
- Never carry the appliance by its cord.
- Never try to open the housing of the appliance yourself.
- Do not insert objects into the housing of the appliance.
- Never leave the appliance unattended during use.
- This appliance should be operated by trained personnel in kitchen of the restaurant, canteens or bar staff, etc.
- This appliance should not be operated by persons with reduced physical, sensory or mental capabilities, or persons that have a lack of experience and knowledge.
- This appliance should, under any circumstances, not be used by children.
- Keep the appliance and its electrical connections out of reach of children.
- Never use accessories or any extra devices other than those supplied with the appliance or recommended by the manufacturer. Failure to do so could pose a safety risk to the user and could damage the appliance. Only use original parts and accessories.
- Do not operate this appliance by means of an external timer or remote-control system.
- Do not place the appliance on a heating object (gasoline, electric, charcoal cooker, etc.).
- Do not cover the appliance in operation.
- Do not place any objects on top of the appliance.
- Do not use the appliance near any open flames, explosive or flammable materials. Always operate the appliance on a horizontal, stable, clean, heat-resistant and dry surface.
- The appliance is not suitable for installation in an area where a water jet could be used.
- Leave a space of at least 20 cm around the appliance for ventilation during use.
- WARNING! Keep all ventilation openings on the appliance free from obstruction.
Special safety instructions
- CANTION! RISK OF BURNS! HOT SURFACES! The temperature of the accessible surfaces could be very high during use. Touch only the control panel, handles, switches, timer control knobs or temperature control knobs.
- An equipotential bonding terminal is provided to allow cross bonding with other equipment.
- WARNING! Fat and oil become very hot during operation. Beware of this.
- If the supply cord is damaged, it must be replaced by the manufacturer, its service agent or similarly qualified persons in order to avoid a hazard.
- WARNING! If the door or door seals are damaged, the oven must not be operated until it has been repaired by a competent person.
- WARNING! It is hazardous for anyone other than a competent person to carry out any service or repair operation that involves the removal of any cover which gives protection against exposure to microwave energy.
- WARNING! Liquids or other foods must not be heated in sealed containers since they are liable to explode.
- WARNING! Microwave heating of beverages can result in delayed eruptive boiling, therefore care must be taken when handling the container.
- WARNING! The contents of feeding bottles and baby food jars must be stirred or shaken and the temperature checked before consumption, in order to avoid burns;
- DO NOT open the door during operation, it will cause microwave exposure.
- Only use utensils that are suitable for use in microwave ovens.
- When heating food in plastic or paper containers, keep an eye on the oven due to the possibility of ignition.
- If smoke is observed, switch off or unplug the appliance and keep the door closed in order to stifle any flames.
- Eggs in their shell and whole hard-boiled eggs should not be heated in microwave function since they may explode even after microwave heating has ended.
- WARNING! DO NOT USE MICROWAVE FUNCTION IF NO FOOD IS PUT INTO OVEN CHAMBER.
Intended use
- This appliance is intended to be used for commercial applications, for example in kitchens of restaurants, canteens, hospitals and in commercial enterprises such as bakeries, butcheries, etc., but not for continuous mass production of food.
- Operating the appliance for any other purpose shall be deemed a misuse of the device. The user shall be solely liable for improper use of the device.
Grounding installation
This appliance is classified as protection class I and must be connected to a protective ground. Grounding reduces the risk of electric shock by providing an escape wire for the electric current.
This appliance is fitted with a power cord with grounding plug or electrical connections with grounding wire. The connections must be properly installed and grounded.
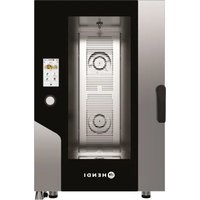
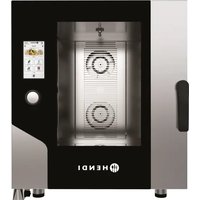
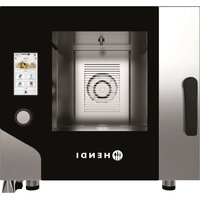
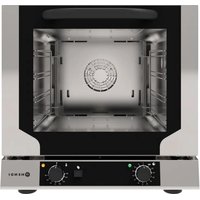
Main parts of the product
(Fig.1 on page 3)
- ON/OFF switch
- Control panel
- USB port
- Air outlets
- Door
- Door handle
- Cavity
- Lower jetplate
Remark: The content of this manual applies for all listed items unless specified otherwise. The appearance may vary from the shown illustrations.
Spare parts or accessories
(Fig.2 on page 3)
-
Pizza stone
-
Teflon Liners
-
Shovel
-
Clip
-
Teflon coated perforated base basket
-
Grill
-
Teflon coated solid bottom tray
Preparation before use
- Remove all protective packaging and wrapping.
- Check that the device is in good condition and with all accessories. In case of incomplete or damaged delivery, please contact the supplier immediately. In this case, do not use the device.
- Clean the accessories and the appliance before use (See ==> Cleaning & Maintenance).
- Make sure the appliance is completely dry.
- Place the appliance on a horizontal, stable and heat resistant surface that is safe against water splashes.
- Keep the packaging if you intend to store your appliance in the future.
- Keep the user manual for future reference.
NOTE! Due to manufacturing residues, the appliance may emit a light odor during the first few uses. This is normal and does not indicate any defect or hazard. Make sure the appliance is well ventilated.
Operating instructions
Start-up Preheating
1.) Press the ON/OFF switch.
2.) Preheat temperature can be customized to choose, "149°C", "204°C", "260°C" or press "Another TEMP" or "No Preheat", custom preheat temperature, temperature range is 93°C \~ 275°C.
3.) If you want to cancel the preheating, click "CANCEL", "Cancel the preheating" will display and then click "YES" to confirm. Do not preheat, enter the automatic recipe interface. In the preheated state, temperature not reached can not click "OK / START" to start cooking.
4.) Click the temperature value, jump directly to the preheating interface, display the preheat progress percentage, preheat complete, please put in the food, click "OK/START" to enter the automatic recipe interface.
Automatic Recipe Operation
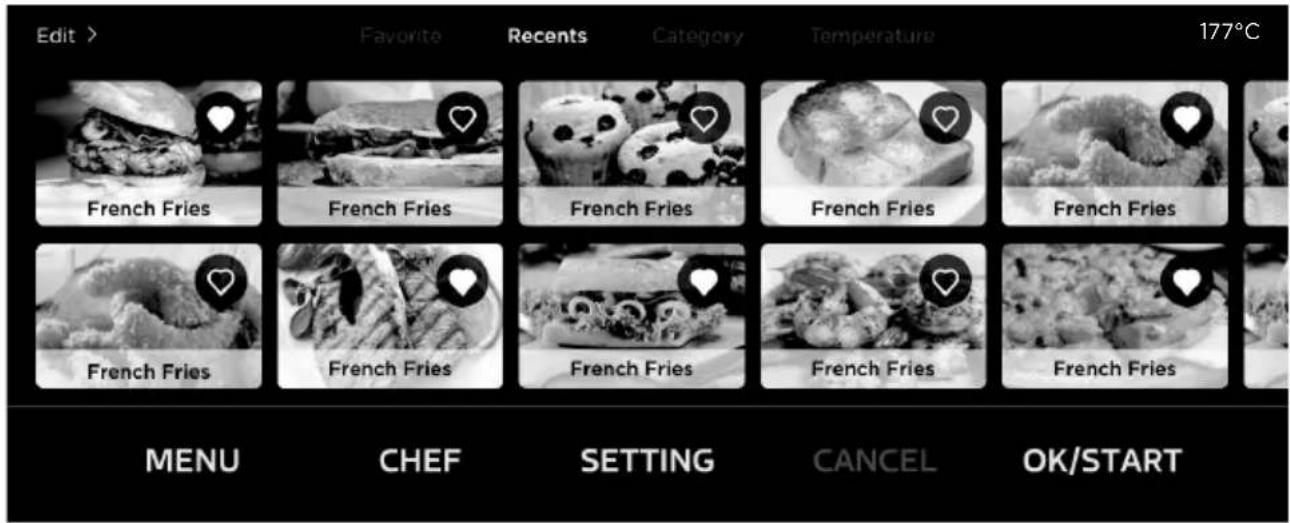
(Fig.3 on page 4)
1.) Since the default recipe list is empty, there are no recipes displayed on this interface. Users can add recipes via a USB drive or the chef function. (General users are not allowed to open the USB cover by themselves; it must be done by professional personnel.)
2.) In the automatic recipe interface, you can choose recipe from "Favorite", "Recents", "Category", and "Temperature".
3.) Click the heart icon on the recipe image to add the recipe to your "Favourite".
4.) Click on "Category" to display all recipes by category. You can choose the desired recipes based on different categories.
5.) Click on "Temperature" to display all recipes categorized by temperature range. You can choose the desired recipes based on different temperature ranges.
6.) Click "Edit", enter the password, and then click "OK / START" to enter the recipe editing interface (the universal password is "FLASHCHEF").
7.) In the recipe editing interface, the added recipes will be displayed, and you can click "-" to delete a recipe. Click "Add More" to add recipes from the factory recipe library. And click "Parameter Edit" to enter the recipe parameter editing interface.
8.) After entering the automatic recipe interface, click on the desired recipe. If the cavity temperature has not reached the required preheating temperature, click "OK / START" to start preheating. Once preheating is complete, place the food inside and click "OK / START" to start cooking.
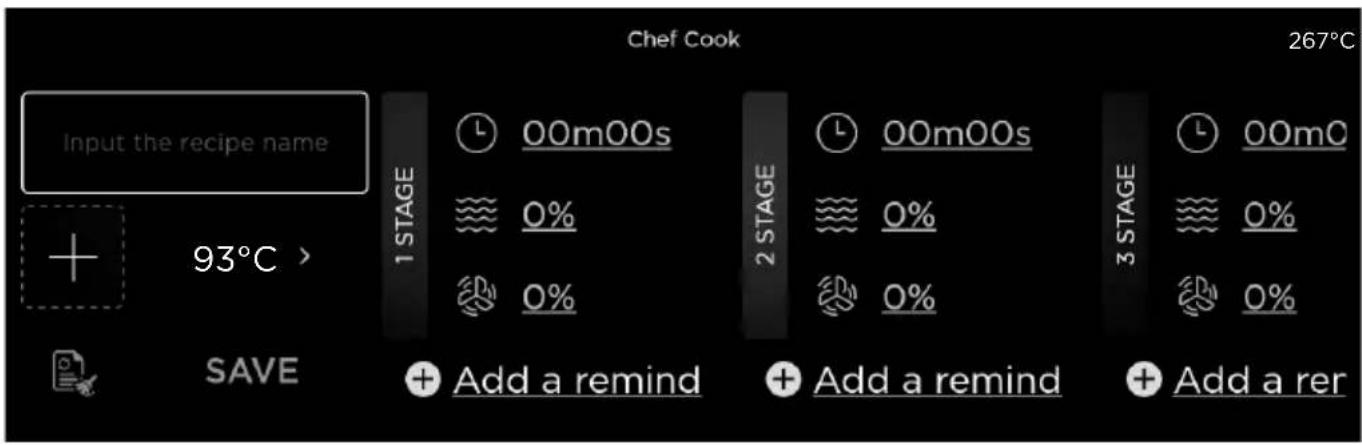
Chef Customization
(Fig.4 on page 4)
1.) Click "CHEF", enter the password, and then click "OK / START" to enter the chef customization settings (the universal password is "FLASHCHEF", and the factory default password is "flashtune").
2.) Click "Input the recipe name", then enter the name of the recipe.
3.) Click "+", then select the desired recipe image.
4.) Click on the preset temperature, then you can set your desired temperature. The temperature range is 93^ C \~ 275^ C.
5.) You can set up to three cooking stages, with each stage allowing you to set the cooking time ☑ microwave power
, and fan speed Additionally, you can click "Add a remind" to set a reminder after each cooking stage (segment reminders can only be added for recipes with more than two steps).
6.) Click "SAVE", then select a category or create a new category, and the recipe will be saved. After saving the recipe, you can click "OK / START" to start cooking.
7.) Click R clear the recipe settings.
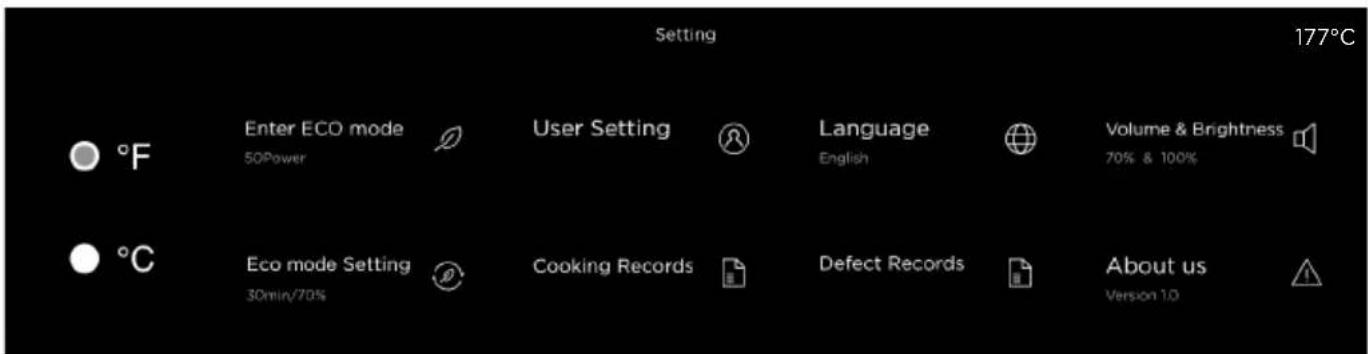
Settings Function
(Fig.5 on page 4)
Click "SETTING" to enter the settings function.
Settings that do not require a password
1.) ^ C / ^ F: Choose the unit of temperature.
2.) Enter ECO mode: Enter ECO mode.
3.) ECO mode Setting: Set the time and power parameters for the two different stages of the ECO mode.
4.) Cooking Records: Record and view the number of times and quantity of current cooked recipes.
5.) Language: Choose different languages.
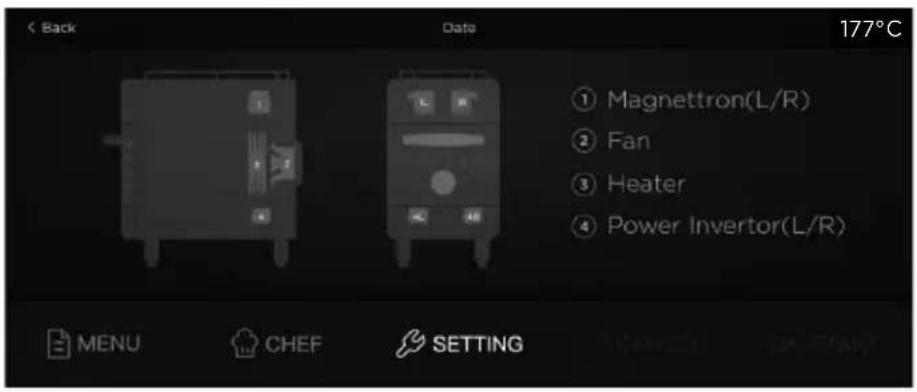
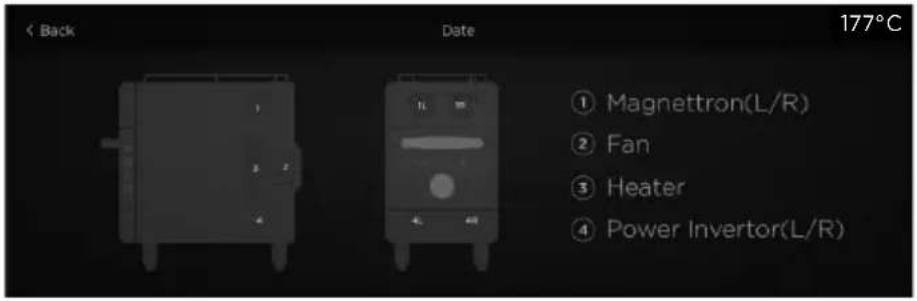
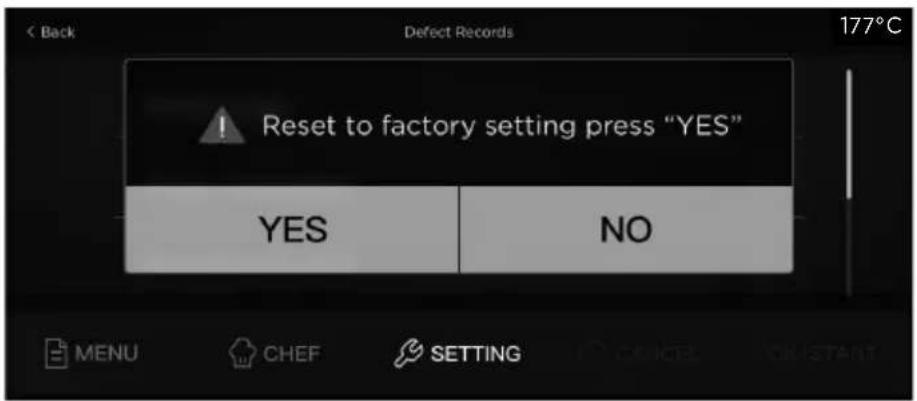
6.) Defect Records: Record and view the operating status, fault records, current running time, and current device status diagram of the device. It is also possible to reset to factory mode (all non-factory data will be lost).
Note: Normal operation is indicated by green, while abnormal components are indicated by red. (Fig.6 on page 5)
7.) Volume & Brightness: Choose the volume and sound effects of the prompts; and adjust the brightness of the display screen.
8.) About us: Check the electronic controller version, model number, software version and available memory of the device.
Settings that require a password
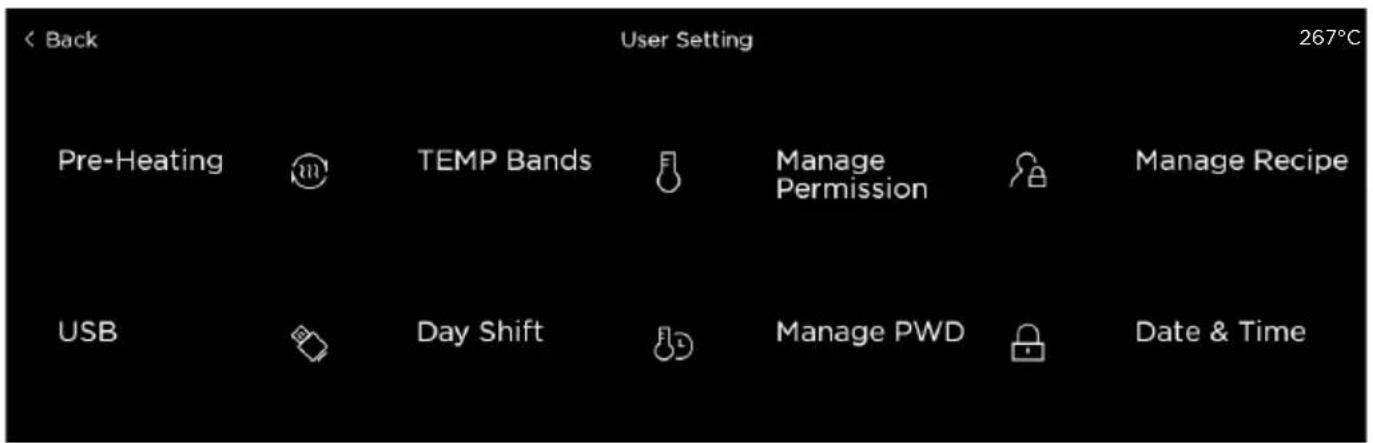
(Fig.7 on page 5)
Click "User Setting", enter the password, and then click "OK / START" to enter the user settings (the universal password is "FLASHCHEF").
1.] Pre-Heating: Set the startup preheat temperature.
2.) USB: Upload or download recipes and firmware updates after inserting the USB. (General users are not allowed to open the USB cover by themselves; it must be done by professional personnel.)
3.) TEMP Bands: Set the temperature bands for the recipe.
4.) Day Shift: Set your preset temperature values to run during three time slots every day of the week.
5.) Manage Permission: You can set whether a password is required to access the recipe homepage editing and chef customization function after each startup.
6.) Manage PWD: Change the current password and key (the default answer for the factory password is 123456789).
7.) Manage Recipe: View the addition time or the most recent modification time of each user's recipe, and you can also directly delete the corresponding recipe here.
8.) Data & Time: Change the date, date format, and time.
Shutdown & clean
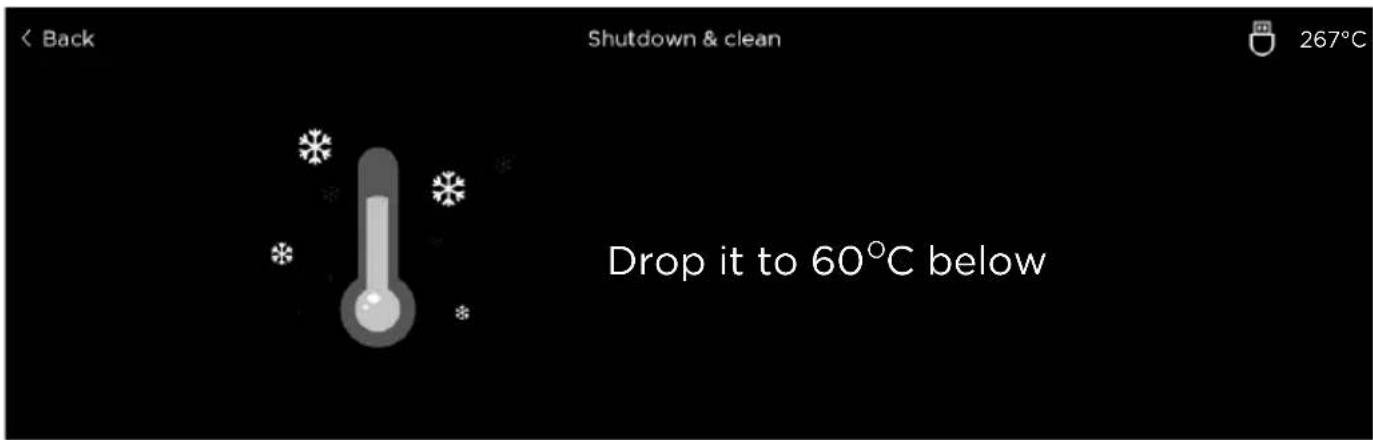
1.) Press the boot button to enter the shutdown & clean interface.
2.) If the cavity temperature is above 60^ C, the screen will display a cooling reminder. (Fig.8 on page 6)
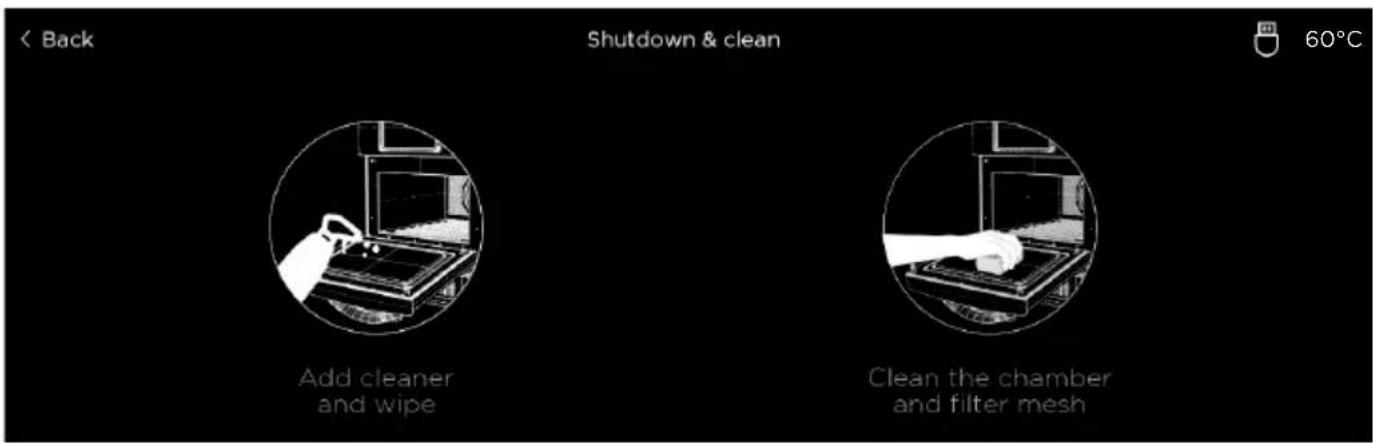
3.) If the cavity temperature is below 60^ C, the screen will display the cleaning page. And then click "OK / START" to shut down the device. (Fig.9 on page 6)
[Note: If the temperature is preheated to 260°C, the process will take approximately 20 minutes.]
4.) Click "CANCEL" or "Back", "Cancel Shutdown" will, then click "OK / START" or "YES" to cancel the shutdown. (Fig.10 on page 6)
Operating tips
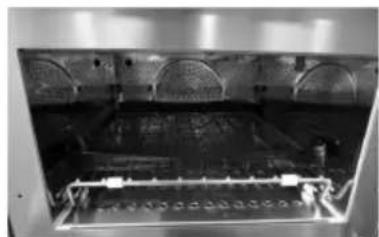
HSO accessories guide
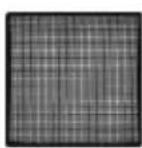
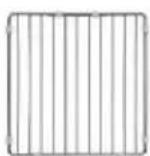
| Fig. 11 on page 7 | Put the grill in the center of the oven cavity, try not to touch the cavity wall. Please refer to the direction shown. Grill is an essential accessory for cooking. |
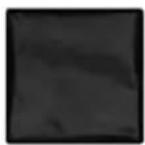
| Fig. 12 on page 7 | According to cooking recipe, such as burgers, it could use the Teflon Coated Solid Bottom Tray. |
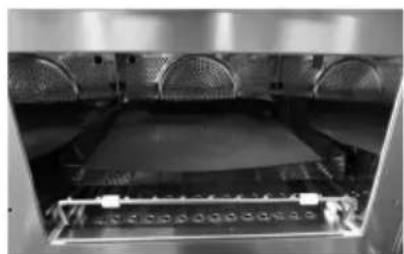
| Fig. 13 on page 7 | According to cooking recipe, such as bread, it could use the Teflon Coated Perforated Base Basket. |
| Fig. 14 on page 7 | According to the recipe, such as bread, it could use the Teflon Liners. |
| Fig. 15 on page 7 | According to the recipe, it could use the Teflon baking grill, liner and basket. |
| Fig. 16 on page 7 | According to the cooking needs, such as pizza, add pizza stone it is recommended to place the pizza stone in the oven cavity in advance and preheat for 3 minutes. |
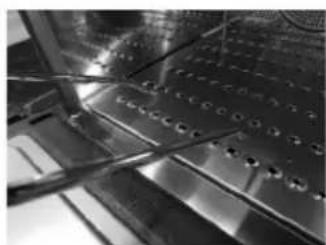
| Fig. 17 on page 7 | When cleaning the cavity, use the clip to take out the lower jetplate and clean the bottom. Please insert the lower jetplate in the direction shown in. |
Cooking utensils guide
Below a general guide to help you select suitable utensils:
| Cooking utensil | Microwave mode | Convection mode | Remark |
| Heat -resistant glass | √ | √ | |
| Non-heat -resistant glass | x | x | |
| Heat resistant ceramics | √ | √ | |
| Microwave-safe plastic dishes | x | x | |
| Kitchen paper √ x | Short duration for warming only. Attended use. | ||
| Metal tray x √ | Arcing occur if used in microwave. | ||
| Metal rack x √ | |||
| Aluminum foil and containers | x | √ | |
| : √ Suitable for use under the corresponding mode. Please follow the manufacturer's instruction and with the lid removed. Do not use if the surface is cracked or damaged.: x Not suitable for use under the corresponding mode. | |||
There may be certain non-metallic utensils that are not safe to use for microwaving. If in doubt, you can test the utensil in question following the procedure below.
Utensil Test:
- Fill a microwave-safe container with 1 cup of cold water (250ml) along with the utensil in question.
- Cook on maximum power for 1 minute.
- Carefully feel the utensil. If the empty utensil is warm, do not use it for microwave cooking.
NOTE: Do not exceed 1-minute cooking time.
RESET the safety cut-out (Hi-limiter or thermal cut-out)
Please note that a RESET button is equipped with the appliance to avoid overheat.
- Disconnect the appliance from the power supply.
- Allow the appliance to completely cool down.
- Press the RESET button of the Hi-limiter (thermal cut-out) (Fig.18 on page 7). You should hear a click sound.
- Connect to the power supply and you can use it again.
Cleaning & maintenance
- ATTENTION! Always disconnect the appliance from the power supply and cool down before storage, cleaning & maintenance.
- Do not use water jet or steam cleaner for cleaning and do not push the appliance under the water as the parts will get wet and electric shock might be resulted.
- If the appliance is not kept in a good state of cleanliness, this can adversely affect the life of the appliance and result in a dangerous situation.
- Food residues should be regularly cleaned and removed from the appliance. If the appliance is not cleaned properly, it will reduce its lifespan and may result in a dangerous condition during use.
Cleaning
- Clean the cooled exterior surface with a cloth or sponge slightly dampened with a mild soap solution.
- For reasons of hygiene, the appliance should be cleaned before and after use.
- Avoid water contacting the electrical components.
- Never immerse the appliance in water or other liquids.
- Never use aggressive cleaning agents, abrasive sponges, or cleaning agents containing chlorine. Do not use steel wool, metallic utensils, or any sharp or pointed objects for cleaning. Do not use petrol or solvents!
- No parts are dishwasher safe.
- Failure to maintain the oven in a clean condition could lead to deterioration of the surface that could adversely affect the life of the appliance and possibly result in a hazardous situation.
- The luminary inside the oven is replaceable. But it should be done by authorized technician.
Maintenance
- Check the operation of the appliance regularly to prevent serious accidents.
- If you see that the appliance is not working properly or that there is a problem, stop using it, switch it off and contact the supplier.
- All maintenance, installation and repair work must be carried out by specialised and authorised technicians, or recommended by the manufacturer.
Transportation and Storage
- Before storage, always make sure that the appliance has been disconnected from the power supply and completely cooled down.
- Store the appliance in a cool, clean and dry place.
- Never place heavy objects on the appliance as this could damage it.
- Do not move the appliance while it is under operation. Disconnect the appliance from power supply when moving and hold it at the bottom.
- Special care must be taken when moving or transporting the machine due to its heavy weight. With at least 2 persons or using a cart. Move the machine slowly, carefully, and never incline more than 45^ .
Troubleshooting
If the appliance does not function properly, please check the below table for the solution. If you are still unable to solve the problem, please contact the supplier/service provider.
| Problem Possible cause Possible solution | ||
| E01 The sensor is not connected, or is broken open circuit. | Contact the supplier.E02 | |
| Shorted temperature sensor on SRB. | ||
| E03 Incorrect mains voltage. Faulty SRB. | ||
| E17 Oven heater element failure. | Reset the thermal cut-out. | |
| F11 Cavity temperature is too high. | Contact the supplier. | |
| CB TFT screen/SRB connection cable unplugged or damaged. Faulty TFT screen or SRB. | ||
| U02 SRB and Motor driver connection cable unplugged or damaged. Faulty SRB or Motor driver. | ||
| U21 Motor over current. Motor blocked. | ||
| U22 Incorrect mains voltage. Faulty Motor Driver. | ||
| U23 Incorrect mains voltage. Motor Driver. | ||
| U25 Ambient overheat >85°C. | ||
| U26 The motor is unplugged or damaged. | ||
| D11 Faulty $RB. | ||
| E-1 Faulty Microwave inverter. | ||
| E-5 Failure of components in the microwave circuit. | ||
| E-6 Shorted magnetron. | ||
| E-8 Microwave Inverter is operating above temperature. | ||
Warranty
Any defect affecting the functionality of the appliance which becomes apparent within one year after purchase will be repaired by free repair or replacement provided the appliance has been used and maintained in accordance with the instructions and has not been abused or misused in any way. Your statutory rights are not affected. If the appliance is claimed under warranty, state where and when it was purchased and include proof
of purchase (e.g. receipt).
In line with our policy of continuous product development we reserve the right to change the product, packaging and documentation specifications without notice.
Discarding & Environment
When decommissioning the appliance, the product must not be disposed of with other household waste. Instead, it is your responsibility to dispose to your waste equipment by handing it over to a designated collection point. Failure to follow this rule may be penalized in accordance with applicable regulations on waste disposal. The separate collection and recycling of your waste equipment at the time of disposal will help conserve natural resources and ensure that it is recycled in a manner that protects human health and the environment.
For more information about where you can drop off your waste for recycling, please contact your local waste collection company. The manufacturers and importers do not take responsibility for recycling, treatment and ecological disposal, either directly or through a public system.
DEUTSCH
Reserveonderdelen of accessoires
Ohutusalased erijuhised
• ETTEVAATUST! BURNS-i VAUD! HOT SURFACES!
for å unngå overoppheting.
- Koble apparatet fra strømforsyningen.
• La produktet avkjøles helt. - Trykk på RESET-knappen på Hi-limiter (termisk utkobling) (Fig.18 på side 7). Du bør høre en klikkelyd.
- Koble til strømforsyningen, og du kan bruke den igjen.
HENDI Romania S.R.L.
Str. Sânzienei FN, DE 305
507075, Ghimbav, Braşov, Romania
Tel: +40 268 320330
Email: office@hendi.ro
HENDI Horeca SL
Polígono Campollano, Calle B, 120
GB: Changes, printing and typesetting errors reserved.
39100 Bolzano (BZ), Italy
Tel: +39 800 727 438
Email: office.italy@hendi.eu
HENDI HK Ltd.
1202, 12/F Exchange Tower
33 Wang Chiu Road, Kowloon Bay, Hong Kong
Tel: +852 2154 2618
Email: info-hk@hendi.eu
Find HENDI on internet:
www.hendi.com
www.facebook.com/HendiToolsforChefs
https://www.linkedin.com/company/hendi-tools-for-chefs/
www.youtube.com/HendiEquipment