
Robot Vacuum X20 Max - Robot vacuum Xiaomi - Free user manual and instructions
Find the device manual for free Robot Vacuum X20 Max Xiaomi in PDF.
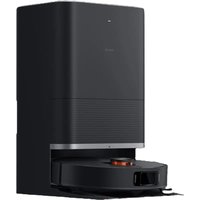


| Product type | Robot vacuum |
| Brand | Xiaomi |
| Model | Robot Vacuum X20 Max (D109GL) |
| Robot dimensions | Φ350 × 97 mm |
| Omni station dimensions | 563 × 420 × 340 mm |
| Battery | Lithium-ion 4800 mAh (operating) / 5200 mAh (nominal) |
| Charging time | Approximately 6.5 hours |
| Station power supply | 220–240 V ~ 50/60 Hz |
| Connectivity | Wi-Fi 2.4 GHz IEEE 802.11 b/g/n, Bluetooth 4.2 |
| App compatibility | Android 9.0 and iOS 12.0 or later |
| Cleaning modes | Vacuuming, Mopping, Vacuuming before mopping |
| Automatic functions | Automatic emptying, Hot water mop washing, Air drying |
| Clean water tank capacity | 4 L |
| Filter type | High performance (recommended replacement every 3-5 months) |
| Main brush | Auto-cut hair brush |
| Safety | Class 1 laser, child lock, auto stop in case of issue |
| Recommended maintenance | Regular cleaning of sensors, brushes, filters, tanks; emptying of disposable bag |
| Spare parts | Disposable bag (lasts approx. 2.5 months), filter, side brushes, mop cloth, etc. |
| Warranty | Refer to legal terms |
Frequently Asked Questions - Robot Vacuum X20 Max Xiaomi
User questions about Robot Vacuum X20 Max Xiaomi
0 question about this device. Answer the ones you know or ask your own.
Ask a new question about this device
Download the instructions for your Robot vacuum in PDF format for free! Find your manual Robot Vacuum X20 Max - Xiaomi and take your electronic device back in hand. On this page are published all the documents necessary for the use of your device. Robot Vacuum X20 Max by Xiaomi.
USER MANUAL Robot Vacuum X20 Max Xiaomi
Read this manual carefully before use, and retain it for future reference.
Usage Restrictions
- This product is for floor cleaning in a home environment only. Do not use it outdoors, on non-floor surfaces, or in a commercial or industrial setting.
- This appliance can be used by children aged from 8 years and above and persons with reduced physical, sensory or mental capabilities or lack of experience and knowledge if they have been given supervision or instruction concerning use of the appliance in a safe way and understand the hazards involved. Children shall not play with the appliance. Cleaning and user maintenance shall not be made by children without supervision.
- This appliance is not intended for use by persons including children with reduced physical, sensory or mental capabilities, or lack of experience and knowledge, unless they have been given supervision or instruction concerning use of the appliance by a person responsible for their safety.
- Children should be supervised to ensure that they do not play with the appliance.
- If the cord set is damaged, it must be replaced by a special cord set available from the manufacturer or its service agent.
- This appliance contains batteries that are only replaceable by skilled persons.
- Ensure children and pets are kept at a safe distance from the robot vacuum while it is operating.
- Do not use the robot vacuum in an area suspended above ground level without a protective barrier.
- Do not place the robot vacuum upside down. Do not move the robot vacuum by using its LDS laser sensor cover, cover, or bumper as a handle.
- Do not install, charge, or use this robot vacuum outdoors, in bathrooms, or near a pool.
- A hazard may occur if the appliance runs over the supply cord.
- Remove fragile or small items from the floor to prevent the robot vacuum from bumping into and damaging them.
- Do not place children, pets, or any item on top of the robot vacuum regardless of whether it is stationary or moving.
- Keep hair, fingers, and other body parts away from the suction opening of the robot vacuum.
- Do not use the robot vacuum to clean any burning substances.
- Do not vacuum up hard or sharp objects.
- The plug must be removed from the socket-outlet before cleaning or maintaining the appliance.
- Do not wipe the robot vacuum or omni station with a wet cloth or rinse them with any liquid. After cleaning washable parts, fully dry the parts before reinstalling and using them.
- Make sure the robot vacuum is turned off when being transported and kept in its original packaging if possible.
- Please use this product in accordance with the instructions in the user manual. Users are responsible for any loss or damage arising from improper use of this product.
- Do not use the robot vacuum at an ambient temperature above 40°C or below 0°C or on a floor with liquids or sticky substances.
Batteries and Charging
WARNING:
- Do not use any third-party battery, cord set, or omni station. The robot vacuum can only be used with the D109-JZEU omni station.
- Do not charge non-rechargeable batteries.
- No action needed from users to shift the omni station between 50 Hz and 60 Hz, and the product can adapt itself for both 50 Hz and 60 Hz.
- Do not attempt to disassemble, repair, or modify the battery or omni station on your own.
- Do not place the omni station near a heat source.
- Do not use a wet cloth or wet hands to wipe or clean the omni station's charging contacts.
- Do not expose the appliance or battery to excessive temperatures.
- Be aware of the risk of terminals of the battery-operated appliance or battery being short-circuited by metal objects.
- If the robot vacuum won't be used for an extended period, fully charge it, then turn it off and store in a cool, dry place. Recharge the robot vacuum at least once every 3 months to avoid over-discharging the battery.
- Do not damage the battery when removing it to avoid short circuits or liquid leakage. If the battery leaks, keep the fluid from touching your skin or clothes, and wipe it away immediately with a dry cloth. Then send the battery to an appropriate recycling facility or the designated after-sales service team to properly dispose of it.
- The lithium-ion battery pack contains substances that are hazardous to the environment. Before disposing of the robot vacuum, please first remove the battery pack, then discard, or recycle it in accordance with local laws and regulations of the country or region it is used in.
- When removing the batteries from the product, it is better to use up the batteries and make sure your product is disconnected from power.
- Uninstall the screw on the bottom, then remove the cover.
- Unplug the battery connector, then remove the batteries. Do not damage the battery case to avoid any risk of injuries.
- Return the batteries to a professional recycling organization.
- The battery must be removed from the appliance before it is scrapped.
- The appliance must be disconnected from the supply mains when removing the battery.
- The battery is to be disposed of safely.

For indoor use only.

Before use, read the instructions.
Laser Safety Information
The laser sensor in this product meets the IEC 60825-1: 2014 and EN 60825-1:2014/A11:2021 Standard for Class 1 laser products.
Please avoid direct eye contact with it during use.
CLASS1 LASER PRODUCT
CONSUMER LASER PRODUCT
EN 50689:2021
EU Declaration of Conformity
CE Xiaomi Communications Co., Ltd. declares that the radio equipment type D109GL is in compliance with Directive 2014/53/EU. The full text of the EU declaration of conformity is available at the following internet address: https://www.mi.com/global/service/support/declaration.html For detailed e-manual, please go to www.mi.com/global/service/userguide
The product does not have a standby mode or other equivalent state in terms of energy efficiency requirements or power management function, the power consumption of the product is likely to be higher than other products meeting these functional requirements.
Product Overview
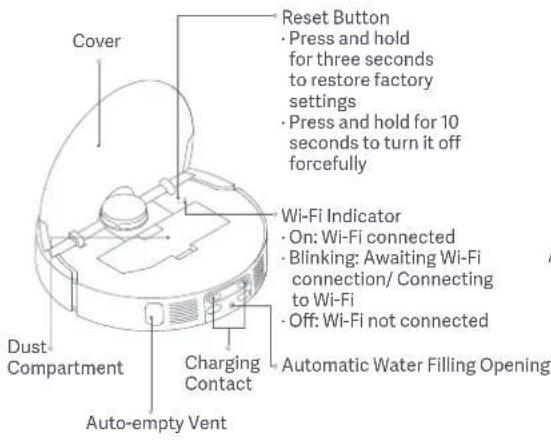
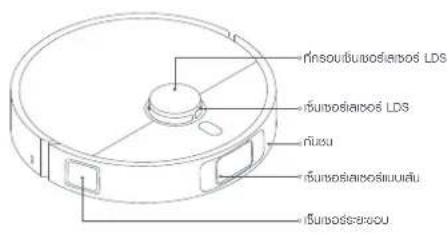
Robot Vacuum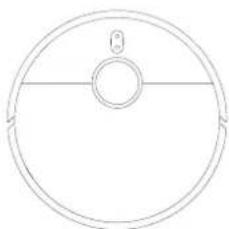
Note: Illustrations of product, accessories, and user interface in the user manual are for reference purposes only. Actual product and functions may vary due to product enhancements.
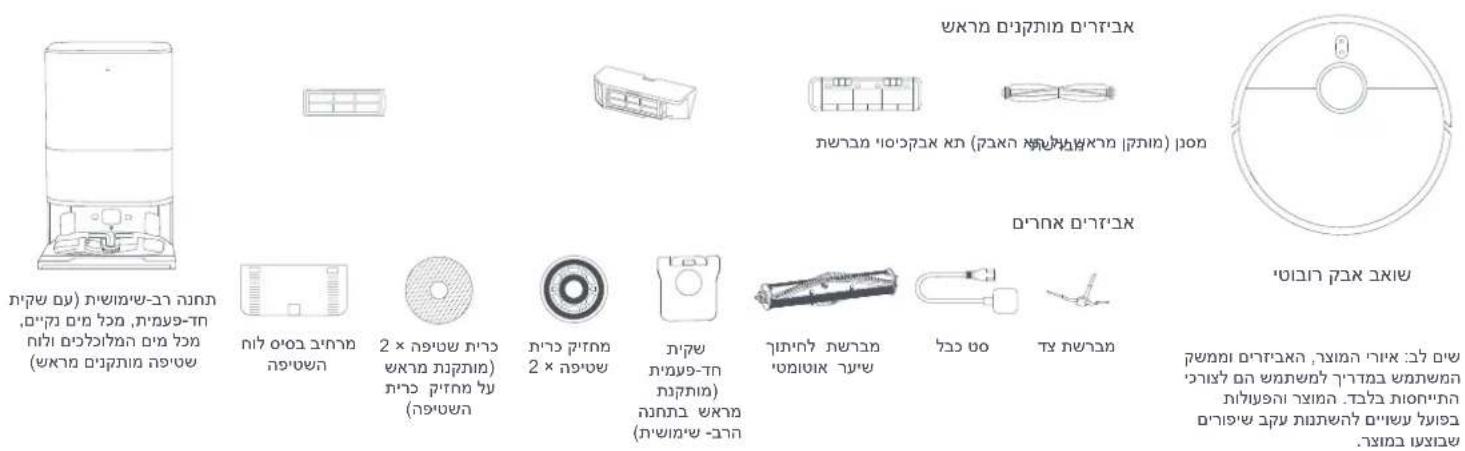
Pre-installed Accessories
Brush
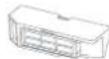

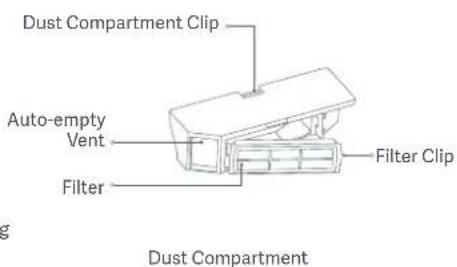
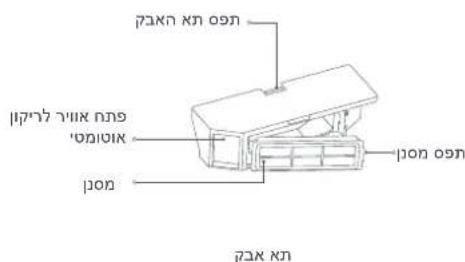
Brush Cover Dust Compartment Filter (Pre-installed on the dust compartment)
Other Accessories
Side Brush
Cord Set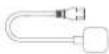
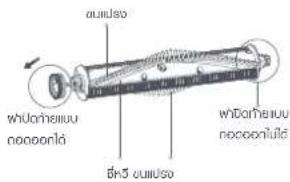
Automatic Hair-cutting Brush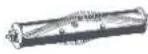
Disposable Bag (Preinstalled in the omni station)
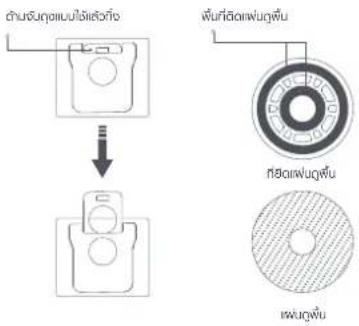
Mop Pad Holder x2
Mop Pad x2 (Pre-installed on the mop pad holder)
Washboard Base Extender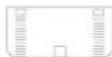
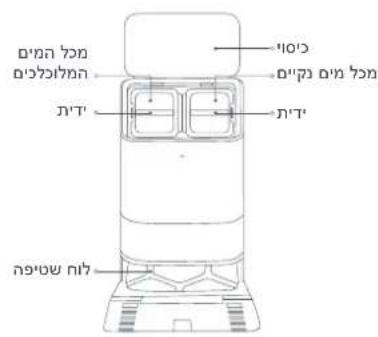
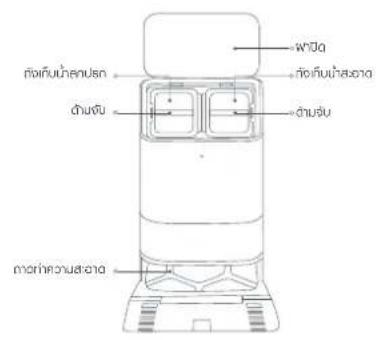
Omni Station (with a pre-installed disposable bag, clean water tank, dirty water tank, and washboard)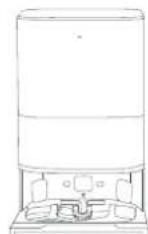
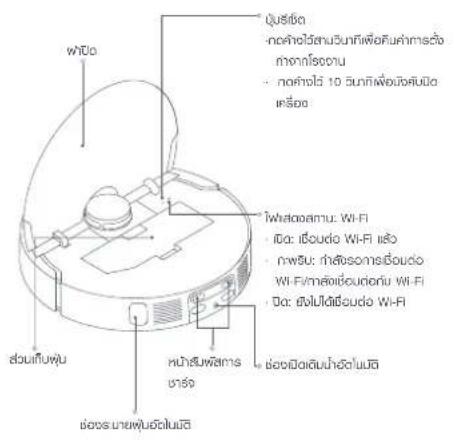
Robot Vacuum
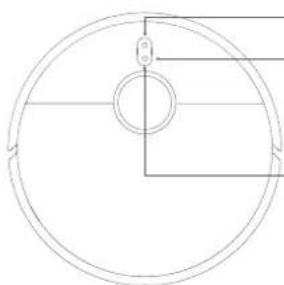
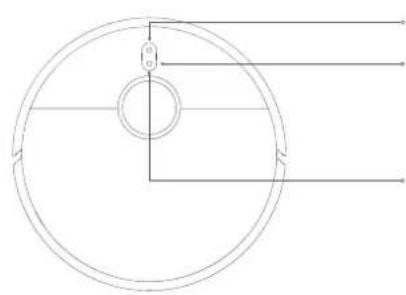
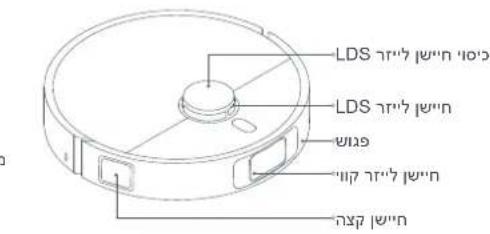
Press and hold for 3 seconds to turn on or off. Press to start cleaning or pause while turned on.
Press to pause while running. Press while paused to return the robot vacuum to the Omni Station for charging. Press to stop docking while returning to the Omni Station. Press and hold for three seconds to enable or disable the child lock.
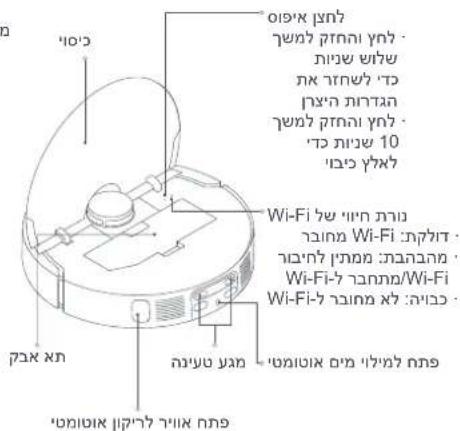
Indicator: White: Cleaning/Cleanup completed/Fully charged. Blinking white: Returning to charge/Repositioning/Updating firmware. Breathing white: Charging. Orange: Wi-Fi disconnected. Blinking orange: Error/Awaiting connection/Connecting to Wi-Fi.
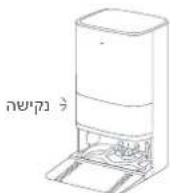
Robot Vacuum Omni Station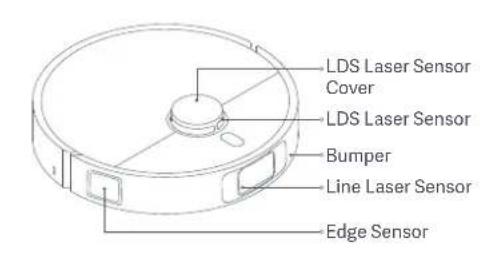
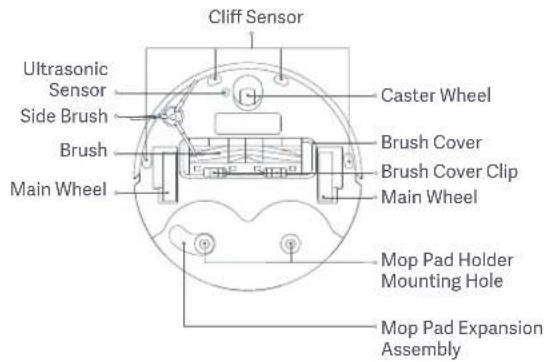
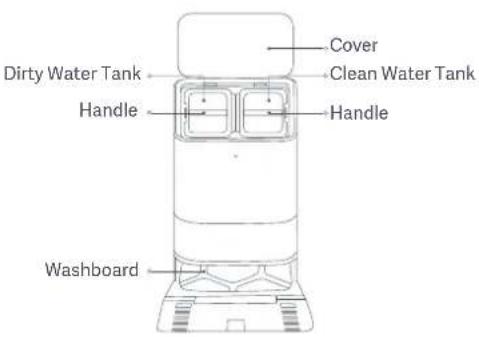
How to Install
Omni Station Removing Protective Coverings
Front View Rear View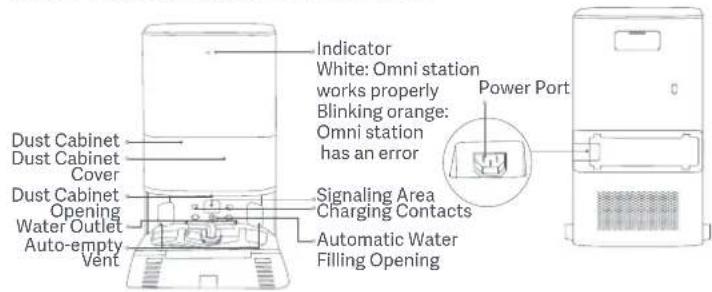
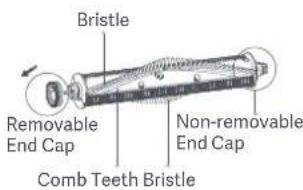
Disposable Bag Mop Assembly Automatic Hair-cutting Brush
Disposable Bag Handle Mop Pad Attachment Area
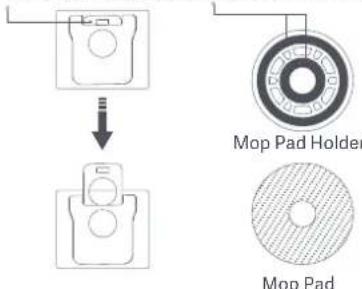
Note: The Omni Station is pre-installed with a disposable bag when leaving the factory.
Note: You can replace it with the brush.
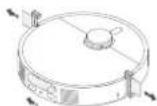
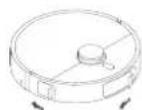
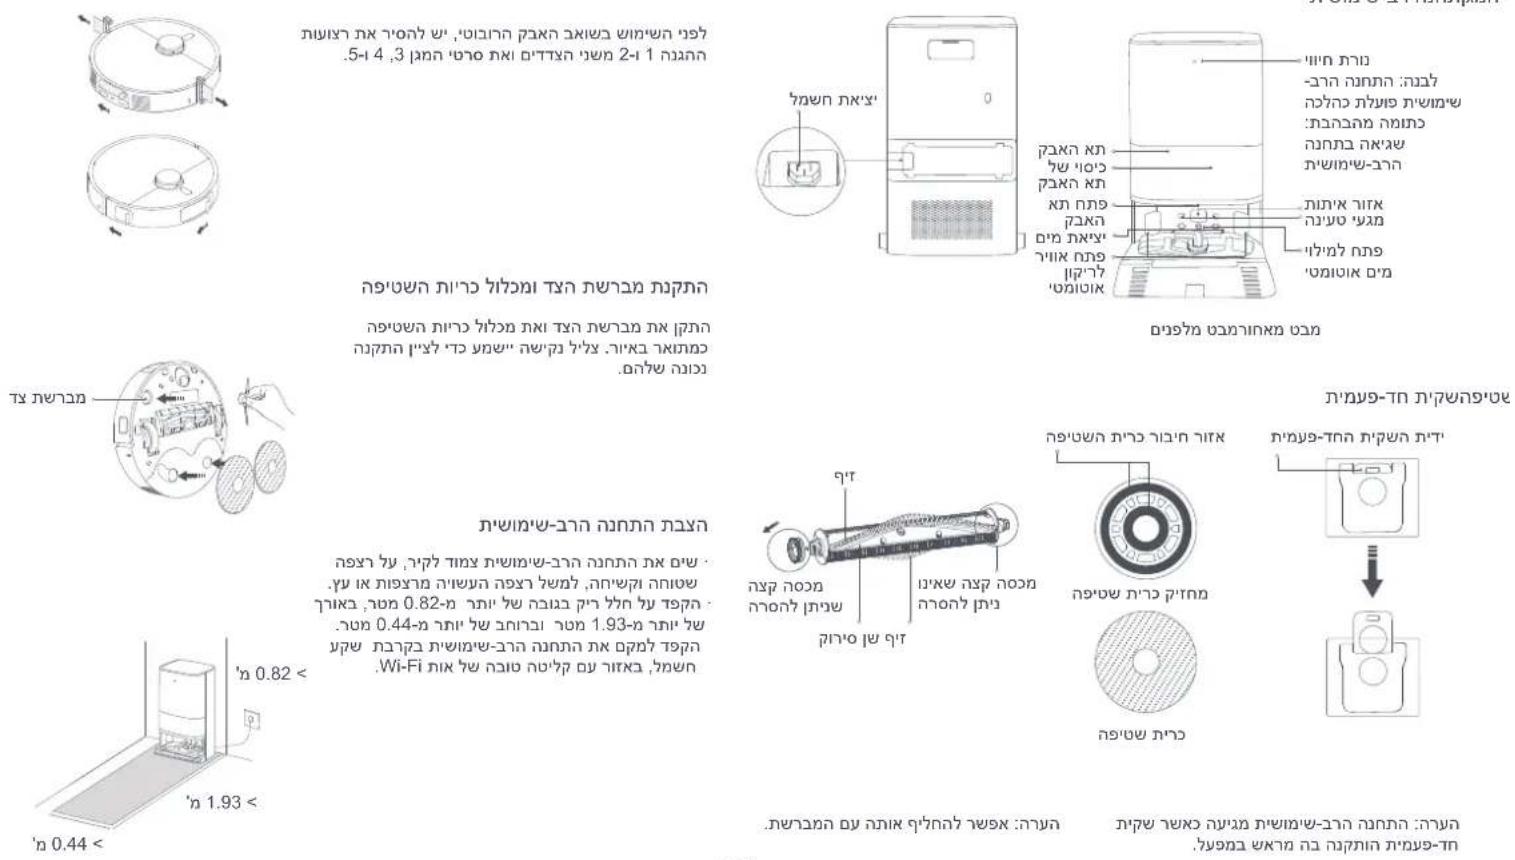
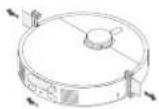
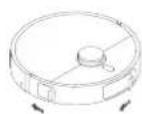
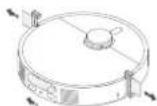
Before using the robot vacuum, remove the protective strips 1 and 2 from both sides and protective films 3, 4, and 5.
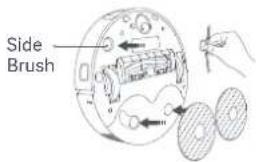
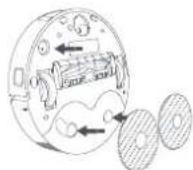
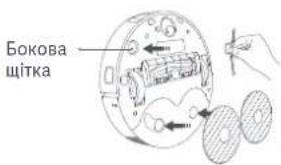
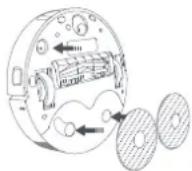
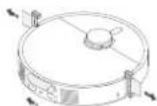
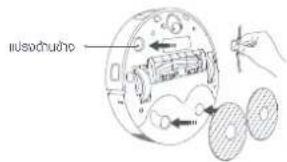
Installing the Side Brush and the Mop Assembly
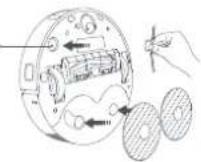
Install the side brush and the mop assembly respectively as illustrated. They are properly installed when you hear a "click".
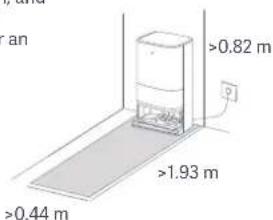
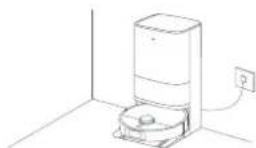
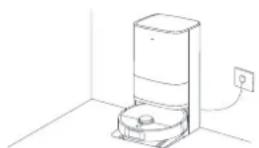
Placing the Omni Station
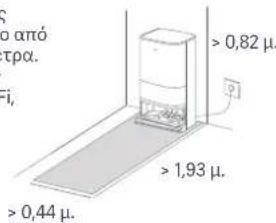
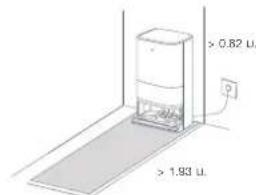
- Place the omni station against a wall on a flat and hard surfaced floor, such as a wooden or tiled floor.
- Make sure there is empty space of more than 0.82 meters in height, more than 1.93 meters in length, and more than 0.44 meters in width. Ensure the omni station is in an area with a good Wi-Fi signal near an electrical outlet.
How to Use
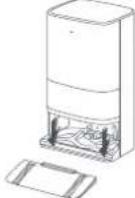
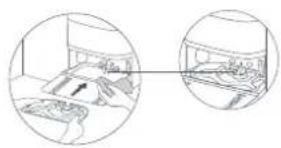
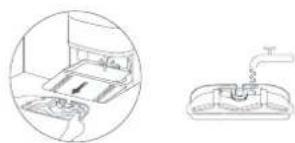
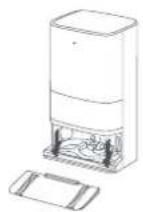
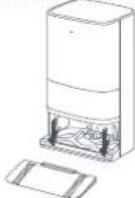
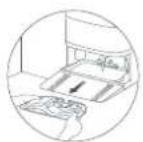
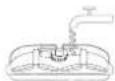
Installing the Washboard Base Extender Adding Water to the Clean Water Tank
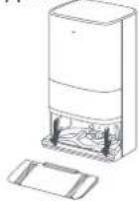
Install the washboard base extender to the omni station along the direction as illustrated. - Make sure the washboard base extender is flush with the bottom of the omni station, and the bottom surface is even.
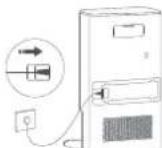
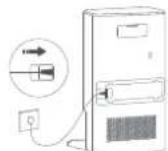
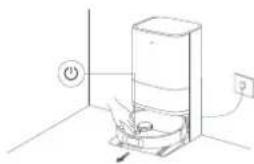
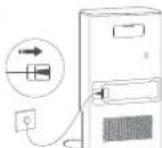
Connecting to Power
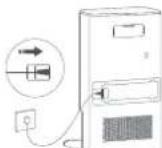
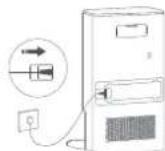
Place the omni station in an appropriate area, connect the cord set to it, and plug the cord set into an electrical outlet. Note: Firmly plug the connector of the cord set into the power port of the omni station until the indicator stays white.
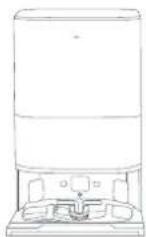
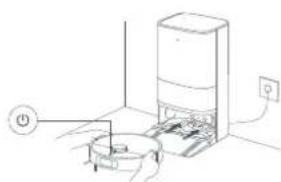
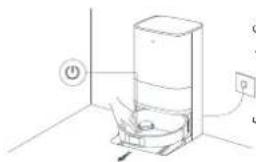
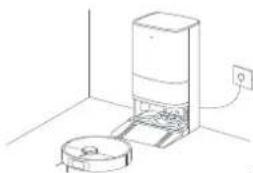
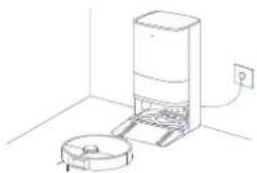
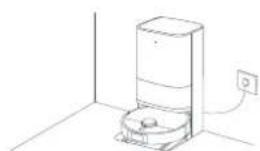
Placing the Robot Vacuum
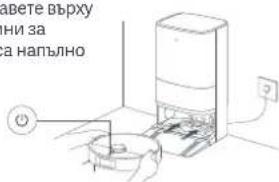
Before use, press and hold the button on the robot vacuum for three seconds to turn it on. Once the robot vacuum is on, place it onto the omni station, and make sure the charging contacts on the robot vacuum and the station are fully aligned. The robot vacuum connects to the omni station successfully when you hear a voice prompt for starting charging.
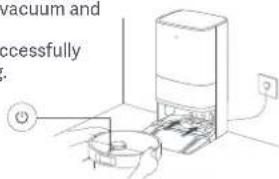
Notes:
- Before the first use, it is recommended to fully charge the robot vacuum.
- If the robot vacuum cannot be turned on due to low battery level, manually place the robot vacuum onto the omni station to charge it for a while.
- When the robot vacuum is being charged, it will automatically turn on and cannot be turned off.
Maximum Water Level Mark Water Tank Capacity: 4 L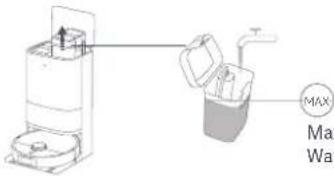
Notes:
- Do not add hot water to the water tank, as this may cause the tank to become deformed.
- Do not add any substance like detergents other than clean water to avoid damaging the robot vacuum.
Connecting with the Xiaomi Home App
This product works with the Xiaomi Home app. Use the Xiaomi Home app to control your device, and to interact with other smart home devices.
Scan the QR code to download and install the app. You will be directed to the connection setup page if the app is installed already. Or search for "Xiaomi Home" in the app store to download and install it.
Open the Xiaomi Home app, tap on the upper right, and then follow the instructions to add your device.
Notes:
The robot vacuum works with the Xiaomi Home app, and it supports Android 9.0 & iOS 12.0 or above. Only 2.4 GHz Wi-Fi networks are supported. The version of the app might have been updated, please follow the instructions based on the current app version.
- When the robot vacuum connects with the Xiaomi Home app successfully, it connects with the network successfully. You can have a reset of Wi-Fi to disconnect it from the network.
Resetting Wi-Fi Pausing
Take the following steps if the robot vacuum cannot be connected to the network because the router is reset, the password is forgotten, or for other reasons:
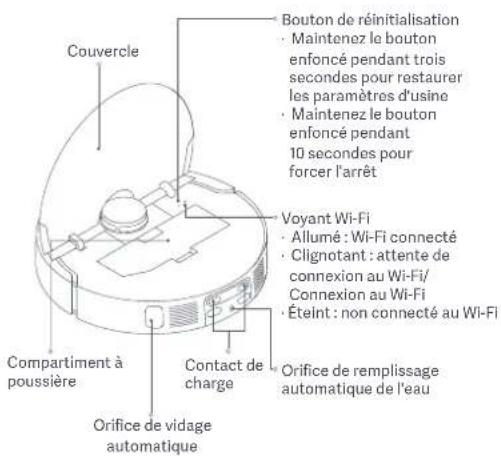
- Open the cover of the robot vacuum so that you can see the Wi-Fi indicator.
- Simultaneously press and hold the buttons and for 7 seconds until you hear a voice prompt to indicate that the robot vacuum is waiting for the network configuration.
- When the Wi-Fi indicator blinks, the Wi-Fi connection has been reset successfully.
Turning On/Off
- Press and hold the button for three seconds to turn the robot vacuum on. When the indicator on the robot vacuum lights up, it means the robot vacuum enters standby mode.
- When the robot vacuum is paused and not being charged, press and hold the button for three seconds to turn it off.
Note: When the robot vacuum is charging, it will automatically turn on and cannot be turned off.
Quick Map Creation
After configuring the network for the first time, follow the instructions in the app to quickly create a map, and the robot vacuum will start mapping without cleaning. The mapping process will be completed when the robot vacuum returns to the omni station, and the map will be saved automatically.
Notes:
- Make sure the robot vacuum is fully charged and starts from the omni station.
- Before mapping, remove the items on the floor, open the doors of the rooms, and block the areas unsuitable for the robot vacuum to enter.
- During mapping, do not follow, move, or interrupt the robot vacuum, and do not move the omni station. After mapping, set up virtual walls or restricted areas in areas unsuitable for the robot vacuum to enter, such as the areas where it may get stuck or be scraped.
- Set up virtual walls or restricted areas in areas with long-hair or fringe carpets to prevent the robot vacuum from getting entangled.
- Set up virtual walls or restricted areas to exclude carpeted areas before mopping to prevent the carpet from getting wet.
When the robot vacuum is running, press any button to pause it.
Note: Do not lift or move the robot vacuum while it is paused. Otherwise, it may have positioning errors that could prevent the robot vacuum from returning to the omni station or cause the loss of the map.
Sleep Mode
The robot vacuum will automatically enter sleep mode after it is paused for 10 minutes, and its indicator will go out. To wake it up, press any button on the robot vacuum. Note: The robot vacuum will automatically turn off after being in sleep mode for 12 hours.
Resuming Cleanup
If the robot vacuum starts running low on battery during a cleaning task, it will automatically return to the omni station to charge. When the robot vacuum is appropriately charged, it will resume cleanup where it left off.
Child Lock Settings
To enable or disable the child lock, press and hold the button on the robot vacuum for three seconds.
Note: When the child lock function is enabled, the buttons on the robot vacuum will not work. Instead, you can control the robot vacuum via the app.
Dust Emptying
When the robot vacuum automatically returns to the omni station to charge after completing a vacuuming and mopping task, a vacuuming before mopping task, or a vacuuming task, the omni station will automatically start to empty the dust compartment.
Notes:
- When the robot vacuum returns midway to the omni station to clean mop pads, the station will not automatically empty the dust compartment.
- If the function of auto dust emptying is disabled in the app, the omni station will not automatically empty the dust compartment.
- If you change the auto-empty frequency in the app, the omni station will empty dust at the set frequency.
Vacuuming and Mopping Vacuuming
Start cleaning
Before starting, ensure the mop assembly and other necessary parts have been installed onto the robot vacuum and the clean water tank has been filled with water. Select the vacuuming and mopping mode in the app, and use the app or press the button on the robot vacuum to make it start from the station. Then the robot vacuum will plan the optimal cleaning route and perform the cleaning task based on the created map.
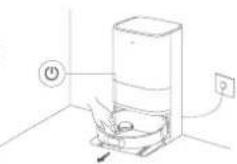
Notes:
The robot vacuum will moisten the mop pads before starting, please wait with patience. Before starting, ensure the omni station is connected to power and the robot vacuum is connected to the omni station. To ensure that the robot vacuum can return to the omni station successfully after completing vacuuming and mopping, it is recommended to make the robot vacuum start from the omni station. Do not move the omni station, the clean water tank, the dirty water tank, or the washboard during cleaning. The omni station supports the function of mop pad washing with hot water, you can enable it in the app. When enabled, do not touch the water outlet above the washboard to avoid scalds.
Automatically return to clean mop pads midway
During cleaning, the robot vacuum may automatically return to the omni station to wash the mop pads after it cleans certain squares of area. Once the mop pads have been washed, the robot vacuum will resume its cleaning task.
Auto dust emptying & mop pad cleaning and air-drying
When the robot vacuum has completed its cleaning task and returned to the omni station to charge, the omni station will automatically start emptying dust and then clean and air-dry the mop pads.
Clean the dirty water tank
After the mop pads have been cleaned and air-dried, please clean the dirty water tank in time to prevent odors.
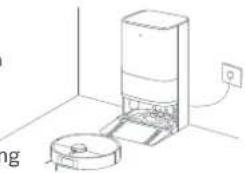
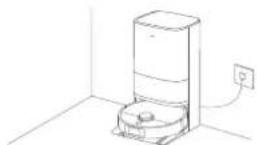
Select the vacuuming mode in the app, then use the app or press the button on the robot vacuum to start cleaning, and the robot vacuum will lift the mop assembly and start from the omni station to vacuum. Once it finishes vacuuming, it will return to the omni station to automatically empty the dust compartment.
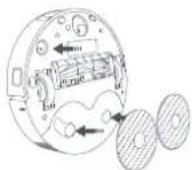
Notes: If the mop assembly is not installed, the robot vacuum will automatically perform the vacuuming after starting.
Mopping
Before starting, ensure the mop assembly and other necessary parts have been installed onto the robot vacuum and the clean water tank has been filled with water. Select the mopping mode in the app, and use the app or press the button on the robot vacuum to start cleaning. Then the robot vacuum will automatically moisten the mop pads first and leave the omni station to start mopping. Once it finishes mopping, it will return to the omni station to wash and air-dry the mop pads.
Vacuuming before Mopping
Before starting, ensure the mop assembly has been installed onto the robot vacuum and the clean water tank has been filled with water. Select the vacuuming before mopping mode in the app, and use the app or press the button on the robot vacuum to start the cleaning task. The robot vacuum will then lift the mop assembly to vacuum. Once it finishes vacuuming, it will return to the omni station to automatically empty the dust and moisten the mop pads, then it will lower the mop assembly to start mopping.
Care & Maintenance
Parts
To keep the robot vacuum in good condition, it is recommended to refer to the following table for routine maintenance.
| Parts Cleaning Frequency | Replacement Frequency | |
| Dust Compartment Clean as required | / | |
| Filter Clean every two weeks | 3-6 months | |
| Clean Water Tank Clean every two weeks | / | |
| Dirty Water Tank | Recommended to clean after each use | |
| Washboard Clean every 1-2 weeks | ||
| Brush Clean every two weeks | 6-12 months | |
| Side Brush Clean every two weeks | 3-6 months | |
| Mop Pad / | 1-3 months | |
| Caster Wheel | Clean every month / | |
| LDS Lasor Sensor | ||
| Edge Sensor | ||
| Line Laser Sensor | ||
| Cliff Sensor | ||
| Robot Vacuum's Charging Contacts | ||
| Bumper | Depending on actual use / | |
| Auto-empty Vents of Robot Vacuum | ||
| Bottom of the Robot Vacuum | ||
| Omni Station | ||
| Omni Station's Charging Contacts | ||
| Omni Station's Signaling Area | ||
| Disposable Bag | / About every 2.5 months depending on actual use | |
Notes:
The replacement frequency is for reference only. If a part is damaged, it should be replaced promptly to ensure efficient cleaning. To move or ship the robot vacuum, please empty the clean and dirty water tanks to avoid the robot vacuum getting damaged in transit.
Replacing the Disposable Bag
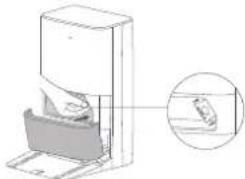
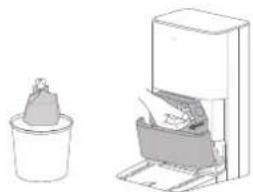
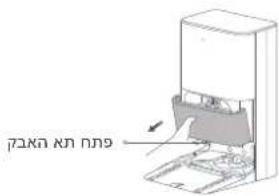
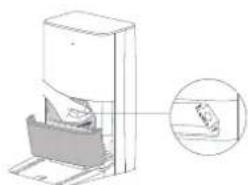
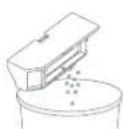
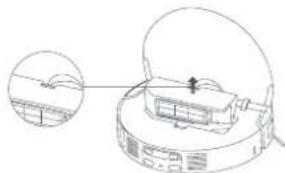
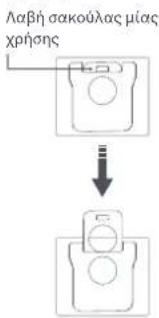
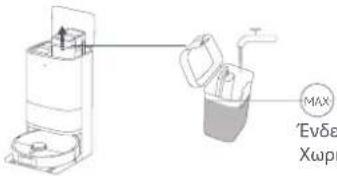
- When the disposable bag is full, pull the cover out from the dust cabinet opening. Remove the disposable bag using the handle, and discard it.
Dust Cabinet Opening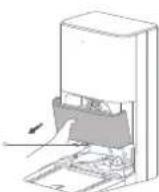
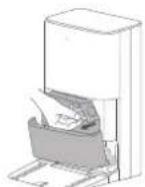
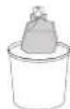
Note: Pull the handle of the disposable bag to seal it to prevent the dust and debris from getting out.
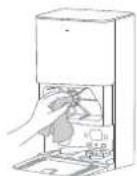
- Use a dry cloth to wipe away any dirt from the filter.
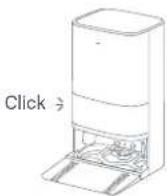
- Install a new disposable bag as illustrated and insert the handle of the bag into the slot.
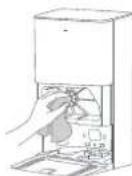
- Put the dust cabinet cover back, and it is properly installed when you hear a "click".
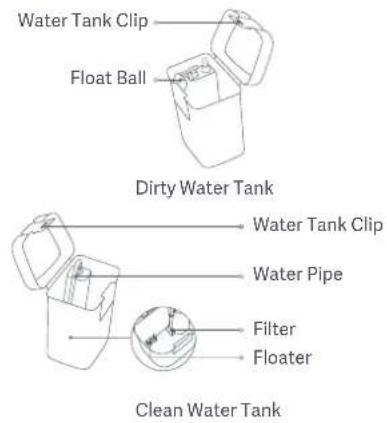
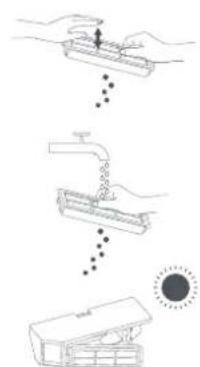
Cleaning the Clean & Dirty Water Tanks
- Remove both the clean and dirty water tanks, open their covers, and pour out the water.
- Use clean water to completely wash the tanks, then wipe the outside of the tanks dry before reinserting them into the omni station.
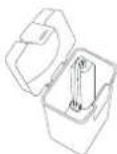
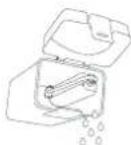
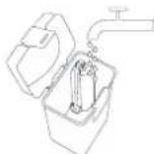
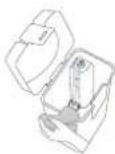
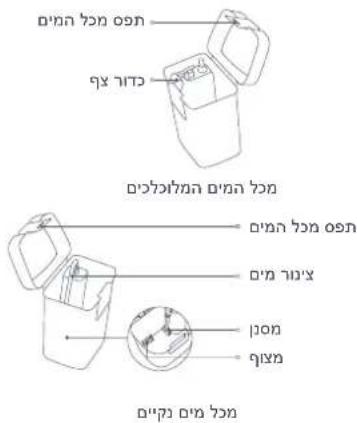
Note: Both the floater in the clean water tank and the float ball in the dirty water tank are movable parts. Do not apply too much force when cleaning them to avoid damaging them.
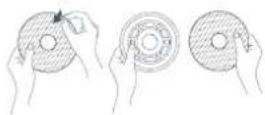
Cleaning the Washboard and Washboard Base
- Remove the washboard, and clean it with a brush using the tap water.
- Wipe the washboard base with a dry cloth, and reinstall the washboard to the omni station. Make sure the water pipe is inside the groove of the washboard; otherwise, it may affect normal use.
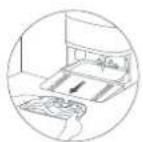
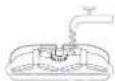
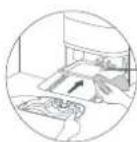
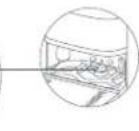
Note: Do not tilt the omni station during daily use or cleaning. If water collects in the washboard base, wipe it dry with a cloth.
Cleaning Sensors and Charging Contacts
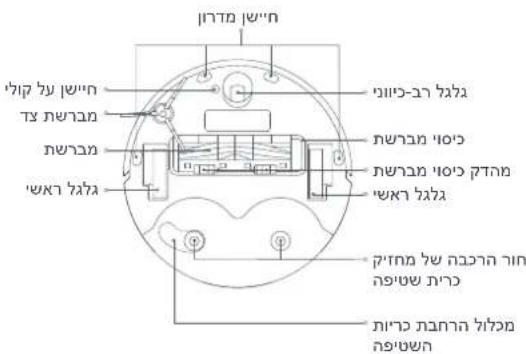
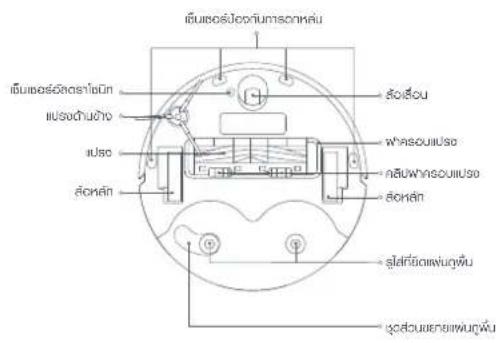
Use a soft cloth to clean all sensors and charging contacts in the robot vacuum: - The cliff sensors on the bottom of the robot vacuum. The charging contacts on the back of the robot vacuum. The LDS laser sensor on the top of the robot vacuum. The bumper and the line laser sensor on the front of the robot vacuum.
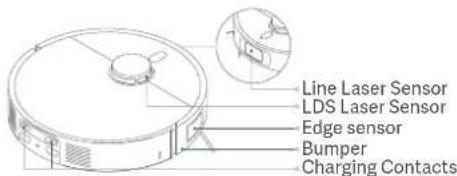
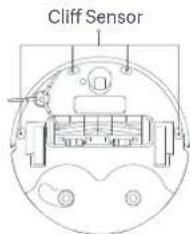
Cleaning the Brush Cleaning the Automatic Hair-cutting Brush
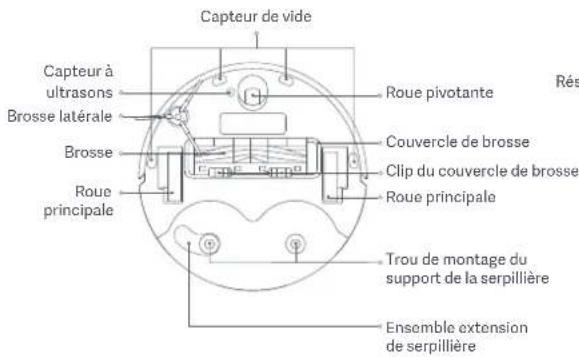
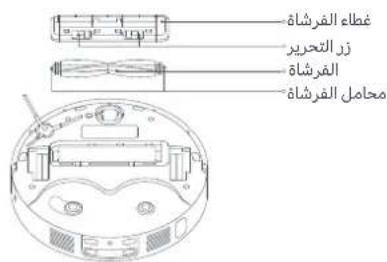
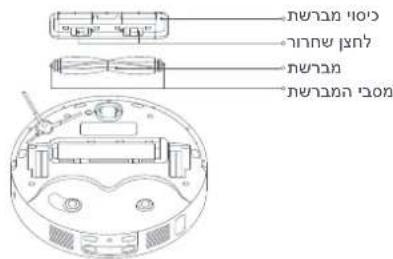
- Flip the robot vacuum over and pinch the clips to remove the brush cover. Lift the brush out, remove the bearings on both ends, and clean the brush's axle.
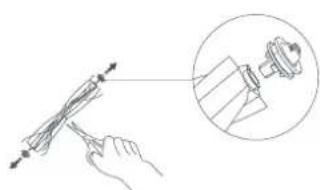
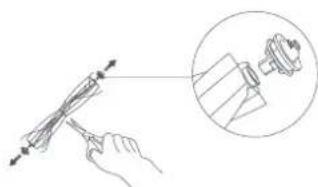
- Use scissors to cut any hair tangled around the brush, and remove any debris.
- Reinstall the brush bearing, brush and brush cover, and clip them in place.
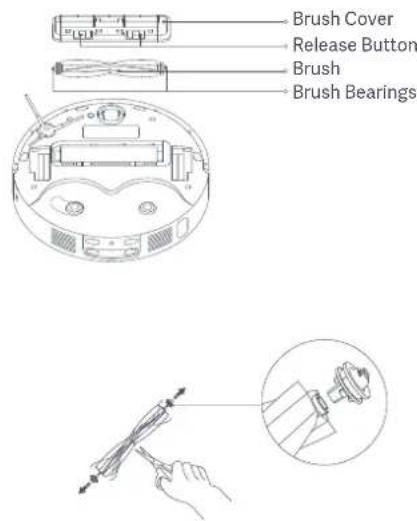
CAUTION: If too much hair is tangled in the brush, or if the hair is tightly tangled, do not forcibly pull on it, as this could damage the brush.
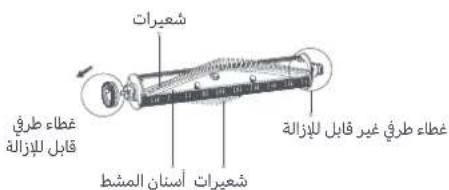
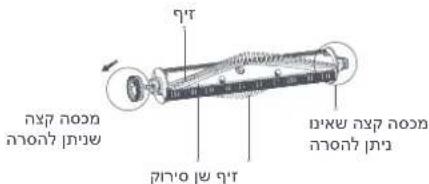
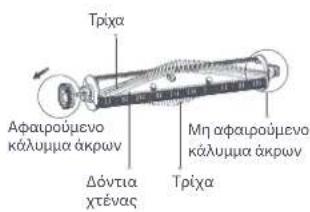
- Remove the brush cover and the automatic hair-cutting brush.
- Take out the removable end cap.
- Clean the two ends of the brush and gaps of the comb teeth with proper tools.
- Put back the removable end cap, and then reinstall the automatic hair-cutting brush and the brush cover. Make sure they are firmly secured.
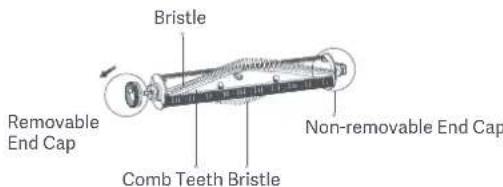
Notes:
- Do not clean the brush bearing with water.
- If the brush is severely tangled with hairs, check whether the dust compartment and the disposable bag are full. If yes, empty the dust
compartment and replace the disposable bag in a timely manner to ensure normal auto-empty function.
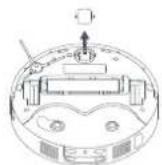
Cleaning the Side Brush
- Turn the robot vacuum over, pull out the side brush upwards, and clean it.
- Reinstall the side brush into the robot vacuum.
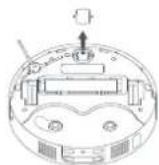
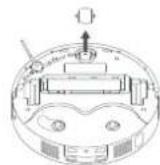
Cleaning the Caster Wheel
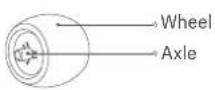
- Flip the robot vacuum over and pull out the caster wheel.
- Remove hair, dirt, and other debris from the wheel and axle.
- Reinsert the caster wheel and press it firmly back into place.
Notes:
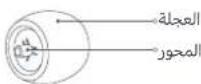
- If needed, you can use a tool such as a small screwdriver to gently pry out the axle from the caster wheel, and clean it. The wheel can be cleaned with water and reinstalled after drying.
Cleaning the Dust Compartment and Filter
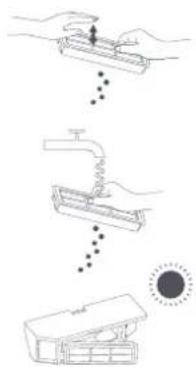
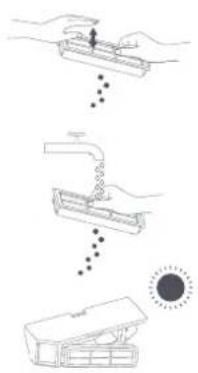
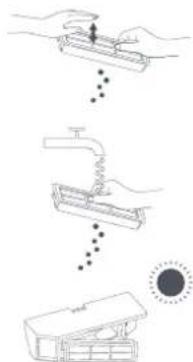
- Press and hold the dust compartment release button to take out the dust compartment, remove the filter from the filter clip, and empty the dust compartment. You can rinse the dust compartment if needed.
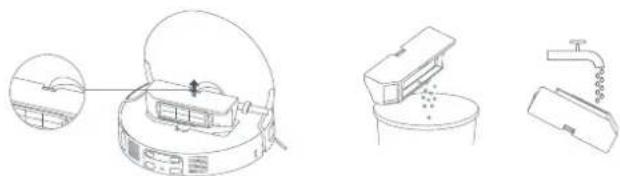
- Gently tap the filter frame to remove dirt, or clean the filter with tap water.
Notes:
- Do not attempt to clean the filter with a hard object, such as a brush or your fingers.
- Frequent rinse is not recommended, otherwise the filter may be damaged. Only use clean water to clean the dust compartment and filter. Do not use detergent.
- Fully dry the dust compartment and filter before reinstalling them.
Replacing the Mop Pad
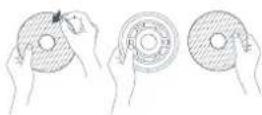
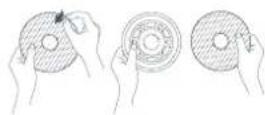
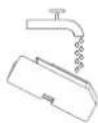
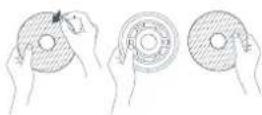
Remove the mop pad from the mop pad holder, and replace it with a new one.
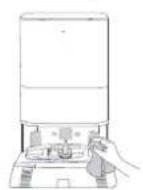
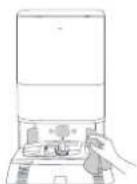
Cleaning the Omni Station
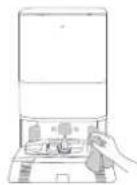
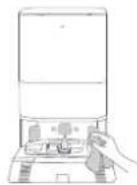
Clean the charging contacts, the auto-empty vents, and the signaling area of the omni station with a soft, dry cloth.
Battery Maintenance
The robot vacuum contains a high-performance lithium-ion battery pack. Please ensure that it remains well-charged during daily use to maintain optimal battery performance.
Note: If the robot vacuum is not used for an extended period, turn it off and put it away. To prevent damage from over-discharging, the robot vacuum should be recharged at least once every three months.
Specifications
Robot Vacuum
| Name Robotic Vacuum Cleaner | |
| Model D109GL | |
| Item Dimensions | Φ350 × 97 mm |
| Li-ion battery | 4800 mAh (Rated Capacity)5200 mAh (Nominal Capacity) |
| Charging Time Approx. 6.5 hours | |
| Compatible with Android 9.0 & iOS 12.0 or above | |
| Wireless Connectivity Wi-Fi IEEE | 802.11 b/g/n 2.4 GHz, Bluetooth 4.2 |
| Rated Voltage 14.4 V | *** |
| Charging Voltage 19.6 V | *** |
| Rated Power 55 W | |
| Operation Frequency 2400–2483 MHz | |
| Maximum Output Power < 20 dBm | |
Under normal use conditions, this equipment should be kept at a separation distance of at least 20 cm between the antenna and the body of the user.
Omni Station
| Model D109-JZEU | |
| Item Dimensions 563 × 420 × 340 mm | |
| Rated Input 220–240 V ~ 50/60 Hz | |
| Rated Output 19.6 V | \( \equiv {1.2}\mathrm{\;A} \) |
| Power (during dust emptying) | 1000 W |
| Power (during hot water cleaning) | 1630 W |
| Power (during air-drying + charging) | 80 W |
| Power Consumption | Standby mode: ≤ 0.5 W |
| Time to Enter the Condition | Standby mode: ≤ 20 min |
WEEE Disposal and Recycling Information

All products bearing this symbol are waste electrical and electronic equipment (WEEE as in directive 2012/19/EU) which should not be mixed with unsorted household waste. Instead, you should protect human health and the environment by handing over your waste equipment to a designated collection point for the recycling of waste electrical and electronic equipment, appointed by the government or local authorities. Correct disposal and recycling will help prevent potential negative consequences to the environment and human health. Please contact the installer or local authorities for more information about the location as well as terms and conditions of such collection points.
For further information, please go to www.mi.com
Manufacturer: Xiaomi Communications Co., Ltd.
Address: #019, 9th Floor, Building 6, 33 Xi'erqi Middle Road, Haidian District, Beijing, 100085, China
Made in China

Address: #019, 9th Floor, Building 6, 33 Xi'erqi Middle Road, Haidian District, Beijing, 100085, China
Made in China

CLASS 1 LASER PRODUCT
CONSUMER LASER PRODUCT
EN 50689:2021
https://www.mi.com/global/service/support/declaration.html
Support of the mop x 2
Mops x 2 (preinstalled on the mop support)
Robot vacuum Omni station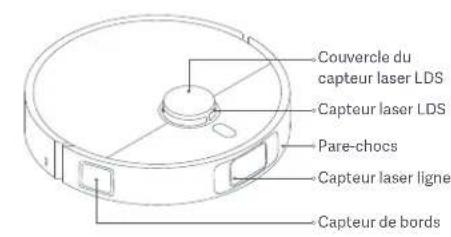
Cleaning of the Omni station
Manufacturer: Xiaomi Communications Co., Ltd
Address: #019, 9th Floor, Building 6, 33 Xi'erqi Middle Road, Haidian District, Beijing, 100085, China
Made in China

Address: #019, 9th Floor, Building 6, 33 Xi'erqi Middle Road, Haidian District, Beijing, 100085, China
Made in China

CLASS 1 LASER PRODUCT
CONSUMER LASER PRODUCT
EN 50689:2021
Address: #019, 9th Floor, Building 6, 33 Xi'erqi Middle Road, Haidian District, Beijing, 100085, China
CLASS 1 LASER PRODUCT
CONSUMER LASER PRODUCT
EN 50689:2021
EU Declaration of Conformity
Xiaomi Communications Co., Ltd. hereby declares that this radio equipment type 109GL is in compliance with Directive 2014/53/EU. The full text of the EU declaration of conformity is available at the following internet address: https://www.mi.com/global/service/support/support/declaration.html. For detailed electronic user guide, please refer to www.mi.com/global/service/userguide
This device may not cause harmful interference, and must accept any interference received, including interference that may cause undesired operation. Its energy consumption is likely to be higher than that of other similar products.
Product description
Illustrations. The illustrations of the complete set of accessories in the manual are provided for informational purposes only; the actual characteristics of the device and its functions may differ due to product improvements.
Pre-installed accessories
Brush
Lid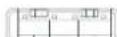
Dust bin before wet cleaning
Before wet cleaning, make sure the bin is installed on the robot vacuum, and the wet cleaning module is installed. Switch the bin to wet cleaning mode using the included cleaning brush. Press the button on the robot vacuum to start wet cleaning. The robot vacuum will start wet cleaning when it detects the bin. After finishing cleaning, it returns to the multi-function station to automatically empty the dust bin, and then lowers the wet cleaning bin to start wet cleaning.
Maintenance and technical service
Components
To keep the robot vacuum in good condition, it is recommended to perform the technical maintenance indicated in the table regularly.
Wait until the dust bag or filter is completely dry, then install them back into the robot vacuum.
Replacing the brushes
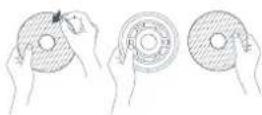
Remove the brush from the holder and replace it with a new one.
Cleaning the multi-function station
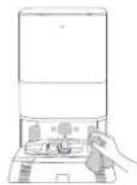
Clean the charging contacts, the self-cleaning outlet, and the signal area of the multi-function station with a dry cloth.
The robot vacuum is equipped with a high-performance lithium-ion battery. It is guaranteed to remain sufficiently charged during daily use to maintain the high performance characteristics of the battery.
Note: If the robot vacuum is not used for an extended period, turn off the power switch. To prevent deep discharge of the battery, charge the robot vacuum at least once every three months.
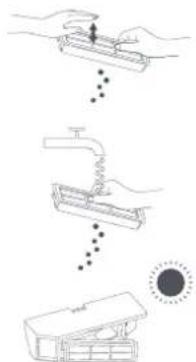
Technical specifications
Robot vacuum
Address: #019, 9th Floor, Building 6, 33 Xi'erqi Middle Road, Haidian District, Beijing, 100085, China
Made in China

Address: #019, 9th Floor, Building 6, 33 Xi'erqi Middle Road, Haidian District, Beijing, 100085, China
Address: #019, 9th Floor, Building 6, 33 Xi'erqi Middle Road, Haidian District, Beijing, 100085, China
Made in Turkey

. .dil
111
. .
.
.
.
.
.
.
.
.
.
.
.
.
.
.
.
.
.
.
.
.
.
.
.
.
.
.
.
.
.
.
.
.
.
.
. 20000000000000000000000000000000000000000000000000000000000000000000000000000000000000000000000000000 3 15 JlJl JlJl JlJl JlJl JlJl JlJl JlJl JlJl JlJl JlJl JlJl JlJl JlJl JlJl JlJl JlJl JlJl JlJl JlJl JlJl JlJl JlJl JlJl JlJl JlJl JlJI JI JI JI JI JI JI JI JI JI JI JI JI JI JI JI JI JI JI JI JI JI JI JI JI JI JI JI JI JI JI JI JI JI JI JI JI JI JI JI JI JI JI JI JI JI JI JI JI JI JI 11111111111111111111111111111111111111111111111111111111111111 222222222222222222222222222222222222222222222222222222222222222222222222222222222222222 4444444444444444444444444444444444444444444444444444444444444444444444444444444444444444444444444444 66666666666666666666666666666666666666666666666666666666666666 8888888888888888888888888888888888888 99999999999999999999999999999999999999999999999999999999999999999999 77777777777777777777777777777777777777777777777777777777777777 333333333333333333333333333333333333333333333333333333333333333333333333333
EN 60825-1:2014/A1:2021 IEC 60825-1:2014 IEC 60825-1:2014
pI 1
1 aai joo jol aio
yieiwljzaiio
EN 50689:2021
y
aagcagccgagagagagagagagagagagagagagagagagagagagagagagagagagagagagagagagagagagagagagagagagagagagagagagagagagagagagagagagagagagagagagagagagagagagagagagagagagagagagagagagagagagagagagagagagagagagag

yll lal lal aall no ll aall alal lal gwl n ng .aall alal aal s gl abg gl aall alal elas cll baiay qal ygl aikco alb gl alal w gog tull
u5go)alolill aboall 0a Juaowu Jauao 2aill olall ojg.o2olg 2olg aull all o1jg (

ps pL qlll aegao Jwogj pag aulio aohio g alolll aboall zo yJygs sIay clll wagao Jwogj alolll aboall ablb iaoy lclll aegao Jwogj p:ablo 1aillg jgllygagall
gjgljgljgljgljgljglj
ailll 0jll lgho bol, piaiwll
JgJ0nOgOgOgOgOg
gaa, Jaaill aagg jaiyagall aaiisall
CLogal alolll alstoll jao stg, alolll alaxall jle
Therefore, angle BAC = 90°.
Therefore, |x - 2| = |x - 4|
a 15 15 a
∴ 0.2 = 2
Therefore, sin α < 0, cos α < 0, tan α > 0
Therefore, cos α > sin α
Xiaomi Communications Co., Ltd.
019, 9th Floor, Building 6, 33 Xi'erqi Middle Road, Haidian District, Beijing,
100085, China

.7
.7y15
.1n
11111111111111111111111 1
.
n nnnnnnnnnnnnnnnnnnnnnnnnnnnnnnnnnnnnnnnnnnnnnnnnnnnnnnnnnnnnnnnnnnnnnnnnnnnnnnnnnnnnnnnnnnnnnnn
·
.07
IN INN NIN
.01
.0
.DTT
.1n71
n nn nnnn nn nnnn nn nnnn nn nnnn nn nnnn nn nnnn nn nnnn nn nnnn nn nnnn nn nnnn nn nnnn nn nnnn nn nnnn nn nnnn nn nnnn nn nnnn nn nnnn nn nnnn nn nnnn nn nnnn nn nnnn nn nnnn nn nnnn nn nnnn nn nnnn nn nannn nn nannn nn nannn nn nannn nn nannn nn
.0nwnnnnnnnnnnnnnnnnnnnnnnnnn
D109-JZEU
50 Hz-7 iny n nn nnnn 60 Hz-50 Hz iinu uinnn nn nnnn nn nnnn nn nnnn
2014/53/EU D109GL Xiaomi Communications Co., Ltd. https://www.mi.com/global/service/support/declaration.html: www.mi.com/global/service/userguide

7
3
1
aahn/ahnnn
1ywnnnnnnnnnnnnnnnnnnnnnnnnnnnnnnnnnnnnnnnnnnn
yoo:0x7 nonannn
wn Wi-Fi nnn
Wi-Fi-nnnn/nnn nnnn nnnnnnnnnn
1
177
unnnn7
14 4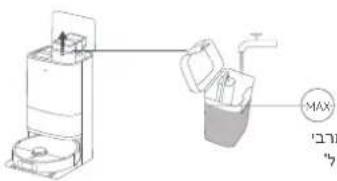
1F09FB68
iOS 12.0 - Android 9.0
2.4GHz Wi-Fi
1

Wi-Fi 019
10 10 10 10
177 7777777
172X 17
Wii-1000 Wi-Fi n nnnn nn nnnn Wi-Fi n nnnn nn nnnn 3.
n/7ywn
y 1
n nn nnn
nnn
nwn nnynnnn7
OIOIN 192 nnn nn ynn nn nn nn nn nn nn nn nn nn nn nn nn nn nn nn nn nn nn nn nn nn nn nn nn nn nn nn nn nn nn nn nn nn nn nn nn nn nn nn nn nn nn nn nn nn nn nn nn nn nn nn nn nn nn nn nn nn nn nn nn nn nn nn nn nn
nW 197 nW
y
:nnn
nannnnn nnnnnnnnnnnnnnnnnnnnnnnnnnnnnnnnnnnnnnnnnnnnnnnnnnnnnnnnnnnnnnnnnnnnnnnnnnnnnnnnnnnnnnnnnnnnnnnnnnnnnnnnn
yannnnn nn nnnnnnnnnnnnnnnnnnnnnnnnnnnnnnnnnnnnnnnnnnnnnnnnnnnnnnnnnnnnnnnnnnnnnnnnnnnnnnnnnnnnnnnnnnnnnnnnnnnnnnnnnnnnnnnnnnn
Tn nn nnnnnnnnnnnnnnnnnnnnnnnnnnnnnnnnnnnnnnnnnnnnnnnnnnnnnnnnnnnnnnnnnnnnnnnnnnnnnnnnnnnnnnnnnnnnnnnnnnnnnnnnnnnnn
Nn nnnn nn nnnn nnnn nnnn nnnn nnnn nnnn nnnn nnnn nnnn nnnn nnnn nnnn nnnn nnnn nnnn nnnn nnnn nnnn nnnn nnnn nnnn nnnn nnnn nnnn nnnn nnnn nnnn nnnn nnnn nnnn nnnn nnnn nnnn nnnn nn
-
yannnnn nn
nnn nn nnnnnnnnnnnnnnnnnnnnnnnnnnnnnnnnnnnnnnnnnnnnnnnnnnnnnnnnnnnnnnnnnnnnnnnnnnnnnnnnnnnnnnnnnnnnnnnnnnnnnnnnnnnnnnn
nynnn nynnnn nn

Waste Electrical and Electronic Equipment - WEEE (2012/19/EU)

| ### | |
| ### 109GL | |
| 40 | ### 97 |
| (###) 4800 mAh (###) 5200 mAh | ### |
| ### 6.5 | |
| ### | |
| ### | |
| ### | |
| ### | |
| ### | |
| ### | |
| ### | |
| ### | |
| ### | |
| ### |
Xiaomi Communications Co., Ltd.
019, 9th Floor, Building 6, 33 Xi'erqi Middle Road, Haidian District, Beijing,
100085, China
10

Address: #019, 9th Floor, Building 6, 33 Xi'erqi Middle Road, Haidian District, Beijing, 100085, China
Made in China

Safety Information
Please read this instruction manual carefully and keep it for future reference.
Restrictions on use
- This device is intended for household use only. Do not use it outdoors, in commercial or industrial environments, or on wet surfaces.
- The device can be used by children aged 8 and above and by persons with reduced physical, sensory or mental capabilities or lack of experience and knowledge if they have been given supervision or instruction concerning use of the appliance in a safe way and understand the hazards involved. Children shall not play with the appliance. Cleaning and user maintenance shall not be made by children without supervision.
- The device is not intended for use by persons with reduced physical, sensory or mental capabilities or lack of experience and knowledge, unless they are supervised or have been given instruction concerning use of the appliance by a person responsible for their safety. Children should be supervised to ensure that they do not play with the appliance.
- If the power cord is damaged, it must be replaced by the manufacturer, its service agent or similarly qualified persons in order to avoid a hazard.
- Battery replacement of the device must be done by a specialist.
- Make sure that children and pets are at a safe distance from the robot vacuum during operation.
- Do not use the robot vacuum on elevated surfaces without a protective barrier.
- Do not turn over the robot vacuum cleaner. When moving the robot vacuum cleaner, do not use the lidar sensor cover, lift it by the top cover.
- Do not install, charge, or use the robot vacuum cleaner outdoors, in a bathroom, or near a swimming pool.
- If the appliance is connected to a power cable, a dangerous situation may arise.
- Remove sharp objects and fragile items that the robot vacuum cleaner might damage or that might get caught during operation.
Do not place children, pets, or any objects on the robot vacuum cleaner. Do not allow hair, fingers, or other body parts to get into the suction opening of the robot vacuum cleaner. - Do not use the robot vacuum cleaner to clean easily flammable substances. - Do not use the robot vacuum cleaner to clean hard or sharp objects. - Before cleaning or maintenance, unplug the appliance from the electrical outlet. - Do not wipe the robot vacuum cleaner or the base station with wet cloth and do not pour any liquid on them. After cleaning, parts that come into contact with water must be thoroughly dried before reinstalling and using. - Before transporting the appliance, turn off the robot vacuum cleaner and, if possible, store it in its original packaging. Use the appliance in accordance with the instructions provided in the user manual. The user is responsible for any damage that may occur as a result of improper use of the product. - Do not use the robot vacuum cleaner at ambient temperatures above 40°C or below 0°C, and also if there is spilled liquid or other liquid on the floor.
Charging
WARNINGS
- It is forbidden to use third-party batteries, chargers, or base stations. The robot vacuum cleaner works only with the base station D109-JZEU.
- It is forbidden to charge non-rechargeable batteries. The user does not need to check the batteries, as the base station automatically detects their charge level. The device automatically adjusts the charging frequency.
- Do not attempt to disassemble, repair, or modify the battery or the base station yourself.
- Do not place the base station near a heat source.
- Do not wipe or clean the charging contacts of the base station with water, liquid, or wet hands.
- Do not expose the appliance or battery to high temperatures.
- Be aware of the risk of short circuit when the appliance is powered by the battery, or short circuit of the battery with metal objects.
- If the power tool is not used for a long period, fully charge it, then switch it off and store it in a dry, ventilated place. Charge the power tool only in a dry place, away from moisture.
- Carefully handle the battery, avoid short circuits or leakage of acid. In case of acid leakage from the battery, immediately wipe it with a dry cloth, avoiding contact with skin. Then dispose of the battery according to the applicable recycling regulations or special waste disposal procedures.
- Lithium-ion batteries may contain reactive substances that are hazardous to the environment. Before disposing of the power tool, first remove the battery, then dispose of it or hand it over for recycling in accordance with local laws and regulations of the country or region where it is used.
- Before disposing of the battery, it must be fully discharged and ensure that it is disconnected from the power source.
- Unscrew the screw on the bottom surface and remove the cover.
- Disconnect the battery connector, then remove it. Do not damage the battery housing to avoid injury.
- Hand over the battery to a recycling facility or a specialized recycling company.
- Before disposing of the device, it is necessary to remove the battery from it.
- Before removing the battery, it is necessary to disconnect the device from the electrical network.
- The battery must be disposed of in a safe manner.

Read the instructions before use.

Familiarize yourself with the instructions before using the device.
Safety information during operation
The laser sensor in this device complies with the requirements of IEC 60825-1:2014 and EN 60825-1:2014/A11:2021 for Class 1 laser products. During use, avoid direct eye contact with the laser beam.
CLASS 1 LASER PRODUCT
COMPLIES WITH 21 CFR 1040.10 AND 1040.11
EN 50689:2021
EU Declaration of Conformity

Xiaomi Communications Co., Ltd. hereby declares that this robot vacuum D109GL complies with the essential requirements and other relevant provisions of Directive 2014/53/EU. The full text of the EU declaration of conformity is available at the following internet address: https://www.mi.com/global/service/support/declaration.html. Detailed electronic manual can be requested at: www.mi.com/global/service/userguide
The device does not have a user-replaceable battery or equivalent power source for energy efficiency or power management. The device may consume more energy than other products that meet the same functional requirements.
Product description
Robot vacuum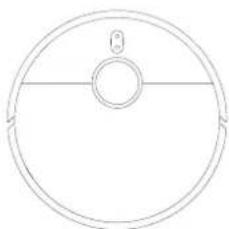
The device, its accessories, and the user interface described in this user manual are subject to change without prior notice.
List of included accessories

Remove the protective film from the display (pre-installed at the factory)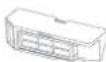
display screen
Other accessories
Water tank
Dust cover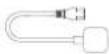
Auto-clean charging station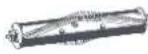
Support bracket (pre-installed on the base station)
Base station (includes pre-installed support bracket, water tank, dirty water tank, and charging dock)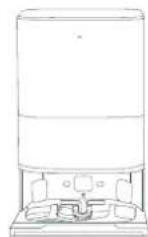
Robot vacuum
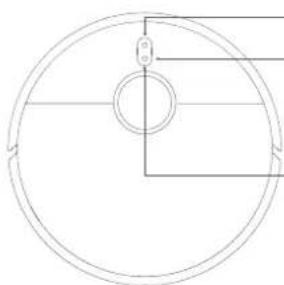
Press and hold the power button for 3 seconds to turn the robot vacuum on or off. Press to start cleaning. Press again to pause cleaning. Press and hold to return the robot vacuum to the base station for charging. Press to resume cleaning after pausing. Press and hold to turn the robot vacuum off. Press and hold for 3 seconds to enable or disable the child lock.
Indicator light status: solid white / flashing white / solid red / flashing red. Solid white: charging. Flashing white: returning to base / updating. Solid red: error. Flashing red: low battery / error. Off: powered off or in sleep mode.
Robot vacuum base station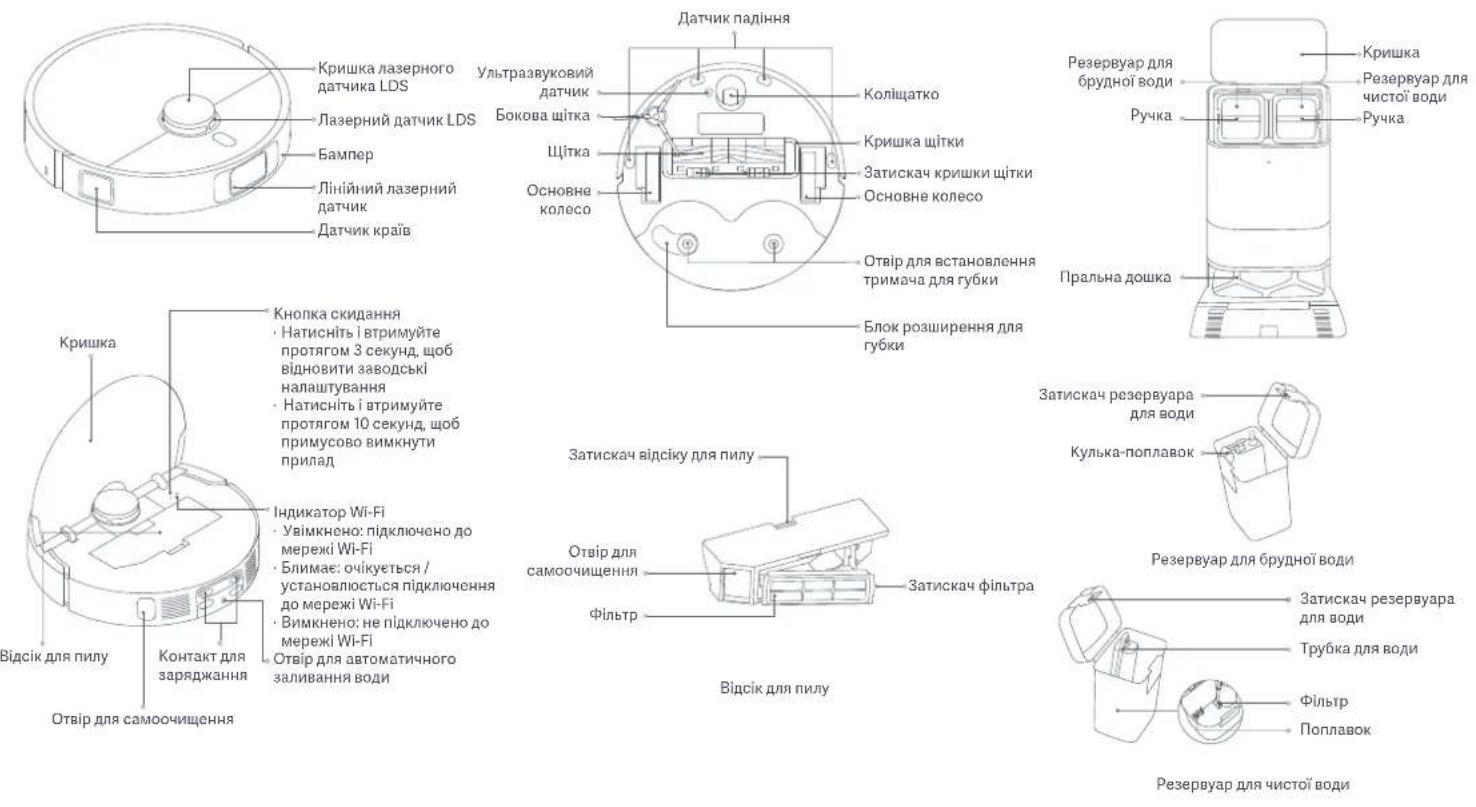
Installation
Base station and protective films
Remove the protective films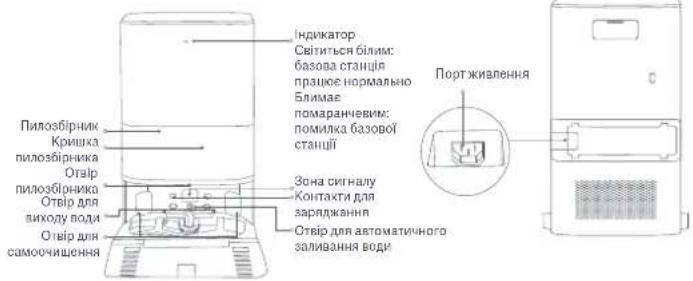
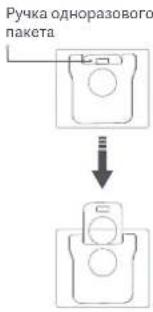
Note: The base station was previously installed with a one-time package.
Note: Replacement is possible with the help of glue.
Before using the vacuum cleaner, remove the important strips 12 on both sides, as well as the protective films 3 and 4.
Installing the base station
Install the base station in the specified direction, as shown in the illustration. When performing this action, make sure it is properly seated.
Positioning the base station
- Place the base station on a flat, hard surface, for example on a wooden or tiled floor. Make sure there is free space of more than 0.82 m in front, more than 1.93 m in length, and more than 0.44 m in width. Place the base station near an electrical outlet with a sufficient Wi-Fi signal.

How to use
Installing the water tank filling the reservoir with water
Install the water tank on the base station in the direction shown in the illustration. The water tank must be in the same plane as the water surface of the station. Together they form a flat surface.
Connecting the power supply
Place the base station in the appropriate zone for connecting to the electrical outlet using the power cord. Note: Do not insert the power cord into the power port of the base station. The indicator should light up white.
Po3aUyBaHHpO6Ta-NINOCoca
IpeepBVKOPNCTAHHAMHaTCHITb KHONKHOHa pOboTINNNOCi yTPMMyte 3 cekyHn, uo6 yBMkHTyn Ioro. LIOHPOpOBoT-NINOCOCYBIMKHTbC,yCTAHOBITbHOHa6a3oBy cTaHtio Ta nepeKohAteC,IO KOHTKnI dapzdkxHHa pOBoTI-NINOCoc tChTuHnOBHCTU cyMIueHo. - PicnycniuHoro nidknnoeHHra p6oTa-ninococdo 6a3oBOi cTahuiB nNouyete roLoocoby nka3ky npo noaToK 3apJxKaHHa.
PnumitKc
-Пердпршим ВИКОПИСТАннЯmpaДМО NOBHCIOЗAPAДNTN pOБOT-NINOCOC. JIko pO60T-nINOOC He BMNAKcTBc Hpe3 Hn3bKn PiBHeb 3apJe 6aTaPei, ypyHy po3aUyTe NOro Ha 6aBoi CtaHui Ta 3aNnUte NOro 3apAkaTnC npOTrOM neBHOY OACy. Плд ac 3apdkaHЯ рбOT-nINOCOC aBtOMaTHHO BMNKAETbCra Ta NOrO HEMOXJIIMBO BUMKHHTN.
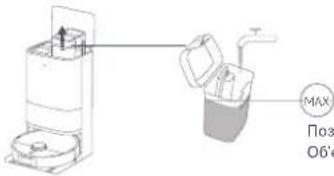
Pn3aHkaMaKcHmAbHbHoropBnBODnO6'empeepByapa nnaBOuN:4n
PpumitKu:
3a60pnoHnEbCn HApntn BpeepByap rapuy Body,ockInbKn ce moKe Ioro nowKoNDn. U6yHnKHTn nookdKeHHa po6oTa-nnococa, He daBaTe kOHNx peOBnH, 3OKPema MmHnx 3acobib, KpIM YCTOBoN.
PikKluuHnHa 3a Donomoro nporpamn Xiaomi Home
Ie npoykt npaioe 3 nporpamoXiaomi Home. BukopictobyTe nporpamy XiaomiHome,IO6 kepybatu CboIM npctpoem I b3aemodirn 3 iHMMnpntpormno pOzMHORO 6dyDHNK.
Ckahyte QR-KoD, 063abAHtAKTNn IHCTANIOBATn nporpamy. Bnpeepdete HA cTOpIHky HanaIITyBAHnN pIKKnOeHNH, KIO nporpama Bke BcTAHOBeHa. A60 3HaJntB "Xiaomi Home" y mara3HI nporpam, 063abAHtAKTNn IHCTANIOBATnporpamy.
BikpniTe nporpamy Xiaomi Home, HATnCHt b y BepxHbomy npabOMy kyT Ta dotpmyTecra Bkazibok, uo6 doatu Cbi npictpi.
1F09FB68
PnumitKc:
- PoBOT-nIIOOC cyMICHn i3 nporpamO Xiaomi Home i nIITPmMy Android 9.0 ta iOS 12.0 abo HOBIOWI Bepci. IπiTpmyoTbc TnbKm Mepexi Wi-Fi i3 qactotoio 2,4Γu. Bepcio nporpam Moke 6ytn OHOBnHO, DToPmYTeCb Bk3iBOK JINOTOH Bepcip nporpam. Koi nproob-niNococ nkiKIOaebcra 3a donomoroo nporpamXiaomi Hone, BIn nkiKIOaebcno MEpekei. Ioo bIeJedn no Ro bID mepekei, moxHa cKnHytn HanaTyBaHn Wi-Fi.
CnndaHnHaawTyBaHbWi-Fi
Press the power button on the robot vacuum cleaner to turn it on. The indicator light will turn on. Follow the instructions in section 1.3 to connect the Wi-Fi. 2. Press and hold the button for 7 seconds until you hear a beep, and the robot vacuum cleaner will enter the network setup mode. 3. The Wi-Fi indicator will blink, indicating that the network setup mode is active.
Turning On and Off
Press and hold the button for 3 seconds to turn on the robot vacuum cleaner. When the indicator on the robot vacuum cleaner lights up, it means the robot vacuum cleaner is in standby mode. If the robot vacuum cleaner is not charging, press the button for 3 seconds to turn it on.
Note: The robot vacuum cleaner cannot be turned on while it is charging.
Creating a Map
Before starting the first cleaning, the robot vacuum cleaner will create a map. The robot vacuum cleaner will automatically create a map without stopping. The map creation will be complete when the robot vacuum cleaner returns to the base station. The map will be saved automatically.
Note:
- Make sure the robot vacuum cleaner is fully charged and placed on the base station.
- Before creating a map, close the doors and windows in the room, and remove obstacles so that the robot vacuum cleaner does not get stuck. Do not move the robot vacuum cleaner or the base station during the map creation process. Do not move the base station. The robot vacuum cleaner may not be able to create a map if there are obstacles in the way. Place the base station against a wall on a flat surface, away from stairs or drop-offs, so that the robot vacuum cleaner does not fall.
- Before starting the map creation, remove any fragile items, cables, or objects with tassels or fringes from the floor to prevent the robot vacuum cleaner from getting tangled.
Pausing
Press any button to pause the robot vacuum cleaner while it is running. Note: When the robot vacuum cleaner is paused, do not lift or move it, as this may cause errors. It may cause the robot vacuum cleaner to lose its position relative to the base station or result in data loss of the map.
Sleep Mode
If the robot vacuum cleaner is left idle, it will automatically enter sleep mode, and the indicator will turn off. Press any button to activate the robot vacuum cleaner. Note: After 10 minutes in sleep mode, the robot vacuum cleaner will automatically turn off.
Resume Cleaning
The robot vacuum cleaner automatically returns to the charging station after completing the cleaning task. The charging station should be installed in a place where the robot can easily reach it.
Charging the robot vacuum cleaner
To turn the robot vacuum cleaner on or off, press the button on the robot vacuum cleaner or use the remote control.
Note: After turning off the robot vacuum cleaner, the buttons on the robot vacuum cleaner will not work. Instead, you can control the robot vacuum cleaner using the app.
Emptying the dust bin
The robot vacuum cleaner automatically returns to the charging station for charging after completing the dry and wet cleaning tasks, the dry cleaning task before the wet cleaning task, or the dry cleaning task. The charging station will automatically empty the dust bin after the robot returns.
Note:
The robot vacuum cleaner will automatically empty the dust bin when it returns to the charging station. If the auto-empty function is turned off in the app, the charging station will not automatically empty the dust bin.
To change the auto-empty frequency in the app, the charging station will empty the dust bin according to the selected frequency.
Dry and wet cleaning
Starting cleaning
- Before first use, make sure the mop pad and any necessary parts are installed on the robot vacuum cleaner, and the water tank is filled with water. Select the dry and wet cleaning mode, then use the remote control or press the button on the robot vacuum cleaner to start cleaning. The robot vacuum cleaner will calculate the optimal cleaning path and begin the cleaning task according to the created map.
Notes:
Before starting cleaning, the robot vacuum cleaner will wet the mop pad, so you need to wait a bit.
Before starting cleaning, make sure the charging station is connected to the power source, and the robot vacuum cleaner is connected to the charging station.
After cleaning the robot vacuum and returning it to the base station, dry and wet cleaning, radio, because the robot vacuum will start cleaning from the base station. Do not move the base station, empty the clean water tank, the dirty water tank, or the cleaning brush. The base and the force hold the cleaning brush. The brush can be removed for cleaning. When removing the brush, do not touch the water outlet opening for a long time, to avoid damage.
Automatic return of the brush to the base station for cleaning
During cleaning, the robot vacuum can automatically return to the base station to clean the brush and the cleaning solution. After cleaning, the robot vacuum resumes cleaning.
Automatic drying of the brush after cleaning and drying
After cleaning and returning the robot vacuum to the base station, the base station automatically performs the drying cycle, and then the brush is dried.
Emptying the dirty water tank
After cleaning and drying the brush, it is necessary to empty the dirty water tank to prevent the formation of unpleasant odors.
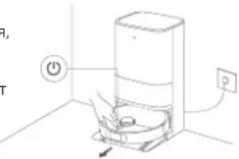
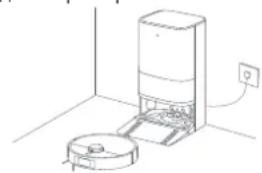
Dry cleaning
Select the dry cleaning program, then use the program or press each robot vacuum to start cleaning. After that, the robot vacuum will only use the brush for dry cleaning on the base station. After finishing dry cleaning, it will return to the base station to automatically empty the dust bin.
Note: If the brush is not installed, the robot vacuum will automatically start dry cleaning.
Wet cleaning
Before starting, make sure the brush is installed on the robot vacuum and the clean water tank is filled with water. Select the wet cleaning program, then use the program or press the button (1) on the robot vacuum to start cleaning. After that, the robot vacuum will first automatically wet the brush, then start wet cleaning on the base station. After finishing wet cleaning, it will return to the base station to clean and dry the brush.
Dry cleaning before wet cleaning
Before starting cleaning, make sure the brush is installed on the robot vacuum and the clean water tank is filled with water. Select the dry cleaning program before wet cleaning, then use the program or press the button 1 on the robot vacuum to start cleaning. After that, the robot vacuum will only use the brush for dry cleaning. After finishing dry cleaning, it will return to the base station to automatically empty the dust bin and wet the brush, then lower the brush to start wet cleaning.
Additional technical maintenance
Details
For proper operation and to ensure the correct functioning of the device, it is necessary to follow the instructions below.
Charging the robot and the remote control
1. Place the robot on the charging base and connect the power adapter.
- Wipe the contacts of the robot and the charging base with a dry cloth and place the robot on the charging base. It is recommended that the robot is placed inside the charging base. The robot can also be turned on manually.
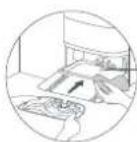
NOTE: Do not use the charging base while it is being cleaned or when it is wet. If the robot is not used for a long time, remove it from the charging base.
Cleaning the charging contacts
Clean the charging contacts of the robot and the charging base with a dry cloth, as described below.
Cleaning the charging base
Clean the charging contacts, the ventilation openings, and the charging base with a dry cloth.
Battery maintenance
The robot vacuum is equipped with a high-performance lithium battery. During normal use, it should be charged regularly to ensure optimal performance of the battery.
NOTE: If the robot vacuum is not used for a long period of time, turn it off and store it. To avoid damage from over-discharging, the robot vacuum should be charged at least once every three months.
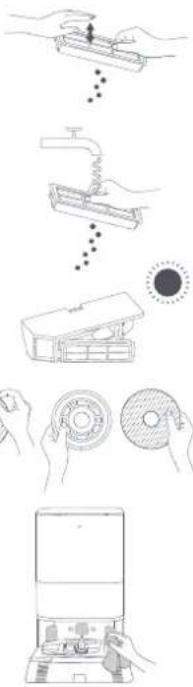
Specifications
Robot vacuum
Address: #019, 9th Floor, Building 6, 33 Xi'erqi Middle Road, Haidian District, Beijing.
100085, China
Made in China

Read the manual carefully before use and keep it for future reference.
Intended use
This product is intended for cleaning floors in domestic environments. Do not use it in outdoor spaces, in non-recessed areas, or on wet surfaces. This device can be used by children aged 8 years and above and by persons with reduced physical, sensory or mental capabilities or lack of experience and knowledge, provided they have been given supervision or instruction concerning use of the appliance in a safe way and understand the hazards involved. Children shall not play with the appliance. Cleaning and user maintenance shall not be made by children without supervision. The device is not intended for use by persons (including children) with reduced physical, sensory or mental capabilities or lack of experience and knowledge, unless they have been given supervision or instruction concerning use of the appliance in a safe way and understand the hazards involved. Children should be supervised to ensure that they do not play with the appliance. If the power cord is damaged, it must be replaced by the manufacturer, its service agent, or similarly qualified persons in order to avoid a hazard. Replacement of the appliance's parts should be done only by qualified personnel. Ensure that children and pets remain at a safe distance from the robotic vacuum when it is in operation. Do not use the robotic vacuum in spaces where the floor is wet without protective measures. Do not place the robotic vacuum upside down. Do not move the robotic vacuum by pulling the LDS sensor cover, the cover, or the sensor. Do not crush, bend, or use this robotic vacuum in outdoor spaces, on uneven surfaces. - There is a risk of danger if the vacuum passes over the power cord. Remove fragile or flammable objects from the floor to prevent the robotic vacuum from hitting them and causing damage.
Do not immerse, spray, or wet the power tool, and do not expose it to rain or moisture. Always keep the tool dry and clean. - Always keep your hands, fingers, and other body parts away from the rotating parts of the power tool. Do not use the power tool for purposes other than its intended use. Do not operate the tool with wet hands. The tool must be disconnected from the power source before cleaning or maintenance. Do not expose the tool to water or rain, and do not leave it outdoors in wet conditions. After completing the necessary tasks, tighten all screws and bolts and use the tool properly. - The power tool must be unplugged when not in use, and, if possible, store it in its original packaging. Use this product only as described in the user manual. Improper use may result in hazardous situations. Do not use the power tool in environments with temperatures above 40°C or below 0°C, or in damp or wet conditions.
Battery and Charger Safety:
Do not use the battery charger outdoors, near water, or in wet conditions. The power tool is designed to be used only with the D109-JZEU charger. Do not charge non-rechargeable batteries. - The charger requires no user intervention to operate on 50 Hz and 60 Hz power supplies, and the product is designed to work only with 50 Hz and 60 Hz. Do not attempt to disassemble, repair, or modify the charger or the power tool. Do not place the charger near heat sources.
Do not operate or clean the charger with wet hands or expose it to water or rain.
Do not expose the tool or battery to extreme temperatures.
Disposal: Dispose of the battery/charger/tool in accordance with local regulations.
Dispose of used batteries: The Wi-Fi module
Recycling: Recycle the battery/charger/tool in accordance with local regulations.
Power tool Charger
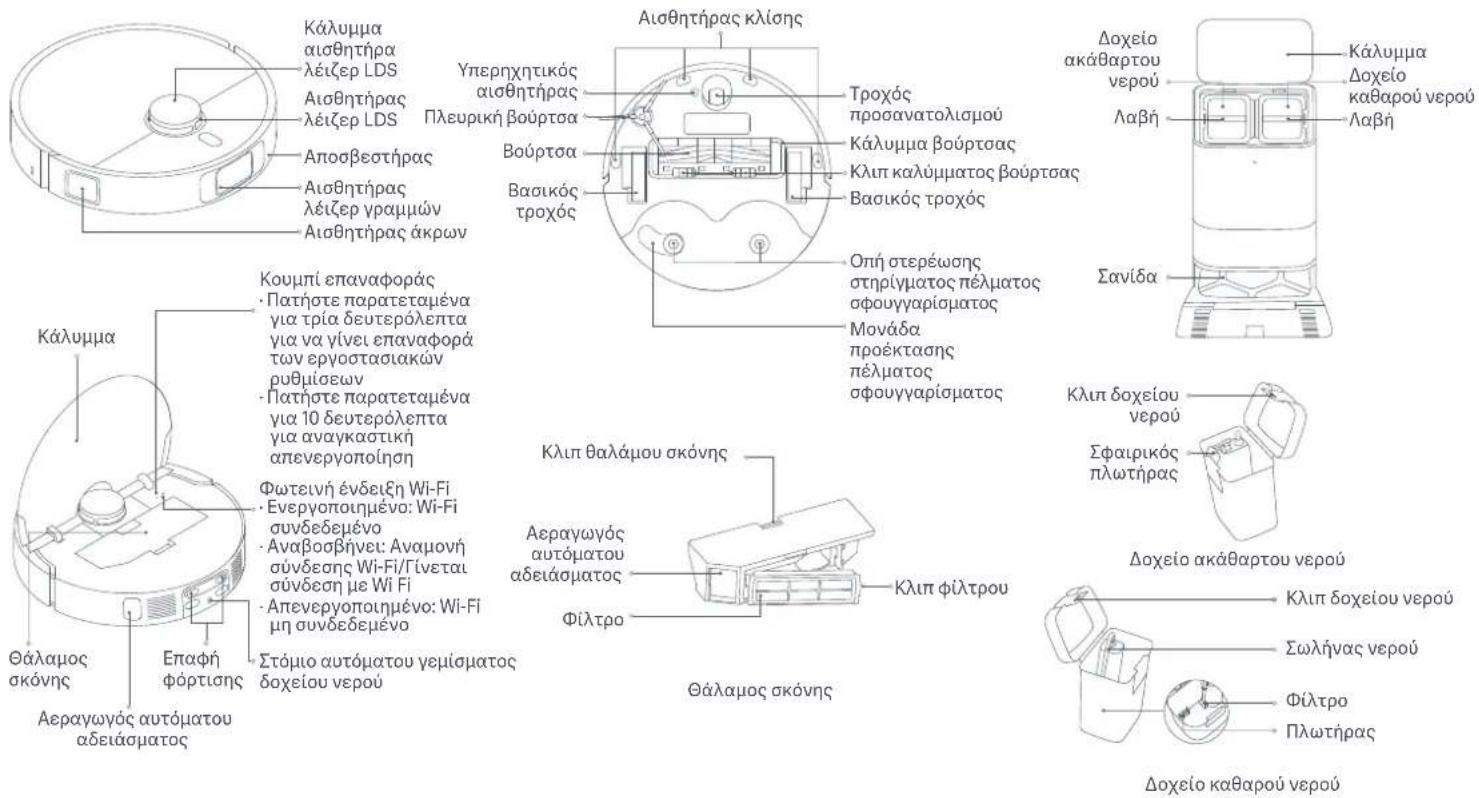
Accessories
Charger for rechargeable batteries
View from above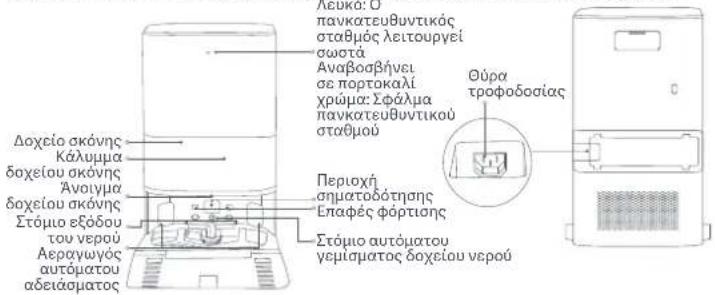
Battery pack
Charging indicator
Charging slot
Warning: The adjustable stand has been pre-assembled and must be used in the workshop.
Burglar alarm control panel
Warning: Do not replace the battery with a drill.
To remove the protective cover, remove the two screws (1 and 2) from the two sides and the protective screws (3, 4, and 5).
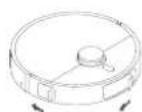
Positioning the burglar alarm and the motion sensor
Place the burglar alarm and the motion sensor as shown in the figure. They have been positioned correctly when you hear a click.
Burglar alarm
Adjustable stand
Place the adjustable stand on a wall or a flat surface, such as a wooden surface or a surface on a pallet.
Make sure there is a clear space of at least 0.82 meters, a width of at least 1.93 meters, and a height of at least 0.44 meters. Make sure the adjustable stand is in a good position and on a Wi-Fi, electrical, or other connection.
Usage
Place the extension base of the ladder near the water tank.
Place the extension base of the ladder when the adjustable stand is in the direction of the arrow. Make sure the extension base of the ladder is at the same level as the lower part of the adjustable stand and the lower surface is flat.
Connect the power supply
Place the device on a flat, stable surface, and place the device's base on a flat surface as well.
Warning: Place the device and its base on a stable surface to prevent the device from falling and causing injury.
Placement of the device
Before use, please place the device on a flat surface for at least a few seconds to ensure proper operation. Once the device is properly placed, place it on the flat surface and adjust it to the correct angle. The device should be placed on a flat surface to ensure it operates correctly.

Notes:
Before first use, it is recommended to charge the device. If the device cannot be charged due to a low battery, place the device on the charging base and connect it to power. The device will start charging automatically and cannot be used until it is charged.
Indicator light: The device is charging when the indicator light is on.
Precautions:
Do not place the device in water, as it may cause damage. Do not add any substances, such as cleaning agents, except for water, to avoid damaging the device.
Connect to the Xiaomi Home app
This device supports the Xiaomi Home app. Use the Xiaomi Home app to control the device and receive notifications.
Scan the QR code to download and install the app. If the app is already installed, you will be directed to the setup page. Alternatively, search for Xiaomi Home in the app store to download and install it.
1F09FB68
Open the Xiaomi Home app, tap the + icon at the top right, and follow the instructions to add the device.
Notes:
Connect the device to the Xiaomi Home app. It supports Android 9.0 and iOS 12.0 or later versions. It is compatible with 2.4 GHz Wi-Fi networks. The manufacturer's instructions may be updated based on the latest version. When first connecting to the Xiaomi Home app, follow the instructions to connect to the network. You can reset the Wi-Fi to disconnect it from the network.
Resetting Wi-Fi
Follow the steps below to reset the device so it can connect to the network if it has been reset or if the password has been changed for other reasons. 1. Open the device's cover and remove the battery. 2. Press and hold the button for 7 seconds while reinserting the battery to hear a voice prompt that indicates the device is ready for configuration. 3. When the indicator light flashes, the device is ready to reconnect to Wi-Fi.
Enable/Disable
To enable the device, press and hold the button for 2 seconds. When the indicator light turns on, the device enters pairing mode. If the device is in a standby state and not connected, press and hold the button for 3 seconds to disable it.
Note: When the device is enabled, it activates automatically and cannot be disabled.
Creating a map
To create a map for the first time, follow the instructions in the app to create a new map and device. The mapping process will be completed when the device returns to the charging dock and stops automatically.
Notes:
Ensure the device is fully charged and the charging dock is placed in a suitable location before creating a map. Remove objects from the floor, close doors, and avoid areas that are not suitable for the device's operation. During map creation, do not move, lift, or carry the device, and do not move the charging dock. After creating the map, mark virtual walls or restricted areas in areas that are not suitable for the device to enter or where it may get stuck. [Repeated text removed]
When the device is operating, press any button to pause it.
Warning: To prevent possible hearing damage, do not listen at high volume for long periods. Additionally, there may be instructions that the user should follow to avoid damage to the hearing system or to the device.
Function α
Information about the disposal and recycling WEEE

All products bearing this symbol are waste electrical and electronic equipment (WEEE, in accordance with Directive 2012/19/EU) and should not be mixed with unsorted household waste. Instead, to protect human health and the environment, you should dispose of this type of waste equipment at a designated collection point or official recycling centers for the recycling of waste electrical and electronic equipment. Proper disposal and recycling helps prevent potential negative consequences for the environment and human health. For more specific information about the nearest collection point, as well as about the terms and conditions of use, please contact your local municipal authority or the official recycling centers.
For more information, please visit the website www.mi.com Manufacturer: Xiaomi Communications Co., Ltd.
Address: #019, 9th Floor, Building 6, 33 Xi'erqi Middle Road, Haidian District, Beijing, 100085, China
Made in China

Safety information
Address: #019, 9th Floor, Building 6, 33 Xi'erqi Middle Road, Haidian District, Beijing, 100085, China
Made in China

Safety information
CLASS 1 LASER PRODUCT
CONSUMER LASER PRODUCT
EN 50689:2021
EU declaration of conformity
Xiaomi Communications Co., Ltd. hereby declares that the radio equipment type D109GL complies with Directive 2014/53/EU. The full text of the EU declaration of conformity is available at the following internet address: https://www.mi.com/global/service/support/declaration.html. For a detailed e-manual, go to www.mi.com/global/service/userguide
Reset Wi-Fi Pause
Address: #019, 9th Floor, Building 6, 33 Xi'erqi Middle Road, Haidian District, Beijing, 100085, China
Made in China


IEC 60825-1:2014 11:2021 and user manual 1
Safety instructions: 1
Safety instructions and warnings
EN 50689:2021
US: This device complies with part 15 of the FCC Rules. Operation is subject to the following two conditions: (1) This device may not cause harmful interference, and (2) this device must accept any interference received, including interference that may cause undesired operation.
C
Xiaomi Communications Co., Ltd. 08666125345@qq.com; 2014/53/EU US: This device complies with part 15 of the FCC Rules. Operation is subject to the following two conditions: (1) This device may not cause harmful interference, and (2) this device must accept any interference received, including interference that may cause undesired operation.
https://www.mi.com/global/service/support/declaration.html
For more information, please visit www.mi.com/global/service/userguide
This device complies with part 15 of the FCC Rules. Operation is subject to the following two conditions: (1) This device may not cause harmful interference, and (2) this device must accept any interference received, including interference that may cause undesired operation.
This device complies with part 15 of the FCC Rules.
FCC ID: 2AFZZ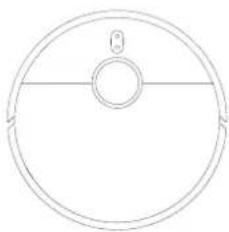
Manufacturer: Xiaomi Communications Co., Ltd. Address: No. 019, 9th Floor, Building 6, 33 Xi'erqi Middle Road, Haidian District, Beijing, China 100085
This device complies with part 15 of the FCC Rules.
This device complies with part 15 of the FCC Rules. (This device complies with part 15 of the FCC Rules.)


| Börskaudag (Jahnsunabhängige) | |
| su D105i. | |
| uncon | €250 x 97 DL |
| nuncaadabauon | 4800 m/s (degnoun) |
| 5200 m/s (nonquail) | |
| comlumansse usancu 6.5 dlucu | |
| cuviuluri Anemid 9.5 leu 105 12.0 dlucu | |
| msdoucoulamre w-fi IEEC 802.11 byn 2 | GtL, Bluetooth 4.2 |
| deusoculwH 14.4 v | m |
| isodulwhumansse 19.8 v | m |
| deinveolwH 65 w | |
| drunchudugrams 2400 2483.5 MHz | |
| meowhimsongeo < 20 dBm |
| sud109-JZEU | |
| undicn 363 x 420 x 348 u.u. | |
| dastinon 220-240 V - 5080 Hz | |
| dastinon 19.6 V | =1.2 A |
| mashow (andromen) 1000 W | |
| mashow (andromen) nuclosanadoukou 1680 W | |
| mashow (andromen) hauhule-mansel | 30 W |
| meltwaren | Krasstaudone: ≤ 0.5 W |
| centramedioule | Krasstaudone: ≤ 30 u |
www.mi.com
Address: #018, 9th Floor, Building 6, 33 Xi'eroi Middle Road, Haidian District, Beijing, 100085, China

Xiaomi Technology Netherlands B.V.
Prinses Beatrixlaan 582, 2595BM, The Hague, The Netherlands
contact@support.mi.com
UK REP.
Xiaomi Technology UK Limited
Davidson House, Forbury Square, Reading, Berkshire RG1 3EU
contact@support.mi.com
Omni Station
| Model D109-JZEU | |
| Dimensi Barang 563 × 420 × 340 mm | |
| Masukan Pengenal 220–240 V ~ 50/60 Hz | |
| Keluaran Pengenal 19,6 V | \( = = {1.2}\mathrm{\;A} \) |
| Daya (selama pengosongan debu) 1000 W | |
| Daya (selama pembersihan air panas) | 1630 W |
| Daya (selama pengeringan + pengisian daya) | 80 W |
| Konsumsi Daya | Mode siaga: \( \leq 0,5\mathrm{\;W} \) |
| Waktu untuk Memasuki Kondisi | Mode siaga: \( \leq {20}\mathrm{{mnt}} \) |
Address: #019, 9th Floor, Building 6, 33 Xi'erqi Middle Road, Haidian District, Beijing.
100085, China
Made in China

https://www.mi.com/global/service/support/declaration.html
You can find a detailed e-guide at www.mi.com/global/service/userguide
Vacuuming for floor washing
Manufacturer: Xiaomi Communications Co., Ltd.
Address: #019, 9th Floor, Building 6, 33 Xi'erqi Middle Road, Haidian District, Beijing, 100085, China
Made in China

Safety information
Address: #019, 9th Floor, Building 6, 33 Xi'erqi Middle Road, Haidian District, Beijing, 100085, China
Made in China

LASER PRODUCT CLASS 1
LASER PRODUCT FOR CONSUMER USE
EN 50689:2021
EU Declaration of Conformity
CE Xiaomi Communications Co., Ltd. hereby declares that the radio equipment type D109GL is in compliance with Directive 2014/53/EU. The full text of the EU declaration of conformity is available at the following internet address: https://www.mi.com/global/service/support/declaration.html For a detailed e-manual, go to www.mi.com/global/service/userguide
White: cleaning / tidying complete / fully charged
Vacuuming before mopping
Before starting, make sure the mop unit is installed on the robot vacuum and there is water in the clean water tank. Select vacuum before mop mode in the app, and use the app or press the (1) button on the robot vacuum to start the cleaning task. The robot vacuum will then lift the mop unit to vacuum. When it has finished vacuuming, it returns to the dock to automatically empty the dust and wet the mop pads. Then it lowers the mop unit to start mopping.
Address: #019, 9th Floor, Building 6, 33 Xi'erqi Middle Road, Haidian District, Beijing, 100085, China
Made in China

Safety information
CLASS 1 LASER PRODUCT
LASER PRODUCT FOR CONSUMERS
EN 50689:2021
Address: #019, 9th Floor, Building 6, 33 Xi'erqi Middle Road, Haidian District, Beijing, 100085, China
Made in China

Safety information
Address: #019, 9th Floor, Building 6, 33 Xi'erqi Middle Road, Haidian District, Beijing, 100085, China
Made in China

Address: #019, 9th Floor, Building 6, 33 Xi'erqi Middle Road, Haidian District, Beijing, 100085, China
Place of manufacture: China

Address: #019, 9th Floor, Building 6, 33 Xi'erqi Middle Road, Haidian District, Beijing, 100085, China
Made in China

Safety information
Address: #019, 9th Floor, Building 6, 33 Xi'erqi Middle Road, Haidian District, Beijing, 100085, China
EN 50689:2021
EC Declaration of Conformity
CE Xiaomi Communications Co., Ltd. hereby declares that this radio equipment type D109GL is in compliance with Directive 2014/53/EU. The full text of the EU declaration of conformity is available at the following internet address: https://www.mi.com/global/service/support/declaration.html For detailed instructions, please visit www.mi.com/global/service/userguide
The product may be placed on the market in a ready-to-use state equivalent to other products in terms of energy efficiency requirements and power management functions, but the energy consumption of the product may be higher than that of other products meeting these functional requirements.
Product overview
Vacuum cleaner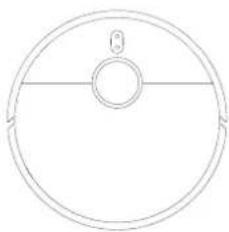
Note: The illustrations of the product, accessories, and user interface in the user manual are for reference only. The actual products may vary due to product enhancements.
Pre-installed accessories
Brush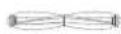

Brush for hard floors (pre-installed on the floor nozzle)
Other accessories: Crevice nozzle
Charging cable
Brush with soft roller
Storage bag for
cordless use
(pre-installed
on the charging
station)
Charging station
Place the charging station on a flat and stable surface, such as the floor or a table. Ensure there is at least 0.82 meters of clearance above, 1.93 meters in front, and 0.44 meters on each side. Make sure the charging station is in a location with good Wi-Fi coverage and near an electrical outlet.
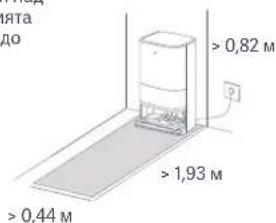
Mounting the base of the vacuum cleaner to the base of the appliance. Adding water to the water reservoir for clean water.
Mount the base of the vacuum cleaner to the main station according to the arrow, as shown in the illustration. Make sure that the base of the vacuum cleaner is attached to the main station and that the surface is even.
Connecting to the charging station
Place the main station on a flat surface, connect the power adapter to it and plug the power adapter into an electrical outlet. Note: Plug the connector of the power adapter into the charging port of the main station until the indicator lights up continuously.
Charging the robot vacuum
- Before first use, press and hold the power button of the robot vacuum for three seconds to turn it on. Then, place the robot vacuum on the main station and make sure that the charging contacts of the robot vacuum and the station are properly aligned.
The robot vacuum is connected to the main station successfully, and the indicator light indicates that charging has started.
Note:
- We recommend charging the robot vacuum fully before first use.
If the robot vacuum cannot be turned on because the battery level is low, place it on the main station to charge it for a while.
While the robot vacuum is charging, it turns on automatically and cannot be turned off.
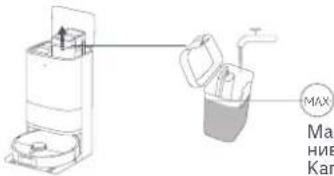
Marking for maximum water level of the water tank of the reservoir: 4 liters
Note:
Do not pour hot water into the reservoir, as this may cause deformation. Do not add any substances, cleaning agents, or detergents, to avoid damaging the robot vacuum.
Companion app Xiaomi Home
This product works with the Xiaomi Home app. Use the Xiaomi Home app to control the device and interact with other intelligent home devices.
Scan the QR code to download and install the app. You will be redirected to the setup page if the app is already installed. Or search for Xiaomi Home in the app store to download and install it.
Open the Xiaomi Home app, tap the plus sign in the top right corner, and then follow the instructions to add the device.
1F09FB68
Notes:
- The robot vacuum works with the Xiaomi Home app and supports Android 9.0 or iOS 12.0 and above. Only 2.4 GHz Wi-Fi networks are supported. The app version may have been updated. Follow the instructions based on the current app version. When the robot vacuum is successfully connected to the Xiaomi Home app, it will be successfully connected to the network. You can turn off Wi-Fi to disconnect from the network.
Turning off Wi-Fi and resetting
If the robot vacuum cannot connect to the network after turning off the router, changing the password, or other reasons, do the following:
- 1. Turn on the robot vacuum so that the Wi-Fi indicator lights up.
2. Press and hold the buttons for 7 seconds simultaneously until you hear a voice prompt.
The voice prompt indicates that the robot vacuum is ready to be configured to the network.
- When the Wi-Fi indicator blinks, the Wi-Fi connection has been reset successfully.
Turning on/off
To turn on the robot vacuum, press and hold button 1 for 3 seconds. When the robot vacuum's indicator light is on, it means the robot vacuum is in standby mode.
If the vacuum cleaner robot is not charging, check the charging and the brushes for blockages and cracks, so that you can exclude them.
Note: If the vacuum cleaner robot is charging, it cannot be switched on manually.
Creating a map
For optimal control of the robot, follow the instructions in the appendix for quickly creating a map, and the vacuum cleaner robot will start cleaning without needing to be guided.
The process of creating a map will be completed when the vacuum cleaner robot has covered the entire station, and the map will be saved automatically.
Note:
Make sure the vacuum cleaner robot is properly docked to the charging station. Using the map is strictly prohibited in areas where the vacuum cleaner robot is not suitable to enter.
Creating a map temporarily does not prevent or hinder the work of the vacuum cleaner robot, nor does it prevent the station. Creating a map creates virtual walls to restrict access to areas that are not suitable for the vacuum cleaner robot, such as areas where it might get stuck or be damaged.
Set virtual walls to restrict access to areas with carpets or rugs, to prevent the vacuum cleaner robot from getting tangled. Set virtual walls to restrict access to areas with cables or wires, to prevent the vacuum cleaner robot from getting stuck or damaged.
If the vacuum cleaner robot is paused and you want to resume it, press the pause button.
Note: Do not lift or move the vacuum cleaner robot while it is paused.
Otherwise, this could lead to errors in the positioning and the vacuum cleaner robot may not be able to return to the charging station or the map may be lost.
Sleep mode
The vacuum cleaner robot will automatically enter sleep mode after being paused for 10 minutes, and the indicators will turn off. To wake it up, press the pause button on the vacuum cleaner robot.
Note: The vacuum cleaner robot will automatically turn off after 12 hours in sleep mode.
Bb306HOBBaHe Ha NOUcTBAHeTO
If the vacuum cleaner is switched off during operation, the vacuum cleaner will automatically return to the charging station. Once the charging is complete, the vacuum cleaner will resume operation from the same place it was interrupted.
Setting the child lock
To enable the child lock function, press the buttons on the control panel or the remote control for 3 seconds.
Note: When the child lock is activated, the buttons on the vacuum cleaner will be disabled. Instead, you can control the vacuum cleaner via the remote control.
Error handling
When the vacuum cleaner returns to the charging station after cleaning and charging, or after cleaning and pausing, or after cleaning, the station will automatically check for errors.
Note:
When the vacuum cleaner returns to the charging station during operation, to avoid damage, the station will automatically perform error checking according to the settings.
If the automatic error check function is enabled in the settings, the station will automatically handle the error. If the recommended frequency and automatic error handling are set in the settings, the station will handle the error at the set frequency.
Cleaning and charging modes
Charging and cleaning
Before starting, make sure the complete set for the mop and other necessary parts are installed, and the vacuum cleaner is connected to the clean water tank or the dirty water tank. Check the cleaning and charging with the mop in the settings and follow the settings or press the buttons on the vacuum cleaner to start the station. After that, the vacuum cleaner will follow the cleaning map and will start the cleaning cycle according to the set map.
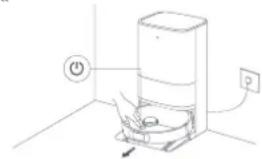
Note:
The vacuum cleaner is equipped with a mop. Before starting the cleaning, the mop must be installed. If you start the cleaning, make sure the station is connected to the water supply. The vacuum cleaner is connected to the station. Make sure the vacuum cleaner can be properly connected to the station, after it has finished the cleaning and charging with the mop, it is recommended to let the vacuum cleaner dry off the station. Do not move the station, the clean water tank, the dirty water tank, or the filter during operation. The station supports the function for filling the mop with hot water, you can activate it in the settings. When the function is activated, do not touch the water outlet or the mop part, to avoid burns.
Automatic return of the robot to the charging station after completing the task.
During operation, the robot must automatically return to the charging station to recharge, after the set cleaning time has elapsed. After the robot's position has been changed, the cleaning robot will resume cleaning.
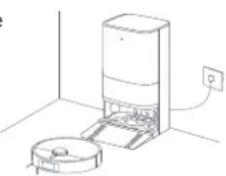
Automatic start of cleaning after charging the robot.
When the cleaning robot starts cleaning, it will return to the charging station for recharging. The charging station will automatically shut down after the robot has been cleaned and the robot's position has been adjusted.
Charging the water tank for mopping.
After the robot's position has been adjusted and cleaned, the robot will charge the water tank for mopping in time to prevent the water from drying out.
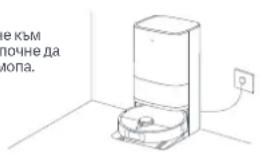
Select the cleaning mode and adjust the position. Press the button on the cleaning robot to start cleaning. After cleaning, the robot will return to the charging station to automatically start the cleaning process. After cleaning, it will return to the charging station to automatically start the cleaning process.
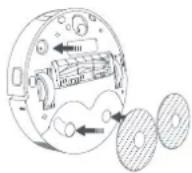
Note: If the cleaning robot is not charging, it will not start cleaning automatically.
Charging the robot
Before starting, make sure the robot and other necessary parts are installed and the cleaning robot is in the water tank for mopping. Select the mode and operate the robot. Press the button on the cleaning robot to start cleaning. After cleaning, the robot will return to the charging station to adjust the robot's position. After cleaning, it will return to the charging station to adjust the robot's position.
Cleaning before charging the robot
Before starting, make sure the robot is installed and the cleaning robot is in the water tank for mopping. Select the cleaning mode before charging the robot. Press the button on the cleaning robot to start cleaning. After cleaning, the robot will return to the charging station to adjust the robot's position. After cleaning, it will return to the charging station to adjust the robot's position.
Maintenance and care
Parts
To maintain the good condition of the cleaning robot, we recommend following this maintenance schedule.
Installation of the front part and the base part
- Insert the front part and the filter, using clean water.
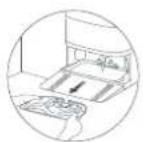
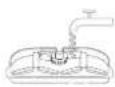
- Select the base part of the front part with the dry brush mounted part against the vacuum cleaner. Make sure that the water inlet is on the front part; otherwise, this may lead to abnormal use.
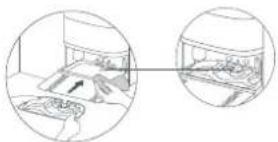
Caution: Do not tilt the appliance during normal use or when the base part is filled with water, dry the brush.
Cleaning the sensor contacts and parts for charging
Use a dry brush to clean the sensor and the contacts and parts for charging from the vacuum cleaner:
- The sensor is located in the lower part of the vacuum cleaner. The contacts for charging are in the rear part of the vacuum cleaner.
- The LDS sensor is in the upper part of the vacuum cleaner.
- The bumper sensor is in the front part of the vacuum cleaner.
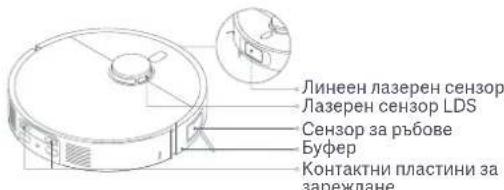
Sensor located
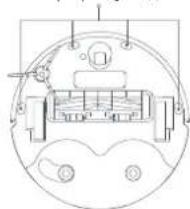
Cleaning the brush Cleaning the brush with automatic hair removal
Turn off the vacuum cleaner and press the buttons to remove the brush cover. Remove the brush, detach the end caps from both sides, and clean the brush. Use scissors to cut the hair, remove the wound hair, and dispose of it. Reattach the end caps to the brush, the brush, and the brush cover, and fix them in place with the screws.
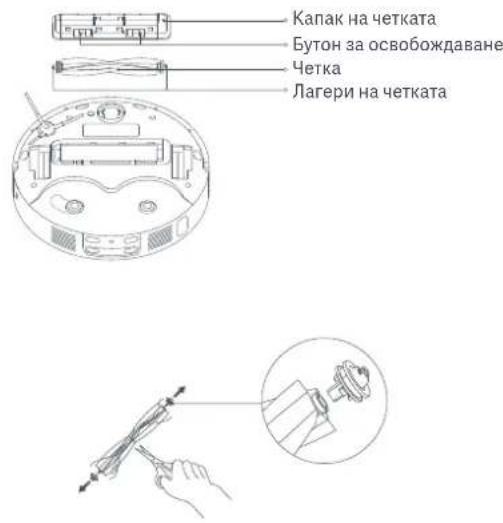
WARNING: If the brush is clogged with a lot of hair, do not pull it with force, as this may damage the brush.
1. Remove the brush cover and the brush with automatic hair removal. 2. Remove the side end caps. 3. Clean with a suitable tool the two ends of the brush and the gaps between the bristles. 4. Reattach the side end caps and the brush, then mount the brush with automatic hair removal and the brush cover. Make sure they are securely fastened.
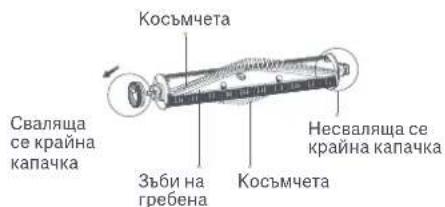
Caution:
If the dust container is full, check the filter for single use. If they are full, empty the dust container and replace the single-use filter completely, so that the appliance can function normally and empty automatically.
Cleaning the dust container
- Turn off the robot vacuum, remove the dust container and empty it.
- Mount the dust container back onto the robot vacuum.
Cleaning the brush roll
1. Turn off the robot vacuum and remove the brush roll. 2. Remove hair, dust and other debris from the brush roll. 3. Mount the brush roll back and fix it in place.
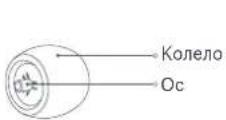
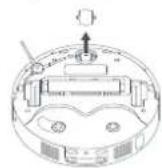
Notes:
If necessary, you can use a tool, such as a screwdriver, to carefully remove the brush roll and clean it. The brush roll can be cleaned with water and mounted back only after it has dried.
Cleaning the dust container filter
- Press the release button of the dust container to remove the dust container, take out the filter and its cover, and empty the dust container. If necessary, you can clean the dust container.
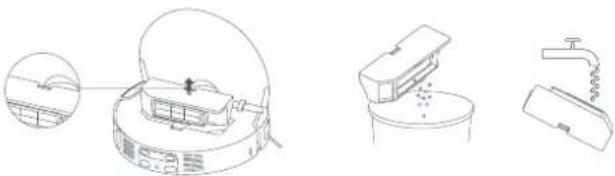
2. Carefully tap the filter frame to remove blockages, or rinse the filter with water.
Notes:
Do not clean the filter with sharp objects, such as a knife or scissors. Do not use cleaning agents, as the filter may be damaged. You should use only clean water to clean the dust container filter. Do not use detergent.
3. Dry the dust container filter completely before mounting it back.
Change of the filter
Charging the robot before first use, to replace the words.
Charging the station
Use the brush and dry cloth to clean the contacts for charging, open the automatic adjustment and the area for cleaning the station.
Robot vacuum
The robot vacuum has a high-performance battery. Make sure to charge it fully before first use to maintain optimal battery performance.
Note: If you do not use the robot vacuum for an extended period, unplug it. To prevent damage from overcharging and to the battery, the robot vacuum should be charged at least once every three months.
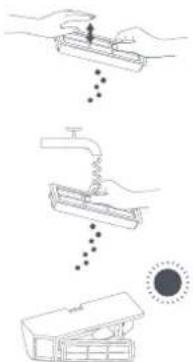
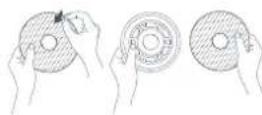
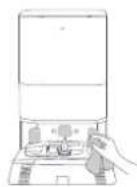
Specifications
Robot vacuum
Manufacturer: Xiaomi Communications Co., Ltd.
Address: #019, 9th Floor, Building 6, 33 Xi'erqi Middle Road, Haidian District, Beijing, 100085, China
Made in China

Address: #019, 9th Floor, Building 6, 33 Xi'erqi Middle Road, Haidian District, Beijing, 100085, China
Made in China

Address: #019, 9th Floor, Building 6, 33 Xi'erqi Middle Road, Haidian District, Beijing, 100085, China
Made in China

Safety information
Read this user manual carefully before use and keep it for reference.
Intended use
- This product is intended for cleaning floors indoors only. Do not use the product outdoors, on non-floor surfaces, or in commercial or industrial environments. Children aged 8 years and above and persons with reduced physical, sensory, or mental capabilities or lack of experience and knowledge can use this device if they are supervised or instructed on safe use and understand the hazards involved. Keep the device out of reach of children. Children must not clean or maintain the device without supervision.
- This device is not intended for use by persons (including children) with reduced physical, sensory, or mental capabilities or lack of experience and knowledge, unless they are supervised or instructed by a person responsible for their safety.
- Supervise children to ensure they do not play with the device.
- If the power cord is damaged, it must be replaced by a special cord from the manufacturer or its service agent.
- Only qualified personnel may replace the battery. Keep children and pets at a safe distance from the robot vacuum while it is operating. Do not use the robot vacuum on elevated surfaces without protective barriers.
- Do not place the robot vacuum upside down. Do not carry the robot vacuum by the LDS laser cover, the housing, or the bumper.
- Do not install, charge, or use this robot vacuum outdoors, in a bathroom, or near a swimming pool.
- Hazard may occur if the device runs over the power cord. Remove objects such as clothes or paper from the floor to prevent the robot vacuum from getting tangled and damaging them.
- Do not place children, pets, or any objects on the robot vacuum, whether it is stationary or moving.
Keep hair, fingers, and other body parts away from the suction opening of the robot vacuum. - Do not use the robot vacuum to clean any flammable substances. - Do not vacuum hard or sharp objects. - Unplug the power cord from the outlet before cleaning or maintaining the device. - Do not wipe the robot vacuum or the multi-function charging dock with a wet cloth or rinse these parts with any liquid. After cleaning the washable parts, dry them completely before reinstalling and using. Ensure the robot vacuum is turned off when transported and kept in its original packaging if possible. Please use this product according to the instructions in the user manual. The user is responsible for any damage or injury resulting from improper use. - Do not use the robot vacuum at ambient temperatures above 40°C or below 0°C, or on floors with liquids or sticky substances.
Battery and charging
WARNING:
- Do not use the device with a damaged power cord or plug. Only use the robot vacuum with the D109-JZEU charging dock.
- The battery cannot be overcharged.
- The user does not need to do anything to switch the charging dock from 50 Hz to 60 Hz; the product can automatically adjust for both 50 Hz and 60 Hz.
- Do not attempt to disassemble, repair, or modify the battery or charging dock.
- Do not place the charging dock near a heat source.
- Do not use a wet cloth or wet hands to clean or wipe the charging contacts of the charging dock.
- Do not expose the battery-powered device to excessive heat. There is a risk of the device's battery terminals catching fire or the battery short-circuiting due to metal objects.
- If the robot vacuum is not used for an extended period, fully charge the battery, then turn it off and store it in a dry, well-ventilated place. Recharge the robot vacuum at least once every 3 months to prevent battery depletion.
- Do not damage the battery when removing it to avoid short-circuiting or liquid leakage. If the battery leaks, ensure the liquid does not come into contact with your skin or clothing, and wipe it clean immediately with a dry cloth. Then, send the battery to an appropriate recycling facility or designated after-sales service team for proper disposal.
- The lithium-ion battery pack contains substances harmful to the environment. Before discarding the robot vacuum, first remove the battery pack, then dispose of or recycle it in accordance with local laws and regulations of the country or region where it is used. When removing the battery from the product, it is better to use up the battery and ensure that your product has been disconnected from the power source.
- Remove the screws on the bottom, then remove the housing.
- Remove the battery cover, then remove the battery. Do not damage the battery to avoid risk of injury.
- Return the battery to a professional recycling organization.
- Remove the battery from the device before disposal.
- Disconnect the device from the power source before removing the battery.
- Dispose of the battery safely.

For indoor use only.

Please read the instructions before use.
Laser safety information
The laser sensor in this product complies with IEC 60825-1:2014 and EN 60825-1:2014/A11:2021 for Class 1 laser products. Please avoid direct eye exposure to the beam during operation.
CLASS 1 LASER PRODUCT
Dust cap (installed on the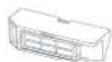
dust container)
Other accessories
Choi canh
Bôdaynguàn
Choi tur dong cattoc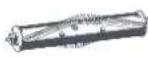
Tui dung mot Ian (Lap san trongtram sac da nang)
Chān dé miéng lau × 2
Mieng lau × 2 (Bucr lap sān trén chan d'é mienglau)
Doan noi dé tām do
Tramsac da nang (co tui dung mot lan, binh nuoc sach, binh nuoc ban, tam ddu ngc lap san)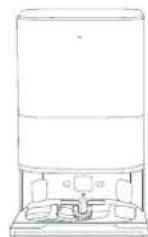
Robot hut bui
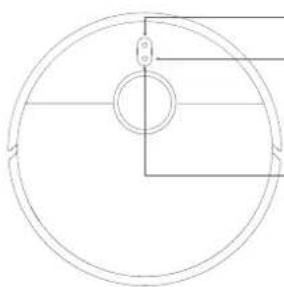
Nhan va giu trong khoang 3 giay de bat hoac tat Nhan de bat dau don dep hoac tam dinr ng trong khi dang bat Nhan de tam dung trogh khi dang chay Nhan tong khi dang tam dung de robot hut bui chay ve tram sac da nang Nhan de dung quay lai ded sac trogh khi dang quay ve tram sac da nang Nhan va giur trogh 3 giay de bat hoac tat chuc nang khoa tre em
Den bao
Den trang:Dang don dep/Don dep xong/Da sac day Den trang nhap nhay: Dang quay lai de sac/Dang tai dinh vi/Dang cap nhat churong trinh co'so Den trang nhay cham: Dang sac Den cam: Dāngat két nei Wi-Fi Den cam nhap nhay: Loi/Dang chékét noi/Dang két noi voi Wi-Fi
Robot hút bui Tram sac da nang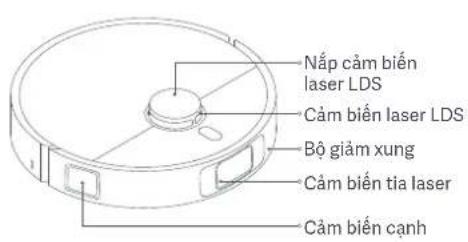
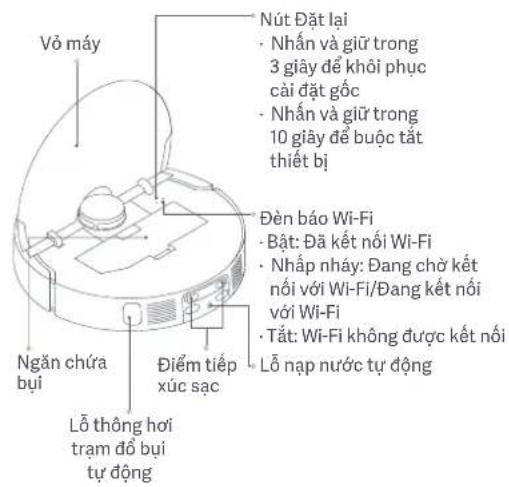
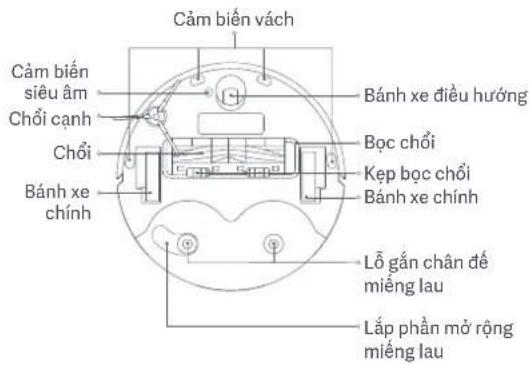
Nganchuabaui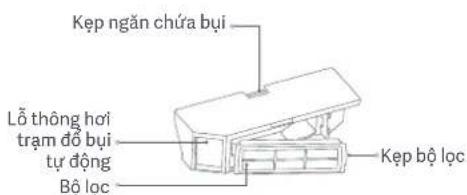
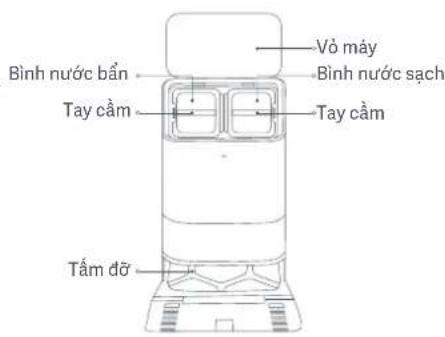

Cachlap
Remove the protective films from the dust compartments.
Insert the dust compartments before use.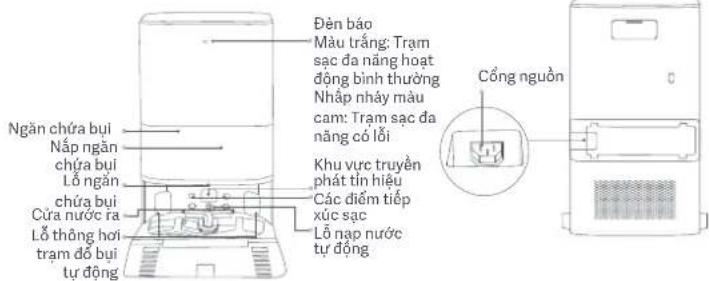
Disposable dust bag, floor cleaning cloth, and side brushes.
Handheld dust bag, cleaning cloth, and mop cloth.
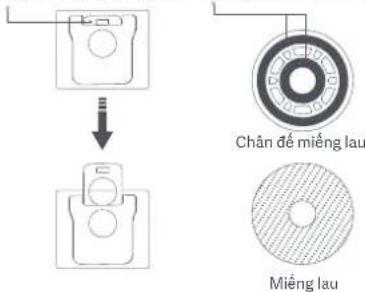
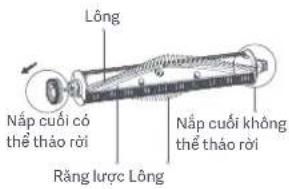
Note: The multi-function dust compartment is pre-installed when shipped.
Note: You can replace it with a brush.
Before using the robot vacuum, remove the protective strips 1 and 2 on both sides and the adhesive tapes 3, 4, and 5.
Install the side brushes and the floor cleaning cloth.
Address: #019, 9th Floor, Building 6, 33 Xi'erqi Middle Road, Haidian District, Beijing,
100085, China
Manufactured in China

Safety warnings
Read all safety instructions and warnings before using this appliance. Failure to follow these instructions may result in electric shock, fire, or serious injury.
- This appliance is intended for household use only. Do not use it outdoors, on wet surfaces, or in commercial or industrial environments.
- This appliance can be used by children aged 8 and above and by persons with reduced physical, sensory, or mental capabilities or lack of experience and knowledge if they have been given supervision or instruction concerning use of the appliance in a safe way and understand the hazards involved. Children shall not play with the appliance. Cleaning and user maintenance shall not be made by children without supervision. Keep the appliance away from children and pets. Do not use the appliance if it is damaged or malfunctioning.
- The appliance must be disconnected from the power supply before cleaning.
- If the supply cord is damaged, it must be replaced by the manufacturer, its service agent, or similarly qualified persons in order to avoid a hazard.
- This appliance is intended for household use only.
- The robot vacuum cleaner is intended for use in dry indoor environments. Do not use it outdoors or on wet surfaces.
- Do not use the robot vacuum cleaner to pick up flammable or combustible liquids, such as gasoline, paint thinner, or alcohol.
- Do not use the robot vacuum cleaner without the dustbin and filters in place. Do not use the robot vacuum cleaner if the dustbin, LDS cover, or bumper is damaged. If the robot vacuum cleaner is dropped, damaged, or makes unusual noises, do not continue to use it. If the appliance is not working properly, contact customer service.
- To avoid injury, do not touch the robot vacuum cleaner's brushes or rotating parts while it is in operation.
Do not place the robot vacuum cleaner on a surface where it could fall, such as a table or stairs. Do not use the robot vacuum cleaner to pick up hot ashes, burning cigarettes, or matches. Do not use the robot vacuum cleaner to pick up sharp objects, such as glass or nails. Do not use the robot vacuum cleaner to pick up water or other liquids. Do not use the robot vacuum cleaner near flammable or combustible materials. Do not use the robot vacuum cleaner in areas with exposed electrical outlets. Do not use the robot vacuum cleaner with a damaged power cord or plug. If the power cord is damaged, it must be replaced by the manufacturer or a qualified person. Do not use the robot vacuum cleaner if it is not working properly. Do not use the robot vacuum cleaner outdoors or on wet surfaces. Do not use the robot vacuum cleaner to pick up anything that is burning or smoking, such as cigarettes, matches, or hot ashes. Do not use the robot vacuum cleaner to pick up flammable or combustible liquids, such as gasoline, paint thinner, or alcohol. Do not use the robot vacuum cleaner to pick up toner or other fine powders. Do not use the robot vacuum cleaner in areas with temperatures above 40°C or below 0°C, or in areas with high humidity.
Battery charging
CAUTION:
- Do not use the robot vacuum cleaner with any battery or charging station other than the D109-JZEU charging station. Do not use the robot vacuum cleaner with any third-party batteries or charging stations. The charging station must only be used with the specified power adapter. Do not use the charging station if it is damaged.
- Do not disassemble, repair, or modify the battery or charging station. Do not expose the charging station to water or moisture.
- Do not use the charging station or battery near flammable materials or in areas with high temperatures. Do not expose the battery or appliance to high temperatures.
- When using the battery, be careful not to short-circuit the terminals, the battery, or metal objects.
- If the robot vacuum is not used for a long time, remove the battery, store it in a cool, dry place, and keep it away from fire. To prevent the battery from being completely discharged, charge it at least once every three months. Do not charge the battery if it has been short-circuited or wet. If the battery leaks, do not touch the liquid or the battery with bare hands; dispose of it properly. To avoid fire or electric shock, do not place the battery in a charger or use it with any other device.
- There are dangerous components inside the battery pack. Do not disassemble the battery pack while the robot vacuum is in operation. Do not place the battery pack near heat sources or open flames, and do not expose it to high temperatures.
- When removing the battery from the device, the battery may be hot. Wait for it to cool down before handling.
- Stop using the device immediately and remove the battery.
- Disconnect the battery connector and remove the batteries. Do not disassemble the battery case to avoid electric shock. 3. Dispose of batteries according to local regulations.
- Remove the battery from the device before disposal.
- When removing or installing the battery, wait for it to cool down.
- The battery must be disposed of properly.

Only for indoor use.

The laser in this device is a Class 1 laser product that complies with IEC 60825-1: 2014 and EN 60825-1:2014/A11:2021 standards. Do not stare directly into the laser beam during operation.
CLASS 1 LASER PRODUCT
LASER PRODUCT
EN 50689:2021
EU Declaration of Conformity

Hereby, Xiaomi Communications Co., Ltd. declares that the radio equipment type D109GL is in compliance with Directive 2014/53/EU. The full text of the EU Declaration of Conformity is available at the following internet address: https://www.mi.com/global/service/support/declaration.html. For the electronic user manual, please visit www.mi.com/global/service/userguide.
The device may be used in other modes or with other functions than the intended use, as long as the device's power consumption and other functions are in accordance with the functional requirements.
Device
Robot Vacuum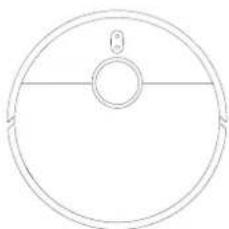
Accessories
Instructions in the manual
Parts and accessories
Interface settings
aHbIKTaMaNbIK MaKcaTTa 6epinreH
HaktbEHIMMHyHKnIaNap EHMIHH KHeEITMDEPiHE baaNbaHbIcTbI e3epYi MYMKH.
P6oT WAnCOpFbIi
Anbih ana ophaTbifan KocankbkypanIap
Kbina
Kbunwak KaKaNafB
UaH KOHTeHepi Cy3r (uaH KOHTeHepiHe andu H aHa opHaTbIHa)
Backa kocanki kypanap
Byipnik Kbilwak
CbIMnap XHHaflbI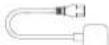
ABTOMATBIL KNU Kbinu#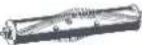
Sip pet KONDAHbIaTBH
EeH Kyfblu TecehiuiHH 6ekitkiwix2
EeHxyfblu TeceHiWiX 2 (edenxyrblu TeceHiWihH 6ekitkiuine andbihana opHaTbnFaH)
KipxyaTbH TakTain HerizH x3apTKbIi
OMHH-CTAHUNa(AnDbH ana opHaTbInfah 6ip pet KONDAHbInaTbIH KAn, Ta3a CV bDcB, Kip cy bDcBxHE Kip KyaTbH TaKaTaBap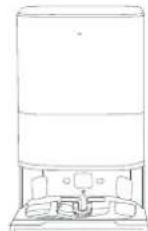

Kocy Hemece eWipy yuin 3 cekyH6oynb6acbin TypbHb3
Ta3anaybbl 6actay hemece kocynbke3de kiipty yinh6cbih3

Icke Kocynbi Ke3iHne KiipTy yuHb6acbHb3
P6oT WaHcOpFbIUtBt3apTay MaKcTaBHa OMHN-CTaHUNrFa KaTApTy yuH KIDiptyI Ke3HHe
6aCbHb3
OMHn-CTaHmraKaIaprAn Ke3eTyNtipyTOKTatyuHb
BananapdAn KopFay KyinbH Kocy Hemece eWipy yuii H syekyH 6acbin TypbH3
HnDnKaTOp
Ak:Ta3aay/Ta3aay aKaTaNbbl/ToNbIK 3aprrTanFaH
A, TycTe JxibInbIbIKay: 3aprdTayra opanyda/OpHbIH aybictbpyda/MnKpObaIapnama KaHaPbIyda
Akyinndey:3aprtanyda
Kb3fbnT capb:Wi-Fi xeniciheh axkbpatbnfah
Kb3Fbint capbltycte kbinbntkay: kate/baunhaic kyinyne/Wi-Fi xenicine Kocbynda
Pobot wahcnpfbl OMH-CTAHn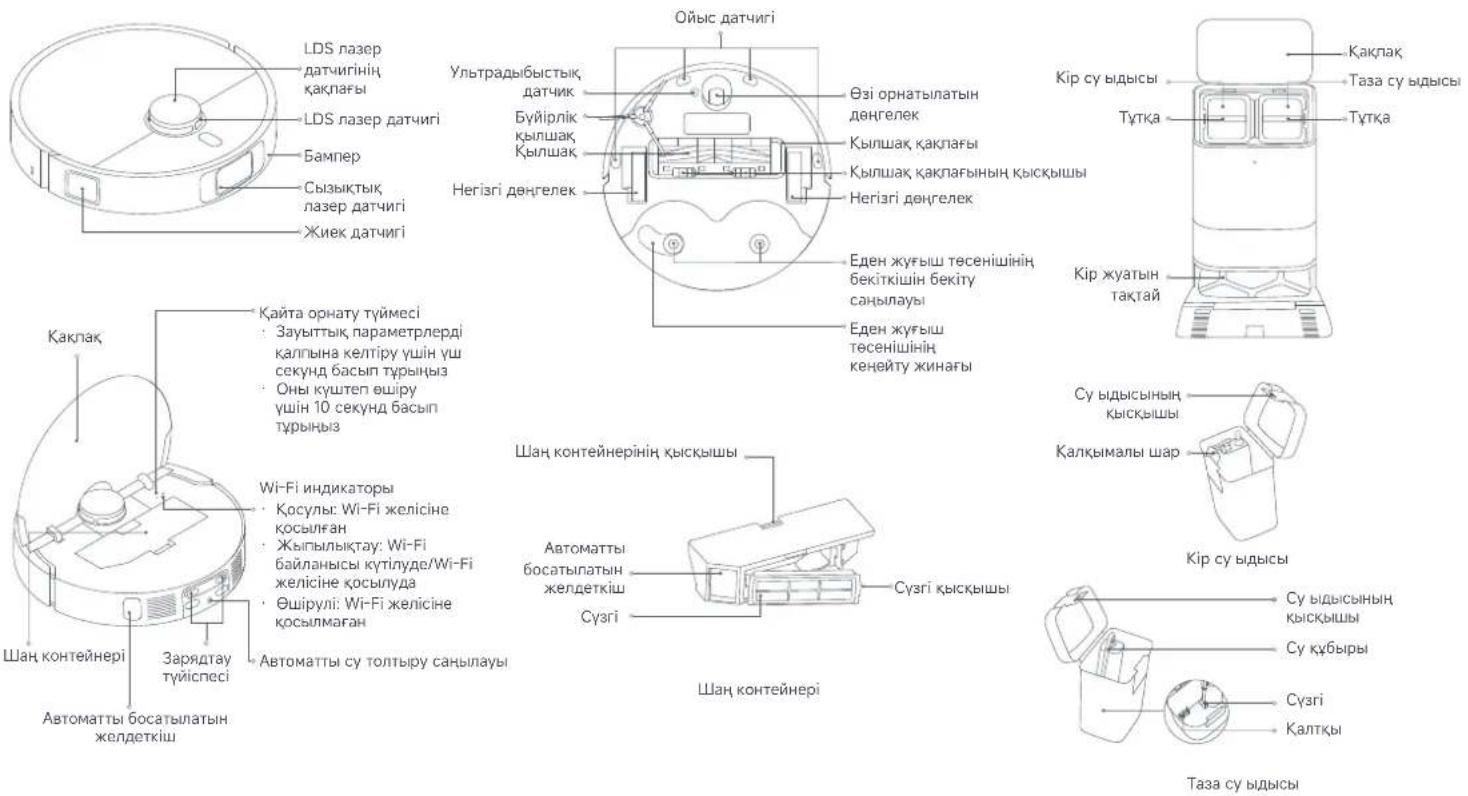
OpHaTy KoiJIbI
OMHN-CTAHUNaKoprafbu KaKaNaKTapdbweuin any AnbnfkbkepiHicApTkblkepiHic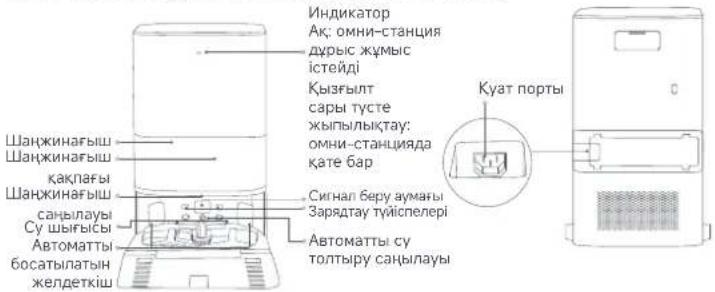
Bip pet KOndaHbInaTbIH Kan Eckprr: OMHN-CTAHUH 3aByTTAN HbKKaH Ke3e bip pet konDaHbNaTbH KAnneH anBbH anaOphtBaNb.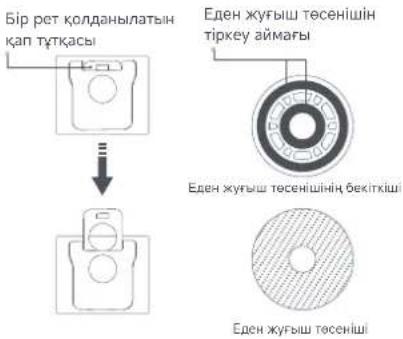
ABTOMaTTbI WALI KINIO KbluaFbl Eckey:ohblklnuaKneH aybictipa anacbl. Po607 wuHcnpBwIbIy naIaIay anbIy da xkxaBHH aIx3e 2 Koparblx konakTapBH xHe 3,4Xe5 Koparblx TaIanapBly uWeiun anbIbH.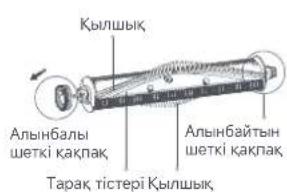
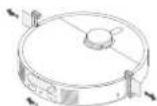
Bvipnk kblwaK peH eed KyfbiXnHaftbOpHaTy Biyipik KJIiIaK MeH eJH xyfbii XmHaftbH Kepcetinrrn deOp TaHbIc. CbTt] tKeH Dbbic bceNt, onap aDbic oOpTaBnFaH.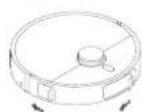
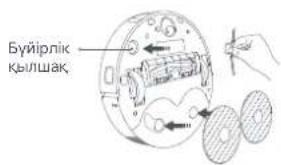
OMHN-CTaHnYHBKIO
OMHn-CTAHmHbKablpfaraafHHeMeCeKaFenbdi eEH CnKTbTERICXHEKATBIEeHReKOHBi3. BnKtiri 0,82 Metpden, y3bHdbf1,93 Metpeh xhehi 0,44 Metpden acatbH boc KcHKTap EkeHHe KcKTKiH3 OMH-CTAHUMHBH 3NkETP o3eTACcbHb HAKHbJa KaKcbI Wi-Fi cHnHa bap aMakta eKeHHe KcKTKiH3.
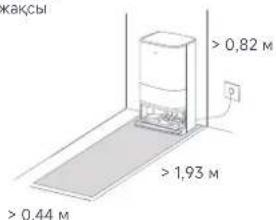
Kaiaa naiandaanhyfa 6oanaB1
Kip kyaTbH TaKaTn Heri3iN y3apTkblbIbI opHaTy Ta3a cy bIbIcblHa cy Kocy
Kj Xaybtah TAKTAY Heri3H y3APKTbMbbl CYPETTE KepcetIrrReHd EbarbB0bMnHa OMNH-CTAHNlBu OPaHbH3. Kip xyatbH TAKTAI HERI3IH Y3APTkBHTBH OMNH-CTAHMHBHt TEMEHIXaXfBMEN BIPdeE EKEHIHE XeA TEHMRI6BeTI BIPKENKI EKEHIHE K03XeTKIiH3.
Kyatka Kocbin In Katbip
OMNH-CTAHURHBNI TICXPEGRKOBH,AF0H CbIMdAP XHHaFBH KOCbPi, CBIMdAP XHHaFBH NKTJDP KTOEATcKaH8 KOcB13h.
Eckopty: INHINKATOP AK 60bIyIN KAMMBAIBHua CbBAPX HAIKHABHBnOH KOHNHEKTOPHIM OHMI-CTAHUNHBHsIK YKOT NPtbiHa MkiTAN KOCBIHb
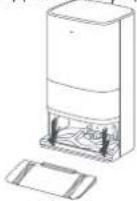
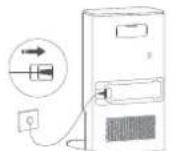
P6oT wahCOPfblwTbKOIO
NananaHny anbihda OHki Kocy yuiin po6oT uHaHc0pfbiHTaftby Tymecin yiu cekyhdacbin tybHua. P6o0T 1aHcOpBbI KOCybn B0nC, OHb OMHN-CTAHUNFA KOHIN, P6o0T 1aHcOpBbI NeH CTAHUNFaB3apdTa TYNCNEpHiT, TOnbIFbMeH TpydaHaFbHaHKe XeKTeKtIiH3. 3a4nTaydb6bacty Taynbi DaYbctBc cypaBdy cteIeHKe3e pe060 1wHcOpBfUWmCTH-tAHuJRAFCA tati KocblnA.
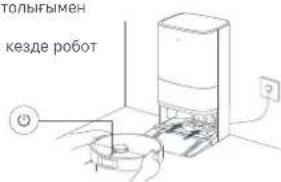
Expert:
This device is designed to work with the 3-in-1 air purifier, humidifier, and fan. According to the manufacturer, the device can be used with the Xiaomi Home app. The device is equipped with a high-efficiency filter that automatically adjusts the fan speed.
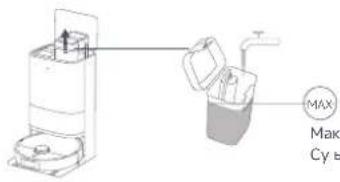
Maximum power consumption: 4 W
Expert:
The device is equipped with a dust sensor, which allows it to automatically adjust the fan speed based on the air quality. The fan speed can also be adjusted manually using the buttons on the device.
Connecting to Xiaomi Home
This device is compatible with the Xiaomi Home app. You can control the device remotely using the Xiaomi Home app on your smartphone.
To connect the device to the app, follow the instructions below. If the device is already connected, you can skip this step. The device can only be connected to the Xiaomi Home app.
When the Xiaomi Home app is opened, if the device is not connected, it will automatically search for nearby devices and prompt you to add it.
1F09FB68
Expert:
The Xiaomi Home app is compatible with Android 9.0 and iOS 12.0 or later versions. The device can only connect to a 2.4 GHz Wi-Fi network. If the device is not connected to the app, it will not be able to connect to the network. The device will automatically search for the Wi-Fi network and connect to it.
Connecting to Wi-Fi network
To connect the device to the Wi-Fi network, follow the steps below:
1. Press and hold the Wi-Fi button on the device for 7 seconds until the Wi-Fi indicator starts blinking. 2. The device will enter the configuration mode. 3. When the Wi-Fi indicator is blinking, the device is ready to be connected to the Wi-Fi network.
Kocy/ewipy
Work with the device in accordance with the operating instructions. The device must be operated in the recommended operating mode. Before starting work, read the operating instructions carefully and follow them.
If the device is used incorrectly, it may automatically switch off and turn on.
Card handling
To configure the card reader, you must connect it to a computer and install the necessary software. The card reader can be connected via a USB port or using the card reader's automatic mode.
Experiment:
The device must be connected to a power source and a USB port. Before starting the card reader, check the connections, then turn on the device. The card reader will automatically detect the card and read the data. If the card reader does not work, check the connections and try again. The card reader can be used with various types of cards (magnetic stripe, chip, or contactless). To avoid damage, do not insert the card incorrectly or use damaged cards. The card reader should be kept clean and free of dust.
The robot vacuum cleaner is intended for dry cleaning only. It is not intended for use on animals or humans. Do not use the robot vacuum cleaner to pick up flammable or combustible liquids or hot ashes.
Safety instructions
Before using the robot vacuum cleaner for the first time, make sure that the power adapter is connected properly. The robot vacuum cleaner will not operate if the battery is low. Note: The robot vacuum cleaner must be charged for at least 12 hours before first use.
Charging the battery
When the robot vacuum cleaner's battery is low, the robot will automatically return to the charging dock. If the robot vacuum cleaner is not charging, check that the charging contacts are clean and that the adapter is plugged in correctly.
Cleaning and maintenance parameters
Before cleaning or maintaining the robot vacuum cleaner, turn off the power switch and unplug the adapter from the wall outlet.
Note: When cleaning the dust bin and filters, use a soft brush or cloth. Do not use water or any liquid to clean the dust bin or filters.
The pressure switch is designed to control the operation of the compressor station and the container station. The pressure switch is installed at the compressor station.
Expert:
When the pressure switch is activated, the compressor station or container station starts operating. When the pressure drops to the set value, the compressor station or container station stops. When the pressure rises to the set value, the compressor station starts again.
Pressure switch setting
Setting procedure
Before starting the adjustment, check that the pressure switch is correctly connected to the electrical circuit. If the pressure switch is not set correctly, the station may not start. The pressure switch is set using the adjusting screws on the pressure switch housing.
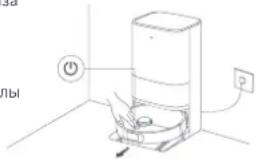
Expert:
The pressure switch has two adjustment screws: one for the cut-in pressure and one for the cut-out pressure. Before starting, the compressor station must be disconnected from the power supply. The pressure switch is set by turning the adjusting screws. The cut-in pressure is set first, then the cut-out pressure. The pressure switch must be set so that the compressor station starts and stops at the correct pressures.
The pressure switch is set to the desired cut-in and cut-out pressures.
The pressure switch is set by turning the adjusting screws. The cut-in pressure is set first, then the cut-out pressure. The pressure switch must be set so that the compressor station starts and stops at the correct pressures.
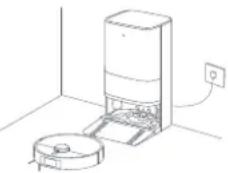
Automatic start and stop of the compressor station and the pressure switch
The pressure switch is set to the desired cut-in and cut-out pressures. The compressor station starts and stops automatically.
Setting the cut-out pressure
After setting the cut-in pressure, the cut-out pressure is set by turning the adjusting screw.
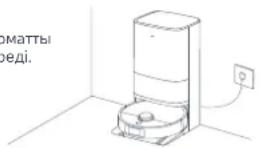
Before starting the equipment, check the condition of the hoses and connections for leaks or damage. If the hoses are damaged, replace them with new ones. The equipment must be operated only by trained personnel.
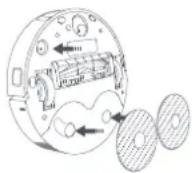
Operator: Before starting work, check that the equipment is properly connected and that all safety devices are in place.
Warning
Before starting work, check the condition of the hoses and connections for leaks or damage. If the hoses are damaged, replace them with new ones. The equipment must be operated only by trained personnel. If the equipment is not working properly, contact the service center.
Before starting the equipment, check the condition of the hoses and connections for leaks or damage. If the hoses are damaged, replace them with new ones. The equipment must be operated only by trained personnel.
Before starting work, check the condition of the hoses and connections for leaks or damage. If the hoses are damaged, replace them with new ones. The equipment must be operated only by trained personnel. If the equipment is not working properly, contact the service center.
Maintenance and technical service
Operator:
Before starting the equipment, check that all safety devices are in place and functioning properly.
| Балдгет Разанay кимир Aумбъру кимир | |
| Шан костайни Кожених тазанay / | |
| Суari EkiAnna calын тазанay 3-6 ai | |
| Таза су bдысь EkiAnna calын тазанay | |
| Ор кONDANFAHMAN KEDH TAZANAY yCbH-biNadbl | |
| Кір куатын Тaktай 1-2Anna calын тазанay | |
| Кушлak EkiAnna calын тazanay 6-12 ai | |
| Буйрік Кушлak EkiAnna calын тазанay | 3-6 ai |
| Едун куши Тосони / 1-3 ai | |
| Бізі орнатулathун дін'reній | |
| LDS laobр дічигri | |
| Жіній дічигri | |
| Сыздічигri laobр dічигri | |
| Оіьс дічигri | |
| Ровот shaцсоггытейн зэрэн'tay tɪyɪcnepepi | |
| Бамлөр | |
| Ровот shaцсоггытейн АВТМАТБIb 6ocatылathун кendetклэпepi | |
| Ровот shaцсоггытейн Temehri kəтNi | |
| ОMHД-стдүйн | / |
| ОMHД-стдүйн тэрэн түйн cɪnghan sepy aymarët | |
| Бір рет кONDыналынkan | / |
Operator:
Adjust the pressure to the required value. If the pressure is too high, reduce it by turning the adjustment knob counterclockwise. - If the equipment is not working properly, turn it off and contact the service center.
One-time use of the equipment
- Before using the equipment for the first time, read the instructions carefully. After using the equipment, clean it thoroughly.
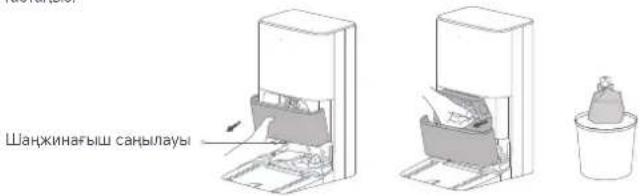
NOTE: To avoid damage to the equipment, do not exceed the maximum pressure. 2. Use only clean water for the equipment.
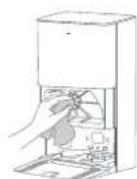
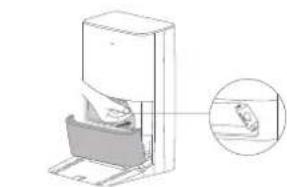
- If the equipment is not working properly, turn it off and contact the service center.
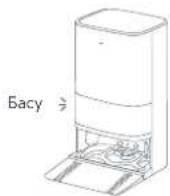
Checking the contents of the tank
- Check the contents of the tank visually, by smell, and by touch.
2. If the contents of the tank are contaminated, the operator must contact the service center.
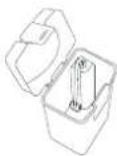
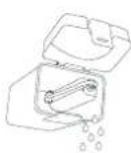
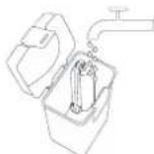
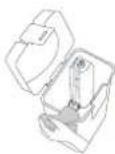
Note: If the contents of the tank are contaminated, the operator must contact the service center. They will determine the cause and provide instructions.
Checking the tank and the tank base
- Remove the tank cover, inspect it for damage, and clean it if necessary.
- Check the tank base for cracks and damage. If the tank base is damaged, contact the service center. If the tank base is cracked, it must be replaced immediately.
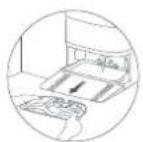
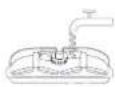
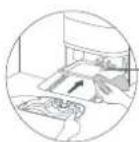
Note: Do not use the tank if it is damaged or cracked. If the tank base is cracked, contact the service center.
Checking sensors and warning devices
The robot is equipped with the following sensors and warning devices for checking:
Robot movement sensors. Robot obstacle detection sensors. Robot tilt sensors. Robot front bumper and laser sensors.
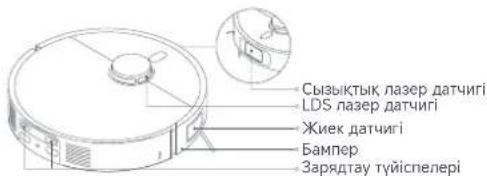
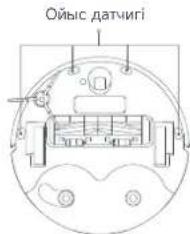
Checking the robot's automatic operation and manual operation
The robot's automatic operation is activated by pressing the start button. The robot's sensors detect obstacles, and the robot stops automatically. If the robot is tilted, the robot and the robot's cover are turned off, and the robot stops.
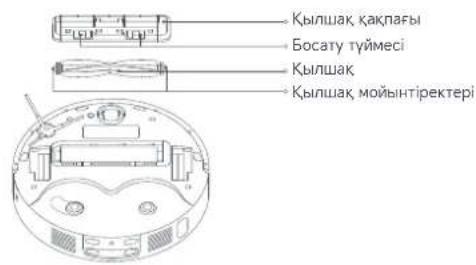
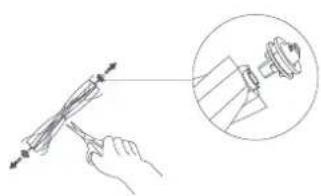
- Clean the filter with a soft brush and warm soapy water. 2. Rinse the filter thoroughly.
- Do not use gasoline, solvents, or flammable liquids to clean the filter. 4. After cleaning, allow the filter to dry completely before reinstalling. Check the filter for damage and replace if necessary.
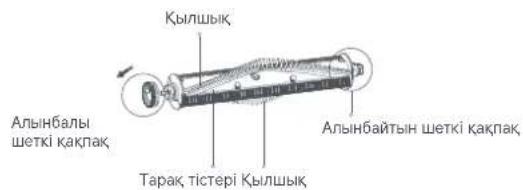
Notes:
Do not operate the vacuum cleaner without the filter. If the filter is damaged or clogged, replace it with a new one. Do not use the vacuum cleaner without the filter to avoid damaging the motor.
For your safety: If the vacuum cleaner emits smoke or sparks, turn it off immediately and unplug it.
Cleaning the vacuum cleaner
- Use a soft cloth to wipe the exterior of the vacuum cleaner.
- Place the vacuum cleaner on a flat surface.
Cleaning the dust container
- Remove the dust container from the vacuum cleaner. 2. Empty the dust and debris into a trash bin.
- Clean the dust container with a damp cloth and let it dry completely before reinstalling.
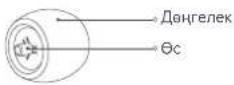
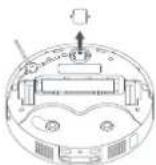
Notes:
If necessary, you can wash the dust container with mild detergent and water, then dry it thoroughly before reinstalling.
Cleaning the filter with water
- Remove the filter from the vacuum cleaner. Rinse it under running water and let it dry completely before reinstalling. If necessary, replace the filter with a new one.
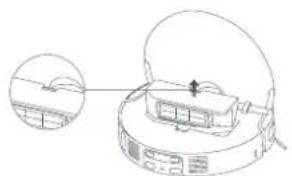
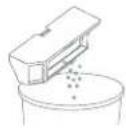
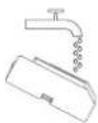
- Kipii ketipy uiuyi cyir jikaktybuk kubipbyu TpyTih3 Hemece cyarlii Kybbyc bym Etaanaba.
Experts:
The liquid container and the liquid must be heated to the required temperature. The liquid is heated, and then it is mixed. For the container and the liquid to be heated, only the liquid is needed. If it is heated, it is heated.
3. The container and the liquid are heated with a special device.
Heating the liquid
The liquid is heated in a special container, and it is heated.
OMHN-STATION operation
OMHN-STATION operation: the device is used to heat the liquid and to supply it. The liquid is heated and then supplied.
Battery technical maintenance
The device is installed in a place where there are batteries. To check the battery, you need to follow the instructions.
If the device is not used for a long time, it should be turned off and stored. If it is not used, it should be stored in a dry place.
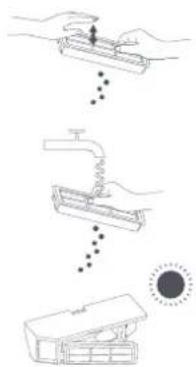
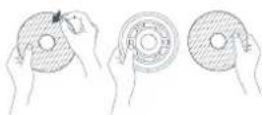

Technical specifications
Device operation
| Aby PoBOT 7ANCOPBII | |
| Modèle D109GL | |
| Tayar en IuWemdepi | Φ350 × 97 MM |
| Литим-новды батер | 4800 mA·caf (HOMINAДы КУТВИЕпь)5200 mA·caf (KoБалк КУТВИЕпь) |
| Заротay уakытBuLAmamEn 6,5 caraR | |
| Мыналрмен уулесимД Android 9.0 | Кане IOS 12.0 Немец одан кейни hyckа |
| Сыmbы Косыну муKMндгiri Wi-Fi IEEE | 802.11 b/g/n 2.4 Гц,Bluetooth 4.2 |
| HOMINAДы Керneyi 14.4 B | ... |
| Заротay Керneyi 19.6 B | ... |
| HOMINAДы Куаты 55 Вt | |
| ЖуMbIC жиiniir 2400-2483,5 МГц | |
| Ен,жогары Шинник КУТВ儿 < 20 дБM |
When installing the antenna, the distance between the antenna and the device must be at least 20 cm.
OMHN-STATION
| Моdensь D109-JZEU | |
| Тауар онлайндир 563 × 420 × 340 мп | |
| Номиналды kipici 220-240 B - 50/60 Г. | |
| Номиналды lilbyысы | 19,6 B=1.2 A |
| Куат (шаннан Бocatу кеинде) | 1000 BT |
| Куат (ыстык,cуемен тазалay кеинде) | 1630 BT |
| Куат (ааяда кentлу + саддоту кеинде) 80 BT | |
| Куат тутыну | Куту рекимi: ≤ 0,5 BT |
| Шартг emглелу укытг | Куту рекимi: ≤ 20 мпн |

This symbol indicates that this product must not be treated as household waste. Instead, it shall be handed over to the applicable collection point for the recycling of electrical and electronic equipment. By ensuring this product is disposed of correctly, you will help prevent potential negative consequences for the environment and human health, which could otherwise be caused by inappropriate waste handling. For more detailed information about recycling of this product, please contact your local city office, your household waste disposal service, or the shop where you purchased the product.
For more information on recycling, please visit www.mi.com: Xiaomi Communications Co., Ltd.
Address: #019, 9th Floor, Building 6, 33 Xi'erqi Middle Road, Haidian District, Beijing, 100085, China
Made in China


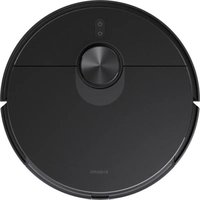
- USAGE RESTRICTIONS
- BATTERIES AND CHARGING
- WARNING
- LASER SAFETY INFORMATION
- EU DECLARATION OF CONFORMITY
- PRODUCT OVERVIEW
- ROBOT VACUUM
- HOW TO INSTALL
- HOW TO USE
- CONNECTING TO POWER
- PLACING THE ROBOT VACUUM
- NOTES
- CONNECTING WITH THE XIAOMI HOME APP
- RESETTING WI-FI PAUSING
- TURNING ON/OFF
- QUICK MAP CREATION
- SLEEP MODE
- RESUMING CLEANUP
- CHILD LOCK SETTINGS
- DUST EMPTYING
- MOPPING
- VACUUMING BEFORE MOPPING
- CARE & MAINTENANCE
- PARTS
- CLEANING THE CLEAN & DIRTY WATER TANKS
- CLEANING THE WASHBOARD AND WASHBOARD BASE
- CLEANING SENSORS AND CHARGING CONTACTS
- CLEANING THE CASTER WHEEL
- CLEANING THE DUST COMPARTMENT AND FILTER
- REPLACING THE MOP PAD
- CLEANING THE OMNI STATION
- BATTERY MAINTENANCE
- SPECIFICATIONS
- WEEE DISPOSAL AND RECYCLING INFORMATION
- CLEANING OF THE OMNI STATION
- PRODUCT DESCRIPTION
- PRE-INSTALLED ACCESSORIES
- DUST BIN BEFORE WET CLEANING
- MAINTENANCE AND TECHNICAL SERVICE
- COMPONENTS
- REPLACING THE BRUSHES
- CLEANING THE MULTI-FUNCTION STATION
- TECHNICAL SPECIFICATIONS
- THEREFORE, ANGLE BAC = 90°
- UNNNN
- SAFETY INFORMATION
- RESTRICTIONS ON USE
- CHARGING
- WARNINGS
- SAFETY INFORMATION DURING OPERATION
- LIST OF INCLUDED ACCESSORIES
- OTHER ACCESSORIES
- INSTALLATION
- BASE STATION AND PROTECTIVE FILMS
- INSTALLING THE BASE STATION
- POSITIONING THE BASE STATION
- CONNECTING THE POWER SUPPLY
- PO3AUYBAHHPO6TA-NINOCOCA
- PNUMITKC
- PPUMITKU
- PIKKLUUHNHA 3A DONOMORO NPORPAMN XIAOMI HOME
- CNNDAHNHAAWTYBAHBWI-FI
- TURNING ON AND OFF
- CREATING A MAP
- NOTE
- PAUSING
- RESUME CLEANING
- CHARGING THE ROBOT VACUUM CLEANER
- EMPTYING THE DUST BIN
- DRY AND WET CLEANING
- STARTING CLEANING
- AUTOMATIC RETURN OF THE BRUSH TO THE BASE STATION FOR CLEANING
- AUTOMATIC DRYING OF THE BRUSH AFTER CLEANING AND DRYING
- EMPTYING THE DIRTY WATER TANK
- DRY CLEANING
- WET CLEANING
- DRY CLEANING BEFORE WET CLEANING
- ADDITIONAL TECHNICAL MAINTENANCE
- DETAILS
- CHARGING THE ROBOT AND THE REMOTE CONTROL
- CLEANING THE CHARGING CONTACTS
- CLEANING THE CHARGING BASE
- INTENDED USE
- BATTERY AND CHARGER SAFETY
- ACCESSORIES
- USAGE
- CONNECT THE POWER SUPPLY
- PLACEMENT OF THE DEVICE
- PRECAUTIONS
- CONNECT TO THE XIAOMI HOME APP
- RESETTING WI-FI
- ENABLE/DISABLE
- FUNCTION Α
- INFORMATION ABOUT THE DISPOSAL AND RECYCLING WEEE
- RESET WI-FI PAUSE
- US: THIS DEVICE COMPLIES WITH PART 15 OF THE FCC RULES. OPERATION IS SUBJECT TO THE FOLLOWING TWO CONDITIONS: (1) THIS DEVICE MAY NOT CAUSE HARMFUL INTERFERENCE, AND (2) THIS DEVICE MUST ACCEPT ANY INTERFERENCE RECEIVED, INCLUDING INTERFERENCE THAT MAY CAUSE UNDESIRED OPERATION
- UK REP
- VACUUMING FOR FLOOR WASHING
- EC DECLARATION OF CONFORMITY
- CHARGING STATION
- CONNECTING TO THE CHARGING STATION
- CHARGING THE ROBOT VACUUM
- COMPANION APP XIAOMI HOME
- TURNING OFF WI-FI AND RESETTING
- BB306HOBBAHE HA NOUCTBAHETO
- SETTING THE CHILD LOCK
- ERROR HANDLING
- CLEANING AND CHARGING MODES
- AUTOMATIC RETURN OF THE ROBOT TO THE CHARGING STATION AFTER COMPLETING THE TASK
- AUTOMATIC START OF CLEANING AFTER CHARGING THE ROBOT
- CHARGING THE WATER TANK FOR MOPPING
- CHARGING THE ROBOT
- CLEANING BEFORE CHARGING THE ROBOT
- MAINTENANCE AND CARE
- INSTALLATION OF THE FRONT PART AND THE BASE PART
- CLEANING THE SENSOR CONTACTS AND PARTS FOR CHARGING
- CAUTION
- BATTERY AND CHARGING
- ROBOT HUT BUI
- DEN BAO
- CACHLAP
- SAFETY WARNINGS
- BATTERY CHARGING
- DEVICE
- P6OT WANCOPFBII
- OPHATY KOIJIBI
- OMHN-CTAHNYHBKIO
- KAIAA NAIANDAANHYFA 6OANAB
- KYATKA KOCBIN IN KATBIP
- P6OT WAHCOPFBLWTBKOIO
- EXPERT
- CONNECTING TO XIAOMI HOME
- CONNECTING TO WI-FI NETWORK
- KOCY/EWIPY
- CARD HANDLING
- EXPERIMENT
- SAFETY INSTRUCTIONS
- CHARGING THE BATTERY
- CLEANING AND MAINTENANCE PARAMETERS
- PRESSURE SWITCH SETTING
- THE PRESSURE SWITCH IS SET TO THE DESIRED CUT-IN AND CUT-OUT PRESSURES
- AUTOMATIC START AND STOP OF THE COMPRESSOR STATION AND THE PRESSURE SWITCH
- SETTING THE CUT-OUT PRESSURE
- BEFORE STARTING THE EQUIPMENT, CHECK THE CONDITION OF THE HOSES AND CONNECTIONS FOR LEAKS OR DAMAGE. IF THE HOSES ARE DAMAGED, REPLACE THEM WITH NEW ONES. THE EQUIPMENT MUST BE OPERATED ONLY BY TRAINED PERSONNEL
- OPERATOR
- ONE-TIME USE OF THE EQUIPMENT
- CHECKING THE CONTENTS OF THE TANK
- CHECKING THE TANK AND THE TANK BASE
- CHECKING SENSORS AND WARNING DEVICES
- CHECKING THE ROBOT'S AUTOMATIC OPERATION AND MANUAL OPERATION
- CLEANING THE VACUUM CLEANER
- CLEANING THE DUST CONTAINER
- CLEANING THE FILTER WITH WATER
- HEATING THE LIQUID
- OMHN-STATION OPERATION
- BATTERY TECHNICAL MAINTENANCE
Brand : Xiaomi
Model : Robot Vacuum X20 Max
Category : Robot vacuum