CR 4415 - Coffee machine CAMRY - Free user manual and instructions
Find the device manual for free CR 4415 CAMRY in PDF.
| Brand | Camry |
| Model | CR 4415 |
| Product Type | Coffee Maker (Moka Maker) |
| Power Supply Voltage | 220-240 V ~ 50/60 Hz |
| Nominal Power | 480 W |
| Reservoir Capacity | 300 ml |
| Usage | Household use only |
| Main Function | Moka coffee brewing with funnel filter and disc filter |
| Safety Devices | Safety valve, manual shut-off after brewing |
| Indicator Light | Indicates power-on |
| Recommended Coffee Type | Ground for moka (medium grind) |
| Lower Reservoir Material | Metal |
| Upper Reservoir Material | Heat-resistant plastic |
| Included Accessories | Funnel filter, disc filter, gasket, base with power cord |
| Replaceable Wear Parts | Rubber gasket and upper disc (ref. CR 4415.1) |
| Cleaning | With mild non-abrasive detergent after complete cooling |
| Descaling | Use liquid descaler for pressure coffee makers |
| Before First Use | Boil two reservoirs of water |
| Automatic Shut-off | No, manual shut-off via switch |
| Power Cord Length | Approximately 80 cm |
Frequently Asked Questions - CR 4415 CAMRY
User questions about CR 4415 CAMRY
0 question about this device. Answer the ones you know or ask your own.
Ask a new question about this device
Download the instructions for your Coffee machine in PDF format for free! Find your manual CR 4415 - CAMRY and take your electronic device back in hand. On this page are published all the documents necessary for the use of your device. CR 4415 by CAMRY.
USER MANUAL CR 4415 CAMRY
natural_image
Black ADLER LEAVES water heater with a red indicator light (no text or symbols on the device itself)CR 4415
text_image
A B L K J I H C E F + G DENGLISH
GENERAL SAFETY CONDITIONS IMPORTANT SAFETY INSTRUCTIONS. PLEASE READ CAREFULLY AND SAVE FOR FUTURE
- Before using the device, read the operating manual and follow the instructions contained in it.
- The device is for home use only. Do not use for other purposes that are not for its intended purpose.
- The device should only be connected to a 230V\~50 Hz grounded socket. To increase operational safety, multiple electrical devices should not be connected to one current circuit at the same time.
- Use extreme caution when using the device when children are nearby.
- WARNING: This equipment may be used by children over 8 years of age and people with reduced physical, sensory or mental ability, or people who have no experience or knowledge of the equipment, if this is done under the supervision of a person responsible for their safety or have been granted them information on the safe use of the device and are aware of the dangers of using it. Children should not play with the equipment. Cleaning and maintenance of the device should not be performed by children, unless they are over 8 years old and these activities are carried out under supervision.
- Boil the water in the tank and pour it twice to get rid of the smell before first use.
- Always remove the plug from the power socket after use by holding the socket with your hand after use.
- When removing the plug from the socket, never pull the power cord but the plug.
- Do not expose the device to atmospheric conditions (rain, sun, etc.) or use in conditions of high humidity (bathrooms, damp mobile homes).
- Do not immerse the cable, plug and the device in water or any other liquid.
- Periodically check the condition of the power cord. If the power cord is damaged, it should be replaced by a specialist repair shop to avoid danger.
- Do not use the device with a damaged power cord or if it has been dropped or damaged in any other way or if it is not working properly. Do not repair the device yourself, as there is a risk of electric shock. Take the damaged device to an appropriate service center for checking or repair. All repairs may only be carried out by authorized service points. Incorrectly performed repairs can cause serious danger for the user.
- Place the device on a cool, stable surface, away from hot kitchen appliances such as: electric stove, gas burner, etc.
- Do not use the device near flammable materials.
- The power cord may not hang over the edge of a table or touch hot surfaces. The manufacturer is not liable for damages caused by using the device contrary to its intended purpose or improper operation. Do not allow children to play with the device, do not allow children or people unfamiliar with the device to use it.
-
Do not leave the device switched on or the adapter unattended when unattended.
-
To provide additional protection, it is advisable to install a residual current device (RCD) in the electric circuit with a rated residual current not exceeding 30 mA. Ask an electrician for this advice.
- Never use the device without water! It may be damaged.
- Never use the device with sparkling water !!!
- Never leave the device at a temperature below 0 degrees Celsius, as it may damage it.
- Always unplug the machine before filling the tank with water.
- Regularly clean and inspect the machine to ensure the quality of coffee obtained and to extend the life of the machine.
- Always disconnect the power source before cleaning and allow all hot parts to cool down. The device should be cleaned with a mild non-abrasive detergent. Never use cleaning solvent as this could damage the paint layer.
- For descaling the machine, use a liquid descaler designed for pressure coffee makers.
- Use only original accessories.
- Do not move or move the device during operation.
Device description Moka maker:
A. Lid B. Top tank C. Bottom tank D. Base E. Power cord F. On / Off switch G. Light
indicator H. Safety Valve I. Funnel filter J. Disc Filter K. Gasket for upper disk
filter L. Upper Disk Filter
Preparing the device for use.
- Remove all packing material from the device.
- Rinse the inside of the Top tank (B) and Bottom tank (C) with water making sure the water does not overflow.
- Use a dry paper towel to dry the device both inside and outside making sure the area between the Base (D) and the Bottom tank (C) is dry.
Please note this device is for making coffee. Do not use any other extracts, cocoa powder, herbs, flowers, sugars, infusions soluble substances, or other substances that might block the holes in the device filters.
Never immerse the base and the boiler in the water while cleaning.
Using the device:
- Check if the device is not hot from previous use.
- Grasp the Top tank (B) with a dry hand and do not press or pull on the handle.
- Grasp the Bottom tank (C) with your other hand.
- Twist the Top tank (B) counterclockwise until you unscrew the Top tank (B) from the Bottom tank (C) making sure not to press or pull on the handle.
- Once you open the device take out the Disk Filter (J) and the Funnel filter (I).
- Fill the Bottom tank (C) with water. The water level should not reach the Safety Valve (H).
- Insert the Funnel filter (I) into the bottom tank.
- Fill the Funnel filter (I) with ground coffee to around 4/5 of its capacity.
- Put the Disk Filter (J) with the little button facing upward. The Disk filter is designed to keep the coffee ground in the Funnel filter. If not used small parts of the coffee ground can end up in the finished coffee brew.
- Screw the Top tank (B) back on top of the Bottom tank (C). Make sure not to press or pull on the handle.
- Put the assembled device onto the Base (D).
- Press the ON / OFF button (F). The Light indicator (G) will turn on.
- The Moka maker will start brewing.
- After some time the Moka maker will start to bubble and prepare the coffee.
(Do not open the lid (A) until the Moka maker if finished brewing. You might get burned with hot steam and hot coffee.)
- Once the bottom tank (C) is empty turn off the device with the On / OFF switch (F). (You will know it is empty as the coffee will not flow anymore and the noise the device is making will be much lower.)
WARNING Please turn off the device with the ON/OFF switch (F) after each use.
- Grab the device by the handle and pour the coffee into prepared cups.
Cleaning:
- Check if the device hot from previous use. Cleaning should be done only after the device has cooled down completely.
- Once the device is cool.
- Grasp the Top tank (B) with a dry hand and do not press or pull on the handle.
- Grasp the Bottom tank (C) with your other hand.
- Twist the Top tank (B) counterclockwise until you unscrew the Top tank (B) from the Bottom tank (C) making sure not to press or pull on the handle.
- Once you open the device take out the Disk Filter (J) and the Funnel filter (I).
- Empty the Funnel filter (I) and clean it with water and a paper towel removing the used coffee ground.
- Clean the Disk Filter (J) with water and a paper towel.
- Empty the remaining water from the Bottom tank (C) and clean the inside of the tank with a soft towel, washing up liquid and water, and then dry with a paper towel.
- Clean the Upper disk (L) and the Gasket (K) with a paper towel.
- Clean the Top tank (B) with water, washing up liquid, and a paper towel.
- Leave the device to dry and then assemble it back before storage.
Changing the Upper disk and Gasket:
After some time the Gasket (L) and upper disk (K) will deteriorate. The gasket will start to fall apart and the filter will discolor or lose its shape. TO exchange,
To exchange the Disk and Gasket:
- Check if the device hot from previous use. Exchange should be done only after the device has cooled down completely.
- Once the device is cool.
- Grasp the Top tank (B) with a dry hand and do not press or pull on the handle.
- Grasp the Bottom tank (C) with your other hand.
- Twist the Top tank (B) counterclockwise until you unscrew the Top tank (B) from the Bottom tank (C) making sure not to press or pull on the handle.
- On the bottom side of the Top tank (B) you will see a round rubber gasket and a metal filter.
- Using a thin blade lift the gasket downwards releasing it from its place along with the upper disk.
- Dispose of the old gasket and upper disk.
- To install put the metal disk in the middle of the empty space with the bulge of the filter facing you.
- Push the new gasket around the filter and then using your finger move the gasket around the new filter until it falls into place.
- You can screw the Top tank back on to see if the gasket is in place.
WARNING: Please note that both the Rubber gasket (K) and the Upper disk (L) are consumable parts and are not covered by the device warranty. Ask your local seller for the availability of the spare disk and gasket. (CR 4415.1 disk and gasket set.)
TIP: After changing the gasket the rubber might change the taste of the coffee depending on the coffee acidity it is advised to make a few cups of either just water or used coffee grounds to remove the taste off the rubber.
Troubleshooting:
Problem:
No coffee in Top Tank (b)
Cause:
No water in the Bottom tank (C).
Solution:
Add water to the Bottom tank (C)
Problem:
Coffee making takes a long time.
Cause:
Bad coffee type. Too coarse or too fine.
The filter is blocked.
Solution:
Use special coffee for Mocca.
Clean the top filter.
Problem:
Coffee dripping from the sides of the bottom tank (C).
Cause:
The top filter is blocked.
The gasket is burned or broken.
Solution:
Clean the filters
Exchange the gasket.
Technical details:
Voltage: 220 - 240V \~ 50/60 Hz
Power: 480 W
Capacity: 300 ml

Please transfer cardboard packaging to waste paper. Pour the polyethylene bags (PE) into the plastic container Worn device should be returned to the appropriate point storage because it is dangerous in the device ingredients may pose a threat to the environment. The electrical device should be handed over to limit its reuse and use. If in the device there are batteries you have to take out and give to the point stored separately.
(DE) DEUTSCH
Lisage alumisse paaki vett (C)
Probleem:
Lisage alumisse paaki vett (C)
Probleem:
natural_image
Glass watercolor kettle with black handle and silver lid (no visible text or symbols)ELECTRIC KETTLE CR 1290
natural_image
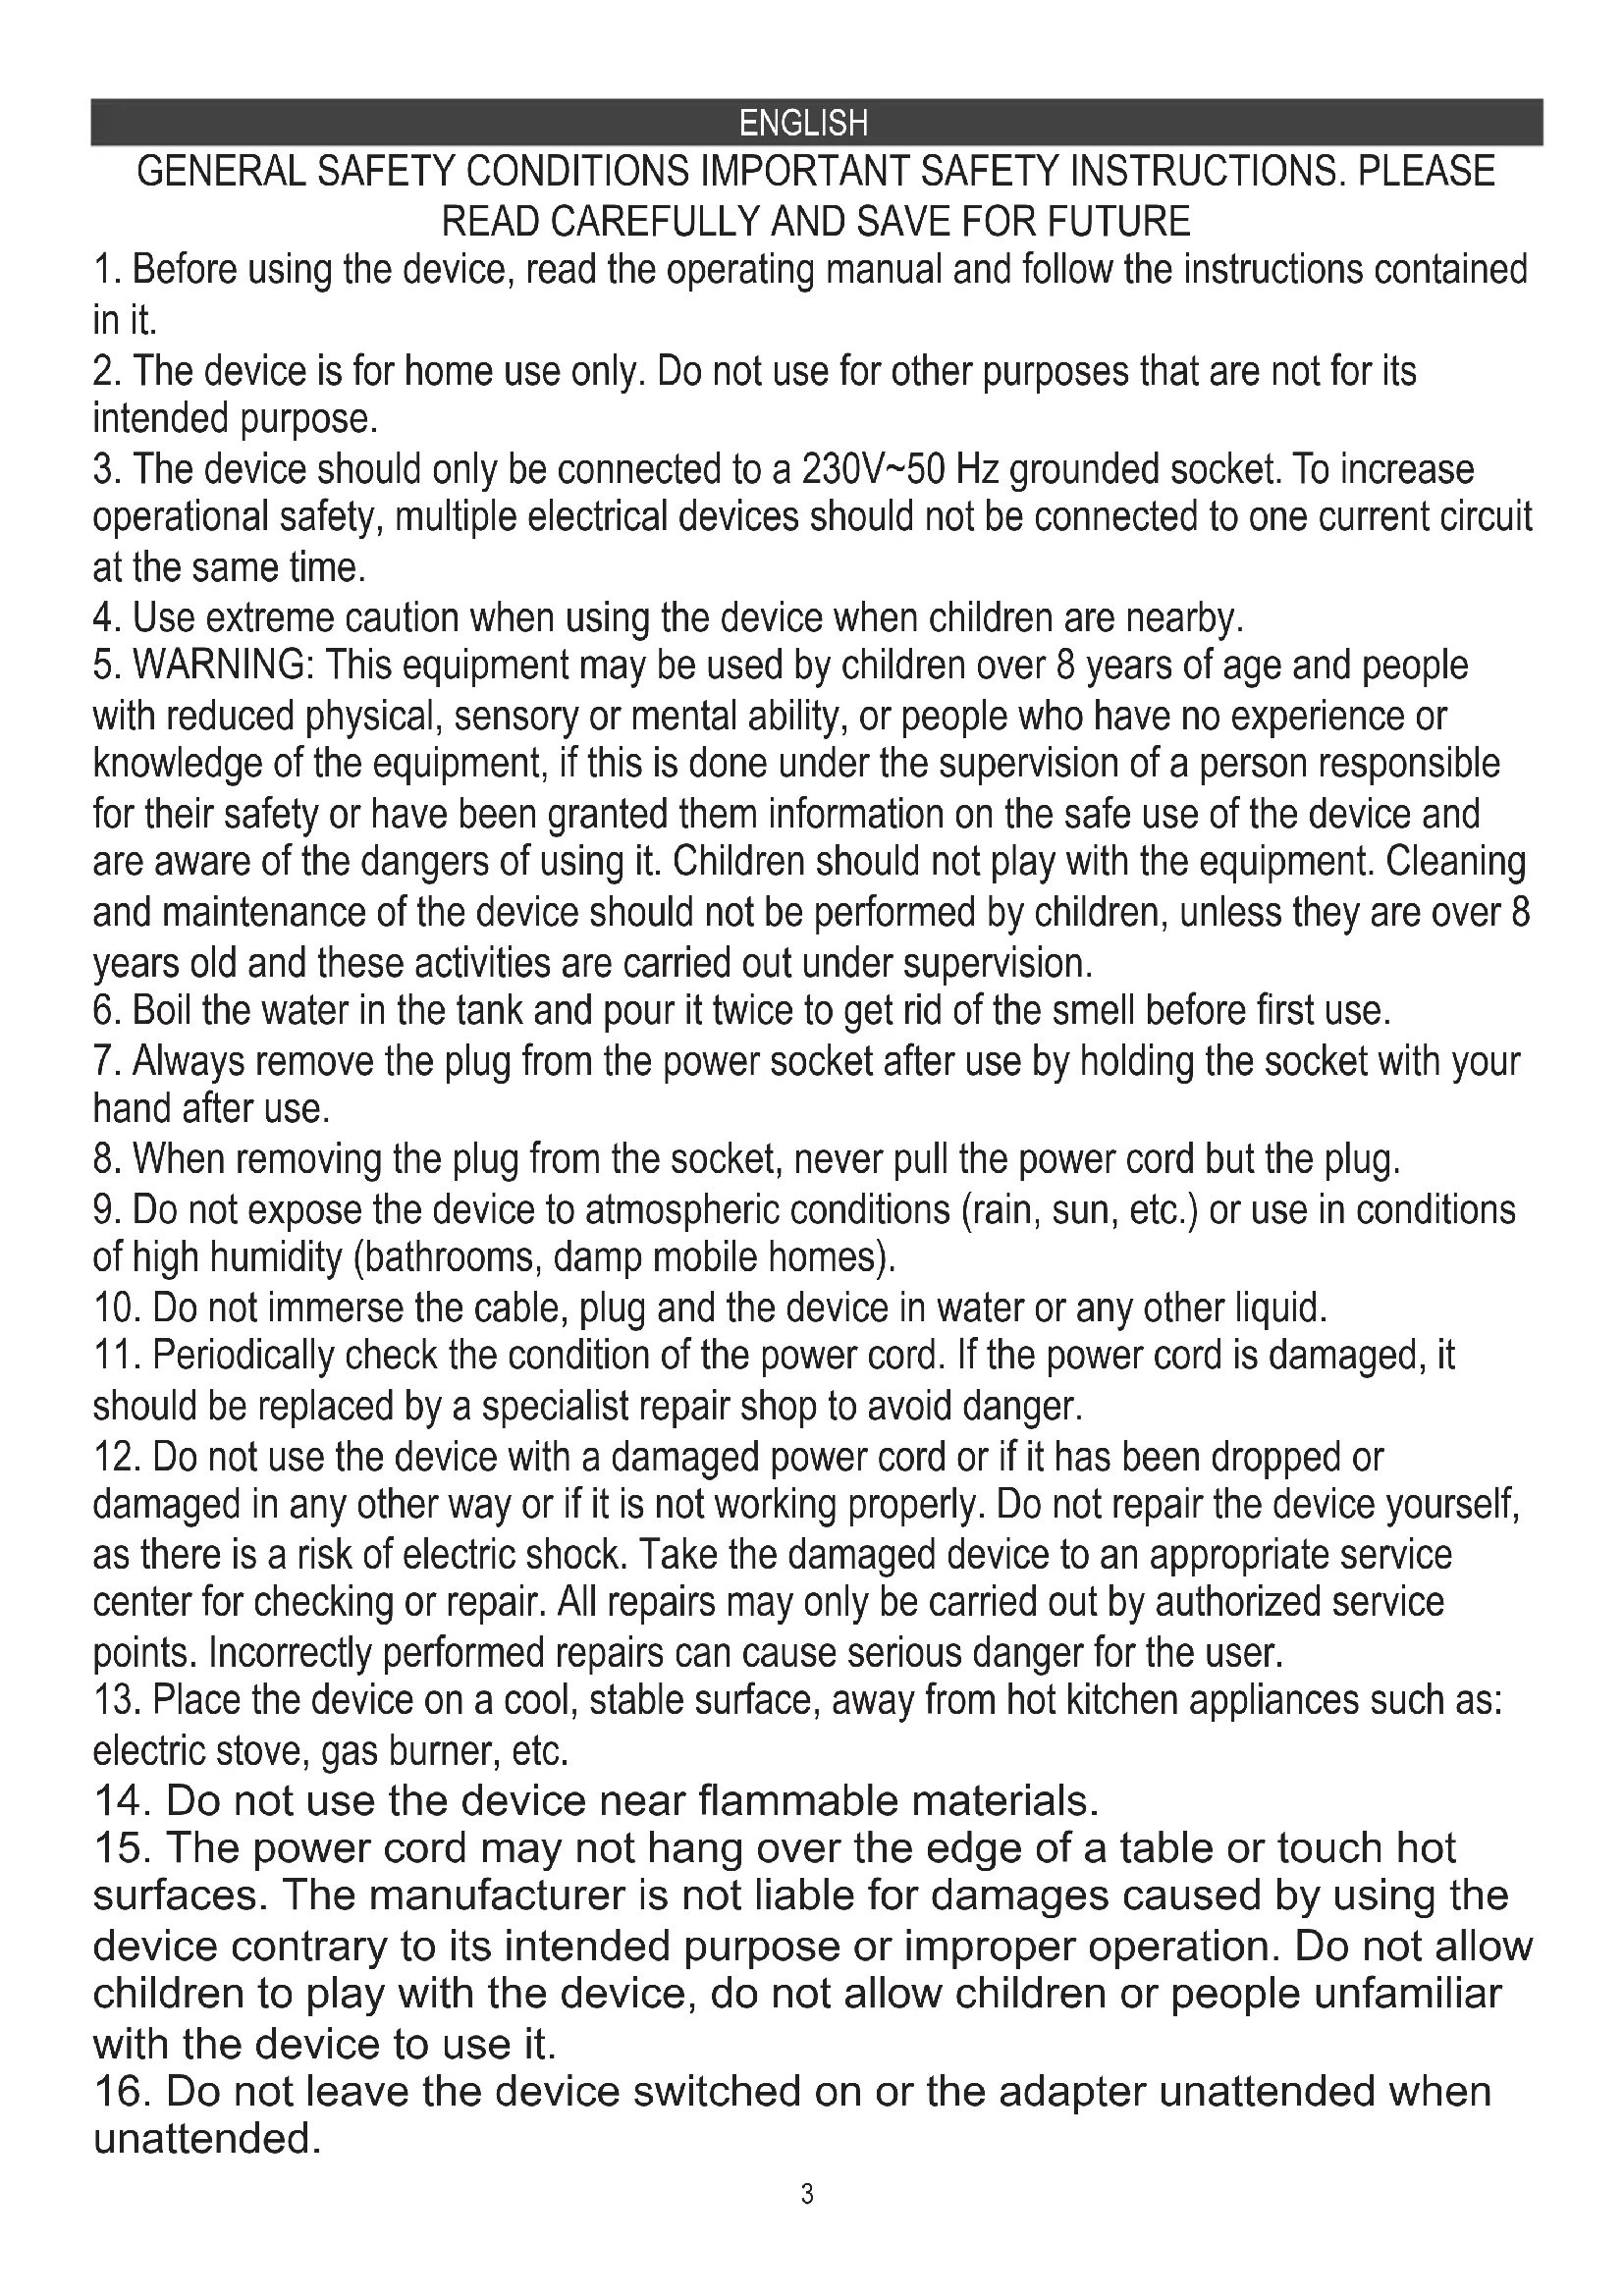
Exterior view of a modern coffee machine (no visible text or symbols)ESPRESSO MACHINE CR 4410

natural_image
Exterior view of a modern office building (no signage)SANDWICH MAKER CR 3054

natural_image
Black electronic device with digital display and control buttons (no visible text or symbols)RETRO RADIO CR 1182

natural_image
White portable air conditioner unit with circular vent and grid grille (no visible text or symbols)AIR CONDITIONER CR 7925

natural_image
Modern stainless steel mixing bowl with digital display and control panel (no visible text or symbols)FOOD PROCESSOR CR 4223

natural_image
White hand mixer with a whisk, no visible text or symbolsMIXER CR 4220

natural_image
Close-up of a black and silver meat processing tool (no visible text or symbols)MEAT MINCER CR 4812
natural_image
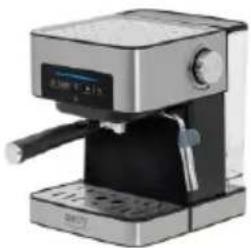
Exterior view of a modern air fryer with digital display (no visible text or symbols)AIR FRYER OVEN CR 6311

natural_image
Exterior view of a modern office building (no signage)BAGLESS VACUUM CLEANER CR 7046

natural_image
White portable air purifier with perforated grille and control panel (no visible text or symbols)AIR DEHUMIDIFIER CR 7851

Trimmer CR 2921

natural_image
White portable electronic device with a textured gray panel and silver handle (no visible text or symbols)CERAMIC FAN HEATEROIL FILLED RADIATOR CR 7732 CR 7812

natural_image
Black rectangular solar water heater with multiple cooling fans and wheels (no visible text or symbols)
natural_image
Exterior view of a silver industrial machine with open lid and internal components (no visible text or symbols)PORTABLE FRIDGE CR 8076

natural_image
A gray oval pet bed with a black cable inserted, showing a small object inside (no text or symbols visible)HEATED ANIMAL DEN CR 7431
camry
Premium

natural_image
Golden kitchen keeler with black handle and silver rim (no visible text or symbols)ELECTRIC KETTLE CR 1292
natural_image
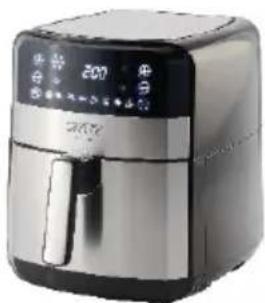
Black hair dryer with a single bulb (no visible text or symbols)HAIR DRYIER CR 2261

natural_image
Golden Roasted Rooster with a beige design and three buttons (no visible text or symbols)TOASTER 2 SLICES CR 3217

natural_image
Modern glass kettle with blue liquid inside, no visible text or symbolsELECTRIC GRILL CR 3044

natural_image
Product photo of a blender with pink liquid and black lid, next to a stainless steel stand (no text or symbols visible)PERSONAL BLENDER CR 4615

natural_image
Exterior view of a black and white stainless steel griddle (no visible text or symbols)WAFFLE MAKER CR 3046

natural_image
Black and white photo of a steamer with handle and base (no visible text or symbols)GARMENT STEAMER CR 5033

natural_image
White cylindrical water heater with black control panel and digital display (no visible text or symbols)AIR HUMIDIFIER CR 7964
natural_image
Front view of a white electronic device with a small black indicator and 'comfy' logo on the front panel (no readable text beyond branding)GLASS HEATER CR 7721

natural_image
Exterior view of a modern washing machine (no visible text or symbols)WASHING MACHINE CR 8054

natural_image
Exterior view of a black horizontal solar power heater with control panel and wheels (no visible text or symbols)OIL FILLED RADIATOR CR 7810

natural_image
White and gray electric guitar body with handle and front panel (no visible text or symbols)HEATING LUNCHBOX CR 4483
natural_image
Exterior view of a modern electric vacuum cleaner (no visible text or symbols)MOSQUITO KILLER LAMP SONIC TOOTHBRUSH CR 7935 CR 2173


natural_image
Folded blanket with floral pattern and a digital thermometer on the right side (no text or symbols visible)HEATING UNDERBLANKET CR 7430
natural_image
Exterior view of a modern hair dryer with pink filter and silver body (no text or symbols visible)HAIR DRYER CR 2256
| AFTER SALE SERVICE NOTICE | |
| GB | If you want to buy spare parts or make any complaints, please contact the seller who issued the receipt directly. |
| DE | Wenn Sie Ersatzteile kaufen oder reklamieren möchten, wenden Sie sich bitte direkt an den Verkäufer, der die Quittung ausgestellt hat. |
| FR | Si vous souhaitez acheter des pièces de rechange ou faire des réclamations, veuillez contacter directement le vendeur qui a émis le reçu. |
| ES | Si desea comprar repuestos o presentar alguna queja, comuníquese directamente con el vendedor que emitió el recibo. |
| PT | Se você quiser comprar peças de reposição ou fazer alguma reclamação, entre em contato diretamente com o vendedor que emitiu o recibo. |
| LT | Jei norite işigyti atsarginių dalių ar pateikti nusiskundimų, susisiekite tiesiogiai su kvitą išdavusiu pardavėju. |
| LV | Ja vēlaties iegādāties rezerves daļas vai izteikt pretenzijas, lūdzu, sazinieties tieši ar pārdevēju, kurš izsniedza čeku. |
| EST | Kui soovite osta varuosi või esitada pretensioone, võtke otse ühendust kviitungi väljastanud müūjaga. |
| HU | Ha pótalkatrészeket szeretne vásárolni, vagy panaszt szeretne tenni, forduljon közvetlenül a bizonylatot kiàllító eladóhoz. |
| BS | Ako želite kupiti rezervne dijelove ili napraviti reklamaciju, obratite se direktno prodavaču koji je izdao račun. |
| RO | Если вы хотите купить запчасти или предъявить какие-либо претензии, пожалуйста, свяжитесь напрямую с продавцом, выдавшим чек. |
| CZ | Chcete-li zakoupit náhradní díly nebo uplatnit jakoukoli reklamaci, kontaktujte přimo prodejce, který účtenku vystavil. |
| RU | Dacă doriți să cumpărați piese de schimb sau să faceți vreo reclamație, vă rugăm să contactați direct vânzătorul care a emis chitanța. |
| GR | Eáv θέλετε να αγοράσετε ανταλλακτικά ή να κάνετε οποιαδήποτε παράπονα, επικοινωνήστε απευθείας με τον πτωλητή που εξέδωσε την απόδειξη. |
| MK | Ако сакате да купите резервни делови или да поднесете какви било поплаки, контактирајте директно со продавачот кој ja издал сметката. |
| NL | Als u reserveonderdelen wilt kopen of een klacht wilt indienen, neem dan rechtstreeks contact op met de verkoper die de bon heeft afgegeven. |
| SL | Če želite kupiti nadomestne dele ali vložiti reklamacije, se obrnite neposredno na prodajalca, ki je izdal račun. |
| FI | Jos haluat ostaa varaosia tai tehdä valituksia, ota yhteyttä suoraan kuitin antaneeseen myyjään. |
| PL | W przypadku chęci zakupu części zamiennych lub zgłoszenia ewentualnych reklamacji należy kontaktować się bezpośrednio ze sprzedawcą, który wystawił paragon. |
| IT | Se desideri acquistare pezzi di ricambio o presentare reclami, contatta direttamente il venditore che ha emesso la ricevuta. |
| HR | Se desideri acquistare pezzi di ricambio o presentare reclami, contatta direttamente il venditore che ha emesso la ricevuta. |
| SV | Om du vill köpa reservdelar eller göra några reklamationer, vänligen kontakta säljaren som utfärdat kvittot direkt. |
| DK | Hvis du ønsker at købe reservedele eller reklamere, bedes du kontakte sælgeren, som har udstedt kvitteringen, direkte. |
| UA | Якщо ви хочете придбати запчастини або подати будь-які претензії, зверніться безпосередньо до продавця, який видав чек. |
| SR | Ако желите да купите резервне делове или да уложите рекламацију, обратите се директно продавцу који је издао рачун. |
| SK | Ak si chcete kúpiť náhradné diely alebo uplatnit’ akúkol’vek reklamáciu, kontaktujte priamo predajcu, ktorý účtenku vystavil. |
| AR | أو غيارقطعاء راش في ترゴب کنعتاذ! شكوى́ أي تقدم، لاصotta فيرجي مbeitrerلاصياً رдумсаً يذلا بال Authentic |
| BG | Ако искате да закупите резервни части или да направите оплаквания, моля, свържете се директно с продавача, който е издал касовата бележка. |