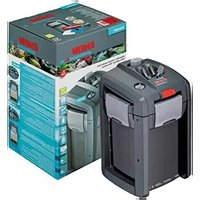
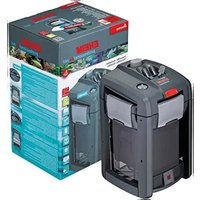
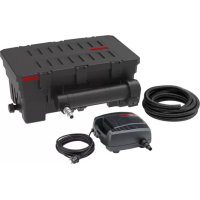
Classic 1500XL - Water filter EHEIM - Free user manual and instructions
Find the device manual for free Classic 1500XL EHEIM in PDF.

| Brand | EHEIM |
| Model | Classic 1500XL |
| Category | Aquarium Water Filter |
| Type | External Canister Filter |
| Use | Freshwater and Saltwater Aquariums |
| Power Supply | Mains (230 V / 50 Hz) |
| Protection Class | II |
| Protection Rating | IPX8 (permanent immersion) |
| Maximum Water Temperature | 35 °C |
| Maximum Installation Height | 150 cm |
| Filtration System | Mechanical and Biological |
| Filter Media Included | EHEIM MECH foam, EHEIM SUBSTRAT biological support, filter net |
| Maintenance | Periodic cleaning of filter media and pump |
| Recommended Aquarium Capacity | Up to 1500 L |
| Safety | Use with 30 mA residual current device recommended; anti-drip loop on power cord |
| Included Accessories | Hoses, suction cups, strainer, spray bar, elbows, filter media |
Frequently Asked Questions - Classic 1500XL EHEIM
User questions about Classic 1500XL EHEIM
0 question about this device. Answer the ones you know or ask your own.
Ask a new question about this device
Download the instructions for your Water filter in PDF format for free! Find your manual Classic 1500XL - EHEIM and take your electronic device back in hand. On this page are published all the documents necessary for the use of your device. Classic 1500XL by EHEIM.
USER MANUAL Classic 1500XL EHEIM
natural_image
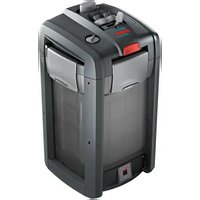
Green cylindrical device with gray top and silver casing, no visible text or symbols2260
2262


de Außenfilter
en External filter
fr Filtre extérieur
nl Buitenfilter
sv Ytterfilter
no Utvendig filter
fi Ulkosuodattimet
da Udvendigt filter
it Filtro esterno
es Filtro exterior
pt Filtro exterior
el Εξωτερικό φίλτρο
cs Vnější filtr
hu Külszürő
pl Filtr zewn etrzny
sl Zunanji filter
sk Vonkajší filter
ro Filtru extern
tr Dis, filtre
sr Spoljni filter
ru Внешний фильтр
bg Външен филтър
zh 外置过器
ko 외부 여과기
natural_image
Technical line drawing of a mechanical assembly with no visible text or symbols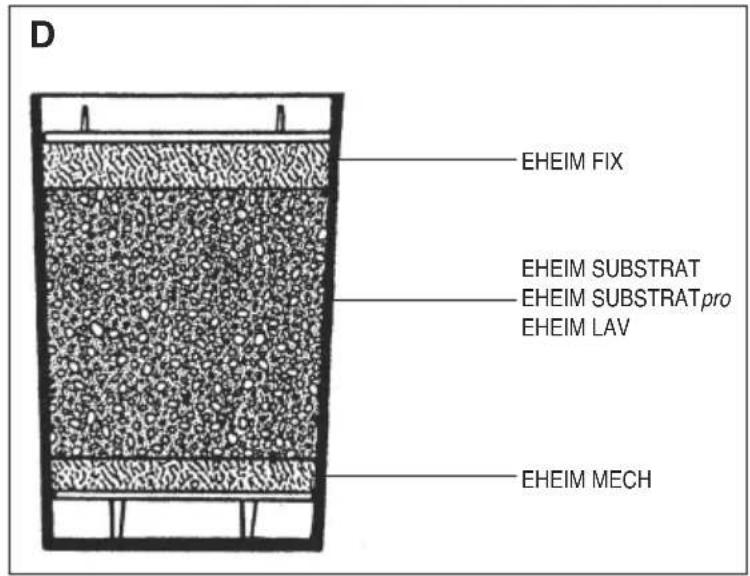
text_image
E (1) (2)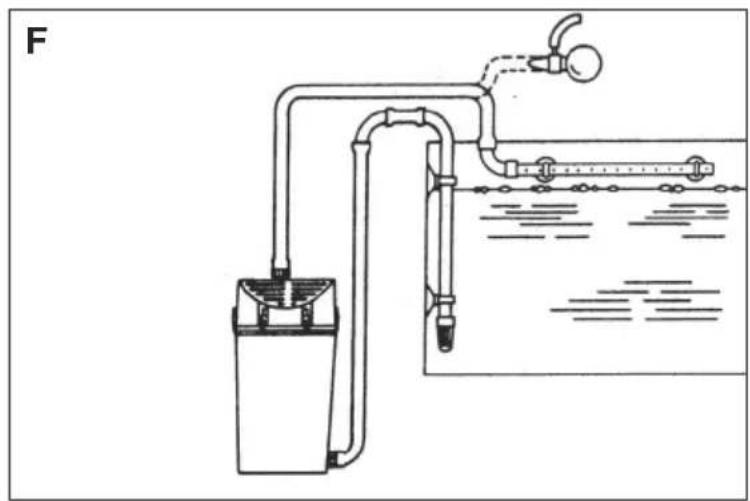
natural_image
Diagram of a water treatment or gas collection system with a pump, tubing, and tank (no text or labels)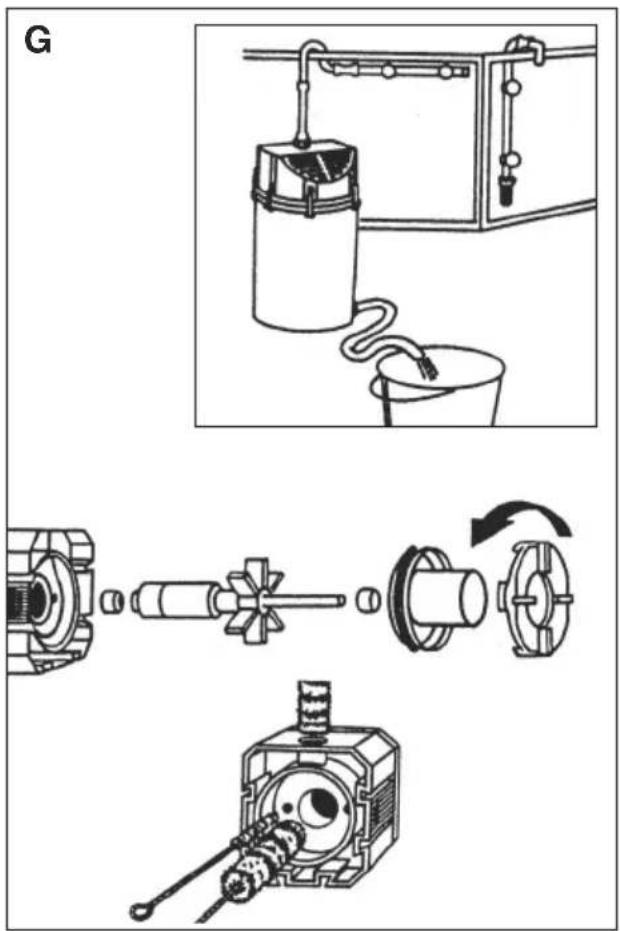
text_image
G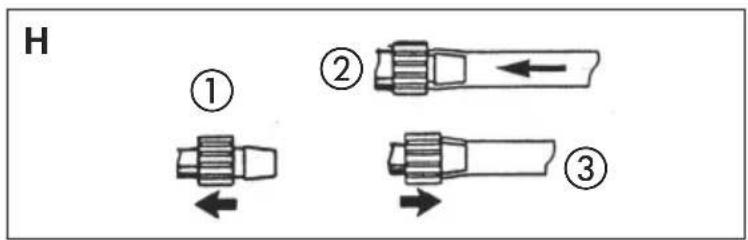
text_image
H ① ② ③VERY IMPORTANT SAFETY INSTRUCTIONS
WARNING- To guard against injury, basic safety precautions should be observed, including the following.
• FOR HOUSEHOLD USE ONLY · WARNING! RISK OF ELECTRIC SHOCK!
- This pump has not been investigated for use in swimming pools areas!
- DO NOT RUN DRY
READ AND FOLLOW ALL SAFETY INSTRUCTIONS.
- DANGER. To avoid possible electric shock, special care should be taken since water is employed in the use of aquarium equipment. For each of the following situations, do not attempt repairs by yourself; return the appliance to an authorized service facility for service or discard the appliance.
- If the appliance shows any sign of abnormal water leakage, immediately unplugit from the power source.
- Carefully examine the appliance after installation. It should not be plugged in if there is water on parts not intended to be wet.
- Do not operate any appliance if it has a damaged cord or plug, or if it is malfunctioning or if it is dropped or damaged in any manner.
text_image
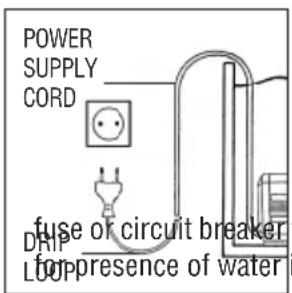
POWER SUPPLY CORD drip LIP fuse of circuit breaker for presence of water- To avoid the possibility of the appliance plug or receptacle getting wet, position aquarium stand and tank to one side of a wall mounted receptacle to prevent water from dripping onto the receptacle or plug. A “drip loop”, shown in the figure, should be arranged by the user for each cord connecting the aquarium appliance to a receptacle. The “drip loop” is that part of the cord below the level of the cord and coming in contact with the receptacle. If the plug or receptacle does get wet, DON'T unplug the cord; disconnect the
that supplies power to the appliance. Then unplug and examine in the receptacle.
- Close supervision is necessary when any appliance is used by or near children.
- To avoid injury, do not contact moving parts.
- Always unplug an appliance from an outlet when not in use, before putting or taking off parts, and before cleaning. Never yank cord to pull plug from outlet. Grasp the plug and pull to disconnect.
- Do not use an appliance for other than intended use. The use of attachments not recommended or sold by the appliance manufacturer may cause an unsafe condition.
- Do not install or store the appliance where it will be exposed to the weather or to temperatures below freezing.
- Make sure an appliance mounted on a tank is securely installed before operating it.
- Read and observe all the important notices on the appliance and its cord.
- If an extension cord is necessary, a cord with a proper rating should be used. A cord rated for less amperes or watts than the appliance rating may overheat. Care should be taken to arrange the cord so that it will not be tripped over or pulled.
- Check that the voltage shown on the label of the unit corresponds to the voltage of the mains supply.
- Disconnect all electrical appliances from the mains before placing hands in the water.
- The line cord of this unit cannot be replaced or repaired. Should the line cord become damaged the appliance must be discarded.
KEEP THESE INSTRUCTIONS FOR FUTURE REFERENCE.
Translation of the original operating manual Aquarium exterior filters classic 1500XL (type 2260 and 2262)
1. General user instructions

Information on using the operating manual
Before using the appliance for the first time, the operating manual must be read fully and understood. Consider the operating manual as part of the product and keep in a safe and accessible location. Enclose this operating manual if passing the appliance on to a third party.
Symbol explanation
The following symbols are used on the appliance:

The appliance must only be used indoors, and exclusively for aquariums.

The appliance is of protection class II.
IP X8
The appliance is certified according to the relevant national regulations and directives, and conforms to EU standards.
The following symbols and signal words are used in this operating manual:

DANGER!
The symbol indicates imminent danger from electric shock that can result in death or serious injury.

DANGER!
The symbol indicates imminent danger that can result in death or serious injury.

WARNING!
The symbol indicates imminent danger that can result in moderate to minor injury or a health risk.

CAUTION!
The symbol indicates the danger of material damage.

Note with useful information and tips.
A
Reference to a figure; in this case, reference to figure A.
▶
You are prompted for an action.
2. Application
The appliance and all parts included in the scope of delivery are intended for private use and must only be used:
- For the cleaning of aquarium water in fresh and salt water aquariums.
- in compliance with the technical data.
The following limitations apply to the appliance:
- do not use for commercial or industrial purposes.
• the water temperature may not exceed 35^ C. - Corrosive, highly flammable, aggressive or explosive substances, foodstuffs and drinking water must not be conveyed.
- never operate without a water flow.
3. Safety instructions
Risks for persons and property can arise from this appliance if the appliance is improperly used or not used as intended or if the safety instructions are not heeded.
For your safety

- Do not allow the device packaging and small parts to get into the hands of children or persons who are not fully in control of their actions as this can be dangerous (risk of suffocation!). Keep away from animals.
Only for EU countries:
- This appliance can be used by children from the age of 8 and by persons with reduced physical, sensory or mental capabilities or lack of experience and/or knowledge if they are supervised and have been instructed in the safe use of the appliance and have understood the resulting dangers. Children must not play with the appliance. Cleaning and user maintenance must not be carried out by children unless they are supervised.
This equipment is not intended for use by persons (including children) with limited physical, sensory or mental abilities or for persons with no experience or knowledge unless they are supervised by a person respond for safety or unless they have received from such a person instructions on how to use the equipment. Children should be supervised to ensure that they do not play with the equipment.

- Before use, carry out a visual inspection to ensure that the appliance, especially the mains cable and plug, are undamaged.
- Do not use the device if it does not function properly or if it is damaged.
- Never use the appliance with a damaged mains cable.
- The connecting line of this device can not be replaced. When the line is damaged, the device must no longer be used.
- Repairs must only be carried out by an EHEIM service centre.
- Do not carry the appliance by the mains cable, and to disconnect from the mains, always pull on the plug and not on the cable or appliance.
- Protect the mains cable against heat, oil and sharp edges.
- Only carry out the work described in these instructions.
- Never make technical modifications to the appliance.
- Only use original spare parts and accessories for the appliance.
- The device should be protected by means of a residual current protective device with a maximum rated residual current of 30 mA. Ask your electrician.
- If they are not being used, always disconnect all devices in the aquarium from the power supply before you install/remove any parts and before all cleaning and maintenance work.

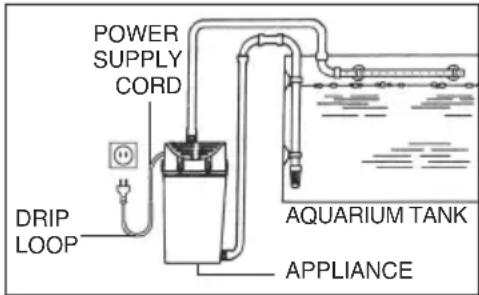
- Protect the mains socket and mains plug against moisture. It is recommended to form a drip loop with the mains cable to prevent any water running along the cable to the mains socket.
- The electrical data of the pump must match the data of the power mains. This data is found on the type plate, the packaging and in these inst
- Connect the device only to a protective earth contact mains socket installed in accordance with the regulations.
text_image
POWER SUPPLY CORD DRIP LOOP AQUARIUM TANK APPLIANCE
20 cm
Notice: These devices produce magnetic fields which might cause electronic and mechanical disturbances or damages. This also refers to pacemakers. Please consult the manuals of medical equipment for the required safety margins.

- Attention: Maintenance work presents the risk of crushing the fingers due to high magnetic forces.
text_image
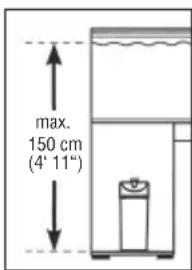
max. 150 cm (4' 11")
- To achieve optimal operational safety there must be a maximum of 150 cm (4' 11") between the surface of the water and the bottom of the filter.
4. Function
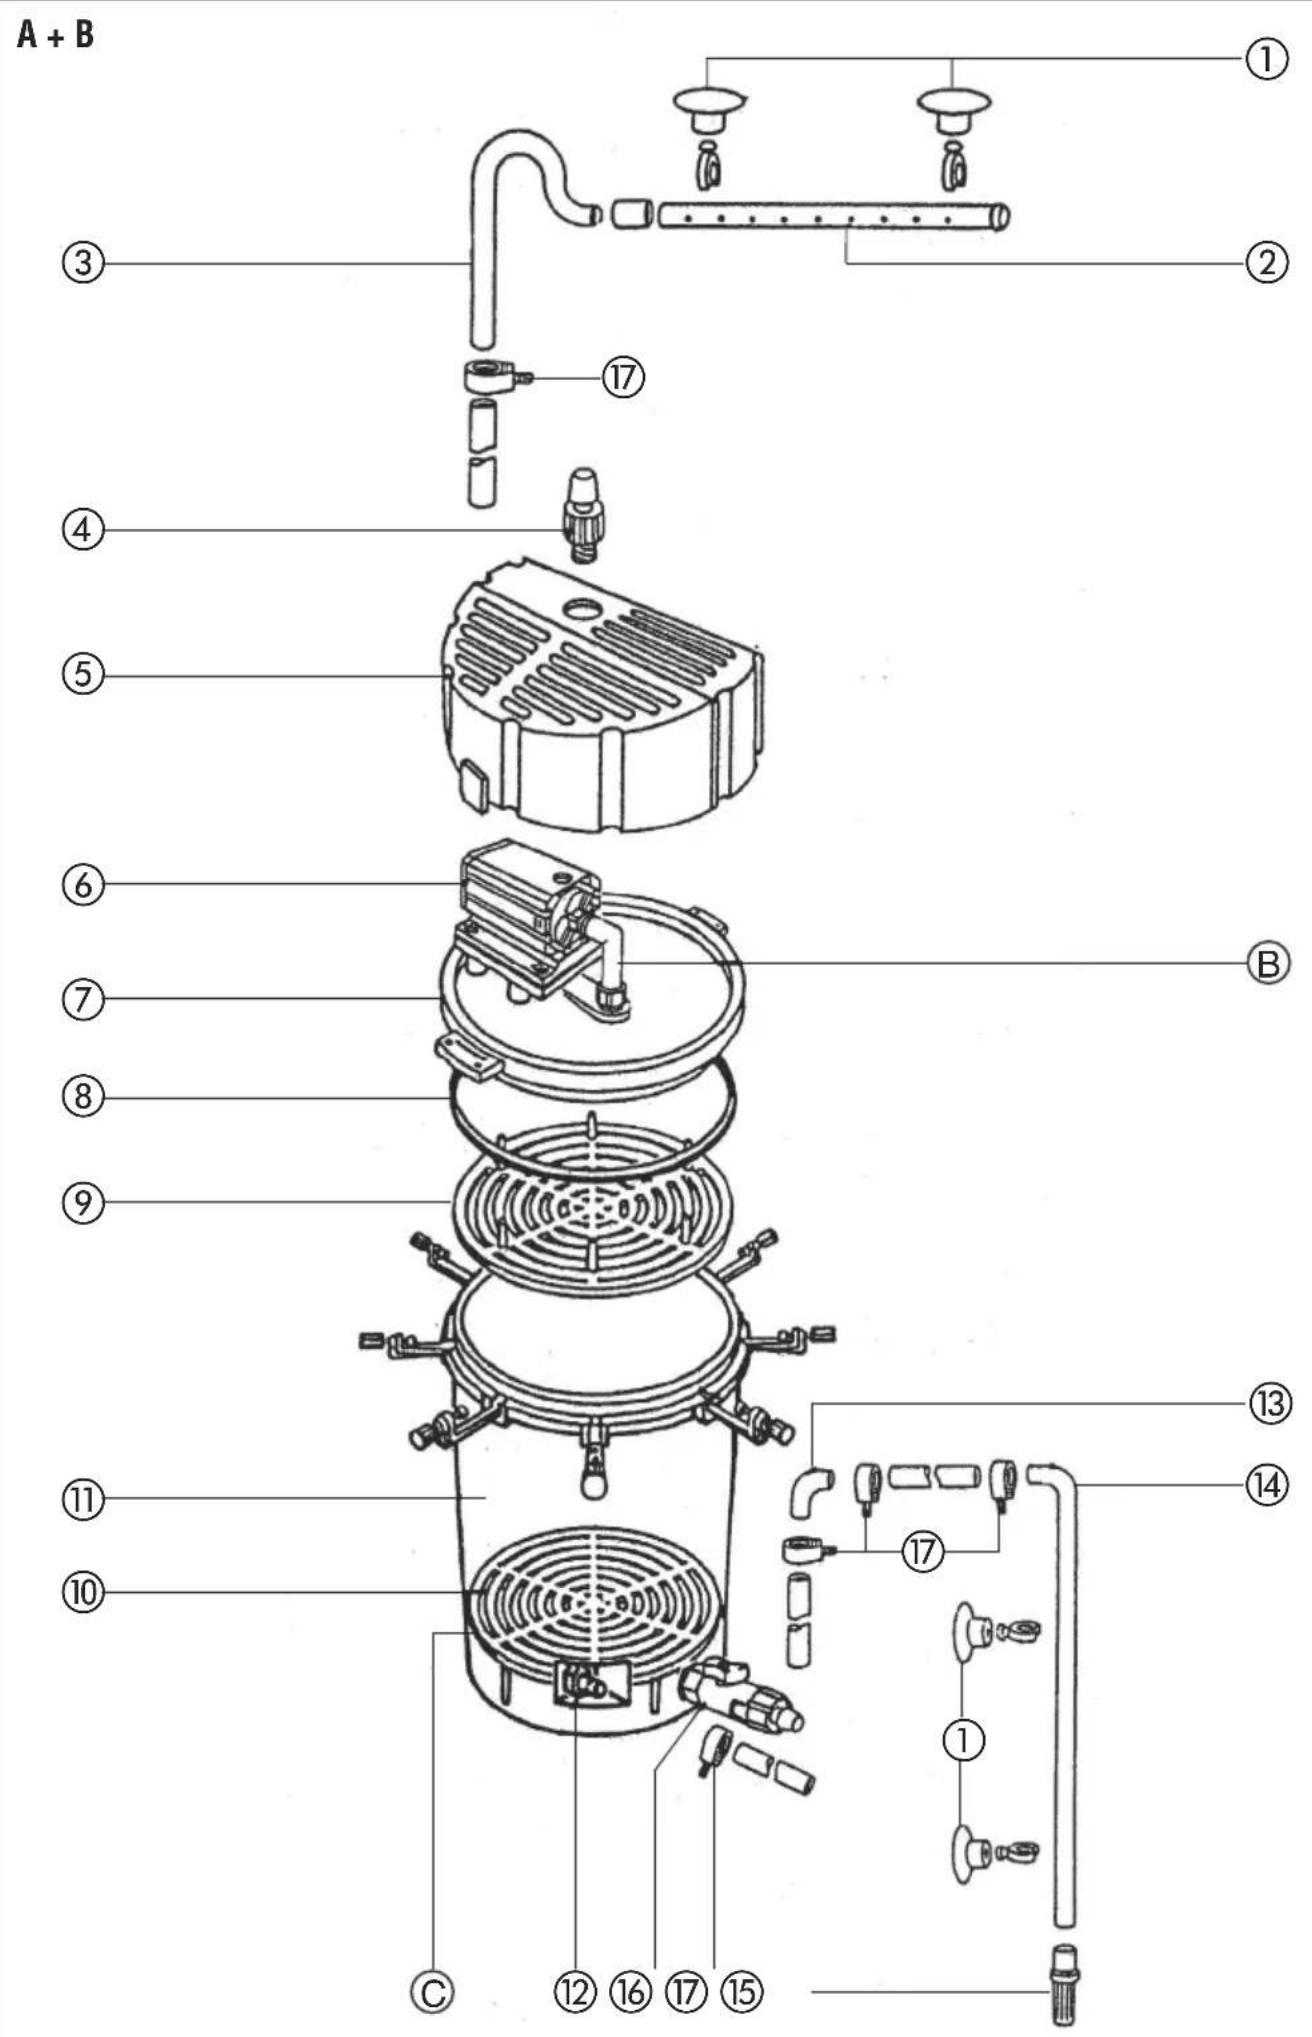
A ① Suction pads with clamping brackets ② Jet pipe with end-plug ③ Outlet elbow ④ Threaded connector, pressure side ⑤ Cover ⑥ Pump ⑦ Filter cover ⑧ Large sealing ring ⑨ Top lattice screen (short lugs) ⑩ Lower lattice screen (long lugs) ⑪ Filter container with fasteners ⑫ Hose connection, suction side ⑬ Elbow ⑭ Intake pipe ⑮ Strainer ⑯ Drain tap (filter model 2260 only) ⑰ Hose clamps ⑱ Elbow connection ⑲ Union nut ⑳ Small sealing ring ㉑ Union ㉒ Base plate.
Filter model 2260/2262 comes complete with a drain tap which should be screwed into the Filter container and closed. It provides for the interim drainage of coarse deposits.
5. Installation
B Slide union nut onto long pipe section of elbow connection and fit sealing ring. Screw threaded end of elbow connection into pump intake socket and adjust vertically. Screw union into filter cover, place pump on base plate so that the elbow connection is inserted into union. Align pump and secure to base plate with 4 self-tapping screws and washers supplied. Screw union nut to union, tightening with light pressure. Screw in pressure side union.
C Install top cover so that the two fastening clips engage the recesses in the filter cover handles.
To remove the top cover, press in the two fastening clips below the handles and push upwards simultaneously.
D Place lower lattice screen (long lugs facing downwards) in the filter canister and install filter compound (D). Place top lattice screen (short lugs facing upwards) in position. Fit sealing ring on filter cover and install complete filter cover/pump assembly on filter canister. Secure cover with fastening screws, making sure they are tight.
Filter compound formation, from base upwards:
Install EHEIM FIX or EHEIM MECH to a depth of approx. 3 – 5 cm as the lowest filtration layer.
Fill the accompanying net bag with EHEIM SUBSTRAT or EHEIM SUBSTRAT pro or EHEIM LAV, as the main mechanical-biological filtration compound, and install in the filter canister. The net bag facilitates subsequent handling for cleaning operations.
Install approx. 3 cm EHEIM FIX as the top layer. Except when carrying out short-term filtering after adding medication, please do not use cotton wool, which soon becomes clogged with the high flow rate through the filter.
Charcoal is only advisable for short-term use if it is necessary to filter out unwanted substances when the filter is new or after the addition of medication. It should be replaced by the specified filtercompound formation after a maximum of 3 weeks. Never re-use old charcoal.
E Pressure side installation:
Secure the jet pipe to the rear aquarium panel with the aid of the two suction pads, at a sufficient distance from the surface to ensure good oxygenation (1) or surface movement (2), depending on type of installation. The outlet elbow should be secured to the jet pipe with a short piece of hose, the elbow being led over the edge of the aquarium. Connect the outlet elbow and pressure side union of the filter with hose.
F Place the filter below the water level, ideally beneath the aquarium. Take care to ensure that the pump receives sufficient ventilation.
Suction side installation:
Fit the intake pipe and strainer together, connect the elbow with a short piece of hose and secure the intake pipe assembly to the aquarium panel with 2 suction pads. Connect the elbow to the intake side hose connector on the filter with hose.
6. Putting into operation
Release the pressure hose from the jet pipe. By suction on pressure side (or using the EHEIM suction device, order no. 4003540), draw water through the end of the hose and over the rim of the aquarium until the filter is functioning fully of its own accord. Now reconnect the pressure hose to the jet pipe and switch on the filter by plugging it into the power supply.
7. Servicing and maintenance
G Always disconnect the power supply before carrying out any cleaning or other operations on the filter.
To clean the filter, pull off the hose from the intake pipe and empty the Filter container into a bucket or allow it to drain. Then, and only then, remove the filter cover. Remove filter compound (clean or replace) and clean the appliance. For the care of the centrifugal pump, refer to the accompanying pump instruction leaflet.
The filter canister on model 2260/2262 can be emptied direct by attaching a hose to the drain tap, if required.
Cleaning of the pump:
Remove the connection bend, unlock the pump lid and remove all parts as shown on the drawing. Clean the pump pipes with a set of cleaning brushes (order no. 4009560). Clean the pump parts under running water and then reassemble in the same order.
H Diagram showing assembly of the safety hose.
Note: All hose connections must be checked at regular intervals for correct fitting.
8. Decommissioning
Storage

- Uninstall the device from the aquarium.
- Clean the appliance.
- Store the appliance in a frost-proof place.
Disposal
When disposing of the appliance, heed the respective statutory regulations. Information on the disposal of electrical and electronic appliances in the European Union: Within the European Union, disposal of electrically operated appliances is governed by national regulations that are based on the EU Directive 2012/19/EU on waste electrical and electronic equipment (WEEE). The appliance may no longer be disposed of with the municipal or household waste. The appliance will be accepted free of charge at municipal collection points or recycling centres. The product packaging is made up of recyclable materials. Dispose of them in an environmentally responsible manner and take them for recycling.
9. Technical data
See page 122
10. Spare parts
See page 123
text_image
max. 150 cm (4' 11")
Élimination/destruction
text_image
max. 150 cm (4' 11")4. Toiminta
text_image
max. 150 cm (4' 11")4. Funktion
text_image
max. 150 cm (4' 11")4. Funzionamento
text_image
max. 150 cm (4' 11")4. Funcionamiento
text_image
max. 150 cm (4' 11")4. Λειτουργία
text_image
max. 150 cm (4' 11")4. Funkce
text_image
max. 150 cm (4' 11")4. Funkció
text_image
max. 150 cm (4' 11")
text_image
max. 150 cm (4' 11")4. Funkcia
text_image
max. 150 cm (4' 11")4. Delovanje
text_image
max. 150 cm (4' 11")4. Functie
text_image
max. 150 cm (4' 11")4. İşlev
text_image
max. 150 cm (4' 11")4. Funkcija
A ① Vakumska stezaljka ② Mlaznica sa čepom za zatvaranje ③ Ispusni luk ④ Navojni otvori sa strane pritiska ⑤ Hauba ⑥ Pumpa ⑦ Poklopac filtera ⑧ Veliki zaptivni prsten ⑨ Gornja rešetka (kratki čep) ⑩ Donja rešetka (dugi čepovi) ⑪ Spremnik za filtriranje sa zatvaračem ⑫ Priključak za crevo sa usisne strane ⑬ Ugaoni luk ⑭ Usisna cev ⑮ Korpa filtera ⑯ Ispusna slavina ⑰ Stezaljke za crevo ⑱ Priključni ugaonik ⑲ Navrtka ⑳ Mali zaptivni prsten ㉑ Priključni prsten ㉒ Osnovna ploča.
Uz filter 2260/2262 isporučuje se ispusna slavina koja se zašrafi u spremnik za filtriranje i zatvori. Arma-tura služi za povremeno ispuštanje grubih nečistoća.
5. Montaža
B Navrtku staviti na dugi komad cevi i navući zaptivne prstenove. Zatim priključni ugaonik sa navojnom stranom zašrafiti u usisne otvore pumpe i namestiti vertikalno. Pumpu staviti na osnovnu ploču, pri čemu se priključni ugaonik istovremeno stavi u priključni komad. Pumpu namestiti i pričvrstiti na osnovnu ploču pomoću 4 priložena samourezna zavrtnja i podloški. Navrtku zašrafiti na priključni komad i zategnuti je uz lagani pritisak. Zatim zašrafiti ispusni otvor.
C Staviti haubu tako da oba zatvarača uskoče u otvore za držanje poklopca filtera. Za otvaranje haube se oba zatvarača pritisnu ispod drške i istovremeno gurnu nagore.
D Donju rešetku (dugi čep prema dole) staviti u spremnik za filtriranje i napuniti filtersku masu (D). Zatim staviti gornju rešetku (kratki čep prema gore). Navući zaptivni prsten na spremnik za filtriranje i kompletan poklopac filtera sa montiranom pumpom staviti na posudu filtera. Poklopac sigurno zašrafiti pomoću zatvarača.
Struktura filterske mase odozdo prema gore:
text_image
max. 150 cm (4' 11")4. Принцип работы
Reproduction or copying – even parts thereof – only with the express permission of the producer.