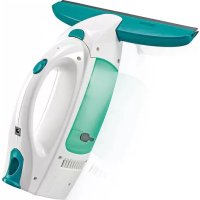
Regulus PowerVac 2in1 - Vacuum Cleaner Leifheit - Free user manual and instructions
Find the device manual for free Regulus PowerVac 2in1 Leifheit in PDF.
Document temporarily unavailable
The manual is currently being transferred to our new server. It will be accessible again in a few hours. Thank you for your patience.
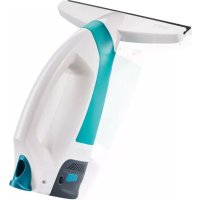
| Product type | 2-in-1 cordless stick vacuum |
| Brand | Leifheit |
| Model | Regulus PowerVac 2in1 |
| Maximum runtime | Up to 40 minutes (eco mode) |
| Charging time | Approximately 3.5 hours |
| Dust container volume | 0.45 L |
| Weight (without accessories) | Approximately 2.8 kg |
| Rated power | 25 W |
| Battery voltage | 20 V (Li-ion, 2 Ah) |
| Charging station power supply | 21.4 V ⎓ 0.6 A |
| Power adapter | Input: AC 100-240 V, 50/60 Hz; Output: 21.4 V ⎓ 0.6 A |
| Suction modes | 2 modes (eco and powerful) |
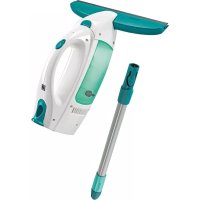
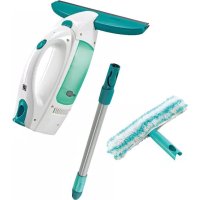
| Included accessories | Floor nozzle, ceiling nozzle, 2-in-1 brush nozzle, charging station |
| Filter type | Washable dust filter + coarse filter (2 pieces) |
| Maintenance and cleaning | Removable dust container, water-washable filters, removable cleaning brush |
| Safety | Do not vacuum liquids, ash, sharp objects; household use only |
| Usage | Hard floors and carpets (floor nozzle), high surfaces (ceiling nozzle), furniture (brush nozzle) |
| Spare parts and repairability | Removable and replaceable battery, filter and brush available; repairs by authorized technician |
| Manufacturer warranty | Warranty for household use, not for professional use |
| General information | Complies with EU directives (RoHS, REACH); declaration of conformity at leifheit.de |
Frequently Asked Questions - Regulus PowerVac 2in1 Leifheit
User questions about Regulus PowerVac 2in1 Leifheit
0 question about this device. Answer the ones you know or ask your own.
Ask a new question about this device
Download the instructions for your Vacuum Cleaner in PDF format for free! Find your manual Regulus PowerVac 2in1 - Leifheit and take your electronic device back in hand. On this page are published all the documents necessary for the use of your device. Regulus PowerVac 2in1 by Leifheit.