Relax Rhythm'n'sound - Chair CHICCO - Free user manual and instructions
Find the device manual for free Relax Rhythm'n'sound CHICCO in PDF.
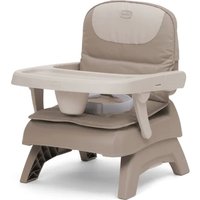
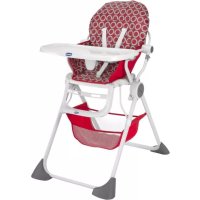
| Product Type | Baby Bouncer (chair) |
| Brand | Chicco |
| Model | Relax Rhythm'n'sound |
| Age of Use | From birth to 9 kg (about 6 months) |
| Maximum Supported Weight | 9 kg |
| Power Supply | 4 AA 1.5 V batteries or USB cable (5-6 V, adapter not included) |
| Main Functions | Adjustable recline, 5-point safety harness, motorized side-to-side motion, musical console with melodies and volume control, timer (10 or 30 min) |
| Restraint System | Adjustable length 5-point harness |
| Recline Mechanism | A1 recline button for multiple position adjustment |
| Motorized Motion | Side-to-side motion activated by L1 button, with two timer modes |
| Musical Console | On/off buttons (L2), volume and melody change (L3), timer (L4) |
| USB Cable | Power connector L5 for mains use |
| Folding | Simultaneous action on buttons A1 and A2 to fold; unfold by pulling the seat upward |
| Cover Maintenance | Removable cover; hand wash in cold water; do not bleach, tumble dry, iron, or dry clean; hang to dry |
| Plastic and Metal Parts Maintenance | Clean with a damp cloth; dry metal parts after contact with water |
| Safety | Never leave child unattended; always use the harness; do not use on elevated surfaces; do not use for car travel; do not use if components are broken |
| Sleep Warning | Not intended for long periods of sleep; use a crib or bassinet for rest |
| Components Included | Base A, feet B (2), screws B1 (2), seat fabric with backrest C, harness D, buckle E, forks F, adjustment ring G, buttons H, fabric slot and tab I/J, USB cable K, console L |
| Warranty | Warranty against conformity defects according to national conditions |
Frequently Asked Questions - Relax Rhythm'n'sound CHICCO
User questions about Relax Rhythm'n'sound CHICCO
0 question about this device. Answer the ones you know or ask your own.
Ask a new question about this device
Download the instructions for your Chair in PDF format for free! Find your manual Relax Rhythm'n'sound - CHICCO and take your electronic device back in hand. On this page are published all the documents necessary for the use of your device. Relax Rhythm'n'sound by CHICCO.
USER MANUAL Relax Rhythm'n'sound CHICCO
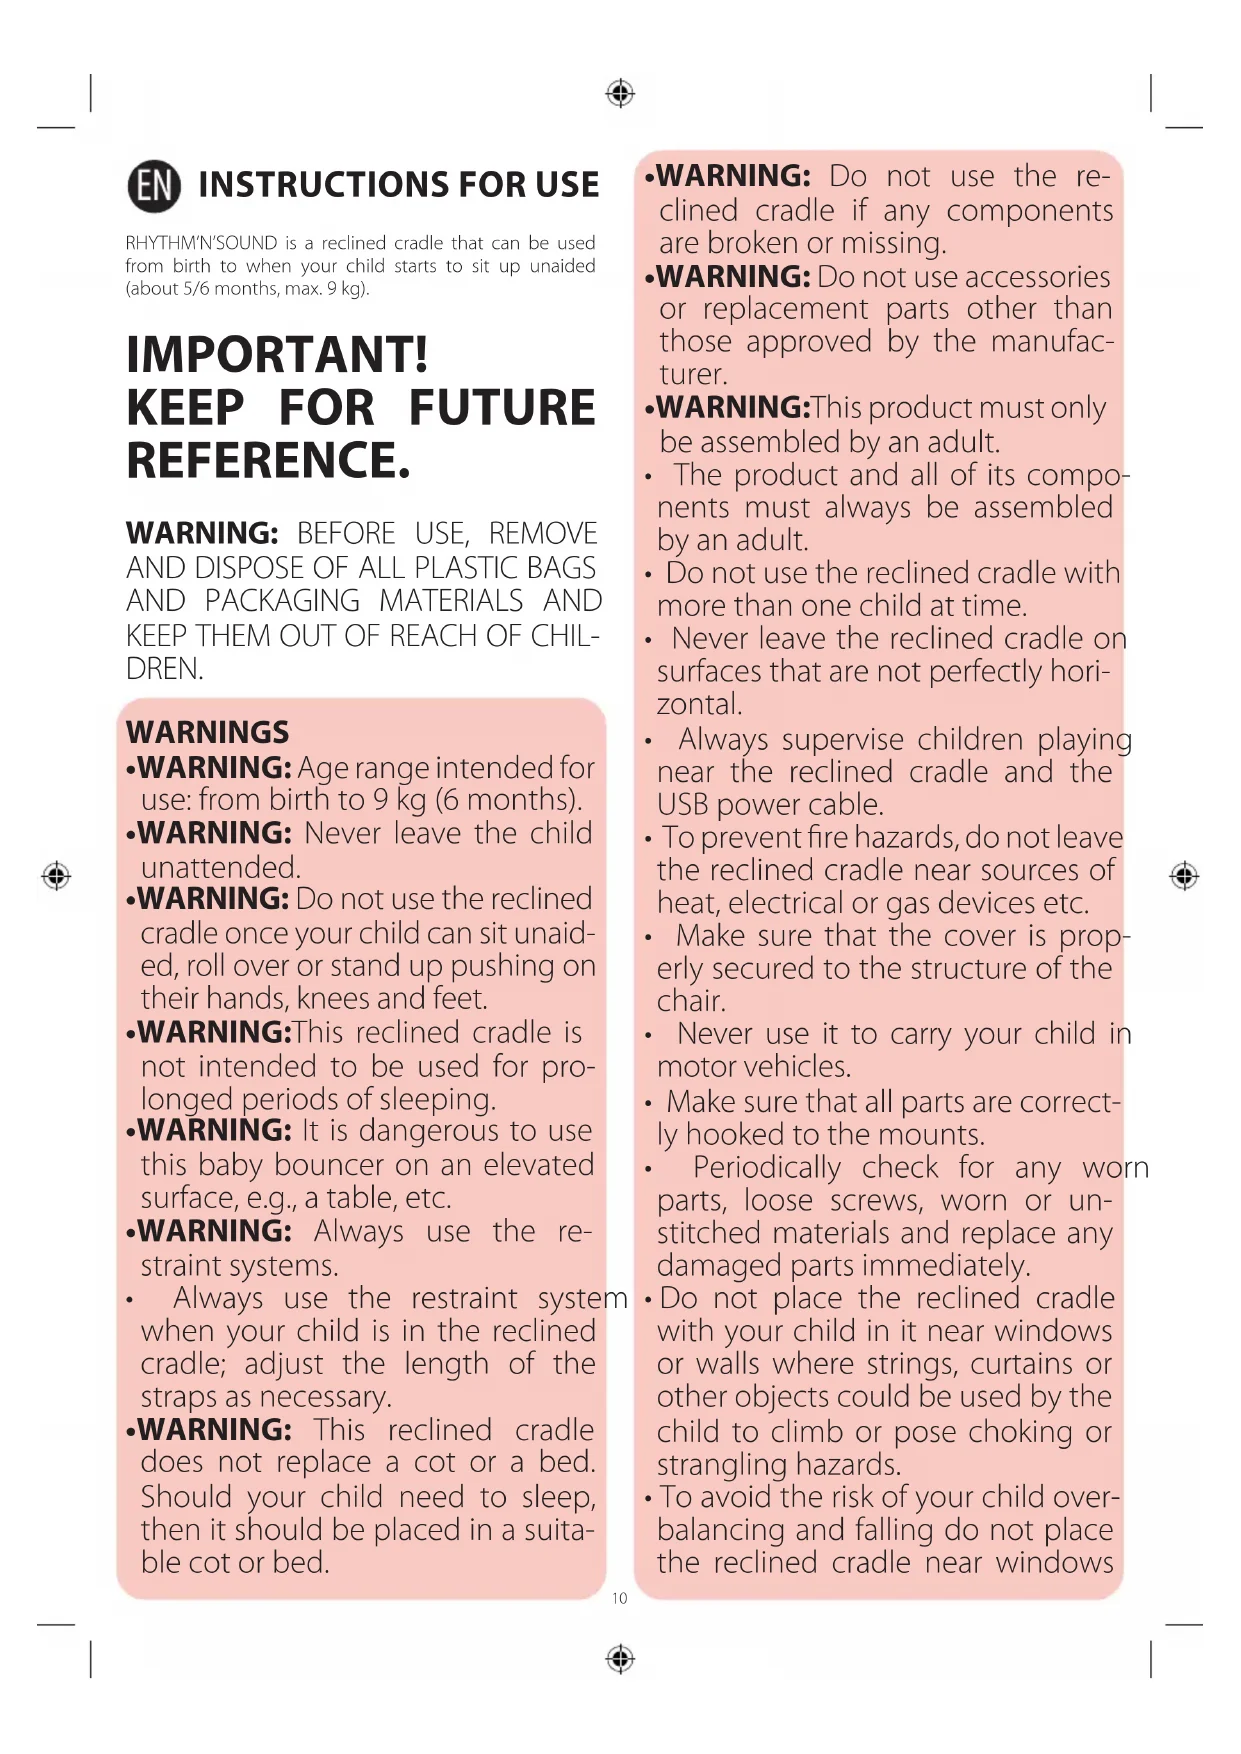
RHYTHM'N'SOUND is a reclined cradle that can be used from birth to when your child starts to sit up unaided (about 5/6 months, max. 9 kg).
IMPORTANT! KEEP FOR FUTURE REFERENCE.
WARNING: BEFORE USE, REMOVE AND DISPOSE OF ALL PLASTIC BAGS AND PACKAGING MATERIALS AND KEEP THEM OUT OF REACH OF CHILDREN.
WARNING
-WARNING: Age range intended for use: from birth to 9 kg (6 months).
-WARNING: Never leave the child unattended.
-WARNING: Do not use the reclined cradle once your child can sit unaided, roll over or stand up pushing on their hands, knees and feet.
-WARNING: This reclined cradle is not intended to be used for prolonged periods of sleeping.
-WARNING: It is dangerous to use this baby bouncer on an elevated surface, e.g., a table, etc.
-WARNING: Always use the restraint systems.
Always use the restraint system when your child is in the reclined cradle; adjust the length of the straps as necessary.
-WARNING: This reclined cradle does not replace a cot or a bed. Should your child need to sleep, then it should be placed in a suitable cot or bed.
-WARNING: Do not use the reclined cradle if any components are broken or missing.
-WARNING: Do not use accessories or replacement parts other than those approved by the manufacturer.
WARNING: This product must only be assembled by an adult.
- The product and all of its components must always be assembled by an adult.
- Do not use the reclined cradle with more than one child at time.
- Never leave the reclined cradle on surfaces that are not perfectly horizontal.
- Always supervise children playing near the reclined cradle and the USB power cable.
- To prevent fire hazards, do not leave the reclined cradle near sources of heat, electrical or gas devices etc.
- Make sure that the cover is properly secured to the structure of the chair.
- Never use it to carry your child in motor vehicles.
- Make sure that all parts are correctly hooked to the mounts.
Periodically check for any worn parts, loose screws, worn or unstitched materials and replace any damaged parts immediately.
- Do not place the reclined cradle with your child in it near windows or walls where strings, curtains or other objects could be used by the child to climb or pose choking or strangling hazards.
- To avoid the risk of your child overbalancing and falling do not place the reclined cradle near windows
or walls.
- If the reclined cradle is left exposed to direct sunlight for an extended period of time, allow it to cool down before placing your child inside.
- Prolonged exposure to direct sunlight can cause the fabric to fade.
- Keep the product out of reach of children when it is not being used.
CARE AND MAINTENANCE
The fabric on the reclined cradle can be removed, see the chapter on "REMOVING THE FABRIC." Periodically wipe the plastic parts clean with a soft damp cloth. After possible contact with water, dry the metal parts in order to avoid the formation of rust. Do not use solvents or abrasive products.
- This product requires periodical maintenance.
- Cleaning and maintenance operations must only be carried out by an adult.
- Check that the fabric, stitching and buttons are in good condition each time you wash it.
- Please refer to the care label for instructions on washing the product:

Hand wash

Do not bleach

Do not tumble dry

Do not iron

Do not dry clean

Do not twist or wring

line drying
LIST OF COMPONENTS
A-Base
A1-Recline button
A2- Close button
A3 - Button to lock/unlock side to side movement
B-Feet (x2)
B1 - Screws for fastening feet (x2)
C-Seat fabric with backrest frame
D-Safety harness
E-Buckle
F-Prongs
G-Ring for adjusting the safety harness
H-Snap buttons
I - Seat fabric buttonhole
J-Hook tab for fabric buttonhole
K - USB power cable
L - Control panel for side to side movement / music
L1 - On/off button for side to side movement
L2 - On/off button for music
L3 - Button for adjusting volume and changing tunes
L4-Timer button
L5 - Power supply connector
L6 - Battery compartment cover
FIRST ASSEMBLY OF THE RECLINED CRADLE
- Insert the feet "B" in the base "A" (Fig. 1), tighten the screws "B1" in their holes (Fig. 2) and open the base "A" of the reclined cradle by pulling up on the rods until you hear a click (Fig. 3).
- Lift the fabric component of the backrest frame "C" to uncover the tubes (Fig. 4), insert the two tubes in the rods located on the base "A" (Fig. 5) making sure they go all the way down (Fig. 6).
- Then, lower the fabric (Fig. 7). Wrap the fabric around the frame, fasten the 2 snap buttons "H" (Fig. 8), finish assembling the fabric by wrapping fabric buttonhole "I" around the hook tab "J" (Fig. 9).
- To adjust the inclination of the backrest from a higher to a less inclined position, pull out on the recline button "A1" (Fig. 10). To switch from a less inclined position to a higher position, simply pull up on the backrest (Fig. 11). This operation may also be carried out with the child sitting in the reclined cradle. In this case it can be more difficult.
WARNING: Always guide the backrest with the fingers when adjusting the reclining.
WARNING: Always check that the backrest is properly locked before use.
USING THE SAFETY HARNESS
- The safety harness should already be fitted when it comes to using the reclined cradle for the first time. (Fig. 12).
To release them, press the central button on the buckle "E" (Fig. 13) and extract the two prongs "F" (Fig. 14). The reclined cradle is ready for the child.
WARNING: When using the product, always fasten the 5-point safety harness and check that it is tight enough and properly fastened.
- To adjust the length and tension of the safety harness, keep one end of the buckle blocked while pulling on the belt and sliding it into the ring "G" (Fig. 15).
FIXED POSITION OR SIDE TO SIDE MOVEMENT
The reclined cradle is equipped with a motorised mechanism that allows it to move from side to side.
- The reclined cradle can be used in fixed or motorised side to side movement mode:
- Fixed mode: push down on the side to side movement lock button "A3" (Fig. 16);
- Side to side movement function: release the side to side lock button "A3" by pulling up and use the side to side movement on/off button "L1" to activate the movement. The side to side movement function can be set to either of 2 different modes using the timer button "L4", activating the function for a maximum of 30 minutes ("L1" power light fixed) or 10 minutes ("L1" power light blinking).
SOUND PANEL
The reclined cradle includes a MUSIC PANEL that can be activated using the buttons located on the side (Fig. 17).
8. To play music simply press the music on button "L2" (Fig. 18)
9. To switch between tunes press the "L3" button once (Fig. 19) until you reach the desired tune.
- To adjust the volume press and hold the "L3" button (Fig. 19).
When the timer is active (power button light "L1" blinking), both the music and the side to side movement will stop after 10 minutes. Parents can reactivate the side to side movement ONLY by simply touching the backrest.
CLOSURE
- The reclined cradle can be closed for transport or storage.
WARNING: The reclined cradle must never be closed with a child sitting in it. Remove the child from the reclined cradle before closing the frame!
- To close the reclined cradle you will need to follow the two steps simultaneously (Fig. 20): To close the reclined cradle you will need to act on 2 buttons simultaneously (Fig. 20):
- Move the incline button "A1" outwards
- Lower the closure button "A2"
- To open the reclined cradle again, just pull the seat upward (Fig. 11) until you hear a click, which indicates that the cradle has been opened completely and correctly.
REMOVING THE COVER
The fabric of the reclined cradle can be removed and washed.
Follow these steps to complete the operation:
- Release the 2 snap buttons "H" located on the side under the metal tube (Fig. 21), free the fabric buttonhole of the seat "I" from the hook tab "J" (Fig. 22).
- Tug lightly on the fabric to pull it upwards; free the shoulder straps and the waist belts from the buttonholes on the fabric; carefully and completely remove the fabric from the frame of the backrest.
- To reposition the fabric on the frame of the backrest, after washing, execute these same steps in reverse order, being sure to insert the safety harnesses in the appropriate buttonholes. Be sure to execute the operation described in Point 3 of the manual.
The harnesses and shoulder straps may need to be adjusted to fit the child, see Point 6 of the manual.
WARNINGSE ELECTRICAL PARTS
The motorised mechanism that allows the reclined cradle to move from side to side and the operation of the sound panel are powered by batteries or by the USB power cable "K".
The reclined cradle can be powered with a USB power cable using an external power supply (not included) with a range of 5 to 6 Volts (the transformer for a mobile phone charger, for example) (Fig. 23).
To operate with the USB power cable, insert the power cable jack in the power supply connector "L5" (Fig. 24).
WARNING: Transformers used with the product are to be regularly examined for damage to the cord, plug, enclosure and other parts, and in the event of such damage, they shall not be used.
WARNING: The product shall only be used with the recommended transformer.
To replace the batteries: loosen the screw on the battery compartment cover "L6" (Fig. 25) with a screwdriver and open the cover. Next, remove the finished batteries and fit new ones, ensuring that they have been fitted with correct polarity (as shown on the product), close the bat
terry cover, and tighten the screw. You will need 4 AA 1.5 V batteries.
- Batteries must only be replaced by an adult.
- Only use alkaline batteries of the same type or equivalent to the type recommended for this product ( 4 × 1.5 V AA batteries).
Make sure the battery polarity is correct. - Never mix new and old or different types of batteries.
Always keep batteries and tools out of reach of children. - Do not short-circuit the power terminals.
Always remove flat batteries from the product to prevent any possible liquid leaks from damaging it.
Always remove the batteries if the product will not be used for a long period of time. - Remove the batteries from the control panel before disposing of the product.
- Do not throw dead batteries into a fire; they must be disposed of through waste sorting.
- If the batteries are leaking liquid, replace them immediately, making sure to clean the battery compartment; thoroughly wash your hands if they have come into contact with the liquid.
- Always dispose of leaking batteries immediately: they can cause burns or other types of injuries.
- Do not try to recharge non-rechargeable batteries: they might explode.
The use of rechargeable batteries is not advised. - Do not leave the product outside in the rain; water will damage the electronic circuit.

THIS PRODUCT COMPLIES WITH THE DIRECTIVE 2012/19/EU.
The crossed bin symbol on the appliance indicates that the product, at the end of its life, must be disposed of separately from domestic waste,
either by taking it to a separate waste disposal site for electric and electronic appliances or by returning it to your dealer when you buy another similar appliance. The user is responsible for taking the appliance to a special waste disposal site at the end of its life. If the unwanted appliance is collected correctly as separate waste, it can be recycled, treated and disposed of ecologically; this avoids a negative impact on both the environment and health, and contributes towards the recycling of the product's materials. For further information regarding the waste disposal services available, contact your local waste disposal agency or the shop where you bought the appliance.
WARRANTY
The product is guaranteed against any conformity defect in normal conditions of use as provided for by the instructions. The warranty shall not therefore apply in the case of damage caused by improper use, wear or accidental events. For the duration of the warranty on conformity defects please refer to the specific provisions of national laws applicable in the country of purchase, where provided

NOTICE D'UTILISATION
Mny ouotpepe n otube

ApoTe To va oTeWwOeI avaptnmuEvo
KATAANO EAPTHMATON
A-Póδia
A1-πλκτρο ανακλιοης
A2-πλκτροκλεισματος
A3-πλκτρο εμλοκής/aημλοκής πλευρικής oλίοθηός
B-Ⅰoδapákia (x2)
B1-BiDcOepeewonCyaTa nodapakia (x2)
C-Ypaoua kaioaatoc nlaioio nataTNC
D-Zwvecaopaaeia
E-Aykpapa
F-△xαλεc
G-AdkTuioyia tnpuouiion tnc wvnacopaaiac
H-Autouata koumuia
I-Ypaouativn oxiaun puOuianc oTo kaioqa
J-λwτiδa ouvδεοnc uvaoupativnco xiouic puθuioc
K-Kaawio tpoopoooc USB
L-Kovolaαελέγχουπλευρικόςλοθησης/Mouaikό
L1 - Koupiévepyooinon/canevepyooinonπeupiknc oia0non
L2 - Koupiévepyooinoc/anévepyooinoc μouaikng
L3-Koupiévtaoickaiaalayncμeawdiac
L4-Koupi xpoovdeltaikotn
L5-∑uvδεμοςτροφδοσίας
L6-Kanaki ΘnKnc μntatapiwv
FALLA IHOP PRODUKTEM
He cyuHTm MExaHicHm Cnocobom

He npacyBaTu

He niiabatn ximuihinyctci

He BnKpyuBaTn Ta He BiXmAtn

CyuTn y niDiBWeHomy cTaHi
NEPEJIK KOMHOHEHTIB
A-Ochoba
A1-KHONKa 3MiHn KyTa Haxiny
A2-Khonka cknadaHHa
A3-KhONka6IOKyBaHHpO36IOkyBaHHraOnaHHa 3i CTOPOHnBCTOPOHy
B-HiKKn(2oD.)
B1-ΓBnHTN KpInnHeHHnHixK (20d.)
C-TeKCTnIbHa 06NbKa cnDiHHa 3 KapKacOM CnHKN
D-PeMeHi6e3NeKn
E-mpaKa
F-3y6u
G-Kinbue dna peryniobaHHpeMeHa 6e3neKn
H-KhONK
I-Tekctnibha netna cninHHA
J-3nKpInnHeHHTeKCTnHbHOI nTNI
K-USB-Ka6eNbXuBnEHn
L-KoHcOJIbKepyBaHHaRoIaHHaM/My3nKaJIbHHM CynpoBOJOM
L1-KhONkA BMKAHHBMMKAHH RAaHH 3CTOPOH B CTOPHY
L2-KHONKaBMKAHHBMMKAHHMy3NK
L3-Khonka ryuHocti ta nepeMnKaHHa MeNoDi
L4-KHonka TaMepa
L5-Po3'EMXINBNEHHH
L6-Kpnka 6aTaapeHOro BiDciKy
IIEPUIECKIAADAHHWE3IOHO
- BCTaBbTe HIXKKn «B» B OCHOBy «A» (MaN. 1), BkpyTtB rBuHTn «B1» y BiNIOBIDHI OTBOpN (MaN. 2) ta po3KnaIITb OCHOBy «A» WsE3NoHr, NotrHyBwB BROPy WtHaHr, NOKn He Nouy-CTe KNaUaHHa (MaN. 3).
2.ПдимитTekctINbHe NOKpTTHa KaKacI cNHNK «C》,O6 DiCTaTcRd O Tpy60k (MaI.4),BCTaBte 2 Tpy6Kn y BiNobiHi WtAHrO cHOBu «A» (MaI.5),nepeBipnBun,O6BOHn Bynn BCTaBHeI Do yNOpy (MaI.6). - Tenep onyctitb Tekctnblhe nokpnTTB (MaI.7).O6rophHITb TekCTnblhe nokpnTTHaBkoNOp Kapkaca, 3acte6HtB 2 KhoTkn H (MaI.8), 3abePwItb HauRaHHaTeKCTnblHO rnoKpnTTB, o6roPHHyBwn 3nUOK KpiInneHHra J TekCTnblHOIO neTneo I (MaI.9).
PERYIIOBAHHCINHKN
4.単06BipperyHOBaTHn HaxIN CnNKn, OnyckAOnu II 3 6InbU BnCOKOro IIOJOKeHHY IIOJOKeHH 3 MeHsIM HaxNIOM, NotarHITb KONky HaxNHy «A1» Ha3OBHi (MaI. 10).単06 nepeHTn 3 MeHs NiHrTO rO NOJKeHH Y 6Inb N iDnHrTe IIOJOKeHH, DOCTaTHbO NOTARHYtN CnNHKy BROPy (MaI. 11). Lio OnpaIIO TAKOK MOxHa BVKOHyBaTI, KOJI DNITNa HAxODITbCBy U We3NoHry. Y cboMy pa3i BVKOHaTn TaKy onepaIIO 6yde TPOX nCKnAdHIwe.
YBATA: 3aBxnn npntpmyte cHnky naIbqMn nIac peryIIOBAHH KyaT Haxny.
YBATA: NpeD BnKOpNCTaHHM 3aBXKn KOHTpOIOIte, 06 cHnHa 6yna npabuNbHO 3a6IOKObaHa.
BVKOPUCTAHRAPEMEHIBBE3IENK
5.ПипершOMу ВИКОРИСТАНИ рЕм希 6e3нeкN«D» 6dIyTB BKe npICTe6HyTi (Man.12).
Uo6 po3cte6Hytn ix, HATNCHTb CEHTpaIbHy KONky npJxKn E(MaI.13) Ta BNTARHITb Dba 3y6ui F(MaI.14). Ue3NOHR roTOBNI Dnpo3MIeHHB HbOMy dNTINH.
YBATA:Пдчacвнкорпстаннзавдзacte6aite5-TOKOBi peMeHi 6e3neKn,пepebipTe npabnIbHicThHaTary Ta npabnIbHicThfikcauii.
- Ⅲo6 BiDpeRyIIOBAt N IOBxNHy Ta HATr peMeHIB 6e3neKn,
MiHIO TpIMaIe KHeCb npJxKn Ta OndHocHo NotarHITb CTPIky Ta npOyCITb II uepe3 BiINOBiHe KInbue «G» (Ma1. 15).
ΦIKCOBAHE NOLOXEHN ABO TOnDAHn I3 CTOPOHN BCTOPOHY
Ue3noHOr OchaueHo npBODHM MexaH3MOM, 0o 3a6e3ne- yec roJdaHHwe3noHa r3 cTOpOH B cTOpOHy.
- MoXHa BnKOpNCToBvBaTn 8e3IOHr y fIKCoBAHOMy nOIOKeHHI a6o 3 fHKUIEIO rOJdaHHB iD npuBOy:
-ΦikcoBaHe noJoxeHHaHTNCiTB BnH3 KhoNky 6NoKyBaHHraOndaHHa3iCTopoHNBCTopoHyA3(Ma1.16);
ФункiohybaHHraonDAHRA3iCTOPOHBCTOPOHy: po36nOKyTe KONky po36nOKyBaHHraonDAHRA «A3», NOTaHyBwN II BROP, Ta HATNCHTb KONKY BMKAHHraonDAHRA «L1», 0o6 HADaN Pyx. MoXHa AKTNByBaTn ROJDAHHY 2 peKImax 3a DOnOMOrIO KONKN TaMepa «L4», Jka 3aJaMaMJIbHNI nepiO dBNKOpNCtAHHr 30 (Jamnocka KONKN BMKAHHRA «L1» rOpNTb NOCTiHo) a60 10 XBINH (Jamnocka KONKN BMKAHHRA «L1» 6nMa).
3BYKOBA NAHEJIb
Ie3noHcnaeHO My3NKaJIbHOIO KOHCOLIIIO,ka BMnKaCTbCk KHONKaMn, 0o 3HaXoJrTbcr 36Oky (man.17).
8.卍6 yBIMKHyTN My3NkY, IOCTaTHbO HaTnCHyTN KHOKNy BMUKAHHMy3NkN «L2» (MaI.18)
9.ДлЯЗIMиMuOДи,HaTnCKaJIteNo OJHOMy pa3y KONKу «L3»(MaI.19),nOKn He Bn6epeTe Notpi6Hy My3NkY.
10. 3miHHTn rYHicTb, TpMaIte HaTNCHYTO KhoNky «L3» (MaI. 19).
Iicra 10 xBnHn p6oTu TaMepa (amnoyKa KHOKN BMKahnra «L1» 6nmae) 3a6nokyTObCRA k MeNoi, TAK i roJdaHN 3i CTOPOH B CTOPHY. DocTAtHbO 6yde JERKOrO dOtNkOdHoro 3 6aTBkIB DO CnHKn, 0o6 3anyCTNTN JINWE roJdaHN 3i CTOPOH B CTOPHY.
CKIADAHH
11.ДЯТРанспорТУВаньа6036epirahHЯ ue3noHr moxHaCKnactN.
YBARA: HikonH He MoKHa cKnJaTaN Wc3NoHr, RaKo B HbO My 3hAxOuTbcra DITnHa. Nepw Hix KcNaJatn Kapkac, taHbTe dHTnHy 3 Wc3IOHry!
12. Ⅲo6 cKnactn Ⅶe3noHr, Heo6xioHO OndHouacHo HaTNCHTN 2 KhoNkn (man. 20):
3cyHbTe KhoNky Haxiny CnIHKn 《A1》Ha3OBHi
OnyctiB KHONKy CKJaadHnA《A2》
13. 3HOBy PO3KlaCTn W3IOH, IOCTaTHbO NOIHTHyTcNdiHHBropy (MaI. 11), nOKn He NooyeTe KnaaHnH, 0E O3HaKOIO npabuNbHorO Ta NobHOrO PO3KlaDaHHA.
AK3HATNOB6NBKY
Moxha 3HATn TeKCTnBHy o6bNkCy ue3noHra, uo6 BnnpaTn ii.
IybcBOrHeo6xHnHO BVKoHaTu HAcTyuHni onepauii:
14. Po3cTe6Hb 2 KhONKn «H» 360ky niD metaIeBOO Tpy6KOIO (MaJ. 21), 3HIMITb TEKCTINbHy nTIIIO CuIHHH «I» 3 RAUKA KpyINNEHHA TEKCTINbHOI netNI «J» (MaJ. 22).
15. O6epexkno NotarHtB TeKCTnIbHy 066nBky Bropy, BnMItb IIeOBI JAMKn Ta IORChi pemeHi 3 NIeTb B 066NBU, NOBHICIO 3HIMITb TeKCTnIbHy 066nBky 3 Kapkaca CnINHKn TAK, 0o6 He NOWKOJNTn III.
16. 3HOBy HnayrHyT NKTcNbHy O6bNkY Ha KapKac cnHKn nCnI npaHn, BnKaHaTe onuCaHI Buue onepauiy 3BOPOTbOMy IopAky, yBaXHO BCTabJIIOU npeme
Hi 63neKn y BiNIOB1HI netTI. O6OB'3KOBO BnKoHaTe onepaio, onncayb nyHKTI 3 iHCTpykii.
KIO noTpi6HO BIDPERyIOBAtn peMeHi Ta nneOBI JAMKn Ni dTaTpy DITINH, DNB. NyHKr 6IHCtpyKcii.
3ACTEPEXEHHJIOOJEKTPNHyXCACTINH
PnBODHm MExaH3M, kN 3a6e3neUy rouaHHa e3IOHra 3i CTOpOH B CTOpHy Ta yHKUioHyBaHH 3ByKOBoi naHeni, npaioe 3aB4Kn BnKOpunctaHHo 6bTapeNoK a60 USB-Ka6eJ KInBLeHHA «K».
Ie3noH moKe npaioBAtn npn BkOpncTahHi USB-KabeJn KInBHeHH, NiKlIOyeHO Do 3OBHIHbOi po3eTKn (He BXoINTB KOMPJIeKT) 3 HAppyTOIO BiD 5 BONbT DO 6 BOJbT (Ha npNKna, 3apAnHn npucptpi Mo6inbHoro TelefoHa) (Ma1.23).
MEPbI IPEIOCTOPOXHOCTN
BHIMAHNE:ИЗдени п dedусмоТрен:ДЯ мальшев с рожденьяdo6 MecaeB (MaKc. Bec pebeHka9Kr).
BHIMAHNE: HnKoIa He octaBJaIte pe6eHka 6e3 npncMOtpa.
BHIMAHNE: He ycaKnBaIte B Ka-yaIky DeTei, KOToPbIe B COCTOaHIN CnIeTb CamOCToRrIbHo, IpeBOpaYuBaTbcra nn npInoDHaMaTbcra, OIIpaAcb Ha pyuKn, KOIeHN HOKKn.
BHIMAHNE:Данhoe Идени He npedHa3HaueHo ДЯ поролжи-TeIbHOrO cHa pe6eHka.
BHIMAHNE: OnacHo yCTaHaBnBaTb n3dJIne Ha BbICOKne IOBepX-HOCTN, TaKne KaK CTOLbl, CTyIbY I np.
BHIMAHHE: O6aTeIbHo NC-IOJIb3yIte CnCTeMy fNkcaun pe6EHa Na cnJeHbe.
Korda pe6eHOK cnIIT B 7e3IOHRe, BceRda nCNoJIb3yIte CnCTEmy yIepKINBaHnra; OTpeYIpNpyIte DInHy peMHei npi NOMOuN COOTBeTCTByIOxN xpeYJrTopOB.
BHIMAHNE: He 3aMeHreT HN KpOBaTKy, HN KObl6eJb. Iyra yloXnTe pe6eHka B KpOBaTKy nn KoIb6eJb.
BHIMAHNE: He nCNoJIb3yIte Ⅶe3IOHr-KaayalKy C NOJOMaHHbIMN IJIH HeOCTaIOUIMN qactaMn.
BHIMAHNE: He nCNoJIb3yIte akceccyapbl nn 3aNaChbIe qactn, ecnn OHI He oO6peHb Ipn0N3BOdntenem.
BHIMAHNE:60pky DaHnHOI3dJIy DOJXHbI OCyUeCTBnTbTOJIbKO B3pOcJIbIe.
- C6opka n3deleny i Bcex ero KOM- NOHeNTOB DoJXHa BbIPOJHrTbCra TOJbKO B3pOcJIbIMN.
- He ycaKnBaIte B Ⅶe3JIOHr (KaayanKy) HeCKOJIbKINX MaJIbISei.
- Hn B Koem Cnyuae He CTaBbTe n3-DeJne Ha HepOBHbIe NObepxHOCTn.
He nO3B0JIte dpyrIm DeTm ngpTaB pIaOM c N3dJIeHem n Ka6eJIem nITaHn USB.
-УTO6bI n36eKaTb cLyuayaHOrO BO3-ROpaHnY, He OCTaBnIte n3dJeNHe B6JIu3n IcTOUHnKOB TePnla, 3JIeKTpNueCKNX nII rA30BbIX npi6OpOB n T.D.
-УбенистовTom,чToЧexОЛ Всeгда надожаши м образом пиКрелен К сонтрукции Изделя.
- 3aπpeuεaetcη nCπoJb3OBAtB n3dEJIne dIy nepeBO3KN pe6eHka B aBTOMo6nIe.
- OśrataleNbH No npOBepaIte HaJex-Hoe i npaBnIbHoe KpeJIeHne BCEX KOMNoHErTOB.
-Перiodиески повераite kom
HONHeTbI N3dEJIa Ha IpeIMeT N3-HOcA; BnHTb IOnJXHbI 6bITb XOpOo 3aTAYtB; He DOnJXHO 6bITb N3HO-WeHHbIX INIi BbICBeTUnx TkaHei. HemeJeHHo 3aMeHЯTe NOBpeKJDeHHbIe KOMNoHEtbl.
He cTaBbTe 7e3IOHc pe6eHKOM pAOM CO CTehAMN IIN OKHAMN, NOpTbePamN, shHypaMn INoO6HbIMN 3JIeMeHTaMn, KOToPbIe pe6eHOK MoKET NCNoMb3OBaTb DInr BCKaPa6KnBaHn. NOpTbePbI, shHypbI INoO6HbIe 3JIeMeHTb MOrYT NocJyXkNTb NCTOChNKOM ydyWeHn.
-He yctaHaBnBaIte 7e3IOHc pe6eHKOM B6n3N OKOH nIIN CTeH, YTO6bl pe6eHOK He nOTepaPaBHOBeCne n He ypaI, OTtaKnBaacb OT HIX.
- После дintelbHOrO npe6bIBaHnIe3IOHra Ha cOnHcE DoXdNTecb,TO6bl OH OCTbl, N TOlbKO NOTOM ycaKINBaIte B Hero pe6eHka.
Длntьhoepe6bBaHne n3dJIЯ Ha coNHe moKeT npVBecTu K Bbl- cBeTaHIO TkaHei.
Korda n3dene He nCnOJb3yeTc, cJeDyET XpaHntb erO B HeNoctyn-HOM dJa DeTeMecTe.
COBETbI NO yXOy
We3noHmMeetcbemHyO6NBky,cm.pa3en"CHTNE O5NBKN".PiactmacCOBIE qactn Heo6xOIMO nepnoiueckOn ouuataBblajKHOI TKaHbIO.HTo6bi npedotBpaTntb 6bp3OBaHHe pXabUHbI,Heo6xOIMO BbcCyunBaTb MetanIInueckne qactn Bcnyae KOHTaKa TcBoIo.He nCnonb3ynte IIN OUYCTKn paCTBOpNTeIN a6pa3NBhIe cpeCTBa.DaHHoe n3dJIeNTEp6yET nepnoiueckoro yxoia
OuNCTKa uYXoIOnJXHbBbINOJIHrTbCtTOJIbKO B3POCJIbMI.
- Pocne KaJdoi CTnPKI npOBepaTe TkaHn, IIBbl N KHOKN Ha npOuHOCb.
- Ha 3nKekte n3denny yka3aHbI peKomeHdaCIn IO CTnKke:

Puchna CTnnpa

He oT6eINBaTb

HeIb3B BbIXMaTb I CyuTb B CtnpaJIbHOm MaUNHe

HeIraIaIbTb

He noDBepratb xIMnCTke

HeckpyuHaTbN HeBblKImaTb

CywnbBNoDBeWeHHOM COCTOHN
NEPEUEHb KOMNOHEHTOB
A-Ba3a
A1-KHONKaOTKnIbBaHIN
A2-KhonkacklaabBaHn
A3-KhONka 6nOKnPOBKN/pa36nOKnPOBKN 6OKOBORO CKoJIbXeHIN
B-HoKn(x2)
B1-BuHTbI KpeHneHnHOKeK (x2)
C-TkahebaoobuBa cUdHeBc KOHCTpyKlnee CnIHKn
D-PemHn 6e3onacHOCTN
E-3amok
F-Bunkn
G-Konbdo nperynpobkn pemn6e3onacnoctn
H-ABTOMATNueCKNE KHOKN
I-TkaHeBa nTnA cnDHeBb
J-3bUOK KpeJIeHnTkaHeBOI nETnI
K-Ka6eJIb nTaHnA USB
L- NylbT ynpaBHeHn6OKOBbIM cKoJIbXKeHHeM/My3bIKOJ
L1-KhONKa BKNIOUeHn/ByIKIOUeHn 6OKOBOrO CKoJIbXeHn
L2-KhONKa BKNIOUeHn/BBKIOUeHnMy3bIKN
L3-KHONKa rpoMkoCTn N Bb6opa MeNoDN
L4-Khonka Taumepa
L5-Pa3bEMNHTAHNA
L6-KpbuKa 6aTapeHoroOTceKa
C6OPKAUJE3IOH
- BCTaBbTe HOxKn "B" B OCHOBaHne "A" (pnc. 1), BBepHnTe BnHTb "B1" B COOTBeTcByUOuIe OTBepCTna (pnc. 2) npa3-LOXknte OCHOBaHne "A" We3IOHra, NOTAHyB BBepx CtepkHN, ppi 3OM DoJKeH Ipo3ByaTb XapaKtepHbI UeJIyOK (pnc. 3).
2.ПОДИМЛТЕ TKAHEBYO VAcTB KOHCTpyKUIN CINHKN "C" TaK, YTO6bI 6blN BUNHbI Tpy6aTbIe 3NeMeHTbI (pnc.4), BCTaBtBe B 2 Tpy6aTbIX 3NeMeHTa COOTBETCTByIOJIne CTepxH N OCHOBAHIN "A"(pnc.5), y6eINBUnCbB TOM, YTO OHN yCTaHOBNeHbI Do ynopa (pnc.6). - Onyctnte 06nBky (pnc.7). O6epHnte 06nBky BOKpyr KOHCTpykun, 3acterHnte 2 aBTOMaTnueckne KhoNkn "H" (pnc.8), 3abePwnte c6opky, coeINHB 3bivok KpeJIeHnra "J" cTKaHEBOI netIe "I" (pnc.9).
PERYUNPOBKA CINHKN
- Yo6bl OtperynnpoBaT haKIOH cINHKB NOJXeHHe HAnMeHbIeRo HaKIOHa, NepeDINbTe KHOKNy OTKnDbIaHn "A1" HApjx (pnc. 10). Yo6bl NepeBeCTn cINHKy n3 OTKNHyTO rnoJoxEHn B NoHrToe, DOCTaTOUHO NotaHyTB cINHKy BBepx (pnc. 11). 3Ty onepaunIO MOXHO BIIONHtB, DaKe ecIn pe6eHOK HaxOuNTcB KpeCInue-KaHank. B 3Tom cnyae OHs 6ydt CnerKa 3atpydHeHa.
BHIMAHHE:BoBpempepynpOBKaHaKJIOHa CnHKn npIepKbAaTe ee pykAm.
BHIMAHHE: Npei nCnoJb3ObaHnem o6aTeNbHO npoBepbTe, YTO cINHka HadeXHo 3aΦNKcnpoBaHa.
NCHOJIb3OBAHNE PEMHEn B3ONACHOCTN
5.ПипрвомИСПОЛБ3OBAHП pemн6e3ONaCHOCTN“D"
6ydyuyke npicterHytbI (Pnc.12).
TTO6bI INx paCCTeHHTb, HAXMNTe CEHTpaJIbHYIO KHONKy 3aMKa "E" (pnc. 13) IN pa3beHNHTe BUNKIN "F" (pnc. 14). TenepbMOXHO yCaJINBaT pe6eHKA B N3dENNE.
BHUMAHNE: He 3a6bBaIte nepeH hauaIOM nCnOJIb3OBAHnHa 3aCTeINBaTb 5-ToueyHbI pEmHe b6eONaCHoCTn, npOBepra IpaBnIbHOe HATJKeHne I npAunIbHOe KpeJIeHne.
6. Yndepxkmba Kpa npkkn, NotHnTe NeHTy n npocyhbTe ee uepe3 cneuaalbHOe KOJIbOo "G", UTo6bl OTpepynipoBaTb DnHy n HataKeHne pemHei (Pnc. 15).
He ycykbaite n He npitnckaite

CyuTeHaBbDyX
CNICbKHAACTHTE
A-OCHOBa
A1-BytoH3aHaKnIOH
A2-ByToH3aCtBbAHe
A3-ByToH 3a 6nokupaHe/de6nokupaHe Ha cTpaHnHOTO nIb3raHe
B-KpaueTa (26p.)
B1-BuHTOBe 3a 3aKpenBaHe Ha KpaYeTaT(a 26p.)
C-TekCTINHa YacHT Ha cedanKaTa C pAMKa Ha oBneranKaTa
D-Ppepa3Hn KOaHn
E-3aknoubaa kaTapaMa
F-Bunkn
G-πpβCTeH 3a perγnɪpaHe Na npερnα3HnKaKoJHa
H-TnK-TaK Konyeta
I-TekTIneH npope3 Ha cedanKaTa
J-E3nue 3a 3aKaUBaHe Ha TeKCTUNHn npope3
K-3axpaHbau USB ka6en
L-KoH3OJa c KOMaHn 3a CtpaHHHO nB3raHe/My3Nka
L1-ByToH 3a BKNIOUBAHe/N3KIOUBAHe Ha CtpaHnHOTOn
L2-ByToH 3a BKNIOUBAHe/N3KNOUBAHe Ha My3NKaTa
L3-BytoH3a cnaHa 3Byka Ha CMHa Ha MeIOJInTe
L4-ByToH TaImeP
L5-3axpaHbau KoHeKTop
L6-KanakHaOTeJeHneTo Ha 6aTeepnnte
Пьрвоначален MOHTAX HA WIE3LOHRA
- NocTabete Kpaetata, B' c ochobata, A" (Φnir. 1), 3abnite BnHTOBete, B' B cbOTBeTHnTe OTBopn (Φnir. 2) n OTbopeTe OCHobata, A" Ha we3IOHra, KaTo n3IbPnate Harope KpbTInTe npoHnn, DOKaTO cyyeTe UpaKaBaHe (Φnir. 3).
- NOBUNHHeTe TckTnHATA YAcCT BbPxy PAMKaTa Ha ObnEraKata, C,Taka Ye Da Ce BnIaT Tpb6HnTE npoHn (DInr. 4), Noctabete 2 Tpb6nB KpbIInTe npoHnHa OCHOBaTa A" (DInr.5), KaTo Ce yBepIne, Ye OTNbAT DOKpaN (DInr.6).
3.ПиTOBAIIOLOXKeHHeCnYChTe TEKCTUHATA YAcT (ФИr.7). HabInTe TEKCTUNHnKaIbΦ OKoLo pAmKaTa, 3aKOnuAte 2 TIK-TaK KOnHTe ,H" (ФИr.8), 3aBbPwTe CrrNo6BaHTo Ha TEKCTUNHn KaJIbΦ, KaTO 3aBnTe E3NcETO 3a 3aKaUBaHe "J" C TEKCTUNHn npope3 "I" (ФИr.9).
PEYINPAHE HA OBJIERAJKATA
- 3a da perynnapate HakoHa ha oJneranikata OT NO-Bncoka N03uN KbM NO-HNCKo HakoHeHa N03uN, INTeTne6yToHa 3a HAKNoH "A1" HABbH (ΦIr. 10). 3a da npemHeTe OT NO-MaIKo HakoHeHa KbM NO-NOBnHATA N03uN, eIOCTaTbHDo DA N3TeRnTe Obnerankata Harope (ΦIr. 11). Ta3n Onpaun MoKe Da ce nBbpUn n aKO DeTeTo E Bwe3IOHra. B To3n Cnyaun Ye mALko No-tpyDHO.
BHIMAHHE: Pn peryunpaHe Ha o6neraKaTa BnHaRn npndpbkaTe c pbce.
BHUMAHNE: BnHaH npOBepBaIe dAn o6JIerAikata e do6pe 6nOKnpaHa npEynynotpe6a.
YIOTPEBA HA IPIPEDNA3HNTE KOJAHN
5.Пи nbрвауnotpe6a npedna3HnTe konaHn "D" Beue ue ca 3akayehn (Our,12).
3a Da ro pa3rBHeTe, HATNCHeTe 6yToHa B cpeDaTa Ha 3aKlIOUcbuaMEXaHn3bM "E"(ΦIr.13) n 3BaIeTe DBeTe BUNKn "F"(ΦIr.14). Ue3IOHbr e roTOB 3a noCTabHn Ha deteto.
BHUMAHNE: Korato ce n3noJ3Ba, BnHaH 3aKoNuaBaIte 5-ToKOBITE KOlaH N npOBePraBte KaKTo npaBnHOTOMM O6TgAHe, Taka n npaBnHOTo m3aKpenBaHe.
6.3a da perynipate bJnKHaTa n 0bTaraHTo Ha npedna3HNTE KOJIAHN, 3aDpXkTe 3dpaboEeHHa KpaH a3aknOuBaunMexaHn3m n ENoHBpeMeHHo C TOBa n3DbpNaIteJeHTaNA HnnB3HETe B cbOTBeTHnI npbCTehG"(ΦnR.15).
I03NUIA QIKCUPAH NIN CTPAHNUHO Nlb3rAHE 1e3IOHbT NMa 3aDnKBaU MExaHn3bM, KOITO NO3BOJRACTPAHNUHOTo Nlb3rAHe Ha Ie3IOHra.
- Moxe da n3non3Bate We3noHra BbB fNkCupaHo nonoJxHHe nn C fYHKcna 3a MOTOpn3npaHO cTpaHnuHO nIb3raHe:
- HenoDnKHO noJooKeHne: HaTnCHTe HADOny 6yToHa 3a ctpaHnUHO nIb3raHe "A3"(ΦIr.16);
Функцястраинчо nIb3rahe:OCBO6OJeTe 6yToHa 3a De6IOKnpaHHe Ha CTpaHnHOTo NIIb3raHe A3"KATO rO nI3TERlnte Harope, nHaTncHete 6yToHa 3a BKNIOBaHc H cTaPAHnHOTo NIIb3raHe L1"3a da AKTNBupate DINKeHNrTO.MoXe TaAKTNBupate CTApaHnHOTo NIIb3raHe NO2HaUNHa, KaTO HaTncHete 6yToHa TaIMep L4", KOnTO ONpeJEn I3NOL3BaHETo DO MaKCMmM 30 MNHyTN (noCTOHHa CBETnHa Ha 6yToHa 3a BKNIOBaHe L1") mnn 10 MNHyTN (npMNIRBaUca CBETnHa Ha 6yToHa 3a BKNIOBaHe L1").
3BYKOB IANAJI
Ue3noHbT mMa MY3NKALHA KOH3OJIA, kOTo ce aKtNbpa ue3 6yToHnTe, noCTaBeHn OTCpaHn (Dur.17).
8.3a da aKTHBnpuate My3NkaTa, e IOCTaTbUHO da HaTNCHe6yToHa 3a BKnHouBaHe Ha My3Nka "L2" (Φnr.18)
9.3a da CMeHnTe My3nKaTa,HaTnCHeTe 6yToH "L3"eHnOkpaTHo (ΦnR.19),doKATO IOCTnHHeTe JeNaHaTa My3nKa.
10.3a da npomeHnte 3Byka,HaTnCHHeTe n 3aApbXKe 6yToH "L3" (DInr.19).
Korato TaHMeBt e AKTINBEH (nPmMnRbAua CBeTINHa Ha 6yToHa 3a BKNIOUBaHe "L1", cNeI KATO n3TeKaT 10 MNHyT, Ie CInpe KaT0 My3NkATA, Taka N CTpaHnHOTo nNb3raHe. JekO DOKOCBaHe NO O6nerankata OT pOnTeNa Ie 6bDe DoCTaTb4HO, 3a Da Ce Bb3O6HOBu CAMO CTpaHnHOTo nNb3raHe.
CTbBAHE
- He3noHbT moKe da ce cBHe 3a TpaHcnpOpTpapHe nn CbxpaHeHne.
BHIMAHHE: Onpaunne Tno CbbaHTo HNKora He Tp6Ba Da ce n3BbPwBaT c DeTe, NoCTabeHo B we3NoHa. PpeiDa CbHeTe KOHCTpyKUra, n3BaDeTe Deteto OT we3NoHa!
12.3a da cBHeTe we3IOHra, Tp86Ba eINHOpeMeHHo Da HATnCHete 2-Ta 6yToHa (ΦIr. 20):
·Ⅱb3HHe 6yToHa 3a HaKaNaHRe“A1”HaBbH
Cnyche6byToHa3aCrbBaHe"A2"
13.3a da pa3bHeTe ue3NoHra, e DoCTaTbHOn Da n3DbPnATEceIankata Harope (FInr. 11), DOKato ce ye ppaKaBaHe, KOETO yKae, ye pa3bBaHTo e npabUHIO HAnbHIO.
OTCTPAHBAHE HA TEKCTNJHATA YACT
Moxete da cbaInTe TEKCTINHn KaIbO OT ue3IOHra, 3a da ro n3nepeTe.
3a da npncbnte KbM onepaunrta, Tp6Ba da n3Bbpinte CneHnTe CTbNkI:
14. Pa3kaeTe DBeTe TnK-Tak Konueta, H, pa3noJxehn CTpaHnHO IOI mTaJIHaTATA Tpb6a (Φnr. 21), oCbo6oJeTe
TeKCTUHnI npope3 Ha cedalkata,OT e3uyeTo 3a 3aKa- uHe Ha TeKCTUNHnI npope3 J" (DInr.22).
15.Лeко n3dbpnaite TeKCTnHnKaIbΦHarope, n3BaTe Te npespaMknTe nOraCHNe KOlaHn OT npope3nte B TEKCTnHaTa Yact, n3BaTeTe N3qraNo TeKCTnHnHaTa Yact OT KOHCTpykLNaTHa H O6JIerAJaKaTa, KaTO BHIMaBATE da HeЯ NOBpeDInTE.
16.3a na noctabnTe o6paTHo TeKCTnHnKaNbΦ Bbpxy pAmkata Ha 06neralkata Cnei N3MnBaHe, N3BbPwTe OncaHnTe NO-rope Onpaun B o6pateH pei, KaTo 06bpHETe BHmAHHe Ha npedna3HnTe KOJAHn B cBoTBeTHnTe npoep3n, yBepete Ce, ye N3BbPWBate OnpaunTa, OncaHa B Toka 3 Ha pkoBODCTBOTO.
Ako e Heo6xOJMo, Tp8Ba da perynipaTe pembUte n npespaMKnte cnopei PbCTa Ha JeTeTo, BxK Toka 6 ot pbKOBOCTBOTO.
IPEyIPEKDEHNA OTHOCHO EJEKTPNUECKNTE YACTN
MToOpn3npaHnT MExaHn3bM, KOITo No3BONBa CtpaHnHOTO Nb3raHe Ha 7e3IOHra I pa60TaHa 3ByKOBnnaHcE, fYHKUHOHPa Upe3 n3NON3BaHeto Ha 6atePNn nnUSB K" ka6eJI 3a 3apeXkaHe.
Bb3moKHO e da 3aJeIcTBate Wc3NoHra ype3 USB 3axpaHbAa K6eN, KaTO IN3NOJ3BaTe BbHWe Hn3ToUHnK Ha 3axpaHBaHe (He e BKNIOUeH B ONaKOBKaTa) C MoUHOCT MExNy 5 BONTA n 6 BONTA (HaPnPmEp TpaHcΦOpMaTOp 3a 3apeXJaHe Ha MObUNHe TeneΦOH) (OINr.23).
3a pa6oTa cbc 3axpaHbau USB ka6en nocTabete ka6ena B 3axpaHbauKoHeKTop "L5" (Фиr.24).
BHIMAHHE: Ppeo6pa3yBaTeJIte, KOITo Ce n3nON3BaT c npOdykta, Tp86Ba nepINOduHO da 6bDat npOBepraBaHn 3a ueTI no Ka6eNa, UenCena, Kopnyca N dpyrN uactN, KATO npu yCTaHOBBAHe Ha ueTI npeo6pa3yBaTeJIte He 6nBa Da CE n3nON3BaT.
BHUMAHHE: PpOdyKtBt TpR6Ba Da 6bDe N3N0J3BaH cMo C npenopbuaHn ppeo6pa3yBaTeI.
3a cmaHa Ha 6atepuHte: C NOMouTa Ha OTBeTpKa pa3xJa6eTe BnHTa Ha KaNaTe Ho OTdeJeHHeTo 3a 6atepn "L6" (ФИг.25),OTbOpete KaNaka,INBaJTe INTOUeHte 6atePnO TOTDeJeHHeTo, NOCTaBeTe HOBnTe 6atePnKATO BnImaBaTe Da Cna3BaTe npabuHaTnIOJIpHOCT Ha NocTaBHe (KaKTo e yKa3aHo Ha npOdyKta),NOCTaBeTe OTHOBKaNaHuTo n 3aterHeTe BnHTa DOKpaI. Ule ca Heo6xOdIMN4 6atePn AA 1,5V.
CmHaTa Ha 6aTeepnnte Tp8Ba BnHaN da Ce n3BbPwBa OT Bb3paCTeH.
- Ⅰзлльави Te ankaJIHn 6aTePnI, eHaKBr nIe EKBBaJIeHTHn Ha npEIpOpbUbaHn 3a pa6OtaT a Ha To3n IpoDyKT BvI (4 6aTePnI AA 1,5V).
- Batepnte Tpr6Ba da 6bDat noctabeHn, KaTO ce cna3Ba npabunHATA NOJrPHoCT.
He cmecBaIte pa3nHn BnIObe 6aTePN INN n3ToeHN C HOBn 6aTePN.
He octabrayte 6atepuinte nn HnctpymeHTe B 6JIn3OCTdo deua.
- He cbeinHbAaTe 3axpaHbAunTe KJIeMn HaKbCO.
BnHaHn N3BaJdaIte N3ToUeHnte 6aTeepnn O npOdykta, 3a da npedOTbPaTne N3TuHaHeTO Ha TeuHOCTn Da yBpeN npOdykta.
BnHaHn 3BaJdaIe 6aTeepn B cnUyai Ha npOdbJIknte- Ien nepnoD Ha HEn3non3BaHe Ha npOdykTa.
- 3BaTe6aTePnIeOT KOH3OJaTa, npei Da r N3XbBpJIte.
He XbpynIe n3toeHnTe 6aepnn B orh H He r n3XbpynIe B OKoJHaTcpea, a r n3XbpynIe ype3 pa3dEnHo Cb6npaHe.
Ako 6atepnte reheepnat n3nuahe Ha TeHocTn, He3a-6abHO rncMeHeTe, KaTO BHIMaBaTe da NoOpNCtnte OTdJeHneTo 3a 6atepnu n da n3mme Teo6pe pbte cB cnuya H a KOHTAKT C n3TEKnata TeHOCT.
-BeHara n3xBpneTe 6atePnnte, aKO TEkAT: Te MOraT da npuHnAT n3rapnHn nn pyn HapaHaBaHn.
He ce onntBaIte da 3apeXdaTe NOBtOpHo Henpe3apeX daunce6aTePmN:MOrat da N36yXHaT.
He ce npenopbya ynoTpe6ata Ha npesapexdaunce 6a- Tepu.
He octabrnte no HeBHMaHne npOdykTa nD bXka; npOHnKBaHTo Ha BODa NOBpeKda eEKeTPOHHata Bepira.
TO3N INPOdyKT E B CbOTBETCTBNE C DNIPEKTNBA 2012/19/EC.
CMBONbT, 306pa3HbAa 3aepTaH KOHTHeP, NOCTaBeH Bbpxy ypeNa NocOyBa, Ye anapaTbT, CnE KpaHaTaMy yNtpe6a, nopadn Heo6xOnu
MOCTa da 6bIe TpeTnpaH OTdJIHO OT DOMAKHNCKTE OTnAdbu, Tp46Ba da 6bIe npedaeB CNEuaHNTe Dena 3a pa3dennho Cb6npaHc Ha eeneKtpueckn H eeneKtpoHHn anapatn Nn BbpHATO B Mara3Ha npn 3aKyNyBaHETo Ha HOBA ekBnBaHENTHa anapaTypa. Notpe6ntenrE otrobopeh 3a npedabaHETo Ha n3Je3nna OT yNtpe6a ypeD B onpeJehne De Ta Cb6npaHepaNpabINHOTo pa3deHIO Cb6npaHe, ZetaCneDaIPO npheacOuaHE Ha ypeA, OCTABEH 3a peuNKInpae, TpeTpane H Cb6pa3eHO EKOLOTHNO X3XBpJIHe, DOnPiHAC 3a npedotBpaTHBaHETo Ha eEBHTyAnHn BpeHN B3DeNCTBnBbPxy 3dpabeTo N OKONHaTa CpeA uYleChra Ba peuKInpaheto Ha MaTePNaHTte, OT KOINTe CbCTaben HypeBt. 3a No-NDpo6Ha INΦOpMaun OTHOCHO Denata 3a Cb6npaHc Ha pa3noNoKeHne Ce o6bHETe KbM MeCHNTe KOMTeHTHn OprAHn Nn KbM TbpROCKnra Obekt, OT KOINTe CTBbPwnn NOKyPKATA.
TAPAHU
IpoDyKbTtMa rapaHcua Cpeu y BcKa JInca Ha CbOTBeCTBnE npHOpMaHn yCIOBnHa yNOTpe6a, KaKTo e npedBnDEHO BnHCTpyKcHnTe 3a yNOTpe6a. IopaHn TOBa rapaHcHnTa He Ce npunara B cNyau Ha uETn, npunHeHn OT He npabnHa yNOTpe6a, n3HocBaHe nn Cnyau Hn Cb6ntna.3a Cpoka Ha rapaHcHnTa, OTHOCHO JIncaTHa CbOTBeCTBnE, BVkTe CneuaHnTE paNOpedeBu Ha MeCTHOTO 3aKOHOdaTeNTBO, pnpnoJIMo B dbpXabata Ha 3aKyNuBaHe, KOratoe npedBnDEHO

INSTRUÇÉS DE USO

m = 311
DETTE PRODUKTET ER I OVERENSSTEMMELSE MED DIREKTIVET 2012/19/UE.
9 5/6 Jg>100111ab cllnly
PQ = 5
m = 311
…
J 1
wL581 a0s alljy p 1x w81 J:
Lg 12 Lg
JLb81 JgLiio
y = - 12x + 3 BC//l
028gll iio:plsswLd aqell aaill j
( 1 - a) + b = 3 ,即 b = 34
a.o 0g00g Jokll 8:
sOlaic jGall poa:
1c 4jg dclw0n goggl jn
gA 1
ai + 1 = 12 · ai · j^i
111 1
.
1c cill lio pli:wljbs 1
Xiao LiqulS. Zao zhaow
aaij Jlaoiwl lc laol y
Jcbbl
Lgic 10i i 1
aag jabll jgll wss
gjU 1
J20 Jzbs j1s1s1J2s2s_2
1
aJ 1jglalp
A
s²jLc gfo CLaLo pssui 8:
aaiiaaa jaoaaeeeee
i 1
b0
a
.
j0j0j0j0j0j0j0j0j0j0j0j0j0j0j0j0j0j0j0j0j0j0j0
· = 1
aolj c bawl lcl jglall gll
[\therefore \log = \omega {21}]
USB 1
jglgl 2
glaLg5gJgJgJgJgJgJgJgJgJgJgJgJgJgJgJgJgJgJgJgJgJgJgJgJgJgJgJgJgJgJgJgJgJgJgJgJgJgJgJg
Lds Lw Lo gai jlc ojg>
J5.0 15hj1 10
1,2,3,4 1,2,3,4 , 1,2,3,4 3,4
iJyJy Jai Jai Jai Jai
Lg:5Loj gJgJgJgJgJgJgJgJgJg
= - 35
1
gaiLw gaiygiAISiJgjgpcn
aJ JUuWU aag aegiogg iyo Lol
1c 0s
(3 J5.11) "L L" cgg gaa
4JcJ11 2aJzJ C'gJJI JnJLbXgJJI gJJI.2
(5 JSLJI) "A" oclal Ic aggll jaiall
(6 JJJ)LoLJawuLgjjoo
10gJgogwSJIg
jj aai jJxjooogwSJJ 20g(BJJ)H
(9 J<.11) "J" 1111111111111
S OBC = S COD + S_ BOC
J 4
JJI JIJI 10JJJ(10JJJ)JJJA1aJLoJj
JcJI) JcUgabJI snnss gsw cLcLo Lc21 JIg
aIJI 1000 g jgJgUuU Jauu Jauu Jauu Jauu Jauu Jauu Jauu Jauu Jauu Jauu Jauu Jauu Jauu Jauu Jauu Jauu Jauu Jauu Jauu Jauu Jauu Jauu Jauu Jauu Jauu Jauu Jauu Jauu Jauu Jauu Jauu Jauu Jauu Jauu
iuiii iagoo 10j
aIoo1gioo Iooiae glool yglaln aag: Lao
plasw81 jpaLw Js yhbl sno yol Lg 3
JL81 aaj JIqwi
JSSIJI JSSS OLOOgOgOgOgOgOgOgOgOgOgOgOgOgOgOgOgOgOgOgOgOgOgOgOgOgOgOgOgOgOgOgOgOgOgOgOgOgOgOgOgOgOgOgOgOgOgOgOgOgOgO
.12
aLw gai Ic aii iog 15, a, aS aai
L 6
.15JL
y
S ACD = S COD + S BDO - S CDO
15 7
1281
J5wU"A3" wLj 20 aSf jiojjgol
(16
oA3" 100000000000000000000000000000000
wii 100 a5j1 jai1 jiai
15 15
aagglbuii g:L4' jai1j piauily jai1j haoill
10g(cuiJscjyai aaiLlal L)gaoS dae30o
()
1g0g81a
j1j21 p1suiLg huiu 5c jw gao aag lrc jglgllg
(17)
(18 L5) "L2" jll lc loaill 5g w lclc Lo .wgl J
g 19 L3"
aagjll aajll j
(19 J5JJI) L3" jjJI lc IaiaiJI cuiig laiai, ciugai ggiuaia iinai.10
gagwll aegi w. (aogj"Li" dall j a) la i jlaill yS Loxic
10 10
yI 11 siu Jn Jn no hao wJ 11 11 a5,11 a,bg
1
aai jai jai jai jai jai 1.11
gll no JabiJjjIe aalai JabJIg jjgl gll jie jia
1,1234567890
(20 15)
C.LuA1AJL0x1
"A2"
11 (11) 11
aal JolSg Cai all 1d jll
aJwSJIaJj
1gLwGjIgAII gAIGS AIIJ S
:Loell pLgBolao
JSSIJI JgJ1 JwJ WdJc JcJgJgJH"H"
J'ell 1000000000000000000000000000000000000000000
(22J≤JU)
a>g a<11 ab>1 1U g>11 g>11
sinu Jb! joo oogwSJI jj.oogwSJI lc ooggJll jll cLis no
LOLS
j 16
Jolal Jllo 100
3abai jia aal aaleaai 5i ai i
JU
JJI JJIJIJI OJIg Jo 0aogol aI SII ABjig aojz Iin pJy
JUJI 6 aIaJI
- S_ AOB = 12 · OB · AB = 12 × 2t × 5
jlll wll l 10
K'USBaJIUJLSgJUJUJU
AeLbJzSsU8B AaBb JLSgRbJcJyJgall aallll s
iJg 6 5 0 2 gai (nainio)
(23 J<.11) (310 Jg>
Jagoo aalll JLSJL USBailllJL
(24) ≤ 12 L L^5, L ≥ 12 L
jooabio gai ge aiaaill 2g jao
log_b = - 1b
iill no yalil J 5011 j 5011
1
10g1j 8a gai jal
aLj no sLig JIg LJw aLb np JILw aJL
Jlll laln 100
Sn + 1 = 12 · Sn = 12 · 1an - 1an = 12
j#
ylll ocl y all lall lll plxw y
jJy j 100
S OBC = S COD + S_ BOC
.EU/2012/19 19,9g8x13.8x14.0000000000000000
jglgoggag
aoe Joleill aiae 0e jie g i j
aaii aiee ai jil l oai i ay
auiySJI aJgaiuaiiI gaiiI jIy
gai jao jgsjw sic glll aaiuai g
J5LoI gll aiaa Lao jzjg jzglj pLw jGmpoasill
a aayyuy yeyy jy 1y y
Jsin ae Joleiig aifleag oog oolc! 5c aie, alaoio lalos
aaiiJI aiiJI Ic aaiuJI JILI YI Jc Joo iag, aiyyjy
JgssuLgio gSsUoLol3oo
1sall aagai aill gaoaia Jg 5aa jsi Logleo
jIgai iio yjgl gill jll gil l oall aol
aayie 8e yaiy
JL JaiJIg 11JJ. psswI Llae J g Cgogg Lo5
aaii 11111111111111111
1
Lgag aJL g JsJwJ Lg A2LWJ AaJg jg


ARTSANA S.P.A.
ARTSANA GERMANY GMBH
Borsigstrasse 1-3
28923 Alcorcon (Madrid)-Spain
902 117 093
www.CHICCO.es

ARTSANA PORTUGAL S.A.
ARTSANA POLAND Sp.zo.o.
Aquarius, UI. Polczynska 31 A
01-377 Warszawa
+48222905990
www.CHICCO.com

OOO"ApTcaHa Pyc"
Pocn 125009 MockBa,
JertapnHnepeynok,4,ctp.1.
ARTSANA BRASIL LTDA.
Dec V. Ruben Dario 1015
Colonia Lomas De Providencia 44647
Guadalajara, Jalisco-Mexico
01800/028983
www.CHICCO.com.mx

ARTSANA ARGENTINA S.A.
Uruguay 4501
Victoria Cp(1644)
San Fernando-Buenos Aires-Argentina
0810-888-2442
www.CHICCO.com.ar

ARTSANA INDIA PRIVATE LIMITED,
7Th Floor, Tower B, Paras Twin Towers,
Golf Course Road, Sector 54
Gurgaon - 122002 - Haryana, India
(+91)(124)(4964500)
www.CHICCO.in

ARTSANA S.p.A.
22070 Grandate (CO)-Italy
Tel. (+39) 031 382 111
Fax (+39) 031 382 400
www.CHICCO.com

NOTE