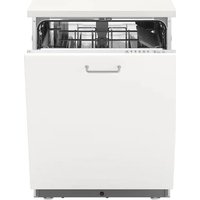
FRÖSLUNDA - Dishwasher IKEA - Free user manual and instructions
Find the device manual for free FRÖSLUNDA IKEA in PDF.
| Product type | Built-in dishwasher |
| Brand | IKEA |
| Model | FRÖSLUNDA |
| Dimensions (W x H x D) | 45 x 82 x 55 cm |
| Capacity | 10 place settings |
| Water pressure | 0.4 - 10 bar (0.04 - 1.0 MPa) |
| Power supply | 230 V, 13 A (compatible plug) |
| Energy consumption (ECO program) | 0.674 kWh per cycle |
| Water consumption (ECO program) | 9.0 liters per cycle |
| ECO program duration | 3 h 35 min |
| Noise level | 44 dB(A) - Class B |
| Available programs | ECO, Auto, Quick, Intensive, Glass, Prewash, Auto Clean |
| Special functions | Automatic door opening, Tablet (adaptation to all-in-one tablets), Delayed start (1-24h) |
| Settings | Water softener (6 levels), rinse aid level (5 levels), button sound on/off |
| Child safety | Child safety lock (not specified in the manual, but presence of instructions for children) |
| Maintenance | Regular cleaning of filters and spray arms; monthly use of a dishwasher cleaner |
| Warranty | 5 years (according to IKEA conditions) |
| Availability of spare parts | Motor parts, pumps, heater, piping: 7 years after discontinuation; hinges, seals, spray arms, baskets: 10 years |
Frequently Asked Questions - FRÖSLUNDA IKEA
User questions about FRÖSLUNDA IKEA
0 question about this device. Answer the ones you know or ask your own.
Ask a new question about this device
Download the instructions for your Dishwasher in PDF format for free! Find your manual FRÖSLUNDA - IKEA and take your electronic device back in hand. On this page are published all the documents necessary for the use of your device. FRÖSLUNDA by IKEA.
USER MANUAL FRÖSLUNDA IKEA
Safety information....3
Safety instructions 4
Product description 6
Control panel....7
Programmes....8
Functions....9
Settings 10
Before first use....11
Daily use....13
Hints and tips ....15
Care and cleaning....17
Troubleshooting....18
Technical information (EN60436)......22
Environmental concerns 23
IKEA Guarantee 23
Subject to change without notice.
⚠ Safety information
Before the installation and use of the appliance, carefully read the supplied instructions. The manufacturer is not responsible for any injuries or damages that are the result of incorrect installation or usage. Always keep the instructions in a safe and accessible location for future reference.
Children and vulnerable people safety
- This appliance can be used by children aged from 8 years and above and persons with reduced physical, sensory or mental capabilities or lack of experience and knowledge if they have been given supervision or instruction concerning the use of the appliance in a safe way and understand the hazards involved.
- Children between 3 and 8 years of age and persons with very extensive and complex disabilities shall be kept away unless continuously supervised.
• Children of less than 3 years of age should be kept away unless continuously supervised. - Do not let children play with the appliance.
- Keep detergents away from children.
- Keep children and pets away from the appliance when the door is open.
- Children shall not carry out cleaning and user maintenance of the appliance without supervision.
- Keep all packaging away from children and dispose of it appropriately.
General Safety
- This appliance is intended to be used in household and similar applications such as:
- Farm houses; staff kitchen areas in shops, offices and other working environments;
- By clients in hotels, motels, bed and breakfast and other residential type environments.
- Do not change the specification of this appliance.
- The operating water pressure (minimum and maximum) must be between 0.4 (0.04)/10 (1.0) bar (MPa).
- Obey the maximum number of 10 place settings.
- When positioning the appliance, ensure the supply cord is not trapped or damaged.
- If the supply cord is damaged, it must be replaced by the manufacturer, its Authorised Service Centre or similarly qualified persons in order to avoid a hazard.
- Keep ventilation openings, in the appliance enclosure or in the built-in structure, clear of obstruction.
ENGLISH 4
- Put the cutlery in the cutlery basket with the sharp ends pointing down or put them in the cutlery rack in a horizontal position with the sharp edges down.
- Do not leave the appliance with the open door unattended to avoid stepping accidentally onto it.
- Before any maintenance operation, deactivate the appliance and disconnect the mains plug from the socket.
- Do not use high pressure water sprays and/or steam to clean the appliance.
- If the appliance has ventilation openings in the base, they must not be covered e.g. by a carpet.
- The appliance is to be connected to the water mains using the new supplied hose-sets. Old hose sets must not be reused.
Safety instructions
Installation
⚠ Warning! Only a qualified person can install this appliance.
- Remove all the packaging and the transit bolts.
- Do not install or use a damaged appliance.
- Do not install or use the appliance where the temperature is less than 0 °C.
- Follow the installation instruction supplied with the appliance.
• Always take care when moving the appliance as it is heavy. Always use safety gloves and enclosed footwear. - Make sure that the appliance is installed below and adjacent to safe structures.
Electrical connection
⚠ Warning!Risk of fire and electrical shock.
⚠ Warning! When positioning the appliance, ensure the supply cord is not trapped or damaged.
⚠ Warning! Do not use multi-plug adapters and extension cables.
⚠ Warning! Do not, under any circumstances, cut, remove, or bypass the grounding prong
• The appliance must be earthed.
- Make sure that the parameters on the rating plate are compatible with the electrical ratings of the mains power supply.
• Always use a correctly installed shockproof socket.
- Make sure not to cause damage to the electrical components (e.g. mains plug, mains cable). Contact the Authorised Service Centre to change the electrical components.
- Connect the mains plug to the mains socket only at the end of the installation. Make sure that there is access to the mains plug after the installation.
- Do not pull the mains cable to disconnect the appliance. Always pull the mains plug.
- This appliance complies with the E.E.C. Directives.
- UK and Ireland only: This appliance is fitted with a 13 A mains plug. If it is necessary to change the mains plug fuse, use only a 13 A ASTA (BS 1362) fuse.
Water connection
- Do not cause damage to the water hoses.
- Before connection to new pipes, pipes not used for a long time, where repair work has been carried out or new devices fitted (water meters, etc.), let the water flow until it is clean and clear.
- Ensure that there are no visible water leaks during and after the first use of the appliance.
- The water inlet hose has a safety valve and a sheath with an inner mains cable.
text_image
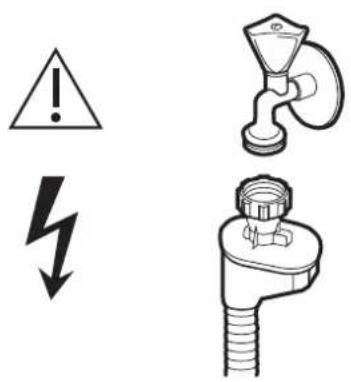
Safety warning symbols and corresponding icons: triangular warning triangle, lightning bolt, and plug device with warning labels.⚠ Warning! Dangerous voltage.
- If the water inlet hose is damaged, immediately close the water tap and disconnect the mains plug from the mains socket. Contact the Authorised Service Centre to replace the water inlet hose.
Use
⚠ Warning! Risk of injury, burns, electrical shock or fire.
⚠ Warning! Do not use the appliance before installing it in the built in structure. The appliance must be disconnected from the power supply before any installation work is done – risk of electric shock.
- Do not sit or stand on the open door.
- Dishwasher detergents are dangerous. Obey the safety instructions on the detergent packaging.
- Use only detergent and rinse aid recommended for use in an automatic dishwasher.
- Never use soap, laundry detergent, or hand washing detergent in your dishwasher.
- Do not drink and play with the water in the appliance.
- Dishwasher detergent is corrosive! Keep dishwasher detergent out of the reach of children.
- Do not remove the dishes from the appliance until the programme is complete. Some detergent may remain on the dishes.
- The appliance can release hot steam if you open the door while a programme operates.
- Do not put flammable products or items that are wet with flammable products in, near or on the appliance.
Service
• To repair the appliance contact an Authorised Service Centre.
- Use original spare parts only.
Disposal
⚠ Warning! Risk of injury or suffocation.
- Disconnect the appliance from the mains supply.
- Cut off the mains cable and discard it.
- Remove the door to prevent children and pets to be closed inside of the appliance.
Note:
When connecting to drinking water make sure that you connect the appliance using a safety device against drinking water contamination through backflow (according to DIN EN 1717) and meet water pollution requirements (according to KTW-BWGL). Product shall be constructed to prevent backsiphonage of non-potable water into the water mains according to IEC/EN 61770. We recommend that installation, including water supply and electrical connections, and repairs are carried out by a qualified technician.
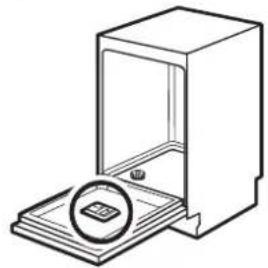
Product description

text_image
Technical diagram of a refrigerator with numbered parts labeled 1 to 6
natural_image
3D technical illustration of a mechanical assembly with grid-like components and a black arrow pointing to a component (no text or symbols)
natural_image
Technical line drawing of a mechanical assembly with no visible text or symbols
natural_image
Line drawing of a multi-tiered bicycle basket structure with no text or symbols
natural_image
Simple line drawing of a funnel with a hanging weight, no text or symbols present1 Salt container
2 Detergent dispenser Upper basket
3 Lower spray arm Cup shelf
4 Filters
5 Rinse aid dispenser
6 Rating plate Salt funnel
7 Cutlery tray


10 Upper spray arm
11 Lower basket

Control panel

text_image
1 2 3 4 5 8:88 6 7 8 9 7 PROGRAMS1 On/off button Display
2 Program button Function indicator
3 Tablet button
4 Auto door open
5 Delay button
8 Program indicator
9 Warning indicator


| Indicators Description | |
 | Rinse aid indicator. It is always on while the rinse aid dispenser needs refilling. |
 | Salt indicator. It is always on while the salt container needs refilling. |
 | Auto open indicator. It is on while activate auto door open function. |
 | Tablet indicator. It is on while active tablet function. |
 | Delay start indicator. It is on while existing a delay start setting. |
Programmes
| Programme Degree of soil / Type of load | Programme phases Options | ||
| ECO (ECO)^1) | Normal soilCrockery and cutlery and pans | Wash (45 °C)RinseRinse (45 °CDrying | Auto door open optionalTablet washDelay start |
| AUTO (Auto) | The programme adjusts to all the degrees of soil.Crockery, cutlery, pots and pans | Prewash (45 °C)Wash (55-65 °C)RinseRinseAutorinse (50-55 °CDrying | Auto door open optionalTablet washDelay start |
| (Rapid) | Fresh soilCrockery and cutlery | Wash (40 °C)RinseRinse (45 °C) | Tablet washDelay start |
| (Intensive) | Heavy soilCrockery, cutlery, pots and pans | Prewash (50 °C)Wash (65 °C)RinseRinseRinse (60 °CDrying | Auto door open optionalTablet washDelay start |
| (Glass) | Delicated soilGlass | Prewash (40°C)Wash (50 °C)Rinse (50 °C)Rinse (50 °CDrying | Auto door open optionalTablet washDelay start |
| (Prewash) | All degree of soil.Crockery and cutlery | Prewash · Delay start | |
| (Self-clean) · No load | The program cleans dishwasher interior. | Auto door open optionalDelay start | |
1) With this programme you have the most efficient use of water and energy consumption for crockery and cutlery with normal soil. (This is the standard programme for test institutes).
Consumption values
| Program | Drying phase | Available functions | Duration of wash program (h:min) | Water consumption (litres/cycle) | Energy consumption (kWh/cycle) |
| ECO ( ECO)^1) | √ | 3:35 9.0 0.674 | |||
| AUTO(Auto) 1:25-2:30 10. | 4-16/6 0.639/1156 | ||||
| (Rapid) - 0:30 10.2 | 0.600 | ||||
| (Intensive) 3:25 15.2 | 1.19 | ||||
| (Glass) 2:00 12.4 | 0.734√ | ||||
| (Prewash) | - | 0:15 | 3.6 | 0.020 | |
| (Self-cleaning) | √ | 2:25 12.3 | 1.199 |
1) The pressure and the temperature of the water, the variations of the mains supply, the options and the quantity of dishes can change the values.
2) ECO programme is suitable to clean normally soiled tableware, and it is the most efficient programme in terms of its combined energy and water consumption. This program is also used to assess compliance with the EU eco-design legislation.
3) Washing tableware in a household dishwasher usually consumes less energy and water in the use phase than hand dishwashing when the household dishwasher is used according to the manufacturer's instructions.
4) The values given for programmes other than the eco programme are indicative only.
Information for test institutes
To receive the necessary information for conducting performance tests (e.g. according to EN60436), send an email to:
info.dishwasher@meicloud.com
In your request please include the product number code (PNC) found on the rating plate.
Functions
It is not possible to activate or deactivate options while a programme is running.
If a function is not applicable to a programme, the related indicator is off or it flashes quickly for a few seconds and then goes out.
- Activating functions can affect the water and energy consumption as well as the programme duration.
The function improves the drying performance with less energy consumption. Door will open automatically during drying pahse (except 📄/ Anthony).
How to deactivate auto door open function
-
Press the on/off button to switch the appliance on.
-
Press The auto door open indicator is Off. The display shows the updated programme duration.
Tablet function
If tablet are used, we recommend using the TABLET button, because it adjusts the program so that the best washing and drying results are always.
How to activate Tablet function
- Press the on/off button to switch the appliance on.
- Press ☑The related indicator is on. The display shows the updated programme duration.
Settings
The water softener
The water softener removes minerals from the water supply, which would have a detrimental effect on the washing results and on the appliance.
The higher the content of these minerals, the harder your water is. Water hardness is measured in equivalent scales.
The water softener should be adjusted according to the hardness of the water in your area. Your local water authority can advise you on the hardness of the water in your area. It is important to set the right level of the water softener to assure good washing results.
Water hardness
| German degrees (°dH) | French degrees (°fH) | mmol/l | Clarke degrees | Water softener level | Salt consumption (gram/cycle) | Regeneration frequency (Every X cycles) |
| 35 - 55 61 | -98 6.1 - 9.8 | 43 - 69 H6 | 60 1 | |||
| 23 - 34 41 | -60 4.1 - 6.0 | 29 - 42 H5 | 30 2 | |||
| 18 - 22 31 | -40 3.1 - 4.0 | 22 - 28 H4 | 20 3 | |||
| 12 - 17 | 21 - 30 | 2.1 - 3.0 | 15 - 21 | H3 1) | 12 | 5 |
| 6 - 11 | 10 - 20 | 1.0 - 2.0 | 7 - 14 | H2 | 9 | 10 |
| 0 - 5 | 0 - 9 | 0 - 0.94 | 0 - 6 | H1 2) | 0 | NO |
1) Factory setting.
2) Do not use salt at this level.
Whether you use a standard detergent or multi-tabs (with or without salt), set the proper water hardness level to keep the salt refill notification active.
- Multi-tabs containing salt are not effective enough to soften hard water.
During every regeneration, an additional 2.0 liters of water is required, energy consumption increases by 0.02kWh and the programme is extended by 4 minutes.
How to set the water softener level
- Press the on/off button to switch the appliance on.
-
Within 60 seconds after the appliance is switched on, press and hold ☑ for more than 5 seconds to enter water softener setting mode.
-
Press □ repeatedly to toggle the following water softener levels on the display: H3-H4-H5-H6-H1-H2.
- Press the on/off button to confirm the setting.
The rinse aid empty notification
The rinse aid helps to dry the dishes without streaks and stains. For best drying performance, always use rinse aid.
The rinse aid is automatically released during the hot rinse phase.
When rinse aid chamber is empty, the rinse aid indicator is turned on notifying to refill rinse aid.
The rinse aid level
It is possible to set the released quantity of rinse aid between "d1" level (minimum quantity) and "d5" level (maximum quantity).
How to set the rinse aid level
- Press the on/off button to switch the appliance on.
-
Within 60 seconds after the appliance is switched on, press and hold for more than 5 seconds and then press to enter rinse aid setting mode.
The rinse aid indicator flashes. -
Press repeatedly to toggle the following rinse aid levels on the display: d3-d4-d5-d1-d2. The higher the number, the more rinse aid released by the appliance.
-
Press the on/off button to confirm the setting.
The key sound activate or deactivate
- Press the on/off button to switch the appliance on.
- Hold and for 3 second to activate or deactivate the key sound.
Before first use
-
Make sure that the current level of the water softener agrees with the hardness of the water supply. If not, adjust the level of the water softener.
-
Fill the salt container.
- Fill the rinse aid dispenser.
-
Open the water tap.
-
Start a programme to remove any processing residuals that can still be inside the appliance. Do not use detergent and do not load the baskets.
After starting a programme, it may take up to 5 minutes for the appliance to recharge the resin in the water softener. It seems that the appliance is not working. The washing phase starts only after this procedure is completed. The procedure is repeated periodically.
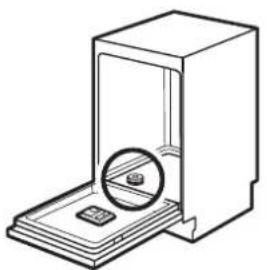
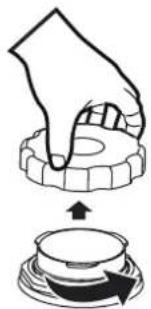
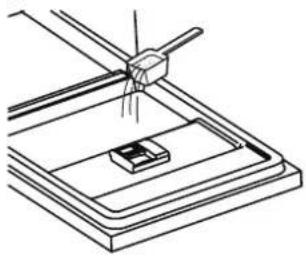
The salt container
Caution! Use rough salt designed for dishwashers only. Fine salt increases the risk of corrosion.
The salt is used to recharge the resin in the water softener and to assure good washing results in daily use.
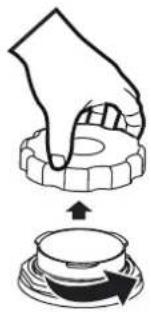
Filling the salt container
i Fill the salt only when the salt indicator turns on.
1
natural_image
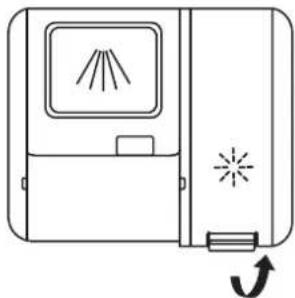
Line drawing of a device with a circular inset showing a magnified view of a component (no text or symbols)Find the salt container at the bottom.
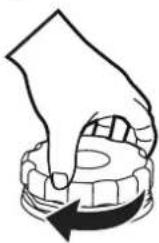
2
natural_image
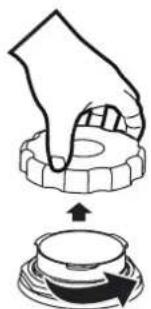
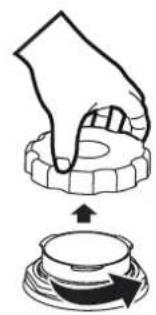
Illustration of a hand pressing down on a gear-shaped component with an arrow indicating press direction (no text or symbols)Remove the cap of the salt container.
34
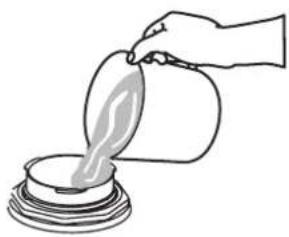
natural_image
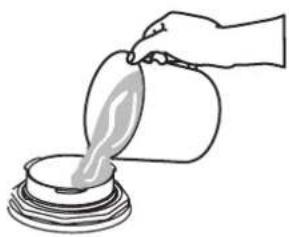
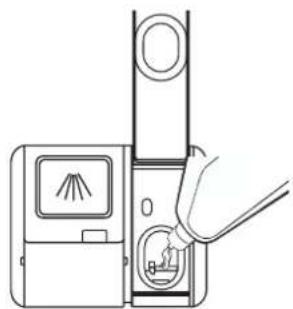
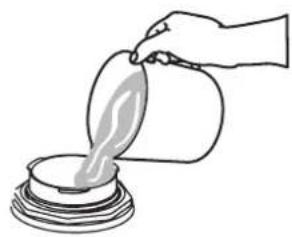
Hand pouring liquid from a container into a pot (no text or symbols visible)Fill the salt container to the maximum level with water.

text_image
SALTPlace the supplied funnel over the mouth of the salt container, then put 1.5 kg of salt in the container.
5
Tightly close the cap of the salt container.
△
Caution! Water and salt may come out of the salt container when you fill it. After you fill the salt container, immediately start a programme to prevent corrosion.
Filling the rinse aid dispenser
1
natural_image
Line drawing of an open refrigerator with a circular base and lid (no text or symbols)Find the rinse aid dispenser on the inside of the door.
2

natural_image
Simple line drawing of a device with a screen and indicator lights, no text or symbols present.Raise the cover of the rinse aid container.
34

natural_image
Line drawing of a hand inserting a device into a vertical panel (no text or symbols)Fill the rinse aid container with rinse aid. Be careful not to overfill.

natural_image
Line drawing of a hand pressing a button on a device (no text or symbols)Close the cover of the rinse aid container.
Daily use
- Open the water tap.
-
Press the on/off button to activate the appliance.
-
If the salt indicator is on, fill the salt container.
- If the rinse aid indicator is on, fill the rinse aid dispenser.
- Rotate the spray arm to see if it rotates freely.
- Load the basket and Add the detergent.
- Set and start the correct programme for the type of load and the degree of soil.
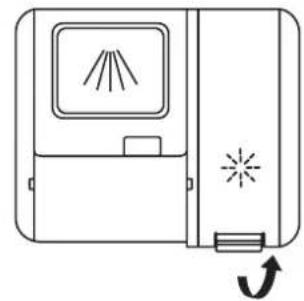
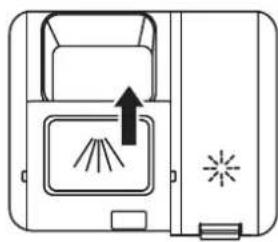
Using the detergent
1
natural_image
Line drawing of a laboratory apparatus with a circular component on a base (no text or symbols)Find the detergent dispenser on the inside the door.
2
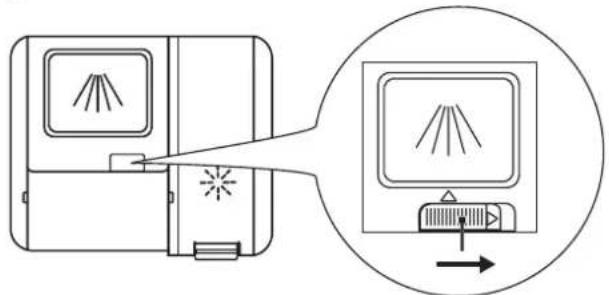
text_image
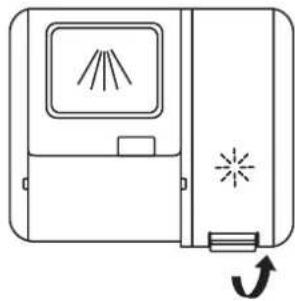
Diagram showing a device with light rays passing through a screen, and a magnified view of the screen displaying light rays.Slide the release catch to right, then open the cap of the detergent dispenser.
3

natural_image
Illustration of a kitchen appliance with a grater pouring liquid into a tray, no text or symbols presentAdd the detergent (powder or multitabs) in the detergent dispenser.
4
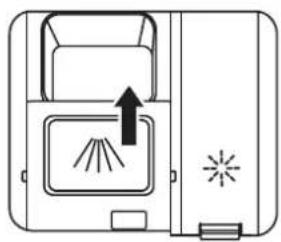
natural_image
Diagram of a device with a screen and indicator lights, no text or symbols presentClose the cap by sliding it forward then pressing it down.
5
natural_image
Technical line drawing of a mechanical assembly with a tool and base plate (no text or symbols)If using prewash programme 📋put the detergent in the inner tub instead of detergent dispenser. Please do not open the dishwasher door during the programme.
Setting and starting a programme
The auto off function
This function decreases energy consumption by automatically deactivating the appliance when it is not operating.
The function comes into operation:
• 15 minutes after the completion of the programme.
• After 15 minutes if the programme has not started.
Starting a programme

Caution! Do not remove the baskets from the dishwasher before a wash cycle.
- Keep the appliance door ajar.
- Press the on/off button to activate the appliance.
- To select a desired programme, press the related programme button.
The related programme indicator is on. The display shows the programme duration. - Set the applicable options.
- Close the appliance door to start the programme.
Starting a programme with delay start
- Set a programme.
- Press repeatedly until the display shows the delay time you want to set (from 1 to 24 hours). The delay indicator turns on.
- Close the appliance door to start the countdown.
While a countdown is running it is possible to increase the delay time but also change the selection of the programme and options.
When the countdown is completed, the programme starts.
Opening the door while the appliance operates
Opening the door while a programme is running stops the appliance. It may affect the energy consumption and the programme duration.
After closing the door, the appliance continues from the point of interruption.
Cancelling the delay start while the countdown operates
When you cancel the delay start you have to set the programme and options again.
Press the on/off button to deactivate the appliance. The delay start will be cancelled.
Cancelling the programme
Press the on/off button to deactivate the appliance.
Or open the door to stop running the programme, and wait a few seconds until the appliance completely stops, then press the on/off button. The programme will be cancelled. Make sure that there is detergent in the detergent dispenser before you start a new programme.
End of the programme
-
Press the on/off button or wait for the auto off function to automatically deactivate the appliance. If you open the door before the activation of auto off, the appliance is automatically deactivated.
-
Close the water tap.
When the programme is completed the display shows 0:00.
All buttons are inactive except for the on/off button.
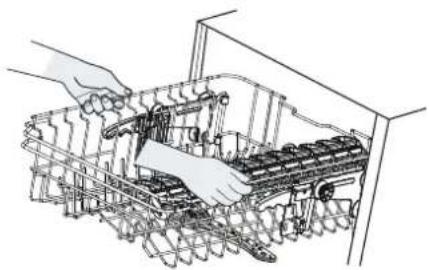
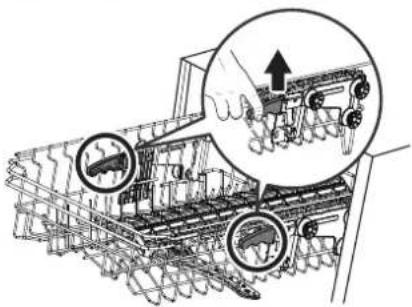
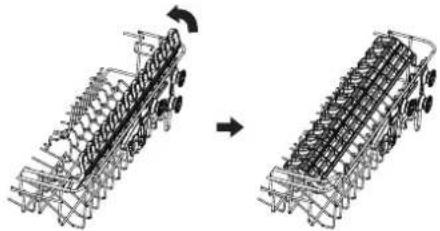
Positioning the upper basket
The upper basket can be re-positioned at different heights to permit storage of dishes of various sizes.
- To raise the upper basket, just to lift the upper basket at the center of each side until the basket locks into place in the upper position. It is not necessary to lift the adjuster handle.
natural_image
Line drawing of hands assembling a mechanical component (no text or symbols)- To lower the upper bakset, lift the adjust handles on each side to realease the basket and lower it to the lower position.
natural_image
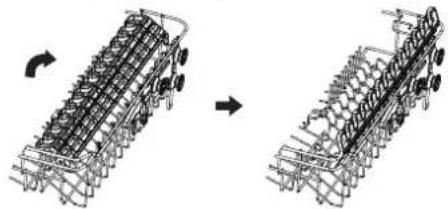
Technical illustration of a mechanical assembly with two circular insets showing hand positioning and tool positioning (no text or symbols)Adjustable cup shelf
The cup shelf in the upper basket can be unfolded to make room for taller dishes.
- Pull the cup shelf up to unfold it.
natural_image
Diagram showing two stages of a mechanical assembly or assembly process, with no visible text or symbols.- To fold the cup shelf, push it down.

natural_image
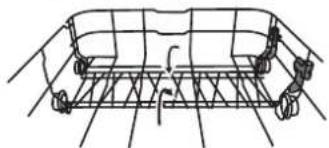
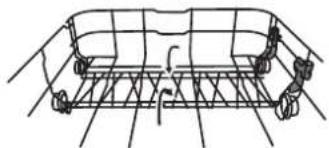
Diagram showing two views of a mechanical assembly with no visible text or symbolsAdjustable lower basket
The spikes of the lower basket can be folded to make room for large dishes.
- Push the spikes of the lower basket down to fold the spikes.
natural_image
Line drawing of a bicycle rear frame structure with no text or symbols- To unfold the spikes of the lower basket, pull it up.
natural_image
Technical diagram of a mechanical assembly with internal components and directional arrows (no text or labels)There will be a click when reach the right position.
Hints and tips
General
The following hints will ensure optimal cleaning and drying results in daily use and also help to protect the environment.
- Remove larger residues of food from the dishes into the waste bin.
- Do not pre-rinse dishes by hand. When needed, use the prewash programme (if available) or select a programme with a prewash phase.
-
When loading the appliance, make sure that the dishes can be completely reached and washed by the water released from the spray arm nozzles. Make sure that items do not touch or cover each other.
-
You can use dishwasher detergent, rinse aid and salt separately or you can use the multi-tablets (e.g. "3 in 1", "4 in 1", "All in 1"). Follow the instructions written on the packaging.
- Select the programme according to the type of load and degree of soil. With the ECO programme you have the most efficient use of water and energy consumption for crockery and cutlery with normal soil.
Using salt, rinse aid and detergent
- Only use salt, rinse aid and detergent for dishwasher. Other products can cause damage to the appliance.
- In areas with hard and very hard water we recommend to use plain dishwasher detergent (powder, gel, tablets containing no additional agents), rinse aid and salt separately for optimal cleaning and drying results.
- At least once a month run the appliance with the use of appliance cleaner which is particularly suitable for this purpose.
- Detergent tablets do not fully dissolve with short programmes. To prevent detergent residues on the tableware, we recommend that you use the tablets with long programmes.
- Do not use more than the correct quantity of detergent. Refer to the instructions on the detergent packaging.
What to do if you want to stop using multi-tablets
Before you start to use separately detergent, salt and rinse aid do the following procedure.
- Set the highest level of the water softener.
- Make sure that the salt and rinse aid containers are full.
- Start the shortest programme with a rinsing phase. Do not add detergent and do not load the baskets.
- When the programme is completed, adjust the water softener according to the water hardness in your area.
- Adjust the released quantity of rinse aid.
- Activate the rinse aid empty notification.
What to do if you want to stop auto door open function.
Please refer to the Functions section to stop the auto door open function.
Press the on/off button to switch the appliance on.
Press The auto door open indicator is Off. The display shows the updated programme duration.
Loading the baskets
i Refer to examples of the load of the baskets at the end of the user manual.
- Only use the appliance to wash items that are dishwasher-safe.
- Do not put in the appliance items made of wood, aluminium, pewter and copper.
- Do not put in the appliance items that can absorb water (sponges, household cloths).
- Remove remaining food from the items.
- Soak items with remaining burned food in water.
- Put hollow items (cups, glasses and pans) with the opening down.
- Make sure that cutlery and dishes do not bond together. Mix spoons with other cutlery.
- Make sure that glasses do not touch each other.
- Put small items in the cutlery basket.
- Put light items in the upper basket. Make sure that the items do not move.
Before starting a programme
Make sure that:
- The filters are clean and correctly installed.
- The cap of the salt container is tight.
- The spray arms are not clogged.
- There is dishwasher salt and rinse aid (unless you use multi-tablets).
- The position of the items in the baskets is correct.
- The programme is applicable for the type of load and for the degree of soil.
- The correct quantity of detergent is used.
Unloading the baskets
For better drying results keep the appliance door ajar for some minutes before you remove the dishes.
-
Let the dishes cool down before you remove them from the appliance. Hot dishes are easily damaged.
-
First remove items from the lower basket then the upper basket.
At the end of the program water can still remain on the sides and on the door of the appliance.
Care and cleaning
⚠ Warning! Before maintenance, deactivate the appliance and disconnect the mains plug from the main socket.
- Dirty filters and clogged spray arms decrease the washing results. Make a check regularly and, if necessary, clean them.
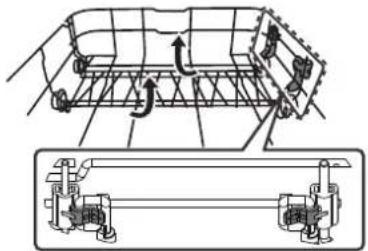
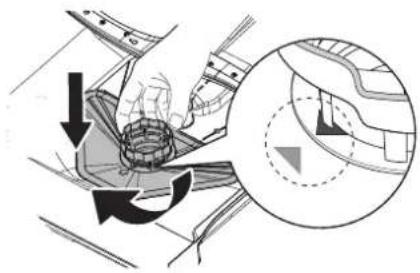
Cleaning the filters
- Turn the filter counterclockwise to unlock, then lift it out of the appliance.

natural_image
Diagram showing a mechanical device with a magnified inset illustrating the internal components (no text or symbols present)- First pull the filter (A) out of the filter assembly by compressing the two bars without snap, Then the filter (B) and (C) can be detached.
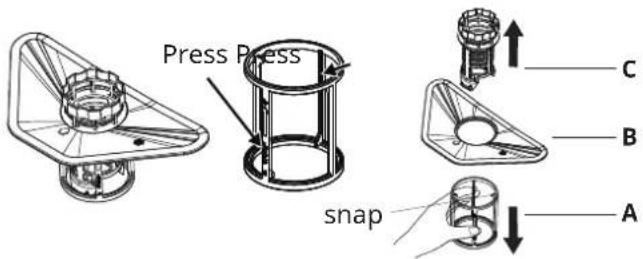
text_image
Press Press snap A B C- Rinse the filters (A), (B) and (C) with water. If necessary, use a soft cleaning brush.
- Re-assemble the filters shown in the figure below.
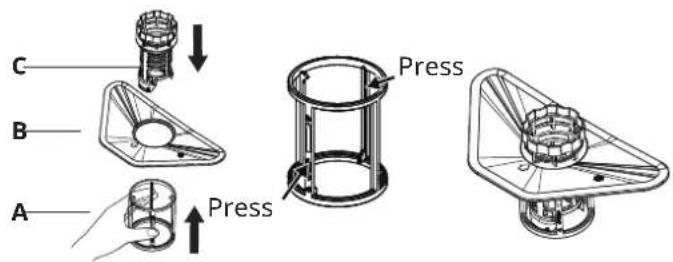
text_image
C B A Press Press- Insert the filter assembly into position, and turn it clockwise until it locks. Make sure the arrows on the filter (B) and (C) are aligned, as shown in the figure below.
natural_image
Diagram showing a mechanical or architectural component with directional arrows and an inset circular detail (no text or symbols)Cleaning the spray arms
We recommend to clean regularly the upper and lower spray arms to avoid soil to clog the holes.
Clogged holes can cause unsatisfactory washing results.
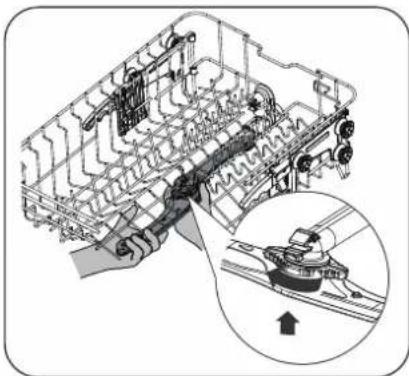
- Pull out the upper and lower baskets.
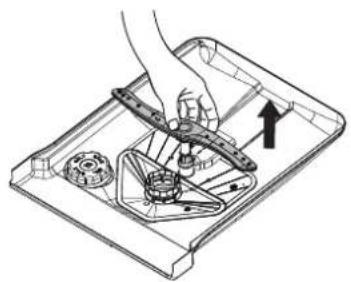
- To disengage the upper spray arm from the upper basket, locate the nut in the center position of the upper arm and turn it counterclockwise to remove.

natural_image
Technical diagram of a mechanical assembly with an inset showing a close-up of a component (no text or symbols visible)- To detach the lower spray arm from the bottom of the appliance, just pull it up to remove.
natural_image
Mechanical assembly diagram showing a hand operating a tool on a tray with gears and a bracket (no text or symbols)ENGLISH 18
-
Rinse the upper and lower spray arms under running water. Use a thin pointed tool (e.g. a toothpick) to remove particles of soil from the holes of the arm sprays.
-
After cleaning, replace the arm sprays. To attach the upper spray arm to the upper basket, align the center position of the upper spray arm with the nut then turn it clockwise to tighten.
natural_image
Technical diagram of a mechanical assembly with an inset showing a close-up of a component (no text or symbols present)To attach the lower arm spray to the bottom of the appliance, insert the lower arm spray into position.

natural_image
Illustration of a hand using a tool to adjust or install a mechanical component, with no visible text or symbols.External cleaning
- Clean the appliance with a moist soft cloth.
- Only use neutral detergents.
- Do not use abrasive products, abrasive cleaning pads or solvents.
Internal cleaning
- Carefully clean the appliance, including the rubber gasket of the door, with a soft damp cloth.
• To maintain the performance of your appliance, use a cleaning product designed specifically for dishwashers at least once a month. Carefully follow the instructions on the packaging of the product. - Do not use abrasive products, abrasive cleaning pads, sharp tools, strong chemicals, scourer or solvents.
• Using short-duration programmes regularly can cause grease and limescale buildup inside the appliance. - Run long-duration programmes at least twice a month to prevent the buildup.
Troubleshooting
If the appliance does not start or it stops during operation, first check if you can solve the problem by yourself with the help of the information in the table or contact an Authorised Service Centre.

Warning! Repairs not properly done may result in serious risk to the safety of the user. Any repairs must be performed by qualified personnel.
With some problems, the display shows an alarm code. The majority of problems can be solved without the need to contact an Authorised Service Centre.
| Problem and alarm code Possible cause and solution | |
| You cannot activate the appliance. | Make sure that the mains plug is connected to the mains socket.Make sure that there is no damaged fuse in the fuse box. |
| The program does not start. | Make sure that the appliance door is closed.If the delay start is set, cancel the setting or wait for the end of the countdown.The appliance has started the procedure to recharge the resin inside the water softener. The duration of the procedure is approximately 5 minutes. |
| The appliance does not fill with water.The alarm code shows “E1”. | Make sure that the water tap is open.Make sure that the pressure of the water supply is not too low. For this information, contact your local water authority.Make sure that the water tap is not clogged.Make sure that the filter in the inlet hose is not clogged.Make sure that the inlet hose has no kinks or bends. |
| The appliance does not reach the required temperature.The alarm code shows “E3”. | Heating element malfunctions. Contact an Authorised Service Centre. |
| The anti-flood device is on.The alarm code shows “E4”. | Close the water tap and contact an Authorised Service Centre. |
| The appliance does not drain the water. | Make sure that the sink spigot is not clogged.Make sure that the filter in the outlet hose is not clogged.Make sure that the interior filter system is not clogged.Make sure that the drain hose has no kinks or bends. |
| The appliance stops and starts more times during operation. | It is normal. It provides optimal cleaning results and energy savings. |
| The program lasts too long. | If the delayed start option is set, cancel the delay setting or wait for the end of the countdown. |
| The remaining time in the display increases and skips nearly to the end of program time. | This is not a defect. The appliance is working correctly. |
| Small leak from the appliance door. | The appliance is not levelled. Loosen or tighten the adjustable feet (if applicable).The appliance door is not centred on the tub. Adjust the rear foot (if applicable). |
| The appliance door is difficult to close. | The appliance is not levelled. Loosen or tighten the adjustable feet (if applicable).Parts of the tableware are protruding from the baskets. |
| Rattling/knocking sounds from inside the appliance. | The tableware is not properly arranged in the baskets.Refer to basket loading section.Make sure that the spray arms can rotate freely. |
| The appliance trips the circuit-breaker. | The amperage is insufficient to supply simultaneously all the appliances in use. Check the socket amperage and the capacity of the meter or turn off one of the appliances in use.Internal electrical fault of the appliance. Contact an Authorised Service Centre. |
Refer to "Before first use", "Daily use", or "Hints and tips" for other possible causes.
Once problem and alarm code occurs on the appliance, deactivate and activate the appliance. If the problem occurs again, contact an Authorised Service Centre.
For alarm codes not described in the table, contact an Authorised Service Centre.
The washing and drying results are not satisfactory
| Problem Possible cause and solution | |
| Poor washing results. | Refer to “Daily use”, “Hints and tips” and basket loading section.Use more intensive washing programmes.Clean spray arm jets and filter. Refer to “Care and Cleaning”. |
| Poor drying results. | Tableware has been left for too long inside a closed appliance.There is no rinse aid or the dosage of rinse aid is not enough. Set the rinse aid dispenser to a higher level.Plastic items may need to be towel dried.For the best drying performance activate the dry plus option.We recommend to always use rinse aid, even in combination with multi-tablets. |
| There are whitish streaks or bluish layers on glasses and dishes. | The release quantity of rinse aid is too much.Adjust the rinse aid level to a lower level.The quantity of detergent is too much. |
| There are stains and dry water drops on glasses and dishes. | The released quantity of rinse aid is not sufficient.Adjust the rinse aid level to a higher level.The quality of the rinse aid can be the cause. |
| The dishes are wet. | For the best drying performance activate the auto door open.The programme does not have a drying phase or has a drying phase with low temperature.The rinse aid dispenser is empty.The quality of the rinse aid can be the cause.The quality of the multi-tablets can be the cause.Try a different brand or activate the rinse aid dispenser and use rinse aid and multi-tablets together. |
| The interior of the appliance is wet. | This is not a defect of the appliance. it is caused by the humidity in the air that condenses on the walls. |
| Unusual foam during washing. | Use the detergent for dishwashers only.There is a leak in the rinse aid dispenser. Contact an Authorised Service Centre. |
| Traces of rust on cutlery. | There is too much salt in the water used for washing.Refer to “The water softener”.Silver and stainless steel cutlery were placed together.Avoid to put silver and stainless steel items close together. |
| There are residues of detergent in the dispenser at the end of the programme. | The detergent tablet got stuck in the dispenser and therefore was not completely washed away by water.Water cannot wash away the detergent from the dispenser. Make sure that the spray arm is not blocked or clogged.Make sure that items in the baskets do not impede the lid of the detergent dispenser from opening. |
| Odours inside the appliance. | Refer to “Internal cleaning”. |
| Limescale deposits on the tableware, on the tub and on the inside of the door. | The level of salt is low, check the refill indicator.The cap of the salt container is loose.Your tap water is hard. Refer to “The water softener”.Even using multi-functional tabs use salt and set regeneration of the water softener. Refer to “The water softener”.If limescale deposits still remain, clean the appliance with appliance cleaners which are particularly suitable for this purpose.Try different detergent.Contact the detergent manufacturer. |
| Dull, discoloured or chipped tableware. | Make sure that only dishwasher-safe items are washed in the appliance.Load and unload the basket carefully. Refer to load of basket at the end of this user manual.Place delicate items in the upper basket. |
Refer to "Before first use", "Daily use" or "Hints and tips" for other possible causes.
Technical information (EN60436)
| Supplier name IKEA of Sweden AB | |
| Supplier address IKEA of Sweden AB, Tulpanvägen 8,343 81 Älmhult, Sweden | |
| Product type Dishwasher | |
| Installation type Built-in | |
| Dimensions (W x H x D) 45 x 82 x 55 cm | |
| Rated capacity a)(ps) 10 | b) |
| Energy efficiency class a) | D |
| EEI a) | 49,9 |
| Cleaning performance index a) | 1,125 |
| Drying performance index a) | 1,065 |
| Energy consumption per cycle c) | 0,674 kWh |
| Water consumption per cycle d) | 9,0 litres |
| Program duration a) | 3:35 (h:min) |
| Airborne acoustical noise emission a) | 44 dB(A) |
| Airborne acoustical noise emission class a) | B |
| Off-mode 0,49 W | |
| Delay start 1,00 W | |
a) For the eco program.
b) The maximum number of place settings to be washed is 10. Refer to examples of the load of the baskets at the begin of this quick guide. Correct loading will contribute to energy and water savings. The Dishes may not clean with incorrect loading.
c) Energy consumption in kWh per cycle, based on the eco programme using cold water fill.
Actual energy consumption will depend on how the appliance is used.
d) Water consumption in litres per cycle, based on the eco program. Actual water consumption will depend on how the appliance is used and on the hardness of the water.
Link to EU EPREL Database
The QR code on the energy label supplied with the appliance provides a web link to the registration of this appliance in the EU EPREL database. Keep the energy label for reference together with the user manual and all other documents provided with this appliance.
It is possible to find information related to the performance of the product in the EU EPREL database using the link https://eprel.ec.europa.eu and the model name and product number that you can find on the rating plate of the appliance. Refer to the chapter "Product description".
For more detailed information about the energy label, visit www.theenergylabel.eu.
Environmental concerns
Recycle materials with the symbol. Put the
packaging in relevant containers to recycle it. Help protect the environment and human health by recycling waste of electrical and electronic appliances. Do not dispose of
appliances marked with the symbol 📄 with the household waste. Return the product to your local recycling facility or contact your municipal office.
IKEA Guarantee
How long is the IKEA guarantee valid?
This guarantee is valid for 5 years from purchase date. The original sales receipt is required as proof of purchase. If service work is carried out under guarantee, this will not extend the guarantee period for the appliance.
Who will execute the service?
IKEA service provider will provide the service through its own service operations or authorized service partner network.
What does this guarantee cover?
The guarantee covers faults of the appliance, which have been caused by faulty construction or material faults from the date of purchase from IKEA. This guarantee applies to domestic use only. The exceptions are specified under the headline "What is not covered under this
guarantee?" Within the guarantee period, the costs to remedy the fault e.g. repairs, parts, labour and travel will be covered, provided that the appliance is accessible for repair without special expenditure. On these conditions the EU guidelines (Nr.99/44/EG) and the respective local regulations are applicable. Replaced parts become the property of IKEA.
What will IKEA do to correct the problem?
IKEA appointed service provider will examine the product and decide, at its sole discretion, if it is covered under this guarantee. If considered covered, IKEA service provider or its authorized service partner through its own service operations, will then, at its sole discretion, either repair the defective product or replace it with the same or a comparable product.
What is not covered under this guarantee?
• Normal wear and tear.
- Deliberate or negligent damage, damage caused by failure to observe operating instructions, incorrect installation or by connection to the wrong voltage, damage caused by chemical or electro-chemical reaction, rust, corrosion or water damage including but not limited to damage caused by excessive lime in the water supply, damage caused by abnormal environmental conditions.
- Consumable parts including batteries and lamps.
- Non-functional and decorative parts which do not affect normal use of the appliance, including any scratches and possible colour differences.
- Accidental damage caused by foreign objects or substances and cleaning or unblocking of filters, drainage systems or soap drawers.
- Damage to the following parts: ceramic glass, accessories, crockery and cutlery baskets, feed and drainage pipes, seals, lamps and lamp covers, screens, knobs, casings and parts of casings. Unless such damages can be proved to have been caused by production faults.
- Cases where no fault could be found during a technician's visit.
- Repairs not carried out by our appointed service providers and/or an authorized service contractual partner or where non-original parts have been used.
- Repairs caused by installation which is faulty or not according to specification.
- The use of the appliance in a non-domestic environment i.e. professional use.
- Transportation damages. If a customer transports the product to their home or other address, IKEA is not liable for any damage that may occur during transport. However, if IKEA delivers the product to the customer's delivery address, then damage to the product that occurs during this delivery will be covered by this guarantee.
- Cost for carrying out the initial installation of the IKEA appliance. However, if an IKEA service provider or its authorized service partner repairs or replaces the appliance under the terms of this guarantee, the service provider or its authorized service partner will reinstall the repaired appliance or install the replacement, if necessary.
This restriction do not apply to fault-free work carried out by a qualified specialist using our original parts in order to adapt the appliance to the technical safety specifications of another EU country.
How country law applies
The IKEA guarantee gives You specific legal rights, which covers or exceed local demands. However these conditions do not limit in any way consumer rights described in the local legislation.
Area of validity
For appliances which are purchased in one EU country and taken to another EU country, the services will be provided in the framework of the guarantee conditions normal in the new country. An obligation to carry out services in the framework of the guarantee exists only if the appliance complies and is installed in accordance with:
- the technical specifications of the country in which the guarantee claim is made;
- the Assembly Instructions and User Manual Safety Information.
The dedicated After Sales Service for IKEA appliances:
Please do not hesitate to contact IKEA After Sales Service to:
make a service request under this guarantee; ask for clarification on installation of the IKEA appliance in the dedicated IKEA kitchen furniture. The service won't provide clarifications related to:
the overall IKEA kitchen installation; connections to electricity (if machine comes without plug and cable), to water and to gas since they have to be executed by an authorized service engineer.
Ask for clarification on user manual contents and specifications of the IKEA appliance.
To ensure that we provide you with the best assistance, please read carefully the Assembly Instructions and/or the User Manual section of this booklet before contacting us.
Availability of the spare parts
The following parts will be available for 7 years after this model has been discontinued: motor; circulation and drain pump; heaters and heating elements, including heat pumps (separately or bundled); piping and related equipment including all hoses, valves, filters and aquastops; structural and interior parts related to door assemblies (separately or bundled); printed circuit boards; electronic displays; pressure switches; thermostats and sensors; software and firmware including reset software.
The following parts will be available for 10 years after this model has been discontinued: door hinge and seals, other seals, spray arms, drain filters, interior racks and plastic peripherals such as baskets and lids.
For ordering the spare parts, please contact IKEA After Sales Service.
How to reach us if You need our service

Please refer to the last page of this manual for the full list of IKEA appointed contacts and relative national phone numbers.
In order to provide You with a quicker service, we recommend that You use the specific phone numbers listed at the end of this manual. Always refer to the numbers listed in the booklet of the specific appliance You need an assistance for. Before calling us, assure that You have to hand the IKEA article number (8 digit code) and the Serial Number (8 digit code that can be found on the rating plate) for the appliance of which you need our assistance.
i SAVE THE SALES RECEIPT! It is Your proof of purchase and required for the guarantee to apply. Note that the receipt reports also the IKEA article name and number (8 digit code) for each of the appliances you have purchased.
Do you need extra help?
For any additional questions not related to After Sales of your appliances, please contact our nearest IKEA store call centre. We recommend you read the appliance documentation carefully before contacting us.
Inhalt
text_image
Safety warning symbols and corresponding diagram showing warning, lightning bolt, and pipe installation instructionstext_image
Technical diagram of a refrigerator with numbered parts labeled 1 to 6
natural_image
3D technical illustration of a mechanical assembly with grid-like components and a black pointer (no text or symbols)
natural_image
Technical line drawing of a mechanical component with internal channels and mounting holes (no text or symbols)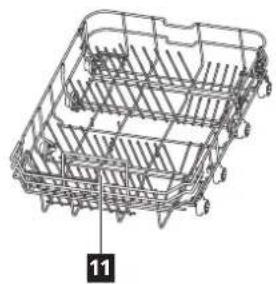
natural_image
Technical line drawing of a multi-tiered bicycle basket structure (no text or symbols)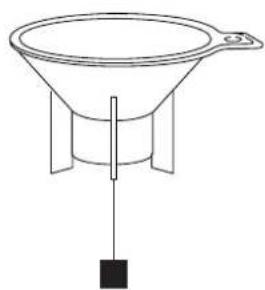
natural_image
Simple line drawing of a funnel with a hanging weight, no text or symbols present1 Salzbehälter
2 Geschirrspülmittelspender Oberer Geschirnorb
3Unterer Sprüharm Tassenablage
4 Filter
5 Klarspülmittelbehälter
6 Typenschild Salztrichter
norb
The image is too blurry to recognize any text content.
The image is too blurry to recognize any text content.
natural_image
Line drawing of a mechanical device with a circular inset showing internal components (no text or symbols)natural_image
Illustration of a hand pressing down on a gear and then pressing into a bowl with an arrow indicating rotation (no text or symbols)natural_image
Illustration of a hand pouring liquid from a container into a bowl (no text or symbols)natural_image
Line drawing of an open refrigerator with a circular button on the side (no text or symbols)2
natural_image
Simple line drawing of a device with a screen and directional arrow (no text or symbols)natural_image
Line drawing of a hand inserting a component into a vertical panel (no text or symbols)
natural_image
Line drawing of a hand pressing down on a device with a screen and indicator light (no text or symbols)text_image
Diagram showing a device with light rays interacting with a screen, and a magnified view of the screen's internal structure.natural_image
Illustration of a kitchen appliance with a grater pouring powder into a tray, no text or symbols presentnatural_image
Diagram of a device with a tray, fan, and indicator light (no text or symbols)natural_image
Technical line drawing of a mechanical assembly with a clamp and base plate (no text or symbols)natural_image
Line drawing of hands assembling or inspecting a mechanical component (no text or symbols visible)natural_image
Technical line drawing of a mechanical assembly with two circular insets showing hand positioning and component details (no text or symbols)natural_image
Two 3D wireframe diagrams showing mechanical assembly before and after rotation, with no visible text or symbols.natural_image
Diagram showing two mechanical assembly stages: one with a rotating component and the other with a grid-like structure (no text or symbols)natural_image
Line drawing of a car chassis frame with wheels and structural ribs (no text or symbols)natural_image
Technical diagram of a mechanical assembly with internal components and directional arrows (no text or labels)natural_image
Diagram showing a mechanical device with a magnified inset illustrating the internal components (no text or symbols present)natural_image
Diagram showing mechanical components with arrows indicating motion, no readable text or symbols presentnatural_image
Mechanical assembly diagram showing internal components and a magnified inset of a tool (no text or symbols)natural_image
Illustration of a hand using a tool to adjust or install a mechanical component (no text or symbols visible)natural_image
Technical diagram of a mechanical assembly with internal components and an inset close-up showing a component (no text or labels)natural_image
Technical line drawing of a mechanical assembly with a hand operating a tool (no text or symbols)text_image
Safety warning symbols including warning triangle, lightning bolt, and pipe fitting with corresponding illustrationstext_image
Diagram of a refrigerator interior with numbered parts labeled 1 to 6
natural_image
3D technical illustration of a mechanical assembly with grid-like components and a black arrow pointing to a component (no text or symbols)
natural_image
Technical line drawing of a mechanical assembly with no visible text or symbols
natural_image
Line drawing of a multi-tiered bicycle basket structure with no text or symbols
natural_image
Simple line drawing of a funnel with a hanging weight, no text or symbols presentnatural_image
Line drawing of a device with a magnified inset showing internal components (no text or symbols)2
natural_image
Illustration of a hand pressing down on a gear-shaped component with an arrow indicating rotation (no text or symbols)natural_image
Illustration of a hand pouring liquid from a container into a pot (no text or symbols)
text_image
SELnatural_image
Line drawing of an open refrigerator with a circular button on the side (no text or symbols)2
natural_image
Simple line drawing of a device with a screen and directional arrow (no text or symbols)natural_image
Line drawing of a hand inserting a small component into a device (no text or symbols)
natural_image
Line drawing of a hand pressing a button on a device (no text or symbols)natural_image
Technical line drawing of a mechanical assembly with a central component and layered base (no text or symbols)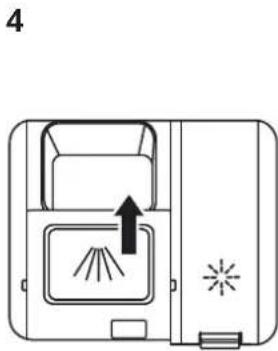
natural_image
Diagram of a device with a tray, vent, and indicator lights (no text or symbols)natural_image
Line drawing of a hand using a tool to install a mechanical component inside a container (no text or symbols)natural_image
Technical illustration of a mechanical assembly with two circular insets showing hand positioning and tool positioning (no text or symbols)natural_image
Two 3D wireframe diagrams of a mechanical component before and after rotation, showing structural changes (no text or symbols)natural_image
Diagram showing two views of a mechanical component before and after assembly, with no visible text or symbols.natural_image
Line drawing of a wireframe container or trailer structure with no text or symbolsnatural_image
Technical diagram of a mechanical assembly with internal components and directional arrows (no text or labels)natural_image
Diagram showing a mechanical device with a magnified inset illustrating internal components (no text or symbols present)natural_image
Diagram showing mechanical components with directional arrows and a magnified inset of a gear or cam mechanism (no text or symbols)natural_image
Mechanical assembly diagram showing internal components and a magnified view of a mechanical assembly (no text or labels)natural_image
Technical line drawing of a mechanical assembly with a hand operating a tool (no text or symbols present)natural_image
Technical diagram of a mechanical assembly with internal components and a magnified inset showing a component detail (no text or labels)natural_image
Technical line drawing of a mechanical assembly with a hand operating a tool, showing no text or symbols.Nettoyage extérieur
text_image
Safety warning symbols including warning triangle, lightning bolt, and pipe fittings with corresponding illustrationstext_image
Technical diagram of a mechanical device with numbered parts labeled 1 to 6
natural_image
Technical line drawing of a mechanical assembly with grid-like components and a black arrow pointing to a component (no text or symbols present)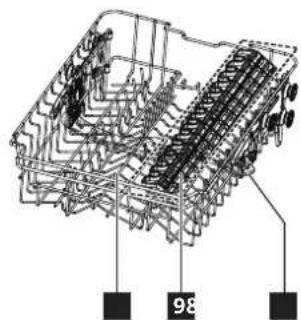
natural_image
Technical line drawing of a mechanical component with no visible text or symbols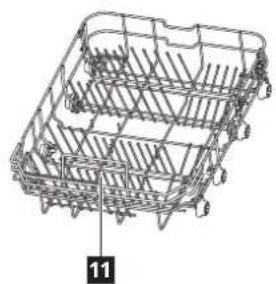
natural_image
Technical line drawing of a multi-tiered bicycle basket structure (no text or symbols)
natural_image
Simple line drawing of a funnel with a hanging weight, no text or symbols presentnatural_image
Line drawing of a refrigerator with an open lid and base, no text or symbols presentnatural_image
Illustration of a hand pressing down on a circular component with an arrow indicating press direction (no text or symbols)natural_image
Simple line drawing of a hand pouring liquid from a container into a pot (no text or symbols)natural_image
Line drawing of an open refrigerator with a circular base and lid (no text or symbols)natural_image
Line drawing of a device with a screen and starburst symbol, no text or labels presentnatural_image
Line drawing of a hand inserting a device into a vertical panel (no text or symbols)natural_image
Line drawing of a hand pressing a button on a device (no text or symbols)natural_image
Line drawing of a refrigerator with an open lid and base tray (no text or symbols)text_image
Diagram showing a device with light rays interacting with a screen, and a magnified view of the screen displaying light rays.natural_image
Illustration of a kitchen appliance with a grater pouring powder into a tray, no text or symbols presentnatural_image
Pure technical line drawing of a mechanical assembly without any text, numbers, or symbols4

natural_image
Diagram of a device with a screen and indicator lights, no text or symbols presentnatural_image
Line drawing of a hand assembling or handling a mechanical component (no text or symbols visible)natural_image
Technical illustration of a mechanical assembly with two circular insets showing internal components (no text or symbols)natural_image
Diagram showing a mechanical assembly before and after rotation, with no visible text or symbols.natural_image
Diagram showing two stages of a mechanical assembly or processing process, with no visible text or symbols.natural_image
Line drawing of a wireframe car chassis frame structure (no text or symbols)natural_image
Technical line drawing of a mechanical assembly with internal components and directional arrows (no text or symbols)natural_image
Diagram showing a device with a magnified inset illustrating mechanical components (no text or symbols present)natural_image
Diagram showing mechanical components with directional arrows and a magnified inset of a gear or cam mechanism (no text or symbols)natural_image
Mechanical assembly diagram showing internal components and a magnified inset of a mechanical component (no text or labels)natural_image
Technical line drawing of a mechanical assembly with a hand operating a tool (no text or symbols present)natural_image
Technical illustration of a mechanical assembly with an inset close-up showing a component (no text or symbols present)natural_image
Technical line drawing of a mechanical assembly with a hand operating a tool, showing no text or symbols.ITALIANO 94
Pulizia esterna
text_image
Technical diagram of a refrigerator with numbered parts labeled 1 to 6
natural_image
3D technical illustration of a mechanical assembly with grid-like components and a black arrow pointing to a component (no text or symbols)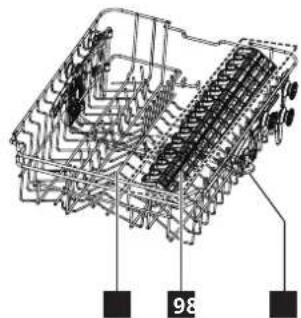
natural_image
Technical line drawing of a mechanical assembly with no visible text or symbols
natural_image
Line drawing of a multi-tiered bicycle basket structure with no text or symbols
natural_image
Simple line drawing of a funnel with a hanging weight, no text or symbols presentnatural_image
Line drawing of a device with a circular inset showing a magnified view of a component (no text or symbols)Find beholderen til filtersalt i bunden.
2
natural_image
Illustration of a hand pressing down on a gear-shaped component with an arrow indicating press direction (no text or symbols)Fjern låget til beholderen til filtersalt.
34
natural_image
Illustration of a hand pouring liquid from a container into a pot (no text or symbols)natural_image
Line drawing of an open refrigerator with a circular base and lid (no text or symbols)natural_image
Line drawing of a device with a screen and indicator lights, showing a right-angle rotation arrow (no text or symbols)natural_image
Line drawing of a hand inserting a device into a vertical panel (no text or symbols)natural_image
Line drawing of a hand pressing a button on a device (no text or symbols)natural_image
Line drawing of a refrigerator with an open lid and base tray (no text or symbols)text_image
Diagram showing a device with light rays interacting with a screen, and a magnified view of the screen's internal structure.natural_image
Illustration of a kitchen appliance with a grater pouring powder into a tray, no text or symbols presentnatural_image
Technical line drawing of a mechanical assembly with a central component and layered base (no text or symbols)4
natural_image
Diagram of a device with a tray, fan, and indicator lights (no text or symbols)natural_image
Line drawing of hands assembling a mechanical component (no text or symbols)text_image
Technical diagram showing mechanical assembly with labeled components and a hand holding a tool, including magnified insets.natural_image
Two technical line drawings of a mechanical component, showing a left-side rotation and a right-side assembly (no text or symbols)natural_image
Two technical line drawings of a mechanical assembly, showing a side-by-side assembly with arrows indicating motion (no text or symbols present)Indstillelig underkurv
Stavindsatserne i underkurven kan klappes ned for at give plads til større service.
- Klap stavindsatserne i underkurven ned ved at skubbe dem.
natural_image
Line drawing of a bicycle rear frame structure with no text or symbolsnatural_image
Technical diagram of a mechanical assembly with internal components and directional arrows (no text or labels)natural_image
Diagram showing a mechanical device with a magnified inset illustrating internal components (no text or symbols present)natural_image
Diagram of a mechanical or architectural component with directional arrows and a magnified inset showing internal structure (no text or symbols)natural_image
Technical diagram of a mechanical assembly with a magnified inset showing a disassembly or disassembly process (no text or labels present)natural_image
Illustration of a hand using a tool to adjust or install a mechanical component on a tray (no text or symbols visible)natural_image
Technical diagram of a mechanical assembly with an inset close-up showing a component detail (no text or symbols present)natural_image
Technical line drawing of a mechanical assembly with a hand operating a tool (no text or symbols present)Udvendig rengøring
text_image
Safety warning symbols and component illustrations: triangular warning triangle, lightning bolt, and pipe fitting with a valve.⚠Advarsel!Farlig spenning.
text_image
Technical diagram of a refrigerator with numbered parts labeled 1 to 6
natural_image
3D technical illustration of a mechanical assembly with grid-like components and a black arrow pointing to a component (no text or symbols)
natural_image
Technical line drawing of a mechanical assembly with no visible text or symbols
natural_image
Line drawing of a multi-tiered bicycle basket structure (no text or symbols)
natural_image
Simple line drawing of a funnel with a hanging weight, no text or symbols present1 Saltbeholder
2 Oppvaskmiddeldispenser ∅vre kurv
3 Nedre sprayarm Kopphylle
4 Filtre
5 Skyllemiddeldispenser
6 Strømetikett Salttrakt
7 Bestikkbrett


10 ∅vre sprayarm
11 Nedre kurv

Kontrollpanel

text_image
1 2 3 4 5 8:88 6 7 8 9 7 PROGRAMSnatural_image
Line drawing of a device with a magnified inset showing internal components (no text or symbols)Finn saltbeholderen nederst.
2

natural_image
Illustration of a hand pressing down on a gear and then pressing into a bowl with an arrow indicating rotation (no text or symbols)natural_image
Illustration of a hand pouring liquid from a container into a bowl (no text or symbols)natural_image
Line drawing of a laboratory apparatus with a circular component inside a rectangular chamber (no text or symbols)Finn skyllemiddel- dispenseren på innsiden av døren.
2
natural_image
Simple line drawing of a device with a screen and indicator lights, no text or symbols present.Åpne dekselet til skyllemiddel- beholderen.
34
natural_image
Line drawing of a hand inserting a device into a vertical panel (no text or symbols)Fyll skyllemiddel- beholderen med skyllemiddel. Ikke overfyll.

natural_image
Line drawing of a hand pressing a button on a device (no text or symbols)Lukk dekselet til skyllemiddel- beholderen.
Daglig bruk
natural_image
Line drawing of a laboratory apparatus with a circular component on a base (no text or symbols)text_image
Diagram showing a device with light rays passing through a screen, and a magnified view of the screen displaying light rays.natural_image
Diagram of a kitchen appliance with a grater pouring liquid into a tray, no text or symbols presentnatural_image
Technical line drawing of a mechanical assembly with a tool and base plate (no text or symbols)4

natural_image
Diagram of a device with a screen and indicator lights, no text or symbols presentnatural_image
Line drawing of hands assembling a mechanical component (no text or symbols)natural_image
Technical line drawing of a mechanical assembly with two circular insets showing hand positioning and component details (no text or symbols)Justerbart koppstativ
natural_image
Two technical line drawings of a mechanical component, showing assembly or assembly process (no text or symbols)natural_image
Two mechanical assembly diagrams showing a grid-like structure before and after rotation, with no visible text or symbols.Justerbar nedre kurv
natural_image
Line drawing of a car chassis frame with no text or symbolsnatural_image
Technical diagram of a mechanical assembly with internal components and directional arrows (no text or labels)natural_image
Diagram showing a mechanical device with a magnified inset illustrating internal components (no text or symbols present)natural_image
Diagram showing mechanical components with arrows indicating motion, including a magnified inset of a gear or cam mechanism (no text or symbols present)natural_image
Mechanical assembly diagram showing internal components and a magnified inset of a mechanical component (no text or labels)natural_image
Illustration of a hand using a tool to adjust or install a mechanical component on a tray (no text or symbols visible)natural_image
Technical diagram of an internal mechanical assembly with a magnified inset showing a component detail (no text or labels)natural_image
Illustration of a hand using a tool to adjust or install a mechanical component (no text or symbols visible)Ytre rengjøring
text_image
Safety warning symbols and three labeled diagrams: triangular warning triangle, falling lightning bolt, and two hand tools with different symbols.text_image
Diagram of a refrigerator interior with numbered parts labeled 1 to 6
natural_image
3D technical illustration of a mechanical assembly with grid-like components and a black indicator symbol (no text or labels)
natural_image
Technical line drawing of a mechanical assembly with no visible text or symbols
natural_image
Line drawing of a multi-tiered bicycle basket structure with no text or symbols
natural_image
Simple line drawing of a funnel with a hanging weight, no text or symbols presentnatural_image
Line drawing of a device with a magnified inset showing internal components (no text or symbols)natural_image
Illustration of a hand pressing down on a gear-shaped component with an arrow indicating press direction (no text or symbols)natural_image
Illustration of a hand pouring liquid from a container into a bowl (no text or symbols)natural_image
Line drawing of an open refrigerator with a circular base and lid (no text or symbols)natural_image
Line drawing of a device with a screen and indicator lights, showing a left-side door and a right-side door (no text or symbols)natural_image
Line drawing of a hand inserting a component into a vertical panel (no text or symbols)natural_image
Line drawing of a hand pressing a button on a device (no text or symbols)natural_image
Technical line drawing of a mechanical assembly with a central component and base plate (no text or symbols)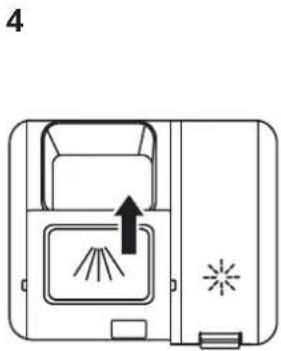
natural_image
Diagram of a device with a tray, fan, and indicator lights (no text or symbols)natural_image
Line drawing of hands assembling a mechanical component (no text or symbols)text_image
Technical diagram showing mechanical assembly with labeled components and a magnified inset highlighting a specific component.natural_image
Two 3D wireframe diagrams showing mechanical components before and after assembly, with no visible text or symbols.- Sulje kuppiteline painamalla se alas.
natural_image
Diagram showing two stages of a mechanical assembly or processing process, with no visible text or symbols.Säädettävä alakori
natural_image
Line drawing of a bicycle rear frame structure with no text or symbolsnatural_image
Technical diagram of a mechanical assembly with internal components and directional arrows (no text or labels)natural_image
Diagram showing a device with a magnified inset illustrating the internal mechanism of a mechanical or electrical component (no text or symbols present)natural_image
Diagram showing mechanical components with arrows indicating motion, including a magnified inset of a gear or cam mechanism (no text or symbols present)natural_image
Technical diagram of a mechanical assembly with an inset showing a machining process (no text or labels)natural_image
Technical line drawing of a mechanical assembly with a hand operating a tool (no text or symbols present)natural_image
Technical diagram of a mechanical assembly with an inset close-up showing a component detail (no text or symbols present)natural_image
Technical line drawing of a mechanical assembly with a hand operating a tool, showing no text or symbols.text_image
Safety warning symbols and corresponding icons: triangular warning triangle, lightning bolt, and plug device with warning labels.⚠ Varning! Farlig spänning.
text_image
Technical diagram of a refrigerator with numbered parts labeled 1 to 6
natural_image
3D technical illustration of a mechanical assembly with grid-like components and a black indicator symbol (no text or labels)
natural_image
Technical line drawing of a mechanical assembly with no visible text or symbols
natural_image
Line drawing of a multi-tiered bicycle basket structure (no text or symbols)
natural_image
Simple line drawing of a funnel with a hanging weight, no text or symbols presentnatural_image
Line drawing of a device with a circular inset showing internal components (no text or symbols)natural_image
Illustration of a hand pressing down on a gear with an arrow indicating press direction (no text or symbols)natural_image
Illustration of a hand pouring liquid from a container into a bowl (no text or symbols)natural_image
Line drawing of an open refrigerator with a circular button on the base (no text or symbols)2

natural_image
Simple line drawing of a device with a screen and directional arrow (no text or symbols)natural_image
Line drawing of a hand inserting a small component into a device (no text or symbols)
natural_image
Line drawing of a hand pressing a button on a device (no text or symbols)natural_image
Technical line drawing of a mechanical assembly with a central component and base plate (no text or symbols)
natural_image
Diagram of a device with a screen and directional arrow, no text or symbols presentnatural_image
Line drawing of hands assembling a mechanical component (no text or symbols)text_image
Technical diagram showing mechanical assembly with labeled components and a hand holding a tool, including magnified insets highlighting specific parts.natural_image
Two technical line drawings of a mechanical component, one showing rotational motion and the other showing structural deformation (no text or symbols)natural_image
Diagram showing a mechanical assembly before and after transformation, with no visible text or symbols.Justerbar nedre korg
natural_image
Line drawing of a car chassis frame with no text or symbolsnatural_image
Technical diagram of a mechanical assembly with internal components and directional arrows (no text or labels)natural_image
Diagram showing a mechanical device with a magnified inset illustrating internal components (no text or symbols present)natural_image
Diagram showing mechanical components with arrows indicating motion, including a magnified inset of a gear or cam mechanism (no text or symbols present)natural_image
Mechanical assembly diagram showing internal components and a magnified inset of a mechanical component (no text or labels)natural_image
Technical line drawing of a mechanical assembly with a hand operating a tool (no text or symbols present)natural_image
Technical diagram of a mechanical assembly with an inset close-up showing a component detail (no text or symbols present)natural_image
Technical line drawing of a mechanical assembly with a hand operating a tool, showing no text or symbols.Utvändig rengöring
text_image
Safety warning symbols and corresponding diagram showing warning, lightning bolt, and pipe fittingtext_image
Diagram of a 3D printer with labeled parts including base, casing, and accessories
natural_image
Technical line drawing of a mechanical assembly with grid-like components and a black arrow pointing to a component (no text or symbols present)
natural_image
Technical line drawing of a mechanical component with no visible text or symbols
natural_image
Technical line drawing of a multi-tiered bicycle basket structure (no text or symbols)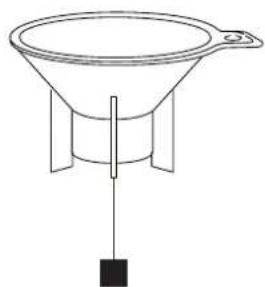
natural_image
Simple line drawing of a funnel with a hanging weight, no text or symbols present1 Recipiente de sal Suporte de talheres
2 Dispensador de detergente
3 Braço borrifador inferior Suporte de copos
4 Filtros
5 Dispensador de abrilhantador
6 Placa de características
8 Cesto superior
natural_image
Line drawing of a device with a magnified inset showing internal components (no text or symbols)Identifique o recipiente de sal na parte inferior.
2
natural_image
Illustration of a hand pressing down on a circular component with an arrow indicating press or adjustment (no text or symbols)Remova a tampa do recipiente de sal.
34
natural_image
Illustration of a hand pouring liquid from a container into a stack of plates (no text or symbols)natural_image
Illustration of a hand pressing down on a mechanical component with an arrow indicating rotation (no text or symbols)Aperte firmemente a tampa do recipiente de sal.
△
natural_image
Line drawing of a box with an open lid and a circular inset showing a small object inside (no text or symbols)2

natural_image
Line drawing of a device with a screen and directional arrow (no text or symbols)Identifique o dispensador de abrilhantador no interior da porta.
natural_image
Line drawing of a hand inserting a device into a vertical panel (no text or symbols)
natural_image
Line drawing of a hand pressing a button on a device (no text or symbols)natural_image
Line drawing of a laboratory apparatus with a circular component on a base (no text or symbols)Identifique o dispensador de detergente no interior da porta.
2
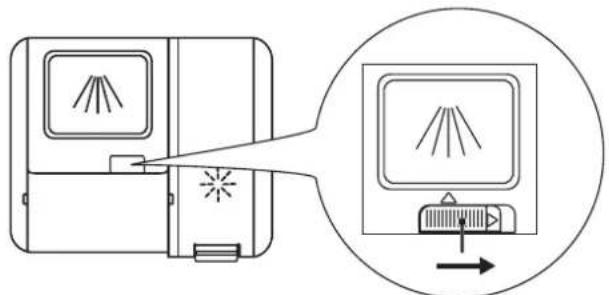
text_image
Diagram showing a device with light rays interacting with a screen, and a magnified view of the screen's internal structure.natural_image
Illustration of a kitchen appliance with a griddle being poured into a tray, no text or symbols presentnatural_image
Technical line drawing of a mechanical assembly with a tool and base plate (no text or symbols)4
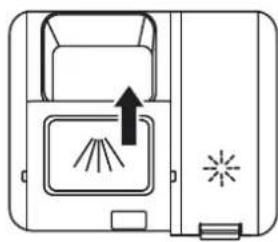
natural_image
Diagram of a device with a tray, fan, and indicator lights (no text or symbols)natural_image
Line drawing of hands assembling a mechanical component with gears and rods (no text or symbols)natural_image
Technical illustration of a mechanical assembly with two circular insets showing hand positioning and component details (no text or symbols)natural_image
Diagram showing two mechanical assembly stages: one with rotational arrow and the other with linear arrangement (no text or symbols)natural_image
Diagram showing two mechanical assembly stages with arrows indicating transformation (no text or symbols)natural_image
Line drawing of a car chassis frame structure (no text or symbols)natural_image
Technical diagram of a mechanical assembly with internal components and directional arrows (no text or labels)natural_image
Diagram showing a device with a magnified inset illustrating mechanical components (no text or symbols present)natural_image
Diagram showing mechanical components with arrows indicating motion, including a magnified inset of a gear or cam mechanism (no text or symbols present)natural_image
Mechanical assembly diagram showing internal components and a magnified inset of a mechanical component (no text or labels)natural_image
Illustration of a hand using a tool to adjust or install a mechanical component on a tray (no text or symbols visible)natural_image
Technical diagram of a mechanical assembly with internal components and an inset view showing a close-up of a component (no text or labels present)natural_image
Technical line drawing of a mechanical assembly with a hand operating a tool, showing no text or symbols.Limpeza exterior
text_image
Safety warning symbols and three labeled diagrams: triangular warning triangle, lightning bolt, and two pipe fittings with different shapes.text_image
Diagram of a refrigerator interior with numbered parts labeled 1 to 6
natural_image
3D technical illustration of a mechanical assembly with grid-like components and a black arrow pointing to a component (no text or symbols)
natural_image
Technical line drawing of a mechanical assembly with no visible text or symbols
natural_image
Line drawing of a multi-tiered bicycle basket structure with no text or symbols
natural_image
Simple line drawing of a funnel with a hanging weight, no text or symbols presentnatural_image
Line drawing of a refrigerator with an open lid and a circular inset showing a small object (no text or symbols)2

natural_image
Illustration of a hand pressing down on a circular component with an arrow indicating press or adjustment (no text or symbols)natural_image
Illustration of a hand pouring liquid from a container into a stack of plates (no text or symbols)
text_image
SALnatural_image
Illustration of a hand pressing down on a mechanical component with an arrow indicating rotation (no text or symbols)natural_image
Line drawing of an open refrigerator with a circular base and lid (no text or symbols)2
natural_image
Line drawing of a device with a screen and starburst symbol, no text or labels presentnatural_image
Line drawing of a hand inserting a device into a vertical panel (no text or symbols)
natural_image
Line drawing of a hand pressing a button on a device (no text or symbols)natural_image
Technical line drawing of a mechanical assembly with a base and clamping tool (no text or symbols)
natural_image
Diagram of a device with a tray, fan, and indicator lights (no text or symbols)natural_image
Line drawing of hands assembling or maintaining a mechanical component inside a container (no text or symbols)natural_image
Technical illustration of a mechanical assembly with two circular insets showing components (no text or symbols)natural_image
Two 3D wireframe diagrams showing structural components before and after rotation, with no visible text or symbols.natural_image
Diagram showing two views of a multi-wheeled container or rack structure, one with directional arrows indicating movement (no text or symbols present)natural_image
Line drawing of a wireframe container or trailer structure with no text or symbolsnatural_image
Technical diagram of a mechanical assembly with internal components and directional arrows (no text or labels)natural_image
Diagram showing a mechanical device with a magnified inset illustrating internal components (no text or symbols present)natural_image
Mechanical diagram showing a gear or cam mechanism with directional arrows and a magnified inset of a gear path (no text or symbols)natural_image
Mechanical assembly diagram showing internal components and a close-up of a component (no text or symbols visible)natural_image
Illustration of a hand using a pliers to adjust or install a mechanical component (no text or symbols visible)natural_image
Technical diagram of a mechanical assembly with internal components and an inset view showing a component (no text or labels)natural_image
Technical line drawing of a mechanical assembly with a hand operating a tool, showing no text or symbols.Limpieza exterior
natural_image
Two technical line drawings of a faucet and a mechanical component (no text or symbols)text_image
Diagram of a refrigerator interior with numbered parts labeled 1 to 6
natural_image
3D technical illustration of a mechanical assembly with grid-like components and a black arrow pointing to a component (no text or symbols)
natural_image
Technical line drawing of a mechanical assembly with no visible text or symbols
natural_image
Line drawing of a multi-tiered bicycle basket structure with no text or symbols
natural_image
Simple line drawing of a funnel with a hanging weight, no text or symbols presentnatural_image
Line drawing of a device with a circular inset showing internal components (no text or symbols)natural_image
Illustration of a hand pressing down on a gear and then pressing into a bowl with an arrow indicating rotation (no text or symbols)natural_image
Illustration of a hand pouring liquid from a container into a pot (no text or symbols)natural_image
Line drawing of a mechanical device with a circular component on its side (no text or symbols)natural_image
Simple line drawing of a device with a screen and indicator lights, no text or symbols present.natural_image
Line drawing of a device with a handle inserting into a socket (no text or symbols)natural_image
Line drawing of a hand pressing a button on a device (no text or symbols)natural_image
Line drawing of a refrigerator with an open lid and base tray (no text or symbols)natural_image
Diagram showing a device with light rays interacting with a screen, and a magnified view of the screen displaying light rays (no text or symbols present)natural_image
Line drawing of a kitchen appliance with a grater pouring powder into a tray (no text or symbols)natural_image
Diagram of a device with a tray, fan, and indicator lights (no text or symbols)natural_image
Technical line drawing of a mechanical assembly with a central component and base plate (no text or symbols)natural_image
Technical line drawing of a mechanical assembly with hands operating components (no text or symbols)natural_image
Technical illustration of a mechanical assembly with two circular insets showing hand and gear components (no text or symbols)natural_image
Two technical line drawings of a mechanical component before and after assembly, showing internal structure and rotation (no text or symbols)natural_image
Diagram showing two mechanical assembly stages: one with a rack structure and arrow indicating rotation, the other with a grid-like structure (no text or symbols)natural_image
Line drawing of a bicycle rear frame structure with guide rails (no text or symbols)natural_image
Technical diagram of a mechanical assembly with internal components and directional arrows (no text or labels)natural_image
Diagram showing a mechanical device with a magnified inset illustrating the internal components (no text or symbols present)natural_image
Diagram of a mechanical or architectural component with directional arrows and a magnified inset showing internal structure (no text or symbols)natural_image
Technical diagram of a mechanical assembly with internal components and a magnified inset showing a component detail (no text or labels)natural_image
Technical line drawing of a mechanical assembly with a hand operating a tool (no text or symbols present)natural_image
Technical diagram of a mechanical assembly with an inset close-up showing a component detail (no text or labels)natural_image
Illustration of a hand using a tool to adjust or install a mechanical component (no text or symbols visible)text_image
Safety warning symbols including warning triangle, lightning bolt, and pipe fitting with corresponding illustrationstext_image
Technical diagram of a refrigerator with numbered parts labeled 1 to 6
natural_image
3D technical illustration of a mechanical assembly with grid-like components and a black indicator symbol (no text or labels)
natural_image
Technical line drawing of a mechanical assembly with no visible text or symbols
natural_image
Line drawing of a multi-tiered bicycle basket structure with no text or symbols
natural_image
Simple line drawing of a funnel with a hanging weight, no text or symbols presentnatural_image
Line drawing of a device with a magnified inset showing internal components (no text or symbols)natural_image
Illustration of a hand pressing down on a circular component with an arrow indicating rotation (no text or symbols)natural_image
Simple line drawing of a hand pouring liquid from a container into a container (no text or symbols)natural_image
Illustration of a hand pressing down on a textured surface with a curved arrow indicating rotation (no text or symbols)natural_image
Line drawing of a box with an open lid and a circular object inside (no text or symbols)2

natural_image
Simple line drawing of a device with a screen and indicator lights, no text or symbols present.natural_image
Line drawing of a hand inserting a plug into a device with a handle (no text or symbols)
natural_image
Line drawing of a hand pressing down on a device with a screen and indicator light (no text or symbols)natural_image
Line drawing of a laboratory apparatus with a circular component on a base (no text or symbols)text_image
Diagram showing a device with light rays interacting with a screen, and a magnified view of the screen's internal structure.natural_image
Illustration of a kitchen appliance with a grater pouring powder into a tray, no text or symbols presentnatural_image
Technical line drawing of a mechanical assembly with a central component and layered base (no text or symbols)4
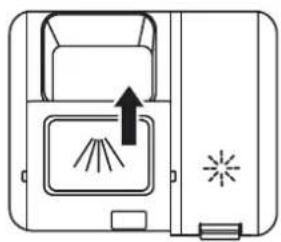
natural_image
Diagram of a device with a screen and indicator lights, no text or symbols presentnatural_image
Line drawing of hands assembling or handling a mechanical component inside a container (no text or symbols visible)natural_image
Technical illustration of a mechanical assembly with hand and gear components, no visible text or symbolsVerstelbaar kopjesrek
natural_image
Two 3D wireframe models of a mechanical assembly, showing structural deformation before and after (no text or symbols)natural_image
Diagram showing two views of a multi-wheeled cart with structural details, one being rotated and the other tilted (no text or symbols)natural_image
Line drawing of a bicycle rear frame structure with no text or symbolsnatural_image
Technical diagram of a mechanical assembly with internal components and directional arrows (no text or labels)natural_image
Diagram showing a mechanical device with a magnified inset illustrating internal components (no text or symbols present)natural_image
Diagram showing mechanical components with directional arrows and a magnified inset highlighting a specific section (no text or symbols present)natural_image
Mechanical assembly diagram showing internal components and a magnified view of a mechanical component (no text or labels)natural_image
Illustration of a hand using a tool to adjust or install a mechanical component on a tray (no text or symbols visible)natural_image
Technical diagram of a mechanical assembly with an inset showing a close-up of a component (no text or symbols present)natural_image
Technical line drawing of a mechanical assembly with a hand operating a tool (no text or symbols)Externe reiniging
text_image
Safety warning symbols and corresponding diagram showing warning, lightning bolt, and pipe installationtext_image
Technical diagram of a refrigerator with numbered parts labeled 1 to 6
natural_image
3D technical illustration of a mechanical assembly with grid-like components and a black indicator symbol (no text or labels)
natural_image
Technical line drawing of a mechanical assembly with no visible text or symbols
natural_image
Line drawing of a multi-tiered bicycle basket structure with no text or symbols
natural_image
Simple line drawing of a funnel with a hanging weight, no text or symbols presentnatural_image
Line drawing of a device with a magnified inset showing a circular component (no text or symbols)natural_image
Illustration of a hand pressing down on a gear-shaped component with an arrow indicating press direction (no text or symbols)natural_image
Hand pouring liquid from a container into a pot (no text or symbols visible)natural_image
Line drawing of a refrigerator with an open lid and base (no text or symbols)natural_image
Line drawing of a device with a screen and indicator lights, showing a right-hand rule for rotation (no text or symbols)natural_image
Line drawing of a hand inserting a device into a vertical panel (no text or symbols)natural_image
Line drawing of a hand pressing a button on a device (no text or symbols)natural_image
Line drawing of a mechanical device with a circular component on its side (no text or symbols)text_image
Diagram showing a device with light rays interacting with a screen, and a magnified view of the screen's internal structure.natural_image
Illustration of a kitchen appliance with a grater pouring liquid into a tray, no text or symbols presentnatural_image
Technical line drawing of a mechanical assembly with a tool and base plate (no text or symbols)4

natural_image
Diagram of a device with a tray, fan, and indicator light (no text or symbols)natural_image
Line drawing of hands assembling a mechanical component (no text or symbols)natural_image
Technical illustration of a mechanical assembly with two circular insets showing internal components (no text or symbols present)natural_image
Two mechanical assembly diagrams showing a grid-like structure before and after rotation, with no visible text or symbols.natural_image
Two mechanical assembly diagrams showing a rack-mounted frame before and after rotation, with no visible text or symbols.natural_image
Line drawing of a car chassis frame with no text or symbolsnatural_image
Technical diagram of a mechanical assembly with internal components and directional arrows (no text or labels)natural_image
Diagram showing a mechanical device with a magnified inset illustrating the internal components (no text or symbols present)natural_image
Diagram showing mechanical components with arrows indicating motion, including a magnified inset of a gear or cam mechanism (no text or symbols present)natural_image
Mechanical assembly diagram showing internal components and a magnified view of a tool interacting with a motor (no text or labels)natural_image
Technical line drawing of a mechanical assembly with a hand operating a tool (no text or symbols present)natural_image
Technical diagram of an internal combustion engine assembly with a magnified inset showing the component detail (no text or labels)natural_image
Technical line drawing of a mechanical assembly with a hand operating a tool, showing no text or symbols.natural_image
Two technical line drawings of a faucet and a mechanical component (no text or symbols)text_image
Technical diagram of a refrigerator with numbered parts labeled 1 to 6
natural_image
3D technical illustration of a mechanical assembly with grid-like components and a black arrow pointing to a component (no text or symbols)
natural_image
Technical line drawing of a mechanical assembly with no visible text or symbols
natural_image
Line drawing of a multi-tiered bicycle basket structure with no text or symbols
natural_image
Simple line drawing of a funnel with a hanging weight, no text or symbols presentnatural_image
Line drawing of a mechanical device with a circular inset showing internal components (no text or symbols)natural_image
Diagram showing a hand pressing down on a gear and then moving a circular component with an arrow indicating rotation (no text or symbols)natural_image
Line drawing of a hand pouring liquid from a container onto a plate (no text or symbols)natural_image
Line drawing of an open refrigerator with a circular button on the side (no text or symbols)2
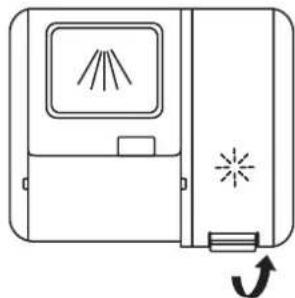
natural_image
Simple line drawing of a device with a screen and directional arrow (no text or symbols)natural_image
Line drawing of a hand inserting a device into a vertical panel (no text or symbols)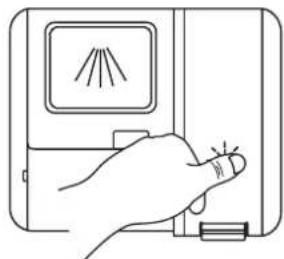
natural_image
Line drawing of a hand pressing a button on a device (no text or symbols)natural_image
Line drawing of a refrigerator with an open lid and base tray (no text or symbols)text_image
Diagram showing a device with light rays interacting with a screen, and a magnified view of the screen's internal structure.natural_image
Illustration of a kitchen appliance with a grater pouring powder into a tray, no text or symbols presentnatural_image
Technical line drawing of a mechanical assembly with a central component and layered base (no text or symbols)4

natural_image
Diagram of a device with a screen and indicator lights, no text or symbols presentnatural_image
Line drawing of hands assembling a mechanical component (no text or symbols)natural_image
Technical illustration of a mechanical assembly with two circular insets showing hand and tool views (no text or symbols)natural_image
Two 3D wireframe diagrams showing mechanical components before and after rotation, with no visible text or symbols.natural_image
Diagram showing two views of a mechanical component before and after assembly, with no visible text or symbols.natural_image
Line drawing of a car chassis frame structure (no text or symbols)natural_image
Technical line drawing of a mechanical assembly with no visible text or symbolsnatural_image
Diagram showing a device with a magnified inset illustrating the internal components of a mechanical assembly (no text or symbols present)natural_image
Diagram showing mechanical components with arrows indicating motion, including a magnified inset of a gear or cam mechanism (no text or symbols present)natural_image
Mechanical assembly diagram showing internal components and a magnified inset of a mechanical component (no text or labels)natural_image
Illustration of a hand using a tool to adjust or install a mechanical component (no text or symbols visible)natural_image
Technical diagram of an industrial machine with internal components and a magnified inset showing a mechanical assembly (no text or labels)natural_image
Technical line drawing of a mechanical assembly with a hand operating a tool (no text or symbols)Czyszczenie obudowy
natural_image
Illustration of a faucet and a valve assembly (no text or symbols)text_image
Technical diagram of a refrigerator interior with numbered parts labeled 1 to 6
natural_image
3D technical illustration of a mechanical assembly with grid-like components and a black arrow pointing to a component (no text or symbols)
natural_image
Technical line drawing of a mechanical assembly with no visible text or symbols
natural_image
Line drawing of a multi-tiered bicycle basket structure with no text or symbols
natural_image
Simple line drawing of a funnel with a hanging weight, no text or symbols presentnatural_image
Line drawing of a mechanical device with a circular inset showing internal components (no text or symbols)natural_image
Illustration of a hand pressing down on a gear and then pressing into a circular component (no text or symbols)natural_image
Illustration of a hand pouring liquid from a container into a pot (no text or symbols)natural_image
Line drawing of a mechanical device with a circular component on its side (no text or symbols)2
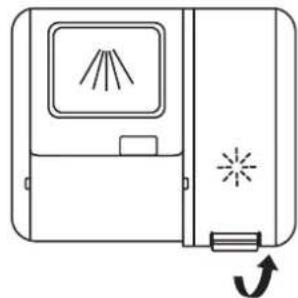
natural_image
Simple line drawing of a device with a screen and directional arrow (no text or symbols)natural_image
Line drawing of a hand inserting a small component into a device (no text or symbols)
natural_image
Line drawing of a hand pressing a button on a device (no text or symbols)natural_image
Line drawing of a mechanical device with a circular component on its side (no text or symbols)natural_image
Diagram showing a device with light rays interacting with a screen, and a magnified view of the screen displaying light rays (no text or symbols present)natural_image
Illustration of a kitchen appliance with a grater pouring liquid into a tray, no text or symbols present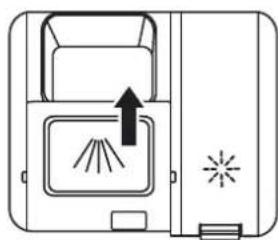
natural_image
Diagram of a device with a tray, fan, and indicator lights (no text or symbols)natural_image
Technical line drawing of a mechanical assembly with a central component and base plate (no text or symbols)natural_image
Line drawing of hands assembling or inspecting a mechanical component (no text or symbols visible)natural_image
Technical illustration of a mechanical assembly with two circular insets showing hand positioning and component details (no text or symbols)natural_image
Diagram showing two mechanical assembly stages: one with a grid-like structure and rotation arrow, the other with a multi-layered frame (no text or symbols)natural_image
Diagram showing two mechanical assembly stages: one with a rotating shaft and arrow, the other with a straight rod and roller mechanism (no text or symbols)natural_image
Line drawing of a wireframe car chassis with wheels and structural ribs (no text or symbols)natural_image
Technical diagram of a mechanical assembly with internal components and directional arrows (no text or labels)natural_image
Diagram showing a mechanical device with a magnified inset illustrating the internal components (no text or symbols present)natural_image
Technical diagram showing mechanical components with directional arrows and a magnified inset (no text or labels)natural_image
Technical diagram of a mechanical assembly with internal components and a magnified inset showing a detail (no text or labels)natural_image
Mechanical assembly diagram showing a hand operating a gear and tool on a tray (no text or symbols)natural_image
Technical diagram of a mechanical assembly with an inset showing a close-up of a component (no text or labels visible)natural_image
Technical line drawing of a mechanical assembly with a hand operating a tool (no text or symbols)text_image
Safety warning symbols including warning triangle, lightning bolt, and pipe fittings with corresponding illustrationstext_image
Diagram of a refrigerator interior with numbered parts labeled 1 to 6
natural_image
3D technical illustration of a mechanical assembly with grid-like components and a black arrow pointing to a component (no text or symbols)
natural_image
Technical line drawing of a mechanical assembly with no visible text or symbols
natural_image
Line drawing of a multi-tiered bicycle basket structure with no text or symbols
natural_image
Simple line drawing of a funnel with a hanging weight, no text or symbols presentnatural_image
Line drawing of a device with a circular inset showing a magnified view of a component (no text or symbols)natural_image
Illustration of a hand pressing down on a gear-shaped component with an arrow indicating press or rotation (no text or symbols)Odstráňte uzáver nádoby na sol.
34
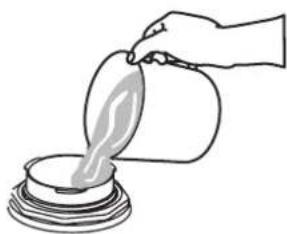
natural_image
Illustration of a hand pouring liquid from a container into a pot (no text or symbols)natural_image
Line drawing of an open refrigerator with a circular base and lid (no text or symbols)natural_image
Simple line drawing of a device with a screen and starburst symbol, no text or labels presentOtvorte kryt nádoby na leštidlo.
34

natural_image
Line drawing of a hand inserting a device into a vertical panel (no text or symbols)natural_image
Line drawing of a hand pressing a button on a device (no text or symbols)natural_image
Line drawing of a laboratory apparatus with a circular component on a base (no text or symbols)text_image
Diagram showing a device with light rays interacting with a screen, and a magnified view of the screen's internal structure.natural_image
Illustration of a kitchen appliance with a grater pouring powder into a tray, no text or symbols presentnatural_image
Technical line drawing of a mechanical assembly with a tool and base plate (no text or symbols)4
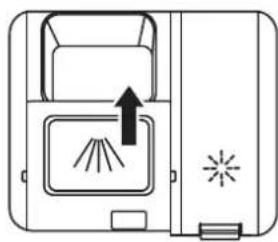
natural_image
Diagram of a device with a tray, fan, and indicator light (no text or symbols)natural_image
Line drawing of hands assembling a mechanical component (no text or symbols)text_image
Technical diagram showing mechanical assembly with labeled components and a hand holding a tool, including magnified insets highlighting specific parts.natural_image
Two technical line drawings of a multi-layered mechanical component, showing assembly and disassembly (no text or symbols)natural_image
Two mechanical assembly diagrams showing a grid-like structure before and after rotation, with no visible text or symbols.natural_image
Line drawing of a car chassis frame structure (no text or symbols)natural_image
Technical diagram of a mechanical assembly with internal components and directional arrows (no text or labels)natural_image
Diagram showing a device with a magnified inset illustrating mechanical components (no text or symbols present)natural_image
Diagram showing mechanical components with arrows indicating motion, including a magnified inset of a gear or cam mechanism (no text or symbols present)natural_image
Mechanical assembly diagram showing internal components and a magnified inset of a mechanical component (no text or labels)- Ak chcete odpojit' dolné ostrekovacie rameno od dolnej časti spotrebiča, jednoducho ho potiahnite nahor.
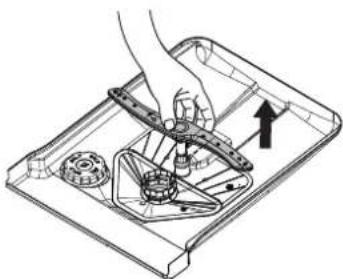
natural_image
Illustration of a hand using a tool to adjust or install a mechanical component on a tray (no text or symbols visible)natural_image
Technical diagram of a mechanical assembly with an inset close-up showing a component detail (no text or symbols present)natural_image
Illustration of a hand using a tool to adjust or install a mechanical component (no text or symbols visible)Vonkajšie čistenie
text_image
Technical diagram of a refrigerator interior with numbered parts labeled 1 to 6
natural_image
3D technical illustration of a mechanical assembly with grid-like components and a black arrow pointing to a component (no text or symbols)
natural_image
Technical line drawing of a mechanical assembly with no visible text or symbols
natural_image
Line drawing of a multi-tiered bicycle basket structure with no text or symbols
natural_image
Simple line drawing of a funnel with a hanging weight, no text or symbols presentnatural_image
Line drawing of a refrigerator with an open lid and base, no text or symbols presentnatural_image
Illustration of a hand pressing down on a gear-shaped component with an arrow indicating press direction (no text or symbols)Nuimkite druskos talpyklos dangtelj.
34
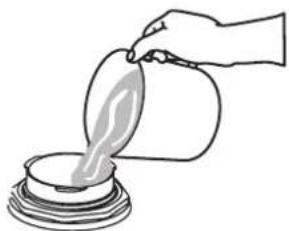
natural_image
Illustration of a hand pouring liquid from a container into a bowl (no text or symbols)Pripildykite druskos talpykla vandeniu iki maksimalaus lygio.
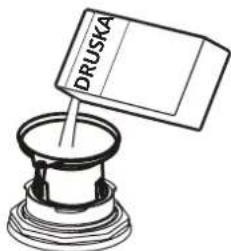
text_image
DRUSKAnatural_image
Line drawing of an open refrigerator with a circular base and lid (no text or symbols)natural_image
Line drawing of a device with a screen and directional arrow (no text or symbols)Pakelkite skalavimo skysčio talpyklos dangtelj.
34
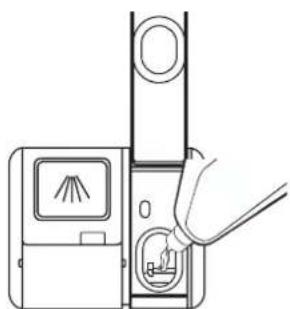
natural_image
Line drawing of a hand inserting a device into a vertical panel (no text or symbols)natural_image
Line drawing of a hand pressing a button on a device (no text or symbols)natural_image
Line drawing of a laboratory apparatus with a circular component on a base (no text or symbols)text_image
Diagram showing a device with light rays interacting with a screen, and a magnified view of the screen's internal structure.natural_image
Diagram of a kitchen appliance with a grater pouring liquid into a tray, no text or symbols presentnatural_image
Technical line drawing of a mechanical assembly with a central component and layered base (no text or symbols)4
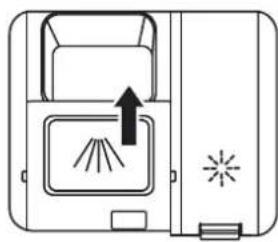
natural_image
Diagram of a device with a screen and indicator lights, no text or symbols presentUždarykite dangtelj pastumdami ji j priekj, tada – žemyn.
natural_image
Line drawing of hands assembling a mechanical component (no text or symbols)natural_image
Technical illustration of a mechanical assembly with two circular insets showing internal components (no text or symbols)natural_image
Two mechanical assembly diagrams showing a grid-like structure before and after transformation (no text or symbols)natural_image
Diagram showing a mechanical assembly before and after transformation, with no visible text or symbols.natural_image
Line drawing of a car chassis frame with no text or symbolsnatural_image
Technical diagram of a mechanical assembly with internal components and directional arrows (no text or labels)natural_image
Diagram showing a device with a magnified inset illustrating the internal mechanism of a mechanical or electrical component (no text or symbols present)natural_image
Diagram showing mechanical components with arrows indicating motion, including a magnified inset of a gear or cam mechanism (no text or symbols present)natural_image
Technical diagram of a mechanical assembly with internal components and a magnified inset showing a disassembled component (no text or labels)natural_image
Diagram of a hand operating a mechanical device with gears and a handle (no text or symbols)natural_image
Technical diagram of a mechanical assembly with an inset close-up showing a component detail (no text or labels)natural_image
Illustration of a hand using a tool to adjust or install a mechanical component (no text or symbols visible)Valymas iš išorės
natural_image
Illustration of a faucet and tap wrench (no text or symbols)text_image
Diagram of a refrigerator interior with numbered parts labeled 1 to 6
natural_image
3D technical illustration of a mechanical assembly with grid-like components and a black arrow pointing to a component (no text or symbols)
natural_image
Technical line drawing of a mechanical assembly with no visible text or symbols
natural_image
Line drawing of a multi-tiered bicycle basket structure with no text or symbols
natural_image
Simple line drawing of a funnel with a hanging weight, no text or symbols presentnatural_image
Line drawing of a device with a circular inset showing a magnified view of a component (no text or symbols)natural_image
Illustration of a hand pressing down on a gear-shaped component with an arrow indicating press direction (no text or symbols)natural_image
Hand pouring liquid from a container into a pot (no text or symbols visible)natural_image
Line drawing of an open refrigerator with a circular base and lid (no text or symbols)natural_image
Line drawing of a device with a screen and indicator lights, showing a left-side button and a curved arrow (no text or symbols)natural_image
Line drawing of a hand inserting a component into a device (no text or symbols)natural_image
Line drawing of a hand pressing a button on a device (no text or symbols)natural_image
Line drawing of a laboratory apparatus with a circular component on a base (no text or symbols)text_image
Diagram showing a device with light rays and a magnified view of its screen, indicating light emission or measurement.natural_image
Illustration of a kitchen appliance with a grater pouring powder into a tray, no text or symbols presentnatural_image
Diagram of a mechanical assembly with a tool and a small component, no text or symbols present4

natural_image
Diagram of a device with a screen and indicator lights, no text or symbols presentnatural_image
Line drawing of hands assembling a mechanical component (no text or symbols)text_image
Technical diagram showing mechanical assembly with labeled components and a hand holding a tool, including magnified insets highlighting specific parts.natural_image
Two technical line drawings of a multi-layered mechanical component, showing assembly and disassembly (no text or symbols)natural_image
Two technical line drawings of a mechanical component before and after assembly, showing internal structure and rotation (no text or symbols)natural_image
Line drawing of a car chassis frame structure (no text or symbols)natural_image
Technical diagram of a mechanical assembly with internal components and directional arrows (no text or labels)natural_image
Diagram showing a device with a magnified inset illustrating mechanical components (no text or symbols present)natural_image
Diagram showing mechanical components with arrows indicating motion, including a magnified inset of a gear or cam mechanism (no text or symbols present)natural_image
Mechanical assembly diagram showing internal components and a close-up of a mechanical component (no text or labels)natural_image
Technical line drawing of a mechanical assembly with a hand operating a tool (no text or symbols present)natural_image
Technical diagram of a mechanical assembly with an inset close-up showing a component detail (no text or symbols present)natural_image
Illustration of a hand using a tool to adjust or install a mechanical component on a tray (no text or symbols visible)Ārpuses tīrīšana
natural_image
Two technical line drawings of a faucet and a mechanical component (no text or symbols)text_image
Technical diagram of a refrigerator interior with numbered parts labeled 1 to 6
natural_image
3D technical illustration of a mechanical assembly with grid-like components and a black arrow pointing to a component (no text or symbols)
natural_image
Technical line drawing of a mechanical assembly with no visible text or symbols
natural_image
Line drawing of a multi-tiered bicycle basket structure with no text or symbols
natural_image
Simple line drawing of a funnel with a hanging weight, no text or symbols presentnatural_image
Line drawing of a device with an open lid and a magnified inset showing internal components (no text or symbols)2
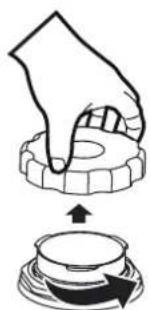
natural_image
Diagram showing a hand pressing down on a gear and then moving a circular component with an arrow indicating rotation (no text or symbols)natural_image
Line drawing of a hand pouring liquid from a container into a bowl (no text or symbols)natural_image
Line drawing of a mechanical device with a circular component on its side (no text or symbols)natural_image
Line drawing of a device with a screen and indicator lights, showing a left-side button and a curved arrow (no text or symbols)natural_image
Line drawing of a hand inserting a device into a vertical panel (no text or symbols)natural_image
Line drawing of a hand pressing a button on a device (no text or symbols)natural_image
Line drawing of a refrigerator with an open lid and base (no text or symbols)text_image
Diagram showing a device with light rays interacting with a screen, and a magnified view of the screen's internal structure.natural_image
Illustration of a kitchen appliance with a grater pouring liquid into a tray, no text or symbols presentnatural_image
Diagram of a device with a tray, fan, and indicator lights (no text or symbols)natural_image
Technical line drawing of a mechanical assembly with a central component and base plate (no text or symbols)natural_image
Line drawing of hands assembling or inspecting a mechanical component (no text or symbols visible)natural_image
Technical illustration of a mechanical assembly with two circular insets showing internal components (no text or symbols)natural_image
Two mechanical assembly diagrams showing a grid-like structure before and after processing (no text or symbols)natural_image
Diagram showing two mechanical assembly stages with arrows indicating motion direction (no text or symbols)natural_image
Line drawing of a car chassis frame structure (no text or symbols)natural_image
Technical diagram of a mechanical assembly with internal components and directional arrows (no text or labels)natural_image
Diagram showing a device with a magnified inset illustrating the internal components of a mechanical or electrical component (no text or symbols present)natural_image
Diagram of a mechanical component with directional arrows and a magnified inset showing internal features (no text or symbols)natural_image
Mechanical assembly diagram showing internal components and a magnified inset of a mechanical component (no text or labels)natural_image
Technical line drawing of a mechanical assembly with a hand operating a tool (no text or symbols present)natural_image
Technical diagram of a mechanical assembly with internal components and an inset magnified view (no text or labels)natural_image
Technical line drawing of a mechanical assembly with a hand operating a tool (no text or symbols)text_image
Safety warning symbols and corresponding icons: triangular warning triangle with exclamation mark, lightning bolt symbol, funnel device, and spray bottle.⚠️Hoiatus!Ohtlik pinge.
text_image
Diagram of a refrigerator interior with numbered parts labeled 1 to 6
natural_image
3D technical illustration of a mechanical assembly with grid-like components and a black arrow pointing to a component (no text or symbols)
natural_image
Technical line drawing of a mechanical assembly with no visible text or symbols
natural_image
Line drawing of a multi-tiered bicycle basket structure with no text or symbols
natural_image
Simple line drawing of a funnel with a hanging weight, no text or symbols presentnatural_image
Line drawing of a device with a magnified inset showing a circular component (no text or symbols)2
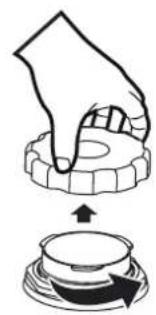
natural_image
Illustration of a hand pressing down on a mechanical component with an arrow indicating motion (no text or symbols)natural_image
Illustration of a hand pouring liquid from a container into a bowl (no text or symbols)
text_image
SOOLnatural_image
Line drawing of an open refrigerator with a circular base and lid (no text or symbols)2
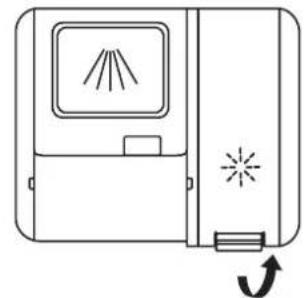
natural_image
Line drawing of a device with a screen and starburst symbol, no text or labels presentnatural_image
Line drawing of a hand inserting a component into a device (no text or symbols)
natural_image
Line drawing of a hand pressing down on a device with a screen and battery (no text or symbols)natural_image
Line drawing of a laboratory apparatus with a circular component on a base (no text or symbols)text_image
Diagram showing a device with light rays interacting with a screen, and a magnified view of the screen's internal structure.natural_image
Diagram of a kitchen appliance with a grater pouring liquid into a tray, no text or symbols presentnatural_image
Technical line drawing of a mechanical assembly with a central component and base plate (no text or symbols)4

natural_image
Diagram of a device with a screen and indicator lights, no text or symbols presentnatural_image
Line drawing of hands assembling or inspecting a mechanical component (no text or symbols visible)natural_image
Technical illustration of a mechanical assembly with two circular insets showing internal components (no text or symbols)Reguleeritav tassiriiul
natural_image
Two mechanical assembly diagrams showing a grid-patterned component before and after rotation, with no visible text or symbols.- Tassiriiuli kokku voltimiseks suruge seda allapoole.

natural_image
Two mechanical assembly diagrams showing a rack-mounted component before and after rotation, with no visible text or symbols.natural_image
Line drawing of a car chassis frame with no text or symbolsnatural_image
Technical diagram of a mechanical assembly with internal components and directional arrows (no text or labels)natural_image
Diagram showing a device with a magnified inset illustrating internal components (no text or symbols present)natural_image
Diagram showing mechanical components with arrows indicating motion, including a magnified inset of a gear or cam mechanism (no text or symbols present)natural_image
Technical diagram of a mechanical assembly with an inset showing a close-up of a component (no text or symbols visible)natural_image
Mechanical assembly diagram showing a hand operating a tool on a tray with gears and a bracket (no text or symbols)natural_image
Technical diagram of a mechanical assembly with an inset showing a close-up of a component (no text or symbols present)natural_image
Illustration of a hand using a tool to adjust or install a mechanical component on a tray (no text or symbols visible)Kodumasina välispindade puhastamine
text_image
Safety warning symbols and diagram showing warning triangle, lightning bolt, and pipe fittings with corresponding icons⚠Upozorenje!Opasan napon.
- Ako je oštećeno crijevo za dovod vode, odmah zatvorite slavinu za vodu i odvojite utikač iz utičnice. Za zamjenu crijeva za dovod vode obratite se ovlaštenom servisnom centru.
Uporaba
⚠ Upozorenje! Rizik od ozljeda, opeklina, električnog udara ili požara.
text_image
Technical diagram of a refrigerator interior with numbered parts labeled 1 to 6
natural_image
3D technical illustration of a mechanical assembly with grid-like components and a black arrow pointing to a component (no text or symbols)
natural_image
Technical line drawing of a mechanical assembly with no visible text or symbols
natural_image
Line drawing of a multi-tiered bicycle basket structure with no text or symbols
natural_image
Simple line drawing of a funnel with a hanging weight, no text or symbols present1 Spremnik za sol
2 Dozator deterdženta Gornja košara
3 Donja ručica za prskanje Polica za šalice
4 Filtri
5 Dozator sredstva za ispiranje Donja košara
6 Nazivna pločica


7 Posuda za pribor za jelo
10 Gornja ručica za prskanje
12 Lijevak za sol
Upravljačka ploča

text_image
1 2 3 4 5 8:88 6 7 8 9 7 PROGRAMS1 Gumb za uključivanje/isključivanje Zaslon
2 Programski gumb
3 Gumb za tabletu
4 Automatsko otvaranje vrata
5 Gumb za odgodu

7 Indikator funkcije
8 Indikator programa
9 Indikator upozorenja
| Indikatori Opis | |
 | Indikator sredstva za ispiranje. Uvijek je uključen dok je potrebno dopuniti spremnik sredstva za ispiranje. |
 | Indikator soli. Uvijek je uključen dok se spremnik soli treba ponovno napuniti. |
 | Indikator automatskog otvaranja. Uključen je dok je aktivirana funkcija automatskog otvaranja vrata. |
 | Indikator tableta. Uključeno je dok je aktivna funkcija tableta. |
 | Indikator odgode početka. Uključen je dok postoji postavka odgode početka. |
Programi
| Program Stupanj onečišćenja / Vrsta opterećenja | Faze programa Opcije | ||
| ECO (ECO)1) | Normalno zaprljanjePosuđe i pribor za jelo i tave | Pranje (45 °C)IspiranjeIspiranje (45 °CSušenje | Automatsko otvaranje vrata po odabiruPranje tabletamaOdgođeni početak |
| AUTO (Auto) | Program se prilagođava svim stupnjevima onečišćenja.Posuđe, pribor za jelo, lonci i tave | Pretpranje (45 °C)Pranje (55-65 °C)IspiranjeIspiranjeAutomatsko ispiranje (50-55 °CSušenje | Automatsko otvaranje vrata po odabiruPranje tabletamaOdgođeni početak |
| (Brzo) | Svježe zaprljanjePosuđe i pribor za jelo | Pranje (40 °C)IspiranjeIspiranje (45 °C) | Pranje tabletamaOdgođeni početak |
| (Intenzivno) | Teško zaprljanjePosuđe, pribor za jelo, lonci i tave | Pretpranje (50 °C)Pranje (65 °C)IspiranjeIspiranjeIspiranje (60 °CSušenje | Automatsko otvaranje vrata po odabiruPranje tabletamaOdgođeni početak |
| (Staklo) | Manje zaprljanjeStaklo | Pretpranje (40 °C)Pranje (50 °C)Ispiranje (50 °C)Ispiranje (50 °CSušenje | Automatsko otvaranje vrata po odabiruPranje tabletamaOdgođeni početak |
| (Pretpranje) | Svi stupnjevi zaprljanja.Posuđe i pribor za jelo | Pretpranje • Odgođeni | početak |
| (Automatsko čišćenje) | Nema posuđa | Program čisti unutrašnjost perilice posuđa. | Automatsko otvaranje vrata po odabiruOdgođeni početak |
1) S ovim programom imate najučinkovitiju potrošnju vode i energije za normalno zaprljano posuđe i pribor za jelo. (Ovo je standardni program za ispitne institute).
natural_image
Line drawing of a device with a magnified inset showing a circular component (no text or symbols)Pronadite spremnik za sol na dnu.
2
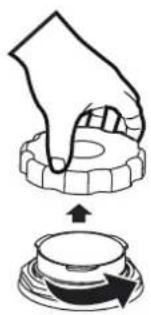
natural_image
Diagram showing a hand pressing down on a gear and then pressing into a circular component with an arrow indicating rotation (no text or symbols)Uklonite poklopac spremnika za sol.
34
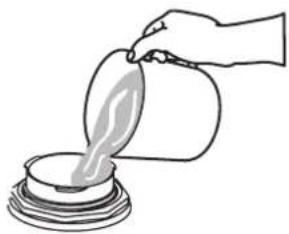
natural_image
Illustration of a hand pouring liquid from a container into a bowl (no text or symbols)Napunite spremnik za sol vodom do maksimalne razine.
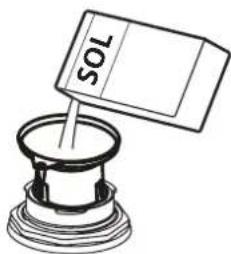
text_image
10Snatural_image
Line drawing of an open refrigerator with a circular base and lid (no text or symbols)Pronadite dozator sredstva za ispiranje na unutarnjoj strani vrata.
2

natural_image
Line drawing of a device with a screen and indicator lights, showing a left-side button and a curved arrow (no text or symbols)Podignite poklopac spremnika za sredstvo za ispiranje.
34
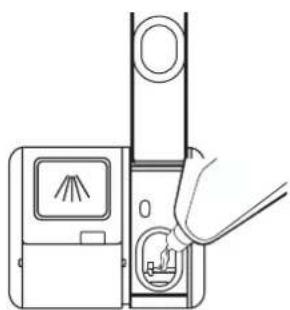
natural_image
Line drawing of a hand inserting a device into a vertical panel (no text or symbols)Napunite spremnik za sredstvo za ispiranje sredstvom za ispiranje. Pazite da ne prekoračite maksimalnu razinu.

natural_image
Line drawing of a hand pressing a button on a device (no text or symbols)natural_image
Line drawing of a laboratory apparatus with a circular component on a base (no text or symbols)Pronadite dozator deterdženta na unutrašnjoj strani vrata.
2
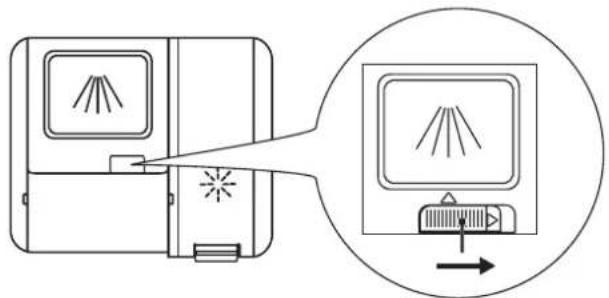
text_image
Diagram showing a device with light rays interacting with a screen, and a magnified view of the screen's internal structure.Gurnite polugu za otpuštanje udesno, a zatim otvorite poklopac spremnika deterdženta.
3

natural_image
Illustration of a kitchen appliance with a grater pouring powder into a tray, no text or symbols presentDodajte deterdžent (u prahu ili višenamjensku tabletu) u dozator deterdženta.
5
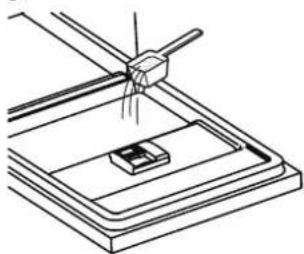
natural_image
Technical line drawing of a mechanical assembly with a central component and base plate (no text or symbols)4
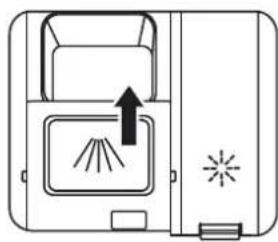
natural_image
Diagram of a device with a tray, fan, and indicator lights (no text or symbols)natural_image
Line drawing of hands assembling a mechanical component (no text or symbols)text_image
Technical diagram showing mechanical assembly with labeled components and a hand holding a tool, including magnified insets highlighting specific parts.Podesiva polica za šalice
natural_image
Two technical line drawings of a mechanical component, one showing internal structure and the other showing external assembly (no text or symbols)- Da biste sklopili policu za šalice, gurnite je prema dolje.

natural_image
Two mechanical assembly diagrams showing a grid-like structure before and after rotation, with no visible text or symbols.Podesiva donja košara
natural_image
Line drawing of a car chassis frame with no text or symbolsnatural_image
Technical diagram of a mechanical assembly with internal components and directional arrows (no text or labels)natural_image
Diagram showing a mechanical device with a magnified inset illustrating the internal components (no text or symbols present)natural_image
Diagram showing mechanical components with arrows indicating motion, including a magnified inset of a gear or cam mechanism (no text or symbols present)Čišćenje ručica za prskanje
Preporučujemo redovito čišćenje gornjih i donjih ručica za prskanje da prljavština ne bi blokirala otvore.
Začepljene rupe mogu prouzročiti nezadovoljavajuće rezultate pranja.
- Izvucite gornju i donju košaru.
- Da biste odvojili gornju ručicu za prskanje od gornje košare, pronađite maticu u središtu gornje ručice i okrenite je u smjeru suprotnom od kazaljke na satu da biste je uklonili.
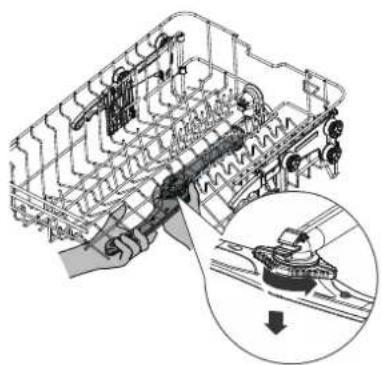
natural_image
Mechanical assembly diagram showing internal components and a close-up of a tool interacting with a component (no text or labels visible)natural_image
Technical line drawing of a mechanical assembly with a hand operating a tool (no text or symbols present)natural_image
Technical illustration of a mechanical assembly with an inset close-up showing a component detail (no text or symbols present)Za pričvršćivanje donje ručice za prskanje na dno uređaja, umetnite donju ručicu na položaj.
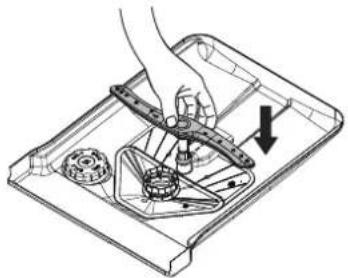
natural_image
Technical line drawing of a mechanical assembly with a hand operating a tool, showing no text or symbols.text_image
Safety warning symbols including warning triangle, lightning bolt, and valve with corresponding icons⚠Upozorenje!Opasan napon.
- Ako se crevo za dovod vode ošteti, odmah zavrnite slavinu i odvojte utikač iz napajanja. Obratite se ovlašćenom servisnom centru radi popravke creva za dovod vode.
Upotreba
text_image
Technical diagram of a refrigerator interior with numbered parts labeled 1 to 6
natural_image
3D technical illustration of a mechanical assembly with grid-like components and a black arrow pointing to a component (no text or symbols)
natural_image
Technical line drawing of a mechanical assembly with no visible text or symbols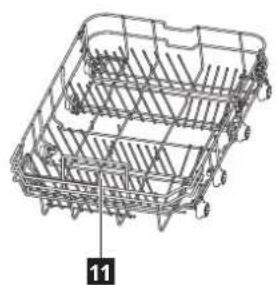
natural_image
Line drawing of a multi-tiered bicycle basket structure with no text or symbols
natural_image
Simple line drawing of a funnel with a hanging weight, no text or symbols present1 Komora za so
2 Dozator deterdženta Gornja korpa
3 Donji krak za raspršivanje Polica za čaše
4 Filteri
5 Dozator sredstva za ispiranje
6 Pločica Levak za so
7 Posuda za pribor za jelo


natural_image
Line drawing of a device with a magnified inset showing a circular component (no text or symbols)natural_image
Illustration of a hand pressing down on a gear-shaped component with an arrow indicating press direction (no text or symbols)Skinite poklopac komore za so.
34

natural_image
Illustration of a hand pouring liquid from a container into a bowl (no text or symbols)Napunite komoru za so vodom do maksimalnog nivoa.
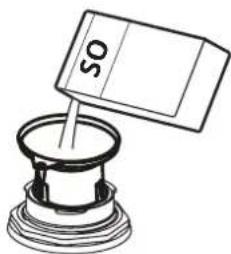
natural_image
Simple line drawing of a mechanical component with a shaft and base, no text or symbols present.Stavite isporučeni levak na otvor komore za so i u nju uspite 1,5 kg soli.
5
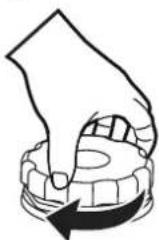
Dobro pričvrstite poklopac komore za so.
△
natural_image
Line drawing of an open refrigerator with a circular base and lid (no text or symbols)2
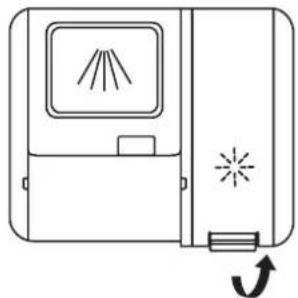
natural_image
Line drawing of a device with a screen and indicator lights, showing a left-side button and a curved arrow (no text or symbols)natural_image
Line drawing of a hand inserting a device into a vertical panel (no text or symbols)
natural_image
Line drawing of a hand pressing a button on a device (no text or symbols)text_image
Diagram showing a device with light rays interacting with a screen, and a magnified view of the screen displaying light rays.Povucite polugu za otvaranje udesno i otvorite poklopac dozatora deterdženta.
3
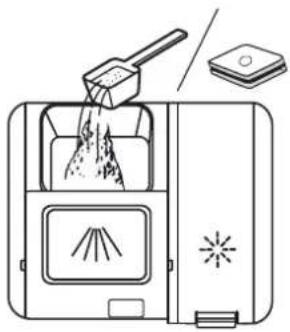
natural_image
Illustration of a kitchen appliance with a grater pouring powder into a tray, no text or symbols presentDodajte deterdžent (u prahu ili multi-tabletu) u dozator deterdženta.
5
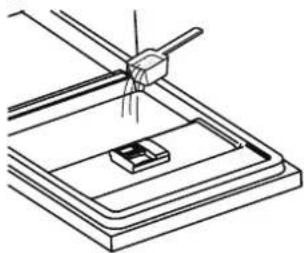
natural_image
Technical line drawing of a mechanical assembly with a central component and surrounding components (no text or symbols)4

natural_image
Diagram of a device with a screen and indicator lights, no text or symbols presentZatvorite poklopac tako što ćete ga pomeriti ka napred i pritisnuti.
Ako koristite program pretpranja 📋, stavite deterdžent u unutrašnju kadu umesto u dozator za deterdžent. Ne otvarajte vrata mašine za pranje sudova tokom programa.
Biranje i pokretanje programa
natural_image
Line drawing of hands assembling a mechanical component (no text or symbols)- Da biste spustili podignutu korpu, podignite ručke za podešavanje sa svake strane da biste oslobodili korpu i spustite je u donji položaj.

text_image
Technical diagram showing mechanical assembly with labeled components and a hand holding a tool, including magnified views of parts with arrows.natural_image
Two mechanical assembly diagrams showing a grid-like structure before and after rotation, with no visible text or symbols.- Pritisnite je da biste je sklopili.
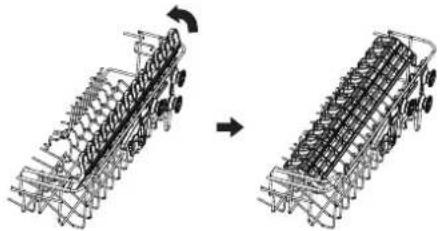
natural_image
Two technical line drawings of a mechanical assembly, showing a side-by-side transformation (no text or symbols present)Podesiva donja korpa
Šiljci u donjoj korpi mogu da se rasklope i sklope, da bi se omogućilo smeštanje velikih sudova.
- Gurnite šiljke donje korpe nadole da biste ih sklopili.
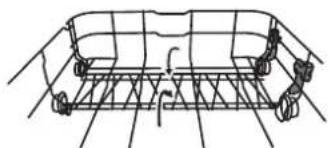
natural_image
Line drawing of a car chassis frame with no text or symbols- Da biste ih otklopili, povucite ih nagore.
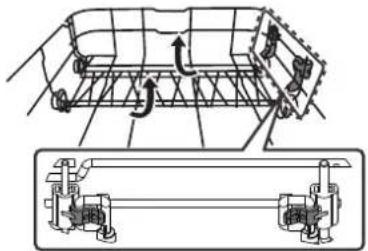
natural_image
Technical diagram of a mechanical assembly with internal components and directional arrows (no text or labels)natural_image
Diagram showing a mechanical device with a magnified inset illustrating the internal components (no text or symbols present)natural_image
Diagram showing mechanical components with arrows indicating motion, including a magnified inset of a gear or cam mechanism (no text or symbols present)natural_image
Mechanical assembly diagram showing internal components and a magnified inset of a mechanical component (no text or labels)- Da biste odvojili donji krak za raspršivanje sa uređaja, samo ga povucite nagore.
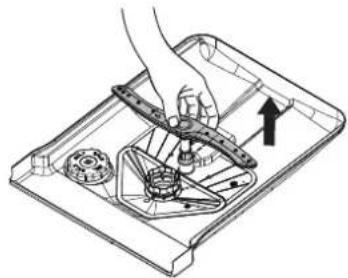
natural_image
Technical line drawing of a mechanical assembly with a hand operating a tool (no text or symbols)natural_image
Technical diagram of a mechanical assembly with an inset showing a close-up of a component (no text or labels visible)Da biste pričvrstili donji krak za raspršivanje za dno uređaja, umetnite ga na njegovo mesto.
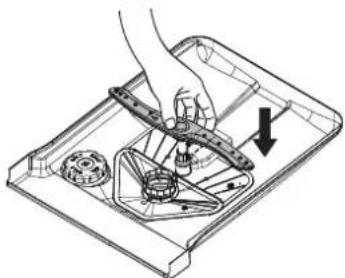
natural_image
Illustration of a hand using a tool to adjust or install a mechanical component, with no visible text or symbols.Čišćenje spoljašnosti
- Uređaj čistite vlažnom mekom krpom.
- Koristite isključivo neutralni deterdžent.
- Ne koristite abrazivne proizvode, abrazivne jastučiće za čišćenje ili rastvarače.
Čišćenje unutrašnjosti
- Pažljivo očistite uređaj, uključujući gumenu zaptivku na vratima, vlažnom mekom krpom.
- Da bi se radne karakteristike uređaja očuvale, koristite namenski proizvod za čišćenje mašina za sudove barem jednom mesečno. Pažljivo sledite uputstva na pakovanju proizvoda.
- Ne koristite abrazivne proizvode, abrazivne jastučiće za čišćenje, jake hemikalije, sredstva za ribanje ili rastvarače.
- Redovno korišćenje kratkih programa može da dovede do taloženja masti i kamenca u uređaju.
- Da bi se sprečilo stvaranje naslaga, koristite duge programe barem dvaput mesečno.
Rešavanje problema
text_image
Safety warning symbols and corresponding icons: triangular warning triangle, lightning bolt, and pipe clamp with plug.⚠️Opozorilo!Nevarna napetost.
text_image
Technical diagram of a device with numbered parts labeled 1 to 6, showing internal components like a tray and casing.
natural_image
3D technical illustration of a mechanical assembly with grid-like components and a black arrow pointing to a component (no text or symbols)
natural_image
Technical line drawing of a mechanical assembly with no visible text or symbols
natural_image
Line drawing of a multi-tiered bicycle basket structure with no text or symbols
natural_image
Simple line drawing of a funnel with a hanging weight, no text or symbols presentnatural_image
Line drawing of a device with a circular inset showing internal components (no text or symbols)natural_image
Illustration of a hand pressing down on a circular component with an arrow indicating press direction (no text or symbols)natural_image
Illustration of a hand pouring liquid from a container into a bowl (no text or symbols)natural_image
Line drawing of a refrigerator with an open lid and base (no text or symbols)natural_image
Line drawing of a device with a screen and starburst symbol, no text or labels presentnatural_image
Line drawing of a hand inserting a component into a device (no text or symbols)V vsebnik sredstva za doziranje dolijte sredstvo za izplakovanje. Pazite, da sredstva ne polijete.
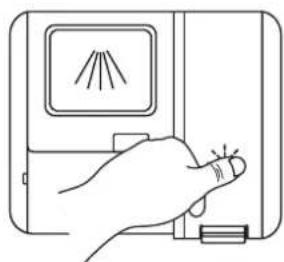
natural_image
Line drawing of a hand pressing a button on a device (no text or symbols)natural_image
Technical line drawing of a mechanical assembly with a base and clamping tool (no text or symbols)
natural_image
Diagram of a device with a lid, vent, and indicator lights (no text or symbols)natural_image
Technical line drawing of a mechanical assembly with hands operating a tool (no text or symbols present)SLOVENŠČINA 552
- Če želite spustiti zgornjo košaro, dvignite nastavitvena ročaja na vsaki strani, da se košara ponovno sprosti in spusti v spodnji položaj.

natural_image
Technical illustration of a mechanical assembly with two circular insets showing internal components (no text or symbols present)Nastavljiva polica za skodelice
natural_image
Two 3D wireframe diagrams showing mechanical components before and after assembly, with no visible text or symbols.natural_image
Two mechanical assembly diagrams showing a rack-mounted component before and after rotation, with no visible text or symbols.Nastavljiva spodnja košara
natural_image
Line drawing of a bicycle rear view with visible tracks and wheels (no text or symbols)natural_image
Technical diagram of a mechanical assembly with internal components and directional arrows (no text or labels)natural_image
Diagram showing a device with a magnified inset illustrating mechanical components (no text or symbols present)natural_image
Diagram showing mechanical components with arrows indicating motion, including a magnified inset of a gear or cam mechanism (no text or symbols present)natural_image
Mechanical assembly diagram showing internal components and a magnified inset of a tool (no text or labels)natural_image
Illustration of a hand using a tool to adjust or install a mechanical component on a tray (no text or symbols visible)- Splaknite zgornjo in spodnjo razpršilno šobo pod tekočo vodo.
natural_image
Technical diagram of a mechanical assembly with an inset close-up showing a component detail (no text or symbols present)natural_image
Technical line drawing of a mechanical assembly with a hand operating a tool (no text or symbols present)Zunanje čiščenje
- Napravo očistite z vlažno mehko krpo.
- Uporabljajte samo nevtralne detergente.
- Ne uporabljajte abrazivnih izdelkov in abrazivnih čistilnih krpic ali topil.
Notranje čiščenje
text_image
Safety warning symbols and corresponding diagram showing warning, lightning bolt, and pipe fittingtext_image
Technical diagram of a refrigerator with numbered parts labeled 1 to 6
natural_image
3D technical illustration of a mechanical assembly with grid-like components and a black arrow pointing to a component (no text or symbols)
natural_image
Technical line drawing of a mechanical assembly with no visible text or symbols
natural_image
Line drawing of a multi-tiered bicycle basket structure (no text or symbols)
natural_image
Simple line drawing of a funnel with a hanging weight, no text or symbols presentnatural_image
Line drawing of a device with a magnified inset showing internal components (no text or symbols)natural_image
Illustration of a hand pressing down on a circular component with an arrow indicating rotation (no text or symbols)natural_image
Illustration of a hand pouring liquid from a container into a bowl (no text or symbols)natural_image
Illustration of a hand pressing down on a textured surface with a curved arrow indicating rotation (no text or symbols)natural_image
Line drawing of an open refrigerator with a circular button on the side (no text or symbols)2
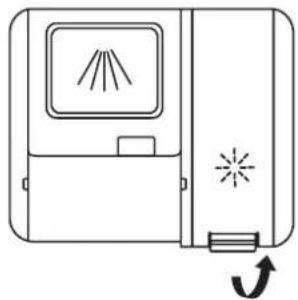
natural_image
Line drawing of a device with a screen and starburst symbol, no text or labels presentnatural_image
Line drawing of a hand inserting a small object into a device (no text or symbols)
natural_image
Line drawing of a hand pressing a button on a device with a screen and battery (no text or symbols)natural_image
Technical line drawing of a mechanical assembly with a central component and base plate (no text or symbols)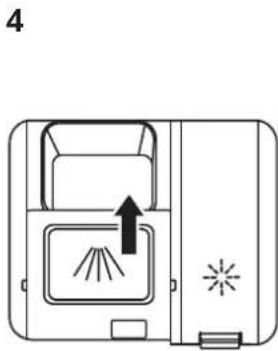
natural_image
Diagram of a device with a tray, vent, and indicator lights (no text or symbols)natural_image
Line drawing of hands assembling a mechanical component (no text or symbols)text_image
Technical diagram showing mechanical assembly with labeled components and a hand holding a tool, including magnified views of parts with arrows.natural_image
Two technical line drawings of a mechanical component, showing assembly or assembly process (no text or symbols)natural_image
Diagram showing two views of a mechanical assembly with no visible text or symbolsnatural_image
Line drawing of a bicycle rear frame structure with no text or symbolsnatural_image
Technical diagram of a mechanical assembly with internal components and directional arrows (no text or labels)natural_image
Diagram showing a mechanical device with a magnified inset illustrating the internal components (no text or symbols present)natural_image
Diagram showing mechanical components with arrows indicating motion, including a magnified inset of a gear mechanism (no text or symbols)natural_image
Mechanical assembly diagram showing internal components and a magnified view of a tool interacting with a motor (no text or labels)natural_image
Illustration of a hand using a tool to adjust or install a mechanical component on a tray (no text or symbols visible)natural_image
Technical diagram of a mechanical assembly with an inset close-up showing a component detail (no text or symbols present)natural_image
Technical line drawing of a mechanical assembly with a hand operating a tool, showing no text or symbols.natural_image
Technical line drawing of a faucet and valve assembly (no text or symbols)text_image
Technical diagram of a refrigerator with numbered parts labeled 1 to 6
natural_image
3D technical illustration of a mechanical assembly with grid-like components and a black arrow pointing to a component (no text or symbols)
natural_image
Technical line drawing of a mechanical assembly with no visible text or symbols
natural_image
Line drawing of a multi-tiered bicycle basket structure with no text or symbols
natural_image
Simple line drawing of a funnel with a hanging weight, no text or symbols presentnatural_image
Line drawing of a device with a circular inset showing a magnified view of a component (no text or symbols)natural_image
Illustration of a hand pressing down on a gear-shaped component with an arrow indicating press or lifting motion (no text or symbols)natural_image
Hand pouring liquid from a container into a pot (no text or symbols visible)natural_image
Line drawing of an open refrigerator with a circular button on the lid (no text or symbols)natural_image
Line drawing of a device with a screen and directional arrow (no text or symbols)natural_image
Line drawing of a hand inserting a device into a vertical panel (no text or symbols)natural_image
Line drawing of a hand pressing a button on a device (no text or symbols)natural_image
Line drawing of a refrigerator with an open lid and base tray (no text or symbols)text_image
Diagram showing a device with light rays interacting with a screen, and a magnified view of the screen's internal structure.natural_image
Illustration of a kitchen appliance with a grater pouring powder into a tray, no text or symbols presentnatural_image
Technical line drawing of a mechanical assembly with a central component and base plate (no text or symbols)4

natural_image
Diagram of a device with a tray, fan, and indicator lights (no text or symbols)natural_image
Technical line drawing of a mechanical assembly with hands operating components (no text or symbols)natural_image
Technical illustration of a mechanical assembly with two circular insets showing internal components (no text or symbols)natural_image
Diagram showing a mechanical assembly before and after transformation, with no visible text or symbols.natural_image
Diagram showing two mechanical assembly stages: one with a rack and arrow indicating rotation, the other with a grid-like structure (no text or symbols)Регулируема долна кошница
natural_image
Line drawing of a wireframe car chassis frame with wheels and structural supports (no text or symbols)natural_image
Technical diagram of a mechanical assembly with internal components and directional arrows (no text or labels)natural_image
Diagram showing a mechanical device with a magnified inset illustrating the internal components (no text or symbols present)natural_image
Diagram showing mechanical components with directional arrows and a magnified inset highlighting a specific section (no text or symbols present)natural_image
Mechanical assembly diagram showing internal components and a magnified view of a mechanical component (no text or labels)natural_image
Technical line drawing of a mechanical assembly with a hand operating a tool (no text or symbols)natural_image
Technical diagram of a mechanical assembly with internal components and a magnified inset showing a detail (no text or labels)natural_image
Illustration of a hand using a tool to adjust or install a mechanical component (no text or symbols visible)Външно почистване
text_image
Safety warning symbols and diagram showing warning triangle, lightning bolt, and pipe fittings with corresponding illustrations.text_image
Technical diagram of a refrigerator internal structure with numbered labels pointing to components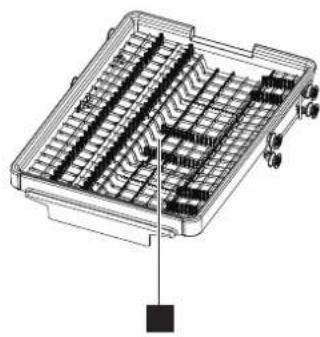
natural_image
3D technical illustration of a mechanical assembly with grid-like components and a black arrow pointing to a component (no text or symbols)
natural_image
Technical line drawing of a mechanical assembly with no visible text or symbols
natural_image
Line drawing of a multi-tiered bicycle basket structure with no text or symbols
natural_image
Simple line drawing of a funnel with a hanging weight, no text or symbols presentnatural_image
Line drawing of a refrigerator with an open lid and base, no text or symbols presentnatural_image
Illustration of a hand pressing down on a circular component with an arrow indicating press direction (no text or symbols)natural_image
Illustration of a hand pouring liquid from a container into a bowl (no text or symbols)natural_image
Line drawing of an open refrigerator with a circular base and lid (no text or symbols)natural_image
Simple line drawing of a device with a screen and starburst symbol, no text or labels presentnatural_image
Line drawing of a hand inserting a component into a vertical panel with circular components (no text or symbols)natural_image
Line drawing of a hand pressing a button on a device (no text or symbols)natural_image
Diagram of a device with a tray, fan, and indicator lights (no text or symbols)natural_image
Technical line drawing of a mechanical assembly with a tool and base plate (no text or symbols)natural_image
Line drawing of hands assembling or inspecting a mechanical component (no text or symbols visible)natural_image
Technical illustration of a mechanical assembly with two circular insets showing internal components (no text or symbols)natural_image
Two 3D wireframe diagrams showing structural changes, one with rotation arrow and the other with grid pattern (no text or symbols)natural_image
Two mechanical assembly diagrams showing a grid-like structure before and after transformation (no text or symbols)natural_image
Line drawing of a car chassis frame structure (no text or symbols)natural_image
Technical line drawing of a mechanical assembly with internal components and motion arrows (no text or symbols)natural_image
Diagram showing a mechanical device with a magnified inset illustrating internal components (no text or symbols present)natural_image
Diagram showing mechanical components with arrows indicating motion, including a magnified inset of a gear or cam mechanism (no text or symbols present)natural_image
Technical diagram of an internal combustion engine assembly with a magnified inset showing internal components (no text or labels)natural_image
Technical line drawing of a mechanical assembly with a hand operating a tool (no text or symbols present)natural_image
Technical diagram of a mechanical assembly with internal components and an inset close-up showing a component (no text or labels)natural_image
Illustration of a hand using a tool to adjust or install a mechanical component (no text or symbols visible)text_image
Safety warning symbols and corresponding diagram showing warning, lightning bolt, and valve componentstext_image
Diagram of a refrigerator interior with numbered parts for identification
natural_image
3D technical illustration of a mechanical assembly with grid-like components and a black arrow pointing to a component (no text or symbols)
natural_image
Technical line drawing of a mechanical assembly with no visible text or symbols
natural_image
Line drawing of a multi-tiered bicycle basket structure (no text or symbols)
natural_image
Simple line drawing of a funnel with a hanging weight, no text or symbols presentnatural_image
Line drawing of a device with a magnified inset showing internal components (no text or symbols)natural_image
Illustration of a hand pressing down on a circular component with an arrow indicating press or rotation (no text or symbols)natural_image
Illustration of a hand pouring liquid from a container into a bowl (no text or symbols)natural_image
Line drawing of an open refrigerator with a circular button on the side (no text or symbols)2

natural_image
Line drawing of a device with a screen and directional arrow (no text or symbols)natural_image
Line drawing of a hand inserting a small object into a device (no text or symbols)
natural_image
Line drawing of a hand pressing a button on a device with a screen and battery (no text or symbols)natural_image
Line drawing of a laboratory apparatus with a circular component on a base (no text or symbols)text_image
Diagram showing a device with light rays interacting with a screen, and a magnified view of the screen's internal structure.natural_image
Illustration of a kitchen appliance with a grater pouring powder into a tray, no text or symbols presentnatural_image
Technical line drawing of a mechanical assembly with a tool and base plate (no text or symbols)4

natural_image
Diagram of a device with a tray, fan, and indicator lights (no text or symbols)natural_image
Line drawing of hands assembling or inspecting a mechanical component (no text or symbols visible)natural_image
Technical illustration of a mechanical assembly with two circular insets showing hand positioning and tool positioning (no text or symbols)Állítható pohárpolc
natural_image
Two technical line drawings of a multi-wheeled industrial machine, showing structural changes (no text or symbols)natural_image
Diagram showing two views of a mechanical component before and after assembly, with no visible text or symbols.natural_image
Line drawing of a car chassis frame with no text or symbolsnatural_image
Technical diagram of a mechanical assembly with internal components and directional arrows (no text or labels)natural_image
Diagram showing a device with a magnified inset illustrating internal components (no text or symbols present)natural_image
Diagram showing a mechanical component with directional arrows and a magnified inset highlighting a specific section (no text or symbols present)natural_image
Mechanical assembly diagram showing internal components and a close-up of a mechanical component (no text or labels)natural_image
Technical line drawing of a mechanical assembly with a hand operating a tool (no text or symbols present)natural_image
Technical diagram of a mechanical assembly with an inset close-up showing a component detail (no text or symbols present)natural_image
Technical line drawing of a mechanical assembly with a hand operating a tool (no text or symbols present)Külső tisztítás
text_image
Safety warning symbols and corresponding diagram showing warning, lightning bolt, and pipe installation instructionstext_image
Technical diagram of a refrigerator with numbered parts labeled 1 to 6
natural_image
3D technical illustration of a mechanical assembly with grid-like components and a black arrow pointing to a component (no text or symbols)
natural_image
Technical line drawing of a mechanical assembly with no visible text or symbols
natural_image
Line drawing of a multi-tiered bicycle basket structure with no text or symbols
natural_image
Simple line drawing of a funnel with a hanging weight, no text or symbols present1 Salthólf
2 Uppbvottaefnisskammtari Efri grind
3Neðri sprautuarmur Bollahilla
4 Síur
5Gljáaskammtari Neðri grind
6 Merkispjald Salttrekt
7 Hnífaparagrind


10 Efri sprautuarmur


Stjórnborð

text_image
1 2 3 4 5 8:88 6 7 8 9 7 PROGRAMS1 Kveikja/slökkva hnappur Skjár
2 Kerfishnappur Aðgerðavísir
3 Töfluhnappur
4 Sjálfvirk dyraopnun
5 Seinkunarhnappur
8 Kerfisvísir
9 Viðvörunarvíśir


natural_image
Line drawing of a device with a magnified inset showing internal components (no text or symbols)natural_image
Diagram showing a hand pressing down on a gear and then pressing into a bowl with an arrow indicating rotation (no text or symbols)natural_image
Illustration of a hand pouring liquid from a container into a bowl (no text or symbols)Fylltu salthólfid af vatni.

text_image
SALTnatural_image
Line drawing of an open refrigerator with a circular base and lid (no text or symbols)natural_image
Line drawing of a device with a screen and starburst symbol, no text or labels presentLyftu upp lokinu á gljáahólfinu.
34

natural_image
Line drawing of a hand inserting a component into a device (no text or symbols)natural_image
Line drawing of a hand pressing a button on a device (no text or symbols)natural_image
Line drawing of a laboratory apparatus with a circular component on a base (no text or symbols)text_image
Diagram showing a device with light rays interacting with a screen, and a magnified view of the screen's internal structure.natural_image
Illustration of a kitchen appliance with a grater pouring powder into a tray, no text or symbols presentnatural_image
Technical line drawing of a mechanical assembly with a clamping tool (no text or symbols)4

natural_image
Diagram of a device with a tray, fan, and indicator light (no text or symbols)natural_image
Line drawing of hands assembling a mechanical component (no text or symbols)ÍSLENSKA 676
natural_image
Technical illustration of a mechanical assembly with two circular insets showing hand positioning and tool positioning (no text or symbols)Stillanleg bollahilla
natural_image
Two mechanical assembly diagrams showing a grid-like structure before and after transformation (no text or symbols)natural_image
Two mechanical assembly diagrams showing a grid-like structure before and after rotation, with no visible text or symbols.Stillanleg neðri grind
natural_image
Line drawing of a wireframe car chassis with wheels and structural supports (no text or symbols)natural_image
Technical diagram of a mechanical assembly with internal components and directional arrows (no text or labels)natural_image
Diagram showing a mechanical device with a magnified inset illustrating internal components (no text or symbols present)natural_image
Diagram showing mechanical components with arrows indicating motion, including a magnified inset of a gear or cam mechanism (no text or symbols present)Hreinsun sprautuarma
natural_image
Technical diagram of a mechanical assembly with internal components and a magnified inset showing a component detail (no text or labels)natural_image
Illustration of a hand using a tool to adjust or install a mechanical component (no text or symbols visible)natural_image
Technical diagram of a mechanical assembly with an inset close-up showing a component detail (no text or symbols present)natural_image
Technical line drawing of a mechanical assembly with a hand operating a tool, showing no text or symbols.Prif að utan
natural_image
Technical line drawing of a mechanical assembly with multiple cylindrical components and a central housing (no text or symbols)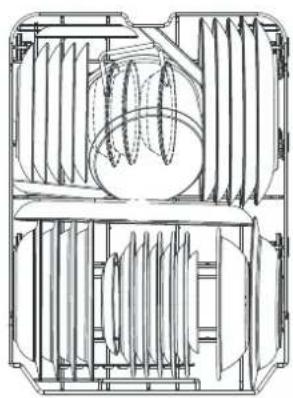
natural_image
Technical line drawing of a mechanical component with internal helical structures (no text or symbols)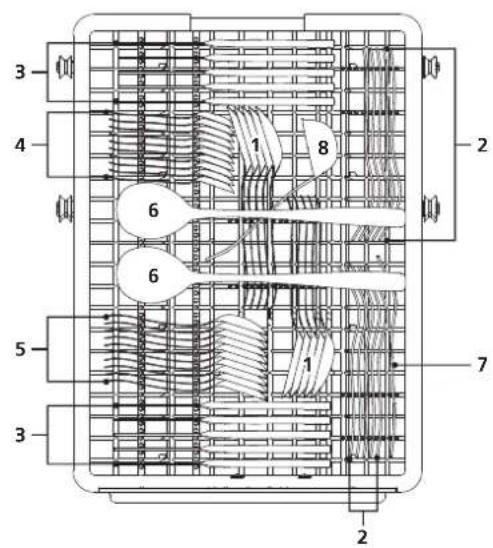
text_image
3 4 1 8 2 6 6 5 1 7 3 2
text_image
① ② ③ ④ ⑤ ⑥ ⑦ ⑧| Country Phone Number Call Fee Opening Time (Mon-Fri) | |||
| Deutschland 08007242420 Kostenlos 8am - 5pm | |||
| France 0805543333 Gratuit | 8.30 am - 7.00 pm (lun-ven)8.30 am - 1.00 pm (sam) | ||
| Italia 800130373 Gratuito 9am-6pm | |||
| España 900822398 Gratis 9am-6pm | |||
| Ελλάδα | 0080044146128(+30)21 6860020 | Χωρίς χρέωση | 9am-6pm |
| България | 0 700 10 218 | Безплатно | 9.00 - 18.00 ч. (пон. - пет.) |
| Nederland Gratis Ma-Vr Local(within NL):050-71112678-20 Za 9-20International:+31 507111267 | |||
| Sverige 0775700500 Kostnadsfritt | mån-fre 8.30 - 20.00lör-sön 9.30 - 18.00 | ||
| Österreich | 0800909626 | Kostenlos | 9am-5pm |
| Danmark | 70 15 09 09 Gratis | man. - fre. 09.00 - 20.00lør. - søn. 09.00 - 18.00 | |
| Norge | 80031407 | Gratis | 9.00 am - 4.00 pm |
| Polska 800012088 Be | zplatne | 9am-5pm | |
| Portugal 800210151 Gratuita 9am-6pm | |||
| Česká republika | 800050717 Zdarma | 9am-5pm | |
| Suomi | 0800302588 | Maksuton | 9.00 am - 4.00 pm |
| Magyarország | 0680984517 | Ingyenes | 9am-5pm |
| Россия | 88005510448 | Бесплатно | 9am-6pm |
| Slovensko | (+42)1415623915 | Bezplatne | 9.00 - 18.00 (pondelok - piatok) |
| Latvija | (+371)67717065 Bezmaksas | 9.00 - 18.00 (P - Pk) | |
| Eesti | (+372)6366525 | Tasuta | 9.00 - 18.00 (E-R) |
| Lietuva | (+370)67641956 | Nemokamai 9.00 - 18.00 (Pr-Pn) | |
| United Kingdom | 08009175827 | free | 9am till 5pm |
| Ireland | free | 9am till 5pm | |
| Schweiz | 0800110344 | Kostenlos 8am - 5pm | |
| Suisse | Gratuit | 8am - 5pm | |
| Svizzera Gratuito | 8am - 5pm | ||
| Србија | IKEA.com | Besplatno | |
| Ísland IKEA.com | Ókeypis | ||
| România | IKEA.com | Gratuit | |
| Hrvatska | IKEA.com | Ne naplaćuje se | |
| Slovenija | IKEA.com | Brezplačno | |
| Tenerife | IKEA.com Gratis | ||