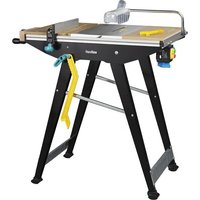
MASTER 650 ERGO - Workbench WOLFCRAFT - Free user manual and instructions
Find the device manual for free MASTER 650 ERGO WOLFCRAFT in PDF.

| Product type | Workbench |
| Brand | Wolfcraft |
| Model | MASTER 650 ERGO |
| Assembled dimensions (L x W x H) | 650 x 720 x 780-950 mm |
| Folded dimensions (L x W x H) | 650 x 180 x 1060 mm |
| Weight | 13,1 kg |
| Maximum load | 120 kg |
| Table tilt | 0° to 65° |
| Clamping range between tables | 110 mm |
| Clamping range between plastic jaws | 410 mm |
| Clamping range for long objects on the floor | 19-80 mm |
| Clamping hole diameter | 20,2 mm |
| Height adjustment | 780-950 mm |
| Removable center table | Yes (removable center part) |
| Main functions | Clamping, tilting, height adjustment, foldable |
| Intended use | Clamping workbench for machining (drilling, sanding, etc.) |
| Safety | Do not overload, do not stand on, wear PPE |
| Maintenance | Clean with dry cloth, oil telescopic tubes |
| Materials | Metal, plastic |
| Warranty | 10 years (domestic use) |
| Delivery contents | Table, legs, tool holder bar, plastic clamping jaws, handle screws, cranks, etc. |
Frequently Asked Questions - MASTER 650 ERGO WOLFCRAFT
User questions about MASTER 650 ERGO WOLFCRAFT
0 question about this device. Answer the ones you know or ask your own.
Ask a new question about this device
Download the instructions for your Workbench in PDF format for free! Find your manual MASTER 650 ERGO - WOLFCRAFT and take your electronic device back in hand. On this page are published all the documents necessary for the use of your device. MASTER 650 ERGO by WOLFCRAFT.
USER MANUAL MASTER 650 ERGO WOLFCRAFT
EN Translation of the original operating instructions 23
BGIpeBODHaOpnHnHaJIHOToynbTBAHe3aynoTpe6a 84
HR Prevod originalog uputstva za upotrebu 88
RU IpeboD opnHnHa nHCTpyKuIN NO 3KnIyatauIN 92
DE Inhalt
EN Contents
FR Contenu
ES Contenido
NL Inhoud
IT Contenuto
PT Indice
DA Indhold
SV Innehäll
FI Sisalto
NO Innhold
PL Zawartosci
ELIeixoEvO
TR icerik
CS Obsah
HU Tartalom
RO Cuprins
BG CbDpbxHaHne
HR Sadrzaj
RU CoepkaHne


119936870
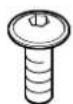
2x
M8 x 50
DIN 603
6x
M6 x 10 ISO 7380-2

2x
M8 x 40 ISO 7380-2
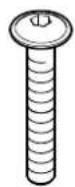
8x
M6 x 40 ISO 7380-2

2x
6x20

6x
M6 DIN 934

2x
M8 DIN 985

8x
M6 DIN 985

2x
6,4 DIN 9021
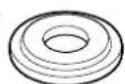
2x

2x
8,4 DIN 125

8x
6,4 DIN 125
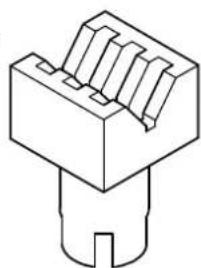
4 × 2 ×
4x
2x2x
2x
DE Montageanleitung
EN Assembly instructions
EN Height adjustment
FR Hauteur régiable
ES Ajuste de la alta
NL Hoogteverstelling
BG Perynipane Ha BucounHaTa
EN Adjusting the worktop
EN Clamping the workpiece
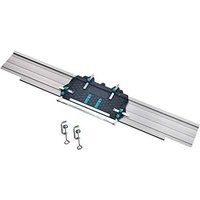
EN Accessories available separately
IMPORTANT - KEEP FOR FUTURE REFERENCE - READ CAREFULLY
GENERAL INFORMATION
INTRODUCTION
These operating instructions describe the MASTER 650 EGO Clamping and Working Table (hereafter also referred to as "Product"). Keep the operating instructions in a safe place for future reference.
The purpose of the figures in this operating manual is to help you better understand the topics and step sequences. The representations in the figures are examples and may deviate slightly from the actual appearance of your product.
SYMBOLS AND MEANINGS

WARNING
WARNING
...means that there is risk of severe to life-threatening injury.

CAUTION
CAUTION
...means that there is risk of minor to moderate injury.
NOTICE
NOTICE
...indicates important information (e.g. risk of property damage), but not hazards.

Information
This symbol indicates information that helps you to quickly and safely perform your tasks.

Warning of a danger
This symbol indicates a general hazard that, if not avoided, could result in injury.

Risk of crush injuries to hands
This symbol indicates hazardous situations that could result in hand injuries.

Observe instructions!
This symbol indicates that the operating instructions must be followed.

Wear safety goggles!
This symbol indicates that you have to wear safety goggles.

Wear ear protection!
This symbol indicates that you have to wear ear protection.

Wear protective gloves!
This symbol indicates that you have to wear protective gloves.

Wear protective mask!
This symbol indicates that you have to wear a protective mask.

Do not apply weight unevenly!

Maximum load: 120kg

Do not use as a seat, ladder or support.

Do not stand on the working table.

Use caution when working with workpieces on an inclined worktop - there is risk of the worktop tilting forward!
SAFETY
GENERAL SAFETY INFORMATION
WARNING
Disregarding the safety information and instructions leads to risk of injury! Failure to comply with safety information and instructions may lead to serious injuries.
a) By following the safety information and instructions provided in these operating instructions, personal injury and property damage may be prevented when working at or with the product.
b) Before starting any work, read the operating instructions, in particular the Safety chapter and the respective safety instructions. It is important to understand the information that has been read.
Always obey the following safety instructions:
- Assemble the working table correctly and check that all the handle screws and screw joints are tight before beginning work. Correct assembly ensures that the table does not fold up and the table top does not tilt unintentionally.
- Never use your working table improperly or for an unintended purpose! Any use other than the intended use may lead to hazardous situations.
- Keep your work area clean and remove all unnecessary items from the working table. Clutter on the work area can cause accidents.
- Make sure that your hands do not get caught in the folding, sliding or tilting parts of the working table. Risk of injury.
- Never work with a defective working table!
- Check the working table for damage before each use.
- Clamp the workpiece to be processed firmly! It is safer to hold a workpiece in place with clamping jaws or other clamping devices than with your hand.
- Make sure that all screws and handle screws are tight during transport.
- Place the working table on a firm, level and horizontal surface. If the working table can slip or wobble, the workpiece or power tool cannot be controlled evenly and safely.
- Make sure that the two lower handle screws are always tightened, so that the height of the table cannot change accidentally.
- Make sure that long workpieces do not bring the working table out of balance. Long workpieces must be supported at the free end.
Wear suitable personal protective equipment: ear protection, safety goggles, dust mask if the work generates dust, protective gloves when working with rough materials and when changing tools. - Do not store the working table outdoors or in a damp environment. There is a risk of corrosion and of the worktop warping.
-
Keep your work area clean and well lit. Untidy or dark work areas can lead to accidents.
-
Keep children and other persons at a safe distance when using the working table. If you are distracted, you may lose control of the device.
Wear suitable clothing. Never wear loose clothing or jewellery. Keep hair, clothing and gloves away from moving parts. Loose clothing, jewellery or long hair can get caught in moving parts. - Avoid overloading the working table and never use it as a seat, ladder or support. Placing excess weight on the working table or standing on it can cause the centre of gravity of the table to shift, so that it tips over.
- Only use genuine wolfcraft spare parts.
- Caution: There is a risk of tipping in the case of protruding workpieces.
- Additionally support protruding or large workpieces, to prevent risk of tilting, and make sure that lateral clamping and machining of laterally clamped workpieces does not result in the table becoming unbalanced. When workpieces protrude beyond the table, the centre of gravity can shift outward, which can cause damage to the workpiece or risk of injury from tilting.
- When working with workpieces on an inclined worktop, be careful that the worktop does not tilt forward.
- Do not use the working table as machine table with a clamped power tool (e.g. circular handsaw, router), nor as machine stand (e.g. cutting stand, drill stand, crosscut and metre saw).
- Make sure that you do not apply excessive clamping pressure when fastening fragile materials. There is risk of splintering!
- Remove all tools from the tool holders of the table before folding up the table, so that there is no risk of the contained tools falling or damaging the table.
Take care not to pinch your hands when folding and unfolding the table.
INTENDED USE
The MASTER 650 EGO can be used for the following purposes:
- As a clamping and working table for machining workpieces (e.g. drilling, sanding, etc.).
- For clamping workpieces between the table tops
- For clamping larger workpieces by means of plastic clamping jaws that have been additionally mounted to the working table.
FORESEEABLE MISUSE
Any use other than that described in the chapter on intended use is considered reasonably foreseeable misuse, e.g.:
- Not observing the safety instructions for this product or the mounted tool.
- Using the table as machine table or machine stand.
- Using the table as work platform or seat.
Applying a load of more than 120kg - Clamping long workpieces with one end protruding without suitable support, causing the centre of gravity to shift outward, which could result in the working table tilting over.
The manufacturer does not accept any liability for property damage or personal injury resulting from reasonably foreseeable misuse or from failure to observe the operating instructions.
PRODUCT OVERVIEW
PRODUCT DESCRIPTION
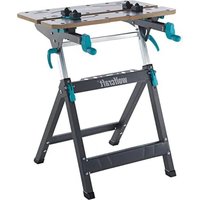
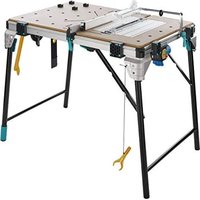
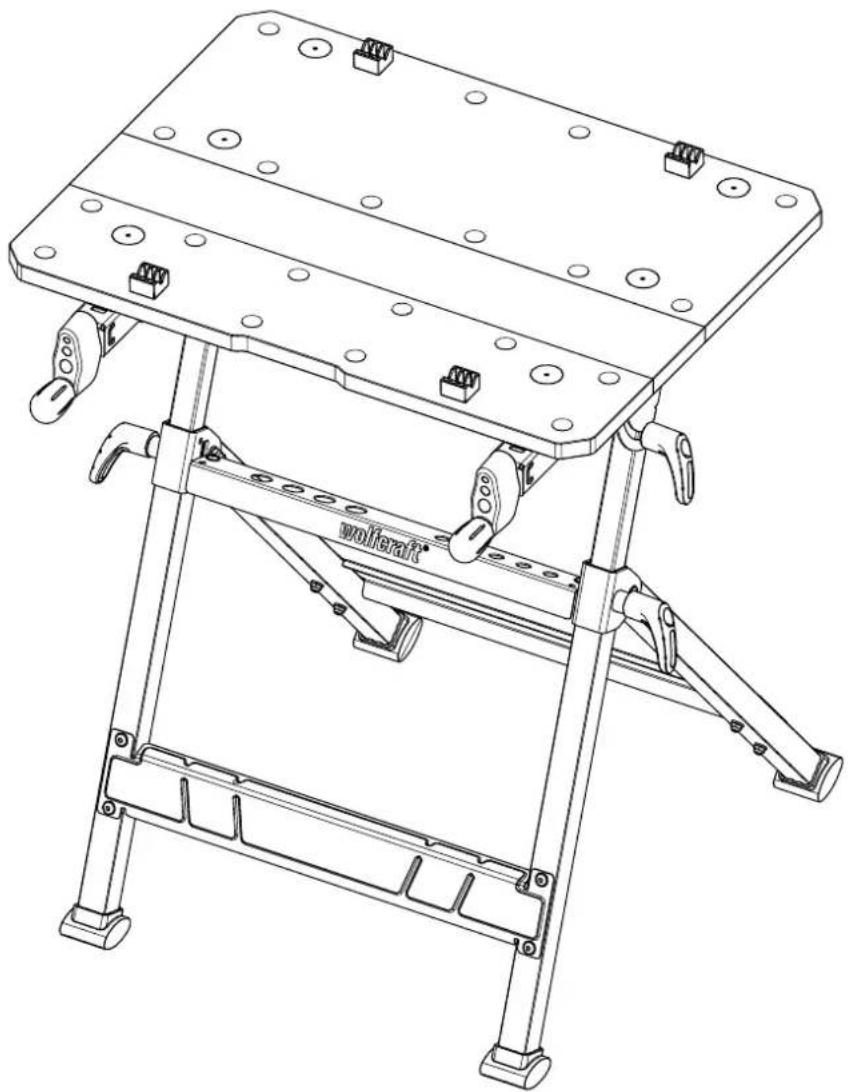
The MASTER 650 is a height-adjustable clamping and working table. It is suitable for use as a working table for machining workpieces (e.g. drilling, sanding, etc.). With the working table, a variety workpieces can be clamped between the table tops. The additional plastic clamping jaws permit larger workpieces to be clamped. The height of the working table can be adjusted to any position between 780 and 950mm . The table's worktop can be variably inclined between 0^ and max. 65^ . The max. load is 120kg .
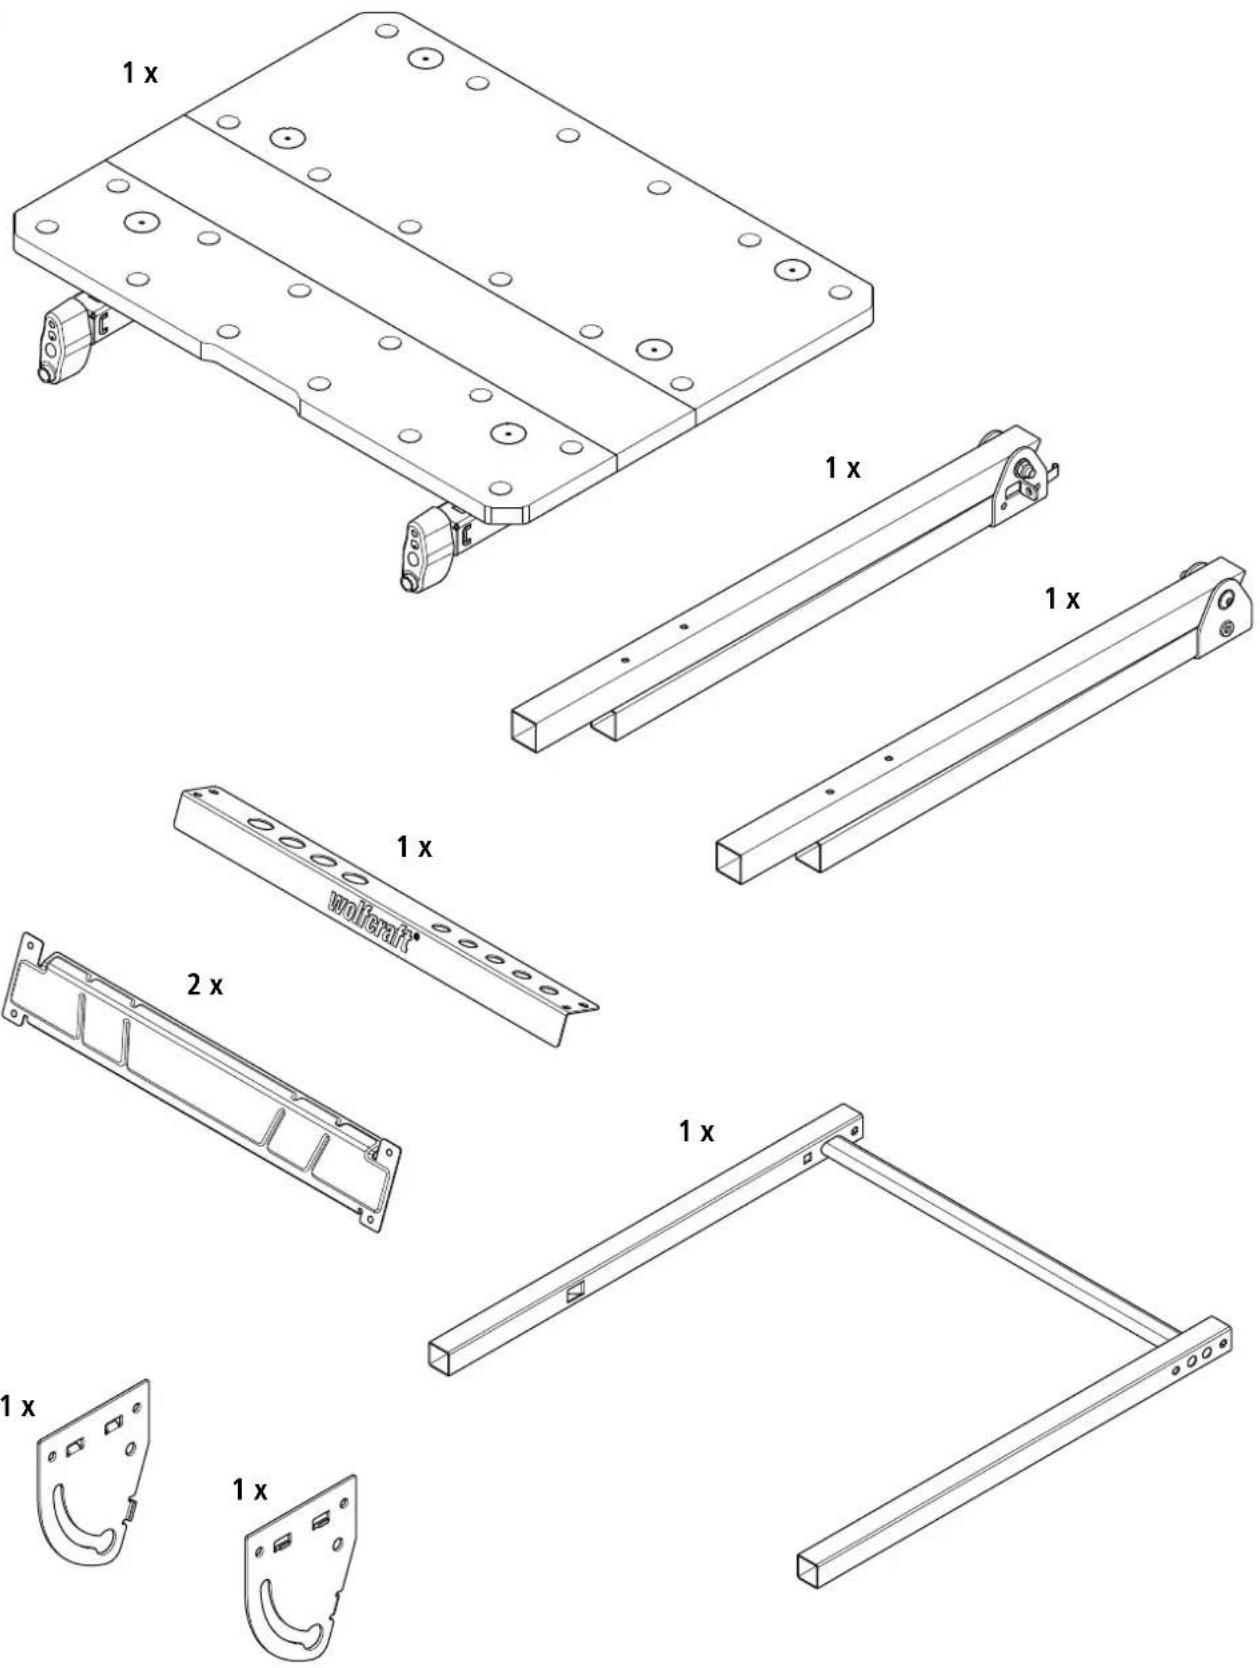
SCOPE OF DELIVERY
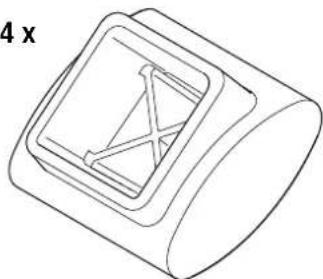
Take the MASTER 650^FRO out of the cardboard box and check that the contents are complete and all illustrated parts are included (Fig. 1).
TECHNICAL DATA
| Dimensions when set up for use (width x depth x height): | \( {650} \times {720} \times {780} - {950}\mathrm{\;{mm}} \) |
| Dimensions when folded up (width x depth x height): | \( {650} \times {180} \times {1060}\mathrm{\;{mm}} \) |
| Tilt of table surface: \( {0}^{ \circ } - {65}^{ \circ } \) | |
| Clamping area between table tops: \( {110}\mathrm{\;{mm}} \) | |
| Clamping area between plastic clamping jaws: \( {410}\mathrm{\;{mm}} \) | |
| Clamping area for long objects that are standing on the floor (Fig. 8): | 19 - 80 mm |
| Bore diameter of clamping holes: \( {20.2}\mathrm{\;{mm}} \) | |
| Maximum load: \( {120}\mathrm{\;{kg}} \) | |
| Weight: \( {13.1}\mathrm{\;{kg}} \) |
ASSEMBLY
ASSEMBLY TOOL
The following assembly tools are required (not included in scope of delivery):

Allen key:
Risk of crush injuries to fingers and hands during assembly
When moving parts are being mounted, there is risk of shear movements, especially if the handle screws, which have a securing function, have not been mounted yet.
Pay attention to your hands and the selected holding positions during assembly work. If necessary, ask a second person to assist you.
The worktop section is pre-assembled; the lower section still has to be fully assembled.
Place the right and left leg of the table on a flat, clean surface.
NOTICE
When screwing the two lower struts in place, make sure that they are aligned correctly: the longer folded edge must be at the top (Fig. 2.1).
Fold open the two legs and mount the two lower struts between the legs. Make sure that the protruding flat spring of the right leg is on the inside. Screw in the bolts and nuts by hand; they will be tightened later (Fig. 2.1 and Fig. 2.2).
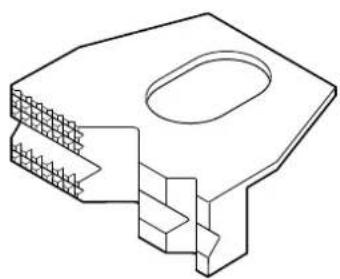
Mount the tool ledge between the legs.
NOTICE
When screwing the tool ledge in place, make sure that it is aligned correctly. The wolfcraft logo has to face forward (to the left in Fig. 2.1).
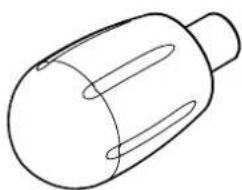
Put on the foot bumpers at the bottom of the legs. Pay attention to the asymmetrical shape of the foot bumpers and mount them as shown (Fig. 2.3).
NOTICE
When pushing in the telescopic tube, make sure that it is aligned correctly. The telescopic tube with the large square hole has to be on the right-hand side (Fig. 2.4).
From the top, push both telescopic tubes into the openings in the legs (Fig. 2.4).
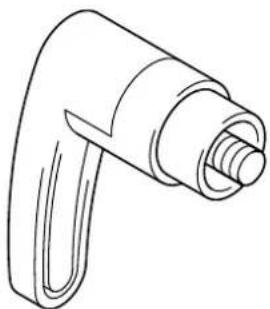
Mount a handle screw at the left and right of the telescopic tubes respectively and tighten them (Fig. 2.5).
On the left and right respectively, install a swivel plate on the two telescopic tubes, using the bolts, washers and nuts shown in the illustration. When fastening the swivel plates in place, make sure that the openings in the swivel plates face towards the wolfcraft logo on the tool ledge (Fig. 2.6).
Then mount the handle screws, washers and bolts. Make sure that the embossing on the washer is aligned correctly (Fig. 2.7).
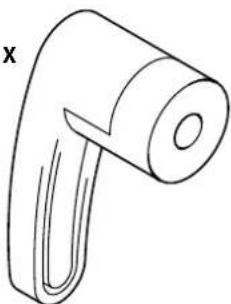
Use tools to fully tighten all bolts that were previously hand-tightened (Fig. 2.8). Turn the worktop section upside down and place it on a table. Mount the handles on the two hand cranks, using the appropriate screws and washers (Fig. 2.9).

CAUTION
Risk of injury from worktop falling during assembly!
The worktop section does not stay in place by itself when it is placed on the lower section.
After placing the worktop section, keep holding it until the bolts have been completely tightened!
Place the worktop section on the lower section. Make sure that the grooves in the worktop section engage in the spring clips of the swivel plate. Put in the bolts and nuts and fasten the worktop section onto the lower section (Fig. 2.10).
OPERATION
FOLDING UP THE TABLE
Fold up the table as follows:
Insert the centre panel between the worktop panels (if necessary) and clamp it in place (Fig. 3.1). Check the height adjustment and set it to the lowest position (if it is in another position).
Firmly tighten the handle screws for the height adjustment (Fig. 3.2).
At the left and right, release the two upper handle screws at the swivel plate and swivel the worktop section until it reaches the limit stop. To fix the worktop section in place, tighten the two upper handle screws again (Fig. 3.3). Now slightly tilt the table onto the rear foot bumpers and fold in the front footpiece until it reaches the stop (Fig. 3.4). The table can be carried with one hand holding it at the cutout in the table's worktop or at the carry bar of the frame (Fig. 3.5). For storage, lean the table against a wall at a slight angle to prevent it from falling over (Fig. 3.6).
FOLDING OUT THE TABLE

CAUTION
Risk of injury from uncontrolled movements of the working table
If the footpieces of the working table are not folded out completely, there is risk of uncontrolled table movements.
Before starting work, make sure that the footpieces have been folded out fully and the working table is standing securely.
Unfold the table as follows:
Make sure that all four handle screws (height and angle adjustment) have been firmly tightened.
Fold out the footpiece to the limit stop und rest the table on both footpieces (Fig. 4.1). At the left and right, release the two handle screws at the swivel plate and swivel the worktop section to the horizontal position (Fig. 4.2). Fix the worktop section in place by tightening the two handle screws again. Subsequently make sure that the table is standing securely (Fig. 4.3).
TABLE HEIGHT ADJUSTMENT

CAUTION
Risk of injury from uncontrolled movements of the working table
If the handle screws for the height adjustment are not tightly closed, there is risk of the worktop section lowering when work is performed on it.
Before starting any work and after each adjustment of the work height, make sure that the handle screws of the height adjustment have been tightened properly, so that the worktop section is securely fixed in place.
You can adjust the working height to any position from 780 to 950~mm . Proceed as follows:
Make sure that both handle screws for tilting the worktop at the swivel plates have been firmly tightened. Release the two handle screws while holding the table (Fig. 5.1). Move the worktop section up or down until it is at the desired height (Fig. 5.2). Tighten the two handle screws again (Fig. 5.3).
TILTING THE TABLE TOP

CAUTION
Risk of injury from falling workpieces or tools
Any mounted tools and workpieces must be removed from the working table before tilting the worktop.

CAUTION
Risk of injury from uncontrolled movements of the working table
If the handle screws at the working table are not tightly closed, there is risk of the worktop folding when work is performed on it.
Before starting any work and after each adjustment of the work angle, make sure that both handle screws have been tightened securely, so that the worktop section cannot tilt.

CAUTION
Risk of injury from uncontrolled movements of the working table
When heavy workpieces are placed on an inclined worktop, there is risk of the working table tilting forward.
Place heavy workpieces as close to the centre of the table's worktop as possible.
The worktop can be tilted at an angle of between 0^ and 65^ . To do so, proceed as follows:
Make sure that the handle screws for the height adjustment have been firmly tightened, so that the table height cannot shift. At the left and right, release the two handle screws at the swivel plate and swivel the worktop section to the desired position (Fig. 6.1 and Fig. 6.2). To fix the worktop section in place, tighten the two handle screws again (Fig. 6.3).
OPERATING FUNCTIONS

CAUTION
Risk of injury from uncontrolled movements of the working table
If the handle screws of the height or angle adjustment are not tightened properly, there is risk of uncontrolled table movements when work is done on the table.
Before starting work, make sure that the handle screws are tightened so that the worktop section is securely fixed in place.
The work area of the Master 650 ERCO can be varied between two sizes. Depending on how much space you need, you can insert the centre panel into the table's worktop, or remove it.
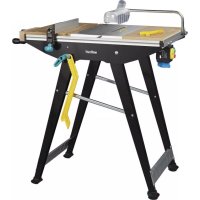
CLAMPING WORKPIECES
The plastic clamping jaws included in the scope of delivery offer a wide range of clamping and support options for workpieces.
NOTICE
To clamp workpieces, remove the centre panel from the worktop section (Fig. 7).
To clamp a workpiece, insert the clamping jaws (if needed) into the table's worktop panels and position the workpiece between the worktop panels or clamping jaws. Turn the two hand cranks clockwise to clamp a workpiece. To release the workpiece, turn the two hand cranks anti-clockwise (Fig. 7).
MAINTENANCE AND CLEANING
- After any work, always clean the clamping and working table using a dry cloth.
- To ensure that the height adjustment works flawlessly, regularly clean the two telescopic tubes. Use a cloth with a small quantity of oil and rub the telescopic tubes with it.
- Do not use aggressive and/or scouring cleaning agents or solvents.
DISASSEMBLY AND DISPOSAL
Dispose of the packaging materials in an environmentally friendly manner. In the event of disposing of the MASTER 650, observe local disposal regulations.
WARRANTY CONDITIONS
Dear DIY enthusiastic, you have purchased a high-quality wolfcraft® product which we know you will enjoy using. wolfcraft® products are built to high technical standards and undergo intensive development and testing before leaving the factory. Constant checks and regular tests during their production ensure a high standard of quality. Sound technical developments and reliable quality assurance give you the certainty that you have made the right purchase decision. For this wolfcraft product, we grant you a 10 year warranty from the date of purchase, provided it is used exclusively for DIY purposes. This warranty only covers damage to the object of purchase itself and only such damage that is attributable to material or manufacturing defects. This warranty does not cover defects or damage attributable to improper operation or inadequate maintenance of the appliance. Moreover, the warranty does not include the effects of normal wear, or defects or damage known to the customer upon conclusion of the purchase contract. Warranty claims can only be asserted upon submission of the invoice/proof of purchase. The warranty granted by wolfcraft does not limit your legal rights as a consumer (supplementary performance, rescission or reduction, compensation for damages or expenses).
Address warranty claims to:
wolfcraft GmbH
Wolffstraße 1
56746 Kempenich
Germany
FR
IMPORTANT - CONSERVER POUR CONSULTATION ULTERIEURE - LIRE AVEC ATTENTION
INFORMATIONS GÉNÉRALES
INTRODUCTION
CONDITIONS DE GARANTIE
Introduzca虽然是 the most popular and most popular of all types of databases. It is a database that contains a wide range of articles, books, journals and book series volumes.
DREJING AF BORDPLADEN

FORSIGTIG
SYMBOLIT JA NIIDEN MERKITYS

VAROITUS
VAROITUS

Imbusovy klic: vel. 4 + vel. 5
Sroubovak: PZ 3

Maticov klic: vel. 10 + vel. 13
MONTAZ

POZOR
Nebezpeci pohmzdeni prstu a rukou pri montaizi
Pri montaizi pohyblivych dilu muze dojt ke smkyovym pohybum, zejmenaPokud jeste nebly namontovany zajiistovaci rukojetové srouby.
Daveje si pri montaizi pozor na ruce a na zvolena mista uchopu. Pripadne pozadeje o pomoc dalsi osobu.
NAKLAPENI DESKY STOLU

AZ ASZTAL MAGASSAGBEALLITASA
VIGYAZAT
AZ ASZTALLAP DONTÉSE
VIGYAZAT
Cheie imbus hexagonal: SW 4 + SW 5

Surubelinita: PZ 3

Cheie pentu suruburi: SW 10 + SW 13
MONTAREA

ATENTIE
Pericol de strivire a degetelor si a mainilor la montare
Pa60THHITIOTMOKeJaCEHaKJIaHnIOBbTbINBdnaNa3OHaMexy 0^ n 65^ .3a Ta3N cEN npoueepaTeNo cneHNHaHH:
Ybepete Ce, Ye nDbata BnHTa C pkoXBaTKn 3a peytnpae Ha BnCOOHATA Ca 3dpabo 3aterHaTn, Taka Ye Macata Da He MoKe Da CE NMeCTBa No BnCOOHn. PaXnaBete BnTA C pkoXBaTKn OTJRAO NOTJACHO Ha BbPTAA ATA CE nperepaia HnakIOHete ropHata Yact Ha Macata B XeJaHOTo IIOJOxHeHn (ΦIg.6.1 nΦIr.6.2).3a PkCnpahe Ha ropHata Yact Ha Macata OTHOB 3aterHete DBA t BAHTa C pkoXBaTKn (ΦIr.6.3).
ФУHKUIN3A YYPABJIEHNE

BHIMAHINE
OnachocOT HapaHbAHe NopaHn HeKoHTpOImpaHO DmXeHne Ha pa60THata Maca
Ako BnHTOBete CpbKoXBATKn 3a peRyNIPAHe Ha BnCOUHHaTmNn bTbNa He ca 3aTeHnat, npn paOta MOrat n BaBbHNKHAT HEKOHTpOJIpaHn DnBXKeHn Ha Macata.
IpeDnBCKa paboTnpoBepBaTe DaJIIN BHTOBe TcPbKoxBAkN ca3paBO 3aTeHATn, Taka Ye rohpHa TaCT Ha Macata Da e cnpyho qnkupha.
Pa3MepbHa pa6oTHaTnOBbpXHOCT Ha Master 650 FRCMOxKe Da BapuBa Dba pa3Mepa. B 3abNCIMOCT OT BaUNTE HyxDN, MoxTe Da NOCTABNTe CEHTPANHATA qACT B NIOTA INI DA JIpeMAXHETe OT NIOTA.
3ATRAHE HA DETAJIIN
C BKNHcHHeNTE B KOMnIeKTA YeIOCTOn OT NpAocTMc aP3NoIaRaTe C pa3HOo6pa3HN Bb3MOXHOCTn 3a 3aTgTaHe I OcnpyBaHe Ha Onopa Ha DeTaJIInTe.
YKA3AHVE
3a 3aTraHe Ha DaTeaHn OTCTpaHete UeHTpAlHaTa YAcT OT RopHata YAcT Ha Macata (ΦIr.7).
3a da 3eTeHETe DetaiN, noCTaBETe npn Heo6xOIMOCT yeHIOCTME B IIOTOBETe Ha pa60THATA Maca nno3uONHpaIte DetaiNa MeKdy NIOTOBETe Ha Macata, pecn. MeKdy YenIOCTTE. 3aBbPTe DBeTe MaHINBENI No yacOBHNKOBATA CTpeJIka, 3a Da 3aterHeTetdAa. 3a OcBO6XDaBaHe Ha detaIIa 3aBBpTe DBeTe MaHINBENI B Nocoka, o6paTHa Ha ycobHNKOBATA CTpeJIka (Φm7).
TEXHNUECKO OBCJNYKBAHE NIOUNCBAHE
- Cnep Bcra Ka paobota noocntBaIte cTgAaata n paobTaMa caca cbc cyxa Kbpna.
-NouCTBaItepeoBHOBeTeTeJeckOnuHnTp6bn3a6e3np6nemHo 0yHKUOHNpaHe hperynpHaTo HBaCOnHATA.HAmokpeT npauan C MaJIKO MaIO pa3tpNIte C Hero TeJeckOnuHnTe TpbN.
-He n3no3BaIte arpecBnH mIaIbpaNBn nouCTBaIcPepCTBa IIN pa3TbOpTeJI.
DEMOHTAX N I3XBbPJIaHE KATO OTnAaBk
BnHaN N3XBpJIaIe OAnoKOByHInTe MaTePnAIN B CbOTBcTCTBne C N3NKBaHnATA 3a OIIaBAHe Ha OKOIHa TcpeJa IN B CIIyauHa N3XBpJIaHE Ha MASTER 650 F600 KaTO OTnAbk CbIoCbIOaBaHTe BaIMHNTE MeCTHn pa3npedn 3a N3XBpJIaHE Ha OTnAbu.
TAPAHUOHNYUCIOBNA
Ckbln Domawh MmCTopkn MmCTopn, 3akynnxte BWCOKKaeeCTBeH npOyKT Ha wolfcraft, KOIT Oe Bn DOCTBn MHOro paDOCT PnM MaIcTOpHeTO B Kbss. IpOdykTtne Ha wolfcraft CbOTBcETCBaT H BAICK TEXHueCKs CTAnDapT INIpeMNhabat IpE3 HHTEN3HBn Hpa3n Ha pa3pa60TK n 3NINTBaHe, IpeDi da nonadHa T bTbProBcKATA MPeka. NocToHHNE IPOBepKn pEOBHNTE H3NTBAHn IO BpMe He cepinHOTo IpnON3BOCTBO rapaHTnpAT BWCOK CTAnDapT HA KaueCTBO. CoINDNITE TexHueCKn pa3pa60TK n HAdekdHnTe IPOBepKn Ha KaueCTBO Bn HOAT YBEpeHOCT, Ye cTe HApPABINn IpaBnINn H3bOp npn NOyKnA. IpyNtpeBa Ha 3akynen HIOPOyKT Ha WfLcraf 3KKnUHTeNo 3 DeHOCIn OT Tnna "Hapabn Cn Ca", Bn Dabame rapaHn 10 roHnO t DaTata HA 3aknyBaHe. Irapaunrta NOKPBA cmo QETn PO Camra HpeMet Ha NOyKnA t NaMo TaKINBA, KOnTO Ce DJIKxAT Ha JeFekTN B MaTePnAna I IN3pa60kTA. Ta3r rapaHnne H NOKPBA DeFekTN uQETn, KOnTO Ce DJIKxAT Ha HEnPABINHa Ecknloatau nnn HEDOCTaYHu NODpBXka. FapanuTAt CBto Taka He NOKPBA npn3Ha nHa oBuaH a Amoptnsaure n TNIuHNO 3a yNtpe6bata IN3HOCBaHe, KaTOn N DeFekTN uQETn, KOnTO ca BNIu IN3BeCTHn Ha KIneHTa Pn CKlouHbHe Ha dOROBopa. FapaHIOHNNI pTeEHUM MOrTa da CE ppeJRAIBat cAmo PnnppeCTABNe Ha qkTypa/KBHTAHUHTA 3a NOKyNA. IpeDcTabeHata OT wolfcraft rapaunr h e OrpaHNUBa 3aKOHnTE B n npaba Ha Notpe6nten (nocJeDaio nIbnHeHne, paBaNHE Ha DoROBOP nIOnOTbNbOT ceHATA, KOMNecCaun Ha QETNt Ne OBe3SeTeHne 3a Hapabehnte PaXoDIn).
TapaHcHnHHTe npTeHcN CneBa da ce OTnpaBrt KbM.
wolffcraft GmbH
Wolffstraße 1
56746 Kempenich
Germany
HR
VAZNO - SACUVATI ZA KASNJE KORISTENJE - PAZLJIVO PROCITATI
OPCE INFORMACIJE
UVOD
U ovim uputama za uporabu opisan je stezni radni stol MASTER 650 ERCO (unastavku teksta takoder se naziva i „proizvod" ). Sačuvajte ove upute za uporabukako bi vam i ubuduće bile na raspolaganju.
HaedeBaIte 3aunTHyMoMacy!
DHaHHb CmMBOJI yKa3bIBAeT Ha Heo6xOIMMOCt b NIOJIb3OBaHn 3a-

PacnpedenTe Harpy3ky paBHOMepHO!

MakcimmaHna Harpzka: 120 Kr

He cauntbca, He nCnoJIb3ObaTb KaueCTBe noHOxKn, TpaNa nn No-mocTa!

Ha paobooy CTOJI He cTaHOBITbCAI

Bybte octopoxhpi np6paoTke 3arotobok HA HAKIOHOH CTJIEHMIe -CTOI MOKET ONPOKHyTcB BnpeI!
BE30NACHOCTb
OBUHE HNCTPYKUNI NO TEXHNKE BE3ONACHOCTN

PTEUYPTPEXDEHNE
Onachoctb TpaBmupoBaHn npn HecobJeHn Hnctpykun no 6e3onacHOCTn yka3aHn pykoBODCTBA!
HecobJIOeHHe INCTpyKcIINo 630nacHOu Yka3AHMOXET CAtb npHNO TAKCILIX TpaBM.
a) CoBIOEHeHn DaHHbIX HNCTpyKmI No 6e3OanCHOu yKa3AHn pyKO BOCTBa N03BOJHT M6ExaTb TpaBMPOBaHN nepCOHaJa MATEpHaJIbHOr YoUePbApnpaBoTe CmONb3OBaHm EaHHOr npOyKaTa.
b) IpeenBbINOJIHeHEmKaKHX-JIbOpaobCmIOJb3OBaHEm DaHHoro npOpyHTA pOHTe DaHHoe pyKOBOCTBO NOJHOCTbO, B AcTHoCTn, pa3den Be3-ONACHOCTb COOTBETCTBYUme HNCTpyKmN No 6e30NaCHOCTn. IpOHHTAHHO Heo6xmoYrCHNTb.
CobIIOJaTe CnElyOUIne OCHOBHeI PtapBnIa TeHnIK6e3oNaCHOCHT:
-Montpyte paobuH CTOn HaJIeKaUHM Opa3OM Npeq HauJOM pa60Bcerda npOBepaTe, TTObI Bce BHTb C pyKoTko N pe3b6ObBi e coEiHHeHb 6bln Tyro 3aTHy. HAIeXaAaC6OpKa npenrCTByET CKlaDbBAHHcTOna nn packaHBAHHIO nTTb CTOnla.
-He mnoIb3yIte paOoun CTOn HeHaJIeXaIUM o6pa3OM nHn He no Ha3NaueHnIO! McnoIb3OBaHnE He No Ha3NaueHnO MoKeT PpNBOuITb K OJACHBIM CNTyaUAM.
-NoDnepKnBaIe NCTOTy pa6Oey 30HbI y6pAaTe co cTOna BCE HeHyXhIe npEIMtB. BecnpaIOK B pa6Oey 30He MoXe TnpuBOuNTb K HeCuaCTHBm CnyaM.
-He donyckaIte nonaadaHn pyK BCKlaNbIbIAUoNecc, BblBnxHbIe nIIN nobopaunBaIOuNecca Hactn pa6oery cTOna.3TO MOxET npNBecTN K TpaMAM!
-He paobotainTe Ha HEnCnpabHom pa6ooyem cTone!
-NepeK KaKdbIM NcNoIb3ObaHHeM npoBepaTe pa6ouN CTOn Ha nped-Met HauuNk KaKx-Nb6o NobpeKDeHn.
-Haexho3axmMaTe 06pa6aTbIbAemBte Tann! UdepXaHne 6pa6aTbBaemOn DetanIO NocpeCTBOM 3axmHOrO PnCnOcOBeHnN KJyAqKOB ABJIETCA Bolee HaexhBIM, Cem YepxahHe BpyHyO.
—CneIte 3a TeM, yTO6bI npn TpaHcnpTnpOBKe BCE 6OJIbI N BnHTbI C pyKOITKoB 6bln HAdEeKHO 3aTnHyTbI.
- YctanabnBaIte paobou CTon HA TBepoB,POBHO, TOpN3OHTaIbHOB noBepxHOCTN. Ecnn CTOn MOKET CMeauTcN ININ NOKaYNBAtbCn, OeocneHHe paBHOMepHO IN 6eONacHO oba6OTKn DetanN NOpeCDtBOM 3NeKTPOHNCTPYMENTA HeBO3MOXHO.
—CneIte 3a TEM, yTO6bI o6a HnHXHbN BnHTa C pyKoRTkAMi BcerJa 6bJIIN 3aTAYbI, yTO6bI He DONYCTNb CJyuaHOrO N3MeHeHrB BbICOTb CTOnA.
—CneIte 3a TeM, yTO6bI IINHbIe DetaJIH He HApUaJIu paBHOBecna pa- 6oOero cToJa. CBO6OJIhBE KOHJI duINHHbIX detaJIe Heo6XoIMo NOJepKINBaT bNn NIOkJaDbIBaT bN OHNx YTO-JIbO.
-ПрименггсоOTBETCTByOHTe CpeCTBaMHINBHyaIbHOB3aunTbI: 3aunTHbIe HayuHnK, 3aunTHbIe OcKn, peCnnpaTOp npn npoBeHnn pa60T c6pa3oBaHmE mbln, 3aunTHbIe nepaTk npn pa60Te c HecTporaHbIM MATEpnaJAMn nPn 3aMeHe DeTaNen.
-He xpaHnTe pa6OuN CToI HA OTKpbTOM BO3dyXe NIN B CbIPbIX MecTx. 3TO MOKET INPBECNT K Koppo3nn I pa36yxaHIO pa6Oey IIITbl.
-CobIouaIte YnCTOy pa6ooyero CTOna n 06ecneuBaIte HAdIeXaIee ocBeueHne pa6ooye 30Hb. BeCnpAIOK n HeIOCTatoHoe OCBeueHne pa6oey 30Hb MOrTy pNBUcTNI KHeCuaCTbIM CnyaM.
-He donyckaTe deteH nprynx IuK pa6oemy cToIy BO Bpemr erO nCnoJIb3OBAHnI. He OTBneKaITeCb, HauYe Bbl MoXeTe noTepeTb KoHTpoJIb HAD INHCTpyMeHTOM.
-HaedeBaIe COOTBETCTBHyOuOJeKdy. He HaeBaIe CBo6OHyO OeJxNy IIN yKpaWeHn. BOnocb, OeXJa n NepyAtKn He DOnKhbI nonaDabTb 3OHy DBNkUxncr AucteR. CBo6OHaI OeKDa, YKpaWeHn IIN paCnyuEHHbe BOLOcbMOrTy 3xAxBaTBbATCBcI DNBkyUmIMcra TaCTAMN.
-He noDBepraIte pa6oHn CTOn CInuKOM 60nbWn Harpy3ke, a TAKKe He caNTecb Ha Hero, He nCNoJIb3yIe erO B KaYeCTBe Tpana IIN NOMOcTa. Ype3MepHaHarpy3Ka IIN Onpa Ha CTOn MOrTy PnPBeCTN K CMeueHIO cHTpa TjXeCTn IN OpOKnDbBaHnIO CTOna.
-ИспόньутToIbkoОриги�льныеЗапа(chyчы wolfcraft.
-BHMaHHe! BbIcTynaIOUne 3aTOrOBK MoYr BbIaCTb.
-NoIepKbAte DnHbIe NkpyHbIe 6pAbTaBbAemble DeTaN DnI npedotBpaueHn OnpOKnbIBaHn. Y6eintecb, TTO oBeCneHyo CToIy HOBoe NOIOXeHne CTOna, PnHnHm 60KobBX 3axMnOBu 6oPb6OTKn 3arOTOBok C 60KobBM 3axNOM. DnHHbIe 6pAbTaBbAemble DeTaN MOrTy Bbl3BaTcMeJeHHe UeHTPa TAgKeCTN 3a PpeJbI cTOna, TTO MoKet npINBeCTN K NOBpeKdEHMIO 6pAbTaBbAemO DeTaN INN ONaCHOCTN NOJIyHeHr TpaBM BCJeCDTBNe OnpOKNbIBaHn.
-ByIbTeOCTOPOXHbI npn O6paB0Ke 3aTOBOK Ha HAKIOHHo CToneuHNue -CTOn MoKET ONpOKMHyTbCBApePe.
-He nIcNoJIb3yIte paOouH CToJI B KaueCTBe CTOna C TaHKa C 3aKaTbIM 3JIeKtPOUNHCTpyMeHTOM (HaNPmEp, UpKUJyRHOH NIOLOB, BepXHei φpe30), a TAKKe B KaueCTBe NOCTaBKN DnIg CtaUHOHApHBIX yCTPoIHCTB (HaNPmEp, JeINITeJIbHOH CTOnK, CBepINJIbHOH CTOnK, TOPOBOOHIO NIIbl).
—Cneinte 3a Tem, YTO6bI He 3akpenTb IOMKne MaTePnaJIbI C ype3MepHo 60nbHmU ycnJnEM. OAnchocTb nonadHnO ockoJkoB!
—Cneinte 3a TEM, yTo6bI B yCTpoNCTBax KpeNHeHn HnCTpyMeHTa nepecknaDbBaHmE CTOna He 6blNo nHCTpyMeHTa, yTo6bl OH He Bbln N He nobpeDn CTOn.
—CneIte 3a Tem,HTo6bI He 3aUeMItb pyKn npn cKnadbHaHm n paKnaIbIBaHHN CTOna.
UEJIIEBOE INPUMMEHEHNE
IcnoJb3yIe npOyKT MASTER 650 ERGO IIN CNEHyOoTe npImMeHEnHa:
TEXHNUECKNEXAPAKTEPNCTNKU
Onachoctb TpaBMPOBaHnI3-3a BblNaDeHnI 3aToBKN mN IN HcTpyMeHTa
IpeepIOBOPOTOMIINbCTOAnHeo6xOIMMo y6paTb c pa6oeryo CTOna yCTaHOB- IeHHbIE NHTpyMeHtBI N DeTaN.

OCTOPOXHO
Onachoctb TpaBMPOBaHnI 3-3a HeKoHTpOIpyEmoR nopeMeueHn pa6ooyero cTolA
EcnKcUeHTpKOBbIe pIaHn Ha onOpne cToJa He 3aTHyTbI, BO3MOxHO cKaIaBbAHne BepXHe Yactn cToJa npn paOte.
KaJdbi pa3 nepeHauaIom pa6oT, a taKke noce KaJdoe perynpoBKn BbcoTb npOBepaTe, yTO6bI oBa BNHTa c pyKoTkAMm dIra npEoTbpaUeHnR CklaDbBaHNr BepxHe qAcTn CTOna 6bln 3aTaNyTbI.

OCTOPOXHO
Onachoctb TpaBMnpoBaHnI 3-3a HeKoHTpOIpyEmoR nopeMeueHn pa6ooyero cTolA
Korda TaKeIbe DeTann ObaPabTaBbAOTcHa HaKaIOHHO NobepxHOCTn CTOna,pa- 6ooum cToJ MoKTe ONpOKHyTbCn Bnepe.
Pa3MeaainTe TReKeIbIe DeTann KaK MoXHO 6JINKe K cHTpy CToJa.
HaKIOH pa6ooyeI IITb MoXHO 3MeHATb B npedeJax oT O do 65 rpaI. DnI 3TOB bInONHT CneDyOuie:
Y6eHNTecb, yTO oBa BnHTa C pyKoRTKaMn DЯ peryNIpOBKn BbICOTb HaJeXHo 3aTHytB, yTObI cTOn He nepeMeuaJcno BbICote. OcnaBte CneBa N Cnpaba OBa BnHTa C pyKoRTKaMn HA NOBOPToHoi KUInCe N NOBepHnTe BepXHIO Yactb CTOna B TpeByemoe NoIOxKeHHe (Pnc. 6.1 n Pnc. 6.2). CHOba 3aTaNHe oBa BnHTa C pyKoRTKaMn, yTObI 3aΦNKpObaTb BepXHIO Yactb CTOna (Pnc. 6.3).
PABOUHEΦYHKUIN

OCTOPOXHO
OnachocTb TpaBMnpoBaHnI 3-3a HeKoHTpOJnpyEmoro nepMeueHn pa6oyero cToJa
Ecno 6bnta cykoTkampeyIipOBaHnI NO Bbcote He 3aTHytbl, np paB0te Bo3MOxHO HeKoHTpOIpMye nepMeIeHne paOoero cToJa.
KaXdbi pa3 neped Hauanom paobt ybeNTecb, TTO BnHTbI C pyKoRTkAM 3aTHy- Tbl, YTO6bl He donyctntb IMMeHHe NOLOxHeBepxHe qACTn CTOnla.
Pa3Mep pa6oey nobepxHOCTM Master 650 F8G0 MoXeT N3MeHrTbCn NO DByM pa3-Mepam. B 3aBcNcMoCTn OT nOte6HoCTe Bbl MoXeTe pa3MeCTnTb ceHTpaJIbHyO acTh Ha pa6oey nIITne IIN CHrTb ee c pa6oey nIITbl.
3AXIM 3AΓOTOBOK
C NOMOUIBO BXOJIAUX B KOMJINEKT NOCTABKIN 3aKMNHbIX KyIaYKOB INIJIACTMaCCBIO3MOXHOIOIOpaTB OINH 3MHOXeCTBaBapnHTOB 3aKpeJIeHnI paNIOJOXeHnI DeTANI.
YKA3AHVE
CHIMMITE UHTpaIbHyIO YAcTb C BepXHeN YAcTn CTOna Dnra 3axmMa DeTaJIeN (Pnc.7).
J3aXIMa 3aT0BkN yCTaHOBnI NO Heo6xOIMOCn 3aXIMHbE KjNAckn B pa-6oOyne nIITb CTOnA N YCTaHOBnTE 3aT0BkY MEXNy PNTAMM INN KJNAckm. No-BepHnTe oBa MAXOBuKa no YACOBn CTpeNke, YTObI 3akpenntb Detanb. JnocBO6oxDeHn IeTAn NOBepHnTe oBa MAXOBuKa npOTNB YACOBn CTpeKn (Pnc.7).
YXOJ
-BytnpaIte3axmHOn npaoChn cTOn cyXoTpAnKoN nocJe kAxdoero 1CNOJIb30BaHHJ.
—PeryIpaH0 ouuauTe oBe TeleckOnnueckne Tpy6bl, UTO6bl oecneuHTb npaBnIbHyIO paOby peryIinopBk BlicOTb. CMOHTe TpAnKy He6oJIbMm KOnIueCTBOM MaCJIA n IpOTpnte EIO TeleckOnnueckne Tpy6bl.
- Hn B KOem Cnyaae He NcnoJIb3yIe eKne H/nn aBpaAIBHbIe MoIOUme cpeiCTBa nn pactBOpHTeJ.
DEMOHTAXI YTNJIN3AUJIA
Heo6xOIMMo yTNIN3nPOBaTb yNAKOBOHbIe MaTePnAJIb B COOTBeCTBm C KIOLOrHuECKMm HOpMaTHaBMn. Ipn yTNIN3aUNn CTOna MASTER 650 FAGO cIeDyIte MeCTHBIM HopMaM No yTNIN3aUNn.
TAPAHINHbIEOB3ATEJIbCTBA
Ybaxaemn XO3KnB Ybaxaembl XO3Hn Bby npno6pEn npoykt wolfcraft, KOTopbl nopaayet Bac B Domaunhem XO3HcTBe. IpoykTBwolfcraft cootbetCTBYOT CTpormTexNHueckm CTanapamnt Mnped npoJaxeip npoxoJrct Taanu TtatehbohpazpaobTKn npOBepkn. Bbcokn ypoebHk kaeCTBa npi cepinHom PON3BOCDte H3dEInn ObecneuBAETC NOCTOHHBM KOHTPOEM nperynphBMn npOBepkAMn. CpebeHbte XTHUeCKNE papaobTKn HaJeKHNKOHTPOBL kaeCTBA ObecneuBAOT ybepeHHocB B npabNlhoCTM peHHeN B noIb3y npno6pTeHn Hawe npOpyKUnn. Ha npObopeTeHbte npoykTBwolfcraft npedoctabIeTc 10-letra rapaHTna OT DaTb NOKynKn. RapaHTna DeCTByNTBOB TOcm Cnyae, EcnnpOdyKunnc NcNoB3yeTcDn BblonHHeNn paobT NODMy. FapAHn pacnPoCTPAHReTc NCKIOHTeLbHO Ha NobpeXeHHeN, cyeeCTByOUsHe HA MoMeHT NOKynKn, n ToIbKOHa Te IINHX, KOTOpBEyKa3bIAoT Ha HekaeeCTBHeHbme MaepNaJIbIMn H3KOE KaeeCTBO N3ROTOBHeHn. HactoAar rapaHTna He paNPocPahreTc Ha DeFeKTb NOBpeXeHHeN, BO3NKUWe BCNECTBne HeHaNeJeka EKCIyyataunm INn HeHaNDNeJauero OBCnyxHBnHn. RaapHTna Takke He pacPocPahreTc Ha Cnyan OsbHOro N3Hoca n eCTCBHeHOro NCTpAnHn, a TAKKe HA DeFeKTb NOBpeXeHHeN, O KOTpBX KIneHTy 6bIIO N3BeCTHO HA MOMENT 3aKIOUeHn IIOBOpAp NOKynKn. RapaHTn Hbte Tpe6OBaHn IMeOT cNly TOnkBo CNYae IpeBbRleHn Cheta-faktpbIMn UeKa. PpeyCMTopeHHa KOMNaHne wolfcraft rapaHTna He OrpaHUNBaet 3aKOHHe IpaBa, IpeIOCTaBIme BAm KAK notpeBtTeIO (npabo Hya YcTpaHEHe DeFeKToB, npabo HA OKa3 OT DorOBopa ININ CHNXeHne NKyTNHO CEbI, PPAB HO KOMNEHCauIO YbIKOB ININ paCXODOB).
FapAHnHbIe IpTeH3N CJIeJeYeT HAnpaBJIaTb IaDpecy:
wolfcraft GmbH
Wolfsstraße 1
56746 Kempenich
Germany
DE GB IE
wolfcraft GmbH
Wolffstraße 1
D-56746 Kempenich
Tel.: +49 (0) 265551280
Fax: +49 (0) 26 55 502 180
technical.service@wod.wolfcraft.com
NL
wolfcraft GmbH
Wolffstraße 1
D-56746 Kempenich
Tel.: +49 (0) 2655 51 324
Fax: +49 (0) 2655 502 324
customerl@wolfcraft.com
NO DK SE FI
wolfcraft GmbH
Wolffstraße 1
D-56746 Kempenich
Tel.: +49-26 55 51 0
Fax: +49-2655502180
customerservice@wolfcraft.com
(correspondence in English)
AT TR BA
wolfcraft GmbH
Hauffgasse 3-5
A-1110 Wien
Tel.: +43 (1) 7480808-0
Fax: +43 (1) 7480808-11
kundendienst@woaut.wolfcraft.com
FR BE LU
wolfcraft s.a.r.l.
1 Rue d'Aurion
F-93110 Rosny-sous-Bois
Telephone + 33 (0) 1 48 12 29 30
Fax +33 0148121540
customerservicefrance@wolfcraft.com
ES
wolfcraft Espana S.L.U.
68, Kliment Ohridski Blvd.
BG-1756 Sofia
Telefon: +359 70045454
Telefax: +3594392112
info@tashev-galving.com
GR CY
AN Mavrofidopoulos S.A.
Technical & Commercial Company
Salaminos 1 & Mavromihali Str.
GR-185 45 Piraeus
Telefon: +30 21 0413 6155
Telefax: +30 21 0413 7692
info@mavrofidopoulos.gr
HR
Manal d.o.o.
Velimira Skorpika 1 a
HR-10090 Zagreb
Telefon: +385-1-3466400
Telefax: +385-1-3466412
manal@manal.hr
RO MD
PARTENER SRL
Calea Moinesti, nr.34
Pavilion Administrativ, et. 3
RO-600281 Bacau
Quarries Square Street
MT-1752 St. Venera
Tel.: +356 99 429402
nastas@onvol.net