SG 42 Classic - Steam cleaner Kärcher - Free user manual and instructions
Find the device manual for free SG 42 Classic Kärcher in PDF.
| Product type | Steam cleaner |
| Brand | Kärcher |
| Model | SG 42 Classic |
| Dimensions (L × W × H) | 460 × 298 × 265 mm |
| Typical operating weight | 7.5 kg |
| Power supply | 220-240 V ~ 50 Hz |
| Heating power | 2250 W |
| Pump power | 50 W |
| Water tank capacity | 1.5 liters |
| Boiler capacity | 0.5 liter |
| Maximum working pressure | 0.4 MPa (4.0 bar) |
| Maximum working temperature | 145 °C |
| Heating time | Approx. 3 minutes |
| Max. steam output | 50 g/min |
| Power cord length | 5 m |
| Protection type | IPX4 |
| Protection class | I |
| Main functions | Steam cleaning, VAPOHYDRO mode (hot water jet), automatic safety shut-off, integrated descaling |
| Included accessories | Steam handle, steam hose, pencil jet nozzle, hand sucker, flat nozzle, round brush (small), flat brush, microfibre cover, descaling product (3 sachets) |
| Optional accessories | Extension tube, floor nozzle with lamellas, mop, Power nozzle, large round brush, textile sucker, window nozzle (ref. 2.863-025.0) |
| Maintenance and cleaning | Boiler rinse every 5 fills; descaling every 20 service hours with bio descaling agent RM 511 |
| Safety | Pressure regulator, boiler bottom temperature sensor, safety thermostat, safety closure with valve |
| Spare parts and repairability | Original parts and accessories available via www.kaercher.com; repairs by authorized service center |
| General information | User manual and safety instructions included; professional use; CE certified |
Frequently Asked Questions - SG 42 Classic Kärcher
User questions about SG 42 Classic Kärcher
0 question about this device. Answer the ones you know or ask your own.
Ask a new question about this device
Download the instructions for your Steam cleaner in PDF format for free! Find your manual SG 42 Classic - Kärcher and take your electronic device back in hand. On this page are published all the documents necessary for the use of your device. SG 42 Classic by Kärcher.
USER MANUAL SG 42 Classic Kärcher

H.Jenner
Chairman of the Board of Management

S. Reiser
Director Regulatory Affairs & Certification
71364 Winnenden (Germany)
Tel.: +49 7195 14-0
Fax: +49 7195 14-2212
Winnenden, 2020/10/01
Technische Daten
Environmental protection. 9
Intended use 9
Symbols on the device 9
Overview of the device 9
Safety devices 10
Cleaning methods 10
Initial startup 10
Operation 10
Using accessories 11
Transport 12
Storage 12
Care and maintenance 12
Troubleshooting guide. 12
Warranty 13
Accessories and spare parts 13
Declaration of Conformity 13
Technical data 14
General notes


Read these original instructions and the enclosed safety instructions before using the device for the first time. Act in ac
cordance with them.
Keep both books for future reference or for future owners.
- If the operating instructions and safety instructions are not observed, the device can be damaged and dangers could arise for users and other persons.
- Notify the dealer immediately in the case of shipping damage.
- Check the package contents when unpacking for missing accessories or for damage.
Environmental protection

The packing materials can be recycled. Please dispose of packaging in accordance with the environmental regulations.

Electrical and electronic appliances contain valuable, recyclable materials and often components such as batteries, rechargeable batteries or oil,
which - if handled or disposed of incorrectly - can
pose a potential threat to human health and the environment. However, these components are required for the correct operation of the appliance. Appliances marked by this symbol are not allowed to be disposed of together with the household rubbish.
Notes on the content materials (REACH)
Current information on content materials can be found at: www.kaercher.com/REACH
Intended use
- The appliance is intended for cleaning with steam and can be used with appropriate accessories as described in these operating instructions.
This device is suitable for commercial use.
This device is not suitable for industrial use.
Symbols on the device
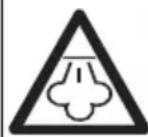
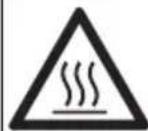
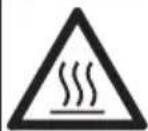
Steam ATTENTION - risk of scalding
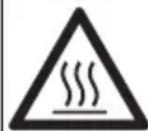
Risk of burns from hot surfaces!
Overview of the device
Description of the device
Illustration A
1 storage position for spotlight nozzle
② Accessory compartment
③ Position of the manual nozzle in the accessory compartment
4 Position of the steam hose in the accessory compartment
5 Mains cable
6 storage net for mains cable
⑦ Carrying handle (foldable)
Device cover
9 Device cover lock
10Casing
1Device socket cover
12Type plate
③ Steam switch
14 Steam gun
⑤Locking button
16Lock(child lock)
17 Position of the steam gun in the accessory compartment
18Control panel
19Storage net for accessories
20Reservoir cap
21 Fresh water tank (removable)
22Safety lock (steam boiler)
23 Steam hose
24 Steam connector
25 Extension tube (special accessory)
26)Spotlight nozzle
27Manual nozzle
28 Floor nozzle with slats (special accessory)
29 Floor cleaning cloth (special accessory)
30 Round brush (large) (special accessory)
31 Flat nozzle
32 Flat brush
33 Power nozzle
34 Round brush (small)
35 Microfibre cover cloth
36 Descaler
Control panel
Illustration B
①indicator light - descending (red)
② Indicator light - heating: Heating process (red), standby (green)
③Reset button - descending
4Indicator light - water shortage (red)
Switch-mode: Steam operation (above), VAPOHY-DRO (below)
6 Switch-heating(on/off)
Safety devices
Safety devices protect the user and may not be disabled or functionally circumvented.
Pressure regulator
The pressure regulator keeps the boiler pressure as constant as possible during operation. The heating is switched off when the maximum operating pressure in the boiler has been reached and switched on again when the pressure in the boiler drops due to steam removal.
Water shortage thermostat
The heating temperature rises when the water in the boiler runs out. The water shortage thermostat switches the heating off and the "Water shortage" indicator light lights up red. The heating cannot be switched on again until the boiler has cooled down or is refilled.
Safety thermostat
- If the water shortage thermostat fails and the device overheats, the safety thermostat switches the device off.
- Before resetting of the safety thermostat, contact the responsible KÄRCHER Customer Service.
Safety lock
- The safety lock seals the steam boiler against the steam pressure present. If the pressure regulator is defective and overpressure occurs in the steam boiler, an pressure relief valve opens in the safety lock and steam escapes through the lock.
- Before re-commissioning the device, contact the responsible KÄRCHER Customer Service.
Cleaning methods
Freshening textiles
Always check the compatibility of the textiles at a concealed point before using the device on textiles: First steam the textile, allow it to dry and then check it for any change in colour or shape.
Cleaning of coated or painted surfaces
Wax, furniture polish, plastic coatings or paint can come off or stains may occur when cleaning painted or plastic-coated surfaces such as e.g. kitchen and living room furniture, doors, parquet or linoleum. To clean these surfaces, steam a cloth briefly and wipe it over the surfaces.
Glass cleaner
Preheat the window pane in seasons with particularly low temperatures. To do this, lightly steam the entire glass surface at a distance of approx. 50~cm . This avoids tension on the surface that can lead to glass breakage.
Initial startup
Installing accessories
- Open the cover of the device socket and plug the steam connector tightly into the device.
- Connect the accessory (floor nozzle, manual nozzle or spotlight nozzle) to the steam gun. Push the parts together until the locking button on the steam gun engages.
- Use extension tubes (special accessories) if necessary. Push the parts together until the respective locking button engages.
- Press the locking button to separate the accessories.
Filling water
Note
Do not fill with pure distilled water! Use a maximum of 50% distilled water mixed with tap water.
- Unlock and open the device cover.
- Check that the safety lock is seated tightly.
- Remove the fresh water tank.
Illustration C
- Open the reservoir cap of the fresh water tank.
- Pour approximately 1.5 litres of tap water into the fresh water tank.
Do not use detergents!
- Close the reservoir cap.
- Fit the fresh water tank.
- Close and lock the device cover.
Operation
Switching on the device
- The heating switches on periodically during use (indicator light lights up red) to maintain the pressure in the boiler.
-
If the device is switched on without water, the "Heating" indicator light lights up red until the water shortage thermostat switches the heating off. The "Water shortage" indicator light then lights up red.
-
Plug the mains plug into a mains socket.
- Unlock and open the device cover.
Note
The device cover must remain open during operation so that the indicator lights can be seen.
3. Switch on the device with the Heating switch. The indicator light lights up red.
Note
The full heating capacity is only available if the steam connector is connected to the device when it is heating up. The system is ready for operation. When the "Heating" indicator light lights up green.
- Switch off the heating at the switch when transporting the device.
- Press the steam switch, steam comes out. Always point the steam gun at a cloth first until the steam flows out evenly.
VAPOHYDRO
- In wet areas, the dirt can also be washed away instead of being picked up with the cloth. To do this, use the VAPOHYDRO mode to maintain a high level of moisture in the steam jet. A hot water stream is emitted, which has the greatest rinsing effect.
- We recommend using the VAPOHYDRO in conjunction with the spotlight nozzle for e.g. cleaning in the bathroom.
- When working with cloths (floor nozzle, manual nozzle), use the steam operation mode to maintain a low level of moisture in the steam jet. This improves the dirt-dissolving power of the steam.
Note
In VAPOHYDRO mode, the boiler empties faster, which means that it can only be used for a short time.
- Switch the VAPOHYDRO on/off with the Mode switch.
Refilling water
Note
The "Water shortage" indicator light lights up red when the water in the fresh water tank is used up.
Note
If the pump does not deliver water despite a full fresh water tank, the boiler must be descaled.
- Remove the fresh water tank.
- Open the reservoir cap of the fresh water tank.
- Pour approximately 1.5 litres of tap water into the fresh water tank.
- Close the reservoir cap.
- Insert the fresh water tank, the "Water shortage" indicator light goes out. The "Heating" indicator light lights up red and after the end of the heating process green, the system is then ready for operation.
Disconnecting accessories
△DANGER
Danger from hot water
Risk of scalding
Never disconnect accessories while steam is being released as hot water may drip out. Allow the device to cool down first.
Switching off the device
- Switch off the heater via the Heating switch.
- Close and lock the device cover.
- Fold down the cover of the device socket and pull the steam connector out of the device.
- Pull the mains plug out of the socket.
Storing the device
Note
Always let the brushes cool down to prevent deformation of the bristles.
- Unlock and open the device cover.
- Remove the fresh water tank, open the reservoir cap, pour out the water, close the reservoir cap and reinsert the fresh water tank.
Illustration D
-
Latch the spotlight nozzle into the storage position in the device cover.
-
Place the steam gun with steam hose, manual nozzle and small parts in the accessory compartment.
- Close and lock the device cover.
- Store the mains cable in the storage net.
Using accessories
Note
Detergent residues or care emulsions on the surface to be cleaned can cause streaks during steam cleaning, but these disappear after repeated use.
Steam gun
Application examples for the steam gun without accessories:
- Eliminate odours and creases from hanging clothes by steaming them at a distance of 10 - 20cm .
- Damp dusting by briefly steaming a cloth and wiping it over furniture.
Spotlight nozzle
- The cleaning effect increases the closer the nozzle is held to the dirty area, since the temperature and pressure of the steam are greatest at the emission point.
- The spotlight nozzle with the various attachments is suitable for cleaning hard-to-reach areas, such as e.g. corners, joints, etc., blinds, central heating, toilets, stainless steel, windows, mirrors, fittings, coated and enamelled surfaces and for loosening stains.
- The power nozzle increases the speed of the emitted steam. It is therefore well suited for cleaning particularly stubborn dirt, blowing out corners, joints, etc.
Note
The round brush is not suitable for cleaning sensitive surfaces.
Floor nozzle
Floor nozzle with slats (special accessory)
- For hygienic cleaning of smooth surfaces, as the surface temperature is higher.
- For a hygienic cleaning result, steam directly over the hard surface at a working speed of max. 30~cm /second.
Using the floor cleaning cloth (special accessory)
Turn and change the floor cleaning cloth regularly to improve dirt absorption.
- Fasten the floor cleaning cloth to the floor nozzle. To do this, fold the floor cleaning cloth lengthways and place the floor nozzle on it, open the retaining clips, place the ends of the cloth in the openings and stretch tightly, close the retaining clips.
CAUTION
Danger from retaining clips
Risk of crushing
Do not put your fingers between the retaining clips.
Manual nozzle
Suitable for small washable surfaces, shower cubicles, mirrors or furniture fabrics.
- Pull the microfibre cover cloth over the manual nozzle.
Window nozzle (special accessory)
Order number 2.863-025.0
- Steam the glass surface evenly at a distance of approx. 20~cm
- Switch off the steam supply.
- Pull off the glass surface in strips from top to bottom with the squeezee.
- Wipe the squeezegee and the lower edge of the window dry after each run.
Textile care nozzle (special accessory)
Order number 2.863-233.0
For freshening hanging textiles e.g. jackets or curtains with two functions:
- De-linting garments with the thread lifter.
- Steaming and removing creases from textiles (also removes odours).
Note
Steam flows out when the steam switch is activated. Always point the steam gun at a cloth first until the steam flows out evenly.
Transport
CAUTION
Failure to observe the weight
Risk of injury and damage
Be aware of the weight of the device during transportation.
- Carry the device by the carrying handle and extension tube (special accessory).
- When transporting the device in vehicles, secure it to prevent it from slipping or overturning in accordance with the respective valid guidelines.
Storage
CAUTION
Failure to observe the weight
Risk of injury and damage
Be aware of the weight of the device during storage.
The device may only be operated indoors.
Care and maintenance
△DANGER
Danger of electric shock
Injuries due to touching live parts
Switch off the device.
Remove the mains plug.
△DANGER
Danger from hot water, steam and hot surfaces
Risk of scalding and burns
Allow the device to cool down prior to all work on the device.
Rinsing the boiler
Rinse the steam cleaner boiler at the latest after every 5th filling of the boiler.
- Remove the accessories from the accessory compartment.
- Disconnect the steam hose from the device.
- Fill the steam boiler with water and shake it vigorously. Lime residue which has been deposited on the bottom of the steam boiler will be released as a result.
- Pour out the water.
Illustration E
Dscaling the boiler
In order to remove lime adhering to the boiler wall, we recommend cleaning the boiler with the KÄRCHER Bio Descaler RM 511. The KÄRCHER Bio Descaler RM 511 is a citric acid-based product that is completely biodegradable.
ATTENTION
Danger from unsuitable descaler
Risk of damage
Only use descalers that have been approved by KARCHER in order to prevent damage to the device. Do not use vinegar or similar agents.
ATTENTION
Danger from descending solution
Risk of damage
Never fill the descending solution into the fresh water tank, as this will damage the pump.
- Pull the mains plug out of the socket.
- Unscrew the safety lock and completely empty the water from the steam boiler.
- Completely dissolve a bag of descaler in 0.5 litres of warm water, stirring constantly.
- Pour the descending solution into the kettle. Do not screw the safety lock onto the device during the descending process.
△DANGER
Danger from inhalation of aerosols
Health risk
Do not use the device while descaler is still present in the boiler.
- Let the descending solution work for approx. 8 hours (overnight).
- Pour out the descending solution. Rinse the boiler at least two more times with cold water to ensure that there are no more residues in the device. Insert the safety lock.
- Unlock and open the device cover.
- Switch on the device.
- Press the reset button until the "Dscaling" indicator light goes out. The device is now ready for use.
Note
After approx. 20 hours of operation, the "Dscaling" indicator light indicates the next required descending.
- Close and lock the device cover.
Troubleshooting guide
△DANGER
Danger of electric shock
Injuries due to touching live parts
Switch off the device.
Remove the mains plug.
△DANGER
Danger from hot water, steam and hot surfaces
Risk of scalding and burns
Allow the device to cool down prior to all work on the device.
△DANGER
Danger from improper repair work
Risk of injury and damage
ave repair work carried out by the authorised customer service only.
The "Water shortage" indicator light lights up red
- Refill water.
The "Dscaling" indicator light lights up red
- Descale the device.
Customer Service department
If the malfunction cannot be corrected, the device must be checked by the Customer Service department.
Warranty
The warranty conditions issued by our relevant sales company apply in all countries. We shall remedy possible malfunctions on your appliance within the warranty period free of cost, provided that a material or manufacturing defect is the cause. In a warranty case, please contact your dealer (with the purchase receipt) or the next authorised customer service site. (See overleaf for the address)
Accessories and spare parts
Only use original accessories and original spare parts. They ensure that the appliance will run fault-free and safely.
Information on accessories and spare parts can be found at www.kaercher.com.
Special accessories
Only special accessories approved by the manufacturer may be used.
| Description Order number | |
| Bio descaler RM 511 (3x 100 g pow-der) | 6.295-987.0 |
| Cotton terry cloth kit 6.370-990.0 | |
| Extension tube for floor nozzle (2 pieces required) | 4.127-024.0 |
| Floor nozzle with slats 2.885-465.0 | |
| Textile care nozzle 2.863-233.0 |
Declaration of Conformity
EU Declaration of Conformity
We hereby declare that the machine described below complies with the relevant basic safety and health requirements in the EU Directives, both in its basic design and construction as well as in the version placed in circulation by us. This declaration is invalidated by any changes made to the machine that are not approved by us.
Product: Steam cleaner
Type: 1.092-xxx
Currently applicable EU Directives
2009/125/EC
2014/30/EU
2014/35/EU
Harmonised standards used
EN 55014-1:2017 + A11:2020
EN 55014-2: 2015
EN 60335-1
EN 60335-2-54
EN 61000-3-2: 2014
EN 61000-3-3:2013
EN 62233: 2008
National standards used
TRD 801
The signatories act on behalf of and with the authority of the company management.

H.Jenner
Chairman of the Board of Management

S. Reiser
Director Regulatory Affairs & Certification
Documentation supervisor:
S. Reiser
Alfred Karcher SE & Co. KG
Alfred-Karcher-Str.28-40
71364 Winnenden (Germany)
Ph.: +49 7195 14-0
Fax: +49 7195 14-2212
Winnenden, 2020/10/01
Declaration of Conformity (UK)
We hereby declare that the product described below complies with the relevant provisions of the following UK Regulations, both in its basic design and construction as well as in the version put into circulation by us. This declaration shall cease to be valid if the product is modified without our prior approval.
Product: Steam cleaner
Type:1.092-xxx
Currently applicable UK Regulations
S.I. 2010/2617 (as amended)
S.I. 2016/1091 (as amended)
S.I. 2016/1101 (as amended)
Designated standards used
EN 55014-1:2017 + A11:2020
EN 55014-2: 2015
EN 60335-1
EN 60335-2-54
EN 61000-3-2: 2014
EN 61000-3-3: 2013
EN 62233: 2008
National standards used
TRD 801
The signatories act on behalf of and with the authority of the company management.

H. Jenner
Chairman of the Board of Management

S. Reiser
Director Regulatory Affairs & Certification
Documentation supervisor:
S. Reiser
Alfred Kärcher SE & Co. KG
Alfred-Karcher-Str.28-40
71364 Winnenden (Germany)
Ph.: +49 7195 14-0
Fax: +49 7195 14-2212
Winnenden, 2020/10/01
Technical data
| SG 4/2 Classic | ||
| Electrical connection | ||
| Mains voltage V 220-240 | ||
| Phase ~ 1 | ||
| Power frequency Hz 50 | ||
| Degree of protection IPX4 | ||
| Protection class I | ||
| Heating capacity W 2250 | ||
| Pump power W 50 | ||
| Device performance data | ||
| Tank capacity I | 1,5 | |
| Boiler capacity | I | 0,5 |
| Maximum operating pressure | MPa (bar) | 0,4 (4,0) |
| Maximum working temperature | °C | 145 |
| Heating-up time | min | 3 |
| Steam volume (max.) | g/min | 50 |
| Dimensions and weights | ||
| Typical operating weight | kg | 7,5 |
| Length x width x height | mm | 460 x 298 x 265 |
| Mains cable | ||
| Power cord type | mm² | H05VV-F 3x1,0 |
| Part number (EU) | 6.647-757.0 | |
| Part number (GB) | 6.647-831.0 | |
| Cable length m | 5 | |
Subject to technical modifications.
Contenu
Remarques generales. 14
Chairman of the Board of Management

S. Reiser
Director Regulatory Affairs & Certification
Responsible de la documentation :
S. Reiser
Alfred Karcher SE & Co. KG
Alfred-Karcher-Str.28-40
71364 Winnenden (Germany)
Tel.: +49 7195 14-0
Télécopie: +49 7195 14-2212
Winnenden, 2020/10/01
\section*{Caracteristiques techniques}
SG 4/2
Classic

H.Jenner
Chairman of the Board of Management

S. Reiser
Director Regulatory Affairs & Certification
71364 Winnenden (Germany)
Tel.: +49 7195 14-0
Fax: +49 7195 14-2212
Winnenden, 2020/10/01
Dati tecnici
SG 4/2
Classic

H.Jenner
Chairman of the Board of Management

S. Reiser
Director Regulatory Affairs & Certification
71364 Winnenden (Germany)
Tel.: +49 7195 14-0
Fax: +49 7195 14-2212
Winnenden, 2020/10/01
Technische gegevens
SG 4/2
Classic

H.Jenner
Chairman of the Board of Management

S. Reiser
Director Regulatory Affairs & Certification
Responsible de documentacion:
S. Reiser
Alfred Kärcher SE & Co. KG
Alfred-Karcher-Str.28-40
71364 Winnenden (Germany)
Tel.: +49 7195 14-0
Fax: +49 7195 14-2212
Winnenden, 2020/10/01
Datasétécnicos

H.Jenner
Chairman of the Board of Management

S. Reiser
Director Regulatory Affairs & Certification
Winnenden, 2020/10/01
Dados技术和
SG 4/2
Classic

H.Jenner
Chairman of the Board of Management

S. Reiser
Director Regulatory Affairs & Certification
71364 Winnenden (Germany)
TIf.: +49 7195 14-0
Fax: +49 7195 14-2212
Winnenden, 2020/10/01
Tekniske data
SG 4/2
Classic
Elektrisk tilslutning
damp OBS - fare for skalding
Chairman of the Board of Management

S. Reiser
Director Regulatory Affairs & Certification
71364 Winnenden (Germany)
TIf.: +49 7195 14-0
Winnenden, 2020/10/01
Tekniske data
SG4/2
Classic

H.Jenner
Chairman of the Board of Management

S. Reiser
Director Regulatory Affairs & Certification
Dokumentationsbefullmaktigad:
S. Reiser
Alfred Karcher SE & Co. KG
Alfred-Karcher-Str. 28 - 40
D-71364 Winnenden (Germany)
Tfn: +49 7195 14-0
Fax: +49 7195 14-2212
Winnenden, 2020/10/01
Tekniska data

H.Jenner
Chairman of the Board of Management

S. Reiser
Director Regulatory Affairs & Certification
71364 Winnenden (Germany)
Puh.: +49 7195 14-0
Winnenden, 2020/10/01
Tekniset tiedot
SG 4/2
Classic
Sahkoliitanta
Duáxta doi biiaipakia yia meayevotepn xpno n yia tov eioevo idoktntn.
H m npon Twv odnyiwxipnoc, kaoockai twv utoedeewv aopaaiac, mtopei va exei ouventieia aec otn ouakeun n Kivovoucs yia tov xepiotn naaataqa.
- Σε περιπτωπ ζημίας από τη μεταφορά εἰδοτοίησε αμέσως το καταστημα αγορά.
Kata to aoivma tsoukeuaoiac, eEyEte To Tepiexóve yia tuxov eAeeiuieic oE eapntmuata Kaohs kai yia znuiε.
PpOoTaOia Tou TepiβaAovToC

Ta uIka oukeuaiae iivai avakukwoiipa.
AnoppittETIc oukeuaoe TepiBaAovtikop0pToTIO.

Oi nAekptikec kai nAektpovikec ouokuec Tepieoxuv TOnutima avakukawoiia uikka kai, ouxva, eapntmuata otwus mtatapies atnEs, ETTavaopoptiovec n Aodia, ta ottoiae
TepiTTwAn Aavthetaevns xpno n atoppiu n
muopoov va theouov oe kivduo tvn avthetawn uyeia
kai to TepiBaalov. Otoo, auta ta ouotatika evai
attapaitna yia tn owtn aeitoupyia tnc ouokeunc. OI
ouakeues TTou fepouv auto to ouboAo dev eTTPTETAI
va atoppitttovta ma zi me ta oikiaka atoppmuata.
YtOeIeIc OxETiKa e OoTAtiKa (REACH)
Evnpwvec pnpopoe c oxetik a t ootatika eivai diaeoiec ot n dieuuvon: www.kaercher.com/ REACH
PpOβλεπóμενη xρόση
H ouakeun npoopiietai yia epyaoiec kaapiooue atuo kai mtopei va xpnaiotointhetai e tov kataaanlo Egoianioo, otwC Tepipapetai otic oyniecs aeitoupyia.
H ouokean autn eivai kataaan yia etayeepaatikn xpno.
H ouokun autn 2ev evidekvutai yia biounxavikn xpno.
KivduvoC nAeKToPonAeIaS
Tpaupatiaoio anto tvn vapn eapntmuata nou diappoeovra ato pEu
OeTe Tn OuaKeun EkToC λeIroupyiaC.
Chairman of the Board of Management

S. Reiser
Director Regulatory Affairs & Certification
YtEuBvOc TeXVIKo paKaEaou:
S. Reiser
Alfred Kärcher SE & Co. KG
Alfred-Karcher-Str.28-40
71364 Winnenden (Germany)
TnA: +49 7195 14-0
Φαξ: +49 7195 14-2212
Winnenden, 2020/10/01
Texvika oToixεia

H.Jenner
Chairman of the Board of Management

S. Reiser
Director Regulatory Affairs & Certification
Winnenden, 2020/10/01
Teknik bilgiler
SG 4/2 Classic
Elektrik baglantisi
Sebeke gerilimi V 220-240
Faz ~ 1
Sebeke frekansiHz 50
Koruma türü IPX4
Koruma sinifi I
Isitma performansi W 2250
Pompanin gucu W 50
Cihaz performers verileri
Depo hacmi 1,5
Kazan hacmi 1 0,5
Azami calisma basinci MPa 0,4 (4,0) (bar)
Maksimum caligi ma sicakligi C 145
Isitma suresi min 3
Buhar miktari (maks.) g/min 50
Ipeed 6pb60Ko yctpoCTBOM 68a3eTbHO npOBepntb TeKCTNtHa nepeHocmOcTB Ha CkpyITOM yactke: cchayana 6pb60TaTb TeKCTNtbpom, daTb npOCxHyTb, a 3aTeM npOBepntb Ha npEdMeT n3MeHeHn qBetAn nn fOpMbI.
OuNCTka NOBepxHocTe c NOKpbITnem nJIn OKpaWeHHbIX NOBepxHocTe
PnOuHCTKe OKpaWeHHbIX NIN NOKpbITbIX NIIaCTNKOM NOBepxHOCTe, TAKX KaK Me6eNb DNy KxHN I ROCTNHO, DBepN, NapKeT, INHOJeym, BOC, NOIInpONb DnA Me6eN, NIACTKOBBIE NOKpbITNA INN Kpacka MOrY T Cne3b INN NOBUTcR NaTHa. INr OUHCTKN TAKNX NOBepxHOCTe CNeDyET CJIerKa IponapNTb caΦeTKy IN PnOtepeTB eIO NOBepxHOCTb.
OuHcTka CTeKJa
B ce3oHb c oc06eHHo Hn3KmM TeMnpaTypamn npedbapntelho HarpeTb OKOHHOe CTekNo.ДЯ 3TOrO cnerka o6pa6oTaTb napOM BcIO NOBepXHOCTb CTekNa Ha pacctOAHN Okono 50 cm. 3TO nO3BOJReT n36eKaTb HanpJxehn Ha NOBepXHOCTn, KOTOpbIe MOyT npNBecTN K pactpeckBaHNUO CTekNa.
BBoD B 3KcPnIyatauIko
YcTaHOBka npHnAdneKHOCTN
- OtkpbItb KpbIuKy po3ETKn yCTpoiCTBa n IIOTHOBCTaBnTb WTEKeP napoBOrO IHaHra B yCTpoiCTBO.
- CoeHnHTb npHaJnEKnOcTb (HaNoIbHyIO HacaKy, pyuHyo HacaKy nIIToueHoe cOnlO) C napOBbIM nICTOJeTOM. BCTABJIaTB DeTaII nDpyrB Dpyra, Noka He cpa6otaet KHONKa 6IoknpoBKN Ha napOBom nICTOJeTe.
- Pn Heo6xOJIMOCtN mCNoJIb30BaTb yIINHInTeIbHbIe Tpy6Kn (cneuaJIbHbIe npHaIJeXHOCTn).BCTaBnTb DeTaIIu Dpyr B dpYra, noka He cpa6oTaET COOTBeTCTByIOUaJ KhoNka 6JOKIpOBKn.
4.ДЯOTCOeINHeHnI npHaIeXHoCTe HaxKaTb Ha KhoNky 6JOKuPoBKn.
3aINBka BObbl
PpumeyaHue
He 3aueamb yucmyo ducmunnpoabnhyo body! Ucnonb30abmb cmecb u3 MaKcumym 50 % ducmunnpoahHOu BOblu BODonpoBODHOBObl
- Pa36JIOKINPOBaT b N OTKpbITb KpbIiKy yCtpoiCTBa.
- PpOBepuTb npOuHocTb nocaKn npedeoxpaHntbHoN npo6Kn.
3.ИЗВЕЧБбAKДПАЧСТОВВODы.PисунокС -
Otkpbblb kpbliKy 6aka dny uHcToB BObl.
-
Hanntb 6ak dJy uCToB BoDbI npImepHo 1,5 NITpa BOdONpOBOdHO BODbl. He nCnOJB3OBaTb MOIOune cpeDCTBa!
- 3aKpbTb KpbIuKy 6aKa
- BCTaBtB 6akДЯчSTOВДbl.
- 3aKpbITb n 3a6IOKnpoBaTb KpbIuKy yctpOcTBA.
ynpabJIeHne
Bknouehne yctpoctBa
BoBpemNcNoIb3OBAHnHaHarpBaTeNBepnoDnueckn BkHouaETcra (KoHTpoNbHaJ lamnoKa CBETTCr KpacHbIM) IJI NaDDepJkaHnJaBHeHn B KOTJIe.
- PnB BKNIOUeHmN yCtPOJcTbA 6e3 BoI b ChaJa n CBeITTCa KOHTpOJIbHa JAmNoUcKa «HarpeB», Noka TepMOCTaT 3auntbI OT HexBaTKn BObl He OTKInouNT HaPeB. 3aTeM KOHTpOJIbHa JAmNoUcKa «HexBaTKn BObl» CBETITcR KpaChbIM UCBETOM.
1. Bctabntb ceTeByo utencelbHyu Bnky B po3eKy.
2. Pa36nokpoBaTb I OTKpbITb KpbIiKy yCtpoiCTBa.
PpumeyaHue
Bo epempaobmykpbuwaycmpoucmea dojxha ocmabamcborykmpbimou,ymo6moXHO 6bIIO eudemb KOHpmoBhble nAmno4ku.
3. BkIIOuHTb yCTpoINCTBO C NOMOUIBbIKIOUaTeNHaRpeBa.KoHTPOINbHnA NaMNOUcKa CBETITcKpaCHbIM.
PpumeyaHue
Ponna Mouchmb Haapeba docmuaemc moIbko e mom clyae, ecnu 0o epema Haapeba K ycmpoucmy nodcoedunen umekep napoeozo wlaha. Ecnu KOHmpobhna lamnoka «Haapee» ceemumcra 3eJeHbIM ueom, cucmema zomoea Ka paBome.
4. BbIKHIOuHTb HArpeB BbIKHIOuHaTeIeM dIa TpaHCnOpTnpOBKn ycTpOiCTBa.
5. HaxaTb Ha BbIKNoyateNb noaun npa,nap BbIXOINT HApxKy.Chayana HanpaBnTB napOBOn NICToJET Ha caNpEeKy, noka nap He 6ydet BbIXOINTPBaBHOMepHO.
VAPOHYDRO
Bo BnaXbIX NOMeUeHnX rpr3b TaKKe MOxHo Cmblb, a He co6npaTb canpeTKoJ. Dnra 3ToR OcNoJIb3OBA Tb peKIM VAPOHYDRO nIPOdepXaHHN BbICOKoB BnaXHOCTn B cTpye npapa. PnI 3OM BbIXOHT TOpYaC Tpy BAdbI, YTO oBeCeHnBaET MAKCMaJIbHbI 3ΦΦEKT NpOMbIBKn.
-Дяу6opknВBaHHoN KOMHaTe peKOMeHdyETc
нсnoЛьзOBaTb VAPOHYDRO, HanpIMep, B
COyETAHIN CTOUeyHbIM CONlOM.
- Ppi pa6ote c canpeTkamn (HacaKa dIy noJa, pyuHa HacaKa) nCNoJIb3OBAtB peKIM npoo6pa3oBaHnI dIy noIePkaHn Hn3KOrO ypoBn BnA rN B CTpye npa. 3TO cnOCo6CTByET yJyuUHeHIO rpr3epactBopraHoe CNOCo6HOCTn npa.
PpumeyaHue
B pexkume VAPOHYDRO komen onycmouaemcra 6bicmpee, ymo o3Haem, ymo e2o MoKHO uCnOJIb308amb moIbKO 8 meueHue Kopomko2o epemeHu.
- BkJIIOHTb/BbIKJIIOHTb VAPOHYDRO c NOMOuIbIO nepeKJIIOHaTeIa peXIMMOB.
OobJIeHHe BObl
PpumeyaHue
Ecnu eoda e 6ake dny uucmoe odbu u3pacxodoeha, KOHmpoIbHa JAMnOka «HexaMa Ka eOdbi Ceemumc KpaChbIM ueemom.
PpumeyaHue
Ecnu hacoc He nodaem body hecmompa Ha mo, ymo 6ak dny ucmou bdoI noon, Heobxodum npoeecmu oucmyk komna om Hakuun.
- N3BnEh 6aK dIy ChToI BObl.
- OtkpbblkpbliKky baka dny uHcToB BObl.
- Hanntb B 6ak dIy uCToB BObl npImepHo 1,5 JITpa BOOpnpOBOH OBObl.
- 3akpbTb KpbIkwky6aka.
- BCTaBnTb 6akДЯчSTOn BOdbl, KOHTpOJIbHaJ lamnoKa《HexBaTKa BOdi》NORacheT. KoHTpoJIbHaJ lamnoKa《HarpeB》CBETnTCa KpaCHbIM, a Nocne 3aBepueHnHa HarpeBa- 3eIeHbIM CBETOM,CNCTeMa rotobaK pa6ote.
OTcoeHHeHne npHaJnxHoCTn
ONACHOCTb
Onachocmb u3-3a 2oprye b0db1
Onachocmb oxoza
3anpeuamaomcoedunhmb npunaadnHexHocmu 60 epem eixoda napa, mak kak moxem bimechy2opraea oda.Caana dam ycmpoucmeo cmbmb.
BbIKIOueHne ycTpoNCTBa
- BbIKNoHTb yCTpoiCTBO C NOMOuB BBIKNoaTeNaHarpeBa.
- 3aKpbTb n 3a6nKpOBA Tb KpbIuKy yCtpoNCTBa.
- Otkinhytb kpbIwky po3eKn np6opa n n3Bneyb wTekep napoBOI oIaHra n3 yCTpoiCTBa.
- 13BneB wTeNCeBHyIO BUNIky n3 pO3eTKN.
XpaHHeHne yCTpOuCTBa
PpumeyaHue
Bceedaabmbuemkamocmbimb maK,ymo6bl u36ekambdeopmauuu emuHbl.
- Pa36nOKpOBaTb N OTKpbITb KpbIiKy yCtpoNCTBa.
- N3BNeB 6akДЯчToB OBObl, OTKpbITb KpbIuKy, BbINrB BOy, 3aKpbITb KpbIuKy n yCTaHOBnTb 6ak DЯчToB OBObl Ha MeCTO.
PucyHok D
- YctaHOBntb ToeueHoe CoNIO B MecTo dIg XpaHeHnB KpbIuKe yCTpOInCTBa.
- NomeCTnTb napOBOn nCToJc napOBbIM UHaHrom,pyHyIO HacaKy IMeKne DeTaJIIN B OTCEK dI npHaDnEeXHOCTeN.
- 3akpbItb n 3a6noknpoBaT kpbIkwy yctpoiCTBa.
- NpOxNtB cTeBOB Ka6eBb CetKy IJn XpaHeHnI.
PpImeHHe npHaJdxHoCTn
PpumeyaHue
Ocmamku mooese cpedcmea unu 3mybcuu dnnyxoda ha ouuzaemou noeepxnocmu npu opa6omke npammoym cmamb npuunHO nOraBHeHua pa3b0do6, komopbie ydaonmca npu MHO2OKpamHou ouucmke.
Papoboi nuctoJeT
PpIMepbI nCNoJIb3OBAHnI npoBOrIO nIcToJeTa 6e3 pInHaJdNExKHOCTU:
- YcTpaHHeHne 3aIaxOB nCKnaDOK Ha BnCyaIe oJExKe npu o6pa6oTKe napOM c pacCTOHaHn 10-20 cm.
BnaXnay y6bOpKa nblnn nyTem kpaTkoBpeMeHHo 06pa6OTKn caIpEtKn napom n npotnpaHn HeIO me6en.
Toeyhoe conno
- Yem 6JIxke CONJIO K 3aIrp3HeHHOMy yUacTKy, TeM BbIe 3ΦΦeKT ONUCTKN, TaK KaK TempepaTpya N daBJIeHne npa Han6OJIee BbICOKN HeIOcpeIcTBENHO B MOMENT eR O BixOJa.
ToeyHoe cOnNo c pa3IuHbIMn HacaKaMn NOxOHT IJI ONUCTKN TpyHNOOCTyNHbIX MECT, TaNX KAK YTbI, CTbIKN T.Д., KaJIHO3N, paDnATOpOB UeHTpaNBHO OTOJNeHn, TyAnETOB, HepXaBeIOUe CTAJI, OKOH, 3epKaJI, apMaTyPbI, NOKpbITbIX N 3MaJIuPoBaHHbIX NOBepXHOCTeN, pactBOpeHn IYTeH.
MoHoe conIyBENuHBaETCKOpocTb BbIXOa napa. NToTMy OHO xopoIooXoIIT dIraOnCTKIO c06o cToiKx 3arpa3HeHn, npOdyBKn yrnoB, CTbIKOB I T. D.
PpumeyaHue
KpyaJnA uemKa He noDxodum dna oucMku yecmeIbHbIX noeepxHocmeu.
HacaKa Jnna noJa
HacaKa dna nona c lamenm (cneuaJIbHa npHaadJeKHOCTb)
ДягнueHueeckO OuNCTKn rnaKnx nobepxHocTe 6NaorOapra 6oonee BbICOKoI TemnepaType nobepxHocTn.
-ДяплоченггншнчогрeshyntaOчNTkn
ндагьnapнессдтбнHoHaTbepyu
nobepxhoctbca6oeyckopoctBuHe6oonee
30cm/c.
Ucnolb3OBAHne caIepKn dIy nona (CneuaJIbHa npHaJdEeXHOCTb)
IepnoDnueckn nepeBopaunBaTb mMeHrTaCAnPeKy dnona nna lyuweo c6opa rpa3n.
- PnKpEnITb canfeTky dIy nOla Ha HacaNk. IInr 3TOrO CIOXHTb cAeTky dIy nOla BDOJb INoIOXHTb Ha Hee HacaNk dyI nOla,OTKpbITb fIKCnpUOJIne 3aXIMbl, NOMECTNTb KOHcbl caIFeTKB OTBepCTnR INIOTHO HAraHyTb IX, 3aKpbITb 3aXIMbl.
△OCTOPOXHO
Onachocmb u3-3a uKcUpouux 3axumO8
Onachocmb 3aueemnHeu He npocoebiamnbnaBmuMekdy fuKcupyouumu 3axumamU.
Puyhna Hacaika
IopxOaNTdNHe6oJbWuxMOUoxxCnOBepxHocTe, dywebbX Kaun, 3epkaJI nn Me6eJbHbIX TkaHei.
- HadeTb yexon n3 MmKpOoΦn6pbI Ha pyuHyo HacaKy.
HacaKa JIy MoKn OKOH (cneuaJIbHa npHaadNeXHOCTb)
HomepДЯЗа3aKa3a2863-025.0
- PaBHomepHo 06pa6oTaTb NOBepXHOCTb CTeKna napom c pacctOraHn npImePho 20 cm.
- BbIKIOuHTb noahy npa.
- ПобODиь по CTeKny pe3nHOBой КрOMКон Hacdkn noJocamс CBepxv BHN3.
- Nocne KaKDoI noIocbI hAcyXo BbltnpaTbe3nHOByIO KpOMKy u HnKHN KpaI OKHa.
HacaKa dny yXoJa 3a TeKCTnIeM (cneuaJIbHa npuHaIeXHOCTb)
HomepДЯЗа3aKa3a2863-233.0
IIOOCEKHeHNA BNCUx TEKCTNJbHbIX N3dEIN, TAKNX KAK INJXAKN INI UTOB6JIaROdAp DByM yHKUmM
- YdaJIeHHe BOpCa C OJExKDbI C NOMOu bIO yCTpOInCTBa dJaJIeHnBopca.
- OtnapnBaHne n ycTaPHeHne cKnaOk Ha TeKCTnne (TakKe ycTaPaHne 3anaxOB).
PpumeyaHue
Nap ebixodum npu haxamuu Ha ebiklouameIb nodaunapa.Chauana Hanpaumb Napoeo nucmolem Hacanfemky, noka nap He 6ydom ebixodumpbabHomepHo.
TpaHcnpTnOpBka
△OCTOPOXHO
Heco6IIOdeHue Beca
Onachocmb nolyuhenma mpaum u noepexdehu Bo epmmpaHcnopmupoeku yumbiamb bec ycmpoucmea.
1.ДЯпенихкустpoиCTBa erO cneDyET 6paTb 3a pyKу ДЯпенихockи n 3a ydInHHTeNbHyTO Tpy6Ky (cneuaNBHa npHaIeNEXHOCTb).
2.ПипеpeBo3e yctpoiCTBaВ TpaHcnopTHbIX cpeICTbax 3aФИКСИрОВaTb erO OT CkONьжEHЯ n ONpOKnIbIBaHnB B COOTBETCTBnC DeIcTBYUOuIMN npabunamn.
Xpahenne
△OCTOPOXHO
Hecobjdoehueeeca
Onachocmb noJyehu mpaM u nobpexdeHu Bo epem xpanehu yumbibamb bcycmpoucmba.
YcTpoIcTBo pa3peIaETCxpaHHTb TOnbKO B NOMeIeHNX.
YxOД n TexHnueckoe 06cIyXnBaHne
ONACHOCTb
Onachocmb npaxeHua 3Jekmuueckum mokom
TpaBmI e pezylbmae kacaHua mokoeedyux yacmeu
BbIKHouumb ycmpoucm80.
U38neuwmencelbHyuBulky.
ONACHOCTb
Onachocmb u3-3a oopaye eodbl, npa u oopayux noepxHocmeu
Onachocmb oxko206
Ipeed hauanom IIObix paobom daume ycmpoucmey ocmbimb.
PombyBka KOTna
Kotel napoochntTeTn npombIbTb He no3dHee, Yem nocJe kKaDoro 5-ro 3anONHeHn KOTJa.
- Y6paTb npHaJnxHocTn 3OtceKa.
- OToeDHHnTb npoBOu WJNaHr ot yctpoNCTBa.
- HanoHnHTb napOBoKOTeJ BDOOn I 3HepruHO BCTpXHyTb. 3TO HeoXoDmO dIra NIOHrTna OCTaTKOB HAKIN, OCEBuxN Ha DHO napOBOro pe3epByapa.
- BbINITb BOy.PcCyHOK E
YdaJIeHHe HAKINN n3 KOtJa
Bbiknioumb ycmpoucm80.
138neuebwmencelbHyuBulky.
ONACHOCTb
Onachocmb u3-3a 2opqeu eodbl,napa u 2opqux noeepxHocmeu
Onachocmb oxko20e
Ipeed hauanom IIObix paobom daume ycmpoicmey ocmbim.
ONACHOCTb
Onachocmb u3-3a HenpaunbH02o peMOHa
Onachocmb dna 3doopobu u onachocmb noepexdeHua Pemohm ycmpoucma dojken bblonHmcbr moIbko aemopuzoahHO cepuechOU cnkybo.
KoHTpOlbHna NaMNoUka «HexBaTka BObI» CBETnC KpaChbIM UCBETOM
1.Доить Вody.
KoHTpOJIbHaJaMNoUka «YdaJeHne HaKInn» CBETTcR KpaChbIM UBeTOM
- YdaHnTb HaKnInb n3 np6opa.
CepBnchna cnyx6a
EcnHnCnpaBHOCTb He ydaetc yctpaHtB, YcTpoIcTB Heo6xOIMO OTnpaBHTb Ha npOBepky B cepBnCHyIO cnYk6y.
TapaHTn
B kaxdoi ctpane DeicTBYOT COOTBEcTByOuine rapaHTnHbIe ycNoBna, yCTaHOBneHHbIe ynoHMOUeHHoJ opraHn3aunie no C6by TaHaWe npOdyKun.Bo3MoXhIe HeNCnpaBHOCTN yCTpoiCTBa B TeueHne rapaHTnHoro cpoKa Mbl yCTpaHReM 6ecnNaTHO, ecn npuHa 3aknOuaETcB DeΦeKTax MaTePnAOB nnn npOn3BOcTBeHHbIX 6pake. B cnyae BO3NHKOHeHn IpeTeHn B TeueHne rapaHTnHoro cpoKa npoc6ba o6paatbcra C yekom O nOKyInke B ToproByIO opraHn3aunIO, npOdaBWyIO n3denn EINB 6bnkaWyo yNOJHOMOueHHyO cnyk6y cepBncHoro 06cnyKBaHN.
(Adpec yka3aHa Ha o6opoTe)
Data BbInycka oTo6paXkaeTcH Ha 3aBOckoT Ta6nueK B 3aKOpOBaHHOM BnE.
Pn3TOMOTdIbHbIeUΦpblmEHT CNeDyIOuee 3HaueHHe::
Приимер: 30190
3 roB BbInycka
0 CToneTne Bbinycka
1 DecTnIeTne BbInycka
9 BTOPAIcPMAeCaBbInycka
0 nepBaIuΦpa MeCraa BbInycka
TakIM 06pa3OM, B DaHHOM npMpe KoD 30190 O3Haayet DaTy BbInycka 09/(2)013.
Chairman of the Board of Management

S. Reiser
Director Regulatory Affairs & Certification
Пиц, OTBETCTBeHHoe 3a BeDeHne DOKymeHTaUN:
II. Pau3ep (S. Reiser)
Alfred Kärcher SE & Co. KG
Alfred-Karcher-Str. 28-40
71364 Winnenden (Germany)
Ten.: +49 7195 14-0
_aKc: +49719514-2212
Winnenden, 2020/10/01
TexHnueckne XapaKTepncTnKn
SG 4/2
Classic
3NeKtpnueckoe NpKnIoueHne
Winnenden, 2020/10/01
Muszaki adatok
SG 4/2
Classic
strankach: www.kaercher.com/REACH

H.Jenner
Chairman of the Board of Management

S. Reiser
Director Regulatory Affairs & Certification
Zmocnenec pro Dokumentaci:
S. Reiser
Alfred Kärcher SE & Co. KG
Alfred-Karcher-Str. 28 - 40
Winnenden, 2020/10/01
Technické udaje
Kazalo
Nevarnost oparin in opeklin
Preden začnete z delom počakajte, da se naprava oh-ladi.
Izpiranje kotla
Winnenden, 2020/10/01
Tehnični podatki

Chairman of the Board of Management

S. Reiser
Director Regulatory Affairs & Certification
Administrator dokumentaci:
S. Reiser
Alfred Karcher SE & Co. KG
Alfred-Karcher-Str. 28 - 40
71364 Winnenden (Germany)
Tel.: +49 7195 14-0
Winnenden, 2020/10/01
Dane techniczne
SG4/2
Classic
Directive UE relevante
2009/125/UE
2014/30/UE
2014/35/UE
Norme armonizate aplicate
EN 55014-1:2017 + A11:2020
EN 55014-2: 2015
EN 60335-1
EN 60335-2-54
EN 61000-3-2: 2014
EN 61000-3-3: 2013
EN 62233: 2008
Standarde nationale aplicate
TRD 801

H.Jenner
Chairman of the Board of Management

S. Reiser
Director Regulatory Affairs & Certification
Insarcinat cu elaborarea documentatiei:
S. Reiser
Alfred Kärcher SE & Co. KG
Alfred-Karcher-Str. 28 - 40
71364 Winnenden (Germania)
Tel.: +49 7195 14-0
Fax: +49 7195 14-2212
Winnenden, 2020/10/01
Date tehnice

H.Jenner
Chairman of the Board of Management

S. Reiser
Director Regulatory Affairs & Certification
71364 Winnenden (Germany)
Tel.: +49 7195 14-0
Fax: +49 7195 14-2212
Winnenden, 2020/10/01
Technické udaje
Sadržaj
www.kaercher.com/REACH
Namjenska uporaba
- Ure'daj je namijenjen za cisćenje s parom i moze se koristiti s prikladnim priborom, kako je opisano u ovim uputama za rad.
- Ovaj uredaj prikladan je isključivo za profesionalnu uporabu.
- Ovaj uredaj nije prikladan za industrijsku uporabu.
Simboli na uredaju
Para POZOR - opasnost od opeklna
Opasnost od opeklinza zbog vrucih povrsina!
Pregled uredaja
Opis uredaja
Sika A
①Przacza uskomlaznu mlaznicu
(2) Pretinac za pribor
3 Položaj ručnog nastavka u pretincu za pribor
4Polozaj parnog crijeva u pretincu za pribor
(5)Mreznikabel
6Mreza za pohranu mreznog kabela
(7)Ručka (sklopiva)
(8) Poklopac uredaja
⑨ZatvaračPoklopca urežaja
10Kuciste
(11) Poklopac uticnice uredaja
12Natpisna pločica
(13)Parni prekidač
(14)Parni pistojl
(15) Gumb za zakljucavanje
16Brava (zaštita za djecu)
(17)Polożaj parnog pistolja u pretincu za pribor
Upravljacko polje
19Mreza za pohranu pribora
20 Bravica spremnika
21Spremnik svjeze vode (uklonjiv)
2 Sigurnosni zatvara (parni kotao)
(23)Parno cijevo
(24)Parni utikač
25Produzna cijev (poseban pribor)
26Uskomlazna sapnica
(27)Ručni nastavak
28 Podni nastavak lamelama (posebni pribor)
(29) Krpa za pod (posebni pribor)
30 Okrugla cetka (velika) (posebn pribor)
31 Ravna mlaznica
(32) Ravna Četka
33Visokoučinska mlaznica
34 Okrugla cetka (mala)
35Navlaka od mikrovlakana
36Sredstvo za uklanjanje kamenca
Upravljacko polje
Sika B
① Kontrolna Zaruljica -uklanjanje kamenca (crveno)
② Kontrolna zaruljica - grijanje: postupak zagrijavanja (crvena), spremnost za rad (zelena)
3 Gumb za resetiranje - uklanjanje kamenca
4 Kontrolna zaruljica -nedostatak vode (crvena)
5 Prekidač za način rada: Način rada s parom (gore), VAPOHYDRO (dolje)
6 Prekida Za grijanje (uklj./isklj.)
Sigurnosni uredaji
Sigurnosni uredaji sluze za zastitu korisnika i ne smiju se stavljati izvan pogona niti se smije zaobici njihovo funkcioniranje.
Regulator tlaka
Regulator tlaka tijekom rada uredaja odrzava tlak u kotlu sto je to vishe moguce konstantnim. Kada se postigne maksimalni radni tlak u kotlu, grijanje se isključuje i po-novno se uključuje kad tlak u kotlu padne zbog oduzi-manja pare.
Termostat za nedostatak vode
Kad vode u kotlu gotovo više nema, temperatura na grijanju raste. Termostat za nedostatak vode iskjučuje grijanje, a kontrlna zaruljica "Nedostatak vode" svijetli crveno. PonovnoPokretanje grijanja sprečava se svedok se kotao ne ohladi ili ponovno ne napuni.
Sigurnosni termostat
- Ako je termostat za nedostatak vode neispravan i uredaj se pregrije, sigurnosni termostat isključuje uredaj.
- Za resetiranje sigurnosnog termostata obratite se nadleznoj servisnoj sluzbi KARCHER.
Sigurnosni zatvarač
- Sigurnosni zatvarač zatvara kotao protivno postojěčem tlaku pare. Ako je regulator tlaka neispravan te u kotlu nastane pretlak, u sigurnosnom zatvaraču otvara se pretlačni ventil i para kroz zatvarač izlazi van.
- Prijje ponovnog uključivanja ureža obratite se nad-ležnoj servisnoj sluzbi KÁRCHER.
Metode ciścenja
Winnenden, 2020/10/01
Tehnički podaci
SG4/2
Classic

H.Jenner
Chairman of the Board of Management

S. Reiser
Director Regulatory Affairs & Certification
Lice ovlasceno za dokumentaciju:
S. Reiser
Alfred Karcher SE & Co. KG
Alfred-Karcher-Str. 28 - 40
71364 Winnenden (Germany)
Tel.: +49 7195 14-0
Winnenden, 2020/10/01
Tehnički podaci
06uynka3aHn
| SG 4/2 Classic | ||
| Elektrichi priključak | ||
| Napon elektrichi ne mreže V 220-240 | ||
| Faza ~ 1 | ||
| Mrežna frekvencija Hz 50 | ||
| Vrsta zašite IPX4 | ||
| Klasa zašite I | ||
| Snaga grejanja | W | 2250 |
| Kapacitet pumpe | W | 50 |
| Podaci o snazi urežaja | ||
| Zapremina rezervaora | I | 1,5 |
| Zapremina kotla | I | 0,5 |
| Maksimalni radni pritisak | MPa(bar) | 0,4 (4,0) |
| Maksimalna radna temperatura | °C | 145 |
| Vreme zagrevanja | min | 3 |
| Količina pare (maks.) | g/min | 50 |
| Dimenzije i težine | ||
| Tipična radna težina | kg | 7,5 |
| Dužina x širina x visina | mm | 460 x298 x265 |
| Mrežni kabl | ||
| Tip mrežnog kabla | mm² | H05VV-F 3x1,0 |
| Broj dela (EU) | 6.647-757.0 | |
| Broj dela (GB) | 6.647-831.0 | |
| Dužina kabla | m | 5 |
Zadržano pravo na tehnicoke promene.
CbDpXaHne
O6uynka3aHn 119
3aunTa Ha OKoJHaTa cpe Da 119
Perynatop Ha HanraHaTeO
PerynatopbHa HaHaRaHTo NoDbpKa HaHaRaHTo B KOTeMa MAKcMaJIHO NOCTOHHo NIO BpeMe Ha pa6ota. HarpaBaHTo Ce n3KIOUba npu DOCTnraHe Ha MaKcMaJIHO To pa6TOHO HAIraHe B KOTena I Ce BKIOUba OTHOBn pncnHa HAIraHTo B KOTena BCNECTBne Ha OTdEHAHTo Ha npa.
NoCTBaHe Ha NOBbpxHOCTn C NOKpNTne HnHa NaKnpaHn NOBbpxHOCTn
Пи почбтвае Ha ЛakupaHи Ил сабdeHи C ПОИМерноКрптупесьрхнocTи, KaTO Hanp. Кухненси Ил кипшп Мeбeн, BpaTи, napket, ПИНоЛeум, могат Да ce OTдeЯгп Ил дa ce помeни цБeТВ Т ha BaKcata, ПОЛNTypaТаHa MeбeNTe, ПОИМерппсп Крпту, Ил дa ce obpa3yВaT netha. Пи почбтваеTo Ha Te3N NOBbpxHOCtN obneite 3a КраТКо Edna KbpNa cnapa И n36bPwete ПОИБьХHOCtNte C Heя.
NouctBaHe Ha cTbKJIO
Pn ceoHnte c oc6eHo Hnckn TemnepaTyPi 3arpeTe npedbapntenHO CTbKnIoTO Ha npo3opeua. 3a Ta3n Uen o6neIe C mAnko KOInueCTBO napa UraNata NOBbpxHOCT Ha CTbKIOTo OT npi6n. pa3cTOrHne 50 cm. Taka ce u368rBat HanpeKeHnB NobbpxHOCTTa, KOnTO MORaT Da DOBeDaT Do ChyInBaHe Ha CTbKnIoTO.
KoHTpOHaTa JAmna "HeIOCTnHbOda" CBeTn B cepBHeHo
1.ДоелTeвoga.
KoHTpoJIHaTa NaMaNa "OTCTpaHЯBaHe Ha KOTneH KaMbK" CBETN B YepBeHo
Bb BcKa Ka DpbKabBa ca BaHnHn H3daJeHHe OT Haun OToPn3pan Anctp6yTop rapaHNoHH yCNoBn.
EbeHTyaHn nobpeiHa Baunypei OTe TpaHm B pAMKInTe Ha rapaHcNOnHHn Cpok 6e3PiAtHo, Ako ce Kacae 3a DeΦeKT B MaTePnaJIte Nn npOn3BQdCTBeH DeΦeKT. B cIyua Hn PpeJRABaHe Ha npaBO Ha rapaHcN, ce ObpHete KbM Baun DaNCTpNbTyOp nN KBM Hau-6n3KnO OTOpN3uPAH cepBn3, KaTO npEdCTaBnTE KACOBaTa 6eJexKa.
(Adpec, Bxk. 3aHaTa cTpaHa)
Akecoapn npeepBnu qactn
N3noJ3BaIte cAmO opuHnHaHn AkceCoapn OpunHnHaJIHn pe3epBHN qactn, no To3n HaunocnpyraBe 6e3onacHata n 6e3npo6JeMHaeknloataaHa ypea.
Hhopmaun OTHOCHOKCECOAPn pe3epBHN qactn ue HamepuTe Tk: www.kaercher.com.
CneuaJIHn npHaJdxKHOCTN
Pa3peSeHa e ynoTpe6aTa cAmo Ha oDo6peHn OTo npOn3BODHTeN CneUanHn npNaDJIeXHOCTn.

H.Jenner
Chairman of the Board of Management

S. Reiser
Director Regulatory Affairs & Certification
Пьномошник NOДOKум entaunraTа:
S. Reiser
Alfred Karcher SE & Co. KG
Alfred-Karcher-Str. 28 - 40
71364 Winnenden (Germany)
Ten.: +49 7195 14-0
_aKc: +49719514-2212
Winnenden, 2020/10/01
TexHnueckn daHHN
| SG 4/2 Classic | |
| Еlektrichiеско CBьрзванe | |
| Мразково наразожени V 220-240 | |
| Фаза ~ 1 | |
| Мразкова чECTOTа Hz 50 | |
| Тил зашита IPX4 | |
| Клас зашиURA I | |
| Нагревателна мошноct W 2250 | |
| Мошност на помпата W 50 | |
| Данни за мошноста на урета | |
| Вмостимост на розерboaраа | I 1,5 |
| Вмостимost на кOTеña | I 0,5 |
| Мakсимално павOTно налаяганe | MPa(bar) 0,4 (4,0) |
| Мakсимално павOTно Temпегатура | °C 145 |
| Вре'mе за подраванe | min 3 |
| Колчесъю пара (макс.) | g/min 50 |
| Размери и тergla | |
| Типунно собстveno тerglo | kg 7,5 |
| Дылжинахшиочиных височиha | mm 460 x 298 x 265 |
| Мразков зaxpanваш кабел | |
| Тил megков зхароваш кабел | mm² H05VV-F 3x1,0 |
| Homeр на част (EU) | 6.647-757.0 |
| Homeр на част (GB) | 6.647-831.0 |
| Дылжина на кабел | m 5 |
3ana3BaMe cn npaBOTO HaTexHueckn IpomeHn.
Sisukord
Tarvikute monteerimine

H.Jenner
Chairman of the Board of Management

S. Reiser
Director Regulatory Affairs & Certification
Dokumentatsoonivolinik:
S. Reiser
Alfred Karcher SE & Co. KG
Alfred-Karcher-Str.28-40
71364 Winnenden (Germany)
Tel: +49 7195 14-0
Winnenden, 2020/10/01
Tehnilised andmed
Saturs
www.kaearcher.com/REACH

H.Jenner
Chairman of the Board of Management

S. Reiser
Director Regulatory Affairs & Certification
Pilvarotais sagatavot dokumentaciju:
S. Reizers (S. Reiser)
Alfred Kärcher SE & Co. KG
Alfred-Karcher-Str.28-40
71364 Winnenden (Vacija)
Tālr.: +49 7195 14-0
Fakss: +49 7195 14-2212
Winnenden, 2020/10/01
Tehniskie datum
Chairman of the Board of Management

S. Reiser
Director Regulatory Affairs & Certification
Winnenden, 2020/10/01
Techninai duomenys
3Mict
He BnKOpncToBvIe MmUoyi 3ac06n!
- 3akpnTn Kpnuky 6aka.
- BCTaBnTn 6ak dnn qucToi BOuN.
- 3akpntni 3a6nokyBaTn Kpniu npncToIO.
KepyBaHHa
YbIMKHeHH npncToPOU
PiI qac BnKopncTahH Harpibau nepioDnHOBMkaeTbCra (KOHTpOlbHa NaMaNa CBITntbCayepBOHm) dnniITpImaHH TnCKy B KOTNI.
- Y pa3i yBIMKHeHHI npncToPO 6e3 BOIN CNoaTky CBiTbCRA KOHTpOJIbHa JAMNa «HarpibaHHra», DOKN TepMOCTa3axNCTy BiD HeCTaHi BOIN He BIMKHe HarpibaHHra. Notim KOHTpOJIbHa JAMNa «HeCTaHa BOIN» CBiTbCRA YepBOHm KOnbOpom.
- BctabNTn mepexeBn uTekep y po3eTky.
- Po36nokyBatn Ta BiDkprntn Kpnu npncToPOU.
Bka3ieKa
Iid yac po6omu kpuwka npucmpoio noBuHnHa 3auiuamuc bdkpumoo, uob moxha byno baumu KOHmponbHi naMnu.
3. YbIMKHyTn npncptpi 3a donomoroB BMnkaH aHarpiBaHHa KoHTpoJIbHa JAmna CBITnbCay HepbOHm KOnbOpom.
Bka3ieka
Noha nomyXhicmb HaepieaHna docyaembcr minbku e momy eunadky, kuo ndac HaepieaHna do npucmpo npueDHaHO wmekep napoezo wana2a. Kaoo KOHmPoBHa lamnoqka «HaepieaHna» cbimumbc 3eJeHUM KJbOpom, cucmema zomoea do po6omu.
4. BumkyTu HarpiBaHHB Bmukayem Ipn TpaHcnpTyBaHH npucTpoI.
5. HatnchutyHa BmMkaH noaH nap,napa BHXoNTb Ha3OBHi.CnoaTky HnpaBHTn npOBn nicToNET Ha TKAHHy,doKn npa He BHXoNTUmepiBHOMipHO.
VAPOHYDRO
YBONORNxpMIMIeHHx6pyMOXHa3MnBaTN,aHe npn6upatn noRo raHcyipKO.ДЯ zuoro BVKOPNCTOByaTN pexm VAPOHYDRO npiTpMaHHBvCOKOi BONORcty cTpyMeHi napi. Pnpu bomy BxOHTb rapayn cTpyMinb Bodn, 3a6e3neHyE mKcMmaJIbHn eFeKT npOMBAHHa.
-Длгпрбираньу BaHHiKimHati peKOMeHdyeTbcBnKOpNcToBvBaTu VAPOHYDRO,HaNPikJa,yNoeHaHHI3TOUKObIM CONlOM.
PiJ cac po60n 3 raHuyipkAmn (HacaKa nnpiiNOrn, pyHa HacaKa) BVKOpncTOByBaTu peKIMpo60tn 3 npoIO nnpiITpMaHHa Hn3bKO rO pIBBOIOnB CTpyMeHi napi. Lc NOKpaUe cnlypo3HNHeHH6pyd npao.
Bka3ieka
Y pexkmi VAPOHYDRO komei cnopoknioembcra wudwe, 0o o3hnae, uo uo2o moxha eukopucmosyamu minbku npomraom Kopomko2o yacy.
- YbIMKHyTN/BmMKHyTN VAPOHYDRO 3a donomoroo nepemnkaaypekimib.
DJIINBaHHBODN
Bka3ieKa
JaKuo ooda e 6aky dny uycmoi oodu bumpaeha, KOHmpoIbHa lamna «HeemaHa oodu» ceimumbcya cepBOHUM KOJIbOpOM.
Bka3ieka
Kaio Hacoc He3eaKaHc Ha NobHu 6ak dny uucmoi bOdu He nodaec body, mpeba budanumu hakun 3 Komna.
- BntaTn 6ak dIy qHcToI BOHN.
- Bɪdɪkpɪntɪ Kpɪnʌkʊ 6aKa dʒər uɪcTɔːtɪ Bɔŋ.
- HauNTB6akDJIaYHcToiBOu npu6n3Ho1,5niTa BOOpOBoiHOI BOu.
- 3akpnTn KpnsKy 6aka.
- YctabNTn 6ak dny uNCTO BoNi, KOHTpoIbHa IaMna «HectaHa BOn» 3rache. KoHTpoJIbHa IaMna «HarpibaHH» Cbitntbcra cepBOHM, a nicJy 3aBepWeHH HarpibaHH - 3eNeHIM KOJIbOpOM, cnCTema roToBa do po6OTn.
Bi'eHaHH npuaa
△HE6E3NEKA
Kpyana uimka He ndoohn yumnueux noepxohb.
HacaKa dna nIdnOr
HacaKa nna iinorn 3 lamenm (cneuaJIbHe npnaAa)
-Дя ririchHOrO OunueHHrJaKnX NOBepxOHb, ockinbkN TemnepaTypa nobepxHi Bnue.
-ДяOTPIMAHHririEHIHOro pe3yIbTaTy OuHHeHHnOaBaTn npay 6e3nocepEnhBo Ha TBepdy NOBepxHIO 3po6OHo WbUdkicTIO He 6iJIbWe 30 cm/C.
BnKOpncTaanHraNHyipKnIaIiDnorn (cneuaIbHe npnaA
PepiouHNO nepeBepTaTn i 3amHOBaTn raHypKy dny niDnOrn dny KpaUoro 3bnpaHH6pydy.
- 3akpinTu raHupKy dny niIbnor Ha Hacadzi dny niIbnor. Dny cboRo cKnactu cepBETky dny niIbnor B3doBx i noknactu Ha Hei HacaKdy dny niIbnor, BiKpTu 3aTnCKaYi, NOMCTTu KInUc cepBETKu B OTbOpu i uJbHo HataRHyTu ix, 3akPtu 3aTnCKaYi.
△OSEPEXHO
He6e3neka yepe3 3amuckaqi
He6e3neKa 3aueemnenn
He npocoeyeamu nalbuji mix 3amuckaHaMu.
PyuHa HacaKa
IiXoUHTb IaI HeBeJIuKx NOBepXOHb, IO MNUOTbcra, dywoBux Ka6iH, 3epKaI a6o Me6JIeBux TkaHH.
- Hatahyn ha puHy hacaiky yoxoJ 3 mikofo6pn.
HacaKa JIy MHTB BIKOH (cneuiabhe npuaD)
Homep 173amOBnHH 2.863-025.0
DorjiaTexHiueo6cnyroByBaHHa
△HE6E3NEKA
He6e3neka ypaKeHHn eIekmuHm cmpymom
Tpaemu e pezynbmani mopkaHn cmpymoBedyux yacmuH
Bumkhymu npucmpiu.
Bumru umencelbny uky.
HE6E3NEKA
He6e3neKa oniky zapraoIO bdoIO,napoIO ma o6 zapayi noepxhi
He6e3neka orikie
Ipeed noamkom 6yob-aykux poibim daume npucmpo0 oxoJohymu.
PommbHHKOTJa
PpomBaTn KOTen napoouChnka He n3Hiue HIX nicna KOKHOro 5- ro 3anOBHeHH KOTna.
- Pnp6paTn npunaIaI3 BiDciKy.
- BiédHaTn napOBm IaHr BiD npncToIO.
- HanobHnTn napOBn KOTeB BOIO TO a eHepriiHo cTpycuTn. Lc eoONMOKe po0CHNHTn 3aJIuKn HAKIny, IIO BiIKnlaIncb Ha dHi napOBoro pe3epByapa.
- BUNITN BOY. ManHOHOK E
BudaneHHaKnny 3 KoTna
ДяВидаленин haKunny, lo yTBopnacra Ha CTiHKaX KOtna, peKOMeHdyeMo YIcTnKoTeJ 3a DOnomorOIO oprahichoro 3aco6y dЯ BvdaIeHry haKunny KARCHER RM 511. Bio3aci6 dЯ BvdaIeHry haKunny KARCHER RM 511 BurotoBleHry Ha OChOBI JIMOHHOI KcNOTi i TOMy nobHicTTO 3dATHN Do 6ioJorIHORo po3uJeHHra.
yBAGA
He6e3neka 8id HenpuadamHux 3ac06ie dna eudaneHHaKuny
He6e3neKa nowkodxehn
Lio6 3anobium nowkodkeHHIO npucmpoIO, eukopucmoByume minbku zacobu dnn budanenHn haKuny, cxanehi KomnaHicIO KARCHER. He eukopucmoBysamu ouem abo nodihi zacobu.
yBAGA
He6e3neka eio po3uHy dna eudaneHHaKuny He6e3neKa nowkoedhen
Hikonu He 3aunueaume po3uH dna eudaneHHaKuny 6bak dny uco moi bodu, ockinbku ue moke npu3becmu do nowkodxehnHa coca.
- Bntarhytn wTeNceJIbHy BNkY 3 pO3eTkn.
- BiikpyTHTn 3anobixHy npo6ky i nobHicTIO 3nITN BOy 3 napOBoro KOTna.
3.Повсгю розинчтп оин naketк зacoby Дьвдаленя накиу B0,5 litpax tenloi BOДи,notiHOrpo3miuIyUOHy. - 3aIITn po3uH 3ac06y dIra BuaIeHH HaKIny B KOTeI. He HApCyUbTu 3anO6ixHy np6ky Ha npncpti niD vac npocecy BuJaIeHH HaKIny.
△HE6E3NEKA
He6e3neka y pa3i 6duxuaHna aepo3oJis
Hebe3neka dna 3do08'
He eukopucmoeyume npucmpiu, noku 8 komni ue 3aci6 dny budaneHHHaKuny.
- 3aIIuHTn po3Hn DJI BnDJIeHHa HAKIpy dIaTn np6Jn3Ho Ha 8 roDn (Ha Hi).
- Bnnt np3HH nIy BuaenHna HauNy. He MeHwe DBOX pa3IB npomtn KOTeXoIOHO BOIO, 0o6 6ytBneBHeHM y Tomy, 0oB npicTpoi biJbWe Hemaec JoDHNx 3aIIuKIB. 3akpyTtN 3ano6ixHy npo6ky.
- Po36nokyBatu Ta BiDkpuTn Kpuu npncTropoU.
- Ybimkhny npncTpni.
- HatncKaTn KhoNky CKnDaHHa, DOKN KOHTpOblHa lamna «BuaaneHHa Hauiny» He 3rache. Pnpctpi 3HOBy roTOBn Do 3actocyBaHHa.
Bka3ieka
Ppu6n3HoYepe320oouhpo6omuKoHmponbHa namna «BudaneHHaHKuny» noka3yE Heo6xidHicmb HacmynHO2o BudaneHHaHKuny.
- 3akpntni 3a6nkyBaTn KpniKny npncTroIO.
Donomora B pa3i HecnpaBHOcte
△HE6E3NEKA
He6e3neka ypaKeHH enekmpuHm cmpymom TpaMu e pezIbmani mopKaHH cmpyMoEdyux yaCmuH
Bumkhymu npucmpiu.
Bumru umencelbny buky.
△HE6E3NEKA
He6e3neka oniky zaparyo odoio,napo ma 06 zapayi noepxhi
He6e3nka onik8
Ipeod nohamkom 6ydb-aykux poibim daume npucmpoio oxonohymu.
△HE6E3NEKA
He6e3neka yepe3 HehaJIeKHi peMoHmHi po6omu
He6e3neKa mpa8MyBaHHma nowkodKeHb
Pemohmi pobomu noBuHHi buKoHybamucr minbku aemopuzoBaHO cepBicHO cnyk6o.
KoHTpOJIbHa IaMaNa «HeCTaHa BODn» CbiITbcra YepBOHIM KOnIbOpOM
1.ДоЛNTN BODY.
KoHTpoJIbHa JIaMna «BuaJaleHnHa KaINy»
CBITbcra YepBOHm KOJIbOpOM
- BvdaJIHTn HAKIN i3 npIcTpoI.
CepBicHa cIyX6a
Ko noKOxHHe moXHa yCyHyTn, Heo6XiHo nepeBipTu npCTpiy cepBichi cnyk6i.
TapaHTia
YkoKhi KpaIHi DIIOTb BiIDNObIHr rapaHTiHi yMOBn, BCTaHOJIeHI yNOHBaXeHOIO oprAizicIO 36yTu HauoI npOdykuii B cH KpaIHi. MoKniBi HecnpaBHOCTI npnAHy npOtaRGM rapaTlHoro cTPOky MN ycBaEMo 6e3KOuTBoH, kUO npuHa HecnPabHOcTI nonrae B deFekTx MaTePiaJIB a60 BnO6bHuOMy bpaKy. Y pa3i BHNKHeHH NpeTeH3i npOtaRGM rapaTlHoro cTPOky npOxAHHa 3BepTaTncRA, MAOnu npu Co6i Yek npo NOKynk, do ToproBeJIbHOI oprAizacI, zo npOdaIa npOdyKT, a6o Do hai6nKQoi yNOHBaXeHOI cnyx6bn cepBichoro o6cLyroBvAHnn.
(Adpecn INB. Na 3BOPoTi)
PpnaT Ta 3anachi deTani
CnD BnKOpNCToBvBaT NIwE opRiHaNbHe npuJaTa Ta opRiHaNbHi 3aNaChi YactHIn, TOMy IIO came BOHr rapaHTyIOb 6e3neHy Ta 6e3nepe6iHy EKcnNyataio npncTPOIO.
InΦopMauii ΣOIO npuiaIaIra Ta 3anachnx YactnH miCTNbCra Ha caTti www.kaercher.com.
Moxha BnKOpNCToBvBaTn NlIe CneuaJIbHe npIaIaIa, CXBaJIeHe Bnpo6HnKOM.
CneuaJIbHe npJauIaIaI

H.Jenner
Chairman of the Board of Management

S. Reiser
Director Regulatory Affairs & Certification
Oc06a, BiINOBiJaIbHa 3a BeDeHHN DOkymeHTaui:
II. Pau3ep (S. Reiser)
Alfred Kärcher SE & Co. KG
Alfred-Karcher-Str.28-40
71364 Winnenden (Germany)
Tei.: +49 7195 14-0
ΦaKc: +49 7195 14-2212
Winnenden, 2020/10/01
TexhiHIXapaKTepeNCTnKN
SG 4/2 Classic
Register your product and benefit from many advantages.
www.kaercher.com/welcome


Rate your product and tell us your opinion.
www.kaercher.com/dealersearch
Alfred Kärcher SE & Co. KG
Alfred-Karcher-Str.28-40
71364 Winnenden (Germany)
Tel.: +49 7195 14-0
Fax: +49 7195 14-2212