
PSW 1820 Battery - Saw Kärcher - Free user manual and instructions
Find the device manual for free PSW 1820 Battery Kärcher in PDF.




| Product type | Cordless pole saw (pruner) |
| Brand | Kärcher |
| Model | PSW 1820 Battery |
| Power supply | 18 V battery pack (Kärcher Battery Power 18 V) |
| Weight (without battery) | 3.8 kg |
| Dimensions (L x W x H) | 2920 x 188 x 94 mm |
| Guide rail length | 200 mm |
| Chain pitch | 3/8" |
| Idle speed | 5.5 m/s |
| Chain oil tank capacity | 50 ml |
| Max. cutting diameter | 180 mm |
| Max. working range | 3 m |
| Sound pressure level (LpA) | 78.4 dB(A) (uncertainty 3 dB) |
| Sound power level (LwA) | 91.6 dB(A) (uncertainty 3 dB) |
| Hand-arm vibration (front handle) | 1.3 m/s² (uncertainty 1.5 m/s²) |
| Main functions | Branch pruning, wood cutting |
| Maintenance and cleaning | Clean with a soft, dry cloth, check and adjust chain tension, lubricate, replace chain |
| Safety | Wear protective equipment (helmet, goggles, gloves, shoes), keep safety distance, safety lock, emergency stop |
| Spare parts and repairability | Use original Kärcher parts, authorized after-sales service |
| General information | Intended use: cutting and pruning branches at height. Do not use for climbing or cutting on the ground. |
Frequently Asked Questions - PSW 1820 Battery Kärcher
User questions about PSW 1820 Battery Kärcher
0 question about this device. Answer the ones you know or ask your own.
Ask a new question about this device
Download the instructions for your Saw in PDF format for free! Find your manual PSW 1820 Battery - Kärcher and take your electronic device back in hand. On this page are published all the documents necessary for the use of your device. PSW 1820 Battery by Kärcher.
USER MANUAL PSW 1820 Battery Kärcher
H. Jenner Chairman of the Board of Management
S. Reiser Director Regulatory Affairs & Certification
71364 Winnenden (Germany)
Tel.: +49 7195 14-0
Fax: +49 7195 14-2212
Winnenden, 2018/09/01
Contents
General notes. 21
Safety instructions 22
Intended use 30
Environmental protection 30
Accessories and spare parts.. 31
Scope of delivery 31
Symbols on the device 31
Protective clothing 31
Description of the device 31
Initial startup 32
Operation 32
Transport 32
Storage 33
Care and service 33
Troubleshooting guide 33
Warranty. 34
Technical data 34
EU Declaration of Conformity. 34
General notes
Read these safety instructions, these original instructions, the safety instructions provided with the battery pack and the original instructions supplied with the battery pack/ standard charger before using the device for the first time. Act in accordance with them. Keep the booklets for future reference or for future owners.
In addition to the notes in the operating instructions, you also need to take into consideration the general safety regulations and accident prevention guidelines applicable by law.
Safety instructions
Hazard levels
DANGER
- Indication of an imminent threat of danger that will lead to severe injuries or even death.
WARNING
- Indication of a potentially dangerous situation that may lead to severe injuries or even death.
CAUTION
- Indication of a potentially dangerous situation that may lead to minor injuries.
ATTENTION
- Indication of a potentially dangerous situation that may lead to damage to property.
General Power Tool Safety Instructions
WARNING
- Read all safety warnings and all instructions.
Failure to follow the warnings and instructions may result in electric shock, fire and/or serious injury. Save all warnings and instructions for future reference.
The term "power tool" in the warnings refers to your mains-operated (corded) power tool or battery-operated (cordless) power tool.
1 Work area safety
a Keep work area clean and well lit. Cluttered or dark work areas invite accidents.
b) Do not operate power tools in explosive atmospheres, such as in the presence of flammable liquids, gases, or dust. Power tools create sparks which may ignite the dust or fumes.
c) Keep children and bystanders away while operating a power tool. Distractions can cause you to lose control.
2) Electrical safety
a) Power tool plugs must match the outlet. Never modify the plug in any way. Do not use any adapter plugs with earthed (grounded) power tools. Unmodified plugs and matching outlets will reduce the risk of electric shock.
b) Avoid body contact with earthed or grounded surfaces such as pipes, radiators, ranges, and refrigerators. There is an increased risk of electric shock if your body is earthed or grounded.
c) Do not expose power tools to rain or wet conditions. Water entering a power tool will increase the risk of electric shock.
d) Do not abuse the cord. Never use the cord for carrying, pulling, or unplugging the power tool. Keep cord away from heat, oil, sharp edges, or moving parts. Damaged or entangled cords increase the risk of electric shock. e) When operating a power tool outdoors, use an extension cord suitable for outdoor use. Use of a cord suitable for outdoor use reduces the risk of electric shock. If operating a power tool in a damp location is unavoidable, use a residual current device (RCD) protected supply. Use of an RCD reduces the risk of electric shock.
3) Personal safety
a) Stay alert, watch what you are doing, and use common sense when operating a power tool. Do not use a power tool while you are tired or under the influence of drugs, alcohol, or medication. A moment of inattention while operating power tools may result in serious personal injury. b) Use personal protective equipment. Always wear eye protection. Protective equipment such as dust
mask, non-skid safety shoes, hard hat, or hearing protection used for appropriate conditions will reduce personal injuries. c) Prevent unintentional starting. Ensure the switch is in the off-position before connecting to power source and/or battery pack, picking up, or carrying the tool. Carrying power tools with your finger on the switch or energising power tools that have the switch on invites accidents. d) Remove any adjusting key or wrench before turning the power tool on. A wrench or a key left attached to a rotating part of the power tool may result in personal injury. e) Do not overreach. Keep proper footing and balance at all times. This enables better control of the power tool in unexpected situations. f) Dress properly. Do not wear loose clothing or jewellery. Keep your hair, clothing, and gloves away from moving parts. Loose clothes, jewellery, or long hair can be caught in moving parts. g) If devices are provided for the connection of dust ex
traction and collection facilities, ensure these are connected and properly used. Use of dust collection can reduce dust-related hazards.
4 Power tool use and care a Do not force the power tool. Use the correct power tool for your application. The correct power tool will do the job better and safer at the rate for which it was designed. b Do not use the power tool if the switch does not turn it on and off. Any power tool that cannot be controlled with the switch is dangerous and must be repaired. c Disconnect the plug from the power source and/or the battery pack from the power tool before making any adjustments, changing accessories, or storing power tools. Such preventive safety measures reduce the risk of starting the power tool accidentally. d Store idle power tools out of the reach of children and do not allow persons unfamiliar with the power tool or these instructions to operate the power tool. Power tools are dangerous in the hands of untrained users.
e Maintain power tools. Check for misalignment or binding of moving parts, breakage of parts and any other condition that may affect the power tool's operation. If damaged, have the power tool repaired before use. Many accidents are caused by poorly maintained power tools.
f Keep cutting tools sharp and clean. Properly maintained cutting tools with sharp cutting edges are less likely to bind and are easier to control. g Use the power tool, accessories and tool bits etc. in accordance with these instructions, taking into account the working conditions and the work to be performed. Use of the power tool for operations different from those intended could result in a hazardous situation.
5 Battery tool use and care
a Recharge only with the chargers specified by the manufacturer. A charger that is suitable for one type of battery pack may create a risk of fire when used with another battery pack. b Use power tools only with specifically designated battery packs. Use of any
other battery packs may create a risk of injury and fire.
c When the battery pack is not in use, keep it away from other metallic objects, like paperclips, coins, keys, nails, screws or other small metallic objects that can make a connection from one terminal to another. Shorting the battery terminals together may cause burns or a fire.
Under abusive conditions, liquid may be ejected from the battery; avoid contact. If contact accidentally occurs, flush with water. If liquid contacts eyes, additionally seek medical help. Liquid ejected from the battery may cause irritation or burns.
6 Service
a Have your power tool serviced by a qualified repair person using only identical replacement parts. This will ensure that the safety of the power tool is maintained.
Additional General Safety Instructions
Note: Regulations may restrict the use of this device in some regions. Seek advice from your local authorities.
DANGER: Risk of fatal injury from cuts as a result of uncon
Controlled device movements. Keep body parts away from moving parts. Risk of injury from hurled or falling objects. Never use the device if there are persons, in particular children or animals, within a radius of 15 m.
- No changes may be made to the device.
WARNING: Children and persons unfamiliar with these instructions are not allowed to operate the device. The age of the operator may be limited by local restrictions. You need an unobstructed view of the work area in order to be able to recognize any potential dangers. Use the device only under good lighting conditions. Before operation, make sure the device, all control elements, and safety devices are working properly. Check for loose locks, make sure all protective covers and handles are properly and securely fastened. Only use the device when it is in a correct condition. Replace any worn or damaged parts before operating the device.
- Never use the device if the trigger on the handle does not switch on and off correctly.
- Risk of kickback due to loss of balance. Avoid an abnormal posture, keep a stable, safe footing and maintain your balance. Serious injuries due to negligence through familiarity
with the device due to frequent use. - Immediately stop the device and check for damage or identify the cause of the vibration if the device has been dropped, hit or vibrates abnormally. Have damage repaired by the authorized Customer Service or replace the device.
CAUTION: Wear full eye protection and hearing protection, strong and sturdy gloves and head protection when operating the device. Wear a face mask when the work is dusty. Wear long, heavy trousers, sturdy shoes and well-fitting gloves when working with the device. Do not work barefoot. Do not wear any jewelry, sandals or short trousers. Risk of injury when loose fitting clothing, hair or jewelry is caught by moving parts of the device. Keep clothing and jewelry away from moving parts of the device. Tie long hair back.
- Hearing protection can impair your ability to hear warning sounds, so pay attention to hazards in your vicinity and in the work area. - The operation of similar tools in the environment increases the risk of hearing damage and the likelihood of failing to hear potential hazards, e.g. people entering your work area. - Slippery handles and gripping surfaces prevent safe
operation and control of the device in unexpected situations. Keep handles and gripping surfaces dry, clean, and free from oil and grease. Only use accessories and spare parts which are approved by the manufacturer. Only original accessories and original spare parts ensure that the appliance will run fault-free and safely.
Safety precautions for cordless saw
WARNING: Do not use the device if there is a danger of lightning. Ensure that all protective devices and handles are correctly fitted, securely fastened and in good condition.
- Ensure a firm footing, a clean workplace and plan a retreat path from falling branches before using the device. Beware of exhaust fumes, oil vapour and sawdust. If necessary, wear a mask or breathing apparatus.
- Always hold the branch cutter with both hands. Hold the shaft firmly with one hand. Hold the rear handle firmly with the other hand, operate the power trigger lockout button and the trigger.
- Risk of electric shock if the saw chain comes into contact with hidden power lines. Hold power tools only by the insulated gripping surfaces, as the contact with live cables can make the
metal parts of the device live.
- Risk of injury. Do not make any modifications to the device. Do not use the device to drive attachments or devices not recommended by the manufacturer of the device.
Kickback may occur when the nose or tip of the guide rail touches an object, or when the wood bends and jams the saw chain in the cut. Tip contact may cause a sudden reverse reaction in some cases, kicking the guide rail up and back towards the operator. Jamming of the saw chain in the top of the guide rail may push the rail rapidly back towards the operator. Any of these reactions can lead to a loss of control.
WARNING: Serious injuries due to loss of control through a kickback. Do not rely solely on the built-in safety devices, but take appropriate measures to work accident-free and injury-free. You must wear the carrying belt provided when using the device. The carrying belt is fitted with a quick-release buckle. The carrying belt helps you to control the device when it is lowered after cutting and to hold the weight of the device during cutting.
- Serious injuries if the carrying belt cannot be removed quickly enough in an emergency. Familiarize yourself with the carrying
belt and the quick-release buckle before using the device. Do not wear clothing over the shoulder strap or otherwise interfere with access to the quick-release buckle. Before switching on the device, make sure that the saw chain does not touch any objects. Serious injuries if a wrongly tensioned saw chain jumps out of the guide rail. Check the chain tension before each use. Make sure the chain is oiled, especially for new saw chains. • Switch the motor off, remove the battery pack and make sure that all moving parts have stopped moving: - Before cleaning the device or removing a blockage. - When leaving the device unattended. - Before mounting or removing attachments. - Before checking, cleaning or working on the device. - Risk of injury due to kickback. Measures to prevent a kickback: Make sure your work area is clear of obstacles. - Avoid any contact of the guide tip with branches, twigs or other objects while working with the branch cutter. - Hold the device with both hands. - Position your body and arms so that you can resist kickback forces.
- Never let go of the branch cutter during operation.
- Avoid unnatural postures. This gives you more control over the branch cutter and prevents unintentional contact with the tip of the bar in unexpected situations.
- Only use the replacement bars and chains recommended by the manufacturer. Incorrect replacement bars and chains may cause chain breakage and/or kickback.
- Sharpening the saw chain is a challenging task. The manufacturer recommends replacing a worn or dull chain with a new saw chain.
- Risk of injury. Do not use the device on ladders or unstable surfaces. Always stand with both legs on firm ground to keep your balance when cutting.
- Risk of electric shock. Do not work with the device within 10 m of overhead lines. - Risk of injury if a branch under tension snaps back when cutting.
- Watch for falling branches and branches that spring back after falling to the ground. - The operator can lose their balance if thin wood gets caught in the saw and flies in the direction of the operator. Be careful when sawing small shrubs and saplings.
- Check the saw teeth if the cutting performance diminishes.
Keep the cutting tools sharp and clean. Sharp cutting tools are easier to control and do not block so easily. If necessary, replace the chain and the bar. Only use original spare parts from the manufacturer. Risk of injury due to a jammed cutting device. If the saw chain or guide rail has become trapped too high to reach it, seek the advice of a professional arborist to safely remove the cutting device. Before each use, check that the shaft connection of the rod and the cutting tool are securely fastened.
ATTENTION • Only store the device indoors.
Additional safety instructions for the battery pack
WARNING: Danger of injury, fire and product damage due to short-circuit. Corrosive or conductive liquids, such as salt water, certain chemicals, bleach, and products containing bleach can cause a short-circuit. Do not immerse the device, the removable battery or the charger in liquids. Make sure that no liquids penetrate into the device or the battery pack.
Safe transport and storage
WARNING: Switch the device off, allow it to cool down and remove the battery pack before storage or transportation. Cover
the cutting tool with the bar scabbard before storing or transporting the device.
CAUTION: Risk of injury and damage to the device. Secure the device against movement or falling down during transport.
ATTENTION: Remove all foreign bodies from the device before storage or transportation.
- Store the device in a dry, well ventilated location out of the reach of children. Keep the device away from corrosive substances such as garden chemicals. Do not store the device outdoors. Make sure the chain is lightly oiled when storing the device for more than one month. The manufacturer recommends using a spray for rust protection and oiling. Ask your Customer Service department to recommend a suitable spray.
Safe servicing and care
Note: Service and maintenance work may only be performed by suitably qualified and specially trained personnel. We recommend sending the product to an authorised service centre for repair. You may only perform the adjustments and repairs described in these operating instructions. Contact your authorised Customer Ser
vice department for other repairs.
WARNING: Risk of injury. The saw chain is extremely sharp. Wear suitable protective gloves when performing chain maintenance and when cleaning, securing or removing the bar scabbard. Follow the instructions for chain tensioning, chain tension adjustment and chain lubrication. Severe injuries due to kickback if a damaged chain is not replaced or repaired. Turn off the motor and remove the battery pack before cleaning or servicing the device. Ensure that the device is in a safe condition by regularly checking that all bolts, nuts and screws are screwed tight. Risk of injury due to long, uninterrupted use of the device. Take regular breaks while working with the device.
CAUTION: Only use accessories and spare parts and attachments that are approved by the manufacturer. Only original spare parts, original accessories and original attachments ensure fault-free and safe operation of the device.
ATTENTION: Clean the product with a soft, dry cloth each time after use.
Residual risks
WARNING
- Certain residual risks remain present, even when the device is operated in the prescribed manner. The following dangers can be present when using the device: Vibration can cause injuries. Use the correct tools for the job, use the handles provided, and restrict the working time and hazard exposure time.
- Noise can cause hearing injuries. Wear hearing protection and limit the duration of exposure.
- Incision injuries on contact with exposed saw teeth of the saw chain.
- Incision injuries due to unforeseen, abrupt movements or kickback of the bar scrubber.
- Incision injuries / risk of injection by parts flying away from the saw chain. Injuries caused by hurled objects (wood shavings, splinters). Inhalation of dust and particles.
- Skin contact with the lubricant / oil.
Risk reduction
CAUTION
- Using the device for longer periods can cause poor circulation in the hands due to vibrations. A general period of use cannot be set, because this depends on several influencing factors:
vibrations. A general period of use cannot be set, because this depends on several influencing factors:
- Personal tendency to suffer from poor circulation (frequently cold fingers, tingling sensation in the fingers)
- Low ambient temperature. Wear warm gloves to protect your hands.
- Holding the device too tightly hindering blood circulation.
- Continuous operation is more harmful than operation interrupted by work breaks. You should see a doctor if using the device regularly and for lengthy periods of time, and in the event of repeated occurrences of symptoms such as tingling in the fingers or cold fingers.
Intended use
△DANGER
Improper use
Danger of death from incision injuries. Only use the device for its proper use.
- The cordless saw with extension is only intended for private use. The device is intended for outdoor use only.
- For safety reasons, always hold the device firmly with both hands. The device is intended for pruning and trimming small branches and twigs high on a tree. The user stands securely on the ground.
Any other use, e.g. when climbing, for pruning low branches or for cutting material at ground level is prohibited. The user shall be liable for hazards arising as a result of improper use.
Environmental protection

The packing materials can be recycled. Please dispose of packaging in accordance with the environmental regulations.

Electrical and electronic appliances contain valuable, recyclable materials and often components such as batteries, rechargeable batteries or oil, which - if handled or disposed of incorrectly - can
pose a potential threat to human health and the environment. However, these components are required for the correct operation of the appliance. Appliances marked by this symbol are not allowed to be disposed of together with the household rubbish.
Notes on the content materials (REACH)
Current information on content materials can be found at: www.kaercher.com/REACH
Accessories and spare parts
Only use original accessories and original spare parts. They ensure that the appliance will run fault-free and safely.
Information on accessories and spare parts can be found at www.kaercher.com.
Scope of delivery
The scope of delivery for the appliance is shown on the packaging. Check the contents for completeness when unpacking. If any accessories are missing or in the event of any shipping damage, please notify your dealer.
Symbols on the device
| General warning symbol | |
| Read the operating instructions and all safety instructions before operating the device for the first time. | |
| Wear non-slip, sturdy gloves when working with the device. | |
| Wear non-slip safety shoes when working with the device. | |
| Always wear suitable eye protection and hearing protection when working with the device. | |
| Do not subject the device to rain or moist conditions. | |
| Electrical hazard. Keep a minimum distance of 10 m away from overhead lines when working with the device. | |
| Danger due to flung objects. Keep spec-tators, especially children and pets, at least 15 m away from the work area. | |
| Pull: Quick-release catch | |
| Running direction of the chain |
Protective clothing
△DANGER
Risk of fatal injury from cut injuries. Wear suitable protective clothing when working with the device. Observe the local regulations for accident prevention.
Head protection
When working with the device, wear a suitable safety helmet that complies with EN 397 and is CE marked. When working with the device, wear hearing protection that complies with EN 352-1 and is CE marked.
For protection against flying splinters, wear suitable safety goggles that comply with EN 166 or are CE marked. Or wear a helmet visor that complies with EN 1731 and is CE marked.
Protective helmets with hearing protection and a safety visor are available in specialist shops.
Protective gloves
Wear suitable protective gloves with cut protection equipment that comply with EN 381-7 and are CE marked when working with the device.
Safety shoes
Wear non-slip safety shoes that meet EN 20345 and are CE marked when working with the device.
Description of the device
The maximum amount of equipment is described in these operating instructions. Depending on the model used, there are differences in the scope of delivery (see packaging).
See graphics page for illustrations. Illustration A
① Chain ② Guide rail ③ End stop ④ Guide rail pin ⑤ Bar cover ⑥ Screw for adjusting the chain tension ⑦ Chain oil tank cap ⑧ Upper shaft ⑨ Twist collar ⑩ Extension insert ⑪ Eyelet for carrying belt ⑫ Lower shaft ⑬ Handle ⑭ Battery pack trigger ⑮ Type plate ⑯ Trigger ⑰ Trigger lockout button ⑱ Carrying belt ⑲ Allen key for adjusting the chain tension ⑳ Bar scabbard ㉑ Chain oil ㉒* Battery Pack Battery Power 18V
- optional
Rechargeable battery pack
The device can be operated with a 18 V Kärcher Battery Power battery pack.
Initial startup
Installing shaft
If required, the device can be extended with the included extension insert.
- Connect the lower shaft and the extension insert. Illustration B
- Connect the upper shaft and the extension insert.
Inserting the carrying belt
The carrying belt helps to lower the device in a controlled manner after cutting and to catch the weight of the device during use.
Illustration C
- Hook the carrying belt hooks into the eyelets on the handle and shaft. Place the carrying belt over one shoulder. Make sure that the carrying belt can be released quickly in the event of danger.
Filling the chain oil tank
- If necessary, clean the area around the filling hole of sawdust and dirt.
- Remove the chain oil tank cap. Illustration D
- Fill the chain oil into the tank. Check the filling level of the chain oil on the sight glass and make sure that the chain oil tank is filled to the maximum below the filling hole.
Illustration E
- Wipe up any spilled chain oil with a cloth.
- Close the chain oil tank cap.
Checking the chain tension
CAUTION
Sharp chain
Incision injuries
Wear protective gloves when working on the chain.
- Remove the bar scabbard. Illustration F
- Carefully pull on the chain. Illustration G
The distance between the guide rail and the chain must be 3 - 4mm
- If necessary, adjust the chain tension (see Chapter Adjusting the chain tension).
Installing the battery pack
- Push the battery pack into the mounting in the device until it audibly latches into place. Illustration H
Operation
Basic operation
1.1. Examine the tree and branches for damage such as rot. In the case of damaged or rotten branches, seek the advice of a professional arborist. 2. Remove the bar scrabber. 3. Hold the device firmly with both hands.
Switch on the device
- Press the trigger lockout button. Illustration I
- Press the trigger.
The device starts up.
- Release the trigger.
The device stops.
Working techniques
When pruning, proceed as follows:
- Place the bar on the branch to be cut and push the device forward so that the end stop touches the branch.
Illustration J
The device stabilizes during pruning and the cuts are made cleaner.
Where possible, maintain a distance of approx. 15 cm between the tree trunk and the cut. - Cut small branches that are thin and light a single cut with the bottom edge of the guide rail. - Heavier branches of larger diameter may break or splinter during pruning. Therefore, cut in several steps:
a Make a cut in the underside of the branch with the top edge of the guide rail. This cut should be about one third of the branch diameter.
Illustration K
b Make a cut in the top of the branch. c If another cut is necessary, never continue cutting in an existing cut but rather start a new cut.
The following should be noted when pruning:
- Do not raise the bar higher than 60° from the horizontal.
- Do not exert excessive force on the guide rail.
- Do not stand under the branch being sawn off.
- Make sure that the falling branch does not endanger the user or spectators nor damage any objects.
- Maintain a safety distance of at least twice the branch length when pruning. If this is not possible, have the work done by a professional arborist.
Removing the battery pack
Note
During longer work breaks, remove the battery pack from the device and secure it against unauthorised use.
- Press the battery pack unlocking button to unlock the battery pack.
Illustration L
- Remove the battery pack from the device.
Finishing operation
- Remove the battery pack from the device (see Chapter Removing the battery pack).
- Clean the device (see Chapter Cleaning the device).
Transport
CAUTION
Failure to observe the weight
Risk of injury and damage
Be aware of the weight of the device during transportation.
CAUTION
Uncontrolled startup
Incision injuries
Remove the battery pack from the device before transport.
Transport the device only with the blade guard fitted.
- Secure the device against slipping and tipping over when transporting in vehicles.
Storage
Clean the device before storing (see Chapter Cleaning the device).
CAUTION
Failure to observe the weight
Risk of injury and damage
Be aware of the weight of the device during storage.
CAUTION
Uncontrolled startup
Incision injuries
Remove the battery pack from the device before storage.
Store the device only with the blade guard fitted.
- Remove the carrying belt.
- Disassemble the shaft into its individual parts.
- If the device is to be stored for more than one month, oil the chain to prevent rust.
- Store the device in a dry, well ventilated location. Keep away from corrosive substances such as garden chemicals and defrosting salt. Do not store the device outdoors.
Care and service
CAUTION
Uncontrolled startup
Incision injuries
Remove the battery from the device before all work on the device.
CAUTION
Sharp chain
Incision injuries
Wear protective gloves when working on the chain.
Cleaning the device
- Remove the battery pack (see Chapter Removing the battery pack).
- Use a brush to clean the chain of cutting residue and dirt.
Illustration M
- Clean the housing and handles with a soft, dry cloth.
Maintenance work
Before every use
The following activities must be carried out before every use:
- Check the filling level of the chain oil, top up the chain oil if necessary (see Chapter Filling the chain oil tank).
- Check the chain tension (see Chapter Checking the chain tension).
- Check the chain for sufficient sharpness, if necessary, invert the guide rail or replace the chain (see Chapter Replacing the chain).
- Check the device for damage.
- Check all pins, nuts and screws for tightness.
Adjusting the chain tension
- Remove the battery pack (see Chapter Removing the battery pack).
- Release the guide rail pin.
Illustration N
- Adjust the chain tension with the screw. Illustration O
- Check the chain tension.
Illustration G
The distance between the guide rail and the chain must be 3-4 mm.
- Tighten the guide rail pin.
Replacing the chain
- Remove the battery pack (see Chapter "Removing the battery pack").
- Remove the guide rail nut. Illustration P
- Remove the bar cover and guide rail. Illustration Q
- Dispose of the old chain professionally.
- Fit the new chain on the guide rail. Illustration R
- Mount the guide rail. Pay attention to the running direction of the chain. Illustration S
- Mount the bar cover, loosely fastening the guide rail nut. Illustration T
- Adjust the chain tension (see Chapter "Adjusting the chain tension").
Troubleshooting guide
Malfunctions often have simple causes that you can remedy yourself using the following overview. When in doubt, or in the case of malfunctions not mentioned here, please contact your authorised Customer Service.
As the battery pack ages, even if it is looked after, its capacity reduces such that the full run time will no longer be reached when fully charged. This does not indicate a defect.
| Fault Cause Rectification | ||
| The device does not start up | Battery pack is empty • Charge the battery pack. | |
| Battery pack is defective. • Replace the battery pack. | ||
| Battery pack is not inserted correctly. | • Push the battery pack into the mounting until it latches into place. | |
| The device stops during operation | Chain blocked by clippings. • Remove the clippings. | |
| The battery has overheated | • Stop working and allow the battery to cool down to normal battery temperature. | |
| Motor has overheated • Stop working and allow the motor to cool down. | ||
Warranty
The warranty conditions issued by our relevant sales company apply in all countries. We shall remedy possible malfunctions on your appliance within the warranty period free of cost, provided that a material or manufacturing defect is the cause. In a warranty case, please contact your dealer (with the purchase receipt) or the next authorised customer service site. (See overleaf for the address)
Technical data
| Device performance data | ||
| Working voltage of the battery V 18 | ||
| Idle speed m/s 5,5 | ||
| Chain oil tank volume ml 50 | ||
| Cut material diameter (max.) mm 180 | ||
| Working range (max.) m 3 | ||
| Determined values in acc. with EN ISO 11680-1 | ||
| Sound pressure level LpA | dB(A) 78,4 | |
| Uncertainty KpA | dB(A) 3 | |
| Sound power level LwA | dB(A) 91,6 | |
| Uncertainty KwA | dB(A) 3 | |
| Front handle hand-arm vibration value | m/s2 | 1,3 |
| Rear handle hand-arm vibration value | m/s2 | 1,2 |
| Uncertainty K m/s | 2 | 1,5 |
| Dimensions and weights | ||
| Length x width x height mm 2920 x | 188 x 94 | |
| Guide rail length | mm 200 | |
| Chain pitch | in | 3/8 |
| Weight (without battery pack) | kg 3,8 | |
Subject to technical modifications.
EU Declaration of Conformity
We hereby declare that the machine described below complies with the relevant basic safety and health requirements in the EU Directives, both in its basic design and construction as well as in the version placed in circulation by us. This declaration is invalidated by any changes made to the machine that are not approved by us.
Product: Battery-powered saw with extension
Type: 1.444-010.0
Currently applicable EU Directives
2014/30/EU
2006/42/EC (+2009/127/EC)
2011/65/EU
Harmonised standards used
EN 50581:2012
EN 55014-1: 2017
EN 55014-2: 2015
EN 60745-1:2009+A11:2010
EN ISO 11680-1:2011
EN ISO 12100:2010
Notified body, 0197 TÜV Rheinland LGA Products
GmbH; Tillystraße 2 D - 90431 Nürnberg, Germany has carried out EC type approval, certificate number: BM 50451225 0001
The signatories act on behalf of and with the authority of the company management.
H. Jenner
Chairman of the Board of Management
S. Reiser
Director Regulatory Affairs & Certification
Documentation supervisor: S. Reiser
Alfred Karcher SE & Co. KG
Alfred-Karcher-Str.28-40
71364 Winnenden (Germany)
Ph.: +49 7195 14-0
Fax: +49 7195 14-2212
Winnenden, 2018/09/01
Contents
General remarks 35
2006/42/EC (+2009/127/EC)
2011/65/EU
H. Jenner Chairman of the Board of Management
S. Reiser Director Regulatory Affairs & Certification
Responsible for documentation: S. Reiser
Alfred Karcher SE & Co. KG
Alfred-Karcher-Str.28-40
71364 Winnenden (Germany)
Tel.: +49 7195 14-0
Fax: +49 7195 14-2212
Winnenden, 01/09/2018
Index
H. Jenner Chairman of the Board of Management
S. Reiser Director Regulatory Affairs & Certification
71364 Winnenden (Germany)
Tel.: +49 7195 14-0
Fax: +49 7195 14-2212
Winnenden, 01/09/2019
Contents
Reducing risks
△CAUTION
Chain pitch in 3/8
Weight (without battery pack) kg 3.8
H.Jenner Chairman of the Board of Management
S. Reiser Director Regulatory Affairs & Certification
71364 Winnenden (Germany)
Tel.: +49 7195 14-0
Fax: +49 7195 14-2212
Winnenden, 2018/09/01
Table of contents
General notes. 80
2006/42/EC (+2009/127/EC)
2011/65/EU
Chairman of the Board of Management
S. Reiser
Director Regulatory Affairs & Certification
Documentation manager: S. Reiser
Alfred Kärcher SE & Co. KG
Alfred-Karcher-Str. 28 - 40
71364 Winnenden (Germany)
Tel.: +49 7195 14-0
Fax: +49 7195 14-2212
Winnenden, 01/09/2018
Indices
General indications 95
Safety instructions. 95
2006/42/EC (+2009/127/EC)
2011/65/EU
H. Jenner Chairman of the Board of Management
S. Reiser Director Regulatory Affairs & Certification
Winnenden, 2018/09/01
Contents
Relevant EU directives
2014/30/EU
2006/42/EC (+2009/127/EC)
2011/65/EU
Chairman of the Board of Management
S. Reiser
Director Regulatory Affairs & Certification
71364 Winnenden (Germany)
Tel.: +49 7195 14-0
Fax: +49 7195 14-2212
Winnenden, 2018/09/01
Contents
General notes. 124
2006/42/EC (+2009/127/EC)
2011/65/EU
Applied harmonized standards
EN 50581:2012
EN 55014-1:2017
EN 55014-2: 2015
EN 60745-1:2009+A11:2010
EN ISO 11680-1:2011
EN ISO 12100:2010
Notified body, 0197 TUV Rheinland LGA Products
GmbH; Tillystraße 2 D - 90431 Nürnberg, Germany has carried out the EC type examination, certificate number: BM 50451225 0001
Chairman of the Board of Management
S. Reiser
Director Regulatory Affairs & Certification
71364 Winnenden (Germany)
Tel.: +49 7195 14-0
Winnenden, 2018/09/01
Contents
General information. 137
⑦ Chain oil tank
8Vre skaft
9Vridmanschett
Chairman of the Board of Management
S. Reiser
Director Regulatory Affairs & Certification
Documentation authorized: S. Reiser
Alfred Kärcher SE & Co. KG
Alfred-Karcher-Str. 28 - 40
D-71364 Winnenden (Germany)
Phone: +49 7195 14-0
Fax: +49 7195 14-2212
Winnenden, 2018/09/01
Contents
General instructions 150
22*Battery Power 18 V
23*Battery Power 18 V - quick charger
- optional
Battery
Chairman of the Board of Management
S. Reiser
Director Regulatory Affairs & Certification
Documentation officer: S. Reiser
Alfred Kärcher SE & Co. KG
Alfred-Karcher-Str. 28 - 40
71364 Winnenden (Germany)
Tel.: +49 7195 14-0
Maintenance instructions
Before first use
Before each use, you must do the following:
Check the chain for proper tension, and if necessary, adjust the chain tension (see chapter on adjusting chain tension). - Check the chain tension (see chapter on checking chain tension). - Check if the chain is sufficiently sharp, and if necessary, reverse the blade or replace the chain (see chapter on replacing the chain). Check the device for damage. Check all screws, nuts, and bolts for tightness.
Chairman of the Board of Management
S. Reiser
Director Regulatory Affairs & Certification
71364 Winnenden (Germany)
Tel: +49 7195 14-0
Fax: +49 7195 14-2212
Winnenden, 2018/09/01
Table of contents
General warnings. 180
2006/42/EC (+2009/127/EC)
2011/65/EU
H. Jenner Chairman of the Board of Management
S. Reiser Director Regulatory Affairs & Certification
Winnenden, 09/01/2018
Contents
General safety instructions 193
Safety instructions for technical maintenance 194
Intended use 207
Environmental protection 207
Accessories and spare parts 208
Scope of delivery 208
Symbols on the device 208
Protective clothing 208
Description of the device 208
Putting into operation. 209
Operation 209
Transportation 210
Storage 210
Maintenance. 210
Troubleshooting 211
Warranty 211
Technical specifications 211
Declaration of Conformity with EU standards ... 212
General instructions
Before first use of the device
It is necessary to familiarize yourself with the instructions and safety precautions, the original operating instructions, as well as the attached safety instructions and the original operating instructions for the battery pack / standard charger. Act in accordance with them. Keep the documentation for future use by the next owner.
In addition to the instructions contained in the operating instructions, also observe the general
statutory safety regulations
to prevent accidents.
Safety instructions
Hazard level
DANGER
- Indicates an imminent hazard that will result in serious injury or death.
WARNING
- Indicates a potentially dangerous situation that could lead to serious injury or death.
CAUTION
- Indicates a potentially dangerous situation that could lead to minor injury.
WARNING
- Indicates a potentially dangerous situation that could result in material damage.
General safety instructions for working with electric tools
WARNING
Read all safety instructions and instructions.
Failure to follow safety instructions and instructions may result in electric shock and/or serious injury. Keep all safety instructions and instructions for future use.
The term "power tool" used in the safety instructions refers to electric tools powered by mains (with mains cable) and battery-powered electric tools (without mains cable).
1 Safety at the workplace: Keep the work area clean and well lit. Clutter or lack of light in work areas can lead to accidents.
Do not work with the power tool in explosive atmospheres where flammable liquids, gases, or
dust are present.
Power tools create sparks that could ignite dust or vapors.
Keep children and other persons away from the work area while using the power tool.
Ombelkaacb, Moxho nomepmb KoHmpoIb HaUHcmpymemom.
2 Electrical safety
The plug of the power tool must fit the socket. Do not modify the plug. Do not use adapter plugs with earthed power tools. Unmodified plugs and matching sockets reduce the risk of electric shock.
b Avoid physical contact with earthed surfaces, such as pipes, radiators, stoves and refrigerators. If your body is earthed,
there is an increased risk of electric shock.
c Keep
power tools away from rain and moisture.
Water entering a power tool increases the risk of electric shock.
d Do not use the cable for carrying, hanging up the power tool, or for pulling the plug out of the socket. Protect the cable from high temperatures, oil, sharp edges or moving parts of the tool.
Damaged or tangled
cables
increase the risk of
electric shock.
e When working with
the power tool
NOD OTKpbITbIM He6om HcNoJb3yIte TOnbKO
PnroHbIДJIa
HapyxHbIX pa6oT
yDJIINHNTeJIbHbI Kα6eJIb. IcNoJIb308aHue
πpu2oδH0sO ΚЯ ḤapyKhbIX pa6om yδnunumeJIbHo2o
Kabena chuxaem puck npaxhenu 3Jekmpuueckum mOKOM.
f Ecnn pa6oTa c 3JIeKTPoINHCTpymeHTOM BO BnaxHoN CpeDe HEn36ExHa, nCnoJb3yIte UcTPOiCTBO 3aunTHoro OTKJIIOUChENr. NcNoJIb3O8aHue maKO2O ycmpoucMba cHuXaem pUCK IopaxHeu r 3JIeKmpuyeCKUM mOKOM.
3 Be3oNaChocTb Iuca BydbTe BnMaTeIbHbI, cJeDInTe 3a CBOIMN DeiCTBnAIM N K pa6Ote C 3JIeKTPOnHCTPymeHTOM npNCtynaiTe C JCHbIM co3HaHHeM. He NCNoJb3yIte 3JIeKTPOnHCTPymeHT B COCTOHN yCTaIOCTN IIN IOd BnIAHHeM HApKOTIKOB, aIKOROJI NII JekapCTBeHHbIX npenapaTOB. Maneuwaj HeocmopoxHocmb npu POJb30BaHuU 3JIeKmpouHcmpymeHmOM MoJem npueecMu K cepbe3HbIM mpa6MaM.
b IcnoIb3yIte cpeIcTBa HnDnBnDyaJIbHOJ 3aHTbI N B o6a3aTeJIbHOM nOpJdKe - 3aHTHbIe OCh. IcNoJIb3ObaHue cpeOcmbe uHduBuDaJIbHOJ 3auumbl,
makux kaK npomubonbile80u pecnupamop, HECKOJIb3raa mpaemob6e3o7acna oby6b, kaca unu Ipomubowymhbie Haywhuku, 3abucumocmu om buda u uCnoB30aHua 3neKmpouHcmpyMeHma, chuxaem puck noIyuHnur mpaem.
c He donyckaTe HeKOHTPOIpnyeMOrO BKNIOUeyH.Npeed TeM Kak NODKNIQUHTb 3JIeKTPOINHCTpyMeHT K NCTOuHNky NITaHnY n/Nn aKKymyIATOpY, B3aTb ero nIi NpeheCTn, y6eINTecb, yTO OH BbIKIouyen. Ecnu npu IpeHocke 3JIeKmpouHcmpyMeHma 6bl depXume naLeu Ha 8bIKIouyameJe uLIu NOdKlIOyaeMe 6KJIIOUeyHbI UHCmpyMeHm K UcmoUHky Numahua, 3mo MoJem PpuBecmu K HeCyaacmHbIM ClyyayM.
d Ipeed BkIIOUeHHeM 3JIeKTPoINHCTpyMeHTa cIeIyET y6paTb peRyIInpOBOuHbI e HHCTpyMeHTbI NJI raeUHbI KJIOnu. IHcmpymEnm uIu KJIOnu, HaxOJaUuCra 60
epaauouecra demaru, moxem npuecmu K mpaumpuohuo.
e N36eRaTe HeecTeCTBcHHO TIOJoxHeNJA KOpNyCa BO BpeMpa6Otbl.CJeInte 3a yCTOnuHBbIM IOJoxHeHem n DepXTe paBHOBeCne.3mo I0360JIeM lyuwe KOHmpoUpOaMb 3JIeKmpouHcmpymh 8 HepeDeBuDeHHbIX cumyaux.
f IcnoIb3yIte noIxOJaIyIO OeJdy. He HaedeBaIte CBo6oDHyIO OeJdy nIIy yKpaWeHnY. He dOnyckaIte KoHTaKTa BOJOC, OeJdbI N IepuATOK C IOdBNXHbIMN qactaMn. C6o6oDa OeJda, nepaamku, yKpaWeHra Ulu dJIuHHbIe BOLocbl Mozym 6bImb 3ax6aueHbI NOBuxHbIMU demaJMy.
Before installing dust removal or collection devices, make sure they are properly connected and used correctly. Using a dust removal device can reduce
risks associated with dust.
4. Use and maintenance of electric tools. Do not overload the tool. For your work, use the electric tool intended for this purpose. Using the appropriate electric tool ensures better and safer work in the specified area of application.
Do not use the electric tool with a damaged switch. An electric tool that cannot be turned on or off is dangerous and must be repaired.
Before adjusting the tool, changing accessories, or storing the tool, unplug the tool from the power outlet and/or remove
the battery pack. This preventive measure prevents unintentional starting of the electric tool.
Store unused electric tools out of the reach of children. Do not allow persons who are unfamiliar with these instructions or who have not read them to operate the tool. Electric tools are dangerous if used by inexperienced users.
Electric tools require careful maintenance. Check for misalignment or binding of moving parts, breakage of parts, and any other condition that may affect the operation of the electric tool. If damaged, have the tool repaired before use. Many accidents are caused by poorly maintained electric tools.
In many cases, inadequate maintenance of electric tools is the cause of accidents.
f. Cutting tools must always be sharp and clean. Carefully maintained cutting tools with sharp edges are less likely to bind and are easier to control.
g. Electric tools, accessories, and tool bits, etc., must be used in accordance with these instructions. Consider the working conditions and the work to be performed. Using the electric tool for operations different from those intended could result in hazardous situations.
5. Use and care of battery packs. a. Charge the battery pack only with the charger specified by the manufacturer. A charger that is suitable for one type of battery pack may create a risk of fire when used with another battery pack.
b. Use the tool only with the specifically designated battery pack. Use of any other battery packs may create a risk of injury and fire.
c. When not in use, keep the battery pack away from other metal objects, like paper clips, coins, keys, nails, screws, or other small metal objects, that can make a connection from one terminal to another. Shorting the battery terminals together may cause burns or a fire.
d. Under abusive conditions, liquid may be ejected from the battery; avoid contact. If contact accidentally occurs, flush with water. If liquid contacts eyes, additionally seek medical help. Liquid ejected from the battery may cause irritation or burns.
Under certain circumstances, electrolyte may leak from the battery. Avoid contact with it. If contact with the liquid occurs, thoroughly
wash it off. If liquid gets into eyes, seek medical attention. Electrolyte can cause burns or irritation.
6 Service
Repair of the power tool must be carried out only by qualified specialists and only with original spare parts. This ensures the safety of the tool.
Intended use
Risk of injury
Use the device only for its intended purpose.
- The battery-powered pole pruner is intended only for private use.
- Operation of the device is intended only outdoors. For safety, always hold the device with both hands.
- The device is intended for cutting and pruning small branches and twigs high up in trees. The user stands firmly on the ground.
Any other use, for example climbing the tree, for pruning in the immediate vicinity of the operator, or for cutting vegetation at ground level, is not permitted. The user is responsible for risks associated with improper use.
Environmental protection

Packaging materials are recyclable. Dispose of packaging in an environmentally friendly manner.

Electrical and electronic devices often contain valuable materials suitable for recycling and also components such as batteries,
accumulators, and oil, which, if handled improperly or disposed of incorrectly, can pose a potential hazard to health and the environment. Nevertheless, these components are necessary for the proper functioning of the device. Devices marked with this
CIMBOJOM, 3aIpeUeHO yTUNIN3NPOBaTB BmecTe C 6bITOBbIMN OTXODAMN.
Yka3aHnno nHrpEnHeTAM (REACH)
Дя полуеня akTyaJIbHои nHфорmaцио6 nHrpeJneHTax CM. www.kaercher.com/REACH
PpOBepKa HATXKeHnIeHN
△OCTOPOXHO
Ocmpa yenb
Iope3bl
Bo 6pemn IIO6bIX paBom c ueIbIO HadeeaUme 3auumHbIe nepyamku.
- CHMNTe 3aunTHbI KOxuy cenn.
PucyHOK F
- Octopoxho notHnTe 3a enb.
PucyHok G
PacctoHne Mekny HnnpabJIOuei n cebHO DOnjHo COCTABJIbTb 3-4 MM.
- Pn Heo6xOIMOCt OtperyNipOBaTb HataKeHne cenn (cm. rnaBy PeryNipOBka HataKeHna cenn).
YctaHOBka aKKymyIaTOpHOrO 6Joka
1. Install the battery block into the device by pushing it in until it clicks. Figure H
Operation
Basic operations
1. Check the branches for damage, e.g., cracks.
If damaged branches are found, consult a professional arborist.
- Remove the battery. 3. Hold the device with both hands.
Switching on the device
- Press the unlock button and the switch of the device.
Figure I
- Press the switch of the device.
The device starts.
- Release the switch of the device.
The device stops.
Work technique
Procedure for sawing:
- Guide the branch in the direction you need to cut, and push the device forward to support the branch.
Figure J
Stabilize the device during cutting, and the cut piece will fall.
- If possible, maintain a distance of about 15 cm between the tree trunk and the cut. Small, thin, and light branches can be cut with a single movement using the lower part of the guide. Heavier branches of larger diameter may break or split during cutting. Therefore, cut in several stages:
a. Make a cut in the lower part of the branch, with the upper part of the guide. This cut should be about one third of the branch diameter.
Figure K
b. Make a cut in the upper part of the branch. c. If another cut is necessary, never continue it from the existing cut, but start a new one.
When cutting branches, observe the following:
Do not raise the guide more than 60° from the horizontal. Do not apply excessive force to the guide. Do not stand under the branch being cut. - Ensure that the branch being cut does not pose a danger to the user or observer and cannot damage any objects. During cutting, maintain a safe distance, which should be at least
the length of the branch. If this is not possible, entrust the work to a specialist.
Removing the battery block
Note
During longer work breaks, remove the battery block from the device and protect it from unauthorized use.
- Press the battery block unlock button to unlock the battery block.
Figure L
- Remove the battery block from the device.
Finishing work
- Remove the battery block from the device (see chapter Removing the battery block).
- Clean the device (see chapter Cleaning the device).
Transport
CAUTION
Failure to observe the weight
Danger of injury or damage during transport. Observe the weight of the device.
CAUTION
Uncontrolled start
Injuries
Before transport, remove the battery from the device. Transport the device only with the protective cover installed. - When transporting the device in vehicles, secure it against slipping and tipping.
Storage
Before storage, clean the device (see chapter Cleaning the device).
CAUTION
Store the device in a dry, well-ventilated place during storage.
CAUTION
Uncontrolled start
Cuts before storage. Remove the battery from the device. Store valuable items only with the protective cover installed. 1. Clean the device. 2. Disassemble the device into individual parts. 3. For devices with more than one place, lubricate the parts to prevent corrosion. 4. Store the device in a dry, well-ventilated place. Store away from corrosive substances, such as garden chemicals and salt for de-icing. Do not store the device outdoors.
Maintenance and servicing
CAUTION
Uncontrolled start
Sharp blades
Before carrying out any work on the device, remove the battery.
CAUTION
Sharp blade
Cuts
During any work with the blade, wear protective gloves.
Cleaning the device
- Remove the battery block (see chapter Removing the battery block).
- Clean the chain from resin and dirt residues with a brush. Figure M
- Clean the housing and handles with a soft dry cloth.
Maintenance work before each use
Before each use, the following actions must be performed:
- Check the oil level in the chain, if necessary add oil (see chapter Filling the chain oil tank).
- Check the chain tension (see chapter Checking the chain tension). Check sufficient sharpness of the chain, if necessary turn the guide bar or replace the chain (see chapter Replacing the chain).
- Check the device for damage.
- Check all bolts, nuts and screws for tight fit.
Adjusting the chain tension
- Remove the battery block (see chapter Removing the battery block).
- Loosen the guide bar bolt. Figure N
- Adjust the chain tension with the screw. Figure O 4. Check the tension. Figure P The distance between the guide bar and the chain should be 3-4 mm. 5. Tighten the guide bar bolt.
Replacing the chain
- Remove the battery block (see chapter Removing the battery block).
- Remove the guide. Figure P
- Remove the casing and the guide. Figure Q 4. Correctly tighten the old screw.
- Install the new guide on the guide. Figure R
- Install the guide. Pay attention to the direction of movement of the chain. Figure S
- Install the casing, then tighten the guide nut. Figure T
- Adjust the chain tension (see the chapter on chain tension adjustment).
Troubleshooting
Frequent malfunctions have simple causes, so with the help of the following guide they can be fixed independently. In case of doubt or if the malfunctions described here occur, contact an authorized service center.
Even with proper care, the battery capacity will decrease over time, so even when fully charged, the operating time will no longer be as long. This is not a defect.
Germany, EC type examination
Type of braid, certificate number: BM
50451225 0001
The undersigned acts on behalf of and with the authorization of the management.
H. Jenner Chairman of the Board of Management
S. Reiser Director Regulatory Affairs & Certification
Alfred Karcher SE & Co. KG
Alfred-Karcher-Str. 28-40
71364 Winnenden (Germany)
Tel.: +49 7195 14-0
Fax: +49 7195 14-2212
Winnenden, 2018/09/01
Table of contents
Chairman of the Board of Management
S. Reiser
Director Regulatory Affairs & Certification
Winnenden, 2018/09/01
Contents
General Instructions 227
Blade pitch 3/8
2006/42/EC (+2009/127/EC)
2011/65/EU
Applied harmonized standards
EN 50581:2012
EN 55014-1:2017
EN 55014-2:2015
EN 60745-1:2009+A11:2010
EN ISO 11680-1:2011
EN ISO 12100:2010
Chairman of the Board of Management
S. Reiser
Director Regulatory Affairs & Certification
Authorized for documentation: S. Reiser
Alfred Kärcher SE & Co. KG
Alfred-Karcher-Str. 28 - 40
Winnenden, 2018/09/01
General instructions 241
Safety instructions 241
Intended use 250
Environmental protection 251
Accessories and spare parts. 251
Scope of delivery. 251
Symbols on the device. 251
Safe transport and storage
△WARNING · Switch off the device before storing or transporting, wait for it to cool down, and remove the battery pack. · Before storing or transporting the device, cover the cutting tool with the chain guard.
△CAUTION • Risk of injury and damage to the device. Secure the device against movement or falling during transport.
www.kaercher.com/REACH
Accessories and spare parts
Use only original accessories and original spare parts, which ensure safe and smooth operation of the device.
Information on accessories and spare parts can be found at www.kaercher.com.
Scope of delivery
Chairman of the Board of Management
S. Reiser
Director Regulatory Affairs & Certification
Authorized representative for documentation: S. Reiser Alfred Karcher SE & Co. KG
Alfred-Karcher-Str.28-40
71364 Winnenden (Germany)
Tel.: +49 7195 14-0
2006/42/WE (+2009/127/WE)
2011/65/UE
H.Jenner Chairman of the Board of Management
S. Reiser Director Regulatory Affairs & Certification
Documentation administrator: S. Reiser
Alfred Kärcher SE & Co. KG
Alfred-Karcher-Str. 28 - 40
71364 Winnenden (Germany)
Tel.: +49 7195 14-0
Relevant EU Directive
2014/30/EU
2006/42/EC (+2009/127/EC)
2011/65/EU
Harmonized standards applied
EN 50581:2012
EN 55014-1:2017
EN 55014-2: 2015
EN 60745-1:2009+A11:2010
EN ISO 11680-1:2011
EN ISO 12100:2010
Notified body, 0197 TÜV Rheinland LGA Products
GmbH; Tillystraße 2 D - 90431 Nürnberg, Germany has carried out the EC type examination, certificate number: BM 50451225 0001
Chairman of the Board of Management
S. Reiser
Director Regulatory Affairs & Certification
Responsible for documentation: S. Reiser
Alfred Kärcher SE & Co. KG
Alfred-Karcher-Str. 28 - 40
71364 Winnenden (Germany)
Tel.: +49 7195 14-0
Fax: +49 7195 14-2212
Winnenden, 2018/09/01
Contents
Cleaning width in 3/8
Weight (without battery) kg 3.8
2006/42/EC (+2009/127/EC)
2011/65/EU
Chairman of the Board of Management
S. Reiser Director Regulatory Affairs & Certification
71364 Winnenden (Germany)
Tel.: +49 7195 14-0
Fax: +49 7195 14-2212
Winnenden, 01.09.2018
| Sadržaj | |
| Opće napomene | 2 9 9 |
| Sigurnosne napomene | 299 |
| Namjenska uporaba | 308 |
| Zašita okoliša | 308 |
| Pribor i zamjenski dijelovi | 3 0 9 |
| Sadržaj isporuke | 309 |
| Simboli na urežaju | 309 |
| Zašitna odječa | 309 |
| Opis urežaja | 309 |
| Pušanje u pogon | 310 |
| Rad | 310 |
| Transport | 310 |
| Kladištenje | 311 |
| Njega i odžavanje | 311 |
| Pomoc u slučaju smetnji | 311 |
| Jamstvo | 312 |
| Tehnički podaci | 312 |
| EU izjava o sukladnosti | 312 |
| Opće napomene | |
| Prijje prve uporabe urežaja pročitajte ove sigurnosne naputke, ove originalne upute za rad i priložene sigurnosne naputke za komplet baterija, kao i priložene originalne upute za rad za komplet baterija / standardni punjač. Postupajte u skladu s njima. Čuvajte knjižice za kasniju uporabu ili za sljedećeg vlasnika. Osim naputaka u uputama za rad, morate uzeti u obzir i opće propisi o sigurnosti i sprejćava-nju nezgoda koje je donio zakonodavac. | |
| Sigurnosne napomene | |
| Sigurnosne razine | |
| ΔOPASNOST | |
| • Uputa na neposredno prijetecu opasnosti koja bi mogla do-vesti do teške ozljede ili smrti. | |
| ski 299 | |
△WARNING
- Indicates a potentially hazardous situation which could result in serious injury or death.
△CAUTION
- Indicates a potentially hazardous situation which could result in minor or moderate injury.
NOTE
- Indicates a potentially hazardous situation which could result in property damage.
Before starting the machine
2006/42/EC (+2009/127/EC)
2011/65/EU
Applied harmonized standards
EN 50581:2012
EN 55014-1: 2017
EN 55014-2: 2015
EN 60745-1:2009+A11:2010
EN ISO 11680-1:2011
EN ISO 12100:2010
Notified body, 0197 TÜV Rheinland LGA Products
GmbH; Tillystraße 2 D - 90431 Nuremberg, Germany
has carried out the EC type examination, certificate number: BM
50451225 0001
Chairman of the Board of Management
S. Reiser
Director Regulatory Affairs & Certification
Documentation officer: S. Reiser
Alfred Karcher SE & Co. KG
Alfred-Karcher-Str. 28 - 40
71364 Winnenden (Germany)
Tel.: +49 7195 14-0
Fax: +49 7195 14-2212
Winnenden, 1.9.2018.
Contents
General notes 312 Safety notes 313 Intended use 322 Environmental protection 322 Accessories and spare parts 323 Scope of delivery 323 Symbols on the device 323 Protective clothing 323 Description of the device 323 Commissioning 324 Operation 324 Transport 325 Storage 325 Care and maintenance 325 Troubleshooting 325 Warranty 326 Technical data 326 EU declaration of conformity 326
General notes

2006/42/EC (+2009/127/EC)
2011/65/EU
Applied harmonized standards
EN 50581:2012
EN 55014-1:2017
EN 55014-2:2015
EN 60745-1:2009+A11:2010
EN ISO 11680-1:2011
EN ISO 12100:2010
Notified body, 0197 TÜV Rheinland LGA Products
GmbH; Tillystraße 2 D - 90431 Nürnberg, Germany has carried out prototype testing, certificate number: BM 50451225 0001
The signatories act on behalf and with the authorization of the management board.
H. Jenner
Chairman of the Board of Management
S. Reiser
Director Regulatory Affairs & Certification
Person authorized to compile the technical documentation: S. Reiser
Alfred Kärcher SE & Co. KG
Alfred-Karcher-Str.28-40
71364 Winnenden (Germany)
Tel.: +49 7195 14-0
Winnenden, 2018/09/01
Contents
Safety instructions 327
Safety instructions 327
Intended use 340
Environmental protection 340
Accessories and spare parts 340
Scope of delivery 340
Symbols on the device 340
Protective clothing 340
Description of the device 341
Safety instructions
Hazard levels
- Indicates an imminent dangerous situation that could lead to serious injury or death.
WARNING
- Indicates a potentially dangerous situation that could lead to serious injury or death.
CAUTION
- Indicates a potentially dangerous situation that could lead to minor or moderate injury.
NOTICE
- Indicates a potentially
- dangerous situation that
- could lead to
- material damage.
General safety warnings for power tools
WARNING
- Read all safety warnings and instructions. Failure to follow the safety warnings and instructions may result in electric shock and/or serious injury.
Storage of the device
Safety instructions and instructions for use.
The term "power tool" in the safety instructions refers to
your mains-operated power tool (with power cord) and
battery-operated power tool (without power cord).
1. Work area safety
a) Keep work area clean and well lit. Cluttered or dark areas
invite accidents.
b) Do not operate power tools in explosive atmospheres, such as in the presence of flammable liquids, gases or dust.
Power tools create sparks which may ignite the dust or fumes.
c) Keep children and bystanders away while operating a power tool.
Distractions can cause you to lose control.
2. Electrical safety
a) Power tool plugs must match the outlet. Never modify the plug in any way. Do not use any adapter plugs with earthed (grounded) power tools.
Unmodified plugs and matching outlets will reduce risk of electric shock.
da 3a2y6ume KoHmpoHa had ypeDa.
2 Electrical safety
a The power tool plug must match the outlet. Never modify the plug in any way. Do not use any adapter plugs with earthed (grounded) power tools. Unmodified plugs and matching outlets will reduce risk of electric shock.
b Avoid body contact with earthed or grounded surfaces, such as pipes, radiators, ranges and refrigerators. There is an increased risk of electric shock if your body is earthed or grounded.
c Do not expose power tools to rain or wet conditions. Water entering a power tool will increase the risk of electric shock.
d Do not abuse the cord. Never use the cord for carrying, pulling or unplugging the power tool. Keep cord away from heat,
oil, sharp edges or moving parts. Damaged or entangled cords increase the risk of electric shock.
e When operating a power tool outdoors, use an extension cord suitable for outdoor use. Use of a cord suitable for outdoor use reduces the risk of electric shock.
f If operating a power tool in a damp location is unavoidable, use a residual current device (RCD) protected supply. Use of an RCD reduces the risk of electric shock.
3 Personal safety a Stay alert, watch what you are doing and use common sense when operating a power tool. Do not use a power tool while you are tired or under the
influence of drugs, alcohol or medication. A moment of inattention while operating power tools may result in serious personal injury.
b Use personal protective equipment. Always wear eye protection. Protective equipment such as dust mask, non-skid safety shoes, hard hat or hearing protection used for appropriate conditions will reduce personal injuries.
c Prevent unintentional starting. Ensure the switch is in the off-position before connecting to power source and/or battery pack, picking up or carrying the tool. Carrying power tools with your finger on the switch or energising power tools that have the switch on invites accidents.
to
the power supply,
MOKe da ce cmu2He do
3JIOJNYku.
UJU OJIaUME KOCU MOZam
da 6bδam 3axeaHamu om
duxueumecyacmu.
g Ako morat da ce MOHTnpaT
cbopbxeHna 3a
IpaXOn3cMyKBaHe I
IpaxoylaBЯHe, yBepTe
ce, Ye Te Ca CBbP3aHn I Ce H3NoJ3BaT npaBnJHo.
I3noJ36aHemoHa
npaxou3cmyK8aHe moKe da
Hamaju puckoeme om
npax.
4 N3noJ3BaHe n o6cIyXBaHe Ha eJIeKTpOHHCTpyMeHTa
a He npetobapbaTe ypeDa.
I3noJ3BaIte 3a pa6oTara
cn npeBnDHeHna 3a TOBa
eJIeKTpOINHCTpyMeHT. C
nooohou
eIeKmpouHcmpymehm
paobomume no-odope u no
6e30nacHO 8 NOCOUHua
MOUHOCmeH duana3OH.
b He n3noJ3BaITe
eJIekTpOuHcTppyMeHT,
ЧИМТО ПЕВКЛЮЧВАТЕДЕФЕKTEN.
EneKmpouHcmpymeHm,
Koumo He Moxe noeue da
ce 6KJIIO48a UUNU3KJIIO48a,
Do not attempt to repair
the device.
With the exception of
the contact N/UNI
remove
the battery,
before adjusting
the settings on the device,
before cleaning
the accessories, or
when leaving the device. This
preventive measure
prevents
unintentional starting
of the power tool.
Do not use power tools in places where they are not safe for use. Do not allow people who are not familiar with the tool or who have not read these instructions to use it. Power tools are dangerous if used by untrained people.
Maintain power tools. Check for misalignment or binding of moving parts, breakage of parts, and any other condition that may affect the power tool's operation. If damaged, have the power tool repaired before use. Many accidents are caused by poorly maintained power tools.
Keep cutting tools sharp and clean. Properly maintained cutting tools with sharp cutting edges are less likely to bind and are easier to control.
They are less likely to bind and are easier to control.
Use the power tool, accessories, and tool bits etc., in accordance with these instructions, taking into account the working conditions and the work to be performed. Use of the power tool for operations different from those intended could result in a hazardous situation.
Battery tool use and care: Recharge only with the charger specified by the manufacturer. A charger that is suitable for one type of battery pack may create a risk of fire when used with another battery pack.
Use power tools only with specifically designated battery packs. Use of any other battery packs may create a risk of injury and fire.
When the battery pack is not in use, keep it away from other metal objects, like paper clips, coins, keys, nails, screws, or other small metal objects that can make a connection from one terminal to another. Shorting the battery terminals together may cause burns or a fire. Under abusive conditions, liquid may be ejected from the battery; avoid contact. If contact accidentally occurs, flush with water. If liquid contacts eyes, additionally seek medical help.
The battery pack may cause burns or a fire if it is damaged or modified.
Service
Have your power tool serviced by a qualified repair person using only identical replacement parts. This will ensure that the safety of the power tool is maintained.
This will ensure that the safety of the power tool is maintained.
Additional Safety Instructions
Note: In some regions, the use of this tool may be restricted by regulations. Consult your local authority.
DANGER: Danger to life from cuts and injuries caused by uncontrolled tool movement. Keep hands away from moving parts. Danger of injury from ejected parts at high speed or falling objects. Never use the tool if there are people, especially children, or animals within a radius of 15 m.
He mpr6ba da npednpuemame npomenu no ypeda.
△PPEyIPEKDEHNE
- Deua u xopa, Koumo He ca 3aNo3Hamu c moBa pbko0oDcmeo, He mpy6ba da pa6omam c mo3u ypeD. BauoHn Ha Mmcmomo pa3npope6u Mozam da HaIa2am O2paHUneHnra 3a 6b3pacm Ha o6cnykaUo JIue. - Hykdaeme ce om Heo2paHUneH nO2neD 6bpxy
pa6omhama 30ha, 3a da pa3no3Habame 6b3MOxHu onachocmu. N3noJ3Baumyepeda camo npu do6po ocBemnue. . Ppedu pa6omama ce ybepeme, ye ypebtm, 8cuuku obcnybav uIeMeHmu u npedna3Hu npucno6bneHua yHKUOHNpam npabunHO. Poepeme 3a pa3xnaBeHu 3ameapau npucno6bneHua, ybepeme ce, ye 8cuuku 3auumnu Kaauu u pbkoxbamku ca 3akpepeHu npabunHo u cuayrho. He u3noJ3BaumyepeDa, ako cbcmorHuemo My He e 6e3ynpueHo. . PpeDu da Iyncheme ypeDa e ekCnloamauzu, cMeHnMaTe u3Hocehume unu noBpeDeHu qacMu. Hukoza He pa6omeme c ypeDa, ako npekbcawbHMHa ypeDa Ha pbkoxbamkama He bKlOuya Ulu u3KlOuya npabunHo. Opanchocm om omkam nopadu 3a2y6a Ha pa6HOBecue N36yaumte HeobuauHa nO3uuzHa mJnomo, ocu2ypeme cu ycmoUuBO, cmaubnHO nOIOXeHue u na3eme pa6HOBecue. TeKku HapaHraBuHua nopadu He6peKnoxm npu omka3 om 3ano3NaBaHe c ypeDa nopadu yeema ynompe6a. Ako ypeBtm e naDnAn, buIe
ydaen uu bupupa HeobuaHNo, He3a6aHNo 20 cnpeme u npoepeme 3a nopedu, pecn. ycmaHObe me npuHa m3a bupaUume. Bb3noxepeMoHmHa nopeDume Ha omopuzupaHua cepu3 uuu cmHeMe ypeda. PEPDA3NBOCT
KoZamo pa6omume c ypeDa, Hoceme nblHa 3auuma 3a Ouyme u clyxa, ycmouuueu u 3dpabu pbkauu, kaKmo u 3auuma 3a 2naBama. Hoceme Macka 3a luue, KoZamo npu pa6omama ce o6pa3yba npax. - П pu pa6oma c ypeDa hoceme - bI2u, 3dpau nHaMaIOnHu, - 3dpau o6yEku u do6pe - npUraaupbKaBau. He - pa6omeme bocu. He hoceme - bujyma, caHdaIu uIu Kbcu - nHaMaIOnu. - OnacnOcm om - hapaHyaHua npu 3axBaUaHe - Ha c6o6oHo obKeKn, kocume - uNu Hakumu om dbuxKeUc - yacmu Ha ypeDa. DpbXme - obKeNomo u HaKumume daJeu - om dbuxKeUc ce yacmu Ha - MauUnama. Bpb3BaUme - dbIzume kocu Ha3ad. 3aumama 3a cnyxa moke da opaHnuycnoocmma Bu da ybame npedynpeumenu cu2nlu, 3amoe aHumaaume 3a 6b3MOxHu onacHocmu 6bIu30cm u e pa6omhama 3oHa. Pa6omama c noo6Hu uHcmpymenu 8
3aobukajama cpeda ybeuaba pucka om ybejdaHna cnyuua U bepormnocmma da He 6bdam ymu 6b3MOxHu onacnocmu, Hanp. xopa, Koumo Haeu3am 6B Bawaama pa6omHa 30Ha.
Xlb32aume pbkoxaumu u no6bpxhocmu Ha pbkoxaamkume 8b3npenmcmam 6e3oapano ynpaBneHue u KOHmpoHa ypeDa HeoukaBuHu cumyaauu.
Ia3eme pBkoXbAmKume u mexHume NOBbpxhocmu cyxu, yucmu u 6e3 MacNo u cMa3OCHu mamepuaJU. N3noJ3BaumecamO akcecoapu u pe3epHu yacmu, Koumo ca odo6peHu om npou3BODumJIa.
OpuzuHaHume akcecoapu u opuzuHaHume pe3ep6Hu yacmu ocuaypraam 6e3opacnama u 6e3npo6mHa ekcpnoamaaunaHa ha ypeDa.
IpeDn3Hm MepKn 3a akymyIaTopeH TpNOH
△ПЕДУПЕЖDEHNE·He u3noJ36aume ypeda npu onacHocm omMbJIHuU.
- YsepeMe ce, ye 8cuKu npedna3Hu npucnoc6JeHua pBkoXbamku ca npabUlno u cu2yphno 3aKepeHua 8 do6po cbcmOHaue. - PpeDu da u3NoJ3BeAme ypeDa, cu ocuaypeme cma6uInho
Always work and cut in the direction away from your body. - Protect yourself from vapors from the blade oil and shavings. If necessary, wear a mask or breathing apparatus. - Keep the blades sharp and the tool clean. Hold the tool firmly with both hands. With the other hand hold the rear handle, using the button to release the blade and the blade guard. - Danger of electric shock if the chain touches hidden electrical wires. Hold the electric tool only by the insulated gripping surfaces, as the chain may contact hidden wiring and could put the metal parts of the tool under voltage. - Danger of injury. Do not make any modifications to the tool. Do not use the tool for driving in nails or for tools not intended by the manufacturer. The kickback can occur if the tip of the guide bar touches an object.
The tool is switched on and the chain is set in motion. In some cases, contact with the tip of the bar can cause an unexpected reaction of the rear handle, which
The guide bar can be thrown up and back towards the operator. The chain catching on the upper edge of the guide bar can cause the bar to jerk back sharply towards the operator. Any of these reactions can lead to loss of control.
WARNING
- Heavy injuries can occur due to loss of control as a result of kickback. Do not rely solely on the built-in safety devices; take adequate measures for safe and injury-free work. When using the tool, you must wear the safety belt provided with it. The safety belt is equipped with a quick-release mechanism. The safety belt helps you control the tool when it drops after cutting and to hold the tool's weight during cutting. Heavy injuries can occur if, in a specific case, the safety belt cannot be released quickly enough. Before
using the tool, familiarize yourself with the safety belt and the quick-release mechanism. Do not wear any objects on the belt when working, and never tamper with the quick-release mechanism in any way. Before switching on the tool, make sure the chain is not touching any objects.
- Heavy injuries can occur when incorrectly tensioning the chain on the guide bar. Check the chain tension before each use. Make sure the chain is properly tensioned; this is especially important for new chains. - Switch off the engine, remove the battery, and make sure all moving parts have come to a complete stop:
- Then you can remove the blocked object. When leaving the tool unattended.
- First remove the battery and then the chain.
- Before checking, cleaning, or working on the tool.
- Danger of injury from kickback. Measures to avoid kickback:
- Make sure there are no obstacles in the work area.
- During operation, keep the tool with both hands. The tool is designed for use with the cutting attachment mounted on the top of the tool. Keep the tool with a firm grip.
- Hold the tool firmly with both hands in a position where you can maintain balance. Never let go of the tool during operation.
- Avoid awkward positions of the body. This will allow better control of the tool and prevent accidental contact with the blade in unexpected situations.
- Use only the cutting attachment and the cutting attachment guard. Ensure the cutting attachment and guard are properly mounted before use.
The tool is a complex task. The manufacturer recommends that the tool be used only by trained or experienced operators. - Risk of injury. Do not use the tool on unstable surfaces. During operation, always stand with both feet on the ground to maintain balance. - Risk of electric shock. Do not work with the tool in rain or near water. - Risk of injury if the blade kicks back suddenly during operation. Be careful of the blade and the blade guard, which may kick back suddenly after being lowered to the ground. If the blade gets stuck and kicks back towards the operator, the operator may lose balance. Be careful when cutting small branches and twigs. - If the cutting performance decreases, check the cutting teeth. Keep the cutting tools sharp and clean. Sharp cutting tools are easier to control and do not bind easily.
Necessity of changing the belt and the blade. For this purpose, use only original spare parts from the manufacturer.
- Risk of injury from the cutting attachment. If the belt or the cutting attachment is too high to reach, contact a professional arborist to lower the device. - Check the condition of the cutting attachment before each use.
WARNING: Store the tool in a dry place.
Mounting the battery
1. Insert the battery into the tool until it clicks into place.
Figure 1
Operation
Basic maintenance
- Check the blade for damage as described. If the blade is damaged or worn, replace it with a new one from a professional arborist.
- Only use the recommended belt. 3. Hold the tool firmly with both hands.
- Press the button to lock the trigger.
#
- Press the trigger. The device starts.
- Release the trigger. The device stops.
Working techniques
Pruning, as follows:
- Place the blade on the branch to be cut, and press the trigger forward, so that the guard touches the branch.
#
During pruning, the device stabilizes and the cuts become cleaner.
- If possible, keep a distance of about 15 cm between the trunk of the tree and the cut.
- Cut thin and light branches with a single cut using the lower part of the guide bar.
- Thicker branches with a larger diameter may bend or break during pruning. Therefore, perform the cut in a working position:
a) With the upper part of the guide bar, make a cut in the lower part of the branch. This cut should be approximately one third of the diameter of the branch.
Fura K
Cut the hedge at the top of the slope. If necessary, never cut in the evening, cut in the morning, cut the new growth.
When pruning, the following must be observed:
Do not raise the blade higher than 60 degrees from the horizontal. Do not apply excessive force to the guide bar. Do not stand under the slope that is being cut. Make sure the slope does not endanger bystanders or observers, nor damage objects. - During pruning, maintain a minimum safe distance of at least twice the length of the pole. If this is not possible, entrust the work to a professional arborist.
Removing the rechargeable battery
Instruction
For prolonged breaks in work, remove the rechargeable battery from the device and store it in a cool, dry place.
- Press the button for unlocking the rechargeable battery to release the rechargeable battery. Fig. 2. Remove the rechargeable battery from the device.
Maintenance work
1. Remove the rechargeable battery from the device (see chapter Removing the rechargeable battery). 2. Clean the device (see chapter Cleaning the device).
Transport
DANGER
Unintentional starting
Danger of injury and damage
When transporting, secure the device against tipping.
DANGER
Uncontrolled leakage
Order of operations
Before transport, remove the accumulator batteries from the device.
Transport the device only with the original packaging.
- When transporting in vehicles, secure the device against use and damage.
Storage
Observe the storage conditions of the device (see chapter Operation of the device).
DISPOSAL
Non-observance of the method
Danger from handling and operation
When storing, pay attention to the method of the device.
DISPOSAL
Uncontrolled leakage
Order of operations
Before commissioning for storage, remove the accumulator batteries from the device.
Remove the device from the packaging before use.
- Remove all packaging.
- Unfold the device and give it its shape. 3. If the device is not stored for more than one month, remove the device to prevent damage. 4. Store the device in a dry and well-ventilated place. Keep it away from corrosive substances such as acids for household use and salt solutions. Do not store the device open.
Device and surface
DANGER
Uncontrolled deployment
Serious injuries
Before any work, inspect
the device for damage.
DANGER
Sharp edges
Serious injuries
When working on the device, always wear protective gloves.
Cleaning the device
1. Remove the device from the packaging (see chapter "Removing the device from the packaging"). 2. Clean the device thoroughly with a material suitable for cleaning. 3. Clean the housing and handles with a soft, dry cloth.
Preparing the machine for operation
Before starting operation, the following activities must be performed:
- Check the oil level of the upper oil, and if necessary, add upper oil (see chapter Filling the upper oil reservoir).
- Check the tension of the chain (see chapter
- Checking the chain tension).
- Check the chain for sufficient tension, and if necessary, adjust the chain tensioner (see chapter Adjusting the chain).
- Check for damage.
- Check the bolts and nuts for a fixed position.
Adjusting the chain tension
1. Remove the battery (see chapter Removing the battery).
- Loosen the bolt of the guide bar. Figure 3. With the screw, adjust the chain tension. Figure 4. Check the chain tension. Figure 5. The distance between the guide bar and the chain should be 3-4 mm.
- Tighten the bolt of the guide bar.
Replacing the chain
- 1. Remove the battery (see chapter Removing the battery). 2. Loosen the nut of the guide bar. 3. Remove the guide bar. Figure 4. Remove the chain.
- Adjust the chain tension. Figure R
- Tension the chain. When doing so, pay attention to the direction of movement of the chain. Figure S
- Check the chain, and in doing so, secure the chain against falling off. Figure T
- Adjust the chain guide (see "Adjusting the chain guide").
Help with malfunctions
Many causes of malfunctions are elementary and can be remedied by yourself using the following instructions. If you are unsure or the malfunctions are not described here, contact an authorized service center.
With increasing age of the battery, the capacity decreases, so that even when fully charged, the full operating time is no longer achieved. This is not a defect.
H. Jenner Chairman of the Board of Management
S. Reiser Director Regulatory Affairs & Certification
Documentation representative: S. Reiser Alfred Kärcher SE & Co. KG Alfred-Kärcher-Str. 28 - 40 71364 Winnenden (Germany) Tel.: +49 7195 14-0 Fax: +49 7195 14-2212 Winnenden, 2018/09/01
Table of contents
General notes. 344
Safety instructions 344
Intended use 353
Environmental protection 353
H. Jenner Chairman of the Board of Management
S. Reiser Director Regulatory Affairs & Certification
Alfred Kärcher SE & Co. KG
Alfred-Karcher-Str. 28 - 40
71364 Winnenden (Germany)
Tel: +49 7195 14-0
Winnenden, 2018/09/01
www.kaercher.com/REACH
Accessories and spare parts
Use only original accessories and original spare parts, as they guarantee safe and faultless operation of the device.
H. Jenner Chairman of the Board of Management
S. Reiser Director Regulatory Affairs & Certification
Documentation prepared by: S. Reiser (S. Reiser)
Alfred Kärcher SE & Co. KG
Alfred-Karcher-Str. 28 - 40
71364 Winnenden (Germany)
Phone: +49 7195 14-0
Fax: +49 7195 14-2212
Chairman of the Board of Management
S. Reiser
Director Regulatory Affairs & Certification
Documentation manager: S. Reiser
Alfred Karcher SE & Co. KG
Alfred-Karcher-Str. 28 - 40
1. If necessary, clean the oil tank filler neck from dirt and grime. 2. Remove the cap of the oil tank. Figure D. 3. Fill the oil tank with oil. Check the oil level through the sight glass and make sure that the oil tank is not filled above the lower edge of the filler opening.
Figure E
4.3a If necessary, top up the oil tank using a funnel. 5. Close the oil tank cap with the handle.
Checking the oil level
CAUTION
Procedure
During any work with the oil tank, protect your hands.
Remove the oil tank cover.
- DIPSTICK
Carefully wipe the dipstick. The dipstick must be inserted into the oil tank opening until it stops, 3-4 mm.
- If necessary, adjust the oil level (see chapter Adjusting the oil level).
- INSTALLING THE BATTERY UNIT
1. Install the battery unit into the recess on the device and slide it until it clicks into place. Figure H
Operation
Basic operations
Check the tree and branches for damage, cracks, or rot. If you find damaged or rotten parts, contact a professional arborist.
2.3. Hold the tool with both hands.
Turning on the tool
- Press the unlock button to turn on the tool. Fig. 1
- Press the trigger to turn on the tool. The device starts. 3. Release the trigger. The tool stops.
Methods of operation
Procedure for use during operation:
- Place the saw on the branch to be cut and guide the tool forward so that it touches the branch.
Fig. 2
The tool stabilizes during operation, and the cut is clean.
- It is possible to hold the tool at a distance of about 15 cm between the tree trunk and the cut. Small, thin, light branches can be cut in one motion with the lower part of the guide. Larger diameter branches may bend or split after cutting. Therefore, cut them in several stages:
a. Make a cut in the lower part of the branch with the upper part of the guide. The cut should be about one third of the branch diameter.
Fig. 3
b. Make a cut in the upper part of the branch.
If you need a deeper cut, never force it into the existing cut, but start a new one.
When cutting, hold the tool as follows:
Never use the device at an angle greater than 60° from horizontal. Do not use large forces on the device. Do not place it under load, as it may tip over. - Make sure that the device is not a hazard to the user or observer and cannot fall on any objects. During operation, keep a safe distance that must be greater than the height of the device. If this is not possible, perform the work at your own risk.
Removing the battery block
Instructions
When removing the battery from the device, protect it from accidental use.
- Press the battery block release button, remove the battery block.
Figure L
- Remove the battery block from the device.
Completion of work
1. Remove the battery block from the device (see chapter Removing the battery block). 2. Clean the device (see chapter Cleaning the device).
Transport
DANGER
Improper handling
Safety during work and damage
When transporting the device
device.
CAUTION
Uncontrolled start
Injuries
Before transporting, disconnect the battery from the device.
Transport the device only with the protective cover installed.
When transporting by means of transport, secure the device against shifting and tipping.
Storage
Before each storage of the device, read the chapter on device maintenance.
CAUTION
Improper
Danger of injury from damage
When storing, take into account the device's weight.
CAUTION
Uncontrolled start
Injuries
Store the device in a dry place, protected from moisture.
Store the battery only with the protective cover installed.
- Remove the battery.
- Disassemble the device into separate parts. If the device is not used for more than one month, remove the battery to prevent corrosion.
- Store the device in a dry and well-ventilated place. Do not expose the device to corrosive substances, acids, chemicals, or salt water. Store the device only indoors.
Maintenance and Technical Service
CAUTION
Before Use
Before using the device, perform the following steps:
- Check the oil level in the engine, and if necessary, add oil (see the chapter on filling the oil tank).
- Check the fuel level (see the chapter on checking the fuel level).
- Check the sufficient tension of the belt, and if necessary, tighten or replace the belt (see the chapter on replacing the belt).
- Check the condition of the cutting tool.
- Check all bolts, nuts, and screws for tightness.
Adjust the fuel level
- 3. Remove the accumulator block (see chapter "Dismantling the accumulator block").
- Release the tension bolt.
Figure N
- Adjust the belt tension using the tensioner.
Figure O
- Check the belt tension.
Figure P
The distance between the tensioner and the belt should be 3-4 mm.
- Tighten the tension bolt.
Replacement
1. Remove the accumulator block (see chapter "Dismantling the accumulator block"). 2. Remove the tensioner spring. Figure Q
- Remove the cover and the tensioner. Figure R 4. Correctly position the belt.
- Install a new belt on the tensioner. Figure S
- Install the tensioner. Pay attention to the direction of belt travel. Figure T 7. Install the cover, slightly stretching the tensioner spring. Figure U
- Adjust the belt tension (see chapter "Adjusting the belt tension").
Elimination of malfunctions
Malfunctions often have a simple cause that can be eliminated independently using the instructions below. If in doubt or in the event of unspecified malfunctions, contact the authorized customer service.
The battery pack capacity decreases over time due to normal wear, so its operating time after a full charge will no longer be sufficient. This is not a defect.
Technical specifications
Chairman of the Board of Management
S. Reiser
Director Regulatory Affairs & Certification
Person responsible for documentation: S. Reiser
Alfred Karcher SE & Co. KG
Alfred-Karcher-Str.28-40
71364 Winnenden (Germany)
Tel.: +49 7195 14-0
Fax: +49 7195 14-2212
Winnenden, 01.09.2018
Kannbl Huyckaynap. 403
Kayinci3ik TexHnKacb6oBbHwa Hyckaynap .... 403
BiybIMdbMaKaCaTbHa cKeKc KOndaHy. 415
KopwaFah opTaHbI Kopfay 416
Kepek-kaapan KHeKocaJIkbI 6eJWeKTeP 416
XeTki3iJIM XnHaftbl 416
KypbIrfbldafl6enrinep. 416
Koprahbiw KIM 416
KypbIINfbIhBcH CnNaTTamacbl 416
Painanahyra eHri3y 417
PaiandaHny. 417
TacbImaIay. 418
CaKray. 418
KyTim XeHe TexHnKaIbIK Kbl3MeT KepeTy 418
Akaynap Ke3iHderi KEmek 419
Keninik 419
Technical manuals 419
Declaration of conformity with the standard. 420
Safety instructions
When using the battery, be sure to follow the safety instructions provided with the device, the safety instructions in the user manual, the safety instructions for the technical device, and the safety instructions for the standard charging device. Follow the instructions carefully. Do not use the device for purposes other than those intended. When using the device, keep the instructions and safety instructions in a safe place for future reference.
Safety instructions for the technical device
Battery warnings
WARNING
- Do not use the battery if it is damaged or if its liquid leaks.
CAUTION
- If the battery is damaged or its liquid leaks
Do not use the battery if it is damaged.
DANGER
- Do not use the battery if it is damaged or if its liquid leaks.
ATTENTION
- The device must be connected to a power source that meets the specified requirements.
ELECTRIC SHOCK HAZARD: DANGEROUS VOLTAGES ARE PRESENT.
- Read all safety instructions and warnings before use.
Instructions and safety precautions
Failure to follow the instructions may result in electric shock, fire, and/or serious injury.
Keep all safety instructions and warnings for future reference.
The term "electric tool" in the safety instructions refers to your mains-operated (corded) electric tool or battery-operated (cordless) electric tool.
1 Work area safety
a Keep your work area clean and well lit. Cluttered or dark work areas can lead to accidents.
b Do not operate electric tools in explosive atmospheres, such as in the presence of flammable liquids, gases, or dust. Electric tools create sparks which may ignite the dust or fumes.
c Keep children and bystanders away while operating an electric tool. Distractions can cause you to lose control.
2 Electrical safety
a Electric tool plugs must match the outlet. Never modify the plug in any way. Do not use any adapter plugs with earthed (grounded) electric tools.
b Avoid body contact with earthed or grounded surfaces, such as pipes, radiators, ranges, and refrigerators. There is an increased risk of electric shock if your body is earthed or grounded.
c Do not expose electric tools to rain or wet conditions. Water entering an electric tool will increase the risk of electric shock.
Do not use the device near bathtubs, showers, swimming pools, or basins filled with water. If the device falls into water, unplug it immediately before reaching in to retrieve it.
Protect the electrical appliance from rain and moisture. Do not immerse the electrical appliance or its power cord in water.
Do not disassemble the electrical appliance, do not insert your hands into it, or do not pull it out of the socket by the cord. Do not use the appliance with damaged cords, plugs, or loose sockets. Damaged or worn-out cords can cause electric shock.
When using the electrical appliance outdoors, use only extension cords rated for outdoor use.
Using an outdoor-rated extension cord reduces the risk of electric shock.
If the electrical appliance cannot be used in a damp place, do not use it with wet hands. Wet hands increase the risk of electric shock.
Be attentive and careful, do not get distracted while working with the electrical appliance. Do not use the electrical appliance if you are tired or under the influence of alcohol, drugs, or medication. A moment of inattention while using the appliance can lead to serious injury.
Wear protective glasses and a dust mask to protect your eyes and respiratory system. When using the electrical appliance, always wear safety glasses and a dust mask to protect against flying debris.
Wear protective gloves and non-slip footwear. Using protective equipment reduces the risk of injury.
Do not overreach. Keep proper footing and balance at all times. If you notice the electrical appliance overheating or if it emits smoke, unplug it immediately. Continuing to use the appliance in such conditions may cause a fire.
Before cleaning or servicing the electrical appliance, unplug it from the power source. Only use the appliance with the accessories specified by the manufacturer.
Do not use the device for purposes other than its intended use. Use only original spare parts and accessories. Proper handling of the electrical appliance reduces the risk of injury.
Do not allow children or untrained persons to use the appliance. Keep the appliance and its cord away from children. Children should not play with the appliance or its cord.
If the power cord or plug is damaged, have it replaced by the manufacturer or a qualified person. Do not attempt to repair the appliance yourself.
4 Using the electrical appliance Safety instructions a Do not use the appliance outdoors. Use the electrical appliance only indoors. When using the electrical appliance, ensure good lighting and safe working conditions.
b) Do not use the electric kettle without water. Before connecting, make sure the kettle is filled with water and properly closed.
c) If the kettle is damaged in any way, do not use it and disconnect it from the power supply and/or remove the battery. This safety measure prevents electric shock.
d) Do not place the electric kettle on surfaces that can be damaged by heat or moisture. Do not use the kettle if you are not familiar with it or have not read these instructions. Electric kettles are not intended for use by persons with reduced capabilities.
e) Do not immerse the electric kettle in water. If the kettle is accidentally immersed or if water gets into the electrical parts, do not touch it and unplug it immediately. Have it checked by a qualified person before using again.
f) Before cleaning or storing the kettle, make sure it is unplugged and has cooled down. Do not use abrasive cleaners or sharp objects that could damage the surface.
g) Follow these instructions for the electric kettle, accessories, and other parts. Pay attention to safety warnings and operating instructions. It is possible to use the kettle for other purposes if allowed by the manufacturer.
5. Battery charging and use: a) Charge the battery only with the specified charger. Using a different charger may cause damage.
b) Use the kettle only with the correct battery type. Using other batteries may cause damage or be unsafe.
c) When the battery is not in use, keep it away from short circuits caused by coins, keys, nails, screws, or other small metal objects. Short-circuiting the battery terminals may cause burns or fire.
d) In some countries, the battery may leak. Avoid contact with the leaked fluid. If contact occurs, rinse with water and seek medical advice. If the battery leaks, dispose of it properly.
6. Maintenance: a) Clean the electric kettle only with a soft cloth.
b) Do not use abrasive cleaners or sharp objects. This may damage the surface and reduce the lifespan of the kettle.
Technical safety instructions:
When operating the device, always keep the safety distance from the cutting tools. Do not touch the moving parts with your hands. If the device is damaged or malfunctions, stop using it immediately. Keep children and unauthorized persons away from the device. You must be careful when operating the device.
WARNING: This device is not intended for use by children or persons with reduced physical, sensory, or mental capabilities. It is possible that the protective devices may not function properly. To avoid injury from the cutting tools, it is necessary to maintain a safe distance.
Before starting the device, check that it is in proper working order. Before starting the device, ensure that the cutting tools are correctly installed and that all safety devices are in place. If the device vibrates excessively, stop it immediately. Before starting the device, remove any foreign objects or debris. If the device does not start or stops unexpectedly, do not attempt to start it again. Contact a qualified technician for repairs. Do not use the device if it is damaged or malfunctioning. Always follow the safety instructions and use the device with caution. If the device is used for purposes other than its intended use, the manufacturer's warranty may be void.
If the device is damaged or malfunctioning, contact an authorized service center for repair or maintenance.
CAUTION: When operating the device, always wear protective gloves, safety glasses, and sturdy clothing. Do not wear loose clothing or jewelry.
When using the device, keep your hands away from the cutting area and always wear protective gloves. Do not use the device without proper safety equipment. Do not use the device if the safety devices are damaged or missing.
If the device vibrates excessively or makes unusual noises, stop using it immediately. Do not touch the moving parts of the device with your hands. Turn off the device and unplug it before cleaning or performing maintenance.
- The protective devices on this equipment are designed to reduce the risk of injury. Do not remove or disable any safety features. Always keep the device away from children and unauthorized persons. If any safety device is damaged or missing, do not use the device and contact a qualified technician.
Before using the device, read and understand all safety instructions and warnings. Keep these instructions for future reference. Do not use the device if it is damaged or malfunctioning. Always use the device in accordance with the manufacturer's instructions. Do not use the device in explosive atmospheres or near flammable materials. Use only approved accessories and replacement parts. Do not modify the device in any way. If the device is not working properly, contact a qualified technician for repair.
Akkumulyator batareyaları
WARNING: If there is a current flow, do not touch the device. All protective devices and switches must be correctly and reliably secured. Do not stand in front of the device when it is in operation, and do not stand in the direction of the exhaust.
Do not place your hands near moving parts.
Do not store the machine in a damp place. If it gets wet, dry it with a cloth. Do not use the device with wet hands. Do not use the device with one hand. Use both hands to operate the device.
Do not use the device to clean or start the device. If the power cord is damaged, only use a grounded outlet. Do not use the device with a damaged power cord.
Use only the recommended accessories. Do not use the device for any other purpose. Do not use the device to lift heavy objects or to move objects. If the device is not working properly or if it is damaged, do not use it.
Possible. In some cases, the reaction may be more violent than expected, so the operator must be careful. The operator must be aware of the possibility of a sudden reaction.
These reactions may cause the device to malfunction.
WARNING: Do not use the device in a manner that could cause injury. Use only the recommended protective equipment, but do not rely solely on it. Always use the device with caution.
Use a suitable container for the waste. The waste container must be properly sealed. The waste container must be placed in a safe location.
Do not use the device if it is damaged or if it has been dropped. If the device is damaged, do not use it and contact a qualified service technician.
Do not use the device if it is damaged. Before using the device, check the device and the power cord for damage. If the device is damaged, do not use it. Do not use the device if the power cord is damaged. Do not use the device if the plug is damaged. Do not use the device if the device is not working properly.
Disconnect the device from the power source and remove the battery before cleaning or performing any maintenance.
The device is intended for use with the specified fuel only. The device is not protected against rain. - Do not use it outdoors or in a damp environment.
Do not operate the device without a filter, or with a damaged filter. - There is a risk of injury from the rotating parts. The rotating parts are dangerous: keep your hands and feet away from them. If the device is blocked, do not try to free it with your hands, feet, or other objects. Always hold the device with both hands. - Bring the rotating parts to a complete stop before touching them. Be careful when the device is running. - Do not use the device if it is damaged. If necessary, have it repaired by a qualified specialist. Only use original spare parts and accessories. Damaged or worn-out parts and accessories must be replaced. -
or it may be possible to repair the rotating parts.
- Replacing the cutting line — important. The cutting line must be replaced by an authorized service center or a qualified specialist.
- Risk of injury. Do not operate the device on slopes or uneven ground. During operation, always hold the device with both hands to maintain balance.
- Electric shock hazard. Do not use the device within 10 m of overhead power lines. - If the cutting head touches the ground during operation, there is a risk of injury.
- Do not touch the cutting head or the cutting line while it is rotating. - If the device gets stuck in the ground, turn it off and disconnect it from the power source. Use a stick to remove the obstruction. - If the device is not working properly, check the spark plug. Do not touch the spark plug or the cylinder with wet hands. Do not operate the device in a closed or poorly ventilated area. The exhaust gases are toxic and can be fatal.
not a toy. If necessary, replace the line and the filter. For this, only use original spare parts. If the cutting line is worn or broken, there is a risk of injury. If the cutting line or the filter is damaged, replace it immediately. Do not use the device without the guard. If the guard is damaged, replace it.
ATTENTION
- Do not operate the device indoors.
Safety instructions for the battery charger
WARNING: There is a risk of fire, explosion, and short circuit. Do not use the charger with a damaged cord or plug, or if it has been dropped or damaged. Do not immerse the charger in water or other liquids.
Do not expose the charger to rain or moisture. Do not touch the charger or the battery with wet hands.
Safe storage and maintenance
WARNING: Before starting work or maintenance, disconnect the battery from the mains.
During maintenance or repair work, protect yourself with insulating gloves.
DANGER: There is a risk of electric shock. Protect yourself from electric shock during repair or any other work.
ATTENTION
Before repair or maintenance, disconnect the device from the power supply. Keep the device away from children and pets. Store the device in a dry place away from chemicals. Do not leave the device in the open air. If the device is not used for a long time, remove the batteries.
Do not expose the device to moisture. Protect it from splashing water and rain. If the device gets wet, contact a qualified specialist.
Maintenance and repair
Instructions: Maintenance and repair work should only be carried out by qualified specialists and authorized personnel. For maintenance, contact a certified service center. Use only original spare parts and accessories. For maintenance, contact a qualified specialist.
WARNING: Risk of electric shock. Do not open the device. During maintenance or repair work, as well as when replacing, cleaning or checking the device, use insulating gloves.
- Replacing, repairing and disposing of batteries
If the battery is not working or is damaged, there is a risk of electric shock. Replace the battery.
If the device is not working or is not being used, remove the battery. Store the device, its parts and accessories in a dry place. Do not expose the device to high temperatures.
There is a risk of electric shock if the device is used for a long time without a break.
Do not use the device with wet hands.
DANGER: Use only original accessories, spare parts and consumables. Using non-original spare parts, accessories and consumables may damage the device and lead to unsafe operation.
HA3AP AYDApbiHbI · Op6ip naudanaHydaH KeuiH eHimDi KymcaK, KypraK wybepeKepeH ma3aHaHbI3.
Kandbik Tayekeldep
△ECKEPTY
KypbIbI aIbIH aIa 6eIaIeH2eHdeu naUdaIaNbIInca da,Keubip kaIbIK mayekEndep kanaDbI. KypbIbIHbI naUdaIaNHaH Ke3De KeNeci kayinmep mybIDaybl MyMKiH: -Діріл заксын келіmpуі мүмін. -эр жүмбіс ушін дүрьіс -кypа пды пада паньпьіз, -беріцен мүмікалapды -пада паньпьіз кәне жүмбіс -уakсын кәнe -экіноцuaясьін uekmeni3. - Lly ecmy kaibinemeH yKcaH keimipyi Mymkih. Kynak Kopray KypaIbIH naudanaHbIbI3 XHe KykmemHi weKmehi3. - Apa wbyHxkbipbIH aWbIK apaIbIK micmepiHe muin KemKeH Ke3dezi kecikmep. KymnezeH kepeH, KehemmeH Ko3raIydaH HeMece 6aFbImmayuUp peIbcmIH Kepi COKKbcbHaH mybIHdaumbIH Kecikmep. - Apa wbiHxblpHaH ywambln 6eKeMepdeH bolambln kecikmep / mecy kayni. JaKmbipbIrfan 3ammapdaH (araW yzIHdinepi, KOHa) 6oJambiH kapaKaammap. - Wanh MeH 6eKmepMeH dem any. - Tepize karaap mau / mau muo.
TəyekeIepeplia3aIy
△AEBAHJIAHbI3
KypbIINfbIHbI y3aK KOndaHraH Ke3de KOndafti KaHaHaNbIMbl 6y3bIybi MymKiH. UemKaMeH KymbcMbIH JkAIIbI y3aKmbIFbIH opHamnay KepeK, ce6e6i on Keinmezeh paakmopnapra bauNaHbICMbI 6oJaDbI: Keke hawap kaH aHaJIbIMFa 6eimdiik (xui caycaKmapbIHbI3 caNKbIHdauObl, caycaKmapbIHbI3 wAHwuObl). KopwaraH opma memnepamypacbI mEmeH. KOnDbI KoprFay ywiH XbInbI KOnFaImapdbI KOndaHbIHb3. - ΚεμκαHbI MbιKmπ γcmay caŋdapbɪHaH KaH aʊHaJIbIMbIHbɪH HaʊaPJIaybl. - Y3iicpeH Kymbic icmeyze KaparaHda, y3diKci3 Kymbic icmey 3uH. KypblfbiHbI mypakmbi JKeHe y3aK KOndaHraH Ke3de JKeHe caycakmapdbIH wahuybl, caIKbIH caycakmap cuKmbi KaH aHaJIbIMbIH HawapJAY bEnzinepi biphewe pem naOda BoIraHda, dApizepze Kapany KaXem.
AkkymyIaTOp XnHaftbI
KypbInfbHb18 B Karcher 6atapeyKaaybI aKKymnTOp KHaBIme6ackapyf6oanabl.
PaiDanaHyFa eHri3y
TyTKaHbI OPHAry
KaKet 6oIca, KpybIfBHI KocBIMwa 6epinetiH y3apTywbl canTamameh y3apTyfa 6oIaIbI.
- TemeHri xhe y3apTyu bI caTamaHbI KocbIbI3. Cypet B
- Kofapfbl XaHe y3apTyUbI cAnTaMaHbIKocBihB3.
TacbImaIay 6aybH 6aIan KOnbIbI3
Install the device on a flat, stable surface, away from direct sunlight and heat sources, ensuring proper ventilation.
Figure C
- The device's feet are designed to prevent slipping. Place the device on a flat surface. If the device is moved, the feet may detach.
Connecting the power cord
- If necessary, clean the connectors and the plug before connecting.
- Connect the power cord to the device's socket. Figure D
- Connect the power cord to a wall outlet. Then, insert the plug into the socket and connect the power cord.
Ensure the power cord is not twisted or bent beyond its maximum bend radius. Figure E
- If necessary, use a suitable adapter for the plug.
- Connect the power cord to the device's socket.
Check the connection
CAUTION
Power cord
Parts
Use only the supplied power cord and accessories.
- Remove the protective cover.
Figure F
- Remove the protective film.
Figure G
When replacing the battery, it is necessary to wait 3-4 minutes.
- If necessary, replace the battery (remove the old battery and replace it).
Battery installation
1. Install the battery in the correct position according to the polarity. Figure H
Disposal
Basic rules
1. If the device is damaged or broken, do not use it. For damaged or broken parts, consult a specialist. 2. Remove the protective cover. 3. Install the device with the included screws.
Removing the device
- Press the device release button with your finger. Figure I
- Press the release button and remove the device. Remove the device from the socket.
- Press the release button and remove the device. Remove the device from the socket.
Battery replacement instructions:
- Before starting work, make sure the device is turned off and disconnected from the power source.
Figure D
To replace the battery, follow the steps below.
If the distance between the battery and the device is more than 15 cm, it is possible to connect them. If the wires and cables are too short, extend them with additional wires. - Do not bend or twist the wires excessively. Connect the wires as follows:
a) Connect the red wire to the positive terminal of the battery, and the black wire to the negative terminal. This connection must be made correctly. Figure K
b) Connect the black wire to the negative terminal.
If the connection is correct, the device will start working immediately. If not, check the connection again.
For battery replacement, you will need:
Remove the old battery. Dispose of it properly. Do not leave the wires or connectors exposed. If the battery is damaged or leaking, handle it with care. - When connecting the new battery, ensure the polarity is correct. If not, the device may be damaged.
Remove the battery from the device
Warning
Do not remove the battery from the device while it is in use, and protect it from unauthorized access.
1. To disconnect the battery, press the battery release button. Figure L 2. Remove the battery from the device.
Xmbictbih aarkanybi
- KypbIbnFbIaH 6atapee XnHaBbH anbIn TactaHb3 (6enimH kapaHbI3 AkkymyJrTOp XnHaBbH anbIn TaTaHbI3).
- KypblfHbTa3anaHb3 (6eImiH KapaHb3 KypblfHbTa3anaHb3).
TacbImaJday
△ABAIJIAHbI3
CanmaKmbiH caKmamaybi Kapakam any kHe KpybInrBHBi 3aKbIMday Kayni TacbImanay Ke3IHoe KpybInrBHBi CaNMaFBiH eckepiH3.
△ABAHJIAHbI3
BaKbIaHa6aumbH icke kocy Kecikmep TacbImaandaydaH 6ypbIH aKKyMnymopdbI KypblfbldaH wbfapbIb13. KypbIFbHbI wbiHxbip KopraHbcih 6ekimin KaHa macbIMaJdaHbI3. Kenik KypannapbImeH TacbImaJnay Ke3iHde, KypblfbiHbI cbipfahaydaH XHe eHKeIOJeH Kopfahbl3.
CakRay
@p6ip caTay aIaIbIHda KypblfHbI Ta3anaHbI3 (6enimin KaPAHb3 KypblfHbI Ta3anaHbI3).
△ABAIJIAHbI3
CanmaKmbIH caKmamaybi
Kapaam any kHe KypblfblHb3aKbIMday Kayni TacbImanay Ke3iHoe KypblfblHbHcAmFaBH eckepiH3.
△ABAIJIAHbI3
BaKbIaHa6aumbH icke Kocy
Do not use damaged batteries.
Do not use the device if the cord or plug is damaged.
- Use only accessories intended for this purpose.
- Do not bend or twist the cord.
- If the cord is damaged, unplug it immediately and have it repaired by a professional.
- Store the device in a cool, dry place. Keep it away from direct sunlight, heat sources, and flammable materials. Do not store it outdoors.
Maintenance and technical service
WARNING
Before cleaning, disconnect the device from the power supply.
Do not immerse the device in water or any other liquid.
WARNING
Open flame
Insert the battery into the remote control, observing the polarity indicated inside the battery compartment.
1. Remove the battery cover (see figure for battery cover removal). 2. Clean the contacts with a dry cloth if necessary. Figure M 3. Clean the housing and buttons with a soft, dry cloth.
Technical service work must be performed by qualified personnel.
Before starting work on the device, read the following:
The following steps are required:
- Check the batteries; if necessary, replace them (see figure for battery replacement).
- Check the battery contacts (see figure for battery contacts).
- Check the battery contacts; if necessary, clean them or replace the batteries (see figure for battery replacement). Check the battery compartment. Tighten all screws, bolts, and nuts.
Check the battery contacts.
1. Remove the battery cover (see figure for battery cover removal). 2. Loosen the screws on the cover. Figure N 3. Clean the battery contacts with a dry cloth.
Figure O
- Check the battery contacts.
Figure G
Battery replacement: 3-4 mm hex key.
5. Remove the battery cover.
Disposal instructions
1. Remove the battery cover (do not remove the battery). 2. Remove the battery cover screw. Figure P 3. Remove the cover and battery cover. Figure Q 4. Dispose of the old battery properly.
- Replace the cover. Figure R 6. Tighten the battery cover screw. This will ensure the battery is secure. Figure S
- Remove the battery cover screw, then remove the cover. Figure T
- Do not touch the battery terminals (do not touch the battery terminals).
Troubleshooting
If the device does not work properly even after following the instructions, contact the service center. If the device is dropped or damaged, contact the service center.
Do not attempt to replace the battery with a non-rechargeable battery, as this may cause a fire or explosion. This is not a toy.
| Kate Ce6e6iЖою | ||
| Курьлгы жуmbic ICTeMeиdi | Аккуларов жинавын 3арды жok. | · Аккуларов жинавын 3ардay. |
| Аккуларов жинавы akayны. · Akky | муларов жинавын aybICTbIPbIbI3. | |
| Аккуларов жинавы дурбс салынбаган. | · Аккуларовдурба opнын Туckeншe устышka салынbI3. | |
| Курьлгы пайдану keziHinde TOKтайды | Шынжыр Кьыршытарmen 6угattалган. | · Kecilген кokыctы anын Таспыз. |
| Аккуларов жинавы Кьыр kin kettti · | хуmbICTы TOKтай, Akkuуларов tempepatypacby Kaыntы 6oJfahшa kytii3. | |
| Козгалткыш Кьыр kin kettti · 百мыctы | ТOKтай, Козгалткышы СуblынbI3. |
Warranty
This product is covered by the warranty conditions provided with the product. If material or manufacturing defects are found, the warranty period will be extended accordingly. If there are any discrepancies in the warranty period, contact the service center or the dealer where the product was purchased. (For more information, see the warranty card)
The product is manufactured in accordance with the standards. The following specifications may change:
3 Hnpinre XbInb 0 ΘHdpinreH racbipbl 1 0HdpinreHOHkbINdbIK 9 ΘnipinreH aibihbH ekihwi caHbI 0 ΘHdpipireh aibihbH 6piHw caHb
CoHbImeH 6yI Mbicnla 30190 KoDbI 09/(2)013 eHdiipinre KYHH 6iDipeJI.
Technical data
| Курьлбын.Texнікалык сипаTTмалары | ||
| ЖуMbIC Kepehyi V 18 | ||
| Бос куPicTiH aiHaIvy caHbI m/s 5,5 | ||
| ШынжыргmaМai Кю 6aRbHbIn KeIeMeli | ml | 50 |
| Кecу Diuametpi (MaKc.) | mm | 180 |
| ЖуMbIC ayKbIMbI (MaKc.) m | 3 | |
| EN ISO 11680-1 CTaHdApTbHa cSeKec 6eIrrineHreHmEHeP | ||
| Дыбic KысынБын DeHrei LpA | dB(A) | 78,4 |
| БeIrrici3diK KpA | dB(A) | 3 |
| ДыбИCTbIK шылдын DeHrei LblrFaI TapaTkblTbIK | dB(A) | 91,6 |
| БeIrrici3diK KblnFaI TapaTkblTbIK | dB(A) | 3 |
| КoJaBn Diipin Məhi 6ap anDbHrBi Tytka | m/s2 | 1,3 |
| КoJaBn Diipin Məhi 6ap apTkbl Tytka | m/s2 | 1,2 |
| БeIrrici3diK K | m/s2 | 1,5 |
| ΘIlieMdepi MeH caImaFbI | ||
| YЗындыгь X eHI x 6bɪktɪri | mm | 2920 x 188 x 94 |
| БaftTayшы рельстɪн YЗындыfBI | mm | 200 |
| Шынжыр KaIaMbI | in | 3/8 |
| СаImaFbI (akKумлайтOP kHIhaftbHcbl3) | kg | 3,8 |
Technical changes reserved.
EU Declaration of Conformity
We hereby declare that this machine complies with the essential health and safety requirements of the applicable EU Directives. The design of this machine is subject to change without notice. Battery: ¥3apTkblb6ap aKKymyIaTopbl apa Tuni:1.444-010.0
Applicable EU Directives
2014/30/EU
2006/42/EG (+2009/127/EG)
2011/65/EU
Applicable harmonized standards
EN 50581:2012
EN 55014-1:2017
EN 55014-2: 2015
EN 60745-1:2009+A11:2010
EN ISO 11680-1:2011
EN ISO 12100:2010
Notified body, 0197 TUV Rheinland LGA Products
GmbH; Tillystraße 2 D - 90431 Nürnberg, Germany
EC Type Examination Certificate No.: BM 50451225 0001
The conformity assessment procedure
and the notified body are as follows.
H. Jenner
Chairman of the Board of Management
S. Reiser
Director Regulatory Affairs & Certification
Authorized to sign: C. Reiser
Chairman of the Board of Management
S. Reiser
Director Regulatory Affairs & Certification
Authorized Representative for Documentation: S. Reiser
Alfred Kärcher SE & Co. KG
Alfred-Karcher-Str. 28 - 40
71364 Winnenden (Germany)
Phone: +49719514-0
Fax: +49 7195 14-2212
Winnenden, September 1, 2018
__SUPPIMER__
- > g a.s.
∴ m = 3/11 ;
1.82080
Co z 1 = ( k 1 - 1) ( k2 - 1)
2g ≤ u ≤ 4( 1/2)
2b > y value
29.3 < 4001
jz//Jc Jae//iic a/0jla2xj
- jj
a>la oogF
2.
j2j2j2j2j2j2j2j2j2j2j2j2j2j2j2j2j2j2j2j2j2j2j2j2j2j2j2j2j2j2j2j2j2j2j2j2j2
a>la>0
4-3 4-3
w b u Jzjbl) jzjll w b u p uU pJb1.3
(2)
aJbll aIc j
.1
a>la oog H
J
__SUPPIMER__
a i > a i,ai
www.kaercher.com/REACH
www.kaercher.com
__SUPPIMER__

THANK YOU!
MERCI! DANKE! iGRACIAS!
Register your product and benefit from many advantages.
www.kaercher.com/welcome ★★★★★
Rate your product and tell us your opinion.
www.kaercher.com/dealersearch
Alfred Karcher SE & Co. KG
Alfred-Karcher-Str.28-40
71364 Winnenden (Germany)
Tel.: +49 7195 14-0
Fax: +49 7195 14-2212



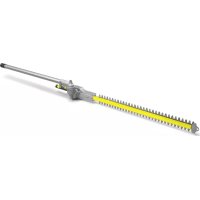

- CONTENTS
- GENERAL NOTES
- SAFETY INSTRUCTIONS
- HAZARD LEVELS
- DANGER
- WARNING
- CAUTION
- ATTENTION
- GENERAL POWER TOOL SAFETY INSTRUCTIONS
- ELECTRICAL SAFETY
- PERSONAL SAFETY
- ADDITIONAL GENERAL SAFETY INSTRUCTIONS
- SAFETY PRECAUTIONS FOR CORDLESS SAW
- ADDITIONAL SAFETY INSTRUCTIONS FOR THE BATTERY PACK
- SAFE TRANSPORT AND STORAGE
- SAFE SERVICING AND CARE
- RESIDUAL RISKS
- RISK REDUCTION
- INTENDED USE
- △DANGER
- ENVIRONMENTAL PROTECTION
- NOTES ON THE CONTENT MATERIALS (REACH)
- ACCESSORIES AND SPARE PARTS
- SCOPE OF DELIVERY
- PROTECTIVE CLOTHING
- HEAD PROTECTION
- PROTECTIVE GLOVES
- SAFETY SHOES
- DESCRIPTION OF THE DEVICE
- SEE GRAPHICS PAGE FOR ILLUSTRATIONS. ILLUSTRATION A
- RECHARGEABLE BATTERY PACK
- INITIAL STARTUP
- INSTALLING SHAFT
- INSERTING THE CARRYING BELT
- FILLING THE CHAIN OIL TANK
- CHECKING THE CHAIN TENSION
- SHARP CHAIN
- INSTALLING THE BATTERY PACK
- OPERATION
- BASIC OPERATION
- SWITCH ON THE DEVICE
- WORKING TECHNIQUES
- ILLUSTRATION J
- ILLUSTRATION K
- REMOVING THE BATTERY PACK
- NOTE
- FINISHING OPERATION
- TRANSPORT
- STORAGE
- CARE AND SERVICE
- CLEANING THE DEVICE
- ILLUSTRATION M
- MAINTENANCE WORK
- BEFORE EVERY USE
- ADJUSTING THE CHAIN TENSION
- ILLUSTRATION N
- ILLUSTRATION G
- REPLACING THE CHAIN
- TROUBLESHOOTING GUIDE
- WARRANTY
- TECHNICAL DATA
- EU DECLARATION OF CONFORMITY
- INDEX
- REDUCING RISKS
- △CAUTION
- TABLE OF CONTENTS
- INDICES
- RELEVANT EU DIRECTIVES
- BATTERY
- MAINTENANCE INSTRUCTIONS
- BEFORE FIRST USE
- GENERAL INSTRUCTIONS
- HAZARD LEVEL
- GENERAL SAFETY INSTRUCTIONS FOR WORKING WITH ELECTRIC TOOLS
- SERVICE
- YKA3AHNNO NHRPENHETAM (REACH)
- PPOBEPKA HATXKEHNIEHN
- △OCTOPOXHO
- OCMPA YENB
- PUCYHOK F
- PUCYHOK G
- YCTAHOBKA AKKYMYIATOPHORO 6JOKA
- BASIC OPERATIONS
- SWITCHING ON THE DEVICE
- WORK TECHNIQUE
- FIGURE J
- FIGURE K
- REMOVING THE BATTERY BLOCK
- FIGURE L
- FINISHING WORK
- FAILURE TO OBSERVE THE WEIGHT
- UNCONTROLLED START
- MAINTENANCE AND SERVICING
- SHARP BLADE
- MAINTENANCE WORK BEFORE EACH USE
- TROUBLESHOOTING
- △WARNING
- BEFORE STARTING THE MACHINE
- APPLIED HARMONIZED STANDARDS
- NOTICE
- GENERAL SAFETY WARNINGS FOR POWER TOOLS
- ADDITIONAL SAFETY INSTRUCTIONS
- IPEDN3HM MEPKN 3A AKYMYIATOPEH TPNOH
- MOUNTING THE BATTERY
- BASIC MAINTENANCE
- FURA K
- REMOVING THE RECHARGEABLE BATTERY
- INSTRUCTION
- DISPOSAL
- DEVICE AND SURFACE
- PREPARING THE MACHINE FOR OPERATION
- HELP WITH MALFUNCTIONS
- FIGURE E
- CHECKING THE OIL LEVEL
- PROCEDURE
- CAREFULLY WIPE THE DIPSTICK. THE DIPSTICK MUST BE INSERTED INTO THE OIL TANK OPENING UNTIL IT STOPS, 3-4 MM
- INSTALL THE BATTERY UNIT INTO THE RECESS ON THE DEVICE AND SLIDE IT UNTIL IT CLICKS INTO PLACE. FIGURE H
- CHECK THE TREE AND BRANCHES FOR DAMAGE, CRACKS, OR ROT. IF YOU FIND DAMAGED OR ROTTEN PARTS, CONTACT A PROFESSIONAL ARBORIST
- TURNING ON THE TOOL
- METHODS OF OPERATION
- FIG
- INSTRUCTIONS
- COMPLETION OF WORK
- IMPROPER HANDLING
- IMPROPER
- MAINTENANCE AND TECHNICAL SERVICE
- BEFORE USE
- ADJUST THE FUEL LEVEL
- FIGURE N
- FIGURE O
- FIGURE P
- REPLACEMENT
- ELIMINATION OF MALFUNCTIONS
- TECHNICAL SPECIFICATIONS
- SAFETY INSTRUCTIONS FOR THE TECHNICAL DEVICE
- ELECTRIC SHOCK HAZARD: DANGEROUS VOLTAGES ARE PRESENT
- DO NOT USE ABRASIVE CLEANERS OR SHARP OBJECTS. THIS MAY DAMAGE THE SURFACE AND REDUCE THE LIFESPAN OF THE KETTLE
- AKKUMULYATOR BATAREYALARI
- SAFETY INSTRUCTIONS FOR THE BATTERY CHARGER
- SAFE STORAGE AND MAINTENANCE
- MAINTENANCE AND REPAIR
- KANDBIK TAYEKELDEP
- △ECKEPTY
- TƏYEKEIEPEPLIA3AIY
- △AEBAHJIAHBI
- AKKYMYIATOP XNHAFTBI
- PAIDANAHYFA EHRI3Y
- TYTKAHBI OPHARY
- TACBIMAIAY 6AYBH 6AIAN KONBIBI
- FIGURE C
- CONNECTING THE POWER CORD
- CHECK THE CONNECTION
- POWER CORD
- FIGURE F
- FIGURE G
- BATTERY INSTALLATION
- BASIC RULES
- REMOVING THE DEVICE
- FIGURE D
- REMOVE THE BATTERY FROM THE DEVICE
- XMBICTBIH AARKANYBI
- TACBIMAJDAY
- △ABAIJIAHBI
- △ABAHJIAHBI
- CAKRAY
- TECHNICAL SERVICE WORK MUST BE PERFORMED BY QUALIFIED PERSONNEL
- CHECK THE BATTERY CONTACTS
- DISPOSAL INSTRUCTIONS
- APPLICABLE EU DIRECTIVES
- APPLICABLE HARMONIZED STANDARDS
- SUPPIMER
- AJBLL AIC J
- J
- THANK YOU
- MERCI! DANKE! IGRACIAS
- WWW.KAERCHER.COM/WELCOME ★★★★★
Brand : Kärcher
Model : PSW 1820 Battery
Category : Saw