
CS 40036 Bp - Saw Kärcher - Free user manual and instructions
Find the device manual for free CS 40036 Bp Kärcher in PDF.




| Product Type | Cordless Chainsaw |
| Brand | Kärcher |
| Model | CS 40036 Bp |
| Rated Voltage | 36 V |
| Chain No-Load Speed | 23 m/s |
| Guide Bar Length | 400 mm |
| Cutting Length | 340 mm |
| Chain Pitch | 3/8\" |
| Chain Oil Tank Capacity | 160 ml |
| Weight (without battery pack) | 5.0 kg |
| Dimensions (L × W × H) | 904 × 217 × 261 mm |
| Sound Pressure Level (LpA) | 92.9 dB(A) |
| Sound Power Level (LwA) | 103.9 dB(A) |
| Vibration Level (front handle) | 3.0 m/s² |
| Vibration Level (rear handle) | 3.4 m/s² |
| Power Supply | 36 V Lithium-ion Battery (Battery Power+ Kärcher) |
| Safety Devices | Chain brake, claw stop, chain lock, anti-kickback chain |
| Required Protective Equipment | Helmet, hearing protection, face shield, cut-resistant gloves, leg protection, safety shoes |
| Routine Maintenance | Regular cleaning, check and adjust chain tension, check chain brake, sharpen or replace chain |
| Spare Parts | Use only genuine Kärcher accessories and parts |
| Warranty | According to country conditions (see invoice) |
Frequently Asked Questions - CS 40036 Bp Kärcher
User questions about CS 40036 Bp Kärcher
0 question about this device. Answer the ones you know or ask your own.
Ask a new question about this device
Download the instructions for your Saw in PDF format for free! Find your manual CS 40036 Bp - Kärcher and take your electronic device back in hand. On this page are published all the documents necessary for the use of your device. CS 40036 Bp by Kärcher.
USER MANUAL CS 40036 Bp Kärcher
Chairman of the Board of Management
S. Reiser
Director Regulatory Affairs & Certification
71364 Winnenden (Germany)
Tel.: +49 7195 14-0
Fax: +49 7195 14-2212
Winnenden, 2018/09/01
Contents
General notes 25
Safety instructions 26
Intended use 35
Environmental protection 35
Accessories and spare parts 35
Scope of delivery 35
Safety devices 35
Symbols on the device 36
Protective clothing 36
Description of the device 36
Installation 37
Initial startup 37
Operation 37
Transport 39
Storage 39
Care and service 39
Troubleshooting guide 40
Warranty 40
Technical data 41
Vibration value 41
EU Declaration of Conformity 41
General notes

Read these safety instructions, these original instructions, the safety instructions provided with the battery pack
tions, the safety instructions provided with the battery pack
and the original instructions supplied with the battery pack/standard charger before using the device for the first time. Act in accordance with them. Keep the booklets for future reference or for future owners.
In addition to the notes in the operating instructions, you also need to take into consideration the general safety regulations and accident prevention guidelines applicable by law.
Working with chain saws poses a very high risk of injury, since you will be working with high chain speeds and very sharp saw teeth. It is vital you observe the safety measures and code of behaviour for working with chain saws.
Working with chain saws poses a very high risk of injury, since you will be working with high chain speeds and very sharp saw teeth. It is vital you observe the safety measures and code of behaviour for working with chain saws.
In addition to the safety warnings stated, the country-specific safety and training regulations (e.g., from authorities, trade associations, or social insurance funds) also need to be observed. The use of chain saws may be restricted to certain times by local ordinances (time of day or time of the year). Observe the local regulations.
DANGER
Indication of an imminent threat of danger that will lead to severe injuries or even death.
- WARNING
Indication of a potentially dangerous situation that may lead to severe injuries or even death.
CAUTION
- Indication of a potentially dangerous situation that may lead to minor injuries.
CAUTION
- Indication of a potentially dangerous situation that may lead to minor injuries.
ATTENTION
- Indication of a potentially dangerous situation that may lead to damage to property.
General Power Tool Safety Instructions
WARNING
- Read all safety warnings and all instructions.
Failure to follow the warnings and instructions may result in electric shock, fire and/or serious injury. Save all warnings and instructions for future reference.
The term "power tool" in the warnings refers to your mains-operated (corded) power tool or battery-operated (cordless) power tool.
1 Work area safety
a Keep work area clean and well lit. Cluttered or dark work areas invite accidents.
b Do not operate power tools in explosive atmospheres, such as in the presence of flammable liquids, gases or dust. Power tools create sparks which may ignite the dust or fumes.
presence of flammable liquids, gases or dust. Power tools create sparks which may ignite the dust or fumes.
Keep children and bystanders away while operating a power tool. Distractions can cause you to lose control.
a Power tool plugs must match the outlet. Never modify the plug in any way. Do not use any adapter plugs with earthed (grounded) power tools. Unmodified plugs and matching outlets will reduce the risk of electric shock.
Power tool plugs must match the outlet. Never modify the plug in any way. Do not use any adapter plugs with earthed (grounded) power tools. Unmodified plugs and matching outlets will reduce the risk of electric shock.
Avoid body contact with earthed or grounded surfaces such as pipes, radiators, ranges and refrigerators. There is an increased risk of electric shock if your body is earthed or grounded.
c Do not expose power tools to rain or wet conditions. Water entering a power tool will increase the risk of electric shock.
d Do not abuse the cord. Never use the cord for carrying, pulling or unplugging the power tool. Keep cord away from heat, oil, sharp edges or moving parts. Damaged or entangled cords increase the risk of electric shock.
gled cords increase the risk of electric shock.
e When operating a power tool outdoors, use an extension cord suitable for outdoor use. Use of a cord suitable for outdoor use reduces the risk of electric shock.
If operating a power tool in a damp location is unavoidable, use a residual current device (RCD) protected supply. Use of an RCD reduces the risk of electric shock.
3 Personal safety
a Stay alert, watch what you are doing and use common sense when operating a power tool. Do not use a power tool while you are tired or under the influence of drugs, alcohol or medication. A moment of inattention while operating power tools may result in serious personal injury.
b Use personal protective equipment. Always wear eye protection. Protective equipment such as dust mask, non-skid safety shoes, hard hat, or hearing protection used for appropriate conditions will reduce personal injuries.
c Prevent unintentional starting. Ensure the switch is in the off-position before connecting to power source and/or battery pack, picking up or carrying the tool. Carrying power tools with your finger on the switch or energising power tools that have the switch on invites accidents.
switch is in the off-position before connecting to power source and/or battery pack, picking up or carrying the tool. Carrying power tools with your finger on the switch or energising power tools that have the switch on invites accidents.
d Remove any adjusting key or wrench before turning the power tool on. A wrench or a key left attached to a rotating part of the power tool may result in personal injury.
e Do not overreach. Keep proper footing and balance at all times. This enables better control of the power tool in unexpected situations.
f Dress properly. Do not wear loose clothing or jewellery. Keep your hair, clothing and gloves away from moving parts. Loose clothes, jewellery or long hair can be caught in moving parts.
g If devices are provided for the connection of dust extraction and collection facilities, ensure these are connected and properly used. Use of dust collection can reduce dust-related hazards.
4 Power tool use and care
a Do not force the power tool. Use the correct power tool for your application. The correct power tool will do the job better and safer at the rate for which it was designed.
b Do not use the power tool if the switch does not turn it on and off. Any power tool that cannot be controlled with the switch is dangerous and must be repaired.
c Disconnect the plug from the power source and/or the battery pack from the power tool before making any adjustments, changing accessories, or storing power tools. Such preventive safety measures reduce the risk of starting the power tool accidentally.
d Store idle power tools out of the reach of children and do not allow persons unfamiliar with the power tool or these instructions to operate the power tool. Power tools are dangerous in the hands of untrained users.
e Maintain power tools. Check for misalignment or binding of moving parts, breakage of parts and any other condition that may affect the power tool's operation. If damaged, have
the power tool repaired before use. Many accidents are caused by poorly maintained power tools.
f Keep cutting tools sharp and clean. Properly maintained cutting tools with sharp cutting edges are less likely to bind and are easier to control. g Use the power tool, accessories and tool bits etc. in accordance with these instructions, taking into account the working conditions and the work to be performed. Use of the power tool for operations different from those intended could result in a hazardous situation.
5 Battery tool use and care
a Recharge only with the chargers specified by the manufacturer. A charger that is suitable for one type of battery pack may create a risk of fire when used with another battery pack.
b Use power tools only with specifically designated battery packs. Use of any other battery packs may create a risk of injury and fire. c When the battery pack is not in use, keep it away from other metallic objects, like paperclips, coins, keys, nails, screws
or other small metallic objects that can make a connection from one terminal to another. Shorting the battery terminals together may cause burns or a fire.
Under abusive conditions, liquid may be ejected from the battery; avoid contact. If contact accidentally occurs, flush with water. If liquid contacts eyes, additionally seek medical help. Liquid ejected from the battery may cause irritation or burns.
6 Service
a Have your power tool serviced by a qualified repair person using only identical replacement parts. This will ensure that the safety of the power tool is maintained.
Additional General Safety Instructions
Note: Regulations may restrict the use of this device in some regions. Seek advice from your local authorities.
DANGER: Risk of fatal injury from cuts as a result of uncontrolled device movements. Keep body parts away from moving parts. Risk of injury from hurled or falling objects. Never use the device if there are persons, in particular children or animals, within a radius of 15 m.
No changes may be made to the device.
WARNING: Children and persons unfamiliar with these instructions are not allowed to operate the device. The age of the operator may be limited by local restrictions. You need an unobstructed view of the work area in order to be able to recognise any potential dangers. Use the device only under good lighting conditions. Before operation, make sure that the device, all control elements including the chain brake and safety devices are working properly. Check for loose locks, ensure that all protective devices and handles are correctly fitted and securely fastened. Only use the device when it is in a correct condition. Never use the device if the trigger on the handle does not switch on and off correctly. Replace any worn or damaged parts before operating the device. Risk of kickback due to loss of balance.
Avoid an abnormal posture, keep a stable, safe footing and maintain your balance. Immediately stop the device and check for damage or identify the cause of the vibration if the device has been dropped, hit or vibrates abnormally. Have damage repaired by the authorised Customer Service or replace the device.
CAUTION: Wear full eye protection and hearing protection, strong and sturdy gloves and head protection when operating the device. Wear a face mask when the work is dusty.
- Wear long, heavy trousers, sturdy shoes and well-fitting gloves when working with the device. Do not work barefoot. Do not wear any jewellery, sandals or short trousers. Risk of injury when loose fitting clothing, hair or jewellery is caught by moving parts of the device. Keep clothing and jewellery away from moving parts of the device. Tie long hair back.
- Hearing protection can impair your ability to hear warning sounds, so pay attention to hazards in your vicinity and in the work area. Only use accessories and spare parts which are approved by the manufacturer. Only original accessories and original spare parts ensure that the appliance will run fault-free and safely.
Chain saw safety warnings
- Keep all parts of the body away from the saw chain when the chain saw is operating. Before you start the chain saw, make sure the saw chain is not contacting anything. A moment of inattention while operating chain
saws may cause entanglement of your clothing or body with the saw chain.
Always hold the chain saw with your right hand on the rear handle and your left hand on the front handle. Holding the chain saw with a reversed hand configuration increases the risk of personal injury and should never be done. Hold the power tool by insulated gripping surfaces only, because the saw chain may contact hidden wiring or its own cord. Saw chains contacting a "live" wire may make exposed metal parts of the power tool "live" and could give the operator an electric shock. Wear safety glasses and hearing protection. Further protective equipment for head, hands, legs and feet is recommended. Adequate protective clothing will reduce personal injury by flying debris or accidental contact with the saw chain. Do not operate a chain saw in a tree. Operation of a chain saw while up in a tree may result in personal injury. Always keep proper footing and operate the chain saw only when standing on fixed, secure and level sur
face. Slippery or unstable surfaces such as ladders may cause a loss of balance or control of the chain saw.
- When cutting a limb that is under tension be alert for spring back. When the tension in the wood fibres is released, the spring loaded limb may strike the operator and/or throw the chain saw out of control.
- Use extreme caution when cutting brush and saplings. The slender material may catch the saw chain and be whipped toward you or pull you off balance.
- Carry the chain saw by the front handle with the chain saw switched off and away from your body. When transporting or storing the chain saw always fit the guide bar cover. Proper handling of the chain saw will reduce the likelihood of accidental contact with the moving saw chain.
- Follow instructions for lubricating, chain tensioning and changing accessories. Improperly tensioned or lubricated chain may either break or increase the chance for kickback.
- Keep handles dry, clean, and free from oil and grease. Greasy, oily handles
are slippery causing loss of control.
- Cut wood only. Do not use chain saw for purposes not intended. For example: do not use chain saw for cutting plastic, masonry or non-wood building materials. Use of the chain saw for operations different than intended could result in a hazardous situation.
Causes and operator prevention of kickback
Kickback may occur when the nose or tip of the guide rail touches an object, or when the wood closes in and pinches the saw chain in the cut.
Tip contact in some cases may cause a sudden reverse reaction, kicking the guide rail up and back towards the operator.
Pinching the saw chain along the top of the guide rail may push the guide rail rapidly back towards the operator.
Either of these reactions may cause you to lose control of the saw, which could result in serious personal injury. Do not rely exclusively upon the safety devices built into your saw. As a chain saw user, you should take several steps to keep your cutting jobs free from accident or injury.
Kickback is the result of tool misuse and/or incorrect operating procedures or conditions and can be avoided by taking proper precautions as given below:
- Maintain a firm grip, with thumbs and fingers encircling the chain saw handles, with both hands on the saw and position your body and arm to allow you to resist kickback forces. Kickback forces can be controlled by the operator, if proper precautions are taken. Do not let go of the chain saw.
- Do not overreach and do not cut above shoulder height. This helps prevent unintended tip contact and enables better control of the chain saw in unexpected situations.
- Only use replacement bars and chains specified by the manufacturer. Incorrect replacement bars and chains may cause chain breakage and/or kickback.
- Follow the manufacturer's sharpening and maintenance instructions for the saw chain. Decreasing the depth gauge height can lead to increased kickback.
Additional safety instructions for chainsaws
Note: Karcher recommends sawing tree trunks on a saw.
horse during first use. When using the chainsaw, keep a first aid kit for large wounds and a means of calling for help. A larger and more extensive first aid kit should be nearby.
- Before switching on the device, make sure that the saw chain does not touch any objects. Serious injuries or death can occur if a wrongly tensioned saw chain jumps out of the guide rail. Check the chain tension before each use. The length of the chain depends on the temperature. Ensure that all protective devices, handles and bucking spikes are correctly fitted, securely fastened and in good condition.
Serious injuries due to incorrect working methods:
- You need to be alert at all times and be in control of your workplace when working with the chainsaw. The size of the workspace depends on the task to be performed and the size of the tree or work piece. Felling a tree requires a larger workspace than e.g. trimming.
- Never saw with your body in line with the guide rail and chain. This reduces the danger of being hit by the chain on the head or body during a kickback.
- Do not move the chainsaw back and forth but rather let the chain do the work, keep the chain sharp and do not try to push the chain through the cut.
- Do not apply pressure to the saw at the end of the cut. Be prepared to relax the load on the saw when it has cut through the wood.
- Do not stop the chainsaw while sawing. Let the saw run until it has finished the saw cut.
- Familiarize yourself with your new chainsaw by making simple cuts in safely supported wood. Repeat this exercise if you have not used your chainsaw for a long time. - Do not saw vines and/or bushes with a diameter of
less than 75 mm. • Switch the device off, lock the chain brake, remove the battery pack and make sure that all moving parts have stopped moving:
- Before cleaning the device or removing a blockage.
- When leaving the device unattended.
- Before mounting or removing attachments.
- Before checking, maintaining or working on the device.
CAUTION: The chainsaw is a heavy device. People who use the chainsaw should be physically fit and in good health. You should have good eyesight, agility, balance and manual skills. In case of doubt, they should not use the chainsaw. When working with the device, always wear a safety helmet with a grille visor to reduce the danger of injury from a kickback into the face and head.
Residual risks
WARNING
- Certain residual risks remain present, even when the device is operated in the prescribed manner. The following dangers can be present when using the device: Vibration can cause injuries. Use the correct tools for the job, use the handles provided
and restrict the working time and hazard exposure time.
- Noise can cause hearing injuries. Wear hearing protection and limit the duration of exposure.
- Incision injuries on contact with exposed saw teeth of the saw chain.
- Incision injuries due to unforeseen, abrupt movements or kickback of the guide bar scabbard.
- Incision injuries / risk of injection by parts flying away from the saw chain. Injuries caused by hurled objects (wood shavings, splinters). Inhalation of dust and particles.
- Skin contact with the lubricant / oil.
Risk reduction
CAUTION
- Using the device for longer periods can cause poor circulation in the hands due to vibrations. A general period of use cannot be set, because this depends on several influencing factors:
- Personal tendency to suffer from poor circulation (frequently cold fingers, tingling sensation in the fingers)
- Low ambient temperature. Wear warm gloves to protect your hands.
- Holding the device too tightly hindering blood circulation.
- Continuous operation is more harmful than operation interrupted by work breaks.
You should see a doctor if using the device regularly and for lengthy periods of time, and in the event of repeated occurrences of symptoms such as tingling in the fingers or cold fingers.
Intended use
△DANGER
Improper use
Danger of death from incision injuries
Only use the device for its proper use.
The chainsaw is suitable for commercial use. The chainsaw is intended for outdoor use. - For safety reasons, always hold the chainsaw firmly with both hands. - The chainsaw was developed for sawing small branches, large branches, trunks and beams. The cutting length of the guide rail determines the maximum possible diameter of the sawed material. The chainsaw may only be used for cutting wood. - Do not use the chainsaw in a wet environment or in the rain. Use the chainsaw only in a well lit environment. - Modifications and changes to the device that are not authorised by the manufacturer are prohibited for safety reasons.
Any other use is prohibited. The user shall be liable for hazards arising as a result of improper use.
Environmental protection

The packing materials can be recycled. Please dispose of packaging in accordance with the environmental regulations.

Electrical and electronic appliances contain valuable, recyclable materials and often components such as batteries, rechargeable batteries or oil, which - if handled or disposed of incorrectly - can
pose a potential threat to human health and the environment. However, these components are required for the correct operation of the appliance. Appliances marked by this symbol are not allowed to be disposed of together with the household rubbish.
Notes on the content materials (REACH)
Current information on content materials can be found at: www.kaercher.com/REACH
Accessories and spare parts
Only use original accessories and original spare parts. They ensure that the appliance will run fault-free and safely.
Information on accessories and spare parts can be found at www.kaercher.com.
Scope of delivery
The scope of delivery for the appliance is shown on the packaging. Check the contents for completeness when unpacking. If any accessories are missing or in the event of any shipping damage, please notify your dealer.
Safety devices
CAUTION
Missing or modified safety devices
Safety devices are provided for your own protection.
Never modify or bypass safety devices.
Chain with a low risk of kickback
A chain with a low risk of kickback reduces the likelihood of kickback.
The raked teeth (engagement blades) in front of each saw tooth prevent the saw teeth from engaging too deeply in the kickback zone, thus reducing the amount of kickback.
When grinding the chain, there is a danger that this safety function will be overridden. If the saw performance deteriorates, the chain should be replaced for safety reasons. For spare parts, use only the combination of guide rail and chain recommended by the manufacturer.
Guide rails
Guide rails whose tips have a small radius usually carry a lower risk of kickback.
Therefore use a guide rail with matching chain for the task, which is just long enough. Longer guide rails increase the likelihood of loss of control during sawing.
Check the chain tension before each use (see chapter Checking the chain tension). If the chain tension is not set correctly, sawing smaller branches (thinner than the full length of the guide rail) increases the danger of the chain being thrown off.
Chain catcher
If the chain loosens or tears, the chain catcher prevents the chain from being thrown in the direction of the user.
Bucking spikes
The integrated bucking spikes can be used as a fulcrum to give the chain saw stability during a cut.
When sawing, press the device forward until the metal spikes penetrate the edge of the wood. Subsequently moving the rear handle up or down in the direction of the cut reduces the physical strain when working with the chainsaw.
Chain brake
Chain brakes are used in case of danger to bring the chain quickly to a standstill.
The chain must come to a standstill immediately when the hand guard/chain brake lever is pressed in the direction of the guide rail.
The chain brake cannot prevent kickback, but reduces the risk of injury if the guide rail hits the user in the event of a kickback.
The proper function of the chain brake must be checked before each use of the device (see chapter Checking the functionality of the chain brake).
Symbols on the device
|  | General warning symbol |
|  | Read the operating instructions and all safety instructions before operating the device for the first time. |
|  | Always wear suitable head protection, eye protection and hearing protection when working with the device. |
|  | Wear non-slip safety shoes when work- ing with the device. |
|  | Wear non-slip, sturdy gloves when work- ing with the device. |
|  | Danger of death from kickback of the chainsaw. Never touch the objects to be sawn with the tip of the guide rail. |
|  | Danger of death due to uncontrolled movements of the chainsaw. Always hold the chainsaw tightly with both hands. |
|  | Danger of death due to uncontrolled movements of the chain saw. Never hold the device with just one hand. |
|  | Do not subject the device to rain or moist conditions. |
|  | The guaranteed sound level specified on the label is \( {105}\mathrm{\;{dB}} \) . |
|  | The chain brake is released. |
|  | The chain brake is locked and the saw chain is blocked. |
|  | Lubrication of the guide rail and the chain |
|  | Turn to adjust the chain tension: + = Tension the chain - = Loosen the chain |
|  | Running direction of the chain (marking is under the bar cover) |
Protective clothing
△DANGER
Risk of fatal injury from cut injuries. Wear suitable protective clothing when working with the device. Observe the local regulations for accident prevention.
Head protection
When working with the device, wear a suitable safety helmet that complies with EN 397 and is CE marked. When working with the device, wear hearing protection that complies with EN 352-1 and is CE marked. For protection against flying splinters, wear suitable safety goggles that comply with EN 166 or are CE marked. Or wear a helmet visor that complies with EN 1731 and is CE marked. Protective helmets with hearing protection and a safety visor are available in specialist shops.
Chainsawing jacket
Wear a chainsawing jacket satisfying the requirements of EN 381-11 and labelled with the CE marking when working with the device.
Protective gloves
Wear suitable protective gloves with cut protection equipment that comply with EN 381-7 and are CE marked when working with the device.
Leg protection
Wear suitable leg protectors with all-around protection that comply with EN 381-5 and are CE marked when working with the device.
Safety shoes
Wear non-slip safety shoes that comply with EN 20345 and are marked with a chainsaw symbol when working with the device. This ensures that the safety shoes comply with EN 381-3. If you only use the chainsaw occasionally, the ground is level and there is little danger of tripping or snagging in bushes, you can use safety shoes with steel front caps and protective leggings that comply with EN 381-9.
Description of the device
The maximum amount of equipment is described in these operating instructions. Depending on the model used, there are differences in the scope of delivery (see packaging).
See graphics page for illustrations. Illustration A
① Chain oil tank cap ② Chain ③ Guide rail ④ Bar cover ⑤ Bar mounting nuts ⑥ Chain tensioning screw ⑦ Bucking spikes ⑧ Chain catcher ⑨ Hand guard/chain brake lever ⑩ Handle, front ⑪ Battery pack unlocking button ⑫ Type plate ⑬ Trigger lockout button ⑭ Handle, rear ⑮ Trigger ⑯ Hex wrench with screwdriver
⑰ Bar scabbard ⑱* Battery Pack Battery Power 36V ⑲* Quick Charger Battery Power 36V
- optional
Rechargeable battery pack
The device can be operated with a 36 V Kärcher Battery Power battery pack.
Installation
Mounting the chain and guide rail
CAUTION
Sharp chain
Incision injuries
Wear protective gloves when working on the chain.
- Loosen the nuts and remove the bar cover.
Illustration B
- Fit the chain on the guide rail. Observe the direction of rotation of the chain.
Illustration C
- Place the chain around the sprocket and insert the guide rail.
Illustration D
- Fit the bar cover and loosely install the nuts.
Illustration E
- Adjust the chain tension (see Chapter Adjusting the chain tension).
- Install the bar scabbard.
Illustration F
Initial startup
Filling the chain oil tank
- If necessary, clean the area around the filling hole of sawdust and dirt.
- Remove the chain oil tank cap.
Illustration G
- Slowly fill the chain oil into the tank.
Illustration H
- Wipe up any spilled chain oil with a cloth.
- Close the chain oil tank cap.
Checking the chain tension
CAUTION
Sharp chain
Incision injuries
Wear protective gloves when working on the chain.
- Remove the bar scabbard.
Illustration I
- Carefully pull on the chain.
Illustration J
The distance between the guide rail and the chain must be approx. 6.5 mm.
- If necessary, adjust the chain tension (see Chapter "Adjusting the chain tension").
Installing the battery pack
- Push the battery pack into the mounting in the device until it audibly latches into place.
Illustration K
Operation
Basic operation
- Examine the tree and branches for damage such as rot.
- Remove the bar scabbard.
- Hold the device firmly with both hands.
Switch on the device.
- Pull the hand guard/chain brake lever in the direction of the handle.
Illustration L
The chain brake is released.
- Press the trigger lockout button.
Illustration M
- Press the trigger.
The device starts up.
Interrupting operation
- Release the trigger.
The device stops.
- Push the hand guard/chain brake lever towards the guide rail.
Illustration N
The chain brake is locked and the saw chain is blocked.
- Remove the battery pack from the device (see Chapter Removing the battery pack).
Working techniques
Working position
△DANGER
Uncontrolled movements of the chainsaw
Danger of death from incision injuries
Plan the cut before cutting and identify any potential dangers.
Always hold the chain saw firmly with both hands.
- Do not guide the chainsaw in the body axis.
Illustration O
- Carry the chainsaw at your side so that parts of your body do not get in the range of movement of the chainsaw.
- Keep as far away as possible from the sawed material.
- Never work on a ladder or standing in a tree.
- Never work in unstable locations.
Pull in/recoil
DANGER
Uncontrolled movements of the chainsaw
Danger of death from incision injuries
Plan the cut before cutting and identify any potential dangers.
Always hold the chain saw firmly with both hands.
Pull-in/recoil is an effect that occurs in principle in the opposite direction to the chain running direction on the sawed material.
Illustration P
1 Pull-in
2 Recoil
When sawing with the underside of the guide rail - forehand cut - the chainsaw can be pulled suddenly towards the sawn object if the saw chain jams or hits a solid object in the wood.
- To avoid pulling in, always set the bucking spikes securely onto the wood.
When sawing with the top side of the guide rail - back-hand cut - the chainsaw can be propelled back towards the user if the saw chain jams or hits a solid object in the wood.
- To avoid a recoil:
- Do not pinch the top of the guide rail.
- Do not twist the guide rail in the cut.
Kickback
△DANGER
Uncontrolled movements of the chainsaw
Danger of death from incision injuries
Plan the cut before cutting and identify any potential dangers.
Always hold the chain saw firmly with both hands.
When kickback occurs, the chainsaw is suddenly and uncontrollably flung in the direction of the user.
A kickback occurs when e.g. the saw chain in the upper region of the blade guide tip unintentionally encounters an obstacle or is trapped.
Illustration Q
Always hold the chainsaw so that the kickback forces can be withstood. Do not let go of the chainsaw. - Do not bend too far forward when sawing. - Do not use the chainsaw above shoulder level. Always wait until the chain has reached full speed and saw at full throttle. - Do not saw with the saw rail tip. - Insert the guide rail into a started cut only with extreme care. - Pay attention to the position of the trunk and to forces that can close the cut and jam the saw chain. - Never saw off several branches at the same time when pruning. - Only work with a sharp and properly tensioned chain. - Use a chain with a low kickback risk and a guide rail with a small rail head.
Plan the fall direction and retreat path
△DANGER
Falling tree
Danger of death
Tree felling work may only be carried out by trained persons.
When planning the fall direction, note the following:
The distance to the next workplace must be at least 2.5 tree lengths. - Do not perform felling in strong wind. The tree can fall unchecked. - Determine the direction of fall based on tree growth, terrain (slope) and weather conditions. Always drop the tree into a growth gap, never onto other trees.
A retreat path must be planned for every worker. Where: The retreat path is to be positioned approximately 45 degrees diagonally opposite the direction of fall. Illustration R. Free the retreat path from obstacles. - Do not place any tools and equipment on the retreat path. - When working on a steep slope, plan the retreat path parallel to the slope. - When using the retreat path, watch for falling branches and observe the crown space.
Preparing the work area at the trunk
- Clean the work area at the trunk of interfering branches, scrub and obstacles. Safe stance ensured.
- Thoroughly clean the root, e.g. with an axe. Sand, stones and other foreign matter make the chain blunt.
- Remove large roots. a Cut the root vertically. Illustration S
b Cut the root horizontally. c Remove the loose root piece from the work area.
Setting the felling cut
DANGER
Falling tree
Danger of death
Tree felling work may only be carried out by trained persons.
- Make sure nobody will be endangered by the falling tree. Calls can be overhead due to engine noise. Only persons occupied with felling may be present in the felling area.
- Set the felling notch at right angles to the direction of fall.
a As close as possible to the ground, make a horizontal cut (sole cut) over approx. 1/3 of the trunk diameter.
Illustration T
b Make an oblique cut (roof cut) at an angle of approx. 45 - 60 degrees.
- Set the felling cut.
a Make the felling cut parallel to the sole cut and at least 50 mm higher. b Only make the felling cut so far that a break-off strip at least 50 mm wide remains.
The break-off strip prevents the tree from twisting and falling in the wrong direction.
As the fell line approaches the break-off strip, the tree should begin to fall.
- Stop the felling cut if there is a danger that the tree will not fall in the desired direction or sway back and jam the saw chain. Use wedges to extend the cut and fell the tree in the desired direction.
- Pull the chainsaw out of the cut when the tree starts to fall.
- Switch off the device.
- Lock the chain brake.
- Lower the chainsaw.
- Follow the planned retreat route.
Cutting tensioned wood
DANGER
Uncontrolled movements of chainsaw and sawing material
Life-threatening incision injuries, injuries caused by sawed material. Plan the cut before cutting and identify any potential dangers. Always hold the chainsaw firmly with both hands. Tensioned wood is created when a trunk, branch, rooted stump or sapling is tensioned by other wood. 1. Watch out for tensioned wood, as there is a danger that it will snap back to its original position.
Illustration U
- Carefully saw the tensioned wood from the pressure side (see also Chapter Trimming a tensioned trunk). Illustration V
Pruning
DANGER
Kickback
Life-threatening incision injuries
When pruning, make sure that the guide rail/chain does not become jammed.
WARNING
Changing weight distribution when pruning
Risk of injury due to uncontrolled movement of the trunk. Select the work area so that no danger arises.
Illustration W
- Prune in the direction of growth.
- Prune from top to bottom.
- Leave larger branches below as supports to keep the tree above the ground.
- Support the chainsaw as much as possible.
- Do not prune while standing on the trunk.
- Do not saw with the tip of the guide rail.
- Watch out for branches that are under tension. Cut branches that are under tension from bottom to top.
- Never saw several branches at once.
- Regularly clear the work area from pruned branches.
Cutting a trunk to length
△DANGER
Uncontrolled movements of the chainsaw
Danger of death from incision injuries
Plan the cut before cutting and identify any potential dangers.
Always hold the chain saw firmly with both hands.
ATTENTION
Damage to the chain due to ground contact
Make sure that the chain does not touch the ground.
- Set the chainsaw onto the trunk with the bucking spikes.
- Evenly saw through the trunk.
Trimming a tensioned trunk
DANGER
Uncontrolled movement of the chainsaw
Life-threatening incision injuries
When trimming tensioned trunks, be sure to follow the sequence of a relief cut at the pressure side and then a separating cut at the tension side.
- Trunk is supported on 2 sides:
a For the relief cut on the pressure side, saw in about 1/3 of the trunk diameter from above.
Illustration X
b Set the cut on the tension side from the bottom.
- Trunk is supported on 1 side:
For the relief cut on the pressure side, saw in about 1/3 of the trunk diameter from below. See Illustration Y.
Set the cut on the tension side from the top.
Removing the battery pack
Note
During longer work breaks, remove the battery pack from the device and secure it against unauthorized use.
- Pull the battery pack unlocking button in the direction of the battery pack.
See Illustration 2.
- Press the battery pack unlocking button to unlock the battery pack.
- Remove the battery pack from the device.
Finishing operation
- Remove the battery pack from the device (see Chapter "Removing the battery pack").
- Clean the device (see Chapter "Cleaning the device").
Transport
CAUTION
Failure to observe the weight
Risk of injury and damage
Be aware of the weight of the device during transportation.
CAUTION
Uncontrolled startup
Incision injuries
Remove the battery pack from the device before transport.
Transport the device only with the blade guard fitted.
- Remove the battery pack (see chapter Removing the battery pack).
- Push the hand guard/chain brake lever towards the guide rail.
Illustration N
The chain brake is locked.
- Install the bar scabbard.
Illustration F
- Only carry the device by the handle and with the guide rail facing to the rear.
- Empty the chain oil tank when transporting over longer distances.
a Remove the chain oil tank cap.
Illustration G
b Fill the chain lubricating oil into a suitable container. c Tighten the chain oil tank cap.
- Secure the device against slipping and tipping over when transporting in vehicles.
Storage
CAUTION
Failure to observe the weight
Risk of injury and damage
Be aware of the weight of the device during storage.
CAUTION
Uncontrolled startup
Incision injuries
Remove the battery pack from the device before storage.
Store the device only with the blade guard fitted.
- Remove the battery pack (see chapter Removing the battery pack).
- Push the hand guard/chain brake lever towards the guide rail.
Illustration N
The chain brake is locked.
- Install the bar scabbard.
Illustration F
- Empty the chain oil tank.
a Remove the chain oil tank cap.
Illustration G
b Fill the chain lubricating oil into a suitable container. c Tighten the chain oil tank cap.
- If the device is to be stored for more than one month, oil the chain to prevent rust.
- Store the device in a dry, well ventilated location. Keep away from corrosive substances such as garden chemicals and defrosting salt. Do not store the device outdoors.
Care and service
CAUTION
Uncontrolled startup
Incision injuries
Remove the battery from the device before all work on the device.
CAUTION
Sharp chain
Incision injuries
Wear protective gloves when working on the chain.
Cleaning the device
- Remove the battery pack (see Chapter Removing the battery pack).
- Use a brush to clean the chain of cutting residue and dirt.
- Clean the housing and handles with a soft, dry cloth.
- Check the function of the chain brake after every cleaning (see Chapter Checking the functionality of the chain brake).
Maintenance intervals
Before every use
The following activities must be carried out before every use:
- Check the filling level of the chain oil, top up the chain oil if necessary (see Chapter Filling the chain oil tank).
- Check the chain tension (see Chapter Checking the chain tension).
- Check the chain for sufficient sharpness, if necessary replace the chain (see Chapter Replacing the chain and guide rail).
- Check the device for damage.
- Check all pins, nuts and screws for tightness.
- Check the function of the chain brake (see Chapter Checking the functionality of the chain brake).
Every 5 operating hours
- Check the function of the chain brake every 5 operating hours (see Chapter Checking the functionality of the chain brake).
Maintenance work
Checking the functionality of the chain brake
- Switch the device on.
- While the device is running, turn your hand on the front handle so that the hand guard/chain brake lever is pressed towards the guide rail with the back of your hand.
The chain brake is locked.
The chain must come to a standstill.
- Pull the hand guard/chain brake lever in the direction of the handle.
The chain must release.
Adjusting the chain tension
- Remove the battery pack (see Chapter Removing the battery pack).
- Loosen the nuts of the bar cover.
Illustration AB
- Adjust the chain tension with the screw. Illustration AC
- Check the chain tension.
Illustration J
The distance between the guide rail and the chain must be ca. 6.5 mm
- Tighten the nuts of the bar cover.
Replacing the chain and guide rail
CAUTION
Sharp chain
Incision injuries
Wear protective gloves when working on the chain.
- Remove the battery pack (see Chapter Removing the battery pack).
- Loosen the nuts and remove the bar cover.
Illustration AD
- Remove the guide rail.
Illustration AE
- Dispose of the old chain and, if necessary, the guide rail properly.
- Fit the new chain on the guide rail. Observe the direction of rotation of the chain.
Illustration C
- Place the chain around the sprocket and insert the guide rail.
Illustration D
- Fit the bar cover and loosely install the nuts.
Illustration E
- Adjust the chain tension (see Chapter Adjusting the chain tension).
Troubleshooting guide
Malfunctions often have simple causes that you can remedy yourself using the following overview. When in doubt, or in the case of malfunctions not mentioned here, please contact your authorised Customer Service.
As the battery pack ages, even if it is looked after, its capacity reduces such that the full run time will no longer be reached when fully charged. This does not indicate a defect.
| Fault Cause Rectification | ||
| The device does not start up | Battery pack is empty ● Charge the battery pack. | |
| Battery pack is defective. ● Replace the battery pack. | ||
| Battery pack is not inserted correctly. | ● Push the battery pack into the mounting until it latches into place. | |
| The device stops during operation | The battery has overheated | ● Stop working and allow the battery to cool down to normal battery temperature. |
| Motor has overheated ● Stop working and allow the motor to cool down. | ||
Warranty
The warranty conditions issued by our relevant sales company apply in all countries. We shall remedy possible malfunctions on your appliance within the warranty period free of cost, provided that a material or manufacturing defect is the cause. In a warranty case, please contact your dealer (with the purchase receipt) or the next authorised customer service site.
(See overleaf for the address)
Technical data
Device performance data
| Working voltage of the battery V 36 | |
| No-load chain speed m/s | 23 |
| Chain oil tank volume ml 160 | |
Determined values in acc. with EN 60745-1, EN 60745-2-13
| Sound pressure level LpA | dB(A) 92,9 | |
| Uncertainty KpA | dB(A) 3,0 | |
| Sound power level LwA | dB(A) 103,9 | |
| Uncertainty KwA | dB(A) 1,1 | |
| Front handle hand-arm vibration value | m/s2 | 3,0 |
| Rear handle hand-arm vibration value | m/s2 | 3,4 |
| Uncertainty K m/s | 2 | 1,5 |
Dimensions and weights
| Length x width x height | mm | 904 x 217 x 261 |
| Guide rail length | mm | 400 |
| Cutting length | mm | 340 |
| Chain pitch | in | 3/8 |
| Weight (without battery pack) | kg 5,0 |
Subject to technical modifications.
Vibration value
△WARNING
The specified vibration value was measured using a standard test procedure and may be used to compare devices.
The specified vibration value may be used in a provisional assessment of the load.
Depending on the way the device is used, the vibration emission can deviate from the specified overall value during the current use of the device.
Device with a hand-arm vibration value >2.5m/s2 (see chapter Technical Data in the operating instructions)
CAUTION Uninterrupted use of the device for several hours can lead to numbness.
- Wear warm gloves to protect your hands. - Take regular breaks from work.
EU Declaration of Conformity
We hereby declare that the machine described below complies with the relevant basic safety and health requirements in the EU Directives, both in its basic design and construction as well as in the version placed in circulation by us. This declaration is invalidated by any changes made to the machine that are not approved by us.
Product: Cordless chainsaw
Type: 1.042-504.x
Currently applicable EU Directives 2014/30/EU
2006/42/EC (+2009/127/EC)
2011/65/EU
2000/14/EC (+2005/88/EC)
Harmonised standards used
EN 50581:2012
EN 55014-1:2017
EN 55014-2: 2015
EN 60745-1:2009+A11:2010
EN 60745-2-13:2009+A1:2010
Conformity evaluation procedure used
2000/14/EC and amended by 2005/88/EC: Appendix V
Sound power level dB(A)
Measured: 103.9
Guaranteed: 105
Notified body, 0197 TÜV Rheinland LGA Products
GmbH; Tillystraße 2 D - 90431 Nürnberg, Germany has carried out EC type approval, certificate number: BM 50452505 0001
The signatories act on behalf of and with the authority of the company management.
H. Jenner
Chairman of the Board of Management
S. Reiser
Director Regulatory Affairs & Certification
Documentation supervisor: S. Reiser
Alfred Karcher SE & Co. KG
Alfred-Karcher-Str. 28 - 40
71364 Winnenden (Germany)
Ph.: +49 7195 14-0
Fax: +49 7195 14-2212
Winnenden, 2018/09/01
Contents
General remarks 42
2006/42/EC (+2009/127/EC)
2011/65/EU
2000/14/EC (+2005/88/EC)
H. Jenner Chairman of the Board of Management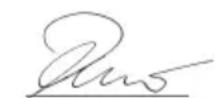
S. Reiser Director Regulatory Affairs & Certification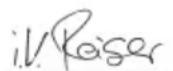
Documentation manager: S. Reiser
Alfred Karcher SE & Co. KG
Alfred-Karcher-Str. 28-40
71364 Winnenden (Germany)
Chairman of the Board of Management
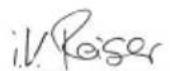
S. Reiser
Director Regulatory Affairs & Certification
71364 Winnenden (Germany)
Tel.: +49 7195 14-0
Fax: +49 7195 14-2212
Winnenden, 01/09/2019
Contents
Reducing risks
CAUTION
H. Jenner Chairman of the Board of Management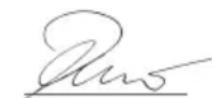
S. Reiser Director Regulatory Affairs & Certification
71364 Winnenden (Germany)
Tel.: +49 7195 14-0
Fax: +49 7195 14-2212
Winnenden, 2018/09/01
2006/42/CE (+2009/127/CE)
2011/65/UE
2000/14/CE (+2005/88/CE)
71364 Winnenden (Germany)
Tel.: +49 7195 14-0
Fax: +49 7195 14-2212
Winnenden, 01/09/2018
Index
General indications 116
Safety warnings 116
- Remove large roots.
a Cut the root vertically.
Figure S
b Cut the root horizontally. c Remove the loose part of the root from the work area.
Define the felling cut
DANGER
Tree fall
Danger to life
2006/42/EC (+2009/127/EC)
2011/65/EU
2000/14/EC (+2005/88/EC)
Chairman of the Board of Management
S. Reiser
Director Regulatory Affairs & Certification
Documentation representative: S. Reiser
Alfred Kärcher SE & Co. KG
Alfred-Karcher-Str.28-40
Winnenden, 2018/09/01
Contents
H.Jenner Chairman of the Board of Management
S. Reiser Director Regulatory Affairs & Certification
71364 Winnenden (Germany)
Tel.: +49 7195 14-0
Fax: +49 7195 14-2212
Winnenden, 2018/09/01
Contents
2006/42/EC (+2009/127/EC)
2011/65/EU
2000/14/EC (+2005/88/EC)
Applied harmonized standards
EN 50581:2012
EN 55014-1:2017
EN 55014-2:2015
EN 60745-1:2009+A11:2010
EN 60745-2-13:2009+A1:2010
Chairman of the Board of Management
S. Reiser
Director Regulatory Affairs & Certification
71364 Winnenden (Germany)
Tel.: +49 7195 14-0
The chain brake is released.
- Press the switch lock-off button.
Figure M
H. Jenner Chairman of the Board of Management
S. Reiser Director Regulatory Affairs & Certification
Documentation officer: S. Reiser
Alfred Kärcher SE & Co. KG
Alfred-Karcher-Str.28-40
D-71364 Winnenden (Germany)
Tel: +49 7195 14-0
Fax: +49 7195 14-2212
Winnenden, 2018-09-01
Contents
H. Jenner Chairman of the Board of Management
S. Reiser Director Regulatory Affairs & Certification
Documentation officer: S. Reiser
Alfred Kärcher SE & Co. KG
Alfred-Karcher-Str.28-40
71364 Winnenden (Germany)
Phone: +49 7195 14-0
Danger warnings and safety instructions
Read and follow all safety and warning notices.
Keep the spray gun and hold it with both hands.
71364 Winnenden (Germany)
Tel: +49 7195 14-0
Fax: +49 7195 14-2212
Winnenden, 2018/09/01
Table of contents
General safety instructions 219
2006/42/EC (+2009/127/EC)
2011/65/EU
2000/14/EC (+2005/88/EC)
H. Jenner Chairman of the Board of Management
S. Reiser Director Regulatory Affairs & Certification
Winnenden, 01/09/2018
Contents
General safety instructions 236
Safety instructions for the device 236
Intended use 250
Protective equipment 250
Accessories and spare parts 250
Scope of delivery 250
Safety devices 250
Symbols on the device 251
Protective clothing 251
Device description 252
Installation 252
Commissioning 252
3Kcnjyaataa 252
TpaHcnpOpBbKa 255
XpaHeHne 255
UxoI TeXHnueckoe o6cnyKuBaHne. 255
POMOuB npH HeNCpPaBHOCTaX. 256
TapaHTnA 256
TexHueckne xapaKTepeNCTnKn 257
3NaueHne Bn6paun 257
DeklapaunO COOTBETCTBn CTahapTaM EC....257
06uine yka3aHnna

IpeepnepBbIM
NcNoJb3OBaHHem
Before using the device, you should familiarize yourself with these safety instructions, the original operating instructions, the safety instructions that come with the battery block, as well as the original operating instructions for the battery block and the standard charging device. Act in accordance with them. The documentation should be kept for future reference by the professional user. In addition to the instructions contained in the operating instructions, the general legal provisions on safety and accident prevention must also be observed.
In addition to the operating instructions, the general legal provisions on safety and accident prevention must also be observed.
Safety instructions
Do not use
Do not use transitional
grounded
power tools.
Use only original
spare parts without
modifications and ensure
proper sockets
to avoid electric shock
when using power tools.
Protect the cable from high
temperatures, oil,
sharp edges or
moving parts.
Instrument.
Damaged or
accidental
connecting cables
may cause
damage.
If possible, install
devices for
dust removal
and collection, ensure
their connection is
correct
usage.
Use
devices for dust removal
Application
Maintenance of the power tool
and do not allow
overloading of the tool.
To perform the work,
use
the safety measures described below:
Hold the saw with both hands, gripping the handles with all fingers. The body of the saw should be in a position that allows you to maintain balance during operation. Take appropriate measures to be able to control the saw in case of kickback. Never let go of the saw.
- Hold the saw with both hands, gripping the handles with all fingers. The body of the saw should be in a position that allows you to maintain balance during operation. Take appropriate measures to be able to control the saw in case of kickback. Never let go of the saw.
- Avoid unnatural body positions during work. Do not work with the saw above shoulder level. This will help prevent accidental contact with the guide bar and allow better control of the saw in unexpected situations.
Use only the guide bars and saw chains prescribed by the manufacturer. Using incorrect guide bars and saw chains may cause the chain to break or kickback.
Sharpening and maintenance of the saw chain
The saw chain must be maintained according to the manufacturer's instructions. Guide bars that are too low increase the risk of kickback.
For impurities, see www.kaercher.com/REACH
Jacket for working with a saw chain
During work with the device, wear a jacket for working with a saw chain that complies with standard EN 381-11 and bears the CE mark.
Protective gloves
During work with the device, wear protective gloves with cut protection that comply with standard EN 381-7 and bear the CE mark.
Leg protection
During work with the device, use full leg protection that complies with standard EN 381-5 and bears the CE mark.
Protective footwear
During work with the device, use non-slip protective footwear that complies with standard EN 20345 and bears the CE mark with the image of a saw chain. This is considered compliant with the protective footwear standard EN 381-3.
If you use the saw chain only occasionally, on level ground, and the risk of the chain getting caught in bushes is low, you can use protective boots with a steel toe and protective gaiters that comply with standard EN 381-9.
Device description
This operating manual describes the device with the maximum equipment. The equipment varies depending on the model (see packaging).
Fig. A: 1 Chain bar oil tank cap 2 Bar 3 Guide plate 4 Cap 5 Cap screws 6 Tensioning screw 7 Sprocket 8 Oil level indicator 9 Handle guard and chain brake lever 10 Front hand guard 11 Battery pack unlock button 12 Type plate 13 Switch lockout button 14 Trigger 15 Switch 16 Chain catch 17 Chain guard 18* Battery Power+ 36V 19* Quick charger Battery Power+ 36V
Battery pack
The device is approved for operation with a 36 V Battery Power+ Karcher battery pack.
Assembly
Mounting the saw chain
CAUTION
Sharp chain
Cuts
During all work on the chain, wear protective gloves.
1. Loosen the nuts and remove the cap. Fig. B 2. Place the chain on the bar. The direction of the chain movement must be observed. Fig. C 3. Turn the chain wheel and insert the bar. Fig. D 4. Install the cap and tighten the nuts without excessive force. Fig. E 5. Adjust the chain tension (see chapter Adjusting the chain tension). 6. Install the chain guard. Fig. F
Commissioning
Filling the chain oil tank
1. If necessary, clean the area around the oil filler neck from dirt. 2. Remove the chain oil tank cap. Fig. G 3. Slowly pour chain oil into the tank. Fig. H 4. If necessary, wipe off spilled oil with a cloth. 5. Close the chain oil tank with the cap.
CAUTION
Sharp chain
Cuts
During work with the chain, wear protective gloves.
- Remove the chain guard.
Figures
Figure J
- Carefully tension the chain. The distance between the chain and the bar should be approx. 6.5 mm. 3. If necessary, adjust the chain tension (see chapter Adjusting chain tension).
Installing the battery block
- Install the battery block into the compartment on the device and press it down until it clicks into place. Figure K
Operation
Basic operations
Work techniques
Working position
DANGER
Uncontrolled kickback hazard
Danger of injury from kickback
Before starting to cut, clamp the workpiece and pull out the danger zone.
Always hold the saw firmly with both hands.
Do not work with the saw in one plane with the body.
Figure O
Work with the saw to the side of your body, so that no part of your body is in the cutting path. Keep as far away as possible from the material being cut. Never work from a ladder or on a tree. Never work from an unstable position.
Kickback and recoil
DANGER
Uncontrolled kickback hazard
Danger of injury from kickback
Before starting to cut, clamp the workpiece and pull out the danger zone.
Always hold the saw firmly with both hands.
Kickback and recoil effects occur mainly in the direction opposite to the movement of the saw blade in the material being cut.
If the saw blade is pinched by the workpiece during a cut, the blade may be pulled sharply toward the operator.
- To prevent this, always keep the blade guard in place.
If the saw blade is pinched by the workpiece during a cut (reverse cut), the blade may be thrown violently toward the operator.
- To prevent this:
Do not pinch the upper side of the blade. Do not force the blade through the cut.
KICKBACK
DANGER
Uncontrolled movement of the saw blade
Danger of injury from kickback
Before starting a cut, plan the cut and identify the hazards.
Always hold the saw firmly with both hands.
In case of kickback, the saw blade is suddenly and uncontrollably thrown toward the operator.
Kickback occurs, for example, when the saw blade accidentally hits an obstacle or gets pinched in the upper part of the cut.
Always hold the saw chain firmly in such a way that it can withstand the kickback forces. Do not let go of the saw chain. During cutting, do not lean too far forward.
Do not raise the saw chain above shoulder height. Always wait until the chain has reached full speed before cutting at full throttle. Cut with the chain brake engaged. Insert the chain very carefully at the start of the cut. - Pay attention to the position of the bar and the forces that can compress or pinch the saw chain. - When pruning branches, never cut several branches at once. Work with a sharp, properly tensioned chain. - Use a chain with low kickback risk and a bar with a small tip.
When planning the felling direction, consider the following:
The distance to the nearest work area must be at least 2.5 times the height of the tree. Do not fell trees in strong winds. The tree may fall uncontrollably. Determine the felling direction based on the tree's shape, lean, and weather conditions. Fell the tree only in the gap between other trees. Never fell a tree onto other trees.
- Make the felling cut at a right angle to the felling direction.
As close to the ground as possible, make a horizontal cut (lower cut) at about 1/3 of the trunk diameter.
Figure 1
b Make an oblique cut (upper cut) at an angle of approx. 45-60°.
- Make the felling cut.
a Make the felling cut parallel to the lower cut, at least 50 mm higher. b Make the felling cut only to such a depth that at least 50 mm of hinge remains. The hinge prevents the tree from twisting and falling in the wrong direction. When the felling cut approaches the hinge, the tree should begin to fall. 4. If there is a risk that the tree will fall in the wrong direction or deviate and pinch the saw chain, stop the felling cut. Use wedges to widen the cut and push the tree in the desired direction. 5. When the tree begins to fall, pull the saw chain out of the cut. 6. Switch off the device. 7. Engage the chain brake. 8. Lower the bar. 9. Move away along the planned escape route.
Cutting tensioned wood
DANGER
Uncontrolled movements of the saw chain or thrown material
Dangerous cuts and injuries from thrown material
Always wear protective gloves and safety goggles when handling the saw chain.
Always hold the chain saw firmly with both hands.
The tensioned guide bar can suddenly lift when the trunk, branches, roots, or other parts of the tree are under mechanical load.
1. Release the tension of the guide bar, as there is a risk of it suddenly releasing.
Figures
- Carefully cut the tensioned wood from the compression side (see also the chapter on cutting the trunk with mechanical tension).
Figures
Cutting branches
DANGER
Search
Dangerous cuts that can be fatal
When cutting branches, make sure that the chain does not get caught.
△WARNING
Change in weight distribution when cutting branches
Risk of uncontrolled movement of the saw due to improper handling
Operate the work area in such a way as to eliminate danger.
Figure W
- Cut branches in the direction of growth.
- Cut branches from bottom to top. Leave larger branches at the bottom as a support that will hold the trunk on the ground. Secure the trunk as well as possible. Do not work standing on the trunk. Do not cut with the tip of the guide bar. Watch out for tensioned branches. Tensioned branches can spring from bottom to top. Never cut several branches at the same time.
- Regularly clean the work area of cut branches.
Cutting the trunk into logs
DANGER
Uncontrolled kickback
Danger of cuts
Before starting to cut, plan the cut and assess the dangers.
Always hold the chainsaw firmly with both hands.
WARNING
Uncontrolled movement of the saw
Dangerous cuts
During cutting, follow the sequence for tensioned trunks.
Make a compensating cut on the compressed side of the cut-out cut with the stretched side.
The barrel rests on both sides:
a Make a compensating cut on the compressed side of the barrel to a depth of approx. 1/3 of the barrel diameter from the top.
Figure X
b Make a cut-out cut with the stretched side from the bottom.
The barrel rests on both sides:
a Make a compensating cut on the compressed side of the barrel to a depth of approx. 1/3 of the barrel diameter from the bottom.
Figure Y
b Make a cut-out cut with the stretched side from the top.
Removing the battery block
Note
During longer breaks in work, remove the battery block from the device and protect it from unauthorized use.
- Press the battery block unlocking button in the direction of the battery block.
Figure Z
- Press the battery block unlocking button to unlock the battery block.
- Remove the battery pack from the device.
End of work
- Remove the battery pack from the device (see chapter Removing the battery pack).
- Clean the device (see chapter Cleaning the device).
Transport
CAUTION
Weight non-compliance
Risk of injury and damage during transport. Observe the weight of the device.
CAUTION
Uncontrolled start
Cuts
Before transport, remove the battery from the device.
Transport the device only with the protective cover closed.
- Remove the battery pack (see chapter Removing the battery pack).
- Press the release button of the seat belt in the direction of the arrow.
Chain brake. 3. Install the chain cover.
Every 5 working hours
Every 5 hours of operation, check the operation of the chain brake (see chapter Checking the chain brake).
Maintenance work Checking the chain brake
- Switch on the device.
- When the device is running, turn the hand on the front handle so that the thumb can press the hand guard and the chain brake lever in the direction of the arrow.
The chain brake engages. The chain must stop.
- Press the hand guard and the chain brake lever in the direction of the hand. The chain must release.
Adjusting the chain tension
1. Remove the battery block (see chapter Removing the battery block). 2. Loosen the cover nuts. Figure AB 3. Adjust the tension with the screw.
4. Turn the tensioner for the chain. Figure AD The distance between the guide bar and the chain should be approx. 6.5 mm. 5. Tighten the cover nuts.
Replacing the chain guide bar
During any work with the chain, wear protective gloves.
- Remove the battery block (see chapter Removing the battery block). 2. Loosen the nuts and remove the cover. Figure AD
- Remove the chain. Figure AE
- Using a suitable method, tension the chain and, if necessary, the chain. 5. Install a new chain on the chain. The direction of movement of the chain must be observed. Figure C
- Guide the chain around the sprocket and into the guide. Figure D 7. Install the cover and tighten the nuts without excessive force. Figure E
- Adjust the chain tension (see chapter Adjusting the chain tension).
Troubleshooting
The malfunctions have simple causes, so with the help of the following instructions they can be eliminated independently. In case of doubt or the occurrence of faults not described here, contact an authorized service center.
With an increase in service life, the capacity of the battery block will decrease even with good maintenance, as a result of which even with a full charge, the full operating time will no longer be ensured. This is not a defect.
Sound power level L(WA)
Measured: 103.9
Guaranteed: 105
Authorized body, 0197 TUV Rheinland LGA
Products GmbH; TillystarBe 2 D - 90431 Nurnberg, Germany (FepMaHn), BbINOJIHnI JcNbItaHnE C TInoBOrO o6pa3a, Homep cepTnФnkata: BM 50452505 0001
HnKeNoDnncabWneCra JIua DeiCTbYIO T O NMeHN I NO DOBepenHOCTN PpaBHeHna.
H. Jenner Chairman of the Board of Management
S. Reiser Director Regulatory Affairs & Certification
Person responsible for documentation: S. Reiser
Alfred Karcher SE & Co. KG
Alfred-Karcher-Str.28-40
71364 Winnenden (Germany)
Tel.: +49 7195 14-0
Fax: +49 7195 14-2212
Winnenden, 01.09.2018
Contents
Chairman of the Board of Management
S. Reiser
Director Regulatory Affairs & Certification
Winnenden, 2018/09/01
Table of contents
General instructions 275
2006/42/EC (+2009/127/EC)
2011/65/EU
2000/14/EC (+2005/88/EC)
H. Jenner Chairman of the Board of Management
S. Reiser Director Regulatory Affairs & Certification
Authorized for documentation: S. Reiser
Alfred Kärcher SE & Co. KG
Alfred-Karcher-Str. 28 - 40
Winnenden, 2018/09/01
Table of contents
General instructions 293
Safety instructions 293
Intended use 302
Environmental protection 302
Accessories and spare parts 302
Scope of delivery 303
Safety devices 303
Symbols on the device 303
2006/42/EC (+2009/127/EC)
2011/65/EU
2000/14/EC (+2005/88/EC)
2006/42/EC (+2009/127/EC)
2011/65/EU
2000/14/EC (+2005/88/EC)
H. Jenner Chairman of the Board of Management
S. Reiser Director Regulatory Affairs & Certification
Documentation administrator: S. Reiser
Alfred Karcher SE & Co. KG
Alfred-Karcher-Str. 28 - 40
71364 Winnenden (Germany)
Tel.: +49 7195 14-0
Relevant EU Directive
2014/30/EU
2006/42/EC (+2009/127/EC)
2011/65/EU
2000/14/EC (+2005/88/EC)
Applied harmonized standards
EN 50581:2012
EN 55014-1:2017
EN 55014-2: 2015
EN 60745-1:2009+A11:2010
EN 60745-2-13:2009+A1:2010
Procedure applied to assess conformity
2000/14/EC as amended by 2005/88/EC: Annex V
Acoustic power level dB(A)
Measured: 103.9
Guaranteed: 105
Notified body, 0197 TÜV Rheinland LGA Products GmbH; Tillystraße 2, D-90431 Nürnberg, Germany, carried out the EC type examination, certificate number: BM 50452505 0001
Chairman of the Board of Management
S. Reiser
Director Regulatory Affairs & Certification
Person authorized to compile the technical documentation: S. Reiser
Alfred Kärcher SE & Co. KG
Alfred-Kärcher-Str. 28 - 40
71364 Winnenden (Germany)
Tel.: +49 7195 14-0
Fax: +49 7195 14-2212
Winnenden, 2018/09/01
Table of contents
2006/42/EC (+2009/127/EC)
2011/65/EU
2000/14/EC (+2005/88/EC)
Applied harmonized standards
EN 50581:2012
EN 55014-1: 2017
EN 55014-2: 2015
EN 60745-1:2009+A11:2010
EN 60745-2-13:2009+A1:2010
Applied conformity assessment procedures
2000/14/EC and amended 2005/88/EC: Annex V
H. Jenner Chairman of the Board of Management
S. Reiser Director Regulatory Affairs & Certification
71364 Winnenden (Germany)
Tel.: +49 7195 14-0
Fax: +49 7195 14-2212
Winnenden, 01.09.2018
Contents
General notes 363
Safety instructions 363
2006/42/EC (+2009/127/EC)
2011/65/EU
2000/14/EC (+2005/88/EC)
Applied harmonized standards
EN 50581:2012
EN 55014-1:2017
EN 55014-2: 2015
EN 60745-1:2009+A11:2010
EN 60745-2-13:2009+A1:2010
H. Jenner Chairman of the Board of Management
S. Reiser Director Regulatory Affairs & Certification
Authorized representative for documentation: S. Reiser
Alfred Kärcher SE & Co. KG
Alfred-Karcher-Str. 28 - 40
71364 Winnenden (Germany)
Tel.: +49 7195 14-0
Fax: +49 7195 14-2212
Winnenden, 1.9.2018.
Contents
General notes 379
Safety notes 379
Intended use 389
Environmental protection 389
Spare parts and accessories. 390
Scope of delivery 390
Safety devices. 390
Symbols on the device. 390
Protective clothing 391
Description of the device 391
Assembly. 391
Starting up 391
Operation. 392
Transport 394
Storage 394
2006/42/EC (+2009/127/EC)
2011/65/EU
2000/14/EC (+2005/88/EC)
Applied harmonized standards
EN 50581:2012
EN 55014-1:2017
EN 55014-2:2015
EN 60745-1:2009+A11:2010
EN 60745-2-13:2009+A1:2010
Chairman of the Board of Management
S. Reiser
Director Regulatory Affairs & Certification
Documentation authorized by: S. Reiser
Alfred Kärcher SE & Co. KG
Alfred-Karcher-Str. 28 - 40
71364 Winnenden (Germany)
Tel.: +49 7195 14-0
Winnenden, 2018/09/01
Safety instructions 396
Safety instructions 397
Use as intended 409
Environmental protection 409
Accessories and spare parts 410
Scope of delivery 410
Safety devices 410
Symbols on the device 410
Protective clothing 411
Description of the device 411
Assembly 411
Commissioning and operation 412
Operation 412
Transport 4
Storage 415
Pnka n npdpbKka. 415
Pomou npn noBpei 416
Tapaun 416
Texnueckn daHHn 416
CTOHOCT Ha Bn6paun 416
ДeКларачиязасьтВETCTBNEHaEC. 416
06и yka3aHnIa

Ipei nIbPBOTo I3NoJ3BaHe Ha ypeDa
IpooyeTe Te3n yka3aHnna 3a 6e30nacnoct,TOBaOpnHaJIHo pBkoBOndCTBO 3a eKcPnloaTaunia, npNIOXKeHNTe KbM akymylnpaaata BaTepya3a 6e30nacnoct n npNIOxKeHTo OpnHaJIHO pBKOBoDCTBO 3a ekCnloaTaunia Akymylnpaa 6aTepyra/ 3apJdNo ycTPOiCTBO. IpOceDnpaYte CbOTBeTHo. 3ana3eTe KNHXKNTe 3a nocJeDbAso N3NOJ3BaHe IJI 3a cpeDbAunia Co6CTBEHnK. OcBeH yka3aHnraTa B pbkOBODCTBOTo 3a ekCnloaTaunia, Tpr6Ba da
Cn3BaTe N O6UOBaIiHnTe 3aKoHOBn IpeDnncAHn 3a 6e3OpacHOCT N n36yRbAHe Ha 3JIOJnyKn.
Yka3aHnna 3a 6e3oNaChOCT
При pa60Ta C BepnxHn ТрnoHи Има MHOro BnCOK PnCK OT HapaHЯBaHe, TbN KaTO CE pa6OTn C BnCOKn СКОPOCTn Ha BepnRaTaN MHOro OCTpn pexeun 3b6cun. HenpeMeHNo Cn3BaIte Меркnte 3a 6e3OpacHOCT N IpaBnJaTaN 3a NOBeJeHne PpN pa6Ota C BepnxHn TpNOHn. В ДОпьЛнЕНе КБМ NOcoYeHNTe yKa3aHrya 3a 6e3OpacHOCT Tpra6Ba Da Ce Cn3BaT CneuФИчHNTe 3a CbOTBeTHaTaN ДьрЖaBA ПpeДпсаня 3a 6e3OpacHOCT N ObuyeHne (HaNP. OT aDMNHICrPaTINVBH N OpraHn, IproΦecNoHaJIHN CdpyKeHny nII N COUaJIHN KacN). ИЗpoЛЗВaHETO Na BepnxHn ТрnoHи може Дa ce OграHNY BbB BpeMeTo nopadi IOKaJIHNTe Pa3PopeДбN (YacT OT DeHЯ ИП N Ce3OH OT rOДиHATA). Cna3BaIte IOKaJIHNTe PpeDnSCaHry.
CTepeHn Ha onaCHOcT
ONACHOCT
- Yka3aHue 3a
- Heed the warnings that may lead to minor injury or death.
△WARNING
- Indication of a potentially dangerous situation that may lead to minor injury or death.
△CAUTION
- Indication of a potentially dangerous situation that may lead to minor injury.
NOTE
- Indication of a potentially dangerous situation that may lead to material damage.
General safety warnings for power tools
△WARNING
- Read all safety warnings and instructions. Failure to follow the safety warnings and instructions may result in electric shock and/or serious injury. Save all safety warnings and instructions for future use.
The term "power tool" in the safety warnings refers to your mains-operated (corded) power tool or battery-operated (cordless) power tool.
1 Work area safety
a Keep work area clean and well lit. Cluttered or dark areas may lead to accidents.
b Do not operate power tools in explosive atmospheres, such as in the presence of flammable liquids, gases, or dust.
Always keep the power tool and its accessories away from children and untrained persons.
Children and bystanders must stand at a safe distance when the power tool is in use. Distractions can cause you to lose control.
2 Electrical Safety
a The plug of the power tool must match the outlet. Never modify the plug in any way. Do not use adapter plugs with
earthed (grounded) power tools. Unmodified plugs and matching outlets will reduce risk of electric shock.
b Avoid body contact with earthed or grounded surfaces such as pipes, radiators, ranges and refrigerators. There is an increased risk of electric shock if your body is earthed or grounded.
c Do not expose power tools to rain or wet conditions. Water entering a power tool will increase the risk of electric shock.
d Do not abuse the cord. Never use the cord for carrying, pulling or unplugging the power tool. Keep cord away from heat, oil, sharp edges or moving parts. Damaged or entangled cords increase the risk of electric shock.
e When operating a power tool outdoors, use only extension cords
suitable for outdoor use.
Use of a cord suitable for outdoor use reduces the risk of electric shock.
f If operating a power tool in a damp location cannot be avoided, use a residual current device (RCD) protected supply.
Use of an RCD reduces the risk of electric shock.
3 Personal Safety Stay alert, watch what you are doing and use common sense when operating a power tool. Do not use
a power tool while you are tired or under the influence of drugs, alcohol or medication.
MeDnKaMeHTn. MomeHm HeBHaHue npu U3NoJ36aHemo Ha eJeKmpouHcmpymeHm MoKe da doBeDe do cepuO3Hu HapaHyaHua.
b Hocete IINuHo 3aunTHo obopydBaHe N BnHaN n3POn3BaIe 3aunTHN OuHJa. Hocehmo Ha JIuHOb 3auumHo obopydeAne Kamo MaCKa 3a npax, ycmouyu Ha XJb32aHe npedna3Hu Obyeku, 3auumHa KaCKa Ulu 3auuma 3a Cnyxa CnopeB uda u ynompebama Ha eJeKmpouHcmpymema HaMaJIra bpuCKa om HapAHyaHua.
c N36yBaIte HeBOJHOTO nyckaHe B ekCnIooatauia. YBepaIte ce, ye eJIeKTPoINHCTpyMentbT e n3KIOUyeH, npEdu da ro CBbpKeTe KbM eJIeKTPo3axpaHBAHeTo n/ nIIaKymyInpaUaTa 6aTePnA, npEdu da ro NoBdInrAte nII Da ro HOcnte.AKO npu HocHe Ha eJIeKmpouHcmpymema Obpxume npbcma cu Ha npEeKIIIOU6amEna Ulu aKo C8bp36ame 6KIOUey H ypeD KbM eJIeKmpo3axpaHbaHemo, MOKe da ce cmuaNe do 3JIOJNYku.
HJI He ca npooyeJI Te3n HHcTpyKcI.
EneKmpouHcmpymehmume ca onachu, ako ce u3noJ3am om xopa 6e3 onum.
e Подьрkaite eJektpOnHCTpymeHTnte rpnKlnBO. IpoBepaIte daJI N IOBnKHNTe qacTn 6e3ynpueHNO HHe ce 3axBaAaT, daJI N HЯMa cUynEni JIn NOBpeDeHn qactN, TaKa Ye 6yHKnJaTa Ha eJeKtpOnHCTpymeHTa Da e HapuSha.
OcHypeTe pemOH T ha NoBpeDeHnte yactn IpeDN n3NOJ3BaHe Ha ypeDa. MHO2O 3IIOPOJyKU ca npuUnHeHu om loWo nooDbpxaHu eJeKmpouHcmpymemu.
f POndIbpxaIte pexeunTe HNCTpyMeHTN OCTPN N uNCTn. PpuxuBO nOoDbpxaHume pexeuu HcmpyMeHmU c ocmpu pexeu pu b6oe ce 3aKluHbAm NO-MaJIko U ca IIO-JeCHU 3a HaIpaBnaHe.
g N3noJ3BaITe eJIeKTpOINHCTpyMeHT, pInHaJleJXHOCTN, pa6OTn HaKpaHnCn IN dp. CbIaCHO Te3n IHCTpyKcN. Ipn TOBa cb6JIOdaBaITe
ycIOBnraHa paOTo n DeHocTtA, KOrTO Tp6Ba Da Ce N3BbPwBa. N3noJ3BaHemo Ha eJeKmpouHcmpymu 3a dpya,pa3nUHa om npeduDeHama ynompe6a, Moke da doBeDe do onacHu cumyaquu.
5 N3noJ3BaHe n noDpBjKka Ha akymylnupaun 6aTepn a 3apekdaIte akymylnupaata 6aTepn caMo c pa3peuHnte OT npOn3BoInTeJ 3apAnu yctpoNCTBa. 3apAnu ycmpoUcme, Koumo He ca npOxodau 3a cbombemhama akymylnupauna 6amepu, MOZam da doBeadam do noJap.
b 3no3BaTe ypeDa camo c noDxOJa7a akymynpa7a 6aTeprna. 3no36aHemo Ha dpyu akymynpa7u bamepuu moKe da doeede do HapahyaHua Ulu nokapu.
c KoraTo He n3noJ3BaTe akymyInpaUaTa 6aTepeHn, RaDpbXTe DaJIeU OT MeTaNn IpeDMEtN KaTO KJaMepn, MoHeTn, KJIIOUOBe, NPOHn, BInTOBe NJIu DpyrMaJIKN MeTaNn IpeDMEtN, KOITOMoRat Da IOBeDaT Do KbCO CbeDInHeHne.
Kbcomo cbeuHHe Moxe da doeede do noxap uu ekCnno3ua.
dПи onpeJeHn O6cToTeJCTBa OT akymylnpaaata 6aTePnra MOxHe Da n3Teue eJeKTPoNT. N36aRbAitte KOHTaKT. Ako IOnaAdHeTe B KOHTaKT C eJeKTPoNTa, N3IIaKHeTe OCHOBHO C BOda. Ako eJeKTPoNTbT IOnaAdHe B OChTE Bn, He3a6abHo NotbpcTe JIekapcka NOMOUs. EJeKmpolumtbm Ha akymynpauzama bamepu MOxHe da npuHu o6puBu u U32apHnru No Koxama.
Have the repair of your power tool carried out only by qualified personnel and only with original spare parts. This ensures that the safety of the device is maintained.
Additional safety instructions
Note: In some regions, the use of this device may be restricted by regulations. Please consult
the competent authorities in your area.
DANGER: Danger to life due to uncontrolled movement of the device caused by improper handling. Keep body parts away from moving parts. Danger of injury from parts ejected at high speed or from objects. Never use the device if there are people within a radius of 15 m, especially children or animals.
Do not make any modifications to the device.
WARNING
- Children and persons who are not familiar with these instructions must not work with this device. Local regulations may set an age limit for the operator. You need an unobstructed view of the work area to recognize potential hazards. Use the device only in good lighting. Before work, ensure that the device, all service elements, including the upper guard and the protective
devices, function properly. Check for loose screws and attachments; make sure all protective devices and handles are correctly and securely fastened. Do not use the device if its condition is not perfect. Never work with the device if the switch of the handle does not turn on or off properly.
- Always keep the device in a safe place, replace worn or damaged parts. Danger of burns due to loss of balance. Avoid unnatural body posture, ensure a stable, secure stance and maintain balance. If the device is running, has been hit or vibrates unexpectedly, stop it immediately and check for damage, respectively have the cause of the faults repaired. Have repairs carried out by an authorized service or replace the device.
RESIDUAL RISK
When working with the device, wear protective equipment for eyes and ears, sturdy
shoes and gloves, as well as protection for the head. Wear a dust mask when dust is generated during work.
- When working with the device, wear
- Keep a distance of 3 meters from the machine.
- Keep a distance of 3 meters from the object and do not
- approach it or touch it. Do not
- work on the machine. Do not
- remove the guards or safety devices
- from the machine. - Danger from
- the device when it is switched on
- for free movement, parts
- or components can be thrown off
- and cause injury. The
- guards and components must be
- kept in place. The
- guards must be
- put back on. The
service department can help you to identify potential hazards in the vicinity and in the work area.
- Accessories and spare parts that have been approved by the manufacturer.
Original accessories and original spare parts ensure the safe and trouble-free operation of the device.
Safety instructions for high-pressure cleaners
Batteries, battery packs or oil,
which, if handled incorrectly or disposed of improperly, can pose a potential hazard to human health and the environment. For the correct functioning of the device, all these components are necessary. Devices marked with this symbol must not be disposed of with household waste.
Information on substances (REACH)
Current information on substances
can be found at: www.kaercher.com/REACH
Accessories and spare parts
Use only original accessories and original spare parts. This ensures the safe and trouble-free operation of the device.
Information on accessories and spare parts can be found at: www.kaercher.com.
Scope of delivery
The scope of delivery of the device is shown on the packaging. When unpacking, check the contents for completeness. If accessories are missing or have been damaged during transport, contact your dealer.
Intended use
△DANGER
Read all safety instructions before use.
Safety instructions serve for your protection.
Never ignore or neglect safety instructions.
Risk of kickback
The risk of kickback increases the probability of kickback.
The teeth of the chain (chain saw) before each cut of the trunk prevent the chain from being caught in the kickback zone, thus reducing the kickback force. The risk of the chain saw exists if the safety function is deactivated. If the chain tension is too low, the chain must be replaced for safety reasons. For this, for the spare parts use only the manufacturer's recommended combination of guide bar and chain.
Guide bar
For guide bars, the tip has a small radius, which reduces the risk of kickback. Therefore, use for work a guide bar with the correct chain, which is sufficiently long. Longer guide bars increase the probability of loss of control during cutting.
Before starting operation, check the chain tension (see chapter Checking the chain tension). If the chain tension is not adjusted correctly, when cutting with a smaller chain (the lower part of the guide bar) there is a higher risk that the chain will come off.
Chain brake
If the chain comes off or breaks, the chain brake prevents the chain from being thrown at high speed towards the user.
Limited cut
The limited cut can be used as a guide for cutting, to give stability to the upper part during the cutting of the cut.
When cutting, press the trigger forward until the metal parts engage the upper part.
When the saw chain is pulled upwards, respectively downwards in the direction of the cut, the physical load is reduced when working with the upper part.
Top handle
The handle is designed to safely lower the top handle in case of danger. When the release for the top handle is pressed in the direction of the arrow, the handle must lower safely. The top handle cannot prevent falls, but it can reduce the risk of injury if the fall is directed towards the user. Before any start-up in operation, the top handle must be checked for proper functioning (see chapter Checking the function of the top handle).
Symbol on the device
Charging the battery
1. Insert the battery into the charging device until it clicks into place. Figure A
Operation
Basic maintenance
1. Turn the handle and lock it in place as described. 2. Remove the protective handle. 3. Hold the handle firmly and pull the trigger.
Switching on the device
1. Press the release for the top handle in the direction of the arrow. Figure B The top handle is released. 2. Press the button to unlock the trigger lock. Figure C 3. Press the trigger. The device starts.
Trigger lock
- Release the trigger lock. The device stops.
- Press the release for the top handle in the direction of the arrow. Figure D
The top handle folds down and the handle locks.
3. Remove the battery from the device (see chapter Removing the battery).
This work is a positioning work.
DANGER
Uncontrolled movement of the upper saw blade
Danger to life from cuts and lacerations. Before cutting, plan the cut and identify the hazards.
Always hold the upper saw blade firmly and with both hands.
Do not point the upper saw blade at your body.
Figure O
- Guide the upper saw blade away from your body so that parts of your body do not enter the movement zone of the upper saw blade. Keep the greatest possible distance from the material to be cut. Never work while standing on a ladder or unstable surface. Never work on unstable surfaces.
Kickback force
DANGER
Uncontrolled movement of the upper saw blade. Danger to life from cuts and lacerations. Before cutting, plan the cut and identify the hazards.
Always hold the upper saw blade firmly and with both hands.
The kickback force occurs when the saw blade suddenly gets stuck in the direction opposite to the movement of the upper saw blade in the material to be cut.
Figure P
Always
When cutting with the lower part of the guide bar - cutting on the pull stroke - the chain may be caught if it hits a hard object in the wood, or it may be sharply pulled toward the material for cutting.
To avoid kickback, install the anti-kickback devices on the bar stably.
When cutting with the upper part of the guide bar - cutting on the push stroke - the chain may be caught if it hits a hard object in the wood, or it may be thrown back toward the operator.
To avoid reactive force:
Do not grip the upper part of the guide bar. Do not tighten the guide bar in the cut.
Kickback
DANGER
Uncontrolled movement of the saw chain is a danger for the operator due to cutting injuries. Before cutting, plan the cut and identify the dangers.
Hold the front handle with the left hand and the rear handle with the right hand.
When kickback occurs, the saw is thrown uncontrollably at high speed toward the operator.
Kickback occurs when, for example, the chain at the upper zone of the tip of the guide bar hits an object or is caught.
Figure Q
Hold the chain saw firmly so that it can be controlled by the force of the kickback. Do not let go of the chain saw. - When cutting, do not lean too far forward. Do not guide the chain saw above the height of the cut. Hold the saw firmly until the chain reaches full speed, then cut with full force. Do not cut with the tip of the guide bar. Insert the guide bar only with extreme care into the cut. Follow the position of the trunk and watch for forces that may close the cut and catch the chain. - Never cut with more than one person at a time. Work only with a sharp and properly tensioned chain. - Use the chain with the low-kickback guide bar and low-kickback chain.
Planning the direction of the felling path for the cut
Work on felling must only be carried out by trained personnel for this work.
When planning the direction of felling, observe the following:
The distance to the felling work area must be at least 2.5 tree lengths from the first tree. Do not perform felling work in strong wind. The tree may fall uncontrollably. - Determine the direction of felling with the help of the tree's lean, terrain characteristics (slope) and atmospheric conditions. Leave the first tree to fall in place, where there is vegetation, never on other trees.
For each worker, an escape route must be planned. When doing so, observe the following:
Set the escape route at a 45° angle opposite to the felling direction. Clear and free the escape route from obstacles. Do not leave any tools or equipment on the escape route. - When working on steep slopes, plan the escape route uphill of the slope. When using the escape route, watch for falling branches and observe the crown zone.
Clearing the work area around the trunk
1. Clear the work area around the trunk from branches, shrubs and obstacles. Ensure a stable position. 2. Clean the base of the trunk well, e.g. with an axe.
Branches, twigs and other parts that touch the ground can cause the tree to tip.
- Remove large root swellings.
a) Cut root swellings vertically. b) Cut root swellings horizontally. c) Remove the freed part of the root from the work area.
Making the felling cut
Danger of tipping over
Work on the felling area only at the time of felling, and only by persons trained for this work.
- The tree may fall unexpectedly due to falling branches. The warning may not be heard due to the engine noise.
In the felling area, only people working on the felling may be present.
- Set the felling cut according to the correct felling direction.
If possible, as close to the ground as possible, make a horizontal cut (bottom cut) at about 1/3 of the trunk diameter.
Figure T
Make a directional cut (top cut) at an angle of about 45-60°.
- Set the felling cut.
a) Set the felling cut device on the bottom cut and at least 50 mm higher. b) Perform the felling cut only by pushing, so that an uncut part of the trunk of at least 50 mm remains.
The uncut part of the trunk prevents the tree from breaking and falling in the wrong direction.
When the felling cut reaches the uncut part of the trunk, the tree should begin to fall.
4. If there is a danger that the tree will not fall in the desired direction or will tip back and the saw chain gets caught, stop the felling cut. Use wedges to widen the cut and let the tree fall in the desired direction. 5. Once the tree begins to fall, pull the saw chain out of the cut. 6. Turn off the device. 7. Fix the saw chain. 8. Leave the saw chain. 9. Follow the planned path for escape.
First aid for injuries
Checking the upper limb and materials for cutting
Dangers for the operator: sharp edges, edges from cutting materials
Before cutting, plan the work and identify the hazards.
Turn the upper limb to the right and with both hands
Voltage is obtained when the barrel, wedge, or the plate is placed under voltage from another tree.
- When cutting under voltage, there is a danger that the tree may spring back to its original position.
Figure U
- Cut the tree carefully under voltage from the side of the pressure (see Chapter I, Reflection of the barrel under voltage to a certain length).
Figure V
Reflection
DANGER
Kickback
Dangers for the operator: sharp edges
When reflecting, be careful that the guide bar and/or chain are not damaged.
Preparation of the tool before work
Danger of injury when moving uncontrolled on the ladder
Choose a work area such that there is no danger.
- Work according to the instructions.
Figure W
- Work with the tool. Leave the tool on the ground, with the cutting blade pointing down, so that the blade is above the ground.
- If possible, secure the ladder. Do not work while standing on the trunk. Move the ladder. Be careful of the blades when they are under tension. Place the blades under tension only when working. Never move a blade while it is under tension.
- Regularly clean the work area of cut branches.
Cutting the trunk to a certain length
DANGER
Uncontrolled movement of the saw chain
Danger to the user due to cuts and injuries when working. Plan the cuts and recognize the dangers.
Hold the saw chain firmly with both hands.
ATTENTION
Lower the saw unit when in contact with the ground. Follow the saw unit so as not to touch the ground.
- Place the top of the tripod on the limit switch.
- Cut evenly through the trunk.
Releasing the trunk under tension to a predetermined length
DANGER
Uncontrolled movement of the saw unit
Dangerous for the operator and bystanders
When releasing to a predetermined length
trunk under tension, follow
the cutting sequence for
release from the pressure side and
separating cut from the side of the load.
The trunk is supported from 2 sides:
a for the release cut from the pressure side, cut the trunk at approx. 1/3 of its diameter.
Figure
Remove the battery from the device before disposal.
The barrel is placed under one side:
For cutting for removal from the side of the pressure, cut the barrel at approx. 1/3 of its diameter.
Figure Y
In the direction of the cut, cut from the side of the disposal.
Removal of the rechargeable battery
Note
When disposing of the device, remove the rechargeable battery from the device and dispose of it separately.
Unlocked device
Danger of injury and damage. When storing, keep the device out of the reach of children.
DANGER
Uncontrolled discharge
Injuries and damage
When storing the device, remove the rechargeable battery from the device. Store the device only with the protective cap on.
1. Remove the rechargeable battery (see Figure B, Removing the rechargeable battery). 2. Press the release button for the belt/stand clip in the direction of the arrow. Figure N The belt clip is fixed. 3. Place the protective cap. Figure F 4. Drain the oil reservoir for the chain. Open the cap of the oil reservoir. Figure G Fill the chain oil into the opening. Close the cap of the oil reservoir. 5. If the device is stored for more than one month, empty the tank to prevent rust. 6. Store the device in a dry and well-ventilated place. Keep away from corrosive substances such as chemicals for household use and salt. Do not store the device open.
Uncontrolled tightening
Adjusting the drum
Before any work, remove the battery from the tool.
Sharp version
Hope3Hu HapaHaBaHu
Ipu eckakbu paobum no eepuzama hoceme 3auumHu pkau.
NouchBaHe Ha ypeDa
1. Remove the battery cover (see chapter). Remove the battery cover. 2. Clean the chain, sprocket, and remaining material from the area. Figure AA 3. Clean the housing and handles with a soft, dry cloth. 4. After each cleaning, check the function of the upper brake (see chapter Checking the function of the upper brake).
Maintenance intervals
Before each start-up in operation
Before each start-up in operation, the following activities must be performed:
- Check the oil level of the upper oil, if necessary add upper oil (see chapter Filling the reservoir for upper oil).
- Check the chain tension (see Chapter "Checking the chain").
- Check the chain tension.
- Check the chain for sufficient tension; if necessary, replace the chain (see Chapter "Replacing the chain and guide bar"). Check the guide bar for damage.
- Check all bolts, nuts, and screws for secure fastening.
- Check the function of the chain brake (see Chapter "Checking the function of the chain brake").
Every 5 working hours
Every 5 working hours, check the function of the chain brake (see Chapter "Checking the function of the chain brake").
Maintenance work
Checking the function of the chain brake
- 1. Switch on the device. 2. While the device is running, pull the hand guard back so that the guard for the chain/bar is pressed against the opposite side of the bar in the direction of the guide bar. The chain brake engages. The chain must stop completely. 3. Pull the guard for the chain/bar back in the direction of the handle. The chain must release.
Adjusting the chain tension
1. Remove the battery (see Chapter "Removing the battery"). 2. Loosen the nuts on the sprocket cover. Figure 3. Use the screwdriver to adjust the chain tension. 4. Check the chain tension.
The distance between the guide bar and the chain must be approx. 6.5 mm.
- Tighten the nuts on the sprocket cover.
Replacing the chain and guide bar
First version
Adjustments and settings
When performing any work on the vertical guides, protect your hands.
1. Remove the battery (see Chapter). Remove the battery. 2. Unscrew the nuts and screws. Figure D. 3. Remove the guide rail. Figure A E. 4. Pull out the old tensioner and spring. Guide rail. 5. Place the new tensioner on the guide rail. When doing so, observe the position of the spring on the tensioner. Figure C. 6. Place the chain around the upper sprocket and install the guide rail. Figure D.
- Install the screws and mount the nuts tightly.
Figure E
- Adjust the chain tension (see Chapter
Adjusting the chain tension).
Help with malfunctions
Many malfunctions are simple and can be fixed by yourself by following the instructions. If you are not sure or the malfunctions are not described here, contact the authorized service.
With increasing age of the battery, the power decreases even at full charge, so that even a fully charged battery no longer provides the full operating time. This is not a defect.
| Грешик Прични Остразия ване | |
| Урешил не сравотва | Актулараата батерия e празна. ● 3ар每一天е akтулараата bateрия. |
| Актулараата bateрия e Deфектна. ● Смене akтулараата bateрия. | |
| Актулараата bateрия He e поставена правлино. ● Пьхнete akтулараата bateрия в гHEЗДОТО, дOKATO ce Ф��спURA. | |
| Урешил сизра по в徕ке на paбota | Актулараата bateрия e перрая ● П配电�тete работа и Ичakайte, дOKATO Temпераурatura на akтулараата bateрия Влесе OTНОВ В рамкитЕ на Нормални диапазон. |
| Моторыт e перрай ● Р配电�тete работа и OCTавete мOTOPада с охлади. |
Warranty
Every device comes with a warranty from our authorized distributor.
Possible damage to the device will be repaired free of charge within the warranty period if it is due to material or manufacturing defects. In case of warranty claim, contact your distributor or the nearest authorized service, presenting the cash receipt. (Address, see last page)
The declared vibration total value has been measured in accordance with a standard test method and may be used for comparing tools.
The declared vibration total value may also be used in a preliminary assessment of exposure.
Depending on the type and manner in which the tool is used, the vibration emissions during actual use of the tool may differ from the declared total value.
Warning: The vibration total value (hand-arm) is > 2.5 m/s² (see chapter
Technical data in the operating instructions)
Prolonged, continuous use of the tool may lead to numbness. Wear protective gloves to protect your hands. Take regular breaks during work.
Product: Cordless rotary hammer
Type: 1.042-504.x
EC Declaration of Conformity
2014/30/EU
2006/42/EC (+2009/127/EC)
2011/65/EC
2000/14/EC (+2005/88/EC)
Applied harmonized standards
EN 50581:2012
EN 55014-1:2017
EN 55014-2: 2015
EN 60745-1:2009+A11:2010
EN 60745-2-13:2009+A1:2010
Applied conformity assessment procedure
2000/14/EC as amended by 2005/88/EC:
Annex V
Measured sound power level dB(A)
Measured: 103.9
Guaranteed: 105
Authorized person, 0197 TUV Rheinland LGA
Products GmbH; Tillystraße 2, D-90431 Nürnberg,
Germany, on behalf of the type examination, Certificate No.: BM 50452505 0001
Authorized to act on behalf of the management body.
H. Jenner
Chairman of the Board of Management
S. Reiser
Director Regulatory Affairs & Certification
Authorized for documentation: S. Reiser
Alfred Kärcher SE & Co. KG
Alfred-Karcher-Str. 28 - 40
71364 Winnenden (Germany)
Tel.: +49 7195 14-0
Fax: +49 7195 14-2212
Winnenden, 2018/09/01
Table of contents
General instructions 417
Safety instructions 417
Proper use 427
Environmental protection 427
Chairman of the Board of Management
S. Reiser
Director Regulatory Affairs & Certification
71364 Winnenden (Germany)
Tel: +49 7195 14-0
Winnenden, 2018/09/01
General instructions 4
3 3
Safety instructions 434
Chairman of the Board of Management
S. Reiser
Director Regulatory Affairs & Certification
Documentation prepared by: S. Reiser
Alfred Kärcher SE & Co. KG
Alfred-Karcher-Str. 28-40
71364 Winnenden (Germany)
Tel.: +49 7195 14-0
Fax: +49 7195 14-2212
H. Jenner Chairman of the Board of Management
S. Reiser Director Regulatory Affairs & Certification
Documentation manager: S. Reiser
Alfred Kärcher SE & Co. KG
Alfred-Karcher-Str. 28-40
The saw chain is designed for cutting wood and wood-based building materials only.
Using the saw chain for purposes other than its intended use may lead to dangerous situations.
Kickback and safety warnings
Kickback may occur when the tip of the guide bar touches an object, or when the wood closes in and pinches the saw chain in the cut. Contact with the tip of the guide bar in some cases may cause a sudden reaction, in which the guide bar kicks up and back towards the operator.
Pinching the saw chain along the top of the guide bar may rapidly push the guide bar back towards the operator.
Either of these reactions may cause you to lose control of the saw, possibly resulting in serious injury. Do not rely solely on the safety devices built into the saw. As a user of the saw, you should take several precautions to ensure
safe operation with the tool.
Kickback is the result of improper use or
incorrect operating procedures of the power tool. It can be avoided by taking appropriate precautions as described below:
Hold the saw firmly with both hands, with your thumbs and fingers encircling the saw handles. The body and handles should be positioned so that you can resist the force of kickback. By taking proper precautions, the operator can control the kickback force. Never let go of the saw.
- Avoid abnormal body posture and do not saw above shoulder height. This helps prevent unintended tip contact and enables better control of the saw in unexpected situations.
Use only replacement guide bars and saw chains specified by the manufacturer. Incorrect replacement guide bars and saw chains may cause
chain breakage and/or kickback.
Sharpening and maintenance of the saw chain should be carried out according to the manufacturer's instructions. Decreasing the depth gauge height can increase the likelihood of kickback.
Check the saw chain before each use (see chapter "Checking the saw chain"). If the chain is not properly tensioned, the risk of the chain jumping off the guide bar during cutting increases (the chain must be properly tensioned).
If the saw chain is weak or broken, replace it immediately. Follow the operator's manual.
Bumper spike
The built-in bumper spike can be used as a pivot point for sawing. When cutting thick branches, push the bumper spike against the wood. To move the saw with one hand or to cut in different directions, working with the saw will be easier.
Chain brake
Chain brakes are used for quick stopping of the chain in case of danger.
When the hand guard and front handle of the chain brake are pressed in the direction of the arrow, the chain must stop immediately.
The chain brake cannot prevent high kickback, but it reduces the risk of injury to the operator in case of kickback.
Before working with the chain brake, check the front hand guard (see chapter "Checking the brake operation").
Symbol device
Illustration. On pages with figures, figure A
①Chain oil tank cap ②Chain oil level (4)Cap ⑤Cap screw for adjusting chain tension ⑦Bumper spike ⑧Front hand guard ⑨Chain brake ⑩Front handle ⑪Battery release button ⑫Table ⑬Unlock button ⑭Rear handle ⑮Switch ⑯Lock button with key ⑰Chain cover ⑱Battery Power+ 36V
Mounting the saw chain
WARNING
During any work with the pump, protect your hands with gloves.
1. Loosen the nuts and remove the cover. Figure B 2. Install the belt on the pulley. The direction of belt movement must be clockwise. Figure C 3. Check the alignment of the belt pulley and set the pin. Figure D 4. Install the cover and tighten the nuts without excessive force. Figure E 5. Adjust the belt tension (see section "Adjusting the belt tension"). 6. Install the belt guard. Figure F
Commissioning
Filling with oil
1. If necessary, clean the area around the filler neck from dirt. 2. Remove the oil tank cap. Figure G 3. Slowly pour oil into the tank. Figure H 4. If necessary, top up the oil level. 5. Close the oil tank with the cap.
Checking the belt tension
CAUTION
Sharp edges
Cuts
During any work with the pump, protect your hands with gloves.
1. Remove the belt guard.
Figure I
2. Carefully press the belt. Figure J The deflection should be about 6.5 mm. 3. If necessary, adjust the belt tension (see section "Adjusting the belt tension").
Mounting the battery block
1. Install the control unit in the socket and push it in until it clicks. Figure K
Operation
Main operations
- Check the tree and branches for damage, cracks, or breaks. 2. Remove the protective cap.
- Hold the device with both hands.
Turning on the device
- Put on protective gloves and safety goggles before starting work.
Figure L
The safety goggles will be worn.
- Press the unlock button to turn on the device.
Figure M
- Press the device switch.
The device starts.
Stopping work
- Release the device switch. The device stops.
- Grasp the handle and place the tool on the marking line.
Figure N
The tool must be switched off before it is stored.
3. Remove the battery pack from the tool (see chapter on removing the battery pack).
Test method
Working position
SAFETY
Uncontrolled movement of the chain saw
Safety instructions for the chain saw
Before cutting, check the chain tension and the safety devices.
Always inform yourself about the working area.
Do not operate the chain saw with one hand while holding the workpiece with the other.
Figure O
- Operate the chain saw away from your body, keeping the chain away from your legs and ensuring it is not in the working area. Keep a safe distance from the material being cut. Never work with the saw above shoulder height. Never work from an unstable position.
Selecting the chain
Check the movement of the saw blade before use.
Check the saw blade for cracks or damage.
Before cutting, make sure the blade is correctly installed and tightened.
Always guide the saw blade with both hands.
The effects of vibration and impact can cause unexpected movement, especially when cutting through hard material.
Figure P
1. Adjustment
2. Cutting
If during cutting the lower side of the blade (right side of the cut) gets pinched, or
if it hits a hard object in the wood, the saw blade may suddenly kick back in the direction of the cut object.
If during cutting the upper side of the blade (reverse side of the cut) gets pinched, or if it hits a hard object in the wood, the saw blade may suddenly thrust back in the direction of the operator.
- 3. To avoid kickback:
Do not pinch the upper side of the blade. Do not twist the blade in the cut.
DANGER
Uncontrolled movement of the saw blade
Danger for the saw blade from the saw blade guard, the riving knife, the splitter and the saw blade guard.
Always keep the saw blade guard in place.
If the saw blade guard is suddenly uncontrolled, press it in the direction of the operator.
The saw blade guard is triggered, for example, when the workpiece is unintentionally pushed back or the upper zone of the saw blade is caught.
Keep the saw blade guard in such a way that you can read the saw blade guard. Do not release the saw blade guard. - When sawing, do not lean too far forward. Do not raise the saw blade guard above the saw blade. Wait until the saw blade has reached full speed and saw at full speed. Do not saw with the blade. - Place the saw blade in the saw blade guard before sawing. Pay attention to the position of the saw blade and the saw blade guard, which can press the saw blade and press the saw blade guard. - When sawing, never cut several saw blades at once. - Use the saw blade with a sharp and properly tensioned saw blade. Use the saw blade with a low risk of sawing and with a saw blade guard.
Adjusting the saw blade guard for the saw blade exit
DANGER
Before sawing
Danger for the saw blade
Only trained personnel may adjust the saw blade guard.
When sawing, always observe the following:
Before starting work, the operator must create a 2.5 m high felling notch. Do not leave the saw in the cut. The tree may fall uncontrollably. - Determine the direction of fall based on the shape of the tree, the terrain (slope) and the weather conditions. - Fell the tree only in the gap between trees. Never fell a tree onto other trees.
For each cut, an escape route must be planned. Think as follows:
- Lay the escape route diagonally backwards at an angle of 45° in the direction opposite to the direction of fall.
Figure R
Clear the escape route from obstacles. Do not place tools or equipment on the escape route. - When working on a steep slope, plan the escape route parallel to the slope. When escaping, watch out for falling objects and remember the size of the crown.
Preparing the work area on the trunk
- Clear the work area on the trunk from branches, undergrowth and obstacles that will hinder the work. Ensure a stable position.
- Carefully clean the base of the trunk using an axe. Sand, stones and other foreign objects will dull the saw chain.
- Cut off large roots.
a Cut the roots vertically.
Figure S
b Cut the roots horizontally. The saw chain must not be damaged by the cut roots.
Creating the felling notch
DANGER
falling tree
Safety for the wedge
Wedges can only be used by authorized persons.
- Make sure that no one is standing near the wedge before use. Wedges may not be removed through the cut.
The wedge can only be used by persons engaged in logging.
2. Make the first cut at a right angle to the direction of the fall.
a. Cut the notch to the ground, make a horizontal cut (lower cut) at about 1/3 of the trunk diameter.
Figure T
b. Make an angled cut (upper cut) at an angle of about 45-60°.
- Make the main cut.
a. Make the main cut parallel to the lower cut, about 50 mm above it. b. Make the main cut only until a remaining strip of about 50 mm is left. The strip prevents the tree from turning and falling in the wrong direction. When the main cut approaches the strip, the tree should begin to fall. 4. If there is a risk that the tree will fall in the wrong direction or move backward and pinch the saw bar, stop cutting the main cut. Use wedges to widen the cut and guide the tree in the desired direction. 5. When the tree begins to fall, remove the saw bar from the cut. 6. Turn off the saw. 7. Remove the wedge. 8. Lower the bar. 9. Proceed as planned.
Cutting felled trees
SAFETY
Uncontrolled movements of the saw bar can cause injury from material
Safety for the wedge: protect against splintering material
Before cutting, inspect the cut and remove any safety hazards.
The stressed wood, the stump, the roots, or the branches of any tree are under mechanical stress.
1. Follow the stressed wood, as there is a risk of sudden release.
Fig. C
- Carefully cut the stressed wood from the compressed side (see also the chapter on cutting the stump with mechanical stress).
Fig. V
Cut branches
DANGER
Kickback
Dangerous for the operator
When cutting branches, follow them so that the saw chain does not get caught.
WARNING
Change of position during branch cutting
Risk of injury due to uncontrolled movement of the stump
Choose the work area so that no danger arises.
- Cut the rod to the required height.
Figure 2
- Cut the rod from the bottom. Insert the larger rod, which is at the bottom, into the support bracket where the post will be held on the ground.
- Secure the tension wire properly. Do not overtighten the posts. Do not pull the rod by hand. Check the tension of the rods. Pull the tensioned rods from bottom to top. Never pull several rods at once.
- Regularly clean the working area of cut rods.
Cutting the post to length
SAFETY
Uncontrolled movements of the guide wire
Danger of injury from falling parts
Before dismantling, loosen the connections and remove the safety devices.
Secure the guide wire with the supplied clamps.
WARNING
Damage to the guide wire in case of contact with
ground
Make sure that the guide wire does not touch the ground.
1. Check the oil level in the hydraulic tank. 2. Cut the drill string evenly.
Cut the drill string with a mechanical saw.
DANGER
Uncontrolled movement of the drill string
Dangerous for the drill string
Cut the drill string with a mechanical saw
Before each use
Before each use, do the following: - Check the hydraulic oil level, add hydraulic oil if necessary (see chapter Filling the hydraulic oil tank).
- Check the oil pressure (see chapter Checking the oil pressure).
- Check that the oil is sufficient for operation, replace the oil if necessary (see chapter Replacing the hydraulic oil).
- Check the attachments and the condition of the pads.
- Check that all bolts and nuts are tightened.
- Check the operation of the hydraulic pump (see chapter Checking the pump operation).
Every 5 hours of operation
Every 5 hours of operation, check the operation of the hydraulic pump (see chapter Checking the pump operation).
Section 3: Technical specifications
Checking the operation of the lever
- Turn off the device.
- When the device is working, turn the handle to the front stop so that the lever is fully protected. The lever will lock. The lever must be released.
- Press the handle and lever protection. The lever must be released.
Adjusting the lever tension
1. Remove the battery pack (see chapter on removing the battery pack). 2. Loosen the adjusting screws.
Figure AB
- Adjust the lever tension using the screw.
Figure AC
- Press the lever.
Figure AD
The lever must be set to approximately 6.5 mm.
5. Tighten the adjusting screws.
Replacing the lever
To do this work, use the plan. Observe hand protection.
1. Disconnect the battery (to avoid battery discharge during disassembly). 2. Loosen the nuts and remove the cover.
Figure AD
- Remove the pin.
Figure AE
- Carefully remove the panel and, if necessary, the pin.
- Install the new panel on the pin. The direction of movement of the panel must be maintained.
Figure C
- Connect the panel to the panel wheel and install the pin.
Figure D
7. Install the cover and tighten the nuts without excessive force.
Figure E
- Regulatory marking (see chapter Regulatory marking).
Troubleshooting
Malfunctions often have simple causes that can be eliminated independently with the help of the instructions below. If in doubt or in case of unspecified malfunctions, contact the authorized service center.
The service life of the battery block may be reduced if it is used without proper care. Full discharge during full operation time is no longer guaranteed. This is not a defect.
H. Jenner Chairman of the Board of Management
S. Reiser Director Regulatory Affairs & Certification
Person responsible for documentation: S. Reiser
Alfred Karcher SE & Co. KG
Alfred-Karcher-Str.28-40
71364 Winnenden (Germany)
Tel.: +49 7195 14-0
Fax: +49 7195 14-2212
Winnenden, 01.09.2018
Safety instructions. 488
Intended use 497
Environmental protection. 497
Accessories and replacement parts 497
Scope of delivery 497
Safety devices 497
Symbols on the device 498
Protective clothing. 498
Description of the device 499
Installation 499
Setup 499
Operation. 499
Transport. 501
Storage. 502
Care and maintenance. 502
503
Guarantee. 503
Technical data. 503
Vibration values. 503
EU Declaration of Conformity. 503
General notes

H. Jenner Chairman of the Board of Management
S. Reiser Director Regulatory Affairs & Certification
Document authorized by: S. Reiser
Alfred Karcher SE & Co. KG
Alfred-Karcher-Str. 28 - 40
71364 Winnenden (Germany)
Phone: +49719514-0
Fax: +49 7195 14-2212
Winnenden, September 1, 2018
Ma3MyHbI
Kannbl Huyckaynap. 504
Kayinci3ik TexHnKacbI 6oBbIHua HycKaynap ....... 504
BiybIMbl MaKCaTbHa cAKeC KOnDaHy. 517
KopwaHaH opTaHbI Kopray 517
Kepek-kaapanKaHe Kocalkb6eJWeKTeP 517
XeTki3iJIM XHaftbl 517
KopraHbic Kypan-ka6bIKapbl 517
KypbInfbdaft6enrinep. 518
Kopfahbiw KIM 518
KypbIINfbIhBcH CnNaTTaMaCbl 518
Ophaty 519
Painanhya enri3y 519
PaiandaHny. 519
TacbImanay. 521
CaKray. 522
KyTim KHe TexHnKaIbIK KbI3MeT KepeTy 522
Akaaynap Ke3iHderi KEmek 523
Keninik 523
TexHnKaJIbIK MaFlyMaTTap 523
Dipin meni 524
EO cTanapTAPbHa cKeCTiri TypaBb
deklapaia 524
Kannbl Hvckaynap

KypbIbIbIaJfaw pet naJaHaH6ac 6ypbH,ocbl
Kayinci3dk XeHinderi
HvckaynapbIH,OCbl
TynHvCKaJIbIK naIdaJaHy
HvCKayIbIfbIH, aKKyMyJrTOP
KINHaBbHa Koca 6epiTeiH
Read the safety instructions and warnings before using the battery charger / starting device. Follow them strictly. Install the device for stationary use or for use in vehicles. In addition to the safety instructions, it is necessary to follow the safety techniques and rules for working with electrical devices.
Safety instructions
When working with lead-acid batteries, dangerous gases are released. These gases are flammable and can explode when in contact with sparks or flames. When working with lead-acid batteries, follow safety rules and self-control procedures carefully.
These safety instructions
Additionally, the device can only be used for its intended purpose (e.g., charging batteries, starting engines, or powering electrical devices).
It is necessary to follow the safety and operating instructions. The device can only be operated with the specified voltage (AC and DC). Keep the operating instructions.
Safety warnings
WARNING
- Read the safety instructions before using the device to avoid serious injury or damage.
CAUTION
- Read the safety instructions before using the device to avoid serious injury or damage.
DANGER
- Read the safety instructions before using the device to avoid injury from electric shock.
ATTENTION
Read the safety instructions before using the device to avoid material damage.
Electrical safety instructions: READ CAREFULLY
- Read all safety instructions and warnings. Instructions and safety techniques are provided.
Failure to follow instructions may result in electric shock, fire, and/or serious injury.
Keep all safety instructions and warnings for future reference.
The term "power tool" in the safety instructions refers to your mains-operated (corded) power tool or battery-operated (cordless) power tool.
1) Work area safety: a) Keep work area clean and well lit. Cluttered or dark areas invite accidents.
b) Do not operate power tools in explosive atmospheres, such as in the presence of flammable liquids, gases, or dust. Power tools create sparks which may ignite the dust or fumes.
c) Keep children and bystanders away while operating a power tool. Distractions can cause you to lose control.
Keep them away. If distracted, you may lose control.
2) Electrical safety
a) Power tool plugs must match the outlet. Never modify the plug in any way. Do not use any adapter plugs with earthed (grounded) power tools.
Unmodified plugs and matching outlets will reduce risk of electric shock.
b) Avoid body contact with earthed or grounded surfaces, such as pipes, radiators, ranges and refrigerators. There is an increased risk of electric shock if your body is earthed or grounded.
c) Do not expose power tools to rain or wet conditions. Water entering a power tool will increase the risk of electric shock.
d) Do not abuse the cord. Never use the cord for carrying, pulling or unplugging the power tool. Keep cord away from heat, oil, sharp edges or moving parts. Damaged or entangled cords increase the risk of electric shock.
Cables must be routed so that they are not damaged. The cable must be laid so that it is not pinched or damaged by sharp edges or corners. The cable must be protected against mechanical stress at the connection point.
If the cable is damaged, it must be replaced. To avoid danger, the cable must be checked regularly for damage. If the cable is damaged, it must be replaced by a qualified electrician.
If the cable is damaged, it must be replaced. To avoid danger, the cable must be checked regularly for damage. If the cable is damaged, it must be replaced by a qualified electrician.
If the cable is damaged, it must be replaced. To avoid danger, the cable must be checked regularly for damage. If the cable is damaged, it must be replaced by a qualified electrician.
If the cable is damaged, it must be replaced. To avoid danger, the cable must be checked regularly for damage. If the cable is damaged, it must be replaced by a qualified electrician.
If the cable is damaged, it must be replaced. To avoid danger, the cable must be checked regularly for damage. If the cable is damaged, it must be replaced by a qualified electrician.
If the cable is damaged, it must be replaced. To avoid danger, the cable must be checked regularly for damage. If the cable is damaged, it must be replaced by a qualified electrician.
If the cable is damaged, it must be replaced. To avoid danger, the cable must be checked regularly for damage. If the cable is damaged, it must be replaced by a qualified electrician.
If the cable is damaged, it must be replaced. To avoid danger, the cable must be checked regularly for damage. If the cable is damaged, it must be replaced by a qualified electrician.
If the cable is damaged, it must be replaced. To avoid danger, the cable must be checked regularly for damage. If the cable is damaged, it must be replaced by a qualified electrician.
If the cable is damaged, it must be replaced. To avoid danger, the cable must be checked regularly for damage. If the cable is damaged, it must be replaced by a qualified electrician.
4. Do not use the electric kettle if the power cord or plug is damaged. For your safety, use the electric kettle only with the supplied stand. Using the electric kettle with an incompatible stand may result in poor contact and poor performance. Do not operate the kettle without water. Do not place the kettle on or near hot surfaces or open flames. Do not let the cord hang over the edge of a table or counter, or touch hot surfaces. Always plug the kettle into a properly grounded outlet. Failure to follow these precautions may cause electric shock or fire. Keep the kettle out of reach of children. Do not allow children to use the kettle without supervision.
Do not allow persons who are unfamiliar with the kettle or who have not read these instructions to operate the kettle. The electric kettle is intended for household use only. Do not immerse the kettle in water or any other liquid. Do not use the kettle if the cord or plug is damaged, if the kettle malfunctions, or if it has been dropped or damaged in any way. To avoid a hazard, have the kettle repaired by a qualified technician. Do not use the kettle outdoors. Keep the kettle clean and dry. Do not use abrasive cleaners or scouring pads, as they may scratch the surface. Follow these instructions when using the kettle, accessories, and attachments. Keep these instructions for future reference.
Pay attention to the warnings when using the kettle. Do not use the kettle for purposes other than its intended use.
5. Charging and Using the Battery
a. Charge the battery only with the charger provided. Using a different charger may damage the battery or cause a fire.
b. Use the battery only with the specified device. Using the battery with other devices may cause damage or reduce its lifespan.
c. When the battery is not in use, keep it away from metal objects such as paper clips, coins, keys, nails, screws, or other small metal objects that can bridge the contacts. Shorting the battery terminals may cause burns or a fire.
d. In certain conditions, the battery may leak fluid. Avoid contact with the fluid. If contact occurs, flush with water and seek medical attention. If the battery leaks, replace it immediately.
6. Service and Maintenance: The electric kettle should be serviced only by qualified personnel. Use only genuine replacement parts. This will ensure the safety and longevity of the kettle.
Follow the safety instructions provided in this manual.
Hygiene • Keep the device and its accessories clean. Regular cleaning is necessary to ensure proper operation. The device must be protected from impacts. Do not use the device if it has been dropped or damaged.
Installation. Do not use the device if it has been dropped or damaged. Keep the device away from children and pets. You should not use the device if it has been damaged.
WARNING • Before using the device, read all instructions and warnings. Regular cleaning is necessary to ensure proper operation. To avoid electric shock, do not immerse the device in water.
The device should be used only for its intended purpose. During use, ensure that the device, all its components, and its accessories are in good working order and safe condition. Check all parts for damage, and if any parts are damaged,
do not use the device. If the device is not working properly, do not use it. If the device is damaged or malfunctions,
do not use it.
Before using the device, remove any packaging or protective materials. If the device has been exposed to extreme temperatures, allow it to reach room temperature before use. Do not use the device if it is damaged or has been dropped. If the device is dropped, damaged, or shows signs of malfunction, do not use it. For repair or replacement, contact an authorized service center.
When using the device, keep your hands and fingers away from moving parts, and wear protective gloves and safety glasses. Do not use the device if your hands are wet.
When using the device, keep your hands dry and wear protective gloves. Do not use the device with wet hands. Do not use the device near flammable materials, gases, or liquids.
Keep the device away from children and pets
There is a risk of injury from moving parts. Keep hands and clothing away from moving parts. Do not wear loose clothing.
The safety instructions in this manual are not exhaustive. Always follow local regulations and use the device only as intended. Only use accessories and attachments recommended by the manufacturer. Using other accessories or attachments may cause injury or damage to the device.
Safety instructions for the device
When using the device, keep all body parts away from the moving parts. Do not place your hands near the moving parts. Keep your hands away from the moving parts when the device is in operation.
Use the chain saw only with both hands.
- When operating the chain saw, hold the rear handle with your right hand and the front handle with your left hand. Do not operate the chain saw with one hand. Improper use can cause serious injury.
The electric chain saw may be held only by the insulated gripping surfaces, because the saw chain may contact hidden wiring. If the saw chain contacts a "live" wire, it will make exposed metal parts of the electric chain saw "live" and could give the operator an electric shock.
Wear protective glasses and ear protection. Use protective equipment for head, hands, legs and feet. Protective clothing reduces the risk of injury from thrown debris and accidental contact with the saw chain.
- When operating the chain saw, always keep both hands on the handles.
There is a risk of injury if the chain is not properly tensioned.
- ΘρΚαψαηνΗυΚ
TypphaHbIHbI3Fa K03
XeTki3iHi3 XəHe
IbIXbIPJbI apaHbI KaTTbI, Kayinci3 XHe Teric Xepde TypfAH KaFdaJaFaHa
naДаньИьI3. TaufaK Jep
Hemece bacnajdaK cunkmbl mypaKcbI3 bemmep menemenheHdiKmi Hemece
wbIHxkbipnbI apaHbIH
6aKbIaybIH Kofanmyfa
əKeJnyi MymKiH.
Before cutting the wires, disconnect them from the battery. First,
when working with the device, it is possible to avoid damage to the wires by protecting them from sharp edges and / or metal parts.
-The wires and cables should be laid without tension during cutting.
Installing the battery
1. Insert the battery into the compartment in the direction of the arrow. See figure
Figure 1
Operation
1. Check that the wires and cables are not damaged. 2. Put on protective gloves. 3. Install the device with both hands.
Removing the device
- Pull the protective glove / wire guide against the direction of the arrow. See figure 2. The wire guide is released.
- Press the release button on the device. See figure 3.
- Remove the device. The device is removed.
Stopping
- Press the release button on the device. The device stops.
- Pull the protective glove / wire guide against the direction of the arrow.
- The battery of the Xinjiang Altyn Tagh (white crane) is from 3 accumulators of Xinjiang Altyn Tagh.
Kumys aisteri
Kumys signature
KAYIN
Measures to prevent the Xinjiang crane
Before cutting, cut the cable at a distance of at least 1 meter from the cutting point and check the cables. Hold the Xinjiang crane firmly with both hands.
- The Xinjiang crane must not be exposed to rain. Image O
- The Xinjiang crane must be protected from rain, and when the rain stops, the bearings must be lubricated with the Xinjiang crane's lubricant. The material must be stored in a dry place. Do not use the pipe without a cap or with a damaged thread. Do not use the pipe with damaged threads.
Targu/kaitra
KAYIN
Measures to prevent the Xinjiang crane
Before cutting, cut the cable at a distance of at least 1 meter from the cutting point and check the cables.
Hold the Xinjiang crane firmly with both hands.
After targu/kaitar, this material must be stored in a dry place, protected from rain and frost.
Figure P
1 Tapny
2 KaItaupy
Safety instructions for the use of the device - before starting work, read the operating instructions carefully and follow them. The manufacturer is not liable for damage caused by improper use.
To start the device, press the test button briefly.
Safety instructions for the device - before starting work, read the operating instructions carefully and follow them. The manufacturer is not liable for damage caused by improper use.
To start:
- Press the start button briefly. Do not touch the device.
Connectors
CABLE
Possible causes of malfunction
Before connecting the cable, make sure that the device is switched off and that the cable is not damaged.
Connect the cable with both hands firmly.
The connector must be inserted into the socket until it clicks into place. If the connector is loose or damaged, it may cause a short circuit or fire.
Figure Q
- Mixing and grinding equipment for the production of mixtures. Mixing is carried out by rotation.
- Before starting work, check the equipment.
- Do not exceed the maximum permissible load.
- The machine must be operated only by trained personnel.
- Do not stand between the rails.
- When starting the engine, make sure that no one is in the danger zone. Pay attention to the warning signs and safety instructions.
- In case of emergency, stop the machine immediately. Only use the emergency stop and brake switches.
- Keep the control cabinet closed and do not touch the rails with wet hands.
Clutch and brake maintenance
CAUTION
Do not operate without guard
Emergency stop
The machine must only be operated by trained personnel.
Before maintenance, observe the following:
The oil level must not be lower than 2.5 liters below the mark. Before each use, check the oil level. The oil change interval is 3 months. Determine the oil level based on the oil dipstick (dipstick) and the marks on it. Do not touch the oil with bare hands, and do not touch other parts.
On the thermometer, the temperature is indicated in degrees Celsius. By the way:
When the column drops to 45°, the device is ready for operation.
Figure R
We have prepared the device for operation. We have filled the column with water and connected the hoses. When the water boils, we direct the column to the boiler and start the process. After the column is heated, we open the valve and adjust the flame to the desired level.
Direct the steam flow
- Direct the steam flow through the hoses, and then through the device. Do not allow it to leak. 2. Direct the steam, for example, with a valve, to the desired location.
The steam will heat the water in the tank and cause it to circulate.
- Remove the large tank cover.
a. Do not touch the metal parts with your hands.
Figure S
b. Do not touch the metal parts until they have cooled. c. Remove the metal cover from the steam outlet.
Replacing worn parts
CAUTION
Use only original parts
Do not use damaged parts
Before starting work, all persons who will be present at the workplace must be instructed.
- When using the tool, it is necessary to follow the safety requirements. It is possible to use protective equipment to prevent injury.
Only persons who have been instructed and are familiar with the work may be allowed to work.
- Do not place the tool in a place where it can fall or be knocked over.
Cut a piece (part of the board) with a length of 1/3 of the board using a straight edge and a pencil.
Figure T
Cut a piece (the remaining part) at a 45-degree angle.
- Place the cut piece.
a) Place the cut piece parallel to the cut board and at a distance of 50 mm from the edge. b) Place the cut piece at a distance of 50 mm from the edge, making a cut line.
Do not allow the cutting line to be crooked or to deviate from the straight edge.
The cut piece must be cut along the marked line, following the straight edge.
4. If the board is cracked or has a knot that may break, stop cutting. Use clamps to secure the board for cutting and to prevent cracking. 5. If the board is warped, remove the warped part with a cut. 6. Sand the surface. 7. Install the hinge. 8. Lower the hinge. 9. Attach the handle with screws.
Align the straight edge
CAUTION
Materials and tools: protective gloves, metal cutting tools, cutting materials, and accessories. Before cutting, mark the cutting lines and identify the tools. Install the straight edge with both hands, ensuring it is secure. Use appropriate tools for cutting wood, plastic, or other materials.
- There is a danger of the device tipping over if the legs are not properly extended. See Figure 2. Do not place the device on an unstable surface (together with the stand, see the instructions for use). See Figure V
Benu
KAYIN
Kepi sokky
During operation, do not touch the hot parts of the device / do not come into contact with the hot parts.
ECKEPTY
During operation, do not place the device on a soft surface or cover the ventilation openings.
Do not use the device if the power cord is damaged.
- Before use, check the device. See Figure W. Do not use the device if it is damaged. To ensure proper operation, replace the damaged parts with new ones.
- Do not use the device if there is a risk of tipping.
- Do not place the device on an unstable surface.
- Do not use the device if it is damaged.
- Do not use the device if the parts are damaged. Replace the damaged parts with new ones.
- Do not use the device if it is damaged. Do not use the device if the power cord is damaged.
Do not use the device if it is damaged.
KAYIN
Inspection and adjustment of the guide rails
Before starting work, check the condition of the guide rails and adjust them.
Use both hands to firmly hold the guide rails.
ATTENTION
Protect the guide rails from damage
Do not drop the guide rails during handling.
- Do not bend the guide rails. 2. Do not twist them.
Do not cut the guide rails to an incorrect length.
KAYIN
Inspection and adjustment of the guide rails
Before starting work, check the guide rails and their components. In the case of cutting the guide rails to length, store the cut pieces in a safe place to prevent damage and loss.
- For cutting, use a guide rail clamp: for the cutting piece, use a saw with a blade diameter 1/3 of the guide rail height. See Figure X. Install the cutting piece in the clamp.
- For cutting, use a guide rail clamp: for the cutting piece, use a saw with a blade diameter 1/3 of the guide rail height.
Figure Y
Do not remove the battery cover.
Remove the battery cover.
Instruction
For battery replacement, use only the specified battery type and do not dispose of it improperly.
1. Press the battery cover latch to open the battery cover.
Figure D
2. Press the battery cover latch to open the battery cover. 3. Remove the battery cover.
Battery disposal
- Remove the battery from the device (see battery removal instructions).
- Dispose of the device (see disposal instructions).
Warning
CAUTION
Safety precautions
During operation and maintenance, be aware of the device's safety.
CAUTION
Battery safety instructions
Before starting, install the battery packs correctly.
Determine the correct position of the switch before starting.
1. Install the battery pack (remove the battery pack).
- Keep hands away from the switch and moving parts.
Figure N
Turn on the switch.
3. Turn off the switch.
Figure F
- Install the battery pack and the switch correctly.
- When the battery is low, turn off the switch and remove the battery.
Remove the battery pack from the switch.
Figure G
Remove the battery from the oven container.
Before removing the battery, make sure the oven is turned off.
- During cleaning, protect the oven from water and moisture.
Storage
Warning
Proper storage
Protect from dust and moisture
During cleaning, do not use abrasive materials.
Warning
Disposal of used batteries
Batteries
Before storage, remove the batteries from the oven.
Store the oven in a dry place, protected from moisture.
1. Remove the battery cover (unscrew the battery cover).
- Use the protective cover / the power cord plug to connect to the mains.
Cyper N
Remove the protective film.
- Remove the protective film from the cord.
Cyper F
- Remove the protective film from the device.
Remove the protective film from the device and the display.
Cyper G
Remove the protective film from the container.
Remove the protective film from the device and the display.
If the protective film is difficult to remove, use a hairdryer to heat it slightly.
- Store the device in a dry and well-ventilated place. Avoid exposure to direct sunlight and high temperatures. Do not store the device outdoors.
Maintenance and technical service
Correction
Warning
Dispose of old equipment
KeciineH kapaKammap
KypbInrblda Kymbic icmemec 6ypbH aKKyMynmaopdbI KypbInrbldaH ubirapblb3.
△ABAJIAHbI3
Omkip ubiHkbip
Kecikmep
UbHxbpMeH Kymbc JacaHaHa epdaubim KopraHbIC KOJrnanmapbIH Kuii3.
KypbINfbHbTa3aNaHbI3
1. AKKymyIaTOp KINHaFbH IbIaRapbHb3 (6eNIMi KaPaHb3 AKKymyIaTOp KINHaFbH aJIbIn TaCTaHb3). 2. 甲HbIbIbI KObIcTap MeH KipDeH Ta3apTy ywiH UeTKaHbI KOJaHaBbIHbI3. Cypet AA 3. Kopnycbi MeH TtTkanaIapbIH KymcaK, Kypfak Wy6pekeNeh Ta3aJaHaB13. 4. Θp6ip Ta3anaydah KeiH WbIHXbIp TeXeriiuH INyMbICbIH TeKcePi3 (6eJIIMdi KaPaHbI 3 WbIHXbIp TeXeriiuH INyMbICbIH TeKcePi3).
TexHnKaIbIK KbI3MeT KepCeTy Mep3ImiNiliri
Op6ip naIdaIaHrya eHri3y anDbIHda
Op6ip naIandaHrya eHri3y anDbIHda KeNeci KbIMeTepdi opbIHday KaKeT:
KaKET 60JCA, WbIHXkbip MaBbHbH MeIeepiH TeKcepH3, WbIHXkbip MaBbH TOITbIPbIH3 (6JIIMdi KaPaHb3 WbIHXkbipFa MaN KyIO 6aRbH TOITbIPy). - LbHxbpHkepinyiTeKcepH3 (6eimKiapaHbI3 LbHxbpHkepinyiTeKcepH3). - 田田田田田田田田田田田田田田田田田田田田田田田田田田田田田田田田田田田田田田田田田田田田田田田田田田田田田田田田田田田田田田田田田田田田田田田田田田田田田田田田田田田田田田田田田田田田田田田田田田田田 KypbIINfbIHb3aKbIMdaImaraHaBH IN TeKcepiH3. Bapnb6oNTTapbIH,COMbIHap MeH 6ypaHaanapdbIH TbIfb3dbfbiTEKcepiH3. - ⅢbHxkbipTexeriiuHjYMbicbiH TeKcepH3 (6eimdi kapaHbI3 ⅢbIHxkbipTexeriuiHjYMbicbiH TeKcepH3).
Θp 5 caraT kymbic
3p5cafATKymbiccaibHWBHkbipTeXeriiHih Kymbcih TeKcepii3 (6eimdi kapaHbi3 LbHHkbip TeXeriiHih Kymbcih TeKcepii3).
TexHnKaJIbIK KbI3MeT KepCeTy XyMbICTapbl
Remove the battery cover.
- Remove the battery.
- When replacing the battery, the positive terminal of the new battery must be oriented as indicated by the diagram inside the battery compartment. Install the battery correctly. The battery must be replaced.
- Remove the battery / battery cover. Pull the battery out by the tab. The battery must be removed.
Replacing the battery
1. Remove the battery cover (see figure: Battery cover removal). 2. Disconnect the connector.
Figure AB
- Replace the battery in the event of a malfunction.
Figure AC
1. Remove the battery cover (see figure: Battery cover removal).
- Disconnect the connector and remove the battery.
Figure AD
3. Remove the cover.
Figure AE
- If the old battery is damaged, remove the cover carefully.
- Do not forget to read the safety instructions. Before using the device, read the analysis of the safety instructions. See C
- If the device is used incorrectly, the safety instructions may be violated. See D
- Do not touch the cover and the contacts. See E
- Device repair (see the repair instructions for the device).
Emergency help
If the device is dropped or the housing is damaged, contact the service center. If the contacts are damaged or the device is not working properly, contact the service center.
If the battery is damaged or the battery contacts are corroded, do not use the device. It may cause a short circuit or fire.
| Kate Ce6e6i XoIo | ||
| Kурьлгы жуmbic ictemeиdi | АKKумлалтор кинагынгдзарды жok. | АKKумлалтор кинагынзардay. |
| АKKумлалтор кинагы akayны. | Мулалтор кинагын aybICTbIPbIb3. | |
| АKKумлалтор кинагы дурбс canbIH6aFан. | AKkymлалтды орнын ТуСkeHшe yCTaftbIIka canbIHb3. | |
| Курьлгы пайдану keziHдe тOKтайды | АKKумлалтор кинагы Кbl3ын кettti | ЖуmbICTы TOKтаби, Akkymлалтор TemnéратупсыkanыNTы bonfahшa kyTih3. |
| КоЗfantКыш Кbl3ын кettti | ТOKтаби, КОЗfantКышТы cybITbIHb3. |
Warranty
The warranty terms provided by the distributor apply. In case of material or manufacturing defects, the warranty does not cover damage caused by improper use. If the warranty is not valid, contact the seller or the authorized service center. (See the additional terms)
Use the device only as described in the manual. The manufacturer is not liable for damages caused by improper use.
Model: 30190
3-pin connector: 0 - pin 1, 0 - pin 2, 9 - pin 3, 0 - pin 4, 0 - pin 5
Therefore, this model has 30190 codes 09/(2)013 and is manufactured in 2013.
Technical specifications
Technical specifications of the device
Kymbc KepHeyi V 36
HbHHkbipbH XyMbIC m/s 23 KblnDaMdbIfbl
UbHxbipra MaJ Kyo 6arbln ml 160 KeJIeMi
EN 60745-1, EN 60745-2-13 boiHwa eJweHreH mHdep
Ib6bcKbcmbHbH DeHrein LdA dB(A) 92,9
Benriciik KpA dB(A) 3,0
Db6bCTbIK WbyINDbH DeHreNi dB(A) 103,9
Lbinran tapaTkbltBik
Bennrici3ik Kblnfan tapaTkbluTbik dB(A) 1,1
KoIbH dipiM mHi bap aIbHfbl m/s2 3,0 TyTka
KoJbH diipin mHi 6ap apTkbl m/s2 3,4 Tytka
Benricizik K m/s2 1,5
OJIwEmdepi MeH caImarbl
Y3bHdbfblx eHI x 6niktiri mm 904x
217x
Subject to technical modifications.
First aid
DANGER
Only use the first aid kit in accordance with the standard safety instructions. It is possible to use it for initial treatment of injuries. The first aid kit must be used before the start of work. It is possible to use the first aid kit in case of minor injuries.
Chairman of the Board of Management
S. Reiser
Director Regulatory Affairs & Certification
Authorized representative for documentation: S. Reiser, Alfred Karcher GmbH & Co. KG
Alfred-Karcher-Str. 28 - 40
71364 Winnenden (Germany)
Tel.: +49 7195 14-0
Fax: +49 7195 14-2212
29 ÷ 14( 10)
a i = 1/n j = 1maij
Jlawg.
jIg0g>Jill Jluo laa xu a, sL jxio, lsc Jaell xc
jxiall
.ooa9 logaw aabio
Ejll Jc Jaell aalio jia
- aca jall
aagg g.
.ogaiao jol aggo
- a≥c且b
- pLxwU
jE jJgjjll JgssuJUaJyJLpUwUg.0JxUg.JorJI
.
.3
sagac Jk, jzglgbl a
a>la oJgS
ol = 2( 1 - lc) lcs( 2 > 0)
1/3 1
60-45 jlaa glj (gll g) Jlo gJao b
Therefore, a > 3
- blaewUgbe bua 3.
50u icg gglal glalglal
JUI Jc po
j50jw5 b2jw j>blawllgab9c1j,
JU 100
gagawllg jzul no ojwslj gia
10
I 1
.
gUulalolUI 000001111111111111111111111111111
29.2011/11/11 12:45
d < 2√11,∴ d < 3 , b > 5
1.
3.
Therefore, the area of triangle OBC equals the area of triangle COD plus the area of triangle BOC.
4. a2b3p12
5..
16 × n × 3
2g ≈ 160t
a i = | a i - 1| ai - 1
JΔQ,J/2g > 0
∴ θ = y/x
α ( a 1 + a 2 + a3) β = 0
| jlglllalagss | |
| A. | |
| B. | |
| C. | |
| D. |
J 103 J 104 J 105 J 106 J 107 J 108 J 109 J 110 J 111 J 112 J 113 J 114 J 115 J 116 J 117 J 118 J 119 J 120 J 121 J 122 J 123 J 124 J 125 J 126 J 127 J 128 J 129 J 130 J 131 J 132 J 133 J 134 J 135 J 136 J 137 J 138 J 139 J 140 J 141 J 142 J 143 J 144 J 145 J 146 J 147 J 148 J 149 J 150 J 151 J 152 J 153 J 154 J 155 J 156 J 157 J 158 J 159 J 160 J 161 J 162 J 163 J 164 J 165 J 166 J 167 J 168 J 169 J 170 J 171 J 172 J 173 J 174 J 175 J 176 J 177 J 178 J 179 J 180
10 20
Jg>REACH( Jg> www.kaercher.com/REACH
Therefore, a_l_2 = 5.
The integral over D of omega times the integral over D of omega prime dx dy.
ab f/ x dx = ab f/ y dy
b ∈ {0, 1, …, m}
∫₀^∞ (1/(1+x²)) (1/x³) (1/x⁴) … (1/xⁿ) dx
Therefore, |S| = |a₁| = |r₂| = |l₂|.
The minimum value of ai a ai is k.
Register your product and benefit from many advantages.
Rate your product and tell us your opinion.
Alfred Kärcher SE & Co. KG
Alfred-Karcher-Str. 28-40
71364 Winnenden (Germany)
Tel.: +49 7195 14-0
Fax: +49 7195 14-2212




- CONTENTS
- GENERAL NOTES
- WORKING WITH CHAIN SAWS POSES A VERY HIGH RISK OF INJURY, SINCE YOU WILL BE WORKING WITH HIGH CHAIN SPEEDS AND VERY SHARP SAW TEETH. IT IS VITAL YOU OBSERVE THE SAFETY MEASURES AND CODE OF BEHAVIOUR FOR WORKING WITH CHAIN SAWS
- DANGER
- INDICATION OF AN IMMINENT THREAT OF DANGER THAT WILL LEAD TO SEVERE INJURIES OR EVEN DEATH
- CAUTION
- ATTENTION
- GENERAL POWER TOOL SAFETY INSTRUCTIONS
- WARNING
- A POWER TOOL PLUGS MUST MATCH THE OUTLET. NEVER MODIFY THE PLUG IN ANY WAY. DO NOT USE ANY ADAPTER PLUGS WITH EARTHED (GROUNDED) POWER TOOLS. UNMODIFIED PLUGS AND MATCHING OUTLETS WILL REDUCE THE RISK OF ELECTRIC SHOCK
- PERSONAL SAFETY
- POWER TOOL USE AND CARE
- ADDITIONAL GENERAL SAFETY INSTRUCTIONS
- CHAIN SAW SAFETY WARNINGS
- CAUSES AND OPERATOR PREVENTION OF KICKBACK
- ADDITIONAL SAFETY INSTRUCTIONS FOR CHAINSAWS
- RESIDUAL RISKS
- RISK REDUCTION
- INTENDED USE
- △DANGER
- IMPROPER USE
- ENVIRONMENTAL PROTECTION
- NOTES ON THE CONTENT MATERIALS (REACH)
- ACCESSORIES AND SPARE PARTS
- SCOPE OF DELIVERY
- SAFETY DEVICES
- CHAIN WITH A LOW RISK OF KICKBACK
- GUIDE RAILS
- CHAIN CATCHER
- BUCKING SPIKES
- CHAIN BRAKE
- SYMBOLS ON THE DEVICE
- PROTECTIVE CLOTHING
- HEAD PROTECTION
- CHAINSAWING JACKET
- PROTECTIVE GLOVES
- LEG PROTECTION
- SAFETY SHOES
- DESCRIPTION OF THE DEVICE
- SEE GRAPHICS PAGE FOR ILLUSTRATIONS. ILLUSTRATION A
- RECHARGEABLE BATTERY PACK
- INSTALLATION
- MOUNTING THE CHAIN AND GUIDE RAIL
- ILLUSTRATION B
- ILLUSTRATION C
- ILLUSTRATION E
- ILLUSTRATION F
- INITIAL STARTUP
- FILLING THE CHAIN OIL TANK
- ILLUSTRATION G
- ILLUSTRATION H
- CHECKING THE CHAIN TENSION
- ILLUSTRATION I
- ILLUSTRATION J
- INSTALLING THE BATTERY PACK
- ILLUSTRATION K
- OPERATION
- BASIC OPERATION
- SWITCH ON THE DEVICE
- ILLUSTRATION L
- ILLUSTRATION M
- INTERRUPTING OPERATION
- ILLUSTRATION N
- WORKING TECHNIQUES
- WORKING POSITION
- ILLUSTRATION O
- PULL IN/RECOIL
- ILLUSTRATION P
- KICKBACK
- UNCONTROLLED MOVEMENTS OF THE CHAINSAW
- ILLUSTRATION Q
- PLAN THE FALL DIRECTION AND RETREAT PATH
- FALLING TREE
- PREPARING THE WORK AREA AT THE TRUNK
- SETTING THE FELLING CUT
- ILLUSTRATION T
- CUTTING TENSIONED WOOD
- UNCONTROLLED MOVEMENTS OF CHAINSAW AND SAWING MATERIAL
- ILLUSTRATION U
- PRUNING
- ILLUSTRATION W
- CUTTING A TRUNK TO LENGTH
- DAMAGE TO THE CHAIN DUE TO GROUND CONTACT
- TRIMMING A TENSIONED TRUNK
- UNCONTROLLED MOVEMENT OF THE CHAINSAW
- ILLUSTRATION X
- REMOVING THE BATTERY PACK
- NOTE
- SEE ILLUSTRATION
- FINISHING OPERATION
- TRANSPORT
- FAILURE TO OBSERVE THE WEIGHT
- UNCONTROLLED STARTUP
- STORAGE
- CARE AND SERVICE
- CLEANING THE DEVICE
- MAINTENANCE INTERVALS
- BEFORE EVERY USE
- EVERY 5 OPERATING HOURS
- MAINTENANCE WORK
- CHECKING THE FUNCTIONALITY OF THE CHAIN BRAKE
- ADJUSTING THE CHAIN TENSION
- ILLUSTRATION AB
- REPLACING THE CHAIN AND GUIDE RAIL
- SHARP CHAIN
- ILLUSTRATION AD
- ILLUSTRATION AE
- ILLUSTRATION D
- TROUBLESHOOTING GUIDE
- WARRANTY
- TECHNICAL DATA
- VIBRATION VALUE
- △WARNING
- DEVICE WITH A HAND-ARM VIBRATION VALUE >2.5M/S2 (SEE CHAPTER TECHNICAL DATA IN THE OPERATING INSTRUCTIONS)
- EU DECLARATION OF CONFORMITY
- CURRENTLY APPLICABLE EU DIRECTIVES 2014/30/EU
- HARMONISED STANDARDS USED
- CONFORMITY EVALUATION PROCEDURE USED
- SOUND POWER LEVEL DB(A)
- REDUCING RISKS
- INDEX
- FIGURE S
- DEFINE THE FELLING CUT
- TREE FALL
- TABLE OF CONTENTS
- UINE YKA3AHNNA
- SAFETY INSTRUCTIONS
- JACKET FOR WORKING WITH A SAW CHAIN
- PROTECTIVE FOOTWEAR
- DEVICE DESCRIPTION
- BATTERY PACK
- ASSEMBLY
- MOUNTING THE SAW CHAIN
- COMMISSIONING
- FIGURES
- FIGURE J
- INSTALLING THE BATTERY BLOCK
- BASIC OPERATIONS
- WORK TECHNIQUES
- UNCONTROLLED KICKBACK HAZARD
- DANGER OF INJURY FROM KICKBACK
- FIGURE O
- KICKBACK AND RECOIL
- FIGURE
- UNCONTROLLED MOVEMENTS OF THE SAW CHAIN OR THROWN MATERIAL
- CUTTING BRANCHES
- SEARCH
- CHANGE IN WEIGHT DISTRIBUTION WHEN CUTTING BRANCHES
- FIGURE W
- CUTTING THE TRUNK INTO LOGS
- UNCONTROLLED KICKBACK
- UNCONTROLLED MOVEMENT OF THE SAW
- FIGURE X
- FIGURE Y
- REMOVING THE BATTERY BLOCK
- FIGURE Z
- END OF WORK
- EVERY 5 WORKING HOURS
- MAINTENANCE WORK CHECKING THE CHAIN BRAKE
- TROUBLESHOOTING
- SOUND POWER LEVEL L(WA)
- APPLIED HARMONIZED STANDARDS
- И YKA3AHNIA
- YKA3AHNNA 3A 6E3ONACHOCT
- CTEPEHN HA ONACHOCT
- ONACHOCT
- △CAUTION
- ADDITIONAL SAFETY INSTRUCTIONS
- RESIDUAL RISK
- SAFETY INSTRUCTIONS FOR HIGH-PRESSURE CLEANERS
- RISK OF KICKBACK
- GUIDE BAR
- LIMITED CUT
- TOP HANDLE
- SYMBOL ON THE DEVICE
- CHARGING THE BATTERY
- BASIC MAINTENANCE
- SWITCHING ON THE DEVICE
- TRIGGER LOCK
- THIS WORK IS A POSITIONING WORK
- UNCONTROLLED MOVEMENT OF THE UPPER SAW BLADE
- KICKBACK FORCE
- FIGURE P
- FIGURE Q
- CLEARING THE WORK AREA AROUND THE TRUNK
- MAKING THE FELLING CUT
- FIGURE T
- FIRST AID FOR INJURIES
- CHECKING THE UPPER LIMB AND MATERIALS FOR CUTTING
- FIGURE U
- FIGURE V
- REFLECTION
- PREPARATION OF THE TOOL BEFORE WORK
- CUTTING THE TRUNK TO A CERTAIN LENGTH
- RELEASING THE TRUNK UNDER TENSION TO A PREDETERMINED LENGTH
- REMOVAL OF THE RECHARGEABLE BATTERY
- UNLOCKED DEVICE
- UNCONTROLLED DISCHARGE
- UNCONTROLLED TIGHTENING
- SHARP VERSION
- NOUCHBAHE HA YPEDA
- BEFORE EACH START-UP IN OPERATION
- CHECKING THE FUNCTION OF THE CHAIN BRAKE
- REPLACING THE CHAIN AND GUIDE BAR
- FIRST VERSION
- HELP WITH MALFUNCTIONS
- KICKBACK AND SAFETY WARNINGS
- BUMPER SPIKE
- SYMBOL DEVICE
- ILLUSTRATION. ON PAGES WITH FIGURES, FIGURE A
- FILLING WITH OIL
- CHECKING THE BELT TENSION
- MOUNTING THE BATTERY BLOCK
- MAIN OPERATIONS
- TURNING ON THE DEVICE
- FIGURE L
- FIGURE M
- STOPPING WORK
- FIGURE N
- TEST METHOD
- SAFETY
- SELECTING THE CHAIN
- ADJUSTING THE SAW BLADE GUARD FOR THE SAW BLADE EXIT
- FIGURE R
- PREPARING THE WORK AREA ON THE TRUNK
- CREATING THE FELLING NOTCH
- CUTTING FELLED TREES
- UNCONTROLLED MOVEMENTS OF THE SAW BAR CAN CAUSE INJURY FROM MATERIAL
- FIG. C
- FIG. V
- CUT BRANCHES
- CUTTING THE POST TO LENGTH
- UNCONTROLLED MOVEMENTS OF THE GUIDE WIRE
- DAMAGE TO THE GUIDE WIRE IN CASE OF CONTACT WITH
- GROUND
- CUT THE DRILL STRING WITH A MECHANICAL SAW
- BEFORE EACH USE
- EVERY 5 HOURS OF OPERATION
- SECTION 3: TECHNICAL SPECIFICATIONS
- CHECKING THE OPERATION OF THE LEVER
- ADJUSTING THE LEVER TENSION
- FIGURE AC
- FIGURE AD
- REPLACING THE LEVER
- FIGURE AE
- FIGURE C
- FIGURE D
- FIGURE E
- MA3MYHBI
- KANNBL HVCKAYNAP
- SAFETY WARNINGS
- ELECTRICAL SAFETY INSTRUCTIONS: READ CAREFULLY
- KEEP ALL SAFETY INSTRUCTIONS AND WARNINGS FOR FUTURE REFERENCE
- ELECTRICAL SAFETY
- SAFETY INSTRUCTIONS FOR THE DEVICE
- INSTALLING THE BATTERY
- REMOVING THE DEVICE
- STOPPING
- KUMYS AISTERI
- KUMYS SIGNATURE
- KAYIN
- TARGU/KAITRA
- CONNECTORS
- CABLE
- POSSIBLE CAUSES OF MALFUNCTION
- CLUTCH AND BRAKE MAINTENANCE
- DO NOT OPERATE WITHOUT GUARD
- DIRECT THE STEAM FLOW
- REPLACING WORN PARTS
- USE ONLY ORIGINAL PARTS
- ALIGN THE STRAIGHT EDGE
- BENU
- ECKEPTY
- DO NOT USE THE DEVICE IF IT IS DAMAGED
- DO NOT CUT THE GUIDE RAILS TO AN INCORRECT LENGTH
- REMOVE THE BATTERY COVER
- INSTRUCTION
- BATTERY DISPOSAL
- FIGURE F
- FIGURE G
- CYPER N
- CYPER F
- CYPER G
- MAINTENANCE AND TECHNICAL SERVICE
- CORRECTION
- △ABAJIAHBI
- KYPBINFBHBTA3ANAHBI
- TEXHNKAIBIK KBI3MET KEPCETY MEP3IMINILIRI
- OP6IP NAIDAIAHRYA EHRI3Y ANDBIHDA
- ΘP 5 CARAT KYMBIC
- TEXHNKAJIBIK KBI3MET KEPCETY XYMBICTAPBL
- REPLACING THE BATTERY
- FIGURE AB
- EMERGENCY HELP
- TECHNICAL SPECIFICATIONS
- FIRST AID
- EJLL JC JAELL AALIO JIA
- THE MINIMUM VALUE OF AI A AI IS K
Brand : Kärcher
Model : CS 40036 Bp
Category : Saw