
73210588 - Power bank HAMA - Free user manual and instructions
Find the device manual for free 73210588 HAMA in PDF.
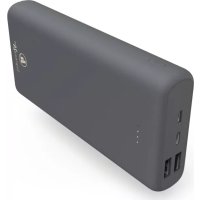
| Product type | Portable power bank / External battery |
| Brand | Hama |
| Model | 73210588 |
| Battery capacity | 10,000 mAh / 37 Wh (typical 10,250 mAh / 37.93 Wh) |
| Battery type | High-density lithium polymer |
| USB-C input | 5V/3A or 9V/2A |
| Micro-USB input | 5V/3A or 9V/2A |
| USB-A output 1 | 5V/3A, 9V/2A, 12V/1.5A (QC 3.0) |
| USB-A output 2 | 5V/3A, 9V/2A, 12V/1.5A (QC 3.0) |
| USB-C output | 5V/3A, 9V/2A, 12V/1.5A (PD 18 W max.) |
| Max. total output current | 3 A (18 W max.) |
| Useful capacity (USB-A) | Approx. 6,605 mAh @ 5V/2A |
| Useful capacity (USB-C PD) | Approx. 6,025 mAh @ 5V/3A |
| Fast charging functions | Power Delivery (PD) and Quick Charge 3.0/2.0 |
| Capacity display | 4 LEDs (25% each) |
| Weight | Approx. 220 g |
| Dimensions | Approx. 140 x 68 x 16 mm |
| Material | Fireproof plastic |
| Package contents | Power bank, USB-C cable, user manual |
| Operating temperature | 0 °C to 40 °C |
| Care and cleaning | Soft dry cloth, without aggressive detergent |
| Recycling | Do not dispose of with household waste – follow local recycling guidelines |
| Safety | Protection against overcharge, short circuit, overheating |
| Repairability | Built-in battery not replaceable – contact a professional for any maintenance |
Frequently Asked Questions - 73210588 HAMA
User questions about 73210588 HAMA
0 question about this device. Answer the ones you know or ask your own.
Ask a new question about this device
Download the instructions for your Power bank in PDF format for free! Find your manual 73210588 - HAMA and take your electronic device back in hand. On this page are published all the documents necessary for the use of your device. 73210588 by HAMA.
USER MANUAL 73210588 HAMA
natural_image
Line drawing of a rectangular electronic device with three internal slots and a mounting hole (no text or symbols)OperatingInstructions
Bedienungsanleitung
Moded'emploi
Instruccionesdeuso
Thankyouforchoosinga H amaproduct.
Take your time and read the following instructions and information completely. Please keep these instructions in a safe place for future reference. If you sell the device, please pass these operating instructions onto thenewowner.
1. ExplanationofWarningSymbolsandNotes
Warning

This symbol is used to indicate safety instructions or to draw your attention to specific hazards and risks.
Note

This symbol is used to indicate additional information or important notes.
High-density lithium-polymercells
This product contains high-density lithium-polymer cells. High-density cells were developed mainly forsmartphoneproductioninordertomeetthehighcapacityandperformancedemandsusinga minimum amount of space. This new generation of lithium-polymer cells enables a lightweight and compactdesignalongwitha c omparativelyhighcapacity.
2.PackageContents
• PowerPack"PD10-HD", 10000mAh
• U SB-CtoUSB-Ccable
• T heseoperatinginstructions
3.SafetyNotes
• T heproductisintendedforprivate,non-commercialuseonly.
• U setheproductforitsintendedpurposeonly.
- Protect the product from dirt, moisture and overheating, and only use it in a dry environment.
- Do not use the product in the immediate vicinity of heaters or other heat sources or in direct sunlight.
- Keep this product, as all electrical products, out of there each of children!
• D o n otdroptheproductanddonotexposeittoanymajorshocks.
- Do not operate the product outside the power limits given in the specifications.
- Do not open the device or continue to operate it if it becomes damaged.
• D isposeofpackagingmaterialimmediatelyaccordingtolocallyapplicableregulations.
- Since the battery is integrated and cannot be removed, you will need to dispose of the product as a w hole.Dothisincompliancewiththelegalrequirements.
- Do not modify the product in any way. Doing so voids the warranty.
- Do not use the product in areas where the use of electronic devices is not permitted.
- Do not attempt to service or repair the product yourself. Leave any and all service work to qualified experts.
- Do not throw the battery or the product into fire.
- Do not tamper with or damage/heat/disassemble the batteries/rechargeable batteries.
4.Operation
4.1ChargingthePowerPack
Warning-Battery

- Do not charge the power pack using your PC or the notebook. The charging currents can damagetheUSBportofthePC/notebook.
- O nlyusesuitablechargingdevicesorUSBconnectionsforcharging.
- As a rule, do not charge devices or USB connections that are defective and do not try to repair themyourself.
- Do not overcharge the product or allow the battery to completely discharge.
- A voidstoring, chargingorusingthedeviceinextremetemperaturesandextremelylow atmosphericpressure (forexample,athighaltitudes).
- When stored over a long period of time, batteries should be charged regularly (at least every three months).
- B eginchargingthepowerpackbyconnectingtheincludedUSB-CtoUSB-Ccabletothepower pack's USB-C (IN 5V/3A; 9V/2A) port and to a suitable USB-C charger. Alternatively, the power pack can also be charged via the Micro-USB port. For this purpose, connect a Micro-USB cable to the Micro-USB input (IN 5V/3A; 9V/2A) on the power pack and to a suitable USB charger. Please refertotheoperatinginstructionsfortheUSBchargerused.
- C hargingbeginsandendsautomatically.
- Charge the Power Pack fully before using it for the first time.
Note-Capacity

• T hecapacityisalwaysshownwhenthePowerPackischarging.
- Each status LED corresponds to 25% of the capacity. When an LED is permanently illuminated, this indicates that this capacity level has already been reached. The Power Pack is charged to at least 75% if three LEDs are illuminated, and the fourth is flashing.
- I f a llfourstatusLEDslightup, thefullcapacityisavailable.
- Press the button of the Power Pack to switch it on and to check its current capacity.
• To switch the power pack off, press the button twice until the status LEDs go out.
4.2Chargingterminaldevices
Warning- Connectingterminaldevices

- Before connecting a terminal device, check whether the power output of the charger can supply sufficientpowerforthedevice.
- Ensure that the total power consumption of the connected terminal device does not exceed 3000mA.
- P leaserefertotheinstructionsintheoperatingmanualofyourterminaldevice.
- It is essential that you observe these specifications and the safety instructions regarding the powersupplyofyourdevices.
• T hepowerpackmustnotbechargedanddischargedatthesametime! - P leasedonotusetheUSBandUSB-Coutputssimultaneouslyforcharging,asthisreducesthe charging current considerably. As a result, the charging time is greatly increased and the power packmaybeoverloaded.
Warning

- N everconnectthechargingcableofthePowerPacktoboththeinputandtheoutputofthe PowerPackatthesametime.Thiscoulddamagethebattery.
- Do not connect any terminal devices while the Power Pack is charging. This could damage the PowerPackandtheconnecteddevice.
- Connect the included USB-C charging cable to the USB-C port on the power pack (OUT 5V/3A; 9V/2A; 12V/1.5A – 18W PD) and to the USB-C port on your terminal device (mobile phone, smartphone, etc.).
- TheMicro-USBcharging/connectingcableincludedmaynotbesuitablefortheUSBconnectionon yourterminaldevice. In this case, use the USB cable that was included with your terminal device.
- When using the USB-A output (OUT 5V/3A; 9V/2A; 12V/1.5A – QC 3.0) for charging, please connect a suitable USB charging cable to the power pack's USB-A output and to the port of your terminal device.
- Charging begins automatically. The status LEDs show the remaining capacity when the Power Pack ischarging.
- The current battery status of your terminal device will appear on this device.
- Press the button on the power pack twice to stop charging and switch it off. The status LEDs shouldswitchoff.
- The Power Pack will automatically switch off if it is not connected to a terminal device.
Note- 0 ptimisedcharging

OptimisedchargingmeansthatthePowerPackrecognisestheconnectedterminaldeviceand suppliesitwiththeoptimalcurrenttominimisechargingtime.Pleasenotethatthemaximum poweroutputofthepowerpackis3000mA.
Note - Power Delivery/QC 3.0, 2.0

- Plug & go: No manual setup necessary, just connect and start:
Voltage and power are automatically configured by Power Delivery/QC 3.0, 2.0. - For efficient and optimised charging, the Power Delivery (PD)/QC 3.0, 2.0 function must be supported by your terminal device.
- With the large quantity of PD/QC-enabled terminal devices with different firmware versions, it canhappenthatthefunctionisnotfullysupported.
5. Care and Maintenance
Only clean this product with a slightly damp, lint-free cloth and do not use aggressive cleaning agents.
6.WarrantyDisclaimer
Hama GmbH & Co KG assumes no liability and provides no warranty for damage resulting from improper installation/mounting, improper use of the product or from failure to observe the operating instructions and/or safety notes.
7.TechnicalData
| USB-Cinput5 V 3 A / 9 V 2 A | — — |
| Micro-USBinput5 V 3 A / 9 V 2 A | — — |
| USB-A output 1 | 5 V — 3 A / 9 V — 2 A / 12 V — 1.5 A (QC 3.0) |
| USB-A output 2 | 5 V — 3 A / 9 V — 2 A / 12 V — 1.5 A (QC 3.0) |
| USB-C output | 5 V — 3 A / 9 V — 2 A / 12 V — 1.5 A (PD 18 W max.) |
| Outputtotal3A(18W m ax.) | |
| Batterytype3.7V/Li-Po | |
| Min.capacity10000mAh/ 3 7 Wh | |
| Typ. capacity | 10250 mAh / 37.93 Wh |
| UsableCapacity* | USB-A:6605mAh@ 5 V — 2AUSB-C:6601mAh@ 5 V — 2AUSB-A ( QC):6365mAh@ 5 V — 2,4A3295mAh@ 9 V — 2A2548mAh@ 1 2 V — 1,5AUSB-C(PD):6025mAh@ 5 V — 3A3228mAh@ 9 V — 2A2452mAh@ 1 2 V — 1,5A |
* Theusablecapacityisthecapacitythatcanbedrawnfromtheoutputsockets.
8. Recycling Information
Noteonenvironmentalprotection:

AftertheimplementationoftheEuropeanDirective2012/19/EUand2006/66/EUinthenationallegalsystem,thefollowingapplies:Electricandelectronicdevicesaswellasbatteries must not be disposed of with household waste. Consumers are obliged by law toreturnelectricalandelectronicdevicesaswellasbatteriesattheendoftheirservicelivestothepubliccollectingpointssetupforthispurposeorpointofsale.Detailstothisare
defined by the national law of the respective country. This symbol on the product, the instruction manual or the package indicates that a product is subject to these regulations. By recycling, reusing the materials or other forms of utilising old devices/batteries, you are making an important contribution to protecting ourenvironment.
Remarque – Power Delivery/QC 3.0, 2.0

Nota – Power Delivery/QC 3.0, 2.0

Nota – Power Delivery/QC 3.0, 2.0

8. Pokynyk likvidaci
Nota – Power Delivery/QC 3.0, 2.0

| EntradaUSB-C5V 3A / 9V 2A | |
| Entrada micro USB | 5V --- 3A / 9V --- 2A |
| Saída USB-A 1 | 5V --- 3A / 9V --- 2A / 12V --- 1,5A (QC 3.0) |
| Saída USB-A 2 | 5V --- 3A / 9V --- 2A / 12V --- 1,5A (QC 3.0) |
| Saída USB-C | 5V --- 3A / 9V --- 2A / 12V --- 1,5A (PD 18W max.) |
| Saída total | 3A (18W max.) |
| Tipodebateria3,7V/Li-Po | |
| Capacidademínima10000mAh/ 3 7 W h | |
| Capacidadetipica | 10250mAh/ 3 7,93Wh |
| Capacidadeútil* | USB-A:6605mAh@ 5 V --- 2AUSB-C:6601mAh@ 5 V --- 2AUSB-A (QC):6365mAh@ 5 V --- 2,4A3295mAh@ 9 V --- 2A2548mAh@ 1 2 V--- 1,5AUSB-C(PD):6025mAh@ 5 V --- 3A3228mAh@ 9 V --- 2A2452mAh@ 1 2 V--- 1,5A |
Avertizare – Acumulator


- ExplanationofWarningSymbolsandNotes
- Warning
- Note
- High-density lithium-polymercells
- 2.PackageContents
- 3.SafetyNotes
- 4.Operation
- 4.1ChargingthePowerPack
- Warning-Battery
- Note-Capacity
- 4.2Chargingterminaldevices
- Warning- Connectingterminaldevices
- Note- 0 ptimisedcharging
- Note - Power Delivery/QC 3.0, 2.0
- Care and Maintenance
- 6.WarrantyDisclaimer
- 7.TechnicalData
- Recycling Information
- Noteonenvironmentalprotection:
- Remarque – Power Delivery/QC 3.0, 2.0
- Nota – Power Delivery/QC 3.0, 2.0
- Pokynyk likvidaci
- Avertizare – Acumulator
Brand : HAMA
Model : 73210588
Category : Power bank