Viaggio 23 Shuttle Plus - Car seat PEG PEREGO - Free user manual and instructions
Find the device manual for free Viaggio 23 Shuttle Plus PEG PEREGO in PDF.
| Brand | PEG PEREGO |
| Model | Viaggio 23 Shuttle Plus (Viaggio 2-3 Shuttle Plus) |
| Product type | Car seat group 2/3 |
| Approval | UN/ECE R44/04 |
| Child weight | 15 to 36 kg (approx. 3 to 12 years) |
| Installation | Forward-facing only (facing the road) |
| Main fixing | 3-point static or retractor seat belt |
| Additional fixing | ISOFIX connectors (Semi-Universal category) |
| Headrest adjustment | 5 positions (height) |
| Backrest width adjustment | 3 positions (closed, intermediate, open) |
| Backrest height adjustment | 3 positions |
| Use without backrest | Allowed only for children of at least 125 cm |
| Cup holder | Yes, removable and can be placed on either side |
| Removable cover | Yes, washable (follow instructions on packaging) |
| Main materials | Plastic, polystyrene (white under seat and backrest), fabric |
| ISOFIX fixing indicator | Green light = correct, red = incorrect |
| Serial number | Under the seat, with orange approval label |
| Maintenance | Clean with a damp cloth; do not use solvents |
| After-sales service | Peg Perego: tel. 0039/039/60.88.213 |
Frequently Asked Questions - Viaggio 23 Shuttle Plus PEG PEREGO
User questions about Viaggio 23 Shuttle Plus PEG PEREGO
0 question about this device. Answer the ones you know or ask your own.
Ask a new question about this device
Download the instructions for your Car seat in PDF format for free! Find your manual Viaggio 23 Shuttle Plus - PEG PEREGO and take your electronic device back in hand. On this page are published all the documents necessary for the use of your device. Viaggio 23 Shuttle Plus by PEG PEREGO.
USER MANUAL Viaggio 23 Shuttle Plus PEG PEREGO
EN Instructions for use
FR Notice d'emploi
RU INHctpyKunno NO Nb3ObaHnIO
TR Kullanim kilavuzu
HR/SRB/MNE/BiH Upute za uporabu
Thank you for choosing a Peg-Pérego product.
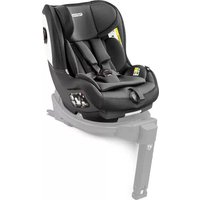
Car seat,Viaggio 2-3 Shuttle Plus "Universal" category with straps
- Complies with the EU regulation UN/ECE R44/04, for children from 15 to 36 kg (around 3 to 12 years).
- Suitable for most car seats but not all.
- The car seat can be correctly installed if your vehicle's instruction and maintenance handbook reports that it is compatible with the "Universal" restraint systems.
- This car seat is classified "Universal" if it meets standards that are more demanding than those for previous models that did not report the type of approval label.
- The car seat can only be used in approved cars, fitted with a 3-point static seat belt or winder, approved in accordance with standard UN/ECE R16 or equivalent regulations.
- IMPORTANT: the use of a 2-point seat belt or lap belt is forbidden.
Car seat,Viaggio 2-3 Shuttle Plus "Universal" category, with straps ^+ ISOFIX
- Complies with the EU regulation UN/ECE R44/04, for children from 15 to 36 kg (around 3 to 12 years).
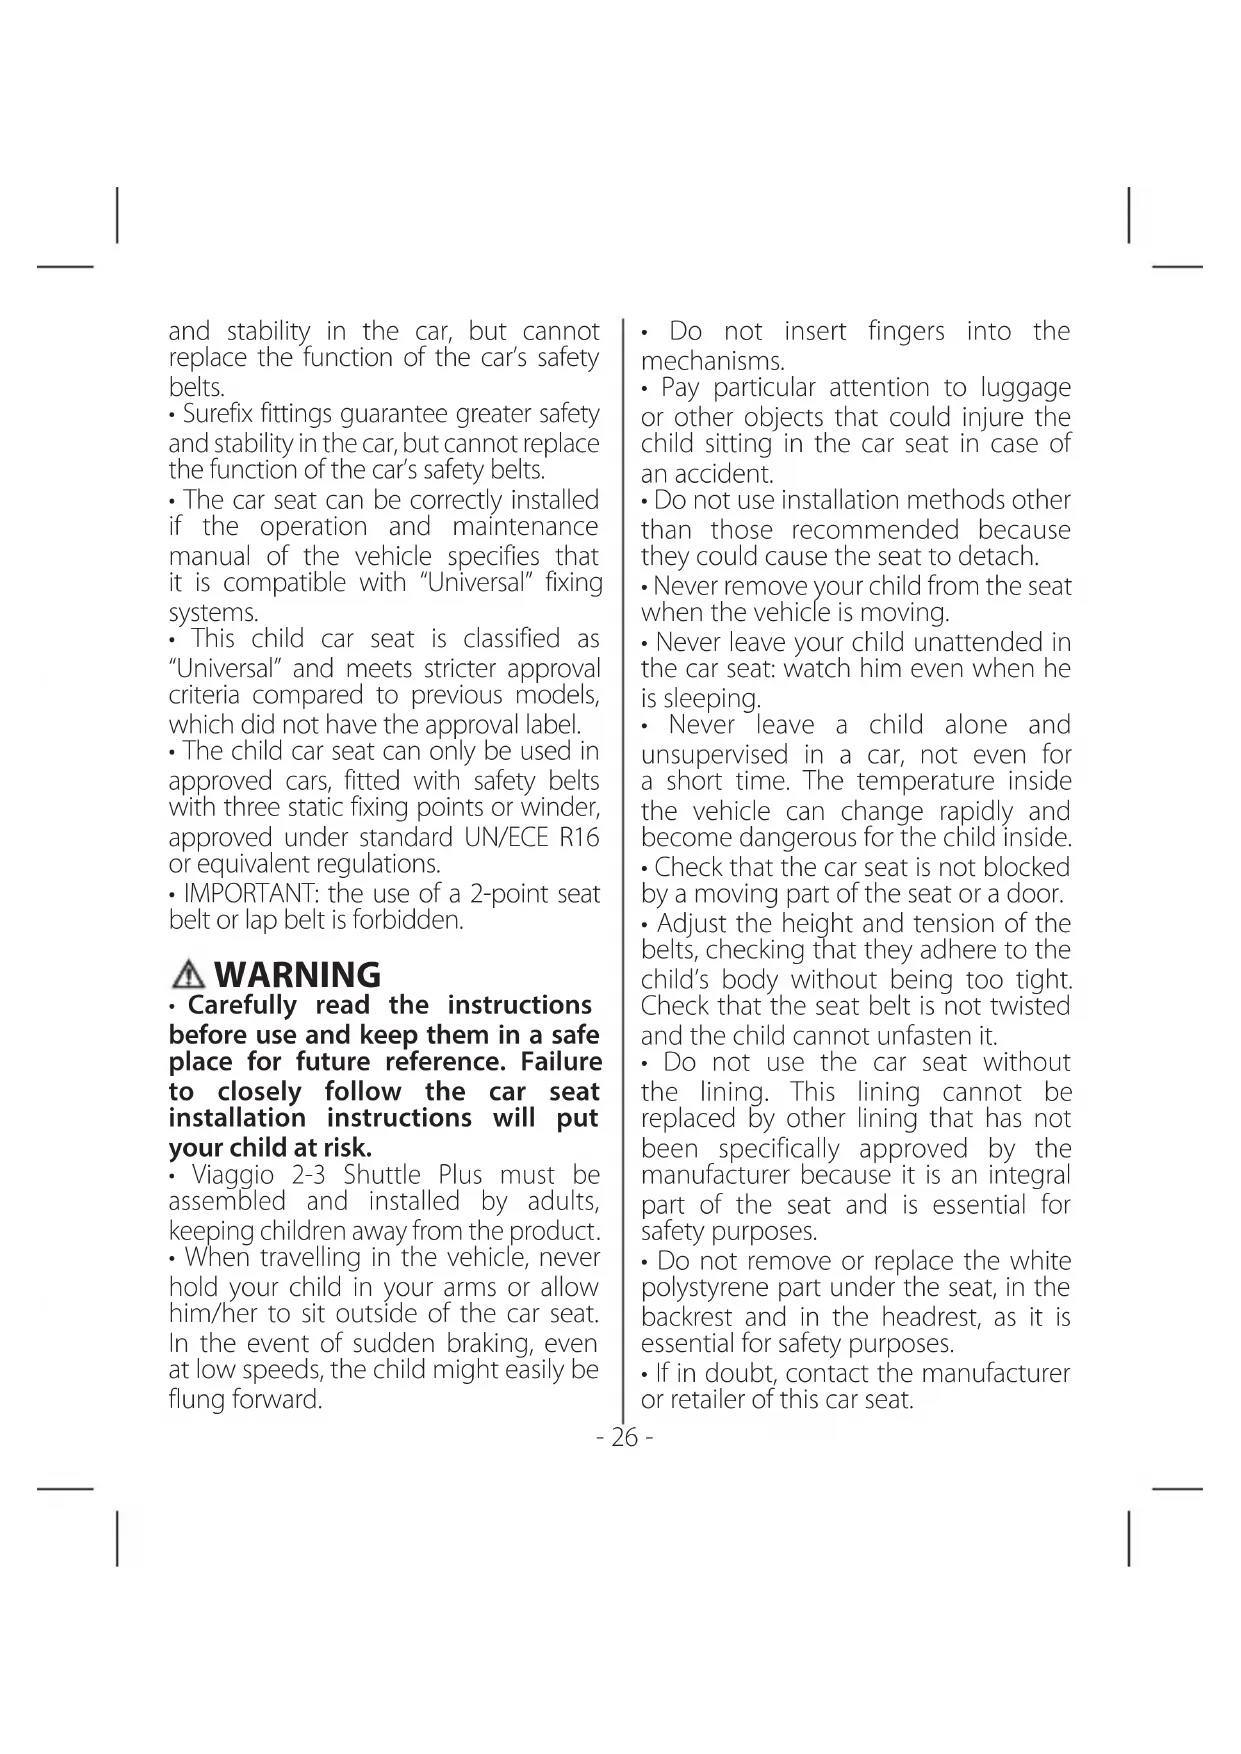
- Surefix fittings guarantee greater safety
and stability in the car, but cannot replace the function of the car's safety belts.
- Surefix fittings guarantee greater safety and stability in the car, but cannot replace the function of the car's safety belts.
- The car seat can be correctly installed if the operation and maintenance manual of the vehicle specifies that it is compatible with "Universal" fixing systems.
- This child car seat is classified as "Universal" and meets stricter approval criteria compared to previous models, which did not have the approval label.
- The child car seat can only be used in approved cars, fitted with safety belts with three static fixing points or winder, approved under standard UN/ECE R16 or equivalent regulations.
- IMPORTANT: the use of a 2-point seat belt or lap belt is forbidden.
WARNING
- Carefully read the instructions before use and keep them in a safe place for future reference. Failure to closely follow the car seat installation instructions will put your child at risk.
Viaggio 2-3 Shuttle Plus must be assembled and installed by adults, keeping children away from the product.
- When travelling in the vehicle, never hold your child in your arms or allow him/her to sit outside of the car seat. In the event of sudden braking, even at low speeds, the child might easily be flung forward.
- Do not insert fingers into the mechanisms.
- Pay particular attention to luggage or other objects that could injure the child sitting in the car seat in case of an accident.
- Do not use installation methods other than those recommended because they could cause the seat to detach.
- Never remove your child from the seat when the vehicle is moving.
- Never leave your child unattended in the car seat: watch him even when he is sleeping.
- Never leave a child alone and unsupervised in a car, not even for a short time. The temperature inside the vehicle can change rapidly and become dangerous for the child inside.
- Check that the car seat is not blocked by a moving part of the seat or a door.
- Adjust the height and tension of the belts, checking that they adhere to the child's body without being too tight. Check that the seat belt is not twisted and the child cannot unfasten it.
- Do not use the car seat without the lining. This lining cannot be replaced by other lining that has not been specifically approved by the manufacturer because it is an integral part of the seat and is essential for safety purposes.
- Do not remove or replace the white polystyrene part under the seat, in the backrest and in the headrest, as it is essential for safety purposes.
- If in doubt, contact the manufacturer or retailer of this car seat.
This article is progressively numbered through its certification label, located on the bottom of the seat (fig. 36).
- Do not remove the adhesive and sewn labels. Removal of these labels could result in the product not complying with the law.
- Do not use the child car seat if it is broken or if there are missing parts, or if it has been subjected to heavy impacts as a result of accidents, as it may have suffered structural damage which is not visible but is extremely hazardous.
- If using a second-hand product, make sure it is a recent model, comes with instructions, and is fully functional in all parts. An obsolete product may not conform to safety standards, due to natural ageing of materials and updating of regulations. If you have any doubts, contact the manufacturer's customer service centre.
- Do not alter the product.
- Contact the post-sales service for repairs, the replacement of components and information on the product; contact information is provided on the last page of this manual.
- When not in use, the car seat can be left in the vehicle provided it is attached to the vehicle's Isofix attachments; otherwise, remove it from the vehicle: in the event of an accident it could be dangerous for other passengers.
- Do not use accessories that have not been approved by the manufacturer or competent authorities.
- Never put hot drinks in the cup holder, if present.
1. AMOUNTANT
- "Viaggio 2-3 Shuttle Plus": this car seat, Group 2-3, must be installed in the direction of travel.
- Do not install "Viaggio 2-3 Shuttle Plus" on seats that are not in the direction of travel or are transversal to the direction of travel.
- It is always advisable to fit the car seat on the rear vehicle seat and on the passenger's side.
- If the car seat is installed on the front seat, it is advisable to place it as far as possible from the dashboard.
- Do not use Viaggio 2-3 Shuttle Plus without the backrest if your child is less than 125cm tall.
Product components
- Inspect the content of the package and contact the post sale Customer Care if some items are missing.
The child car seat includes: headrest (a), backrest (b), seat with armrests (c), and adjustable shoulder belt, located under the seat's packaging (d).
The car seat is ready to use: no assembly operation is required.
Product features
Viaggio 2-3 Shuttle Plus adjusts to grow with your child. Each adjustment is independent, to ensure maximum flexibility of use.
- The headrest can be adjusted in 5 positions. Lift the handle (fig_a)
on the back of the headrest and simultaneously raise the headrest (fig_b), placing it at the desired height.
IMPORTANT: as the child grows, it is necessary to adjust the height of the headrest according to that of the child.
IMPORTANT: after completing the operation, try moving the headrest to ensure it is correctly fitted in place.
-
The width of the backrest may be adjusted in three positions (closed, mid, opened). Push the button on the side of the knob (1) and rotate the knob (2) clockwise to open the wings. This operation is required as your child grows. To close the wings, push the side button and turn the knob anti-clockwise.
-
The height of the backrest can be adjusted in 3 positions: push the handle behind the backrest upwards (1) while simultaneously raising the entire backrest (2) to the desired position. To lower the backrest, pull the handle (1) and at the same time push the backrest downwards (2). This operation is required as your child grows.
How to attach the car seat to the vehicle if you own a car with Isofix attachments
This type of attachment can be used if your car is fitted with Isofix hooks. Otherwise, go to the next section. For further information on the availability
of these hooks and their location, refer to the vehicle's instruction manual.
Fastening the attachments guarantees greater stability and safety in the vehicle, but cannot replace the restraining function of the vehicle's seat belts.
6. To lengthen the connectors inside of the seat, turn the handle on the front of the seat, placing your hand into the slot shown in yellow (fig_a) pulling it longitudinally towards you (fig_b). The connectors will automatically be expelled (fig_c). Repeat to ensure that the connectors have been expelled at the same time and are extended fully.
7. Fix the connectors of the car seat to the Isofix hooks in the car itself, verifying that they "click" into place.
8. 3 important: The vehicle's Isofix hooks and the seat are correct coupled when a green signal appears above the connectors (fig_a). A red signal indicates that the attachments have NOT been coupled correctly (fig_b).
9. The car seat may be reclined as shown in the figure.
Lengthen the Isofix connectors by pulling the car seat towards you to recline the seat.
- To release Viaggio 2-3 Shuttle Plus from the seat, pull the handle (1) until the connectors are completely exposed. By doing this, the yellow release buttons will be visible on the sides of the base; pull the two buttons (2) until you hear the click of the connectors opening. You can the
proceed to remove the seat.
- To reposition the connectors within the seat, pull the lever (1) while pushing one of the two connectors (2) until they are barely visible.
How to attach the car seat to the vehicle if you own a car with no Isofix attachments
- Position the Viaggio 2-3 Shuttle Plus car seat on the vehicle seat in the direction of travel, leaving the attachments inside the Surefix Base (fig_a) and position the child in the seat as shown in the figure (fig_b), ensuring the car seat does not move during this operation.
How to secure your child with Viaggio 2-3 Shuttle Plus
13- Fasten the seat belt, ensuring that it clicks into place. Position the two parts of the seat belt as shown in figure; both the waist and shoulder straps must pass under the armrest.
14. To finish securing your child, thread the belt through the router placed on the headrest: thread the belt between the router and the headrest (1) until it slides into the router slot (2).
IMPORTANT: If the belt is loose, pull it taut above the loop (3). Ensure the belt is always tensioned and untwisted.
15- To remove the belt, slide it out of the router slot (1) and then between the router and the headrest (2) until it
is completely removed.
- IMPORTANT: the seat belt is correctly positioned if the child's shoulders are slightly below the seat belt loop, as shown in the figure.
Use without backrest
WARNING: Do not use Viaggio 2-3 Shuttle Plus without the backrest if your child is less than 125 cm tall.
HOW TO REMOVE THE BACKREST
- Pull the carry handle bar (1) to permit access to the two buttons on the back.
Press the two buttons (2) while simultaneously pulling the backrest upwards (3). - insert the two hooks on the seat into their housings adjacent to the back part of the seat.
How to connect up the car seat in the car if you have a car with Isofix connectors
Refer to the figures and text from point 6 through point 11.
How to connect up the car seat for cars that are NOT fitted with Isofix connectors
Refer to figure 12 and the corresponding instructions.
How to secure your child on a Viaggio 2/-3 Shuttle Plus car seat without a backrest
19-Strap the child in as in the figure, ensuring that the seat does not move during this operation.
20- Fasten the seat belt, ensuring that it clicks into place. Position the two parts of the seat belt as shown in figure; both the waist and shoulder straps must pass under the armrest.
21. To complete the installation process into the car, the adjustable shoulder loop can be used. To remove the loop from its location under the fabric of the seat, follow the instructions below.
22. Remove the strap from the loop under the car seat.
23- Extend the strap for the shoulder loop by pressing the button located behind the car seat (1) and pulling it upwards (2).
24- Insert the seat belt into the shoulder loop (as in the box), then lower the shoulder loop (1) by pulling the belt (2).
25. The correct height of the shoulder loop is just above the shoulder level.
How to remove the fabric lining
The fabric elements of Viaggio 2-3 Shuttle Plus may be removed for cleaning.
26. Follow the washing instructions on the seat's lining.
REMOVE THE LINING FROM THE SEAT:
- Unbutton the buttons on the side of the seat and pull out the seat.
- Hook the two elastics at the sides to the base of the backrest.
- Unbutton the two buttons and pull off the lower back protection.
REMOVING THE LINING FROM THE BACKREST:
30- Remove the four eyelets from the plastic buttons on the sides of the backrest. To facilitate this operation, widen the side wings
31. Release the two upper elastics and the two lower ones located on each side.
32- Remove the two flaps from their slots on the upper part of the backrest. To facilitate this operation, raise the headrest. At this point you can remove the lining from the car seat's backrest.
REMOVING THE LINING FROM THE HEADREST:
- To remove the plastic cover on the back of the headrest, unfasten the two side hooks.
- Release the bottom (1) and top (2) as shown.
35- To remove the headrest lining, slightly raise the headrest and release the two elastics on one side (fig_a) and then on the other (fig_b). Remove the lining.
How to cover the car seat
Proceed to perform the operations shown in figures 26 through 35 in reverse order.
Serial numbers
- On its underside, Viaggio 2-3 Shuttle Plus contains information about its product name, production date and serial number, along with its orange certification label.
Cup holder
- The car seat has a cup holder. Position the cup holder on the mushroom button on either side of the seat and fix it in place.
Product cleaning
- This product requires minimal maintenance. Cleaning and maintenance must only be carried out by adults.
It is advisable to keep all the moving parts clean. - Clean the plastic parts periodically with a damp cloth. Do not use solvents or similar substances.
- Brush the fabric parts to remove dust or clean following the instructions provided in the dedicated section.
- Do not clean polystyrene parts with solvents or other similar products.
- Protect the product from atmospheric agents, such as humidity, rain or snow. Extended exposure to sunshine can cause colour changes in many materials.
- Store the product in a dry environment.
How to read the type approval labe
This paragraph explains how to interpret the type approval label (orange label).
Fixing system with safety belts with three static fixing points or winder
- the UNIVERSAL marking indicates that the car seat is suitable for vehicles with this kind of safety belt.
- The label shows the car seat weight category.
The letter E in a circle indicates the European type approval mark and the number indicates the country that issued the type approval (1: Germany, 2: France, 3: Italy, 4: Netherlands, 11: Great Britain, 24: Ireland).
- Type approval number: if it starts with 04, this indicates the fourth amendment (the one currently in force) of Regulation R44.
Reference standard: UN/ECE R44/04.
- Production serial number: on issue of type approval, each car seat is personalised with its own number.
PEG-PEREGO S.p.A.
Peg-Perego SpA adopts a quality management system certified by TÜV Italia Srl in accordance with the ISO 9001 standard. Peg Pérego can make changes at any time to the models described in this publication for technical or commercial reasons.
Peg-Pérego after-sales service
If any parts of the item get lost or damaged, only use genuine Peg-Perego spare parts. For any repairs, replacements, information on the
products and sales of genuine spare parts and accessories, contact the Peg-Perego Assistance Service and state the serial number of the product, if present.
tel. 0039/039/60.88.213
Toll free number 800/147.414
(contactable by landline)
All intellectual property rights on the contents of this manual are the property of PEG-PEREGO S.p.A. and are protected by the laws in force.
FR_Français
Viaggio 2-3 Shuttle Plus adjusts to grow with your child. Each adjustment is independent, to ensure maximum flexibility of use.
AByokpicno roTOBe IJRA BnKOpncTaHHa: 36npatn NOro He Notpi6Ho.
XapakTepnCTnKn Bnpo6y
AbtoKpicno Viaggio 2-3 Shuttle Plus peryIIOeTbcB BiINOBiIDHO Do 3poCTaHHaWoI dNTInH. KoxeH
Ha npampeyIIOBaHHnE He3aJIeXHnM IJ 3a6e3neueHH MaKcImMaJIbHOI rHyKoCTi eKcNlyataui.
3.ПлголиВнКМоЖаВCTaHOBЛВаTN B5NoLoXKeHb.PiДнИмТьpyUk(MaI.a)Ha 3aДий NOBepxHi NiDrOJIbHnKa i BOJHOuacPiHIMtB NiDrOJIbHnK(MaI.b), BCTaHOBuBшИуRoHa6aJkaHy BVCOTy.
BAXJIINBO! 3i 3pocTaHHaM dINTHn noTpio6Ho peryIIOBaTu BNCOTy NiIroIIBNka BiNObiIDHO Do IOBXHN TiJa dNTHn. BAXJIINBO! Nicra 3akInueHna cnpo6ynte NOBOpuyHTu NiIroIIBNk, 0o6 nepeKoHaTnc, 0o BiH HaleXHM YHOM 3aΦIKCOBAHn.
-
Μιπυήν Cπηнκη Mɔχna peγιλιοBaTn y Tpbox Πολοχεnhαx (3aKpnte, cepeɪnHe, BIDKpnte). HATnCHiMb KHONky 36OKy pyuKn (1) i NOBepTaIte pyuKy (2) 3a FOДИНнКОВОЮ CTpiIKNO, ΜΟБ BiДКpNTn 6OKOBHn. Lii CπiD NOBTOPbOAtn, KOJI NITnHa πIDpoCTaTmE. ΜIo6 3CyHyTN 6OKOBHn, HATnCHiMb 6iUHy KHONky i NOBepTaIte pyuKy npOTn FOДИНнКОВОЮ CTpiIKN.
-
CnHKy MoXHa BCTaHOBIOBaTH B 3 noJoxeHHa 3a BnCOTOIO: NotrHiTb pyKHa 3aHmY qACTHI CnHKn BVOPy (1) i BodHOuac NiHIMaHTe BCIO CnHKy (2) Do notpi6Horo noJoxeHHa. OOnCTHTN CnHky, NotarHITb pyKv (1) N BoDHOUac HATNCaHTe Ha CnHKy BHN3 (2). Li dIcIIOBTOpOBaTH, KOJI DNTINHa NiDPOCTaTIme.
J3aФikcybamu abmokpicno 8 aBmomobili, 06naHaHomy
KpinJIeHЯMl Isofix
UeH MeTOD KCaui MoXHa BnKOpNCTOBvBaTu Nlue B TOMy pa3i, RaKIO aBTOMoBInb OblaHaHo rAChAMIsofix. B iHwOmy pa3i nepeiItb Do HAcTyNHorO po3iny. IInr OTPmAHnHdoKnAdHiwoi InOpMaui npo HaABHicTB rauchIB i ixHe PO3TaWyBaHHa INB. IHCTpyKciio 3 ekCnIyatauCi aBTOMoBIna
Фikcaця 3a ДОПOMOROю снх крпльень rapаHTус Крашу CTiNKICTb i 6e3neky B abTomo6ili, npote He може 3amHHTn co6oU yTpmyuoyi peMeHi 6e3neKm MaunHn.
- 506 BnTAYTN 3'EDHyBaYi 3 CNDiHNN, NOTaHITb pyky B nepeDHiy qactNHi CNDIHNN, BCTaBnBUn pyky B OTBip, BiMueHn Ha MaJIHOHKy KOBTIM KONbOPOM (MaI. a), i BNTraIOUH II B NO3IOBxHOMy HAnpMy Do ce6e (MaI. b). 3'EDHyBaYi BNCyHyTbCn ABTOMATNUHO (MaI. c). NOBToptB, 506 nepeCbIDuHTncs, 50 3'EDHyBaYi 6yNo BnTARHYTO BODHOAc i NOBHlCTIO.
7-3akpiitb 3'edHyBaqi abTOKpicna Ha raukaxIsofix aBTOMo6iina,nepekoHaBnCb, IO BOHn 3aue6HuNcra KlaUaHHaM.
-
BAXJIINBO! Taayn Isofix i aBtOKpicno 3'EnHaHippaBnIbHO, RkUo HAd 3'EnHyBaayMn BnDHO 3eJeHi BiIMTKn (MaI. a). YepBoHI BiIMTKn Bka3yIOb Ha Te, 0 3'EnHyBaayi HE 3aKpiINnCra HaleXnM uHOM (MaI. b).
-
ABTOKpicNo MOxHa HaxuHITn, RaK NOKa3aHO Ha MaIIOHky. 106 HaxuHITn aBTOKpicNo, BNTaHITb 3'EDHyBaui Isofix, NotraHyBwn aBTOKpicNo Ha ce6e.
-
Ⅲo6 BiD'EDHaTn ABTOKpicNo Viaggio 2-3 Shuttle Plus BiD cnDiHHaMaHHn, NotarHITb pyKy (1), nOKn 3'EDHyBaui He 6yde BiDKpIto NobHicTIO. Ppr cBOMy 3 6OKiB OCHOBn ABTOKpicNa 6yde BnHO KOBti KNONKn Bi'DHaHHa; NotarHITb DBI KNONKn (2), nOKn He NouyTe, k 3'EDHyBaui 3 KnaCaHHaM BiDKpNtBCsA. TeNep MoJHa 3HrTn ABTOKpicNo.
-
506cxOBaTI3'EDHyBaUiBAbTOKpICNo, NOTARHITb BaxINb (1), BOHOuac 5TOBxAIOU ONIH 3 DBOX 3'EDHyBaUIB (2), NOKI IX MaJKe He 6ynde BNIO.
J3aKcybamu abmokpicno b aBmomohi, He 6nHaHomy KpinneHnAmn Isofix
- NocTaBte abTOKpicNo Viaggio 2-3 Shuttle Plus Ha cnDInHnA bTOMoBnI y HanpRmKy Ioro pyxy (npn cBomy KpInIeHHra MaOTb 3aIIuWATncBaCEpeNHi 6a3n Surefix Base (MaI. a)) i nocadItb DHTINHy B abTOKpicNo, kN pOKa3aHO Ha MaJIIOHky (MaI. b), nepecBiJUHbUncSb, 10 NiJ qac Ux DiI BOHO He 3MICTINOcR.
Як писебун AntunHyВ abtokpicni Viaggio 2-3Shuttle Plus
-
3acti6Hb peMHb 6e3neKn aBTOMo6I, nepeKoHaBwncb y TOMy, uO BIn 3aui6HyBC3 KlauHaHnM. Po3TaUynte DBi YactHH pEmHe 6e3neKn, kNOKa3aHO Ha MaIIOHKy; NORCHA N PteOBA YactHH MaOTb npOXoHTn NiD NIDNOKITHKOM.
-
Ⅲo6 3aKiHunTn φikcaiHO dtuHN B KpiCni, npOnyctitb peMiHb uepe3 HappaBnK Ha NiIroJIIBnKy: BCTaBTe pemHb MIX HappaBnKOM i NiIroJIIBnKOM (1), 0o6 BiH KOB3HyB B OTBip HappaBnKa (2).
BAKJIINBO! Kaio peiminb npOBncae, nIdTarHitb Noro HaCko6oO (3). PepecbiuItbcra, zo peiminb 6e3neKn HataRHytn i He nepekpyehn.
- Ⅲo6 BntaTn peMiHb, npotarHiTb NOrO 3 OTBOPy HAnpaBnHa (1) MIX HaPpABHnKOM i NiIroJIIBHnKOM (2), NOKI NOBHICTU He BNTaRHeTe.
16·BAKJIINBO: Pemihb 6e3neKn npabnblho po3taWOBaHni, kUO pNeuyi DHTuHn TPOXn HxKye cKO6n dJa peMeHr 6e3neKn, kNOKa3aHO Ha MaIIOHky.
BukopncTaHn6e3 cnHHKn
PONEPENXEHNA. He BnKOpNCbOByTe KpicNo Viaggio 2-3 Shuttle Plus 6e3 cinnKn, kkuo 3pict dHTHMeHwe 125cm.
AK3HATN CINHKY
-
Notarytbyryky dlya nepeheceHHa (1) dlya otprimaHHa DOCTyNy Do DBOX KHOJOK Ha 3aHi NOBepxHi BnO6y. HATNCHTb DBi KHOJKN (2), BOHoc AOTARHyBm CnNHKy Bropy (3).
-
BCTaBTe Dba rauKn Ha cnDiHHi y BiINOBiHi rH3da nopA i3 3aDHbOIO qACTnHOU CnDiHHI.
K bcmahobumu abmokpicno b avmomobili, 0bnaHahomy 3'edHyBaayamn Isofix
INB.MaJIIOHKNI TeKCT DO NyHKtIB 36 Do 11.
K cmaHobmu abmokpicno b avmom6i, HE o6naHaHomy 3'edHyBaayamn Isofix
BvkoHaTe ⅡI, 3o6paXeHi Ha MaJIOnKax 3 26 Do 35, y 3BOpOTHomy NOPaIKy.
CepiñHi HomepN
- Ha HnKhbomy 6oCi aBtOKpicna Viaggio 2-3 Shuttle Plus MicTbCn DaHi 7ODo Ha3Bn Bnpo6y, DaTa Bnpo6HnCTBa Ta cepiHn Homep, a TakoX opaHKeBa ceptNaCuHa Ta6nUka.
TpMa4 nIpaKn
- ABTOKpicno obnaHaHe TpImaYe M nIyIKn. BcTaHObitb TpIMaY dIy I IyIKn Ha rpi6oNoi6Hy KHOJKy, kKi E 3 KOxHOrO 6OKy cnDInHry, i 3aΦiKCyuTe Ha MiCiI.
Чишиenna Виpo6y
- Zei Bnpi6 Bmarae MiHimaIbHOro 06cnyroByBaHHa. YnueHHa 06cnyroByBaHHa Bnpo6y MaIOTb
BIVKOHyBaTNIINIeDopocniOco6n.
- PekomeHIOBaHO TpIMaTH B uNCTOTi BCI pYXOMI yACTINH.
- NepioiunuO ouuynTe nlaCTNKOBi deTani BOIoroIO TKaHnHO. He BnKOpNCTOByTe PO3UnHHNKiB qH INHX NODi6HNx peoBNH.
- Ynctitb TkaHnHi DeTani 1IITKOIO Ira BndaJIeHHa Nny a6o DOTpIMyIteC8 BkazIBOK i3 YnueHHa, HabeJeHX y BiINOBiHOMy po3di.
He uctitb Detani 3 noictpoly po3HHkamu nn iHnMMn nDi6HmnpeOBUHaMn.
3axuauTe Bnpi6 BiD iI aTMocphiHx
fakTopiB, TaKnx YK BOJORA, DoU a6O
CHir. TpNBane nepe6yBaHHa coHcI
MOxe npVBecTN Do 3miH KOnbOpY
6araTbox MaTepiJIIB.
36epiraite Bnpi6 y cyxomy Miczi.
Be3KoUToBnHm Homep:800/147.414 (3i cTaioHapnX TeNeΦOHIB ItaII)
En. nowa: assistenza@pegperegogo.it
Be6-caT: www.pegperego.com
Yci npaba iHTeNeKtuaIbHoI BlnacHocti, NOB'3aHI 3 BMICTOM cboO Ioc6Hnka 3 ekCnlyaTaui, HaleXaTb KOMNaHII PEG-PEREGO S.p.A. i 3axuiehi uHHnM 3aKOHOJaBCTBOM.
EL_Eλληνικα
Zac EuyapioToupe Nou EpiEaTe Poiov Peg-Perego.
Káθισμa autokivnóu, Viaggio 2-3 Shuttle Plus katnyopia "Universal" με ζώνες
cIailllaiaLao aol s521 gslglllJeo
golil aIb Joo 8 yll LwJ
L5oUoUoUoUoUoUoUoUoUoUoUoUoUoUoUoUoUoUoUoUoUoUoUoUoUoUoUoUoUoUoUo
Iaaii iiai aoiyagjIg.hae Igc
UN/ECEJg aaggl g slg gl
aLiLi LiIgR11
g jihaiiill 1oaoj81 plaxw wu Cawy 2:po
a

BlaX1ePcAolLcLleJlO
LgolsswosLx wllio jLg
Lolai pIJI pJJI pIc gOg Jaailll lal jae Jauu Jauu Jauo
jblsi
Cui xiān lǜcà JIYU YI
Shuttle PTus 3-2 Viaggio
cilll lce 1e 1ably blaa-21
12j 8.0JwJy JcLw sLi
J 1
golal alol all
m = 311
AR
000s
Peg-Perego
Viaggio.
"LaL"Shuttle Plus 3-2
a0j
UN/ECER 2g
LoLe 1 r 1000
( L_1) = ( L)
LgLS uJ sJg. JuJ uJ selao oBoo wli
LaiuLi:
CgLo aaiwgl gaiwWg
"alolilj" 1JooJI aoi jI zo Igai
Joo "Jolow" aieall iia
Xgjjl aaiLjll 1yloia jaoa Jgij
gjgl aelb Jai
olSjoll JaiJl 0o ooi
Iolai aLi ci 1oJg.
UN/ECER17jellgoaaggllg.Ls
.11Lol yloI
jihaii11 2021 plsswys
1
Viaggio.
Shuttle Plus 3-2 Viaggio
ISOFIX + a ojol g"ddL
2/UN/ECER 24
LoLe 1 f Jf r (0) a = S r 1 1 1 0 jjj j JLaBdU
(L)
S Lg. Isofix 1
aJwJ aJ aJ bJ yJ aJ aJ g J aJ
Johaiolwgl akol
1
CgLo aillnll pssw 21
"alolJl JluoJ aobj go aoelgj
Jabll 20 go a511 plsiw ally
a Jabll g Lio Jabll 2ao jLg.LjLs
4kni k. isofix Llwo abwog
Isofix Llwo n SjLol: oJrLwJ
ggf no Jabll 2ao g, f.
e 2o
Lg y e gag aJg: oJrWJ 2ao
. bI I I I I I I I
no LgIc g dvo 1gwwS1 pdswi 8
. aiai I I I I I 9
aiisw aggs 2. aegall ally
P L A1
Shuttle 3-2 Viaggio" 2 aegos
Shuttle Plus 3-2 Viaggio" 8.
10
11
12
13
14
15
16
17
18
19
20
21
22
23
24
25
26
27
28
29
30
31
32
33
34
35
36
37
38
39
40
41
42
43
44
45
46
47
48
49
50
51
52
53
54
55
56
57
58
59
60
61
62
63
64
65
66
67
68
69
70
71
72
73
74
75
76
77
78
79
80
81
82
83
84
85
86
87
88
89
90
aLwJ C1g5o
.0000000000000000000 2
40000000000000000000
.20000000000000000000
.20000000000000000000
.20000000000000000000
.20000000000000000000
.200000000000888888888888888888888888888888888888888888888888
ciill pwlly aaleill cLogell eao alwi
aLs:AJ LwLwJgJgLiX1
aJJIJIJIJIJIJIJIJIJIJIJIJIJIJIJIJIJIJIJIJIJIJIJIJIJIJIJIJIJIJIJIJIJIJIJIJIJIJIJIJIJIJIJIJIJIJIJIJIJIJIJIJIJIJIJIJIJIJIJIJIJIJIJIJIJIJIJIJIJIJIJIJIJIJIJIJIJIJIJIJIJIJIJIJIJIJIJIJIJIJIJIJIJIJIJIJIJIJIJIJIJ
aigjol
37
Jabll 2ao g wglg 20 go yil glc
all
oocla jn nn nnnnnnnnnnnnnnnnnnnnnnnnnnnnnnnnnnnnnnnnnnnnnnnnnnnnnnnnnnnnnnnnnnnnnnnnnnnnnnnnnnnnnnnnnnnnnnnnnnnnnnnnnnnnnnnnnnnnnnnnnnnnnnn
S OBC = S COD + S_ BOC
129
#
30
Jalal Jao g wglggo jil
Jauu Jauu Jauu Jauu Jauu Jauu
Jibll
G11 G19 wolfdiaabio 32
CooosLos 1
Jwuc aIc So J! ooo j sii .g
.og...
#
a281 0000000000000000000000000000000000000000000000000
jI jI JcJcJcJcJcJcJcJcJcJcJcJcJcJcJcJcJcJc
g 1 ggi iLi
J 34
Lilj
golj1 sj+1 jLagjLso no no Lij3 35
gj1. gge w: geell oio sfo
ogw5glj jsc.abbaiioa sic. wll
.
1.1111111 1.1111111 1.1111111 1.1111111 1.1111111 1.1111111 1.1111111 1.1111111 1.1111111 1.1111111 1.11
(aalaaa aalb) aalab
gaii jiyjy bawag ylll p 1
aLs - alas
"UNIVERSAL"
no gglgoggJzI
.
40o pssll lalbln jg klae Iy
g
CII
aAaBll aoLe c g y f g g E .
suI g ll lI L:1) aAaBll oLg
(luI Jr:2, gall Lilb:11,ldg:2
aIy iIg .2 12 15 12
gbl) R22 odclllg Bg
(LJL
. UN/ECE R22 :aegl OcLJI
sea J5 d:1wUill Cli:Q
q
PEG-PEREGO S.p.A
Peg-Perego Spa
Lag TUV Italia Srl
9.1 ISO
Peg Perego
Peg-Perego
Peg Perego
Peg Perego
Peg Perego
Peg Perego
Peg Perego
gaiuui L aaiai alwog sJLw j 1
925 Joc dgyo "gilge" JLaii
gogd iia bdo w qn jyag gag
.25k nj yin jygi y 1
"glge" uigic ay s0g sgsydi
slo Jao L aaiia o g w dsiy aii
glajrLo L .aiaiaiaiaaay Bg
.213423456789
.213423456789
Jlai abai aw Li giay gladiyas ay jgco
UN/234234234234234234234234234234234234234234234234234234234234234234234234234234234234234234234234234234
#
1,La nJgdojgs 4y JLa JaoJIgws.
Sg:JnJLc0 Sdy BoJg y Jy
SLa JaoJIgws Gd Cpc .
1,LaW sGg jy Jy Bgso
.
Shuttle Plus 3-2 Viaggio.
Jg j Jg g j
Sj g j
Sj g j
j Lg Sj g j
j Lg Sj g j
j Lg Sj g j
Sj C w j
Sj C w j
Sj C w j
Sj C w j
Sj C w j
Sj C w j
Sj C w j
Sj C w j
Sj C w j
Sj C w j
Sj C w j
Sj C w j
Sj C w j
Sj C w j
Sj C w j
Sj C w j
Sj C w j
Sf Sf
FA
L 1
3-2Viaggio .Shuttle Plus "Universal"
.04/UN/ECER44 LgjLdLdLdLdLdLdLdLdLdLdLdLdLdLdLdLdLdLdLdLdLdLdLdLdLdLdLdLdLdLdLdLdLdLdLdLdLdLdLdLdLdLdLdLdLdLdLdLdLdLdL d 15 jn jn jn jn jn jn jn jn jn jn jn jn jn jn jn jn jn jn jn jn jn jn jn jn jn jn jn jn jn jn jn jn jn jn jn jn jn jn jn jn jn jn jn jn jn jn jn jn jn jn j n J
12 L3 36 L 15 15
.
.
.
.
.
.
.
.
.
.
.
.
.
.
.
.
.
.
.
.
.
.
.
.
.
.
.
.
.
.
.
.
.
.
.
.
.
.
.
.
.
.
.
.
.
.
.
.
.
.
.
.
.
.
.
.
.
.
.
.
.
.
.
.
.
.
.
.
.
.
.
.
.
.
.
.
.
.
.
.
.
.
.
.
.
.
.
.
.
.
.
.
.
.
.
.
.
.
.
.
.
.
.
.
.
.
.
.
.
.
.
.
.
.
.
.
.
.
.
.
.
.
.
.
.
J
J
J
J
J
J
J
J
J
J
J
J
J
J
J
J
J
J
J
J
J
J
J
J
J
J
J
J
J
J
J
J
J
J
J
J
J
J
J
J
J
J
J
J
J
J
J
J
J
J
J
jShuttle Plus 3-2Viaggio j10 LbL bgs (1) dss s
Jl aL b. dRd Jolg sb
aL b gdo yJ Ls
(2) aL do yoL
L b J L b J b J b J b J b J b J b J b J b J b J b J b J b J b J b J b J b J b J b J b J b J b J b J b J b J b J b J b J b J b J b J b J b J b J b J b J b J b J b J b J b J b J b J b J b J b J b J b J b J b J b
4gog Jus Lgog aai
jL Lw gg 51 JIsofix La
Shuttle Plus 3-2 Viaggio gdsu 12
Jr S
(a_Js)Surefix JdL Ldoa a
4Sg b Jcog g ai wj d j
J (b_J< )J
Jgds 4Sds 4
Shuttle Plus 3-2Viaggio
13
13
13
13
13
13
13
13
13
125 < 0 < 1
:
30
1J 1J 1J 1J 1J 1J 1J 1J 1J 1J 1J 1J 1J 1J 1J 1J 1J 1J 1J 1J 1J 1J 1J 1J 1J 1J 1J 1J 1J 1J 1
31
32
34
35
33
34
35
36
37
135 26 000000000000000000000000000000000000
JLsw sLo
Shuttle 3-2Viaggio.36
Jgsso plaBogosotcLb1 sgl Plus
aoli gS bgsjg JyRw oJg
.37
Shuttle Plus 3-2 Viaggio
19
19
20
20
20
21 21
22 1 23 aal (2) 2L aaw
24
L 1
(2)25
(1)
25
Shuttle 3-2 Viaggio s1 yjgs Jg jg Plus
01 27
28
29
R44 gJgJ 04/UN/ECE R44:JgJ JLa.
JgJgJgJgJgJgJgJgJgJgJgJgJgJgJgJgJgJgJgJgJgJgJgJgJgJgJgJgJgJgJgJgJgJgJgJgJgJgJgJgJgJgJg
1..AA,11/49/..9:assistenza@pegperegooit:www.pegperegoo.com:Wg wogwogwogwogwogwogwogwogwogwogwogwogwogwogwogwogwogwogwogwogwogwogwogwogwogwogwogwogwogwogwogwogwogwogwogwogwogwogwogwogwogwogwogwogwogwogwogwogwogwogwog