
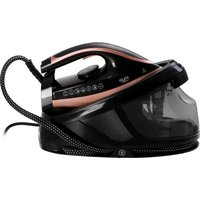
AD 5054 - Iron ADLER - Free user manual and instructions
Find the device manual for free AD 5054 ADLER in PDF.
| Product Type | Iron |
| Brand | Adler |
| Model | AD 5054 |
| Power Supply | 220-240 V ~ 50-60 Hz |
| Power | 3000 W |
| Standby Consumption | 0.45 W |
| Ironing Functions | Dry, steam, vertical steam, spray, steam shot, self-cleaning |
| Anti-scale System | Yes (integrated filter, durable) |
| Anti-drip System | Yes |
| Auto Shut-off | 30 s in horizontal position, 8 min in vertical position |
| Display | LCD screen with temperature indicator |
| Temperature Setting | + and - buttons, 4 levels (synthetic, silk-wool, cotton, linen) |
| Steam Type | Steam pump (i-pump) |
| Water Tank Capacity | Approximately 300 mL (estimation) |
| Soleplate Material | Stainless steel (not specified, common estimation) |
| Safety | Overheat protection, auto shut-off, hot surface warning |
| Maintenance | Clean soleplate with damp cloth and non-abrasive cleaner; empty tank after use; do not use vinegar or descaling product |
| Repairability / Spare Parts | Contact retailer for parts and claims; repairs by authorized center |
| Usage | Household only, on stable and flat surface |
| Safety Instructions | Do not immerse, do not use near children without supervision, unplug before filling |
Frequently Asked Questions - AD 5054 ADLER
User questions about AD 5054 ADLER
0 question about this device. Answer the ones you know or ask your own.
Ask a new question about this device
Download the instructions for your Iron in PDF format for free! Find your manual AD 5054 - ADLER and take your electronic device back in hand. On this page are published all the documents necessary for the use of your device. AD 5054 by ADLER.
USER MANUAL AD 5054 ADLER
GENERAL SAFETY CONDITIONS
IMPORTANT SAFETY INSTRUCTIONS FOR USE
READ CAREFULLY AND KEEP FOR FUTURE REFERENCE
- Before using the device, read the instruction manual and follow the instructions contained therein. The manufacturer is not responsible for damage caused by using the device contrary to its intended use or improper operation.
- The device is for domestic use only. Do not use for other purposes, incompatible with its purpose.
- The device should be connected only to a grounded outlet 220 - 240V 50 - 60Hz , in order to increase the safety of use, multiple electrical appliances should not be connected to a single circuit at the same time.
- Be especially careful when using the device when children are around. Do not allow children to play with the appliance do not allow children or people who are not familiar with the appliance to use it.
- WARNING: This equipment may be used by children over 8 years of age and persons with limited physical, sensory or mental ability, or persons without experience or familiarity with the equipment, if it is done under the supervision of a person responsible for their safety or they have been given instructions on the safe use of the equipment and are aware of the dangers associated with its use. Children should not play with the equipment. Cleaning and maintenance of the equipment should not be performed by children unless they are over 8 years of age and these activities are performed under supervision.
- Always remove the plug from the power outlet after use by holding the outlet with your hand. DO NOT pull on the power cord.
- Do not immerse the cord, plug and the entire device in water or other liquid. Do not expose the unit to weather conditions (rain, sun, etc.) or use in high humidity conditions (bathrooms, damp camping houses).
- Periodically check the condition of the power cord. If the power cord is
damaged, it should be replaced by a specialized repair facility to avoid danger.
- Do not use the device with a damaged power cord or if it has been dropped or damaged in any other way or malfunctions. Do not repair the device yourself, as there is a risk of electrocution. Return a damaged device to a competent service center for inspection or repair. All repairs may be made only by authorized service centers. Improper repair may cause serious danger to the user.
- Place the appliance on a cool stable, level surface, away from hot kitchen appliances such as an electric stove, gas burner, etc.
- Do not use the device near flammable materials.
- The power cord must not hang over the edge of the table or touch hot surfaces.
- Do not leave the device plugged into an outlet unattended.
- To provide additional protection, it is advisable to install in the electrical circuit, a residual current device (RCD) with a rated residual current of not more than 30mA . In this regard, consult a specialist electrician.
- If it is necessary to use an extension cord, use only one with a grounding pin and suitable for the loaded power, not less than the iron connected to it. Other ("weaker") extension cords may overheat. Arrange the cable so as to avoid accidental pulls or tripping over it.
- Always, before filling the iron with water or when the iron is not in use, disconnect it from the power supply.
- Touching the hot foot, contact with hot steam or water risks burns. Be careful when you turn the iron upside down with the foot, as there may still be hot water in the reservoir, even when the iron is unplugged.
- DO NOT allow the hot iron to come into contact with fabrics or flammable materials for too long.
- Be careful that the power cord does not come into contact with the hot iron foot. Allow the iron to cool completely before putting it away.
- If you do not use the iron even for a short time, turn off the steam options.
- Do not, under any circumstances, iron clothes or materials on people
or animals.
- Never direct the steam onto people or animals.
- Use the iron on a stable level surface and only put it down on such a surface.
- Do not pour water with chemical additives, fragrances or descaling preparations into the tank.
- Do not fill the water tank above the MAX level.
- The power plug must be unplugged from the plug socket before filling the tank with water (for irons with steam humidification and irons with a washer.
- The opening for filling the water tank must not be opened during ironing
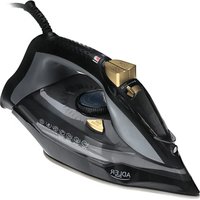
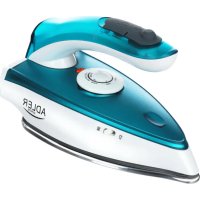
DEVICE DESCRIPTION
- LCD display
- Water pump on button,
- Temperature control button "+"
- Temperature control button "-"
- Spray button
- Steam ejection button
- Self-cleaning button
- Washer outlet nozzle
- Power cord
- Water tank cover
- Water tank
- Iron foot
PREPARATION:
Sort the laundry to be ironed, Choose the right temperature according to the material you want to iron. It is recommended to start ironing with the material with low temperature, and finally iron the material that requires maximum temperature.
Note: If the fabric consists of different types of fibers, always choose the lowest ironing temperature of the composition of these fibers. Start ironing clothes that require a low temperature, this reduces the waiting time (the iron needs less time to heat up than to cool down) and eliminates the risk of burning the fabric.
The following information shows the temperature setting and the corresponding fabric to be ironed shown on the display (1)
Setting 0: standby
Setting 1: Synthetic fabric
Setting 2: Silk-wool
Setting 3 : Cotton
Setting 4: Linen
Table:
MARKINGS ON LABELS
TYPE OF MATERIAL
THERMOSTAT CONTROL
| Silk - wool | Low temperature - | |
| Synthetic fiber | Medium temperature - - | |
| Cotton | High temperature - - - - | |
| DO NOT PRAISE |
FILLING WITH WATER
Note: Before starting the water filling procedure, make sure the iron is not plugged in,
- Open the water tank cover (10)
- Fill the water tank with water to the "MAX" level.
- Close the water tank lid (10).
FIRSTUSE
When using the iron for the first time, you may notice a slight emission of smoke and hear sounds coming from the plastic. This is quite normal and stops after a short time. A small amount of water may remain in a brand-new iron after a routine leak check of the product.
Dry ironing function (no steam)
- Plug the power cord of the appliance into a grounded outlet. The display (1) will turn green, showing the information that it has gone into standby mode.
- Press the button (3) "+" (4) "-" to adjust the iron settings and select the appropriate ironing temperature.
- After selecting the appropriate setting, the display will light up blue, the thermometer icon on the display will blink, this means, that the iron plate is heating up.
- When the iron reaches the desired temperature, the information on the display will stop flashing and the iron will make a short beep.
- After use, press the (4) "-" button until the display turns green (1)
- Remove the plug from the power outlet.
WASHER FUNCTION
- Fill the tank with water as described in "Filling with water".
- Press the water spray button (5).
- Note: Regardless of the type of ironing: steam or dry ironing, the spray will always work in any case.
STEAM IRONING FUNCTION
- Fill the tank with water as described in "Filling with water".
- Plug the power cord of the appliance into a grounded outlet. The display (1), will light up green, showing information about the transition in the standby state.
- Press the button (3) "+" (4) "-" to adjust the iron settings and select the appropriate ironing temperature.
- Steam will only come out on the setting from 3,4.
-
When you select the appropriate setting 3 or 4, the display will light up blue, the thermometer icon on the display will flash, this means, that the iron plate is heating up.
-
When the iron reaches the desired temperature, the information on the display will stop flashing and the iron will make a short beep.
- Press the "i-pump (2)" button, the water pump will start working and steam will start coming out of the iron foot. Each time you put the iron down
press the i-pump (2) button to exclusively pump water.
- After use, press the i-pump (2) button for water pump only, press the (4) "-button until the display turns green (1)
- Remove the plug from the power outlet
- Make sure the water tank is empty after each use.
- Note: Do not use the steam ironing function on clothes or fabrics worn by people or animals. The temperature is too high.
STEAM EJECTION FUNCTION
This function will be able to provide more steam to remove stubborn creases.
- This function works with the temperature setting from level 3,4.
- Press the steam ejection button (6). There should be a gap of 3-5 seconds between two presses of the steam ejection button (5) to get the best steam ironing result.
- Fill water to the MAX position before using this function.
- To prevent water leakage from the iron foot, do not press the steam ejection button (5) continuously for more than 5 seconds.
VERTICAL STEAM IRONING FUNCTION
The vertical steam ironing system allows you to use the iron to iron vertically. This is especially useful for removing creases from hanging clothes, curtains.
- Fill the tank with water as described in "Filling with water".
- Plug the unit's power cord into a grounded outlet. The display (1), will light up green, showing information about the transition in the
standby state.
- Press the button (3) "+" (4) - to adjust the iron settings and select the appropriate ironing temperature.
- Steam will only come out on the setting from 3,4.
- When you select the appropriate setting 3 or 4, the display will light up blue, the thermometer icon on the display will blink, this means,
that the iron plate is heating up.
- When the iron reaches the desired temperature, the information on the display will stop flashing and the iron will make a short beep.
- Press the "i-pump (2)" button the water pump will start working and steam will start coming out of the iron foot. Every time you put the iron down
press the i-pump (2) button to exclusively pump water.
- Hang your clothes on the clothes rack and tighten them with one hand.
- Hold the iron upright with the other hand and press the steam ejection button (6) to iron the clothes. Tap the garment lightly with the iron to remove creases. To prevent water leakage from the iron foot, do not press the steam ejection button (6) continuously for more than 5 seconds.
- After use, press the "i-pump" button (2) for water pump only, press the button (4) "-until the display turns green (1)
- Remove the plug from the power outlet
- Make sure the water tank is empty after each use.
- Note: Do not use the steam ironing function on clothes or fabrics worn by people or animals. The temperature is too high.
SELF-CLEANING FUNCTION
- Fill the tank with water as described in "Filling with water". Do not use vinegar or other descaling liquids in the water tank.
- Press the (3) "+" (4) "-" button to set the iron to the maximum power setting.
- Hold the iron in a horizontal position over the sink. Press and hold the Self-Clean button (7).
- Steam and boiling water containing salts and minerals that have accumulated in the steam chamber from previous uses will begin to flow out of the holes in the ironing plate.
- Gently rock the iron back and forth until the water reservoir is empty.
Note: The water flowing out during self-cleaning is very hot. Be very careful that it does not fall on you.
8. When the water tank is empty, release the self-cleaning button.
9. Wait until the iron has cooled completely.
10. Wipe the ironing foot with a cold damp cloth.
ANTI-LIMESCALE SYSTEM
A special filter inside the water tank softens the water and prevents scale buildup in the foot. The filter is durable and does not need to be replaced.
- Use only tap water.
- Distilled and demineralized water renders the anti-limescale system ineffective by changing its physicochemical properties.
ANTI-DRIP SYSTEM
The iron is equipped with a drip stop function: the iron automatically stops steaming when the temperature is too low to prevent water from dripping from the iron foot.
Thanks to the anti-drip system, you can perfectly iron even the most delicate fabrics.
AUTO SHUT-OFF SYSTEM
- The electronic safety device will automatically turn off the heating element if the iron has not been moved more than 30 seconds in the horizontal position. If the iron is left in the vertical position, this will happen after 8 minutes.
AFTER PRESSING:
To prolong the life of the iron, it is recommended to empty the reservoir after ironing as follows:
Unplug the iron from the power outlet. Empty the iron by opening the lid of the water tank and holding it with the tip facing down.
Shake it lightly over the sink, then close the lid. Clean the iron foot with a dry cloth from traces of moisture.
CLEANING AND MAINTENANCE
Before cleaning, unplug the iron from the power outlet and wait for the iron to cool down sufficiently.
- Wipe the iron foot with a damp cloth and a non-abrasive (liquid) cleaner.
- If the fiber is stuck to the iron foot, use a damp cloth with vinegar to wipe the iron foot.
- Never use strong acid or alkali to avoid damaging the iron foot.
TECHNICAL SPECIFICATIONS:
Voltage: 220-240V ~ 50-60Hz
Power: 3000W
Power consumption in off state, with information display:: 0,45W
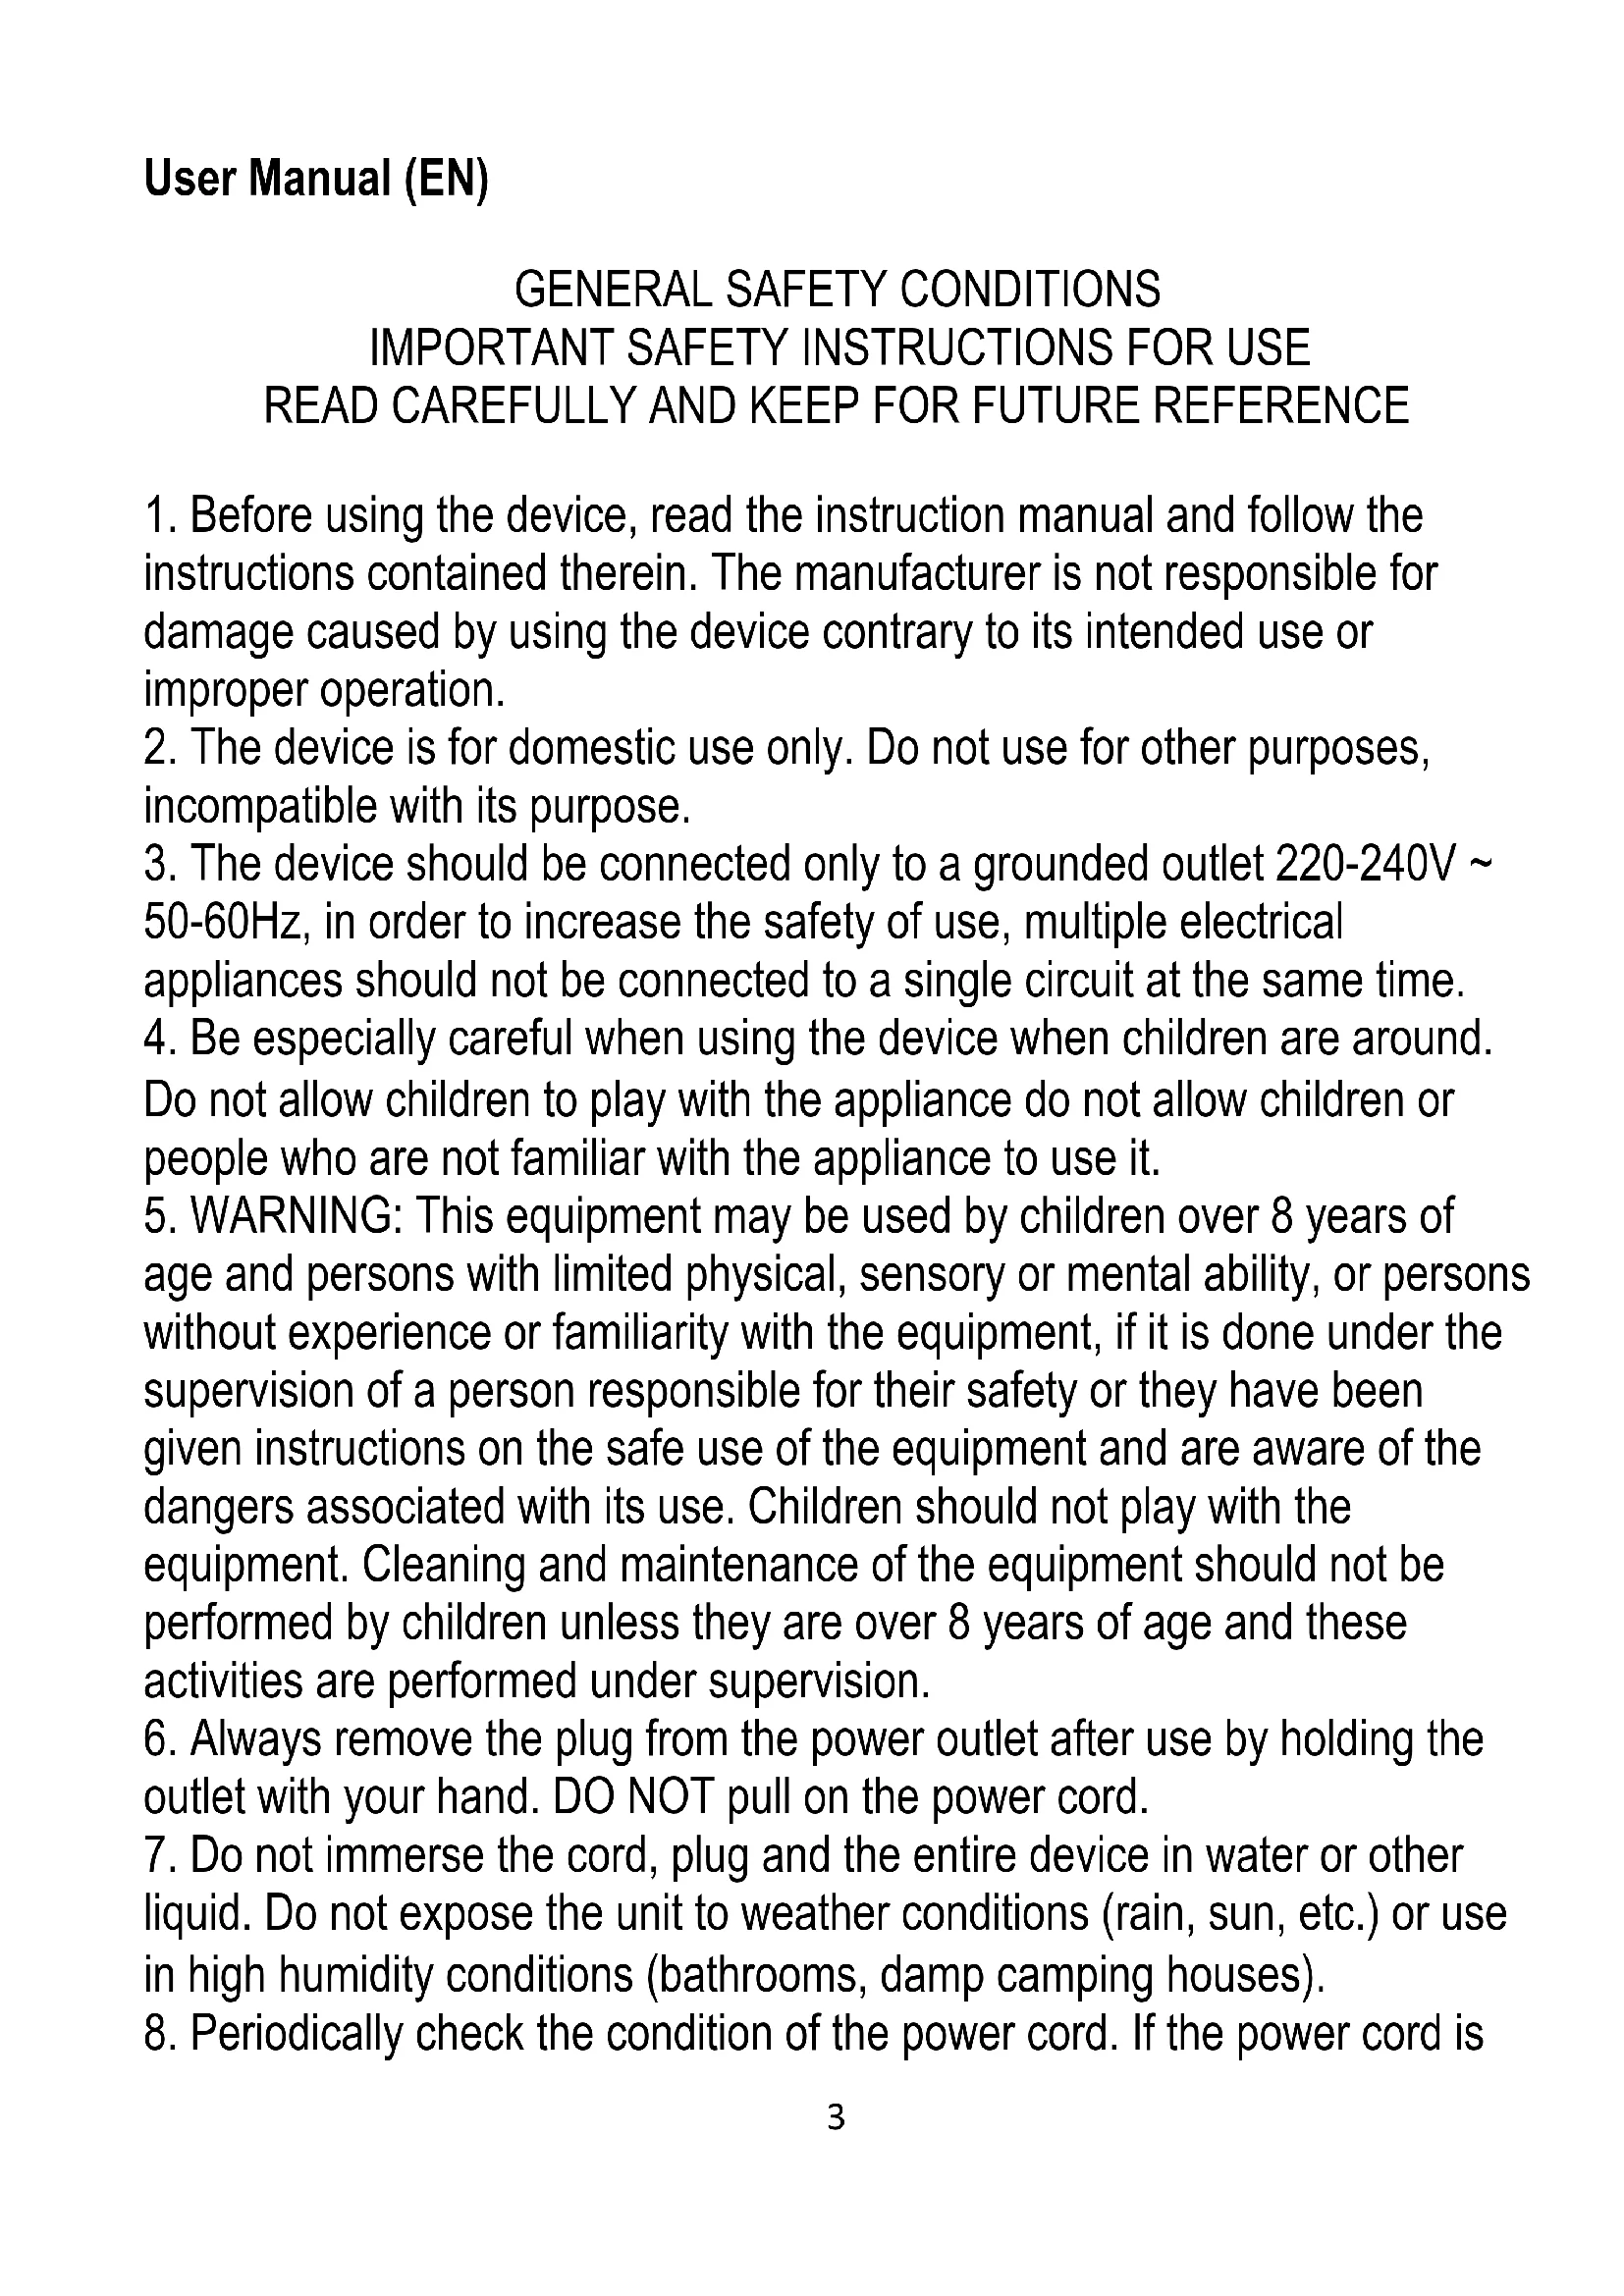
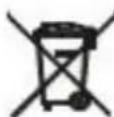
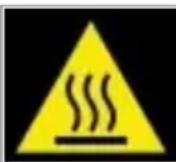
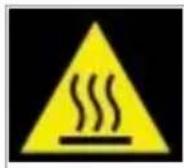
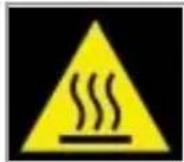
Note hot surface:
The temperature of the accessible surfaces of the operating device may be high. Do not touch the hot surfaces of the unit

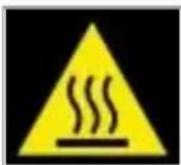
For the sake of the environment. Information about waste electrical and electronic equipment In accordance with Article 13(1) and (2) of the Law of September 11, 2015 on waste electrical and electronic equipment, we inform you about the proper handling of waste electrical and electronic equipment: 1. It is forbidden to place waste electrical and electronic equipment together with other waste - this is confirmed by marking in the form of a "crossed out basket", ordering selective collection of this type of waste.
-
Electrical and electronic equipment may contain hazardous substances, mixtures and components that, when released into the environment, can cause serious danger to the health and life of humans and living organisms. They can lead to numerous health ailments, such as vision, hearing and speech disorders, and can also damage the kidneys, liver and heart, and cause skin diseases. Harmful substances, can also have adverse effects on the respiratory and reproductive systems and lead to cancerous changes. Consumption of plants growing on contaminated soils, and products made from them, can risk the aforementioned health effects.
-
Waste electrical and electronic equipment should be handed over only to authorized collection points, a list of which should be included on each Municipality's website.
-
The household plays an important role, in contributing to the reuse and recovery, including recycling, of waste equipment. It also plays a key role in the waste electrical and electronic equipment management system due to the possibility of direct delivery to authorized collection points and the elimination of undesirable social habits resulting in leaving waste equipment in places not intended for it.
In addition, Donate waste electrical and electronic equipment at the point of delivery. A distributor, when supplying equipment intended for households to a purchaser, is obliged to take back used household equipment free of charge at the place of delivery of such equipment, provided the used equipment is of the same type and performed the same functions as the supplied equipment.
Cardboard packaging and polyethylene (PE) bags should be placed in the appropriate containers for separate collection of municipal waste according to their description. If there are batteries in the equipment, remove them and separately dispose of them at a collection and storage facility.
SISTEMA ANTI-CALCÁRIO
PykoBODCTBO noIb3OBaTeJIa (RU)
OBUHE YCIOBNA BE3OPACHOCTN BAXHBIE YKA3AHNA NO BE3OPACHOCTN NCPOJb3OBAHNA BHIMATEJIbHO IPOHTAITE N COXPAHNTE DJIY DAJIbHEIWERO NCPOJb3OBAHNA
- Перацьовим рибopa почтente Инструкцию по Экплуataси и седуне соржашимся в ней уka3aням.
Ipon3BODITeIb He HecET OTBeTCTBeHHOCTn 3a yUep6, pInuHHeHbI Bpe3yIbTaTe IcNoJIb3OBaHnI prIbopa He nO Ha3NaueHnIO nIIHnnpaBnIbHOro ObauneHnCnM. - Прибор предназануен только дя бытoboro Исповаян. He Исповете erо дя друг nx цelne, HecoBmecTIMbIX c ero Ha3haueHnem.
- Прибор седиует подкючыт только к заимлени розтke 220-240 B ~ 50-60 Г, дя вшей бezогасти Испльзоваян He седиует подкючыт несоклько олесгорьк OДНОДИODHOBPEMeHNO.
- CobIouaTe ocO6yIO OCTOpOXHocTb pRn nCpOJIb3OBaHm npIbopaB
IprncyTCTBnI DeTei. He I03BOJYTe DeTAM nrgaTb C npu6Opom, He I03BOJYTe DeTAM nII NlUaM, He 3HaKOMbIM C npu6Opom, NOJIb3OBA TbCBaN M.
- ПРЕДУПЕЖDEHNE: Данhoe оборудане может И сплььотьсддьмистарше 8 лет и лицамс орразниени IMN Физунчесим, ceHCOPнБIMи пл умстваимспосбостам, a takke Лцам, He IMeюшIM ONыITA пл 3нани ob stOM оборудан, ecпл STO DeJaETcя по habлюденem Лца, OTBETCTBEHNOrO 3a nx 6e3ОпаСНСТь, пл ecпи OНп пolyнл ИНСТPyкци NO 6e3ОпаСНOMY ИСПЛьЗOBAHIOоборудани 3нанOT ob onachoctax, CBЯЗнblx C erо ИСПОЛьЗВАнEM. Дети Н должны ngparbс оборуданe.ЧИСТka n obSclужване оборудане He DoJXны BblONHЯТьсдTeBMn, ecпи TOЛьКо Oнн Heстп He BblONHЯOTcя поprincmotpom.
- После Использовая BCeГда ВынмайтЕ ВИКУ n3 рОЗТКИ, пindержавая ee ryко. HE TЯнITE 3a ceTeВОй shHyp.
- HE norgykaite shnyp, Bnky nIi BecB np6op B Body nIi IIO6yIO dpuyo XndKocTb. He noDBepraite np6op Bo3deiCTBnO nOrOhbIX ycIOBni (doXdb, coHnce n T.d.) n He nCNOJb3yTe erO By cNoBnx IOBblsEHNO BnaJxHOCTN (BaHHbie KOMHaTbI, BnaJHbIe doma Ha KOlecax).
- Пернодунески поверягte состорныешнура петаня.Еснишни рптаня поврждан, bo n3бжане опасноctи erо следует замень у спесиалоста по ремонту.
- He IncnoIb3yIte np6op c nobpeJdeHbIM shHypom nITaHnra, a TaKKe ecIn erO yPOHJI, NOBpeJIN KAKIM-JI6o dpyrIM cNoCo6OM nII IN OH He pa6oTaET doJXHBIM o6pa30m. He pemOnTIPuYTe np6op camocToTaeJIbHO, TaK KaK cyUeCTByET ONaCHOCb TOpAKeHnRAJIeKTPueCKM TOKOM. OTHeCITE nobpeJdeHbIM np6op B KOMPeHTHbI CepBnCHbI ZEHTP DJI npOBepKNI IN PeMOHTa. IIO6o peMOHT MOKET BbINOJHrTbCS TOJbKO B aBTOpN3OBaHHbIX CepBnCHbIX ZcHTpax. HenpaBnJIbHbI peMOHT MOKET npedCTabJIrTb cepBe3HyIO NaCHOCTb DJI IOJIb3OBaTeJIa.
- Помецпгпьоги на похладую ровун IOВерхнocь, поальше OT горачи Кухоньх ппборов, takx kaK злелкрпNTa, ra3OBая
ropeIka n T.Д.
- He nCloIb3yIe npI6Op B6IIN3n IeRKOBOcPJaMeHЯUxxCa MaTePnaJIOB.
- Μύнур пітань He должень CBиcaTb chepe3 край стола плп КасТься Горачи NOВерхност. <|im_start|>assistant
- Μύнур пітань He должень CBиcaTb chepe3 край стола плп КасТься Горачи NOBepxHocTei.
- He octabray Te np6op BkIIOueHHbIM B po3eKy 6e3 npncMOtpa.
- Дя доролнітьній 3аиntы pekomehnyetcay yctahOBNTb B эл ektrпческоцу nyc troйсво OCTaTOUHOrTo TOKa (Y3O) c HOMHaJIbHbIM OCTaTOUHbIM TOKOM He 6oJee 30 mA. По зTomy BONpocy СпедуET прOKHcylbTnpoBaTbCS CO CpeцnaJIncTOM-эЛeКТPNKOM.
- Ecni Heo6xOIMo IcnoIb3OBaTb ydInHITeIb, IcnoIb3yIte TOnbKO TOr, KOtOpBIMeET 3a3eMnIoum N tBIpB n paCCHTan Ha Harpy3Kv He MeHbSe, Yem NODKJIuOeHHbI K HeMy yTIOr. Dpyrne ("cna6bIe") ydInHITeIN MOryt nepePepTBcR. PaCnoIraaTe Ka6eIb TaK, UTo6bl CInuAHO He NotaHyTb 3a Hero nIIH He CNOTKHytbcR.
- Bcerda, nepei TeM KaK HAnOpHnHTb yTIOr BOoI, IIN KOrDa yTIOr He NcNoJIb3yETcR, OTKnIOuAaTe erO OT 3JNeKTpocEtN.
- Прикочьене К гораян HOжke, KOHTaKT C горачим пapOM Или ВODОчрваты OЖогами. Бydte OCTopoЖны, NepeBopayNBа yTюг HOrOВВерх, ТAK К Ak B pe3epByape может OCTaBaTbСя рорача BODa, Даже ecПу TTKЛюун OT cETИ.
- HEdonyckaTe dInTeIbHOro KOHTaKTa rOpayero yTHora c TkaHamyuJIJIerKOBOcPJaMeHaUOUsMnCSa MaTePnaJAmN.
- Следи te 3a tem, утосышур петаши He copnkaçacЯ C lankoi roprayero ythra. Дай Te ythry nonhoctbIO OCTbITb,праздуem y6paTbe ro.
- Ecni Bbl He nCnoIb3yeTe yTOr dJaKe B TeueHne KopoTKoro BpeMeHn, OTKnIOuHTe 4yHKcNIO pOaHn npa.
- И в koem слуае не падытешду ил MaTePnaIbI Ha ЛюяиллЖИВOTHbIX.
- Hnkorda He haprabnyte nap Ha IIOdei nn XNBOTbIX.
-
Историяуг на устоньов, ровно NOBepxHocTN n CTaBbTe erо Tolbko Ha TaKyIO NOBepxHocTb.
-
He haɪnbaɪte B pe3epByap BODy C xɪmNUeCKMn Do6aBkamn, apoMaTn3aTOPaMn nI I nepaTaMn dIЯ ydaJIeHnЯ HaKIII.
- He haonHnIe pe3epByap Ira BoIbI Bbiwe ypoBn MAX.
- Перацлелем pe3epByapa BODон Heo6xOДМО BbIHyTb BnIKy n3 po3eTKI (ДЯ yTIOROB C napOBbIM yBlaJXHeHem I yTHROB C MOJKOJ.
27.ОТверстпдязапонецpe3epByapa BODон He должноOTKpbiBaTbcr BO BpeMЯ Глженя
ONICAHNE IPIPIBOPA
- JKK-ducnnnei
- KhONka BkJIIOUeHnB OBOJHO HAcOca,
- KhoNka perynnpOBKn tempepaTpyb " + "
4.KhONka ynpaBnieny TempepaTpyoJ"-" - Khonka paacbilehna
- Khonka BbIbPoca npa
- Khonka camoochntkn
8.Hacaika DnMoKn - Φнур петаня
- Kpbuika baka dIy BoDbl
- BaKДЯВODы
12.KeJen3HaNHOKKa
IIOIROTOBKA:
OToCtoPnyTe 6eBbE nIg rnaXKn, BbIbePte npabunbHyIO Tempepatpy B 3aBncmocn OT MaTePnana, KOtOpB b BB XOTNTe rnaDHT. PekomeHdyETc HauHaTb rnaXkcy C TkaHc C Hn3KoI Tempepatypoi N B KOHc IpaNtB TkaHb, Tpe6yUyIO MAkCmAbHo TEMpepatpybl.
PpmeaHne: Ecn Tkahb CoCTOnT n3 pa3nUhblx TINOB B0NOKOH, BcERda Bb6paIte camyu Hn3kyo Tempeatpy rnaKeHnB 3aBNCIMOCtN OT COCTaBA 3TNX B0NOKOH. HauHaIe TnAINTb ODeKdy, Tpe6yUOyU Hn3KOJ Tempeatpybl, 3TO COKpaUaet BpeM OKnJaHnra (yTour Tpe6yeTcMa HeBHe BpeMeHN Ha HarpeB, Yem Ha OCTbBaHne) N NCKlIOuaET Pnck npoxeYb TkaHb.
Hnke nokaahbI hactpoKn TempepaTybI COOTBETCTByOuJa TkaHb dIg IJaxHeHn (1)
Hacpoika 0:peKIM OXnDaHnA
HacTpoIka 1: CnHTeTnueCeKa TkaHb
Hacpoika 2:weik - wepctb
YcTaHOBKa 3:XJIOJOK
YCTaHOBka4:JIeH
CtoT:
- Korla yTIOr DoCTNRHeT Heo6xOIMoI TeMnepaTypbI, INHOpMaIg Ha IINcPiE nepeCTaHT MInraTb, a yTIOr N3dAcT KOPOTKm 3ByKOBo CnHaJ.
- Haxmte KhoNky "i-pump (2) ", n BOJHOH HAcOC HaHET pa60TaB, a N3 HOXKN yTHOra HaHHT BbIXOINb nap. KaKdbI pa3, Korda Bbl ONyCKaeTe yTIO
HaxMMTe KHOJky "i-pump (2) ", YTO6bI BBIKIOUHTb BOJHOH HAcOC.
- Nobecbte Beu h Ba BeuaIky dIy OdeKdbI n 3aTHeIte ee oHoi pykoJ.
- Depxte ythor BepTKaIbHO npyro pyko n HaxmTe KhoNky Bb6poca npa (6), YTObI npornaIb Beu. CnEka noctynte yTOROM IOdExe, YTObI y6paTb cKlaIaKn. Bo n36exaHne npoteKaHra BoBIO I3 IaIKn yTOHa He HaxMaTe KhoNky Bb6poca npa (6) HenpepbIBHO 6oee 5 cekyHd.
- Nocne nCnoB3OBAHnna HaxMnte KhoNky "I-pump" (2) TOnbKO dIy BODaHOro HacOca, HaxMmaTe KhoNky (4) "-", Noka dinCnne He cTaHET 3eJIeHbIM (1)
- BbHbTe BnIKy n3 po3ETK
- Y6eHntecb, yTo pe3epByap IINB OBOI ncyT nocne kaxdo rOncn0b3oHaHn.
- PpmeHHe He nCnoB3yIe cyHKnIO npoBOrO rnaKeHna Ha oExKde nn TkaHx, KOtOpbIE HocrT IIOu nn JKNBOThbIe. Cnukom Bicokar TemepaTypa.
IpeepyNCTKOB BbInbTe BnIKy n3 po3eTKn I NOdoXdTe, NOKa yTHOr DOCTaTOH OCTbIHET.
1.ПоТРИТЕ HOXКУ YTHORA BINAЯнOH TKAнБЮ C Hea6ba3INBHyIM (KYNKIM) UNCTYIM CpeIcTBOM.
2. EcIn BOJOKHO npnnnno K HOKKe yTOra, npoTpnte ee BJaXHoi TkaHbIO cyKcycOM.
3. HnKorda He nCnoJb3yIe CnIbHyIO KNCIoTy IIN IeIOuB, yTo6bl He NOBpeDnTb HOxKy yTHora.
TEXHUNECKHEXAPAKTEPNUK:
HaprajkeHe: 220-240V ~ 50-60Hz
MoUHocTB:3000BT
Iotppe6JIemar MOUHOCTb B BBIKHOUeHHOM COCTOHN, c INCnJIeem: 0,45 BT

OctopoxHo, ropya nOBepxHocTb:
Temnepa typa doctynbix noBepxHocTei pa6oTaUeero np6bopa moKet 6bTb BbICOKo. He npKacaiTec b K ropaum nobepxHOCTm np6bopa


B cIeJx 3aunbI oKpykaUoe cpebl. HOpmaun6 oOtpaOtaHOM 3eKtpueckom n 3eKtpoHOM 06opyDbaHn B COOTBTCTBN co CTaBei 13 (1) n (2) 3aKaHO a6 OTOXdax 3eKTPueckoro n 3eKTPoHORo 06opyDbaHn OT 11 ceT8p2 2015 rdaMbIXOTENbIpOnHfOpMnPoBaTB Bac o npabNbHom 6paueHH C TOXDAAMN 3eKTPueckoro n 3eKTPoHORo 06opyDbaHn:
1.3aPeeaaetcpa3MeaaTb 0xOdbI 3neKtpnHeckoro 3neKtpoHHOr 06OpyDobAHmBMeCTe C npTBePkaTeC mApKnpoBkoB BInde "pepeepkHyto yhpbl", ppeNtcblaiou ceKeTNBh b6op daHOro Bnda OTXoOB.
2.3neKtpnueckoe n 3neKtpnoHoe o6OpOBAHne MoKet copektaB onacbIe BeecTBA, cMeCN KOMNOHEHTbI, KOtOpbI pnp NOnaHaHN B OKpyKaHOuHO cpdy MOrTy npctabNtB cepbe3HyO yrp03y dnn 3doPobBy nXm3H NeuOBeka n XmBbIX opraH3MOB. OH Myr TpNBCTN KMHOOTNCNEHbIM npoJIeMaC o3DopOBBeM, taKIM KAK HApUWeHn 3peHn, cLyxa n peyn, a TaKKe NOBpeNTb NocKN, neeyh, cePdE N bI3BaTb KOKHbIE 3aBoNeBaHn. BpeHbIe BeueCTBa TAKKE MOrTy OKa3bBaTb HeratNBHOe BO3deCTBHe Na bIXaTeNbHyIO npPOyKTMBHyO CnCTeMbI n PnIBoNTb K paKOBbIM 3aBoLBeHnM. YnTope5enne B Niuy pacthen, pactTuixn Ha 3aqrA3HeHHbx IOvBax, IN POyKTOB, NOnyuehHBx IN 3 HIX, MOKET npNBCTN K BblweYONMAHytBIM NocneCTBnM Dn 3doPobBy.
3. OToxOJI 3JIeKTPnueCKoro H 3JIeKTPoHnHO o6OpDobAHn CneJeYet CdaBaTb TOnbKO B yNtHOMOeHHBie nyHKTBcOpa, CNICOK KOtOpBX DoJKeH 6bITb pa3MeueH Ha caTe KaJDoR MyHmUInaIInTeTa.
4. DomaJhee XO38CTBO IprAe TBaKHyo pOB B COnEChBn NOBTOPOMy INCNoB30BaHmIO BOCCTaHOBHeHIO, BKNIOYaepep6Oky, Otp6oTaHHoro 6obopyoBaHn. OHO TAKKe IprAe KNOUeByo pOB B CInCTeMe ynpabEnHry OTXoAMn 3NeKTPnuCeCKOr IO 3NeKTPoHrO O6OpDyOBAHn 6IarOapra BO3MOxHOctIN PpMOn DOCTaBKn BYONlHOmOeHNbIe NyHKTbI C6opA n YcTpAneHIO HHexeNaTeNbHbIX CoMaJIbHbIX PnNBIbYek, PnNBoJdXkX KOTABNeHIO
Otpa6oTaHnHO 6opdyoBaHnB MeCtax, He npEpaHa3NaeHHbIX DInr 3TxN ceJIeI.
Kpome toro, Bo3bpaaie otpabotahnoe 3nEkpueeoe n 3nEkpohoe o6opyoBaHne no Mecty nocTabKn. DictpnbtoTup, nocTabn npoknatio o6opyoBaHne, npdHa3naeHHoe dny domaunx x03yCTB, o83an becnnaTHO npHHMaTb otpabotuwe e6opyoBaHne OT domaunx x03yCTB Mece noctabkn 3TO rO o6opyoBaHn, npyncnoBn, TOr otpabotabuee o6opyoBaHne toro xe TnA N BblonHae Te je FyHKm, YTO nocTabn HOB o6opyoBaHne.
KapToHHyU yNtakOBky NnOIN3TNHeOBbIe (T3) NaKeTbI CneDyET NOMEaTaB B COOTBeTcTBYIOUe KOHTeHepbI nIpa3dEhBOrO c6bIToBBx OTXoDB B COOTBeTcBm Cnx OINCAHEm. EcnB I pInbOpoe IMMeJTOc8bAtpen, IN Heo6xoIMMo N3BNeYb NytINImnIPoBaTb OTDeHbHO B nyHKTe c6bopa N xpaHemn. He bIbPacBaBAte Pnp6op B KOHTeHep dNl 6bITobBX OTXoDB!!
CepBc Ecln Bbl XOTIe npno6peTn 3aIacHbIe YAcTn IIN npedbYBnTb npTeHmN, noXaanyCTa oBaauTecb HEnocpeDCTBeHHo K npOaBcy, BldaBWeMy Yek.
BESCHRIJVING VAN HET APPARAAT
TOBAOBOpyBaHBe63nIaTHo,piuYcNoBHeyeN3nO3BaHOToOBOpyBaHae eOTcbuTINnN3nBnHbRaCbUHTeFyHKmKATOIOCTaBeHOToOBOpyBaHae.
KaptoHeHHTe OAnOBKn NOnnTeHNHeOBHTe (PE) Top6Nk Tpr6Ba Da Ce NoCTABRT B Cb0TBtHnTE KOHTeHepn 3a pa3dEHO cb6npaHc H6TOBn
OTnabuB CbOtBeTcBne c TxHOTo ONIcaHne. Ako B ypea HMa 6aTePN, Te Tp8Ba Da ce N3BaJr T da ce N3XBpbNr pa3dEnHO B cbOpBXeHne 3aCb6paHne n CbxpaHene.
He 3xBbPnIe ypea B KOHTeHepa 3a 6ntOBn OTnabun!!
CepBn3 Ako JxenaTe da 3aKynIe pe3epBNH qactn nn da npedraBITE peKlmaun, MoJc ce o6bphete DnpekTHO KbM TbproBeua, KOITo e n3daI KacOBATA 6enEKA.
Brugsanvising (DA)
GENERELLE SIKKERHEDSBETINGELSER VIGTIGE SIKKERHEDSINSTRUKTIONER TIL BRUG LAES OMHYGGELIGT OG GEM TIL SENERE BRUG
VAŽNE SIGURNOSNE UPUTE ZA UPOTREBU
PAŽLJIVO PROČITAJE I SACUVAJTE ZA BUDUĆU REFERENCU
- Prije upotrebe uredaja, procitajte korisnički prisćnik i slicedite upute koje se u njemu nalaze. Proizvodac nods odgovoran za štetu nastalu koristjenjem uredaja suprotno njegovoj namjeni ili nepravilnim radom.
- Urešaj je namijenjen sano za kućnu upotrebu. Ne koristite ga u druge svrhe osim za one za koje je namijenjen.
- Urežaj treba prikljuciti samo na uzemljenu uticnicu 220-240V ~ 50-60Hz. Da biste poveçali sigurnost rada, nemojte istovremeno spajati vishe elektrčnih urežaja na"Justno strujno kolo.
- Budite posebno oprezni prilikom korištenja urežaja kada su djeca u blizini. Ne dozvolite djeci da se igraju s urežajem. Ne dozvolite djeci ili osobama koje nisu upoznate s urežajem da ga koriste.
- UPOZORENJE: Ovaj uredaj mogu koristiti djeca starija od 8 godina i osobe s ograničenim fizickim, senzornim ili mentalnim sposobnostima, ili osobe koje nemaju iskustva ili znanja o uredaju, ako se to radi pod nadzorom osobe odgovorne za njihovu sigurnost ili ako su im date upute o
Noctabka 1: CnHTeTmKa TkaeHnHa
Noctabka 2: CBnla-BoHa
NocTabka 3: NamyK
NocTabka 4:JIeH
Ta6ena:
| ОЗHAКИ HA ETUNKETI | ТП П HA MATEРИJАЛ | ПИДАГОДУBAЧЕ HA TEPMOCTAT |
| · | СвILA - ВOLнa | Нисka Temперараза - |
| ·· | СИNTЕТ<UКИ ВЛАКHA | П�осяна Temперараза -- |
| ··· | Памук | Виска Temперараза -- -- |
ПОЛHEБЕ CO BODA
3a6eueka: Ppe da 3anouhe Te co nocTankata 3a nonHeBe B0da, npOBepTe daIi nnernata He e BknyeHa BO cTpyja,
- OToBopeTe ro kanakot Ha pe3epBoapot 3a B0da (10)
- HanoJIHHeTo ro pe3epBOaPOT 3a BOda co BOda Do HnBOTO "MAX".
- 3aTbopeTe ro kanakot Ha pe3epBoapot 3a Boda (10).
INPBA YIOTPEBA
Kora ja kopncntte nepnata 3a npB naT, moKe da 3abeJeKte MaJa KOJIuHa Yad N da CnyuHete 3ByuN IoTo DoaraaT od Pnactnkata. Oba e cocema HopMaJIHO Ke pIeCTaHe NO KpaTKO BpeMe. Mana KOJIuHa BOa MoKe da OCTaHe BO cocema HOBa nepna no pyTHNcKa npOBepka 3a npoteKyBaHe.
ФУHКЛИJA3A CyBO NEPJIAHbE(6e3 napea)
- Nop3eTo Ra Ka6eIOT 3a HanojyBaHe Ha ypeIoT co 3a3emjeH wTeKeP. EkpaHot (1) Ke cBeThe 3eJeHO, npKkaKyBajKn HOpMaun 3a npepnyBaHe BO pexMn HA NOIROTBEOCT.
- PnTncheTe ro konHeTo (3) ^+ 4) -" 3a da r n npnaOndte noctabKnte Ha nnerata na ja na n36epete cooDBetHaTa Tempepatya 3a neIrahe.
- Otkako Ke ro n36epete cooDBeTHOTo noDecyBaHBe, ekpaHot Ke cBETHe CnHO, a IKOHATA Ha TepMometapOT Ha ekpaHot Ke Tpenka, 03NaUByajkn
Deka Jeene3HaTa nNova ce 3arpeBa.
- Kora nernta ke ja doctnne noTpe6HaTa TemnepaTypa, nHopmaunte Ha ekpaHOT Ke npctanat da Tpenkaat n nerntaKe nCnytN kpatOK 3Byk.
- N yonTpe6a, npntncheTe ro konHeTo (4) ,-“doKeKa ekpaHOT He CBeThe 3eNeHo (1)
- NcknyeTe ro Ka6eNoT 3a HanojyBaHe oD SInHnOt WTeKeP.
ФУHKЛИJAHAПЕЧKA
- Hanonhe ro pe3epboaot co BODa kako wTo e onnwaHO ,POnHeBe BODa".
2.Путисею konчetoа npckaheBoda(5). - 3a6eJeuKa: Be3 orIeH Na BnOTo H a nIeHa: nIeHaBe co napea nn nIeHaBe Ha cyBO, cnpejOT cekoraw Ke deNyBa BO cekoJ cnuyaj.
ФУHKЛJA 3A ПЕЛАБЕ CO NAPEA
- Hanonhe ro pe3epboapot co BODa kako wTO e onuwaHO Bo,ToJIHeBe BODa".
2.Поврете ro kaбелOTаHaNojyBaHé Ha ypeIOT co 3a3emjeH wTekep.ЕкpaHOT (1) Ke cBEThe 3eJIeHO, npKakJyBaJKN HOpMaUNI 3a npemHOT KOH
cocto6aHa noDrotBeHocT.
- PnTncheTe ro konyeTo (3) ^+ 4) " 3a da r n npnilarOIne noctabKIne Ha nernata n da ja n36epete cooDBeHTaTe TMnepaTypa 3a nnernahe.
- Steam ke ce ocnoobn camo npn nocTaKa 3.4.
- Otkako Ke ro n36peTe COODBETHOTo NODECyBaHe 3 uN4, ekpaHOT Ke CBeTHE cNHO, IKOHATA Ha TepMometapot Ha ekpaHOT Ke Tpenka, UTO ykaxyaHa
deKa JeIe3HaTa nNova ce 3arpeBa.
- Kora nernta ke ja doctnre noTpe6hata TemnepaTypa, nHopmaunte Ha ekpaHot Ke npctanat da Tpenkaat n nerntataKe nCnytN kpatOK 3Byk.
- Пптуншете сюкчето „i-pump (2)“, лумпата за вда ще почес наразоти и od плочата ще Излгува napea. Секов nat kora ща CTABITE nerлata HabtpaHa
PnntncheTe ro konyeTo i-pump (2) 3a da ro 3anpeTe npmnaBeTo B0da.
- IynoTpe6a, npntncheTe ro konyeTo i-pump (2) 3a da ro 3anpeTe nymaHbeto Boda, npntncheTe ro konyeTo (4) "doeka ekpaHot He CBETHe 3eJeHO (1)
- Ncknyte To Ka6eIOT 3a HanojyBaIbe OJ SdHnOt WTeKep.
- Ito cekoja ynoTpe6a, npOBepTe daHn pe3epBoapOT 3a BOa e npa3eH.
- 3a6eIeIka: He ja KopncTeTe cyHKnjuTa 3a nnerNahe co napea Ha obNeKa IIN TkaEHHH To Hocat Jyfe IIN XNBOTHN.
Tempepatypatae npebucoka.
ФУHКЛИJAHAПAPEA
ObaaФyHKuJaKe Moke Da o6e36eNIOBeKe napea 3a OTcpaHbAbe Ha TBpdoKOpHnTe Ha6opn.
1.ObaaФункиJA pa6OTn Ha TempepaTpa oD 3,4.
2. Пптисе剂量 конутоа паea (6).Тpebaда Има пayзд 3-5 cekyнпnomудbe ппськы ha konчeto 3a паea (5)да ce nocturhe Надобap pezylntat Ha паebeto.
2. HanoJIHeTe BODo noLoX6a MAX nped da ja kaKOpIcTnTe Obaa yHKunja.
3. 3a da cnpeuTe nCTeKyBaHe Ha BODa oN pIoUaTa, He ro npNTnCKajTe KOHTnHynpaHO noBeKe od 5 ceKyHdN.
ФУHKUJIA 3A BEPTIKAJHO IENJIAHBE CO NAPEA
BepnkaJIHHOT cIeTcM 3a nnerlahe co napea BN OBO3MOxUyBa da ja KopncTITe nerlaTa 3a nnerlaHe BO BepnKaIIHa noLoX6a. Oba e oO6eHO KOpNCHO 3a OTCTpaHyBaHe Ha H6opn OD BVceUka 06NeKa, 3abecn.
- Hanonhe ro pe3epboaot co Boda kako wto e onnshaHO Bo,NoJHebe Boda".
- Nop3eTo Ra Ka6eNoT 3a HanojyBaHe Ha ypeoT co 3aemjeH uTeKeP. EkpaHot (1) Ke cBeThe 3eneHo, npKakyBajKn HOpMaun 3a npemHOT KOH COctoJbHa NoIroTbeHOCT.
- Ппшение ro konчeto (3) +" (4) -" 3a Да Гп пилагдente NOCTABKITE Ha nernata n da ja ИЗберete cooDBeTHaTe Tempepatya 3a nerlahe.
- Steam ke ce ocnofoa camo npn noctabka 3.4.
- Otkako ke ro n36epeTe cooDbetHOTo noDecyBaBe 3 mnn 4, ekpaHot Ke cBeThe cnH0, IKohata Ha TepMometapot Ha ekpaHot Ke TpEnka, wTO yKaxyBa Ha
Ieka JKeJ3HaTnOua ce 3arpeBa. - Kora nerIATA ke ja DocTHHe notpe6HaT a TemnepaTypa, INHΦopMaunTe Ha ekpaHOT Ke npecTaHaT da TpenKaat n nerIATA Ke IcnytN KpAToK 3Byk.
- Пуитишисту сюкчeto „i-pump (2)“, пуллata 3a вoda ke понда paBOTи параза ke понда n3nerуba od пiochata ha nerлata. Секов nat kora ke ja CTabITE поглata на место Пуитишисту сюкчeto i-pump (2) за до р�петe пуллathoвoda.
- 06ecete ja oblekata ha 3akaayka 3a obleka n dpjke ta ja cterhata co eHa t paka.
9.Држete ja nerIata uCnpaBeno co Dpyrata paka nPnTncheTe ro konyeTo 3a napea (6) 3a da ja nCnerIate obNekata. Jecho doIppete ja obJIekata co nerIata 3a da rN OTcTpaHnte ha6Opnte. 3a da cnpeuHte nCTeKyBaHe Ha BODa od IIIOUATA, He ro npITnCKajTe konyeTo 3a napea (6) KOHTINHynpaHO NOBeKe O5 cekyni. - Np ynoTpe6a, npntncheTe ro konueTo ,i-pump" (2) 3a da ro 3anpeTe nymaHbeto BODa, npntncheTe ro konueTo (4), "doeka ekpaHOT He CBeThe 3eJeHo (1)
11.ИcknyeTe ro kaBeJIoT 3a HanojyBaHbe OI SInHnOt WTeKep. - Iо cekoja ynoIpe6a, npOBepeTe dani pe3epBoapot 3a BOda e npa3eH.
- 3a6eJeuKa: He ja KopucTe ΦyHKuJaTa 3a nerNaHe co napea Ha obNeKa IIn TkaEHnH ITo rHocat lyfe nIN XNBOTHN. Temepatypata e npEbuCoka.
ФУHКЛИJA3ACAMOΥNCTEΗБ
- Hanonhe ro pe3epboapot co Boda kaKo 7to e onuHaHO BO „PonHeBe BODa". He Kopnctete ouet nIIN dpyTteHocTn 3a OTCTpaHyBaHbe 6nrop BO pe3epboapot 3a BODa.
- Пусяншете Гончeto(3)“(4)"3aДа jaюставite nerлataHa MaKcmaJHa MOKHOCT.
5.Држete ja nerIaTахориоТанHo haad MnjaJIHnKOT.ПпTNChTe И држete ro konTuTo 3a caMoUHcTeHe (7). - Napea n BpeJa BOa 7to CoJPKaT COIN MHepaN 7to Ce HAcO6pAe BO KOMopaTa 3a napea od npTeXoHN ynoTppeBn Ke noHaT da Teay Od DynKIne Ha NIOuYATA 3a npNTUckaHbe.
- Hexho Hnuajte ja nernata Hanpei-Ha3a d Odoeka pe3epBoapot 3a B0da He ce ncpnaHn.
3a6eueka:Boata uTo n3JeryBa 3a BpeMe Ha camOuHCTeHbETo e MHORY TOnna. BndTe MHORY BHIMATEHN da He naHe Bp3 Bac.
8. Kora pe3epBoaop 3a Boda e npa3eH, otnyuTeTe ro KonUeTo 3a camOuHCTHe.
9. Pooekajte nergata ueocho da ce olaan.
10.Избшete ja nnoyata 3a nerlahe co laHa, BlaXHa Kpna.
CINCTEM IIPOTIB BAP
CneuJaanen HnIeP BO BHaTpeHIOCTa Ha pe3epBOaPOT 3a BODa ja OMeKHyBa BODaTa n CnpeyBa fOpMpaHe Ha 6nrop Ha nnouata. HnItePOT e N3dpxKnB n He 6apa 3aMeHa.
- KopinCTe cAmo BOda OJYeMa
2.ДectилараHaTЯИдмнералпраHa BODa ro npabn CnCTeMOT npoTnB Bap HeeФнКaceH CO nPOMeHa Ha HerOBnTeФи3NtKoxemmckn CBOjCTBa.
CNCTEMIPTIBKANEH
Pernata e onpemeha co yHKunja 3a 3anpahe Ha KanebeTo: nIraT a BtOMaTcN npctaHyBa da nnapyBa kora TemepaTypa e npHncka 3a da ce cnpeuKanebe Ha BOda od fOHOT Ha nnerata.
BnaoradapeHne Ha cnCTemOT npOTnB KaneHe, MoKeTe COBpSeHo Da rN nCnerJaTe DpyN HajHexHIne TkaEHNI.
CNCTEM 3A ABTOMATCKO NCKJyUBAHcE
- EneKtpoHcNt 6e36eHnOeH ypeA BToMaTcKn Ke ro Ncknyu rpeaOT aKO nErIaTa He e nomecTeHa nobEke od 30 ckyHn BO xOpH3OHTaHa nooXbA.AKO nErIata e ocTaBeHa BO BepTKaHa nooXbA, Toa ke ce cnHyn 8 MInyTu.
NO NENJIABETO:
3a da ro npoJnxTe Bekot Ha TpaHe Ha BaWata nerla, no nnernaheTo, ce npenopayBa da ro ncpa3HnTe pe3epBoapOT Ha cIeHNOB HauIN:
IcknyeTe ja nerlata od stkepot. Icnpa3Hete ja nerlata Taka 7to Ke ro OTbOpTE KanaKOT Ha pe3epBoapot 3a Boda n Ke ro dpxnte co BpBOT cBPTEN HADJy. IecHO npOTpeCte Ro had MjajHnKOT, a noToa 3aTbOpTe Ro KanaKOT. NcncTeTe ja nNoUata Ha nerlata co cyBa Kpna 3a da rN OTCTpaHnte CITE Tparn oD Blara.
CHCTEHEIOOPKYBAHBE
IpeudnctHe,ncknyte ja nnerlaTa od ctpya n noekejTe doeka He ce oana DoBOJHO.
1.ИЗбпшеTe ja плочаТаHa nerлata CO BnaЖнa Крna И Hea6pa3nBHO (TeuHo) cpeДСТВо 3aЧИСТЕи.
2. Ako BnaKaHaTa ce 3aIeneHn Ha nIOyata, KopncTeTe BnaXHa Kpna co Ocet 3a da ja n3bpiuTe pnoHaTa.
3. Hikorai He KopinTe CnHa KnceiHa nn aKan 3a da n36erHete OwTeYBaHe Ha nNoata.
TEXHNUKINODATOLU:
HanoH:220-240V\~50-60Hz
MoHooCT:3000W
IotpouyBaUka Ha eHepnja BO ncknyeha coctoj6a, co nHdopmatuBEN dncnnej:0,45 W
Bhimahne, XeSha Ka NobpunHa:
Temnepaypata Ha doctanHte noBpHHn Ha ypeot moke da bide BncoKa kora pa6oTn. He donnpajTe nn Xeukite noBpHHn Ha ypeot.

Bo nHTepes Ha XnBOTHata CpeDHa. HhOpMaun 3a yNtpe6yBaHa eEeKtpuHa n eEeKtpoHcKa onpema Bo coTnacHoc t co YHe13 cTab 1 uYHe 2 od 3akOHot od 11 cTeMBprn 2015 roDHa 3a yNtpe6yBaHa eEeKtpuHa n eEeKtpoHcKa onpema, Be HhOpMpAme 3a npabInHTo pakyBaHbe co OTnAdHa eEeKTPuHa n eEeKtpoHcKa onpema:
- 3a6pahe o e pnahe Ha yIOTpebeHa eNktpnHa n eNkTPOHcKa onpema 3aeHcO co pyr OTnA - OBa e NtBpdeHO cO 03NaYBaHeTO BO fOpMa Ha "PneptHa Kopna", wTo bapa ceNkTBHo cObpaHae Ha OBOJ BND OTnA.
- EneKtpnHIne n eEKeTPOhCKIne ypeMoKe Da codpKaT OAnCh CynCTaHcN, Cmecn N KOMNoHEHTN KOI, KORA Ke CE nCNYtAT BO JKNBOTHa TcpeHnA, MoKAT da npETCTabyBaat cepno3Ha 3akaHa 3a 3dpabjeto N KMBOTOT Ha NyreTo N KMBTE opraHIm3M. Tne MoKAT da DOBeaTdo 6poJHn 3dpabCTbeHn 3aOlyBaHa, kako To Ce: HApuyBaHa Ha BnOTo, CnyXoT N RObOpTo, a ITO Taka MOKAT Da rN OWTeTa 6y6pe3nte, uPHNO TpO bN CpTeTo N da npEni3bKaat KOxHn 3aOlyBaHa. WTeTHNe cyntaHcN, ITO TaKa, MOKAT Da NMAaT HeaTINBEH ePekt Bp3 PecnPapTopHNOT n pePNDyKTNBHNT CNTEM n da DoBeDat do KaHuePoReHn IpomeHn. KOHCympaheTo pacteHnJa wTo pactaT Bo KONTAMHHaHn NOBn INPOsBOHn HapabeHn OD HMB MoKe da npETCTabyBa pnsk oD ropeHaBeHeHte 3dpaCTbeHn ePektn.
- YnOtpe6eHata eNekTpnuHa n EneKtpoHcKa onPema Tpe6a Da CE DO OcbTaBvBa cAmo Do OBnacteH MeCTa 3a co6paIbe, HJ Cnncok Tpe6a Da 6uDe doctanen Ha Be6-CTpaHcuaT a HA cekoJa ONUTHcKaHcEJIapJa.
- DomaKHHCTBOI rpa Baxha yNora BO pndOHecoT KOH NOBtOpHATA yNTopeBa n ObHOByBaHeto, BKnYHTeHNO H peuNKnPaHeto, Ha yNTopeBeHaTa onPema. NcTo taka, rpa KnyHa yNora BO CNTeMOT 3a ynpabByBaHbe CO OTNa OD yNTopeBeHa eJekTPnHa n eJekTPoHcKa ONpema nopadm MoxHcTa 3a dInpeKTHO pneHecyBaHbe DO OBnactEH MeCTA 3a cObipae H ennoXeHNHte CounjAnn HabIKn WTO pe3yTTnpaAT CO OCTaBaHe Ha OTnAdn OHpema HA MecTa ITO He CE HameHETn 3a OBaa HameHa.
DononHnTeHo, Bpate ja ynoptpeheata eneKtpnHa n eneKtpoHcKa onPema Ha MeCTOto Ha HcnpaKa. NCTPNbYtePoT, npn HcnpaKa Ha onPema HameHeta 3a DomaknHCTBaTdo KnyBaVOT, eOnKeH beCnNaTHo Ja ja 3eMe Ha3ad ynoptpeheata onPema Od DomaknHCTBaTaa Ha MeCTOto Ha HcnpaKa Ha TAKbTa ONPema, noD ycNoB ynoptpeheata onPema da e oNt TmN Da nn3BpWyBa NCTHTe FyHKuN Kako HcnpaHaHa Ta onPema.
VAŽNE SIGURNOSNE UPUTE ZA UPORABU
PAŽLJIVO PROČITAJE I SACUVAJTE ZA BUDUĆU REFERENCU
CHIUEHHRAOBCJYROBYBAHH
IpeepuHnHBMdknOHTb npacky BiD mepexi Ta 3auekaTe, nOK BOHa DOCTaTHbO OXONOHe.
- Ipoptitb niOuBBy npackn BONIOO raHupkoTo Ta Hea6pa3NBHM (piKm) 3acobom nla YnueHHra.
- RaIO BOJIOKHO npNJINIO DO NiOoBn npackn, npotpiB II BOJIOIO raHcipKO 3 OOTOM.
- Hikon He BnKopncToByte CnBn Kncnotn a6o Jnyn, 06 yHmKHytn noWkoJKeHHa niouBn npackn.
TEXHIUHDAHI:
Hanpyra: 220-240 B ~ 50-60 Γι
NotykhHcTb:3000BT
CnoxmbaHa nOtjXhictb y BmKHeHomy cTaHi 3 iHΦopMaiziHm DnCnIeM:0,45BT

О��선목, 빼다 훨선목:
TeMnepatypa doctynHnx nobepxohb npncptpo moxe 6ytB Bncoko o iD yac noo po6otn. He TopkaTecraPaxnx nobepxohb npncptpo.
B INTEpecax DoBkinna. InOpmaia npo BnKOpncTahe eneKtpnue Ta eneKtpOnHe obnHaHH BiinobiHdo ct. 13 n. 1 Ta n. 2 3aKohy Bid 11 BepeChra 2015 pOky npo BnKOpncTahe eneKtpnue Ta eneKtpOnHe obnHaHH, MM inHopmyMo Bac npo npabInbHe nobOjKeHH 3 BiJxOamn eneKtpnHOrTo a eneKtpOnHOrO obnHaHH:
1.3a6bopohrae bocpa0muiybaTn BnKOpncTahe enektpnHHe Ta enektpnoHe 6nadHaHn pa0m 3 iHUMM BiXoamn - ce nIiTBepkkyetbcn MapkyBaHHm y Brnlaq [NepeKpcneHoro KOnTeHepa],Ke BImarae po3dInbHoro 36bpy cboR biDy biXoib.
2. EneKtpnHi Ta eIeKtpoHni pncTpoMoxTyMiCTTN He63neHpipeOBHn, cymi ta KOMHOENT, kpi npotpannnHb HABKOIMHe cepedobume MOxyTB cTAHOHTN Cepno3Hy 3arpo3y Dnla 3doopBraTa XTTa JIODei XINBHX OprAH3mIB BOHMOxTy pn3BcTn DO YCNHEHHX 3axBOPBOAbh, TAKHX R: npuyehn30py, cnxy Ta MOBNEHHA, a TAKOX MOxy TB NOUKODTN HMPKN, neiuHY Ta cepue, a TAKOX cnpnuHNTn 3axBOPBOHHaikipn. lkDNI B peOBOHN TAKOX MOxyTB HerATNBHO BnNBATn Ha dnxanbHy Ta penpOdyKTINBHy CNCTEMn Ta pns3BOHTN Do pakOBHX 3mH. BxHBnHPOCmH, 10 poctYb HA 3abpydneHn xpyHTax, Ta npodykTB, BnTOBNEHnx 3 HIX, MOKe CTAOHNT Pn3NK BUNe3aHaehNX HacniKbD n3doPob'
3. BnKOpNCTaHe eNkTpuHHe Ta eNkTpoHHe 0bnHaHHa CnI d3aBAtu NnEe Do aBtup3oBaHux nyKtB 36opy, cncok knx Ma6 byn DocTyHn Ha Be6caNT KoXHorO MyHunabHoro ynpabnHn.
4. DmOrocnoapCTBO Biaipae BaxnHy porb y cnpnHni NOBTOPHOMY BkOpNCTAHNO TA yTNl3aui, BKIOuAOny Nepepo6ky, BxNBaHO 0bnHaHH. BOHO TAKOX Biiirpa KIOOBy poIy b ciTeM iynpabINHBAiXoAMn IINBxNBaHO ENEKTPUHORo TA eEeKTPOHORo 0bnHaHH 3aBdKNMOxNBOCTI 6e3nocepEnbIo nepeaHi do aTOpn3OBaHNx nyKTHIB 360py Ta ycHHeH NoBaxaHnx CoJIaNbHx 3BNOH, 10 npn3BoJb Do 3aIIuHaHH BIDnPaCboBaHO 0bnAnHnB Micqx, He pIn3NaHeHN Dx nlaie Metn.
Kpim toro, noBepHtB bNOKPcTahe eEeKtpnHe Ta eEeKtpOnHe 0bLaHaHHa Do Micu JoocTbKn. NcTpnc6IOTop, nIac DocabKn 0bLHaHHa, pnaHaeHoro dIy DOMOROCNOapCTB, NOKUIO 3O6OB'3AHHN 6e3KOHTOBHO 3a6paTb NIKOPcTahe 0bLaHaHHa 3 DoMOROCNOapCTB y MUCJIOCTABKn TAKORA 0bLAdHnH, 3a yMOBN, IIO BKNOPcTahe 0bLaHaHH a TOro X TINy Ta BIKOHyBaI O KfhyKuII, IIO NoocTabne He 0bLaHaHH. KaptonHy ynakokBy ta NlntiHeneBO (IE) NaekTu cnI ytni3yBatnu Y BiNobdi KOTeHepn IpozDInhoro 360py nobyTOBx BixDIOB 31dHO 3ix ONiCOM. Raio B npictpo i e bataeKn, ix CnI BnHrtu Ta BiHectn Do NyHKty po3DInhoro 360py ta 36epirahn.
HeBnKaIaTe npicstpiy no6byoBi bIXdoH!!
Cepbic Kxio BN 6baaete npia6bta3nacnhi aactnnh ao noatn bdyaki ckapri, 3BepHtbc 6e3nocepeHbdo npdaBua, kyn Buaab Yek.
a a a a a a a a a a a a a a a a a a a a a
Jgssnss
1 1
aai jgljg jglj gij .jgljlll jllj 4yabj yblal
1
y. 1
aBbI sllw
J 2.
ylll yipjg jg j 1 (wll g lal) yjgl
()
X 1
.
J 1
J 1
- 2
1
$$ \cdot \dot {p} \dot {a} \dot {i} \dot {w} \dot {a l l} \frac {1}{c} \dot {l} \dot {a} \dot {w} \dot {b} \dot {i} \dot {a} \dot {l} \dot {w} \dot {l} \dot {w} \dot {l} \dot {w} \dot {l} \dot {w} \dot {l} $$
$$ \begin{array}{c} \dot {1} \dot {2} \dot {3} \dot {4} \dot {5} \ \ddot {1} \dot {2} \dot {3} \dot {4} \dot {5} \end{array} $$
$$ 1 0 \omega $$
$$ . \mathrm {s l i d} \quad \mathrm {s l i d} \log \left( \right.j \mathrm {s l i d} \quad \mathrm {d} g g g g g g g g g g g g g g g g g g g g g g g g g g g g g g g g g g g g g g g g g g g g g g g g g g g g g g g g g g g g g g g g g g $$
$$ 1 1. J _ {i j} $$
$$ 1 2. \dot {a} \dot {i} \dot {l} $$
$$ \downarrow \omega \omega \omega j _ {i} \downarrow \downarrow \downarrow \downarrow \downarrow \downarrow \downarrow \downarrow \downarrow \downarrow \downarrow \downarrow \downarrow \downarrow \downarrow \downarrow \downarrow \downarrow \downarrow \downarrow $$
$$ \because \mathrm {a} \mathrm {f l a s} \mathrm {a} \mathrm {f l a s} \mathrm {a} \mathrm {f l a s} \mathrm {R C D} $$
$$ \frac {1}{2} \cdot \sum_ {i = 1} ^ {n} \sum_ {j = 1} ^ {m} \sum_ {k = 1} ^ {n} $$
$$ j g _ {i j} \equiv \frac {\partial}{\partial x _ {i}} \frac {\partial}{\partial y _ {j}} \frac {\partial}{\partial z _ {k}} $$
$$ . \cup \cup \cup \cup \cup \cup \cup \cup \cup \cup \cup \cup \cup \cup \cup \cup $$
$$ \left. \int_ {0} ^ {1} \frac {\sin x}{x - 1} d x + \int_ {1} ^ {2} \frac {\sin x}{x - 1} d x + \int_ {2} ^ {3} \frac {\sin x}{x - 1} d x + \int_ {3} ^ {4} \frac {\sin x}{x - 1} d x + \int_ {4} ^ {5} \frac {\sin x}{x - 1} d x + \int_ {5} ^ {6} \frac {\sin x}{x - 1} d x + \int_ {6} ^ {7} \frac {\sin x}{x - 1} d x + \int_ {7} ^ {8} \frac {\sin x}{x - 1} d x + \int_ {8} ^ {9} \frac {\sin x}{x - 1} d x + \int_ {9} ^ {1 0} \frac {\sin x}{x - 1} d x\right) $$
$$ \left. \right.\left. \right.\left. \right.\left. \right.\left. \right.\left. \right.\left. \right.\left. \right.\left. \right.\left. \right.\left. \right.\left. \right.\left.\left.\left.\left.\left.\left.\left.\left.\left.\left.\left.\left.\left.\left.\left.\left.\left.\left.\left.\left.\left.\left. \text {的} \right]\right]\right]\right]\right]\right]\right]\right]\right]\right]\right]\right]\right]\right]\right]\right]\right]\right]\right]\right]\right]\right] $$
$$ \left. \int_ {0} ^ {1} \frac {\sin x}{x + 1} d x \right| _ {0} ^ {1} = \int_ {0} ^ {1} \frac {\sin x}{x + 1} d x = \int_ {0} ^ {1} \frac {\sin x}{x + 1} d x = \int_ {0} ^ {1} \frac {\sin x}{x + 1} d x = \int_ {0} ^ {1} \frac {\sin x}{x + 1} d x = \int_ {0} ^ {1} \frac {\sin x}{x + 1} d x = \int^ {\infty} \frac {\sin x}{x + 1} d x $$
$$ \therefore b \text {i} a l \text {如} r b \text {i} c \text {i} g \text {i} j z i l l $$
$$ \left. \frac {1}{2} \int_ {0} ^ {1} \frac {d x}{x - 1} \right| _ {0} ^ {1} = \frac {1}{2} \int_ {0} ^ {1} \frac {d x}{x - 1} $$
$$ \cdot \rho $$
$$ \begin{array}{c} \text {V} _ {\mathcal {S}} \end{array} $$
$$ \dot {a} \dot {j} \dot {l} \dot {k} \dot {l} \dot {w} \dot {w} \dot {e} \dot {l} \dot {a} \ddot {a} \ddot {b} \ddot {c} \ddot {c} \dot {c} \dot {c} \dot {c} \dot {c} \dot {c} \dot {c} \dot {c} \dot {c} \dot {c} \dot {c} \dot {c} \dot {c} \dot {c} \dot {c} \dot {c} \dot {c} \dot {c} $$
$$ \therefore \lim _ {x \to 0} \frac {\sin x}{x + 1} = \frac {\sin x}{x + 1} $$
$$ \therefore \text {j i d} J L _ {2} \text {i n} J L _ {1} \text {i n} J L _ {0} \text {i n} J L _ {3} \text {i n} J L _ {4} \text {i n} J L _ {5} \text {i n} J L _ {6} \text {i n} J L _ {7} \text {i n} J L _ {8} \text {i n} J L _ {9} \text {i n} J L _ {1 0} \text {i n} J L _ {1 1} \text {i n} J L _ {1 2} \text {i n} J L _ {1 3} \text {i n} J L _ {1 4} \text {i n} J L _ {1 5} \text {i n} J L _ {1 6} \text {i n} J L _ {1 7} \text {i n} J L _ {1 8} \tag {2.18} $$
$$ \therefore \mathrm {d} \mathrm {f} = \mathrm {d} \mathrm {g} $$
$$ l a l \cdot d \cdot j i \cdot o l g a l l \cdot j i l. \cdot a i \cdot l a l l \cdot o l g a l l \cdot d e l \cdot a i l l \cdot s l w \cdot a w d y p d c n o d s 1 9 $$
$$ l _ {i j} l _ {k} \dot {s} \dot {s} \dot {s} s \dot {s} g \dot {s} \dot {s} $$
$$ . \text {j} _ {\text {i}} \text {i} _ {\text {i}} \text {i} _ {\text {i}} \text {i} _ {\text {i}} \text {i} _ {\text {i}} \text {i} _ {\text {i}} \text {i} _ {\text {i}} \text {i} _ {\text {i}} \text {i} _ {\text {i}} \text {i} _ {\text {i}} \text {i l} _ {\text {i}} 2 0 $$
$$ \left. \right.\left. \right.\left. \right.\left. \right.\left. \right.\left.\left.\left.\left.\left.\left.\left.\left.\left.\left.\left.\left.\left.\left.\left.\left.\left.\left.\left.\left.\left.\left.\left.\left.\left.\left.\left.\left.\left.\right.\right.\right.\right.\right.\right.\right.\right.\right.\right.\right.\right.\right.\right.\right.\right.\right.\right.\right.\right.\right.\right.\right.\right.\right.\right.\right.\right.\right\rangle_ {2 1} $$
$$ \therefore \text {l i g h t} \quad \text {g} \quad \text {j} \quad \text {o u t} \quad \text {i} \quad \text {i} $$
$$ . \Delta \Delta \Delta \Delta \Delta \Delta \Delta \Delta \Delta \Delta \Delta \Delta \Delta \Delta \Delta \Delta \Delta \Delta \Delta \Delta \Delta \Delta \Delta \Delta \Delta \Delta \Delta \Delta \Delta \Delta \Delta \Delta \Delta \Delta \Delta \Delta \Delta \Delta \Delta \Delta \Delta \Delta \Delta \Delta \Delta \Delta \Delta \Delta \Delta \Delta \mathrm {g} ^ {\prime} g ^ {\prime} g ^ {\prime} g ^ {\prime} g ^ {\prime} g ^ {\prime} g ^ {\prime} g ^ {\prime} g ^ {\prime} g ^ {\prime} g ^ {\prime} g ^ {\prime} g ^ {\prime} g ^ {\prime} g ^ {\prime} g ^ {\prime} g ^ {\prime} g ^ {\prime} g ^ {\prime} g ^ {\prime} g ^ {\prime} $$
$$ b \text {a} g \text {g} \text {w} \text {w} \text {w} \text {w} \text {w} \text {w} \text {w} \text {w} \text {w} \text {w} \text {w} \text {w} \text {w} \text {w} \text {w} \text {w} \text {w} \text {w} \text {w} \text {w} \text {a l l} \text {a l l} \text {a l l} \text {a l l} \text {a l l} \text {a l l} \tag {23} $$
$$ \left. \frac {1}{2} \int_ {0} ^ {\infty} \frac {1}{x} f (x) d x + \int_ {0} ^ {\infty} \frac {1}{x} f (x) d x\right) = 0 $$
$$ . \dot {n} j $$
$$ . \text {a} ^ {\prime} \text {a} ^ {\prime} \text {a} ^ {\prime} \text {a} ^ {\prime} \text {a} ^ {\prime} \text {a} ^ {\prime} \text {a} ^ {\prime} \text {a} ^ {\prime} \text {a} ^ {\prime} \text {a} ^ {\prime} \text {a} ^ {\prime} \text {a} ^ {\prime} 2. 2 5 $$
$$ \left. \right.\left. \right.\left. \right.\left. \right.\left. \right.\left. \right.\left. \right.\left.\left.\left.\left.\left.\left.\left.\left.\left.\left.\left.\left.\left.\left.\left.\left.\left.\left.\left.\left.\left.\left.\left.\left.\left.\left.\left.\right.\right.\right.\right.\right.\right.\right.\right.\right.\right.\right.\right.\right.\right.\right.\right.\right.\right.\right.\right.\right.\right.\right.\right.\right.\right.\right\rangle_ {j} ^ {j} j = 2 6 $$
$$ . (i) \left{a _ {1} ^ {2} + a _ {2} ^ {2} + a _ {3} ^ {2} + a _ {4} ^ {2} + a _ {5} ^ {2} + a _ {6} ^ {2} + a _ {7} ^ {2} + a _ {8} ^ {2} + a _ {9} ^ {2} + a _ {1 0} ^ {2} + a _ {1 1} ^ {2} + a _ {1 2} ^ {2} + a _ {1 3} ^ {2} + a _ {1 4} ^ {2} + a _ {1 5} ^ {2} + a _ {1 6} ^ {2} + a _ {1 7} ^ {2} + a _ {1 8} ^ {2} + a _ {1 9} ^ {2} + a _ {2 0} ^ {2} + a _ {2 1} ^ {2} + a _ {2 2} ^ {2} + a _ {2 3} ^ {2} + a _ {2 4} ^ {2} + a _ {2 5} ^ {2} + a _ {2 6} ^ {2} + a _ {2 7} ^ {2} + a _ {2 8} ^ {2} + a _ {2 9} ^ {2} + a _ {3 0} ^ {2} + a _ {3 1} ^ {2} + a _ {3 2} ^ {2} + a _ {3 3} ^ {2} + a _ {3 4} ^ {2} + a _ {3 5} ^ {2} + a _ {3 6} ^ {2} + a _ {3 7} ^ {2} + a _ {3 8} ^ {2} + a _ {3 9} ^ {2} + a _ {\mathrm {的}} ^ {2} + a _ {\mathrm {的}} ^ {3} + a _ {\mathrm {的}} ^ {4} + a _ {\mathrm {的}} ^ {5} + a _ {\mathrm {的}} ^ {\mathrm {一}} + a _ {\mathrm {的}} ^ {\mathrm {二}} + a _ {\mathrm {的}} ^ {\mathrm {三}} + a _ {\mathrm {的}} ^ {\mathrm {四}} + a _ {\mathrm {的}} ^ {\mathrm {五}} + a _ {\mathrm {的}} ^ {\mathrm {六}} + a _ {\mathrm {的}} ^ {\mathrm {七}} + a _ {\mathrm {的}} ^ {\mathrm {八}} + a _ {\mathrm {的}} ^ {\mathrm {九}} + a _ {\mathrm {的}} ^ {\mathrm {(十)}} + a _ {\mathrm {(十)}} ^ {\mathrm {(1)}} + a _ {\mathrm {(十)}} ^ {\mathrm {(2)}} + a _ {\mathrm {(1)}} ^ {\mathrm {(3)}} + a _ {\mathrm {(1)}} ^ {\mathrm {(4)}} + a _ {\mathrm {(1)}} ^ {\mathrm {(5)}} + a _ {\mathrm {(1)}} ^ {\mathrm {(6)}} + a _ {\mathrm {(1)}} ^ {\mathrm {(7)}} + a _ {\mathrm {(1)}} ^ {\mathrm {(8)}} + a _ {\mathrm {(1)}} ^ {\mathrm {(9)}} + a _ {\mathrm {(1)}} ^ {\mathrm {(1 0)}} + a _ {\mathrm {(1)}} ^ {\mathrm {(1 1)}} + a _ {\mathrm {(1)}} ^ {\mathrm {(1 2)}} + a _ {\mathrm {(1)}} ^ {\mathrm {(1 3)}} + a _ {\mathrm {(1)}} ^ {\mathrm {(1 4)}} + a _ {\mathrm {(1)}} ^ {\mathrm {(1 5)}} + a _ {\mathrm {(1)}} ^ {\mathrm {(1 6)}} + a _ {\mathrm {(1)}} ^ {\mathrm {(1 7)}} + a _ {\mathrm {(1)}} ^ {\mathrm {(1 8)}} + a _ {\mathrm {(1)}} ^ {\mathrm {(1 9)}} + a _ {\mathrm {(1)}} ^ {\mathrm {(2 0)}} + a _ {\mathrm {(1)}} ^ {\mathrm {(2 1)}} + a _ {\mathrm {(1)}} ^ {\mathrm {(2 2)}} + a _ {\mathrm {(1)}} ^ {\mathrm {(2 3)}} + a _ {\mathrm {(1)}} ^ {\mathrm {(2 4)}} + a _ {\mathrm {(1)}} ^ {\mathrm {(2 5)}} + a _ {\mathrm {(1)}} ^ {\mathrm {(2 6)}} + a _ {\mathrm {(1)}} ^ {\mathrm {(2 7)}} + a _ {\mathrm {(1)}} ^ {\mathrm {(2 8)}} + a _ {\mathrm {(1)}} ^ {\mathrm {(2 9)}} + a _ {\mathrm {(1)}} ^ {\mathrm {(3 0)}} + a _ {\mathrm {(1)}} ^ {\mathrm {(3 1)}} + a _ {\mathrm {(1)}} ^ {\mathrm {(3 2)}} + a _ {\mathrm {(1)}} ^ {\mathrm {(3 3)}} + a _ {\mathrm {(1)}} ^ {\mathrm {(3 4)}} + a _ {\mathrm {(1)}} ^ {\mathrm {(3 5)}} + a _ {\mathrm {(1)}} ^ {\mathrm {(3 6)}} + a _ {\mathrm {(1)}} ^ {\mathrm {(3 7)}} + a _ {\mathrm {(1)}} ^ {\mathrm {(3 8)}} + a _ {\mathrm {(1)}} ^ {\mathrm {(3 9)}} + a _ {\mathrm {(1)}} ^ {\mathrm {(4 0)}} + a _ {\mathrm {(1)}} ^ {\mathrm {(4 1)}} + a _ {\mathrm {(1)}} ^ {\mathrm {(4 2)}} + a _ {\mathrm {(1)}} ^ {\mathrm {(4 3)}} + a _ {\mathrm {(1)}} ^ {\mathrm {(4 4)}} + a _ {\mathrm {(1)}} ^ {\mathrm {(4 5)}} + a _ {\mathrm {(1)}} ^ {\mathrm {(4 6)}} + a _ {\mathrm {(1)}} ^ {\mathrm {(4 7)}} + a _ {\mathrm {(1)}} ^ {\mathrm {(4 8)}} + \dots \right}. $$
$$ \therefore \sum_ {i = 1} ^ {n} \sum_ {j = 1} ^ {m} \sum_ {k = 1} ^ {n} \sum_ {l = 1} ^ {m} \sum_ {m = 1} ^ {n} \sum_ {n = 1} ^ {m} \sum_ {l = 1} ^ {n} \sum_ {m = 1} ^ {n} \sum_ {l = 1} ^ {m} \sum_ {m = 1} ^ {n} \sum_ {l = 1} ^ {m} \sum_ {m = 1} ^ {n} \sum_ {l = 1} ^ {m} \sum_ {m = 1} ^ {n} \sum_ {l = 1} ^ {m} \sum_ {m = 1} ^ {n} \sum_ {l = 2 7} ^ {2 7} $$
j+
1
距离 c_1 = 3 .
3"++
4"8
5.
6
j7.
allweil 8
aillll .9
olall jj 10.10
olalj1j.11
oiSoll 12.12
:
(1) aiee eae eae eae ee eae eae eae eae eae eae eae eae eae eae eae eae eae eae eae eae eae eae eae eae eae eae eae eae eae
21 × 21 ② : 0 21 × 21
22 × 3
213
J135N14
S OBC = S AOB + S_ BOC
a a a a a a a a a a a a a a a a a a a a a a a a a a a a a
jll
a a a a a a a a a a a a a a a a a a a a a
3.4 aJrall aJr Jd! iie aiai gai jaoi .1
J 1000000000000000000000000000000000000000000
aalgl 0e alalul
5 55
sall
aallll aalll lallll al j 1 1 1 1 1 1 1 1 1 1 1 1 1 1 1 1
"clal cia" 90 90 90 90 90 90 90 90 90
y 1 y
- = ( x1,y1) , = ( x2,y2)
ailllll l l 1 1 1 1 1 1 1 1 1 1 1 1 1 1 1 1 1 1 1 1 1 1 1 1 1 1 1 1 1 1 1 1 1 1 1 1 1 1 1
3.4 12015 16 18 19 20 Steam 12015 16 18
1 4 3 25
J 1
- jai li gai ol sall jaiin w jiaagll jie aull lglge od gaoal clogaall gai gall boll o jali yjol gai lao 6
i.
alall iia (2) i-pump jj binai
. 8
a a a a a a a a a a a a a a a a a a a a a a a a a a a a a a
jilll llll
1
ailll 1e! gaii ie iie aiaii "-(4) "+(3) jil kaii .4
V. (j)ii i j j j j j j j j j j j j j j j j j j j j j j j j j j j j j j j j j j j j j j j j j j j j j j j j j
6
biol all
15 7
aale 4a aea o aia jai l jai yai gai iai jai jai eai ai
iiill 1iill j j j. i j olal l j j a y Lioie .8
alaiol 9
AaBb,32yUuluaaBaaCll Cwau.10
yll slzolb
Jy j 1 y j 1 1 1 1 1 1 1 1 1 1 1 1 1 1 1 1 1
1.23 2.24 3.25 4.26 5.27 6.28 7.29 8.29 9.29 10.29
ailll 111111111111111111111111111111111111111111
biitil gai pabi
alall aollll alal lalalalalalalalalalalalalalalalal
J 1
a 1
S OBC = S COD + S_ BOC
y
jie 1
y j 11 y j 11 j 11 j 11 j 11 j 11 j 11 j 11 j 11 j 11 j 11 j 11 j 11 j 11 j 11 j 11 j 11 j 11 j
aill 1
a 1
(1) 1.
ol gall axel jlll aalaae piai oI gall axel aie cill 1.2
J 3
:
60-50\~240-220:
3000:
0,45 :1oall jie pa. 1jill aill aai aiil
j 2 j 2 j 2 j 2 j 2 j
aiaiil jieaii i 1
1 1 1 1 1 1 1 1 1 1 1 1 1 1 1 1 1 1 1 1 1 1 1 1
. alaxiwall aig jgjll gaiy jai 10 alaxiwall
y6s0g2000 300b000 805b00d3s00 8dy60b030b
- amyomomomol yamgbsdqg 300b
amabasngmolsbymdd2s6gm qdo3y300ds
amjagmo6bmyg3o8b.6amgmo sm mo
3bysbolagmo amyomomomol q5o5bgymobs
asmy6bob s6sulmno ayadmrob agosgssd3y
966g. - amydoomds 363yog3b0mos abmmo lsbmol
3o6mgo do ydsygbdo. sm ydmoygmo
osboqymol dsydo ydmygbdo y6cos lb3s
do66yobogol. - amyomomms y60s oynl dohongymo abmmo 220-240 ^ 50 - 60 3n3ds3obosdofoogymb308o.
3mssoo bglsgnoombodg66qob do6b0o,
mogmms so agsmon msagbdoj
mdoamhyomomms gon hgo. - 3565390000000000000000000000000000000000000000000000000000000000000000000000000000000000000000000000000000
- 8gnoobomos: s3 gno30mnbol aadmy6ds ygdmoos
8gno yno sss3o bs3a3b qs adybgogmo
go3mo, b5bmoynmo s5 m6dmo3o adbsdmogmoab
admb30nbs, 5 od 30nbs, mdagdbss 3s30
s30mnbod s4amgbobgdmo 5bmoobs, mg
blbgsdo no glsgnoobon30b 3sbgbdaqjmo 30molb
a003smygmoob 33d56 mgoa oogoo obggydo
amymoabu gusgmoa gadmybdo abbsg0 os 008
doo y6dmy6ydsboos6 os33doomgmo bsghmbdo
agusb. 33d3gdssn 6b0os onssdaanb smfyn60mdoon.
amymoabu 36d2bcos os amgs-36gmbsns 6b0s
agsbmm6 33d3gds, mgo 8hwmbgmbo sbs30
s6mos 0s glsdgoafoa bnogmgo
am3smygmoob 33d.
- 3s4myg608o 3d4qg ym30030b bynnnn a2y600
3g3bmo q96o5. sm amsbmo q96o5o 3s8ymo. - sm hysno 3s8ymo, 3g3bmo 5 doomn o mnydoomms
fysmao sb 1b3s boombdo. sm gya3soan mymdogmdo
s060o 306m8bg (f3ods, 46g qss s.a.) 66gdmooygmo
dsosmo 85osmbdo 306m8do (s8s66do, 6jbsosbo
3d306gob bsmgdo). - 3gmonqymso ydsmdjg 33j0b 3s8ymob aogmadsymos.
om 33j0b 3s8mo gos6os6ygmos, bsghonb0b os30os5
ss30mgmo so y6os d03smmbl 3gosmo6ygm
bs6dmbm b6gmmmbdo. -
36 yamoybmo amydoomms osbosbgymo 3300s
38ymo,56 mgbos 05265b63836500805656
4ymo 36ymo 05300,
685656 yodmo 30mbl ydmnmo
052656008056056008056056008056008056008056008056008056008056008056008056008056008056008056008056008056008056008056008056008056 -
amfymoos dmssos3bgo gno, bsdoomn, os5s86
8003066, 6bmo lssbsygmnu 80bo3085
ammogoo, mgofooss: yjns, 8bol bspongs
cos s.a. - sm gsdmooybmon dmhyndomms ssmgosqo dsusmgob dsbmmssq.
- 339ab 380mo s6 y6oos 30qmb ds80qnb 30qgb 56
y6oos b6j0mogb 60cm 60os30gdb. - 5608m3mnn anfynmdoomms yyynsqgjmo, mdoymoB
Bshongmossn390 - qoosgdoomn oos30u y6myb3cmsymg3q, mnojodym
66qao bssy63moss osdmo5sogybu 66hbo qo6ob
amhyoomms (RCD), maomol bmdo5mgo 66hbo qo6bs
s30mA-b.sdsbs 0s3do600
cos3do600m 3300000 - ng bsfo ms gdsgssnoogmo 38gmo bsdmy68s,
gsmoy600 dbmnnn no yoo, mndgms 33b qdofo80oB
aogbu mo os mdagmo 853yogomos dsl6g
dogmo ymo ymo mb s65s3wgd 0s3060030030b. b63s ("g3m bglgo") ssdssoomjmo 38gmo adodmg
8osbmo. 38gmo obg 60s oymb 85msdgymo, ma
ms3005 oJbS S0omgmo agobb33000 8f3s sb6bg
osbmo. - yom yom300030b 8admnoog o260b yomosb yomoo
a3b0sagg s6 mqglssyom sn 3sdmooyo8ds. - 3b9m do605 a8b8s, 3b9m m60mss5 s5 yssmon5
3m5sds agdmoos osd3mms 3dofo3omu. 60mbos
oysoom oomls os3osyo6s 8os86b8o5u, 8q3s5 s3bd
aodmoosbgofoysooyu, gombgob yssms 8amno3obdqoggs30.
- 56 qosy3s0 3b0mo yom jbm3o0do5 56 ssymdoa oasymdo b 36b0sdo qo0n b60b 36d0msdo.
- 0s6h6y6b00n, 6m3390nb 388mo 6n jb0ds yombl 6b0do mb. 880s65adog do800 n oomb bmymsg 88noymob bsagmgs.
- ng yombl 306b600s30 s6 ny6j8o, sdoonogm
mondmol g6j8o. - sshs0ooss aodob3o3sdo sm y6os qosyommmn 8sbssdagmo
5 obgno 603oyn, mdaogoo sosdasbub sb bmo3jymab
gbds. - sbsqmb doafoom mnoososbsbol sb 6bm30j08ol305.
- yom 60s o5sb gdoy68ymo os 6oos3b8ymo abmnnog bdoomg, osbsssg qos3o68g.
- 5h bssbso s3bao jodogno, smdsosomohou 56
6s0gob amssamngmo osbsdsjrob ad3y ysgmo. - 66 ags3bmo ygmoos 36o MAX qom6gog adqms.
- 360b ygmoa a3b8saoq g5ob aogbmo y6oos
snoom 6m98oos5 (mnojmo b oosbsdo b os
ab6n8o1o5 g6bboa d56y gmofoa doa0b33sdo). - cosyogomjob qhmbl ymo1s3b0b agss3bdo b3nmo s6
gbsos 8sobb5sb.
aoyomnoomolos
- LCD gob3ggo
- ygmo 8ygd m qoos36g,
- 3g3g3g3g3g3g3g3g3g3g3g3g3g3g3g3g3g3g3g3g3g3g3g3g3g3g3g3g3g3g3g3g3g3g3g3g3g3g3g3g3g3g3g3g3g3g3
- 3g3g3g3g3g3g3g3g3g3g3g3g3g3g3g3g3g3g3g3g3g3g3g3g3g3g3g3g3g3g3g3g3g3g3g3g3g3g3g3g3g3g3g3
- agbbgngol qocss30
- monjogob gabmogob 200330
7.0300096g6gol g00530
8. bs6gboa56b5o ydaambsuagmo bgafo
9.333800b 358g000
10. fymob sbgso
11. yymob sbo
12.6306bdo6o
00000000:
- 360000000000000000000000000000000000000000000000000000000000000000000000000000000000000000
- gomb sbodogno boadosob sbsagg qsbgygocqssfoa (3)"(4)"
- yom 3ofofofofofofofofofofofofofofofofofofofofofofofofofofofofofofofofofofofofofofofofofofofofofofofofofofofofofofofofofofofofofofofofofofo
- 36gob 206goggsb smbgmo 5bb3980005 gohygd moojmoos os doyos yocm 0gbs,
6mgmoa 203g35a 6o0mgabos dobgssagab, moogogfo5 aodmygogdoos 0s6mmsmogomol
3sdgso. -
yom gmbocog o56b0o fob os 35, bs5d hycoob 360s qosgogos.
85035: m00f95c0u oemls sddmssoymo dssmos 6bmos. dsmos 6mboocogooys300, ma ob
m35bg6s qadmaq3sso. -
600g536yqo1s3360000000000000000000000000000000000000000
- qsgmgo gomb bgygoggos
- yjfo5goo goyomgb dofo 03o,6g0sfo jgmo000
3060b b5f055g8g8b06gds
yomol s0bol do600 m6ugmo b8gosmo gocmo 6do yomol os bgaol gaojol
fodomj5b dohob goggoosbg. gomsoaaddngs o ggaemsl sn bsfoomjob.
- 8300g500 ab000006356b y9ymo.
- gdoobooo oq odobmoobgmo hyso 3060b lboobaaogam bolgdaa bdo bdo 90806-odno ngolagob ag33cmn.
3000000b 150000000000000000000000
yom yjg3000s yjg00ab yjg00b yj6000: yom s30mssyj6yj90u mndjmoa aodmyg3sb,
30mssyno 8aamn03b b0b03s
- 1000000000000000000000000000000000000000000000000000000000
30 6896g 600 b60b 656s6g6d6o 66 gogogogogogg 36606b6g6g6o 60000
36035g 8000000000000000000000000000000
Qgogogolag
gombogmgbcnobabbsba6dmo3g0s, gomgolagdaqga, 3a2g2g2g2g2g2g2g2g2g2g2g2g2g2g2g2g2g2g2g2g2g2g2g2g2g2g2g2g2g2g2
gagagagagagagagagagagagagagagagagagagagagagagagagagagagagagagagagagagagagagagagagagagagagagagagagagagagagagagagagag
gom gol yosms. yom 36b oog bngn 8bb00 jgmo
gom. dugyogg gagbgyogog bojgsbgs, gagcgo 30 oaslsbgyo gsbnygog. gombsdofoa
Jbmoqmoafo600,6oos 8gbo33soaamsdmo.
QsBg03g03g0 QsDn3C
y6d85qo105, ydoomnogon gom qgbo hysmog5 99 gongon, b53d u3dsmbg 888no
a a a a a a a a a a a a a a a a a a a a a a a a a a a a a a a a a a a a a a a a a a a a a a a a a a a a
2015 11
2015
2015
2015
2015
2015
-
3660000000000000000000000000000000000000000000000 - 355b 355b255b255b255b255b255b255b255b255b255b255b255b255b255b255b255b255b255b255b255b255b255b255b255b255b255b
-
gddgmo 00 gddgmo 66000000000000000000000000000000000000000000000000000000000000000000000000000000000000000000000000000
-
8888888888888888888888888888888888888888888
-
oxbo 600g500g5 600b sbngcngsb 600g600g600b gbsbsb 600g600g600b 600g600g600b 600g600g600b 600g600g600b 600g600g600b 600g600g600b 600g600g600b 600g600g600b 600g60o8o8o8o8o8o8o8o8o8o8o8o8o8o8o8o8o8o8o8o8o8o8o8o8o8o8o8o8o8o8o8o8o8o8o8o8o8o8o8o8o8o8o8o8o8o8o8o8o8o8o
gssssssssssssssssssssssssssssssssssssssssssssssssssssssssssssssssssssssssssssssssssssssssssssssssssssssssssssssssssssssssssssssssssssssssssssssssssssssssssssssssss
aegbogagcoggagbog (PE) 36390o y60s y6y600000000000000000000000000000000000000000000000000000000000000000000000000000000
68 2000000000000000000000000000000000000000000000000000000000
aabg 8888888888888888888888888888888888888888888
KARTA GWARANCYJNA
- GENERAL SAFETY CONDITIONS
- DEVICE DESCRIPTION
- PREPARATION:
- FILLING WITH WATER
- FIRSTUSE
- WASHER FUNCTION
- STEAM IRONING FUNCTION
- STEAM EJECTION FUNCTION
- VERTICAL STEAM IRONING FUNCTION
- SELF-CLEANING FUNCTION
- ANTI-LIMESCALE SYSTEM
- ANTI-DRIP SYSTEM
- AUTO SHUT-OFF SYSTEM
- AFTER PRESSING:
- CLEANING AND MAINTENANCE
- TECHNICAL SPECIFICATIONS:
- Note hot surface:
- SISTEMA ANTI-CALCÁRIO
- PykoBODCTBO noIb3OBaTeJIa (RU)
- OBUHE YCIOBNA BE3OPACHOCTN BAXHBIE YKA3AHNA NO BE3OPACHOCTN NCPOJb3OBAHNA BHIMATEJIbHO IPOHTAITE N COXPAHNTE DJIY DAJIbHEIWERO NCPOJb3OBAHNA
- ONICAHNE IPIPIBOPA
- IIOIROTOBKA:
- CtoT:
- OctopoxHo, ropya nOBepxHocTb:
- Brugsanvising (DA)
- GENERELLE SIKKERHEDSBETINGELSER VIGTIGE SIKKERHEDSINSTRUKTIONER TIL BRUG LAES OMHYGGELIGT OG GEM TIL SENERE BRUG
- VAŽNE SIGURNOSNE UPUTE ZA UPOTREBU
- PAŽLJIVO PROČITAJE I SACUVAJTE ZA BUDUĆU REFERENCU
- ПОЛHEБЕ CO BODA
- INPBA YIOTPEBA
- ФУHКЛИJA3A CyBO NEPJIAHbE(6e3 napea)
- ФУHKЛИJAHAПЕЧKA
- ФУHKЛJA 3A ПЕЛАБЕ CO NAPEA
- ФУHКЛИJAHAПAPEA
- ФУHKUJIA 3A BEPTIKAJHO IENJIAHBE CO NAPEA
- ФУHКЛИJA3ACAMOΥNCTEΗБ
- CINCTEM IIPOTIB BAP
- CNCTEMIPTIBKANEH
- CNCTEM 3A ABTOMATCKO NCKJyUBAHcE
- NO NENJIABETO:
- CHCTEHEIOOPKYBAHBE
- Bhimahne, XeSha Ka NobpunHa:
- CHIUEHHRAOBCJYROBYBAHH
- TEXHIUHDAHI:
- О��선목, 빼다 훨선목:
- y6s0g2000 300b000 805b00d3s00 8dy60b030b
- KARTA GWARANCYJNA
Brand : ADLER
Model : AD 5054
Category : Iron