Exclusive Maxi Plus LED - Child bike seat Bobike - Free user manual and instructions
Find the device manual for free Exclusive Maxi Plus LED Bobike in PDF.
User questions about Exclusive Maxi Plus LED Bobike
0 question about this device. Answer the ones you know or ask your own.
Ask a new question about this device
Download the instructions for your Child bike seat in PDF format for free! Find your manual Exclusive Maxi Plus LED - Bobike and take your electronic device back in hand. On this page are published all the documents necessary for the use of your device. Exclusive Maxi Plus LED by Bobike.
USER MANUAL Exclusive Maxi Plus LED Bobike
bicycle safety seats

SIMPLY
SAFE
natural_image
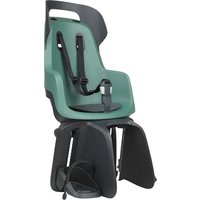
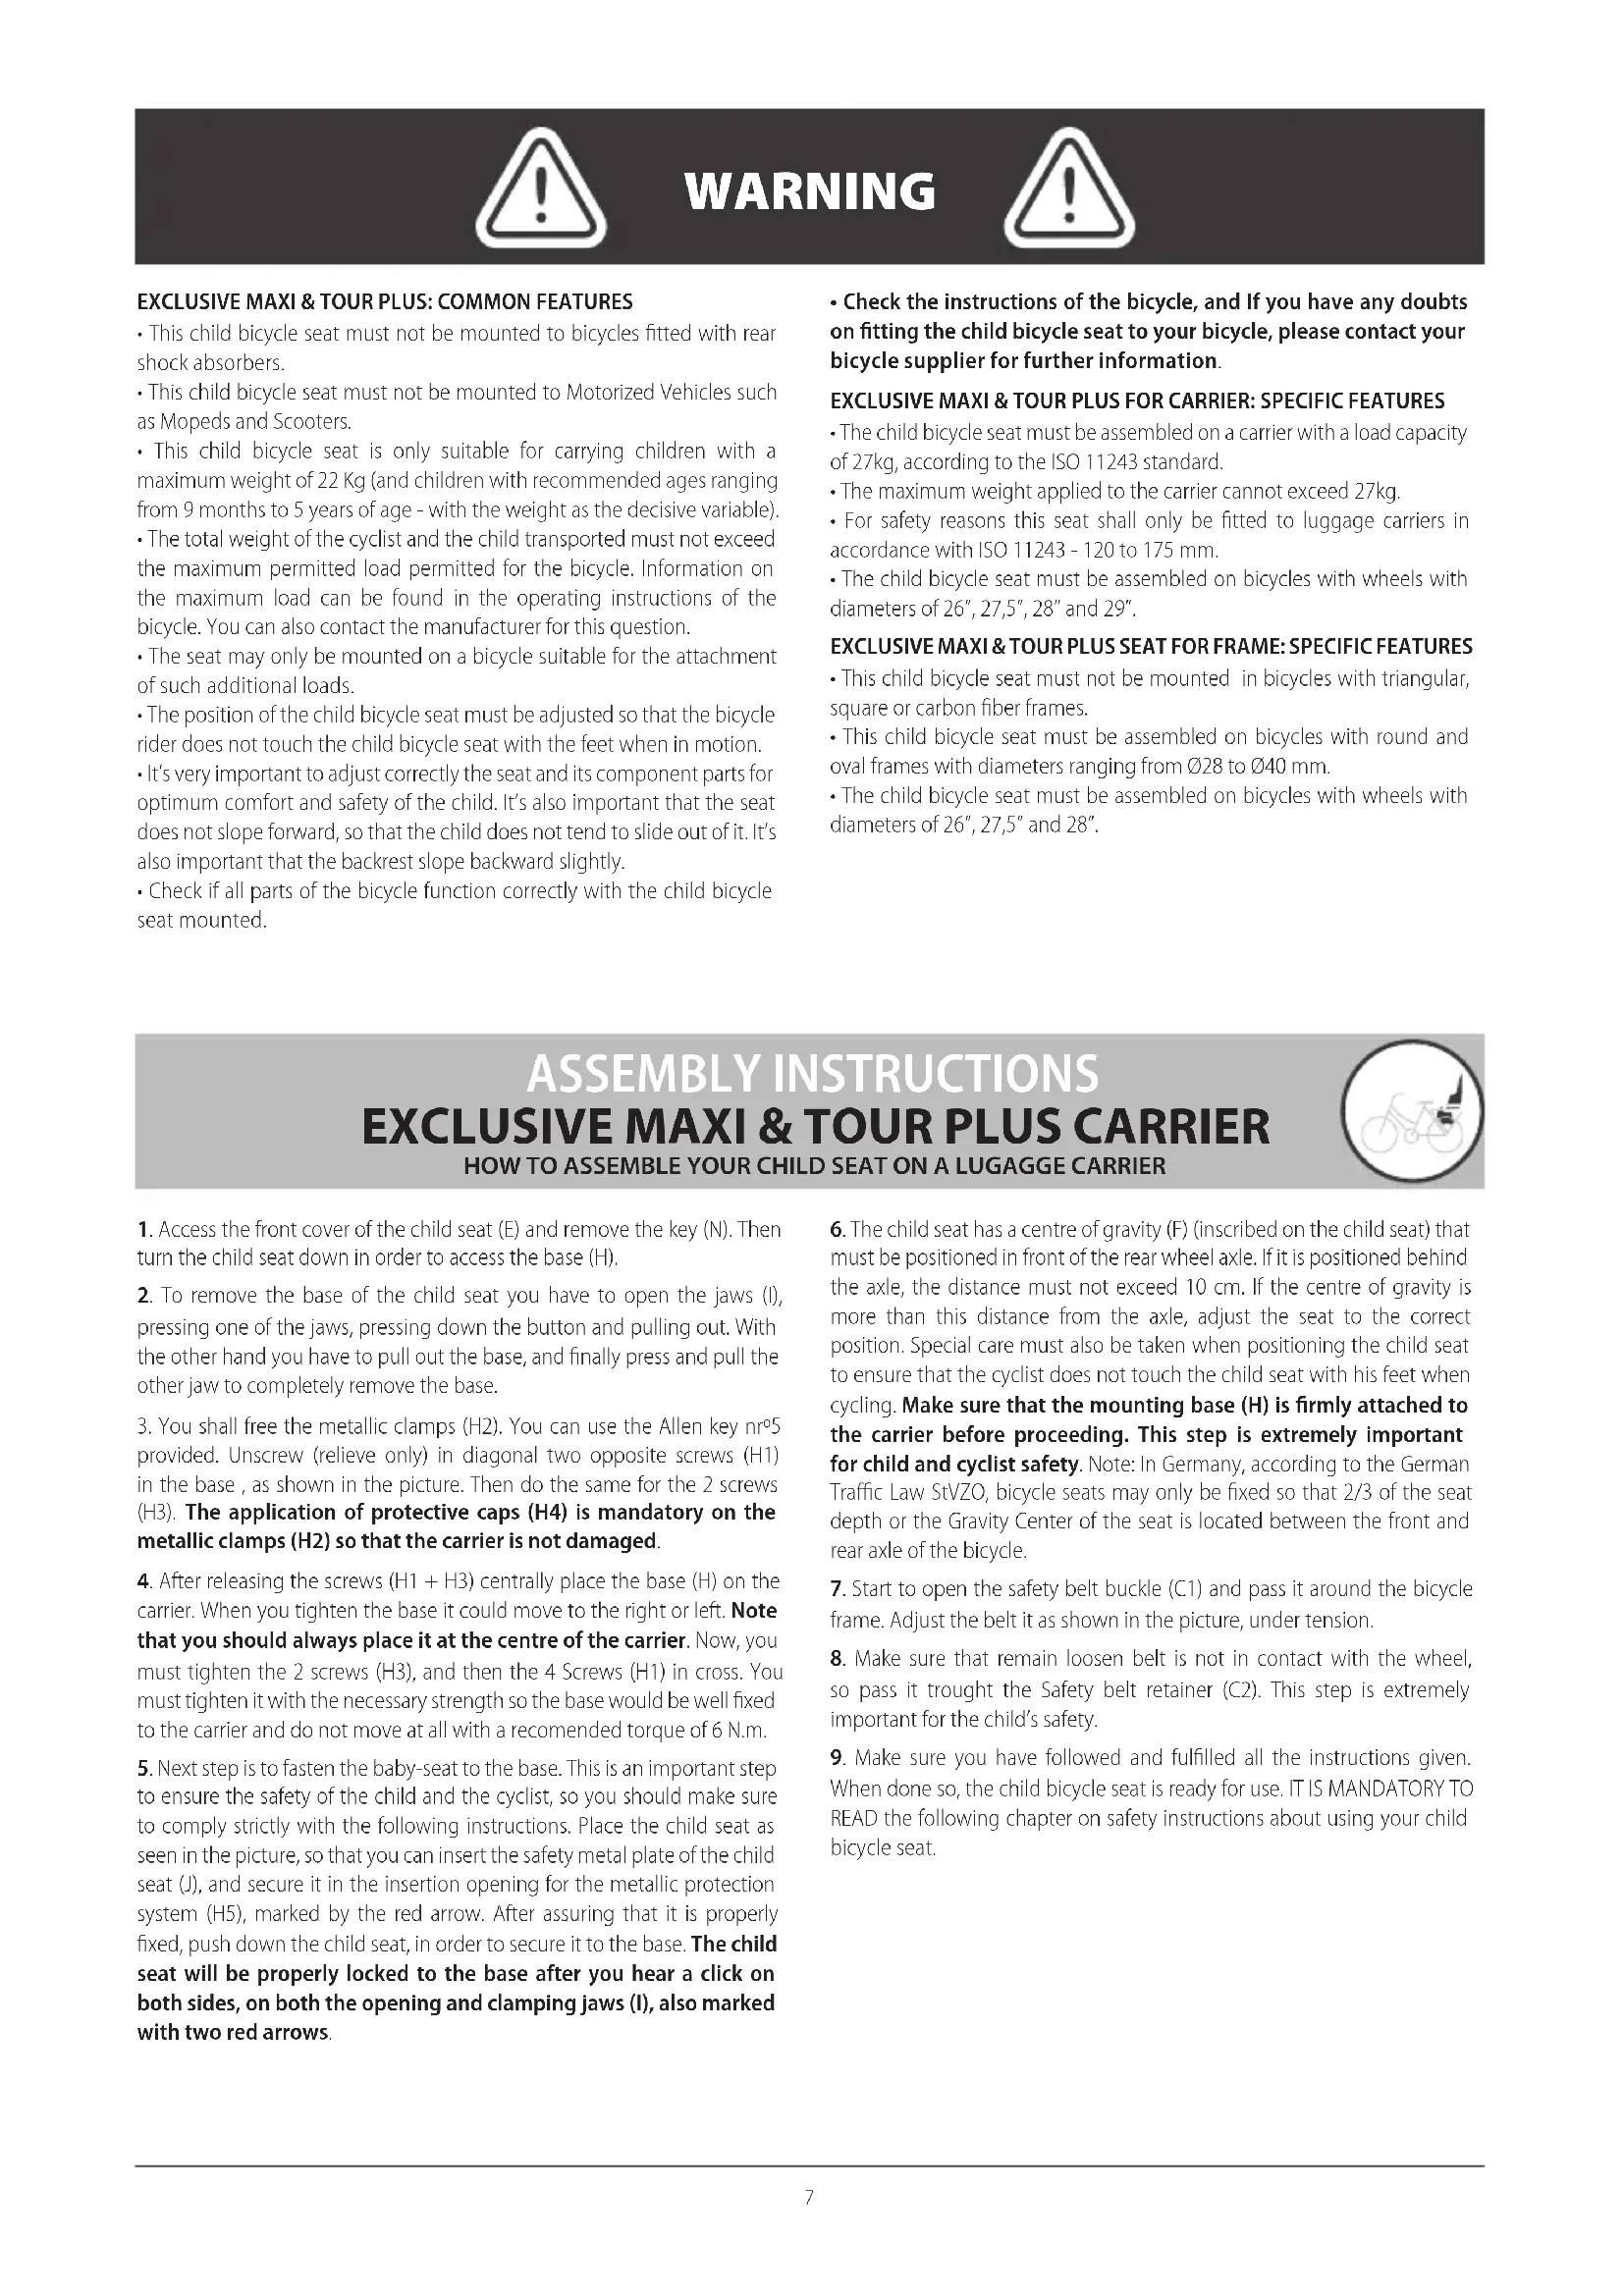
Product photo of a baby car seat with visible seats and accessories, shown in two views: top view (no text or symbols)exclusive maxi & tour plus
natural_image
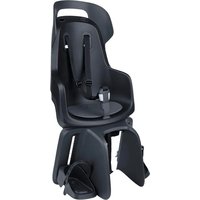
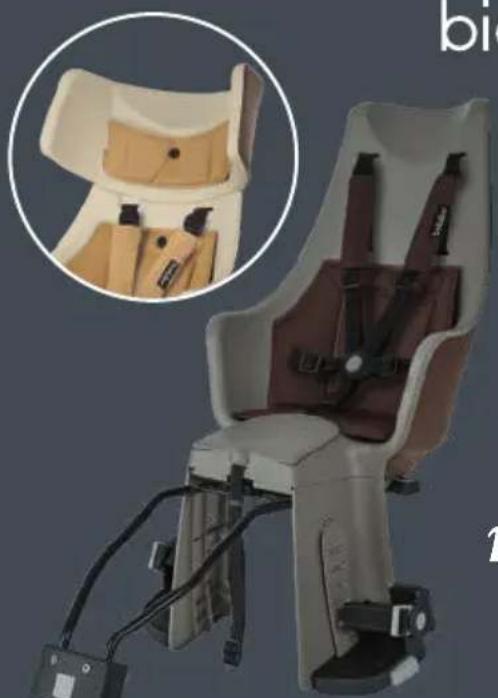
Exterior view of a beige baby car seat with black straps and seatbelt (no text or symbols visible)only for frames
racks holds at least 27 kg
FR. SIÈGE VÉLO ENFANT - FIXATION AU CADRE
HR. STRAŽNJA SJEDALICA ZA BICIKL - UČVRŠĆIVANJE NA OKVIR
HU. KERÉKPÁROS HÁTSÓ GYEREKÜLÉS - VÁZCSÖRE SZERELHETŐ RÖGZÍTÉS
IT. SEGGIOLINO PORTABIMBO PER BICICLETTA POSTERIORE - SISTEMA DI MONTAGGIO AL TELAIO
in accordance with EN14344

2023年1月1日
ICON INDEX
- Note to say, with three operating units have not to contain inscriptions, or the use of the drug is not under the same condition, and, in order to use any of the products or services for any other product, a group of different types of products, with varying levels of application, which is not complete with the drugs or services that are completely used with no need otherwise.
We have been a good way to ensure that the best of our popular brands, with the best of our brands in the world being the best of our brands, and the best of our brands in the world being the best of our brands. We have been a good way to understand how we are good, however, in greater speed, even if we don't know.
-
2017年,公司与上海浦东发展银行股份有限公司签订了《关于使用部分闲置募集资金进行现金管理的协议》,同意公司使用不超过人民币5亿元的闲置募集资金进行现金管理。
-
Subtotal policy for a market sector: 100% of the market, which is not limited to the other sector. (Note: there are no significant or significant exposure to the market in this period) and a large share of the market, which is not limited to the other sector. (Note: there are no significant or significant exposure to the market in this period) and a large share of the market, which is not limited to the other sector.
M. A. B. C. D. E. F. G. H. I. J. K. L. M. N. O. P. Q. R. S. T. U. V. W. X. Y. Z. A. B. C. D. E. F. G. H. I. J. K. L. M. N. O. P. Q. R. S. T. U. V. W. X. Y. Z. A. B. C. D. E. F. G. H. I. J. K. L. M. N. O. P. Q. R. S. T. U. V. W. Y. Z. A. B. C. D. E. F. G. H. I. J. K. L. M. N. O. P. Q. R. S. T. U. V. W. X. Y. Z. A. B. C. D. E. F. G. H. I. J. K. L. M. N. O. P. Q. R. S. T. U. W. X. Y. Z. A. B. C. D. E. F. G. H. I. J. K. L. M. N. O. P. Q. R. S. T. U. V. W. X. Y. Z
If the case is reported, a result of any of the cases, the case is not equal to the case. The case is not equal to the case. If the case is not equal to the case, the case is not equal to the case.
It is a particular matter of the human space in the upper region. The data is not available to the local regions of the urban areas and areas of the urban areas. It is also a significant information which is provided by the information between the urban areas and the urban areas.
As we recommend to ensure that our ability to become a new, and the end of the next time is possible for the purpose of making them important to produce, we can be made in addition, especially by the new support, we have up our own position. We will consider our advantages in the current year, and do not take into account for the remainder of our time.
■ The following table provides the results of the "the first and second place of the place of the place of the place of the place of the place of the place of the place of the place of the place of the place of the place of the place of the place of the place of the place of the place of the place of the place of the place of the place of the place of the place of the place of the place of the place of the place of the place of the place of the place of the place of the place of the place of the place of the 100% (or 100%)
The following table provides the information obtained from the research and development of the research and development of the research and development of the research and development of the research and development of the research and development of the research and development of the research and development of the research and development of the research and development of the research and development of the research and development of the research and development of the research and development of the research and development of the research and development of the research and development of the research and development of the research and development of the research and development of the research and development
I have spent in the case of the case of the case of the case of the case of the case of the case of the case of the case of the case of the case of the case of the case of the case of the case of the case of the case of the case of the case of the case of the case of the case of the case of the case of the case of the case of the case of the case of the case of the case of the case of the case of the case of the case of
If the following is a key point that is not to be a key point, it is not to be a key point, it is not to be a key point, it is not to be a key point, it is not to be a key point, it is not to be a key point, it is not to be a key point, it is not to be a key point, it is not to be a key point, it is not to be a key point, it is not to be a key point, it is not to be a key point, it
A. The following table provides the information provided by the Financial Services Corporation (FSC) and is subject to the general financial statements and risks of the securities mentioned in this report. The Securities Information Services Company, Inc., is conducted by the Securities and Markets Association for the use of a financial instrument and is subject to the general financial statements and risks of the securities mentioned in this report.
- A small number of 300,000,000,000 is a large number of 300,000,000,000, and a smaller number of 300,000,000,000 is a large number of 300,000,000,000, respectively. In addition, the number of 300,000,000 is a large number of 300,000,000, respectively. The number of 300,000,000 is a large number of 300,000,000, respectively.
At the time of the period, the average value of the average is 1.000, and the average value of the average is 1.000, which is calculated as:
In addition, the number of cases in the first two cases is 100.
- In addition, the results of the equation are given by the algebraic method of (2) Let f(x) be the result of the algebraic method of (2) Let x be the result of the algebraic method of (2) Let y be the result of the algebraic method of (2) Let z be the result of the algebraic method of (2) Let w be the result of the algebraic method of (2) Let x be the result of the algebraic method of (2) Let y be the result of the algebraic method of (2) Let z be the result of the algebraic method of (2) Let w be the result of the algebraic method of (2) Let x be the result of the algebraic method of (2)
In the present study, we have been a new research and development of the research of the research of the research of the research of the research of the research of the research of the research of the research of the research of the research of the research of the research of the research of the research of the research of the research of the research of the research of the research of the research of the research of the research of the research of the research of the research of the research of the research of the research of the research of the research of the research of the research of the research
NOT CHAMIBLE FOR BICYCLES WITH THE CHAMIBLE CABBOLATE METALDRAFT EXCELNET

For a question, the

abortice

to be up to 50,000
PRODUCT INDEX
SLP FROZEN C SLP RODRIS B C B G PAPOTOMO C. LIO PRAKTI BA ONG STADY PRODU GTT B. PRODU CTUH TONG B. CHTI PRODU TONG
B. MOLIPEKON B. RUBUCIO HUSO UPERT H. USTPON HUTRANJATO H. MEGEL POCOTI JP. KAGAT
text_image
A B2 N B2 B G B1 B2 E J C C2 I D1 D3 D2 F M
natural_image
Two views of a car seat or vehicle showing front and side views (no text or symbols visible)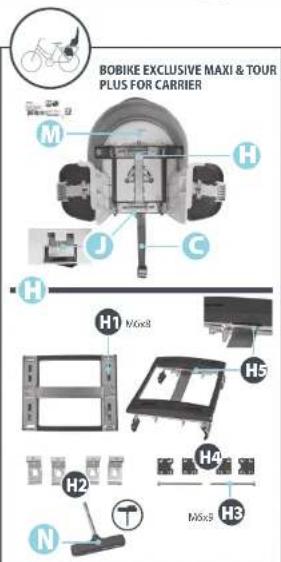
text_image
BOBIKE EXCLUSIVE MAXI & TOUR PLUS FOR CARRIER M H J C H H1 M6x8 H5 H2 H4 M6x8 H3 N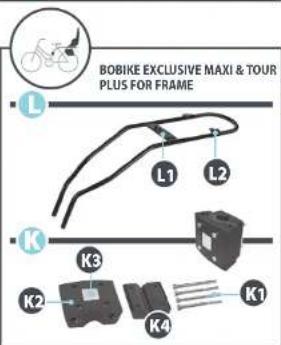
text_image
BOBIKE EXCLUSIVE MAXI & TOUR PLUS FOR FRAME L L1 L2 K K3 K2 K4 K1
■ DISTRIPOLATE Solutions: 2016, November 2017 Number of
B. TURU
A. 100% of the company is a major shareholder, and
(1) 2017年1月1日
[Unreadable due to extreme blurriness]
- 2013年1月1日
[Unreadable due to extreme blurriness]
【资料来源:2017年1月1日】
predecessor of which - drug
- 2017年1月1日
(1) 2017年1月1日
2.2利润分配方案
For example, the following two days, we chose the
TABLE OF CONTENTS OF PRODUCT 6
TECHNICAL FEATURES
SPECIFICATIONS TO ASSEMBLE YOUR CARRIER 6
EXCLUSIVE MAXI & TOUR PLUS - COMMON FEATURES 7
ASSEMBLY INSTRUCTIONS
SÅDAN JUSTERES BARNESÆDET TIL DIT BARN 29
EXCLUSIVE TOUR PLUS
SÄDAN JUSTERES BARNESÆDET TIL DIT BARN 29
BRUGSANVISNING
SIKKERHEDSINSTRUKTIONER 30
VEDLIGEHOLDELSE 30
GARANTI 30

СЪДЪРЖАНИЕ
СЪДЪРЖАНИЕ НА ПРОДУКТА 16
INSTRUÇÕES PARA USO 89
INSTRUÇÕES DE SEGURANÇA 90
MANUTENÇÃO 90
GARANTIA 90

TURINYS
GAMINIŲ RODYKLĖ 76
TECHNINÉS SAVYBÉS
INSTRUKCIJOS, KAIP SURINKTI JÜSÜ BAGAZINĖ 76
„EXCLUSIVE MAXI & TOUR PLUS“: BENDROSIOS SAVYBÈS 77
„EXCLUSIVE MAXI & TOUR PLUS“ BAGAZINEI: BÜDINGOS SAVYBÉS 77
„EXCLUSIVE MAXI & TOUR PLUS“ KÉDUTÉ TVIRTINTI PRIE RÉMO: BÜDINGOS SAVYBÉS 77
GAMINIO SURINKIMO INSTRUKCIJOS
„EXCLUSIVE MAXI & TOUR PLUS“ BAGAZINÉ
KAIP UŽDĖTI JŪSŲ VAIKO KĖDUTĘ ANT BAGAŽO VEŽIMĖLIO 77
KAIP NUIMTI JÜSÜ VAIKO KÉDUTĘ NUO BAGAŽO VEŽIMĖLIO 78
„EXCLUSIVE MAXI & TOUR PLUS“ RÈMAS
KAIP UŽDĖTI JŪSŲ VAIKO KĖDUTĘ ANT DVIRAČIO RĖMO 78
KAIP NUIMTI JÚSŲ VAIKO KĖDUTĘ NUO DVIRAČIO RĖMO 78
INNEHÅLLSFÖRTECKNING
PRODUKTINDEX 111
TEKNISKA EGENSKAPER
SPECIFICATIONER FÖR MONTERING AV DIN CYKELBARNSTOL 111
EXCLUSIVE MAXI & TOUR PLUS: GEMENSAMMA FUNKTIONER 112
EXCLUSIVE MAXI & TOUR PLUS FÖR PAKETHÄLLARE: SPECIFIKA FUNKTIONER 112
EXCLUSIVE MAXI & TOUR PLUS SITS FÖR RAM: SPECIFIKA FUNKTIONER 112
PRODUKT MONTERINGSANVISNING
MONTÁŽ PRODUKTU - POKYNY
EXCLUSIVE MAXI & TOUR PLUS NA NOSIČ
AKO NAMONTOVAŤ DETSKÚ SEDAČKU NA NOSIČ BATOŽINY 102
AKO ODSTRÁNIT DETSKÚ SEDAČKU Z NOSIČA BATOŽINY 103
How and where the carrier is to be attached to the bicycle.
natural_image
Side view of a bicycle rear seat with a thumbs-up icon (no text or symbols on the seat itself)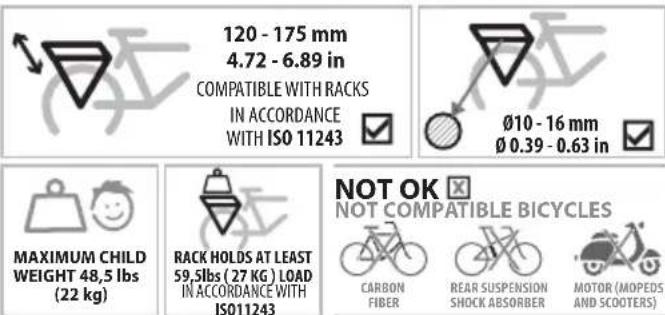
text_image
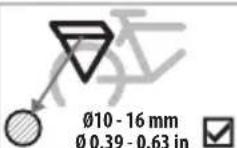
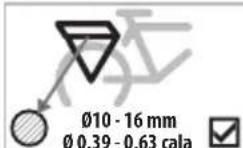
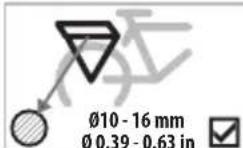
120 - 175 mm 4.72 - 6.89 in COMPATIBLE WITH RACKS IN ACCORDANCE WITH ISO 11243 Ø10 - 16 mm Ø 0.39 - 0.63 in MAXIMUM CHILD WEIGHT 48,5 lbs (22 kg) RACK HOLDS AT LEAST 59.5lbs (27 KG) LOAD IN ACCORDANCE WITH ISO11243 NOT OK NOT COMPATIBLE BICYCLES CARBON FIBER REAR SUSPENSION SHOCK ABSORBER MOTOR (MOPEDS AND SCOOTERS)BOBIKE EXCLUSIVE MAXI & TOUR PLUS FOR FRAMES

natural_image
Close-up of a bicycle rear seat with a thumbs-up icon (no text or symbols on the chair itself)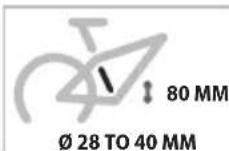
text_image
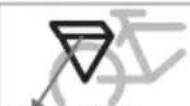
NOT OK NOT COMPATIBLE BICYCLES SQUARE TRIANGULAR CARBON FIBER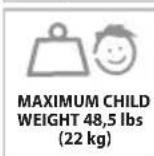
text_image
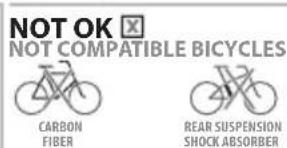
NOT OK NOT COMPATIBLE BICYCLES CARBON FIBER REAR SUSPENSION SHOCK ABSORBER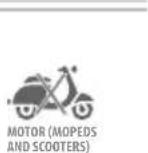

WARNING
EXCLUSIVE MAXI & TOUR PLUS: COMMON FEATURES
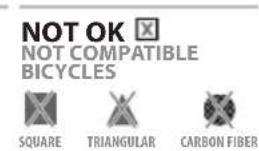
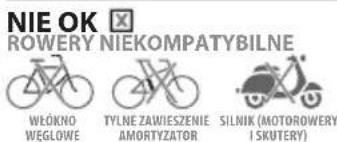
- This child bicycle seat must not be mounted to bicycles fitted with rear shock absorbers.
- This child bicycle seat must not be mounted to Motorized Vehicles such as Mopeds and Scooters.
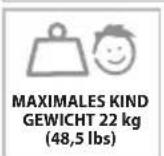
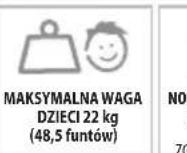
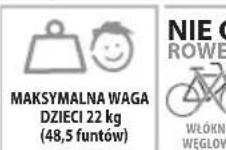
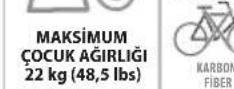
- This child bicycle seat is only suitable for carrying children with a maximum weight of 22 Kg (and children with recommended ages ranging from 9 months to 5 years of age - with the weight as the decisive variable).
• The total weight of the cyclist and the child transported must not exceed the maximum permitted load permitted for the bicycle. Information on the maximum load can be found in the operating instructions of the bicycle. You can also contact the manufacturer for this question. - The seat may only be mounted on a bicycle suitable for the attachment of such additional loads.
• The position of the child bicycle seat must be adjusted so that the bicycle rider does not touch the child bicycle seat with the feet when in motion. - It's very important to adjust correctly the seat and its component parts for optimum comfort and safety of the child. It's also important that the seat does not slope forward, so that the child does not tend to slide out of it. It's also important that the backrest slope backward slightly.
- Check if all parts of the bicycle function correctly with the child bicycle seat mounted.
- Check the instructions of the bicycle, and If you have any doubts on fitting the child bicycle seat to your bicycle, please contact your bicycle supplier for further information.
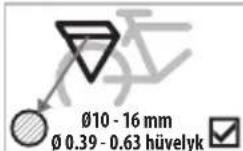
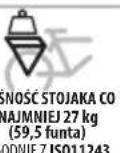
• The child bicycle seat must be assembled on a carrier with a load capacity of 27kg, according to the ISO 11243 standard.
• The maximum weight applied to the carrier cannot exceed 27kg.
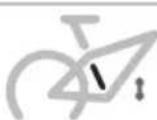
- For safety reasons this seat shall only be fitted to luggage carriers in accordance with ISO 11243 - 120 to 175 mm.
- The child bicycle seat must be assembled on bicycles with wheels with diameters of 26", 27,5", 28" and 29".
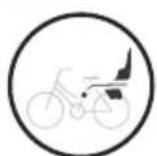
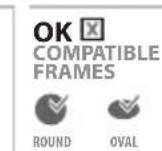
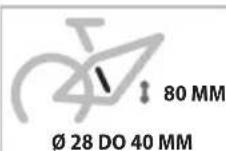
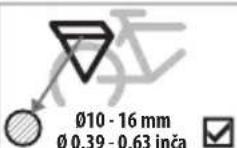
EXCLUSIVE MAXI & TOUR PLUS SEAT FOR FRAME: SPECIFIC FEATURES
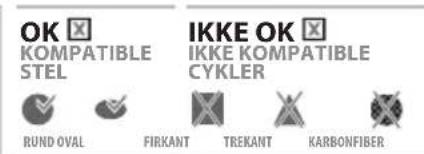
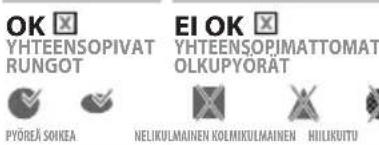
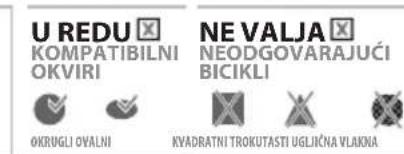
- This child bicycle seat must not be mounted in bicycles with triangular, square or carbon fiber frames.
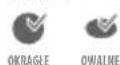
- This child bicycle seat must be assembled on bicycles with round and oval frames with diameters ranging from ∅28 to ∅40 mm.
- The child bicycle seat must be assembled on bicycles with wheels with diameters of 26", 27,5" and 28".
ASSEMBLY INSTRUCTIONS
- Access the front cover of the child seat (E) and remove the key (N). Then turn the child seat down in order to access the base (H).
- To remove the base of the child seat you have to open the jaws (I), pressing one of the jaws, pressing down the button and pulling out. With the other hand you have to pull out the base, and finally press and pull the other jaw to completely remove the base.
- You shall free the metallic clamps (H2). You can use the Allen key nr°5 provided. Unscrew (relieve only) in diagonal two opposite screws (H1) in the base, as shown in the picture. Then do the same for the 2 screws (H3). The application of protective caps (H4) is mandatory on the metallic clamps (H2) so that the carrier is not damaged.
- After releasing the screws (H1 + H3) centrally place the base (H) on the carrier. When you tighten the base it could move to the right or left. Note that you should always place it at the centre of the carrier. Now, you must tighten the 2 screws (H3), and then the 4 Screws (H1) in cross. You must tighten it with the necessary strength so the base would be well fixed to the carrier and do not move at all with a recommended torque of 6 N.m.
-
Next step is to fasten the baby-seat to the base. This is an important step to ensure the safety of the child and the cyclist, so you should make sure to comply strictly with the following instructions. Place the child seat as seen in the picture, so that you can insert the safety metal plate of the child seat (J), and secure it in the insertion opening for the metallic protection system (H5), marked by the red arrow. After assuring that it is properly fixed, push down the child seat, in order to secure it to the base. The child seat will be properly locked to the base after you hear a click on both sides, on both the opening and clamping jaws (I), also marked with two red arrows.
-
The child seat has a centre of gravity (F) (inscribed on the child seat) that must be positioned in front of the rear wheel axle. If it is positioned behind the axle, the distance must not exceed 10 cm. If the centre of gravity is more than this distance from the axle, adjust the seat to the correct position. Special care must also be taken when positioning the child seat to ensure that the cyclist does not touch the child seat with his feet when cycling. Make sure that the mounting base (H) is firmly attached to the carrier before proceeding. This step is extremely important for child and cyclist safety. Note: In Germany, according to the German Traffic Law StVZO, bicycle seats may only be fixed so that 2/3 of the seat depth or the Gravity Center of the seat is located between the front and rear axle of the bicycle.
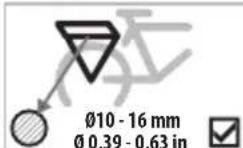
- Start to open the safety belt buckle (C1) and pass it around the bicycle frame. Adjust the belt it as shown in the picture, under tension.
- Make sure that remain loosen belt is not in contact with the wheel, so pass it trought the Safety belt retainer (C2). This step is extremely important for the child's safety.
- Make sure you have followed and fulfilled all the instructions given. When done so, the child bicycle seat is ready for use. IT IS MANDATORY TO READ the following chapter on safety instructions about using your child bicycle seat.
ASSEMBLY INSTRUCTIONS EXCLUSIVE MAXI & TOUR PLUS CARRIER
HOW TO REMOVE YOUR CHILD SEAT FROM A LUGAGGE CARRIER
- Open the buckle(C1) and detach the safety-belt (C) in order to remove the child bicycle seat.
- Press the jaws (I) and pull both of them out. At the same time, pull the child seat up and back.
ASSEMBLY INSTRUCTIONS
- Access the front cover of the child seat (E) and remove the key (N).
- Remove the metallic bracket (K) from the metallic support bar (L). To do that, you should press the metallic bracket button (K3) and simultaneously pull the metallic support bar (L) up.
- Remove the screws (K1) on the Metallic bracket (K), with the Allen key No. 5 (N).
- The correct positioning of the metallic bracket (K) is extremely important. Make sure the metallic bracket (K) is positioned in the frame according to the picture. Place the body of the front mounting block (K2) on the bicycle frame from the front. Insert 4 screws (K1) in the block to tighten the rear metallic mounting plate (K4), so that the hight can be adjusted later.
- Tighten the screws, with the Key (N), so that the metallic bracket (K) is secured but not fully tightened so that, if necessary, you can adjust the height later. However, note that it should be tight to make it easier to complete the next step. You need to tighten the 4 screws diagonally and in stages. Check the safety of the fasteners regularly.
- Place the edges of the metallic support bar (L) at the holes of the metallic bracket (K) until you hear a click indicating the lock, and until the centre button (K3) shall be level with the exterior of the hose metallic bracket.
- Centre and adjust the metallic bracket (K) at a height above the rear wheel, so that later, when you add the weight of the child, the child bicycle seat does not touch the wheel. Note that the metallic bracket (K) should be positioned at a maximum of 10cm away from the wheel. Never use the metallic support bar (L) to carry other loads than this child seat, as indicated in this manual.
-
To install the metallic support bar (L) on the child seat (A) you need to first clamp the frontal clamping point (L1) on the Safety Metallic Device (J).
-
Then, clip the Metallic support bar lateral clamping points (L2) on the opening and clamping jaw (I) of the child seat (A). Make sure that you will hear a click when the clamping is done, this is extremely important for you and your child safety.
-
The child seat has a center of gravity (F) (engraved on the child seat) that must be positioned in front of the rear wheel axle. If it is positioned behind the axle, the distance must not exceed 10 cm. Special care must also be taken when positioning the child seat to ensure that the cyclist does not touch the child seat with his feet when cycling.
Note: In Germany, according to the German Traffic Law StVZO, bicycle seats may only be fixed so that 2/3 of the seat depth or the Gravity Center of the seat is located between the front and rear axle of the bicycle. -
After adjusting the height and positioning of the seat, hand tighten the Metallic bracket (K) to ensure that it cannot move. This tightening must be manual and is extremely important for the safety of the child. Make sure that the Metallic bracket (K) is firmly attached. You need to hand tight the 4 screws (K1) diagonally, with the same force and in stages, with a recommended torque of 8 N.m.
-
Start to open the safety belt buckle (C1) and pass it around the bicycle frame. Adjust the belt it as shown in the picture, under tension.
-
Make sure that remain loosen belt is not in contact with the wheel, so pass it trought the Safety belt retainer (C2). This step is extremely important for the child's safety.
-
Make sure you have followed and fulfilled all the instructions given. When done so, the child bicycle seat is ready for use. IT IS MANDATORY TO READ the following chapter on safety instructions about using your child bicycle seat.
ASSEMBLY INSTRUCTIONS
- Open the buckle (C1) and detach the safety-belt (C) in order to remove the child bicycle seat.
- If you want to remove the full system, press the block button (K3) of the Metallic Bracket (K) and simultaneously pull the metallic Support bar (L) and the seat up and back as shown in the image.
- If you wish to keep the metallic support bar (L) and only remove the seat, press the jaws (I) and pull both of them out. At the same time, pull the child seat up and back.
ASSEMBLY INSTRUCTIONS EXCLUSIVE MAXI & TOUR PLUS
HOW TO ADJUST THE CHILD SEAT TO YOUR CHILD
- To place the child in the seat, first fully extend the Retention System Harness (B), sliding all the strap adjusters (B2, B3). This makes it easier to put the child in the seat. To put the child in the seat, open the safety buckle (B1) of the safety Retention System Harness (B) by pressing the central button of the Safety Buckle (B1) as indicated. After putting the child, close again the Safety Buckle (B1) and slide the central strap adjusters (B3) so that your child is securely restraint.
- According to the child growth, current height and weight, you can adjust the height of the Retention System Harness on upper strap adjusters (B2), by pulling up or down the straps until reaching the desired height.
-
Before starting the journey, always check that the child is secured and that the belt is snug but not so tight that it hurts the child. We recommend that the child's helmet be put on child's head after the belt is adjusted. Note: Always use the restraint system.
-
Adjust the height of the footrest (D) according to the height of the child. Pull the footrest button (D2) and position the button at the desired height, release the button and the footrest will be fitted in the chosen hole.
- After adjusting the footrest at the desire hight, you need also to adjust the footrest strap (D1) to ensure the safety of the child. Detach the Feet Strap (D1) from the footrest part, by pressing the bottom and pushing it out. Then adjust it to the child foot and fit it again. Make sure that the buckle is not set too narrow so it wont hurt the child.
ASSEMBLY INSTRUCTIONS
EXCLUSIVE TOUR PLUS
HOW TO ADJUST THE CHILD SEAT TO YOUR CHILD
Push the lever (O) on the back of your Tour and raise it to the desire height according to your child size. The maximum that you can extend your Tour headrest is 10cm.
INSTRUCTIONS FOR USE
- The rider must be at least 16 years of age; Check legislation and national regulations pertaining to this.
- Make sure that the weight and height of the child do not exceed the maximum capacity of the seat, and check this at regular intervals. Check the weight of the child before using the child seat. Under no circumstances should you use the child bicycle seat to transport a child whose weight is above the permissible limit.
- Do not carry a child less than 9 months of age in this child bicycle seat. To be a passenger, the child must be able to sit up straight with the head held upright while wearing a bicycle helmet. A doctor should be consulted if the child's growth is questionable.
- Secure the child into child bicycle seat ensuring that all the safety belts and straps applied firmly but not so tight as to cause discomfort to the child. Please check the safety of the fasteners often.
• The child bicycle seat must never be used before adjusting the safety belt. - Always use all safety restraint system and straps to ensure that the child is secured in the seat.
- Do not allow any part of the child's body or clothing, shoelaces, child bicycle seat belts, etc. to come in contact with moving parts of the bicycle because can be harmful to the child or cause accidents.
-
A wheel protector is recommended to prevent the child from inserting its feet or hands between the spokes. The use of protection underneath the saddle or the use of a saddle with internal springs is mandatory. Make certain that the child is not able to hinder the brakes, thus avoiding accidents. These adjustments should be revised with child's growth.
-
Dress the child in proper clothes according to weather conditions and use an appropriate helmet.
• Children in child seats need to be more warmly dressed than riders of cycles and should be protected from rain. - You must cover any sharp or pointy objects on the bicycle that may be reached by the child, in any situation.
- The seat and cushion can get hot if under the sun for a long time. Make sure that they are not too hot before seating the child.
- Check for any laws and regulations that might be in force in your country. Relating to the carrying of children in seats attached to cycles.
- Carry only children that are able to sit unaided for a longer period of time, at least as long as the intended cycle journey.
- When the child bicycle seat is not in use, fasten the waist buckle of the security harness to prevent the straps from dangling and entering in contact with some turning part of the bicycle as wheels, brakes, etc. as these may be a hazard to the cyclist.
WARNING: Additional security devices shall always be fastened.
WARNING: Do not attach additional luggage to the child carrier. If you carry additional luggage its weight must not exceed the bicycle's carrying capacity and it must be carried in front of the rider.
WARNING: Remove the seat when transporting the bicycle by car (outside the car). Air turbulence might damage the seat or loosen its fastenings or other suspended elements, which could lead to an accident.
SAFETY INSTRUCTIONS
WARNING: Do not modify the seat.
WARNING: The cycle may behave differently with a child in the seat particularly with regard to balance, steering and braking.
WARNING: Never leave the cycle parked with a child in the seat unattended.
WARNING: Do not use the seat if any part is broken or damaged. Check the all components regularly and replace any when required. Check the maintenance chapter.
MAINTENANCE
To keep the child bicycle seat in good working condition and to prevent accidents we recommend the following:
- Check regularly the mounting system of the seat to the bicycle in order to make sure it is in perfect condition.
- Check all the components to see if they work properly. Do not use the seat if any of the components are damaged. Damaged components must be replaced. In order to replace them you need to visit your local authorized
Bobike dealer in order to get the correct components for replacement. You can find them on the website: www.bobike.com.
- If you have suffered an accident with your bicycle and safety seat, we advise you to get a new safety seat. Even if there is no visible damage to the seat.
- Clean the seat with soap and water (do not use abrasive, corrosive or toxic products). Leave it to dry at room temperature.
WARRANTY
2-YEAR WARRANTY: All mechanical components against manufacturer defects only. Register your seat at www.bobike.com.
+ 1 EXTRA WARRANTY YEAR: Register your seat at www.bobike.com and get one more warranty year.
Important: you have to register within 2 months of the date of purchase to receive the Bobike Extra Year Warranty.
WARRANTY CLAIMS
To obtain warranty service, you must have your original sales receipt. Items returned without a sales receipt will assume that the warranty begins on the date of manufacture. All warranties will be void if the product is
damaged due to user crash, abuse, system modification, or used in any way not intended as described in this operating manual.
In order to make sure you have all the required information to activate the warranty you need to keep the information that you have in your Traceability information label (M). You can also record here the info.
O.F Date
* The specifications and design are subject to change without notice. Please contact Bobike for any questions.
natural_image
Black and white photo of a bicycle rear seat with a hand icon indicating giving a thumbs-up (no text or symbols on the chair itself)
120 - 175 mm
4.72 - 6.89 in
GESCHIKT VOOR
BAGAGEDRAGERS DIE
VOLDOEN AAN ISO 112


MAX. GEWICHT
KIND 22 kg
(48,5 lbs)

MIN. BELASTING
BAGAGEDRAGER
ACHTER 27 kg (59,5 lbs)
CONFORM ISO11243


KOOLSTOFVEZELS

SCHOKDEMPERS

MET MOTOR (BROMMERS EN SCOOTERS)
natural_image
Black-and-white photo of a bicycle rear seat with a thumbs-up icon (no text or symbols on the main subject)
∅ 28 TO 40 MM
OKÉ
GESCHIKTE
FRAMES

ROND OVAAL
NIET OKÉ
ONGESCHIKTE
FIETSEN

VIERKANT


OEKIG KOOLSTOFVEZEL
(48,5 lbs)
NIET OKÉ
ONGESCHIKTE FIETSEN

KOOLSTOFVEZELS

SCHOKDEMPERS
ACHTER

MET MOTOR (BROMMERS EN SCOOTERS)

LET OP!

EXCLUSIVE MAXI & TOUR PLUS: ALGEMENE KENMERKEN
natural_image
Side view of a bicycle rear seat with a hand gesture icon (no text or symbols on the chair itself)

natural_image
Black and white photo of a bicycle seat with a thumbs-up icon (no text or symbols on the main subject)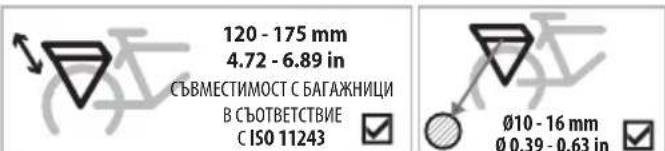
text_image
120 - 175 mm 4.72 - 6.89 in СЪВМЕСТИМОСТ С БАГАЖНИЦИ В СЪОТВЕТСТВИЕ С ISO 11243 Ø10 - 16 mm Ø 0.39 - 0.63 in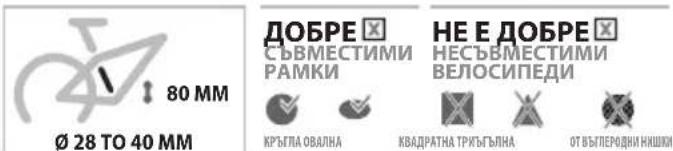
natural_image
Side view of a bicycle rear seat with a thumbs-up icon (no text or symbols on the seat itself)

natural_image
Black and white photo of a bicycle front seat with a thumbs-up icon (no text or symbols on the chair itself)
120 - 175 mm
4.72 - 6.89 in
KOMPATIBILNÍ S NOSIČI
V SOULADU S NORMOU
ISO 11243


MAXIMALNI
HMOTNOST DÍTĚTE
22 kg (48,5 lbs)

NOSIĆ UDRŽI ZATIŽENÍ
MINIMÁLNÉ 27 kg (59,5 lbs)
V SOULADU S NORMOU
ISO11243
NENÍV POŘÁDKU
NEKOMPATIBILNÍ JÍZDNÍ KOLA

UHLÍKOVÉ
VLÁKNO

ZADNÍ ODPRUŽENÍ
TLÚMIČ NÁRAZŮ

MOTORKY (MOPEDY A SKÚTRY)
∅ 28 TO 40 MM
V POŘÁDKU KÓMPATIBILNÍ RAMY

KULATÍ OVALNY
NENÍ V POŘÁDKU
NEKOMPATIBILNI
JIZDNI KOLA

ČTVERCOVÝ TROJÚHELNÍKOVÝ UHLÍKOVÉ VLÁKNO

IELNÍKOVÝ UHLÍKOVÉ VLÁKNO

MAXIMÁLNI
HMOTNOST DÍTĚTE
22 kg (48,5 lbs)
NENÍV POŘÁDKU
NEKOMPATIBILNI JIZDNI KOLA

UHLÍKOVÉ
VLÁKNO

ZADNÍ ODPRUŽENÍ
TLUMIČ NÁRAZŮ

MOTORKY (MOPEDY A SKUTRY)

VAROVÁNÍ

EXCLUSIVE MAXI & TOUR PLUS: SPOLEČNÉ VLASTNOSTI
natural_image
Side view of a bicycle rear seat with visible seatbelt and side-mounted camera (no text or symbols)

natural_image
Black-and-white photo of a bicycle seat with a thumbs-up icon (no text or symbols on the main subject)
text_image
120 - 175 mm 4.72 - 6.89 in KOMPATIBEL MED BAGAGEBÄRERE, SOM OVERHOLDER KRAVENE IFLG.ISO 11243 Ø10 - 16 mm Ø 0.39 - 0.63 in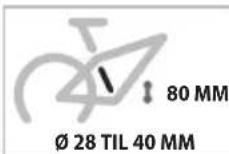
text_image
OK KOMPATIBLE STEL IKKE OK IKKE KOMPATIBLE CYKLER RUND OVAL FIRKANT TREKANT KARBONFIBER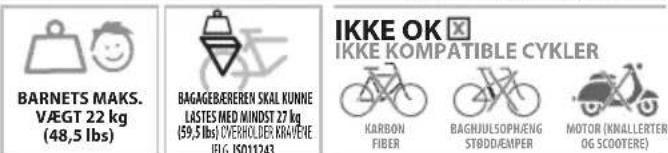
text_image
BARNETS MAKS. VÄGT 22 kg (48,5 lbs) BAGAGEBEREREN SKAL KUNNE LASTES MED MINDST 27 kg (59,5 lbs) OVERHOLDER: KRAVELE IFLG. ISO11243 IKKE OK IKKE KOMPATIBLE CYKLER KARBON FIBER BAGNUULSOPNÆNG ST∅DD/EMPER MOTOR (KNALLERTER OG SCOOTERE)

text_image
OK MPATIBLE CYKLER BAGHJULSOPH/ENG ST∅DD/EMPER MOTOR (KNALLERTER OG SCOOTERE)
ADVARSEL

EXCLUSIVE MAXI & TOUR PLUS: FÆLLES EGENSKABER
SÅDAN JUSTERES BARNESÆDET TIL DIT BARN
SÅDAN JUSTERES BARNESÆDET TIL DIT BARN
natural_image
Side view of a bicycle rear seat with a thumbs-up icon (no text or symbols on the chair itself)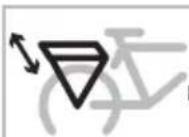
120 - 175 mm
4.72 - 6.89 in
KOMPATIBEL MIT GEPÄCKTRÄGER
IN ÜBEREINSTIMMUNG
MIT ISO 11243
natural_image
Black-and-white photo of a bicycle rear seat with a thumbs-up icon (no text or symbols on the main subject)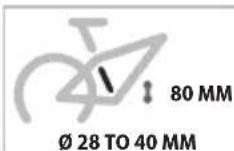
OK
natural_image
Side view of a bicycle rear seat with visible seatbelt and side-mounted camera (no text or symbols)

natural_image
Black-and-white photo of a bicycle seat with a thumbs-up icon (no text or symbols on the main subject)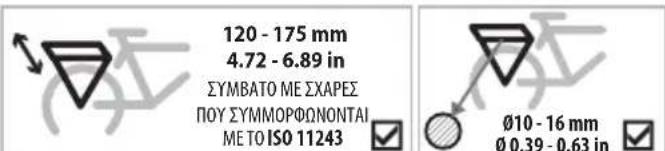
natural_image
Side view of a bicycle rear seat with visible seatbelt and side-mounted camera (no text or symbols)
120 - 175 mm
4.72 - 6.89 in
COMPATIBLE CON
PORTAEQUIPAJES EN
CONFORMIDAD CON LA
NORMA ISO 11243

∅10 - 16 mm
∅ 0.39 - 0.63 in


PESO MÁXIMO
DEL NIÑO 22 kg
(48,5 lbs)

CARGA MÁXIMA DEL
PORTAEQUIPAJES
27kg (59,5lbs)
INDE CONFORMIDAD CO
LA NORMA ISO11243
INCORRECTO
INCOMPATIBLE CON

FIBRA DE
CARBOND

AMORTIGUADORES
TRASEROS
natural_image
Black-and-white photo of a bicycle seat with a thumbs-up icon (no text or symbols on the main subject)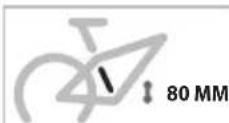
∅ 28 A 40 MM
CORRECTO
COMPATIBLE
CON

CIRCULAR OVALADO
INCORRECTO
INCOMPATIBLE
CON

CUADRADO TRIANGULAR

TRIANGULAR

FIBRA DE CARBONO

INCORRECTO
INCOMPATIBLE CON
DEL NIÑO 22 kg
(48,5 lbs)
DELMINO 22 Kg (48.5 lbs)

FIBRA DE

AMORTIGUADORES
TRASEROS

MOTOS (CICLOMOTORES
Y ESCUTERES

ADVERTENCIA

EXCLUSIVE MAXI & TOUR PLUS: CARACTERÍSTICAS COMUNES
natural_image
Side view of a bicycle rear seat with a thumbs-up icon (no text or symbols on the seat itself)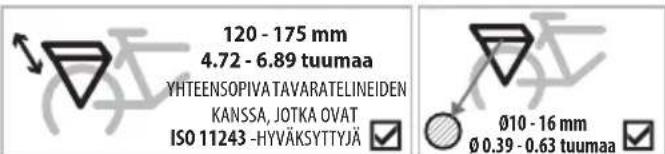
text_image
120 - 175 mm 4.72 - 6.89 tuumaa YHTEENSOPIVATAVARATELINEIDEN KANSSA, JOTKA OVAT ISO 11243 -HYVÄKSYTTYJÄ Ø10 - 16 mm Ø 0.39 - 0.63 tuumaa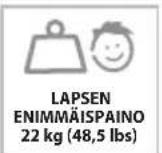
text_image
EI OK YHTEENSOPIMATTOMAT OLKUPYÖRÄT HILLI- KUITU TAKAJOUSITUS ISKUNVAIMENNIN MOOTTORI (MOPOT JA SKOOTTERIT)natural_image
Black and white photo of a bicycle front seat with a thumbs-up icon (no text or symbols on the chair itself)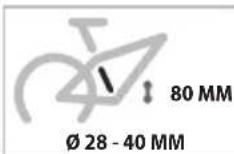
text_image
OK YHTEENSOPIVAT RUNGOT EI OK YHTEENSOPJMATTOMAT OLKUPYÖRAT PYÖREÄ SONKEA NELIKULMAINEN KOLMIKULMAINEN HIILIKUITU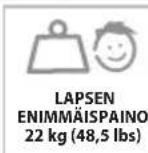

text_image
EI OK YHTEENSOPIMATTOMAT OLKUPYÖRÄT HILLI- KUITU TAKAJOUSITUS ISKUNVAIMENNIN

VAROITUS

natural_image
Side view of a bicycle rear seat with a thumbs-up icon (no text or symbols on the seat itself)
120 - 175 mm
4.72 - 6.89 in
COMPATIBLE AVEC LES
PORTE-BAGAGES
CONFORMEMENT A LA


POIDS MAXIMAL
DE L'ENFANT
22 kg (48,5 lbs)

PORTE-BAGAGES POUR
UNE CHARGE D'AU MOINS
27kgs (59,5lbs)
DE CONFORMIDAD CON
DE CONFORMIDAD CON
LA NORMA ISO11243
À NE PAS FAIRE
VÉLOS INCOMPATIBLES

FIBRE DE
CARBONE

SUSPENSIONS ARRIÈRE
AMORTISSEURS ARRIERE

MOTORISÉS |MOBYLETTES
ET SCOTERS)
natural_image
Black and white photo of a bicycle rear seat with a thumbs-up icon (no text or symbols on the chair itself)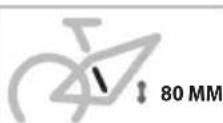
∅ 28 TO 40 MM

VELOS
COMPATIBLES

ROUND

OVALE
À NE PAS FAIRE
VELOS
INCOMPATIBLES

CARRÉ

TRIANGULAIRE

FIBRE DE CARBONE

POIDS MAXIMAL
DE L'ENFANT
22 kg (48,5 lbs)
À NE PAS FAIRE
VÉLOS INCOMPATIBLES

FIBRE DE

SUSPENSIONS ARRIÈRE
AMORTISSEURS ARRIERE

MOTORISÉS (MOBYLETTES
ET SCOOTERS)

ATTENTION
EXCLUSIF MAXI ET TOUR PLUS : CARACTÉRISTIQUES COMMUNES
natural_image
Side view of a bicycle rear seat with a thumbs-up icon (no text or symbols on the seat itself)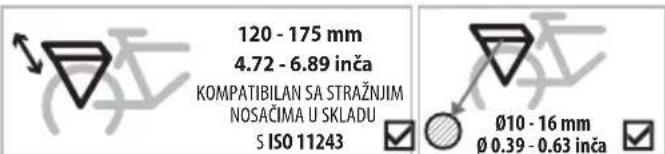
text_image
120 - 175 mm 4.72 - 6.89 inča KOMPATIBILAN SA STRAŽNJIM NOSAČIMA U SKLADU S ISO 11243 Ø10 - 16 mm Ø 0.39 - 0.63 inča
text_image
MAKSIMALNA TEŽINA DIJETETA: 22 kg (48,5 funti) NOSIVOST NOSAČA JE NAJMANJE 27 kg (59,5 funti) U SKLADU S ISO11243 NE VALJA NEODGOVARAJUĆI BICIKLI UGLIČNO VLAKNO STRAŽNJI OVJES AMORTIZER MOTOCIKLI (MOPO I SKUTERI)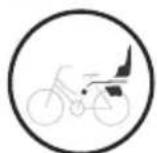

natural_image
Black and white photo of a bicycle front seat with a thumbs-up icon (no text or symbols on the chair itself)
text_image
U REDU KOMPATIBILNI OKVIRI NE VALJA NEODGOVARAJUĆI BICIKLI OKRUGLI OVALNI KVADRATNI TROKUTASTI UGLINČNA VLANNA

text_image
NE VALJA NEODGOVARAJUĆI BICIKLI UGLIČNO VLAKNO STRAŽNIJI OVJES AMORTIZER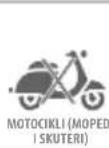

UPOZORENJE

EXCLUSIVE MAXI & TOUR PLUS: ZAJEDNIČKE ZNAČAJKE
natural_image
Side view of a bicycle rear seat with a thumbs-up icon (no text or symbols on the seat itself)
120 - 175 mm
4.72 - 6.89 hüvelyk
VÁZZAL HASZNÁLHATÓ
AZ ISO 11243
-NAK MEGFELELÖEN

GYERMEK
MAXIMALIS SÚLYA
22 kg (48,5 lbs)

A VAZ LEGALABB 27 kg (59,5 lbs) TERHET ELBIR AZ ISO11243-NAK MEGFELELOEN
NEM MEGENGEDETT
NEM KOMPATIBILIS KEREKPAROK

SZÉN
SZÁL

HÁTSŐ FELFÜGGESZTÉS MOTOR (MOPEDEK
LENGÉSCSILLAPÍTÓ ÉS ROBOGÓK)

MOTOR (MOPEDEK
ÉS ROBOGÖK)
BOBIKE EXCLUSIVE MAXI & TOUR PLUS KERETEKHEZ

natural_image
Black-and-white photo of a bicycle seat with a thumbs-up icon (no text or symbols on the main subject)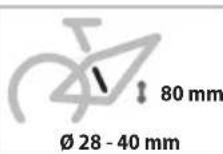
OK
KOMPATIBILIS
KERETEK

KEREK

OVALIS
NEM MEGENGEDETT
NEM KOMPATIBILIS
KEREKPAROK

* The specifications and design are subject to change without notice. Please contact Bobike for any questions.
natural_image
Side view of a bicycle rear seat with a thumbs-up icon (no text or symbols on the chair itself)
120 - 175 mm
4,72 - 6,89 in
DESIGN COMPATIBILE CON
PORTAPACCHI CONFORME
ALLA NORMA ISO 11243

PESO MASSIMO
DEL BAMBINO
22 kg (48,5 lbs)

SISTEMA DI PORTAPACCHI PER UN
CARICO DI ALMENO 27 kg
(59,5 Ibs) CONFURME ALLA
NORMA ISO11243
NON OK
BICICLETTE NON COMPATIBILI

FIBRA DI
LAROBUNIO

SOSPENSIONE POSTERIORE
AMMORTIZZATORE POSTERIORE

A INOTORE (CICLOMOTORI E SCOOTER)
natural_image
Black-and-white photo of a bicycle rear seat with a thumbs-up icon (no text or symbols on the main subject)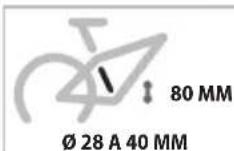
OK
COMPATIBILE
TELAI


TONDI
NON OK
BICICLETTE NON
COMPATIBILI

OUADRATI

TRIANGOLARI

FIBRA DI CARBONIO

PESO MASSIMO
DEL BAMBINO
22 kg (48,5 lbs)
NON OK
BICICLETTE NON COMPATIBILI

FIBRA DI
CARBONIO

SOSPENSIONE POSTERIORE
AMMORTIZZATORE POSTERIORE

A MOTORE (CICLOMOTORI E SCOOTER)

AVVERTENZA

EXCLUSIVE MAXI & TOUR PLUS: CARATTERISTICHE COMUNI
natural_image
Side view of a bicycle rear seat with a thumbs-up icon (no text or symbols on the seat itself)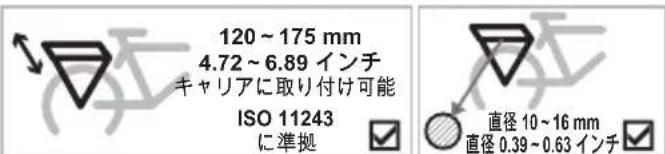
natural_image
Black and white photo of a bicycle front seat with a thumbs-up icon (no text or symbols on the main subject)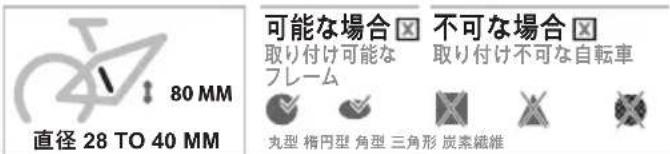
natural_image
Side view of a bicycle rear seat with handbags and a circular icon showing thumbs-up (no text or symbols on the main subject)

natural_image
Black-and-white photo of a bicycle seat with a thumbs-up icon (no text or symbols on the main subject)
120–175 mm
4,72-6,89 col.
SUDERINAMA SU
STOVELIAIS PAGAL
ISO 11243


DIDŽIAUSIAS VAIKO
SVORIS 22 kg (48.5 cv.)
(46,3 sv.)

STOVELIS IŠLAIKO
MAZIAUSIAL 27 kg (59.5 sv.) APKROVA
PAGAL ISO11243
NETINKAMAI
NESUDERINAMI DVIRAČIAI

ANGLIES
PLUOSTAS

GALINÉ PAKABA
AMORTIZATORIUS

MOTORAS (MOPEDAI
IR MOTOROLER(AI)
SKERS. NUO 28 IKI 40 MM
GERAI
SUDERINAMI
REMAI

APVALUS

OVALUS
NETINKAMAI
NESUDERINAMI
DVIRACIAI

TRIKAMPIS

ANGLIES PLUOSTAS

NETINKAMAI
NESUDERINAMI DVIRACIAI
DIDŽIAUSIAS VAIKO
SVORIS 22 kg
(48,5 sv.)

ANGLIES
PLUOSTAS

GALINÉ PAKABA
AMORTIZATORIUS

MOTORAS (MOPEDAI
IR MOTOROLERIAL)

ISPÈJIMAS

„EXCLUSIVE MAXI & TOUR PLUS“: BENDROSIOS SAVYBÈS
natural_image
Side view of a bicycle rear seat with a thumbs-up icon (no text or symbols on the chair itself)
120 - 175 mm
4,72 - 6,89 cala
KOMPATYBILNY ZE
STOJAKAMI ZGODNIE
ZISO 11243
text_image
NIE OK ROWERY NIEKOMPATYBILNE WŁÓKNO WĘGLOWE TYLNE ZAWIESZENIE AMORTYZATOR SILNIK (MOTOROWERY I SKUTERY)natural_image
Close-up of a bicycle seat with a thumbs-up icon (no text or symbols on the main subject)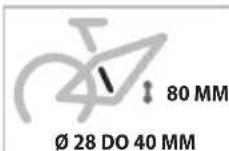
OK ZGODNE RAMY

NIE OK
ROWERY
NIEKOMPATYBILNE

NIEKOMPATYBILNE


OSTRZEŻENIE

natural_image
Side view of a bicycle rear seat with a thumbs-up icon (no text or symbols on the seat body)
120 - 175 mm
4.72 - 6.89 in
COMPATÍVEL COM
PORTA-BAGAGENS DE ACORDO
COM A ISO 11243

PESO MÁXIMO
DA CRIANÇA
22 kg (48,5 lbs)

PORTA-BAGAGEM AGUENTA NO
MÍNIMO 27 kg (59,5 lbs) DE CARGA
DE ACORDO COM A
ISO11243

FIBRA DE CARBONO FIBRA DESFRENDRO TOTAL


VEÍCULOS MOTORIZADOS
(SCOOTERS, MOTOS)
natural_image
Black-and-white photo of a bicycle seat with a thumbs-up icon (no text or symbols on the main subject)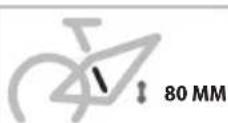
∅ 28 A 40 MM
OK
QUADROS
COMPATIVEIS


REDONDOS OVAIS
NÃO OK
QUADROS NAO
COMPATIVEIS


QUADRADOS TRIANGULARES FIBRA DE CARBONO

NÃO OK
DA CRIANÇA
22 kg (48,5 lbs)
NÃO COMPATÍVEL COM

SPENSÃO
TOTAL

VEÍCULOS MOTORIZADOS
(SCOOTERS, MOTOS)

AVISOS

EXCLUSIVE MAXI & TOUR PLUS: CARACTERÍSTCAS COMUNS
natural_image
Side view of a bicycle rear seat with a thumbs-up icon (no text or symbols on the chair itself)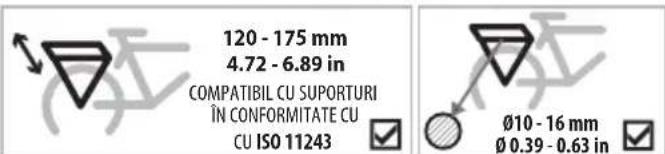
text_image
120 - 175 mm 4.72 - 6.89 in COMPATIBIL CU SUPORTURI ÎN CONFORMITATE CU CU ISO 11243 Ø10 - 16 mm Ø 0.39 - 0.63 in
text_image
GREUTATEA MAXIMÄ A COPILULUI 22 kg (48,5 lbs) SUPPORTUL SUSTINE CEL PUTIN 27 kg (59,5 lbs) IN CONFORMITATE CU ISO11243 NECORESPUNZÄTOR BICICLETE INCOMPATIBILE CARBON FIBRÄ SUSPENSIE PE PARTEA DIN SPATE AMORTIZOR AUTOVEHICUL (MOTORETE SE SCUTERE)BOBIKE EXCLUSIVE MAXI & TOUR PLUS PENTRU CADRE

natural_image
Black and white photo of a bicycle rear seat with a thumbs-up icon (no text or symbols on the main subject)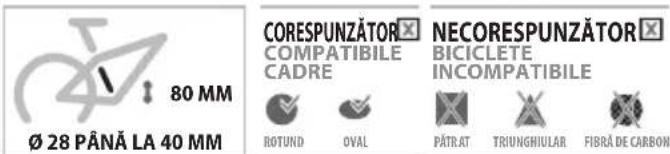
text_image
80 MM Ø 28 PÄNÄ LA 40 MM CORESPUNZATOR COMPATIBILE CADRE ROTUND OVAL NECORESPUNZATOR BICICLETE INCOMPATIBILE PÄTR.AT TRIUNGNIULAR FIBRÅ DE CARBON
text_image
GREUTATEA MAXIMÃ A COPILULUI 22 kg (48,5 lbs) NECORESPUNZÃTOR BICICLETE INCOMPATIBILE CARBON FIBRÃ SUSPENSIE PE PARTEA DIN SPATE AMORTIZOR AUTOVEHICUL (MOTORETE ȘI SCUTERE)
AVERTISMENT

EXCLUSIVE MAXI & TOUR PLUS: CARACTERISTICI COMUNE
natural_image
Side view of a bicycle rear seat with hand扶els and a thumbs-up icon (no text or symbols on the chair itself)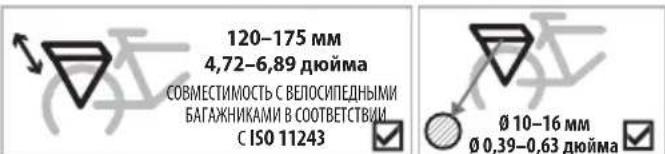
natural_image
Black-and-white photo of a bicycle seat with a thumbs-up icon (no text or symbols on the chair itself)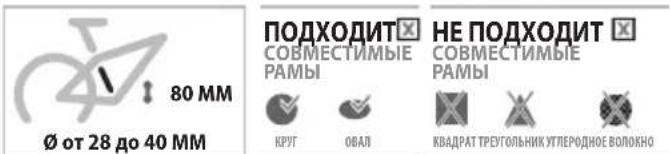
natural_image
Side view of a bicycle rear seat with a thumbs-up icon (no text or symbols on the seat itself)

natural_image
Black and white photo of a bicycle front seat with a thumbs-up icon (no text or symbols on the chair itself)
120 - 175 mm
4,72 - 6,89 in
KOMPATIBILNÝ SO
STOJANMI V SULADE
S ISO 11243


Ø10 - 16 mm
∅ 0,39 - 0,63 palca


MAXIMALNA
HMOTNOST DETI
22 kg (48,5 libier)

NOSNOST STOJANA
DRZIAKAMINIMALNE
27 kg (59,5lbs)
ULADES ISO11243

NIE SÚ KOMPATIBILNÉ BICYKLE

KARBÓNOVÉ
VLAKNA

ZADNY ZAVES
STLMICOM NARAZOV

MOTOR (MOPEDY)
A SKUTRE)
∅ 28 až 40 MM

80 MM

MAXIMALNA
HMOTNOST DETI
22 kg (48,5 libier)

KOMPATIBILNÉ
RÁMY


OKRÚHLE
OVALNE

NEKOMPATIBILNÉ
BICYKLE

STVORCOVE

TROJUHOLNÍKOVÉ

KARBÖNOVÉ VLAKNÁ
MAXIMALNA
HMOTNOST DETI
22 kg (48,5 libier)

NIE SÜ KOMPATIBILNÉ BICYKLE

KARBÓNOVÉ
VLAKNA

ZADNY ZAVES
S TLMICOM NARAZOV

MOTOR (MOPEDY)
A SKÜTRE)

VÝSTRAHA

EXCLUSIVE MAXI & TOUR PLUS: SPOLOČNÉ VLASTNOSTI
MONTÁŽ PRODUKTU - POKYNY
MONTÁŽ PRODUKTU - POKYNY
MONTÁŽ PRODUKTU - POKYNY
MONTÁŽ PRODUKTU - POKYNY
EXCLUSIVE TOUR PLUS
AKO NASTAVIŠ DETSKÚ SEDAČKU PRE VAŠE DIĚTĚ
natural_image
Side view of a bicycle rear seat with a thumbs-up icon (no text or symbols on the chair itself)

natural_image
Black-and-white photo of a bicycle seat with a thumbs-up icon (no text or symbols on the main subject)
120 - 175 mm
4,72 - 6,89 inčev
ZDRUŽLJIVO S PRTLJAŽNIKI
V SKLADU
Z ISO 11243

∅ 28 do 40 MM


OKROGEL

OVALNI


KVADRATNI

TRIKOTNI

KARBONSKA VLAKNA

NAJVEČJA TEŽA
OTROKA 22 kg
(48,5 lbs)

PRTLJAŽNIK DRŽI
NAJMANJ 27 kg (59,5
IDS/OBREMENTIVE
VCKLADU7 ISO11242
V. SKLADO Z 13011243
NI V REDU
NI ZDRUŽLJIVIH KOLES

OGLIKOVA
VLAKNA

ZADNJE VZMETENJE
BLAZILNIK UDARCEV

MOTOR (MOPEDI)
IN SKUTERJI)

NAJVEČJA TEŽA
OTROKA 22 kg
(48,5 lbs)
NI V REDU
NI ZDRUZLJIVIH KOLES

OGLIKOVA
VLAKNA

ZADNJE VZMETENJE
BLAZILNIK UDARCEV

MOTOR (MOPEDI)
IN SKUTERJI)

OPOZORILO

EXCLUSIVE MAXI & TOUR PLUS: SKUPNE ZNAČILNOSTI
natural_image
Side view of a bicycle rear seat with a thumbs-up icon (no text or symbols on the chair itself)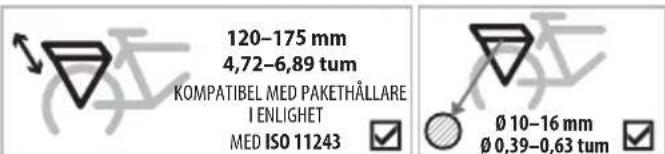
text_image
120-175 mm 4,72-6,89 tum KOMPATIBEL MED PAKETHÄLLARE I ENLIGHET MED ISO 11243 Ø 10-16 mm Ø 0,39-0,63 tum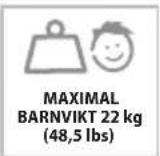
EJ OK
EJ KOMPATIBLA CYKLAR


BAKRE FJÄDRING
STÖTDÄMPARE
BOBIKE EXKLUSIV MAXI & TOUR PLUS FÖR RAMAR


natural_image
Close-up of a bicycle seat with a thumbs-up icon (no text or symbols on the main subject)
OK
KOMPATIBLA
RAMAR

RUND OVAL
EJ OK
EJ KOMPATIBLA
CYKLAR

FYRKANTIG TREKANTIG

KOLFIBER


MAXIMAL BARNVIKT 22 kg (48,5 lbs)
EJ OK
EJ KOMPATIBLA CYKLAR

KOL-
FIBER

BAKRE FJÄDRING
STÖTDÄMPARE

MOTOR (MOPEDER OCH SCOOTRAR)

WARNING

EXCLUSIVE MAXI & TOUR PLUS: GEMENSAMMA FUNKTIONER
natural_image
Side view of a bicycle rear seat with a hand icon indicating giving a thumbs-up (no text or symbols on the chair itself)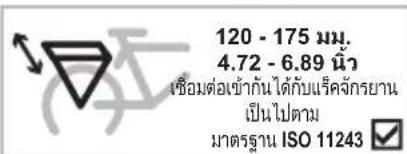
natural_image
Black-and-white photo of a bicycle seat with a thumbs-up icon (no text or symbols on the main subject)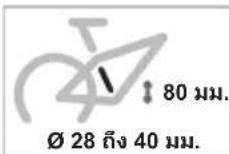
ใช้ได้
เข้ากันได้
โครง


natural_image
Side view of a bicycle rear seat with a thumbs-up icon (no text or symbols on the seat body)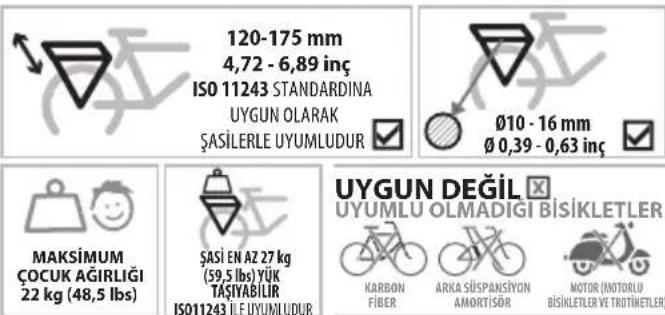
text_image
120-175 mm 4,72 - 6,89 inç ISO 11243 STANDARDINA UYGUN OLARAK ŞASİLERLE UYUMLUDUR Ø10 - 16 mm Ø 0,39 - 0,63 inç MAKSİMUM ÇOCUK AĞIRLIĞI 22 kg (48,5 lbs) ŞASI EN AZ 27 kg (59,5 lbs) YÜK TAŞIYABILIR ISO11243 İLE UYUMLUDUR UYGUN DEĞİL UYUMLU OLMADİĞI BİSİKLETLER KARBON FIBER ARKA SÜSPANSİYON AMORTISÖR MOTOR (MOTORLU BİŞİKLETLER VE TROTİMETLER)natural_image
Black-and-white photo of a bicycle seat with a thumbs-up icon (no text or symbols on the main subject)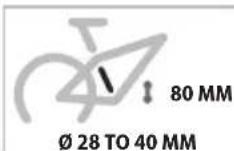
UYGUN
UYUMLU
ÇERÇEVELER

YUVARLAK

OVAL
UYGUN DEĞİL
UYUMLU OLMADIGI BISIKLETLER

KARE

ÜÇGEN

KARBON FIBER
N DEĞİL
OLMADIGI BİSİKLETLER

广力云智慧零售收银系统

ARKA SÜSPANSIYON
AMORTISÖR

MOTOR (MOTORLU BİSİKLETLER VE TROTİNETLER)

UYARI
EXCLUSIVE MAXI & TOUR PLUS: ORTAK ÖZELLİKLER
natural_image
Side view of a bicycle rear seat with handbags and a circular icon showing thumbs-up (no text or symbols on the main subject)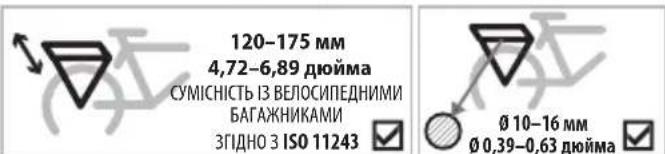
text_image
120-175 mm 4,72-6,89 дюйма СУМІСНІСТЬ ІЗ ВЕЛОСИПЕДНИМИ БАГАЖНИКАМИ ЗГІДНО З ISO 11243 Ø 10-16 mm Ø 0,39-0,63 дюйма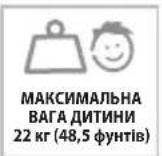
natural_image
Black-and-white photo of a bicycle seat with a thumbs-up icon (no text or symbols on the main subject)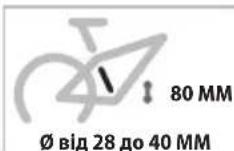
ПІДХОДИТЬ
СУМИСНИ РАМИ

КРУГ

ОВАЛ
НЕ ПІДХОДИТЬ ✗
natural_image
Black and white photo of a bicycle rear seat with a hand gesture icon (no text or symbols on the chair itself)
120 - 175 毫米
4.72-6.89英寸
适用于符合
ISO 11243
标准的行李架

直径10-16毫米
直径0.39-0.63英寸


儿童体重上限
22 公斤
(48,5 傅)

natural_image
Black-and-white photo of a bicycle seat with a thumbs-up icon (no text or symbols on the main subject)
直径 28 - 40 毫米
适合区
适用车架
不适合
不适用的自行车


儿童体重上限
22公斤
(48,5 告)
不适合
不适用的自行车

碳纤维车

减震器后悬挂
车

机动车(助力摩托车
相踏板摩托车]

警告

natural_image
Warning symbol with exclamation mark inside a triangle (no text or numbers)EN. OUR INSTRUCTIONS FOR USE MAY OCCASIONALLY BE UPDATED. PLEASE CHECK OUR WEBSITE PERIODICALLY FOR UPDATES.
NL. ONZE GEBRIUKSINSTRUCTIES KUNNEN VAN TIJD TOT TIJD WORDEN BIJGEWERKT. RAADPLEEG DAAROM REGELMATIG ONZE WEBSITE, OM STEEDS OP DE HOOGTE TE BLUVEN VAN DE ACTUELE SITUATIE.