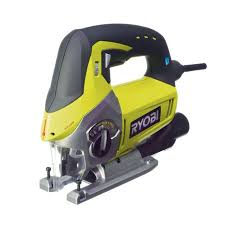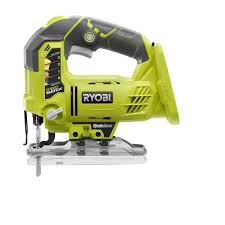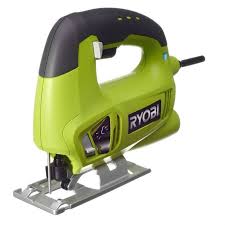
EJ500 - Jigsaw RYOBI - Free user manual and instructions
Find the device manual for free EJ500 RYOBI in PDF.



User questions about EJ500 RYOBI
0 question about this device. Answer the ones you know or ask your own.
Ask a new question about this device
Download the instructions for your Jigsaw in PDF format for free! Find your manual EJ500 - RYOBI and take your electronic device back in hand. On this page are published all the documents necessary for the use of your device. EJ500 by RYOBI.
USER MANUAL EJ500 RYOBI
If operation is dusty, also wear a dust mask.
Wait for the cutter to stop before setting the tool down. An exposed cutter may engage the surface leading to possible loss of control and serious injury.
Hold power tool by insulated gripping surfaces only, when performing an operation where the cutting accessory may contact hidden wiring or its own cord. Cutting accessory contacting a "live" wire may make exposed metal parts of the power tool "live" and could shock the operator.
If the power supply cord damaged, it must be replaced only by the manufacturer or by an authorized service center to avoid risk.
SPECIFICATIONS
| Voltage | 230 V ~ 50 Hz |
| Input power | 500 W |
| Stroke per minute | 3000 min-1 |
| Stroke length | 19 mm |
| Max cutting capacity | |
| Wood | 65 mm |
| Steel | 6 mm |
FEATURES
KNOW YOUR SAW
Before attempting to use your saw, familiarize yourself with all operating features and safety requirements.
ELECTRICAL CONNECTION
Your saw has a precision built electric motor. It should be connected only to a power supply of the type specified by its rating plate. Do not operate this tool on direct current (DC). A substantial voltage drop will cause a loss of power and overheating. If your tool does not operate when plugged into an outlet, double-check the power supply.
WARNING
Do not allow familiarity with tools to make you careless. Remember that a careless fraction of a second is sufficient to inflict serious injury.
OPERATION
SWITCH
See Figure 1.
To turn your saw on, depress the switch.
Release switch trigger to turn your saw OFF.
LOCK-ON BUTTON
See Figure 1.
Your saw is equipped with a lock-on feature, which is convenient when continuous cutting for extended periods of time is required. To lock-on, depress the switch trigger, push in and hold the lock-on button located on the side of the handle, then release switch trigger. Release lock-on button and your saw will continue running.
To release the lock, depress the switch trigger and release. If you have the lock-on feature engaged during use and your saw becomes disconnected from power supply, disengage the lock-on feature immediately.
WARNING
Before connecting your saw to power supply source, always check to be sure it is not in lock-on position (depress and release switch trigger). Failure to do so could result in accidental starting of your saw resulting in possible serious injury. Also, do not lock the trigger on jobs where your saw may need to be stopped suddenly.
English
TO INSTALL BLADES
See Figure 2.
Unplug the tool.
WARNING
Failure to unplug your saw could result in accidental starting causing possible serious injury.
Turn the tool upside down.
- Rotate the quick release lever counter-clockwise and hold in position.
- Insert the saw blade into the groove in the roller guide, making sure the back of the saw blade is properly positioned in the groove.
NOTE: Only T-shank saw blades can be used.
Push the saw blade into the blade clamp as far as it will go.
Release the quick release lever.
WARNING
To avoid possible serious injury, always wear safety goggles or safety glasses with side shields. Keep hands and fingers away, from the motor housing and blade clamp and do not reach underneath work while blade is cutting.
WARNING
To avoid serious personal injury, do not use saw without safety guard properly in place.
GENERAL CUTTING
See Figure 3.
Rest the front of the saw base on the workpiece and align cutting edge of the blade with the line on your workpiece. Make sure the power cord is out of the way of saw blade and not in the line of cut. Start your saw and move it forward on the work surface. Apply downward pressure to keep the saw steady and only enough forward pressure to keep the blade cutting.
WARNING
Do not force your saw. Forcing your saw may overheat the motor and break saw blades.
SCROLL CUTTING
See Figure 4.
Scroll cuts can be made with your saw by guiding the direction of the cut with applied pressure on the handle.
WARNING
Excessive side pressure to the blade could result in broken blades or damage to the material being cut.
ANGLE CUTTING (BEVEL CUTTING)
See Figure 5.
Bevel cutting angles may be adjusted from 0^ to 45^ right or left. Angles for cuts from 0^ to 45^ in 22.5^ increments are marked on a scale on both the left and right side of the base.
The use of a protractor is recommended when accurate cuts are required.
ADJUSTING THE ANGLE
See Figure 5.
- Loosen the base retaining screw with the wrench until the base can be moved.
- Slide base forward slightly to release the base from the tab on the motor housing.
Align the mark on the base of the desired angle with the edge of the motor housing.
Once the desired angle is reached, slide the base back until the tab on the motor housing aligns with the appropriate notch on the rear of the base.
Position the holder for the roller guide in such a manner that the guide roller faces against the back of the saw blade. Precise cuts are possible only when the guide roller faces tightly against the back of the saw blade. - Re-tighten the base retaining screw with the wrench to secure the base.
To avoid loss of control, broken blades, or damage to the material being cut, always use extreme caution when making plunge cuts. We do not recommend plunge cutting on materials other than wood.
Mark the line of cut clearly on the workpiece.
Set the cutting angle at 0^
Tilt your saw forward so that it rests on the front edge of the base and blade will not come in contact with the workpiece when the saw is turned on.
English
Make sure the blade is inside the area to be cut.
Start your saw by using high speed and slowly lower the blade into the workpiece until the blade cuts through the wood.
- Continue lowering the blade into the workpiece until the base rests flat on the work surface, then move the saw forward to complete the cut.
Use only the 7 teeth per inch blade for this type of cut.
METAL CUTTING
Many kinds of metals can be cut with your saw.
Be careful not to twist or bend the blades. Do not force.
If the blade chatters or vibrates excessively, use a finertooth blade or higher speed. If blade heats excessively, use lower speed. If blade teeth become filled or clogged when cutting soft metals, such as aluminum, use a coarser-tooth blade or lower speed. We recommend the use of oil when cutting metals to keep blades cool, increase cutting action, and prolong blade life. Clamp the work firmly and cut close to the clamping point to eliminate any vibration of the workpiece being cut.
When cutting conduit, pipe or angle iron, clamp work in a vise if possible and saw close to the vise. To cut thin sheet materials smoothly, "sandwich" the material between hardboard or plywood and clamp the layers to eliminate vibration and material tearing. By doing this, the material will be cut smoothly. Lay out your pattern or line of cut on top of the "sandwich".
IMPORTANT!
When cutting metal, keep exposed portion of saw bar clean and free of metal chips by wiping frequently with an oily cloth. Use extreme caution in disposing of oily cloth after completion of job to prevent potential fire hazard.
SAWDUST BLOWER DEVICE
See Figure 7.
- With the air jet of the sawdust blower device, the cutting line can be kept free of dust and chips.
- Switching on the sawdust blower device: For cuts in materials with high removal rate, such as in wood, plastic, etc.. Push dust blower button up.
- Switching off the sawdust blower device: For cuts in metal and when a dust extraction system (not included) is connected. Push dust blower button down.
TO CONNECT DUST EXTRACTION SYSTEM (NOT INCLUDED)
Unplug the tool.
WARNING
Failure to unplug your saw could result in accidental starting causing possible serious injury.
- Connect the nozzle of the dust collection system to the dust port.
OPTIONAL EDGE GUIDE (NOT INCLUDED)
See Figure 8.
An edge guide is available for use with your saw and can be used for making crosscuts and rip cuts.
TO INSTALL:
Unplug your saw.
WARNING
Failure to unplug your saw could result in accidental starting causing possible serious injury.
Insert arm of the edge guide through the two slots in the base of your saw.
- Adjust edge guide to the desired width and lock in place with the edge guide screw.
WARNING
When servicing, use only identical replacement parts. Use of any other parts may create a hazard or cause product damage.
LIVE TOOL INDICATOR
This tool features a live tool indicator which illuminates as soon as the tool is connected to the supply. This warns the user that the tool is connected and will operate when the switch is pressed.
MAINTENANCE
GENERAL
All other parts represent an important part of the class II insulation system and should be serviced only by a qualified service technician.
Avoid using solvents when cleaning plastic parts. Most plastics are susceptible to damage from various types of commercial solvents. Use clean cloths to remove dirt, dust, oil, grease, etc.
English
WARNING
Do not at any time let brake fluids, gasoline, petroleum-based products, penetrating oils, etc., come in contact with plastic parts. They contain chemicals that can damage, weaken or destroy plastic.
It has been found that electric tools are subject to accelerated wear and possible premature failure when they are used on fiberglass boats, sports cars, wallboard or plaster.
The chips and grindings from these materials are highly abrasive to electric tool parts such as bearings, brushes, commutators, etc.. Consequently, it is not recommended that this tool be used for extended work on any fiberglass material, wallboard or plaster. During any use on these materials it is extremely important that the tool is cleaned frequently by blowing with an air jet.
LUBRICATION
All of the bearings in this tool are lubricated with a sufficient amount of high grade lubricant for the life of the unit under normal operating conditions. Therefore, no further lubrication is required.
CAUTION
Keep extension cords away from the cutting area and position the cord so that it will not get caught on lumber, tools, etc., during cutting operation.
WARNING
Check extension cords before each use, if damaged replace immediately. Never use tool with a damaged cord as touching the damaged area could cause electrical shock resulting in serious injury.
Extension cords suitable for use with your saw are available at your nearest service center.
WARNING
Always wear safety goggles or safety glasses with side shields during power tool operation or when blowing dust. If operation is dusty, also wear a dust mask.
ENVIRONMENTAL PROTECTION

Recycle raw materials instead of disposing of as waste. The machine, accessories and packaging should be sorted for environmental-friendly recycling.
SYMBOL

Safety Alert
V Volts
Hz Hertz
Alternating Current
W Watts
No No-load speed
min-1 Revolutions or reciprocations per minute

Maximum cutting capacity in wood

CE Conformity

Double Insulation

Wear ear protection

Wear eye protection

Please read the instructions carefully before starting the machine.


Waste electrical products should not be disposed of with household waste. Please recycle where facilities exist. Check with your Local Authority or retailer for recycling advice.
Français
DESCRIPTION
GUIDE LATERAL OPTIONNEL (NON FOURNI)
Voir figure 8.
TAGLI OBLIQUI (SMUSSATURE)
Vedere la figura 5.
HOEKZAGEN (AFSCHUINEN)
Zie afbeelding 5.
ALLMÄNNA FÖRESKRIFTER
FOR A LAGE ET DYKK-KUTT
Se fig. 6.
ADVARSEL
TEXHUYECKHEXAPAKTEPNUKIN
OCHOBAHne H3a1, NOKA 3aUeIknKa Ha KOpNcE DBnIaTeJIH He CBMeCTnTCr C COOTBETCTByOuIM THe3DOM Ha TbJbBOH CTOpOHc OCHOBAHN.
UcTaHOBIne KpEnIeHne polnIKoBOH nHaPabJIIOuSei TAKHM o6pa3OM, yTo6bI polnIKoBra HnPaPabJIIOuJa paCNoIarIaIacb no3aIIN pExyJUero noIoTHa. ToHbIy pa3pe3 Bo3MOKeH ToIbKO npN paCNoIOJKeHHn polnIKoBOH nHaPabJIIOuSeI cTporO no3aIIN pExyJUero noIoTHa.
3aTAHnTE raeHbIM KIOUOM fIKCpuyOuIN BnHT OCHOBaHnI dIra ero 3akpeJIeHnI.
BbIIOJHHeHNE BHYTPEHHX BbIPE3OB
CM.puc.6.
OCTOPOXHO
Bo n36exkaHne nOteprynpabJnemocTn HNCTpyMeHTa, nONOMKn peKyuIINX nONOTEN N NOBpeJxHeHHN o6pa6aTbIbAeMO MATEPmHa BcERda npoRbIyTe NOBblIeHHUO OCTOpOKHoCTb Pnpi BblONHeHHN BHyTpeHHNX Bblpe0B. HepeOMeHNdyETc HauHHatb pe3AHne 3aTrnyb6JIeHem c NOBepxHOCTN KAKHX-1n6o MaTEpnaIOB, KpOME dpeBeCInHbI.
HaHocnTe YeTKyI JINHHo pa3pe3a Ha 3aROTOBKe.
YCTaHOBInTe yroJ pe3aHnO 0^
HaKnIOHInTe NINy BnpeD TakIM O6pa3OM, YTO6bI OHa CToRJa Ha nepeDnei KpOMKe OCHOBaHNa, a NINbHOe NOtHO He npKacAnocb K 3aTOrOBe, KOrDa NINa 6yDet BKNIOHeHa.
Pexyuue noonTOHO dONKHO paCnOraTaBcA BHytpn pa3pe3aemOn 6nactn.
3aIy6nIe ee bAorO8ky, nkaJe3BHe npoeKTepeBOHcKBo3b.
IpoJOnKnTb CHIXKeHne J3BnBe B 3aTOBkOy Do 6a3bl Jeknt PnaamHa naBoCyu NoBepxHocTb, a 3aTem peNeHTy yBdEn Ha neDcy H naLoHoe CokpaZeHne
Дя takoro Tnna pe3aHnI nCIOJIb3yIte ToJIbKO pexyuIne nOIoTHa C wARo 7 3y6beB Ha JIOIM.
PE3AHNE METAJIA
Даннайпа дonyckaет ресаимеMHORNXBIDOBmetаллов. He donyckaite nepekpybuahe mnn n3n6ba pekyuixn nonoten. He npknakdaibayteчрсe3meqphbux yucniln.
Ppynpe3mepno Bn6paun pexyuzero noltoHa
ncnloh3ynte pexyuiee noIOTHO mAlbim 7aorom
3y6beb nn pa60taite Ha nobblseHHo ckopocTn.
Ppynpe3mepHom HapRebaHn pexyuzero noltoHa
ncnloh3ynte noHNJKeHHUO ckopocT. Ecnn 3y6bja
pexyuzero noltoHa nInbI zacopraHtcr npn pe3aHnn
MЯгкinxMetaJIIOB,HанрIMep,ANOMMHNIA,NCNOL3yIte pexuuee nOToTHo C 60JIe KpyNHbIM WaJorom 3y6BeB INI pa6oTae HnONHXeHHoC kOPOCTn. PekomeHdyetcN noNtOBaTBcMa NCMON Prn Pe3aHNm METALNOB DnO OxnaXeHnE pyKyuux nOToTe, NObblSeHnE cKOpOCTn pe3aHNs I npOdJIeHnCRpOKa cnyx6blpeKyuux nOToTe. NaDeXho 3aKpEnITE 3aRTOBky N BblOnlHne Tpe3aHnE 6bnke K ToUck KpENHeN, YTo6bl N36ExaTb Bn6paun O6paBaTaBbAemaO 3aRTOBKn.
Ipi np e3aHn XeNo6OB, Tpyb nIi YrnoBOro MetaIIa 3aXMnTe 3aTOrOBky B TnCKn (PnN Bo3MOKHOCTn) I ByIOJIHnIe pe3aHnE 6bnKe K TnCKam. JnIPOBHorO pe3aHn TOHKORO NCTa MaTePnAla, 3aXMnTe 3OT IJNC Mekdy IInCTAmn KApTOHa IINI PaHepbI, YTObSI npedOTBpaNTb Bn6paTuNIO pAspBbM aTePnAla. DeJaA 3TO, MaTePnAIN 6yDet COKpaUeH rnaDko. YIoXnTe 5a6bON Hnn HaecnTE pa3MeTOHy IOHHIO CBepxY 3TOrO "6byTe6pOda".
Baxhnoe 3aMeuahnne!
PpnpesaHmmetaHndepKnteOTKpbTyuYacTb PnblHOHsHnHbUcCToN CBO6OHDnOT MetaHnmueecko3 CTpykKn,peyIrpHo npoITpaey eepomacneHno TprnIKo. YTo6bI NCKIIOHTb BO3MOXHOCTb BO3ROPaHnO, CObNDaTe OC6bU OCTOPOXHOCTb, KOrda Bbl6paBbAeTp omacneHhble TprnKn IO OKOHauHN pa60tbl.
MEXAHIN3M BbIyBAHnIaIIOFOBAJIbHOIbIIN
CM.puc.7.
Blaqoapra Bo3dyuhoN noToky n3 yctpoCTBa BbIyBaHnna bIJIINnHnpa3pe3a ocTaTcBcO6DHOOn TO bJIInnONnOK.
BkIIOUeHHe MexAHn3Ma BbIyBaHnIe IINIOPOBaIbHOI nbIi: IJIa 6oBa6OToK IeRKO peXyUxxCr MaTePnAIOB -depeBa,IIaCTMaCC,IT.N. OTOXMITE BBePx KONIKy BblyBaHnIe PbIi.
BbIKIOUOHeMEXaHIN3Ma BbIyBaHnIa IINIOFOBaNbHOI nbIIN:IIpe3AHHMeTALNaI npri NOckIOUOHeHN cNCTeMbI bIyEuaHEn (He npinraaeTc).HaXMMTe KONKlByDyBaHnIpbIIN.
ПОДКЛIOUЧЕНЕСИCTEMbl ПыILEUYDAJIENHA (HE PIPNJIAFAETCA)
OTKJIIOUHTe INHCTpyMeHT OT 3JIeKTPoCeTn.
OCTOPOXHO
Hecnooc6hOCTb OTKIOUHTe YBIDEN MOXET PnIBeCTN K CnyauHIM HauHHa Bbl3bIbAE T BO3MOXHbIX Cepse3bHbIX TaPBM.
Pycckn
He Bb6paBbIaIe CbIpe.CDaIaJIe erO b NepepaBcTy. MaIina, AeCCecCyapbI yynAOKBaJIOJXHbIb 6bITbOTcOpTnOBaHbI.
CIMBOJ

BHHMaHHe
V BoNbT
Hz Tepu
IepeMeHHbI TOK
W BATT
No CKOPoCTb Ha XOJIocTOM XOdy
min-1 O6oopoTOB mIN B03BpaTHO-nocTyNaTeIbHbIX DnKHeH N B MInHyT

MaKcImaJIbHЯpeXyuaCnOco6HocTbBdepeBe

COOTBETCTBNE Tpe6oBaHnM CE

Довинагиэлaria

PpIMMeHJTe CpeDCTBa 3aUHTbI opraHOB cnyxa

PpIMMeHЯTe CpeIcTBa 3aIITbI OprAHOB 3peHn

Peped nCnoNb3OBAHnEe npi6opa BHMMaTeJIbHO 03HaKoMbTeCb C daHHo INCHyKlmei.
Otpa6oTaHHa 3neKtpoTeXnuecka npDyKuJa D0JkHa yHnUToxAbTcB MBeCTe C bIbTObIMN tOXdAmN. YtUnnInpuyTe, ecn NmEeTCa CneUaJIbHoE TexHnueCeKoe o6OpyDoBaHne. IIO BOpocam yTunn3aunn npOKOHcyIbTpuyTEcb MecThbIM OprAHOM Bnacti NN ppePnpTNeM P03HnHOn TTOBNI.
Polski
OPIS

m = 311 ;
PENTRU A INSTALA LAMELE
A se vedea figura 2.
Deconnectati unealta.
A AVERTISMENT
PENTRU A CONNECTA SISTEMUL DE EXTRAGERE A PRAFULUI (NEINCLUS)
Deconectati unealta.
A AVERTISMENT
POSEBNA SIGURNOSNA PRAVILA
Ako radite u prasini nosite i masku za zašitu od prasine.
Pripe no sto postavite alat sačekajte dok se rezačne zaustavi. Ižložen rezačmöze aktivirati površinu dovodeci do moguceg gubitka kontrole i ozbiljinh povreda.
Držite uredaj po izoliranim ručkama povrsina samo pri obavljanju operaciye u kojo rezanje skrivene ožicenja ili vlastiti kabel. Rezanje pribor kontakta "uzivo"Žice moze napraviti izloženi metalni dijelovi uredaja "uzivo" i šok operadora.
Ako je kabel za napajanje ostecen, mora ga zamijeniti samo proizvodač ili ovalsteni servisni centar kakobi se izbjugla opasnost.
SPECIFIKACJE
| Napon | 230 V ~ 50 Hz |
| Ulazna snaga | 500 W |
| Poteza po minuti | 3000 min-1 |
| Duljina poteza | 19 mm |
| Maksimalni kapacitet rezanja | |
| Drvo | 65 mm |
| Čelik | 6 mm |
ZNAÇAJKE
UPOZNAJTE SVOJU PILU
Prijje pokušaja korišenja pile, upoznajte se sa svim radnim svojstvima i zahtjevima vezano za sigurnost.
ELEKTRICNI PRIKLJUÇAK
Ova pila ima precizno ugraden elektrichi motor. Treba se prikljuciti na izvor napajanja iste vrste koji je naveden na natpinosoj plocici. Ne radite s ovim uredajem na istosmjernoj struju (DC). Značajni pad napona uzrokuje gubitak snagie i pregrijavanje. Ako alat ne radi kad je uklučen u uticnicu, provjerite napajanje.
UPOZORENJE
Anouvdeote aTo to pεuα to εpyaIeio.
IPOEIOIH2H
Av dev antouovdeoet n oya mtpei va eteltheu xiao Eekivnka kai va tpokaeoi oobapo oomegaikotpaumio.
TupioTeToepyaleioavantoo
Ipeiptpepty tov moxlo ynpnyopnc aTeptlakns apioTepoaTpoopa kai kpatnoTE tov otn teon tou.
Eiaayete Tn Aetioa Kotttn OTO auakai OTov oNyo kuiivopoukai Baeiaowite OTn Tiow 6ynTn5eTTAc Eiva Kaal totoetnevTo aukai.
Atoouvodet a to pEuMa to epyaIio.
IPOEIIOIOIHsH
Av aioouvfoeTe T oya mopoie va eTaetheta tuxao Eekivma kai va pokaloei oobapo oomegaikotpaumiao.
Suvodote To aKpOoAio Tou ouotnmuToG auLoyns oKovns ot npua oKovns.
IPOAIPETIKOZ OAHHOZ AKPHZ (ΔEN ΠEPIΛBANETAI)
Bλ.Σχημa 8.
MaçéTovKoTTIN TAPExaOByoc ákpnTou μtopei va XpəuoiTOInθei yia va káveTe OtaupwTe KOTe Kai KOTε
EλnviKa
aTiooXionc.
TONOETHsH:
Atooovdeote aTo to pEuμaTov KOTTIN.
A IPOEIAOIOIH2H
Av aioouvfoeTe n oya mtopei va eIeAtheuao Eekivnkaai vipokaloei oobapo Oomegako tpaumio.
Eiayetovbpaxiova Tou oyoukpcns mea ato tic duo tuec stn faon tou kontn.
PuθμiσeTovoyóáρncσOToεπθμŋtoⅡλaTockλεδωeTov Θηθεοιou μετηβioda oynoyóáρnc.
A IPOEIOIHOH
Kata Tc EtiDiop0waeic, XpnoiOpTIOeite Movo TavaoioiTuta avtaaAaktia. H xpon aAwwv Eapntuaw mTopei va Tpokaalee Kiivuo n 9mu oTo Tpoiov.
ΦQTEINH ENADEIEH ΘEΣHΣ YΠO TAZH
O yuviaokos troxoc oac eivai eotlliaoevoc me ia wfteivn Evdeiogn tto taon n otraia avaei moaic to epyaieio ouvdetheta.I HVdeiogn autn epiota tvnpooxya c otveyovoc ot o troxoc biaketai uto taan kai ta tebei oe Aeitoupyia mclc th aopwete To diakottn Tpoc ta mptpoata.
SYNTHPHZH
TENIKEZSYZTAEIZ
Ola ta aaaa Eaaptnata atotetloov nmavtko apeos ouatnatoa mowonks kaoans II kai 0 npTei va etnkeuaovtai mvo ano EikueuEevo TExVKo oepic.
AToFyETe Tn Xpnoaiautwv KaTAtov KaOApioo PAAOTIKwv EapntmuWv.
Ta TEPIOOTepa TTAAOTIKA Eivai ETIPPPETN OE 00pec aTO TOUC diaopouc touTOC diautW ToEivai dia0eoi OTO EMTIOPO. XpOAIOTIOATE eva KaApO TrAV ia V apaipoeTe Bpwua, oKovn, Adbia, ypaO K.
A IPOEIOIHsH
Mny apnveTe TOTe Upya PpEuvv, BeVzivn, TpoioVta
me Baon To TETPéλio, DieIOBUTIKA élaia, KATT va
epoouv OE tTAPn Jte Ta IIAOITIKA TuJnata. TatpoioVTA
auta TPEIXOUX XnJIkeCs OuaIEcTou MTOPOUV VA
tpoEvnouO Znuiva, V a MEIWooU n va kataoTppeouv
TOTIAOTIKo.
Exi BpEeoi Ta nAekpiKa epyaia TnapouiaQov ynpoyopota qoopaTl thawCslaVae vupitepa otav XpNtioiovtae KApn me paIITepyKAs,OTnp autokivnta, yuooaviides n yuO.
Ta piviaqata kaiPokaviobia atio auta ta uliká eivai
Egapietika tpittiká yia Egapntjata nλeKtpiuv epyaaleiw
otwic epaba, yntkpec, metatpottiec kALT. Suvetiwocac
attotptetiou atno tvnapatetavevn xnpontou epyaaleiou
autou tntaw o paiaiteypkac, elaoata etikakuyns,
otko n yuwo. KaTn diapkeia xnpang c e auta ta
uliká, eivai Egapietika onmaVTko va kaθapicete TAKTIKA to
epyaaleio quovtac me deaepa.
AIIANENH
Ola ta ebpava oto epyaiaio exouv aivantoei ie tnpkn Toootrta laivtikou uynlou tutou Tou apkeyia tn diapkeia cnc ts movadac osauvnekec kavovikcn xponic. SuveNTWC, dxe xpeiaetai kajua eimTIAeovltanov.
A PPOZOxH
Diatnpieite Ta kalwbia Tpoektaonc Jakpi aTo tv Nteipoxn KOTnC KAI TOTOBETnOte EToI Wote va mnu MUTOPOUv VA TiAOtouv OE UAEia, EpyAeia kTt. KaTn TEiApkeoi nKOTnC
A IPOEIOIHOH
Elyxete ta kalwia Tpoektaon TPIV aTO kAeXpnKai OE TEPITIWON QOpWv, AVTKATAOTnOte TAaEOwC. Mny xpanoIOIEITE TOE Epyaleia ME qapueva kalwia apou n EtApn ME tN qapveyn TEPioxntrovi TPOkAeAeI NkETPOTANxi Ka oBapop Taumatio.
Mtopeite va peite katalaa kalaowia troektaoic ia xpion me tov kottin oac, oTo pAnieatope Kevtpo ePBC.
A IPOEIAOIOIHszH
Φopáte πávτa TpOoTATEUItká yuaIáñ yuaIá oαφaIeIc με πλaiEvε aotidEs kata tvx eIpiioμ oμnxavokivntwEpyaIeWnEe pyaIeε με σκovn. Av n EpyaIa TpOKaIe Iσκov, φoPαe KI eIDIK μακα.
EλnviKa
IPOSTAEIA TOY IEPIBAMONTOZ
AvakukwveTc TIPWEc UAEc Avt va TIC TEATOv Kdo Okiakw ovIoppimuTuV. Tia TnV TpOoTaia Tou TEPiBaALVoTc, TpeTeYaivetI dAloyou Tou epaaiou, Tuv EapntuAtuv KAIuov OuaKeuaiwv Tou.
IYMBOAO

PioeiδoTioinασφλεις
V BλT
Hz 2
EvaAaσμεvρεuα
W Bat
Tautnta 0Kev
min- Apioo sOtpov n kivnoew avaAeTT

Meyiotnikavotnta kottns e EuLo

Σμρφωη CE

Aπλn movωσn

Φopáte TTPOOATEUtÍKA autiWv

Opate Tpooatautika maowv

IapakaloumeiaaoteTisOndyieS TPOOeKTIka TpvEkvnoTeTo mXavna.
Ta nλeKtpiKa TpOioVt TpOc atoppiyn Vb TpTei va atoppittovta jaCi Ta oikiaKa atoBnTa. Napakaloue avakukwote otou utapxouv ov aiTIOXeE ykataaTaeic. MiHone tC tottiKc epacx eN tov Twnltny ia va aoc evnpewooov oxetiké Ta TpoypaMATA avakukkwanC.
Türkçe
ACIKLAMA
All Ryobi products are guaranteed against manufacturing defects and defective parts for a period of twenty four (24) months from the date stated on the original invoice drawn up by the retailer and given to the end user. Deterioration caused by normal wear and tear, unauthorised or improper use or maintenance, or overload are excluded from this guarantee as are accessories such as battery packs, light bulbs, blades, fittings, bags, etc. In the event of malfunction during the warranty period, please take the NON-DISMANTLED product, along with the proof of purchase, to your retailer or nearest Authorised Ryobi Service Centre.
This warranty in no way affects your legal rights concerning defective products.

GARANTIE - CONDITIONS
The vibration emission level given in this information sheet has been measured in accordance with a standardised test given in EN 60745 and may be used to compare one tool with another. It may be used for a preliminary assessment of exposure. The declared vibration emission level represents the main applications of the tool. However if the tool is used for different applications, with different accessories or poorly maintained, the vibration emission may differ. This may significantly increase the exposure level over the total working period.
An estimation of the level of exposure to vibration should also take into account the times when the tool is switched off or when it is running but not actually doing the job. This may significantly reduce the exposure level over the total working period. Identify additional safety measures to protect the operator from the effects of vibration such as: maintain the tool and the accessories, keep the hands warm, organisation of work patterns.

AVERTISSEMENT
DECLARATION OF CONFORMITY
We declare under our sole responsibility that this product is in conformity with the following standards or standardized documents: 2006/42/EC, 2006/95/EC, 2004/108/EC, EN55014-1, EN55014-2, EN61000-3-2, EN61000-3-3, EN60745-1, EN60745-2-11, EN62233. Noise level [K=3dB(A)]: Lp=90.8dB(A) Lw=101.8dB(A) Vibration level: Cutting wood [K=2.5m/s²] ah=10.7m/s², Cutting metal sheet [K=1.5m/s²] ah=11.9m/s²
FR
Déclaration de CONFORMITE
Address: 24/F, CDW BUILDING, 388 CASTLE PEAK ROAD, TSUEN WAN, HONG KONG.
Web: www.ttigroup.com
Name/Title: Brian Ellis / Vice President - Engineering
Signature:
Jun 15, 2010
Technical File at
Name of company: TTI EMEA
Address: MEDINA HOUSE, FIELDHOUSE LANE, MARLOW, BUCKS, SL7 1TB, UNITED KINGDOM.
Web: www.ttigroup.com
Name/Title: Carl A. Jeffries / Head of Ryobi Product Marketing
Signature:
Trademarks:
The use of the trademark Ryobi is pursuant to a license granted by Ryobi Limited.